It's been awhile since I've posted on this thread, but that doesn't mean that I haven't been getting anything done on the '64. Quite the opposite, actually. I have been working on the brake system, and there is a design issue with the '60-'66 trucks that has always bugged me and I decided to do something about it. I have never liked the brake pedal height (way too high) and I have always thought that the trucks that have had the disc brake conversion have the wrong pedal ratio. There's too much brake pedal travel. After some thought, research, and fabrication, I may have come up with the answer.
I'm not a fan of buying expensive aftermarket parts because I try to stretch my "project money" as far as possible. I was adamant that this mod had to be inexpensive and utilize as many factory parts as possible.
First of all, let's talk about brake pedal ratio. Instead of going through a long discussion about theory, here's a link that explains it easily:
http://www.piratejack.net/index.php?...d=14&Itemid=21
I calculated the pedal ratio of the stock, manual brake pedal on my '64 and came up with 6.8-1. That's just fine for manual brakes, but wrong for power brakes. After some calculation, I determined that if you move the linkage attach point on the pedal down 1.5", you can get a brake ratio of 4.1-1, perfect for power brakes. So, I got a 3/8" drill bit and drilled the new hole. I mocked everything up, but I didn't like what I saw. Now, the linkage from the pedal to the booster would be going up at a steep angle to depress the plunger in the booster. I didn't like this at all:
I have one of Capt. Fab's booster adapter brackets (HIGHLY recommended) and have a 1996 S-10 booster. The biggest issue (at least to me) about using a late model booster is what to do with the eyelet on the end of the booster rod. A lot of guys will chop them off and re-thread the rod for a clevis or a heim joint. I actually LIKE the eyelet, but just couldn't figure out how to integrate it into my linkage. The only way for it to work was that it had to be supported so the booster rod would stay in a stationary arc. I pulled the pedal/clutch pedal assembly out of the truck and noticed that there was an unused hole about 3" back from the brake pedal hinge pin. It was obviously used on another truck application, probably the C60 and up models. I measured the i.d. of the hole, and came to the conclusion that it was the exact same size hole as the brake pedal hinge pin. Thank You, GM!!
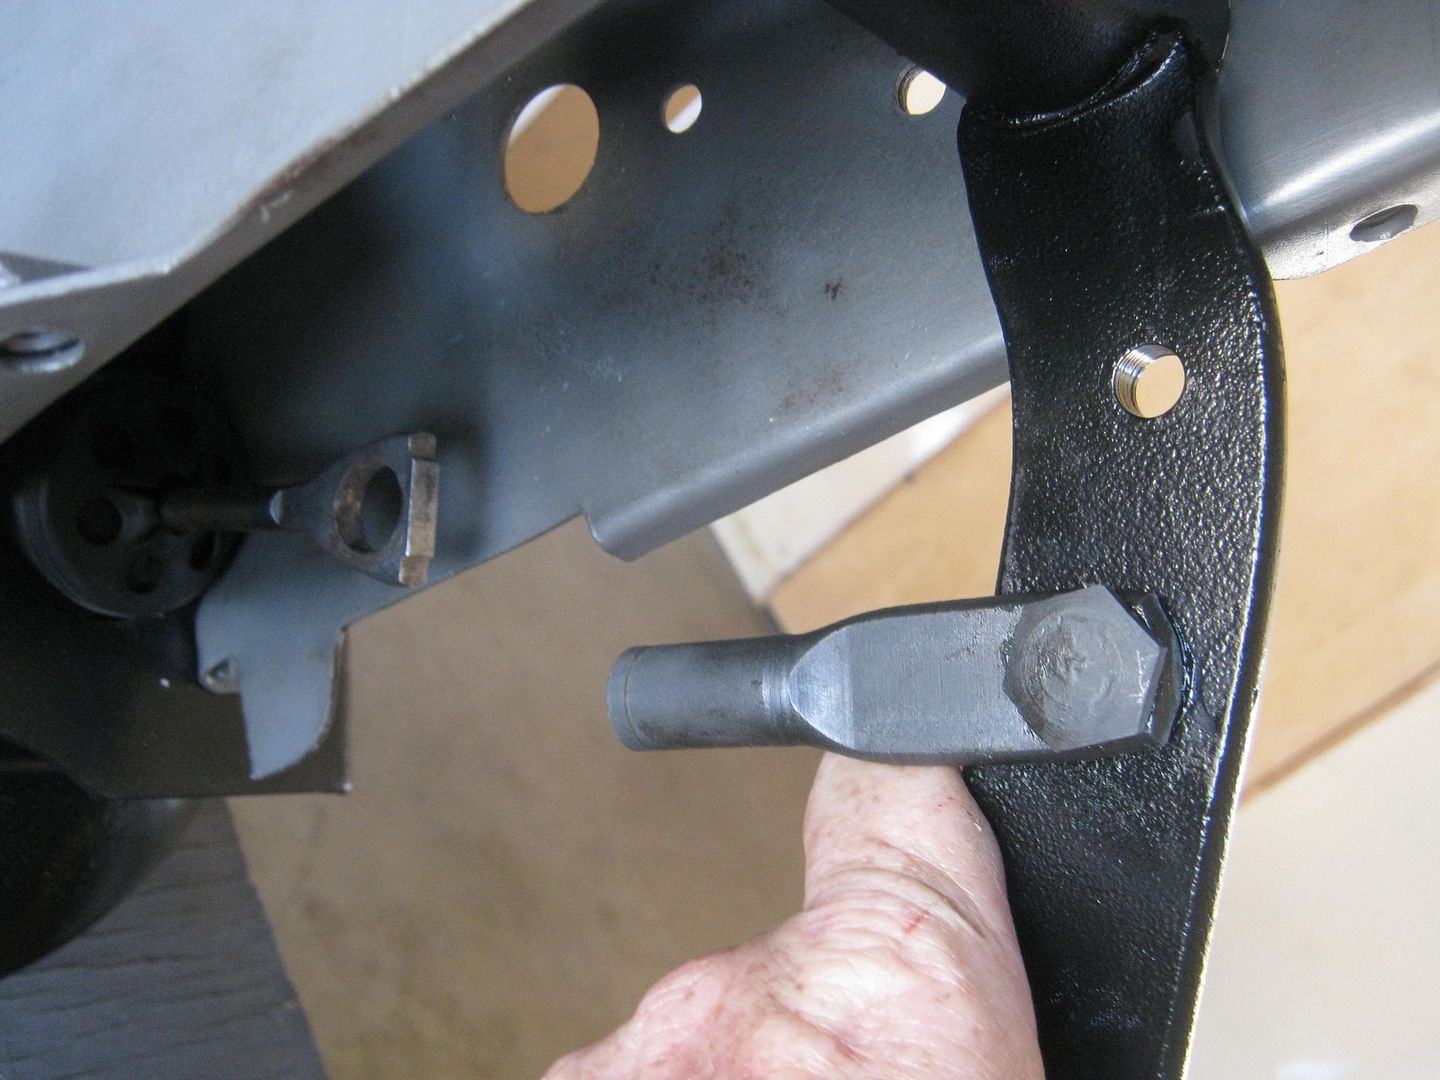
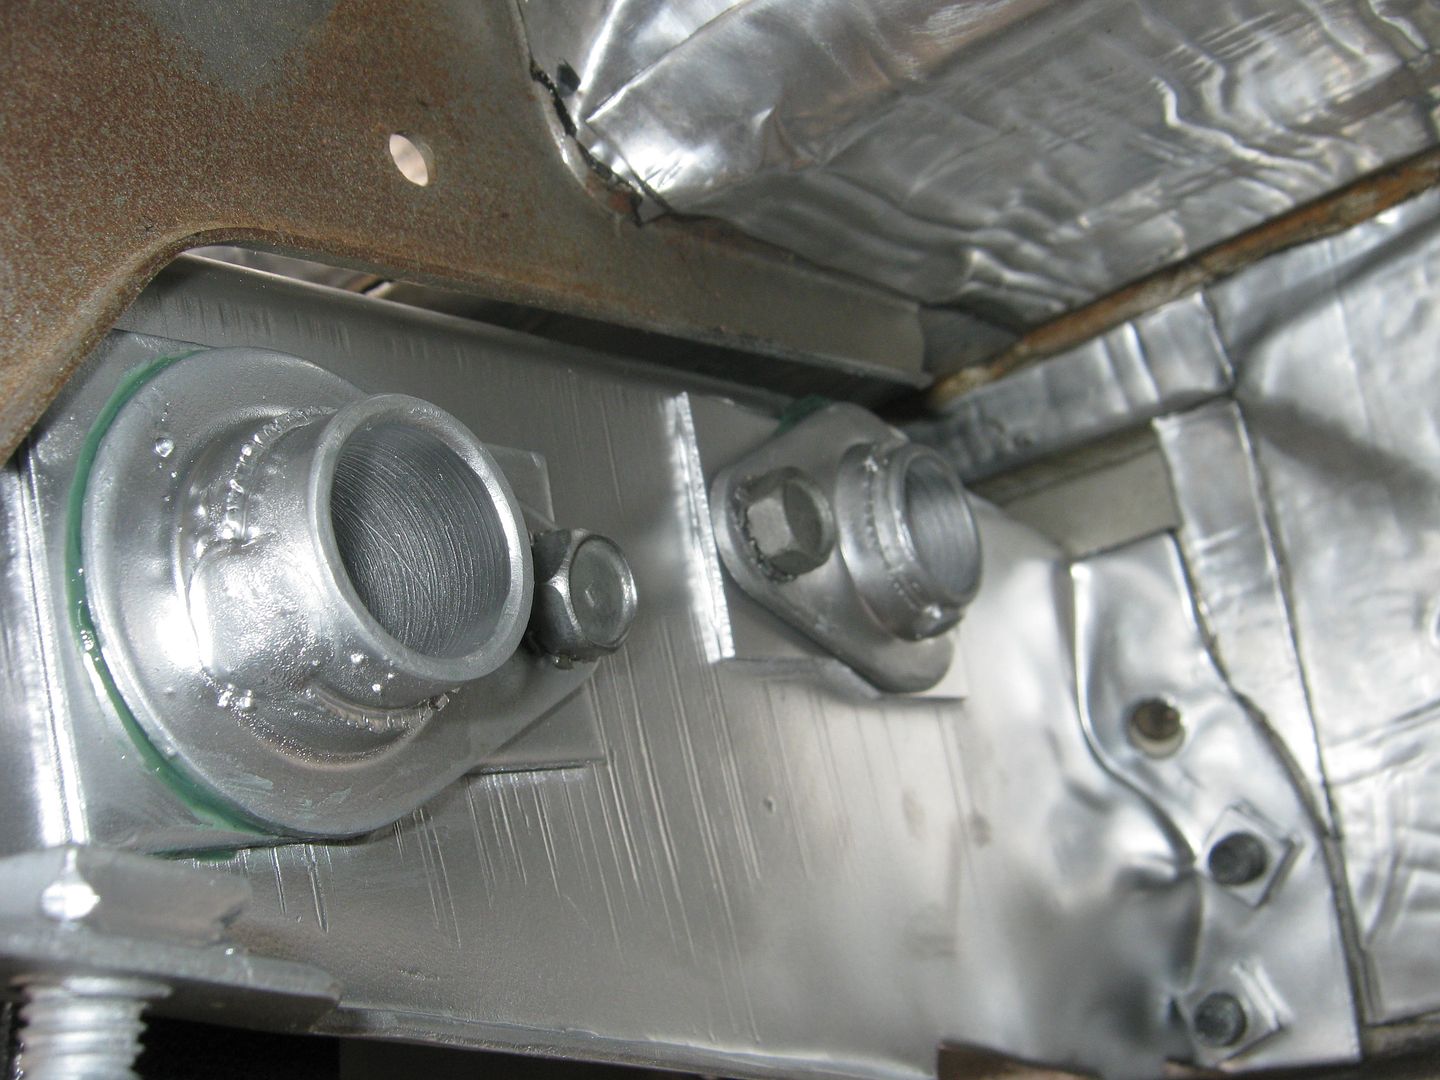
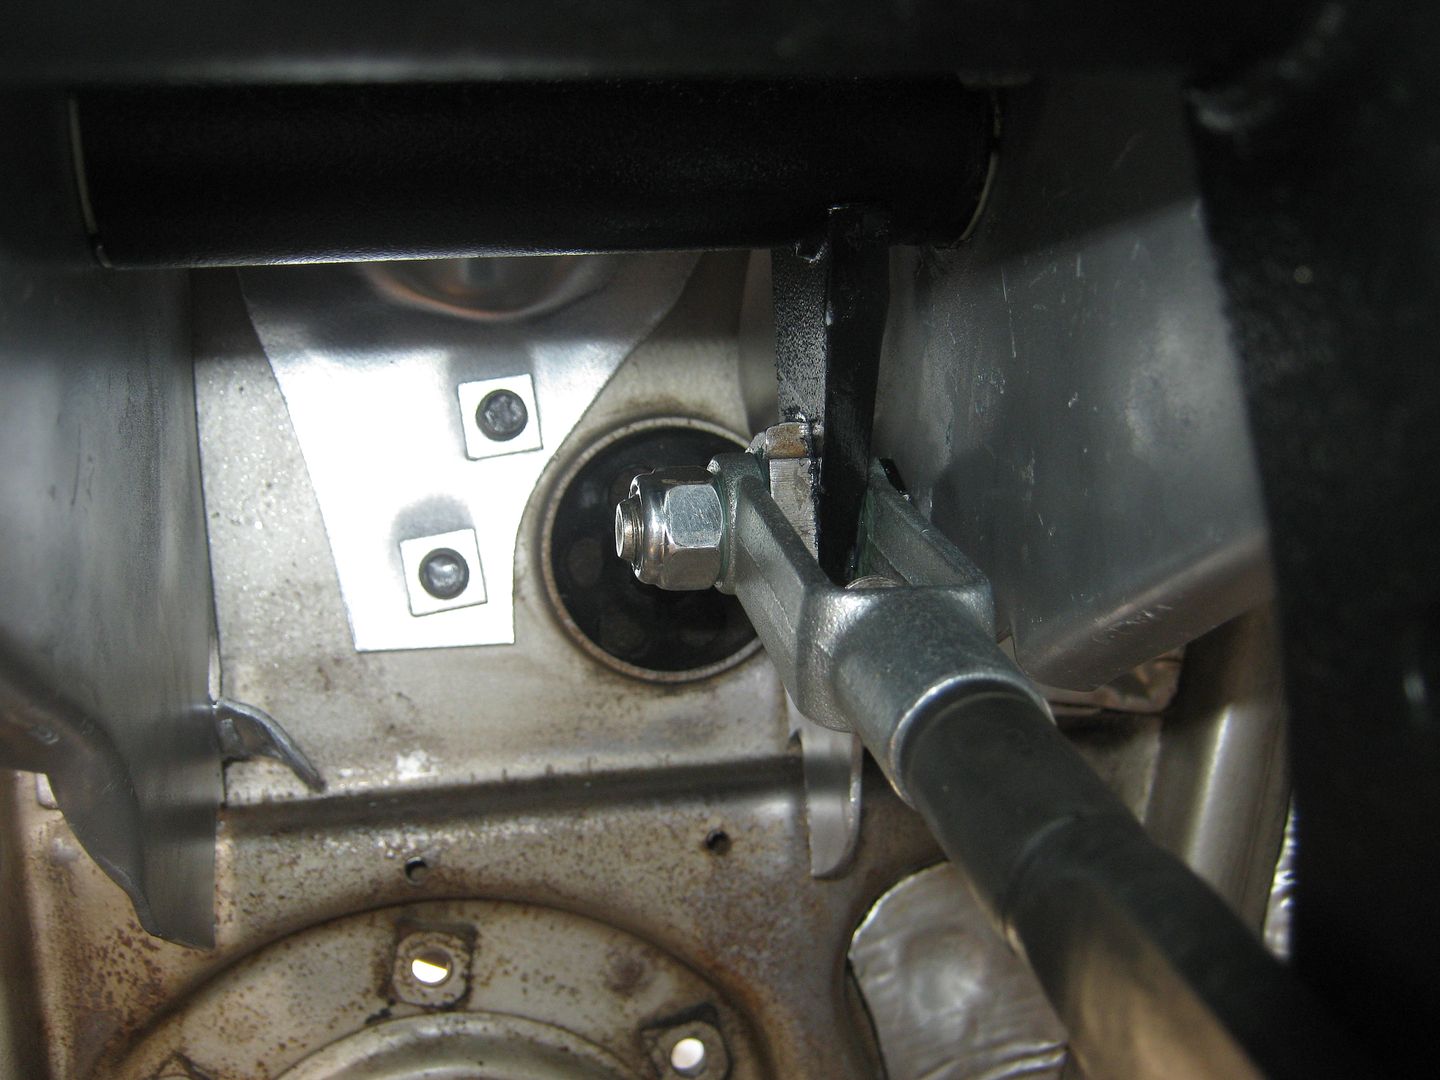
Now, I knew how I was going to support the booster eyelet. I went to the wrecking yard and got another brake pedal and hinge pin. I wound up getting the entire assembly for $12.50. In this picture, you can see the pin slid into the previously un-used hole, and the attach bolt lined right up.
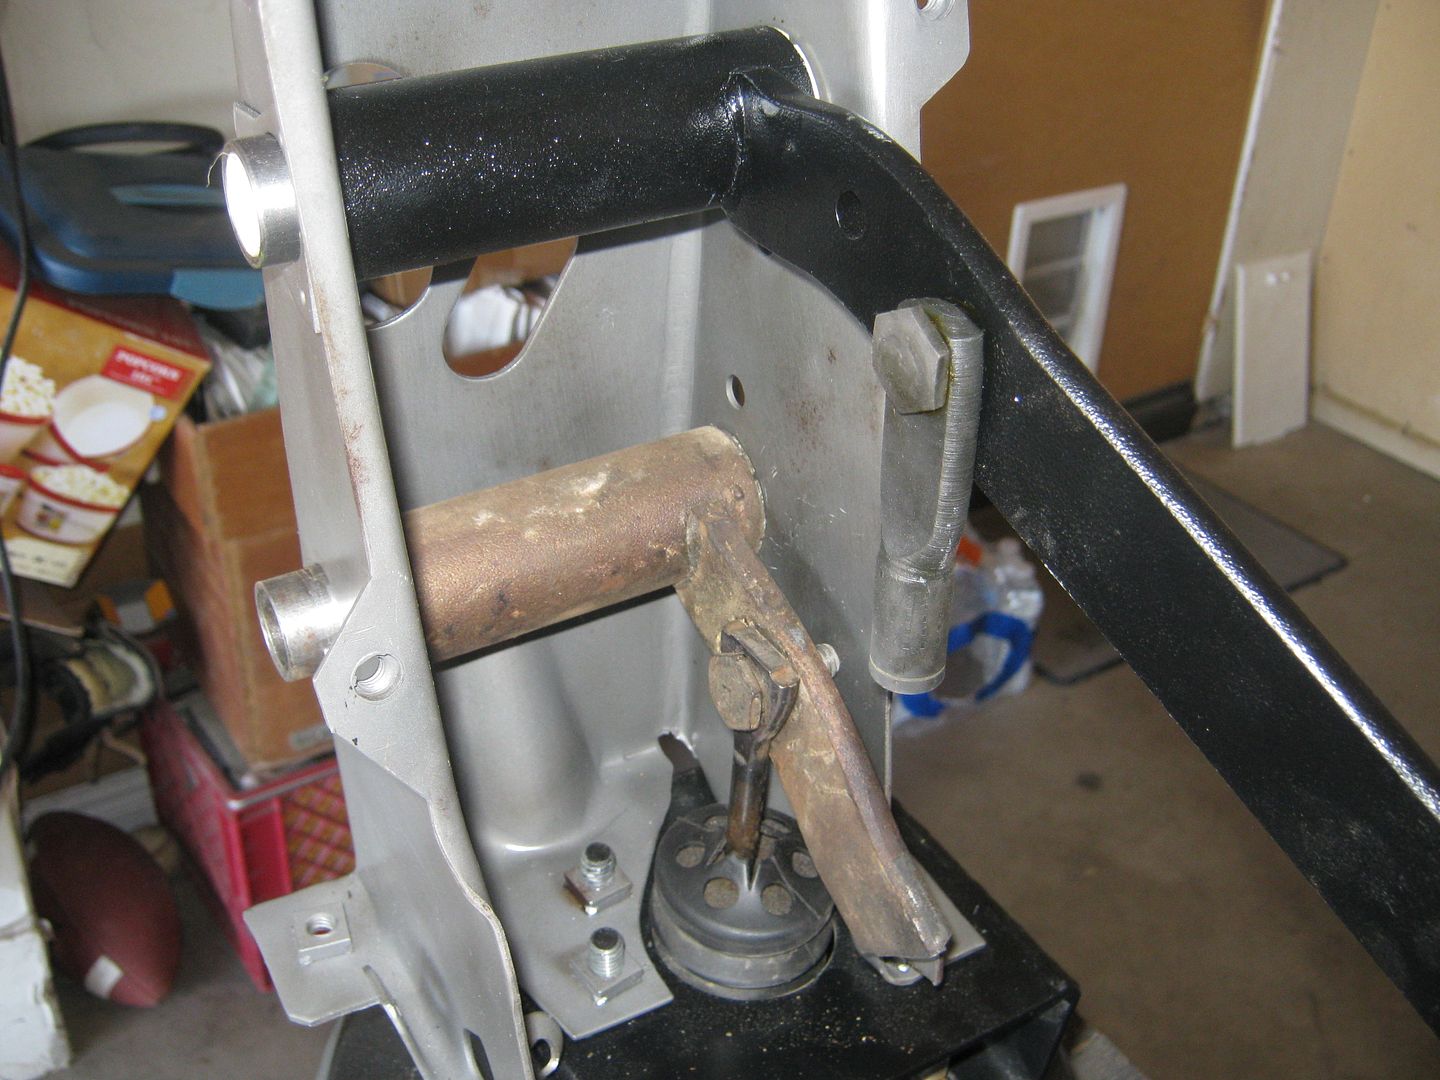
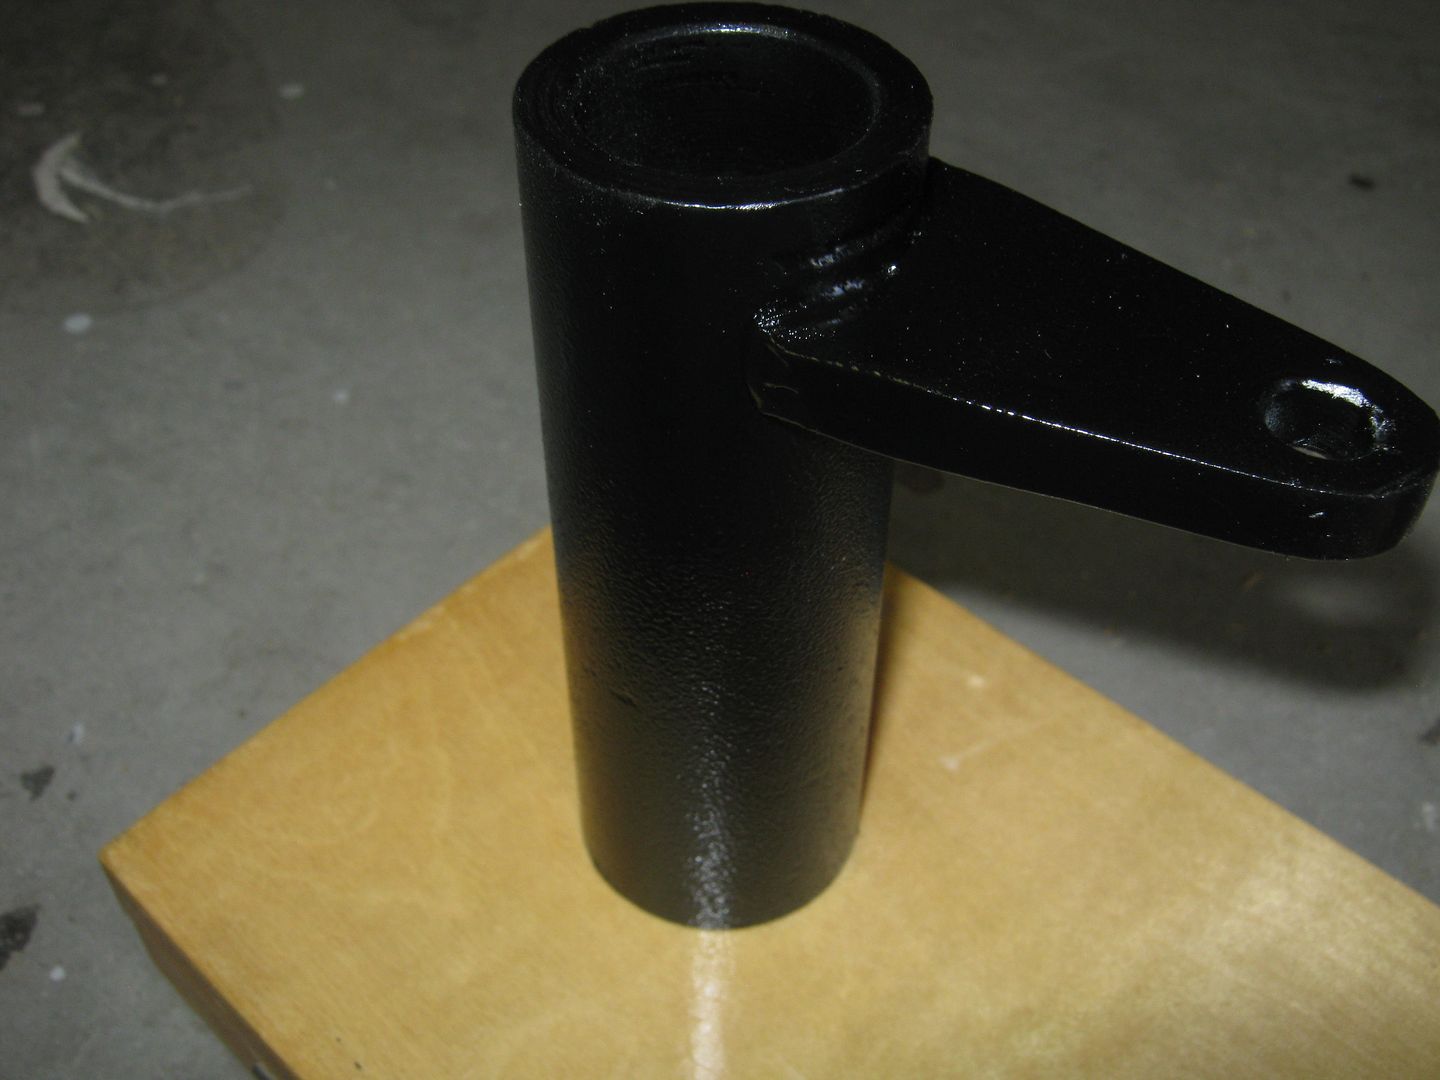
Here's the trial run mock-up. I did a quick chop on the extra brake pedal and basically turned it into a bellcrank. The existing hole in the brake pedal for the factory brake linkage worked out fine. You can see that the clevis on the brake pedal (the pedal painted black) will now attach to the tab on the chopped pedal.
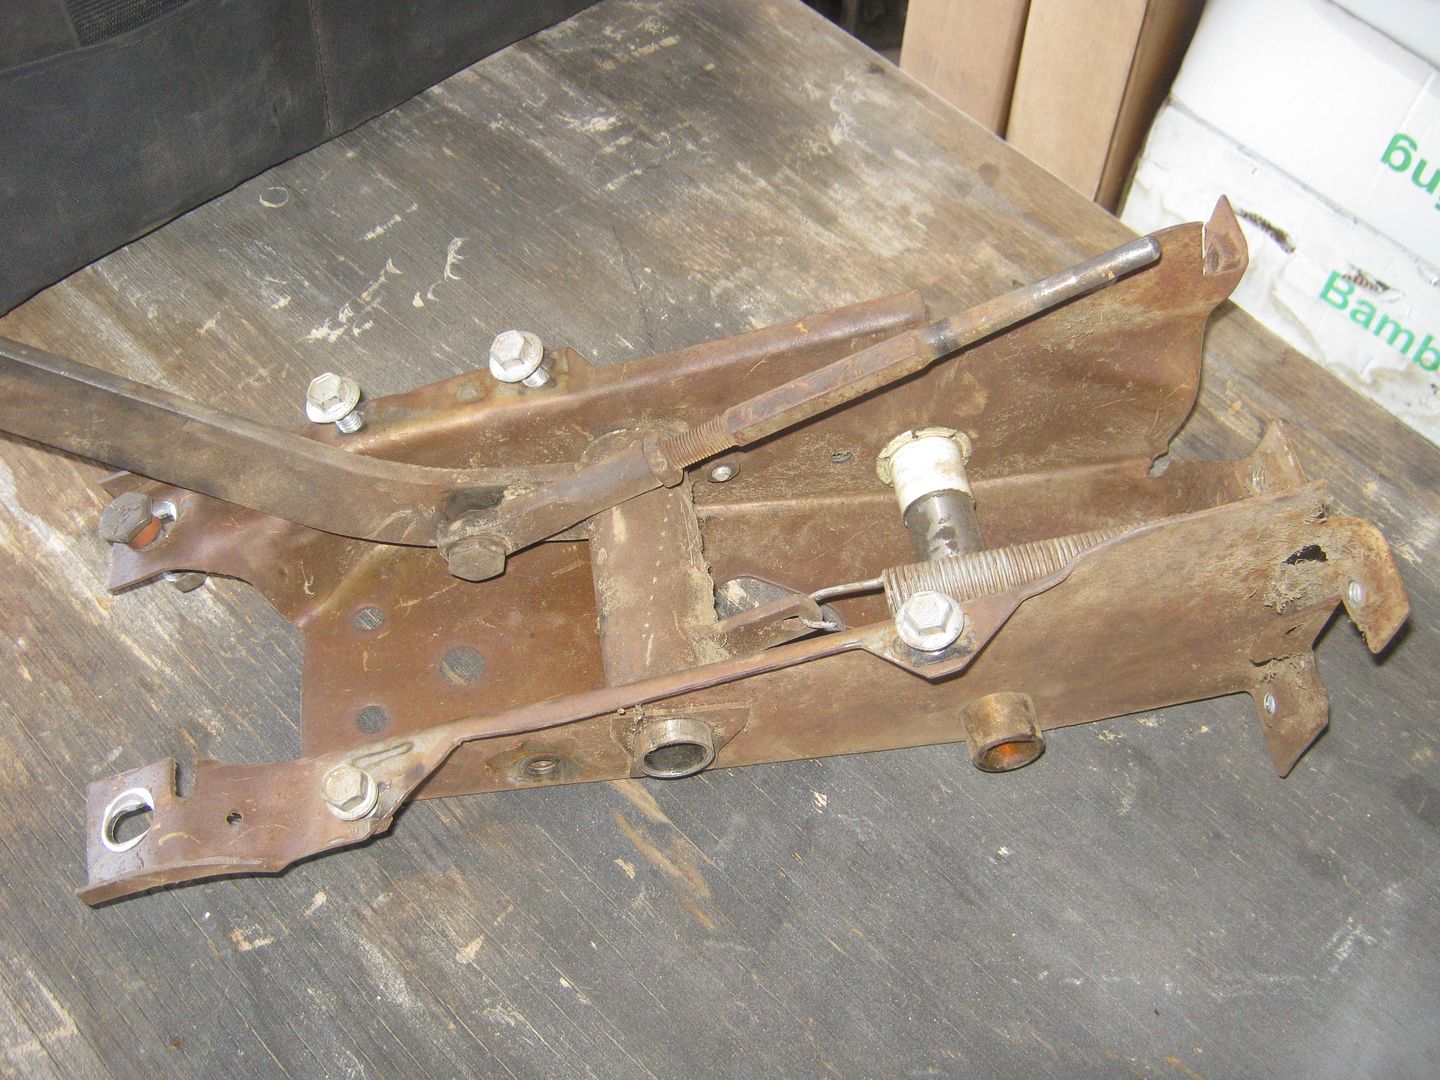
Here's what the chopped pedal looks like after a little grinding and some paint. I want this to look 100% factory.
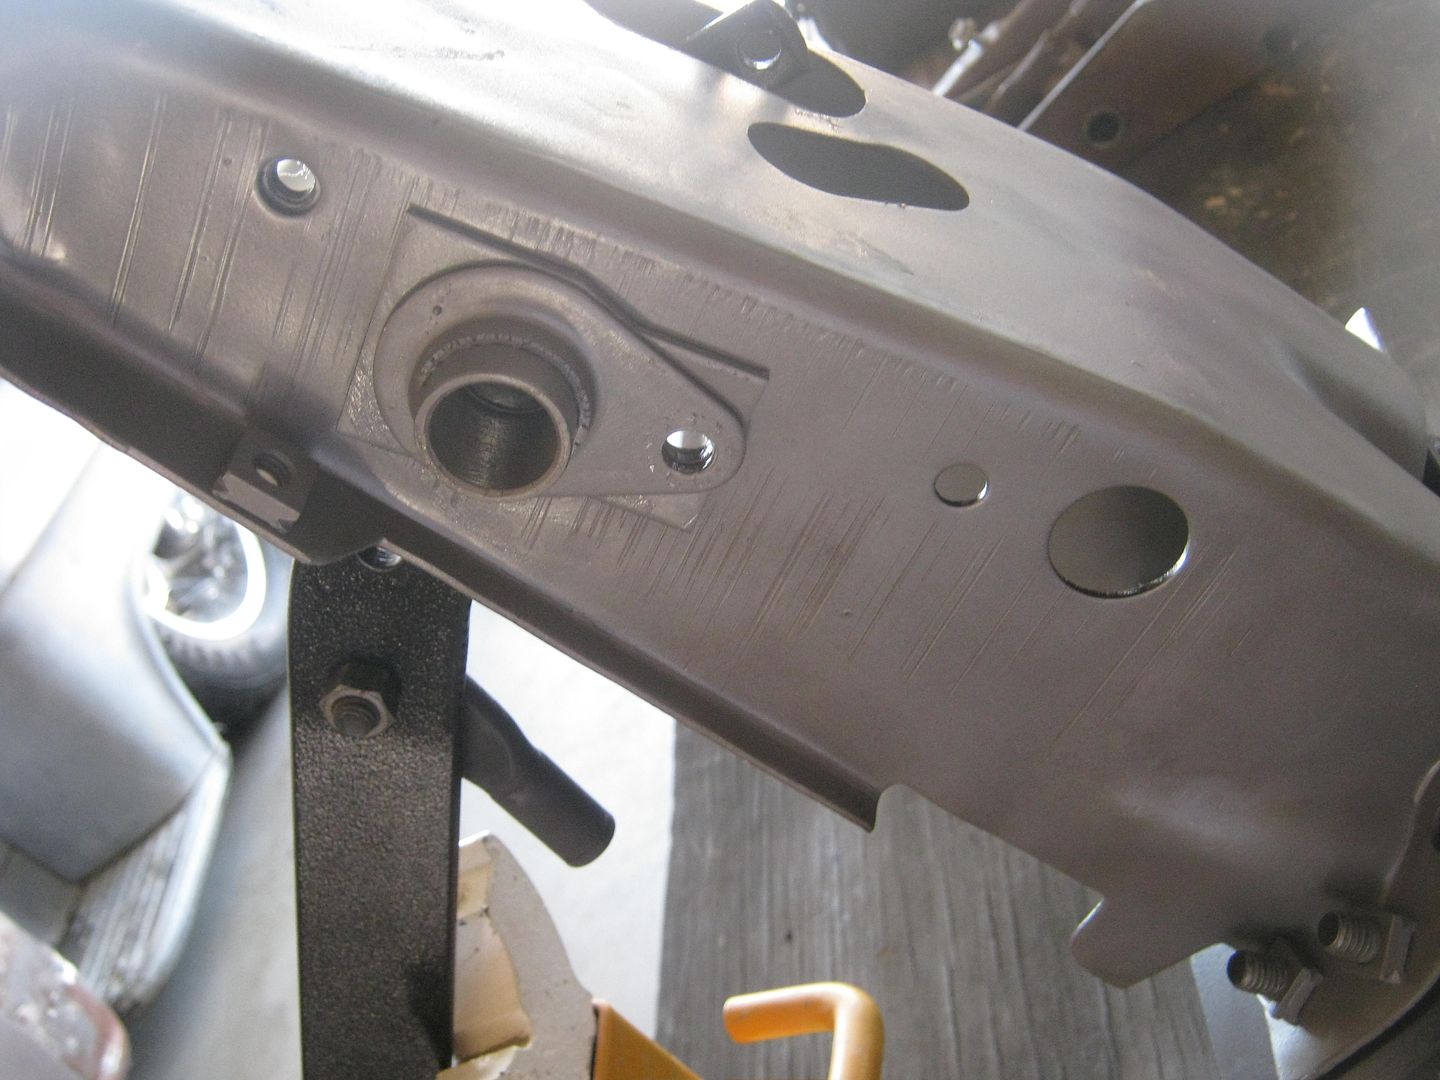
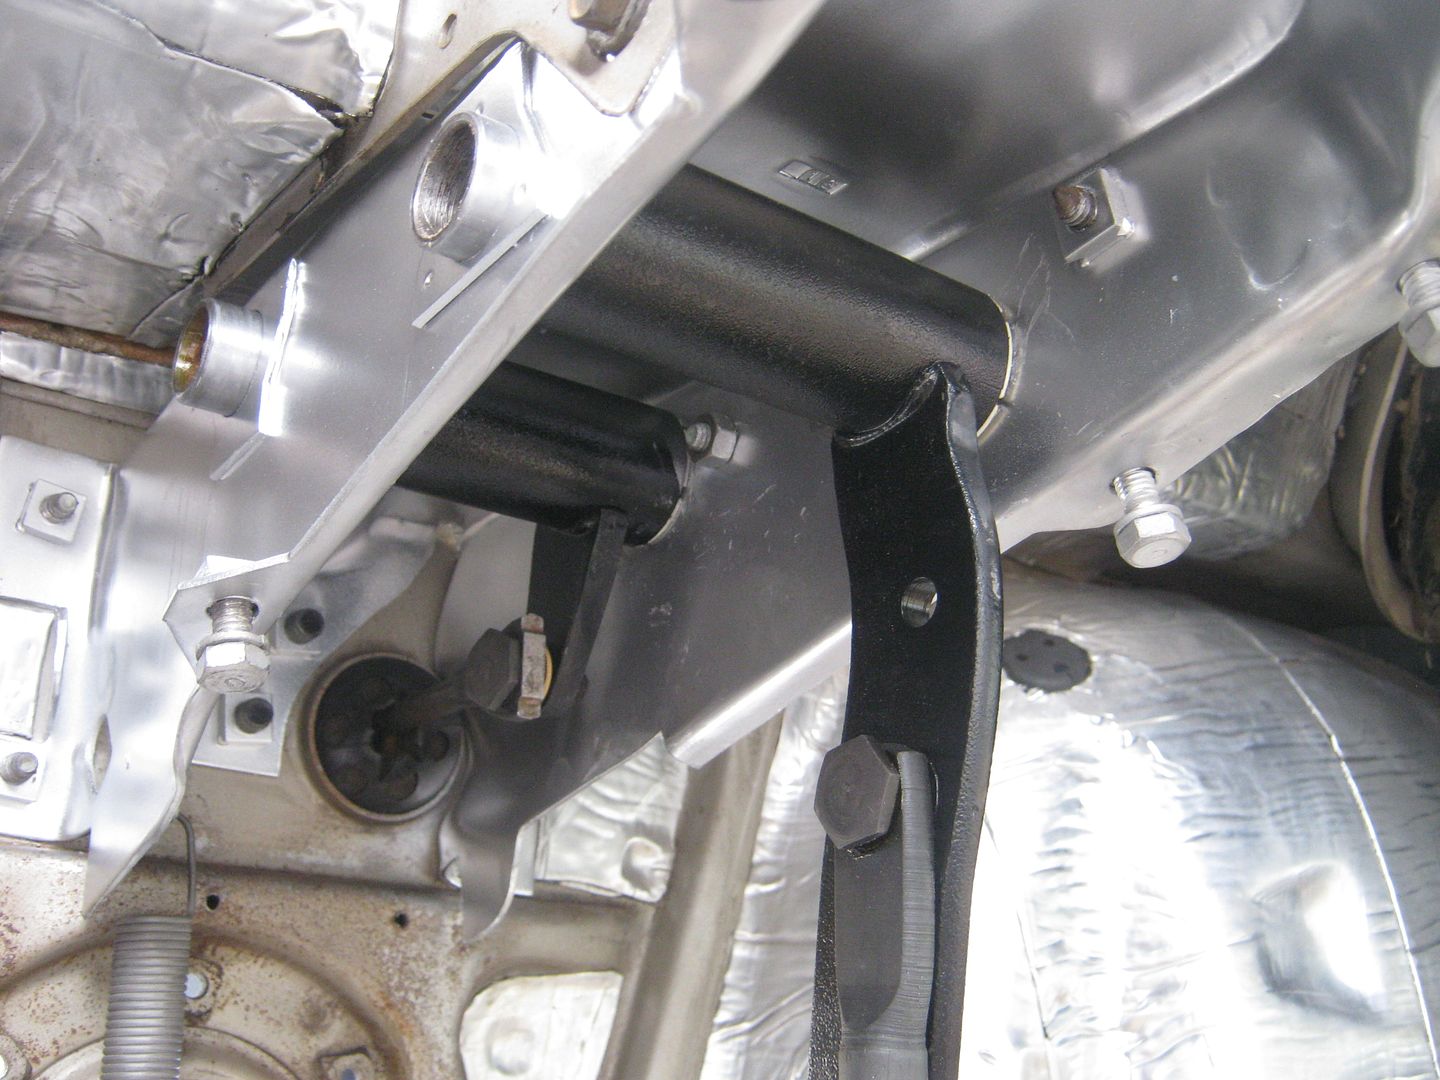
Here's a picture of the set-up mocked in place. You can see how the bellcrank now supports the eyelet. You can also see the reinforcement pieces around the penetration holes for the hinge pin on the rear pin. I drilled out the spot welds on the piece I got from the wrecking yard and spot-welded the plates to the pedal support in order to make it all look factory. The issue now is how to attach the bellcrank to the stock brake pedal.
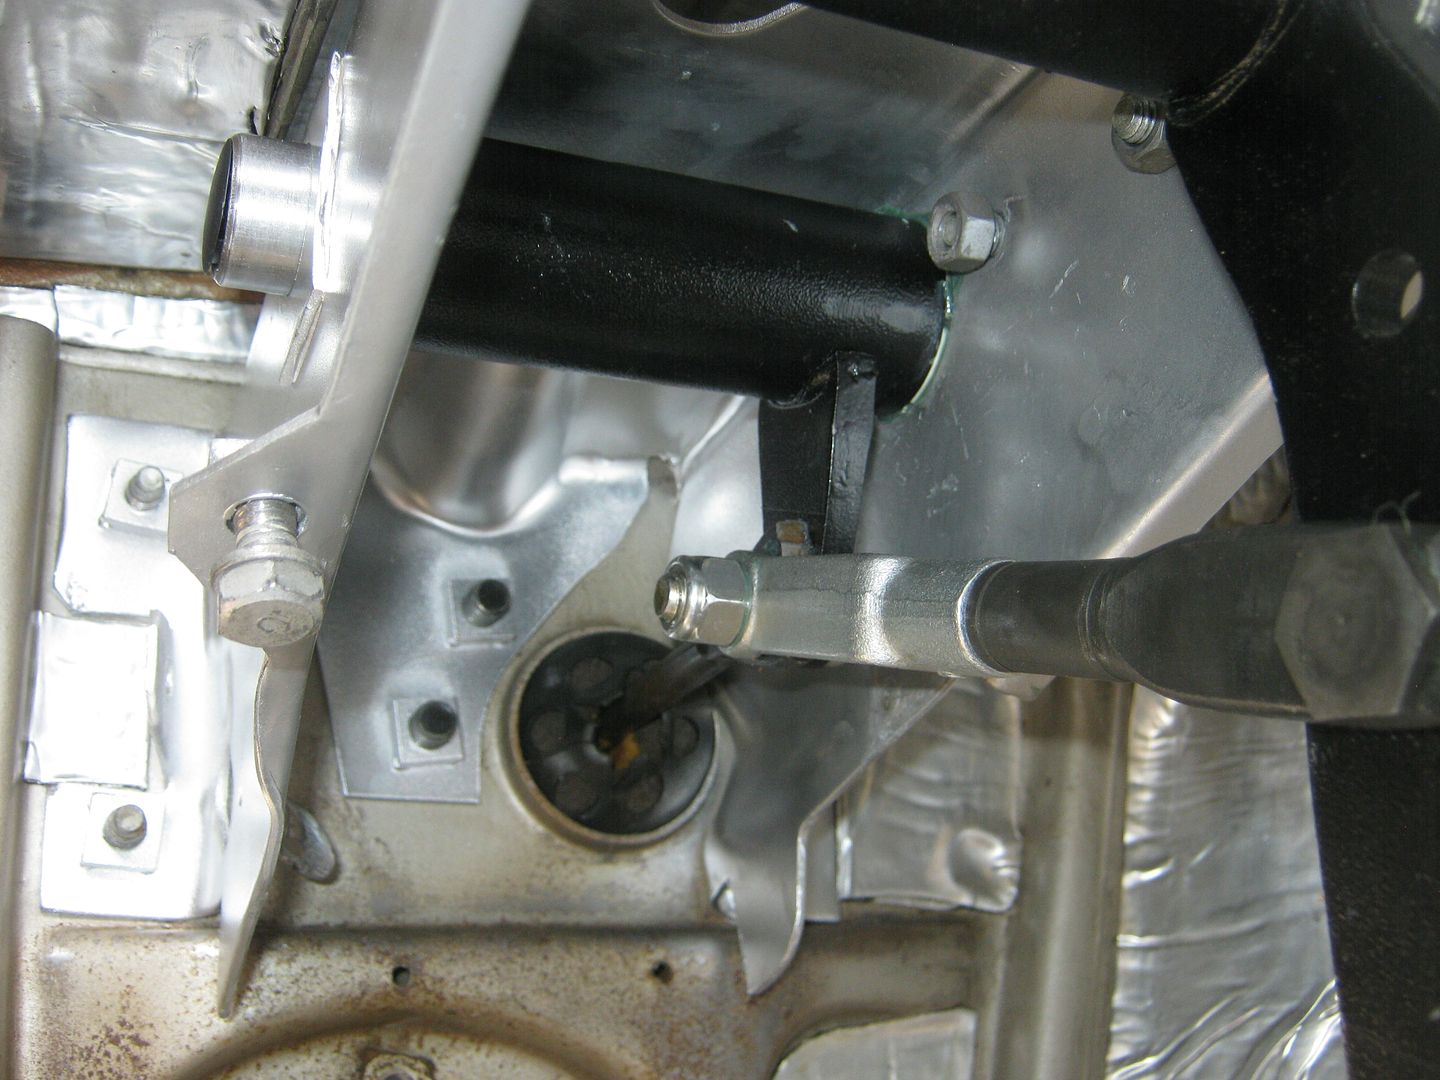
It had to be a clevis of some sort, preferably one that captured both sides of the bellcrank/booster rod connection. Brad was at the bolt shop and they had the perfect clevis. It's about 2.5" long, and the span of the jaw was .500", and it was a whopping $5. I measured the total width of the booster eyelet and the bellcrank tab, and it was .585", so the jaw was opened up slightly. The clevis is threaded on the end to accept a 7/16-20 fine thread bolt, just like the factory linkage. The only goofy thing about the clevis is that the eyelet holes are 7/16", so the factory hole in the brake pedal (which is now the bellcrank) needed to be opened up to 7/16". The eyelet in the booster is .640", which means that you will need to find or fab a bushing with an outer diameter of .640 and have an inner diameter of .437 (7/16"). I found a bronze bushing at Lowes with an o.d. of 5/8" (.625) and an i.d. of 3/8" (.375)., and it cost $3.88. The o.d. would work, but I opened the i.d. to 7/16" and chopped the total end to end length to .275. It worked perfectly. The linkage rod is merely a 2.5" 7/16-20 set screw, and it cost $1.80. The through bolt is a Grade 8, 2" long. The bolt head had to be ground down to about .250" tall in order to clear the side of the structure when the brake pedal is depressed. After all of the attach points were greased, the linkage works like butter, and the booster rod depresses the plunger with very little change in height. Another thing that this mod did was move the brake pedal closer to the floor. No longer will you have to lift your leg completely off of the seat to push the brake. Mission accomplished!
Sorry for the long explanation, but I think that this mod will help anybody wanting to make their brakes work better and have vastly improved ergonomics. Plus, it was cheap, and I like that!!