Thank you
mongocanfly, Getter-Done, Bean Counter and Ol Blue K20 .
Looking forward to get the link, Getter-Done, always good for the inspiration
to see other wagons!
Not much progress on the project now, as it seems like every part needs to
be either polished or painted before going on the car. The sheemetal part
that screws to the grille and goes inside the top of the front bumper was
pretty badly wrinkled up, so I had to hammer and dolly, and even weld it a bit
before grinding, sanding and filling. It's so cold in the garage now, that the
filler wouldn't harden, so the six foot long thingy is standing in the shower
stall for the moment being

The wife wondered what the smell was.
Grins
I mounted two of those "body by Fisher" treshold moldings today, after
spending a lot of time polishing them. They're all pretty badly oxidized, and
should really be scrapped, but as the carpet isn't new either, they still look
pretty decent when polished. Everything is relative.
I also polished the thingy that almost look like a park/turn signal (in the pic
below), and mounted it. The left hand one had been glued in place because
the nuts were missing. Something was wrong with the two "stalks" that the
nuts swrew onto, so the usual sheet metal nuts wouldn't take. Using a die I
made1/4" threads on them,so now they take standard nuts.
Then had to call it a day and go vote. We had parliamentary election here
today.
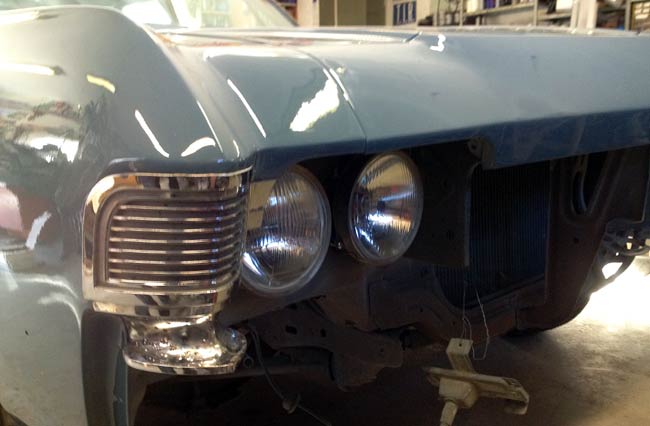
As can be seen in this pic, the chrome is pitted, as it is on most parts. Still it
polishes up, so I think it'll look decent seen from a few feet away. In this very
case the worst pitting goes inside the bumper.
Edit: The wife looked the car over as it sat outside, and in a thoughtful way said:
"It looks a bit high in the front"
She's learning! And yes, a few coils might eventually just disappear.