Ive been plugging away at the to do list on the truck, it's been mostly little stuff (nothing particularly interesting), but theres a couple of S10 swap specifics Ill share here. First is the e-brake cable pass-thru. The S10 rubber pass-thru is designed for a horizontal floor, and not a particularly thick one. The S10 grommet also appears to be placed on the cable prior to forming the ends, as it appears to be non removable/replaceable. My truck floor is angled where the pass-thru goes, and happens to be at a spot where multiple panels overlap, so its far too thick for the S10 grommet. My S10 also had what appeared to be a nearly new cable assembly so I wanted to keep it. I tried to modify an angled grommet to work, but it was frustrating and would not have been great so in the end I just fabbed up an angled mount that allowed the use of the S10 grommet. It snaps right into place and seals nicely:

Next was the S10 shifter cable pass-thru. This thing does a nice job of sealing off the cable, but its designed to come through the floor just in front of the bench seat. Not great for these old trucks due to the sudden sharp angle where the floor rises to meet the firewall. The cable however is free to slide in the pass-thru, so the pass-thru can just be slid to wherever it would work best. The floor of the S10 has a nicely molded section of sheet metal that grips the pass-thru securely, so it can be cut out and added to the floor of the project truck.
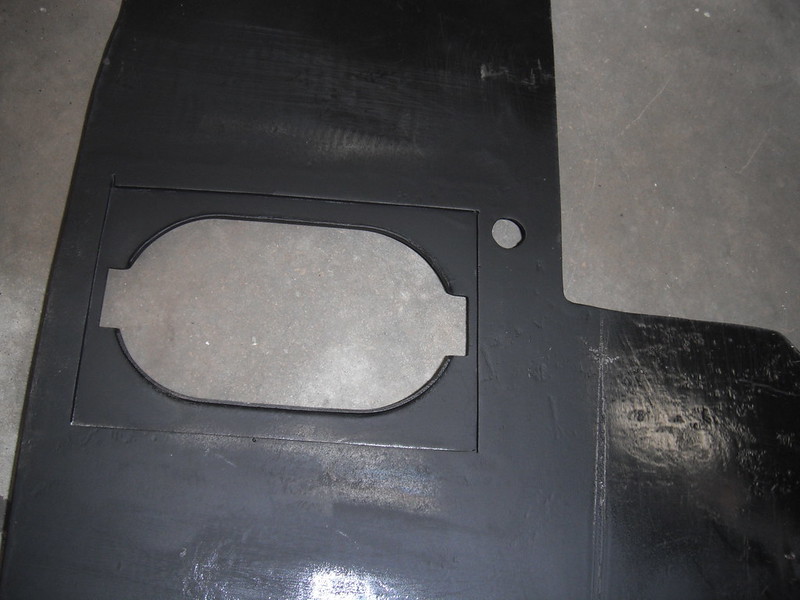
S10 swap tip: Buy a good one!!!! All kidding aside, if anyone plans on one of these swaps its well worth the money to find a good, rust free, well maintained S10 (assuming of course that you are not merely after the frame). The number of reusable parts is unreal if you have a good donour. When I needed the pass-thru for the shifter cable I simply cut it out of the S10 and welded it in. Heres the underside of that pass-thru:

Mine was completely rust free, just needed to cut & weld. Im so glad I waited till I found a solid donour S10.
Here it is welded into one of my floor panels (no attempts to make it pretty, it cant be seen unless you either lift the carpet or lie under the truck).
And here it sits, just waiting to be hooked up to the column when I do my final assembly (theres no interference with the gas pedal, its just the way the pic came out):

Next was horns. Once again, sheer dumb luck helped me out. By simply drilling and tapping a hole in each rad support bracket I was able to bolt on the S10 horns using the brackets they came with. The brackets are mirror images of each other and I now have a matching set of horns that sit perfectly inside the curved front grillwork:

I then took a look at the front bumper, which was a mess. This truck had a hard life, and the front bumper was badly twisted, and bent in sharply on the drivers side. It also had the nice big buckles in the edges that you get whenever you bend metal out of shape. The metal in these old bumpers is thick (3/16ths of an inch), so I knew I was in for a chore. One thing I have learned since moving out to the countryside: If you are not sure how to do a heavy chore, ask a farmer! After conferring with my farmer neighbour I managed to save the bumper. It was actually really easy to do. To remove the twist, the bumper was chained down to my heavy steel work table, and a 2nd chain was used to attach a big steel prybar:

Removing the twist with a 6 foot prybar was delightfully easy. All it took was a couple of mild lifts on that huge bar. Next was the bent driver side. This involved a couple of rounds of using both a come-along and a BFH. The bumper was again strapped to that table, and the come-along was used to remove the bend, along with the BFH to flatten out the buckles along the edges:

Here it is now:

I completely forgot to take a before pic, which is a shame as this thing was a mess. It aint perfect, but it will look just right on this beat up truck. While on the topic of messes, I also had to deal with the front fender braces, which had also been nicely bashed up. I was expecting to fab up a completely new pair, then realized that I could just do some untwisting and modification of the lower end (which no longer had a place to bolt to as a result of the S10 frame swap). All I had to do was chop off the lower section and fab a replacement piece. Heres one of the original braces:

And heres the new modified brace:

And here it is in place, bolted to a mount (which is just tacked to the frame for now):

Id earlier posted about that huge S10 wiring harness, and here is how I dealt with it on the inside of the cab. For now my goal is to get the thing running and spend some time driving it and debugging any problems. I still plan to greatly thin out the harness (both under the hood and inside the cab) but I didnt want to overdo it right now as I have very limited experience with wiring and zero experience with computers and fuel injected engines. I erred on the side of caution for now, but later on I will spend some time in the winter months making the harness simpler.
For now I have a good idea of how to route that huge wiring harness under the dash, using those rubber lined clamps. Dealing with nuts and bolts up the far end of the dash is however not a ton of fun, so I installed studs wherever possible so that I can affix those wire clamps using only a nut later on. I also made the pass throughs in the 2 spots where the S10 harness goes through the firewall. I plan on sticking the bulk of the harness on the passenger side. The drivers side gets pretty busy with the brake and steering assemblies that I fabbed up, so routing wires there would not be fun. Other than the firewall, there are really no good spots to affix those rubber lined clamps so I had to make some panel(s) to attach the clamps and to allow for relatively easy servicing of breakers, flashers and fuses. Here it is for now, securely fastened with the bulk of it on the passenger side. Its not yet taped/loomed as I still have to figure out how to hook up heater, headlights, gauges, etc:

As I continue to plug away at my to-do list, I keep spotting more stuff to do. The darn list is growing rather than shrinking. More to follow!