I've been taking two hour cracks at this project since my last post.
Some quick testing revealed only one of those wires are necessary at the starter. The AAW wiring harness used does not have a wiring diagram associated with it. A search of the AAW website turned up nothing. Dad did the research on the antenna wire grommet but came up short there. Then while looking things over one day I found the antenna was shipped with a new grommet. We made quick work of installing the antenna and cowl screens followed by the cowl and hood to cowl seal. The old seam sealer was scraped away and new stuff applied prior to covering everything up. Belts and hoses are all secured. A couple clamps for the heater hoses ordered on August 9th finally showed up on the 27th.
I soldered a couple more wires for the wiring(choke and battery-to-forward harness) to complete the wiring. Battery cables are routed and installed.
I used a torch to heat up the exhaust manifold studs so they could be removed. The first one twisted right off using the stud removal tool. After that, I used vice grips to turn the stud back and forth to loosen it from the manifold prior to using the stud tool. This worked like a charm and now I just had to deal with the broken one. I used the torch to blow out much of the broken stud. Once I got as much as I dared without damaging the manifold I gave it the heat treatment one last time and quickly got in there with a drill bit. This worked quite well but did not get it all. Once the manifold cooled down I used a tap to remove the remaining broken stud material left from the torch...worked just as I imagined. The manifold were then cleaned up and re-coated and new stainless steel studs installed.
I had a heck of a time figuring out the shifter linkage. Dad wanted it replaced from tranny to the column. I posted a question about it on the forum here and thanks to Don D I was able to take care of it. Turned out I was missing the part that clamps the vertical rod. Don posted photos that cleared things right up.
https://www.67-72chevytrucks.com/vbo...d.php?t=837492
The manifolds went on next. Driver side then passenger, which is about when I remembered I wanted to leave the passenger side off until the tranny lines were installed. Oh well, it's installed and staying.
Stainless transmission lines went in with a lot of manipulation and force. I first ran them under the motor mount perch before coming to the realization they are to be routed under the engine. I pulled them and went about getting them re-routed properly. One was pretty bent out of shape after all this but getting it back to where it needed to be was nearly effortless.
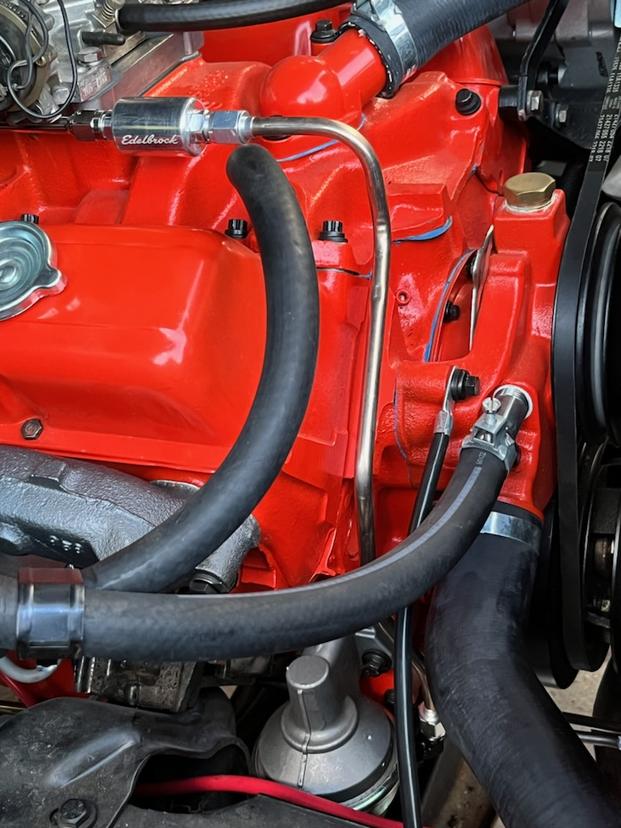
I made a hard line for the fuel filter to fuel pump using -6AN fittings on 3/8" NiCopp. It turned out as planned and has a nice look to it.
The transmission crossmember was still loose from the pan gasket/filter change so I buttoned that up. This is where I noticed the driveshaft will need to be removed to get it into the transmission. It was not removed when removing the engine/tranny. I removed the U-bolts at the carrier and unbolted the carrier bearing to get the space required to insert the drive shaft into the tranny then buttoned it back up. Also noticed was the vacuum modulator tube was missing. Located that and installed.
Back up top I started filling the tranny by dumping in three quarts figuring I would check it and go from there. As I waited for the fluid to drain down I turned my attention to installing the valve cover gaskets. In the middle of that I saw tranny fluid leaking onto the floor. I jumped back under the pickup and immediately saw it leaking from the pan. My step son did not get all the pan bolts tightened. I should have checked this prior to buttoning up the crossmember because now I'm taking that loosed again so I can get at all the pan bolts. So, crossmember loose, tranny mount bolts removed, still had to raise tranny to get at two pan bolts. Everything tight and buttoned back up...disaster averted.
Back up top I drop another quart of tranny fluid and find the fill tube is not inserted completely and another leak appeared. Took care of that and drop another quart in there and yet another leak! This time, it's the detent cable. I questioned this in my mind but was uncertain and now I know it will need replaced. Waiting for parts. I ordered the Lokar detent cable/bracket and a pan with a drain plug.
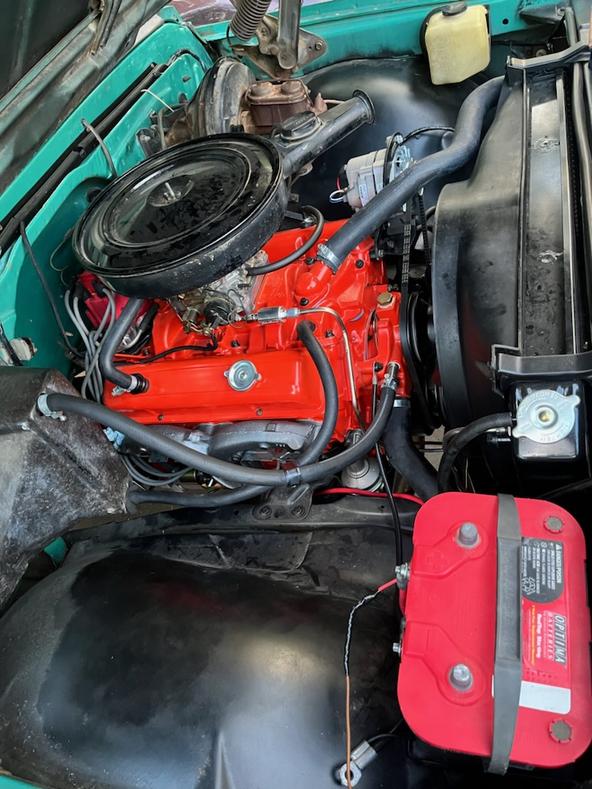
I went ahead and filled the engine with oil so it will be ready.
The much shorter list of To Do's:
Install oil pressure gauge hard line
Install engine lift cables
Torque balancer bolt
Install torque converter bolts
R/R detent cable/pan
Startup