In an earlier post I had shown the custom tranny mount that I had made. I had read through the S10 swap how to thread and saw the Skymangs method, but dealing with that weird shaped original transmission mount struck struck me as doing things the hard way, so I fabricated a simpler design:

On the weekend I had some time and I tossed the engine/transmission back into the truck, and then started to assemble the exhaust. When I went to mount the catalytic converter, guess what was directly in the way? My new fancypants transmission crossmember!
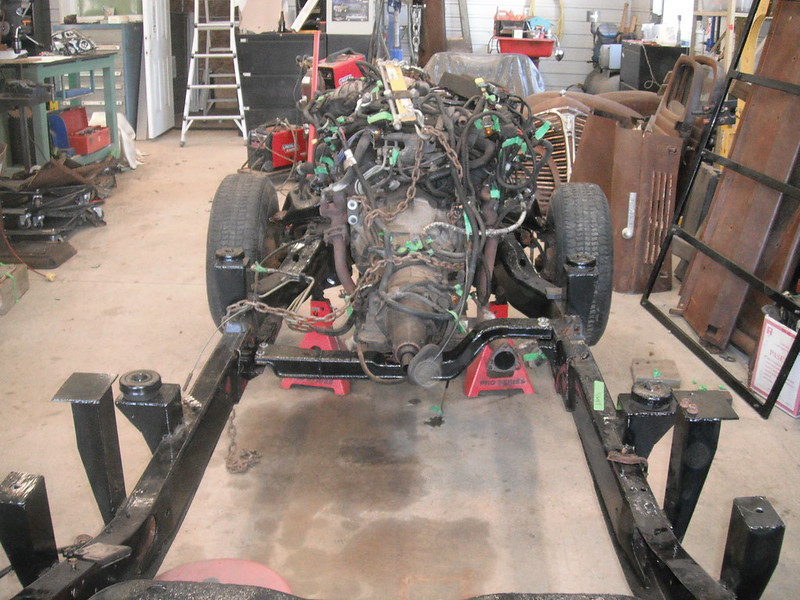
Here is the original S10 crossmember, cut to fit and welded back up, just like it was suggested in page 1 of the How-To thread. In addition to giving catalytic converter clearance, the factory crossmember has the exhaust hanger that sets the cat converter in exactly the right place, making exhaust work simpler. My engine is set at factory S10 height, so all I will have to do is find a way to shorten my exhaust system 8.5 inches to make up for the distance I moved the engine back. The entire exhaust system should (theoretically) mount exactly the same way a factory system does.

The only modification I made to Skymangs method was how I attached the cross member to the passenger frame rail. I chopped off the part of the original cross member that curves downwards and bolts to the frame rail, as it was going to make things tight between the mounting bolts and the catalytic converter. I just made a 2nd shelf to bolt that side of the crossmember onto. Of course the factory end that I cut off had crush sleeves to protect the tubing, so I had to do something to protect the end of the crossmember from getting squished while tightening the attachment nuts & bolts. Here is a pic of the not pretty but functional crush sleeve.

And here it sits after I slid it into the end of the crossmember and anchored it with a light weld along the edge. I know that most people would have just drilled out the mounting holes and welded in some pieces of round tube in the crossmember, but as I get further into this project I often find myself thinking if I have done this wrong, how much work will it be to undo it?. In this case, a quick pass of the grinder is all I need to remove that sleeve.

And here it sits in place. Moral of the story: If someone has done dozens of S10 frame swaps there is probably a good reason when they tell you to do things a certain way!
I recently had to make a decision about which rear axle to use on this build. I have a parts truck outside (4wd Blazer) but the rear axle parts on it are completely rusted up so it would need absolutely everything replaced (rotors, calipers, pads, parking brake, dust shields, lines) and this is a lot of money. My existing axle from my donour 2wd S10 is in perfect shape and needs just a brake line. It also hooks right up to the parking brake cables (so no modifying a 4wd axle to accept them) and I assume my ECU is already set up to provide an accurate speedo output based on the stock gear ratio in my existing axle. Given that this is a low-buck build, with a stock V6 that will always be driven gently, I opted to stick with the existing rear axle and just use spacers to give me bedside clearance for the wheels. Remember also that I am going for the stock Fargo look, and these spacers will put my wheels pretty much bang-on.

With this stuff all done, I sat back and had a beer. Getting the body and drivetrain to fit the frame was a fair bit of work, and there is still tons to do, but from this point on it's a bunch of mini-projects that I can putter away at as time permits.