Thanks guys. I often get stuck trying to figure out the little things, so Im doing my best to document generic S10 swap details that I have had to sort out. Speaking of which, heres more!
I got started on that cab by first stripping everything out of it and placing it on blocks to lift it up. The entire Fargo floor from the seat forwards can be removed, so I am able to step inside the cab and work on things while comfortably standing on my shop floor (instead of crouching inside the cab with screaming knees).

The toeboard was badly dented and had all kinds of cutouts that are not needed, so I used it as a template to cut out a new one. I may fab up some stiffening beads to weld to the underside, but I used 13 gauge steel and once bolted down this thing has almost zero flex (I also painted it black while it was easy to do, so pic quality is not great):

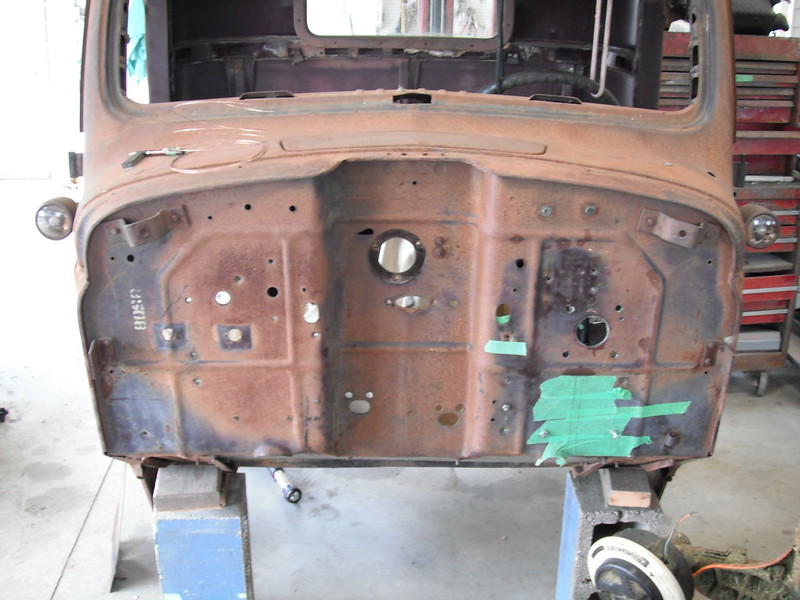
The firewall also had a ton of cutouts and holes of all shapes and sizes that needed to be closed up. I figured a couple of hours should do this, until I counted up all the openings that needed to be shut (60 of em!).

Full welds were added to previously tacked together parts::

After doing the final welds on the column support and brake assemblies, I tossed them both back into the cab to figure out the firewall passthrough. The U-joint at the base of the column ends up where I knew it would (right in the firewall) so I needed a passthrough and a sealing system.


As for the passthrough, I grabbed some steel and fabbed a box that would extend the firewall forward enough to enclose the u-joint. Unfortunately this spot is where the firewall bends down under the floor so it took a lot of fooling around to be able to match all the little bends and jogs that go on down there (there are overlapping panels as well, so this tiny little box was a bit of a nightmare to fab up!). I was going to weld the little box in place, but since I am doing this with the cab off the frame I figured it would be best to bolt it on in case I discover a clearance problem when I reassemble the truck. Heres where I ended up (its temporarily fastened with just a couple of bolts)


To handle the seal on the engine side of the firewall, I just used the original 96 S10 rubber seal and the original bearing as it fits a ¾ DD shaft. Here are those parts on my new DD shaft, and then temporarily installed:


For the inside cab seal, I went to my parts truck (a 2000 or so Blazer) and found that it had a nice rubber flex cone to seal the column. To use this cone I had to remove the 1996 S10 lower column seal and insert the 2000 Blazer lower column seal. They both fit, but there is a clocking difference that required me to use the Blazer lower column seal to properly align the rubber boot:

I may fab up a big ring that will bolt the edges of the boot firmly down, but I have some more mods to do in that area that require pulling out the brake assembly first, so it will have to wait.
I was a little tired of crouching around and working on that passthrough so I switched to something quick & easy (or so I thought). Sometimes its the little things that slow me right down. I found a couple of snapped screws on the glovebox door where the swingarm attaches and I figured this should be quick. Famous last words. I have no idea why this happens, but every so often I come across snapped off screws that resist all attempts to drill them out. I also had just run out of acetylene, so no help there. I went through 7 or 8 new drill bits, and both screws just wore the bits out. Here is one of the little buggers (it's the one on the left), and you can see the snapped off portion down inside. The construction of the glovebox door is strange, as the outer screw holes have an air gap between the glovebox doorskin and whatever the screws thread into:

I got around the problem by grabbing a carbide bit with a rounded end and I hogged out a hole that was wide enough and deep enough to lay a nut in This shot is actually the right side of that glovebox door but its the same process):

The nut was then welded in place and the welds cleaned up a bit. Not the prettiest, but it's for the inside of a glovebox.


And after all that I was able to reattach that glovebox door with new screws on both ends:

I repaired a couple of rusty cracks that I found on the floor near the kick panels, and then I welded in a patch to close up the big oval hole where the original gas filler tube passes through the cab floor on its way to the original gas tank (boring stuff so no pics taken).
More to come!