February 2018 - Alright, back on Berthas.
I had been intimidated by the wiring and always said that it was the main thing holding me back on this project since the drivetrain was completed. Once it was all laid out and I knew what I needed out of the wiring, it became a bit easier and less intimidating.
I installed parts of an American Auto Wire wiring harness maybe in earlier 2017? I kind of had a feeling that it wasnt going to do everything that I needed it to do. I needed to add some circuits and wanted/needed to run several different relays. I wanted everything in one place on one panel if it could work. I figured up everything that was needed in addition to the main AAW harness and started laying it out. Some of it works with the AAW harness or uses it as a source to trigger relays.
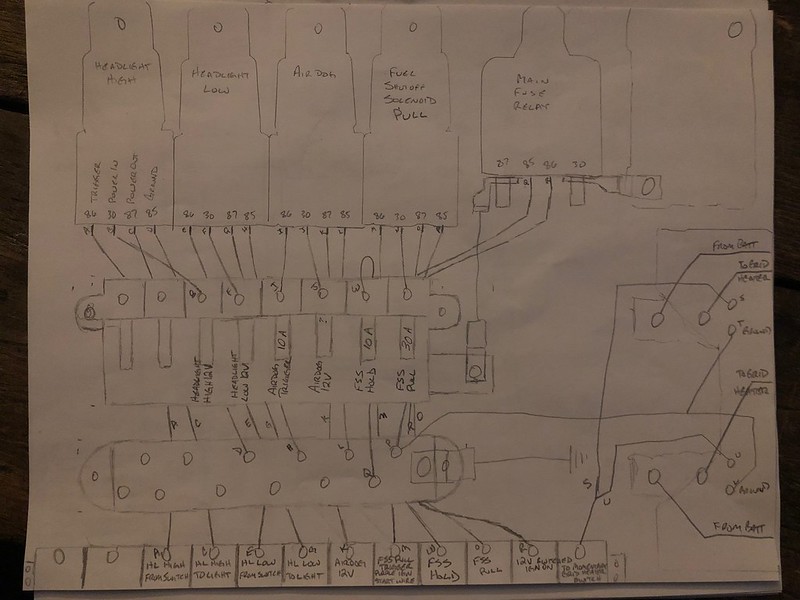
This was the first sketch of the layout I came up with and actually ended up pretty close to this with the addition of a tach module and the main power distribution block.
The main components were:
- Main Circuit breaker
- Main 120A relay
- Fuel Shutoff Solenoid relay
- Lift Pump relay
- Low Headlight relay
- High Headlight relay
- Dakota Digital DSL-1 Tach Module
- Grid Heater relays
- 8 Fuse Panel
- 12 Terminal block
- Ground block
This panel will be fed from a main power distribution block that will also feed the AAW Main fuse block, the grid heater relays, and it will be where the alternator will sense the voltage drop. The power distribution block will be fed by a 2/0 cable from the battery. The alternator charge cable will be 2 gauge and run from the alternator directly to the battery.
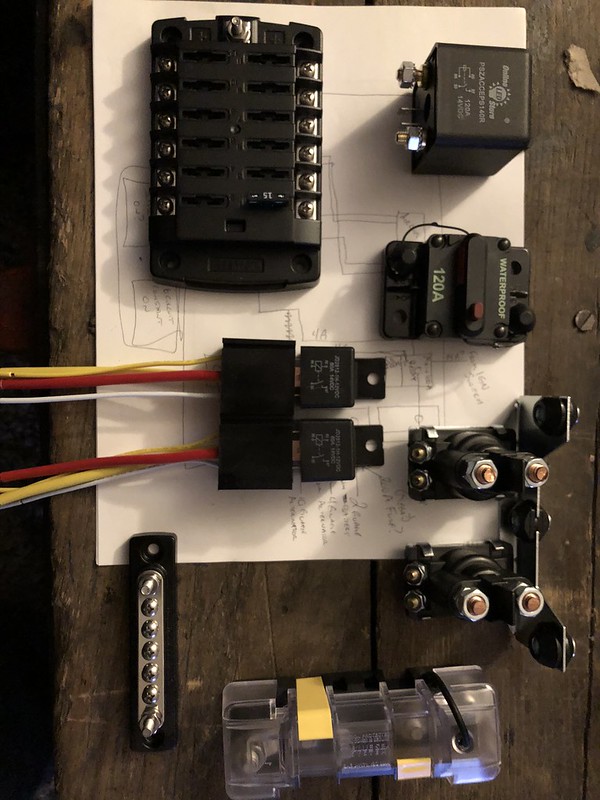
Playing with layouts of the panel
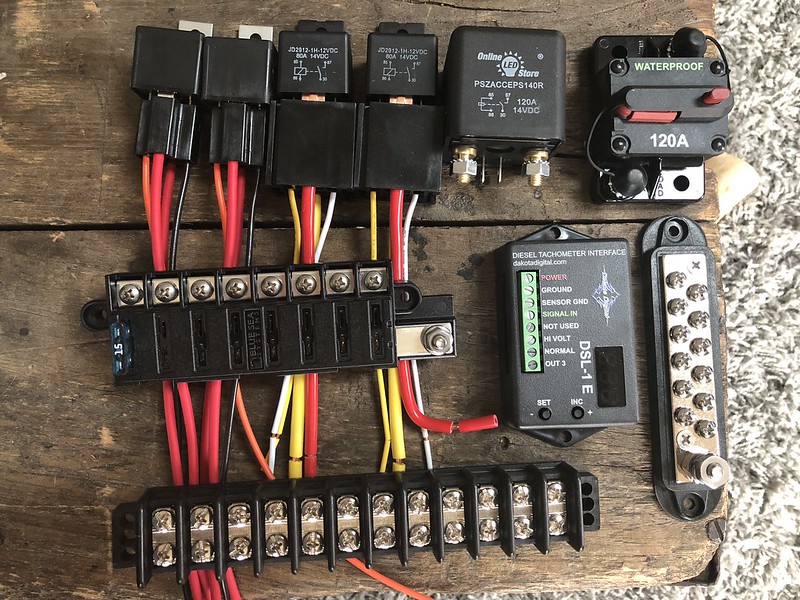
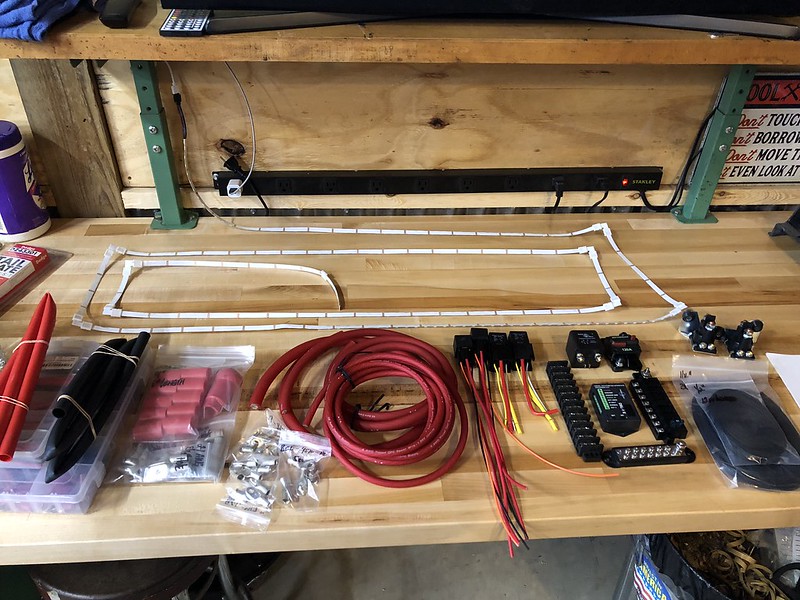
Most of the components needed for the power transfer and panel needs.
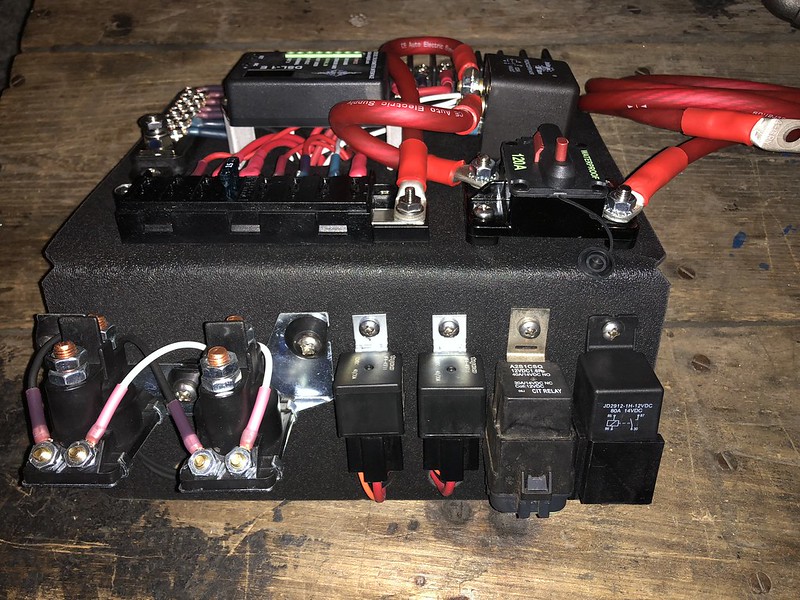
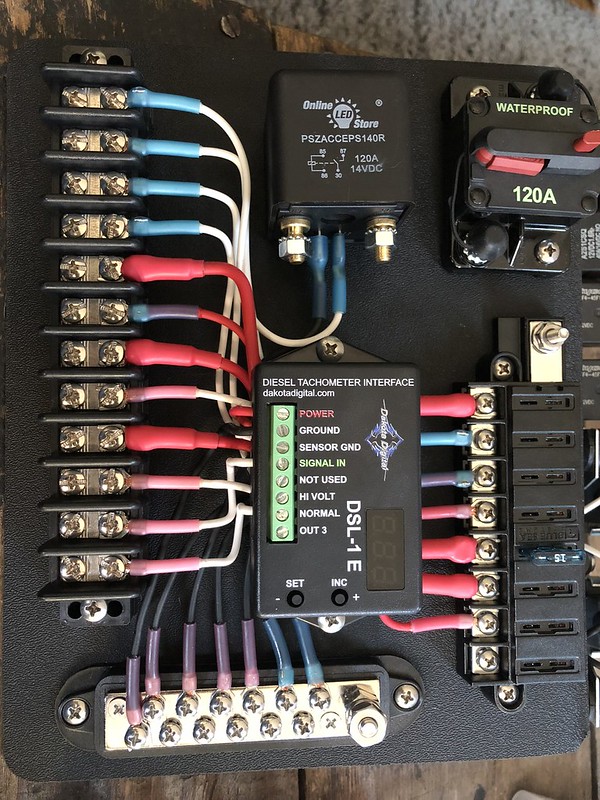
This a piece of 1/8" HDPE that was cut on the waterjet, heated and bent, and the beginnings of the final assembly and wiring of the panel.
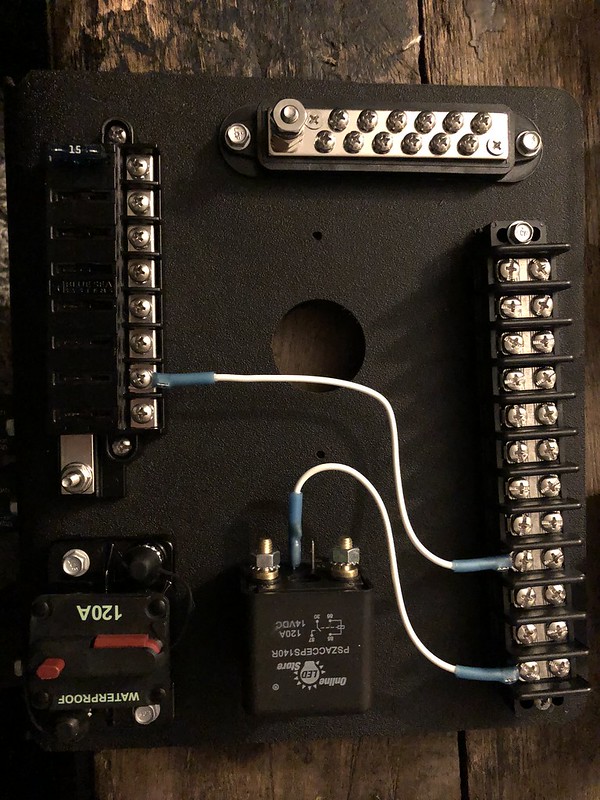
All of the wires to and from the panel will be routed through the large hole in the center of the panel.
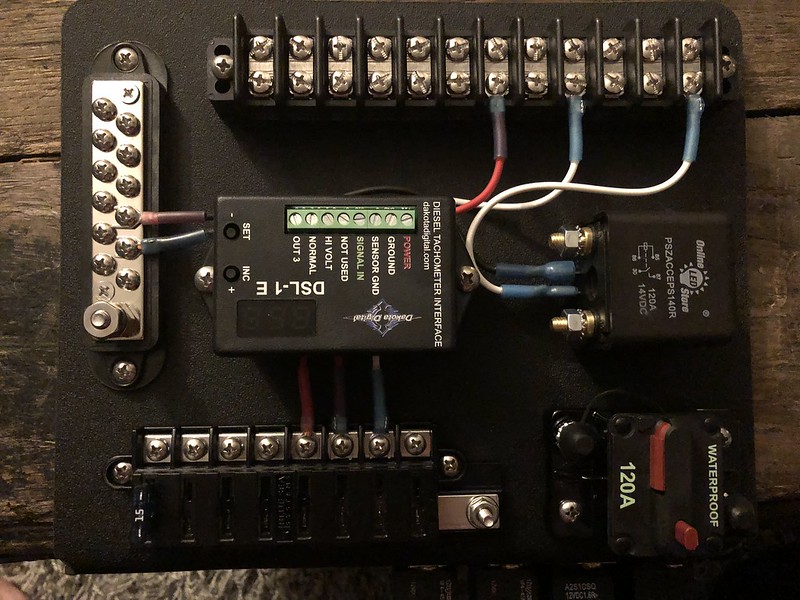
Then came up with the idea to cover the mess of wires running through the hole with the tach module but it would have to be blocked up to allow the wires to pass under it and through the hole.
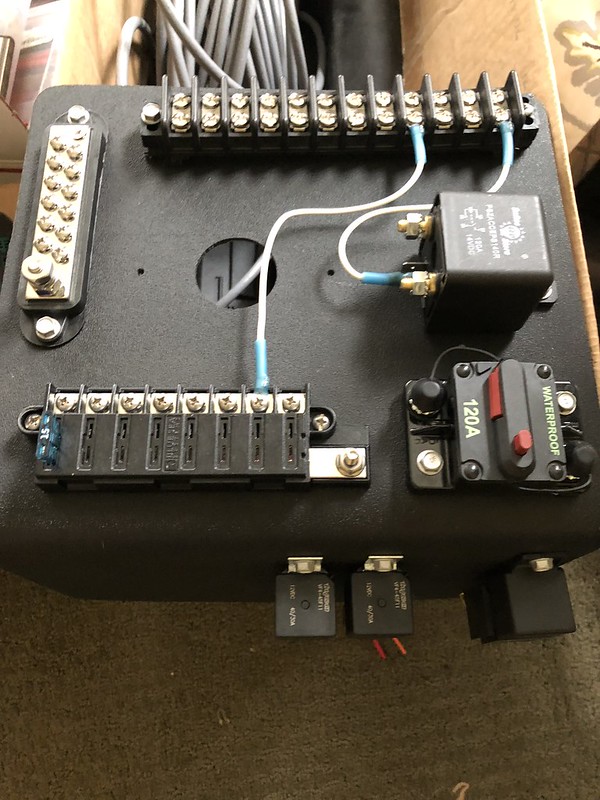
Most of the small gauge wires are ran with the exception of the wires from the AAW harness to trigger the circuits. They will come up through the same hole under the tach module as well and routed under the terminal block, which was also blocked up, and then ultimately connected to the terminal block.
Power supply cables added
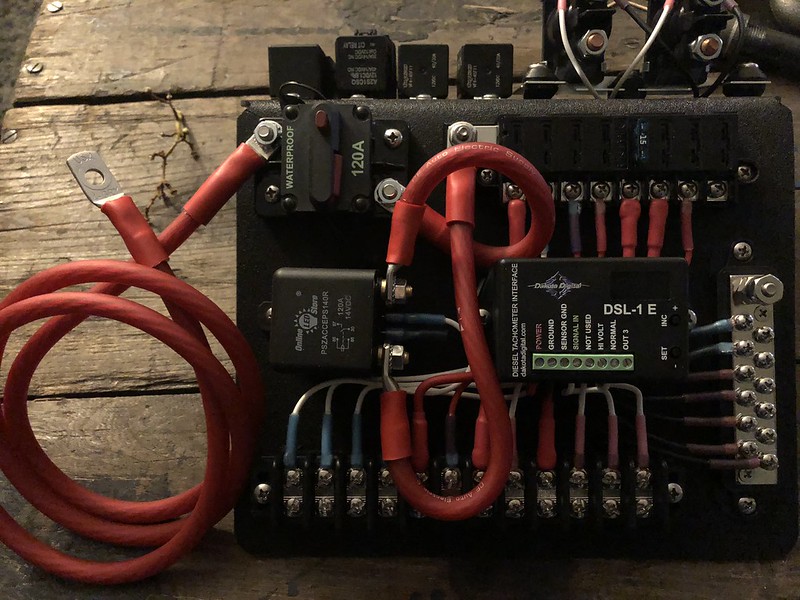
Relays mounted and routed. You can also see the 1" aluminum blocks that were cut on the waterjet to elevate the tach module for clearance for the wires to run through the hole underneath it. Ill post more on the installation of the panel and cables in a later update.