The outcome may hinge a pound it (HA HA)
Getting to make a modification to the door hinges that as far as Im concerned should be a standard on all door hinges.
The Hinges where being stubborn, the hinge pin did not want to come out, I tried penetrating oil and heat but it didnt want to budge. But I found if I ground the head off the hinge pin and use a socket to support the frame around the head area and one or two solid hits on the pin it came right out. The spring pin holding the slider was bent and had to be cut out with a small cutoff wheel in my Dremel and pushed out in small peaces.
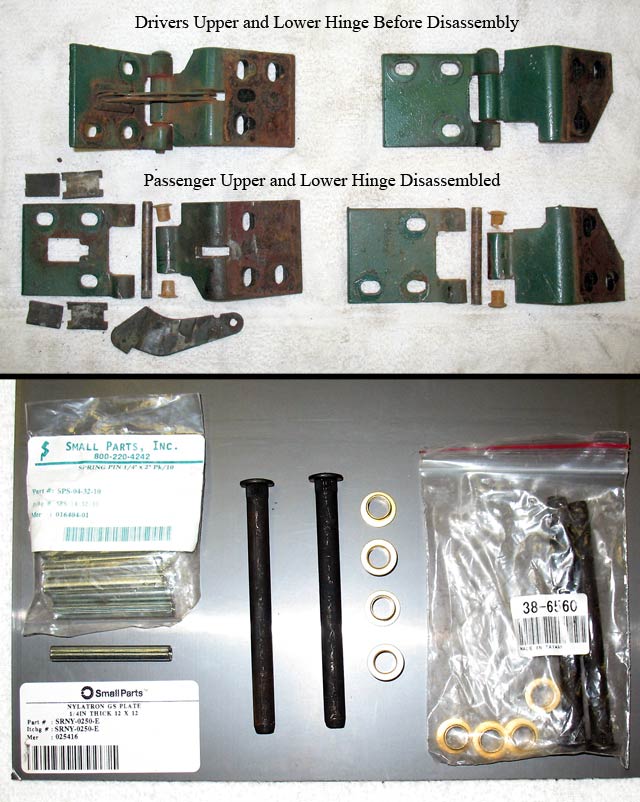
Gathering the parts that I was going to need for the rebuild
(Qty 2) 38-6560 hinge pin rebuild kits from LMC
(Qty 1 pack) SPS-04-32-10 Spring Pin ¼ x 2 inch from Small Parts Inc.
note this is a larger spring pin than the stock one of 3/16 x 1 inch
(Qty 1) SRNY-0250-E NYLATRON GS PLATE ¼ thick 12 inch x 12 inch from Small Parts Inc. note this is a guess on my part that this material is similar to the stock material
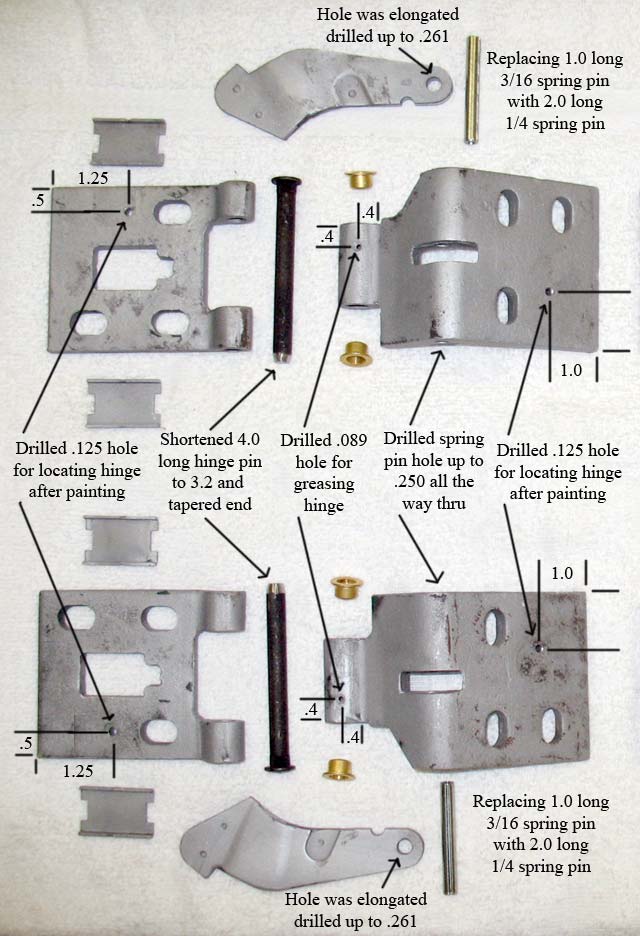
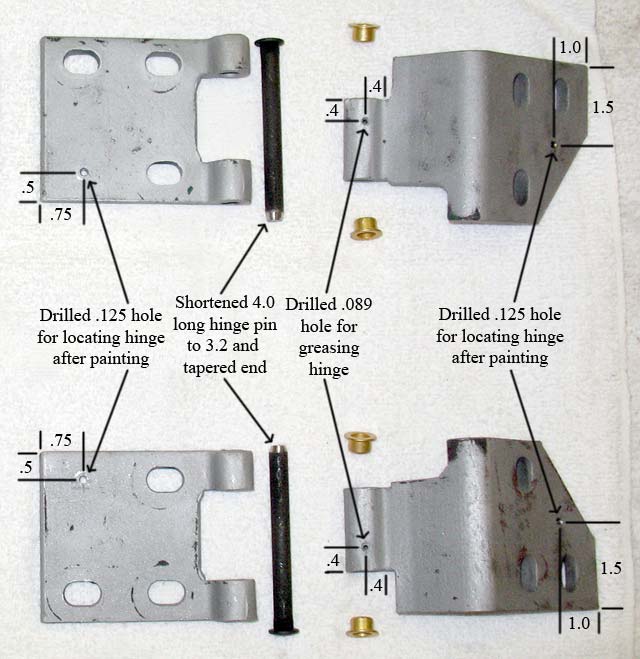
I never found a way to get grease in the hinge pin area the way I thought it should be. So I drilled a small hole that will let me use a grease gun needle nozzle to get the grease where I think it is needed on occasion. (See picture below)
One technique Ive found useful is drilling a 1/8 Dia Hole in the hinge halfs so that after you get the door to fit and fair right you drill a corresponding hole in the door and frame thru these holes. Then when you put the doors back on after painting you get the doors real close to where they need to be with very little if any adjustments. I just use a clecko to line the holes up for installation. (See picture below for those that are interested)
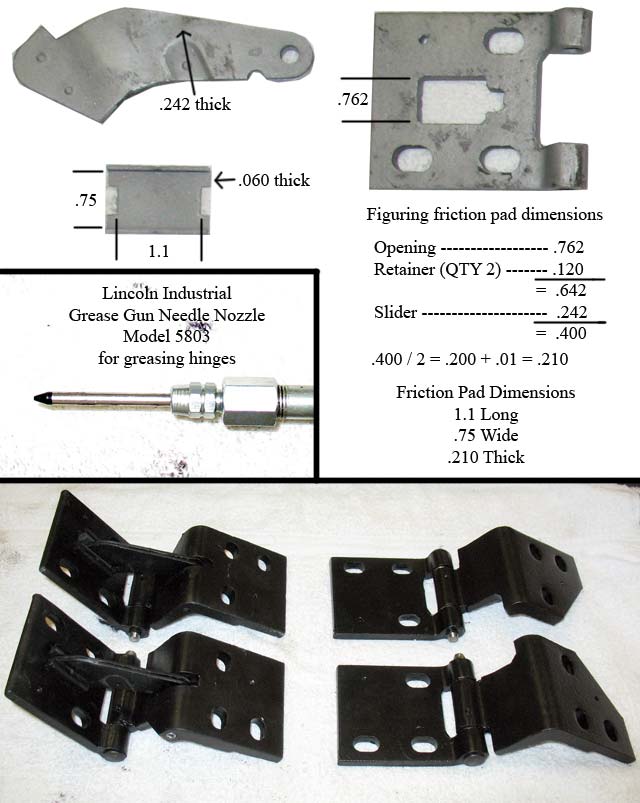
The friction pads where completely wore out and not knowing the exact nylon material or how thick the pad should be I sat down to try and figure it out. (See picture below for calculations) No guarantee this is going to work right but time will tell. The pads where staked in the retainer no rivets as Ive seen in other pictures so I just staked the new ones in.
There all put together and painted and ready for installation
Have an enjoyable 4 of July and dont blow up or set fire to any thing that has value to any one.