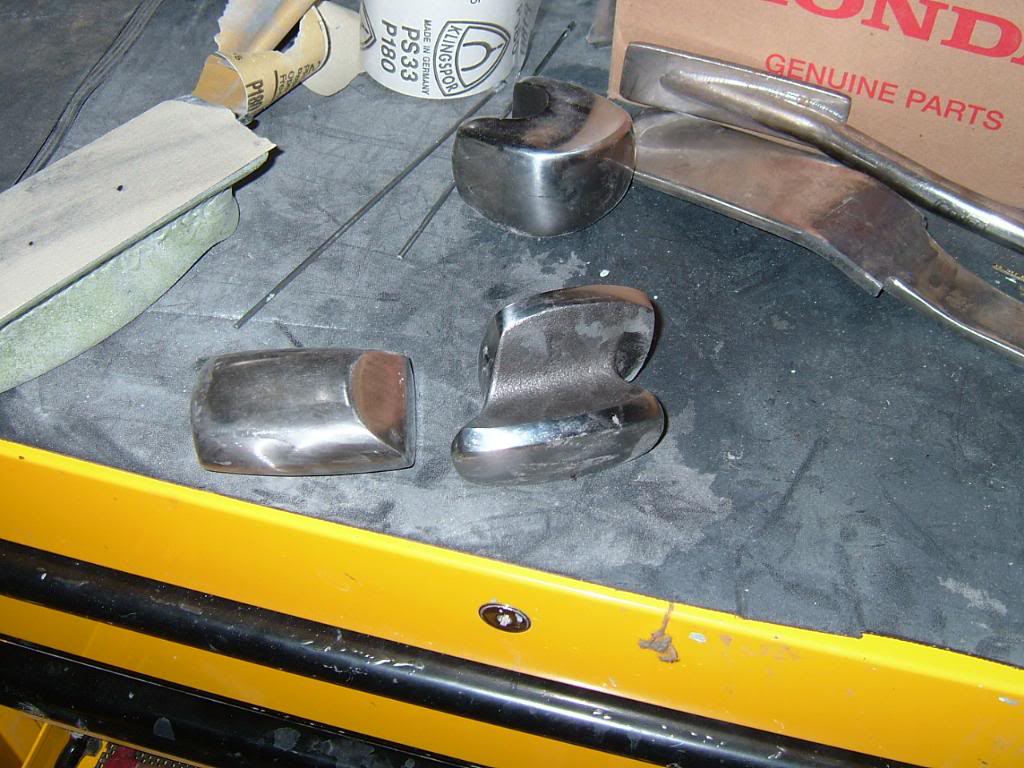
A hammer and dolly are the essential tools for dent repair, without those properly repairing dents does not exist. This picture shows my most used dollies. A good dolly will have curvature in both directions since a true dead flat panel does not exist. A true dead flat does happen from time to time but count on your exterior panels not to be dead flat. You also want dollies with different shapes, a dolly with too little curve will flatten out a panel and a dolly with too much curve is counter productive. The dolly on the left is referred as an Egg dolly made by Martin Tools. The two on the right are made by Dagger Tools are probably my favorite dollies.
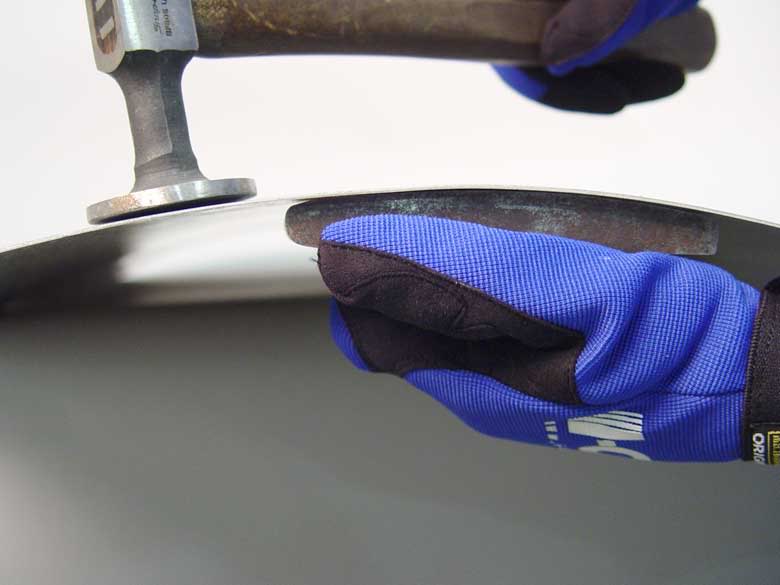
Previous experience tells me the dents in the back are nothing but displaced metal. Displaced metal is metal just needing rearrangement. The metal in is area is not stretched from the impact, in fact the high spots surrounding the dent is actually shrunk to a minor degree. Now since the metal just needs rearrangement and I do not want to stretch it the best method of repair is to use the hammer OFF dolly method which is shown below. The dolly placed underneath the dent and the hammer hitting from the topside. The dolly is placed under the low spot and the hammer hits the high spot.
The hammer and dolly is never in direct contact with each other hence the name hammer OFF dolly. This method rearranges the metal without farther stretching the metal. With upward pressure on the dolly you lightly tap the high spot with the hammer. Doing so levers the low spot up while driving the high spot down together. Simply hitting the high spot will not correct again but actually damage the panel more.
I will use the hammer OFF dolly method for the vast majority of the repair.
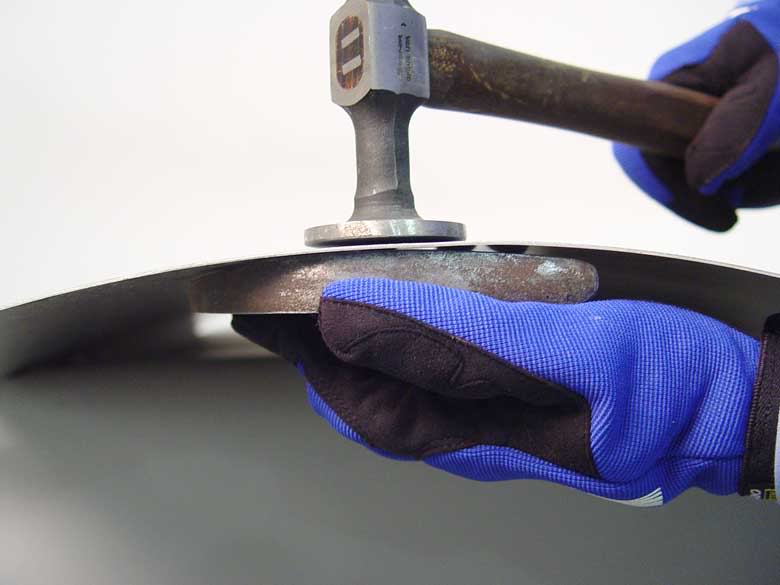
For comparison, this picture shows the hammer ON dolly method. This method has the hammer and dolly in direct contact and stretches the metal out which causes the metal to increase in surface area and rise up. The hammer ON dolly method shall not find much usage in this repair. The photo is for comparison only.
Before we can start repairing dents one must first know the basics of dents because some simple rules due apply. You got to understand what happened to the metal to properly repair the dent. Simply banging the dent out will not remove the damage, in fact it can cause more damage. So the first step in any dent repair is to look at the damage and study how the dent was formed and how the metal reacted.
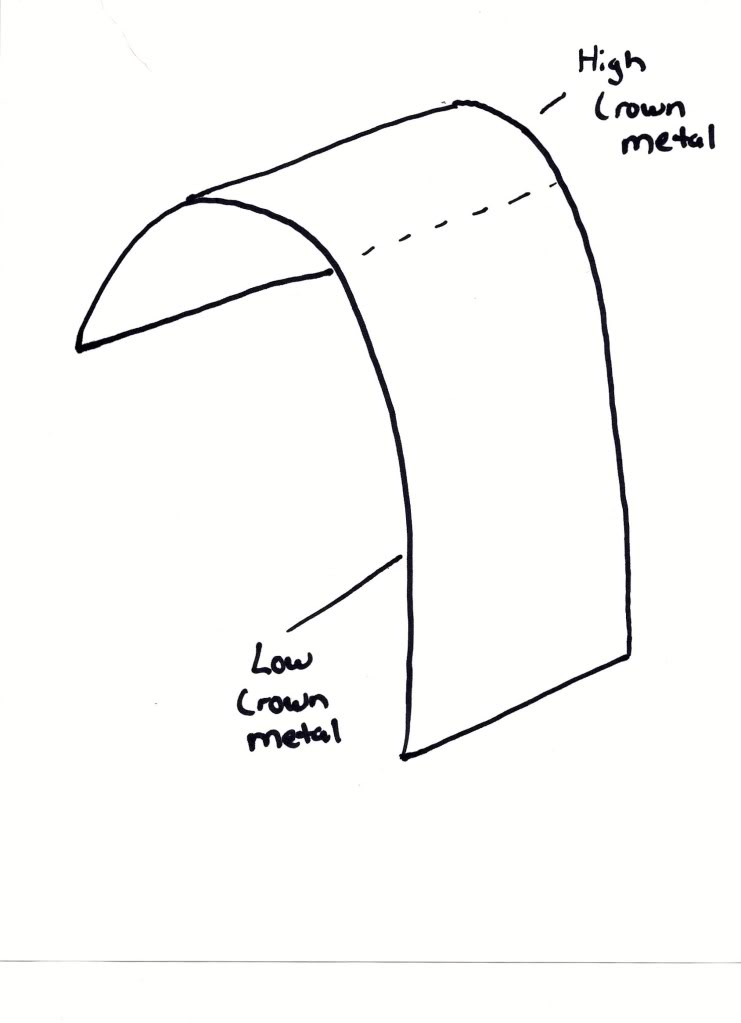
Ok, sheet metal panels consist of three basic shapes the high crown, medium crown, and low crown. Crown is just how much curve a panel has, the higher the curve the higher the crown. Also, panels are a combination of crowns, you can have a high and low crown panel. As seen in the drawing below, the high crown is the portion with the large amount of curve up at the top. As you come down the panel it flattens out and becomes a low crown panel.
Pay close attention to the high crown portion. Viewed from the side the panel has a large curve making it a high crowned panel. But a frontal view shows the panel being flat resulting in a low crown panel. So what this shows is a panel in one area can be both a high crown and low crown panel thus making a combination of crowns in one single area.
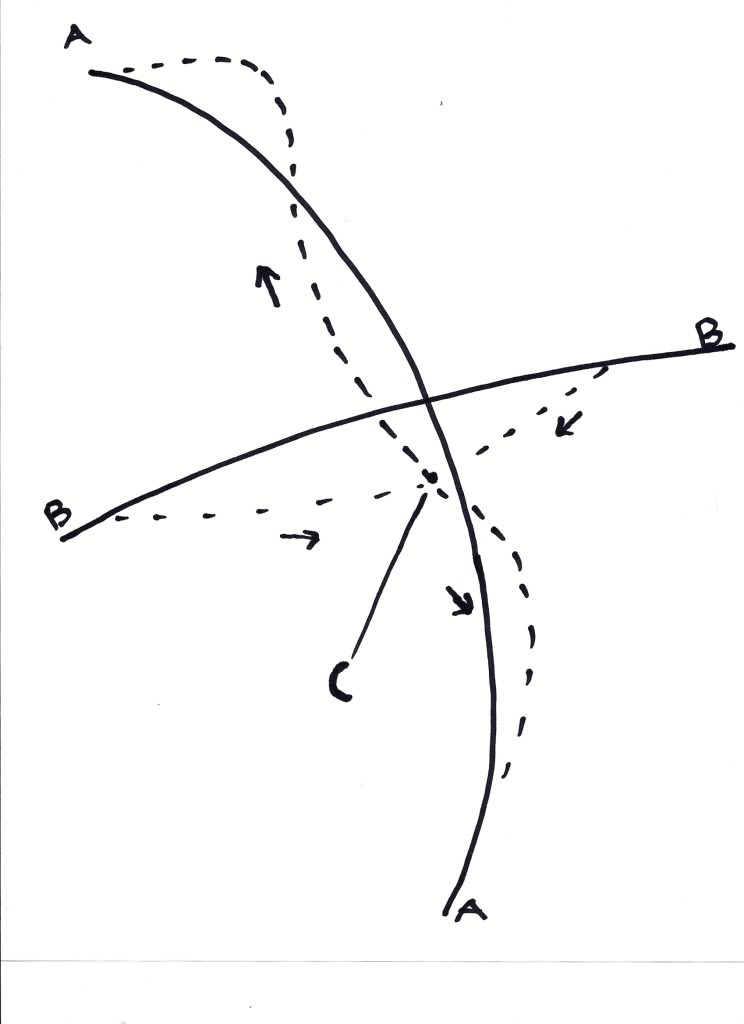
Some might be asking whats the big deal if a panel is high or low crown. Well the following drawing shows the importance of crown and the affects an impact takes on the panel.
Hard to understand at first so break it down line by line and the drawing begins to make sense. The drawing shows a typical combination panel with a high and low crown. Line AA represents the high crown curve. Line BB represents the low crown. The point C shows the point of impact.
Now comes the importance of understanding the affects of crown and collision impacts. Start at line AA or the high crown. The dotted lines represent the metal after the impact. The impact drove the metal down and outward, the outward forces cause the metal to buckle upward. The aftermath is a low spot with high spots surrounding the low spot.
Line BB or the low crown has a much different result then Line AA. The impact on the low crown panel causes the metal to move inward, basically shorten the panel. So understanding the importance of crown is critical to a proper repair. A high crown panel experiences outward forces causing buckles to be formed. A low crown panel sees a drawing effect and the panel effectively becoming shorter due to the inward draw of the metal.
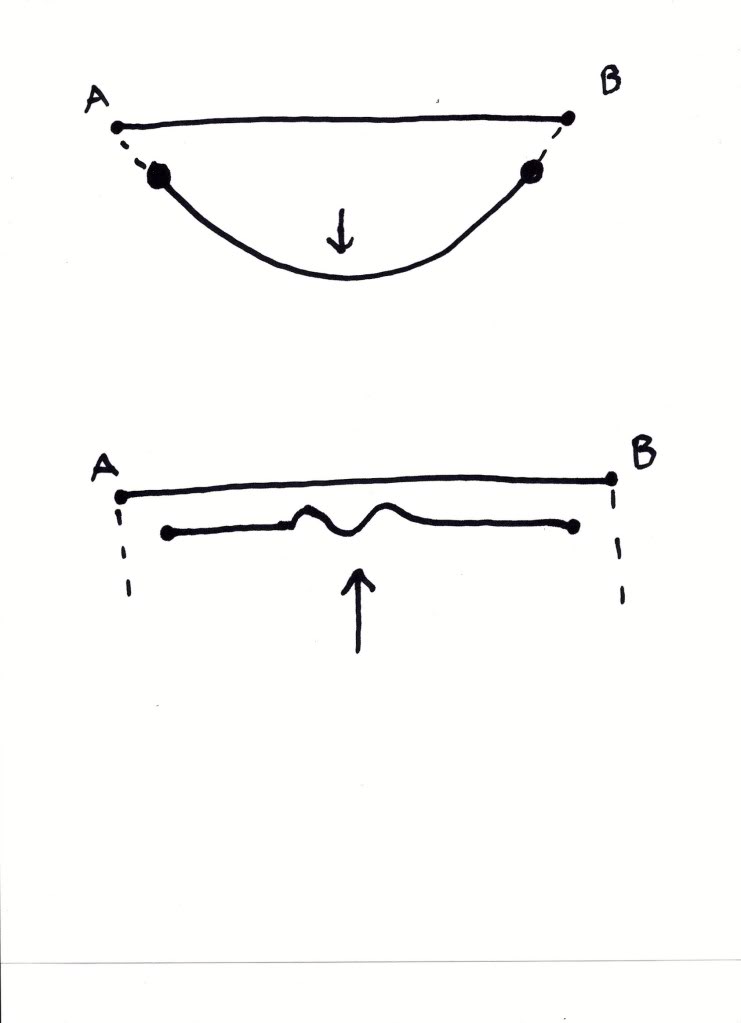
I wont get overly involved in showing the repair procedures for a low crowned panel because the accompanying photos dont deal with too much of a low crown repair. This drawing does show what happens when you incorrectly repair a low crown panel. Line AB represents a typical undamaged low crown panel. The top drawing shows the damage after the impact, the metal is drawn inward causing the distance of points A and B to become shorter.
The bottom drawing shows the attempt at repairing the damage. By simply pushing the dent back upwards causes the main dent to come up but at the cost of additional damage in the form of buckles because of the resistance in the metal not wanting to yield. In addition, not only is there new damage formed but the distance of point A and B is still in the damage state. The panel is still short and not remotely properly repaired even though the visual aspect of the panel shows the dent is mostly gone.
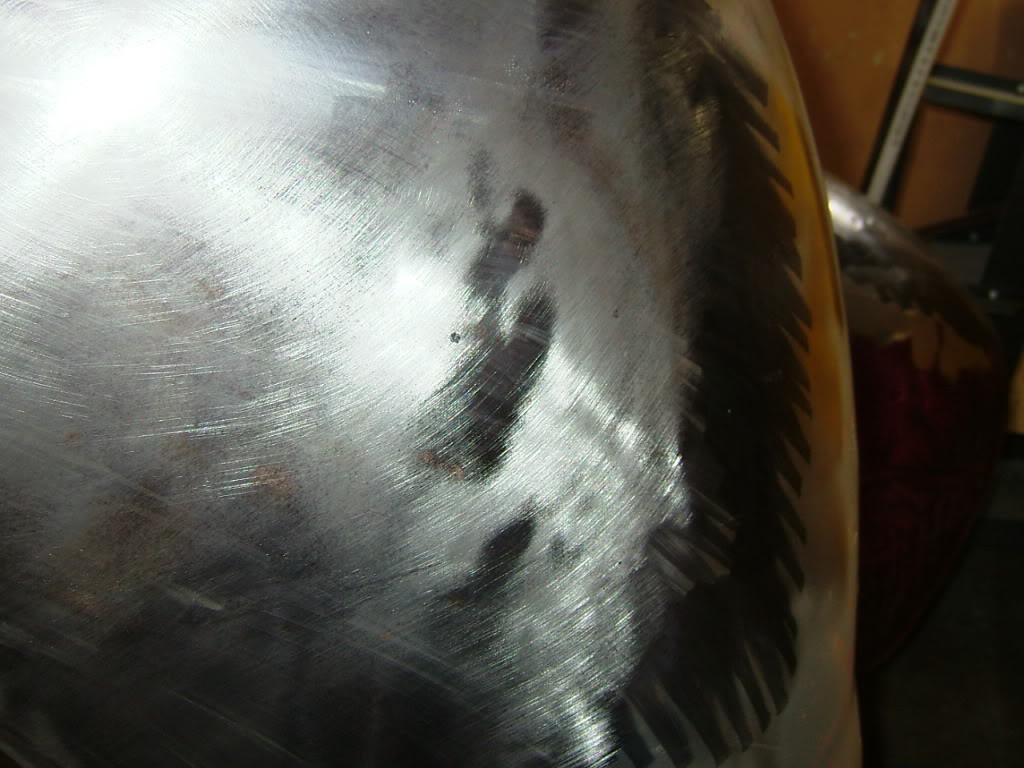
Real world picture showing the affects of collision impacts upon sheet metal crowns. Scanned photo from old auto body book showing a collision damaged door. The door is a combination high and low crown panel. Front to back the panel is nearly flat or a low crown. But from top the bottom the panel is a high crown with a large curvature. Take notice, viewing from top to bottom, the high crown portion of the door you see two large buckles caused by the outward forces.
From front to back no buckles are present showing no outward force. But look at the gaps, the impact on the low crown portion and the inward forces have made the door shorter causing large gaps.
Knowing what happens to metal under a collision and how to repair the dent means the difference in an easy, fast, and properly repaired panel and poorly repaired panel hiding under body filler.

Because of the dent formation basics and the location of the dent on the fender I know what the sander is showing me is correct. The dent is located on an area with high to medium crowns both directions. I have a low spot surrounded by a ridge or buckle formed by the outward forces of the impact. The damage is relatively low and the metal is simply displaced and needs some rearrangement.
Now we have the tools and the technique for dent removal lets fix some dents. I start off by matching the shape of the fender or the curve of the fender to a dolly, I want to come as close to matching the two curves. One thing about matching dollies to a panel is never use a dolly with a flatter curve always use a slightly more curved dolly. A dolly with a flatter curve flattens out the panel, not a good thing.
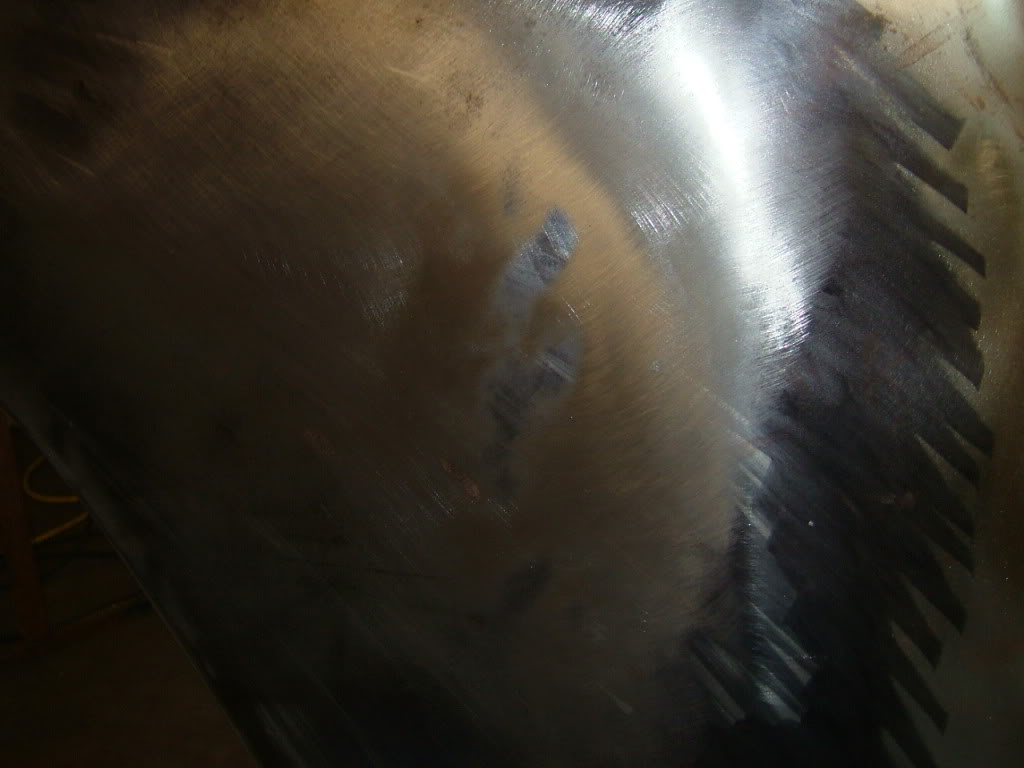
I start by placing the dolly on the backside of the dent. I want to put the dolly on the outward most part of the low spot next to the high spot, be extremely careful not to place it directly under the high spot and the hammer. With the hammer or in my case the slapper, I lightly tap the high spot and work around the perimeter of the dent. After making one complete pass Ill move the dolly slightly inward and start over, tap the high spot with the slapper and move around the dent. Once this is done take the block sander and check your progress.
This picture shows the results after only one or two rounds. As you can see the dent is smaller and shallower. Once again all this work is done with the hammer OFF dolly method to rearrange the metal.

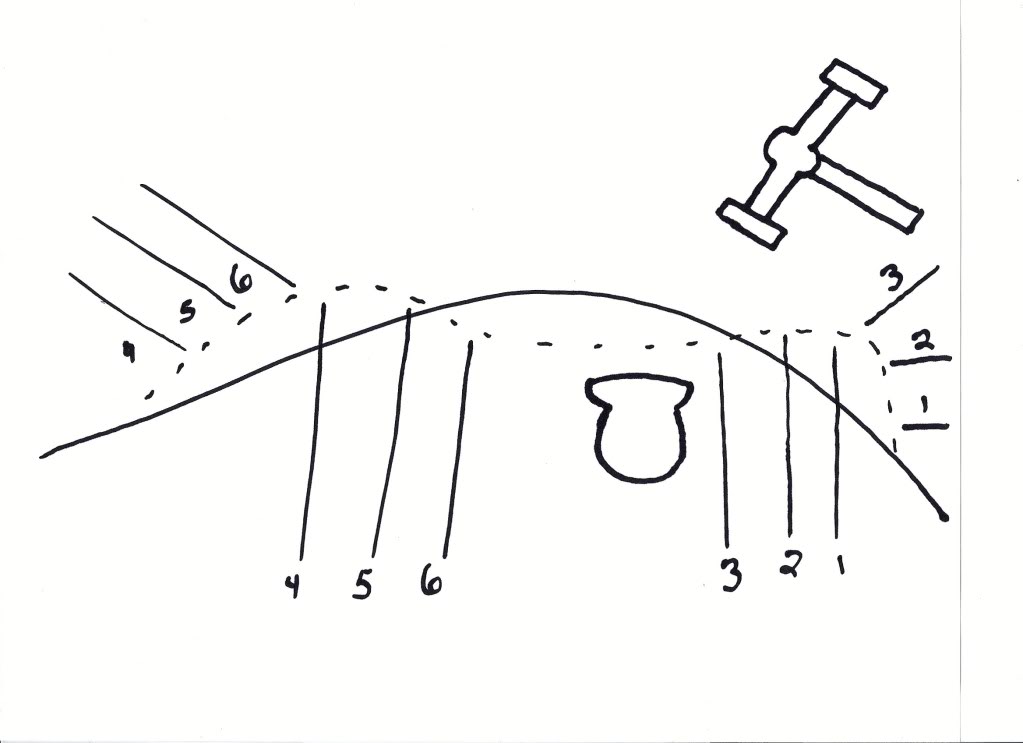
The drawing shows the basic method of using the hammer OFF dolly technique and the order of hammer and dolly placement. The dotted line shows the metal after the impact. The lines and numbers on the bottom half represent the location of the dolly, were the top half show where the hammer strikes. Notice how you start inward and work towards the center of dent. This drawing is what I did in the picture above. I started at location one and moved around the perimeter of the dent then went to location two.
Never should the hammer and dolly be in direct contact, they need to be offset. The offsetting of the hammer and dolly is what causes the rearrangement of the metal allowing the metal to go back to the previous undamaged state.
This picture shows round number two. I believe Ive made 3 or 4 complete passes around the dent with each pass moving slightly more inbound. Always work from the outside in, never start working a dent from the middle. At this point the remaining dent is very shallow and my time involved in this repair so far is less then 5 minutes! Once again all work done is with the hammer OFF dolly method rearranging the metal around. Another view shown below.