Previously: 2288.83
new:
window mounting buttons and screws, friendly chevy: 12.92
gallon sealer (48, used ¼) 12
8 quarts sprayable clear (140, used ½) 70
amp wiring kit 24.95
third brake light 25.79
mtx amp had
mtx 10 inch sub and box in unknown condition: 10
MSD 6N box had
heddman headers, y pipe, cat, exhaust: 100
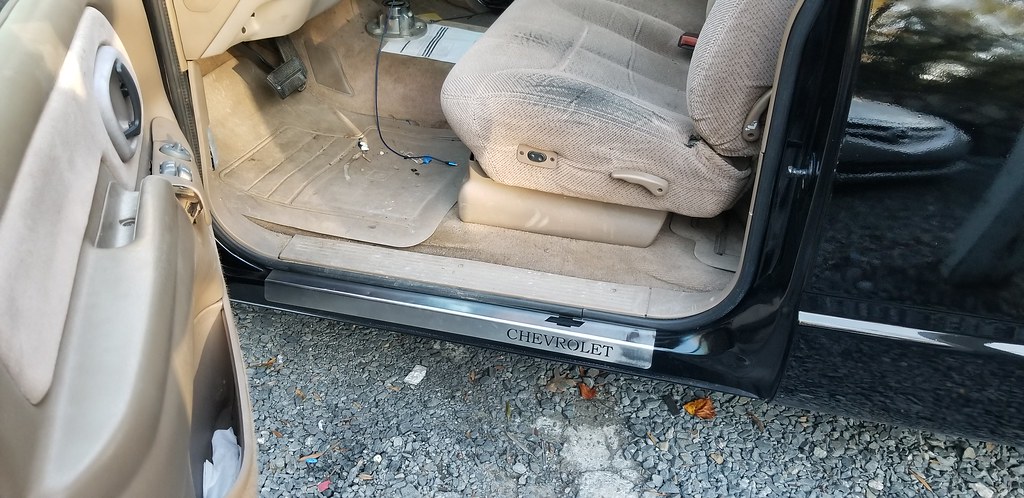
nifty stainless sill plates: free from scrap guy
self traded kenwood hd stereo from my race car for the free blaupunkt I had in here
self traded new stock tails from parts haul for aftermarket in stepside
hidden hitch, wiper cowl, and roll pan: free
new brake calipers: free
new total: 2544.49
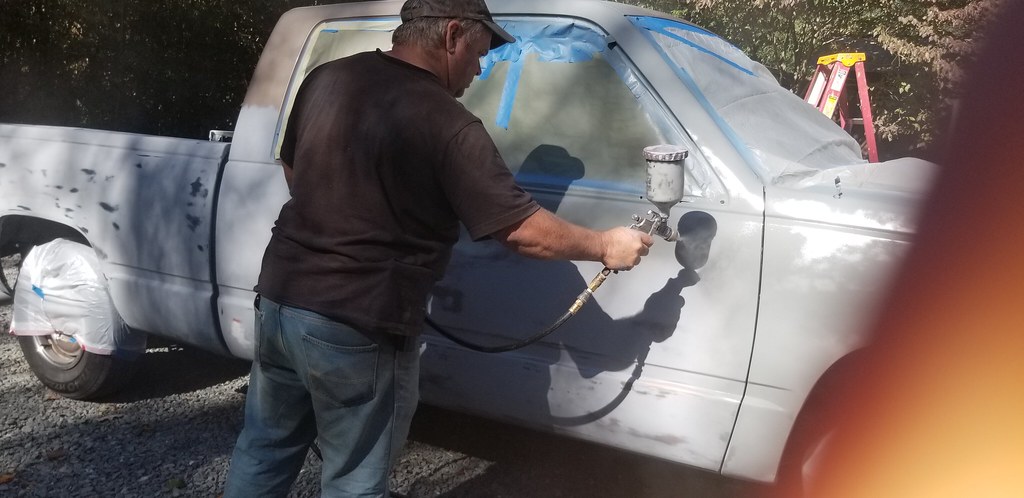
left off with the truck in high build and guide coat. We used ½ gallon of high build, ½ gallon of reducer, and ¼ gallon of sealer. Then, 1/3 gallon base, and ½ kit of clear coat. But, whole truck is black now. Art touched up a few spots for me that he didn't like, we sprayed high build and guide coat again, I blocked with 500 grit.
 20201026_171143
 by
Michael Crawford, on Flickr
 20201026_122301
 by
Michael Crawford, on Flickr
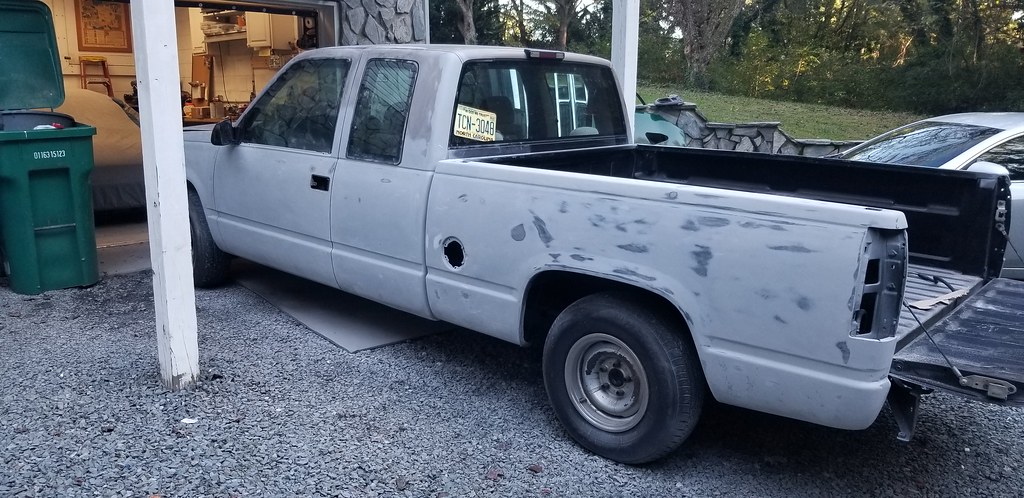
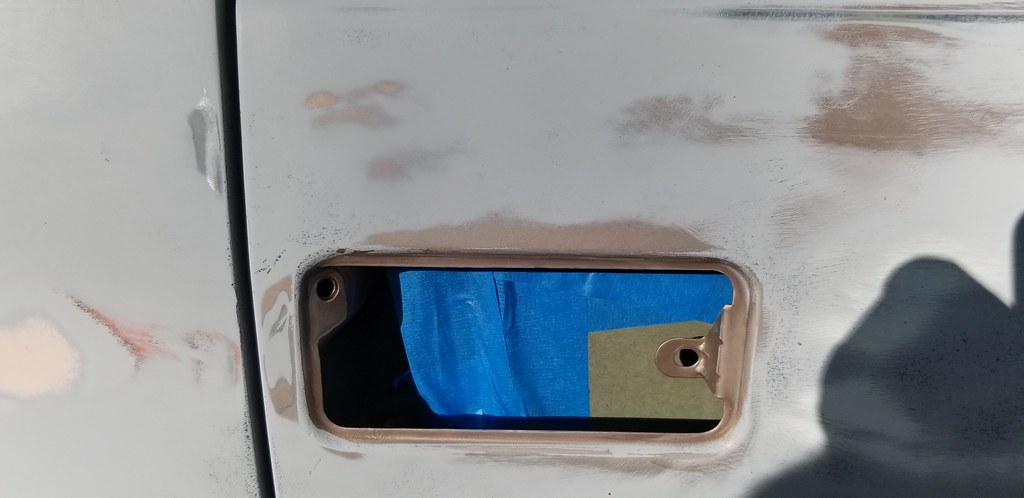
im going to take this opportunity to discuss making cheap paint look great. I know that most of us could, but wont, paint in their gravel driveway. Most guys will at least take it to maaco or earl shibe. Pay for the $299 special, or whatever it costs these days. Now, nothing wrong with that at all! But the thing to remember, with any paint job, is that the end result is all in the prep. Prep is more than just sanding. The biggest thing is the tape process. Most shops will tape off anything that isn't supposed to be painted. Every tape line is a place for chips, missed spots, etc. especially like this with a color change. For example, the door handles. You can see exactly where the tape and door handles were before I removed them, so you can see what would have been if we shot it like that. I promise you it was an eyesore waiting to happen. Pulling the parts also allows that edge to be sanded and cleaned properly.
 20201030_101830
 by
Michael Crawford, on Flickr
another thing this disassembly before paint does is allow for a good cleaning. Again, prep. Behind the handles, mirrors, and weatherstipping was filthy on this, and it was better than others we've done. I prefer, as a final step before taping up to spray, to wash the vehicle a few times. I used scotchbrite pads and dawn dish soap and warm water and a hose. Every nook, cranny, edge, seam, cavity. Wash the wheel wells, the engine bay, everywhere. Take off everything you can that you don't want painted, do it again, and again. Then go for tape. We even pulled the extended cab glass to get a better job.
 20201030_101912
 by
Michael Crawford, on Flickr
I also try to jig up loose parts. Make it simpler for a good coverage with less screwing around by the painter. For this, I used spray paint can lids to sit the door handles on, and a piece of scrap plywood with holes drilled to stand the mirrors up on. Sat these on a sawhorse. Sat the hood, tailgate, and front bumper filler on body sawhorses.
 20201031_084825
 by
Michael Crawford, on Flickr
 20201031_140109
 by
Michael Crawford, on Flickr
when it comes time to tape up, make every effort to reduce and eliminate areas that the dried paint particles can collect and become dust that gets blown back into the paint. We tend to do the engine bay in a wrap of plastic for this reason. We also, make sure to fully tape every edge, and avoid wrinkles.
 20201030_121852
 by
Michael Crawford, on Flickr
 20201030_121905
 by
Michael Crawford, on Flickr
up next was a coat of sealer.
 20201030_122035
 by
Michael Crawford, on Flickr
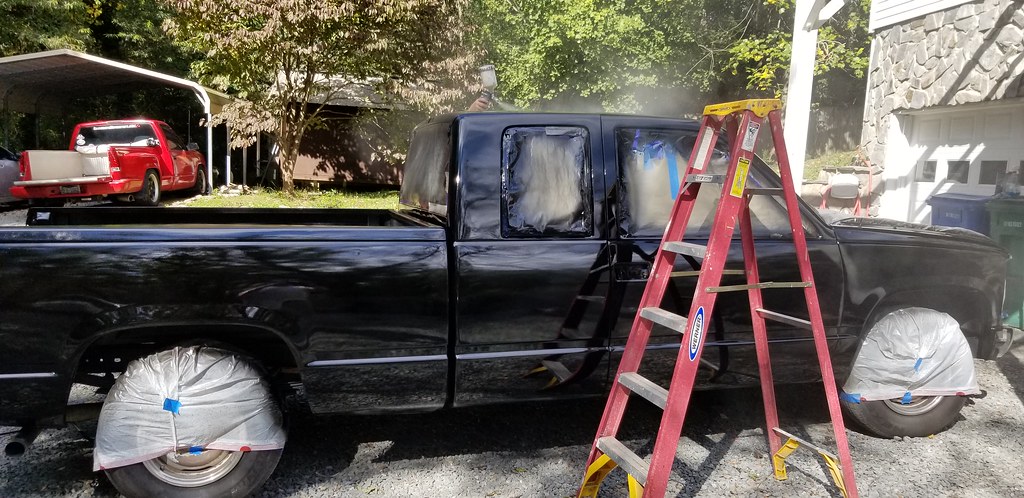
then, black!
 20201030_163432
 by
Michael Crawford, on Flickr
we had a bunch of trouble with the initial base coats. So, we stopped. Wetsanded out the issues, and redid it the next morning when conditions and tempers were better. A few heavy coats of base, followed by a few heavy coats of clear.
 20201031_090004
 by
Michael Crawford, on Flickr
 20201031_131930
 by
Michael Crawford, on Flickr
 20201031_140055
 by
Michael Crawford, on Flickr
 20201031_140117
 by
Michael Crawford, on Flickr
 20201031_142813
 by
Michael Crawford, on Flickr
waited for it to dry enough, and pulled it under the carport to cure for the night
 20201031_155702
 by
Michael Crawford, on Flickr
next, I put the tailgate on to keep it out of harms way. Best place for it. I also stole the nifty aftermarket taillights from the stepside to put in new stock stuff.
 20201101_153409
 by
Michael Crawford, on Flickr
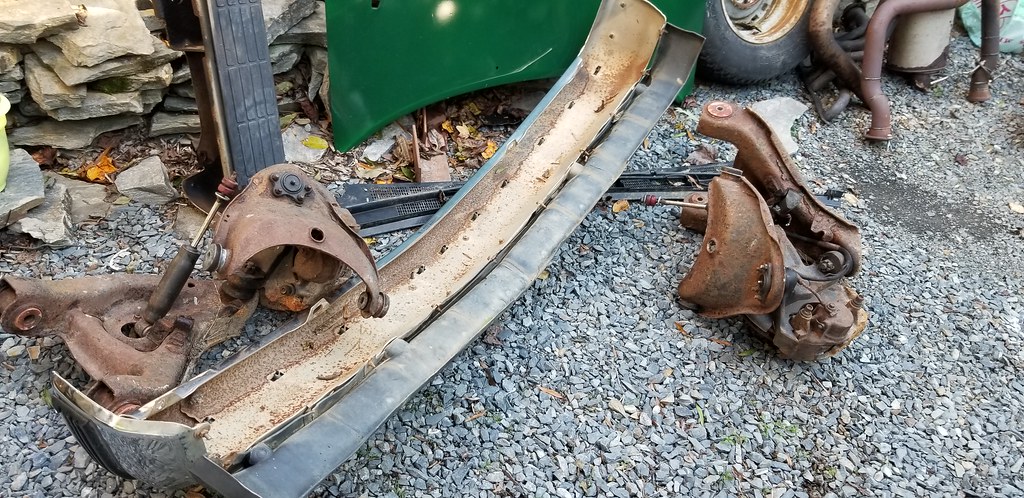
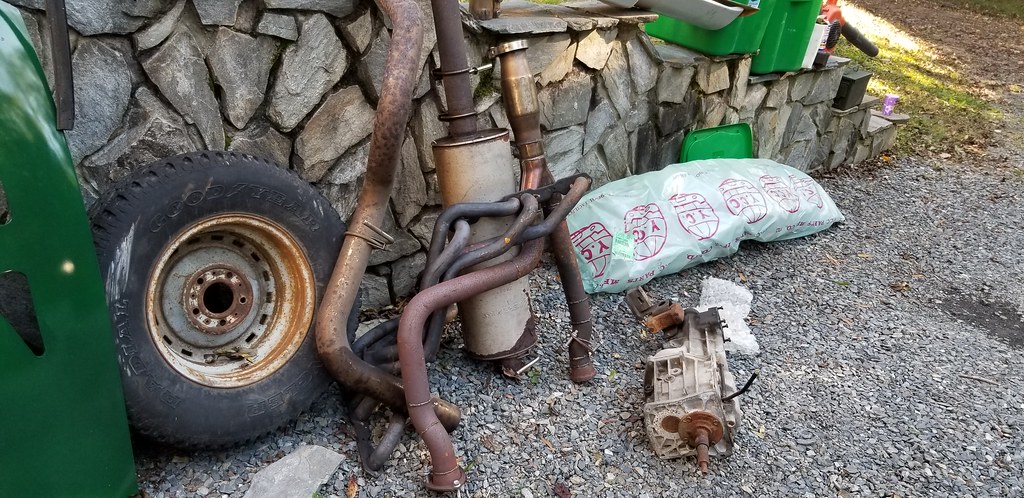
im going to break from paint and body for a second. During the first round of basecoat spraying, when everything went wrong, stampie brought the miata back to me from the challenge, along with a truckload of parts. I was not expecting a lot of what showed up, to be honest. The drop spindles came with refreshed upper and lower control arms attached, along with calipers and rotors. The headlights lights came in boxes that also had brand new front calipers, new stock tail lights, wiring pigtails, etc. the headers and exhaust were as expected if not way better than anticipated for the $100 investment, and 759rng brought me a fiberglass roll pan, hidden hitch, wiper cowl, and some part I cant identify. Waaay more stuff than I expected, and ALL of it will get used between the two trucks.
 20201030_160740
 by
Michael Crawford, on Flickr
 20201030_160753
 by
Michael Crawford, on Flickr
 20201030_160757
 by
Michael Crawford, on Flickr
anyway, back to paint and body.
When we got it untaped, I wanted to finish up the jambs and such before reassembly. Every paint job ive done has gotten overspray into the jambs no matter what ive tried. So ive resigned myself to refinishing jambs. On this one, I used rattle cans to go from tan to black. Taped the bejeeus out of everything, prep with scotchbrite, wipe down with wax and grease remover, shoot.
 20201102_105049
 by
Michael Crawford, on Flickr
 20201102_105055
 by
Michael Crawford, on Flickr
I did the wiper cavity and engine bay jambs as well, but no pictures.
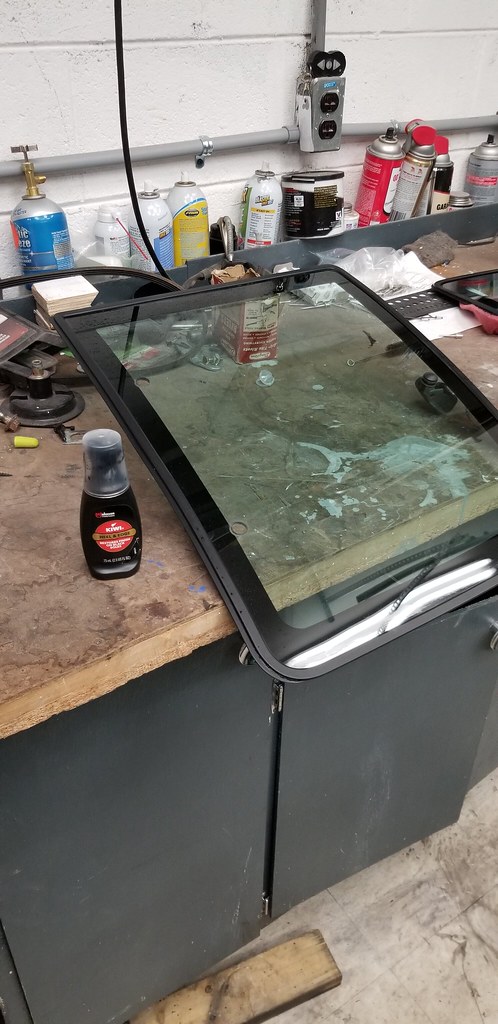
I also did a refresh of the window rubbers. A trick ive learned is to wipe clean with lacquer thinner, let dry. Then, use the kiwi edge and sole stuff in the sponge applicator. Works well for a long time.
 20201101_073149
 by
Michael Crawford, on Flickr
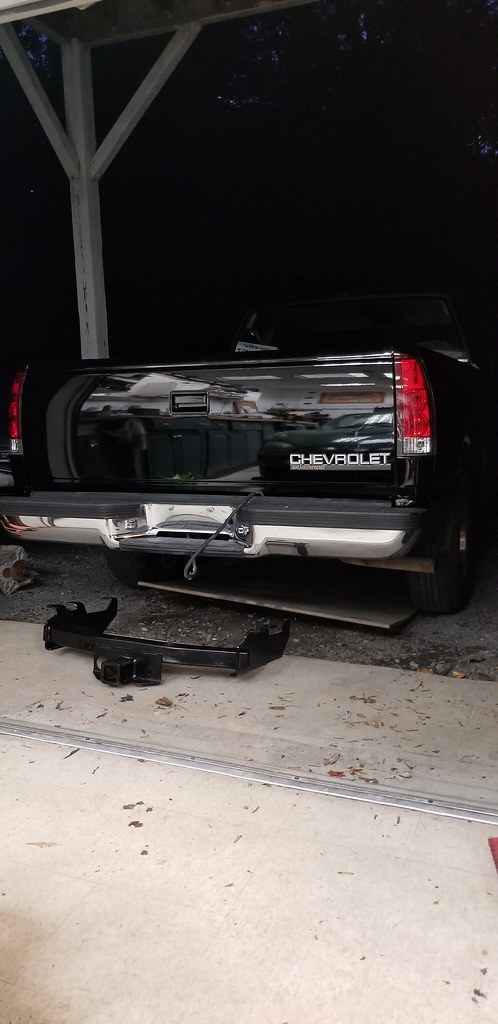
during removal of the rear windows, I had to drill out two of the retainers. Picked them up at the local chevy dealer. Went ahead and reinstalled the bumpers, freshly painted side mirrors, freshly painted door handles, re-polished sill plates I got from the scrap guy, the tailgate emblem, and the painted trailer hitch.
 20201102_105039
 by
Michael Crawford, on Flickr
 20201103_175418
 by
Michael Crawford, on Flickr
 20201104_080951
 by
Michael Crawford, on Flickr
I spent an insane amount of time taping up and painting the new grille. But it, with the factory emblem shot in black, and the new lights, turned out pretty awesome. Need to adjust the lights, black out the side marker bulb plugs, do the four high mod, and repaint the AC condenser and core support. But, I really, really like it.
 20201102_105035
 by
Michael Crawford, on Flickr
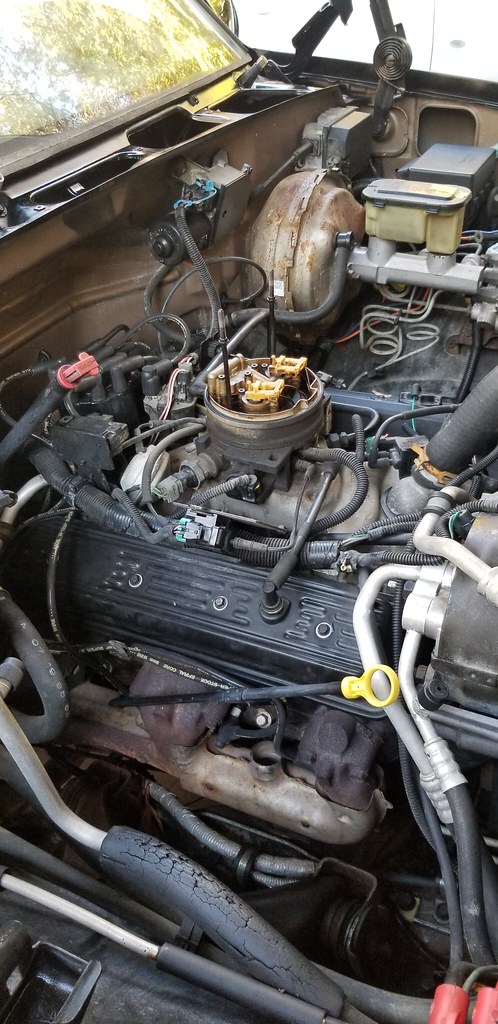
before we put the painted hood on (traded the bent and rusty stock to the scrap guy for a black one to repaint) I went ahead and fixed more fire damage, loomed up the plug wires, mounted the MSD box and ran the power wire for the amp. I also pulled out the trailer brake wiring from the loom, and gave things a once over. The TBI needs rebuilt badly, grounds need cleaned, vacuum lines need freshened. I also deleted the failed closed flapper door in the intake snorkel. Step at a time.
 20201108_084721
 by
Michael Crawford, on Flickr
 20201108_084747
 by
Michael Crawford, on Flickr
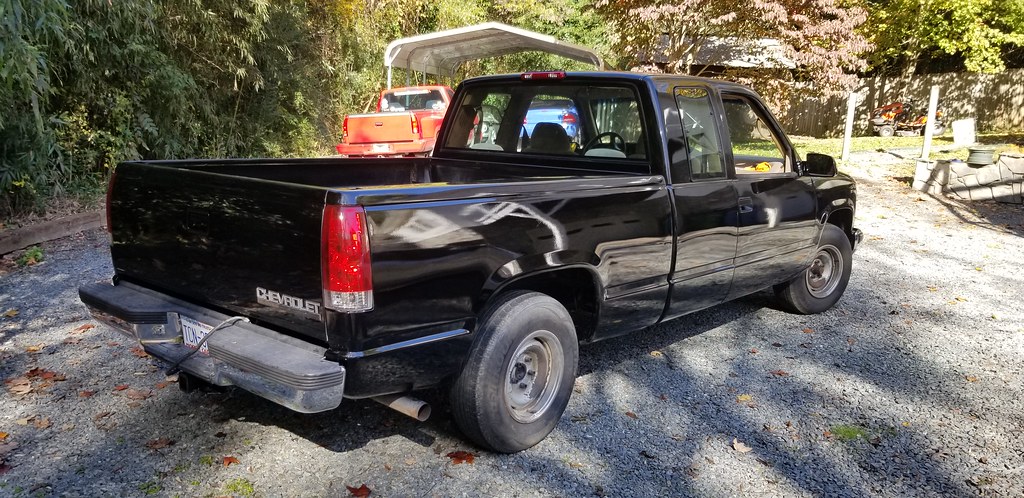
got the new hood on, and realized we forgot to paint the filler door. Again. But, the thing is back together! I drove it around! And it looks fairly OK. Soon, will be better with the new wheels, and a touch lower. And window tint. But, still.
 20201108_104037
 by
Michael Crawford, on Flickr
 20201108_104042
 by
Michael Crawford, on Flickr
 20201108_104052
 by
Michael Crawford, on Flickr
 20201108_104104
 by
Michael Crawford, on Flickr
 20201108_104112
 by
Michael Crawford, on Flickr
 20201108_104133
 by
Michael Crawford, on Flickr