I have had a couple requests for information regarding my fuel tank installation and seeing as how I can't do much productive work with only one opposable thumb and all, I figured this was a good time to give a few details on the swap.
As was previously stated, I used a fuel tank from azblazer/K5NUTT's 79 K5. Now, we all realize that these tanks have the fuel fill pipe on the passenger side and our fill is on the driver's side. I remedied this by rotating the tank 180* front to back. The only problem I see with this is reduction of departure angle. This is something to consider, seeing as how Suburbans have an extremely horrible departure angle to start with. I decided to roll the dice and give it a shot anyways. That being said, if I were to do it again, I would take a good look at a similar vintage van. They had similar capacities and the fuel fill pipe is already on the driver's side. I am not sure if the dimensions work or not, but if they do and they have the taper at the rear, this may just be the hot ticket.
Now, I stated "similar vintage". There is a reason for this. Our trucks use what is now considered a tiny 1-3/8" fill pipe. Most newer vehicles use 1-1/2" or larger fill pipe. Up to at least 1979, the fill pipe diameter was still 1-3/8". There are ways around this if you opt to use a later model tank (i.e. late model with fuel injection sending unit and internal baffeling for F/I). I have done it. It is not real fun, but it can be done. It involves welding a "bushing" onto the end of the existing fill pipe that matches the diameter of the fill pipe on the tank. One benefit to doing this is it gets you into a larger diameter hose which is easier to find. Gates now makes fuel fill hose with 45* and 90* bends, but they do not make it in 1-3/8".
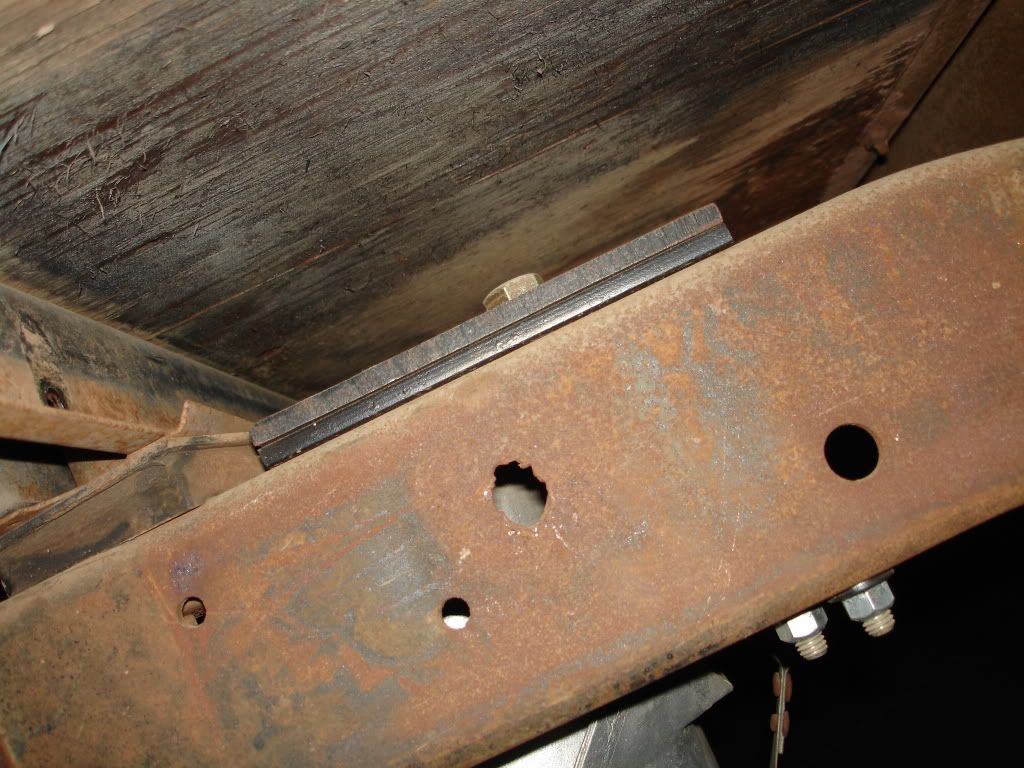
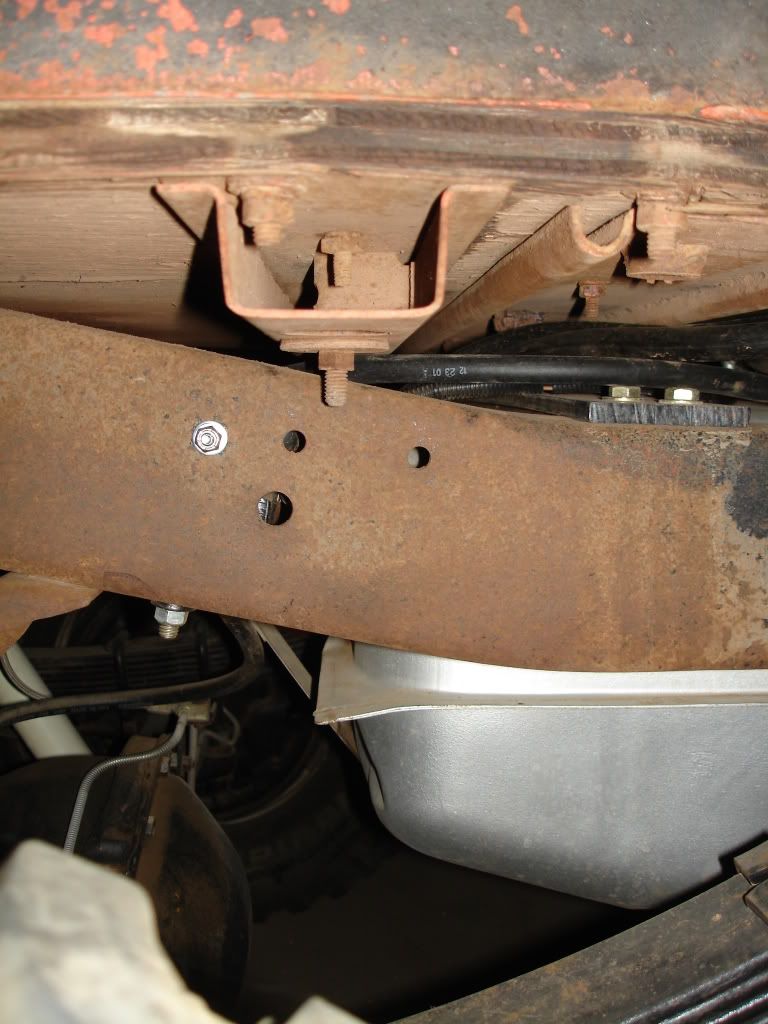
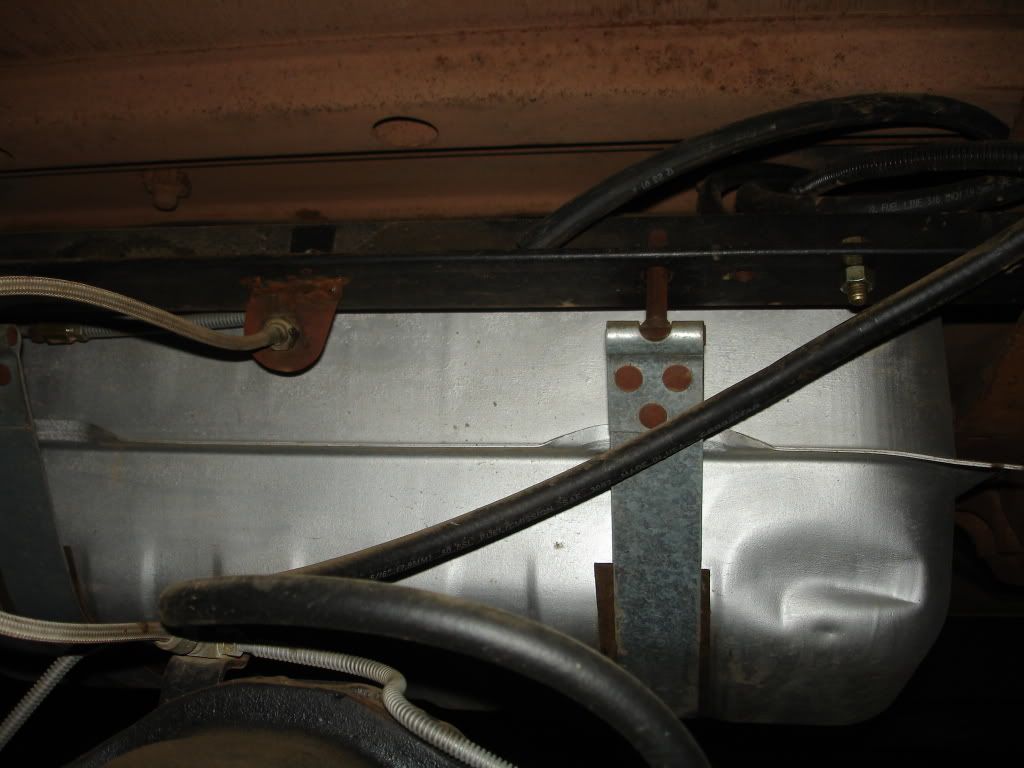
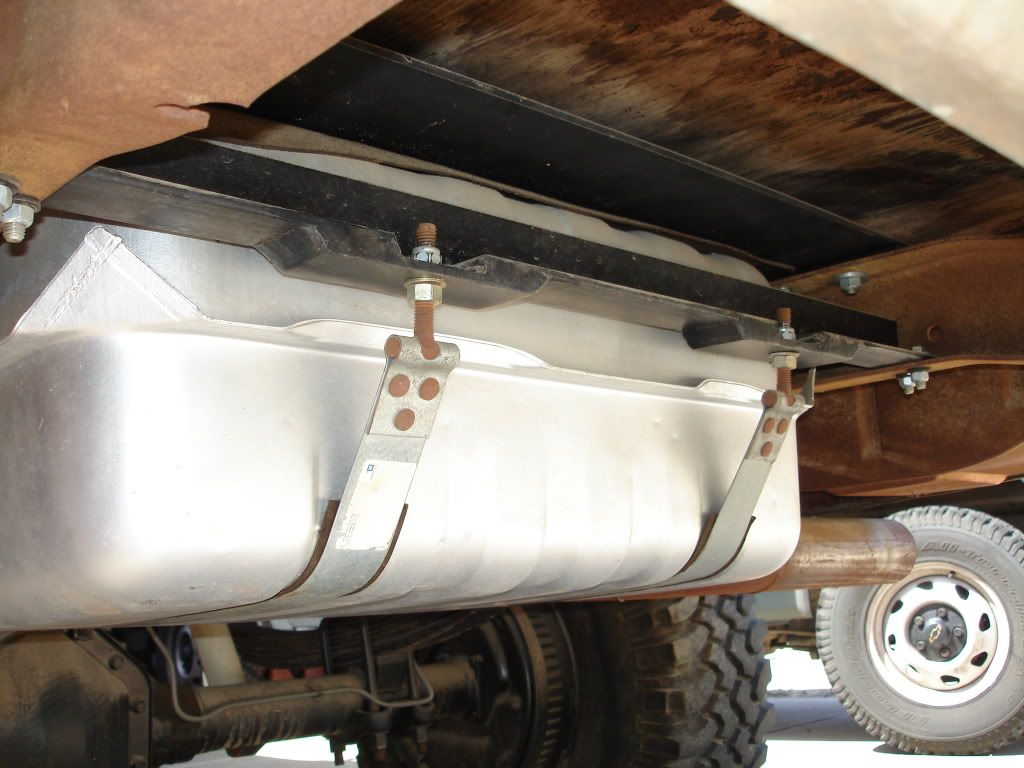
The nuts and bolts of the swap are pretty straightforward. In the back, I used a piece of 5/16" x 4" flat stock laid across and bolted to the top of the frame rails spaced up by a piece of 5/16 x 2" flat stock. In the front, I used a piece of 3/8" x 3" flat stock. This is what the top of the tank will be loaded against when installed. I used this strange combination of material to avoid using a channel type material to keep from running into interference with the body. After all was said and done, I realize this was not necessary as there was room to have support ribs, but what I made works, so there it stays. I made two crossmembers out of 2x2x.187 wall angle stock for the straps to mount to. For the straps, I used stock GM replacement straps for a '79 K5. They lend themselves well to adapting to a project like this because they have a hook on one end and a threaded stud on the other. For vibration isolation/abrasion resistance, I used 60lb roofing felt for the strap iinsulators and upper tank cushions. It works great and is readily available if you have recently replaced a roof.
I guess some pics are in order.
This is the rear upper mounting. The spcers under the plate can be seen.

This is the front upper mounting. It also illustrates the location of the front of the tank relative to the frame/body.

This is the forward crossmember for mounting the straps:

This is the rear crossmember:

So that shows the basic mounting of the tank. If I had it to do over, I would probably change a few things, but this is what I have for now. In my opinion, there are many advantages to doing this swap over a custom tank. One being cost. Finding a tank in a wrecking yard is cheap, the mounting steel is cheap, the straps from GM are not terribly cheap, but not too terribly expensive either.
Another advantage is it is all GM. Go to the parts store and get a sending unit or a tank seal or a sending unit strainer etc--readily available cheap parts. The sending unit, whether you use an old tank or a fuel injection tank will be the same 0-90 ohm range as your original gauge--not some aftermarket only range that renders your oe gauge useless. I feel it is also a clean swap. The tank looks like it belongs in the truck. It is not an angular, welded unit. It is a clean, smooth, radiused unit. Maybe that's not worth much, but I think it keeps the clean look going on.
So there you have it. This is how I did mine. I am sure there are many other ways to obtain the same end result, but I wanted to show how I did mine to hopefully answer some questions of give a visual or two on what one way to do it is.
Man, typing with only one thumb in an interesting endeavour. It doesn't seem like it should make much difference, but it sure takes alot longer.