Quote:
Originally Posted by daddyjeep

Lots of good things going on here. I love the entrance to the garden.
|
Thanks! I'm happy with how it came out.
So last week I went to install the fenders and they were way off. The core support was too far forward and needed to come up like two inches to get the front of the fenders to bolt in place. I knew that had to be wrong. So I tried to move the cab forward but the body mounts where all the way forward in the slots. Then I remembered when I bought the cab the front floor pans and floor braces and front mounts, inner and outer rockers had already been replaced. I remember adding metal to the inner rocker panel to meet the new outer rocker panel as who ever installed the rockers had it way off as the doors did not fit right. That and they were a little beat up. So when I fit the rockers I knew the inners where off but the thought that the whole front of the floor pan was off as well never crossed my mind. So at first I cut a 1/2 spacer and installed them on top of the rear cab mounts. it was slightly better but I still needed more so I had a set of polyurethane body mounts for a willys jeep. They were about a inch thick so I installed them on top of the 1/2 spacer I had made and finally the the fenders fit in place perfectly. But now the radiator fan motor hits the oil fill on the gear cover on the cummins and the wastegate actuator on the turbo that I modded to clear the heater box now hits the heater box again.
Also on a side note I did replace the complete rear floor and crossmember I just want to say I got it perfect as if it was off the gas tank would not have bolted in place. As that was my first thought. I thought I messed up, then realized the gas tank would not have bolted up if it was off.
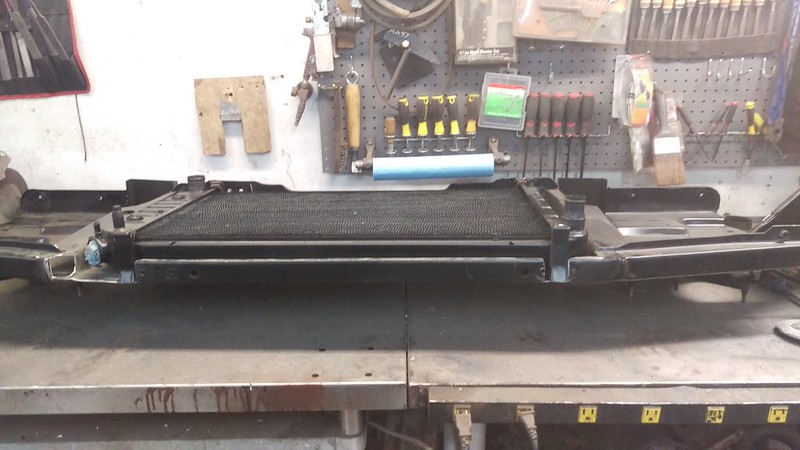
So anyways I decided to modify the coresupport so the fan motor would clear the oil fill. The radiator has a slight rake to it. So I modified it to sit vertical in the coresupport to create more room.
 IMAG2930
 by
jarrod vanwinkle, on Flickr
 IMAG2931
 by
jarrod vanwinkle, on Flickr
I cut the lower mounts so it would sit vertical.
 IMAG2932
 by
jarrod vanwinkle, on Flickr
 IMAG2933
 by
jarrod vanwinkle, on Flickr
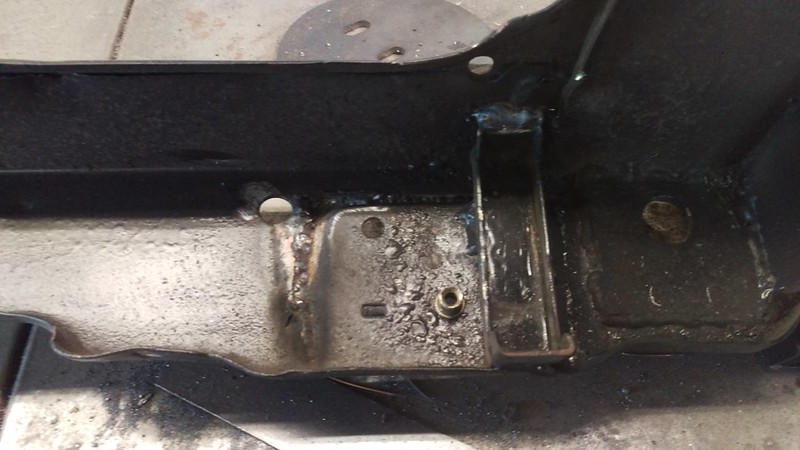
Now I need the upper mounts to sit inside of the coresupport so I made two raised humps so they would clear.
 IMAG2934
 by
jarrod vanwinkle, on Flickr
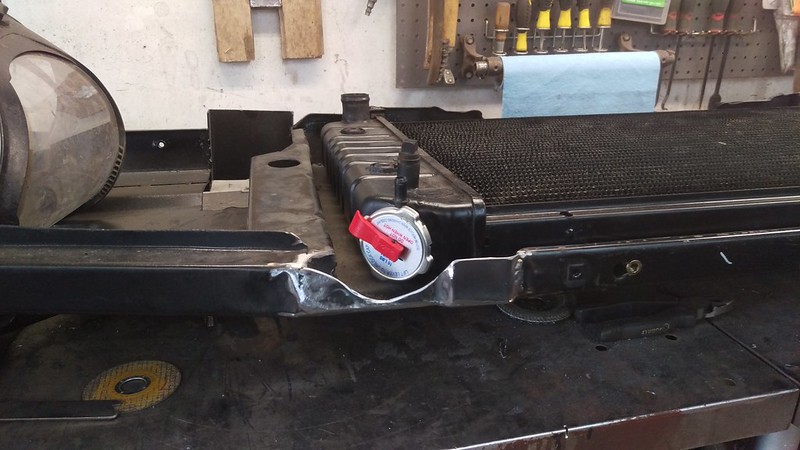
Now I need to clear the radiator cap.
 IMAG2935
 by
jarrod vanwinkle, on Flickr
 IMAG2936
 by
jarrod vanwinkle, on Flickr
 IMAG2937
 by
jarrod vanwinkle, on Flickr
 IMAG2938
 by
jarrod vanwinkle, on Flickr
It took me a while to find the best way to make the upper mounts work. I ended up taking some 3/4 1/8 angle iron and welded it to the upper mounts then I took the mounting bracket that I removed from the upper mounts and moved them inward to clear the the humps and they work perfectly. I have 1/4 of clearance all the way around the radiator to the coresupport and they sandwich the radiator nicely.
 IMAG2939
 by
jarrod vanwinkle, on Flickr
 IMAG2940
 by
jarrod vanwinkle, on Flickr
 IMAG2941
 by
jarrod vanwinkle, on Flickr
I have more room
 IMAG2943
 by
jarrod vanwinkle, on Flickr
But I only have a 1/4 of clearance on the motor to the oil fill. So I am going to delete the oil fill and add one to the front valve cover. Then I am gong to see if I can move the cab and coresupport back a little to clear the wastegate to the heater box.
 IMAG2945
 by
jarrod vanwinkle, on Flickr
 IMAG2946
 by
jarrod vanwinkle, on Flickr
My back was killing me, so hopefully tomorrow I will get the hood installed.
I does look like the cab is sitting level to the frame.
 IMAG2947
 by
jarrod vanwinkle, on Flickr
 IMAG2948
 by
jarrod vanwinkle, on Flickr