The Suspension
This is where it kinda gets weird and I really start to wander off the AD restorod reservation.
I started this project knowing that the C10 front cross-member it came with was going to be too wide a track for a low truck, and the last thing I wanted was something that was going to ride like a truck anyway. So I sold it on Craigslist and wanted to use the Dakota front end that Industrial Chassis sells. But when I called them, they said it wasnt currently in production (but it is now I think). Id recently rebuilt the suspension on my old Jag XJS, and when I was researching truck IFS suspensions, the Jag came up a lot, especially in hotrods in Europe, Australia and New Zealand. It was kinda like the M2 is here. The track width was right, uses a Chevy bolt pattern, has big Girling brakes, they were cheap, I knew how to rebuild them, and they had the additional bonus of being very easy to adapt to use airbags. Whats not to like?
Having rationalized my way into the Jag IFS, I began to wonder if the traditional Jag IRS could work too. The track width seemed right (came to regret this later), lots of Cobra kit cars use them with a fair amount of HP, there a quite a few ratios available, most have positraction, can use Dana 44 carrier/ring/pinion, bolt pattern is good, uses standard ujoints, it is a modular bolt-in unit, and finally, theres the nostalgic/cool factor.
There are better IRS setups than the Jag, but as a kid growing up in the 60s and 70s, I thought hotrods with the Jag rear suspension were the tits. Rationalization complete. Never mind that I could only find a couple of guys that has succeeded in putting one on airbags and you had to drop out the whole rear end to change the rear brake pads on the inboard brakes. How often do you change rear brake pads anyway?
First the front suspension. This is a junkyard Jag IFS

The Jag IFS is mounted on rubber isolators, and since I was looking for as posh a ride as I could get, I decided that Id use those isolators on my truck instead of welding the Jag cross member to the frame rails. Heres the front bracket that the jag isolator bolts to - the isolators bolt location in the bracket set the caster of the front end at about 3.5 degrees-
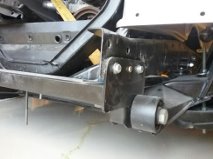
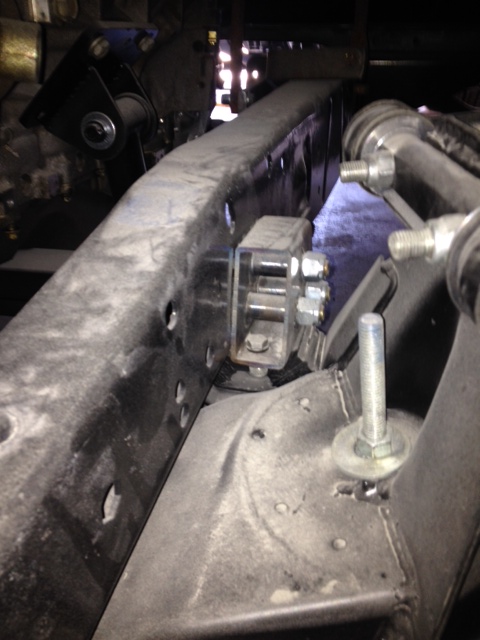
A bracket attached to the trucks frame picks up the Jags rear rubber isolator
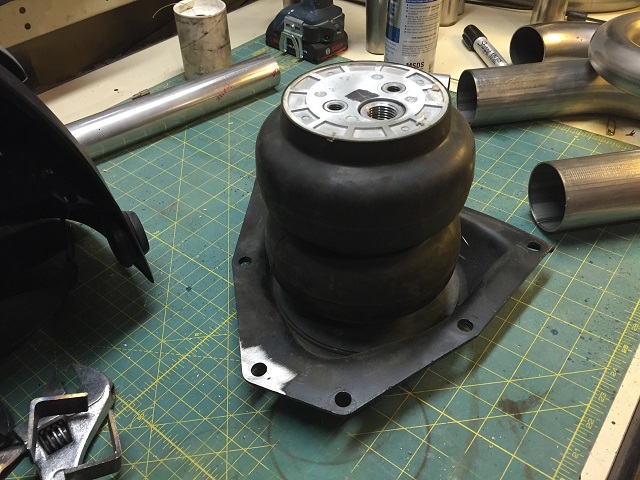
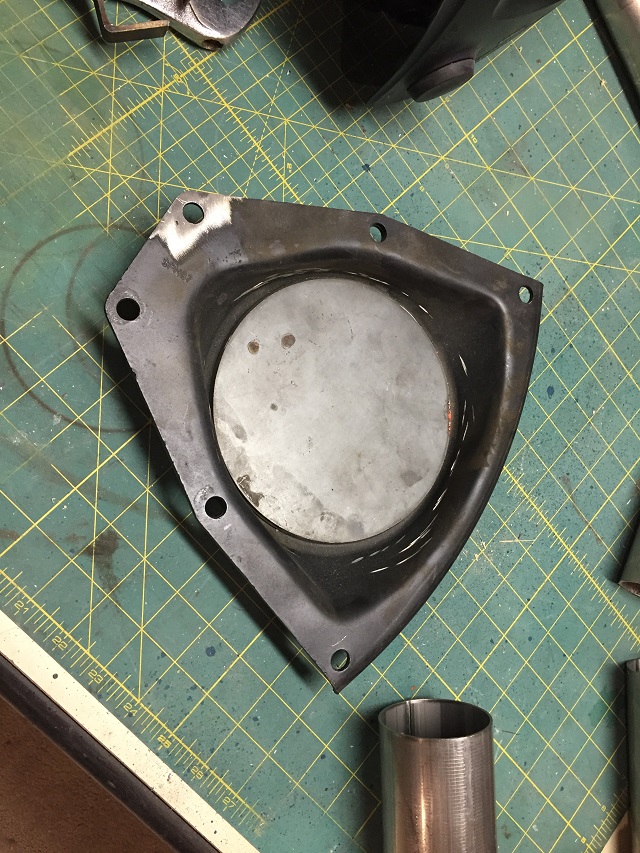
The hat the centers the spring in the upper pocket of the cross member was removed to provide a flat base for the 6 SLAM airbag
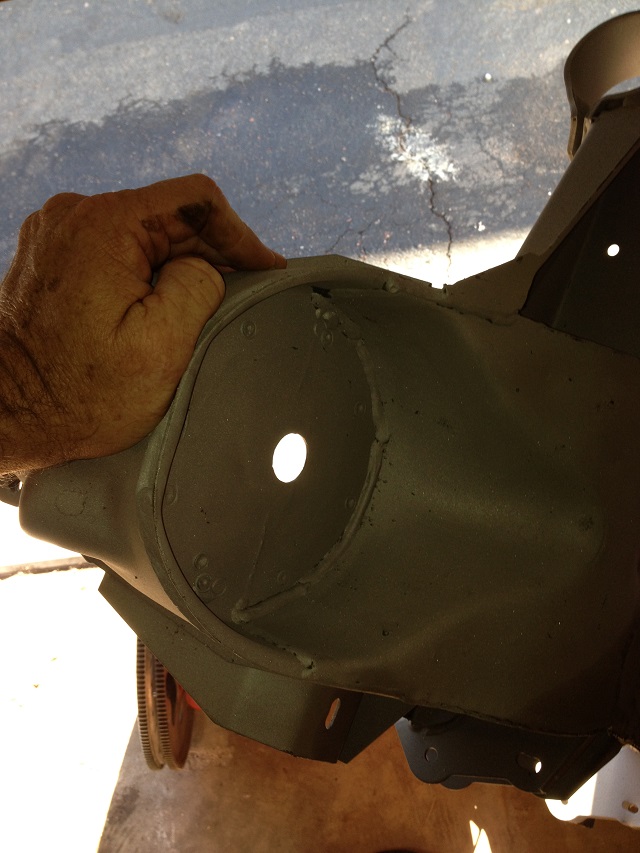
The pan that bolts to the lower Jag control arm was modified to accept the SLAM airbag by cutting out the spring hat and welding in a round plate that would be drilled to the airbags mount pattern-
Another view without the bag in the way-
The Jag suspension doesnt have its own upper shock mount, so I bought a universal shock tower mount from Suicide Doors and modified it for my truck. It will be welded to the Jag cross member.
Had the steering rack rebuilt at Arizona Rack and Axle, which is very near my work. $150 and a lifetime guarantee. They may come to regret this.
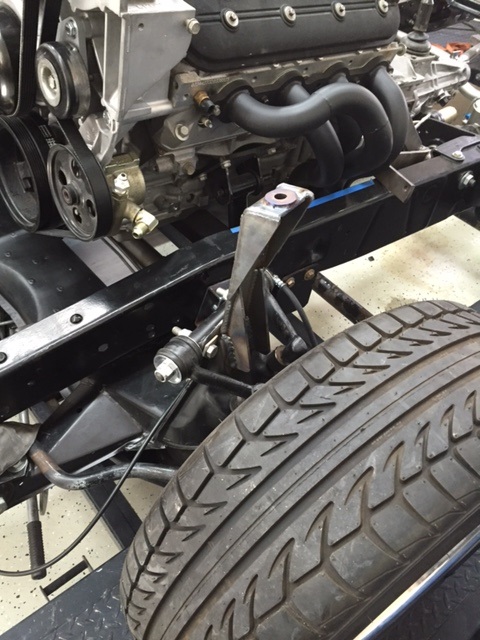
Heres the complete Jag IFS in the truck with the airbags. Takes about 75 psi to bring it to ride height.
I was a little concerned about how close the front tire was to the fender when the truck was sitting low. I noticed that the mounting flange on the staggered Boss wheels Im using were much thicker on the narrower front wheel than the rear. I wondered if I could pick up a little extra clearance by having the mounting flange machined on the front wheels to match the thickness of the rear wheels. A local custom wheel store told me that they sometimes do this to fine-tune offset for fender clearance on wide wheels. I found a machine shop here that specializes in machining offsets on wheels in a CNC machine. For $150, they welded the holes closed, machined the back face about .500 to correct the offset and re-machined the bolt pattern on the CNC. Heres a shot of the final product- it needs to be repainted, but that was a good deal.

On to the IRS.
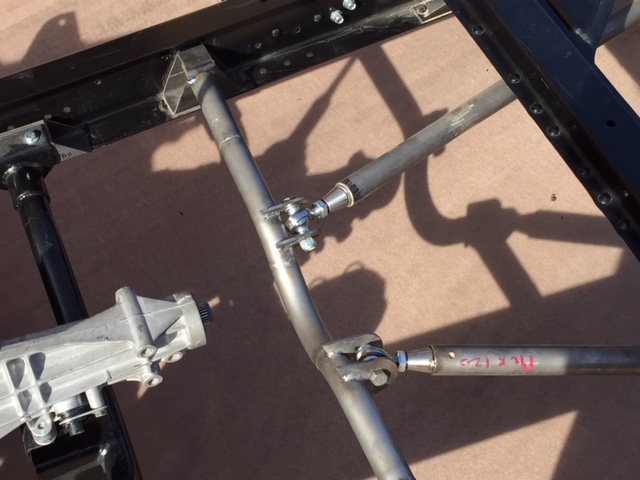
I wanted to rubber mount the IRS too, but there was no way to use the factory mounts that I liked, so I built a truss that would bolt to the IRS to the frame rails of the truck. To isolate it, I used Jeep spring eye bushings in 1.5 diameter tube. The Jag IRS is tilted up 4 degrees and the engine is tilted down 4 degrees for driveshaft balance.
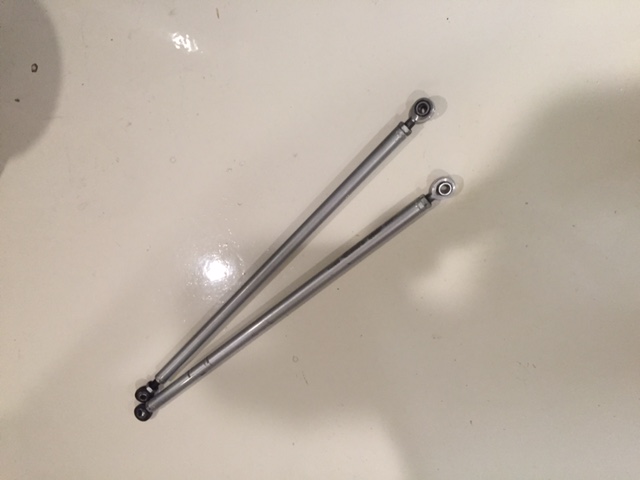
A couple of adjustable rods mounted at the bottom of the diff and connected to the frame will keep engine torque and braking forces from moving the diff and truss too much in the frame as well as keep the diff angle planted to avoid any driveshaft vibration.
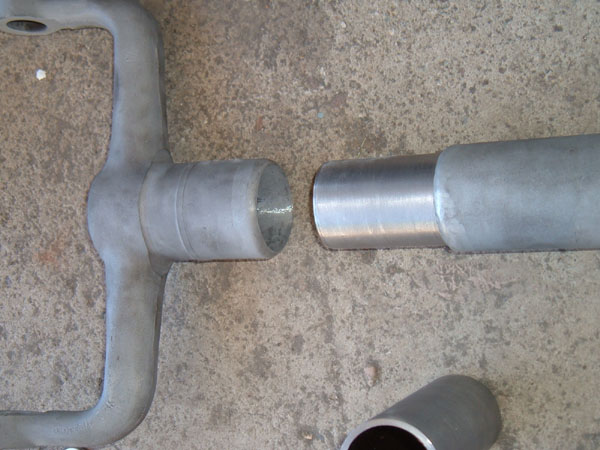
Somewhat impulsively, I bought a set of Boss wheels for the truck before I really should have. I have 18 wheels about 8 wide in the front and 10 in the rear. When I mocked up the new bed and fenders to the chassis, I couldnt get a finger between the fender lip and the tire. Not only that, the tires were wider than the fender. The tire width issue was easily solved by mini-tubbing the bed side, but to solve the close tire and fender situation, I would either have to widen the fender or narrow the Jag IRS. I decided to narrow the Jag IRS by shortening the lower control arms and half shafts. The lower control arm was shortened, sleeved and re-welded-
The Jags half-shafts are a forged solid shaft, and the idea of cutting that apart, sleeving it, and welding it didnt seem likely to be successful. They look like this-
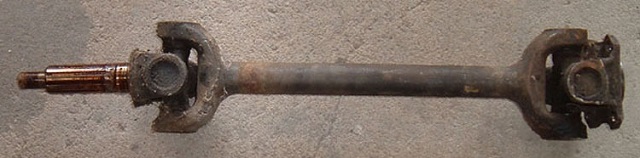
The XKE driveshaft length would have worked, but they are expensive. Since they are a standard u joint, I could buy Spicer yokes and make them like a Corvette half shaft. Heres the IRS with the shortened lower control arms and new tube half shafts-

The Dana 44 diff I got out of the junkyard with the IRS had a ratio of 2.77. I found a Jag diff from a six cylinder XJS on Craigslist with a 3.54 ratio, so I picked it up. Cool finned cover was a bonus.
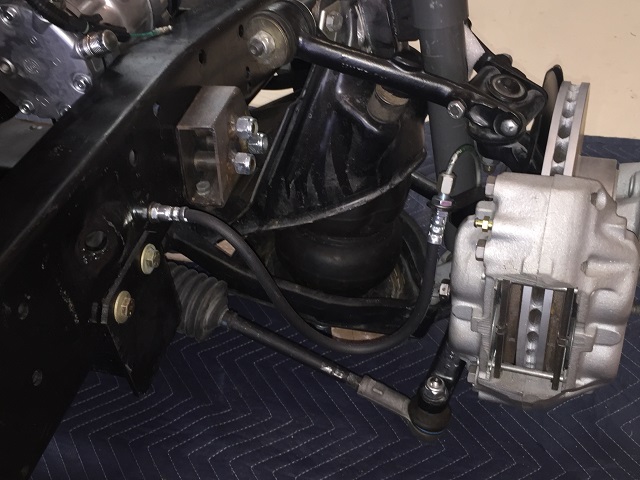
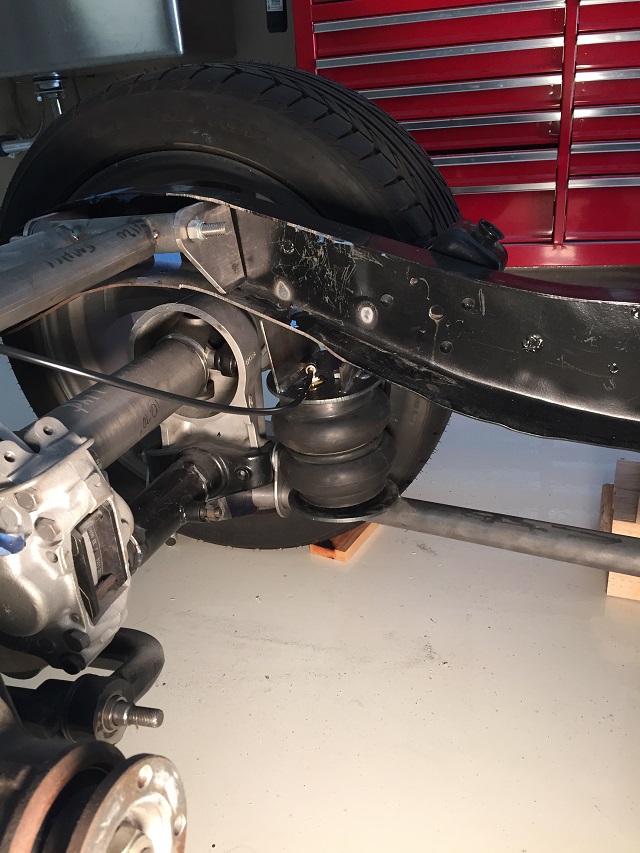
The rear airbag was a bit of a challenge. I suppose I could have used an integrated shock-airbag, but that would put a moment load on the lower control arm and those shockwaves are expensive. What I did was add a trailing arm kind of like a C10 has that moves in the same plane as the lower control arm, so when I put a bag on the arm, theres no moment load, just a straight force. It uses a 5 slam airbag
This is the tie-in to the Jag lower control arm looking up from the floor (not welded yet either)
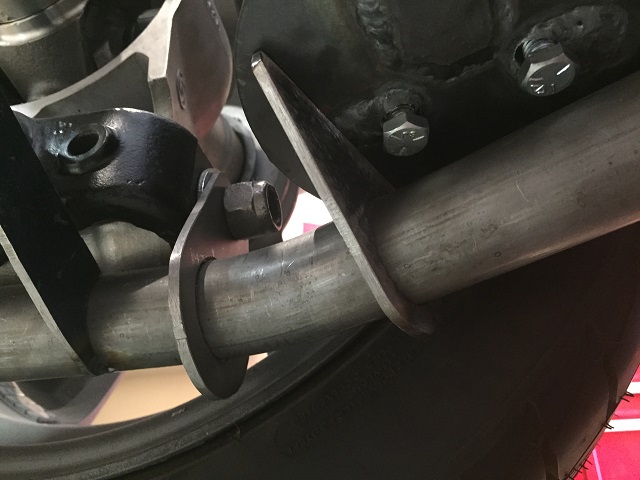
The front of the IRS radius arm for the airbag mounts in the same pivot line as the lower control arm-
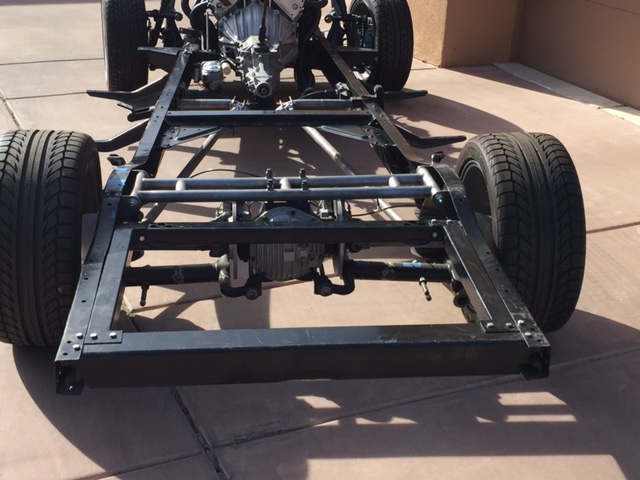
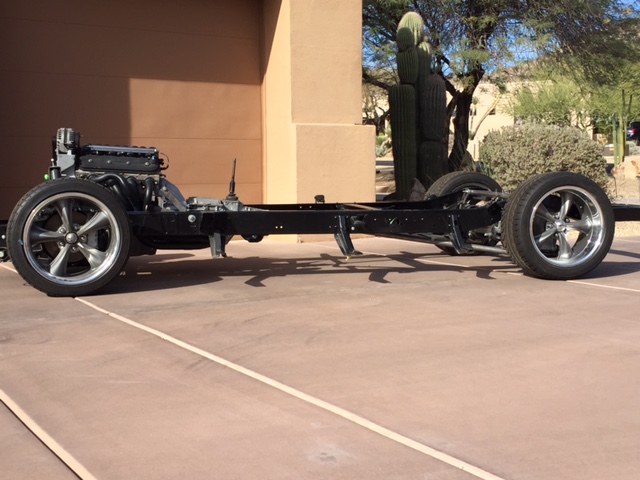
Heres the chassis ready to go have the MIG welds done next week this is about normal ride height
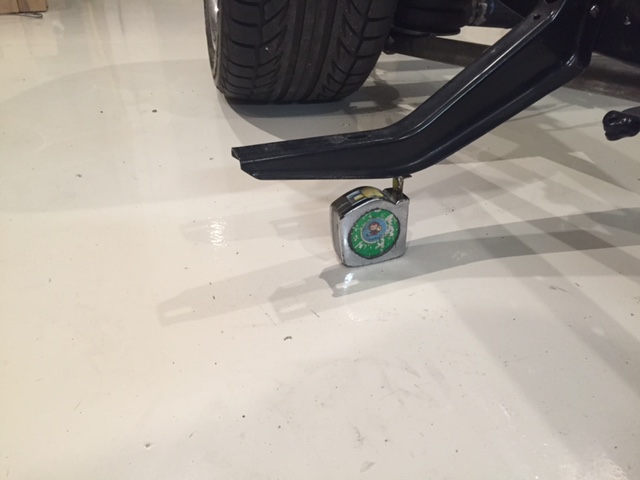
With the bags on the bump stops, heres the ground clearance. Since I narrowed the IRS, the outboard hub carriers rub against the side of the frame rail now. A little clearancing of the aluminum carrier will allow the truck to drop another inch or so. At this point my truck oil pan will be about 2 off the pavement.
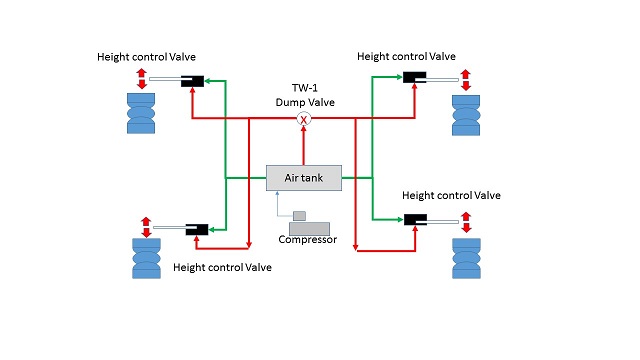
Im on the fence about how to control the airbag ride height. Manual valves would be pretty simple, but the idea of having all that tube in the cab isnt appealing. A traditional electrical valve and switch box is a little better but still a little clunky for my taste. I like the idea of the Accuair system, but not the cost. Im contemplating doing something like this for a set-and-forget type system.
Any feedback from any old coots like me with airbag suspensions would be appreciated. Not into the 'aired out' thing, the truck probably will never haul anything more than lawnchairs and a beer cooler so I just want a really cushy ride