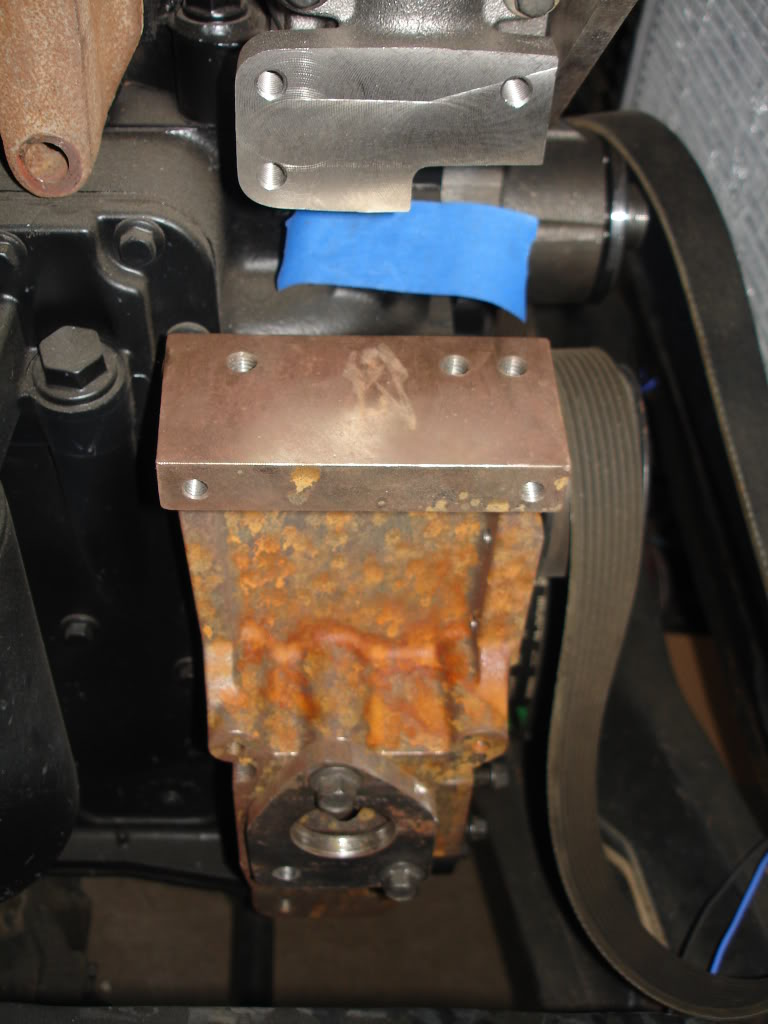
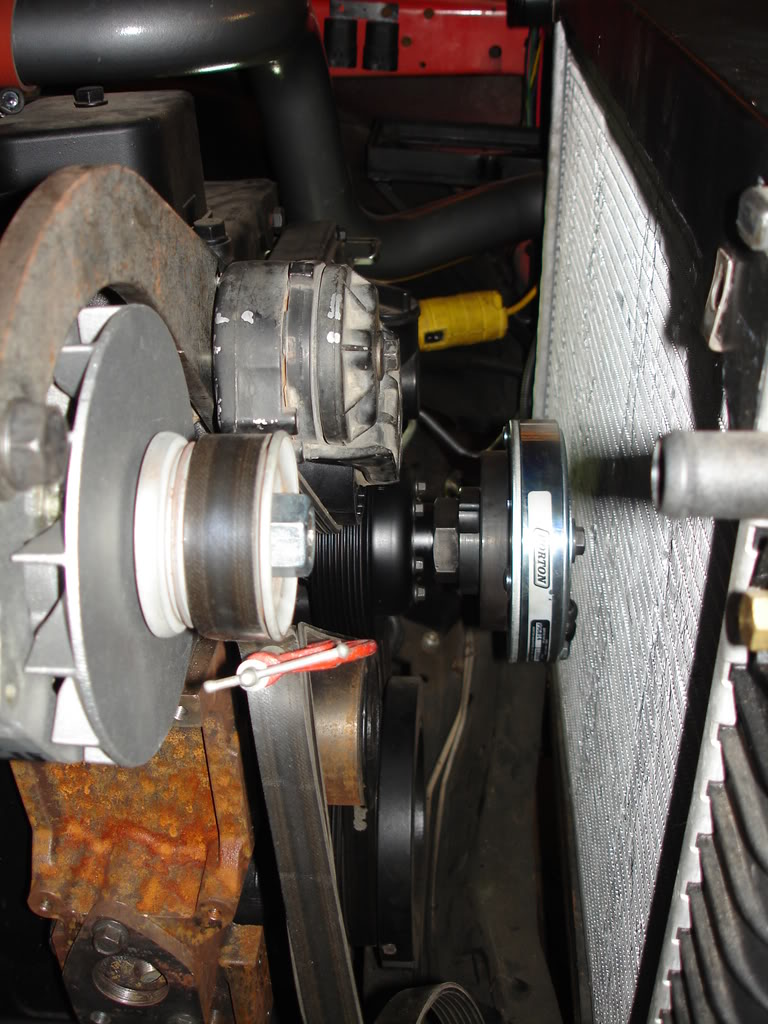
I figured it was about time to get a belt on this thing. The sticking point that I was dealing with was the tensioner. The water inlet housing that I used has provisions to mount a tensioner bracket on it in one of two locations. One is down low (there are two bolts in the lower holes in this pic) and one upper (you can just make out some silver spots in the pic where the upper mounting location is).
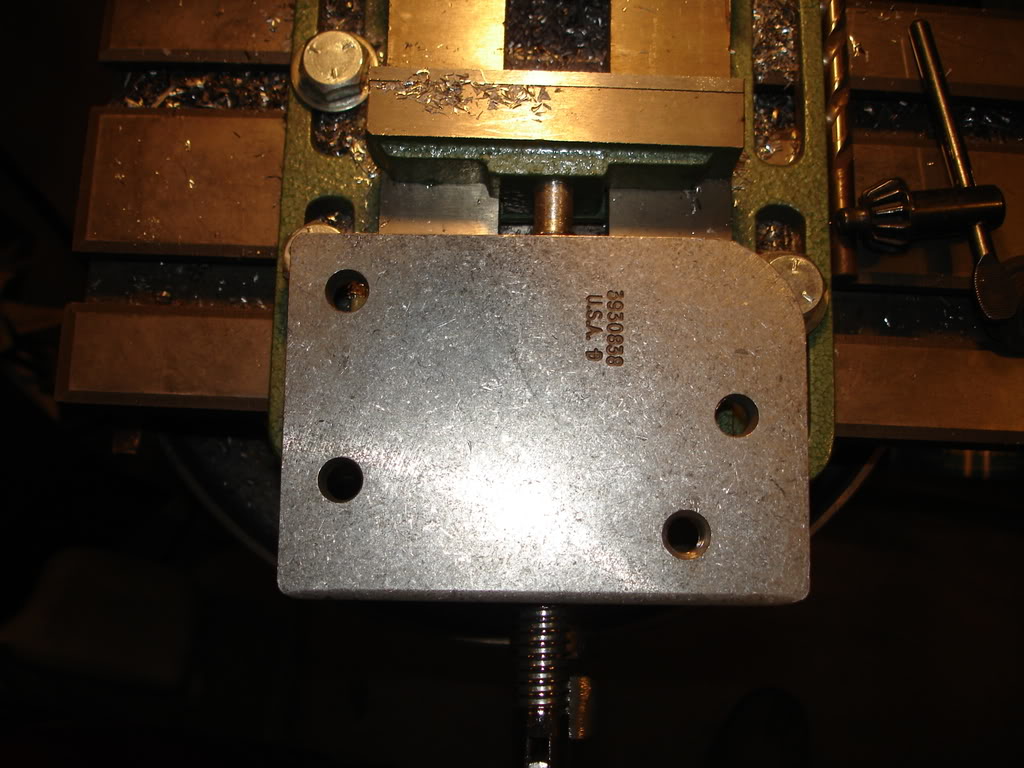
This plate is used to mount the tensioner to the water inlet housing: 3/8" plate
The problem with this setup is the location of the mounting holes in the inlet housing. The upper holes are directly in front of where the compressor will mount. This is bad. The lower holes put the bracket and plate into the frame rail. This is bad also. A plan "C" is going to be necessary. After staring at it for a few hours, I got an idea. The upper alternator bracket is a nice stout piece of 3/8" plate. Hmmm, that is the same as the tensioner bracket....
So I decided to route a belt on it and see if my theory would fly. I grabbed an old belt I had from a 4.3L and routed it around and used a clamp to make it the correct length. It looked like it should work, so I went ahead and drilled and tapped the hole in the plate to mount the tensioner. I did not drill the hole for the indexing pin yet.
It looks like it should work.
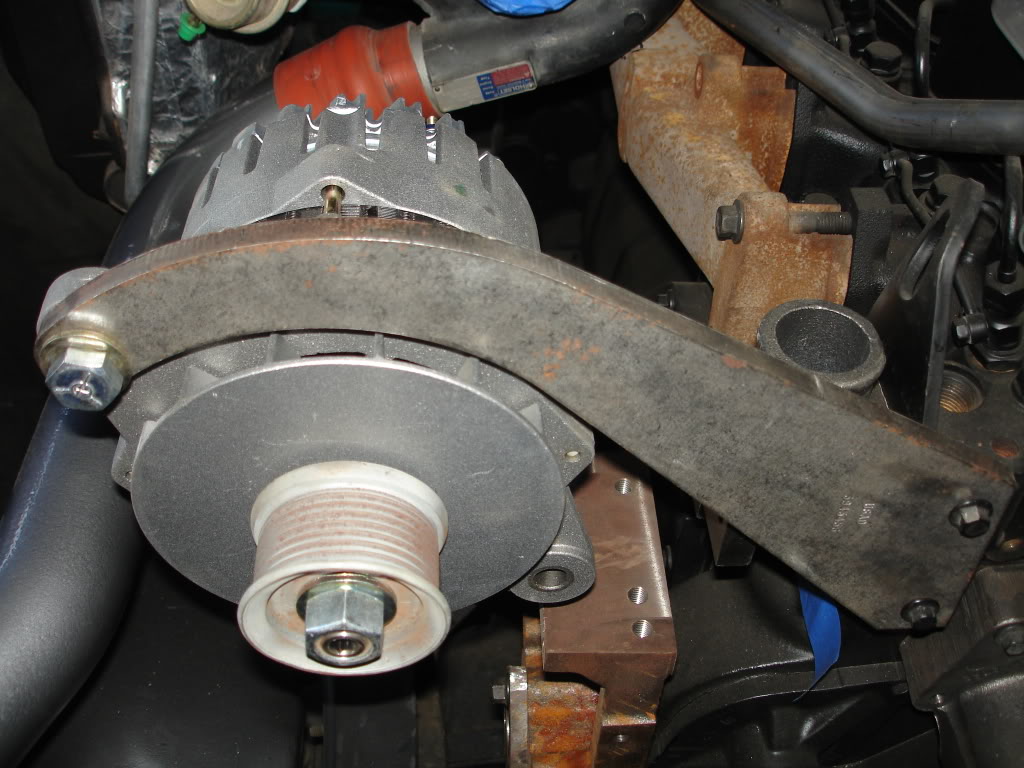
Now, it is hard to tell from the pic, but the routing of the belt was not ideal. It came straight up off of the crank to the fan hub, went around that, under the tensioner, around the alternator, down around the water pump and then back to the crank. I got a couple belts this length, but before I even tried them, I decided this was not a good setup. The fan hub had only about 90* coverage. When that Horton fan clutch engages, the belt is going to scream like a scalded ape. I decided to re-route the belt (I'm glad I made this decision before I bored the hole for the indexing pin on the tensioner). Now, the belt comes off the crank and goes to the water pump, wraps around it (over 180* coverage), then goes over to the fan hub and wraps around it (well over 180* coverage), then under the tensioner, around the alternator and back down to the crank. So with this change, I got excellent coverage on all the high-drag components without resorting to adding pulleys etc.
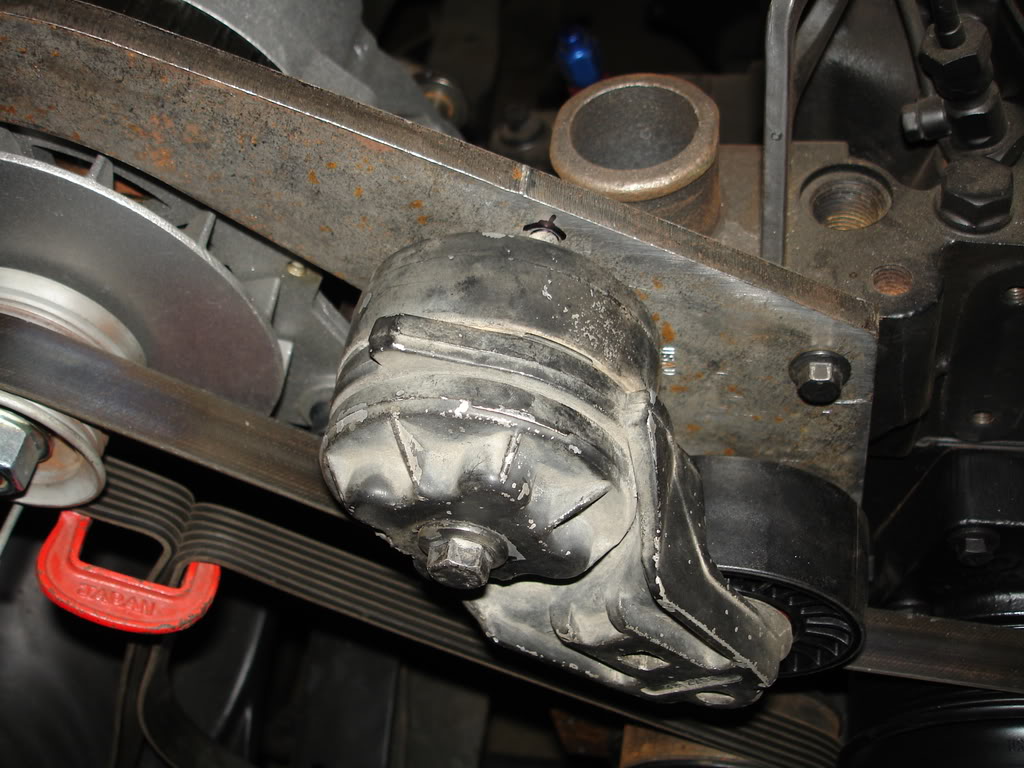
This is what I ended up with:
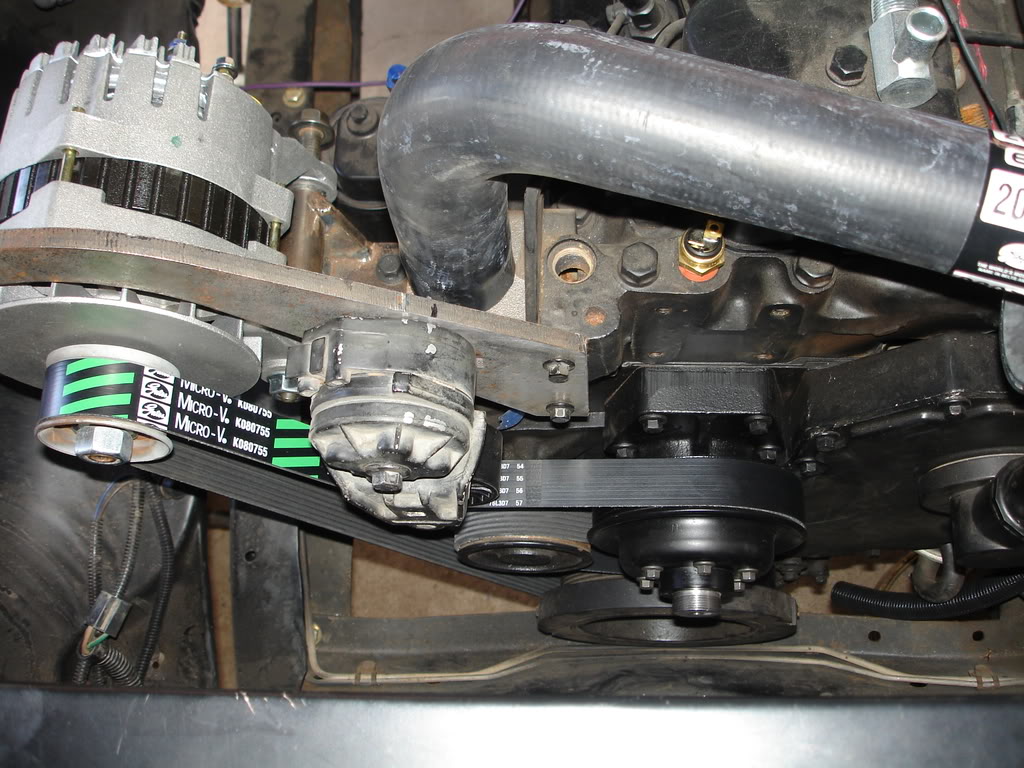
I was concerned with the location of the indexing hole for the tensioner, but in the end I got it right on the money. With the tensioner pulled all the way back, a belt can JUST be slipped on and when relaxed the tensioner is at 3/4 of its range.
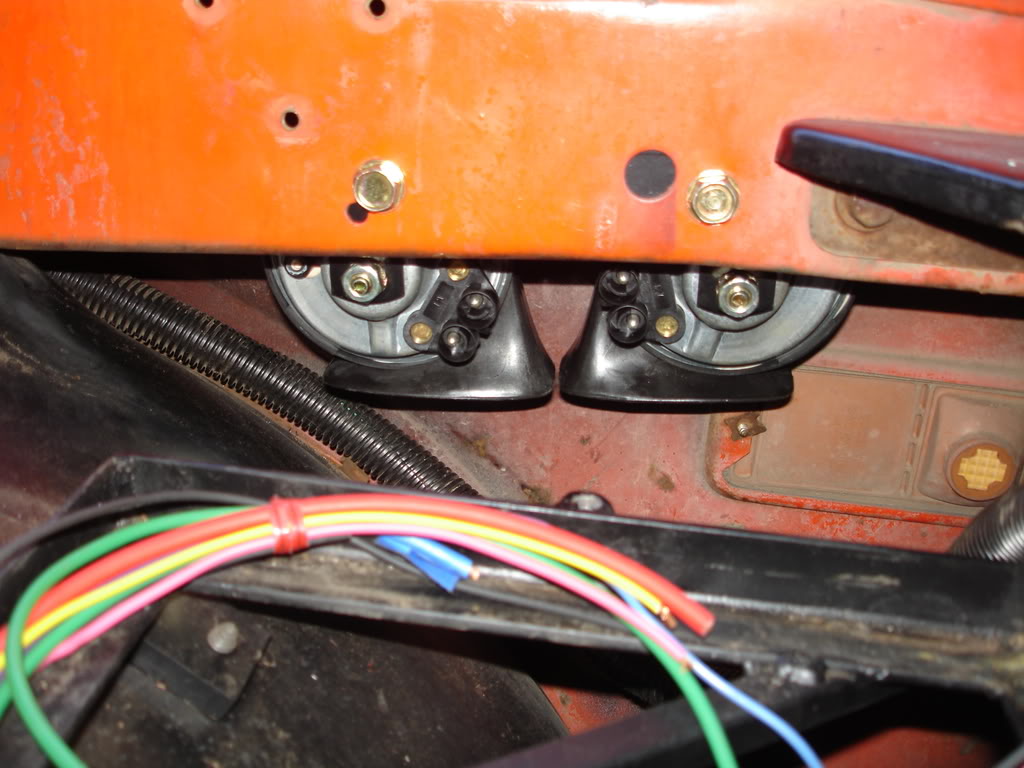
With that done, I started looking in my box of stuff left to put on. Unfortunately, my box appears to have more stuff in it than there is room left under the hood for it. I decided to tackle the horns. They are Delco replacement horns, but they look like something off of a European import. I tested them out and they are loud as hell and have a domestic tone to them (no import squeak horns here). I toyed around with a few mounting locations. I do not recall this thing having horns on it when I got it, so I do not know where they are supposed to be, but I found a place that works well and would otherwise be unused space.
I'm getting closer.......