Quote:
Originally Posted by daddyjeep

That bumper turned out good. Pretty beefy for a four wheeler.
Sorry to hear about the back. hopefully things heal up good.
|
Thanks,
The main two plates that the receiver is mounted to is 3/16 the rest is 10 gauge scrap I had left over from another project.
Quote:
Originally Posted by nlped
I just found this thread. Love the truck!!! The Cummins is the best way to go.
I hate to hear that your having such horrible back problems as Ive wrenched mine a few times, but nothing compared to yours.
I hope to build one of these out of my 67 C30. Mine is a LONG way away from where yours is.
Keep plugging along!
|
Thanks, I'm hoping to finish up the engine in a few weeks and hopefully by then the cab and front suspension will be installed and I can start making mounts. Build a car hauler?
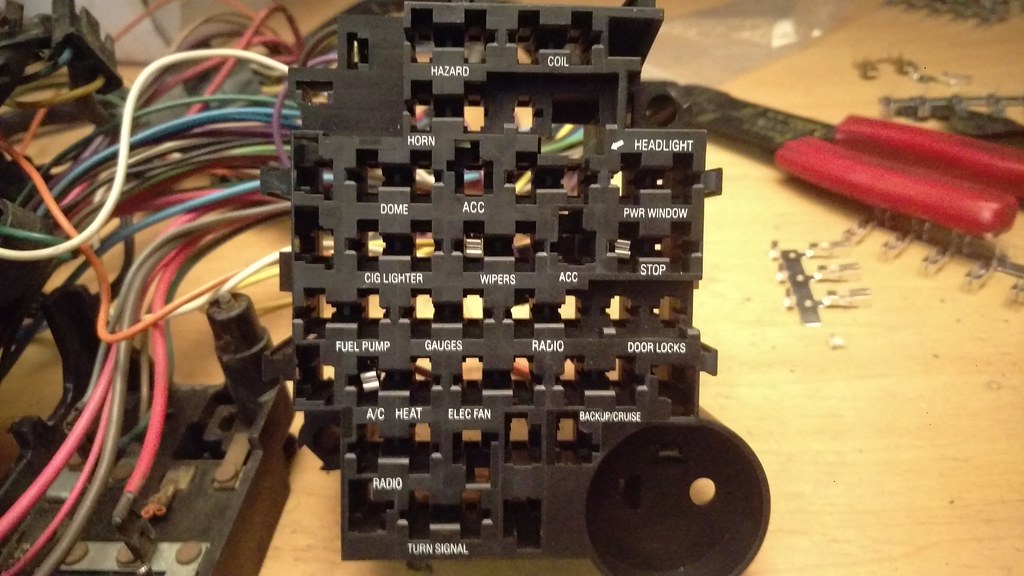
The other day I started upgrading the fuse box to a 18 circuit fuse box.
Here is a pic of the new fuse box.
 IMAG2651
 by
jarrod vanwinkle, on Flickr
Here is the list of all the circuits on the new fuse box.
1 HAZARD
2 COIL
3 HORN
4 HEADLIGHT
5 DOME
6 PWR WINDOW
7 CIG LIGHTER
8 WIPERS
9 STOP
10 fUEL PUMP
11 GAUGES
12 RADIO
13 DOOR LOCKS
14 A/C HEAT
15 ELEC FAN
16 BACKUP/ CRUISE
17 RADIO
18 TURN SIGNAL
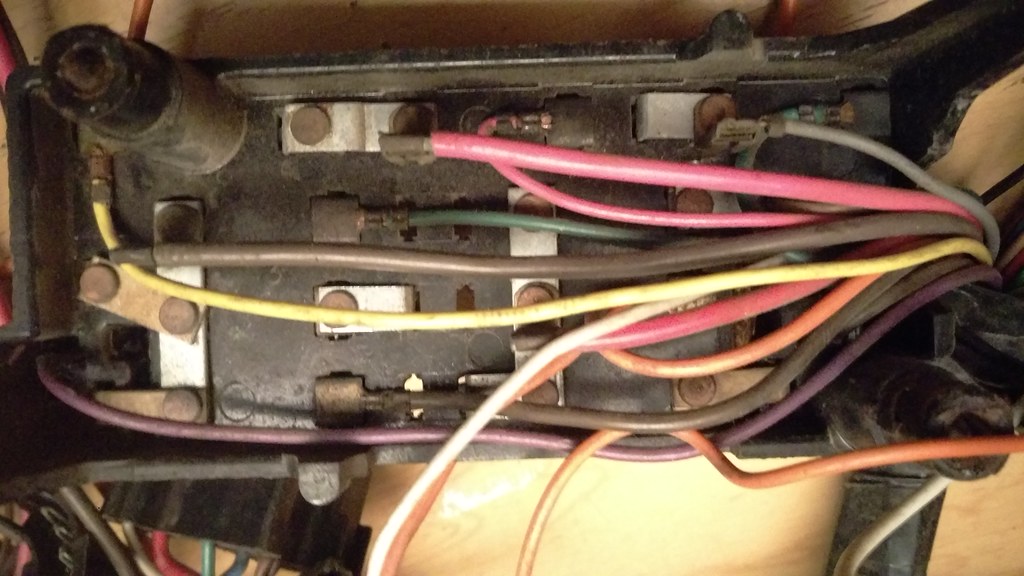
Here is the list of all the circuits on the old fuse box.
1 AIR COND HEAT
2 RADIO IS A BLADE CONNECTOR
3 BU LPS
4 WIPERS
5 TRAFFIC HAZ
6 TAIL STOP PARK DOME
7 GL BOX & SPOT LP
8 PNL LTS
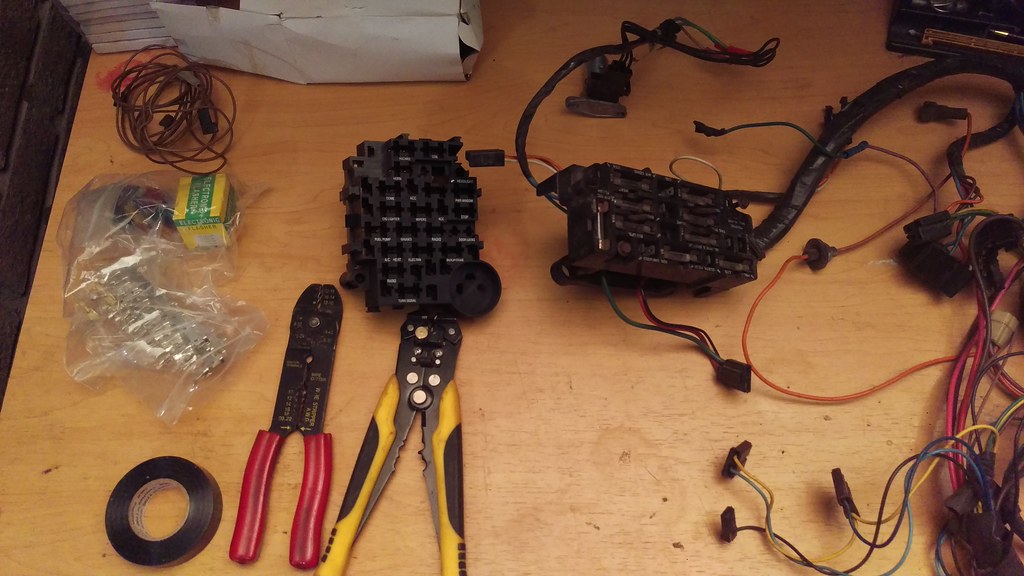
Here is the list of all the circuits on the new fuse box. That I have hooked up.
1 HAZARD (5) TRAFFIC HAZ is jumped to the flasher relay.
2 COIL
3 HORN
4 HEADLIGHT
5 DOME
6 PWR WINDOW
7 CIG LIGHTER
8 WIPERS (4) WIPERS
9 STOP (6) TAIL STOP PARK DOME
10 fUEL PUMP
11 GAUGES (8) PNL LTS
12 RADIO
13 DOOR LOCKS
14 A/C HEAT (1) AIR COND HEAT
15 ELEC FAN
16 BACKUP/ CRUISE (3) BU LPS
17 RADIO
18 TURN SIGNAL
I plan on running all unused fuses to a 12 Position Covered Dual Row Screw Terminal Block Connector Bar. So when I add the rest of my accessories I can just connect them to the Terminal Block for keyed fused power.
 IMAG2650
 by
jarrod vanwinkle, on Flickr
 IMAG2649
 by
jarrod vanwinkle, on Flickr[
I made a mounting bracket to mount the fuse box, terminal blocks and relays. I made the bracket out of some .063 (1/16) thick 3003-H14 aluminum sheet I had left over from another project.
 IMAG2666
 by
jarrod vanwinkle, on Flickr
Here is a test fit of the bracket. I plan on running a electric e brake. So I have the bracket moved farther over than needed. It would fit No problem but I wanted to give myself extra room.
 IMAG2671
 by
jarrod vanwinkle, on Flickr
I used two rivnuts to mount the fuse box to the bracket.
 IMAG2670
 by
jarrod vanwinkle, on Flickr
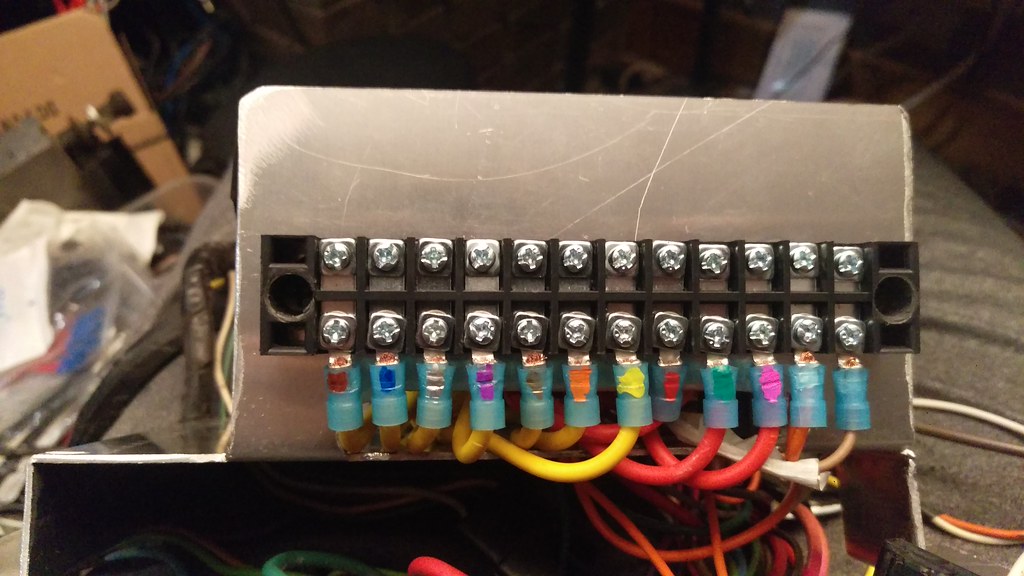
Here is a pic of the terminal block that powers all the keyed accessories. I am going to use a relay to power the terminal block using the stock keyed power wire to switch the relay on. I used 12 gauge wire for both terminal blocks. That way no matter what I end up adding I will have a sufficient gauge wire to power it.
 IMAG2673
 by
jarrod vanwinkle, on Flickr
Here is a pic of the terminal block connector bar. All the yellow wires are keyed power and red wires are always on. The first terminal is for the fuel sending unit. The second is the second to light up any gauges I add. The third is for the dome light. The fourth is if I want to add anything else that needs power all the time. I don't know what I will end up using it for I can't think but I thought I would add it. The fifth and sixth is for the radio one for constant power and one for switched. The rest are for when I add other accessories.
 IMAG2674
 by
jarrod vanwinkle, on Flickr
I color coded all the fuse turnimals to there terminal block to make it easier for when I add an accessory. I also made the bracket big enough so when I add a accessory. I have room to label the turnimals as the fuse box is pre labeled but I won't be using them for what is printed on the fuse box.
 IMAG2675
 by
jarrod vanwinkle, on Flickr
I bench tested it after I wire up the relay.
I added nutserts to the fire wall, I installed them backwards as I have a 10mm sound deadening/ heat insulation mat on the firewall the nucerts sit flush with the mat.
 IMAG2677
 by
jarrod vanwinkle, on Flickr
I also made a block off plate for the hole for the old e brake as I plan on running a electric e brake. I drilled the mounting holes bigger than the nutserts so the plate sits flush with the firewall.
Here is a pic of the fuse box mounted and the wiring harness installed.
 IMAG2681
 by
jarrod vanwinkle, on Flickr
I modified a gas pedal from a 04 wrx sti to work with the stock mounting location.
 IMAG2672
 by
jarrod vanwinkle, on Flickr
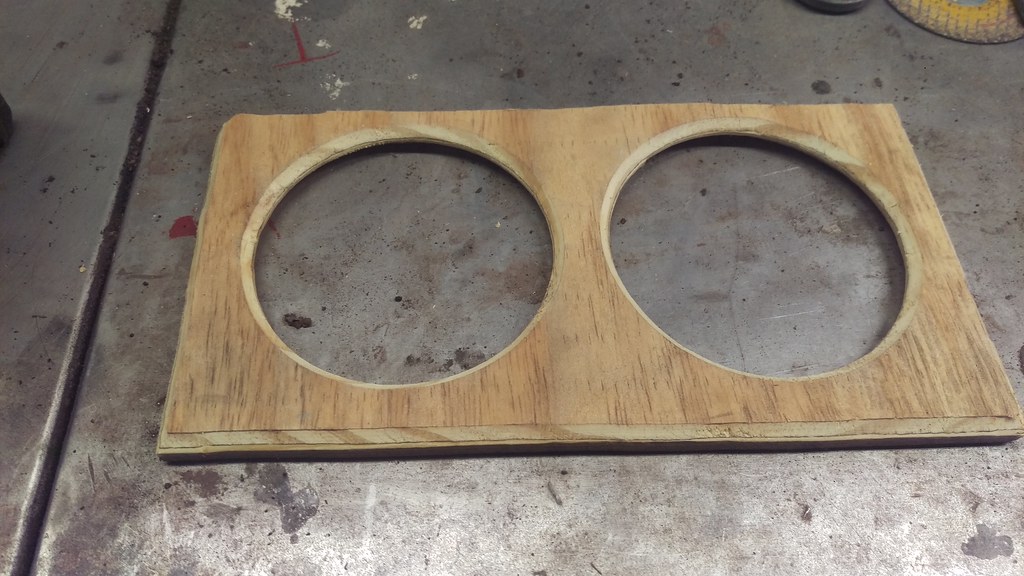
I also made a bracket for a set of 4 inch speakers for the dash.
 IMAG2661
 by
jarrod vanwinkle, on Flickr
 IMAG2662
 by
jarrod vanwinkle, on Flickr
 IMAG2663
 by
jarrod vanwinkle, on Flickr
I made a block off plate and cut the fire wall to mound the heater box as the new cab was a ac cab and I did not realize the firewalls where different.
 IMAG2657
 by
jarrod vanwinkle, on Flickr
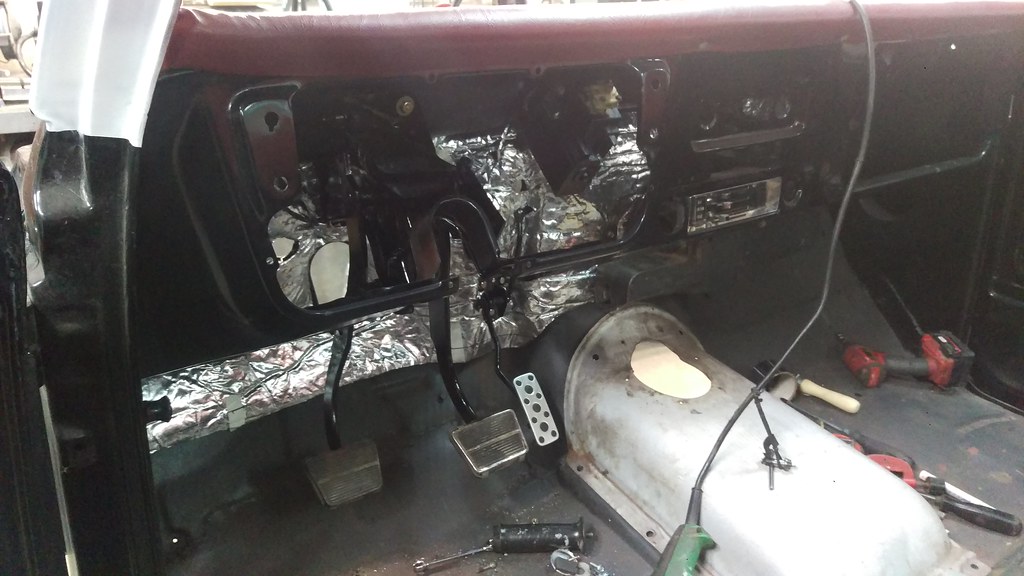
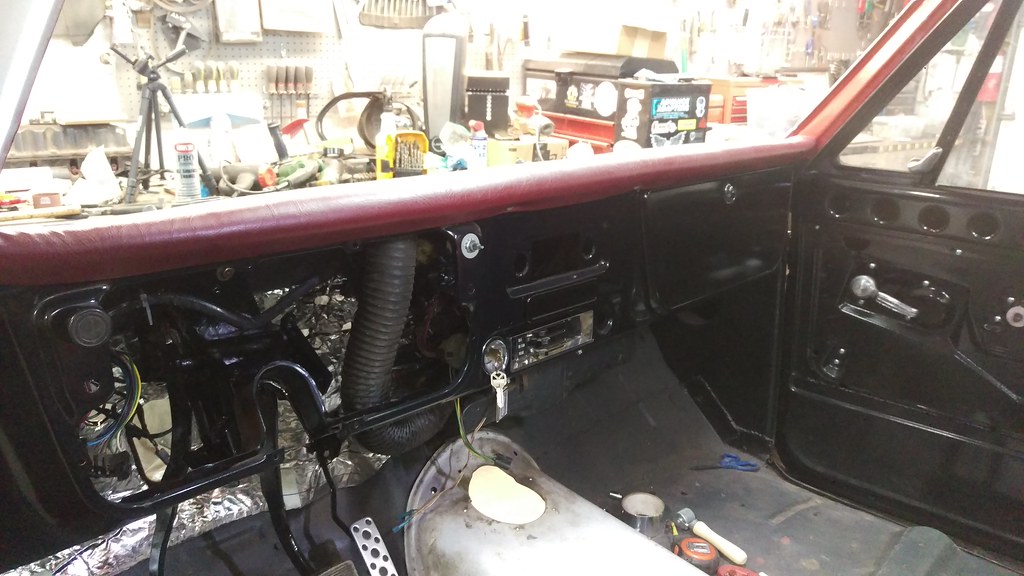
I got all the under dash parts installed and the heater controls, ash tray and glove box door as well as all the switches. I don't know what I did with the wiper switch knob. I think I am missing a box of parts, I don't know where I put a few things.
I'm going to leave the gauge cluster out for now as I want to replace the manual oil gauge with a electric one. I'm also looking into adding a boost gauge and possibly a tachometer.
 IMAG2678
 by
jarrod vanwinkle, on Flickr