Cecilia's going to be a daily driver one day so the first job on the table is making her more reliable. Right now she runs like a one legged duck on a whack-a-mole table. I started with a carb (carburetor) rebuild. I'm sure it's the wrong thing to do. Most of the things I choose to do are probably wrong. I've learned to live with it

My carb is still the original Stromberg WW model. I plan to upgrade to a Holley 4410c 500 CFM eventually, but I want to have everything else running smoothly before that happens. So I bought a GP Sorenson Carb Kit from Autozone for $37.99. The part number is 96-574.
The carb kit does NOT come with a float, in fact the computer told the little guy at Autozone that this carb
doesn't need a float. He was like, "Ok, now this computer is just flat out lying to me." Points for the parts guy having a sense of humor

I got my kit home and waited until the weekend when I'd have someone watching my youngest and I could draft my main helper for photography duty.
Saturday it was bacon, eggs, biscuits and gravy, pain killers for the hip, and then off to Cecilia with my child number 2 in tow.
For this project I needed:
(sorry for the metric, someone stole my standard wrenches just a week ago. A pox on their house!)
- 12 MM wrench
- 13 MM wrench
- 15 MM wrench
- Flathead screwdriver
- Carburetor cleaner or dip (dip preferred! 27.90 @ Autozone)
- 2 or 3 old towels
- About 4-6 hours. I did mine over two days and 8 hours to allow the JB Weld to cure.
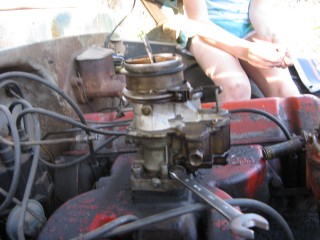
As you can see I have the old style oil bath air cleaner. It'll be cleaned too by the time this is over. Start by removing the wing nut on the top of it.
Click any of these images to see a larger version.
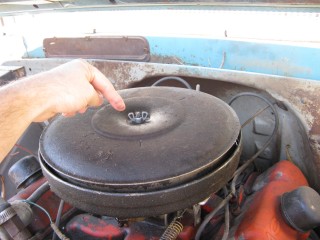
I always just set the nut on top of the air cleaner so I don't lose it. This won't work if you don't put the air cleaner in a safe place though. Watch for gremlins stealing those wingnuts. They're like candy to them.

Then just lift the entire air cleaner away. OOOh, Ahhhh!
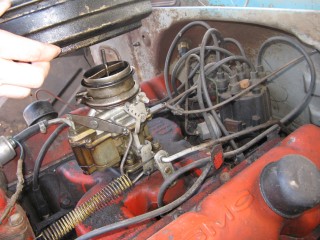
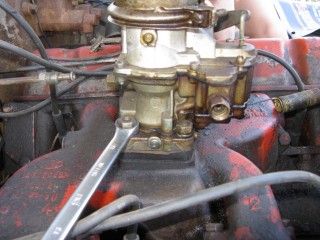
Next we remove the gas line. If your large brass connection isn't very tight then you'll need to use two wrenches to remove the smaller brass fitting, with one holding the large fitting stationary while the small one turns. I'm using a 15mm and a 13mm shown here.
There *could* be a screen in here so be careful. Mind did not have one. Gremlins, I tell you.
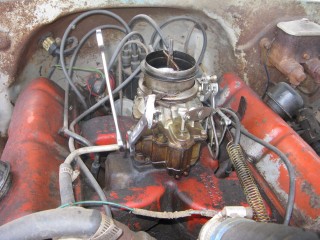
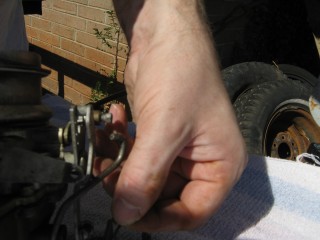
Now unhook the large spring. I don't know all of the official terms for everything so we'll call this the Large Throttle Spring Of Doom. Be careful because it is under tension. Tension is what gives it a hunger for blood.
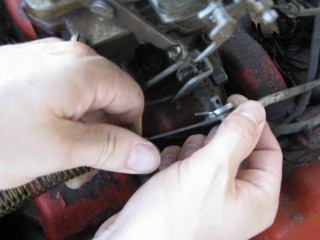
Then pull free the linkage (metal bar) that the Large Throttle Spring Of Doom was hooked into.
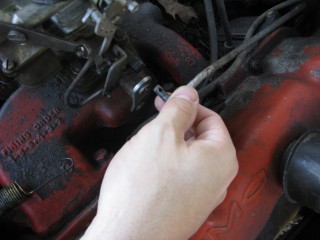
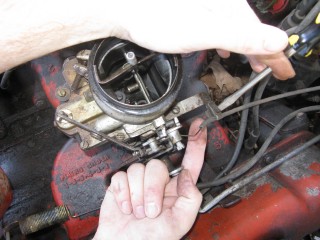
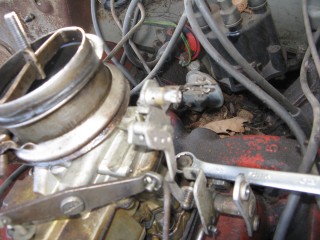
At this point I reached around the back of the carb to remove the brass fitting that runs to the vacuum advance. Here I'm using a 12 open ended wrench.
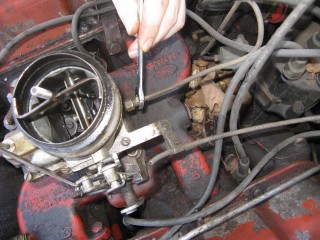
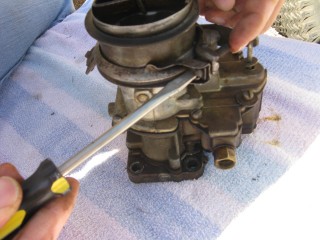
Now come back to the throttle linkage. Unscrew the top screw just a couple of turns. This screw holds the wire that's poked through underneath it. We're just wanting it to let go of the wire, we're not trying to remove the screw.
There's another screw that we need to loosen directly behind the one we just did. There's a nut on the back end of it (indicated by my ugly finger) so don't unscrew it too much or you'll be chasing it down a spark plug hole.
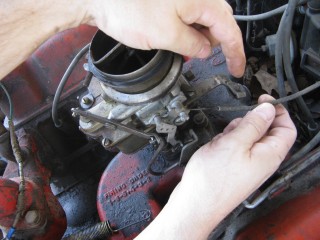
Just unscrew it a couple of turns and disconnect the cable by pulling it out to the side.
Here's me pulling it to the side. I bet you're glad you saw this. You're so well informed.
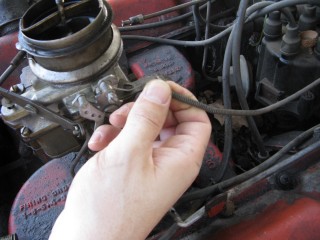
Now pull the little wire free from the top. It MAY be bent around to help hold it in place. If so just unbend it. It doesn't need to be bent if your screw is tightened properly anyway. Leave it straight. Straight is how God intended.
Congrats! At this point we've removed all of the "stuff" hooked to the carburetor! Pat yourself on the back - well, no. Your hand is filthy. What's wrong with you? Born in a barn? Ask someone else to pat you on the back. That will also give you the opportunity to tell them how manly and tough you are for making it this far.
Ohhh Yeahhh!!

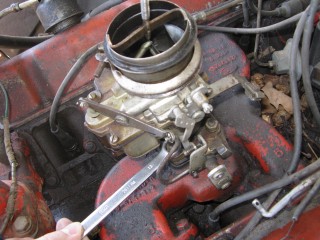
Ok, back to work, Superman. You've only got four nuts left and you're in the clear!
I'm using a 15mm wrench to remove these. DO NOT DROP THE NUTS. They're very difficult to fish out of the spark plug holes. Where Gremlins live. And they bite.
Remove the nut located here:
And here (don't mind my Photographer in the background):
Then here:
And finally here, under all that spaghetti we just took loose.
My carb had lock washers, but only on the front two bolts. Again, do NOT DROP THESE or you'll have a heck of a time fishing for them in spark plug holes. Don't believe me? Go ahead Mr. Know it all. Drop one. I double DOG dare ya!
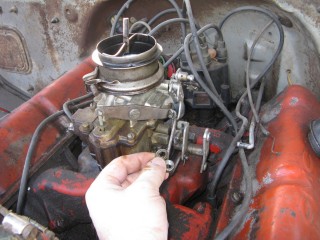
Now just lift the entire carb up and off!
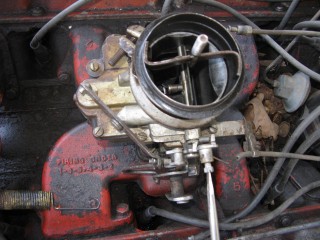
You'll be left with this.

Eww. That's anticlimactic.
Here's what it looks like with the bottom plate removed. You can see how tall the lip is without the plate.
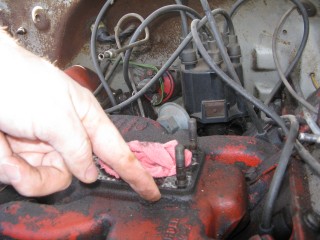
Now is a good time to poke a clean(ish) rag in the intake hole so you don't drop crud down there and ruin your engine.
My bottom plate had this really cool homemade gasket on it. It was made from what I assume was the box that the previous carb repair kit came in. It looked about like a cereal box only much thinner. They just tore off a piece and mashed it on the bolts. There were little bits of superthin cardboard everywhere.
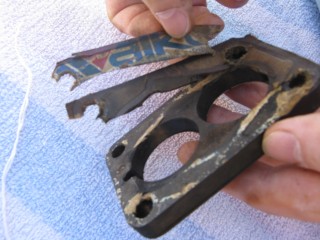
I pulled off most of the cardboard but several pieces were pretty stuck. They'll come off in the dip though.
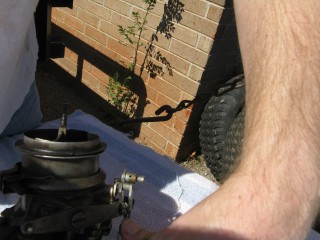
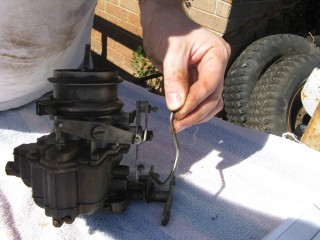
With the carb removed and placed on these very manly pink and turquoise towels that my wife donated to my project, we'll get back to the dissassembly by straightening and removing the cotter pin shown at the top of the remaining linkage.
Sort of...My photographer had a hard time fixing the shot in the bright sunlight.
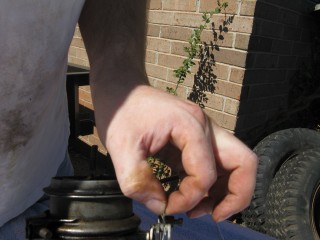
These cotter pins were very thin so bending them with a thumbnail was no trouble. Now we remove the lower cotter pin.
Remove the final bit of linkage.
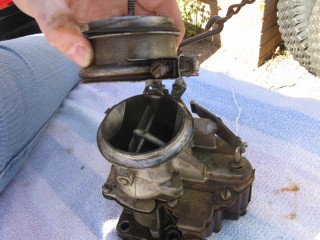
Now we remove the riser off of the "air horn", which is a fancy way of saying the top tube off of the carb. This screw has a nut on the other end, but it's clamped in there. You shouldn't be able to lose it, but don't try really hard just in case.
Now just remove the riser by pulling it straight up.