So Sunday morning I approached it all again.
Based on various comments on the forums I looked closer at what I had.

Karl “Aggie” from Longview, Texas also commented and added further advice. Making sense to the ownership of a 40 year old truck.
Quote:
Originally Posted by aggie91

Rian,
I saw it on FB too, but was not where I could help out. Yes, they are left and right threads.
The ES409LT is the INNER Tie Rod End. You need to get the ES409RT for the OUTER Tie Rod End. I recommend getting the new adjuster sleeves too. You can put them together in the comfort of you living room before heading out into the cold garage. Pull of the set on one side and make the new set match the length of the old set. This gets you close on the toe adjustment. the Adjuster sleeves are part number ES2004S in Moog ($7.08USD each) or Quick Steer ($1.81USD each) on RockAuto.com.
FYI - Moog and Quick Steer are BOTH brands from Federal Mogul which is now part of Tenneco.
Once you have both sides reassembled you can adjust the toe as needed till you can get to the alignment shop.
|
I have decided to replace the sleeves as well.
New parts should only improve things further.
And looking at the receipt and numbers from my order it seems the order was correct but wrong items picked and shipped.
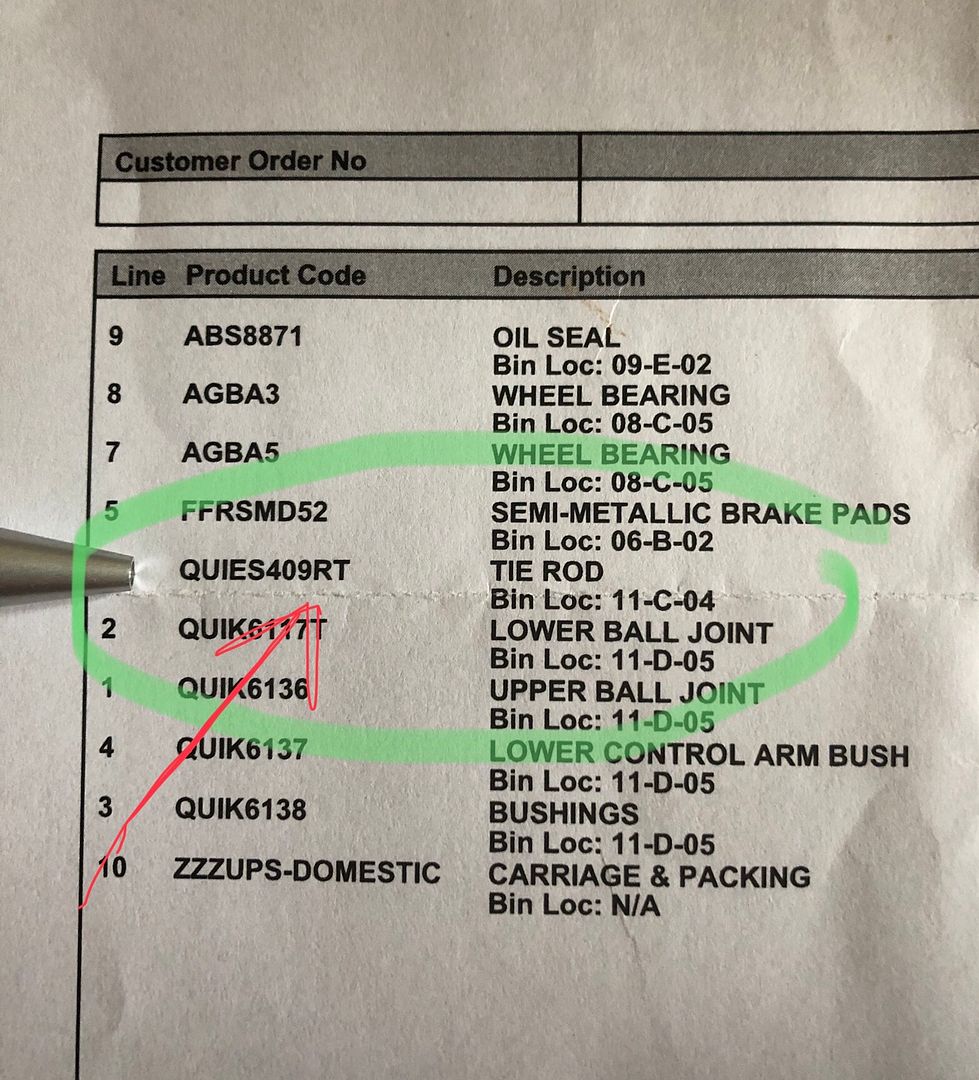
So these are the inner tie rod ends. Based on the LT code.
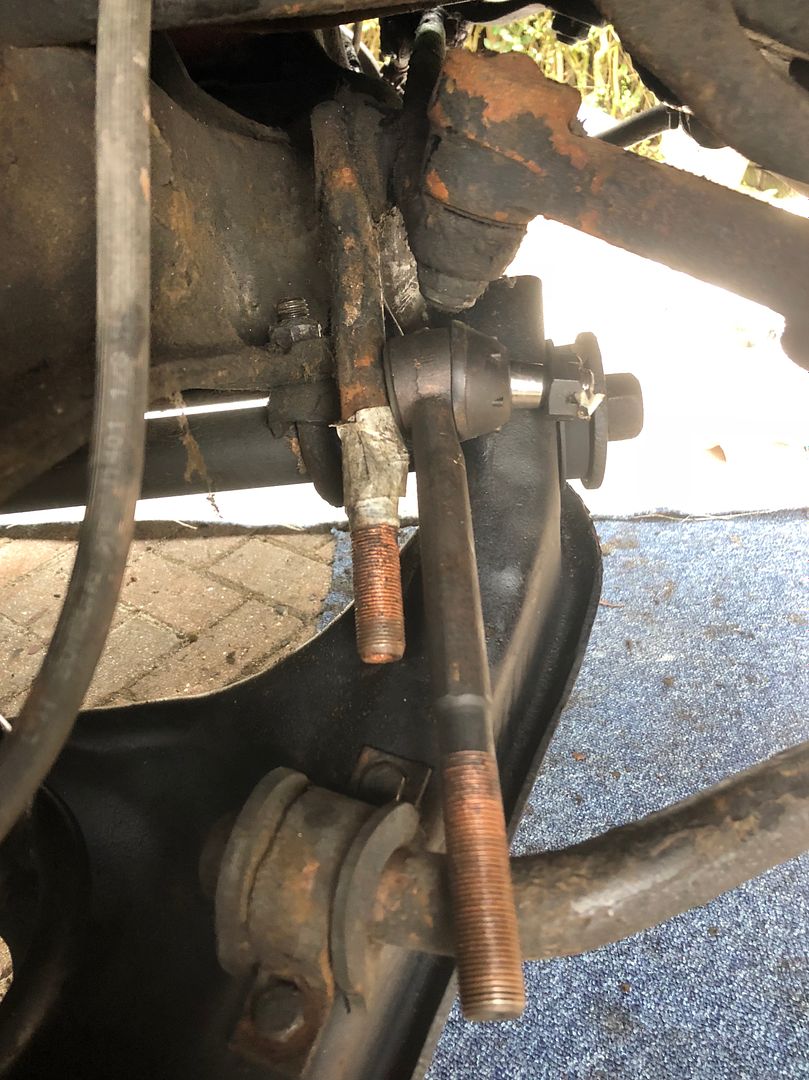

So once I realised I could not complete the job, I removed, cleaned and greased up the drivers side too and refitted both sides

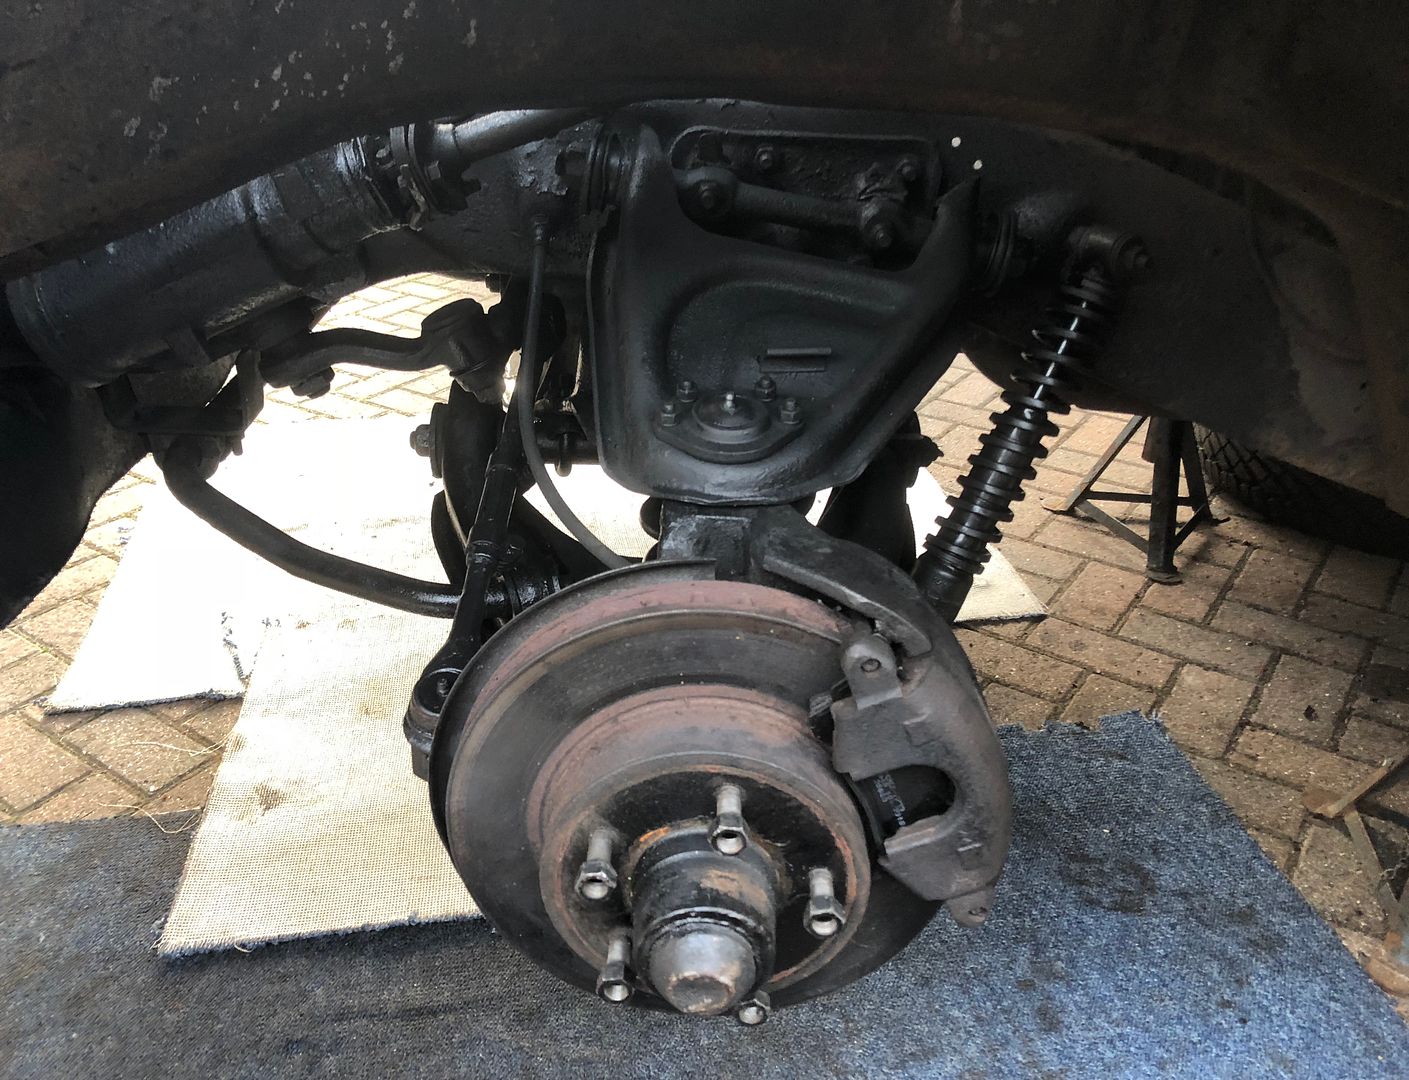
Next up was further cleaning up of all the underside parts, nuts and surfaces. Then greasing up all the grease points.
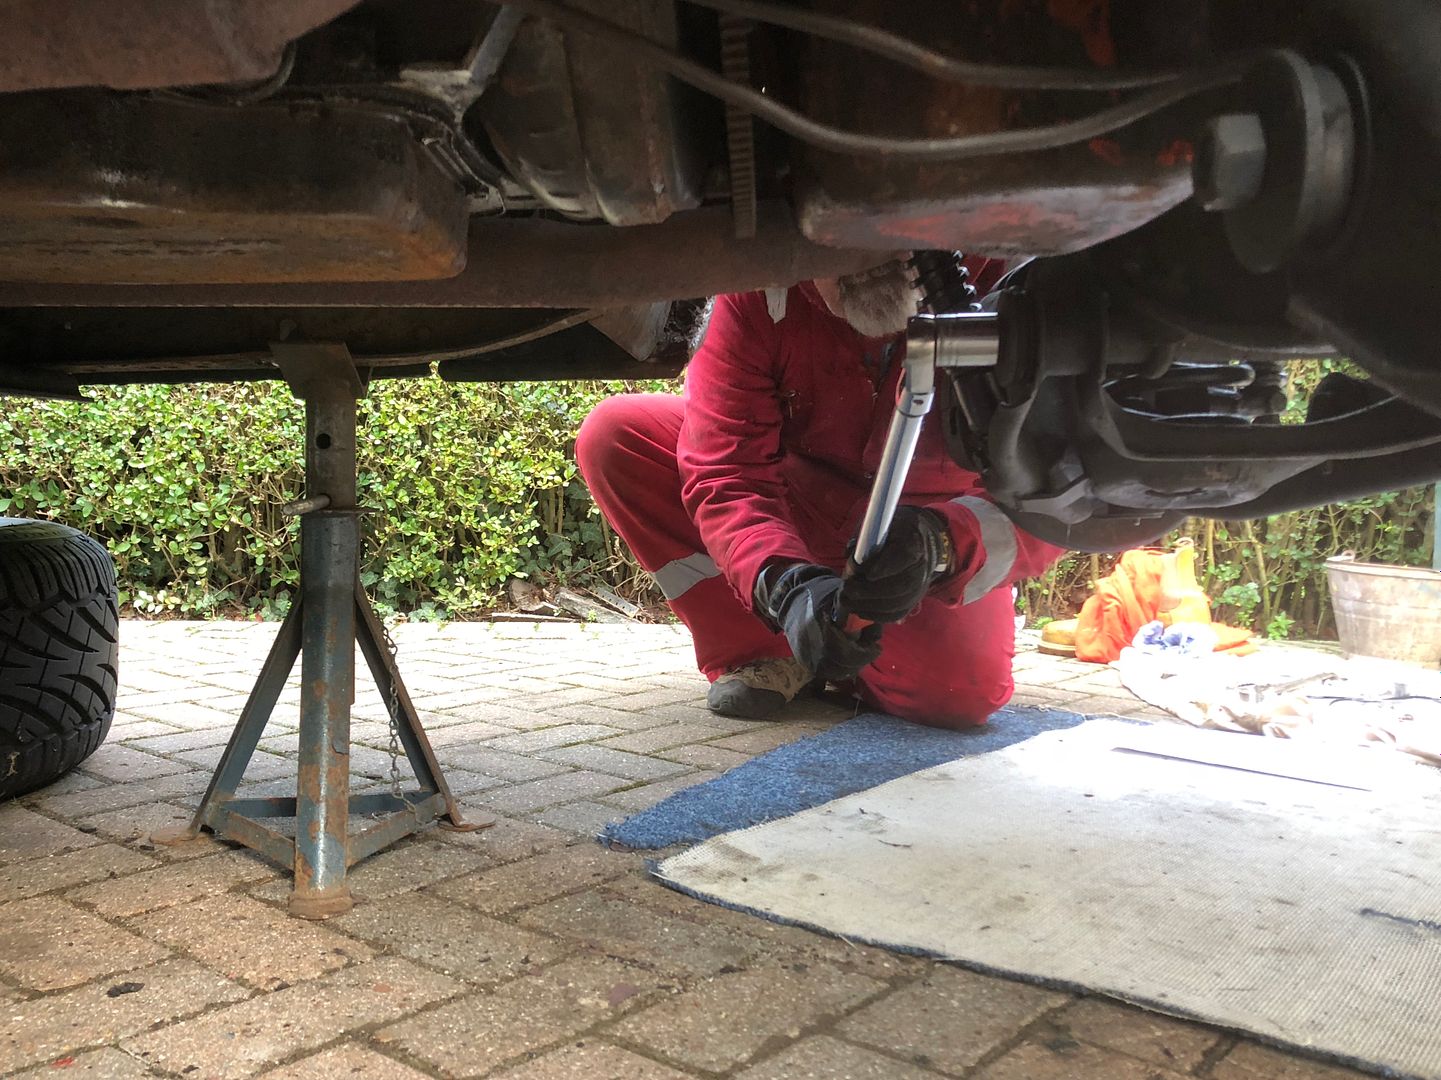
Once all was cleaned up, bolted down, I torqued down every nut, keeping in mind the control arms needed to be done under full load. This was done by making a small adapter for the jack to fit the lower ball joint grease nipple into and raising the front suspension till it lifted the truck, creating full load. I followed with a final coat of Würth underbody sealer.
Happy with the outcome.
Passenger side.

Drivers side.
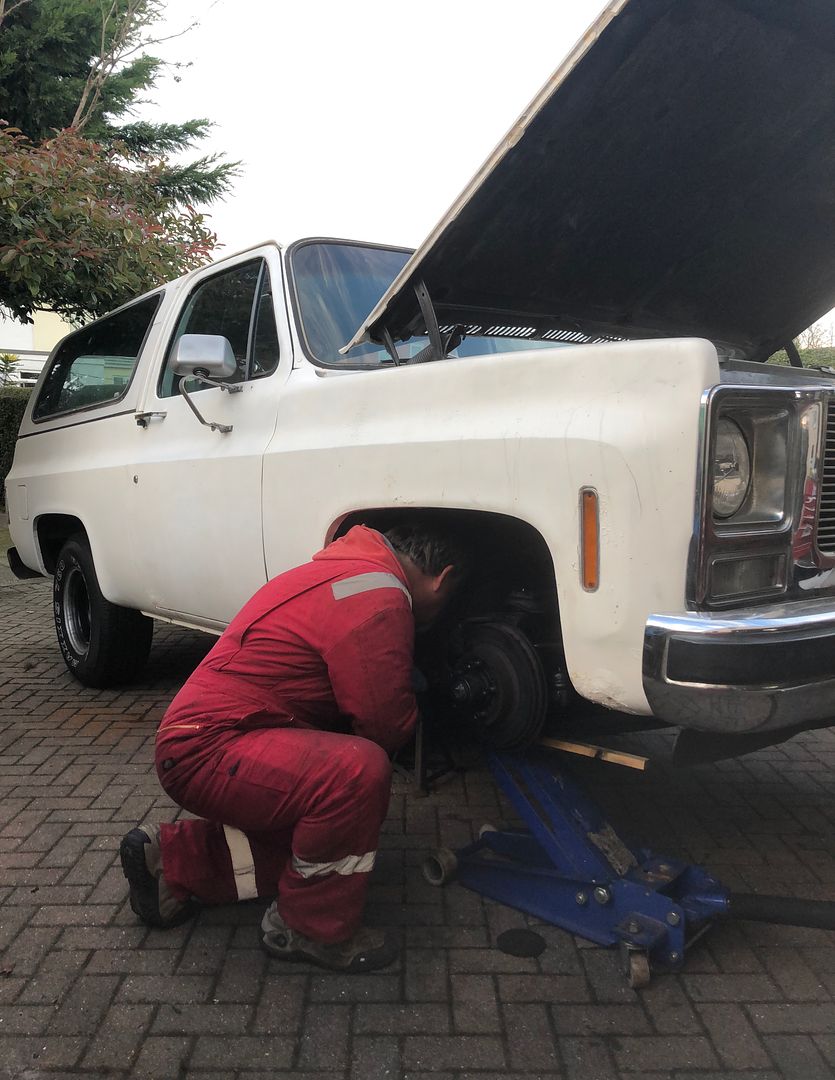
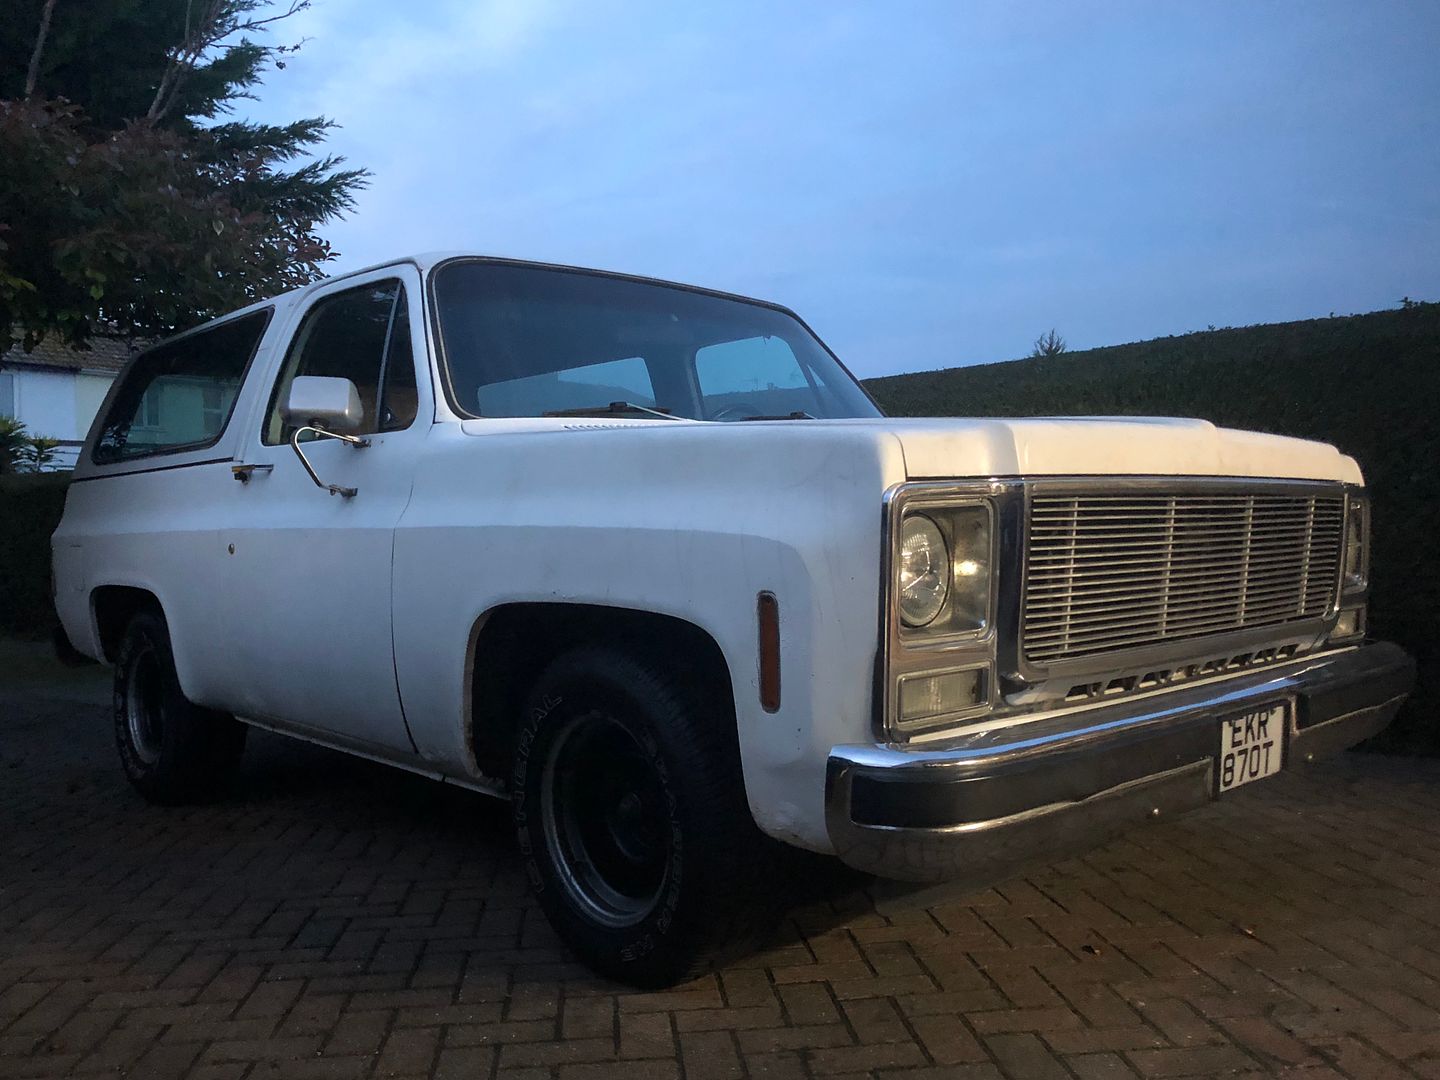
I then refitted the wheels and brought the truck down to the ground.
Rocking it hard in all directions it was almost dark but I got one photo. Will do some in daylight after a drive.
The final wheel arch height has gone from 680mm up to a much better looking 740mm
So a ain of 60mm with thenew parts and springs.
Final job to do will be to get sone DOT4 Brake Fluid to top up and bleed the brakes.
Then it should be all go for MOT when I get a chance.
Did I mention that this is “Not a Project”
Later.