Quote:
Originally Posted by Kim57

Very nice work Jim.
Kim
|
Thank you Kim.
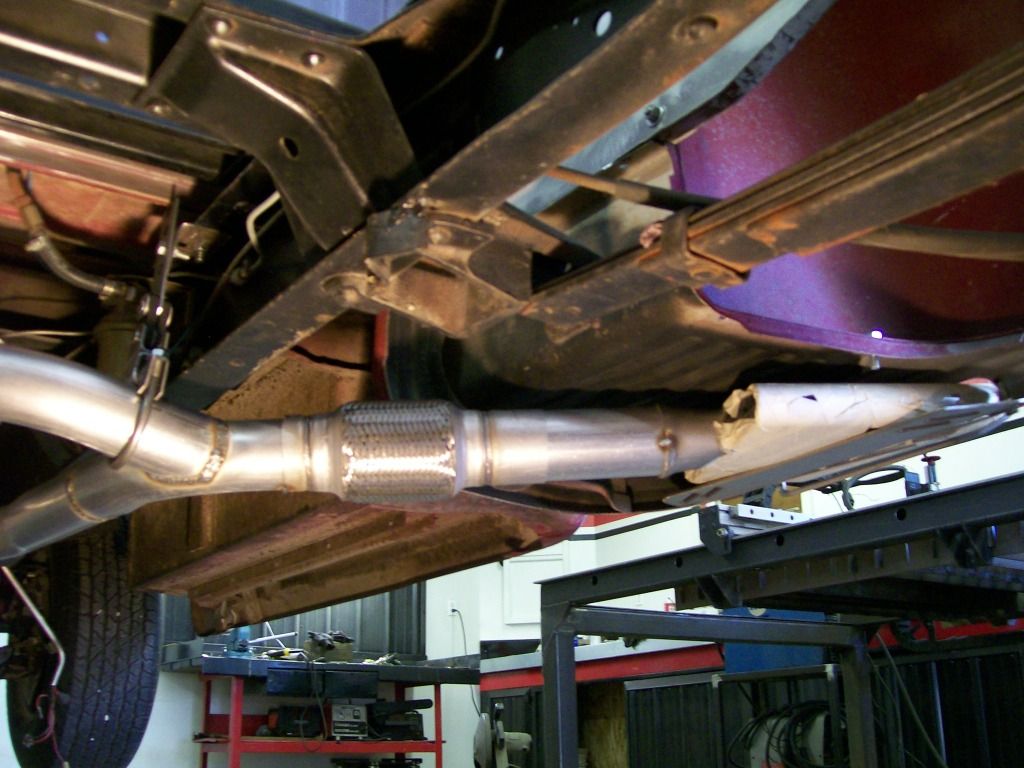
One concern I had when building the exhaust was the movement between the engine and the bed steps. I needed a way to allow flexing so the welds wouldn't be stressed.
Thumbing through the Jegs catalog I found exactly what I was looking for. They are stainless steel with a braided covering over flex tubing within, exactly what I was looking for.
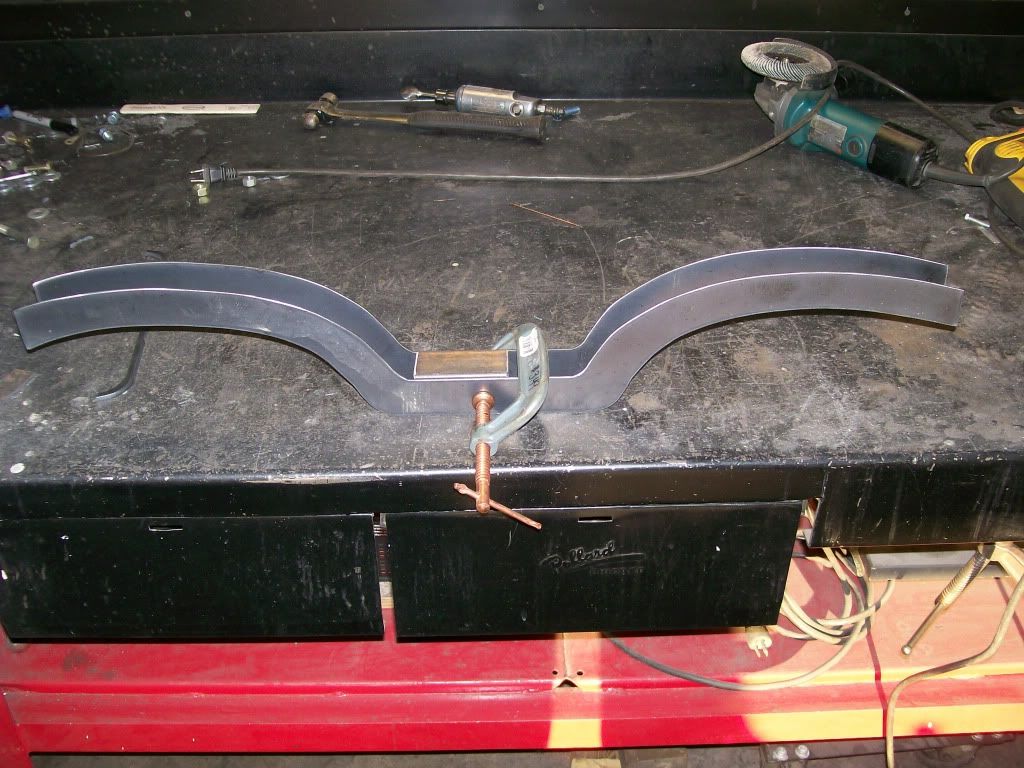
Once the exhaust took it's course I had to get the crossmember made. After taking measurements with the exhaust in place I cut the sides as in the last set of pictures. I used some tubing that was the same with that I wanted the crossmember to be when done. Then clamped the two sides together using these tube spacers. Before clamping as this stage, be sure the two sides are aligned as perfect as possible.
Once the clamping is done, I cut the top and bottom plates to match the width and length of space I have to cover. Now it's a matter of getting the top and bottom to follow the contour.
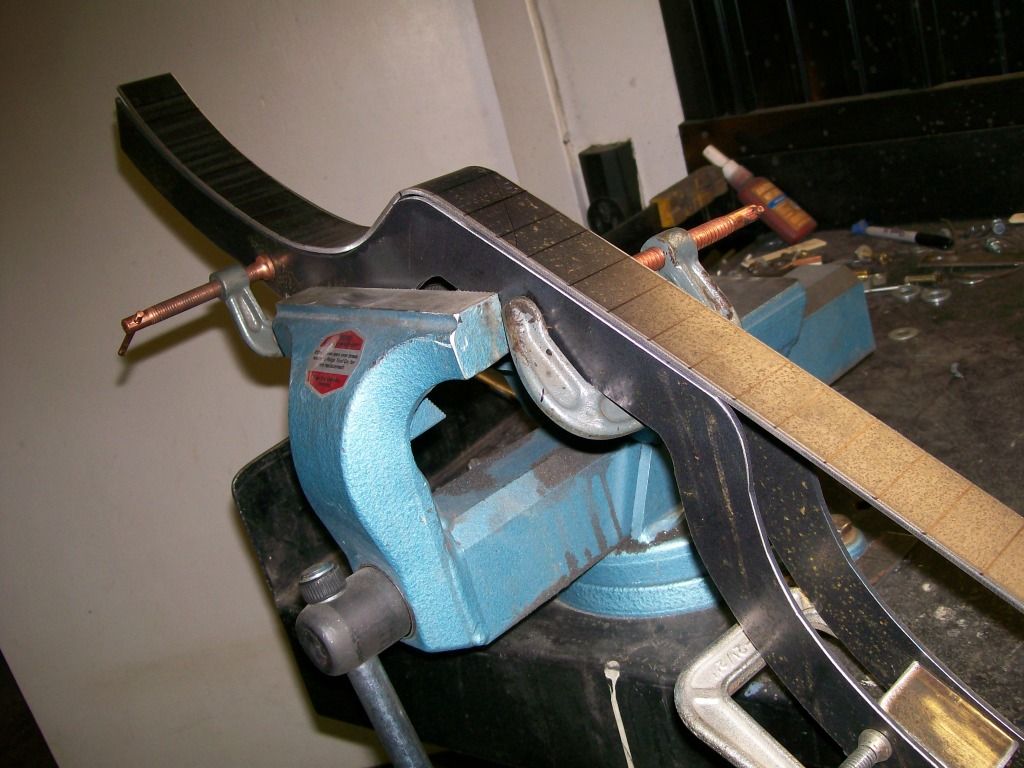
I did not want to use heat or a hammer. I used the press and slowly shaped the plates. The black sharpie markings on the plate gives me a reference to the exact 90 degree, now as I press shape the plate I know it's not going to start going off center. I have just a couple small areas to refine, but coming along quite fine.
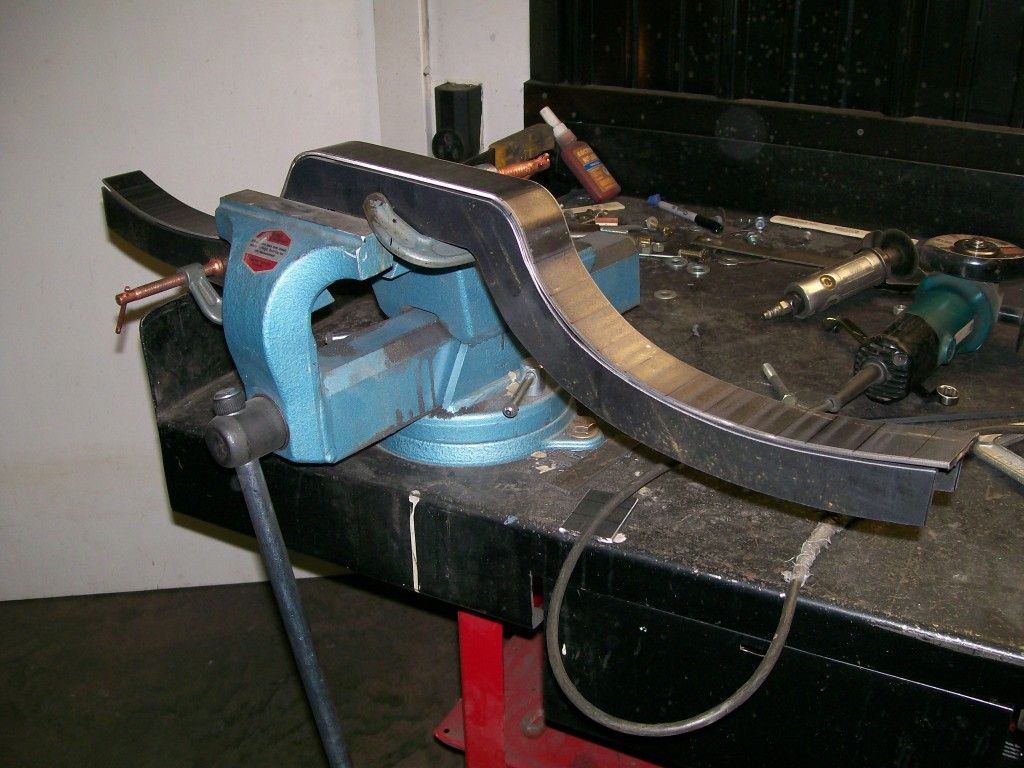
One plate done, one to go.
