
|
Register or Log In To remove these advertisements. |
|
|
|
|||||||
 |
|
|
Thread Tools | Display Modes |
|
|
 05-18-2006, 12:33 AM
|
#1 |
|
Registered User
Join Date: Dec 2004
Location: Saskatchewan, Canada
Posts: 1,371
|
Fast Orange: Rodstoration
I've decided to compile all my posts here and leave this as my standard build thread, kind like N2Trux and N2Billet have done. Seems like a good idea, and keeps it all in one place.
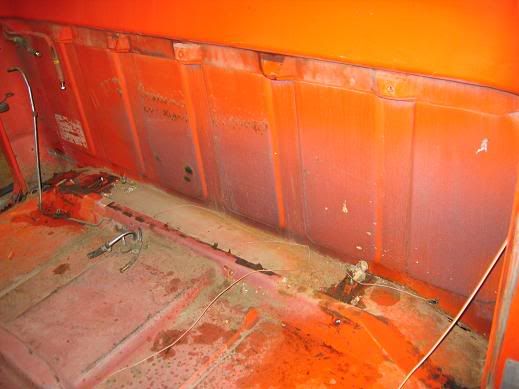
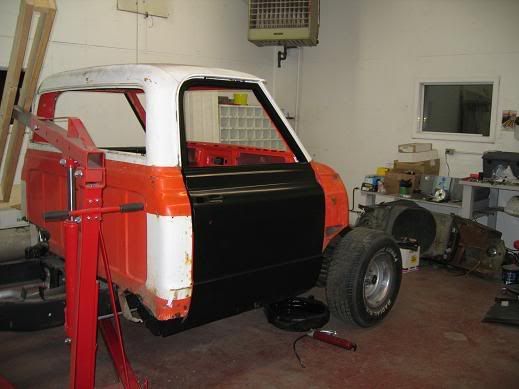
Well, I've finally decided that the charger is not a suitable daily driver. When I fixed the corvette, it worked decent for a parts hauler, not good, just decent. Now I have two other projects, plus I work at a lumber yard, so a truck is really a necessity. A little over a year ago I found a 1972 chevy custom deluxe for sale. I always wanted a 72 longbox, and the fact that it was orange finished the deal. It came with a recently rebuilt 350 4bbl, a fresh rebuilt TH350 tranny with stage 2 Transgo shift kit, Fresh rear gears (Highway gearing, can't recall ratio) and a new radiator. When I looked at it I knew it was beaten, rusty and needed new wiring something fierce, but for the cheap price it was worth it. Here is what it looked like for the 11 months I drove it: 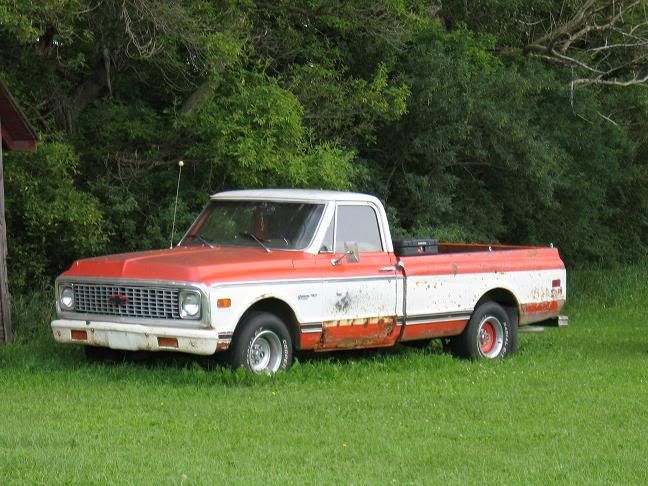 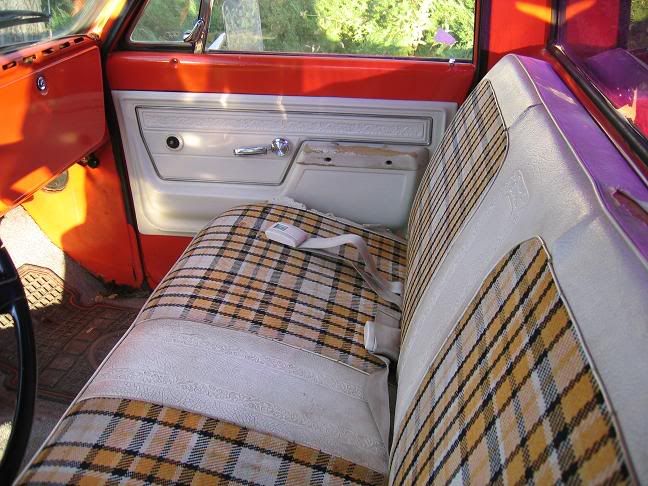 Like the highlander seat? It was kind of cool in the truck, but it makes a nicer garage couch. Anyways, the truck was half made of duct tape and mono foam, the heater and wipers didn't work, it had Mono AM radio, the one tire went flat 3 times a week and the passenger window was made of plexiglass and siliconed in, but it worked for knocking around. As it got colder out, it got more miserable to drive, so I decided it was time to park it and rebuild it. I had been buying bits and pieces for it since I got it (it came with a pile of parts as well, including a dent and rust free box) but I knew I had to go all out and do it right the first time. I tore it half apart and figured out what I needed, then ordered all new goodmark sheetmetal for it (Cab corners, rockers, floorpans, doors, fenders, etc.).
__________________
1964 Chevy Short Fleet: Tornado 1972 Chevy C10: Fast Orange Secondaries Wide Open |

|

|
|
05-18-2006, 12:34 AM
|
#2 |
|
Registered User
Join Date: Dec 2004
Location: Saskatchewan, Canada
Posts: 1,371
|
Re: Fast Orange: Rodstoration
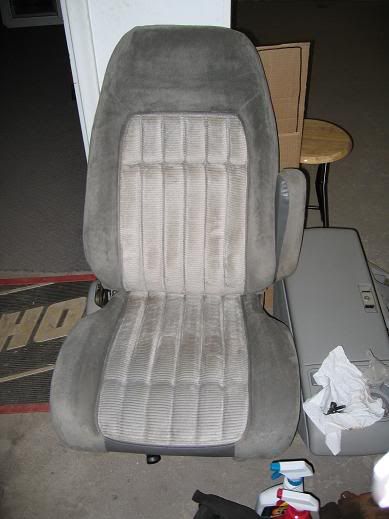
After I ordered the parts, I planned everything out in my head. I wanted something cooler/cheaper than stock (The trim was all bent or missing, not to mention the plaid seatcover that is no longer reproduced as a single piece...). I went to the wrecker for some inspiration, and came home with a nice pair of 92 chevy buckets/console in a grey velvet (they have since been steam cleaned and look a lot better)
 I then ordered material to match that will work for custom door panels and headliner. I managed to track down a tilt column for it as well (Thanks HeavyD!), and a few other trick interior pieces that I will post at a later date. Next thing that needed to be addressed was the look of the truck. In stock form it looks nice, stylish and vintage, but the price of the trim and everything would break me, so I will be going custom. It will still be orange and white, but with a bit of a different twist to it. Now, onto the gory detail pics, the destruction and resurrection of my old pickup. I started tearing it apart a couple weeks ago, and found no real surprises. I knew it needed a lot of sheetmetal and a lot of wiring (the fuse box caught fire last month as well), so what you are about to see did not surprise me. 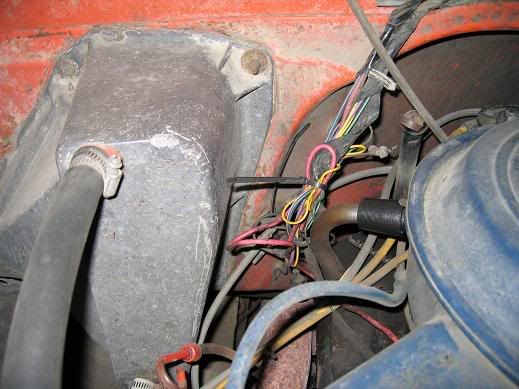 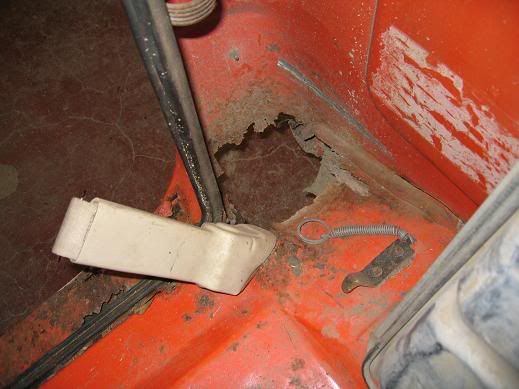 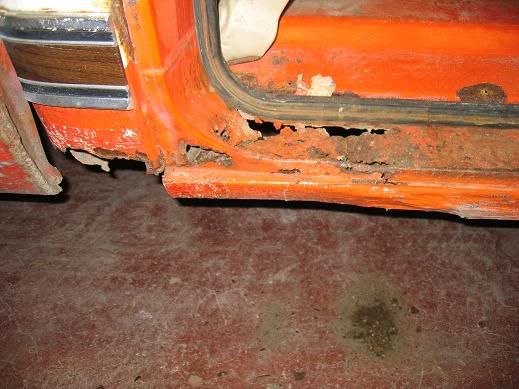 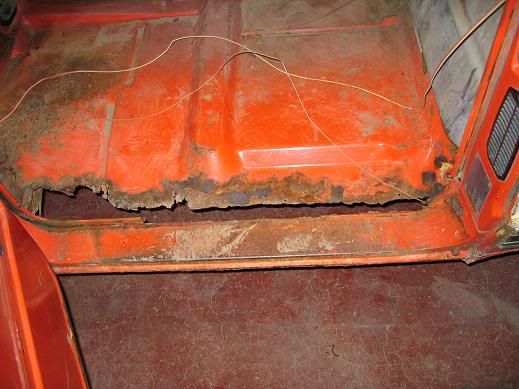 
__________________
1964 Chevy Short Fleet: Tornado 1972 Chevy C10: Fast Orange Secondaries Wide Open |
|
|
|
|
05-18-2006, 12:35 AM
|
#3 |
|
Registered User
Join Date: Dec 2004
Location: Saskatchewan, Canada
Posts: 1,371
|
Re: Fast Orange: Rodstoration
   Well, thats it for now. The cab and box are unbolted, and the wiring harness is out as well. Should I remove the cab to fix the rust (cab supports, rockers, inner rockers, floor pans, cab corners) or leave it on the frame? I assume it would be better to remove it, but I'm not sure. Also, how many circuits should I look for in an aftermarket wiring harness. My stock fuse box has 9 fuses, and the aftermarket one I'm looking at has 12, does that sound like a good number (CD deck, heater, electric choke, all lights, horn etc. No real big options.) Thanks and I look forward to sharing more progress, hopefully going the right direction when I put it all back together.
__________________
1964 Chevy Short Fleet: Tornado 1972 Chevy C10: Fast Orange Secondaries Wide Open |
|
|
|
|
05-18-2006, 12:35 AM
|
#4 |
|
Registered User
Join Date: Dec 2004
Location: Saskatchewan, Canada
Posts: 1,371
|
Re: Fast Orange: Rodstoration
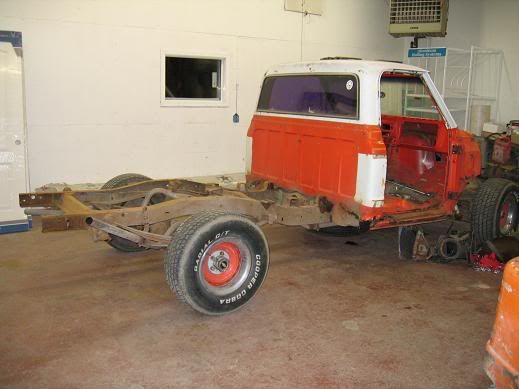
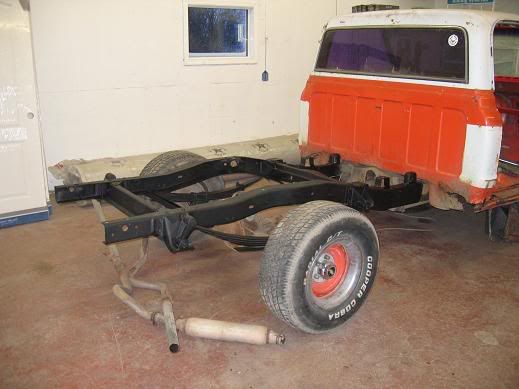
Well, after a lot of grinding, bending, sanding, priming and painting I'm back with another update!! The box is off, and the cab is ready to come off, so I figured I might as well paint the frame, as I hope to never have to tear this truck apart again (or at least not for a long time).
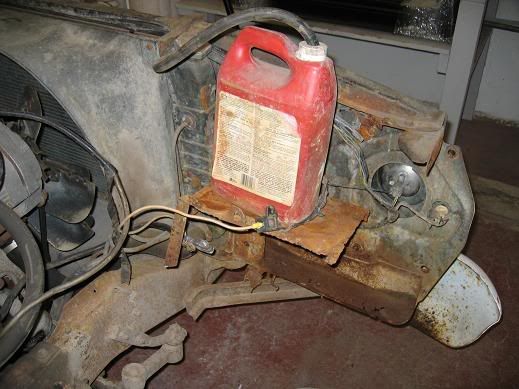
 Once I got the box off, I noticed that there was indeed minor damage to the rear of the drivers side frame rail from when I got rearended. It was straighted with a hammer and a crescent wrench prior to painting.  One rainy trip to the auto wrecker (the most miserable trip ever) the heater and wipers quit. On the drive home I noticed it got louder. One of the rusty old bottles had broken, and was just kind of hanging there. When I took the box off I hit it and broke it right off.  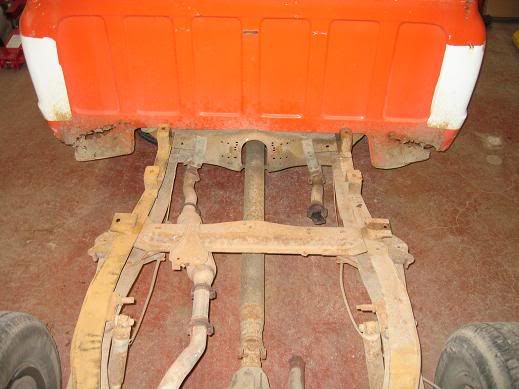 Another area of concern was the shocks, I knew the truck was bouncy and needed new ones, but I never expected to find these. Anyone know when the last time they made Gabriel AjustOMatics was? 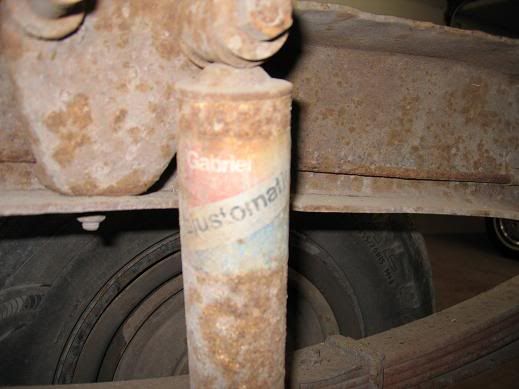 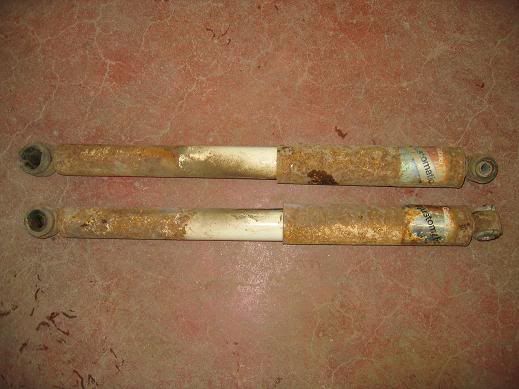
__________________
1964 Chevy Short Fleet: Tornado 1972 Chevy C10: Fast Orange Secondaries Wide Open |
|
|
|
|
05-18-2006, 12:36 AM
|
#5 |
|
Registered User
Join Date: Dec 2004
Location: Saskatchewan, Canada
Posts: 1,371
|
Re: Fast Orange: Rodstoration
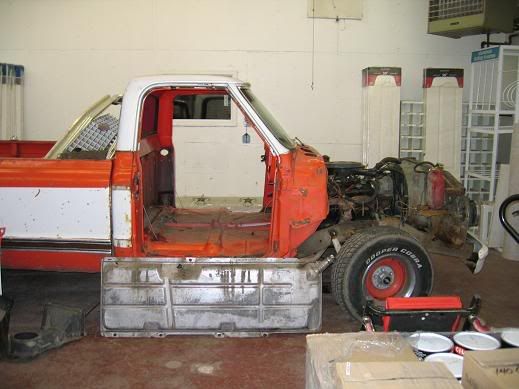
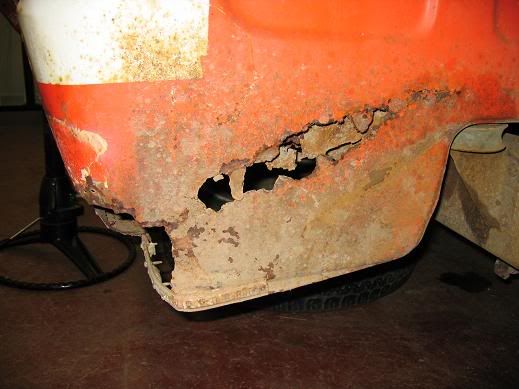
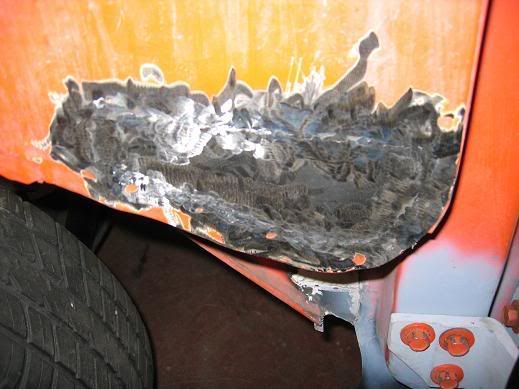
Once everything was out of the way, I noticed the extensive rust damage that my cab corners have suffered. I wondered why the patch panels were so big.....
  Armed with my trusty roller, brush, and spraycan I started on the frame. I wanted to give it that slightly textured look that new truck frames have, so I used a thin foam roller. Here it is in primer. 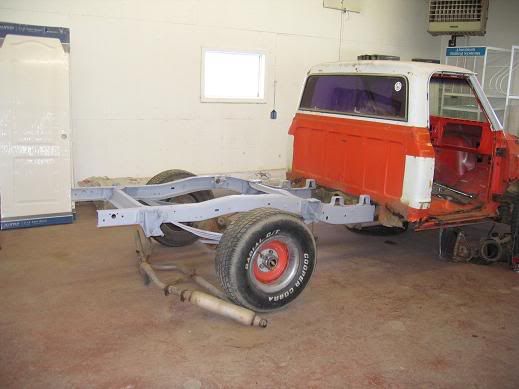 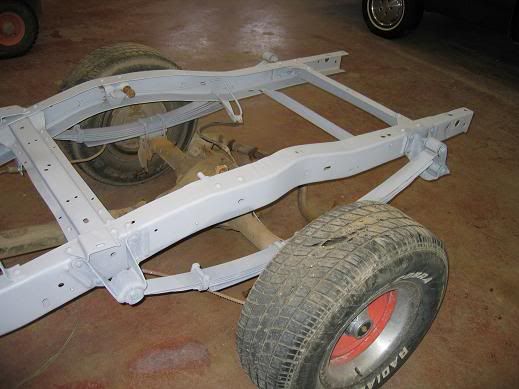 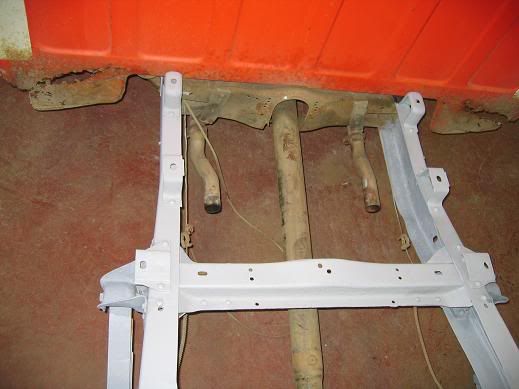 Notice the modified exhaust in the last pic? It's going to be loud as hell for a while, but I figure the kind people on main street miss me owning a vehicle with straight pipes, and I'm not one to disappoint ;D . I will be getting performance mufflers put on, as bottles don't seem to last very well.
__________________
1964 Chevy Short Fleet: Tornado 1972 Chevy C10: Fast Orange Secondaries Wide Open |
|
|
|
|
05-18-2006, 12:37 AM
|
#6 |
|
Registered User
Join Date: Dec 2004
Location: Saskatchewan, Canada
Posts: 1,371
|
Re: Fast Orange: Rodstoration
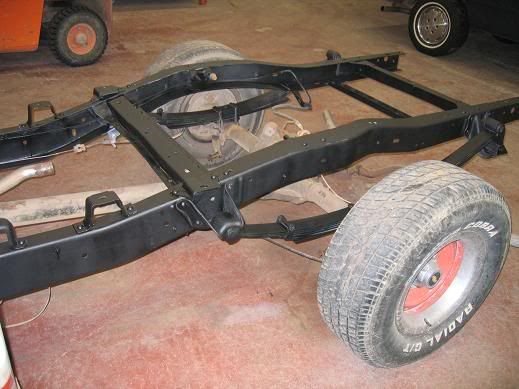
And here it is with a fresh coat of flat black. It looks kinda blotchy in the pic, but it wasn't dry. I checked it today and it dried nice and even. The diff and will be painted by the end of this week hopefully. I'm in the process of scraping about 1" of grease off of it.
__________________
1964 Chevy Short Fleet: Tornado 1972 Chevy C10: Fast Orange Secondaries Wide Open |
|
|
|
|
05-18-2006, 05:47 AM
|
#7 |
|
69fatmotor
Join Date: Oct 2005
Location: bama
Posts: 660
|
Re: Fast Orange: Rodstoration
looking good, keep up the good work.
|
|
|
|
|
05-18-2006, 10:13 AM
|
#8 |
|
67 is sold
Join Date: Apr 2001
Location: Troy, Michigan
Posts: 6,738
|
Re: Fast Orange: Rodstoration
Great thread! Thanks for all of the pics, looks like you have done quite a bit so far! Keep it up, threads like this are an inspiration to many here

|
|
|
|
|
05-18-2006, 07:41 PM
|
#9 |
|
Senior Member
 Join Date: Nov 2005
Location: Round Rock, TX
Posts: 1,100
|
Re: Fast Orange: Rodstoration
Nice job on the truck.
Keep the pics updated. They provide motivation for many of us our here. Thanks, Thomas
__________________
Soon to be selling all but one, or two... Depends on what the Boss has to say....... 67 GMC Shortbed 454 Project more junk and most of it is for sale |
|
|
|
|
05-19-2006, 12:37 AM
|
#10 |
|
Happy to be here
 Join Date: Mar 2000
Location: Cypress, TX
Posts: 39,023
|
Re: Fast Orange: Rodstoration
Nice build thread! looks like some really good progress. Keep the pics and updates coming....

__________________
Follow me on Facebook and Instagram @N2trux.com Articles- "Jake" the 84 to 74 crewcab "Elwood" the77_Remix 85 GMC Sierra "Scarlett" "Refining Sierra" |
|
|
|
|
05-22-2006, 03:47 PM
|
#11 |
|
Next project: 1970 K10
Join Date: Feb 2004
Location: Fort Collins, Colo 80524
Posts: 6,685
|
Re: Fast Orange: Rodstoration
Excellent job! Your patch panels look great! What kind of seam sealer did you use: the caulking gun kind in a tube, or the brush-on kind?
__________________
Bob 1970 Chevy K10 LWB "Goldie" 350/TH350 next project!! 1981 Chevy C10 LWB 355/TH350 - My son's truck LS SWAP FORUM! Tons of LS swap info here! PLEASE CLICK HERE TO SUPPORT THE GREATEST BOARD ON THE NET! CLICK HERE FOR THE FAQ INDEX by KRUE |
|
|
|
|
05-23-2006, 01:15 AM
|
#12 |
|
Registered User
Join Date: Dec 2004
Location: Saskatchewan, Canada
Posts: 1,371
|
Re: Fast Orange: Rodstoration
The seam sealer is the caulking gun kind. I can't remember what brand, it was in a blue and yellow tube. It's nice stuff to work with, but almost impossible to get off your hands.
__________________
1964 Chevy Short Fleet: Tornado 1972 Chevy C10: Fast Orange Secondaries Wide Open |
|
|
|
|
05-23-2006, 01:52 AM
|
#13 |
|
1970 GMC
Join Date: Jul 2004
Location: Idaho
Posts: 95
|
Re: Fast Orange: Rodstoration
Very nice thread, I love the instrument cluster, looks very good.
__________________
MadDog's Website |
|
|
|
|
05-23-2006, 08:12 AM
|
#14 |
|
Next project: 1970 K10
Join Date: Feb 2004
Location: Fort Collins, Colo 80524
Posts: 6,685
|
Re: Fast Orange: Rodstoration
So did you lay it down then spread it out with a puddy knife or your fingers, or just smear it around with the tube? I have both kinds (from Eastwood) and can decide on which to use.
__________________
Bob 1970 Chevy K10 LWB "Goldie" 350/TH350 next project!! 1981 Chevy C10 LWB 355/TH350 - My son's truck LS SWAP FORUM! Tons of LS swap info here! PLEASE CLICK HERE TO SUPPORT THE GREATEST BOARD ON THE NET! CLICK HERE FOR THE FAQ INDEX by KRUE |
|
|
|
|
05-24-2006, 01:07 AM
|
#15 |
|
Registered User
Join Date: Dec 2004
Location: Saskatchewan, Canada
Posts: 1,371
|
Re: Fast Orange: Rodstoration
I layed it down then spread it with my finger. If you use that route, wear rubber gloves,this stuff is gooey!
__________________
1964 Chevy Short Fleet: Tornado 1972 Chevy C10: Fast Orange Secondaries Wide Open |
|
|
|
|
05-24-2006, 08:16 AM
|
#16 |
|
Next project: 1970 K10
Join Date: Feb 2004
Location: Fort Collins, Colo 80524
Posts: 6,685
|
Re: Fast Orange: Rodstoration
Gotcha! Thanks for the tip!
__________________
Bob 1970 Chevy K10 LWB "Goldie" 350/TH350 next project!! 1981 Chevy C10 LWB 355/TH350 - My son's truck LS SWAP FORUM! Tons of LS swap info here! PLEASE CLICK HERE TO SUPPORT THE GREATEST BOARD ON THE NET! CLICK HERE FOR THE FAQ INDEX by KRUE |
|
|
|
|
12-17-2006, 04:43 PM
|
#17 |
|
Registered User
Join Date: Dec 2004
Location: Saskatchewan, Canada
Posts: 1,371
|
Re: Fast Orange: Rodstoration
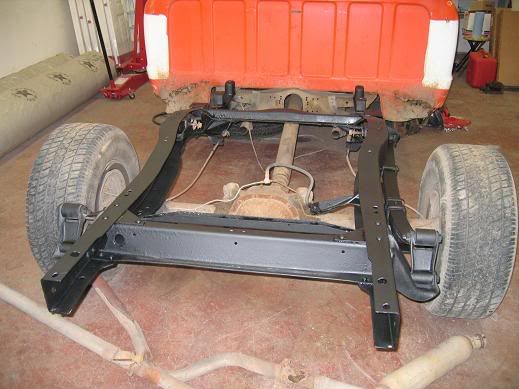
I'm baaaaaaack! As you may have guessed, the project got cancelled...........................Just kidding
 I just took the summer off to have fun, cruise in my other vehicles and take in a few shows etc. So, without further interruption, here we go again! I just took the summer off to have fun, cruise in my other vehicles and take in a few shows etc. So, without further interruption, here we go again!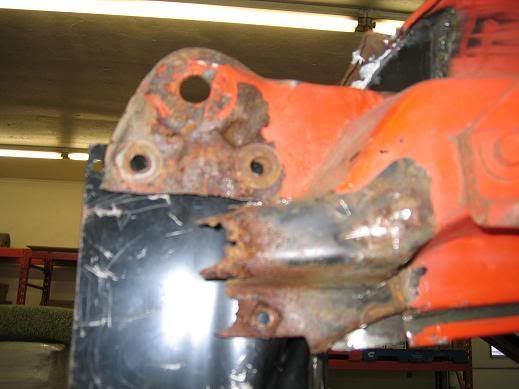 That is the old rusty front fender mount/front cab upright. Rusted, destroyed......... 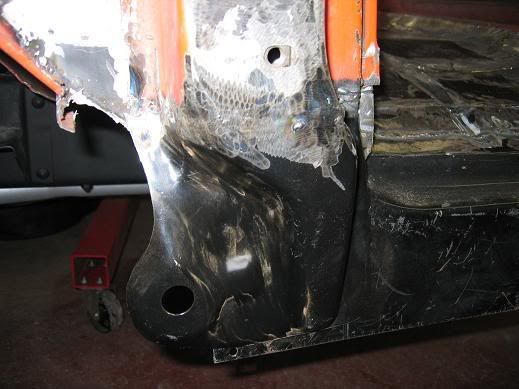 But with a little TLC, a grinder and a mig welder, it looks a lot better (don't forget the Goodmark patch panel either.)  Since it's the evver classic "Frame Off Resto" that we hear so much about, I figured I'd better get a shot of the bare rolling chassis, since I never plan on seeing it this way again.
__________________
1964 Chevy Short Fleet: Tornado 1972 Chevy C10: Fast Orange Secondaries Wide Open |
|
|
|
|
12-17-2006, 04:44 PM
|
#18 |
|
Registered User
Join Date: Dec 2004
Location: Saskatchewan, Canada
Posts: 1,371
|
Re: Fast Orange: Rodstoration
  Just a shot showing how close I'm getting. It's scary to think that someday I'll drive this thing again. The goodmark panels are top quality, and fit really well with minor tweaking. At first I thought they sucked, but after putting new pins and bushings in my door hinges, it went a lot better. 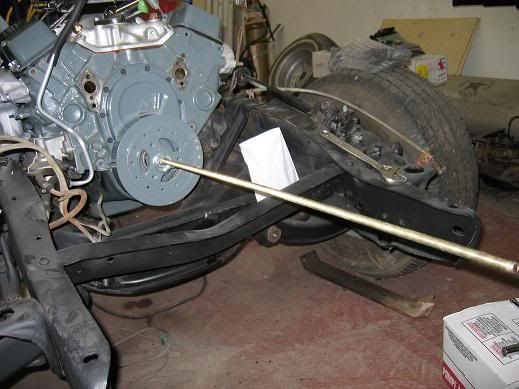 And here's my home made balancer installer. It worked great! I know, I should have shortened the threaded rod, but isn't this a lot funnier????? 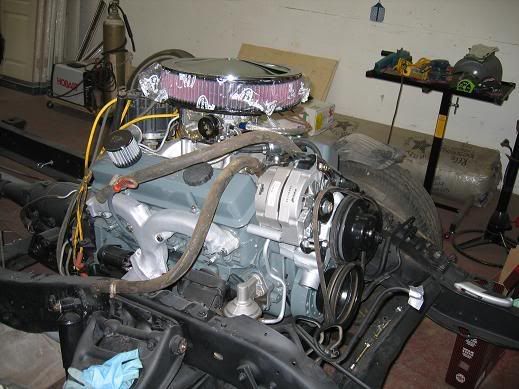 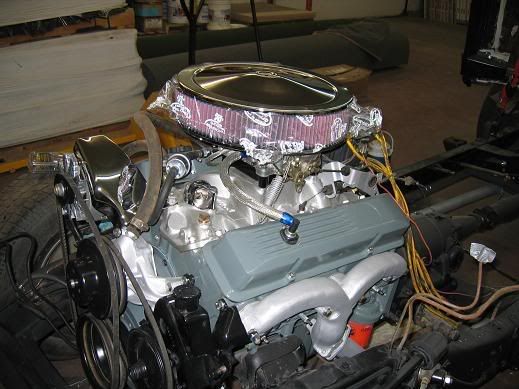 And my pride and joy, the only real finished part of the truck, the engine. It looks a lot better now than it did when I got the truck, and with all the new parts on/in it, it should perform better too!
__________________
1964 Chevy Short Fleet: Tornado 1972 Chevy C10: Fast Orange Secondaries Wide Open |
|
|
|
|
12-17-2006, 04:45 PM
|
#19 |
|
Registered User
Join Date: Dec 2004
Location: Saskatchewan, Canada
Posts: 1,371
|
Re: Fast Orange: Rodstoration
Another update. This is the most current stuff I have pics of, but I have a feeling this week is going to be a big one.
 Both kick panel vents were rusted out from filling with water, dirt, leaves, etc. 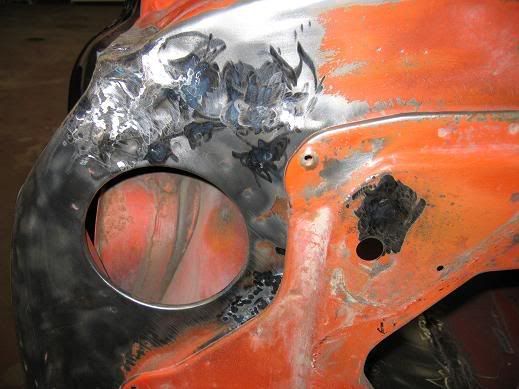 Anything remotely close to the heater was as well, so more welding had to take place. 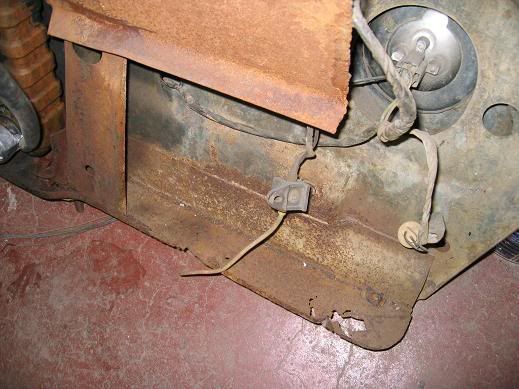 The radiator support was BAD. The original battery tray had rusted off years ago, taking part of the rad support and the inner fender with it. I assume the odd leaky battery was the cause.... That ugly piece of tin in the top of the pic was the new battery tray. It was jagged from being cut with a torch, and had been stick welded to the inner fender and the rad support. I have since bought an OEM style one. 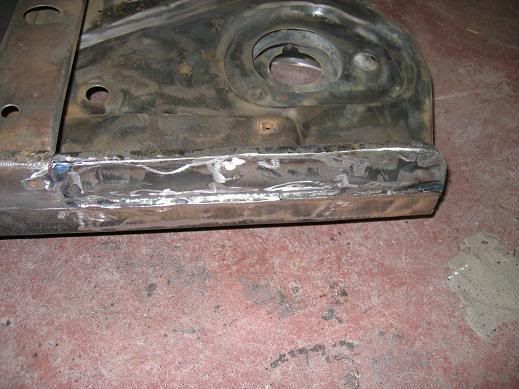 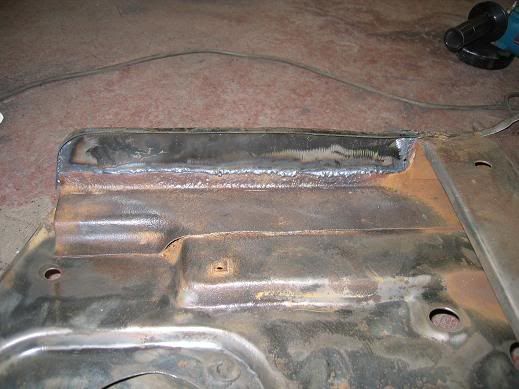 And here's the finished product (minus the nuts that are now welded to it. It will be getting an optima this time, so hopefully there won't be any more problems like this). This week I hope to get the old fuel filler hole shaved, the antenna hole shaved, the doors lined up, and the cab corners and rockers on. Am I asking for a lot? Sure, but I work on it for 5-7 hours every night, and the whole weekend. It's doable 
__________________
1964 Chevy Short Fleet: Tornado 1972 Chevy C10: Fast Orange Secondaries Wide Open |
|
|
|
|
01-08-2007, 01:39 AM
|
#20 |
|
Registered User
Join Date: Jan 2007
Location: troutdale oregon
Posts: 169
|
Re: Fast Orange: Rodstoration
its looking good just hope you have the energy to keep going .im kinda doing the same thing to my 71 but with out the cab removal ill post pics soon...keep it up and it'll come around keep the pics coming...jc
|
|
|
|
|
12-17-2006, 09:19 PM
|
#21 |
|
Senior Member
Join Date: Jun 2006
Location: Oregon City, Or
Posts: 758
|
Re: Fast Orange: Rodstoration
The truck has come along way. Keep up the good work.
|
|
|
|
|
12-17-2006, 09:30 PM
|
#22 |
|
someday it will be done!
Join Date: Sep 2004
Location: Lloydminster,AB. Canada
Posts: 1,620
|
Re: Fast Orange: Rodstoration
jeez man you're catchin up to me in a big hurry!Lookin great so far.
__________________
'72 C-10 Proud owner of a million new and used pieces that used to be and will once again be(god willing) a testament to the term "they don't build em like that anymore.   '80 LWB 2wd beater '67 GMC long fleet (cab donor) '66 long step (parked till it's turn comes around) '65 short step (parts truck that will donate it's bed and possibly frame to the '66) '06 Grand Prix wife's car (she hardly lets me touch it) my pics |
|
|
|
|
12-17-2006, 10:19 PM
|
#23 |
|
Registered User
Join Date: Sep 2003
Location: Franconia,N.H.
Posts: 1,029
|
Re: Fast Orange: Rodstoration
lots of progress getting done there. now come to my garage and do some work on mine so i can have it when i get my drivers license
__________________
(Only) Member of the CPNE Fan Club Aint that the truth") 67 C-10 350 with 3-speed tranny and 308 gears swb step 82 Z28 Camaro 355 small block over 350 hp and a borg warner super t-10 (blown engine) 72 Chevy K20 Suburban (future project) 70 Chevy K20 now 68 GMC K2500 2003 Chevy 2500hd ccsb 4X4 (daily driver) Last edited by CPNEJR; 12-17-2006 at 10:21 PM. |
|
|
|
|
12-18-2006, 08:12 PM
|
#24 |
|
Registered User
Join Date: Sep 2006
Location: Bow Island, AB, Canada
Posts: 166
|
Re: Fast Orange: Rodstoration
i like that a lot man good job
|
|
|
|
|
12-24-2006, 06:10 PM
|
#25 |
|
Registered User
Join Date: Mar 2002
Location: southern calif.,usa
Posts: 200
|
Re: Fast Orange: Rodstoration
i am going to be doing the same thing to my 70. what did you use to cut the floor with ? and what brans/amp welder did you use ? your doing a grewat job.
__________________
70 c10 stepside ,350v8, m-20 4 speed 
|
|
|
|
|
| Bookmarks |
|
|


 Hybrid Mode
