
|
Register or Log In To remove these advertisements. |
|
|
|
|||||||
|
|
Thread Tools | Display Modes |
 03-13-2011, 01:37 PM
|
#1 |
|
Registered User
Join Date: Aug 2010
Location: West Chicago, IL
Posts: 24
|
Installing a CPP C-Notch kit on a '66 shortbed
I just finished installing a CPP C-Notch kit on my '66 shortbed Fleetside. My truck has a 5"/6" drop. The rear is lowered using Classic Performance springs, adjustable panhard bar, drop shocks and a shock relocation kit. I didn't have a problem with the rear hitting the frame but I do want to do some towing so the notch will give me about 5" more travel.
First, here are CPP's online instructions: http://www.classicperform.com/tech_a...ch/c-notch.htm What they don't tell you is you first need to pull the springs and cut the old bump stops off. I used an angle grinder to cut the top bumpstop rivet off, wedged it out and then use a reciprocating saw to get the next two. 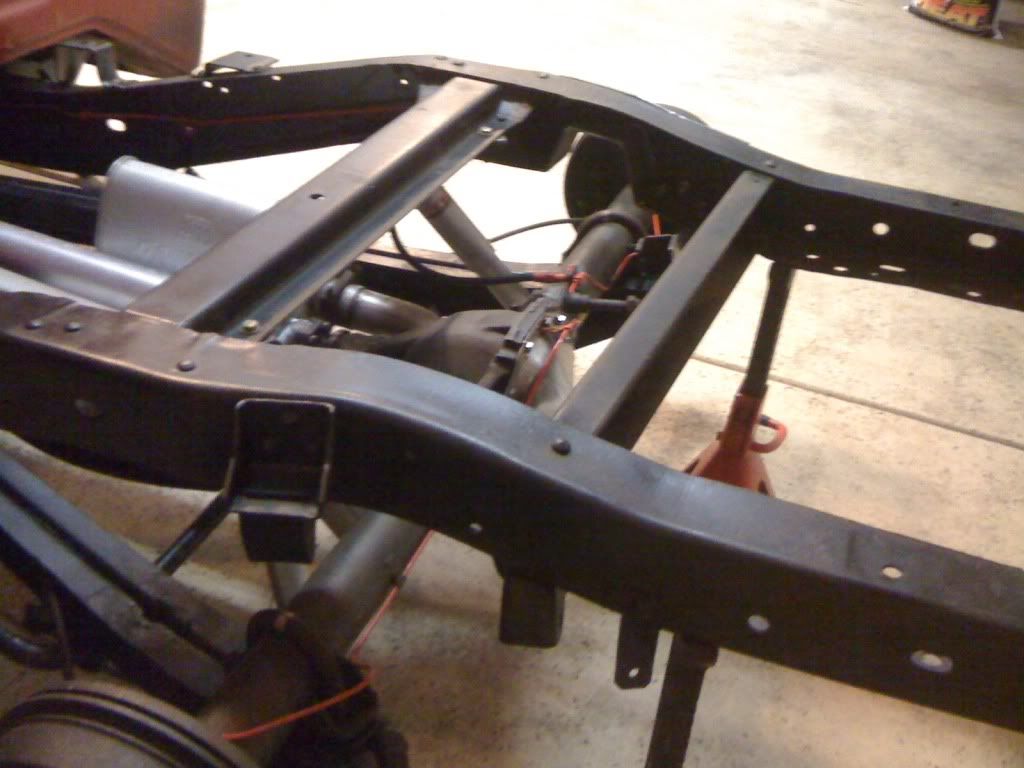 If you don't have a right angle drill, you need to drop the rear end and trailing arms to drill holes in the bottom of the frame. They say you can do this with the bed on, good luck!!! I used jackstands to support the frame on both sides of the cut. 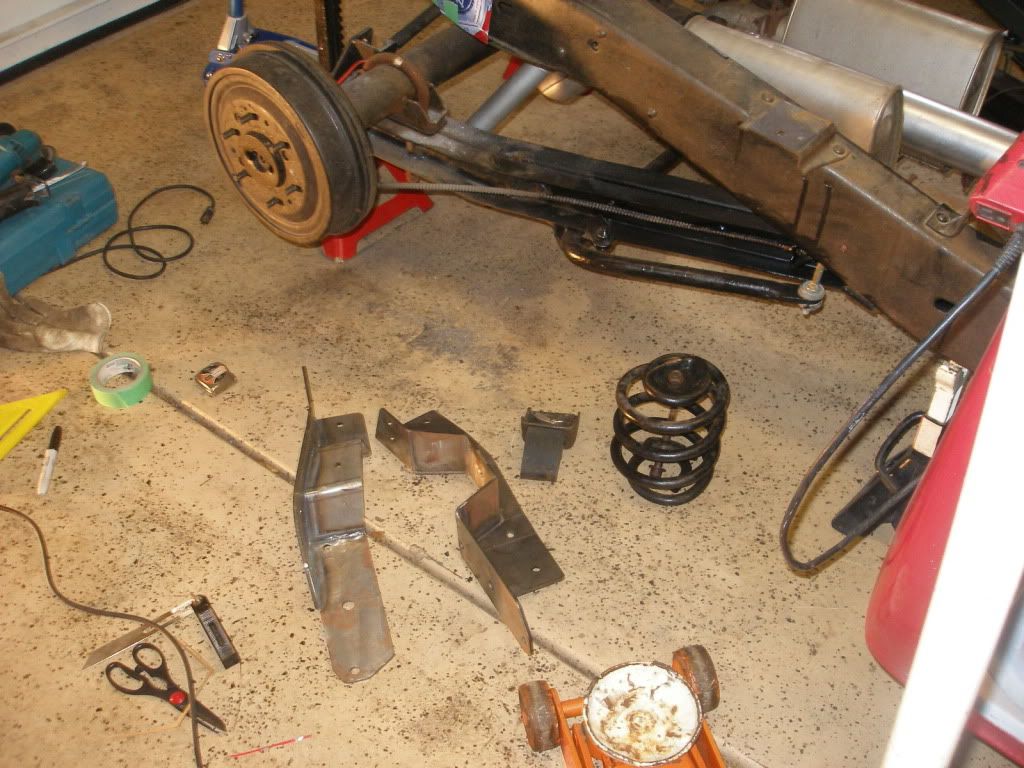 They tell you to line up the front of the notch with the back of the oval shaped holes in this pic. They don't tell you to cut off part of the coil spring mount where it hangs over the frame. The important part of the line up is making sure the hole on the bottom of the notch lines up with the hole for the coil spring mount bolt. I found mine needed to be about 1/8" forward of the back of the oval shaped hole. 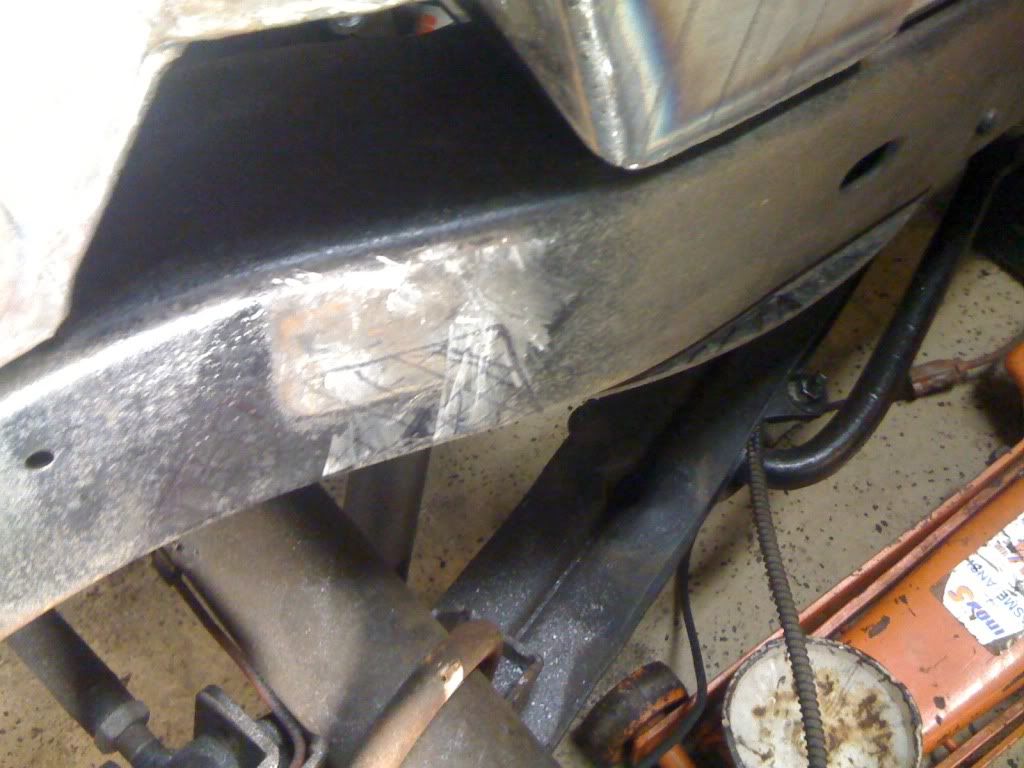 Next, I made a template and marked the frame. Drink the PBR after using the power tools! 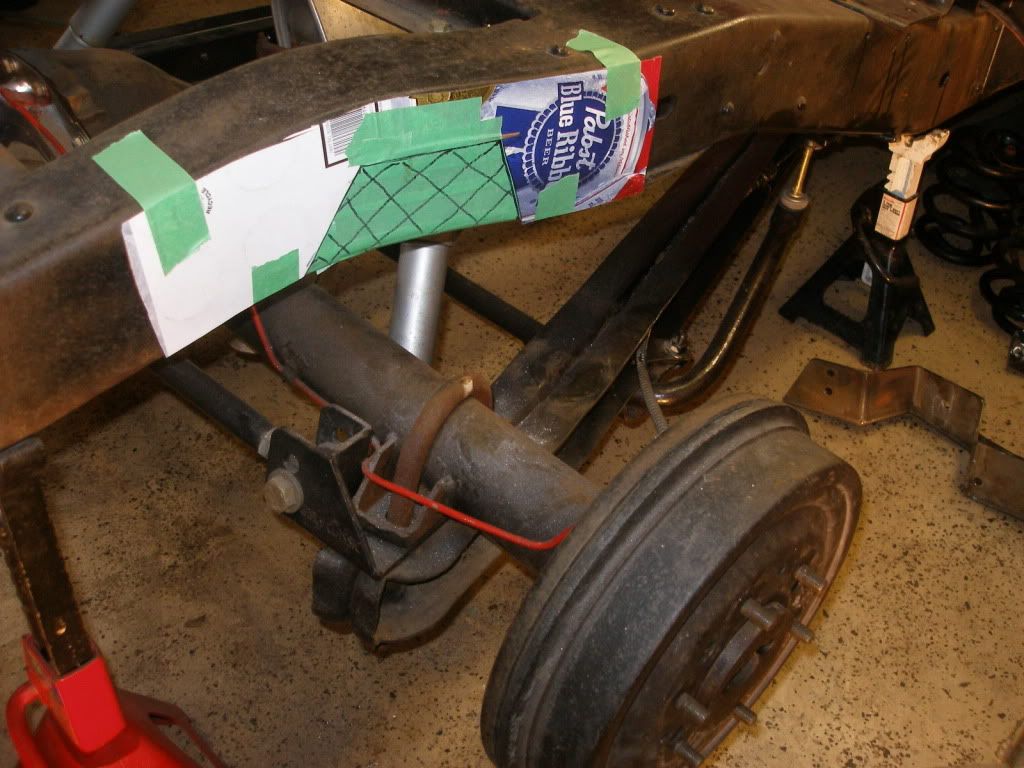 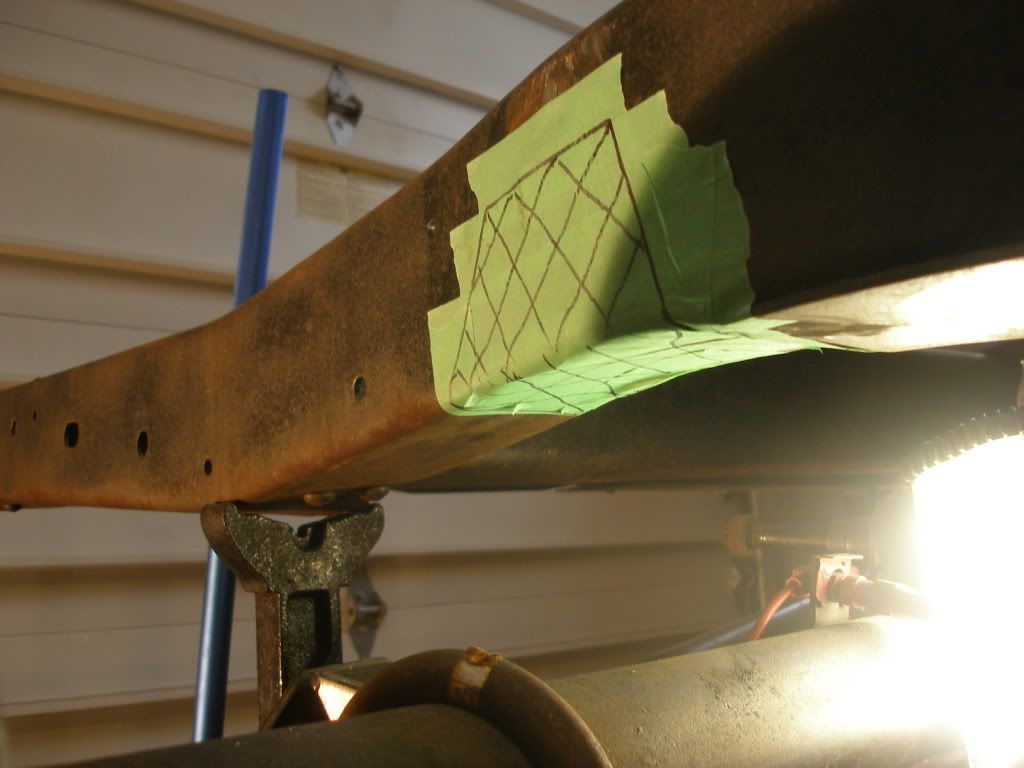 Then using a thin cut off wheel and a reciprocating saw I cut out the notch. The bottom of the frame is cut at a 90 degree angle to the face of the frame. 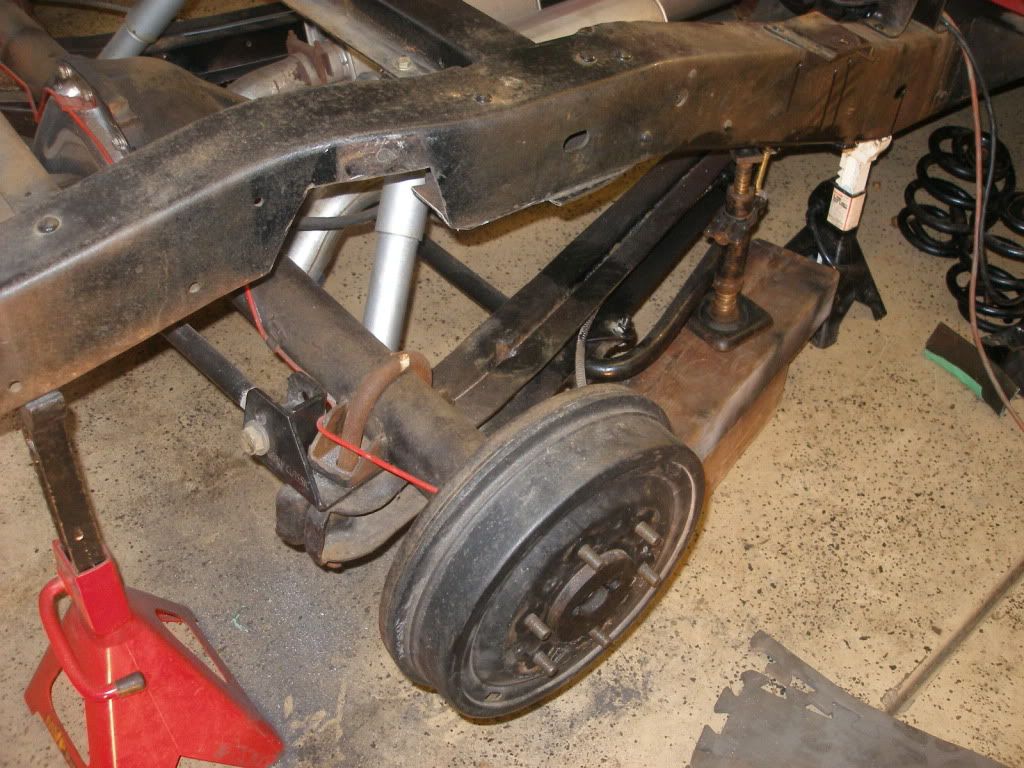 I then used a cut off wheel to remove any rivet heads from the bottom of the frame and I cut off part of the coil spring bracket where it overhangs on the side. The C-Notch is now ready to be clamped in place for a trial fit. Use the coil spring bolt to line it up and c clamps to pull it tight. 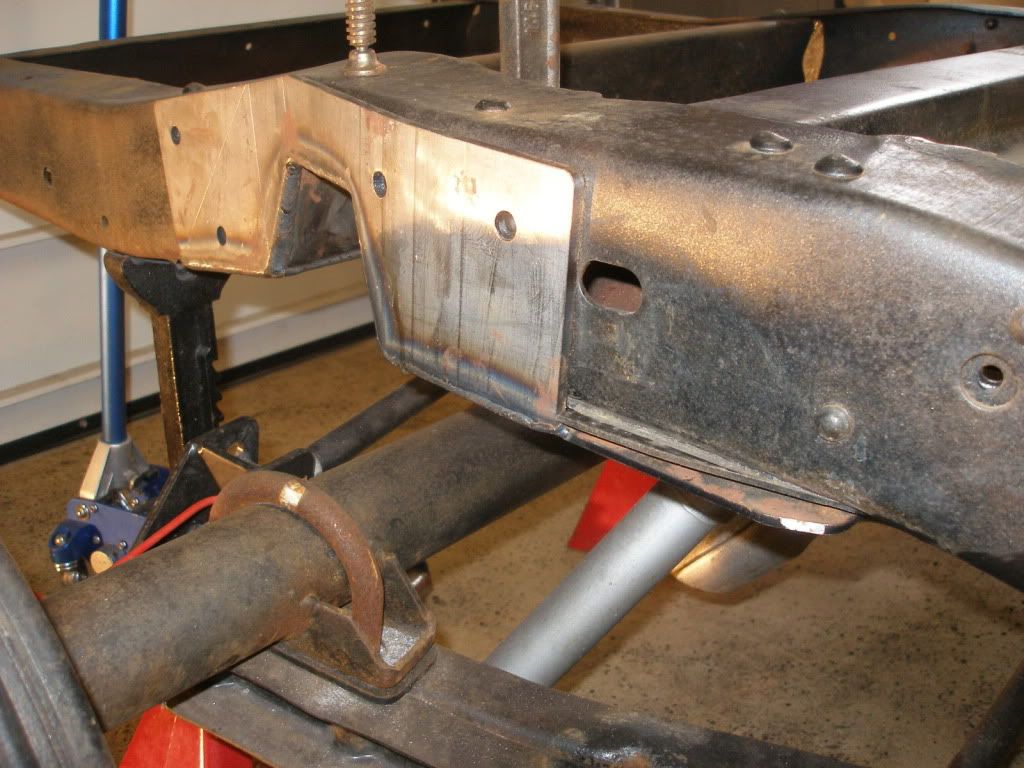 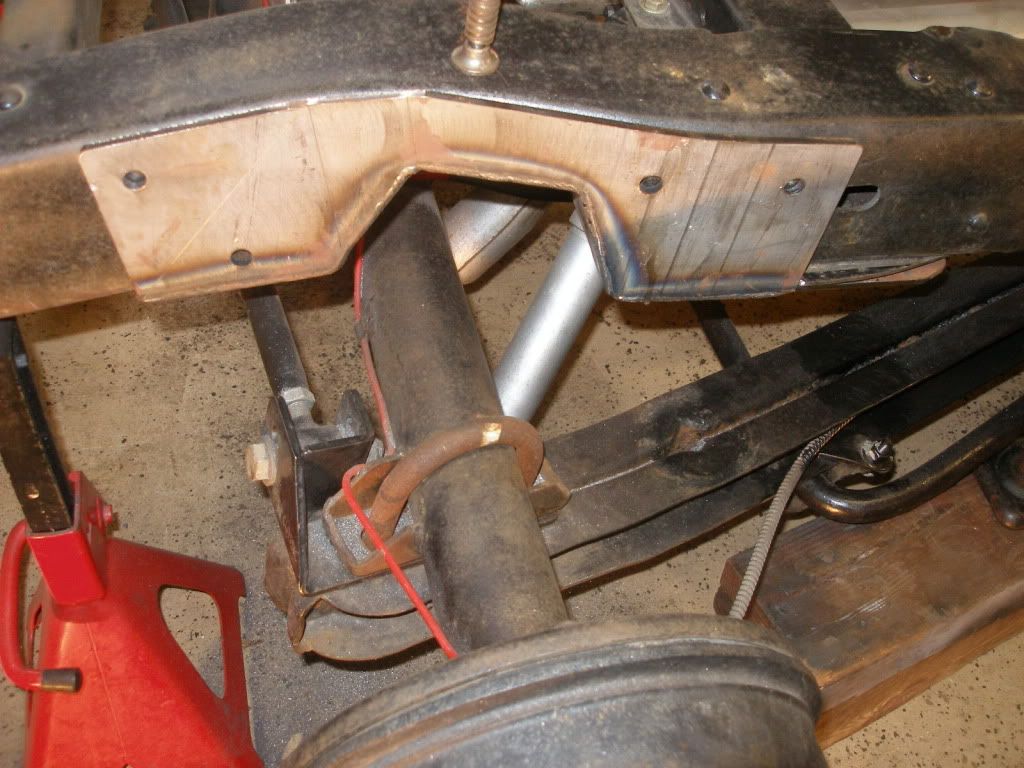 You are supposed to be able to use some of the rivet holes for the bolts. Unfortunately, I found the C-Notch holes to be about 1/4" off from the rivet holes. So DO NOT punch out the rivets yet! I used a 7/16" drill bit to start the holes so they would be centered, then went to a step drill and then back to the 7/16". It was a long drilling process with 16 holes to be done. After I was through the rivet head, the remaining rivet was easy to chisel/punch out. some of the holes were a little elongated but there was still enough material to keep the bolts from moving. I needed to buy two slightly longer Grade 8 bolts for the front two bolts on the bottom. 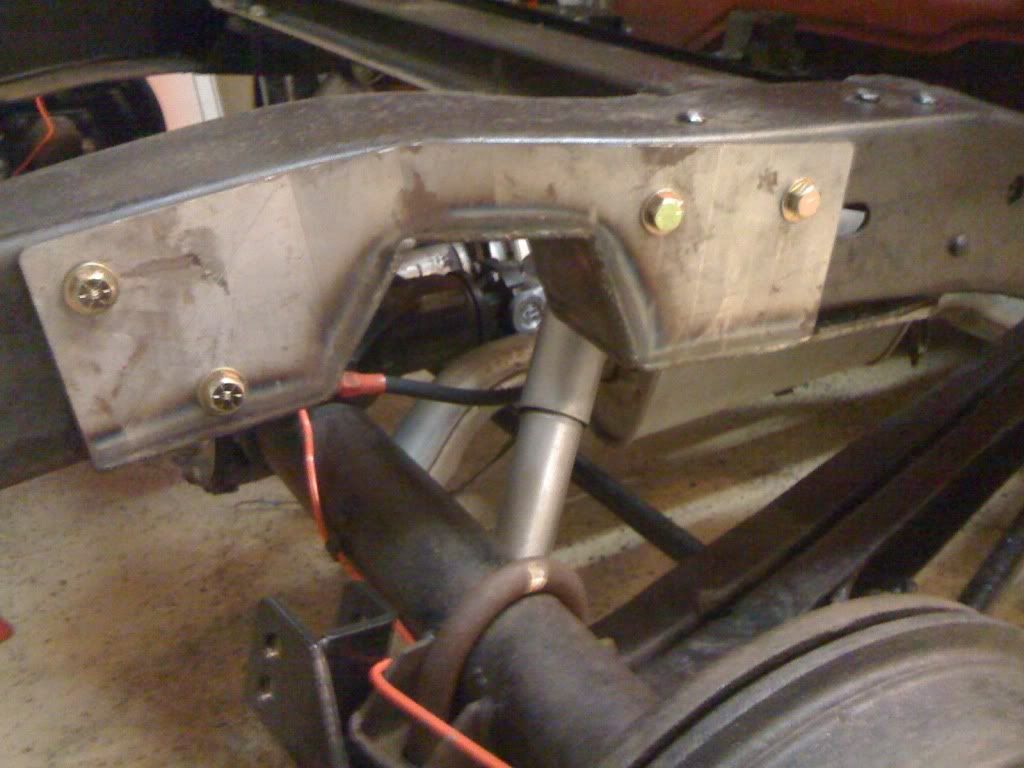  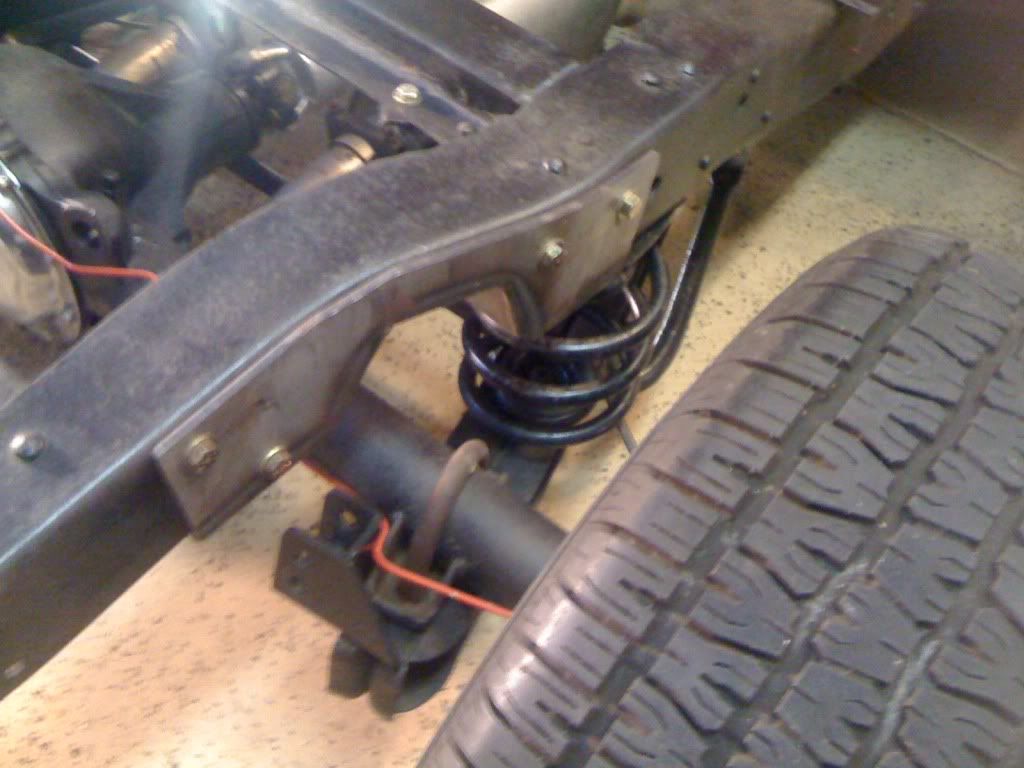 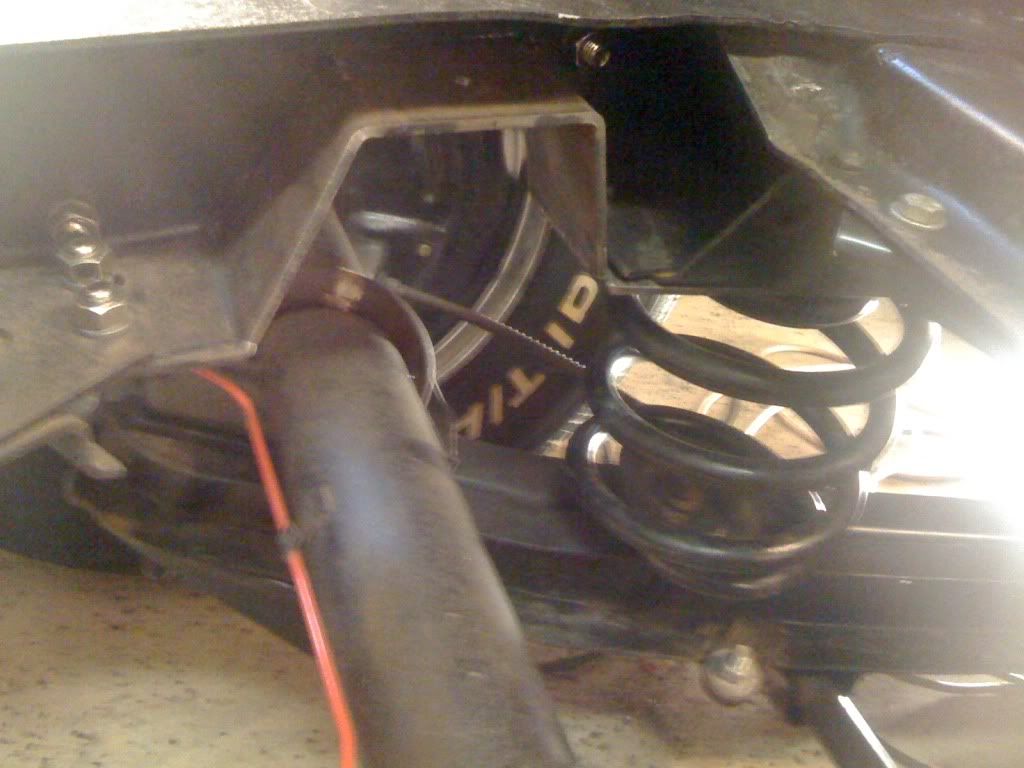 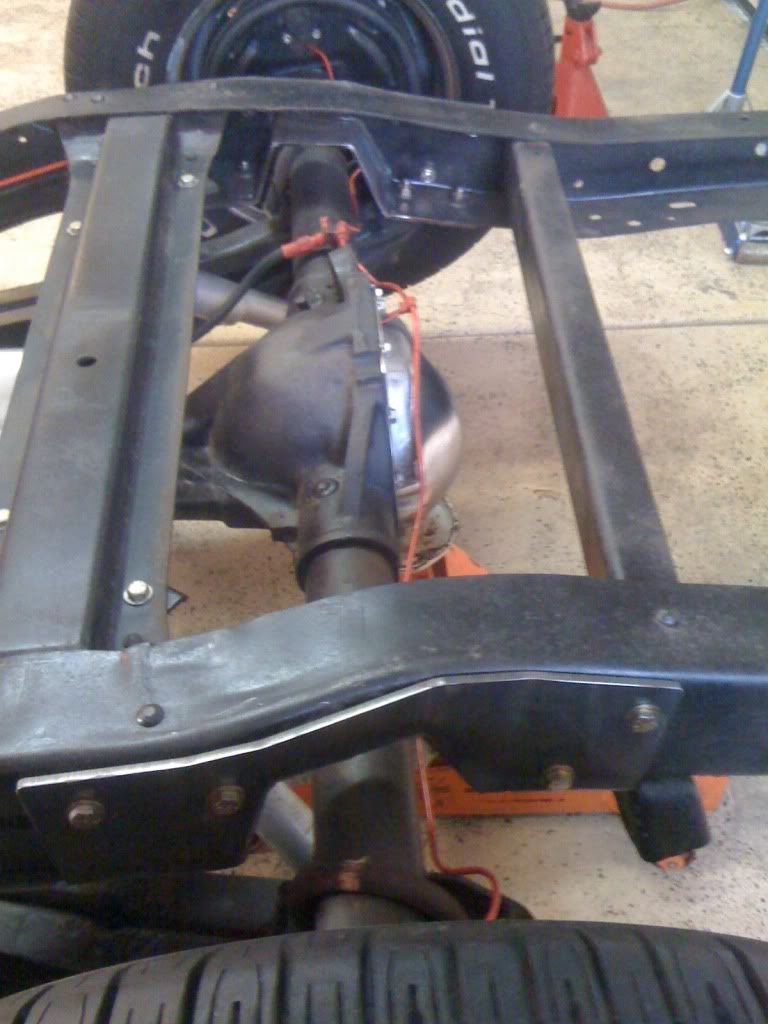 All done, I used a BFH to beat in the top edge to keep water from ponding in there. I might run a weld bead around the entire notch just to be safe. A few more pictures here: http://s1093.photobucket.com/albums/...view=slideshow So in all, not a bad product but the instructions could be better. Next step is to install a hitch receiver and then coat everything in Chassis Saver paint (it is like POR-15). |

|

|
| Bookmarks |
|
|


 Threaded Mode