
|
Register or Log In To remove these advertisements. |
|
|
|
|||||||
 |
|
|
Thread Tools | Display Modes |
|
|
 09-11-2017, 12:48 PM
|
#1 |
|
Registered User
Join Date: Nov 2014
Location: Oakland, CA
Posts: 114
|
Re: Kell's Two Cents - 1946 build
Hey any of you guys running tanks under the beds in your truck, how/where are you running the breather vent?
|

|

|
|
09-11-2017, 06:13 PM
|
#2 | |
|
Registered User
Join Date: Dec 2010
Location: washington NJ
Posts: 766
|
Re: Kell's Two Cents - 1946 build
Quote:
 It's amazing how many people have issues with the gap between the booster and the MC You would think they would set the proper gap at the factory when it is assembled. I still have the same problem as you. I have zero pedal for the first 1-2" then I get a good pedal. It may be because I have a small leak at the rear residual valve. When I address that issue I think I am going to try an 1-1/4 MC. |
|
|
|
|
|
09-18-2017, 02:33 AM
|
#3 | |
|
Registered User
Join Date: Nov 2014
Location: Oakland, CA
Posts: 114
|
Re: Kell's Two Cents - 1946 build
Quote:

|
|
|
|
|
|
09-18-2017, 02:53 AM
|
#4 |
|
Registered User
Join Date: Nov 2014
Location: Oakland, CA
Posts: 114
|
Re: Kell's Two Cents - 1946 build
well folks, I've been on a real hot job this week, and glad to say I finally got it all knocked out. I kept saying that once I'm up and running then I will really be getting to work the kinks out, and so far that is holding true, so this all good. I trouble shot it all Monday, then only had from about 6 PM after work each day to get a couple hours in, but finally got a full day on the truck today and am back up and solid
So basically I'd have the truck running and idling and everything would be looking good, sounding good. Then I'd run the truck down the block and I'd come back dripping just a ton of oil... I came to find out that at idle there wasn't enough oil pressure to cause any issues, but soon as I'm up in RPM's down the street it would be enough pressure to have oil coming out somewhere in the rear of the engine. First I confirmed it wasn't the oil pressure sender or the oil pressure switch. It wasn't, but I eventually had to pull the pressure switch because it was blocking my view of where it was actually coming from. I had it in the oil port on the top of the block at the back of the intake manifold, and replaced it with a 1/8" brass plug. From there I was able to clearly see an area where oil was seeping right out between the intake manifold and the block. I pulled it all apart to have a look and pretty quickly was able to see what was going on. On the front and the back strips you create your own gasket with RTV, and it's a shame cause somehow right in this one area I must not have put it on thick enough and I could see on either side that the seal wasn't getting made 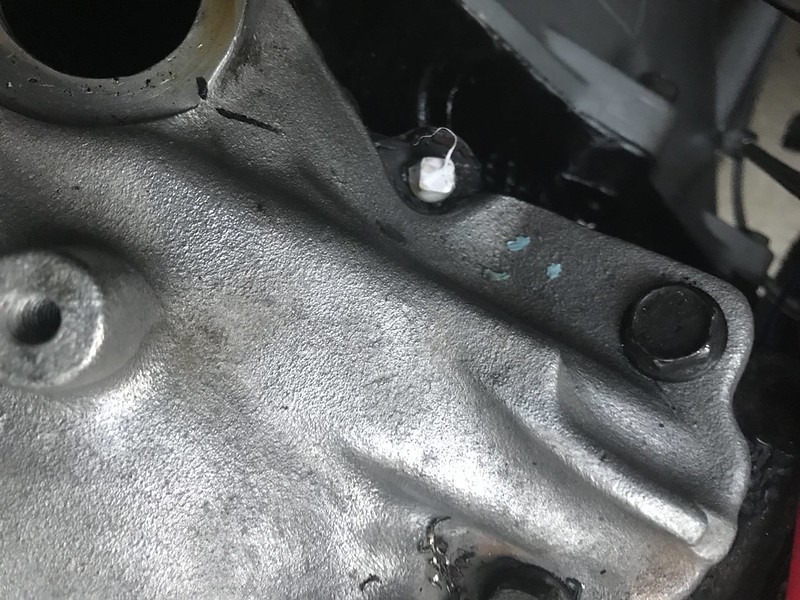  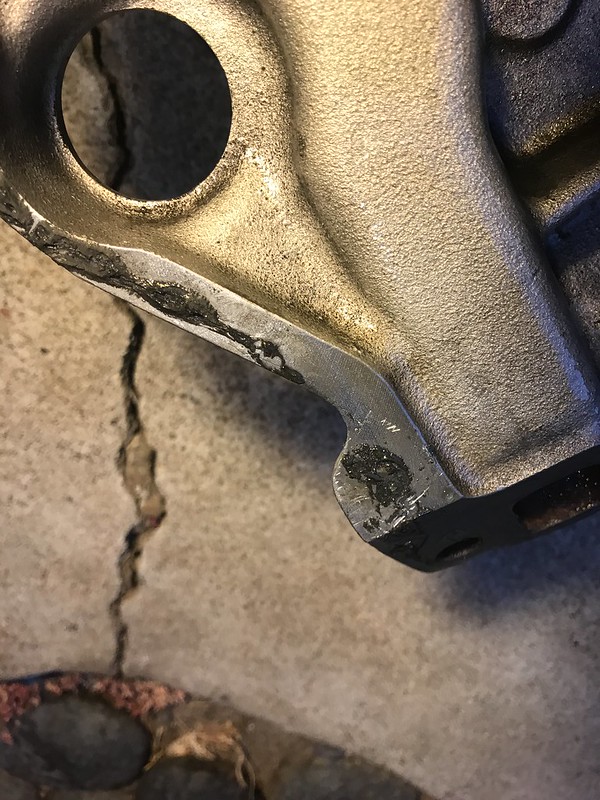
Last edited by gokellurself; 09-19-2017 at 12:55 AM. |
|
|
|
|
09-18-2017, 03:44 AM
|
#5 |
|
Registered User
Join Date: Nov 2014
Location: Oakland, CA
Posts: 114
|
Re: Kell's Two Cents - 1946 build
Changing out an intake manifold is no big deal, right... but no, it keeps going. I saw this little area of coolant down in the engine area and started being concerned about coolant crossing over and getting into the oil. I figured it was just residual coolant from the intake manifold/block that had fallen down in there, but I figured I'd just drain my oil and see what it was looking like
Sure enough it was milky, and after a while of letting the pan settle out you could tell that the coolant had separated itself and was sitting in a fine layer on top of the oil. Now, I have to be fully transparent here and own up to what mistakes I had made when initially building my top end... I was a bit hasty at the time for sure, I checked the photo dates during that time and it was over a year and a half ago that I had initially done it. But I remember not cleaning off any of the bolt threads, and I remember straight up dipping the bolts in oil then bolting the heads down. Big mistake. At this point I'm surprised I wasn't leaking blinker fluid as well.. pretty much the only thing I did right was the torque spec and sequence Now if it were only coolant in the oil, I would have considered trying to change and add sealant to each bolt one at a time. But since I had the intake off already, I in a way felt a responsibility to take it all apart and attempt to do it properly. So this time I actually chased all the threads, including the ones on the block, I cleaned up all the mating surfaces, got new gaskets and grabbed some teflon sealant. I drained all the coolant from the block and got the rest of it torn down one evening after work. I had it all back together Friday and just let it sit til I could get back over there Sunday to do all the final reassembly stuff and fill all the fluids up again. I ran it for a while today and so far so good! A few trips up the block and back and so far not a drop. As far as coolant in the oil goes though, I'm gonna run it again tomorrow and then go ahead and change the oil again this week and see how it's looking. Even if it's good to go Im hoping this oil change will help get any of the extra moisture out that had gotten in there initially. And if the oil is milky again then, well... idk what to do so pray for me Also, one minor fix that I took care of all at the same time was that the tensioner pulley was too close to the radiator fan. I had noticed it before but being as it wasn't a spinning part I paid it little mind, but I didn't consider the fact that the tensioner is spring loaded, so once the engine was running it would move just enough and create like a tapping noise, bumping on the fan housing. I had mounted the fan dead center on the shroud so while I had everything apart I went ahead and pulled the shroud and shifted the fan up and to the right and drilled new holes. Plenty of clearance now I tried to clean up my spark plug wires a bit too by running them on the under side of the headers, but really they're not quite long enough on the passenger side to do it. Looks a little better though, I'll take what I can  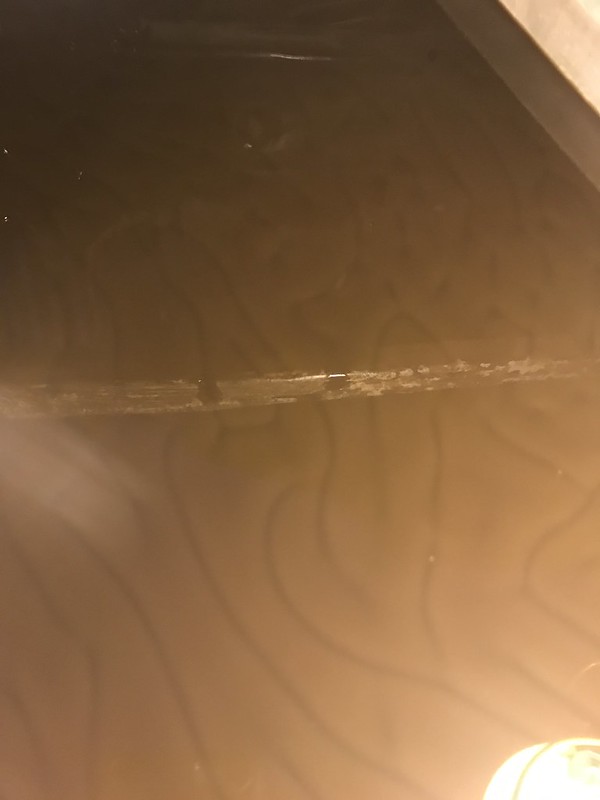 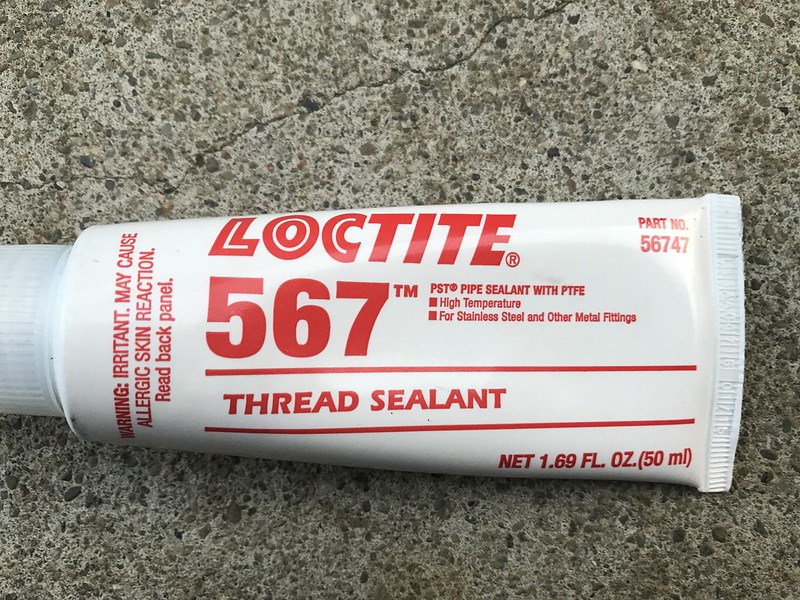 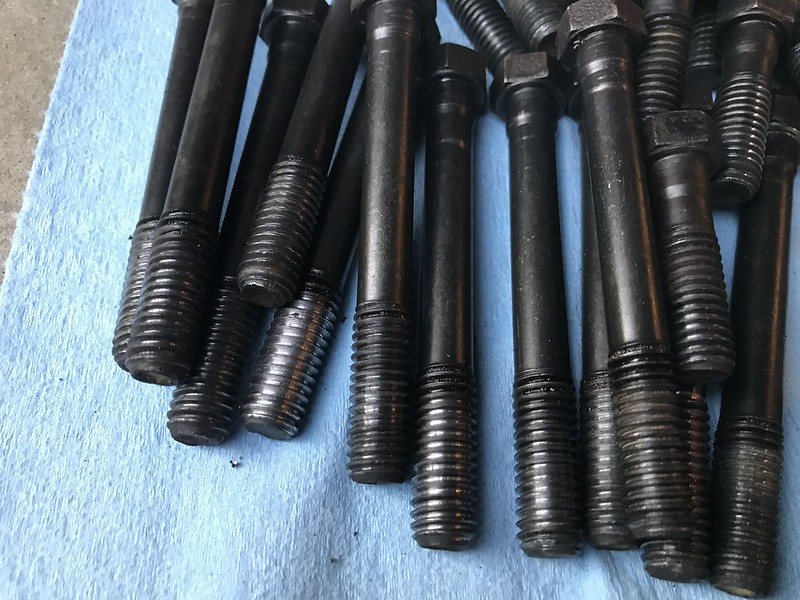 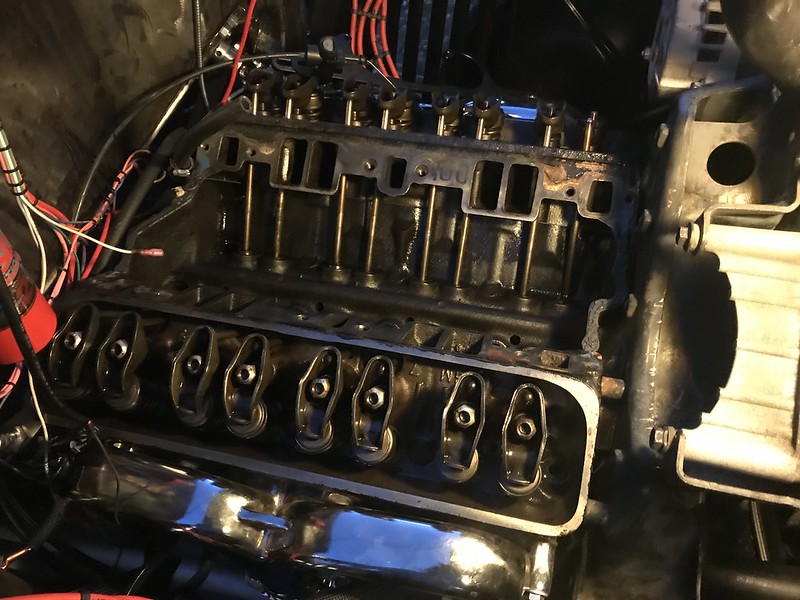 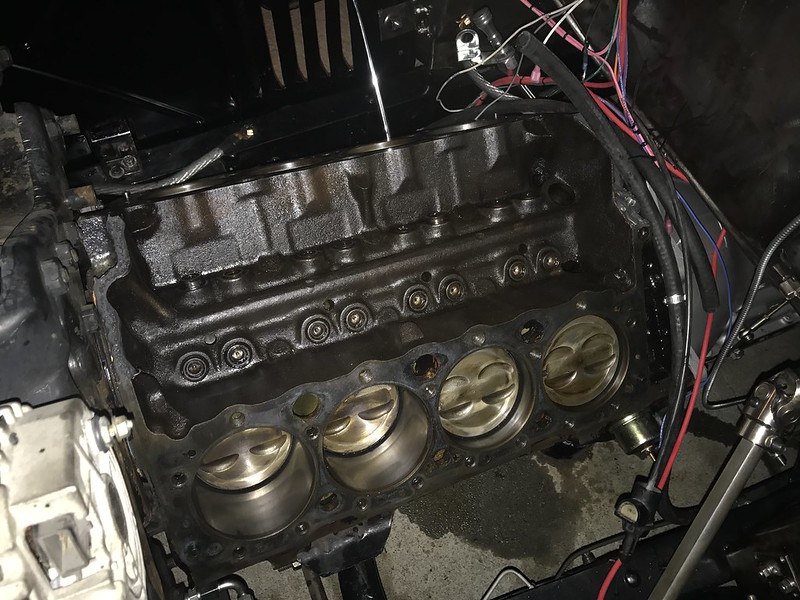 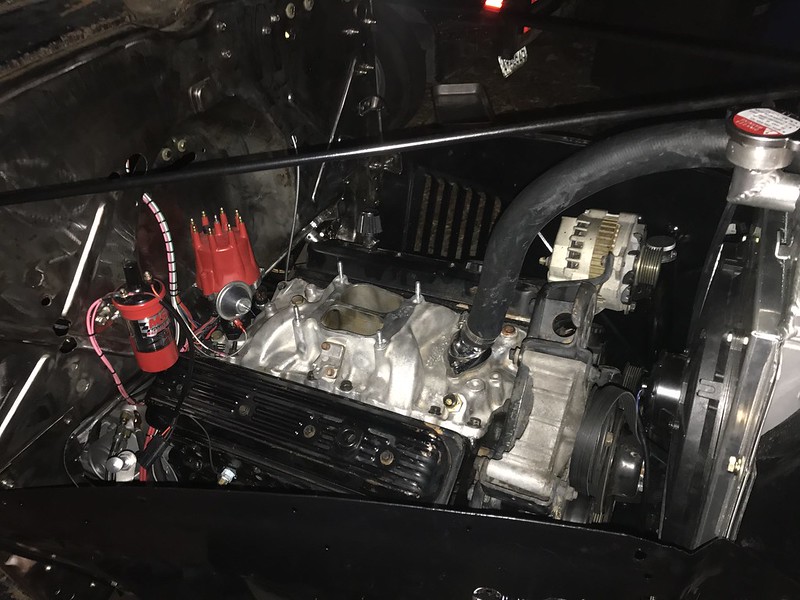  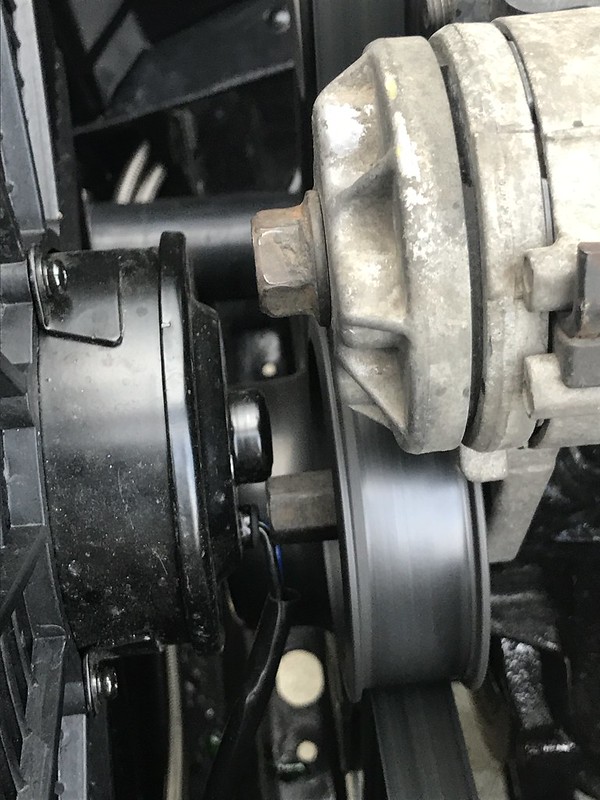 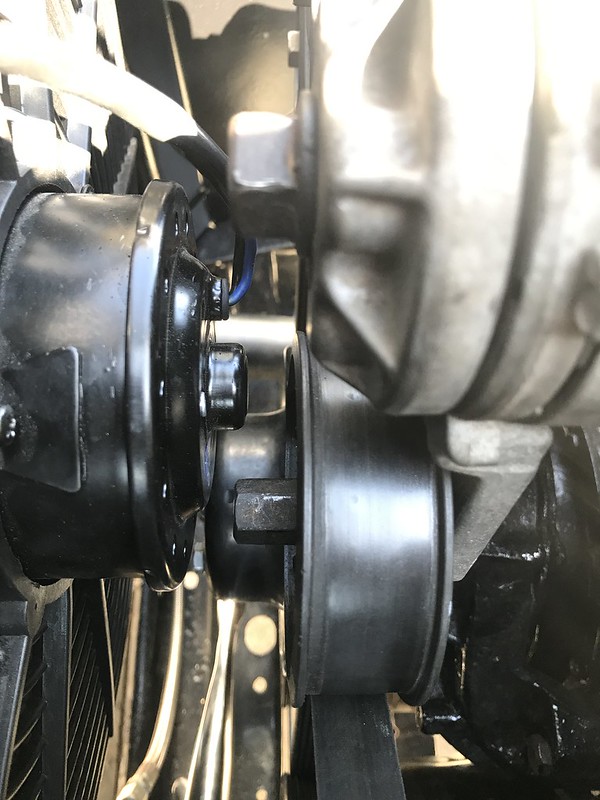
Last edited by gokellurself; 09-19-2017 at 01:39 AM. |
|
|
|
|
| Bookmarks |
|
|


 Hybrid Mode
