
|
|
|
 12-12-2008, 11:38 AM
|
#1 |
|
Its Deja Vu time again
Join Date: Aug 2008
Location: Marysville, North of Seattle WA
Posts: 815
|
Re: My 1965 build thread
Horizontal as well. Keeps the wires up nice and tight otherwise your going to have to have a big fat wiring loom to the left of your Fuse Box.
As for the unspoken rule I agree what the heck is up with that? Of course I worked on a Honda once and it had a split fuse box half behind each door and it really confused the heck out of me. |

|

|
|
12-12-2008, 02:46 PM
|
#2 |
|
Registered User
Join Date: Apr 2001
Location: DALLAS,TX
Posts: 21,923
|
Re: My 1965 build thread
I also like the horizontal but . . ..... along those 'un-spoken-rules' mentioned, I think future service might be easier if they were coming out the side & then routed 90° up to keep them out of the way. This would allow some extra slack should the need for repairs sneek up on you (not that anything you install would fail).
__________________
67SWB-B.B.RetroRod 64SWB-Recycle 89CCDually-Driver/Tow Truck 99CCSWB Driver All Fleetsides @rattlecankustoms in IG Building a small, high rpm engine with the perfect bore, stroke and rod ratio is very impressive. It's like a highly skilled Morrocan sword fighter with a Damascus Steel Scimitar..... Cubic inches is like Indiana Jones with a cheap pistol. Last edited by SCOTI; 12-12-2008 at 02:46 PM. |
|
|
|
|
12-13-2008, 01:13 AM
|
#3 |
|
1 thing at a time is progress.
Join Date: Jun 2007
Location: Ball Ground GA
Posts: 5,511
|
Re: My 1965 build thread
Thanks for the inputs.
Well GM came thru like they said. The ubolts came in and they actually gave me an extra. I had to go to the hardware store for lock nuts. GM doesn't offer them. 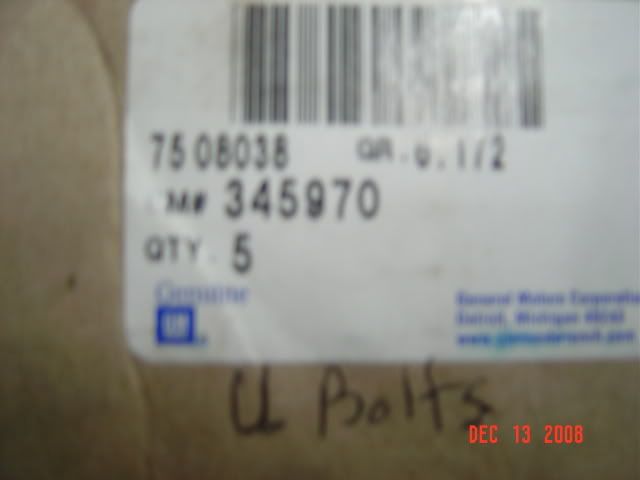 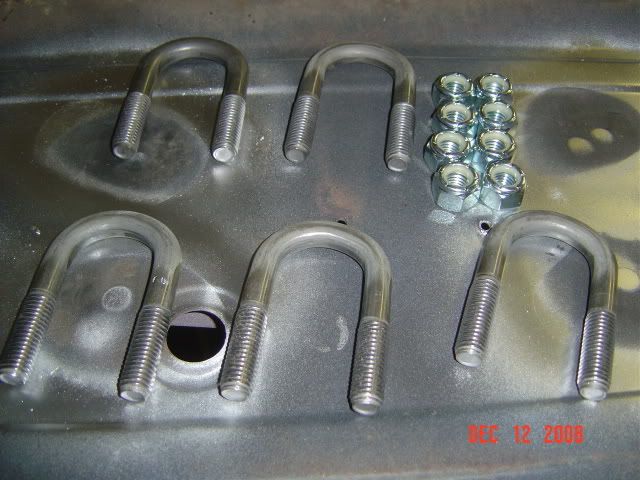 This a very nice and safe spring compressor that I borrowed. I think he said it is an OTC brand. It is pretty pricey he says. 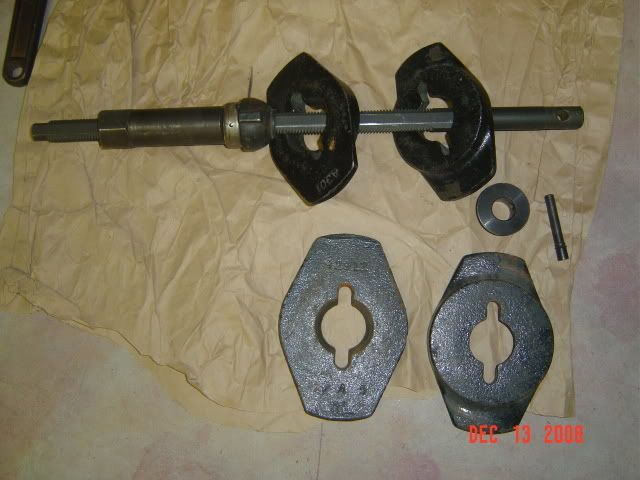 This is as far as i could get the left front upper A arm bushing screwed in while on jack stands. I hope it will go further in. I'm sure it is supposed to be like the rear one. Please excuse the dust.  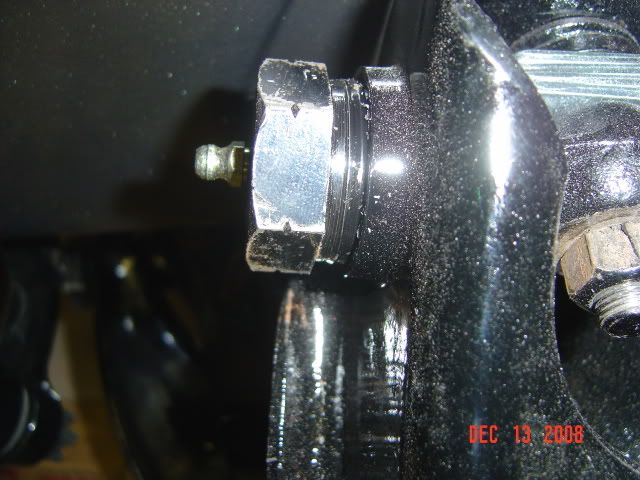 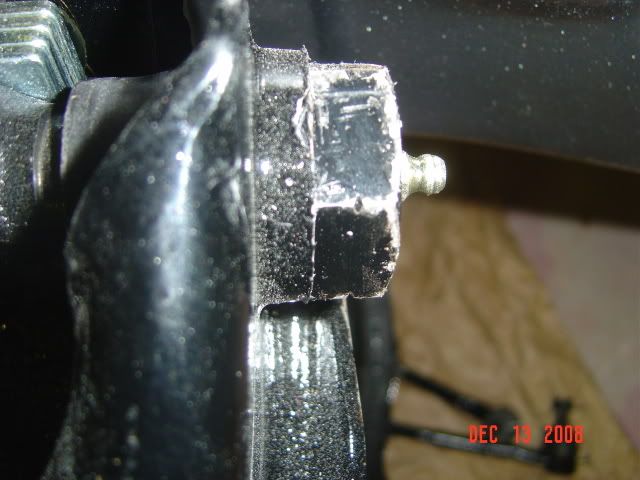 Left side done. 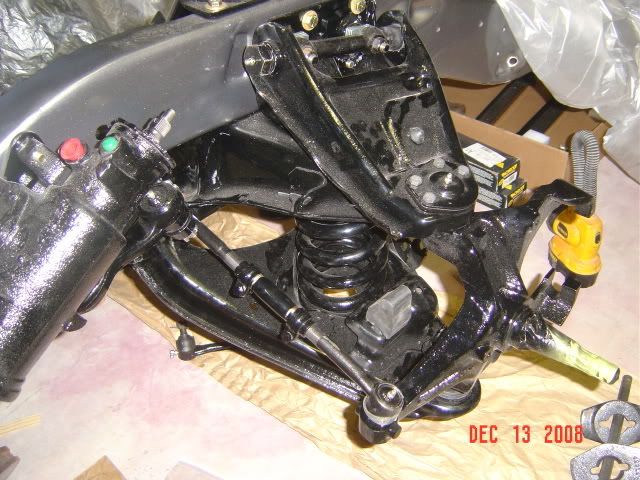
__________________
Alan
Philippians 2:14-16 |
|
|
|
|
12-13-2008, 12:11 PM
|
#4 |
|
Registered User
Join Date: Oct 2008
Location: Southern, MO
Posts: 233
|
Re: My 1965 build thread
I like the vertical mount. All the labels on the panel are for vertical mount, so if you were to see the panel I think mounted horizontal would look out of place.
|
|
|
|
|
12-14-2008, 01:47 AM
|
#5 | |
|
1 thing at a time is progress.
Join Date: Jun 2007
Location: Ball Ground GA
Posts: 5,511
|
Re: My 1965 build thread
Quote:
 Both front springs and tierods are in still need to drill for the idler arm bracket. Wheel bearings are packed and installed (not pictured). 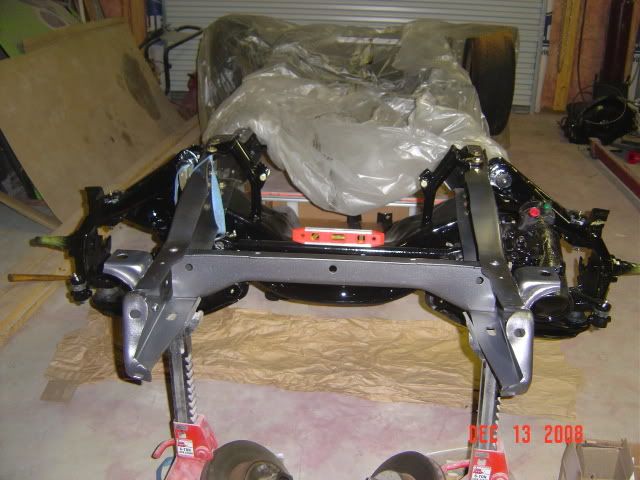 I used a roloc stripping wheel to clean the dust shields. It does good to clean everything but does leave minor scratch marks. It is not supposed to be used on a high speed grinder. It's not rated for high rpm's. Just throttle it down. 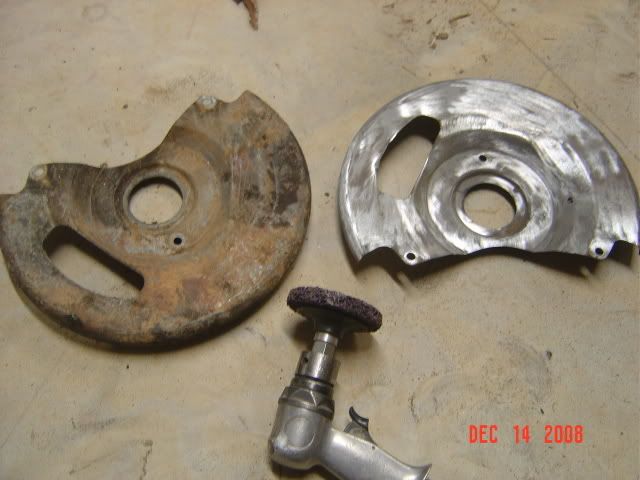
__________________
Alan
Philippians 2:14-16 |
|
|
|
|
|
12-14-2008, 08:56 AM
|
#6 |
|
1961 crewcab
Join Date: Dec 2007
Location: missoula, mt
Posts: 6,164
|
Re: My 1965 build thread
so... does the fuse block have to be under the dash?
If you are going with all new wires and system, maybe a different more accessible spot would be better. ideas: on the inner fenderwell with a waterproof cover. in, or access through the glove box. in a floor console (if you have one). on the outside of the firewall w/ waterproof cover. on the outside of the driver fender right under the c/10 emblem  ....just kidding with that one ....just kidding with that one
|
|
|
|
|
12-14-2008, 09:25 AM
|
#7 | |
|
1 thing at a time is progress.
Join Date: Jun 2007
Location: Ball Ground GA
Posts: 5,511
|
Re: My 1965 build thread
Quote:
You gave me an idea. What about inside the frame rail like under the driver. The brake and fuel lines run along the passenger side. Now i"ve got something else to dwell on. Thanks for the inspiration.
__________________
Alan
Philippians 2:14-16 |
|
|
|
|
|
12-14-2008, 10:40 AM
|
#8 |
|
1961 crewcab
Join Date: Dec 2007
Location: missoula, mt
Posts: 6,164
|
Re: My 1965 build thread
my sisters car reminded me.. she has a 2000-1? dodge neon, and the fuse box is crammed under the hood right next to the battery in a waterproof box. Took a while for an old timey car guy like me to find it there . right in plain sight btw!
framerail, it would be out of view, and a clean install, depending on how low you are , might be hard to get to to change one on the fly. Last edited by jonzcustomshop; 12-14-2008 at 10:42 AM. Reason: cant speel my way out of a box!!! <lol can't even do that right! |
|
|
|
|
12-14-2008, 01:23 PM
|
#9 | |
|
Registered User
Join Date: Apr 2001
Location: DALLAS,TX
Posts: 21,923
|
Re: My 1965 build thread
Quote:
__________________
67SWB-B.B.RetroRod 64SWB-Recycle 89CCDually-Driver/Tow Truck 99CCSWB Driver All Fleetsides @rattlecankustoms in IG Building a small, high rpm engine with the perfect bore, stroke and rod ratio is very impressive. It's like a highly skilled Morrocan sword fighter with a Damascus Steel Scimitar..... Cubic inches is like Indiana Jones with a cheap pistol. Last edited by SCOTI; 12-14-2008 at 01:23 PM. |
|
|
|
|
|
12-14-2008, 03:00 PM
|
#10 |
|
Its Deja Vu time again
Join Date: Aug 2008
Location: Marysville, North of Seattle WA
Posts: 815
|
Re: My 1965 build thread
Water and electricity don't play well together.
For me if its not where it normally goes it would be in the engine bay on the other side of that wall or under the seat somewhere. Either way its gotta be up high enough so water doesn't get anywhere near it. One puddle could really screw up your day. |
|
|
|
|
12-14-2008, 09:29 PM
|
#11 |
|
1 thing at a time is progress.
Join Date: Jun 2007
Location: Ball Ground GA
Posts: 5,511
|
Re: My 1965 build thread
Under the dash it is for the fuse panel.
Rolling frame  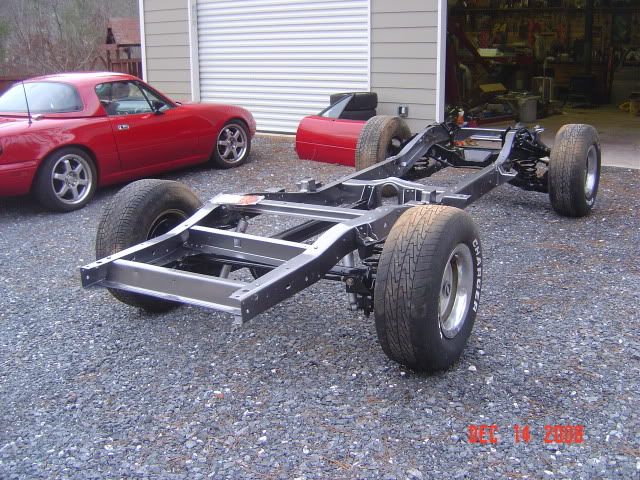 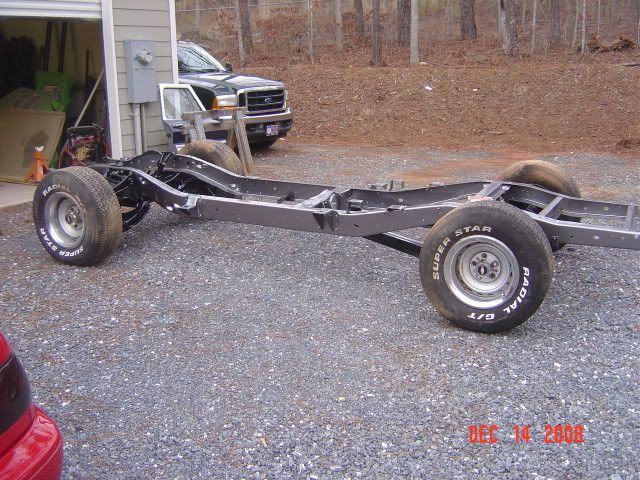 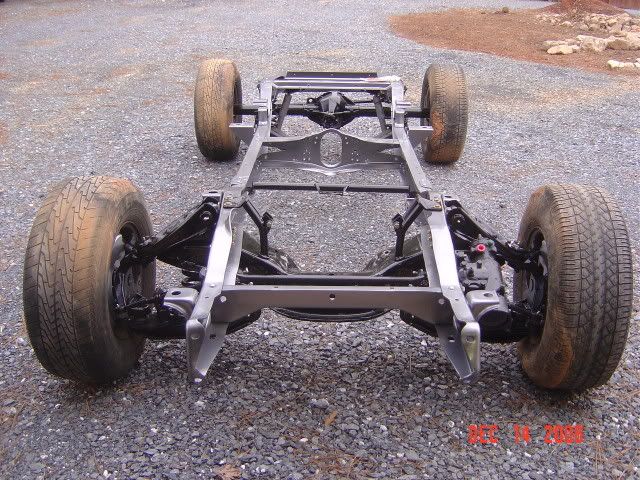 Here's a tag I got off of ebay that I will run on the truck 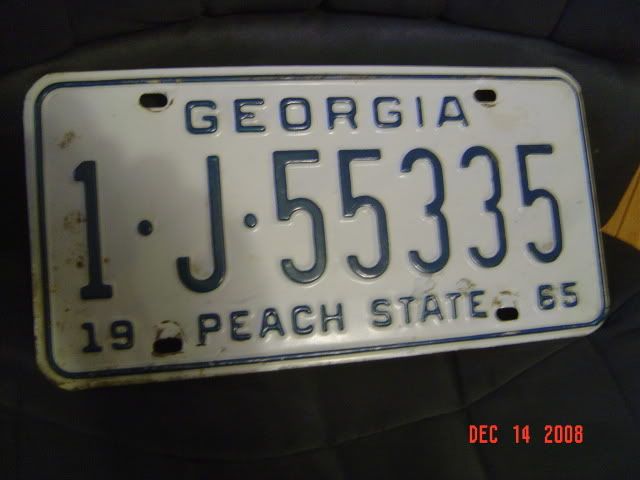 I took the girls Christmas shopping and saw this rolling down the road today. 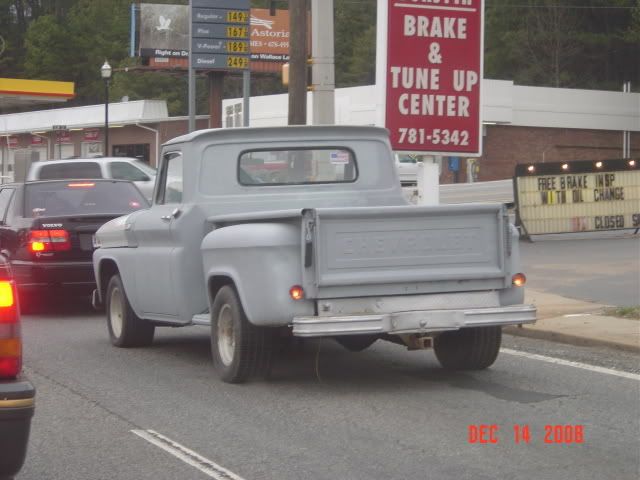
__________________
Alan
Philippians 2:14-16 |
|
|
|
|
12-14-2008, 09:40 PM
|
#12 |
|
Rottenwood Garage Member..Yes!
Join Date: Oct 2008
Location: Marietta, Georgia
Posts: 174
|
Re: My 1965 build thread
looks awesome Alan, I have one of those 65 GA tags on my truck.... Got asked by a Marietta police officer in a parking lot for my info, he didn't know you could do that.... Yikes... I took the advice of the dmv to carry the paper work and the real plate in the truck... After I showed him everything and educated him he was, lets say a little embarrased
I should try no plate like the guy in the primer step!!
__________________
When interests become diversified, not all can be Barrett Jackson. Budgets and Accountants get in the way. My 65 (SOLD) http://67-72chevytrucks.com/vboard/s...d.php?t=317013 My 51 (SOLD) http://67-72chevytrucks.com/vboard/s...80#post3551880 Racetruck III (SOLD) http://67-72chevytrucks.com/vboard/s...72#post4254972 Rottenwood Garage and Speed Shop.....where everything must be racy! Gone to dark side for a while...1966 F100 in the stable 
Last edited by Old School Kid; 12-14-2008 at 09:41 PM. |
|
|
|
|
12-14-2008, 10:45 PM
|
#13 |
|
Its Deja Vu time again
Join Date: Aug 2008
Location: Marysville, North of Seattle WA
Posts: 815
|
Re: My 1965 build thread
Congrats on getting it on all 4's again.
|
|
|
|
|
12-15-2008, 01:35 AM
|
#14 |
|
chevy only
 Join Date: Sep 2006
Location: Phoenix, AZ
Posts: 6,619
|
Re: My 1965 build thread
alan nice work,dig the two tone,solid work and clean as h-ll
__________________
CHEVY ONLY... Nothin Else ! |
|
|
|
|
12-15-2008, 08:44 AM
|
#15 |
|
Shloooooong bed member #2
Join Date: Aug 2008
Location: Millington Tn.
Posts: 1,864
|
Re: My 1965 build thread
Alan and Old School,
explain how the old tags are used. Alan, Very clean, Thanks for sharing the pictures.
__________________
David, Daughters 66 truck: http://67-72chevytrucks.com/vboard/s...d.php?t=484601 Learning to drive a 3 on the tree: http://www.youtube.com/watch?v=CcCMvRgBo1Q |
|
|
|
|
12-15-2008, 05:10 PM
|
#16 |
|
Registered User
 Join Date: Sep 2003
Location: n.e. IL border
Posts: 208
|
Re: My 1965 build thread
progress looks great. are you running stock gas tank? Possibly if access allows. look at mount in cab corner, inside truck behind seat so you can get at it to change fuse & still very easy to get at an unused & protected space. pics on your progress & quality of workmanship are very inspirational. Hope it does lead to your own business someday. I'd recommend ya. JW
|
|
|
|
|
12-15-2008, 11:34 PM
|
#17 | |||
|
1 thing at a time is progress.
Join Date: Jun 2007
Location: Ball Ground GA
Posts: 5,511
|
Re: My 1965 build thread
Quote:
Quote:
Quote:
__________________
Alan
Philippians 2:14-16 |
|||
|
|
|
|
12-15-2008, 11:27 PM
|
#18 | |
|
1 thing at a time is progress.
Join Date: Jun 2007
Location: Ball Ground GA
Posts: 5,511
|
Re: My 1965 build thread
Quote:
__________________
Alan
Philippians 2:14-16 |
|
|
|
|
|
12-17-2008, 08:20 AM
|
#19 |
|
1961 crewcab
Join Date: Dec 2007
Location: missoula, mt
Posts: 6,164
|
Re: My 1965 build thread
I remember seeing a thread like this where the sway bar would not reach the frame on a guys truck, he was having all sorts of problems...
un fortunatly I don't emember what it was called. will the mount position change with the wieght of the motor, caba nd sheet metal? |
|
|
|
|
12-17-2008, 11:24 PM
|
#20 |
|
Senior Member
Join Date: Nov 2007
Location: Greenville, SC
Posts: 873
|
Re: My 1965 build thread
Hey Alan,
I just bought front and rear sways from Brothers that are ADDCO's as well. The front is ADDCO #117 (63-87 C10) and the bar bolts directly to the frame without the offset brackets?? I haven't mounted it yet but I am a bit concerned based on your trouble and the different design. CPP has a technical article for mounting sway bars that doesn't say anything about removing rivets. http://www.classicperform.com/tech_a...ar/SwayBar.htm By the way. Brothers uses a Helwig number for their sway bars to trick you into thinking you were going to get a Helwig bar I suppose. Your thread is very interesting and helpful as you have heard at least 100 times by now. TR
__________________
1965 C10 SWB Fleet Two owner LS2 Swap Thread http://67-72chevytrucks.com/vboard/s...d.php?t=413880 |
|
|
|
|
12-18-2008, 12:39 AM
|
#21 | ||
|
1 thing at a time is progress.
Join Date: Jun 2007
Location: Ball Ground GA
Posts: 5,511
|
Re: My 1965 build thread
Quote:
Quote:
Thanks for the compliment. I'm glad this thread is helpful to some. If I can just help people not make the mistakes I make, I can see that being very helpful.
__________________
Alan
Philippians 2:14-16 |
||
|
|
|
|
12-18-2008, 08:30 AM
|
#22 | |
|
Registered User
Join Date: Aug 2007
Location: pittsburgh pa
Posts: 1,970
|
Re: My 1965 build thread
Quote:
I have the Addco Sway bar on my 64... It bolts directly to the frame with out the factory style brackets to lower the mounting point... It worked great... I don't know what you paid through brothers but I called Addco and bought directly from them. Mine was also custom bent to work with the dropmember and the ART control arms.. It was only $138.00
__________________
68 C10 Shorty TPI,Bagged, and all the good stuff. Classic trucks feature June 06, On the cover of Jegs Christmas Catalog 08 67 C10 Shorty Shop truck project Bagged and Z'd under destruction and getting nowhere fast. 64 C10 Shop Truck/Daily driver, Bagged, Dropmember, SOLD!!!! Gone but not forgotten.. 54 GMC under the knife getting a S10 chassis swap and bagged. See my build thread... 07 GMC Sierra 5/7 drop, 22's and 24's Air ride on my mind.. http://67-72chevytrucks.com/vboard/s...d.php?t=339340 See pics of my trucks in my profile |
|
|
|
|
|
12-18-2008, 06:40 PM
|
#23 |
|
Registered User
Join Date: Feb 2007
Location: South West Pennsylvania
Posts: 163
|
Re: My 1965 build thread
Years ago when I installed a sway bar on my 63, I had to drill four holes. The sway bar brackets are between the rivets just like your photo. I had similar instructions and realized that the rivet location wasn't correct. Best of luck. I did recently convert to polyurethane bushings because the control arm bushing do take a beating in this application.
Rick
__________________
RED RUMBLE 1963 C10 Chevy Truck Owned since 1984 
|
|
|
|
|
12-18-2008, 10:29 PM
|
#24 |
|
Senior Member
Join Date: Nov 2007
Location: Greenville, SC
Posts: 873
|
Re: My 1965 build thread
Hey Addict and Rick,
Thanks for the info. I feel better now about the bars. I plan to mount them up over Christmas and will post pics. (without highjacking Alan's thread). Brothers had them on sale a few weeks ago. $100 each, $138 delivered, imagine that. TR
__________________
1965 C10 SWB Fleet Two owner LS2 Swap Thread http://67-72chevytrucks.com/vboard/s...d.php?t=413880 |
|
|
|
|
12-19-2008, 12:06 AM
|
#25 | ||
|
1 thing at a time is progress.
Join Date: Jun 2007
Location: Ball Ground GA
Posts: 5,511
|
Re: My 1965 build thread
Quote:
Quote:
Still no response from CPP. Verticle it is. The fuse panel is mounted. 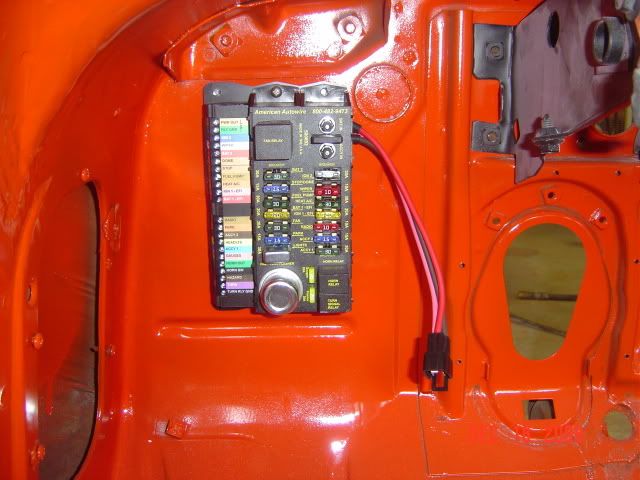 The dash is in for the last time. It's welded and my personal photogragher (sdailey) took some pix of yours truely. 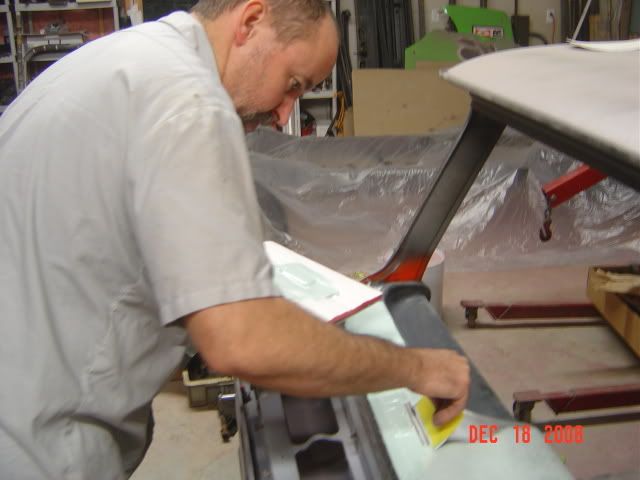 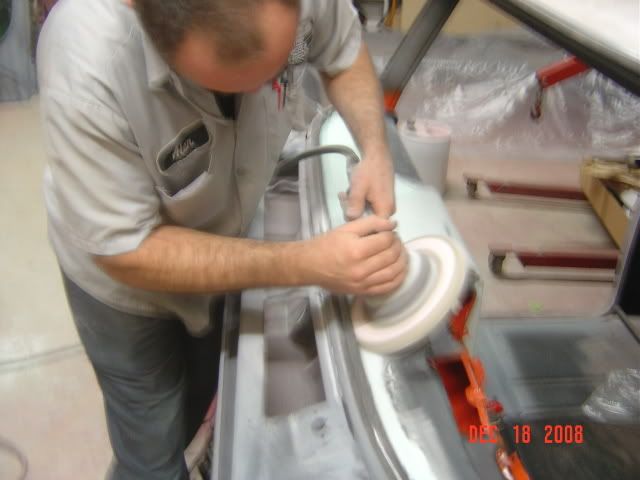 For those of you that don't know this. When you have a sharp piece of metal that your working around just run a piece of tape along the edge. It will help some. I did this on the pinch weld. 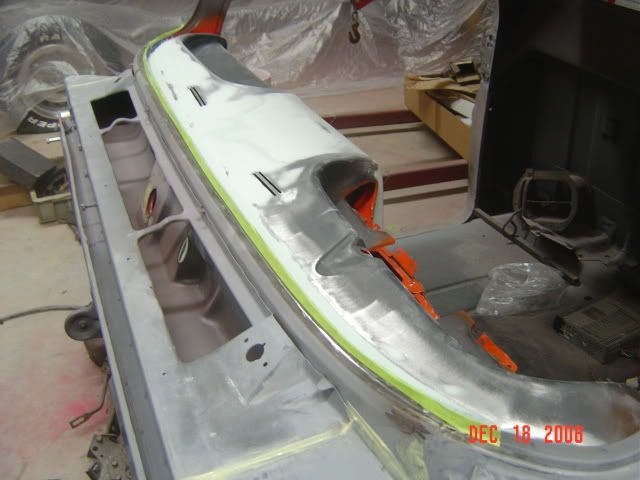 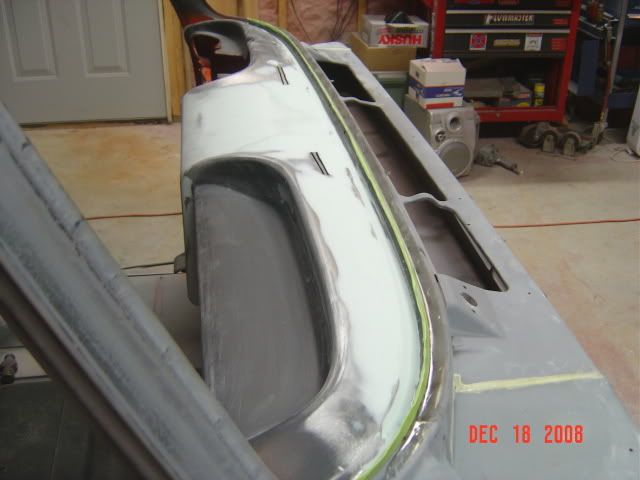
__________________
Alan
Philippians 2:14-16 |
||
|
|
|
 |
| Bookmarks |
| Tags |
| 1959, 1960, 1964, 1965, 1966, c10, hugger, impala, orange |
|
|


 Hybrid Mode
