
|
 01-20-2009, 07:10 AM
|
#401 |
|
69fatmotor
Join Date: Oct 2005
Location: bama
Posts: 660
|
Re: Senior Project Build
as far as your motor being an lq4 or lq9 , the lq4 has a slight dish in the piston and the lq9 is a flat top. mine is an lq9. i used the 317 heads which is the same as the ls6 head with a slighty larger combustion chamber (71.06cc vs 64.45cc). i had my head deck and changed to the ls6 valve springs . the later lq4 and all lq9's have the same cam as the ls1. according to the machine shop should yeald a 10.8 compression ratio,
Last edited by mike nutt; 02-22-2009 at 08:48 PM. |

|

|
|
01-20-2009, 11:00 AM
|
#402 |
|
Registered User
Join Date: Oct 2007
Location: Sherwood Oregon
Posts: 1,908
|
Re: Senior Project Build
Looks good Mike, I believe mine are flat tops. So I should have stronger rods eh
|
|
|
|
|
01-20-2009, 11:37 AM
|
#403 | |
|
Hittin E-Z Street on Mud Tires
 Join Date: Nov 2004
Location: Greenville, SC
Posts: 23,090
|
Re: Senior Project Build
Quote:
__________________
Jesse James 1967 C10 SWB Stepside: 350/700R4/3.73 1965 Ford Mustang: 289/T5-5spd/3.25 Trac-Loc 1968 Pontiac Firebird: Project Fire Chicken! 2015 Silverado Double Cab 5.3L Z71 2001 Jeep Wrangler Sport 4.0L 5spd 2020 Chevrolet Equinox Premium 2.0L Turbo 2011 Mustang V6 ~ Wife's ride  American Born, Country by the Grace of God  1967 CST Shop Truck Rebuild! My 1967 C-10 Build Thread My Vintage Air A/C Install Project "On a Dime" Trying my hand at Home Renovation! 1965 Mustang Modifications! |
|
|
|
|
|
01-20-2009, 11:46 AM
|
#404 |
|
Hittin E-Z Street on Mud Tires
Join Date: Nov 2004
Location: Greenville, SC
Posts: 23,090
|
Re: Senior Project Build
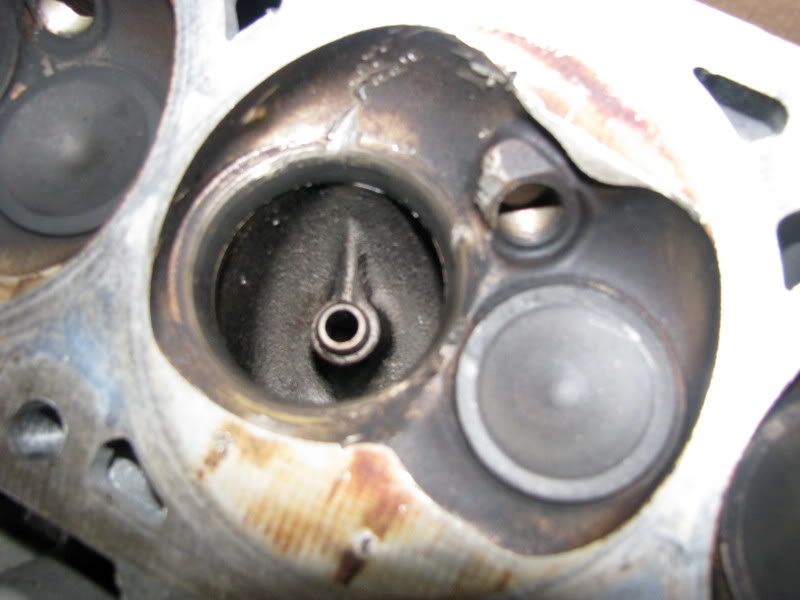
Also, this thing is a vacuum line that connects to the throttle body. Not sure what it does, probably has to do with idle/start up/advance. Now, on say a 350 with a carb, there would be a vaccum line to run the advance on an HEI from the carb to the HEI. This line probably serves the same purpose on a FI TB vehicle. I'm not sure how that works with no distributor? Will your set up keep the coil packs? And if so, what will "run" them.
I'm very interested in this swap, as computers scare the crap out of me, and eliminating the computer eliminates lots of wiring, and the huge expense of getting it reprogrammed and tuned. You need to figure out how you're going to get a PCV set up and how your going to vent the motor. I could swear I recently saw a LS motor with an old school filter style vent where the oil fill is, that would take care of that, but you probably need to leave the PCV on the DS. 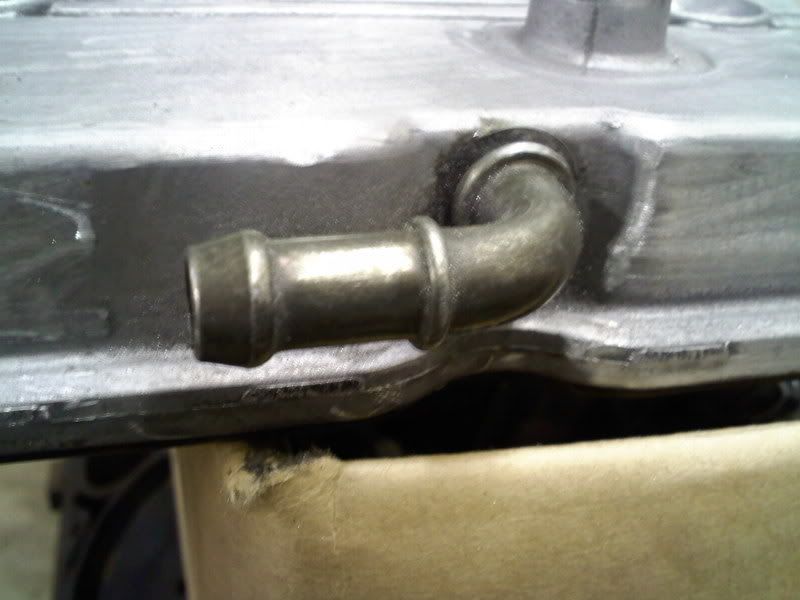
__________________
Jesse James 1967 C10 SWB Stepside: 350/700R4/3.73 1965 Ford Mustang: 289/T5-5spd/3.25 Trac-Loc 1968 Pontiac Firebird: Project Fire Chicken! 2015 Silverado Double Cab 5.3L Z71 2001 Jeep Wrangler Sport 4.0L 5spd 2020 Chevrolet Equinox Premium 2.0L Turbo 2011 Mustang V6 ~ Wife's ride American Born, Country by the Grace of God 1967 CST Shop Truck Rebuild! My 1967 C-10 Build Thread My Vintage Air A/C Install Project "On a Dime" Trying my hand at Home Renovation! 1965 Mustang Modifications! Last edited by 67ChevyRedneck; 01-20-2009 at 11:51 AM. |
|
|
|
|
01-20-2009, 03:00 PM
|
#405 | |
|
Registered User
Join Date: Sep 2008
Location: Georgetown, Texas
Posts: 170
|
Re: Senior Project Build
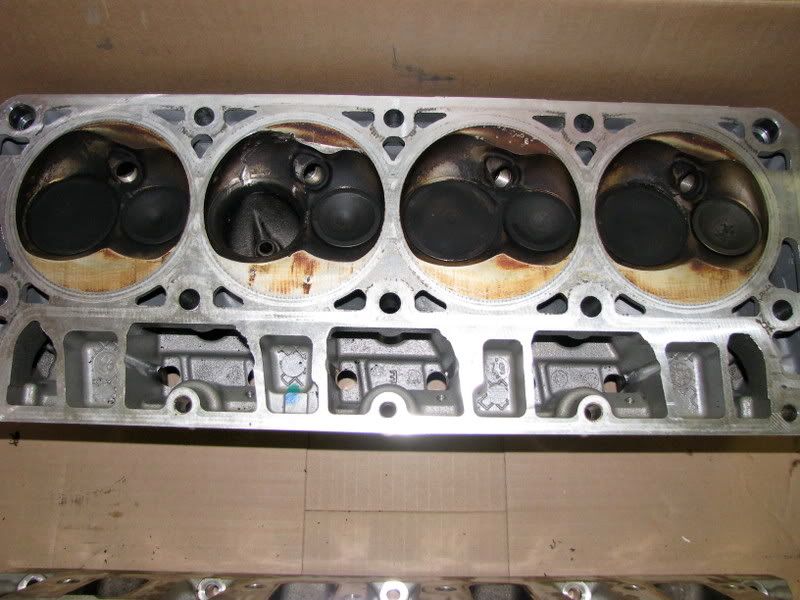
According to this picture, it is an LQ4.
Quote:
__________________
'68 Chevrolet Short Step
6.0 L + 91mm + TH400 + 9" + 4-Link |
|
|
|
|
|
01-20-2009, 08:55 PM
|
#406 | |
|
Registered User
Join Date: Oct 2007
Location: Sherwood Oregon
Posts: 1,908
|
Re: Senior Project Build
Quote:
|
|
|
|
|
|
01-20-2009, 09:00 PM
|
#407 |
|
Registered User
Join Date: Oct 2007
Location: Sherwood Oregon
Posts: 1,908
|
Re: Senior Project Build
Damn. Oh well LQ4's are great too. I can't wait to see 15 PSI through yours SCIV! And 67redneck, I am using the MSD ignition controller that runs the stock coils. From what I have read, it does a marvelous job, and you can make custom timing curves using a lap top. And on the PCV, I will have the filter in the oil fill that you speak of. A few pages back I posted a picture of a carb 6.0 in an IROC camaro, it has the breather setup that I am going to run.
|
|
|
|
|
01-20-2009, 09:01 PM
|
#408 | |
|
Registered User
Join Date: Oct 2007
Location: Sherwood Oregon
Posts: 1,908
|
Re: Senior Project Build
Quote:
|
|
|
|
|
|
01-20-2009, 09:57 PM
|
#409 |
|
Registered User
Join Date: Oct 2007
Location: Sherwood Oregon
Posts: 1,908
|
Re: Senior Project Build
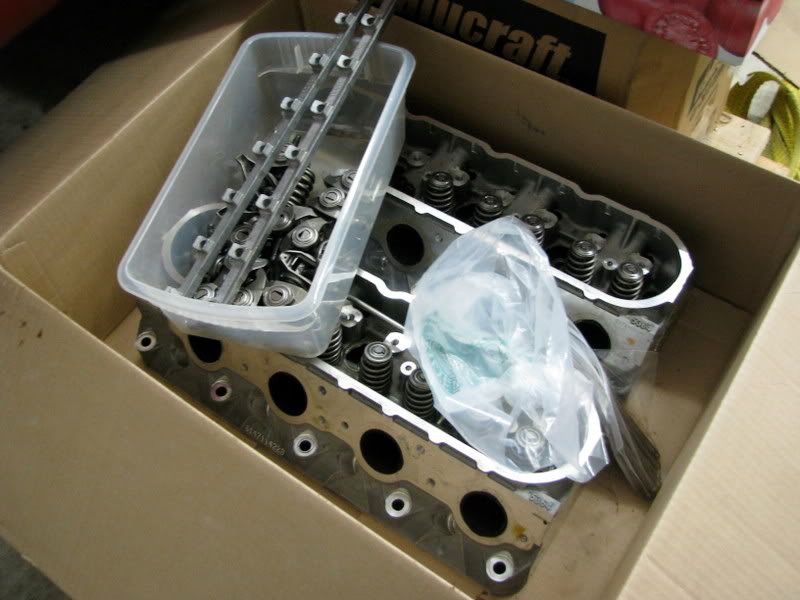
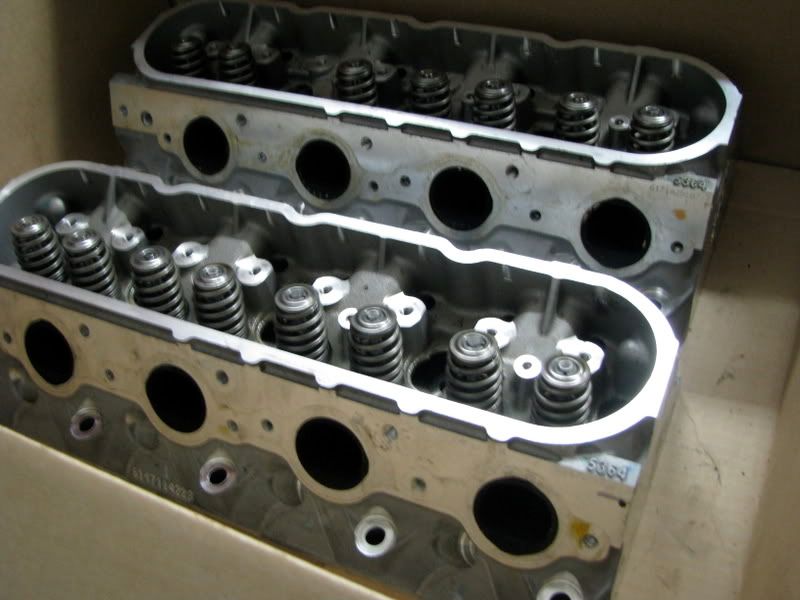
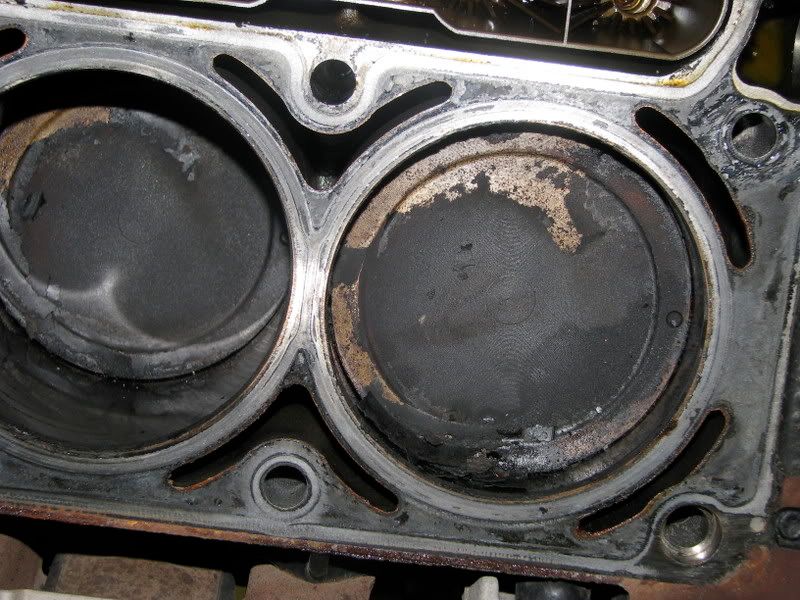
So I traded my 317 heads, truck intake, and some cash for a set of L92's, but one cylinder dropped a valve. The motor was out of a 2007 Escalade with 7k on it. The whole motor was pulled under warranty. The machine shop quote to fix it is $110. While they are in the machine shop, is there anything I can have done to help increase HP? I have been told that I can mill a little off to bump up the compression, is this a good idea? And is there any porting or polishing that can be done? Oh, and do the pushrods from the 317 heads fit the L92's?
|
|
|
|
|
01-20-2009, 10:09 PM
|
#410 | |
|
Eat My Rust
Join Date: Jan 2007
Location: Cypress, Texas
Posts: 3,362
|
Re: Senior Project Build
Quote:
|
|
|
|
|
|
01-20-2009, 10:45 PM
|
#411 | |
|
69fatmotor
Join Date: Oct 2005
Location: bama
Posts: 660
|
Re: Senior Project Build
Quote:
when i painted mine ,i bolted the heads down with a couple of bolts , then taped the heads up . are you going to run a turbo or belt driven supercharger ? the engine i'm using had a supercharger with too much boost , it busted two pistons and spun the balancer on the crankshaft. if you gonna run a belt driven supercharger you need to have the crank and balancer keyed and forged pistons would be a big help for the motor to last . |
|
|
|
|
|
01-21-2009, 12:27 AM
|
#412 |
|
Registered User
Join Date: Oct 2007
Location: Sherwood Oregon
Posts: 1,908
|
Re: Senior Project Build
Cool Mike, but my plans of forced induction have been placed aside due to budget concerns. I am just going to run NA. I will keep that in mind in the future though. That is a good idea, I was thinking about tracing my heads to make a couple of cardboard covers to keep paint out.
Last edited by LuckyHenriksen; 01-21-2009 at 03:39 AM. |
|
|
|
|
01-21-2009, 03:34 AM
|
#413 |
|
Registered User
Join Date: Oct 2007
Location: Sherwood Oregon
Posts: 1,908
|
Re: Senior Project Build
Got the valley cover off
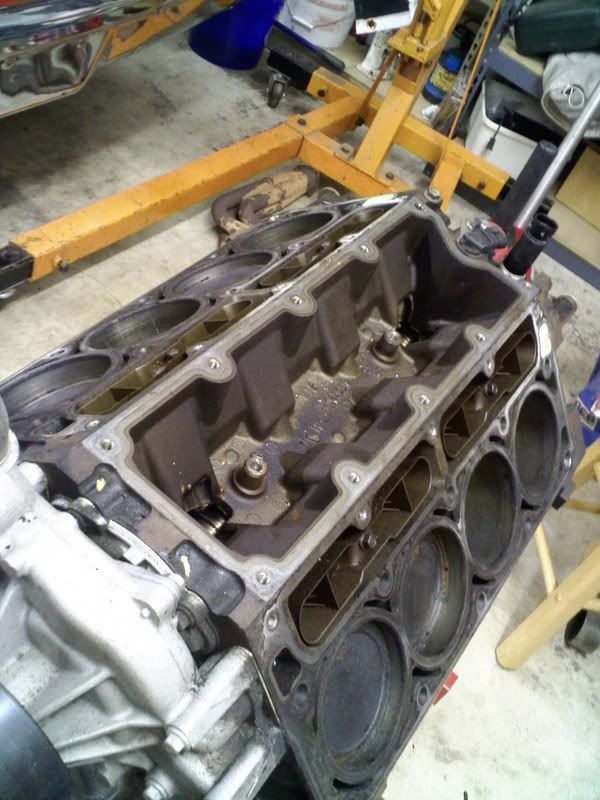 And have some more questions. When I use the MSD box do I reuse any of the stock harness from the coil packs? 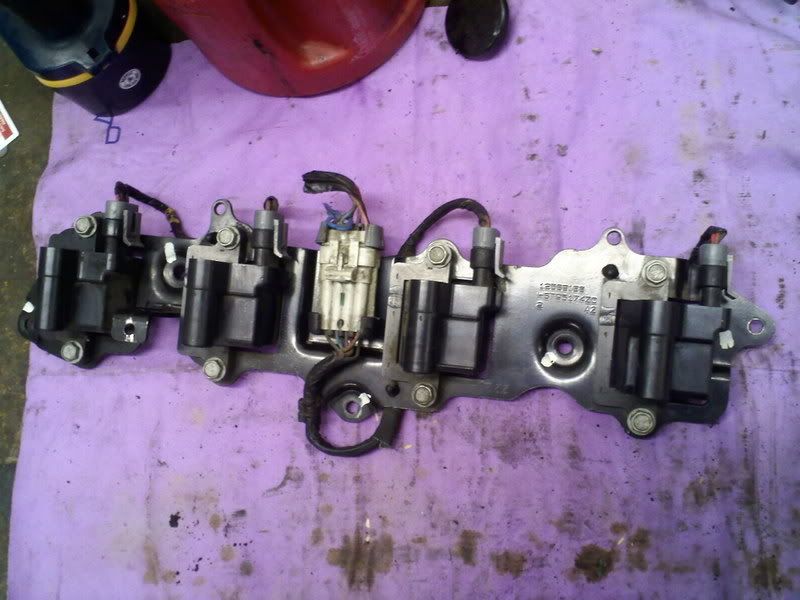 And I have two flexplates, one from my motor and another from the 2007 caddy motor. They seem to be exactly the same, is one better? 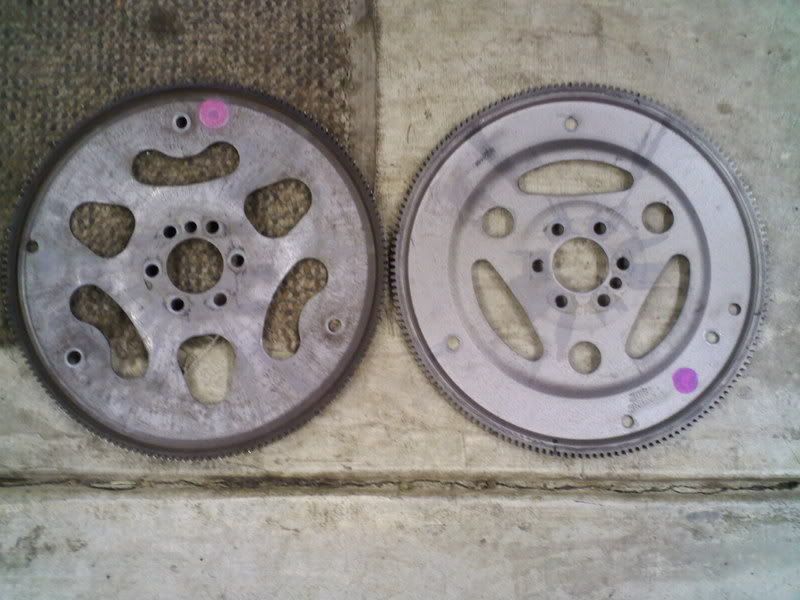 And I have a couple coats of paint on the valve covers now, and also on the valley pan. 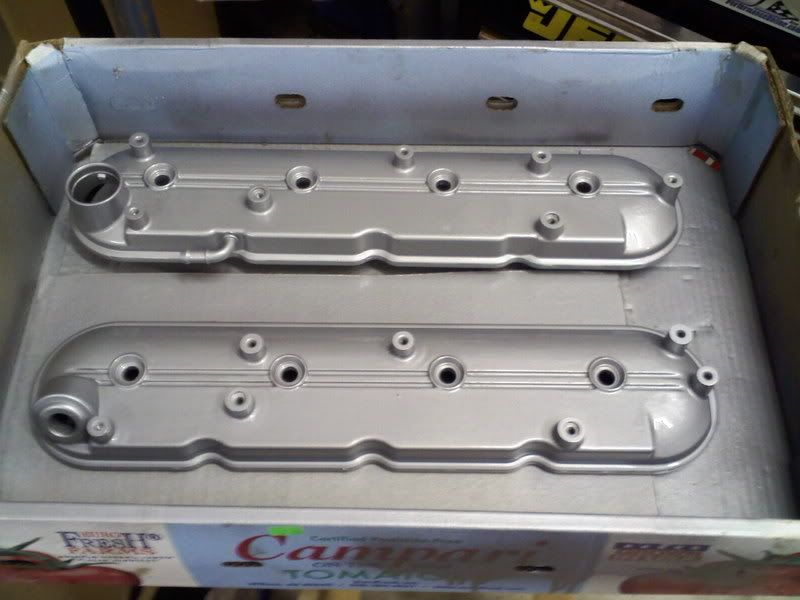
|
|
|
|
|
01-22-2009, 12:55 AM
|
#414 |
|
Registered User
Join Date: Oct 2007
Location: Sherwood Oregon
Posts: 1,908
|
Re: Senior Project Build
Finally got the fan off. After I hacked through several of the fins to get some leverage and had some help holding it down. Oh and it turned out to be regular thread, not reverse
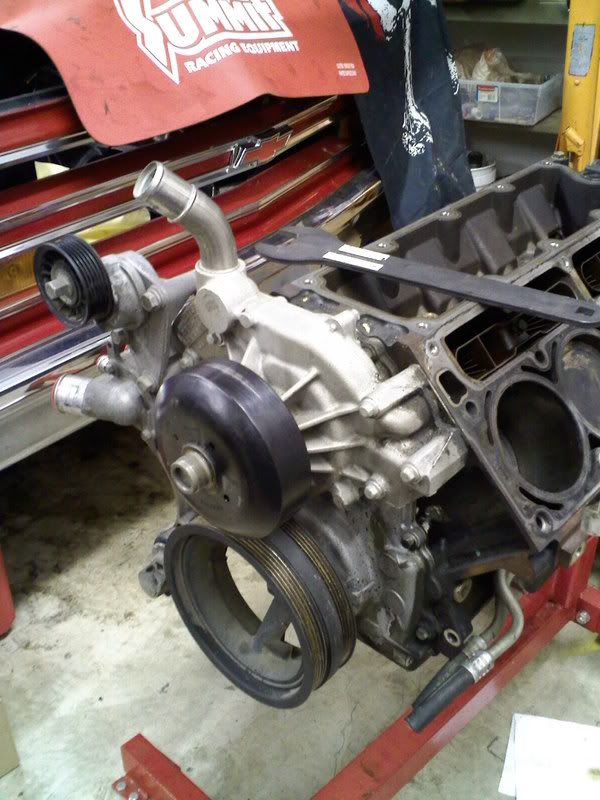 I hacked the oil fill tube and ground down an old breather to fit. It looks alot better than the stock tube, and will be my PCV.  And my painted valve covers look pretty good I think 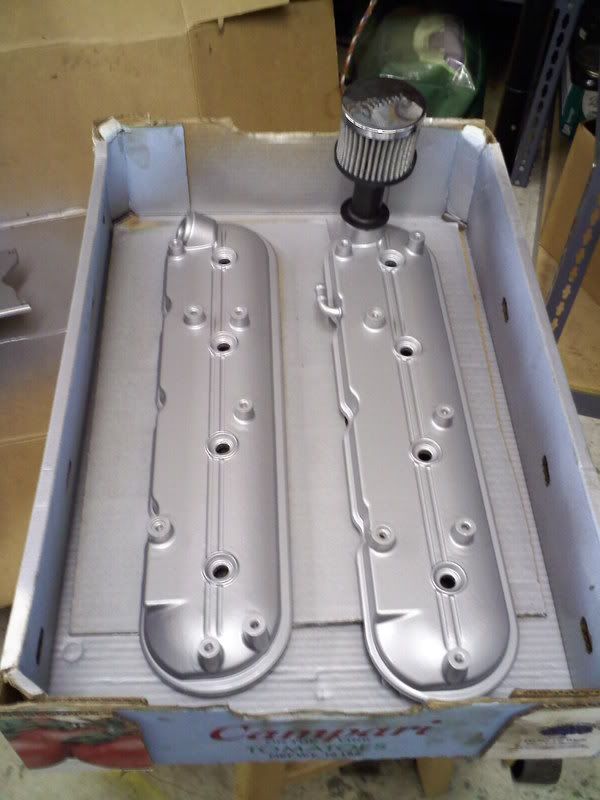 And does anyone know what these sensors do? Do I need them? 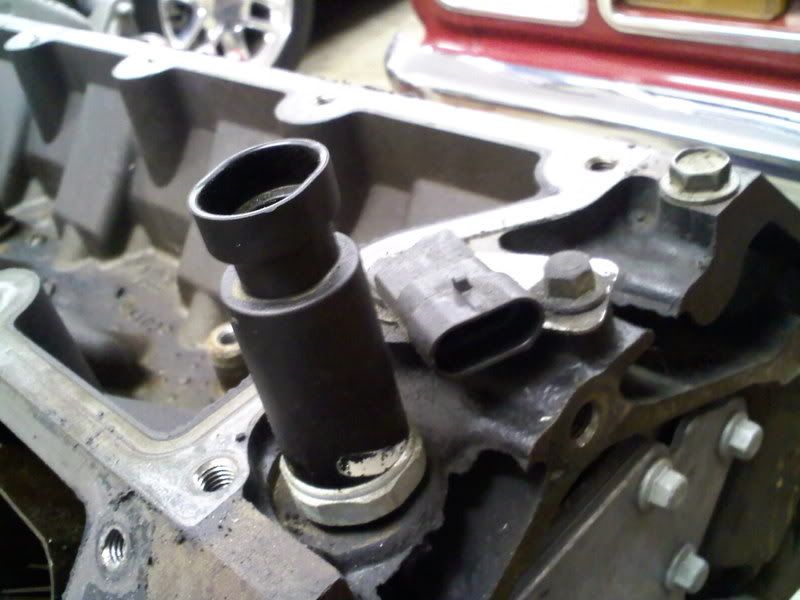
Last edited by LuckyHenriksen; 01-22-2009 at 12:56 AM. |
|
|
|
|
01-22-2009, 12:57 AM
|
#415 |
|
Registered User
Join Date: Oct 2007
Location: Sherwood Oregon
Posts: 1,908
|
Re: Senior Project Build
Oh and the pictures are kinda blurry cuz I took them with my phone
|
|
|
|
|
01-22-2009, 02:23 AM
|
#416 |
|
Hittin E-Z Street on Mud Tires
Join Date: Nov 2004
Location: Greenville, SC
Posts: 23,090
|
Re: Senior Project Build
The short stubby one looks like the Camshaft Position Sensor. The tall one is the oil pressure switch.
http://shop.advanceautoparts.com/Pro...pe=417&PTSet=A http://shop.advanceautoparts.com/Pro...pe=985&PTSet=A I'm not 100%, but pretty sure, hopefully someone can confirm my info. Not sure what to do about the cam sensor, but you should be able to remove the oil pressure switch and replace it with a mechanical gauge one.
__________________
Jesse James 1967 C10 SWB Stepside: 350/700R4/3.73 1965 Ford Mustang: 289/T5-5spd/3.25 Trac-Loc 1968 Pontiac Firebird: Project Fire Chicken! 2015 Silverado Double Cab 5.3L Z71 2001 Jeep Wrangler Sport 4.0L 5spd 2020 Chevrolet Equinox Premium 2.0L Turbo 2011 Mustang V6 ~ Wife's ride American Born, Country by the Grace of God 1967 CST Shop Truck Rebuild! My 1967 C-10 Build Thread My Vintage Air A/C Install Project "On a Dime" Trying my hand at Home Renovation! 1965 Mustang Modifications! Last edited by 67ChevyRedneck; 01-22-2009 at 02:41 AM. |
|
|
|
|
01-22-2009, 10:54 AM
|
#417 |
|
Registered User
Join Date: Sep 2008
Location: Georgetown, Texas
Posts: 170
|
Re: Senior Project Build
You are correct on the sensors.
Does the MSD need the cam signal? I dunno much about the MSD setup.
__________________
'68 Chevrolet Short Step
6.0 L + 91mm + TH400 + 9" + 4-Link |
|
|
|
|
01-22-2009, 11:34 AM
|
#418 |
|
Registered User
Join Date: Oct 2007
Location: Sherwood Oregon
Posts: 1,908
|
Re: Senior Project Build
Ya I just spread the MSD stuff out on the floor, it had a plug for the cam sensor. I will pull the tall one off and see what it looks like
|
|
|
|
|
01-22-2009, 12:31 PM
|
#419 | |
|
Registered User
Join Date: Sep 2008
Location: Georgetown, Texas
Posts: 170
|
Re: Senior Project Build
Quote:
__________________
'68 Chevrolet Short Step
6.0 L + 91mm + TH400 + 9" + 4-Link |
|
|
|
|
|
01-22-2009, 10:32 PM
|
#420 |
|
Registered User
Join Date: Oct 2007
Location: Sherwood Oregon
Posts: 1,908
|
Re: Senior Project Build
I would love to know what you find out about making the temp and oil sensors work
|
|
|
|
|
01-23-2009, 12:41 AM
|
#421 |
|
Registered User
Join Date: Oct 2007
Location: Sherwood Oregon
Posts: 1,908
|
Re: Senior Project Build
The last thing in my way is the balancer. What do I need to get it off? The crank bolt took a couple of big cheater bars and lots of grunting.
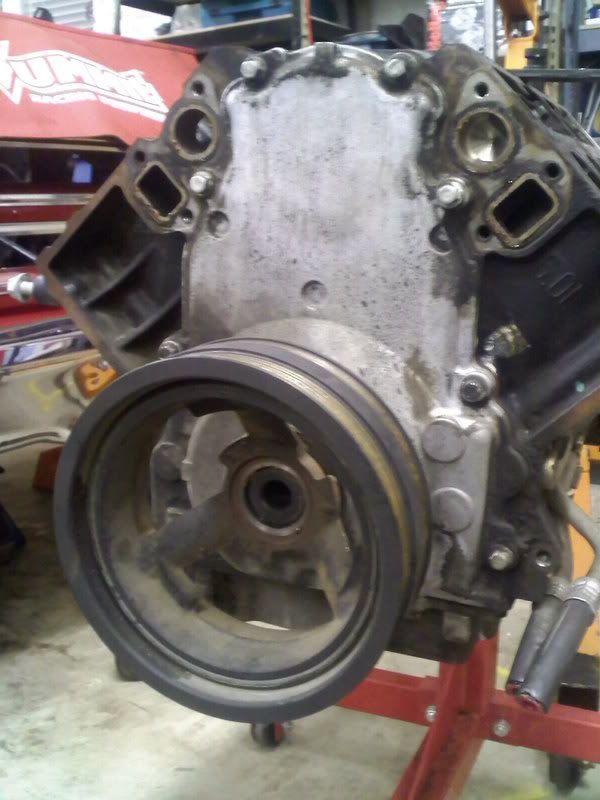 Here are the ever important numbers! If only old blocks had this kind of description on them ") 
|
|
|
|
|
01-23-2009, 12:54 AM
|
#422 |
|
Eat My Rust
Join Date: Jan 2007
Location: Cypress, Texas
Posts: 3,362
|
Re: Senior Project Build
You need the strength of Chuck Norris, and the patience of Clint Eastwood.
|
|
|
|
|
01-23-2009, 01:03 AM
|
#423 |
|
Registered User
Join Date: Oct 2007
Location: Sherwood Oregon
Posts: 1,908
|
Re: Senior Project Build

|
|
|
|
|
01-23-2009, 11:27 AM
|
#424 | |
|
Registered User
Join Date: Sep 2008
Location: Georgetown, Texas
Posts: 170
|
Re: Senior Project Build
Quote:
Oil pressure I am pulling the stock sensor & replacing with the gauge sensor. That is the plan so far, now I just need to figure out what kind of threaded adapters to use! For the balancer, you need a 3 jaw puller to get it off. Slow and patient because you can break the tabs off the balancer.
__________________
'68 Chevrolet Short Step
6.0 L + 91mm + TH400 + 9" + 4-Link Last edited by SCIV; 01-23-2009 at 11:28 AM. |
|
|
|
|
|
01-23-2009, 07:49 PM
|
#425 |
|
Registered User
Join Date: Oct 2007
Location: Sherwood Oregon
Posts: 1,908
|
Re: Senior Project Build
Thanks SCIV. I called the machine shop today and they said they couldn't find a valve to fit my head, and that they were too busy to look for one. Does this sound like a load to you or is it just me?
On a side note, does anybody know where to get a new valve and all the pieces for a L92 head? |
|
|
|
 |
| Bookmarks |
|
|


 Linear Mode

