
|
 07-09-2012, 11:31 AM
|
#401 |
|
Registered User
Join Date: Nov 2011
Location: Edmond, OK.
Posts: 1,362
|
Re: Crash's 72 K10
No pictures for the work I did this weekend (Sunday). I did re-route the electric fan control wires back into the engine wiring harness and terminated those wires under the dash. I also routed two 10 Gauge power wires from the red battery connection box to under the dash to power the fuse box, relays, and PCM. I spent about 6 hours working on the wiring. My goal is to make sure everything fits on the cab before I do the rest of the body work and paint, just in case I have to do some more welding or drilling to mount the pieces needed. Next week I will install the wiring for the Vintage Air System, Air Conditioning Control, Radio (maybe), gauges, etc. Once everything has been fitted, I will tear it all down, finish the body work, primer, and figure out how to paint this thing.
I would recommend for others to do this test fitting before they paint, I will need to do some welding on the inner firewall to get all of the AC relays and other items mounted without running screws though the firewall missing up all the work I did to shave it. On a positive note I did get everything re-wired so that I could start the engine again.. this is one of the motivators I use to work in the summer
__________________
Mark ----------------------- Crash's 69 4x4 SWB Crash's Roof over Lake Home Crash's 1988 Land Cruiser Build |

|

|
|
07-16-2012, 08:44 PM
|
#402 |
|
Registered User
Join Date: Nov 2011
Location: Edmond, OK.
Posts: 1,362
|
Re: Crash's 72 K10
Time for an update, I took a few days off last week and worked a little on the truck.
First I worked out a method to install the new hood springs on the new hinges. This seemed to work ok..  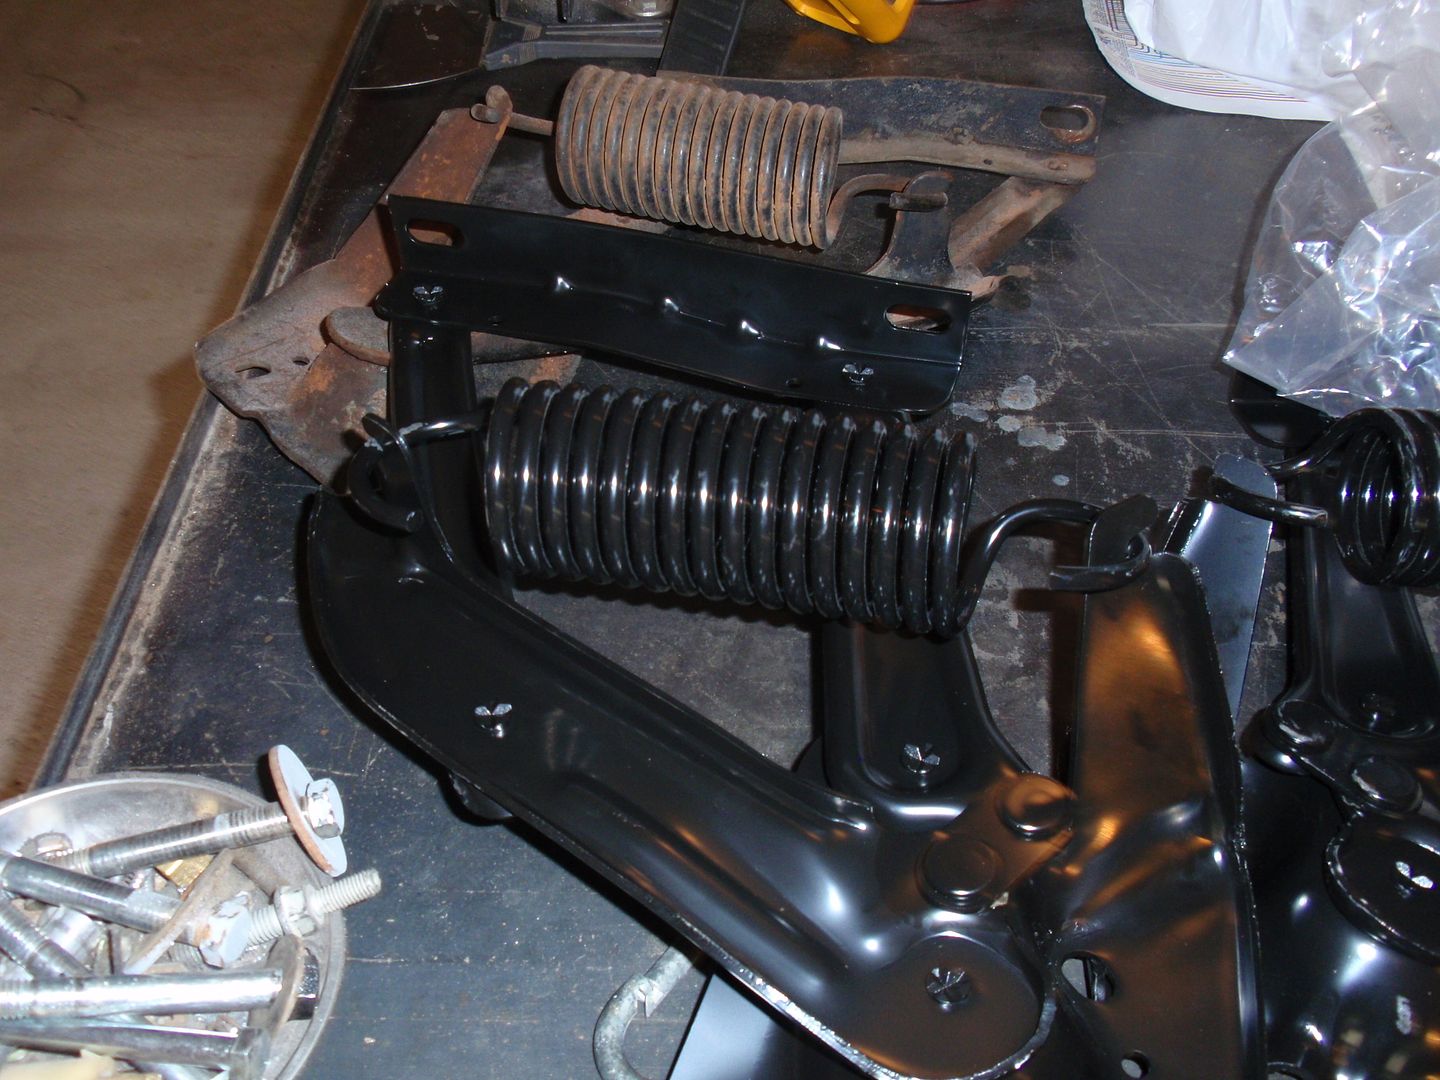 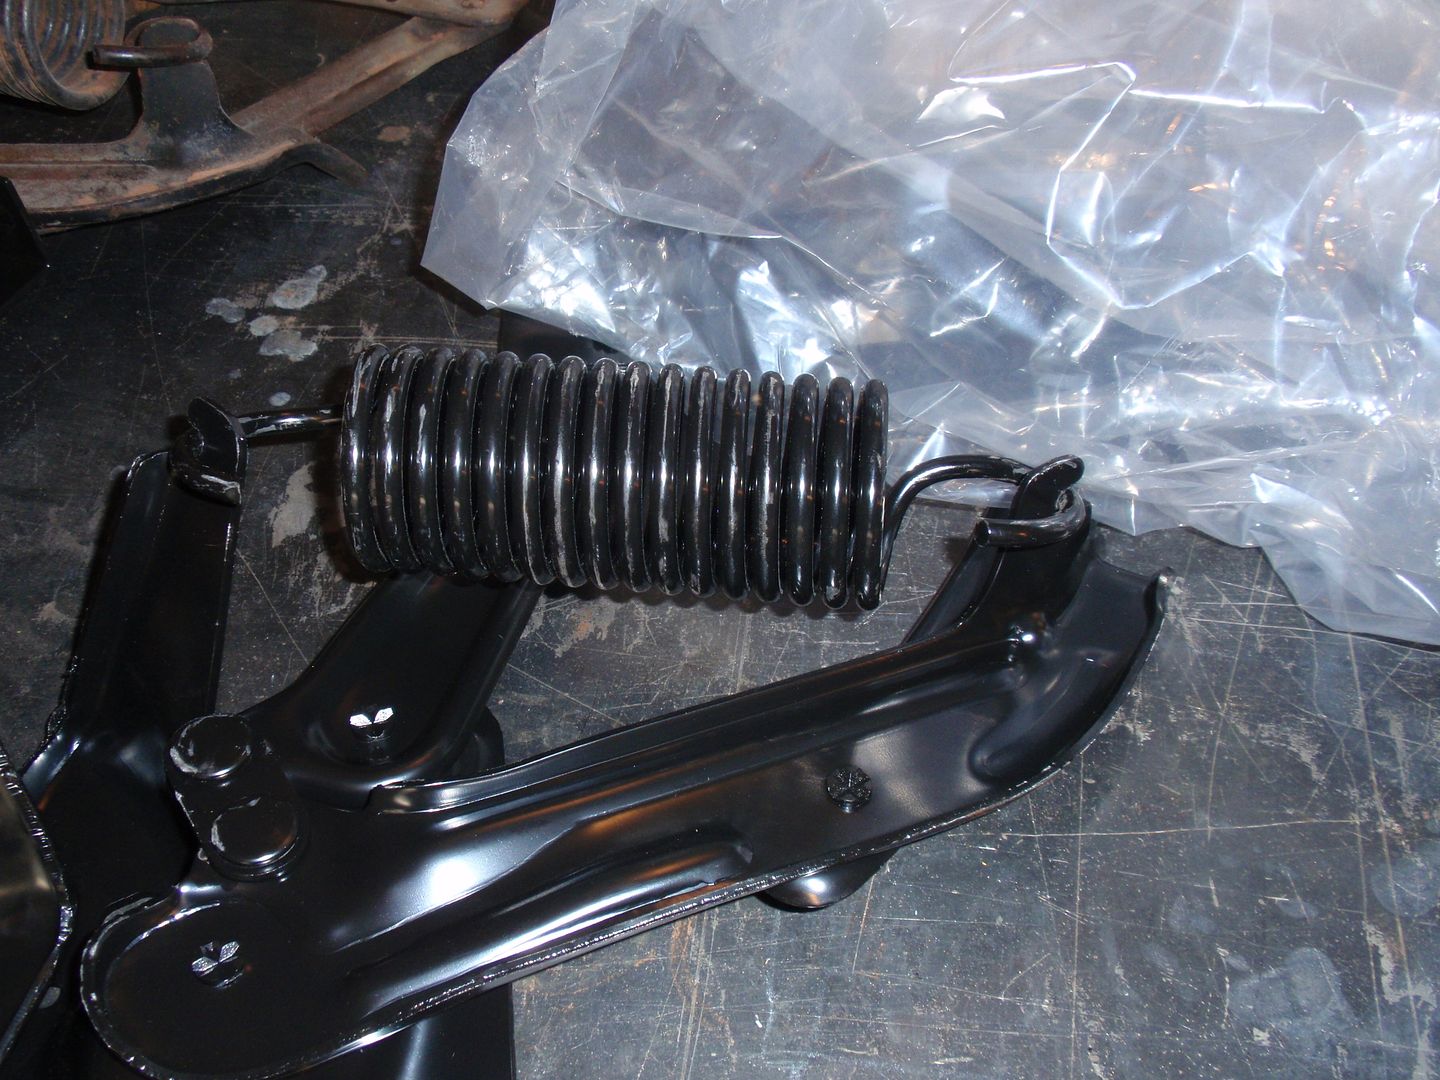 Then I worked on the door hinges; broke them down, sand blasted, installed new bushings and hinge pins, and then painted with por15. 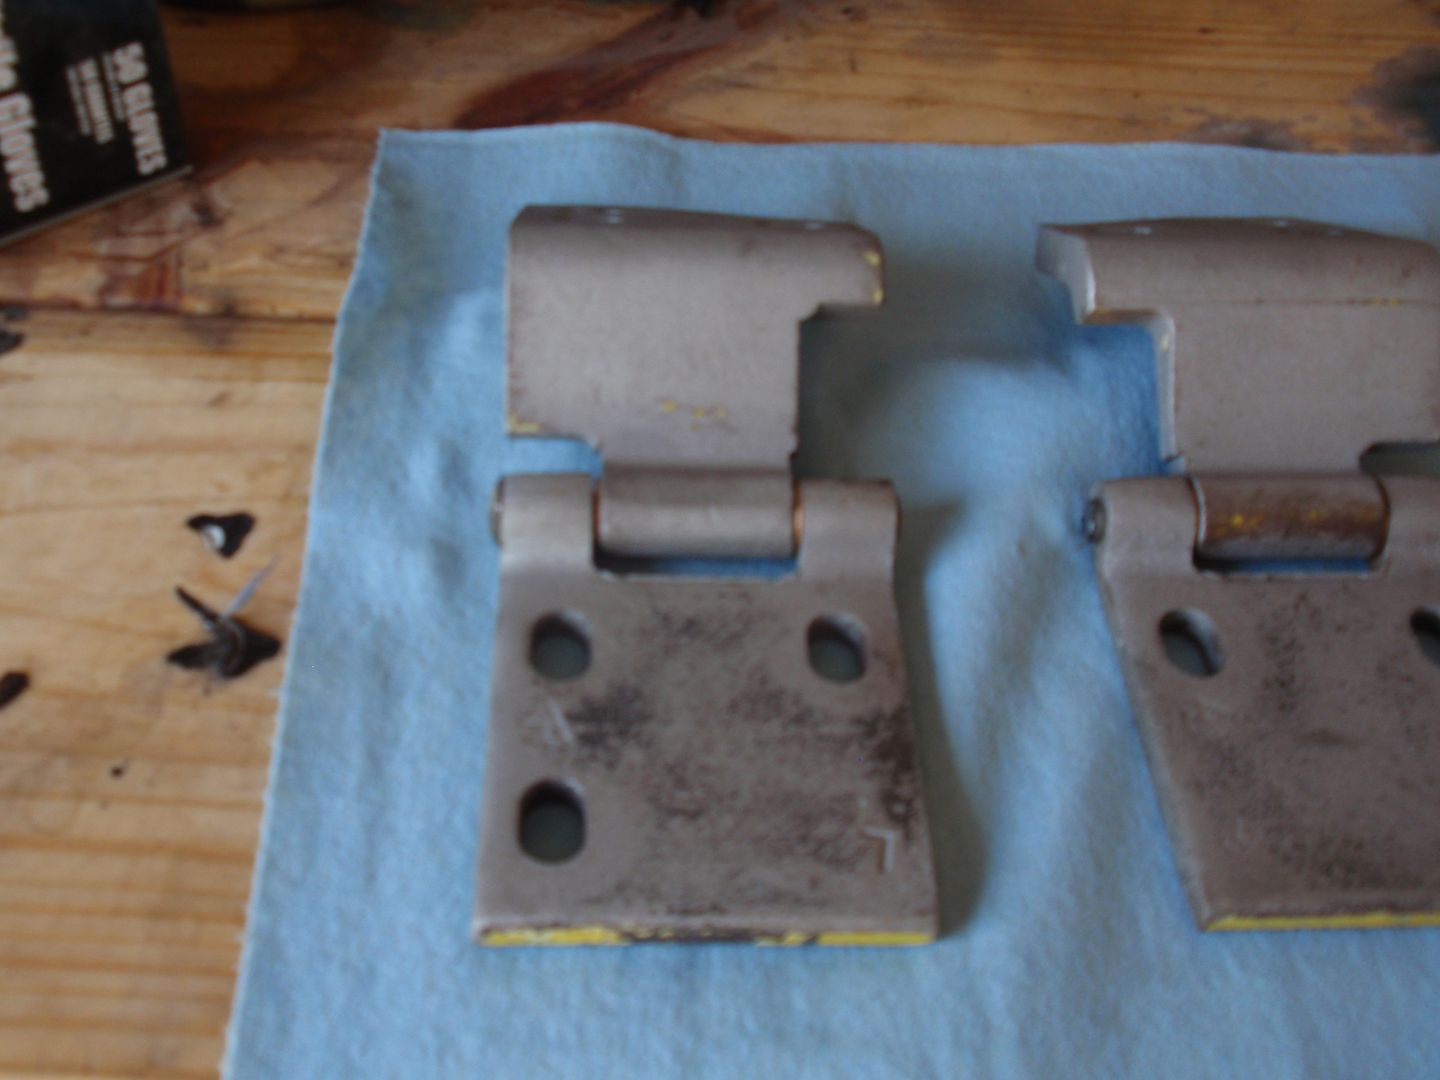 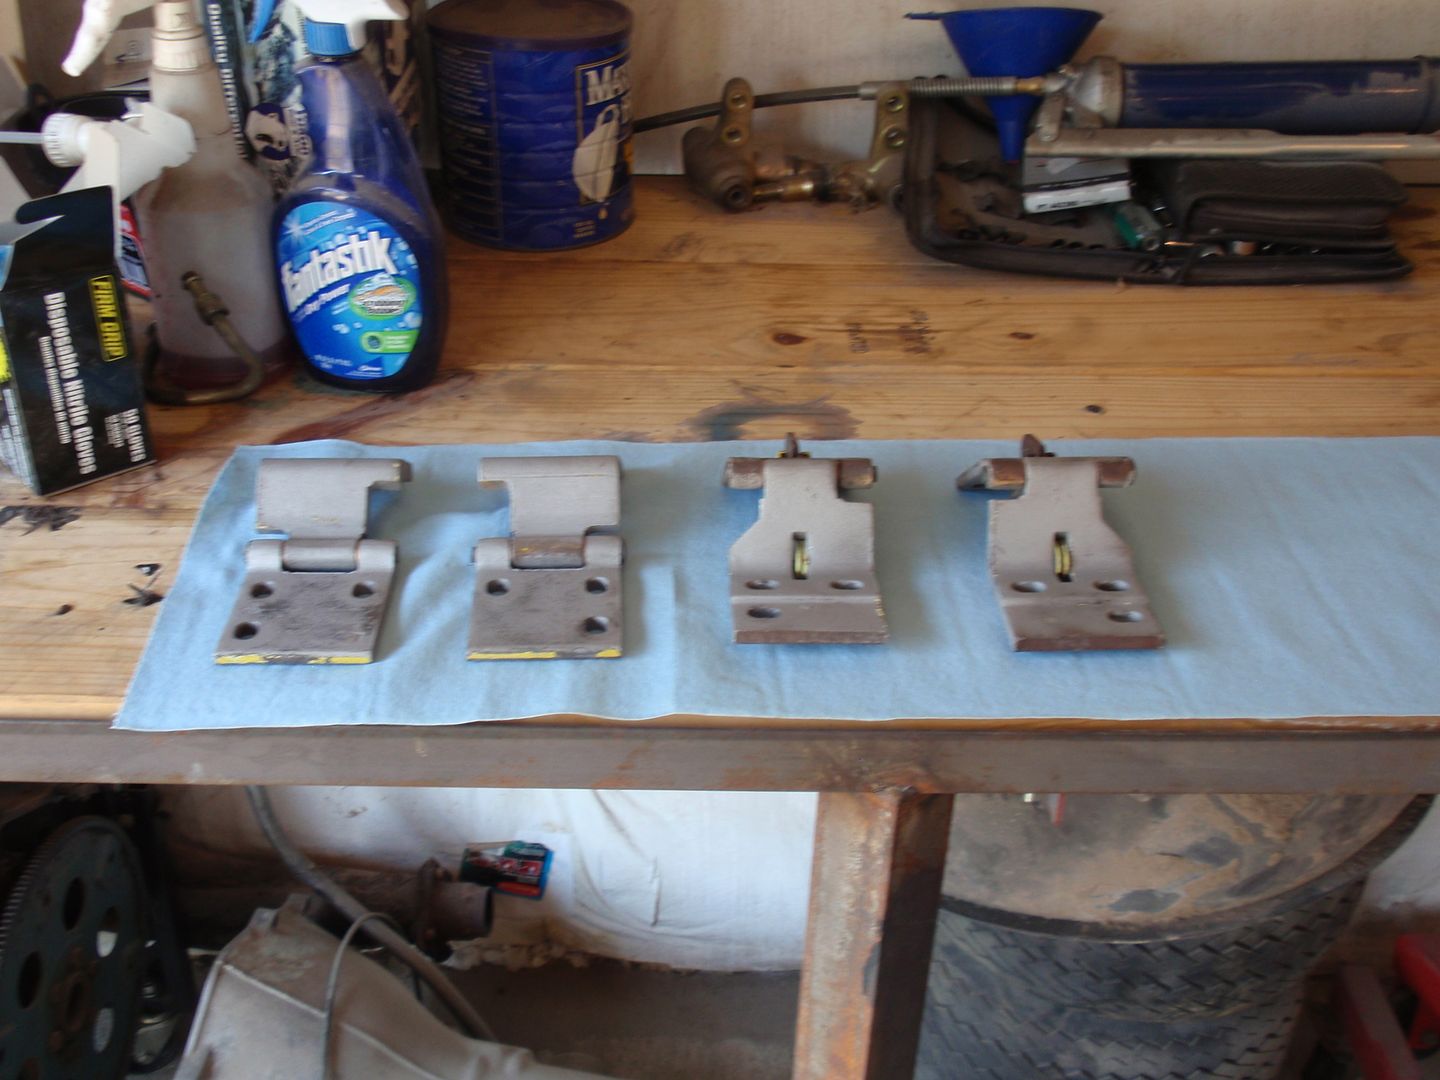   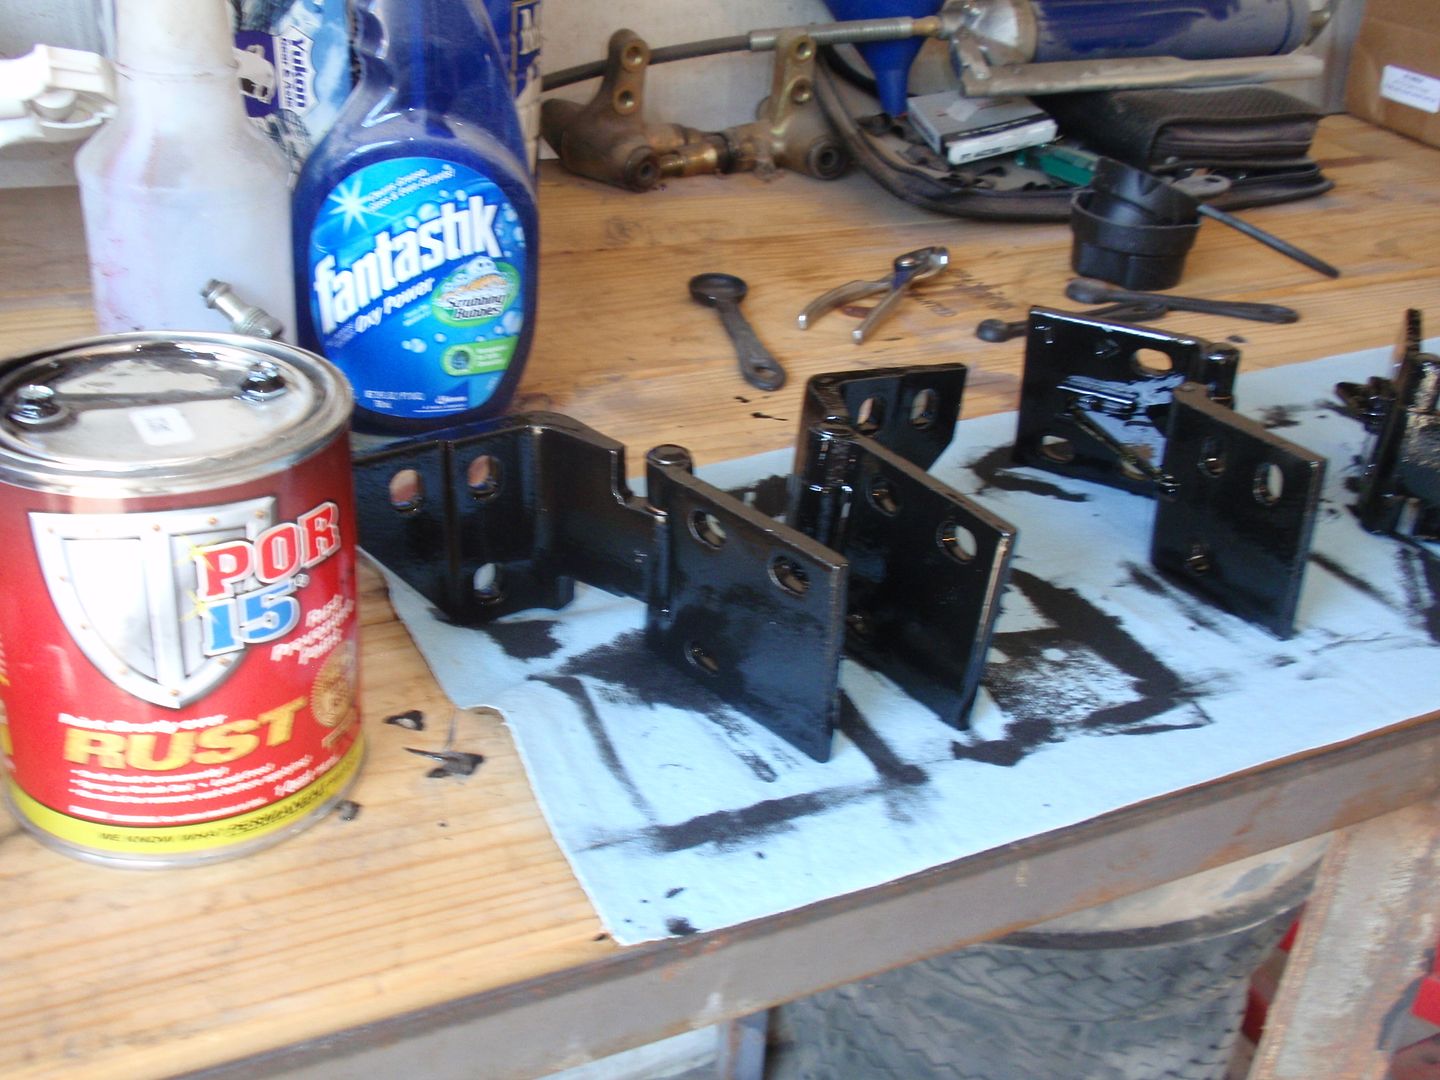 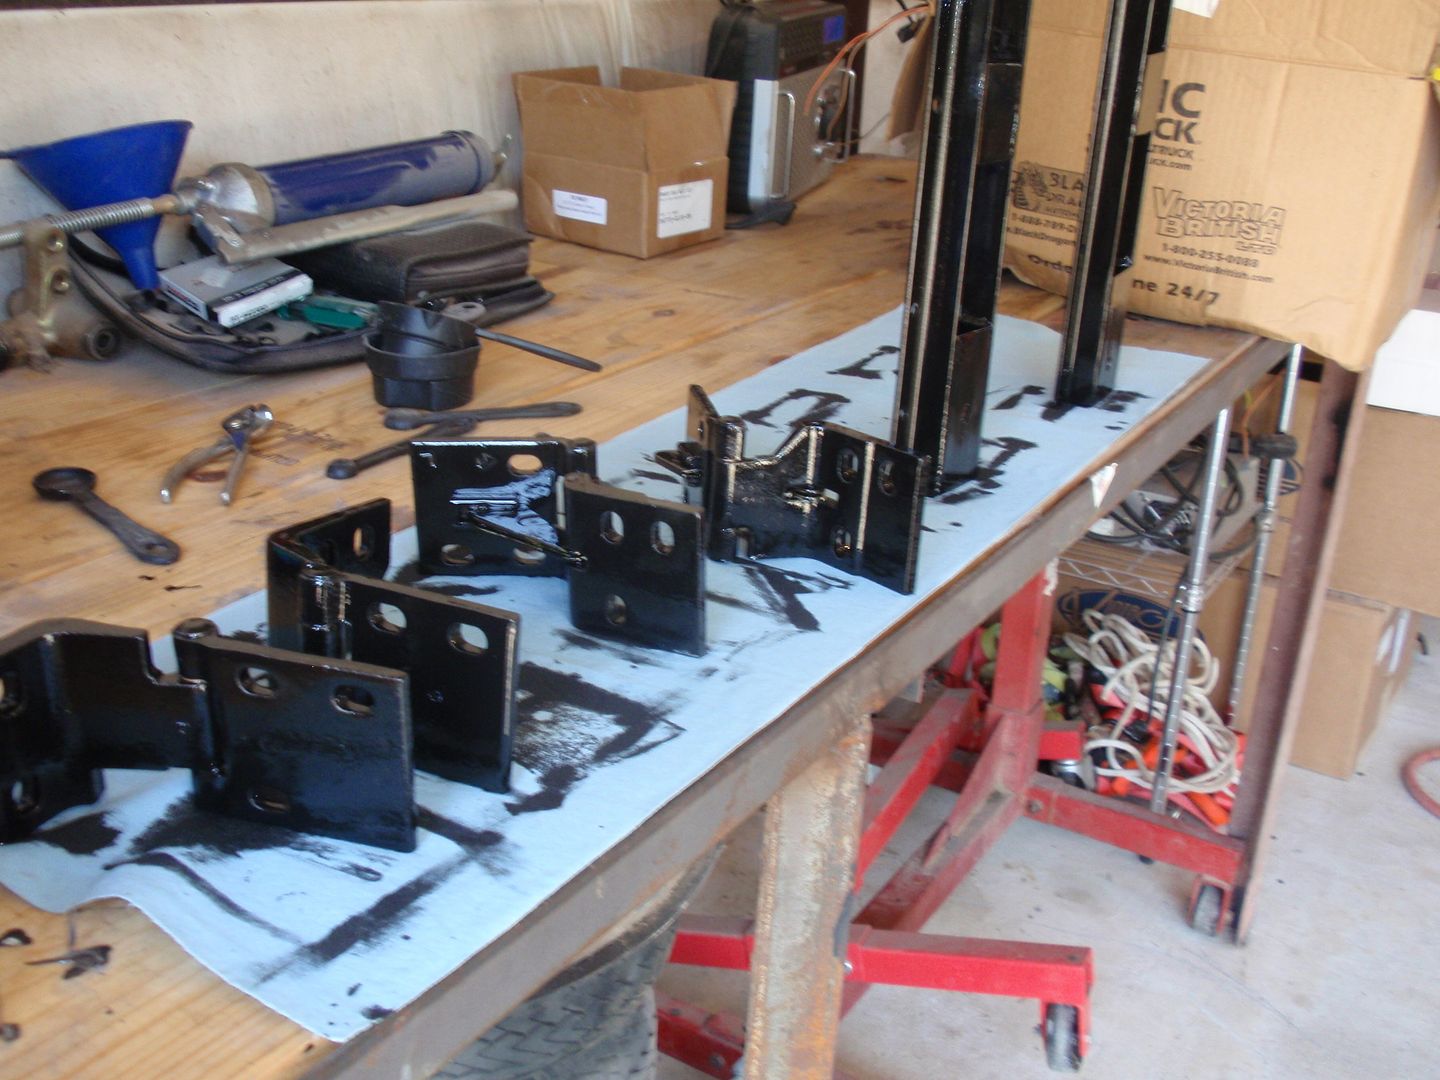 After that I test fit the new doors.. There is an issue with the location of the hinge mounting nuts in the doors. The worst one was on the lower section of the passenger door. It appears it is offset ¼ to 3/8 of an inch.   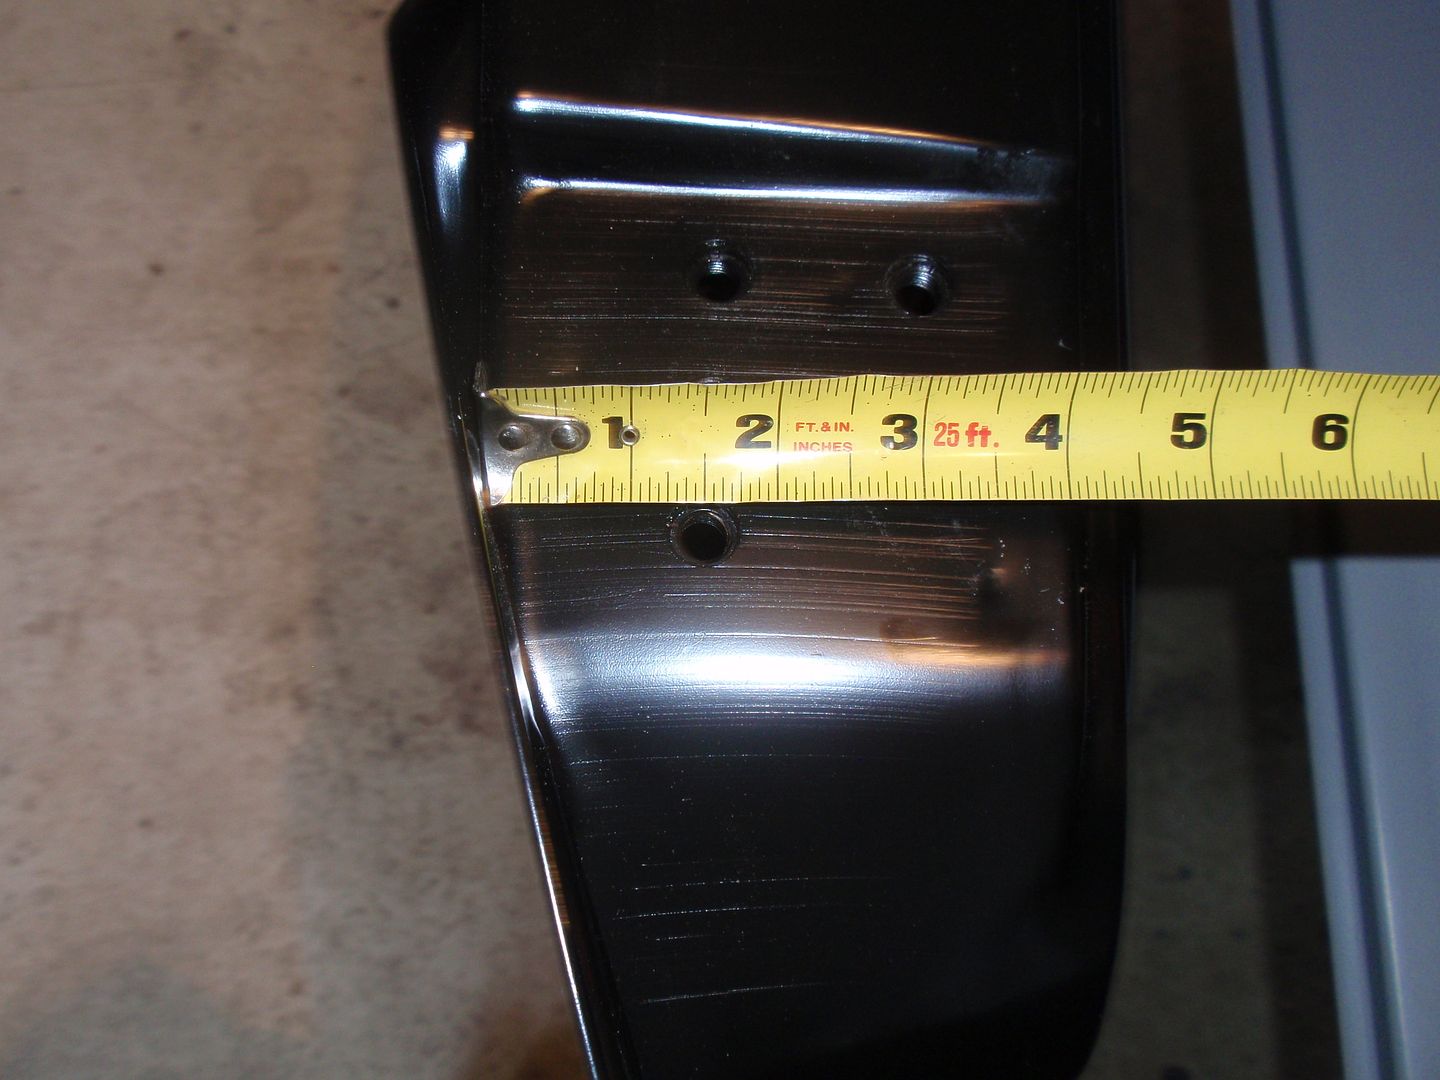 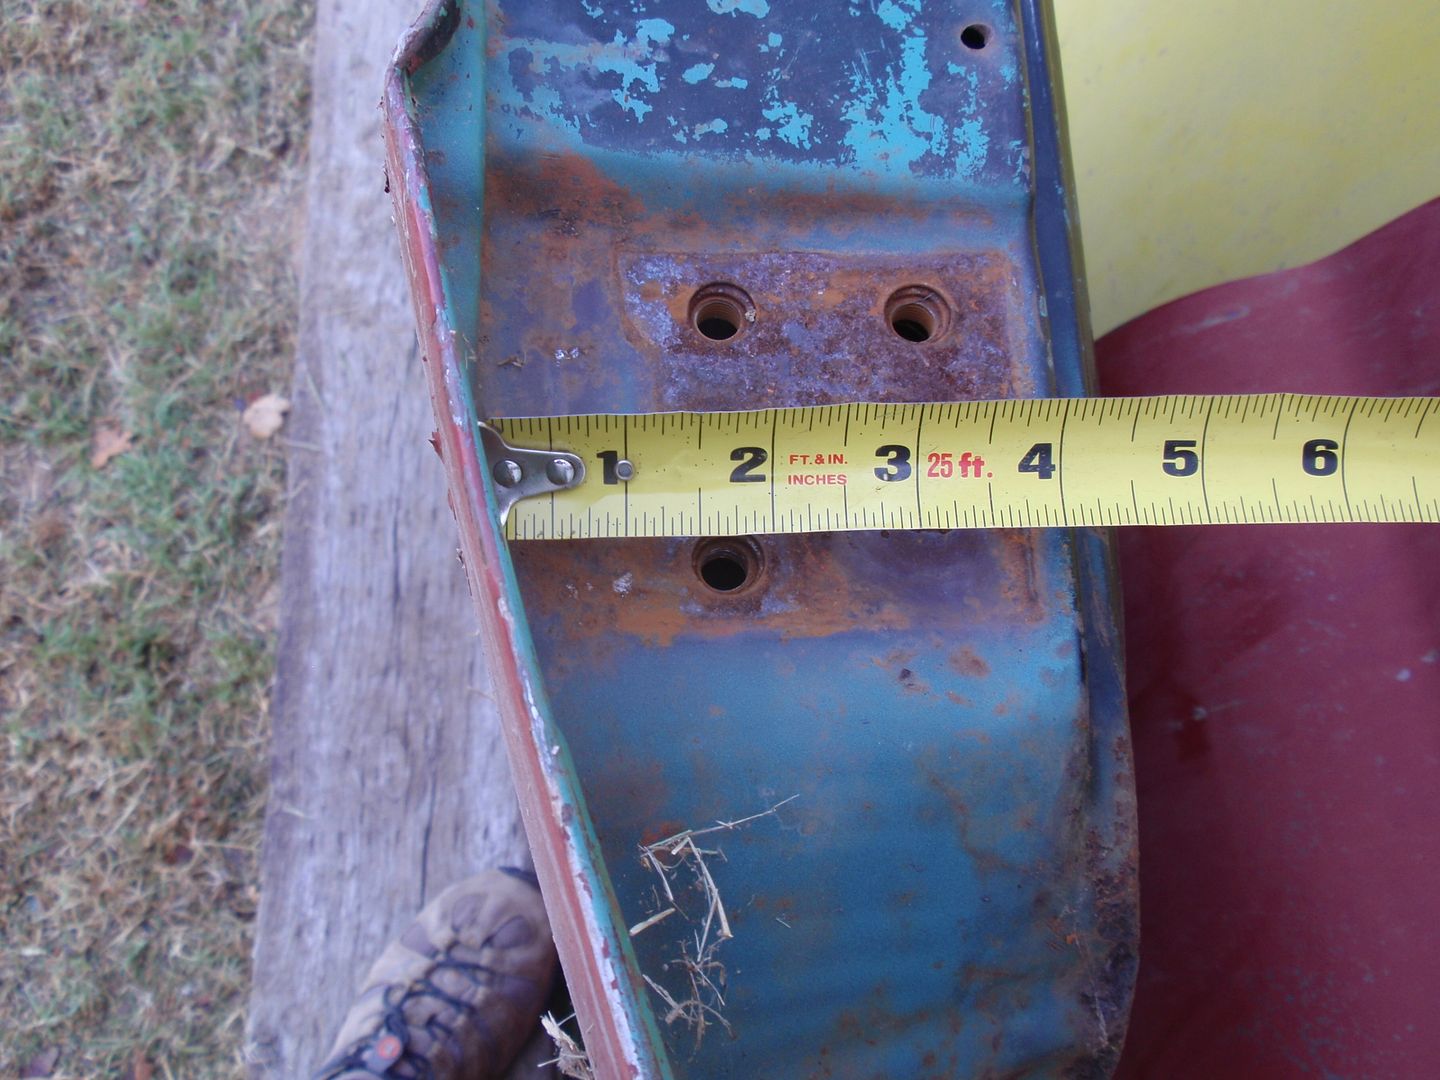  In addition it appears the door window hoop may be too tall on the new doors.. But I have not decided how much yet… 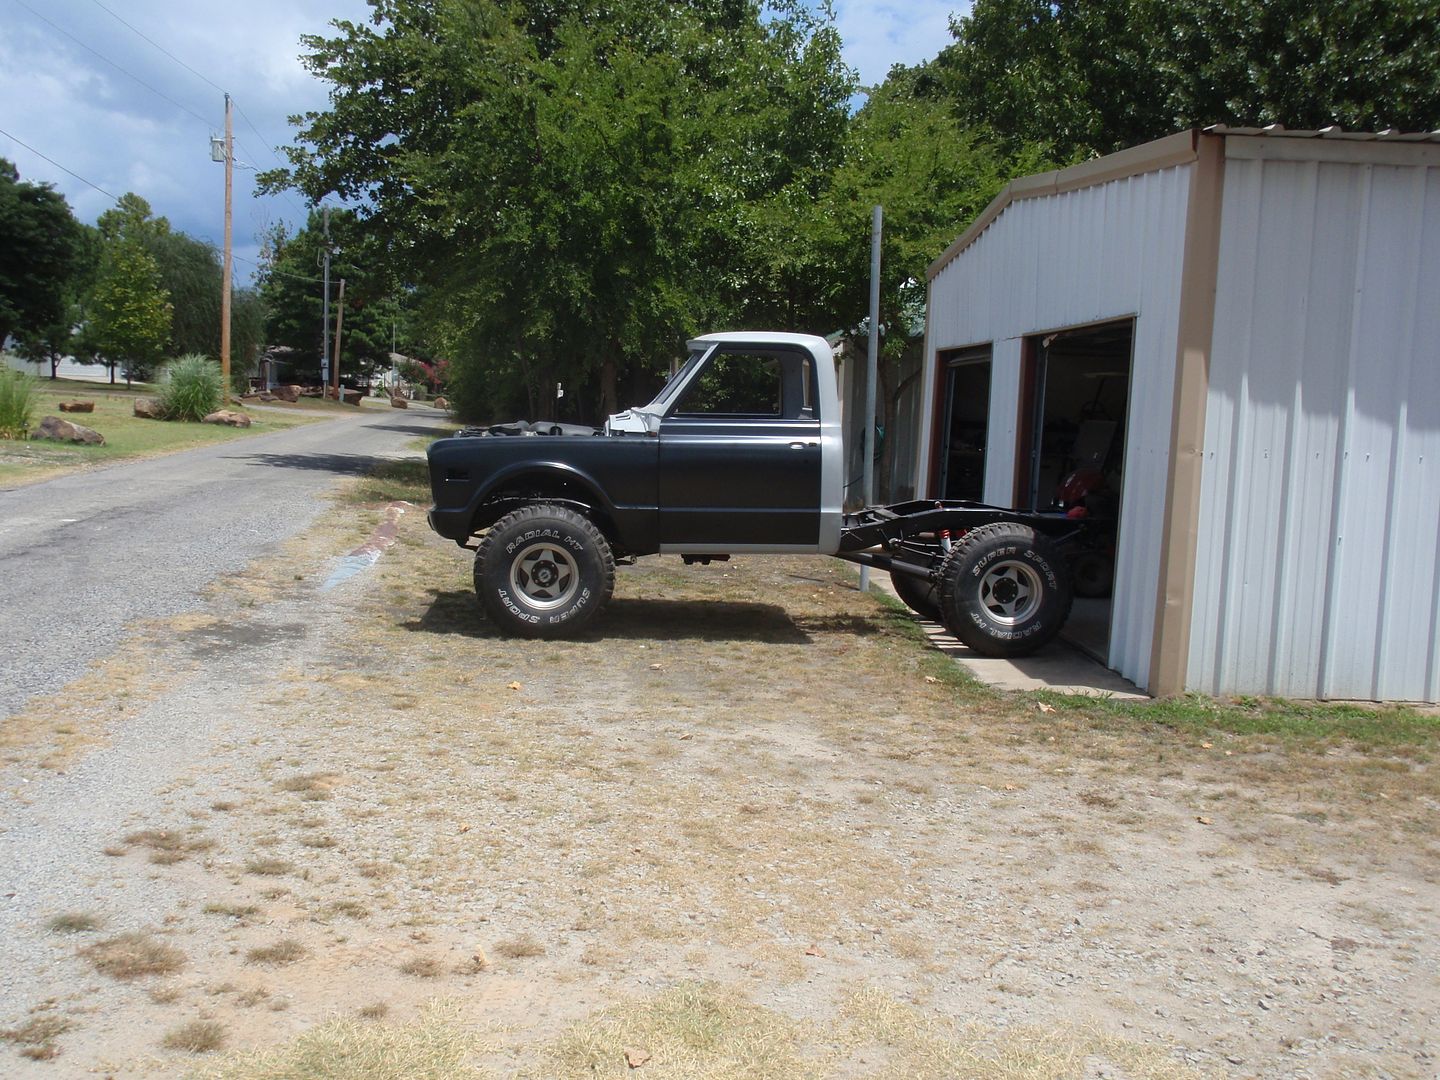 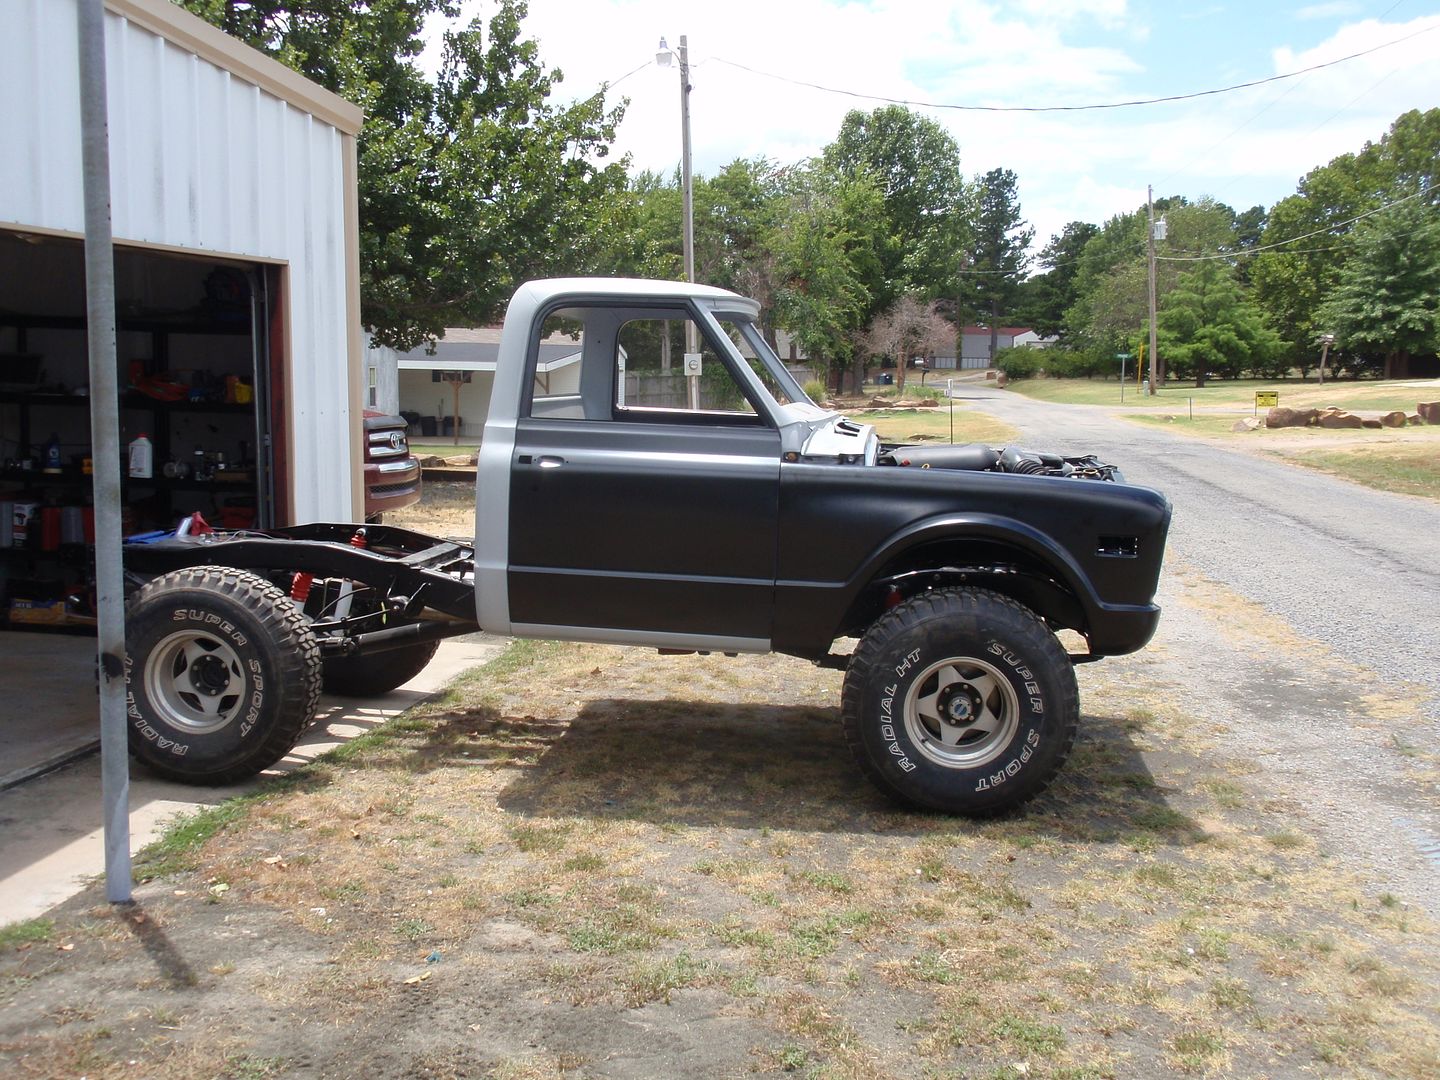   And finally on Sunday I started modifiy the old truck cab wiring harness for the new electronics… 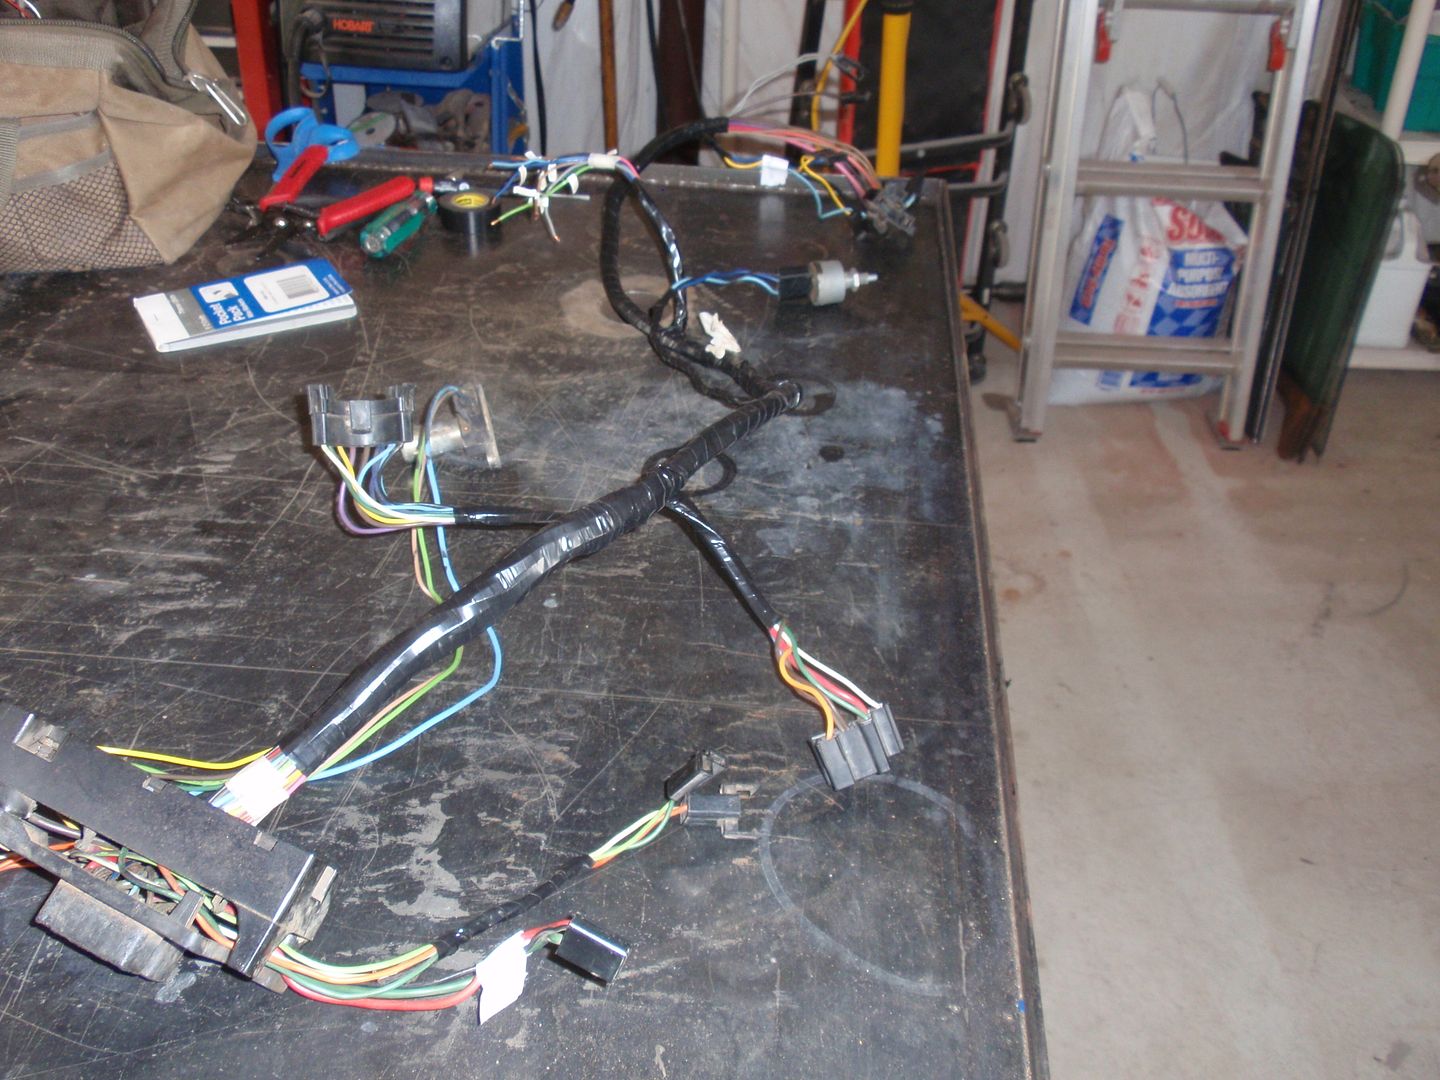 Next week I will build another plate to mount the electronics to for the rest of the relays and modules. This will help me to test and fit my new Dakota Digital Gauge set.
__________________
Mark ----------------------- Crash's 69 4x4 SWB Crash's Roof over Lake Home Crash's 1988 Land Cruiser Build Last edited by Crash_OK; 07-16-2012 at 08:50 PM. |
|
|
|
|
07-20-2012, 02:19 PM
|
#403 |
|
Registered User
Join Date: Jun 2012
Location: San antonio, TEXAS
Posts: 74
|
Re: Crash's 72 K10
I really wanna do this to my 72 but the only thing scareing me away is all the wires and electronics....
Thats really the only thing thats holding me back... How hard/easy would it be for someone who doesnt really ever work with wires to redo the wire harness like you did? Btw your truck looks really nice and im really liking your stands  Posted via Mobile Device |
|
|
|
|
07-20-2012, 03:55 PM
|
#404 | |
|
Registered User
Join Date: Nov 2011
Location: Edmond, OK.
Posts: 1,362
|
Re: Crash's 72 K10
Quote:
Good luck and thanks for the comments...
__________________
Mark ----------------------- Crash's 69 4x4 SWB Crash's Roof over Lake Home Crash's 1988 Land Cruiser Build |
|
|
|
|
|
07-21-2012, 07:32 AM
|
#405 |
|
Still Learning
Join Date: Jul 2009
Location: Central Oklahoma
Posts: 10,108
|
Re: Crash's 72 K10
Very nice progress Mark! Things are really coming together for you.
Posted via Mobile Device |
|
|
|
|
07-21-2012, 09:49 AM
|
#406 | |
|
Registered User
Join Date: Nov 2011
Location: Edmond, OK.
Posts: 1,362
|
Re: Crash's 72 K10
Quote:
Hope you are fishing or golfing today... Posted via Mobile Device
__________________
Mark ----------------------- Crash's 69 4x4 SWB Crash's Roof over Lake Home Crash's 1988 Land Cruiser Build |
|
|
|
|
|
07-28-2012, 10:48 PM
|
#407 |
|
Registered User
Join Date: Nov 2011
Location: Edmond, OK.
Posts: 1,362
|
Re: Crash's 72 K10
Time for a update.. IT IS FREAKING HOT!! 110F today .. That’s the update…
I am still working on the electrical stuff.. Modifying the original wiring harness to work with the new Dakota Digital gauges, Vintage Air AC, and late model PCM. First step is rework (I Hate it, but it happens).. Removed TAC module from above the PCM to new mounting plate on firewall. Then install DD control box were the TAC was. 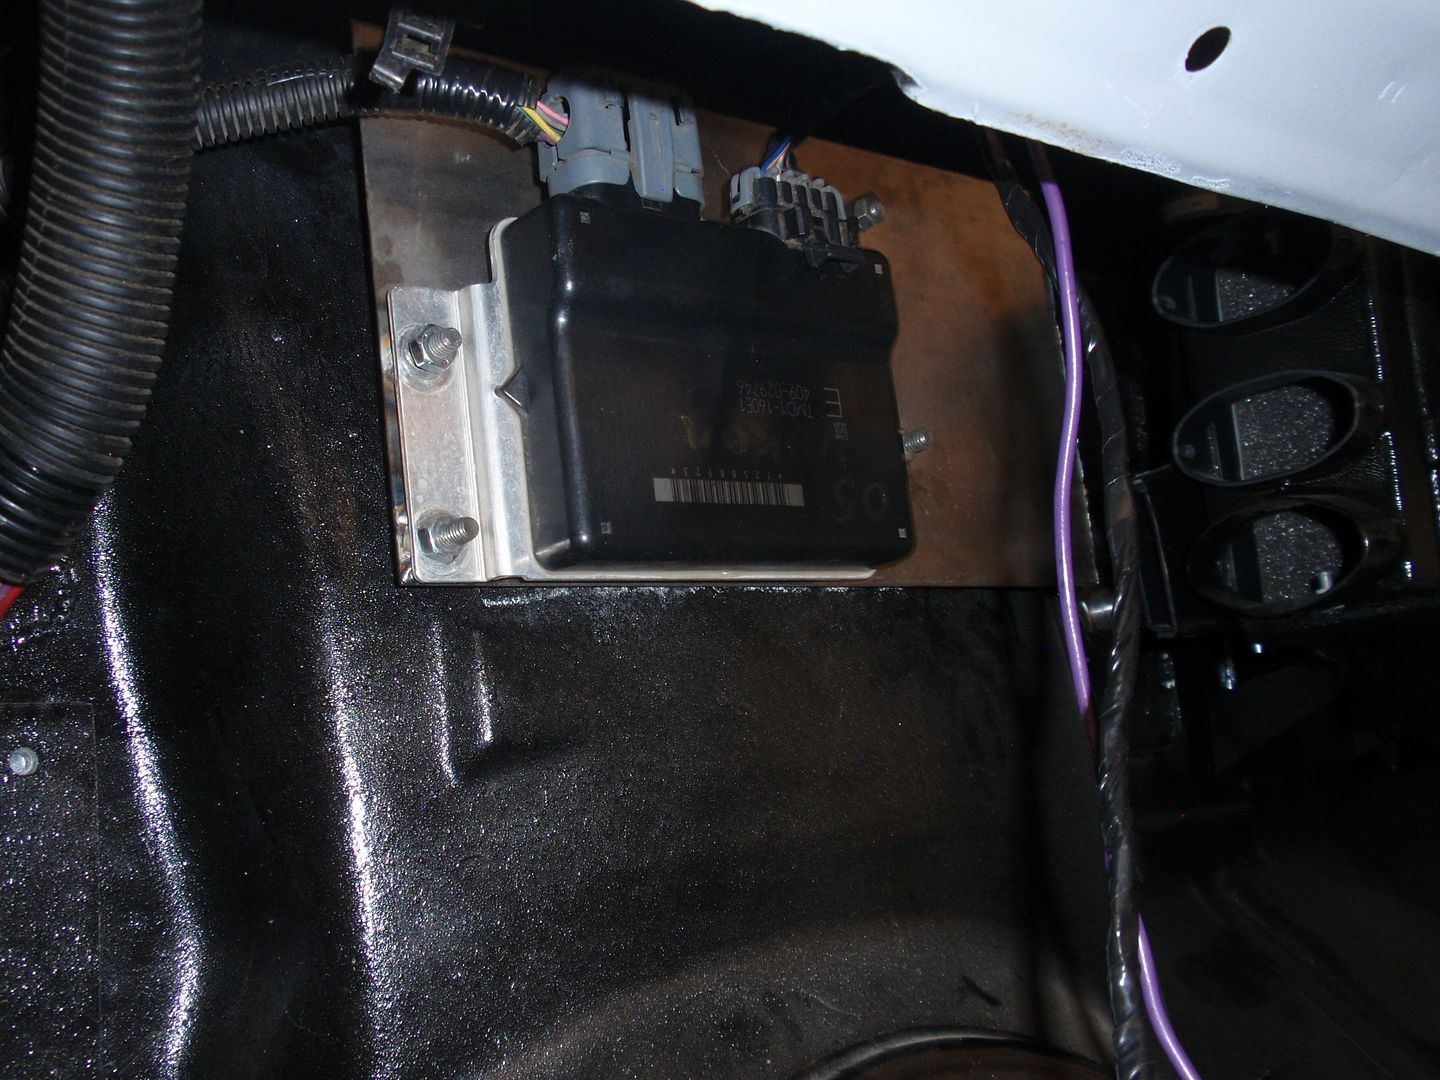 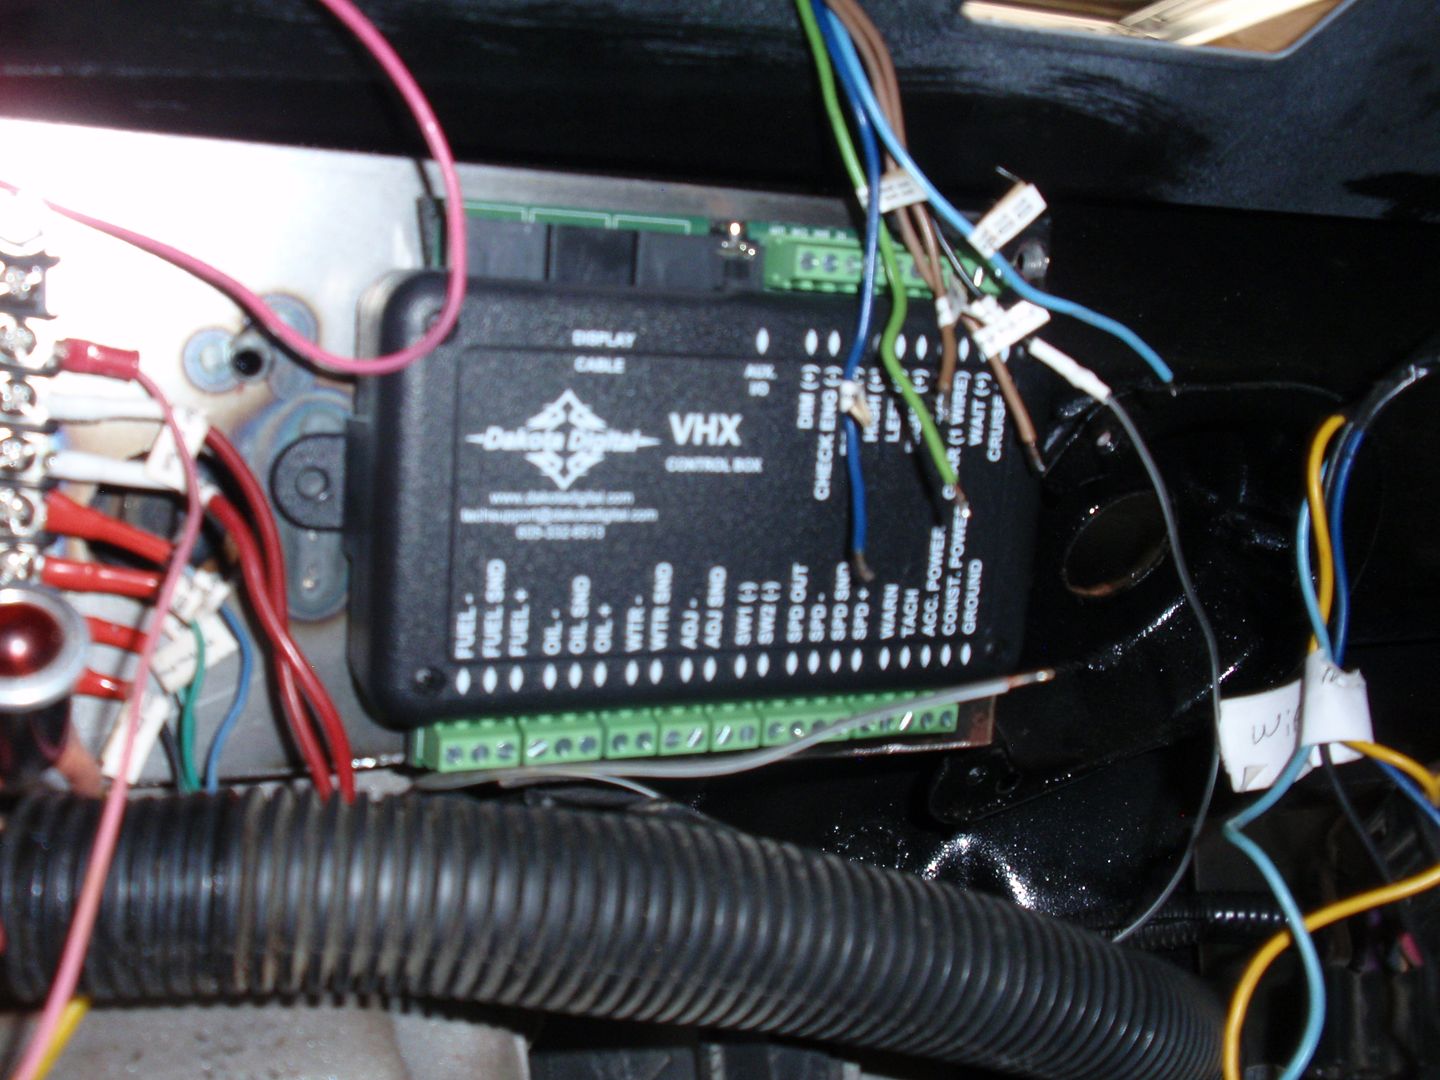 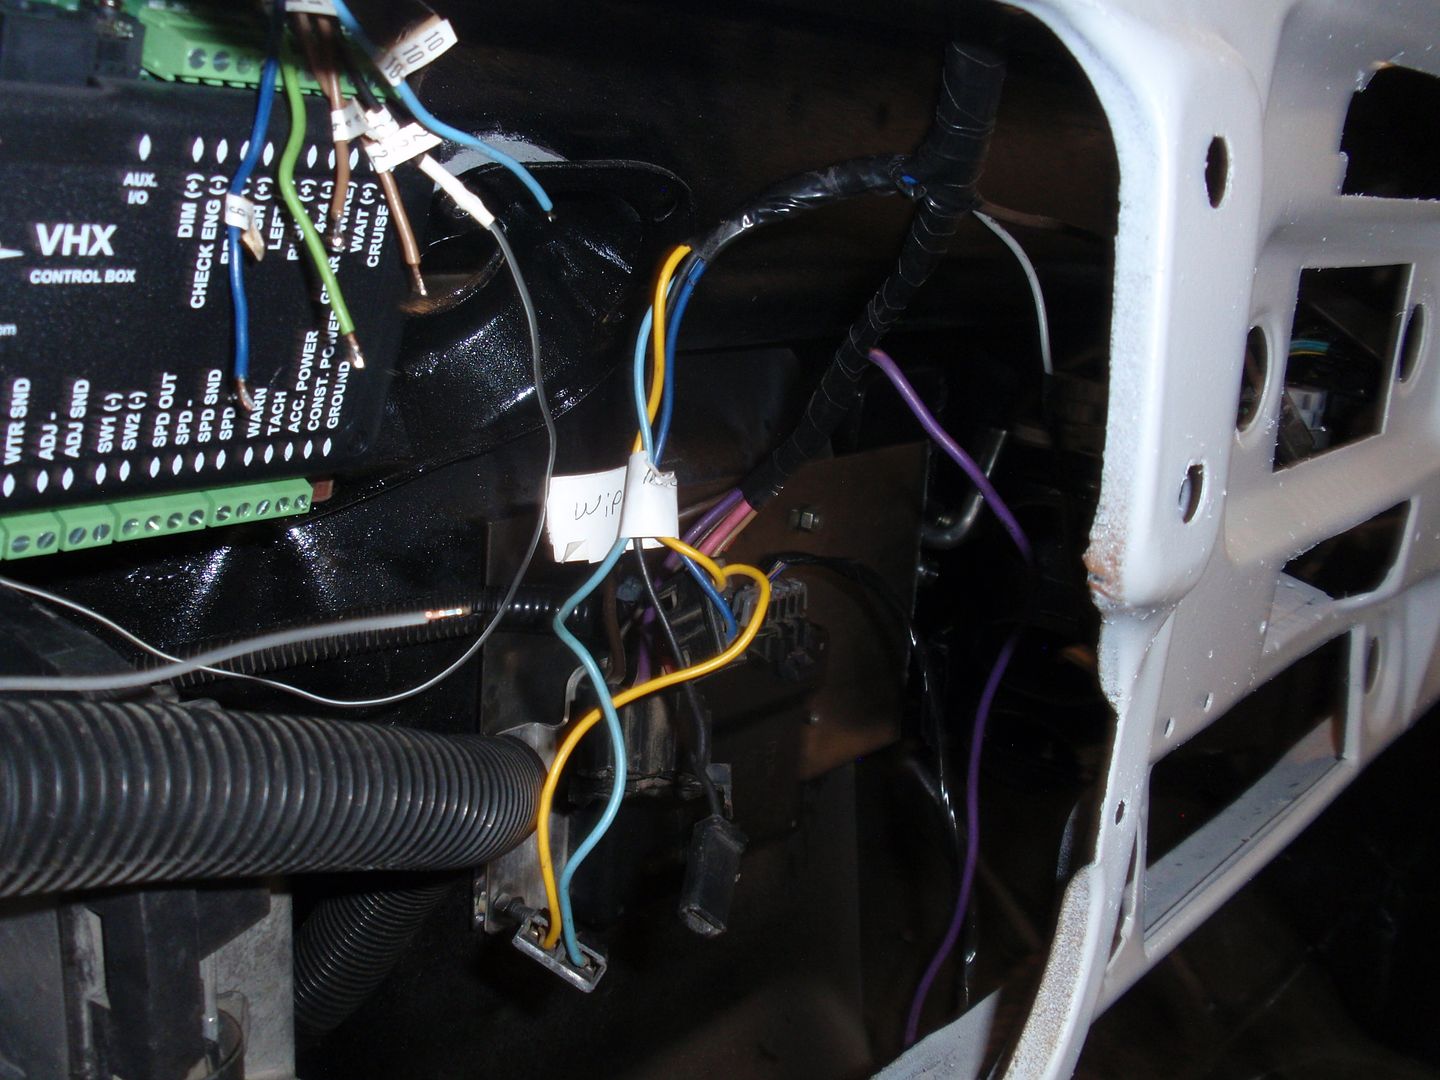 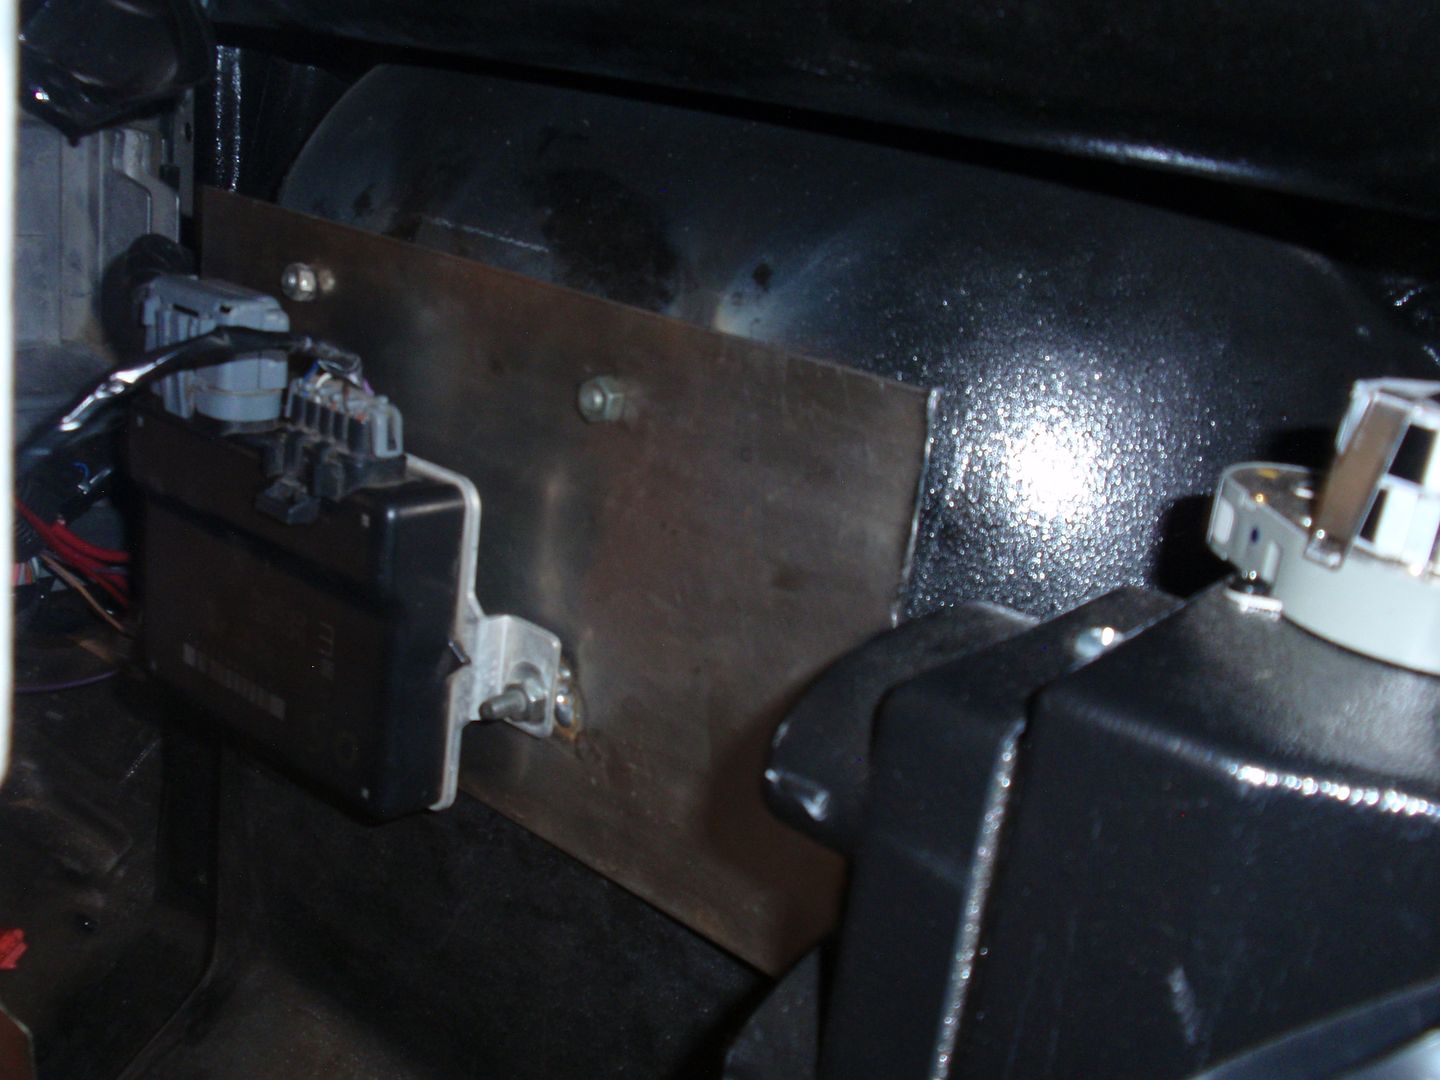 Next problem was bring the rear wiring harness, fuel pump, fuel sending unit, low fuel sensor, AC, and heater solenoid wires into the cab without cutting new holes in the firewall. I decided to use the existing wire bulkhead connector. It had spare slots. First step was to find the terminal ends needed.. 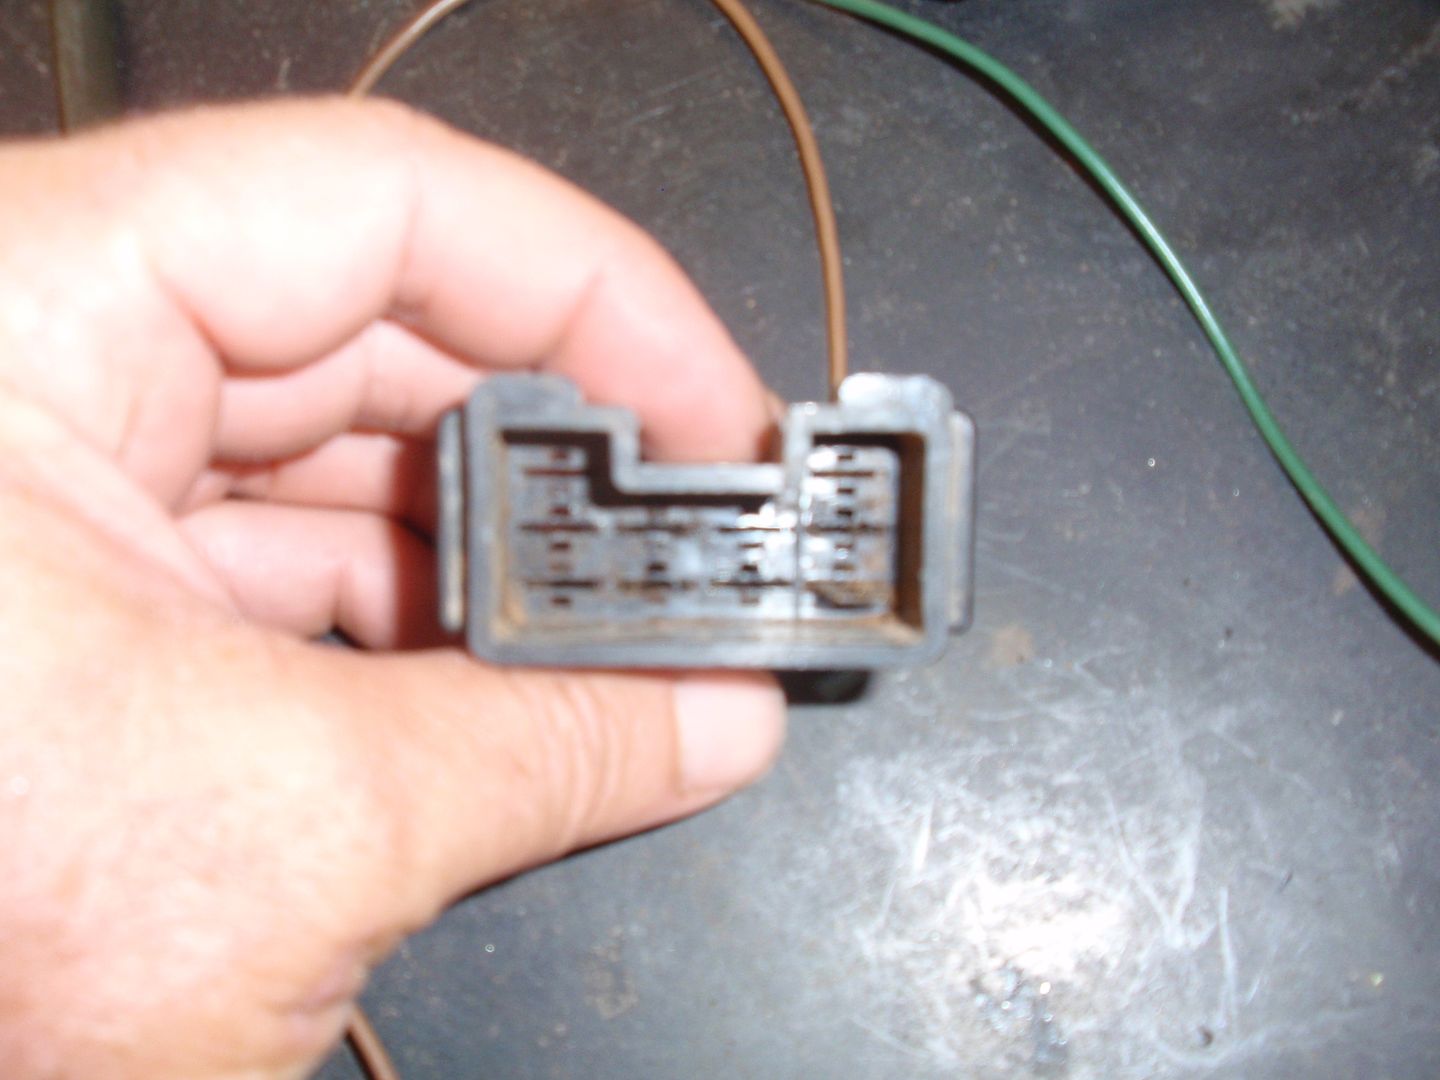 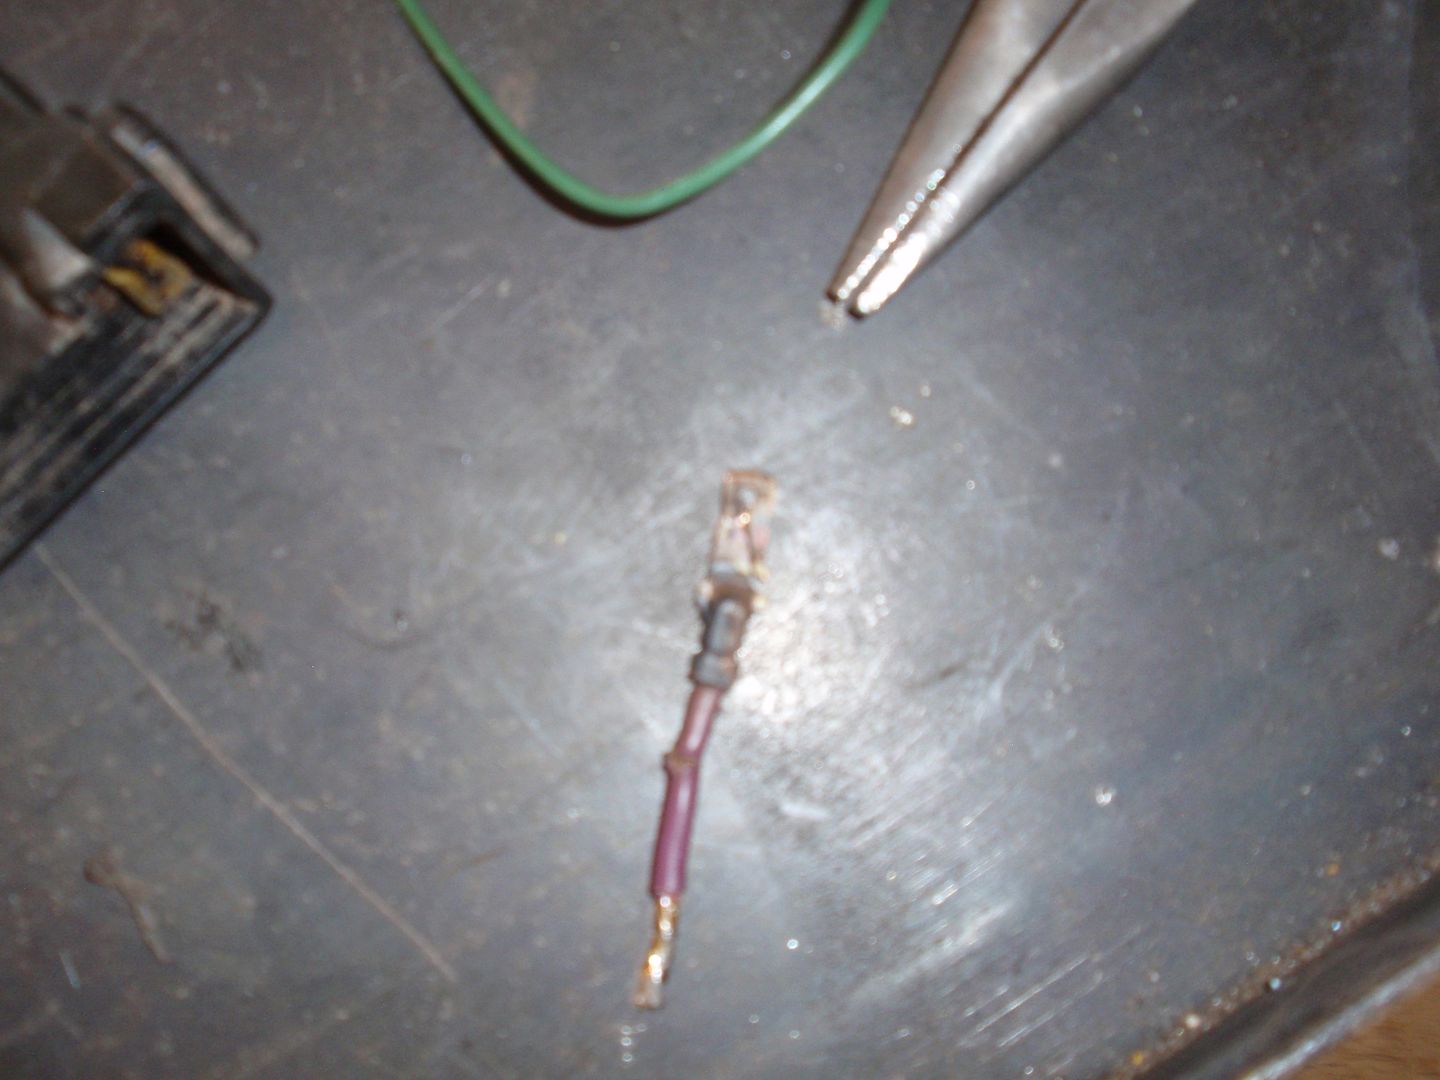 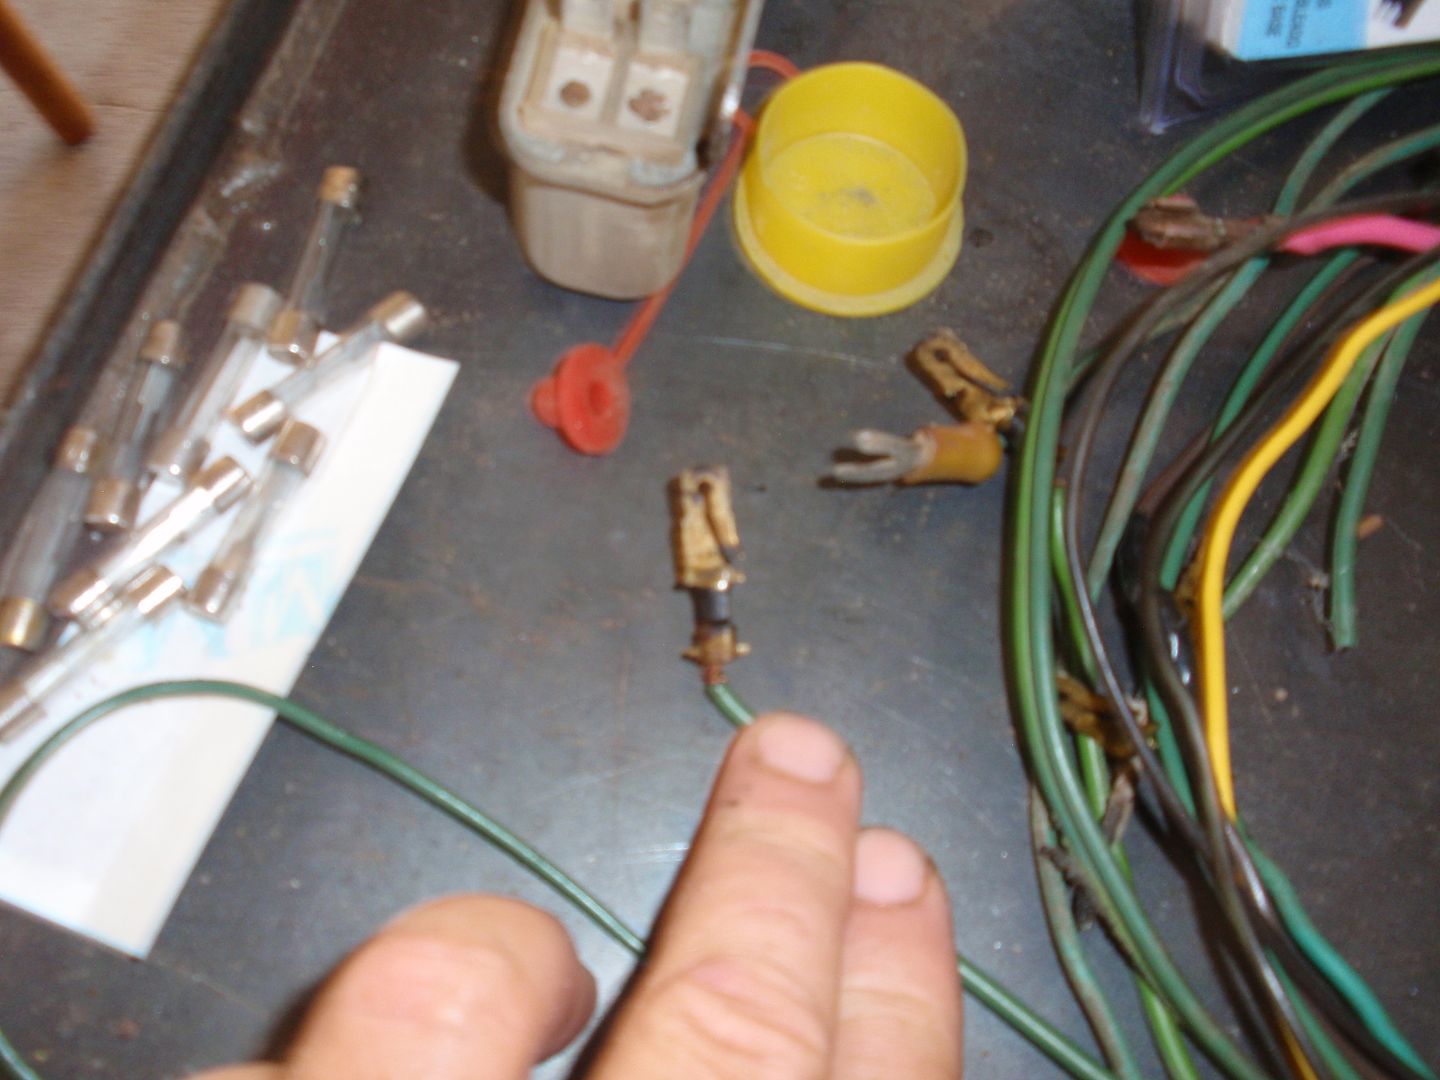 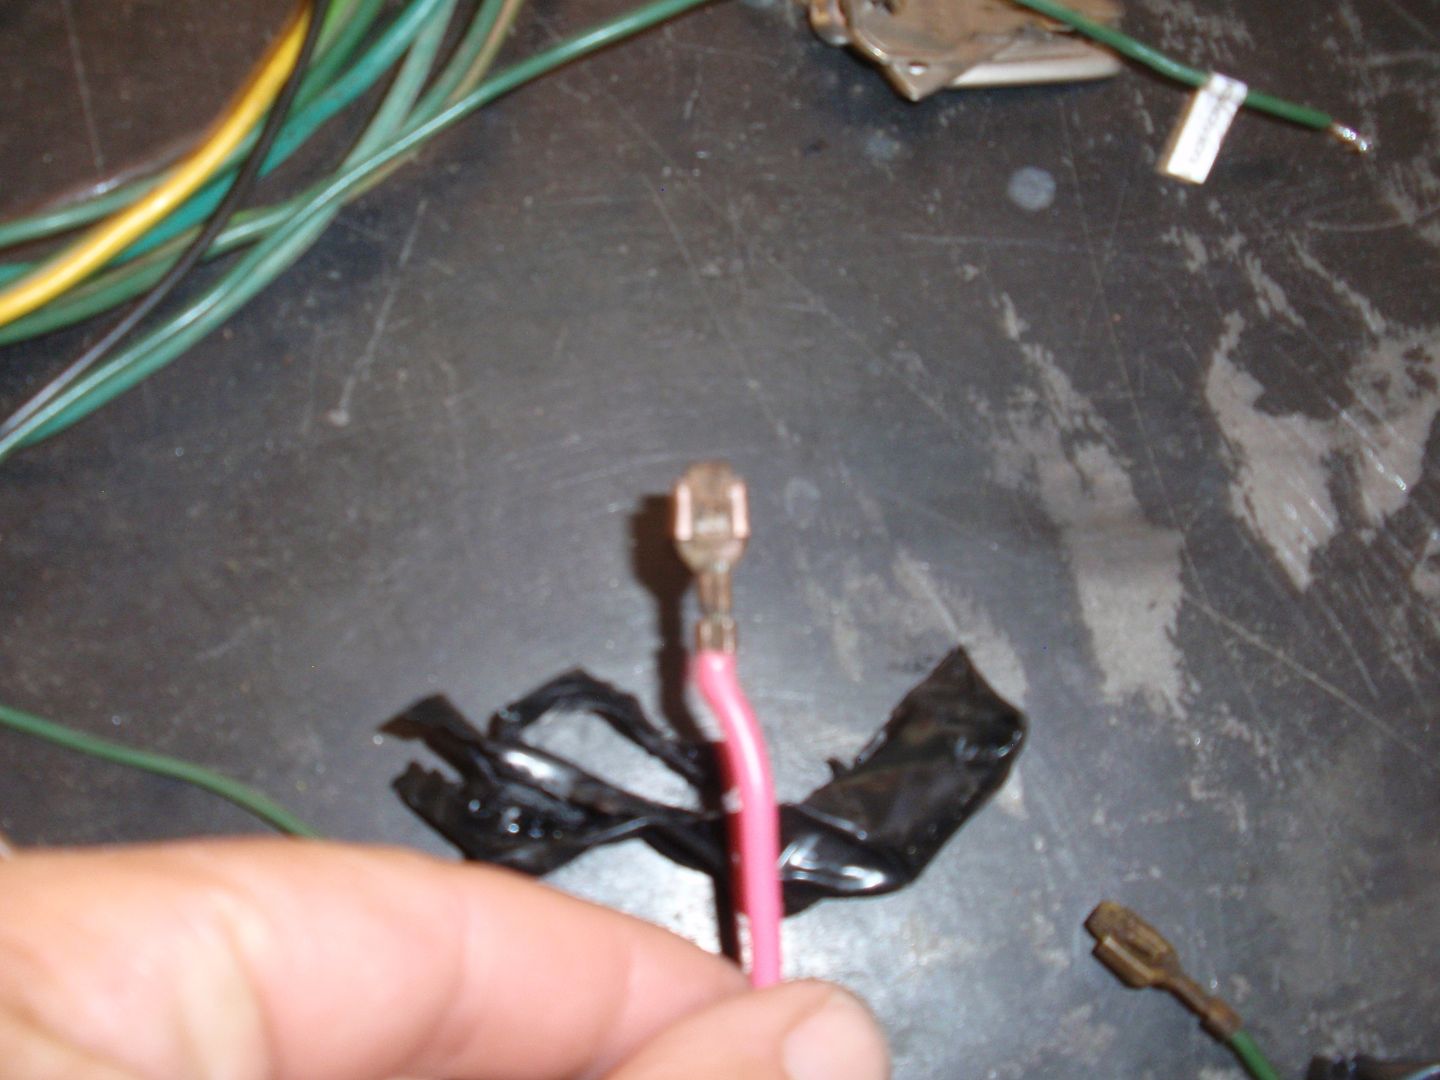 I found the terminal ends at DigiKey. 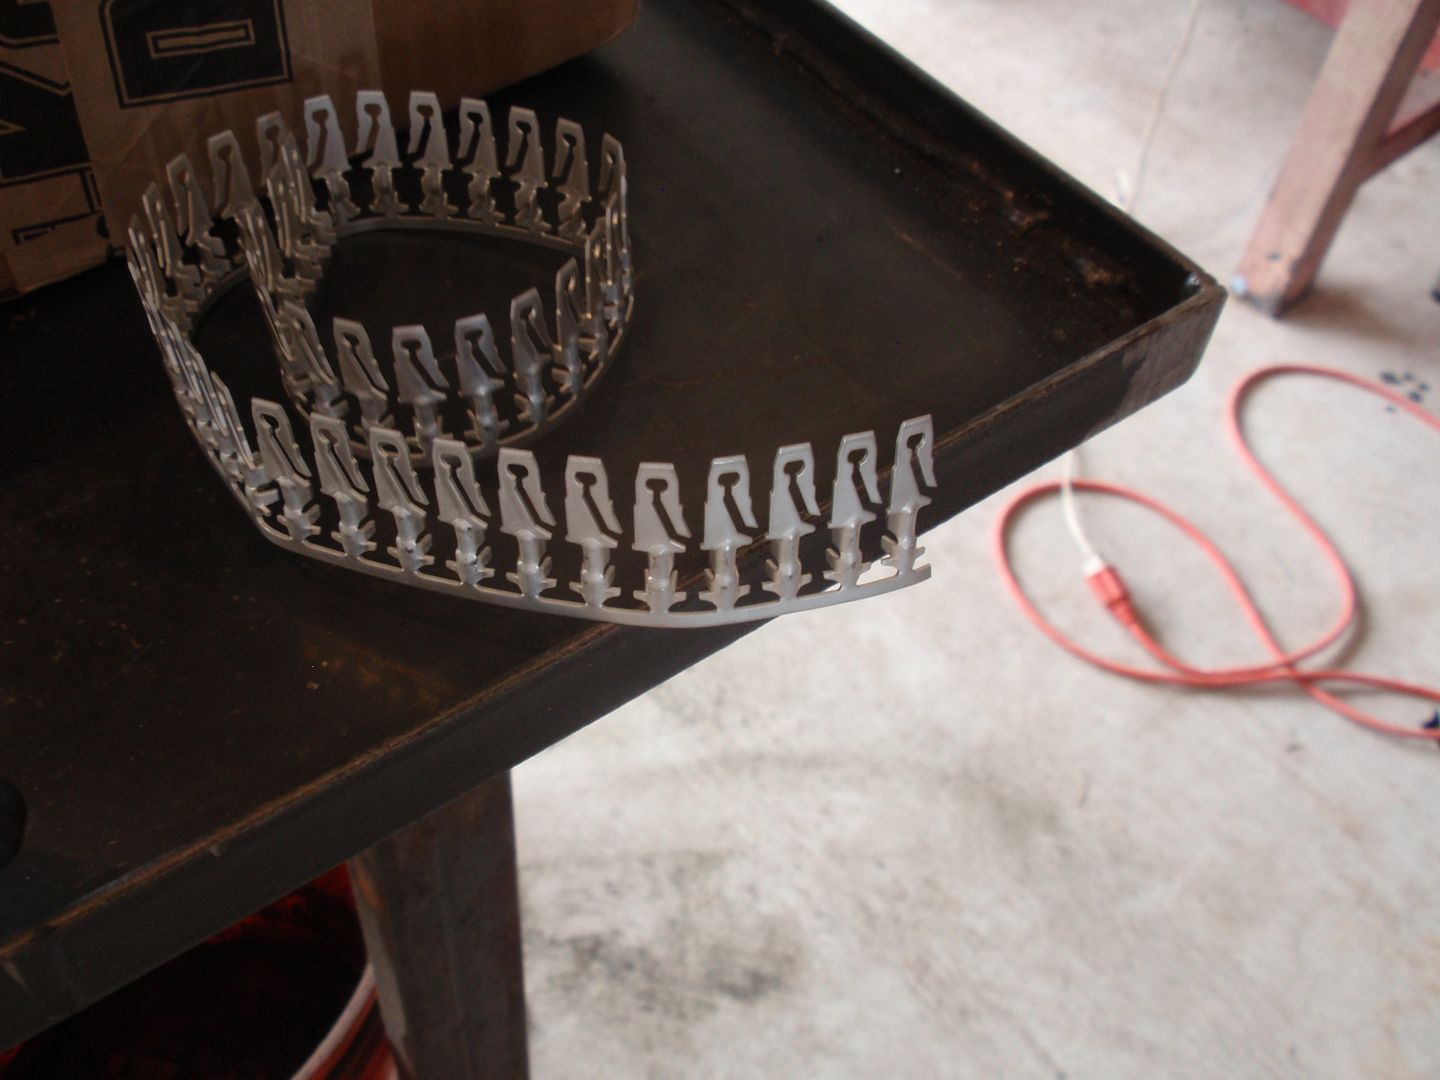 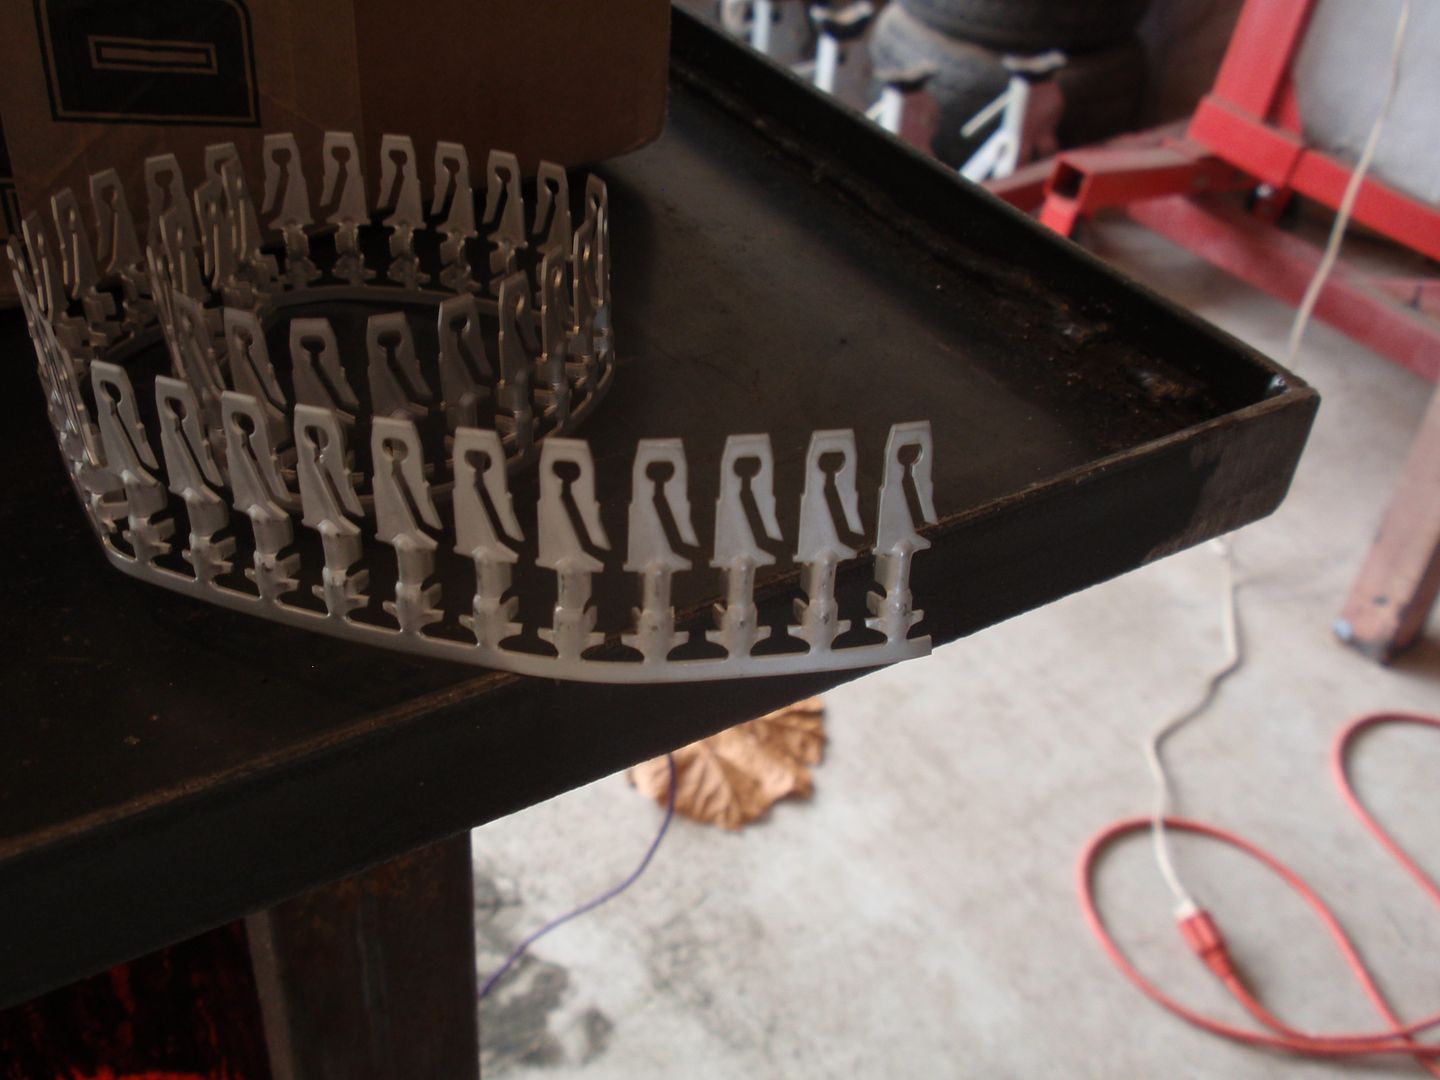 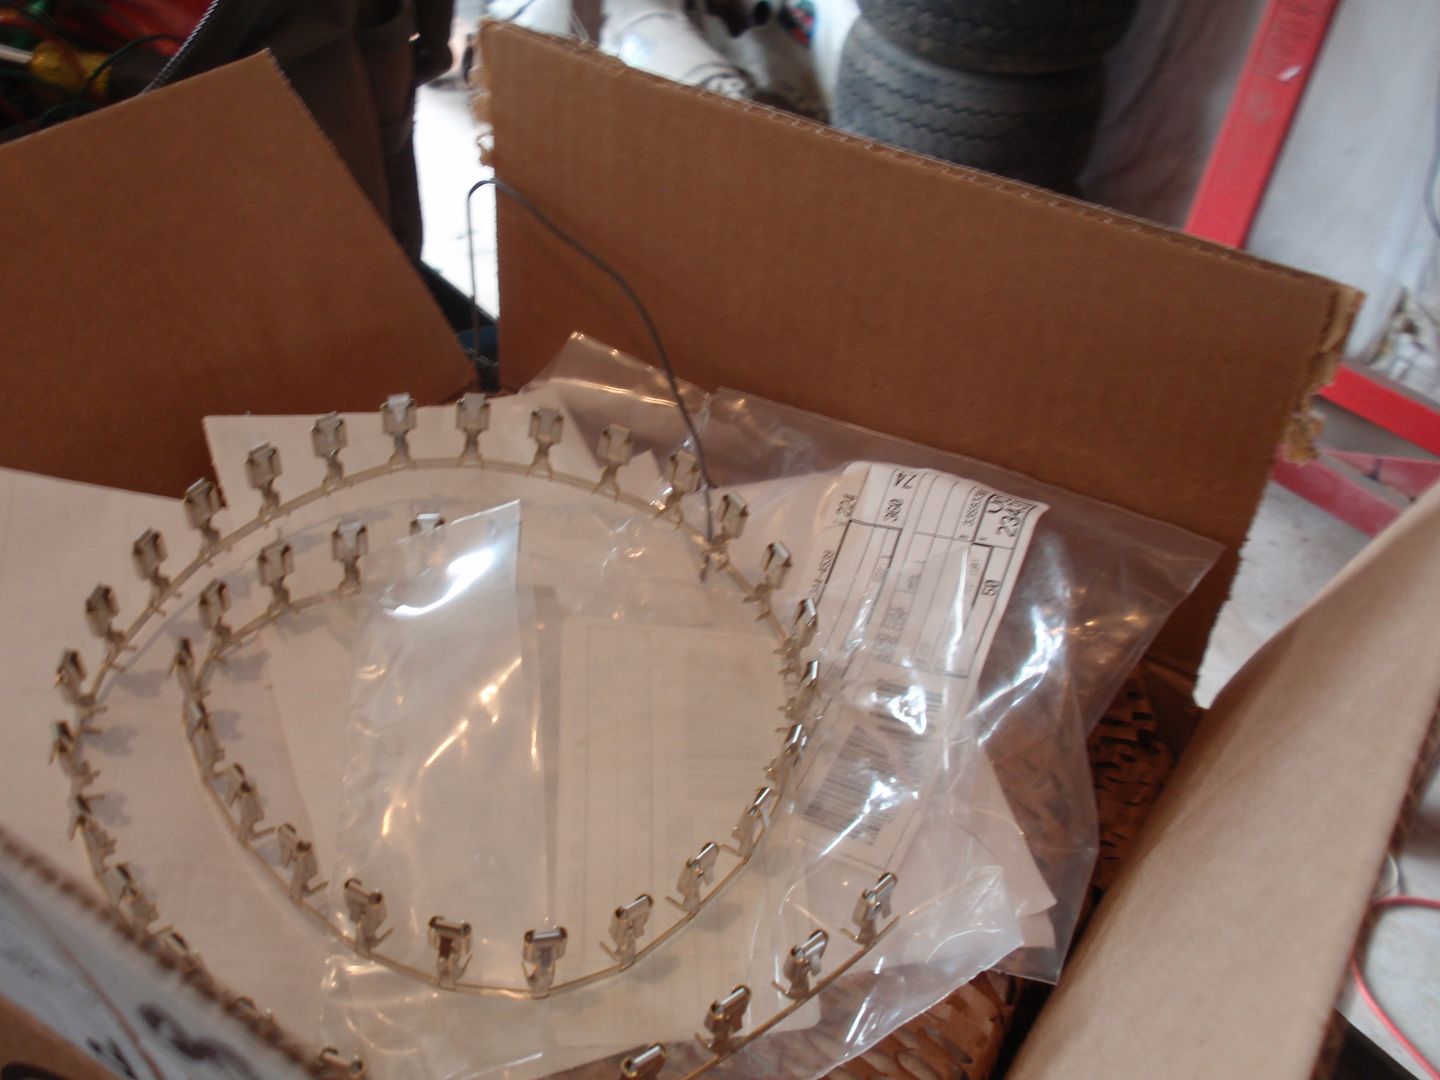 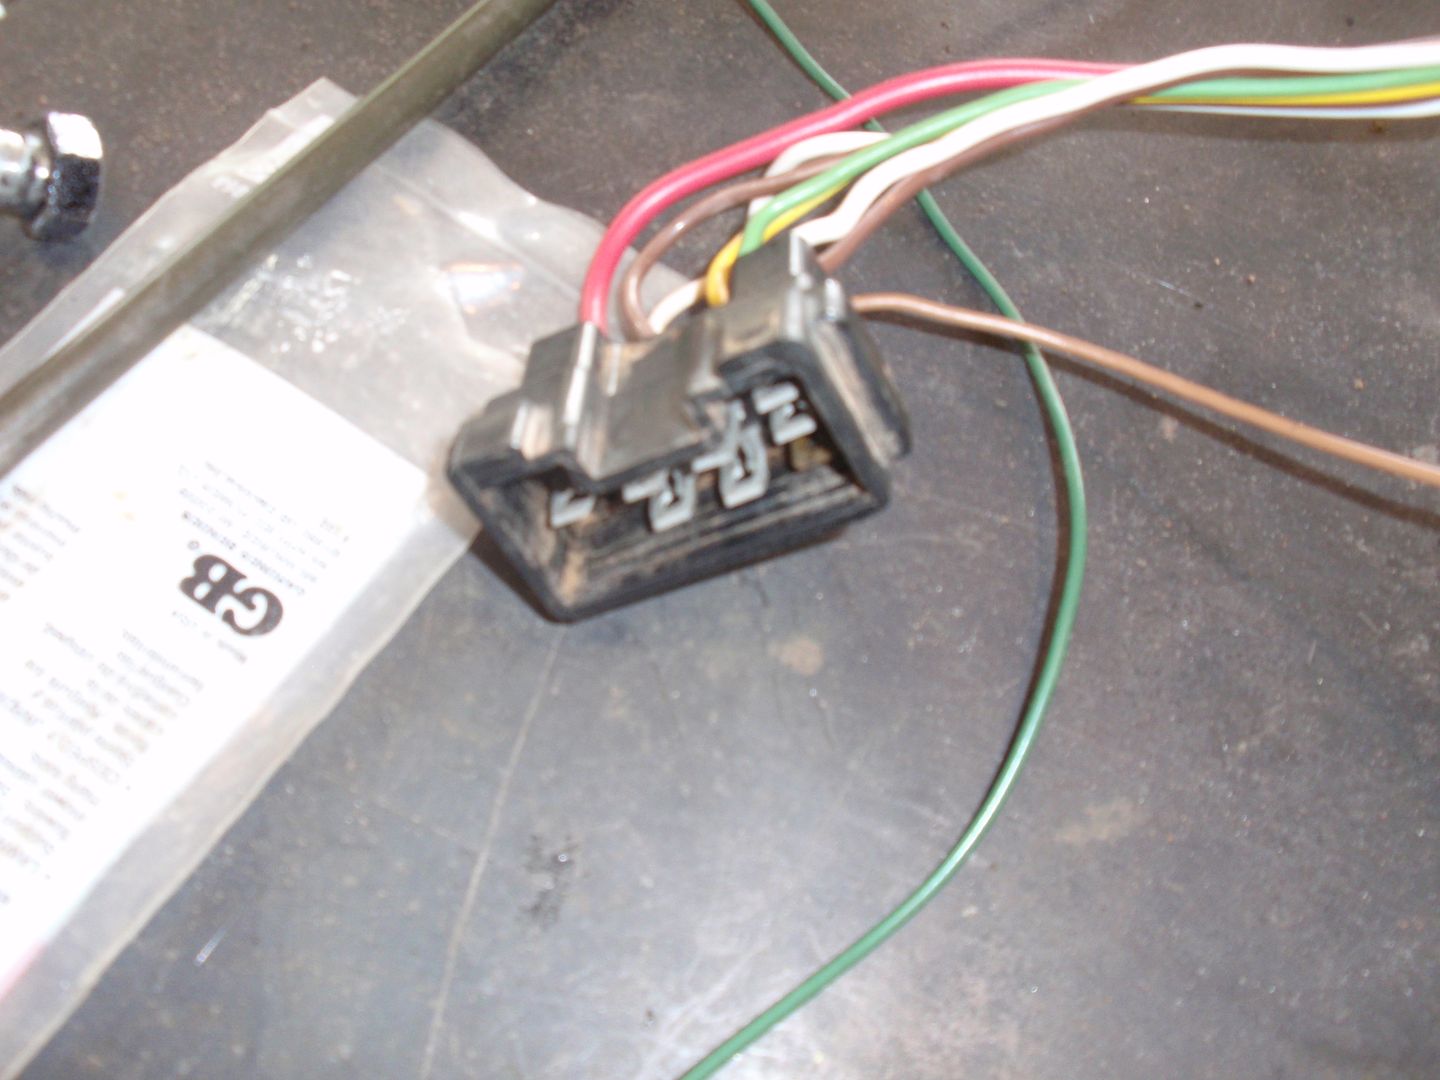 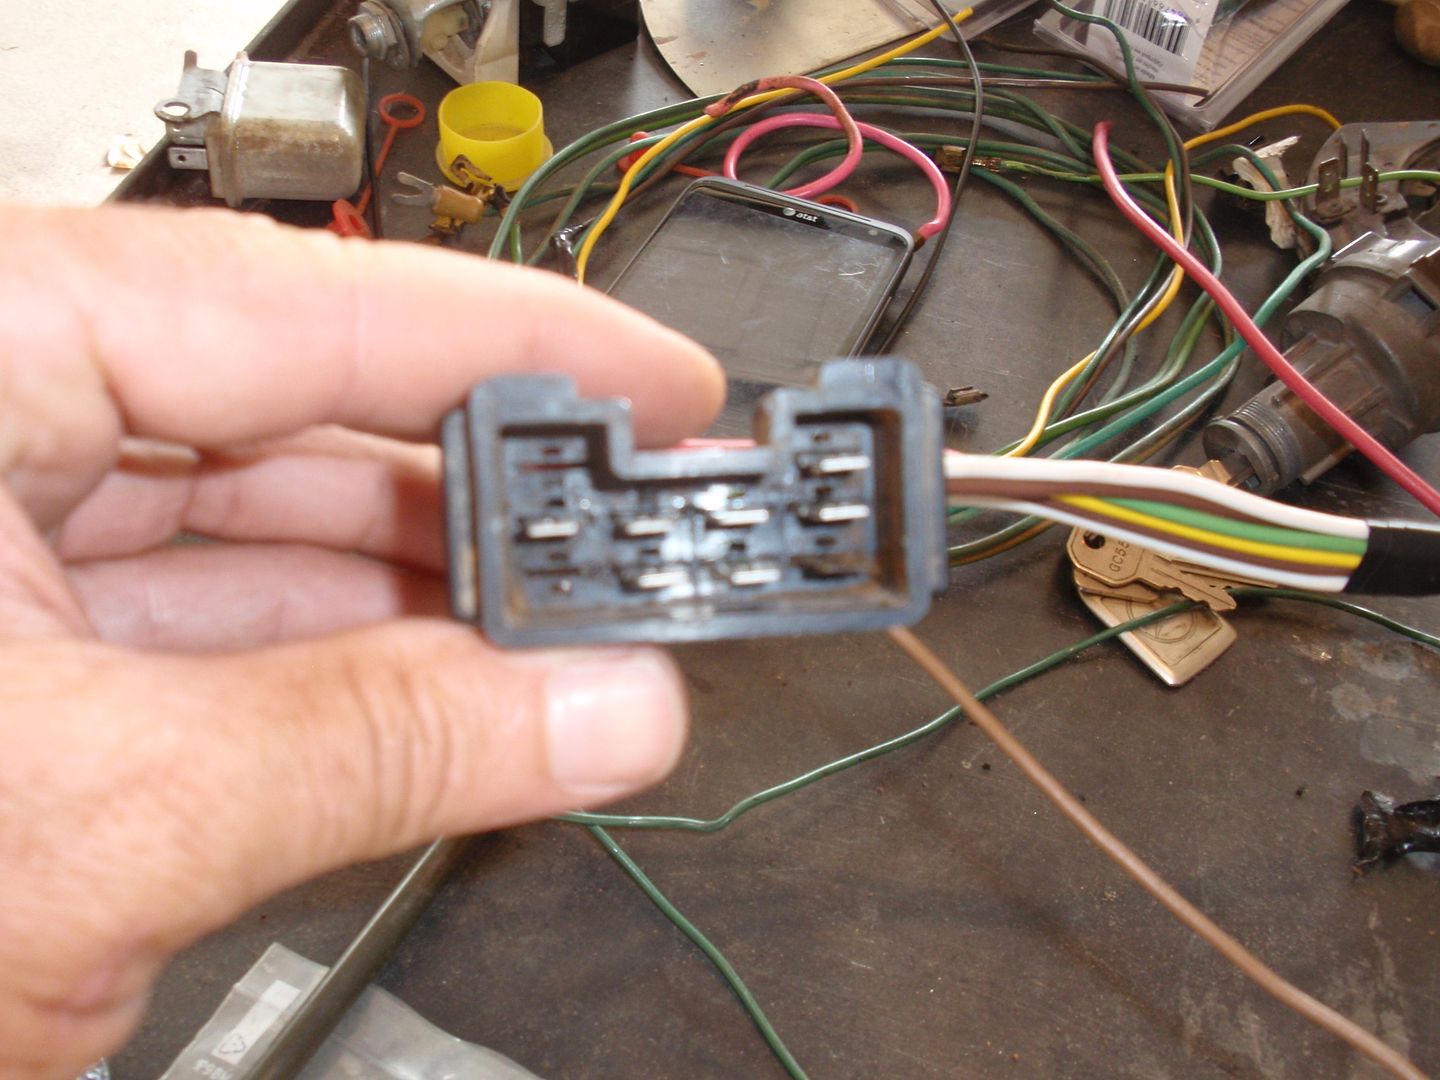 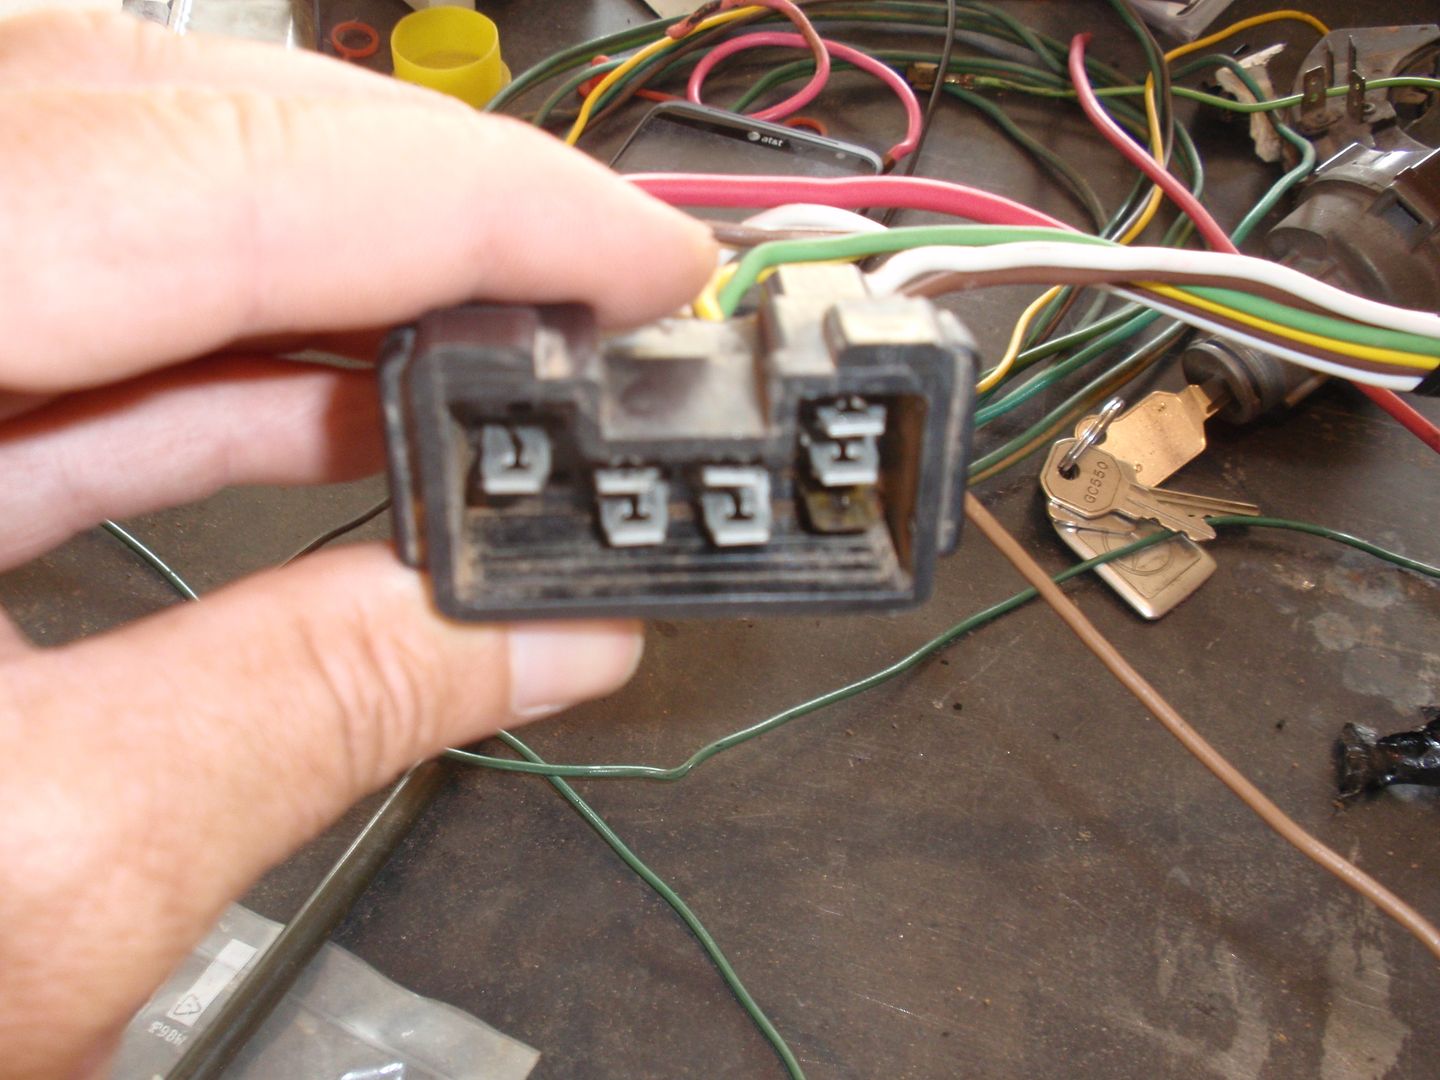 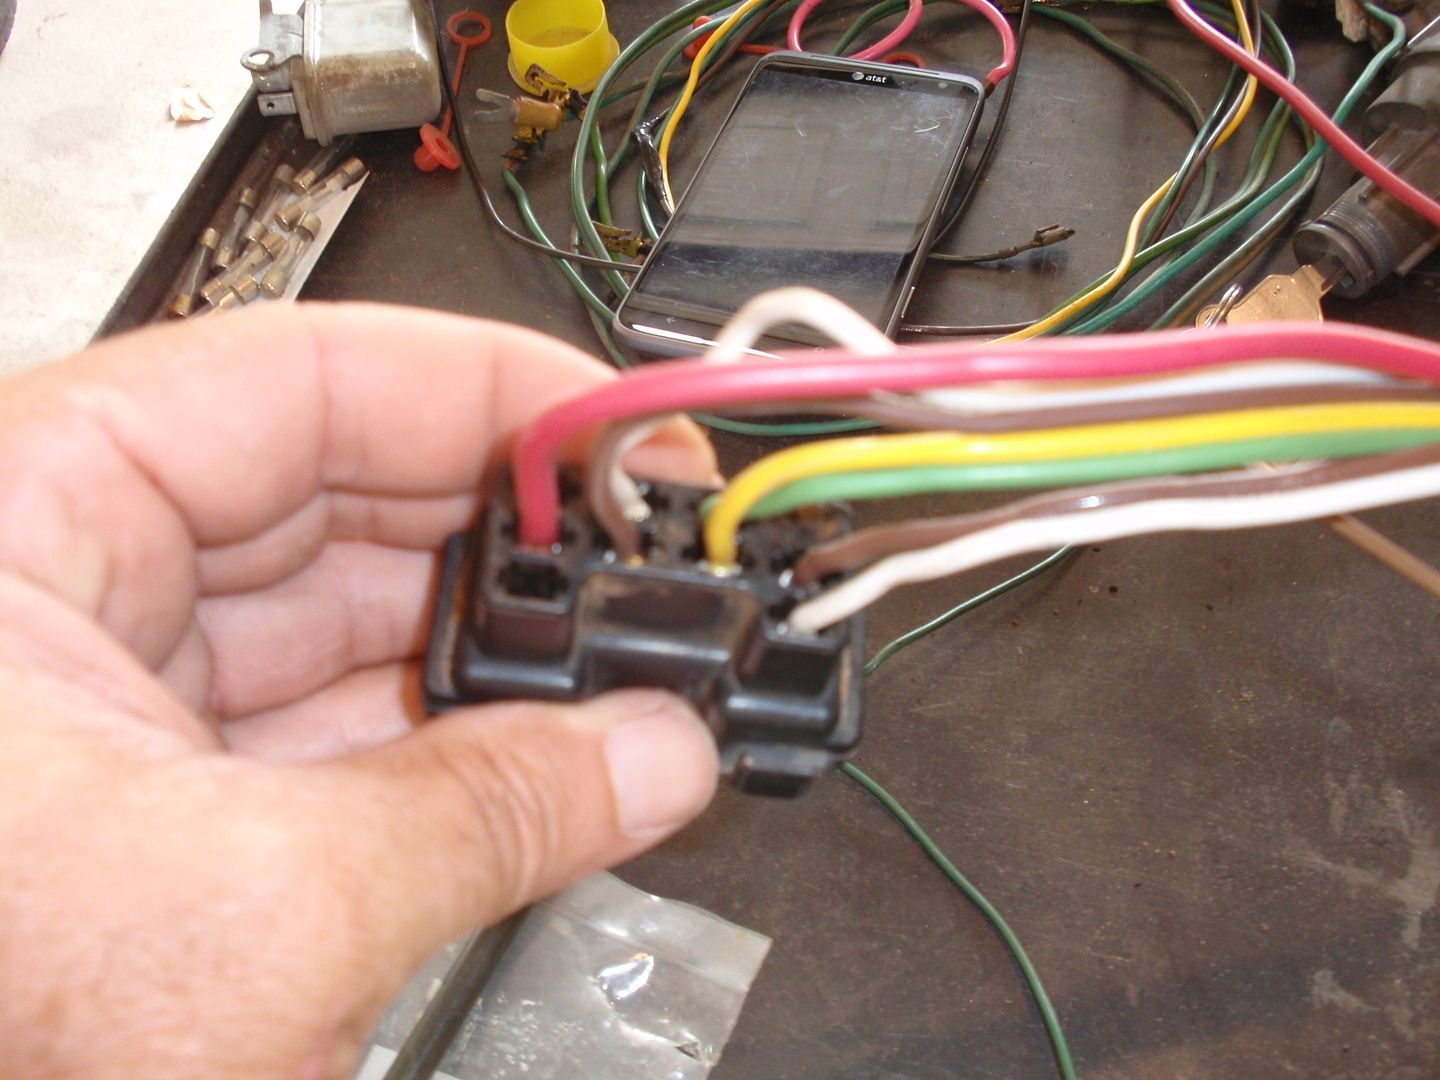 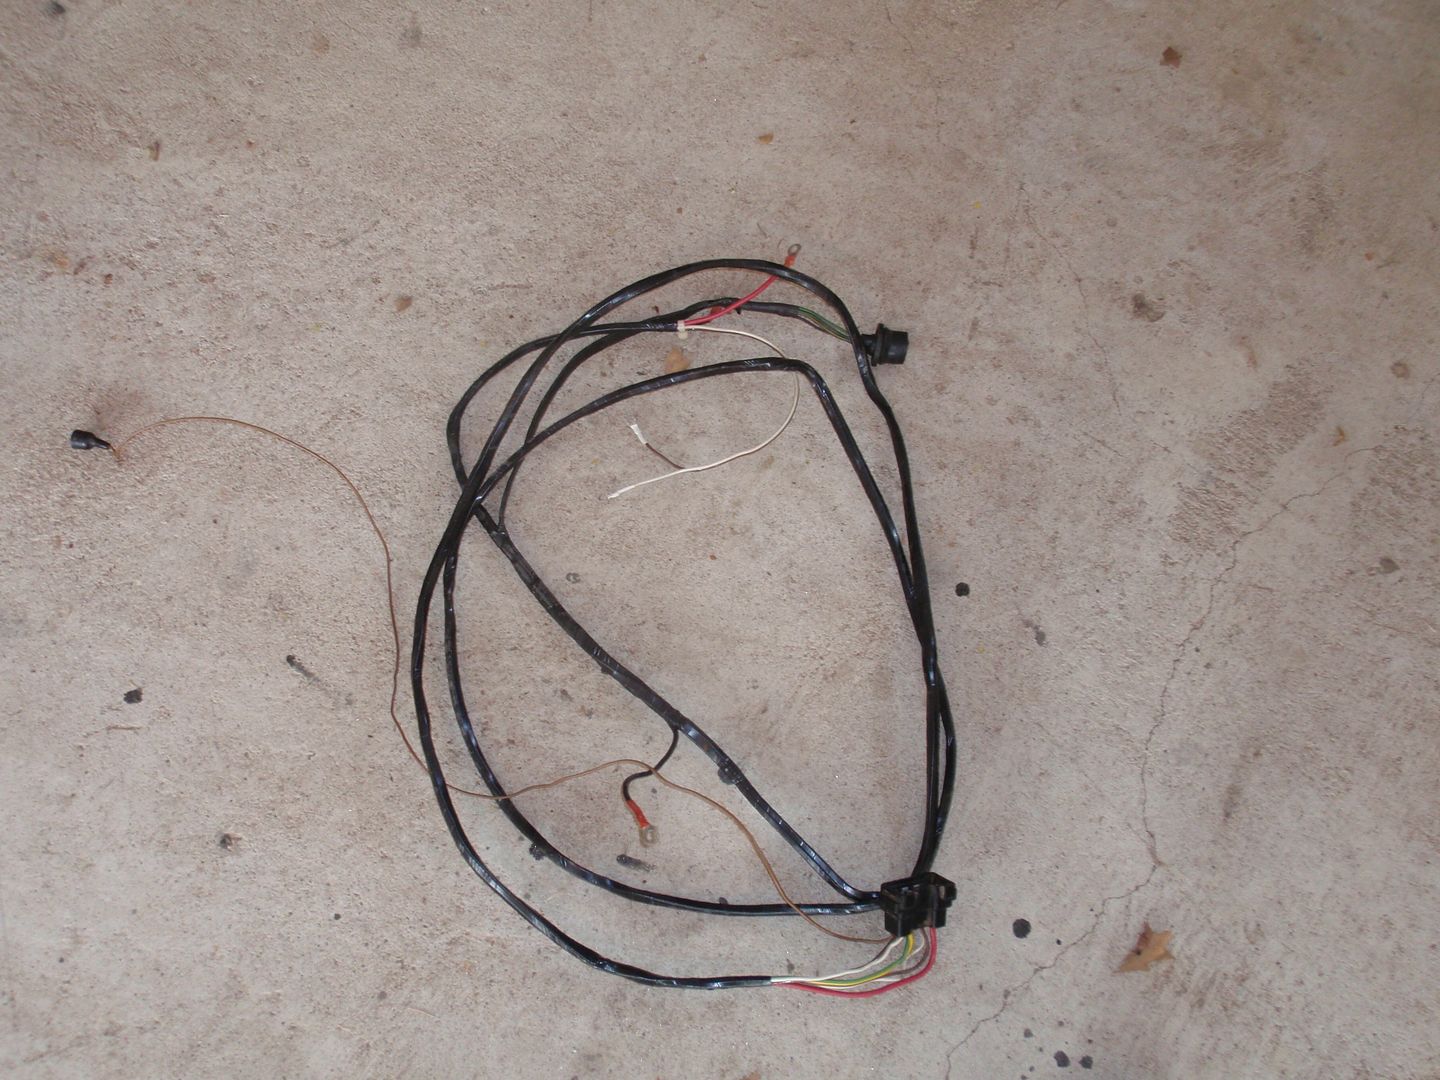 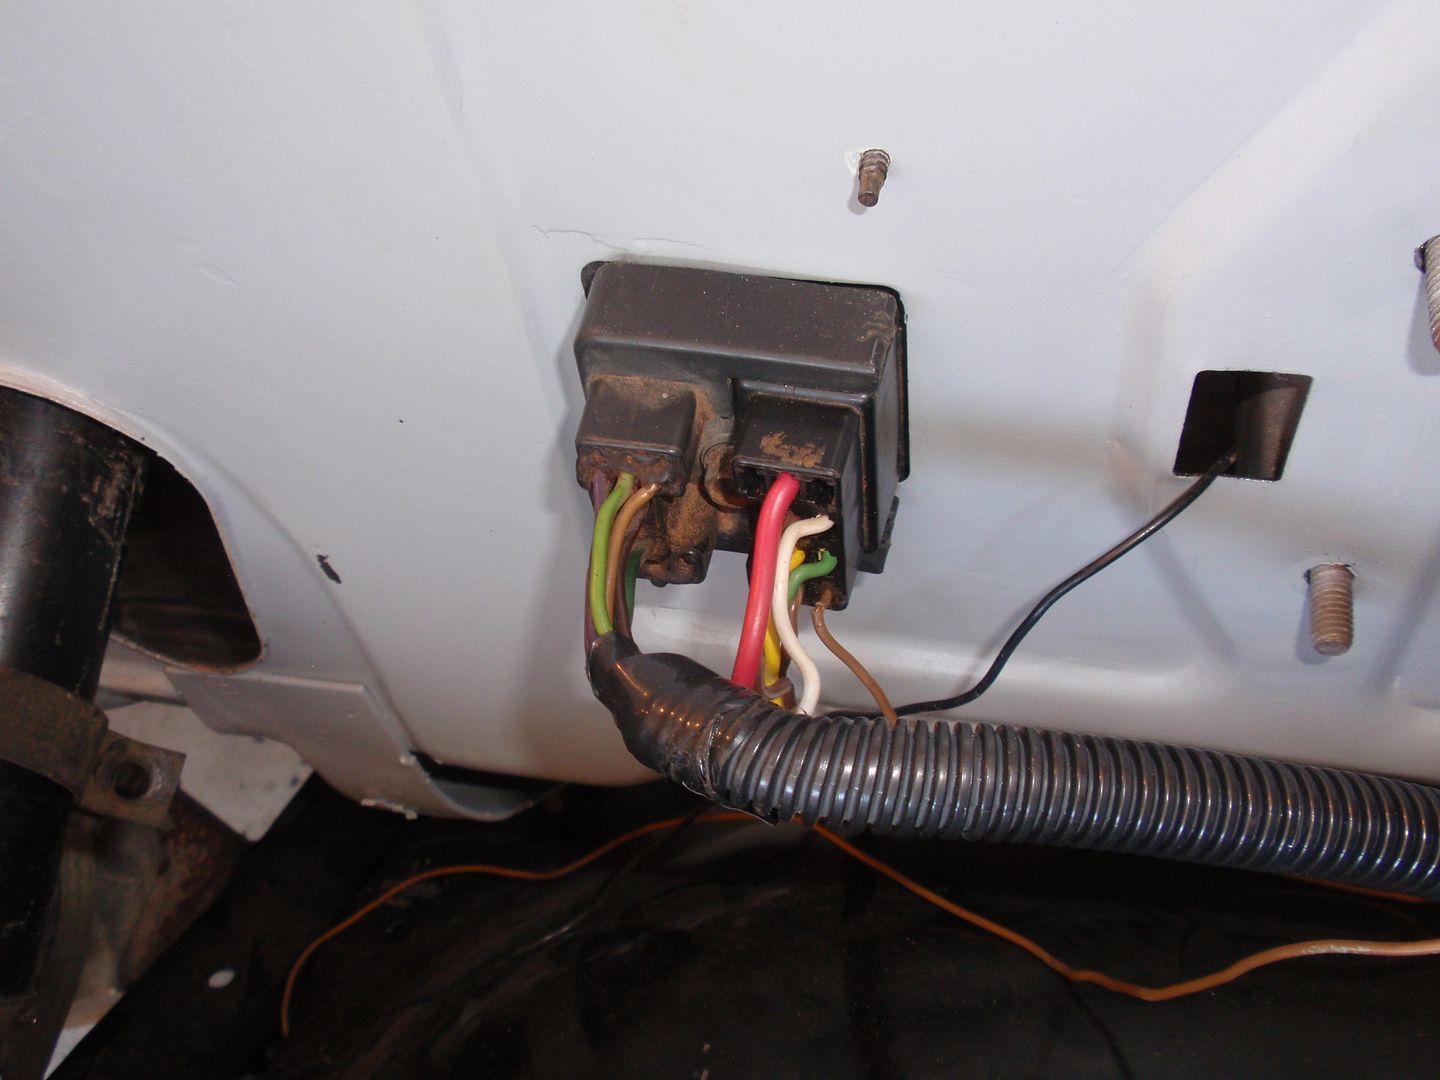 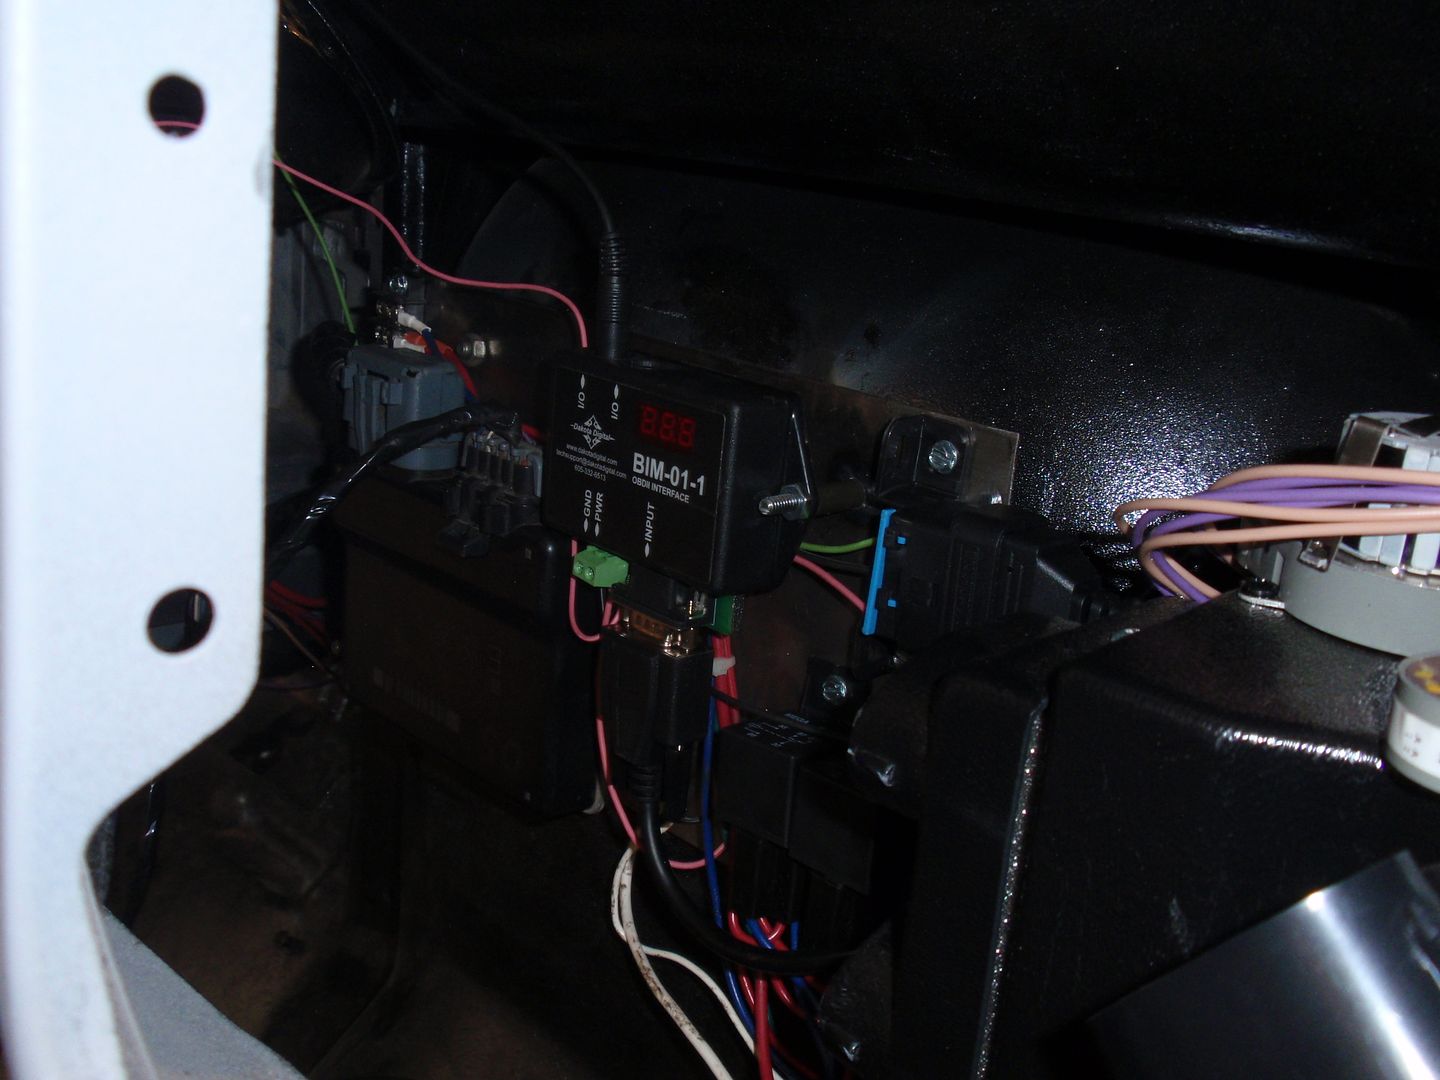 Built new mounting plate to install TAC, DD OBDII interface, AC relays, etc.. Had to do some welding on the firewall to attach the mounting bolts.. 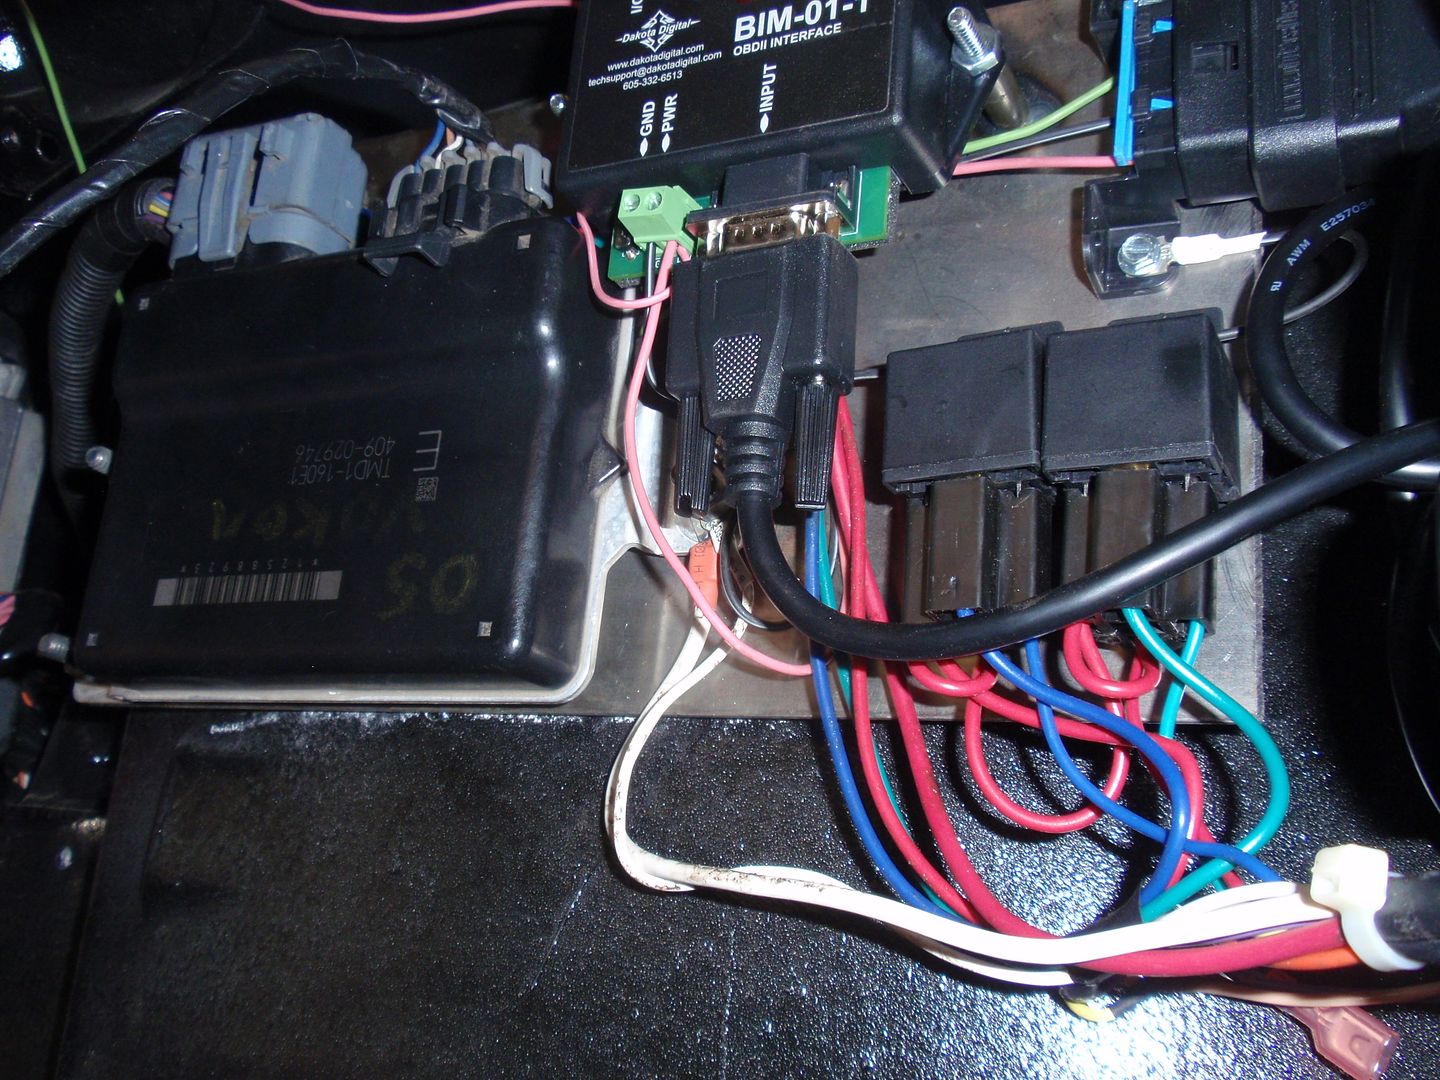 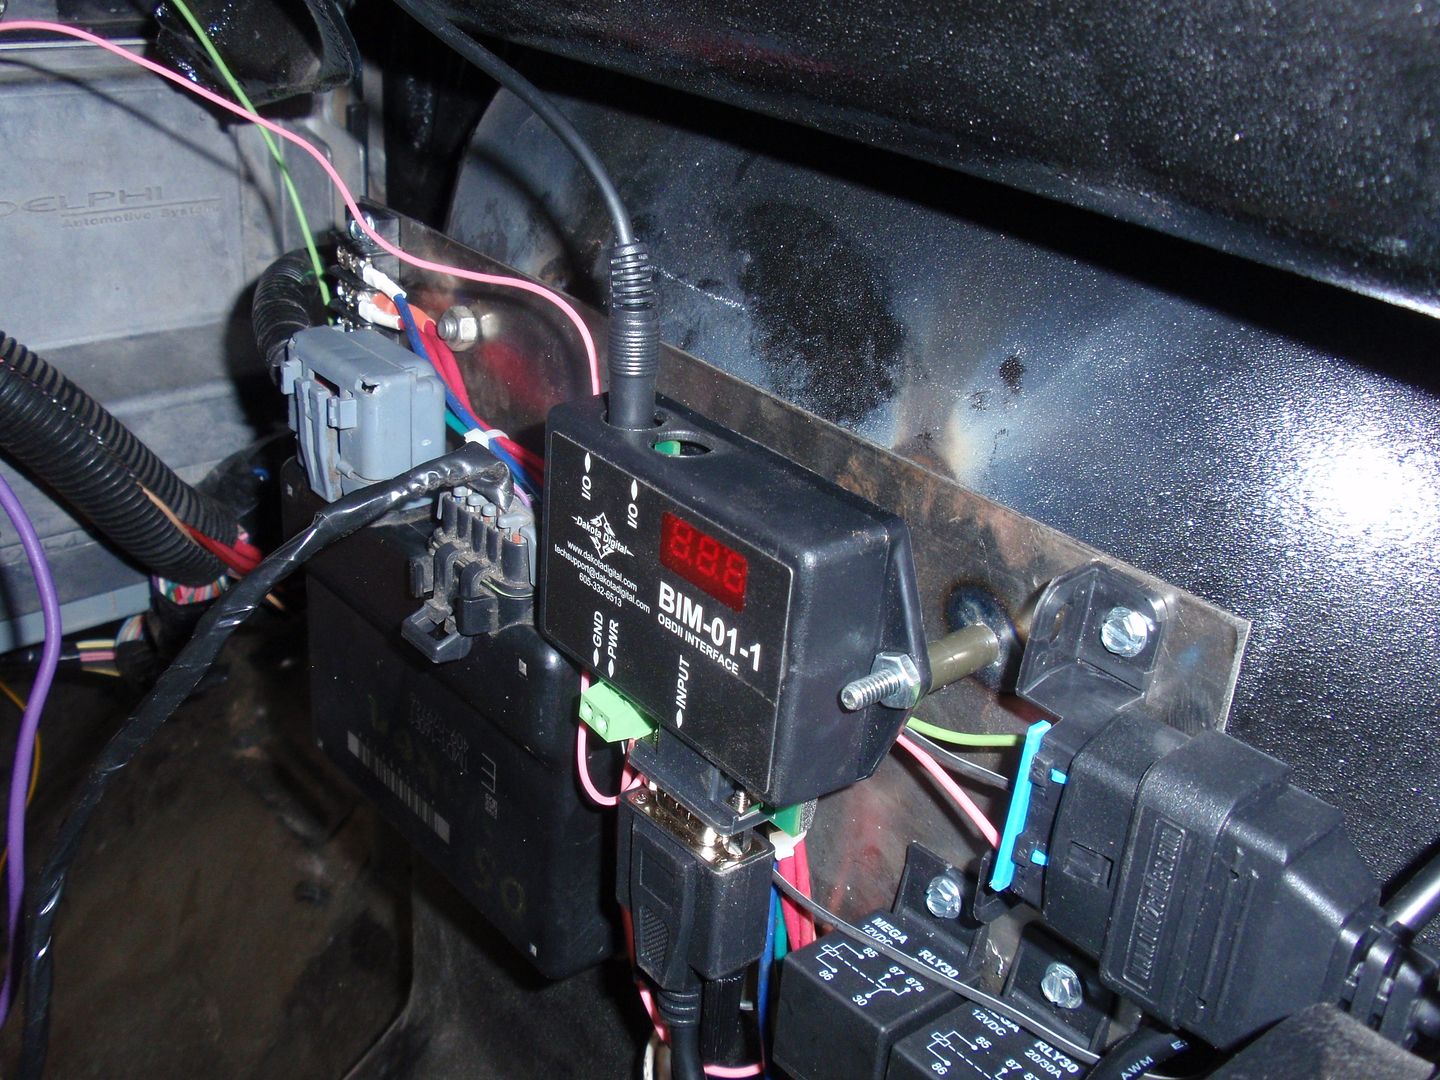 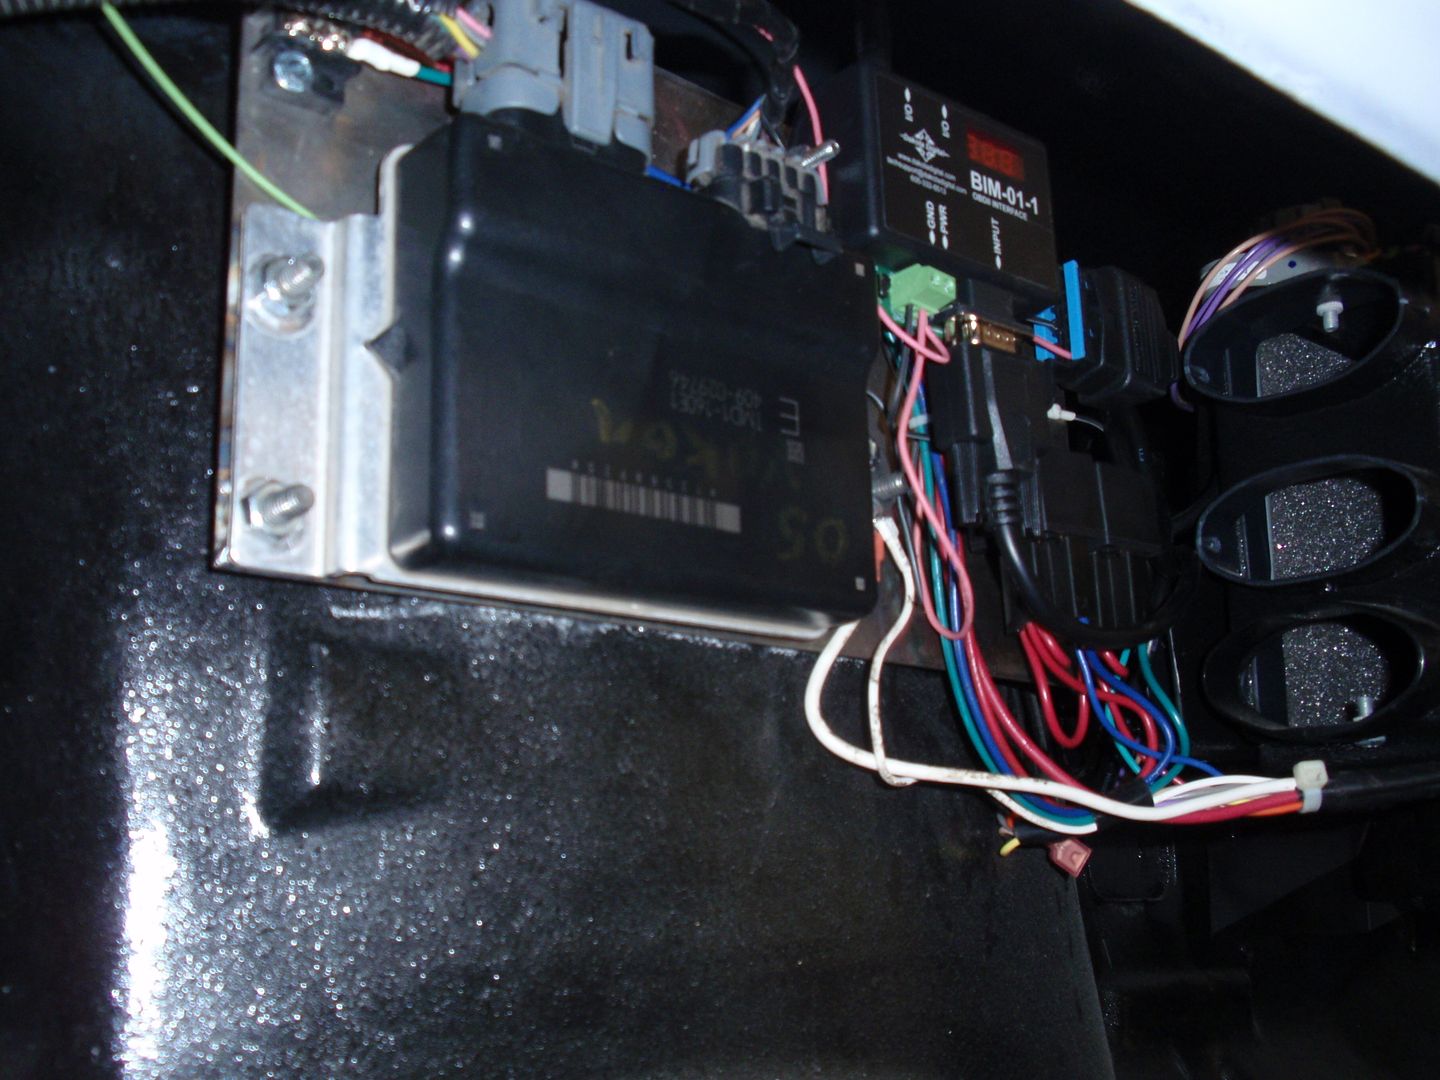 Then I installed the DD gauges… Sweet setup.. I am using the PCM to feed all of the readings to the gauges.. Water Temp, Transmission Temp, Speed, Tach, Gear indicator, etc… 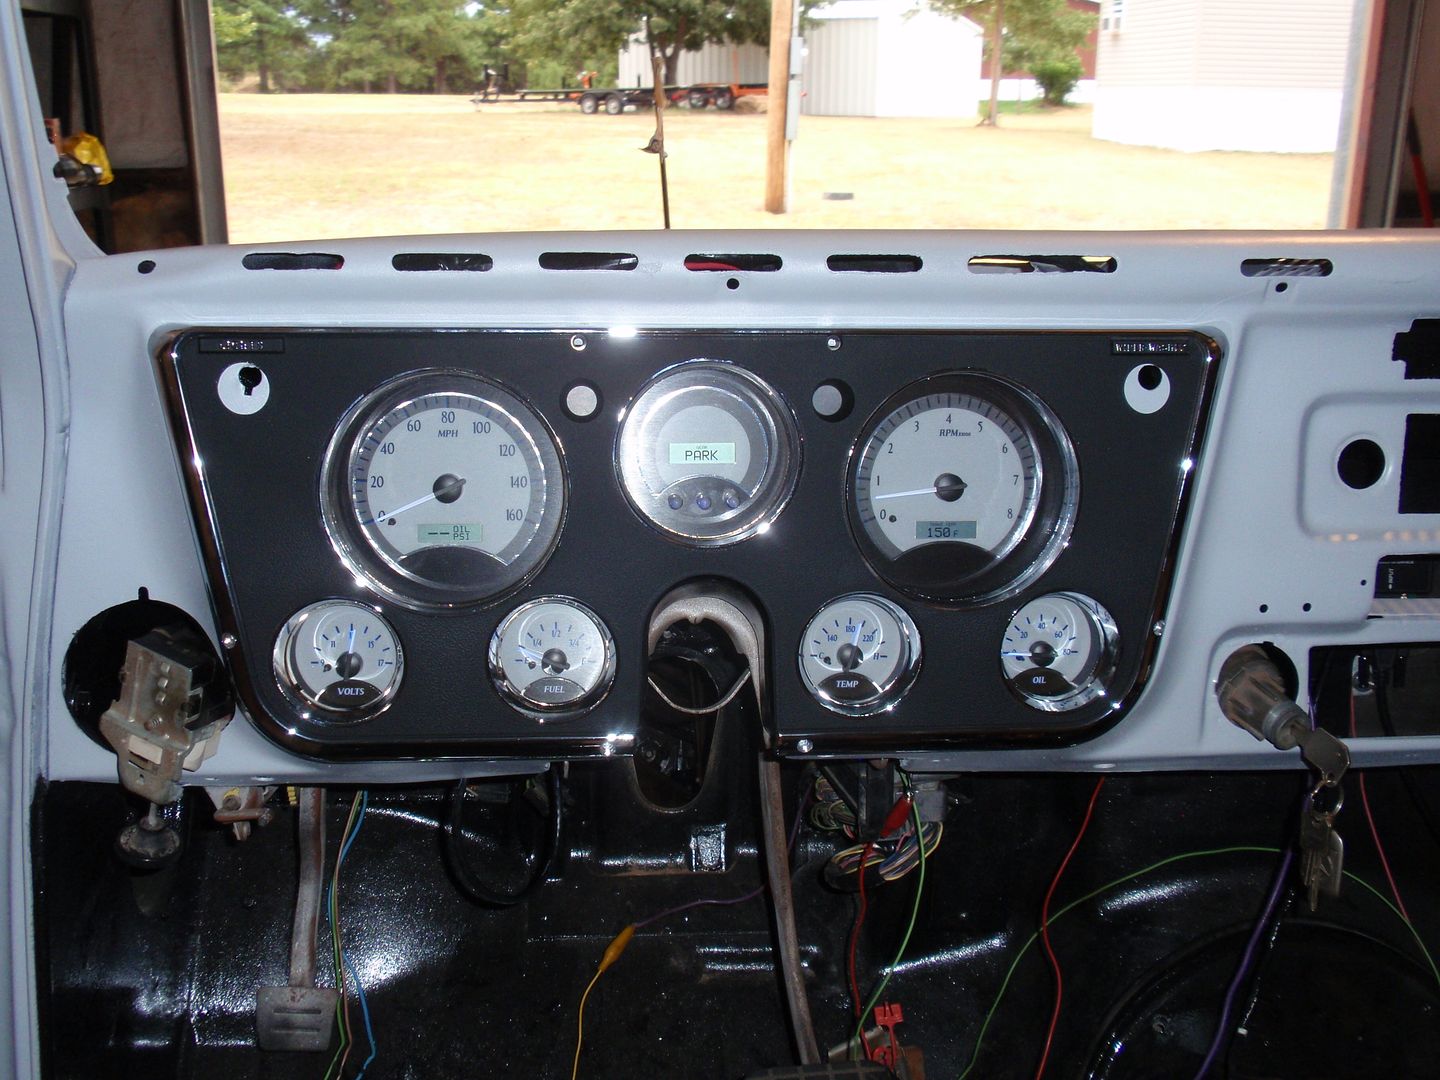   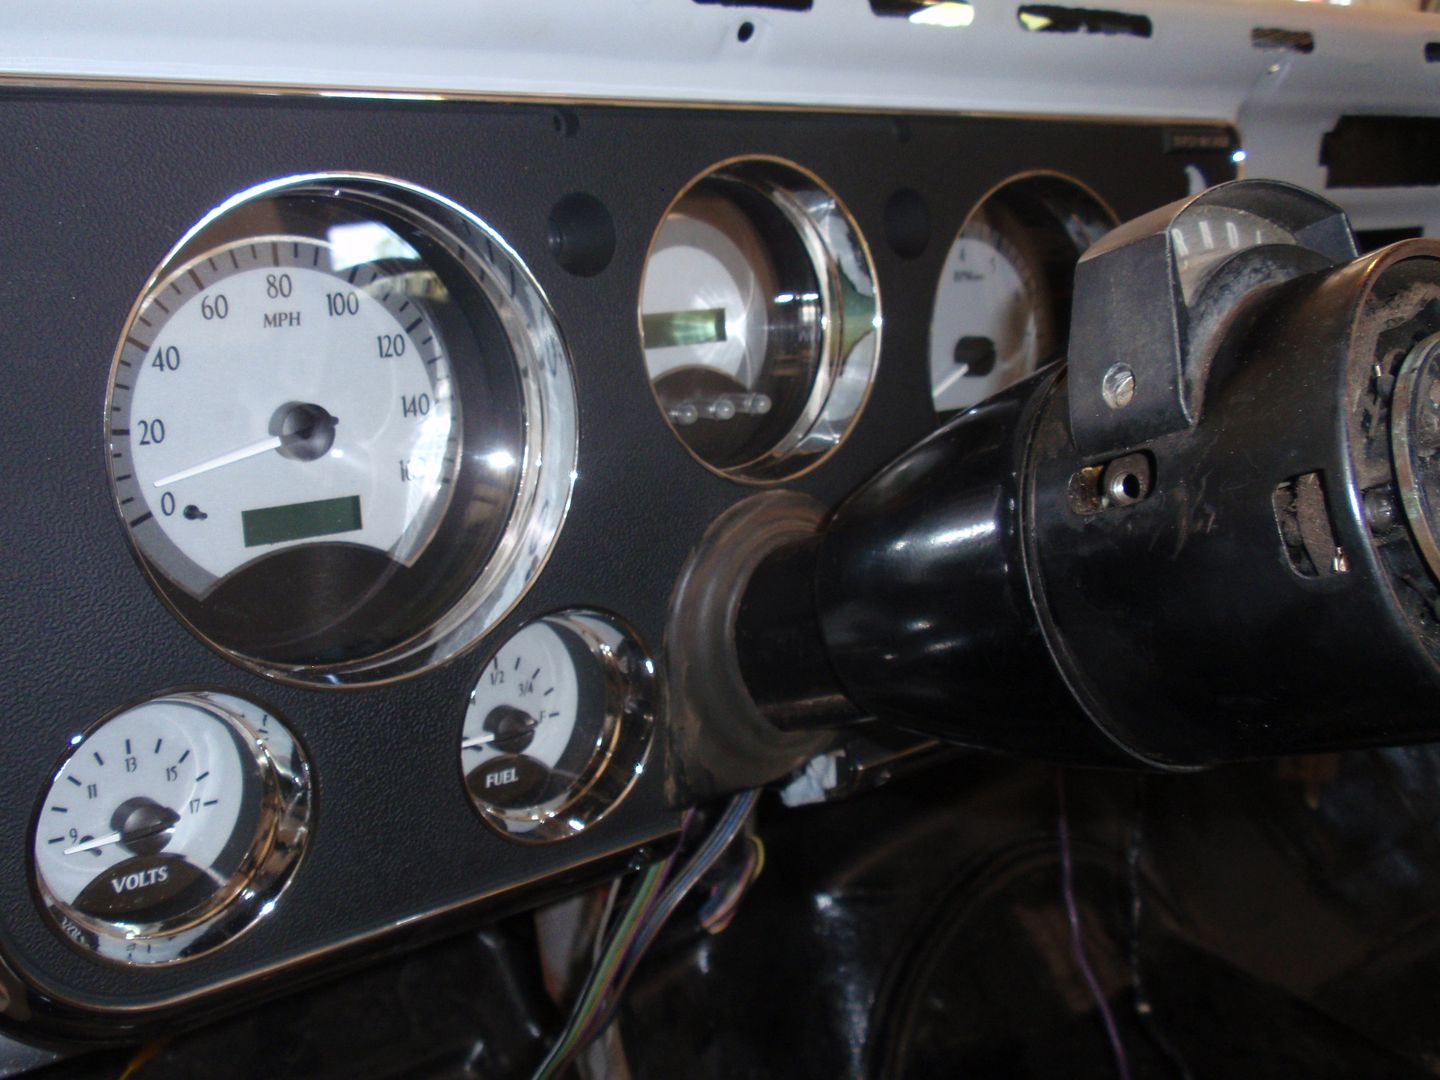 I am close to having all the wiring complete. I have it completed enough to use the key to start…. After that it is back to the bodywork.. I will be ordering the patch panel for the bed floor repair this week.. I only need a 4”x6” patch.. and it looks like I have to buy a 48”x16” patch panel, so I will have some left over if anyone needs bed floor patches.. Also, starting the search for a new steering wheel, and retro radio.. anybody have any ideas on which direction I should go?
__________________
Mark ----------------------- Crash's 69 4x4 SWB Crash's Roof over Lake Home Crash's 1988 Land Cruiser Build Last edited by Crash_OK; 07-28-2012 at 10:53 PM. |
|
|
|
|
07-28-2012, 11:03 PM
|
#408 |
|
Still Learning
Join Date: Jul 2009
Location: Central Oklahoma
Posts: 10,108
|
Re: Crash's 72 K10
I love the new cluster! That looks great. Very clean work with the wiring like always. I need to hire you to do my wiring
 I want to buy one of the DD setups too. Lots of cash $$$$ Posted via Mobile Device |
|
|
|
|
07-28-2012, 11:54 PM
|
#409 |
|
Registered User
 Join Date: Jun 2012
Location: Hill Country
Posts: 435
|
Re: Crash's 72 K10
I have been on the hunt for bed patch panels,I guess I need to look at the DD setups again, the only ones I've seen are the digital numbers in the guage itself which I dont care for, I didn't know you could actually get digital guages with the sweep scales on them, thanks for taken a pic with the lights out so we could see the contrast of the nightime dash lights coool. Those terminal ends, are the exactly like the originals that go in the bulkhead blocks? I'll be looking into those also. Doing all the mock up is a necessary evil but once you got it, it sure makes the final assembly go that much easier (LOL) most of the time.
Keep moving forward it is looking real good. |
|
|
|
|
07-29-2012, 12:03 AM
|
#410 |
|
VA72C10
 Join Date: Mar 2008
Location: Midlothian, VA
Posts: 25,269
|
Re: Crash's 72 K10
That looks great! Love the gauges and super clean install on the wiring!
__________________
Looking for a 67-72 swb or blazer project in or around VA. 
|
|
|
|
|
07-29-2012, 07:51 AM
|
#411 | |
|
Registered User
Join Date: Nov 2011
Location: Edmond, OK.
Posts: 1,362
|
Re: Crash's 72 K10
Quote:
Thanks Mike.. No problem on the wiring... you have already pre-paid.. :-) The DD was $$$, but not a lot more than a restored cluster.. Have a great day..
__________________
Mark ----------------------- Crash's 69 4x4 SWB Crash's Roof over Lake Home Crash's 1988 Land Cruiser Build |
|
|
|
|
|
07-29-2012, 07:57 AM
|
#412 | |
|
Registered User
Join Date: Nov 2011
Location: Edmond, OK.
Posts: 1,362
|
Re: Crash's 72 K10
Quote:
The terminal ends seem to be exactly the same except they are tin and not copper/brass. They fit exactly the same as far as I can tell. I will get the part number and post on here. Almost done with the wiring mockup... then it is back to the bodywork. Once again thanks..
__________________
Mark ----------------------- Crash's 69 4x4 SWB Crash's Roof over Lake Home Crash's 1988 Land Cruiser Build |
|
|
|
|
|
07-29-2012, 07:58 AM
|
#413 | |
|
Registered User
Join Date: Nov 2011
Location: Edmond, OK.
Posts: 1,362
|
Re: Crash's 72 K10
Quote:
__________________
Mark ----------------------- Crash's 69 4x4 SWB Crash's Roof over Lake Home Crash's 1988 Land Cruiser Build |
|
|
|
|
|
07-29-2012, 09:31 AM
|
#414 | |
|
Still Learning
Join Date: Jul 2009
Location: Central Oklahoma
Posts: 10,108
|
Re: Crash's 72 K10
Quote:
Posted via Mobile Device |
|
|
|
|
|
07-29-2012, 11:46 AM
|
#415 |
|
Registered User
Join Date: Dec 2011
Location: Creighton Sask. Canada
Posts: 4,121
|
Re: Crash's 72 K10
Really nice work, the wiring setup is so well thought out and looks like car show quality, appreciate wiring done right, I do a lot of wiring so it made me smile. Cool build on the truck too, nice fitment of the doors to fenders and cab. better watch it I think people are going to start lining up with jobs.
|
|
|
|
|
07-29-2012, 02:59 PM
|
#416 | |
|
Registered User
Join Date: Nov 2011
Location: Edmond, OK.
Posts: 1,362
|
Re: Crash's 72 K10
Quote:
Thanks Mike, I will check with them.. Have a great day...
__________________
Mark ----------------------- Crash's 69 4x4 SWB Crash's Roof over Lake Home Crash's 1988 Land Cruiser Build |
|
|
|
|
|
07-29-2012, 03:01 PM
|
#417 | |
|
Registered User
Join Date: Nov 2011
Location: Edmond, OK.
Posts: 1,362
|
Re: Crash's 72 K10
Quote:
Have a great day..
__________________
Mark ----------------------- Crash's 69 4x4 SWB Crash's Roof over Lake Home Crash's 1988 Land Cruiser Build |
|
|
|
|
|
08-10-2012, 11:11 PM
|
#418 |
|
Registered User
Join Date: Nov 2011
Location: Edmond, OK.
Posts: 1,362
|
Re: Crash's 72 K10
Finally got to work on the project again. Decide to start back on the bed floor. I ordered a patch for the rust spot I had already cut out a few weeks ago. I needed a patch 4” by 6”, and I had to order a 66” by 18” from Classics Industries. It was packed very well and arrived with no damage.
I considered replace the hole rear section, but decide to keep the original metal and only replace what was needed. 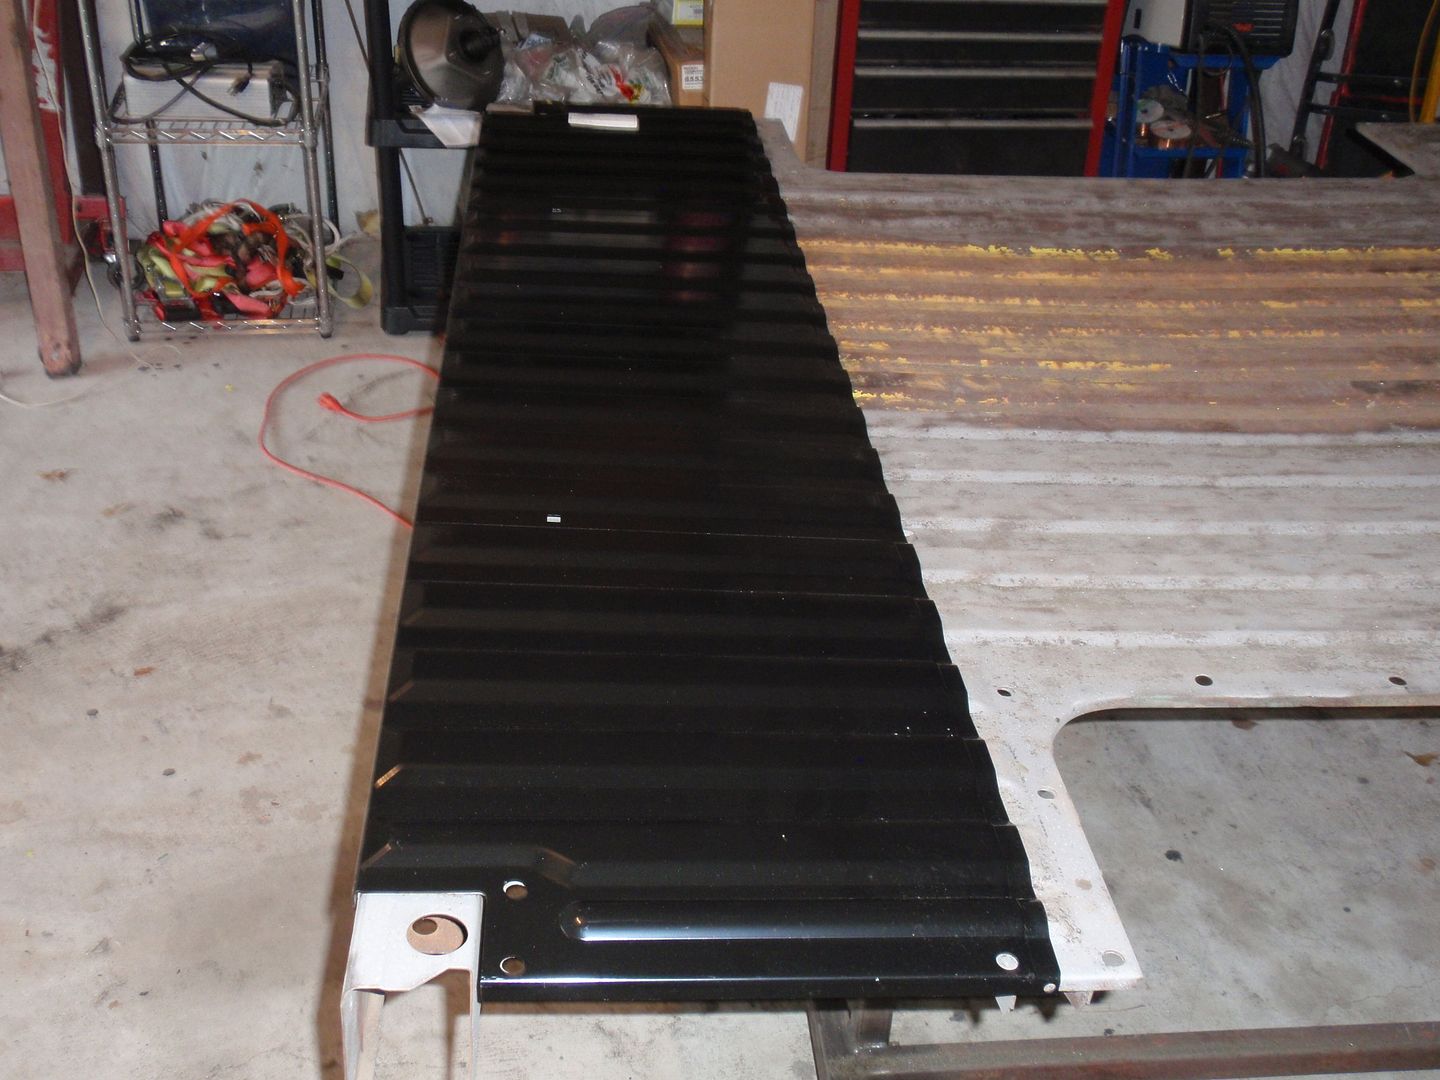 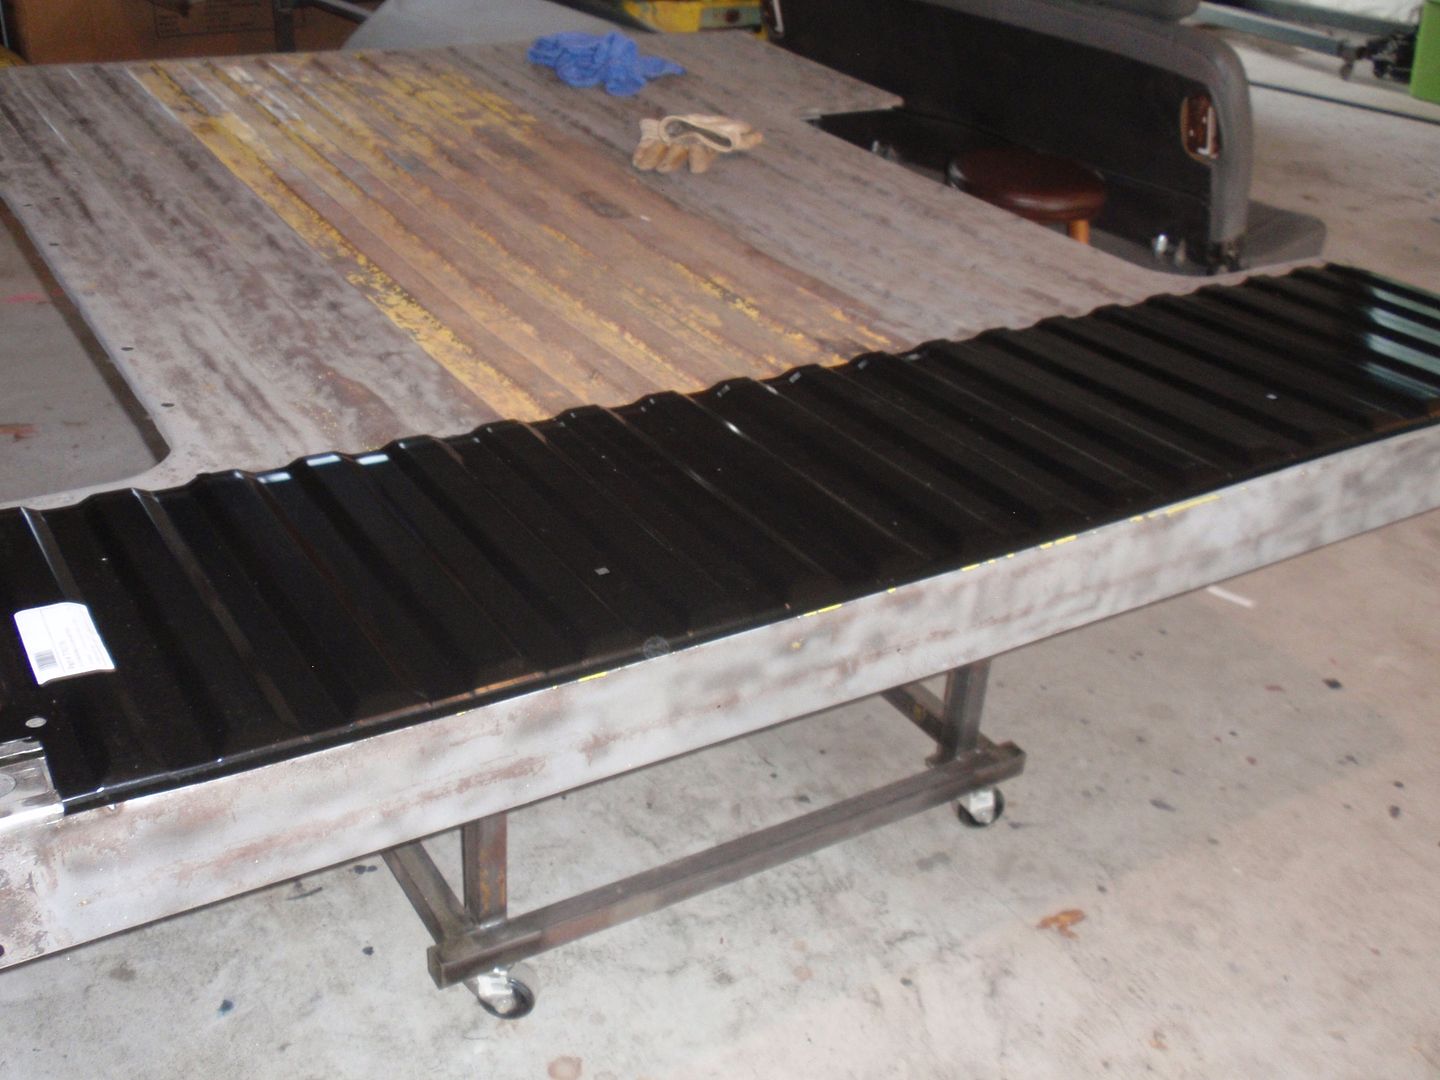 First I needed do create a patch for the support cross member. I used a sheet of 16 gauge metal I picked up at Lowes. 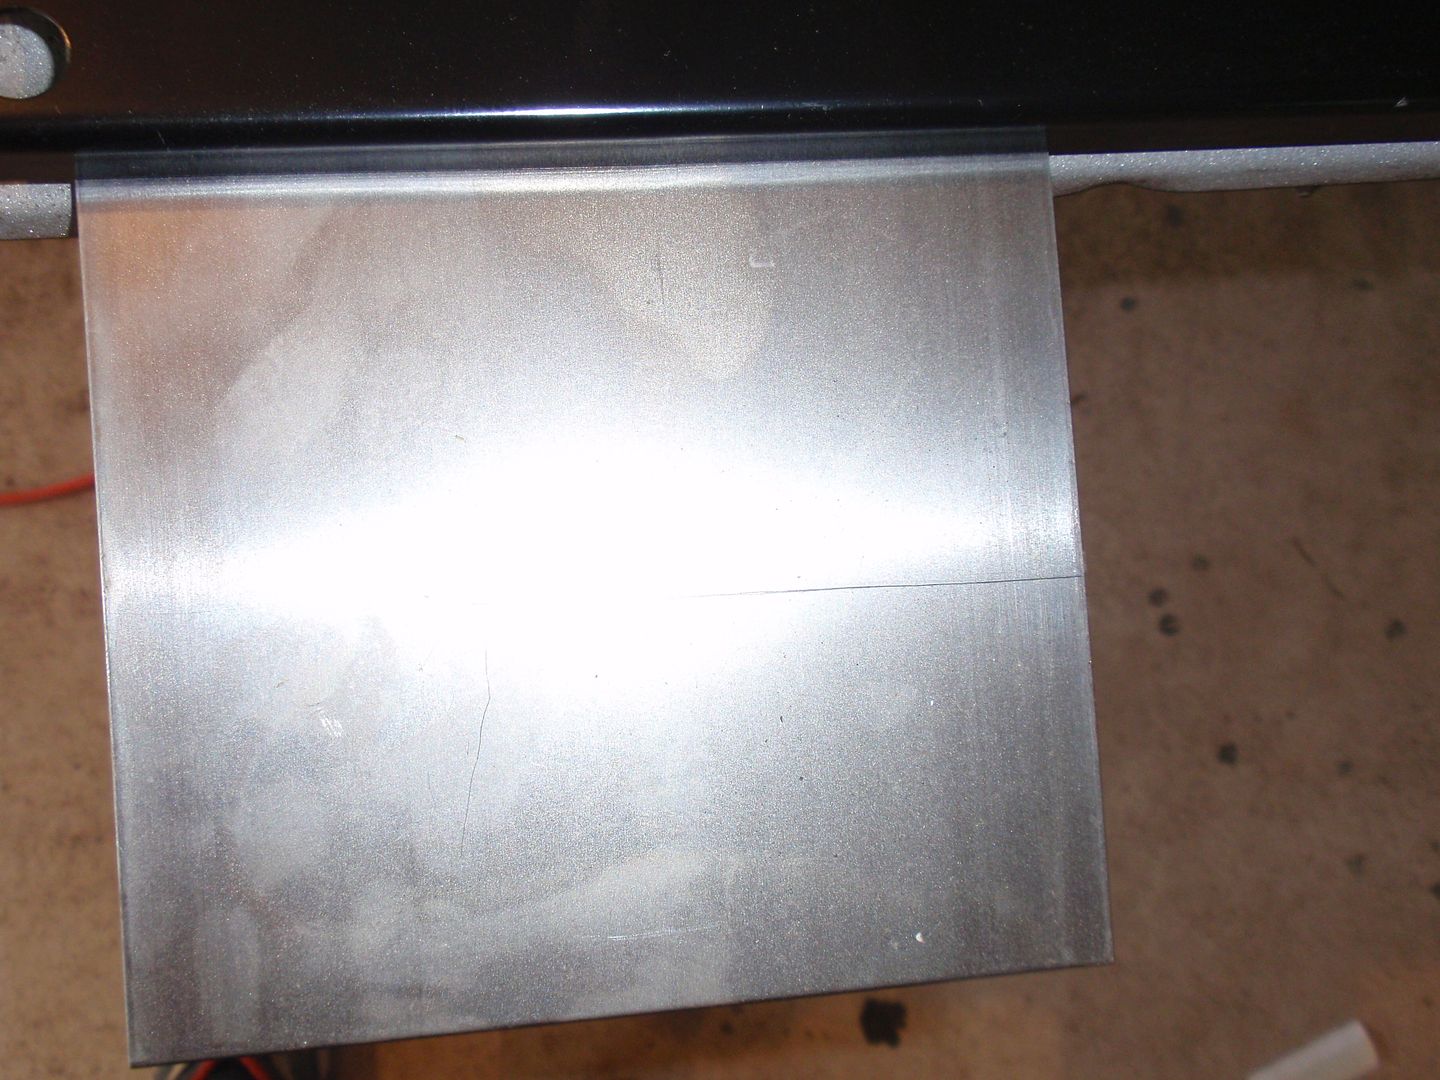 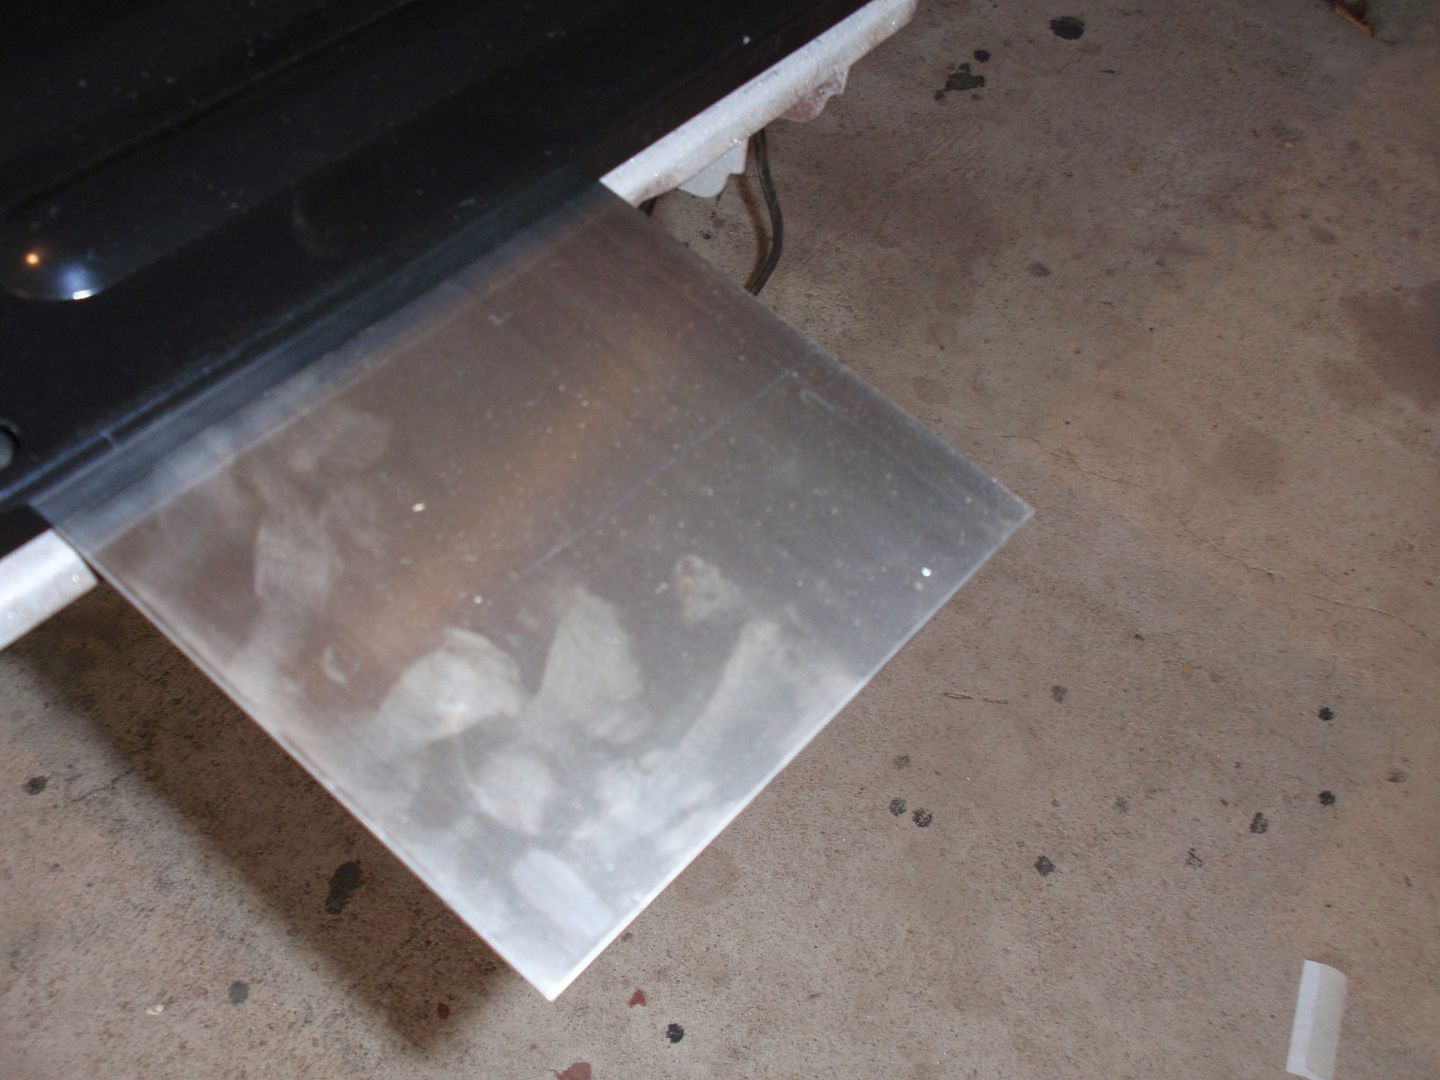 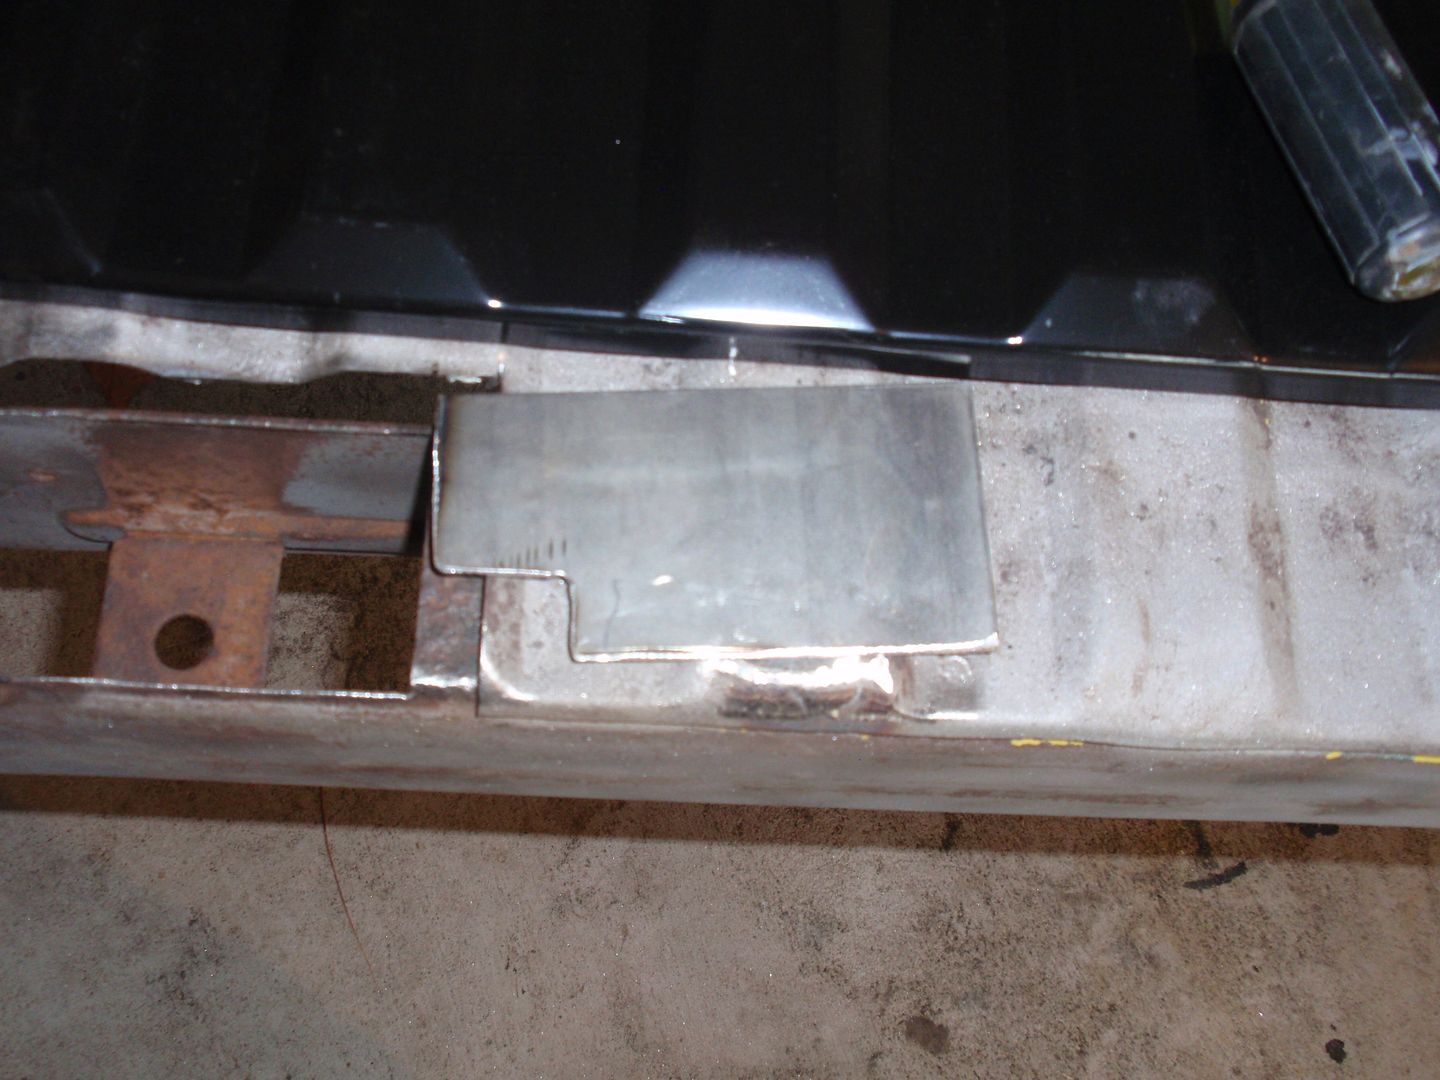 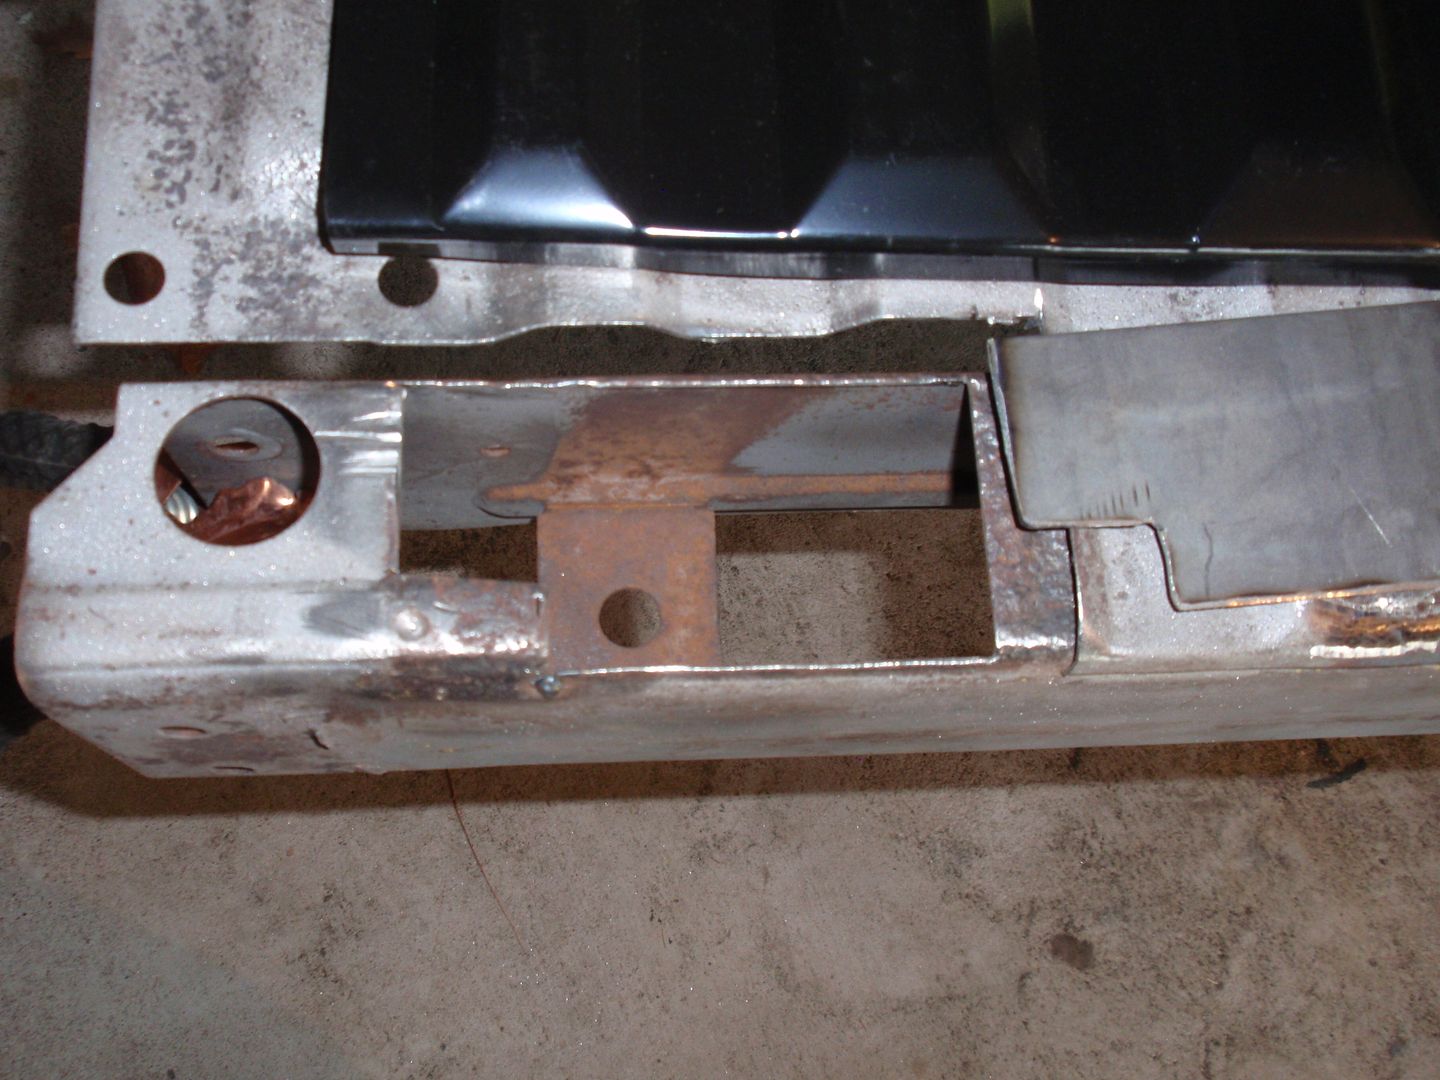 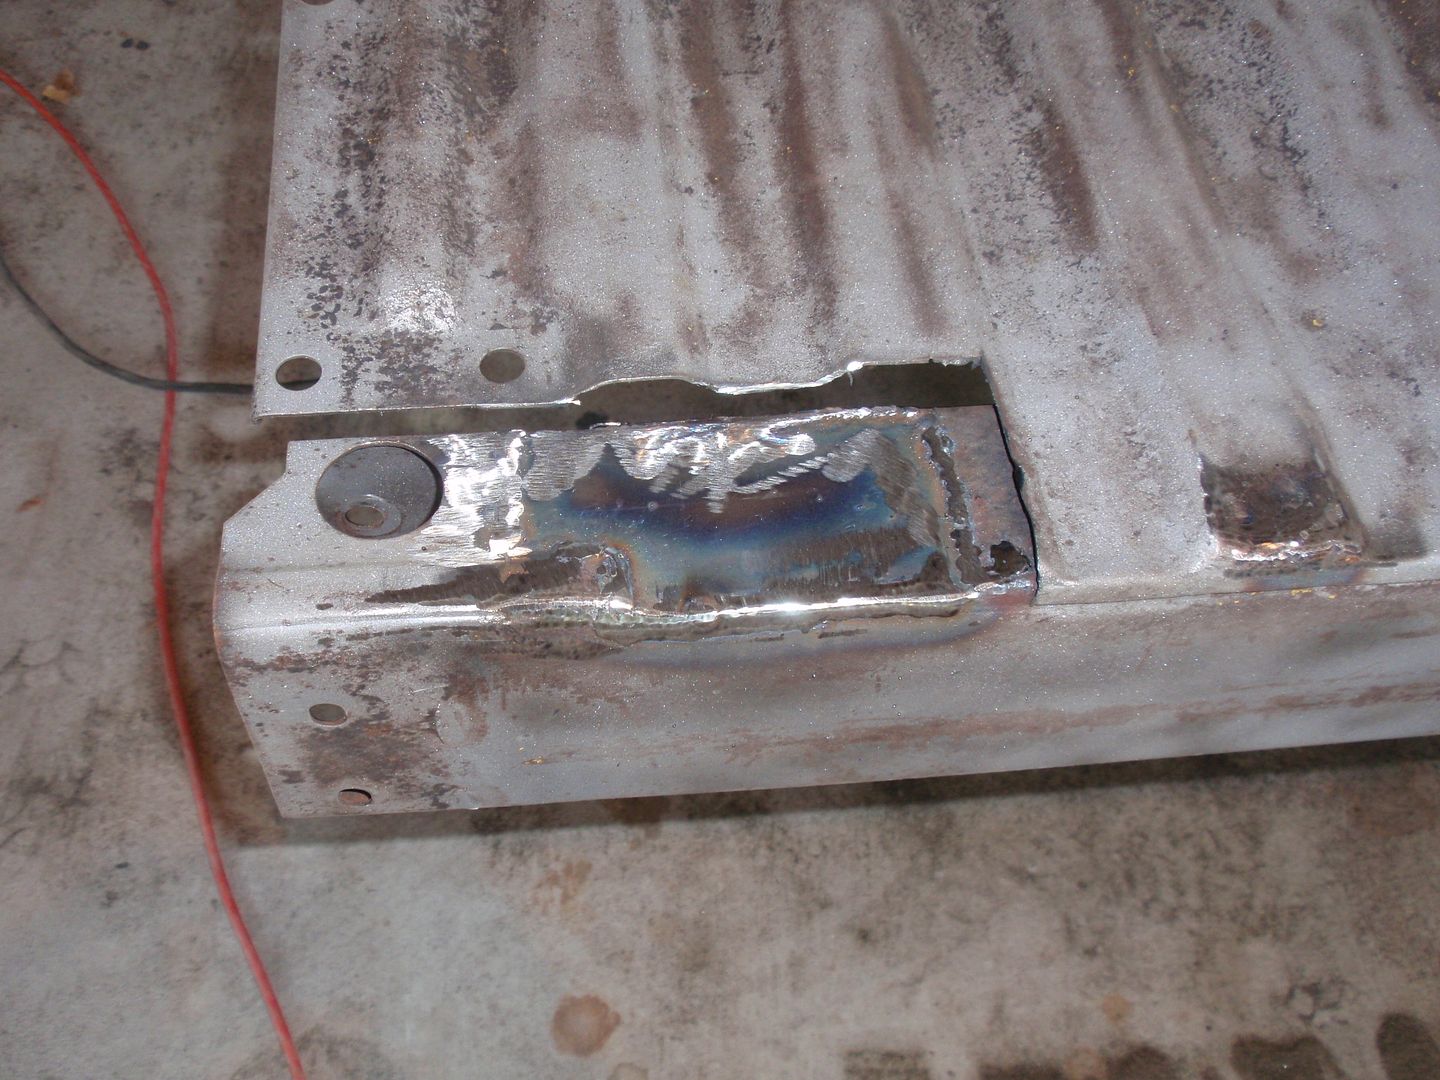  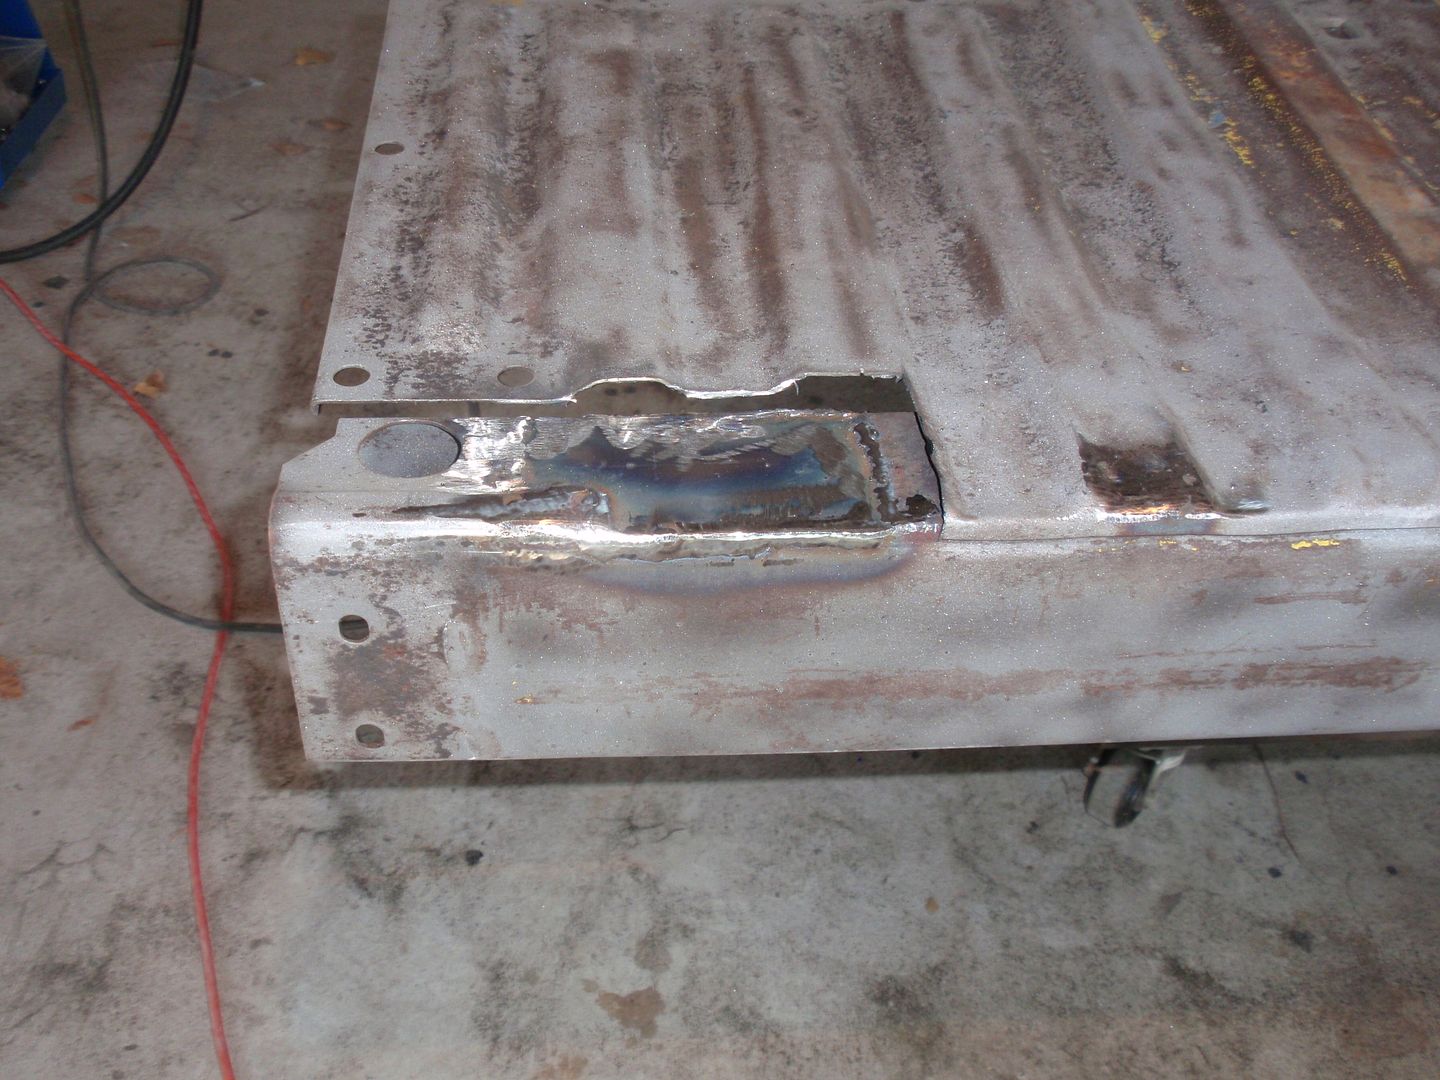 Then I marked and cut out the patch from the large patch. 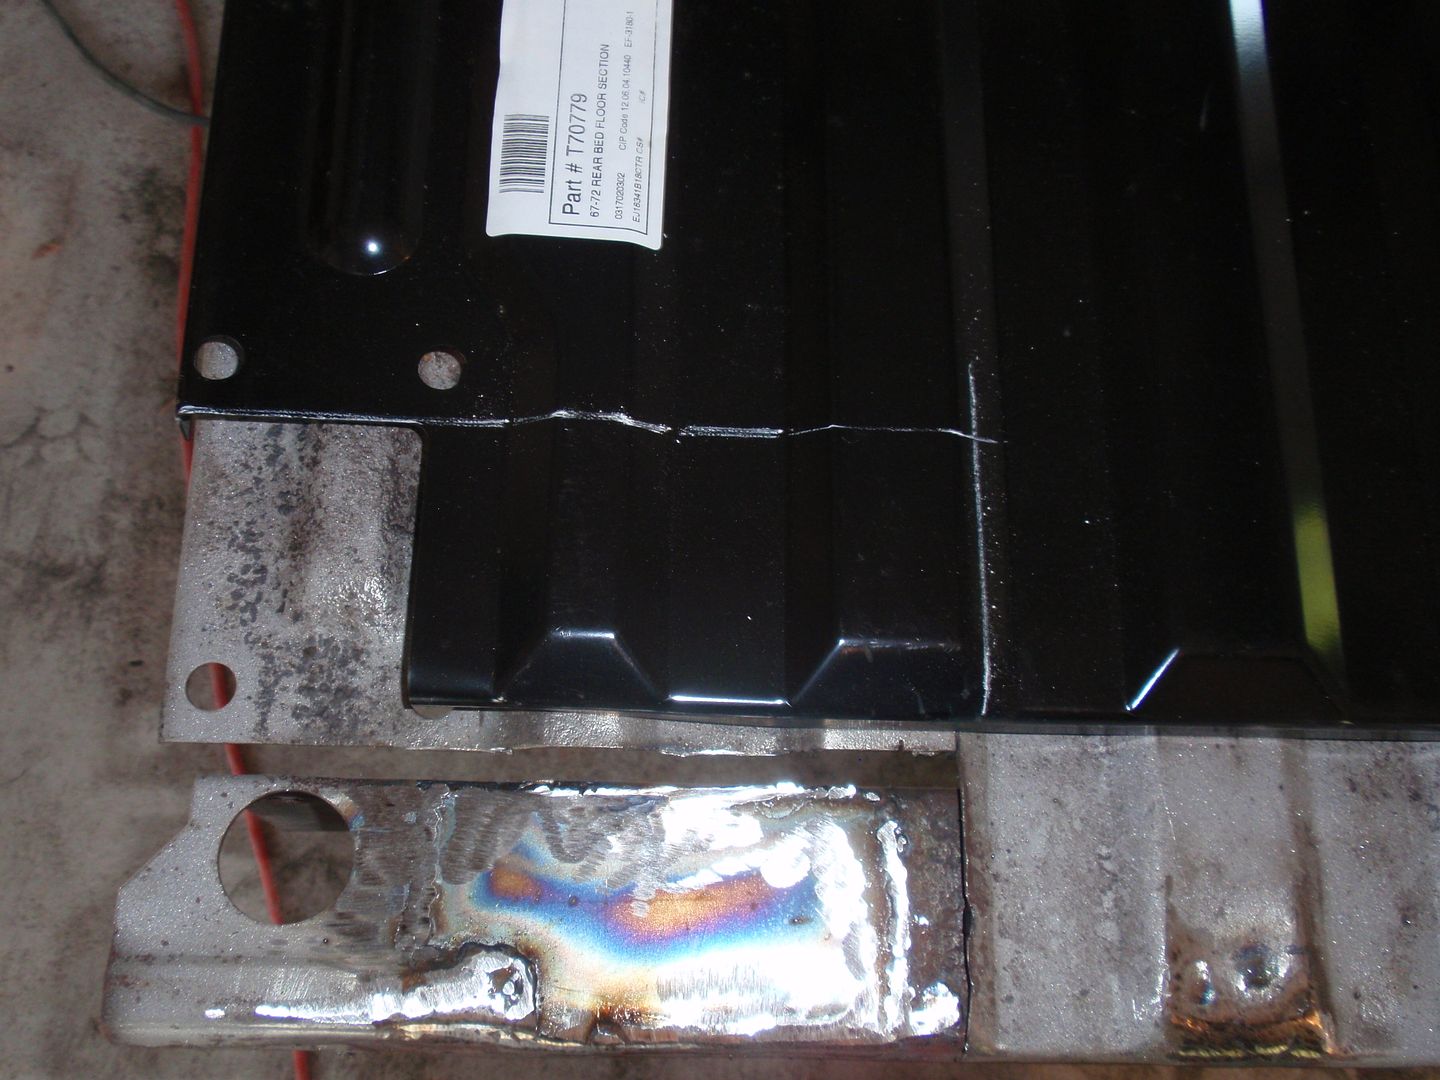 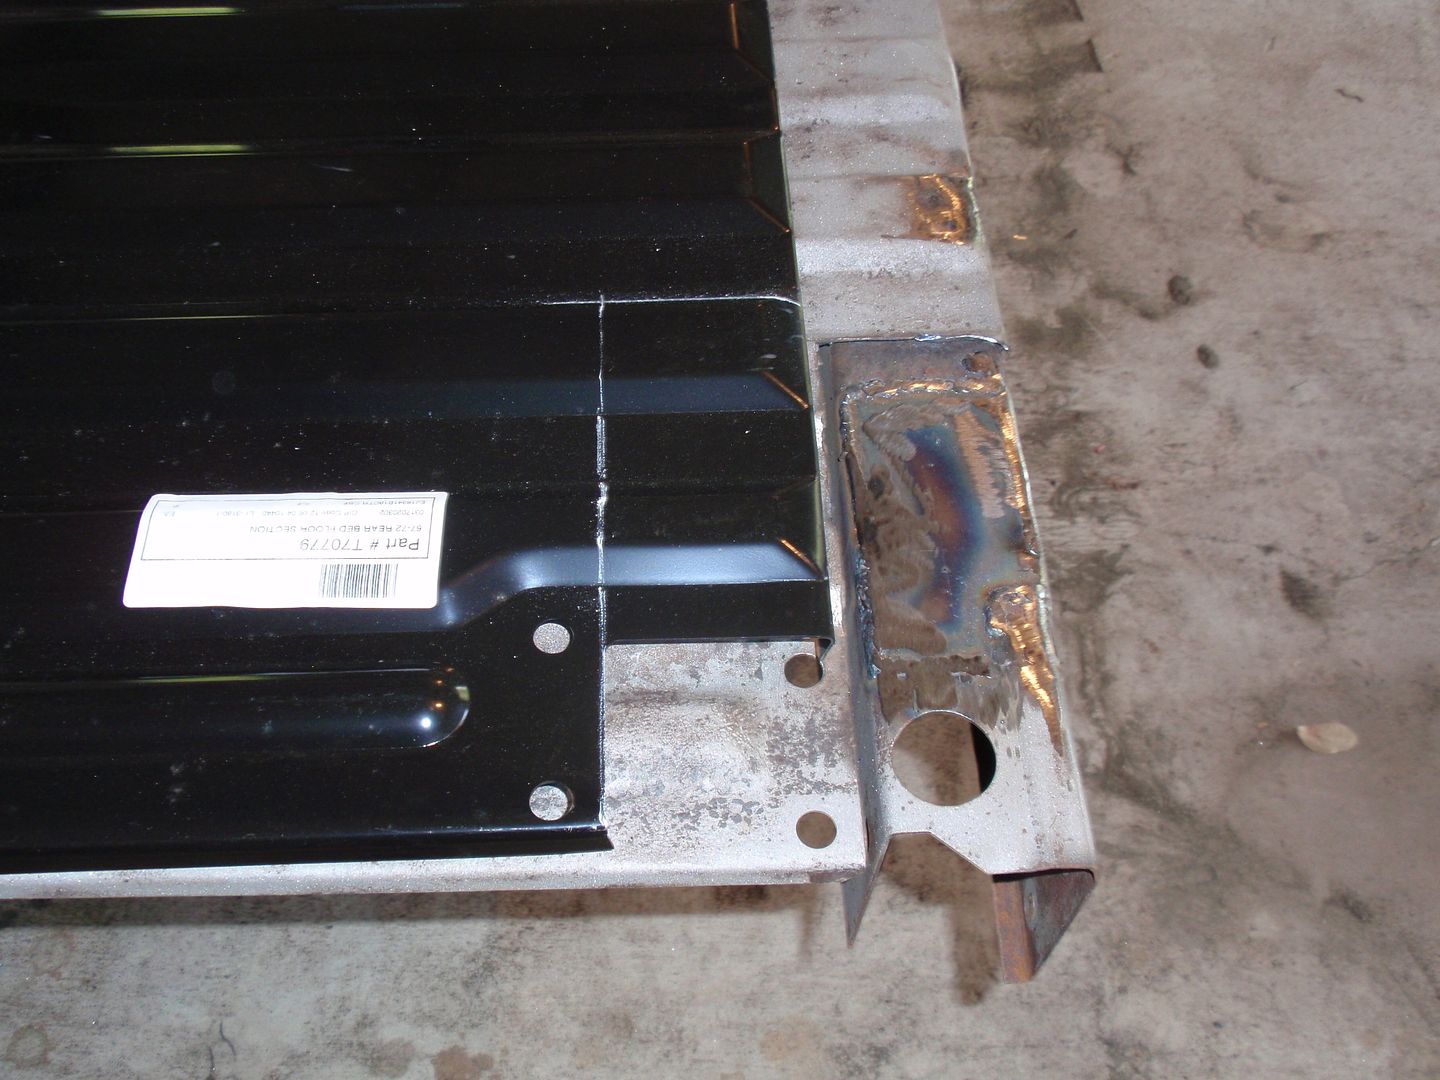 Then welding it in place. 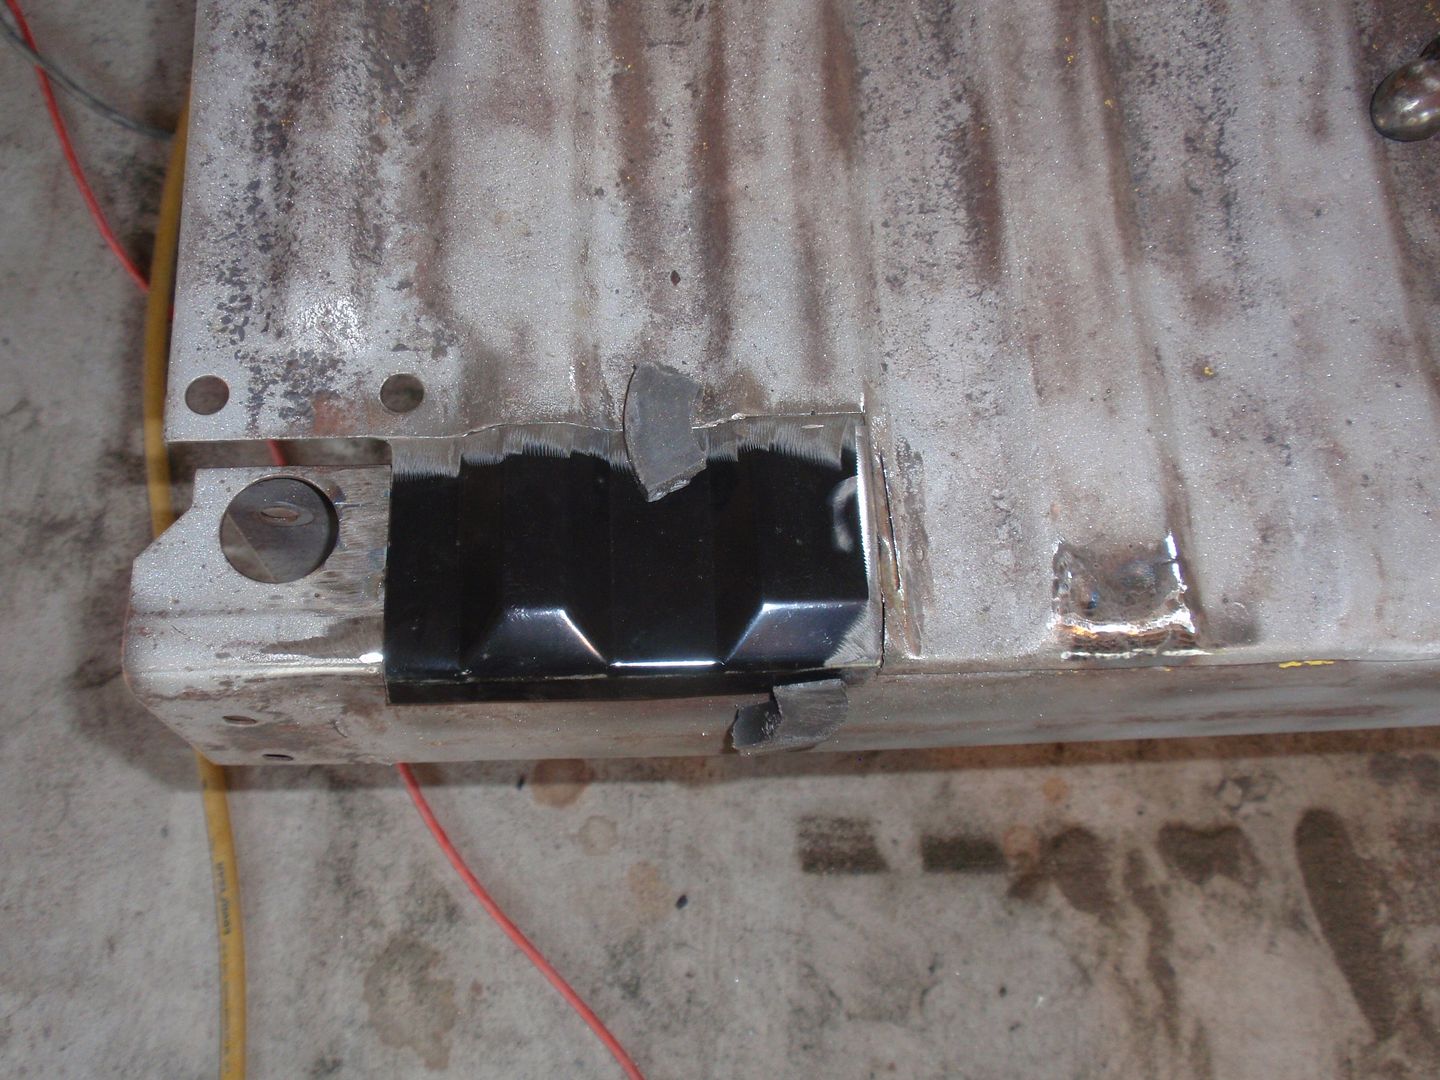 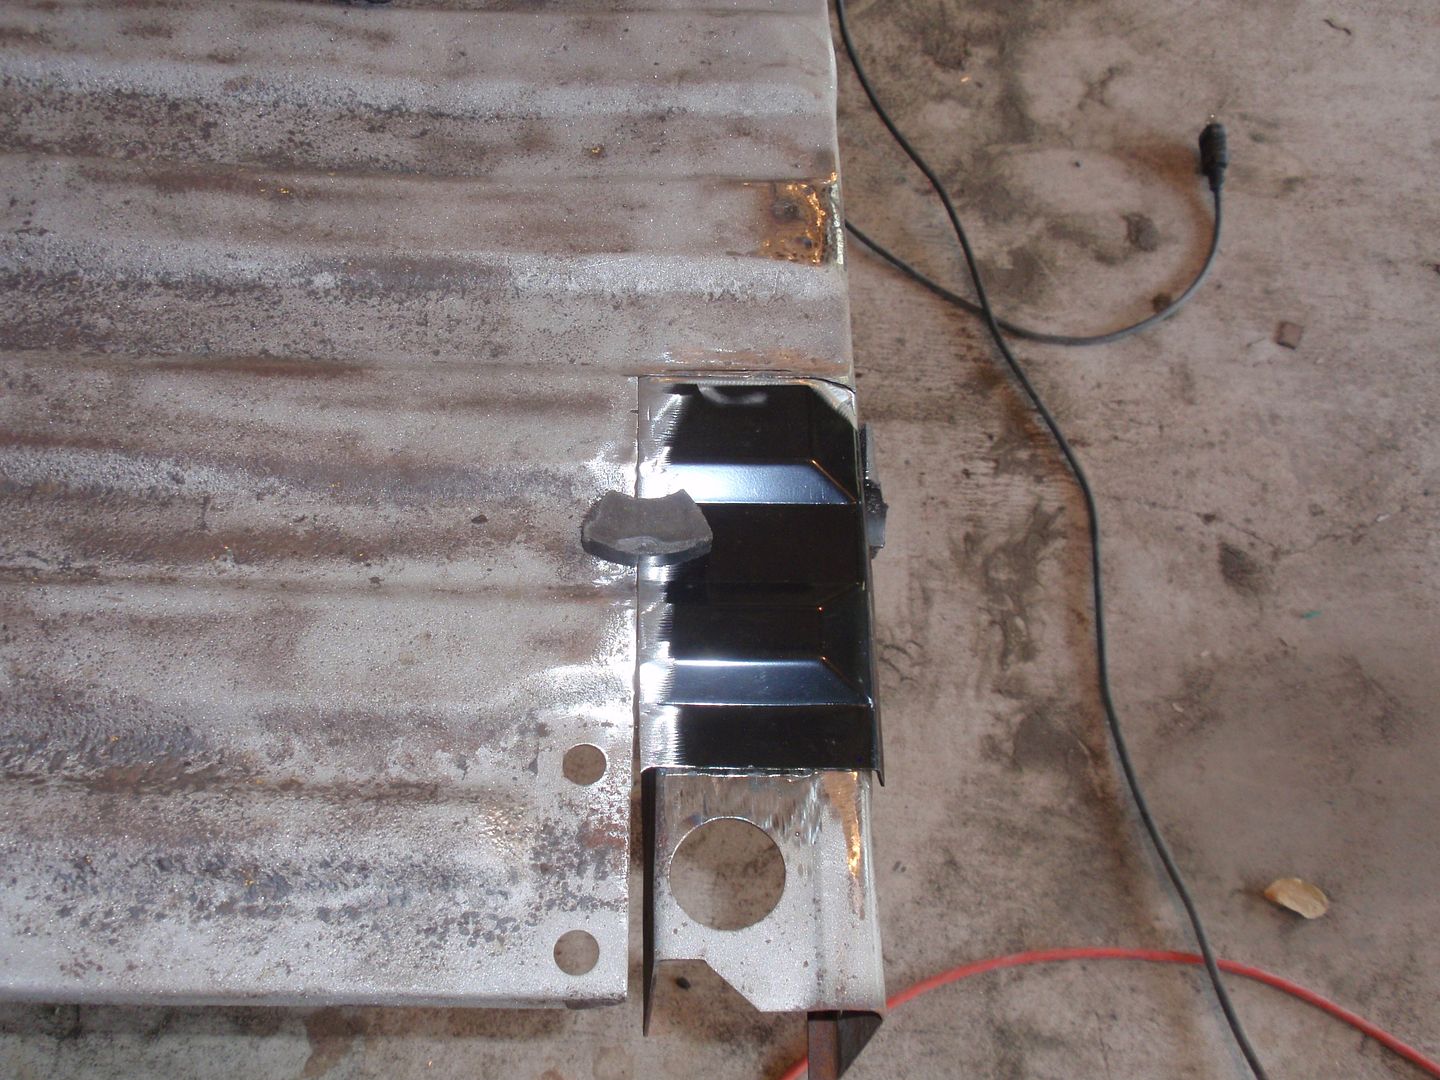 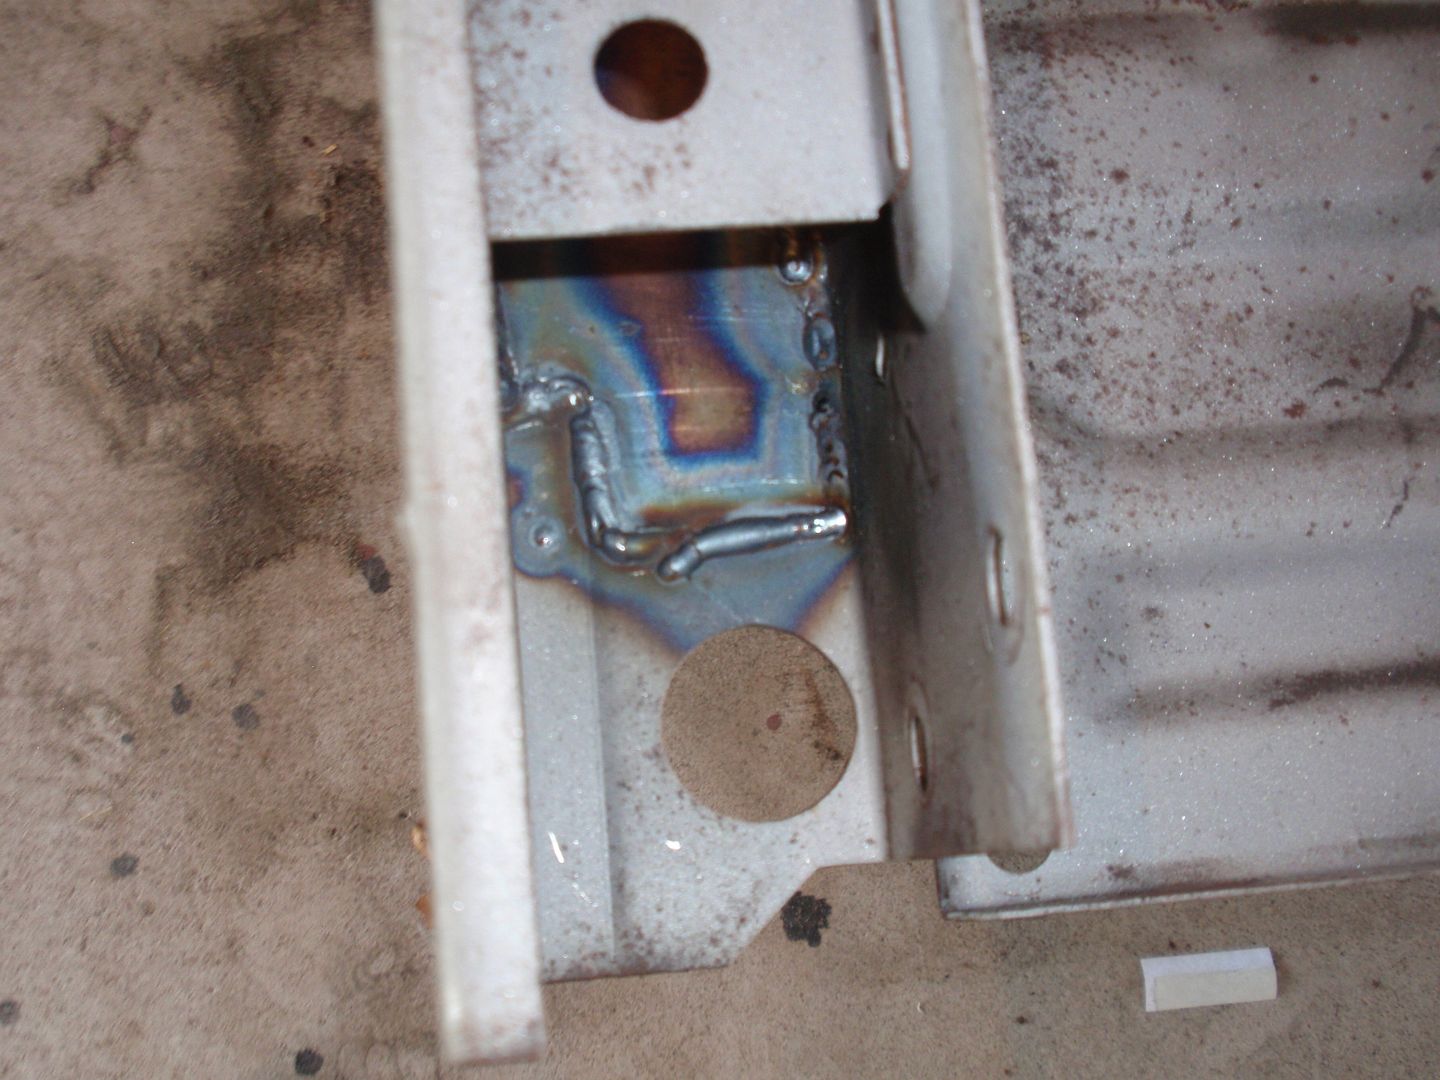 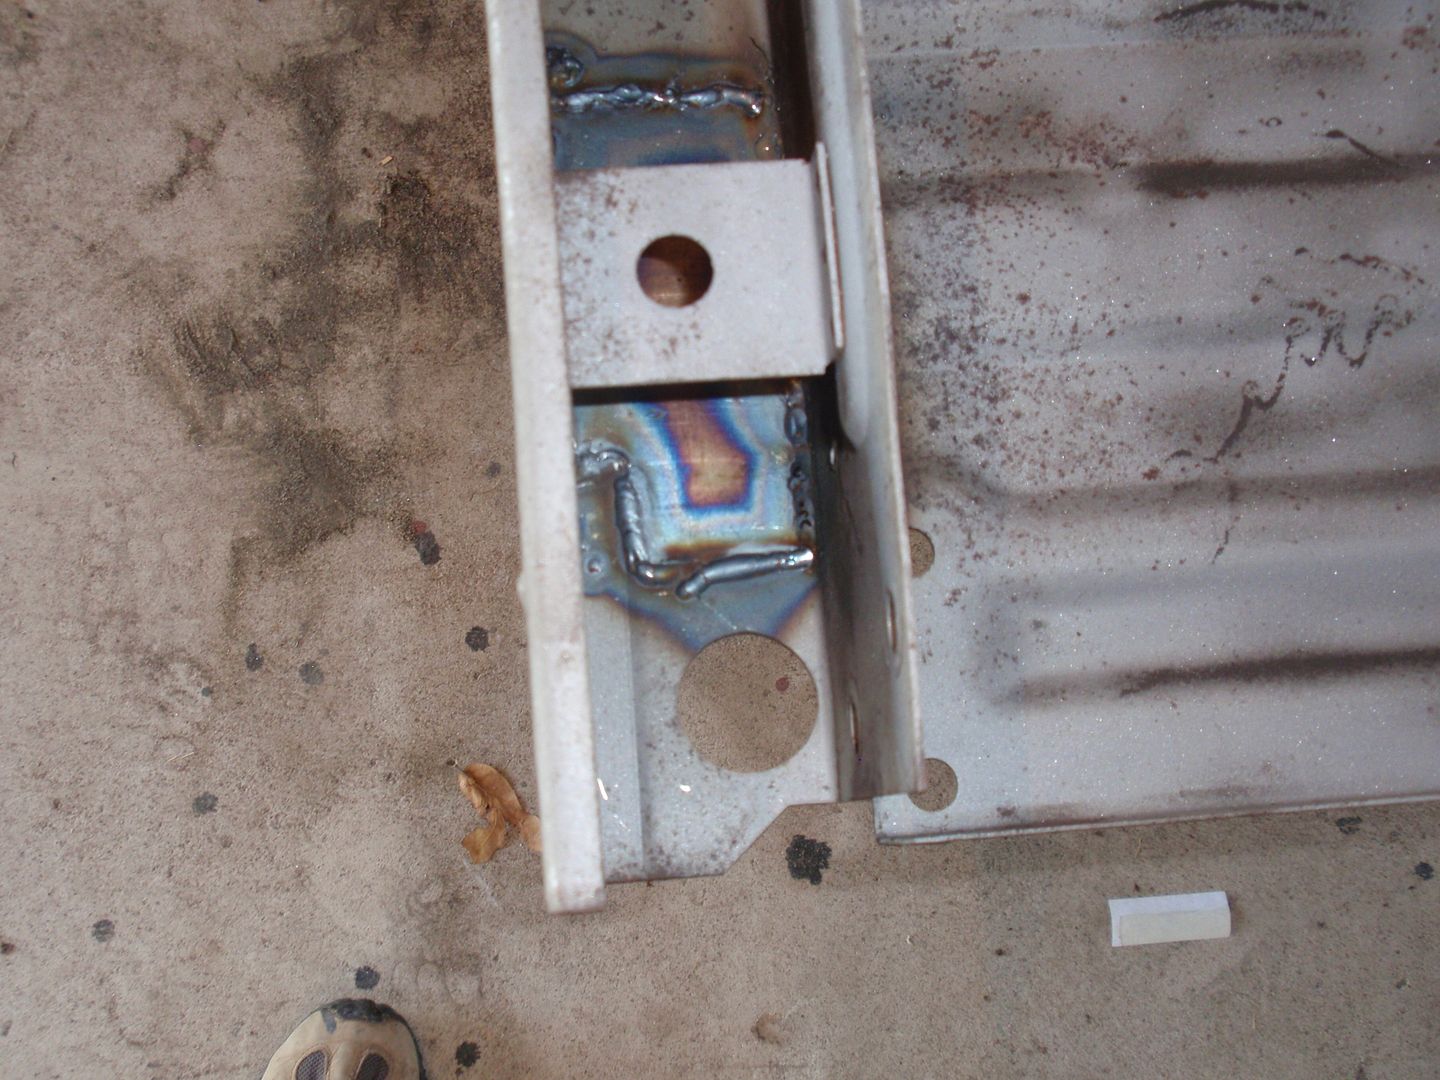 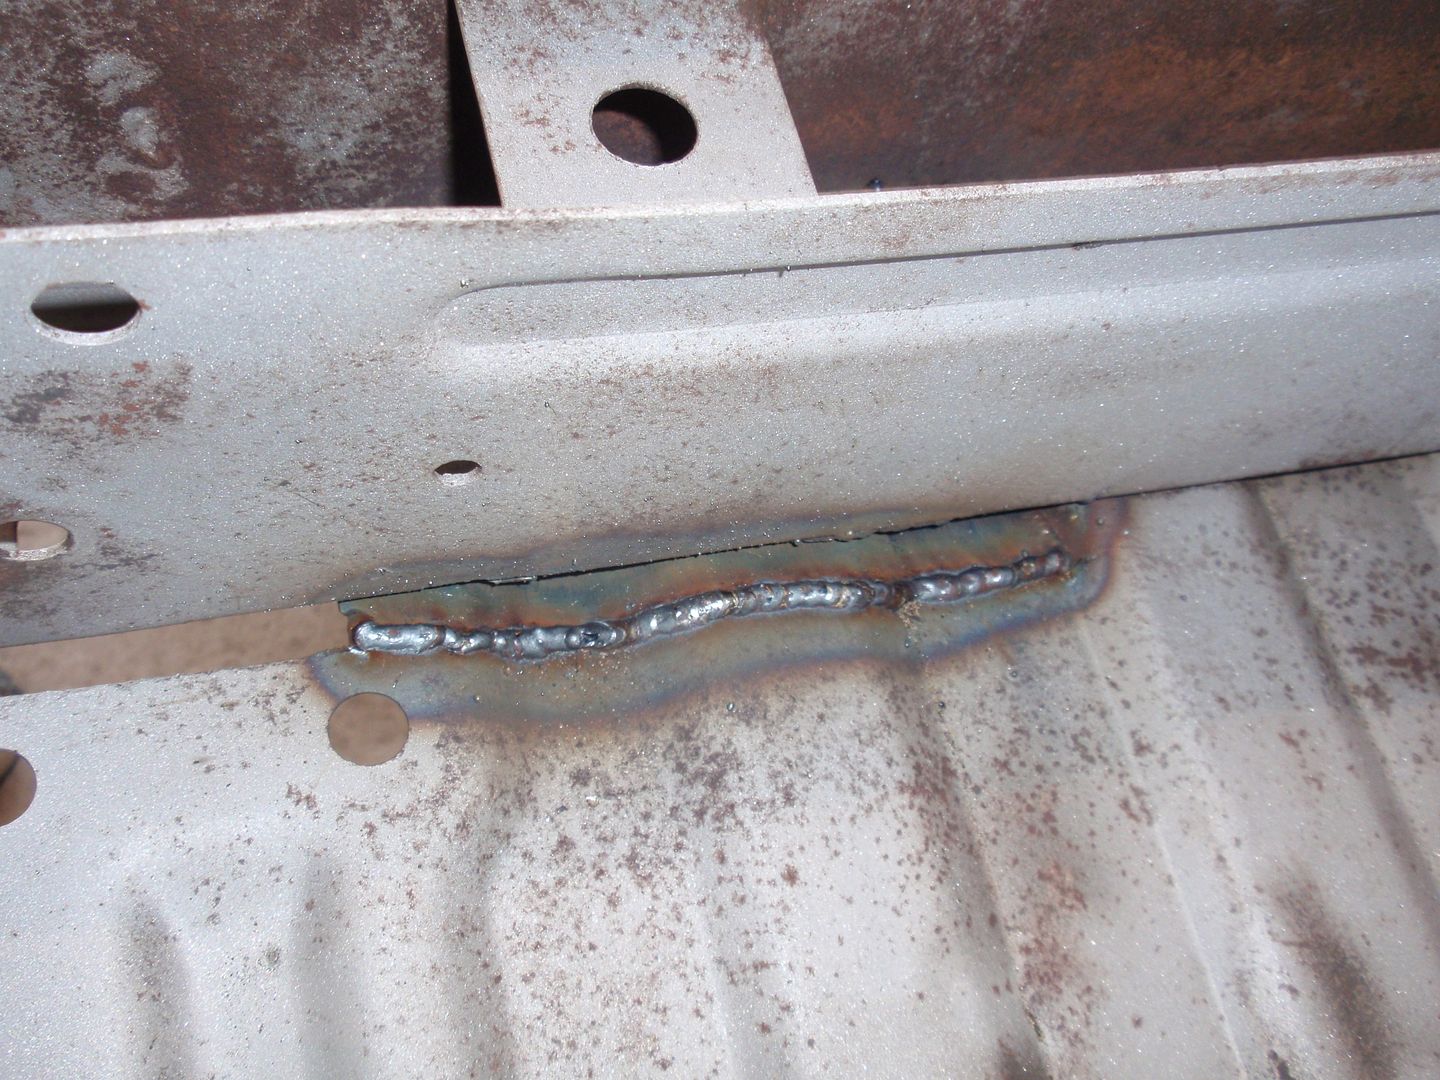 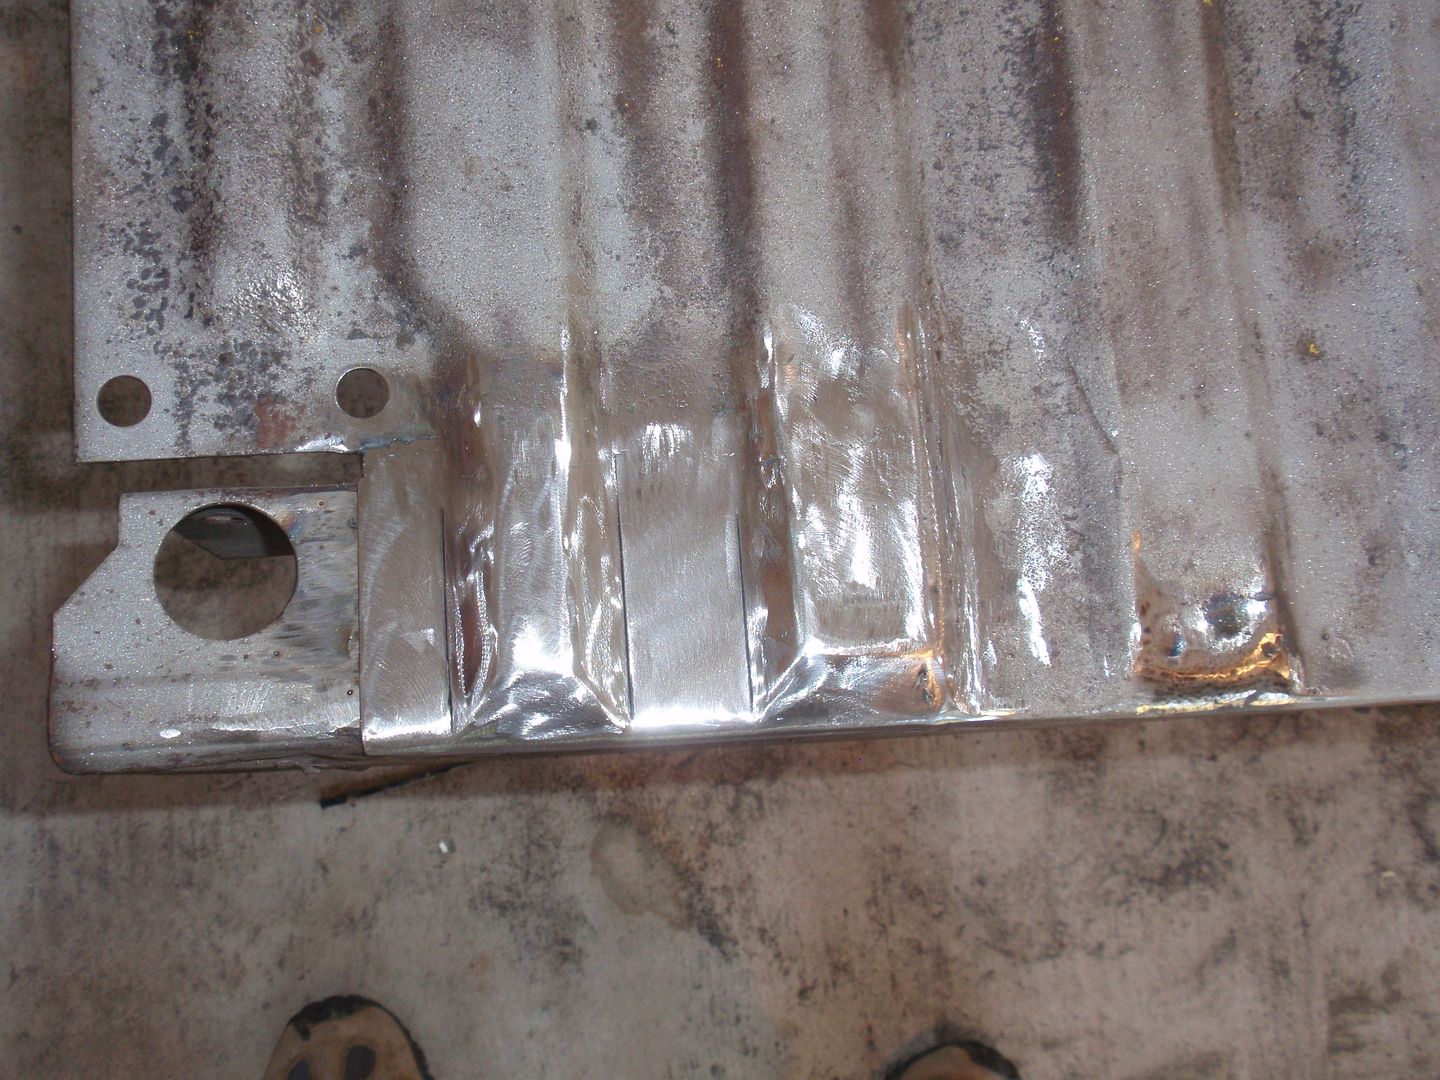 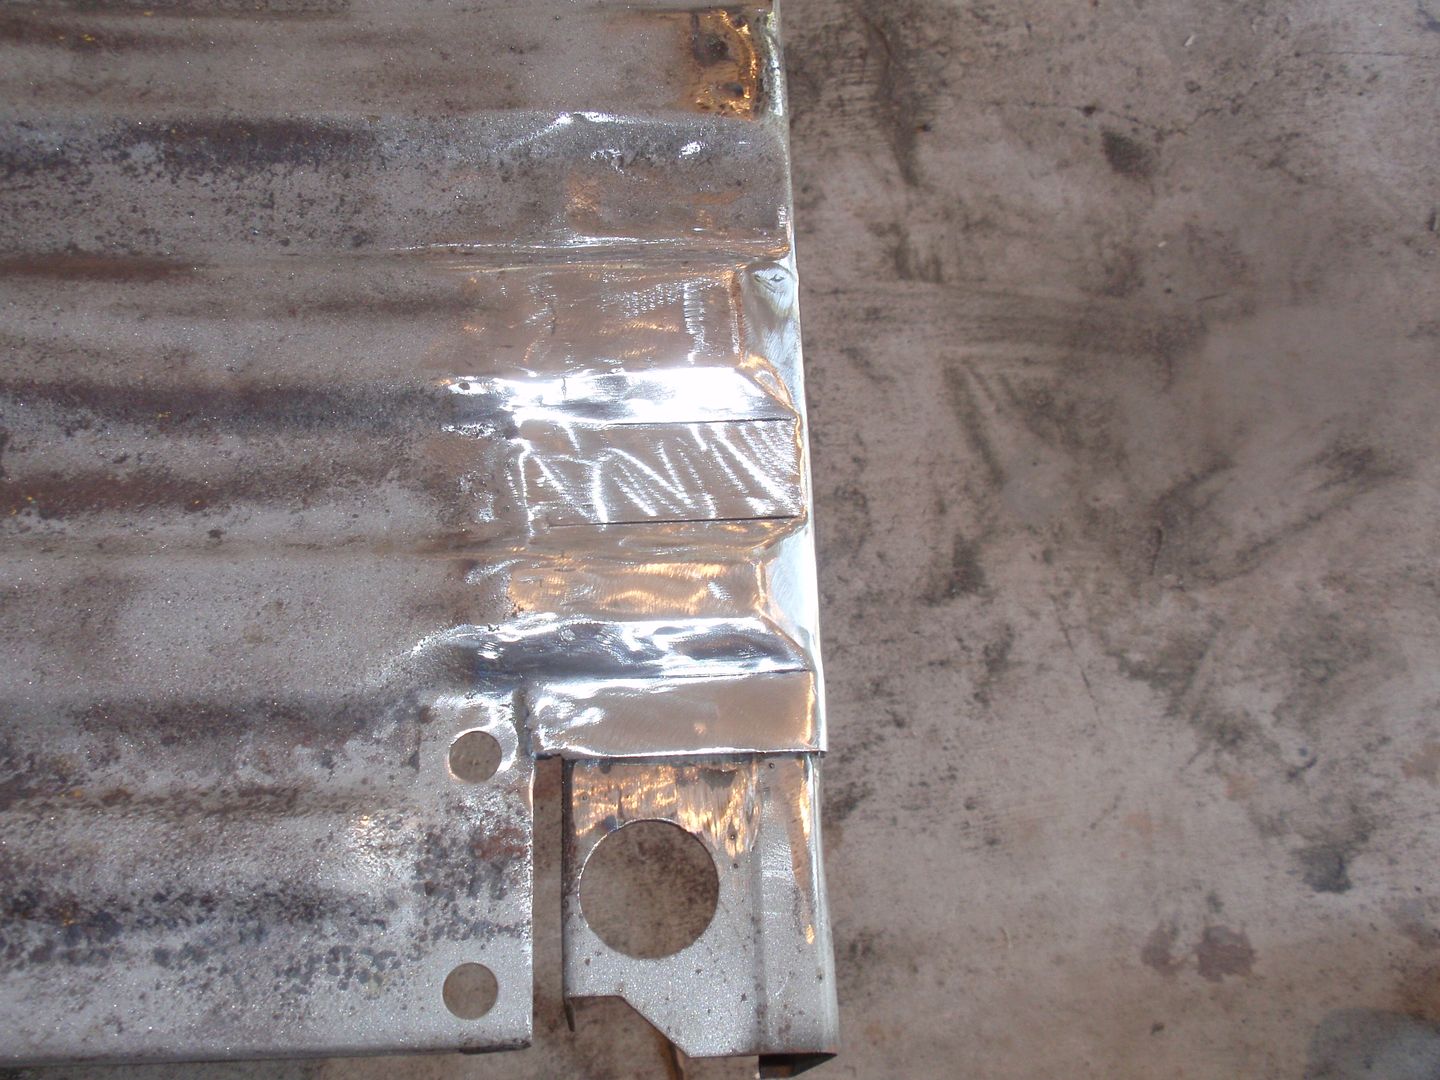 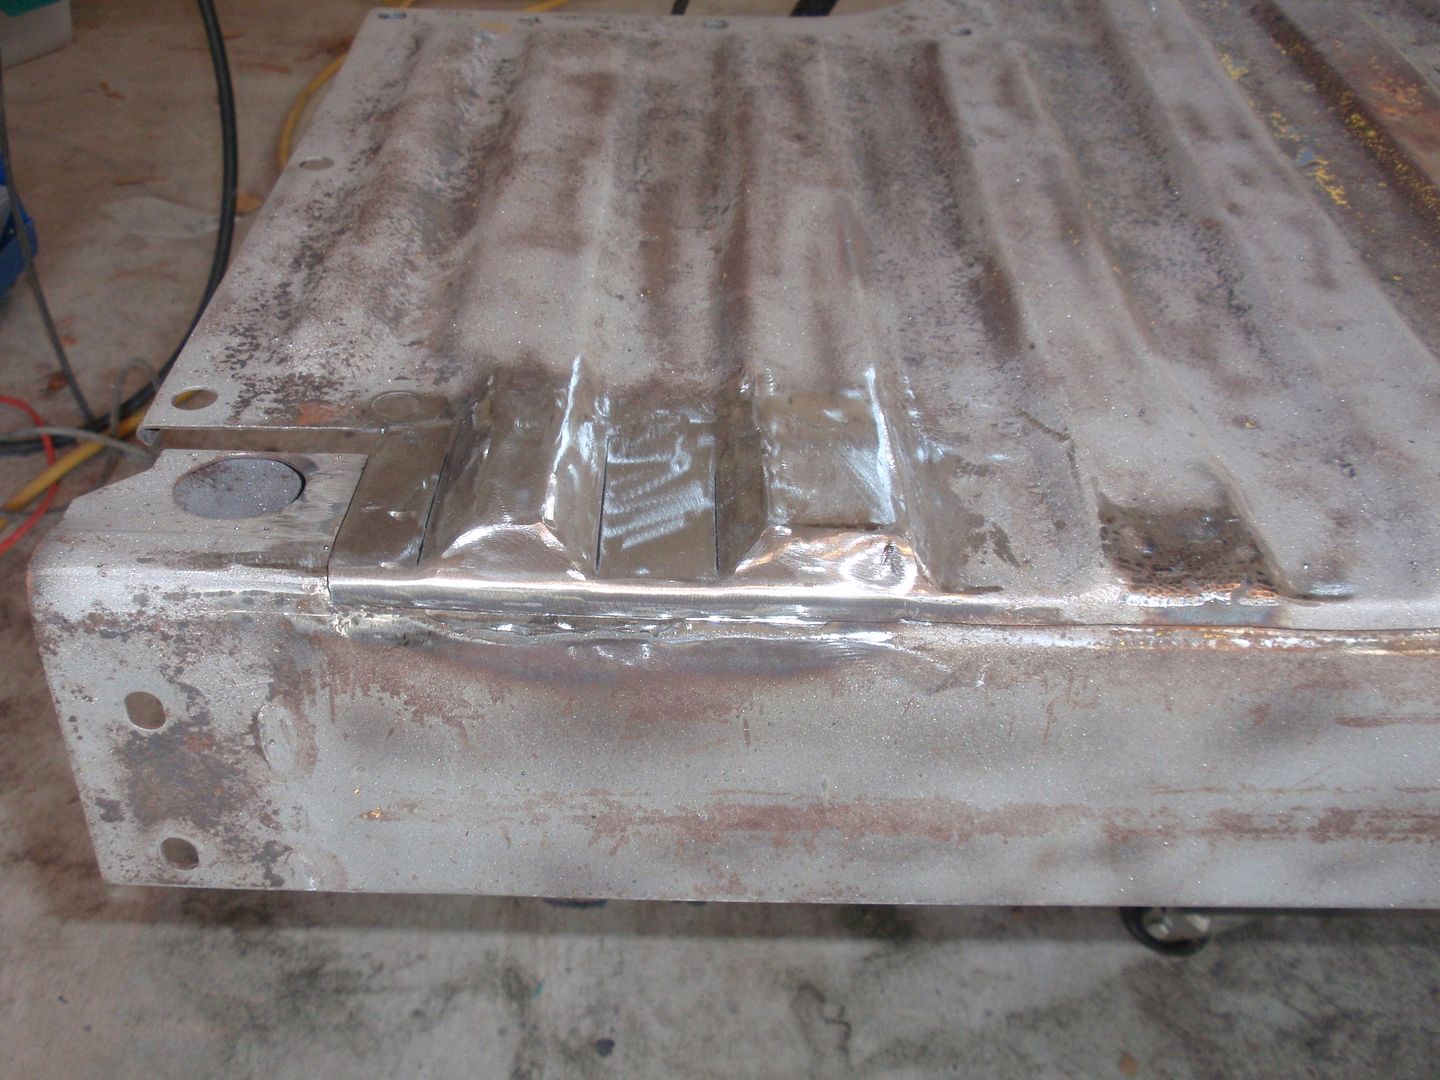 Then I welded up all of the holes in the bed. the same person that drilled the 72 holes in the high hump must have been involed in the bed drilling.. There were 31 holes in the bed from 5/16” to 1 1/4”. After that I finished sand basting the floor and then POR15 the floor bottom. Also sprayed the POR15 rubberized spray on the bottom of the floor. 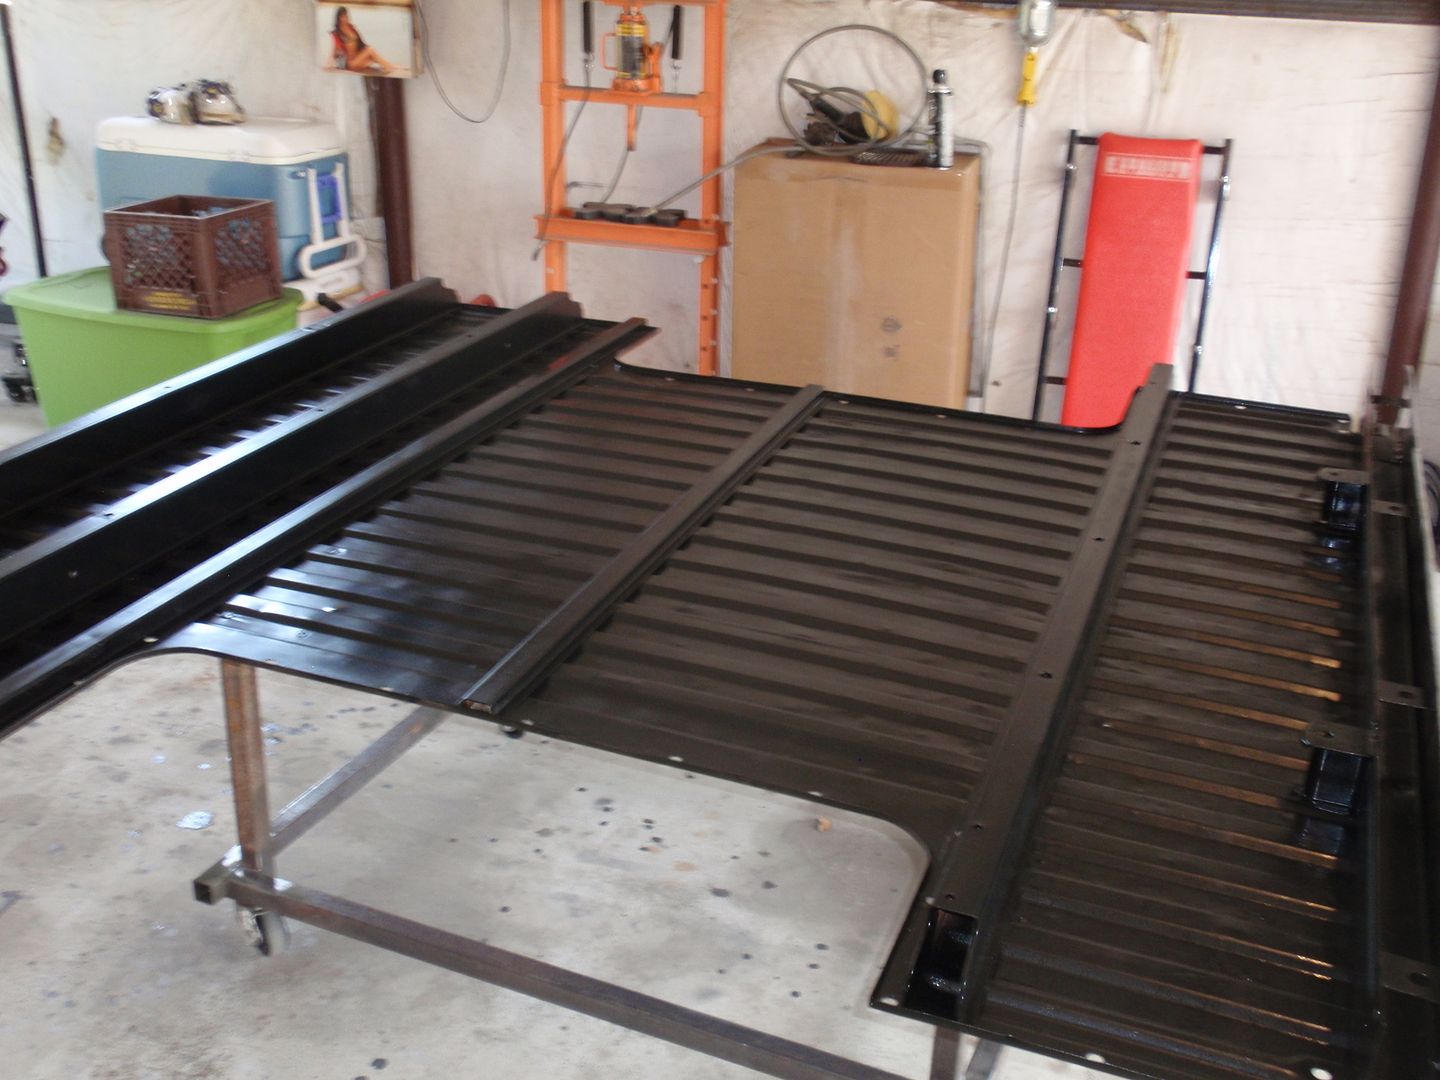 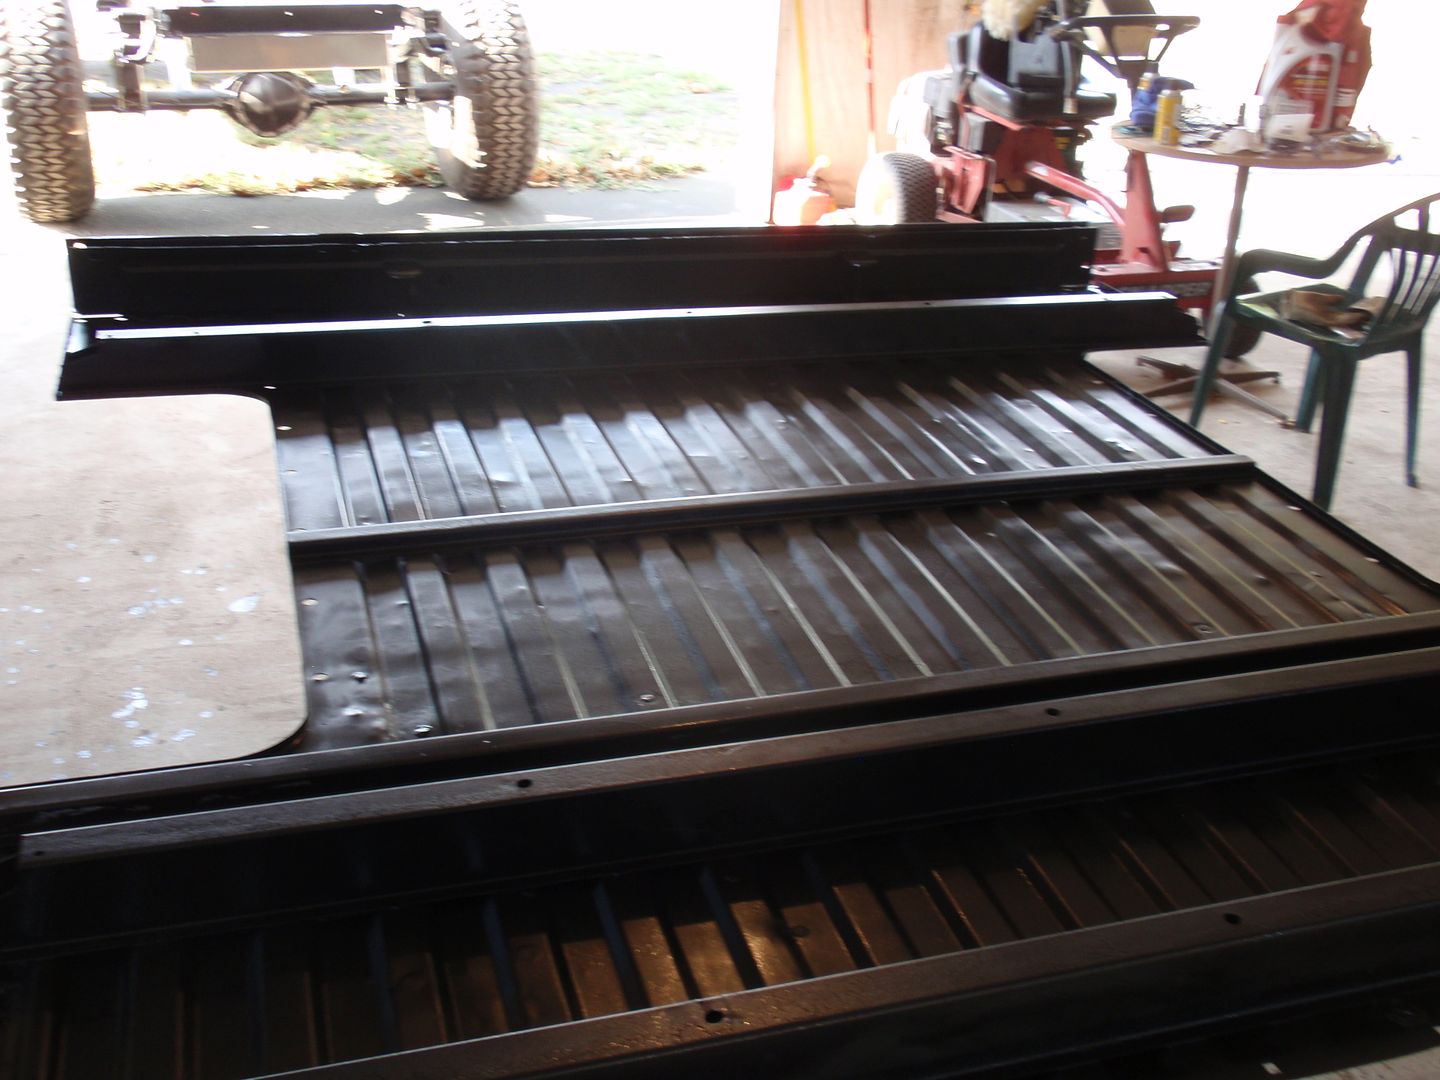 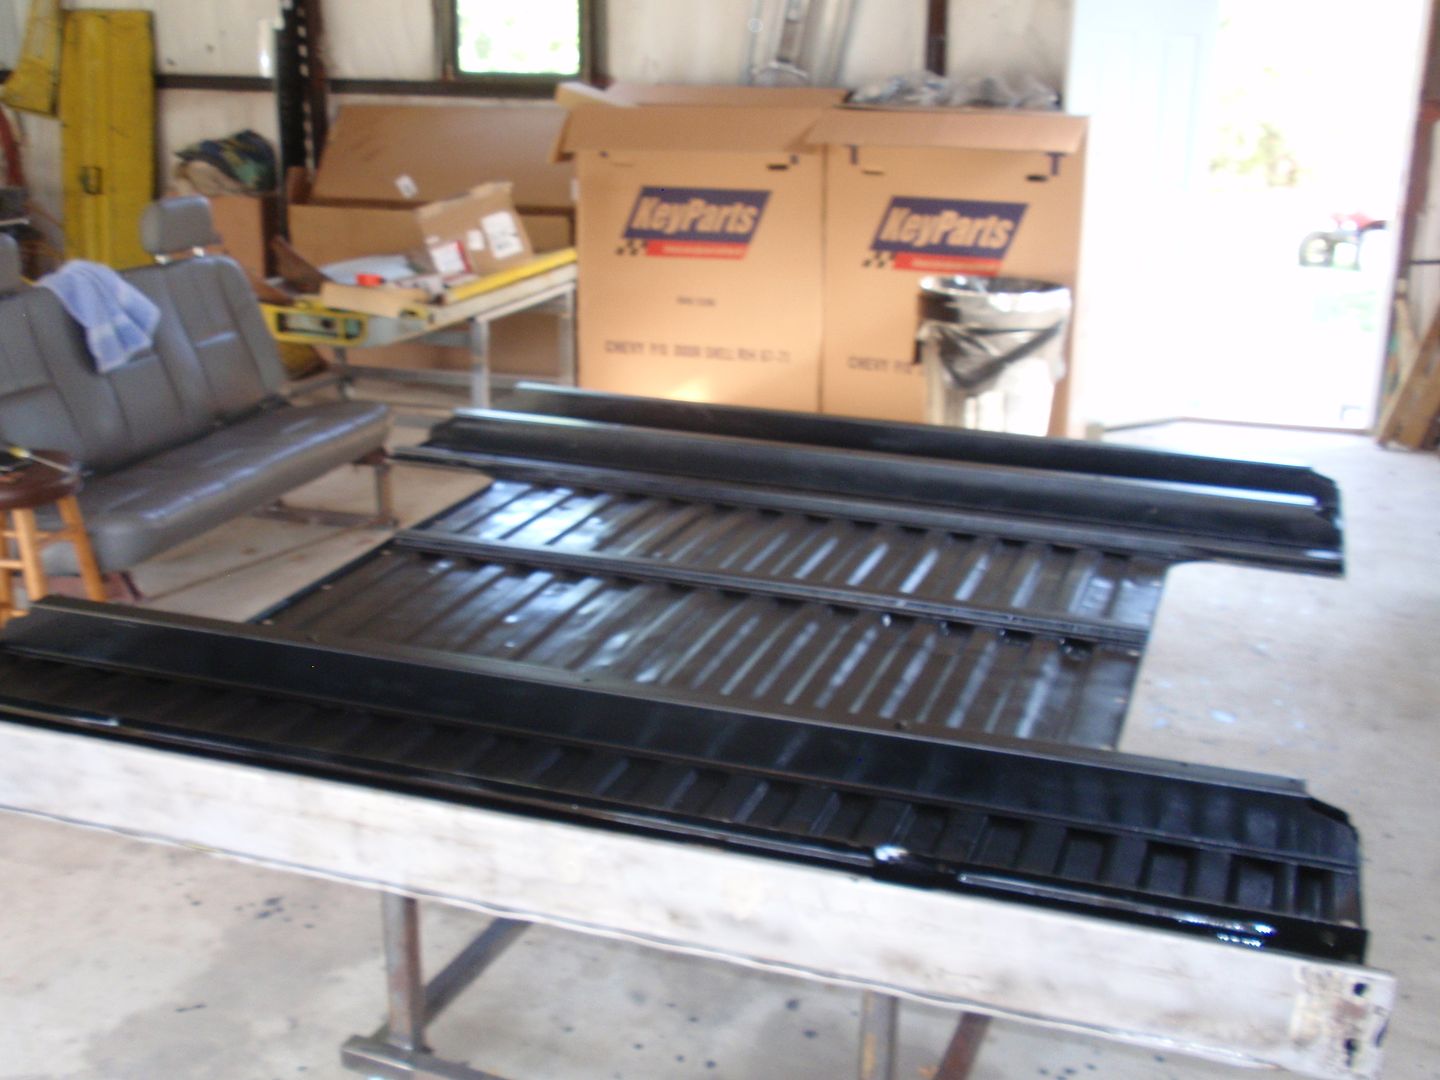 Decide to work on the AC control while I waited for the paint to dry. It had a broke lever and I needed to install the new faceplate that came with the Vintage Air system. Everything went well except for the little push on clips that hold the levers to the slide pieces. If anyone knows where to get them let me know. 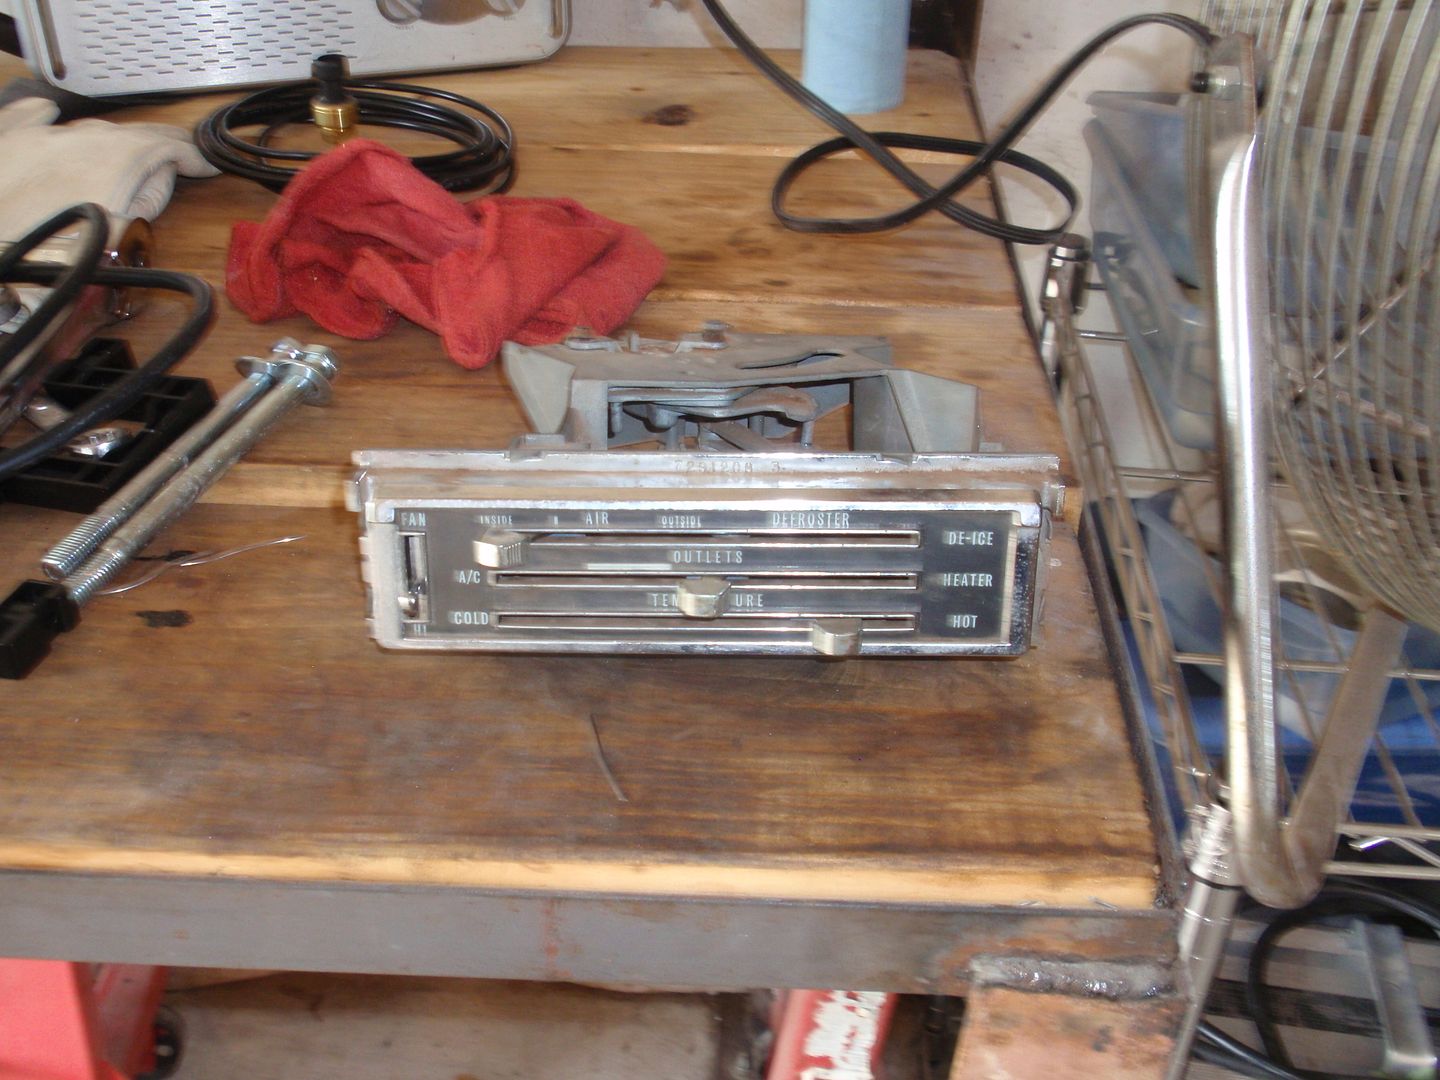 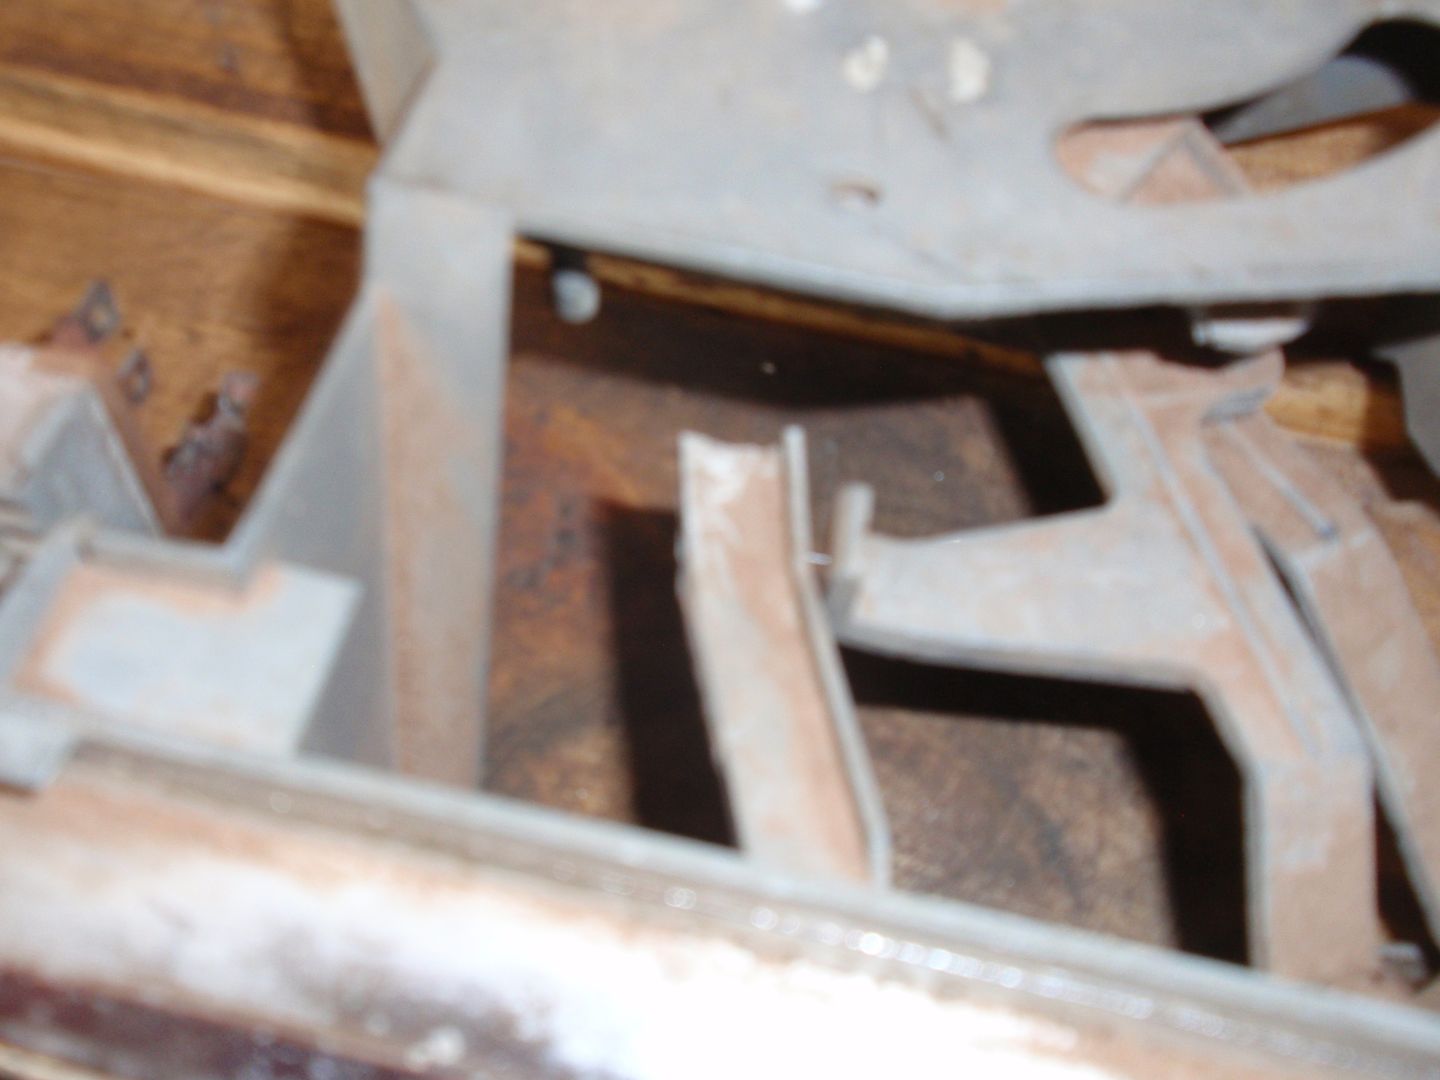 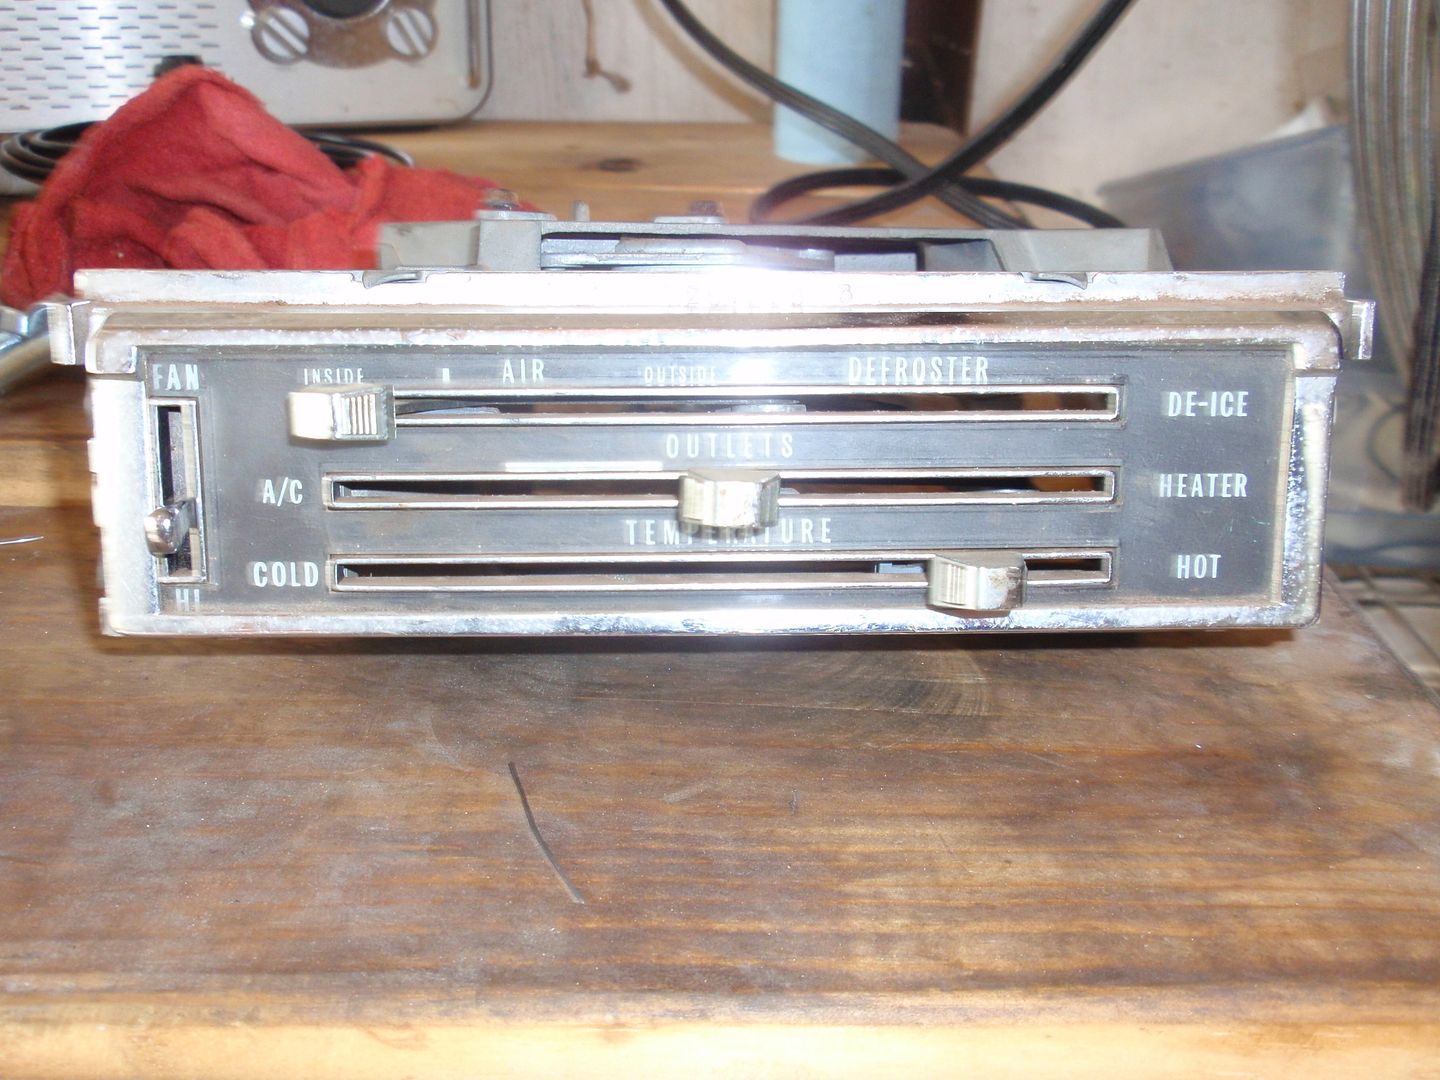  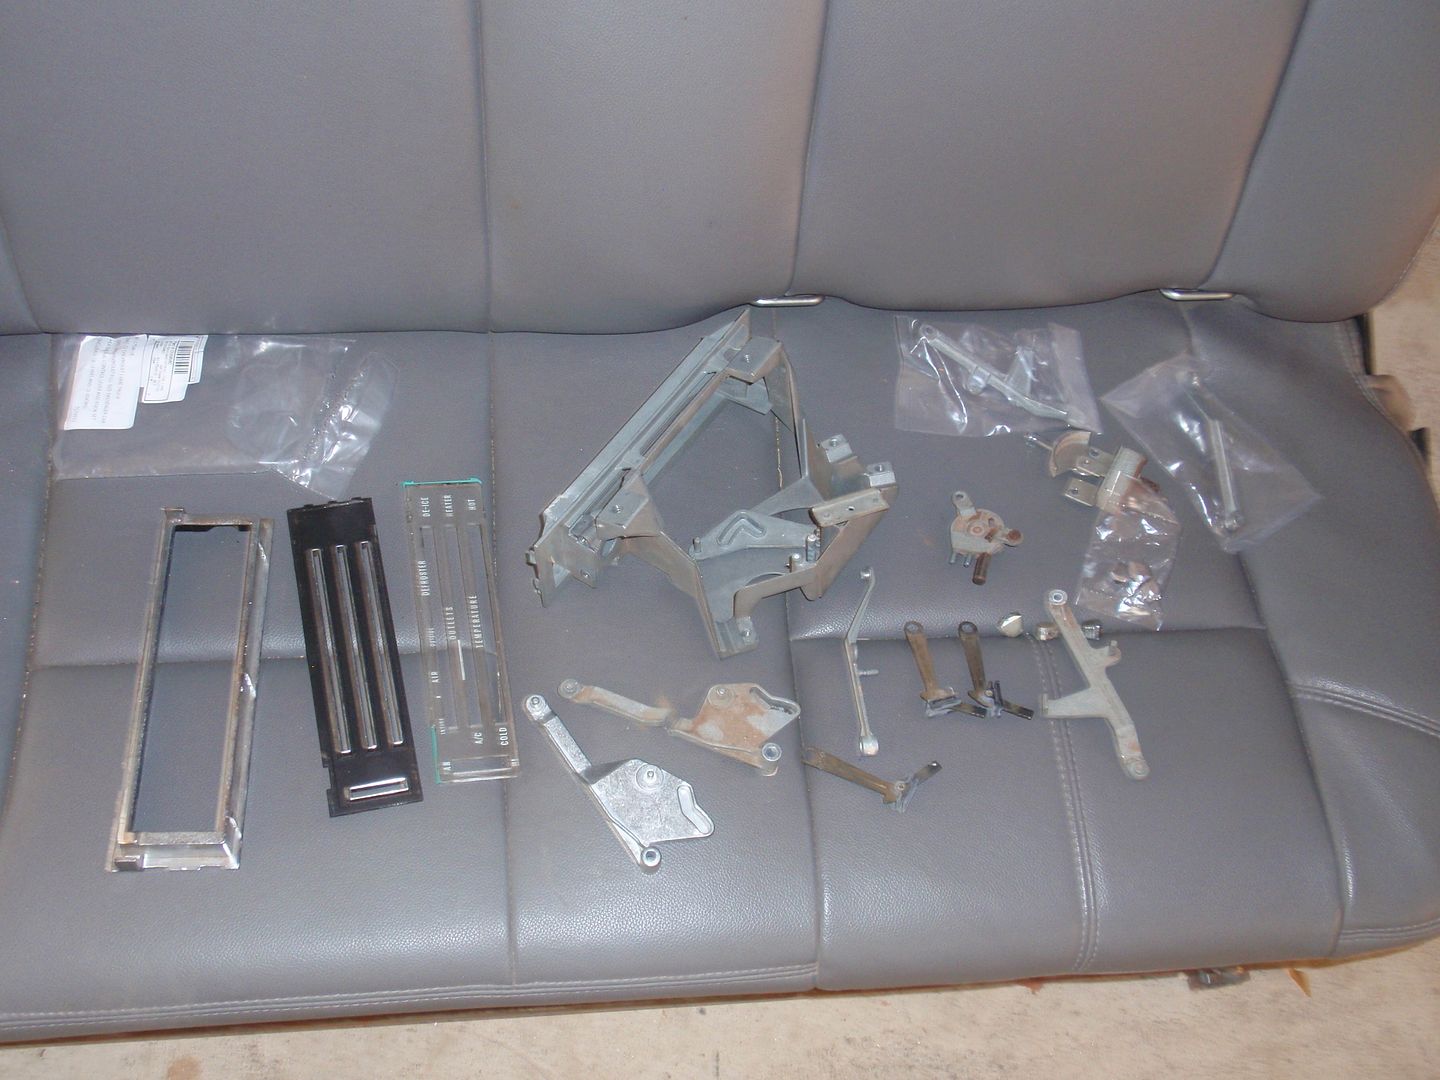 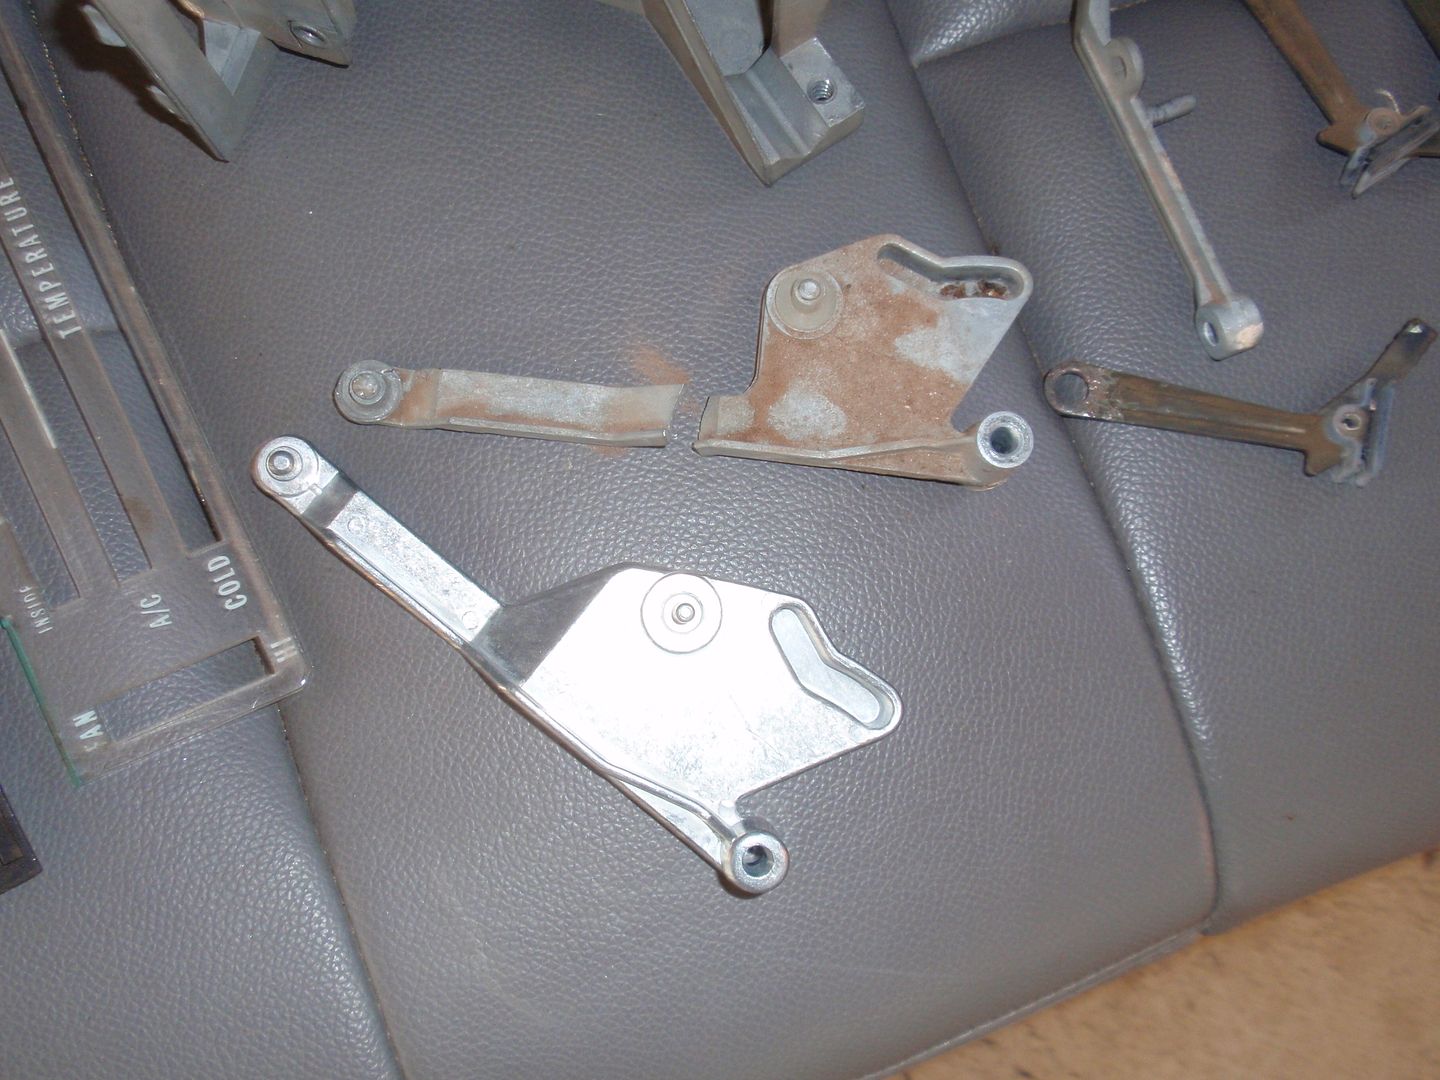 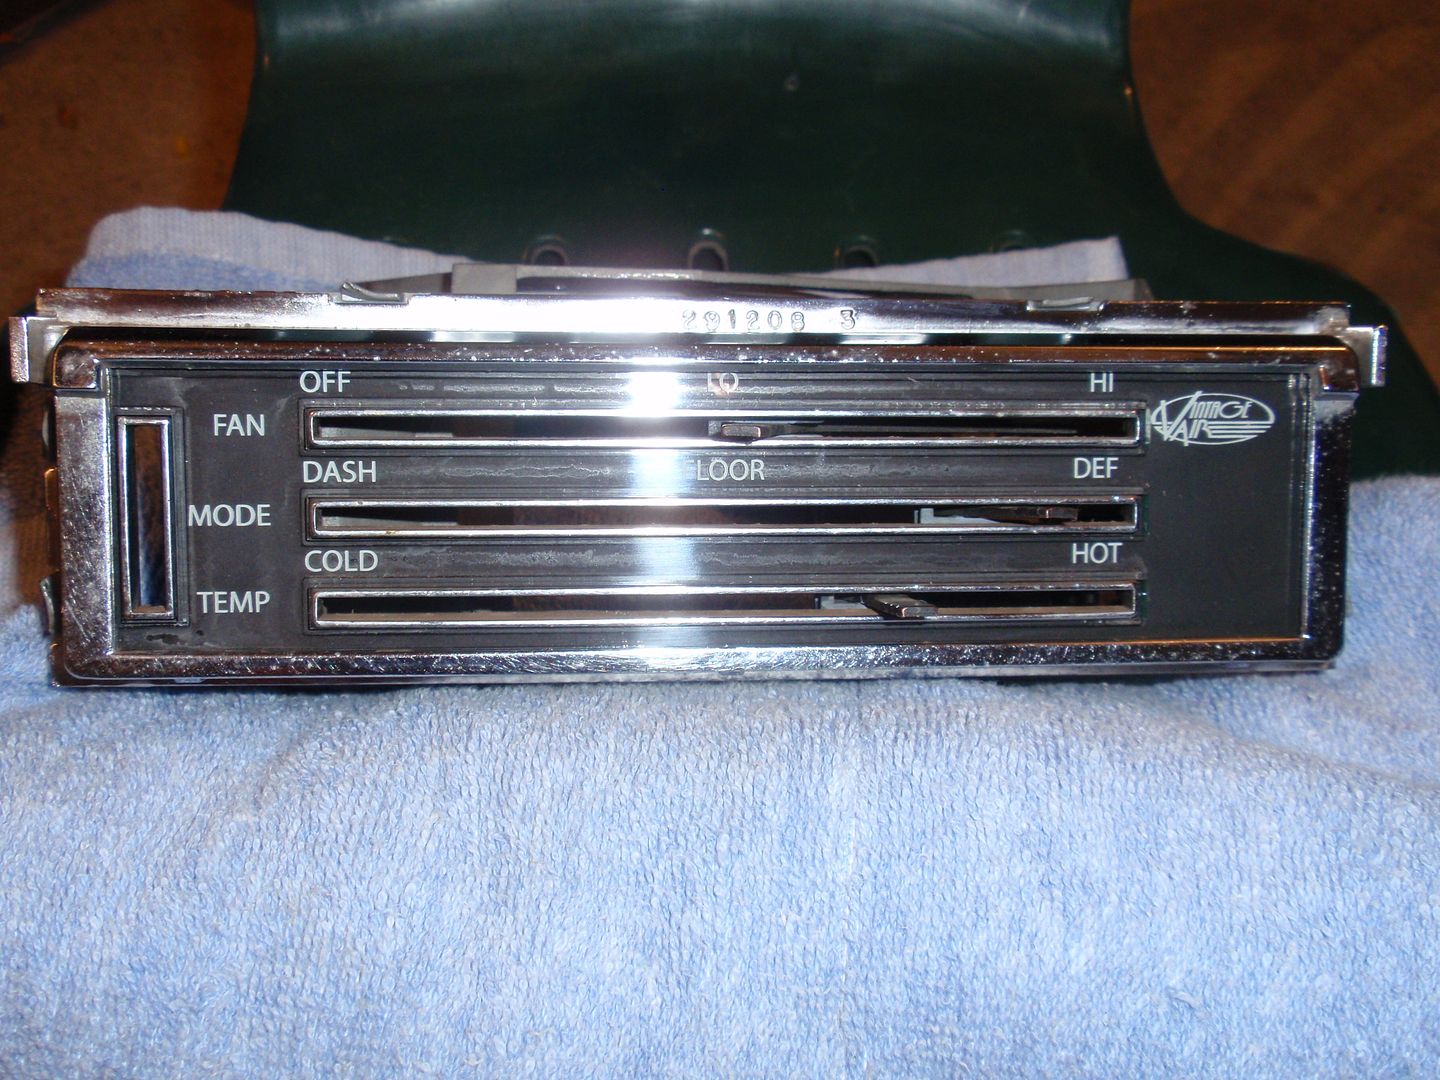 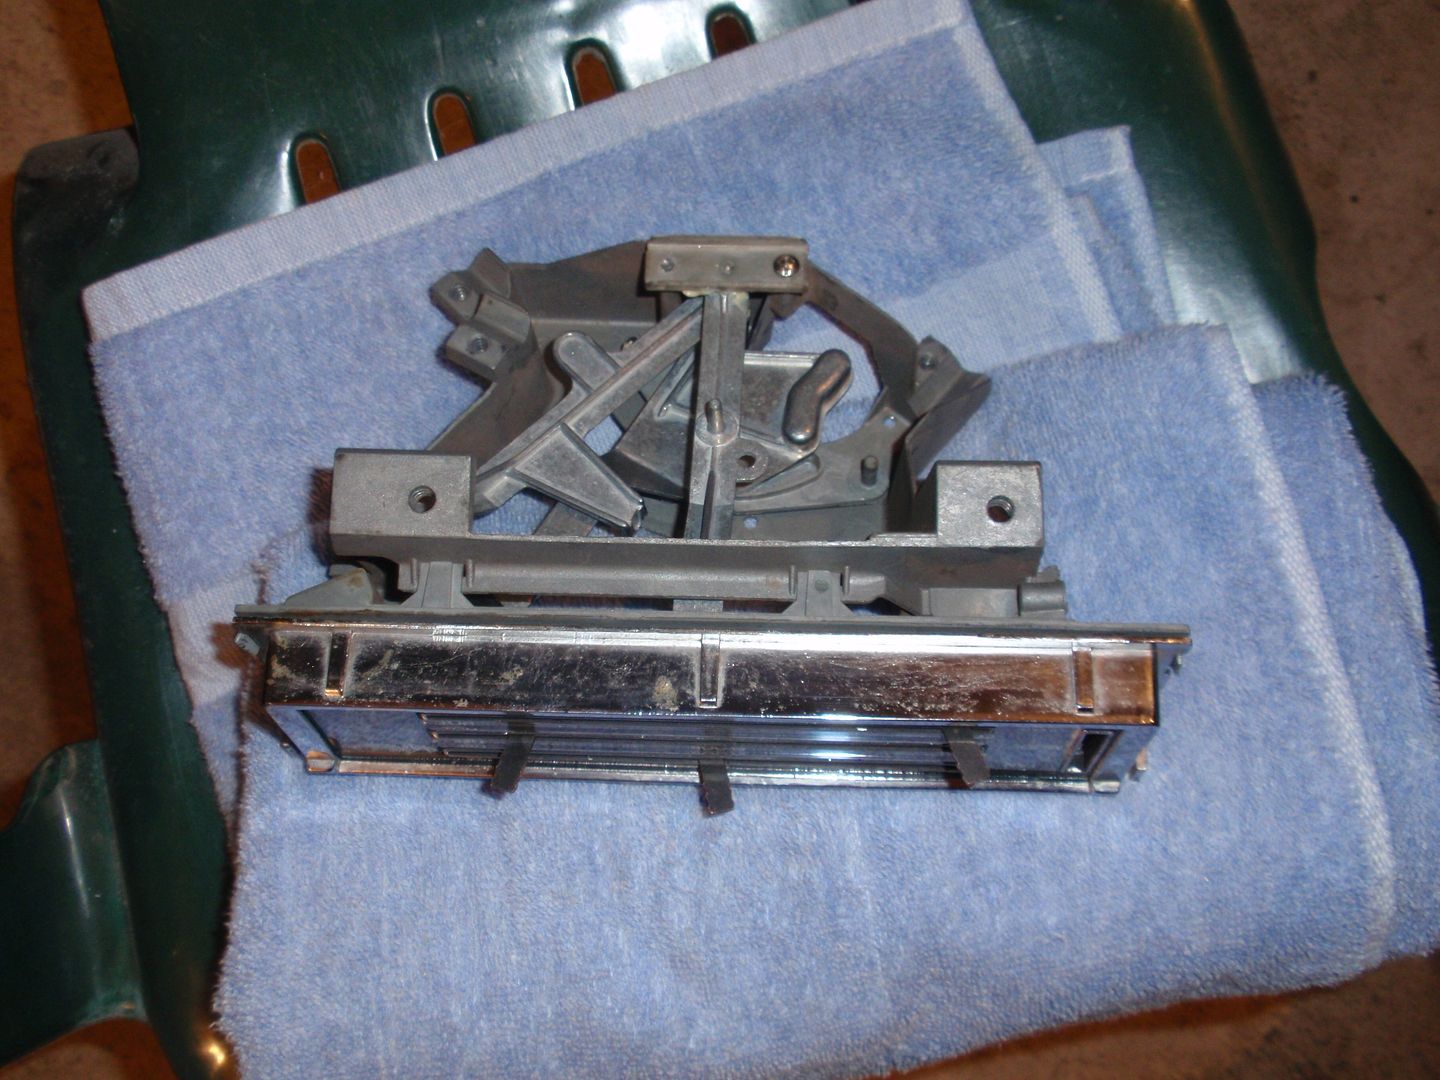 Also installed a new battery.. 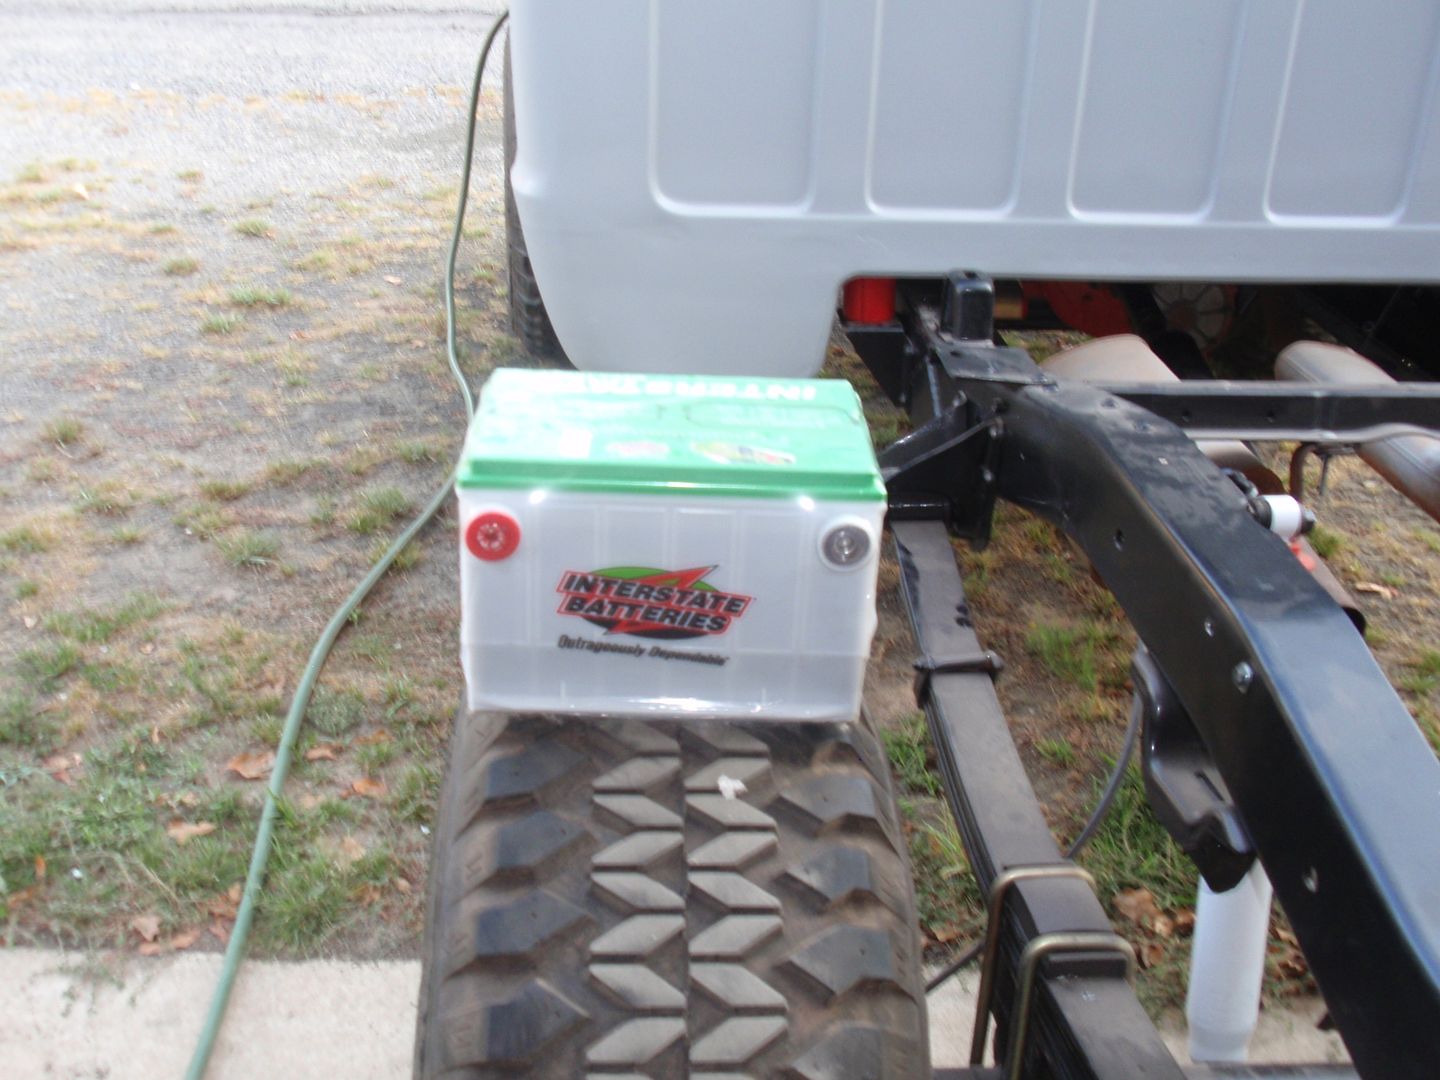 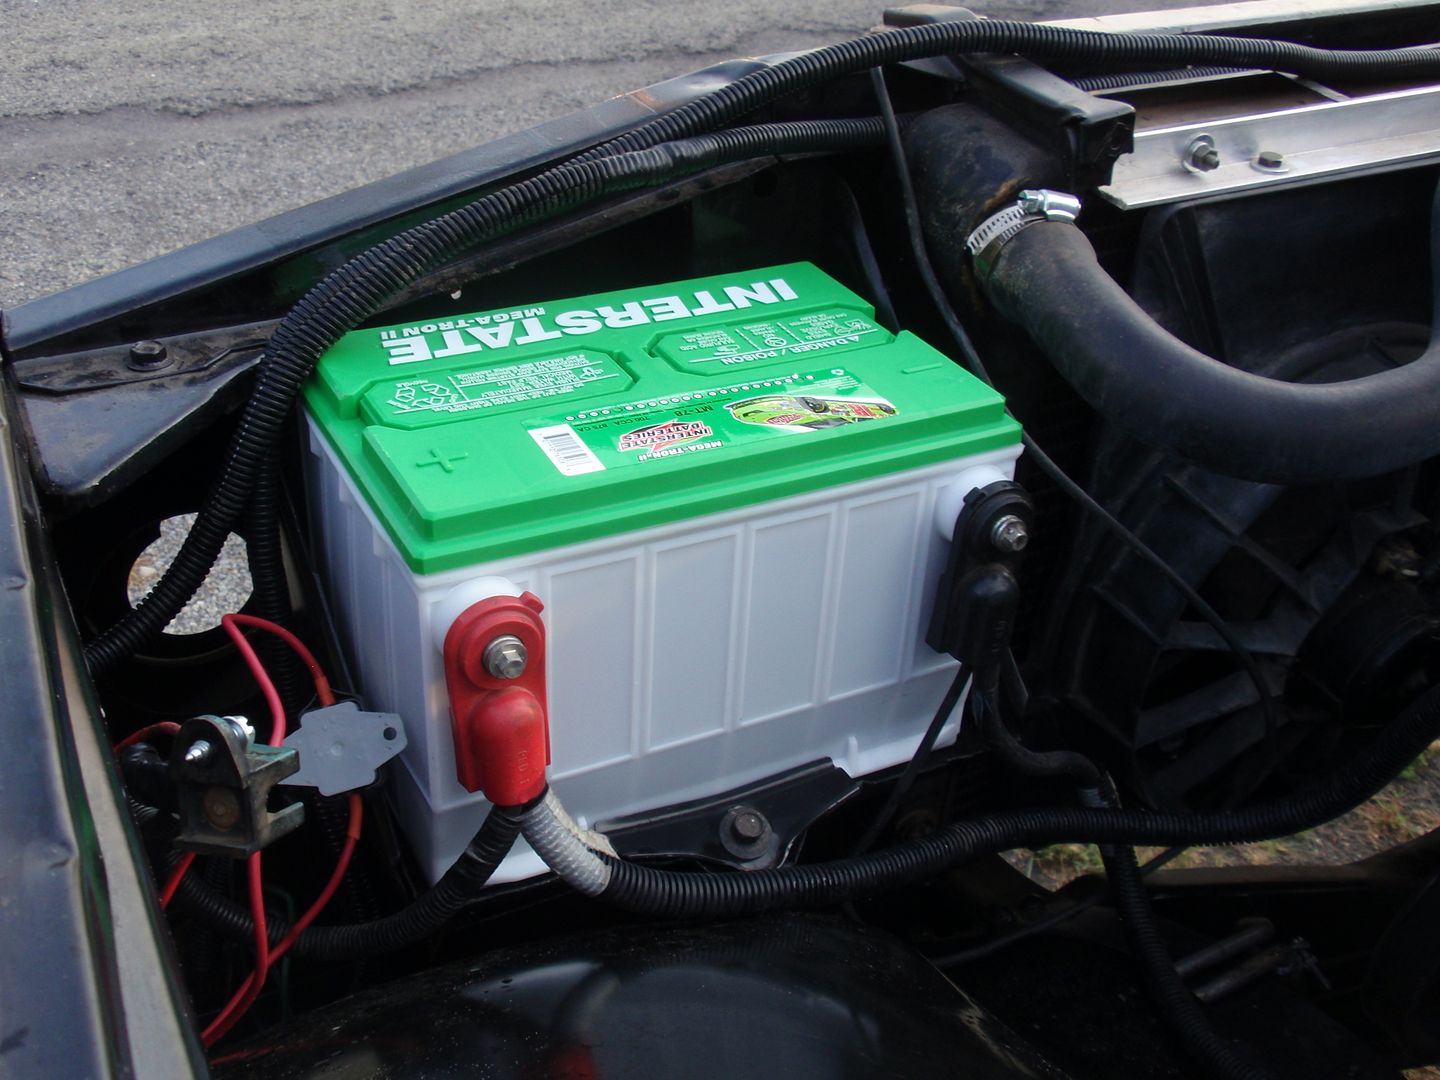 Tomorrow I hope to epoxy Primer the top of the bed floor, and then start on the rear fender wells and bedsides.
__________________
Mark ----------------------- Crash's 69 4x4 SWB Crash's Roof over Lake Home Crash's 1988 Land Cruiser Build Last edited by Crash_OK; 08-10-2012 at 11:19 PM. |
|
|
|
|
08-10-2012, 11:47 PM
|
#419 |
|
VA72C10
Join Date: Mar 2008
Location: Midlothian, VA
Posts: 25,269
|
Re: Crash's 72 K10
Nice work!
__________________
Looking for a 67-72 swb or blazer project in or around VA.
|
|
|
|
|
08-11-2012, 12:14 AM
|
#420 |
|
Registered User
Join Date: Jun 2012
Location: Hill Country
Posts: 435
|
Re: Crash's 72 K10
good call on using only what you needed that is alot of cutting,welding and grinding if you use the whole patch. Aint it fun cutting out little pieces of metal and fitting them in holes with no bottoms(LOL) sounds like someone got happy with the drill on your bed. Well I have been posting and searching for some patch panels to no avail, but... I finally found a whole bed floor from Jerimiah King a member here that is local for me(SCORE) bed is really nice and no rust to speak of but I too was cutting and filling numerous holes on it also. I think about 13 is all. keep at it you are waay ahead of me, Question: what kind of seam sealer are you going to use if at all to assemble your bed?
|
|
|
|
|
08-11-2012, 07:43 AM
|
#421 | |
|
Registered User
Join Date: Nov 2011
Location: Edmond, OK.
Posts: 1,362
|
Re: Crash's 72 K10
Quote:
__________________
Mark ----------------------- Crash's 69 4x4 SWB Crash's Roof over Lake Home Crash's 1988 Land Cruiser Build |
|
|
|
|
|
08-11-2012, 07:46 AM
|
#422 | |
|
Registered User
Join Date: Nov 2011
Location: Edmond, OK.
Posts: 1,362
|
Re: Crash's 72 K10
Quote:
__________________
Mark ----------------------- Crash's 69 4x4 SWB Crash's Roof over Lake Home Crash's 1988 Land Cruiser Build |
|
|
|
|
|
08-11-2012, 09:48 AM
|
#423 |
|
GEARHEAD
Join Date: Aug 2003
Location: MN
Posts: 6,116
|
Re: Crash's 72 K10
I used the same seam sealer on my bed wheel tubs as I used around the drip rail. Just the regular caulk tube stuff. Your wiring work is outstanding. I really like the new DD gage set ups better than the old LED readouts they used to have. Nice job on the bed patches.
__________________
If no one knows what you're doing, they can't tell you you're doing it wrong HG's Dream Car Build - Shelby Cobra Kit Build your own adjustable track bar 71  Long Fleet C/10 Long Fleet C/10 72  Jimmy 4x4 (Junkyard Jimmy) Jimmy 4x4 (Junkyard Jimmy)HG's Plow Truck '78  K35 Dually K35 DuallyBigass Farm Truck HG's thread of miscellaneous stuff |
|
|
|
|
08-11-2012, 11:17 AM
|
#424 |
|
Still Learning
Join Date: Jul 2009
Location: Central Oklahoma
Posts: 10,108
|
Re: Crash's 72 K10
Very nice progress Mark. That ac control turned out great. Is there a chance I may have the clips you're looking for?
Posted via Mobile Device |
|
|
|
|
08-11-2012, 11:41 AM
|
#425 | |
|
Registered User
Join Date: Nov 2011
Location: Edmond, OK.
Posts: 1,362
|
Re: Crash's 72 K10
Quote:
Thanks Mike.. I bet you would have the clips, but I am not sure how to remove them with tearing them up..
__________________
Mark ----------------------- Crash's 69 4x4 SWB Crash's Roof over Lake Home Crash's 1988 Land Cruiser Build |
|
|
|
|
 |
| Bookmarks |
|
|


 Linear Mode

