
 |
Register or Log In To remove these advertisements. |
|
|
|
|||||||
 |
|
|
Thread Tools | Display Modes |
|
|
#26 |
|
Registered User
Join Date: Jun 2015
Location: shreveport, la.
Posts: 160
|
Re: Tucker69 "Project No-Name"
Anyway, i'm gonna work on resizing these pics rest of the nite. Tommorrow if your lucky i might share with ya'll a painted and fully installed/lowered-4-linked-4 wheel coilovered, power rack&pinioned roller chassis...good nite & thanks for your patience & understanding
|
|
|

|
|
|
#27 | |
|
Registered User
Join Date: Oct 2009
Location: Lincoln City Oregon
Posts: 173
|
Re: Tucker69 "Project No-Name"
Quote:

__________________
1970 K20 1967 Blown Stepside 2016 Chevy 2500 Duramax 1989 Jeep Cherokee 1995 S-10 2014 Infinity Q-50 AWD 1970 Chevy K20 build thread http://67-72chevytrucks.com/vboard/s...d.php?t=634164 1967 stepside rebuild http://67-72chevytrucks.com/vboard/s...d.php?t=684913 Shop build http://www.garagejournal.com/forum/s...d.php?t=225559 |
|
|
|

|
|
|
#28 |
|
Registered User
Join Date: Oct 2007
Location: Spanaway
Posts: 8,451
|
Re: Tucker69 "Project No-Name"
Its all good, we gotta learn eventually, On my Samsung i am able to choose the middle of 3 sizes before i load them to email, then i send to myself and download them to my computer, the size works great for uploading to the forum. The last few pic's you posted are good size.
Another way to try is Photoshop, but admittedly i'm not very great at that ether. I seem to be an old low tech guy myself. 
__________________
Mike. Swamp Rat build thread : http://67-72chevytrucks.com/vboard/s...d.php?t=595019 72 3/4T 4X4 4" BDS Lift 33" BFG's |
|
|

|
|
|
#29 |
|
Registered User
Join Date: Jun 2015
Location: shreveport, la.
Posts: 160
|
Re: Tucker69 "Project No-Name"
okay, back to progress and I think I have all our pictures sized right.. Here is more pics of the frame & "No Limit" chassis coming together
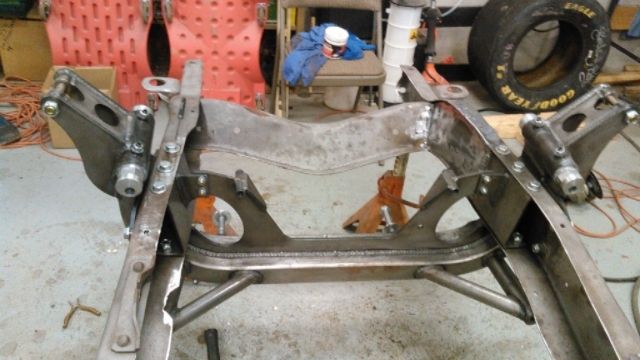 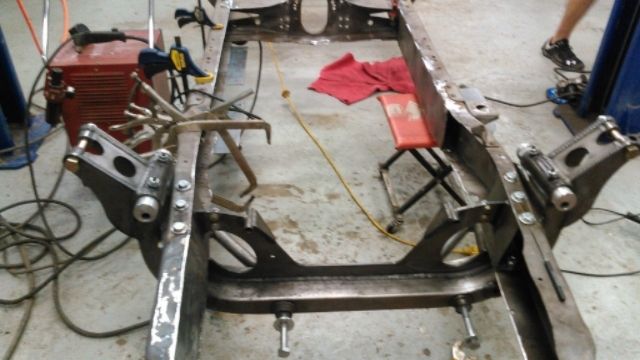 At this point I had all suspension brackets & front crossmember welded/mounted so I test fit everything and stripped back down for paint.. I had intentions to powdercoat the frame but I have had such good luck with the "POR" products I decided to paint instead... I usually use the small "1" paint brush from HomeDepot or if I am doing larger surfaces I will use the "3-4" foam rollers. There is considerable more waste with roller but it's easier to apply. 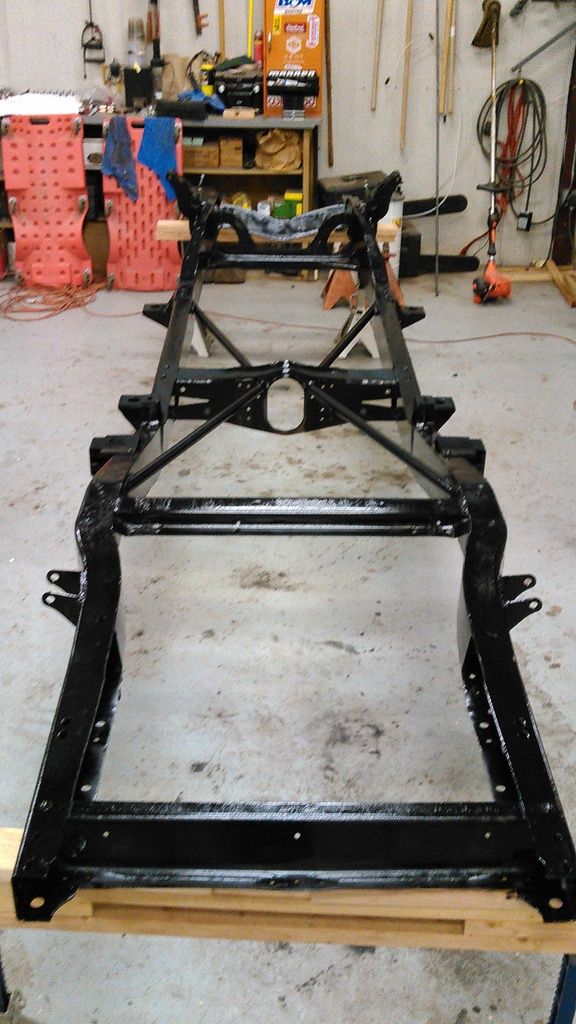
|
|
|

|
|
|
#30 |
|
Registered User
Join Date: Jun 2015
Location: shreveport, la.
Posts: 160
|
Re: Tucker69 "Project No-Name"
|
|
|

|
|
|
#31 |
|
Registered User
Join Date: Jun 2015
Location: shreveport, la.
Posts: 160
|
Re: Tucker69 "Project No-Name"
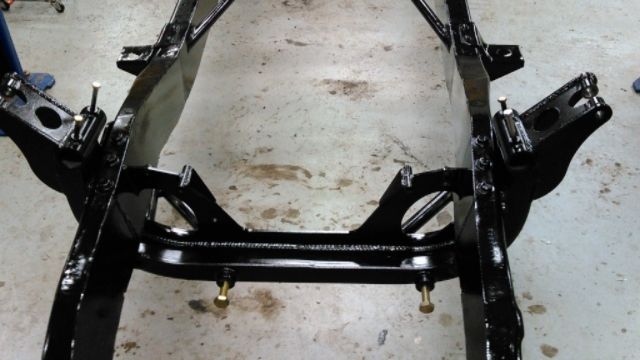 So now I am starting with installation of front coil-overs, upper/lower control arms, rack etc... 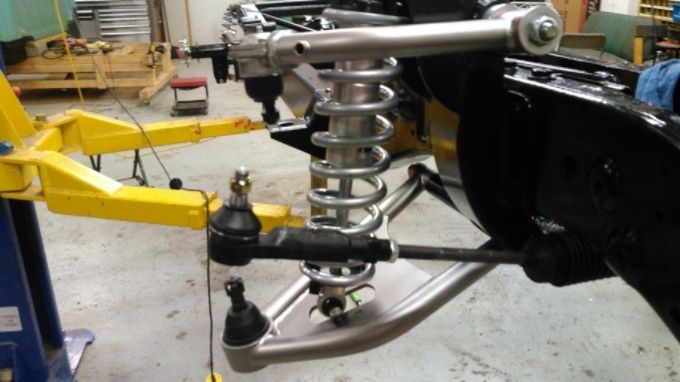 The rotors & stock calipers came with the No Limit kit. I may upgrade at some point.. I now move to rear for 4-link, differential, coil-overs & track bar installation 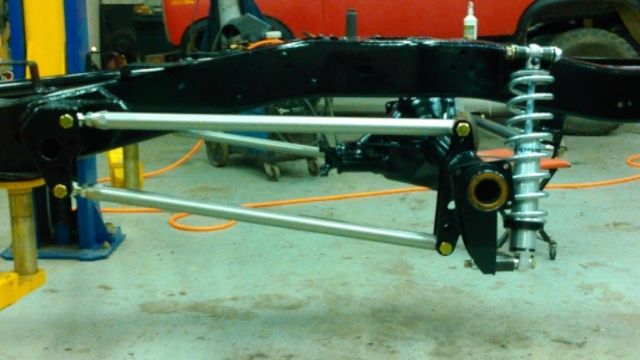 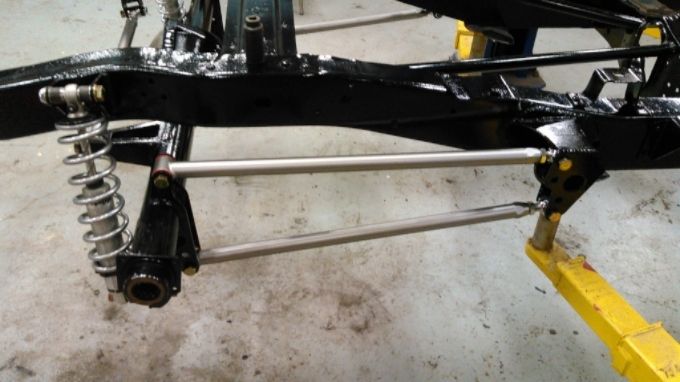 I know a lot of the guys are going with the Ford 9'' but I rebuilt the original 12 bolt with new "posi unit" and Mose axles with 3.73 ratio 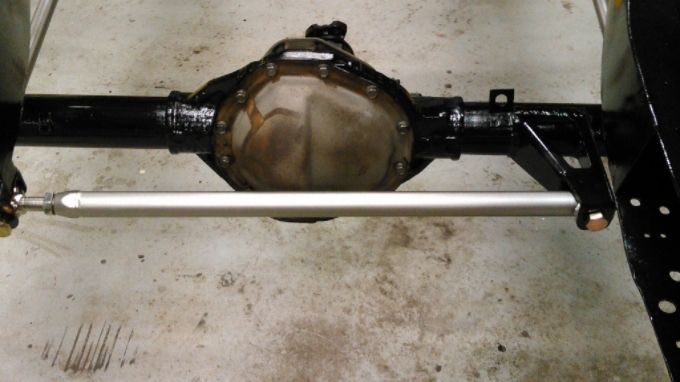
|
|
|

|
|
|
#32 |
|
Registered User
Join Date: Jun 2015
Location: shreveport, la.
Posts: 160
|
Re: Tucker69 "Project No-Name"
I toyed with the idea of air ride. however I didn't want it on the ground, I didn't want all the clutter from air tanks and such. Also felt I could get the lowered stance without "c notch". Planning on wide tire on back and think I can get space needed with mini tubs on inner bed side..
All on the control arms, link bars, etc, came from Rob @ No Limit already powdercoated black. But on mock-up I didn't like all the black and wanted some contrast. Since I have a love affair with "POR" products.... POR has this cast steel color in aerosol that I really like. its durable, applys easy with good coverage 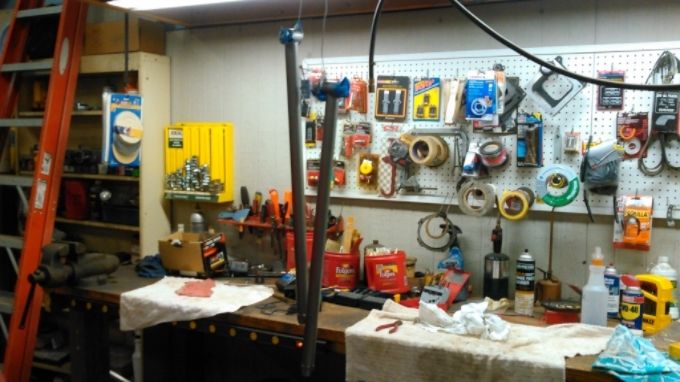
|
|
|

|
|
|
#33 |
|
Registered User
Join Date: Jun 2015
Location: shreveport, la.
Posts: 160
|
Re: Tucker69 "Project No-Name"
|
|
|

|
|
|
#34 |
|
Registered User
Join Date: Jun 2015
Location: shreveport, la.
Posts: 160
|
Re: Tucker69 "Project No-Name"
I HAD GOTTEN MY GO FAST STROKER KIT FROM WISECO. I AM BUILDING A 408C.I. LS FROM A LQ4 6.0 BLOCK. I DECIDED TO PORT THE EXISTING HIGHER CC "317" HEADS. WE PICKED CAM/PISTON COMBINATION FOR THIS SET-UP WITHINTENTIONS FOR POSSIBLE TURBO LATER ON
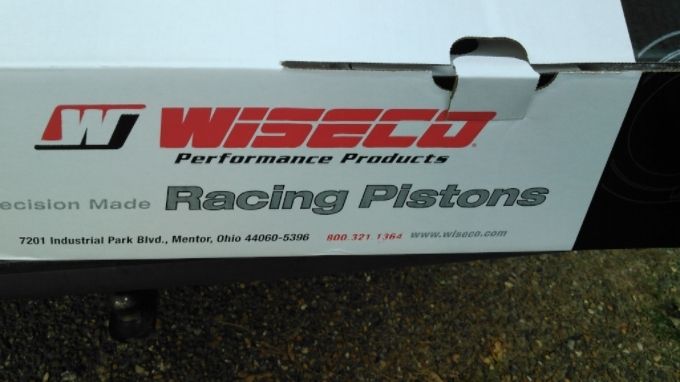 HERE IS K1 TECH. RODS & BEARINGS 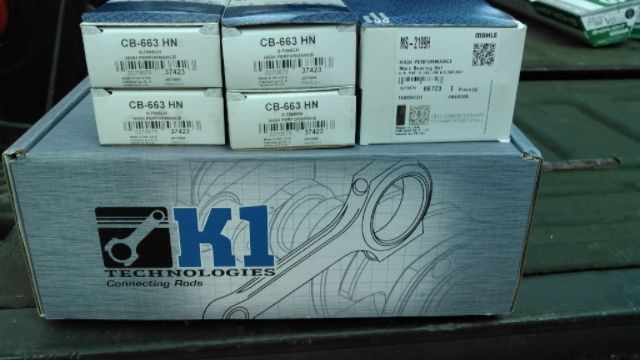 ANOTHER OF THE "H-BEAM" RODS 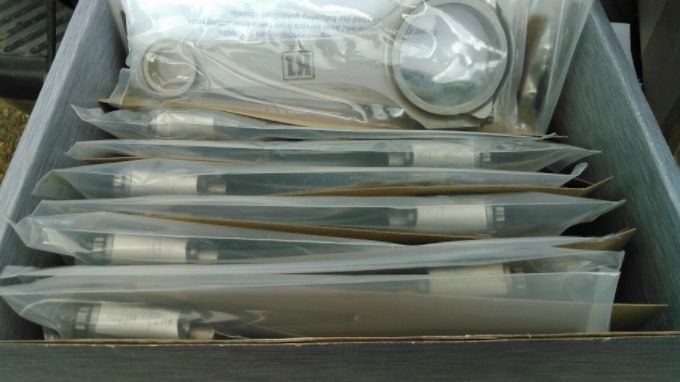 AND THE K1 TECH FORGED CRANK 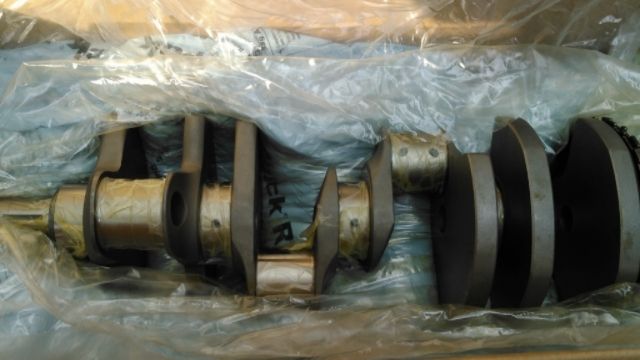
|
|
|

|
|
|
#35 |
|
Registered User
 Join Date: Oct 2012
Location: Burnet, Tx
Posts: 332
|
Re: Tucker69 "Project No-Name"
Man that chassis is looking great and that was a ton of metal work on the cab. Looking forward to the progress reports.
|
|
|

|
|
|
#36 |
|
Registered User
Join Date: Jun 2015
Location: shreveport, la.
Posts: 160
|
Re: Tucker69 "Project No-Name"
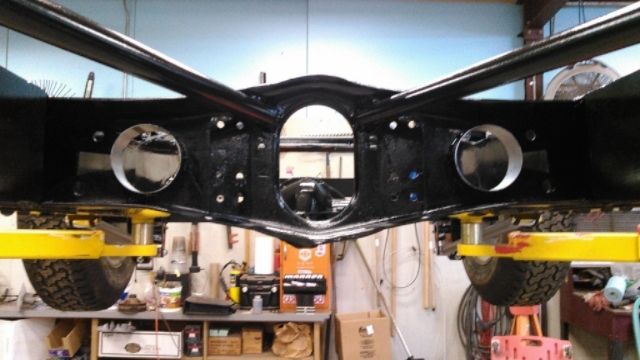
THIS IS A PIC OF MY EXHAUST CUT-OUTS THAT I SAW SEVERAL OF YOU GUYS DO. I SIMPLY GOT ME A SCRAP PIECE OF 4'' STAINLESS, CUT INTO 2 SLEEVES 2.5'' long. I then took a 4'' hole saw AND CUT ME A TEMPLATE/GUIDE FROM 1/2'' PLYWOOD WITH BOLT HOLE IN CENTER. BOLTED THE PLYWOOD GUIDE TO CROSSMEMBER WHERE I WANTED MY HOLE AND USED HOLE SAW TO CUT HOLE. WHEN I WAS MOCKING THE SLEEVES IN PLACE I LIKED THE SLEEVE CENTERED IN CROSSMEMBER, SO THAT IS WHERE I WELDED IT IN.. AFTER THOUGHT, I WISH I WOULD HAVE LEFT IT FLUSH WITH BACK WALL OF CROSSMEMBER, THAT WAY MY TACK WELDS COULD HAVE BEEN GROUND DOWN FOR SMOOTHER APPEARANCE. I MAY REDO, ONE OF THE MANY TRIAL, TRIAL & REDO STEPS IN A BUILD LIKE THIS
|
|
|

|
|
|
#37 |
|
Registered User
Join Date: Jun 2015
Location: shreveport, la.
Posts: 160
|
Re: Tucker69 "Project No-Name"
Thanks blown66, i have done some more cab & sheet metal work. Should be posting some of those soon. My transmission has made it back, my harness is back(need to unbox).. Should be getting my shortblock back soon and will post images... P.s i am looking for a aftermarket intake if anyone has one..leaning towards "fast" or "msd atomic"..but tell me what you guys have..thanks again for your patronage and hope ya'll enjoy my little "no name(big picture)" project
|
|
|

|
|
|
#38 |
|
Registered User
Join Date: Jun 2015
Location: shreveport, la.
Posts: 160
|
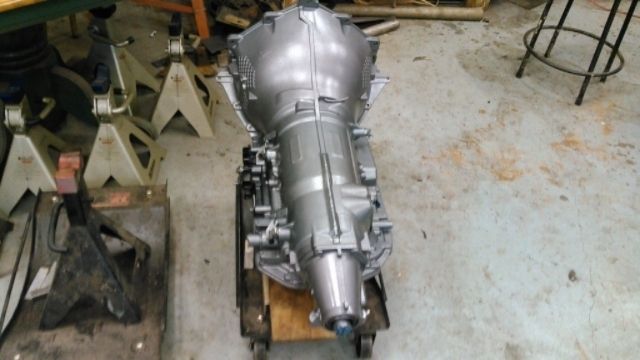
Here is my 4l80 transmission freshly back from rebuild. It has all the beefed up roller sprags, clutch discs, etc.. I cleaned everything and sprayed my POR cast steel color..Now if i can just get my shortblock back from machinist i can finish with engine assembly and mate them together for install... It's starting to get exciting
|
|
|

|
|
|
#39 |
|
Registered User
Join Date: Jun 2015
Location: shreveport, la.
Posts: 160
|
Re: Tucker69 "Project No-Name"
Thought i would take time to give you guys a few more pictures of some of the other sheetmetal progress. As always you do some things that afterwards you wish you had done differently. When it comes to the body, this trucke was so tight when i first looked, bought & brought home, i would never have dreamed i would have replaced/repaired all that i ended up doing. Other than the outer rockers and passenger rr cab corner the truck did not look as if it had ever been apart. The rockers had been brass brazed plug welded on. The cab corner also was brass brazed, but was an overlay. The cab corner, i think, was some much older repair work. Even the replacement rockers makes believe were replaced way back. Unfortunately the original owner had passed so i was unable to get any info on this.
The original owner purchased truck new and drove as 6cyl-manual until engine crater around 1984. He had started to remove 6cyl/manual and implant the smallblock v-8/t-350 trans you seen in earlier pics. He passed around 1987 prior to finishing. The trucked was parked in his backyard at his passing with the combo just sitting in engine bay. 1 or both of his sons played with truck here and there(with the truck never leaving backyard) for the next 25 odd years. The house & vehicle was about to get impounded by the parrish due for non upkeep of property when my friend was able to purchase truck from the sons. My buddy had the truck about 2 months, had gotten the smallblock running, tightened up some loose ends when i showed up at his house to look at a 1972 rallaye sport nova he was looking to sell. When i pulled up in his driveway i seen the truck. Needless to say he still has the nova and i had my soon to realize rust bucket. |
|
|

|
|
|
#40 |
|
Registered User
Join Date: Jun 2015
Location: shreveport, la.
Posts: 160
|
Re: Tucker69 "Project No-Name"
As i was saying if i had it to do again, i would have saved/repaired both doors and the floorpan. After all the fighting, beating, cutting , splicing of these repop panels. But, what do they say about hindsight?
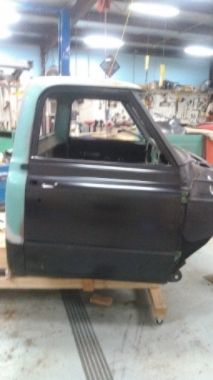 WE were so worried about the floor aligning with "a" pillars after having to cut in lower pillars on both sides. We braced the cab, but there was nothing holding the lower A pillars to the floor except a sliver of the inner toe board on 1 side and a sliver of the outer Lower extension on the other. I guess all my clean living paid off, everything lined back up with minimal persuasion. 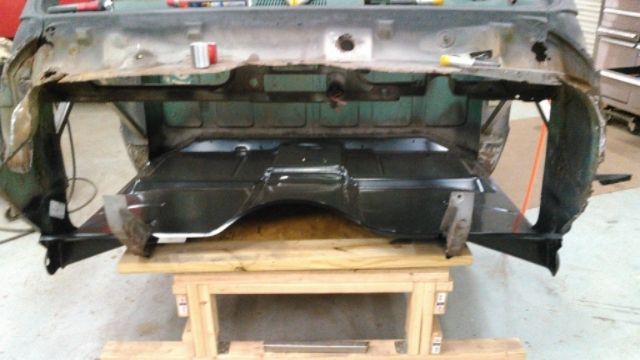 On the lower windshield area & lower cowl around wiper motor, i cut out the bad, fabricated/welded patch panels. Then i f'glassed several of the spots that were going to be hidden. Especially underneath the curved lower cowl panel were it meets the underside of dash 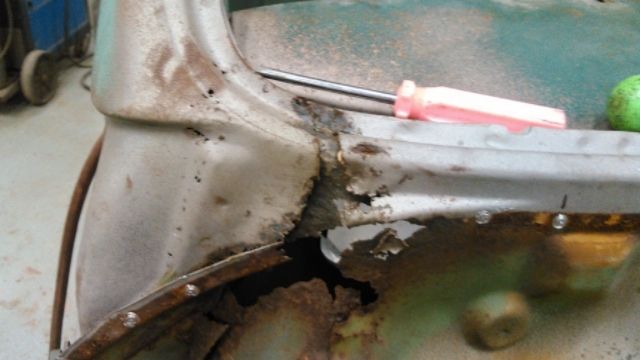
|
|
|

|
|
|
#41 |
|
Registered User
Join Date: Jun 2015
Location: shreveport, la.
Posts: 160
|
Re: Tucker69 "Project No-Name"
I meant to post this during chassis pics, I was really impressed with the quality of the kit i got from Rob @ No Limit Engineering. This was my first time installing a kit of this type. I didnot know Rob/No Limit at all. Like most of you i started with somewhat of an idea that i wanted to accomplish. That is when my son directed me to 67-72chevytruck forum. I started researching, looking at some of ya'll builds and this was were i found "No Limit". I knew i didn't want airride, didn't want to be on the ground. I did want a driver that was lowered, would handle like a camaro and have good performance/styling. Remember this will not be a trailer queen. I have a 1965 Mustang Fastback, A code, auto, a/c, disc brake numbers matching car. I have owned this car about 8 years. I love the styling/looks of this car. But frankly it leaves a little to be desired in the "fun to drive" catagory. Over the years i have added/upgraded things to make it more fun to drive. But i still find it sitting in the garage for months at a time without me driving it. So, this is one of the main issues i wanted to address with this build. This is why i am putting fuel injection, overdrive, coilovers, etc.. into this build
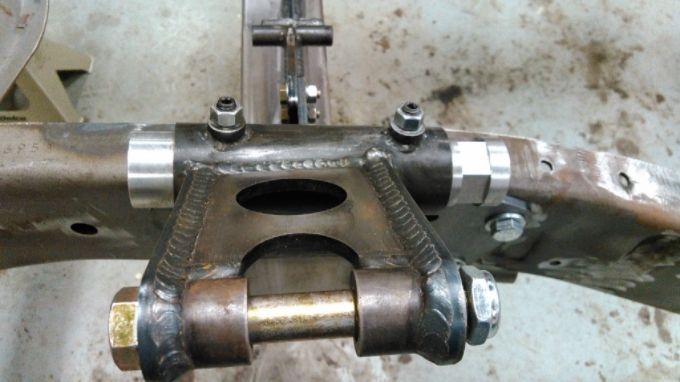 Back to "No Limits" chassis components...Everything went together like it should. the kit was designed to be a mostly bolt-on kit. We decided to weld after mock-up and measuring. I mean its not like i am going to unbolt the kit if i don't like the ride/handling later on.. Ron has always answered my phone calls. Everyone there is helpful and knowledgable. Please don't misunderstand this next statement, but, even the females i spoke to were on ther game. I mean we have all called some business only to get a person on the phone that leaves you thinking... "what is going on, i'm more confused now than i was". Anyway, this is not meant to be a sales pitch, as i said i have never met Rob other than by phone and i have not had the oppportunity to actually test there suspension, i am simply stating that they seemed to know what they are talking about, i got my product in a timely manner and all my questions have been answered so far. The only place i could complain about is the installation instructions. They are partly on dvd disc and partly on paper. The printed instructions were typed with hand drawn illustrations. I found myself watching the dvd many many times(there is no rewind/fast forward and if you pause the dvd it usually started over from beginning). I read & reread the printed instructions. Again, i am not bad mouthing there outfit, as i said it went together as advertised. I just found myself scratching my head with the instructions and i manage/own 2 auto repair business' and would feel for the guy trying this in his backyard with minimal expertise. |
|
|

|
|
|
#42 |
|
Registered User
Join Date: Jun 2015
Location: shreveport, la.
Posts: 160
|
Re: Tucker69 "Project No-Name"
Here is another tidbit i would reccomend to someone doing there first body/bed-off build. If you have the room build you a simple roll-around cart for cab/bed. I built the first one for the bed. I knew i was not going to be metal working the bed for awhile. this enables you to move the complete bed around by youself. It's much easier to take measurements, push outside or whatever. I purchased some lumber and a few casters and botta-bing.
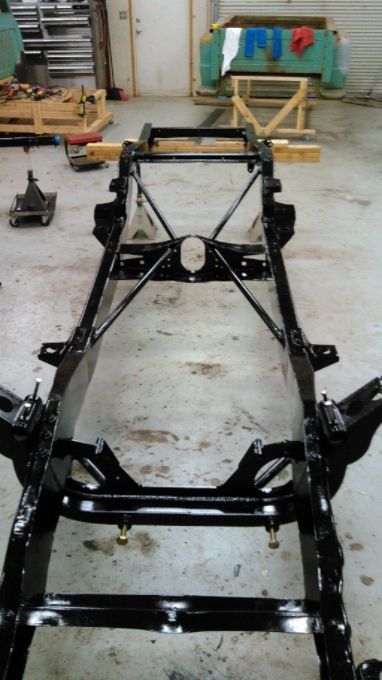 After seeing how useful the bed cart was i went back to HomeDepot for some more wood and casters. I decked the cart and made it longer than the cab. This allowed me to flip(without damage) to gain access to underside much easier. Plus instead of having to constantly use blocks or jackstands to raise your workpiece to a more comfortable height, simply make the deck at the height you need. 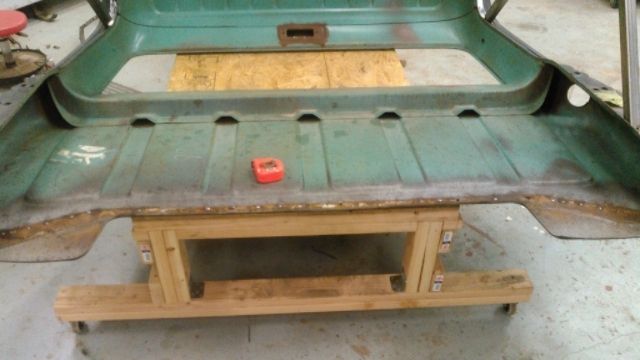
|
|
|

|
|
|
#43 |
|
Registered User
Join Date: Jun 2015
Location: shreveport, la.
Posts: 160
|
Re: Tucker69 "Project No-Name"
While waiting on engine I went back to sheetmetal on cab. Again this is one of those "if I had it to do over" I would have repaired both doors, outside of original doors was fairly solid, but inside lowers were bad & had large prior owner speaker holes. Based off of what I know now and as much trouble I have had aligning these @#$%&^ aftermarket doors I would have fixed the original.. Oh well. we call that experience...
 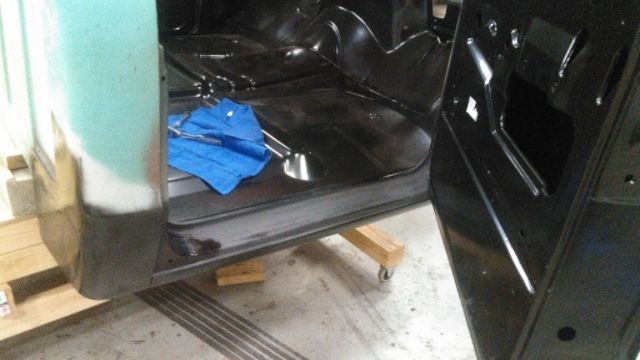 I am still going to smooth the firewall some, plan on loosing the weatherstrip gutter as well, but new firewall is in. 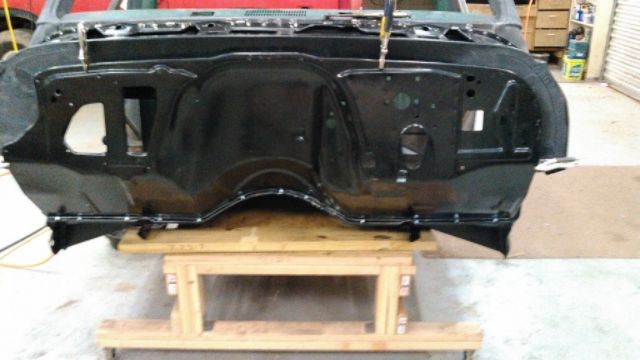
|
|
|

|
|
|
#44 |
|
Registered User
Join Date: Jun 2015
Location: shreveport, la.
Posts: 160
|
Re: Tucker69 "Project No-Name"
I got my reworked engine harness & reflashed pcm back from SpearTech(ahead of schedule i might add)
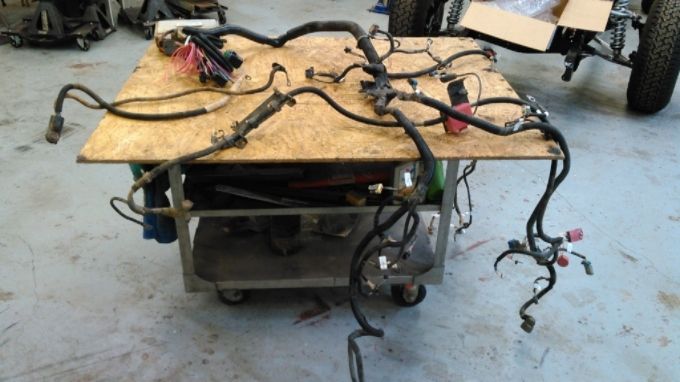 I am having trouble with Photbucket tonight...Whats new, I always have trouble with something when i am trying to mess with computer. Last edited by tucker69; 10-18-2015 at 07:12 PM. |
|
|

|
|
|
#45 |
|
Registered User
 Join Date: Oct 2012
Location: Burnet, Tx
Posts: 332
|
Re: Tucker69 "Project No-Name"
You've got a ton of work in that cab and it looks great.
|
|
|

|
|
|
#46 |
|
Registered User
Join Date: Jun 2015
Location: shreveport, la.
Posts: 160
|
Re: Tucker69 "Project No-Name"
|
|
|

|
|
|
#47 |
|
Registered User
Join Date: Dec 2013
Location: DALLAS, TX
Posts: 268
|
Re: Tucker69 "Project No-Name"
Moving right along!! Great progress.
|
|
|

|
|
|
#48 |
|
Registered User
Join Date: Jun 2015
Location: shreveport, la.
Posts: 160
|
Re: Tucker69 "Project No-Name"
I finally got my engine back from machine shop & was able to take a break from hunting to get a little done this weekend...I think I have finally realized all the trouble i have been having with photobucket has not been photobuckets problem..... it seems to be my 1983 model Dell computer i have at the house, there seems to be a compatability issue, photobucket works fine at work but not here..i will post pics tomm. when i get to shop. To recap i got my shortblock back and was getting ready to start assembly when i figured out my "piston to head" clearance was a little tighter than i was happy with. Not by much but i am going to inveatigate in options for thicker headgaskets tommorow. I was able to cc my heads and finish my porting, install lifters & retainers, install harmonic balancer & spray 1st coat of primer on engine. I removed the old wire loom from engine harness, removed a few of the wires that "SpearTech" left in my old harness, as well start cleanup of the harness.
|
|
|

|
|
|
#49 |
|
Registered User
Join Date: Jun 2015
Location: shreveport, la.
Posts: 160
|
Re: Tucker69 "Project No-Name"
|
|
|

|
|
|
#50 |
|
Registered User
Join Date: Jun 2015
Location: shreveport, la.
Posts: 160
|
Re: Tucker69 "Project No-Name"
|
|
|

|
 |
| Bookmarks |
|
|