
|
 07-08-2015, 11:43 AM
|
#476 |
|
Registered User
Join Date: Apr 2011
Location: .
Posts: 3,104
|
Re: 55 Wagon Progress
Sat down with my morning coffee to get caught back up, read through the last couple of pages and yup, mind blown ready to start the day.
Great work |

|

|
|
07-09-2015, 10:40 PM
|
#477 |
|
Registered User
Join Date: Jan 2013
Location: Leonardtown, MD
Posts: 1,636
|
Re: 55 Wagon Progress
Thanks for the comments guys!
Well, we had gotten some more sanding done...... 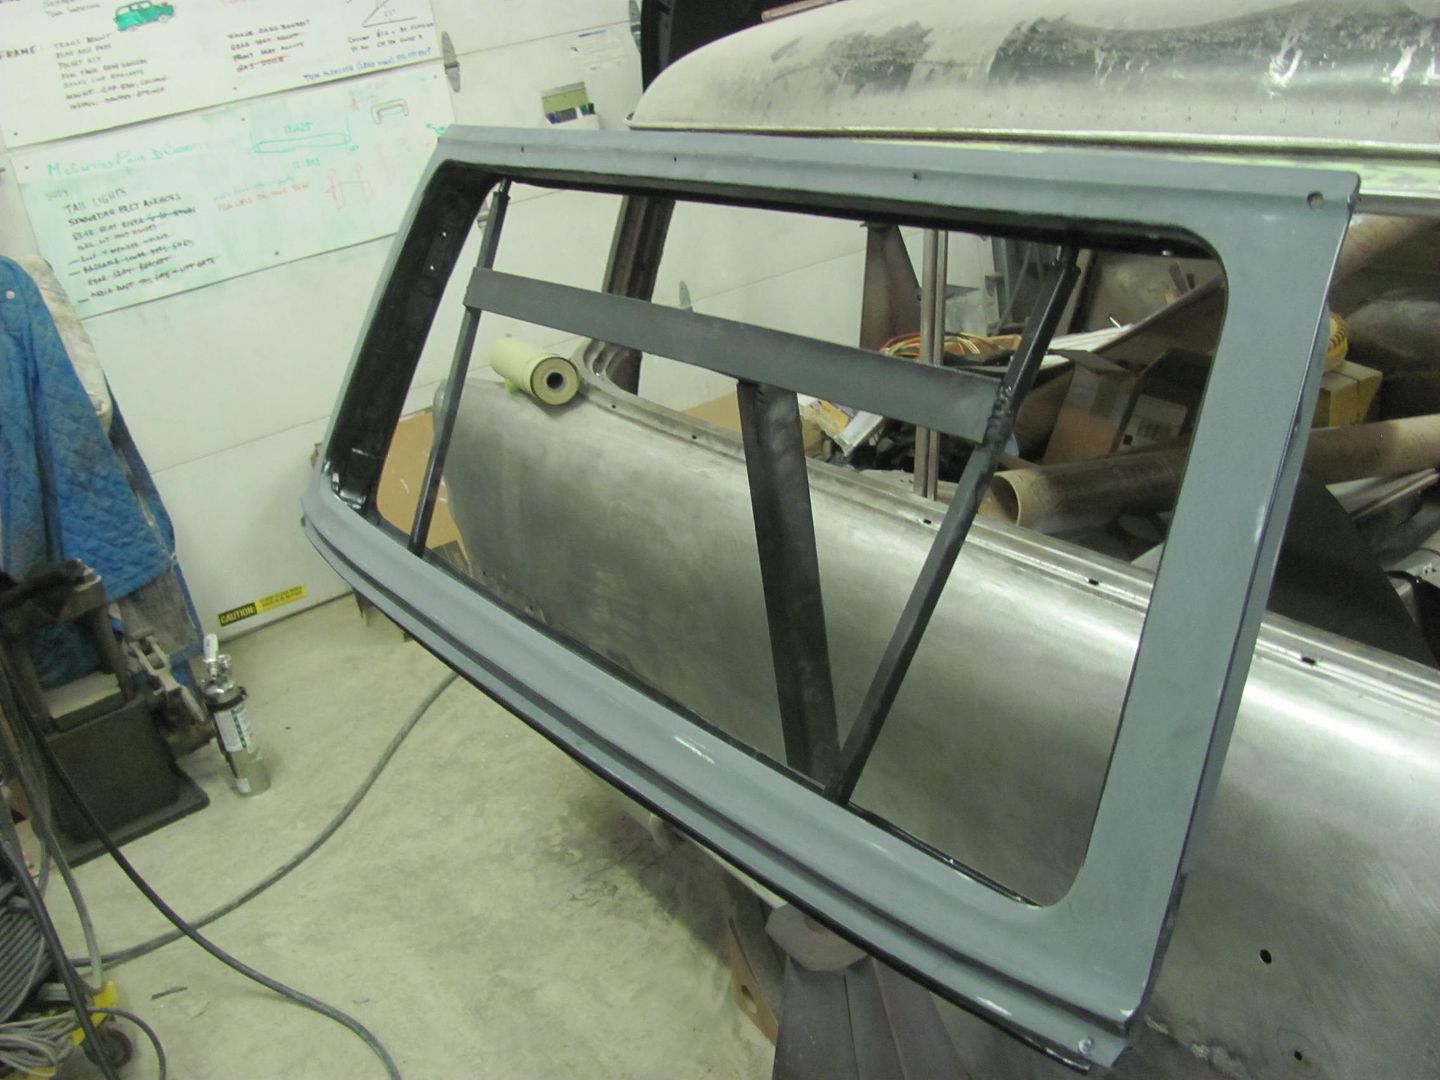 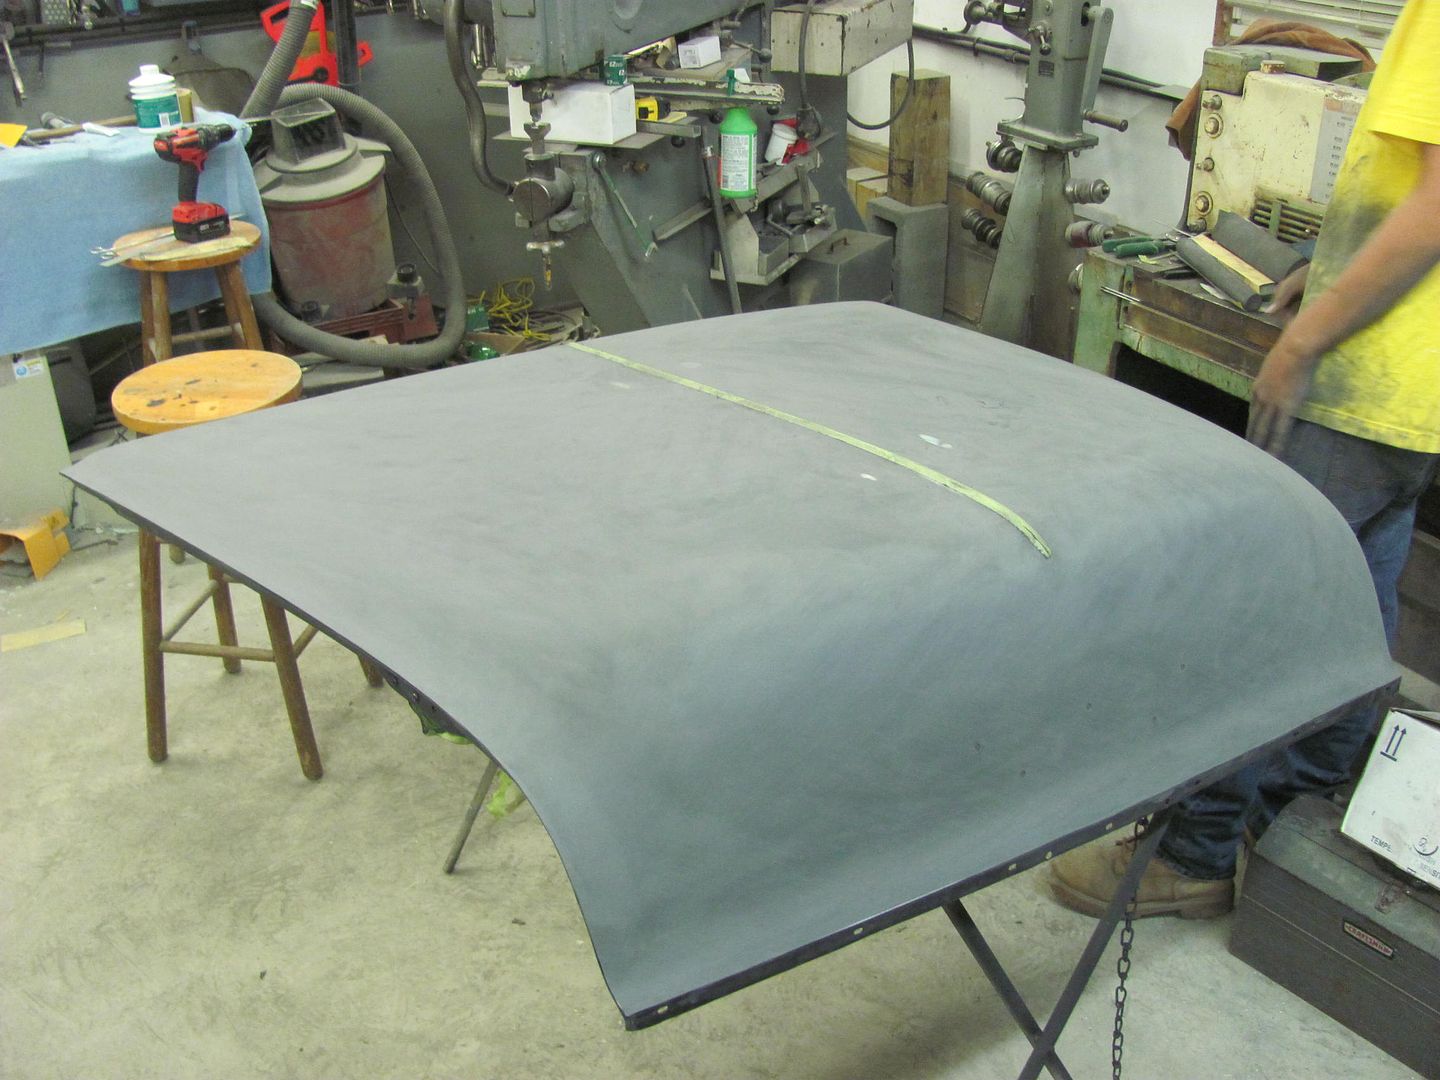 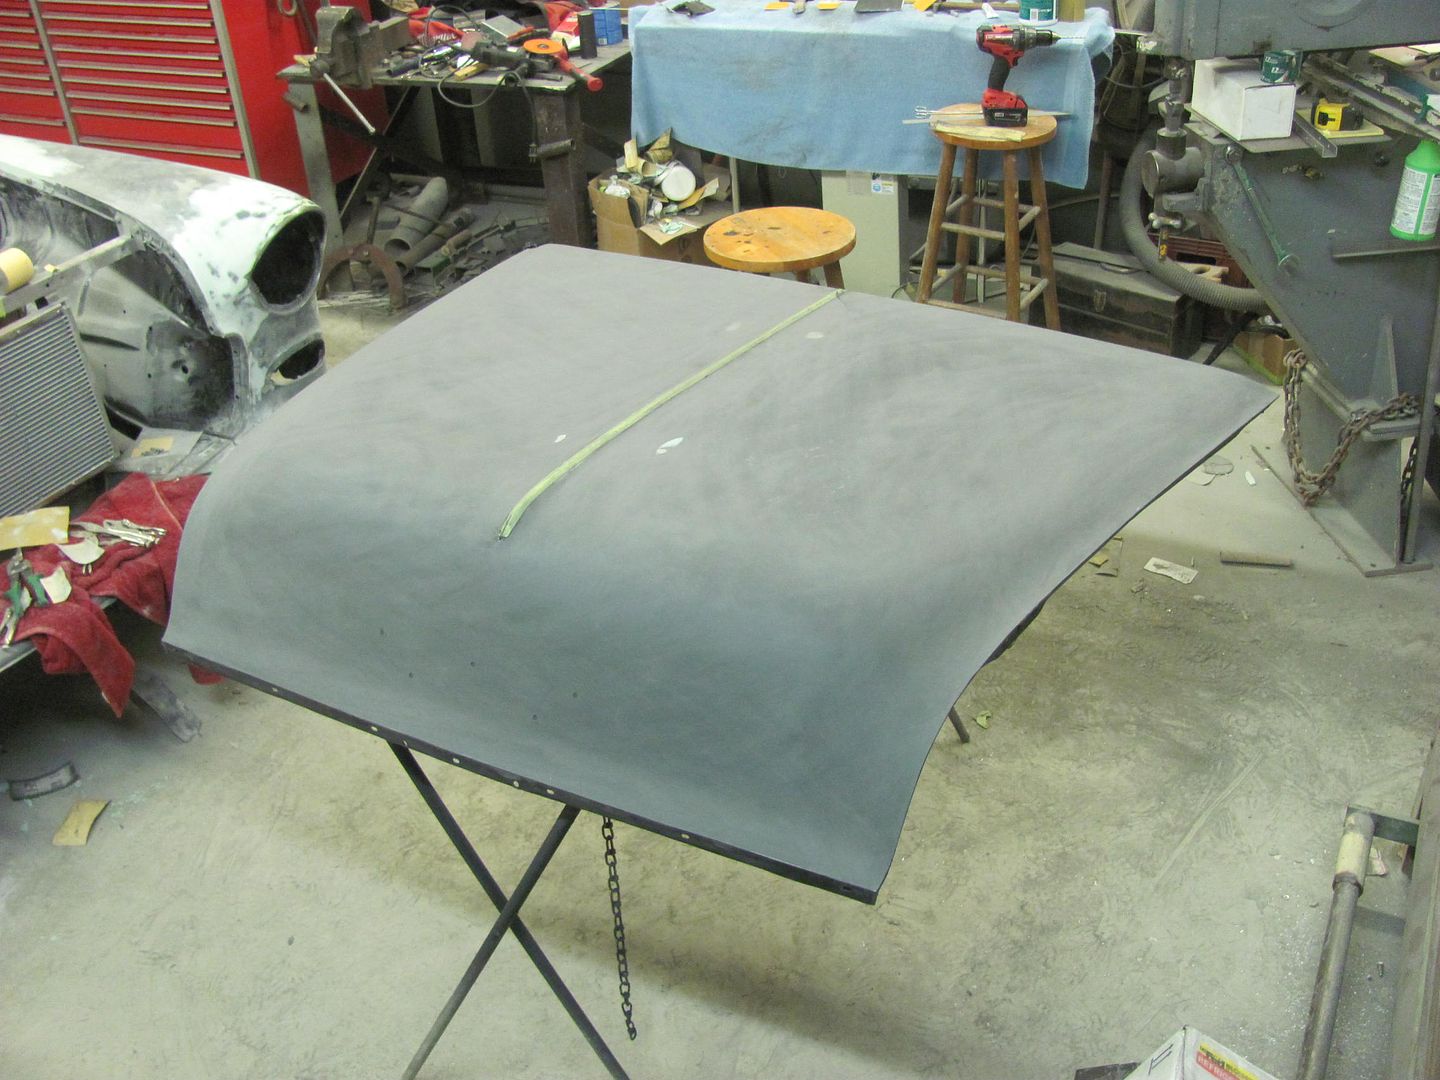 .....and since it was still early in the evening, mixed up some more epoxy....  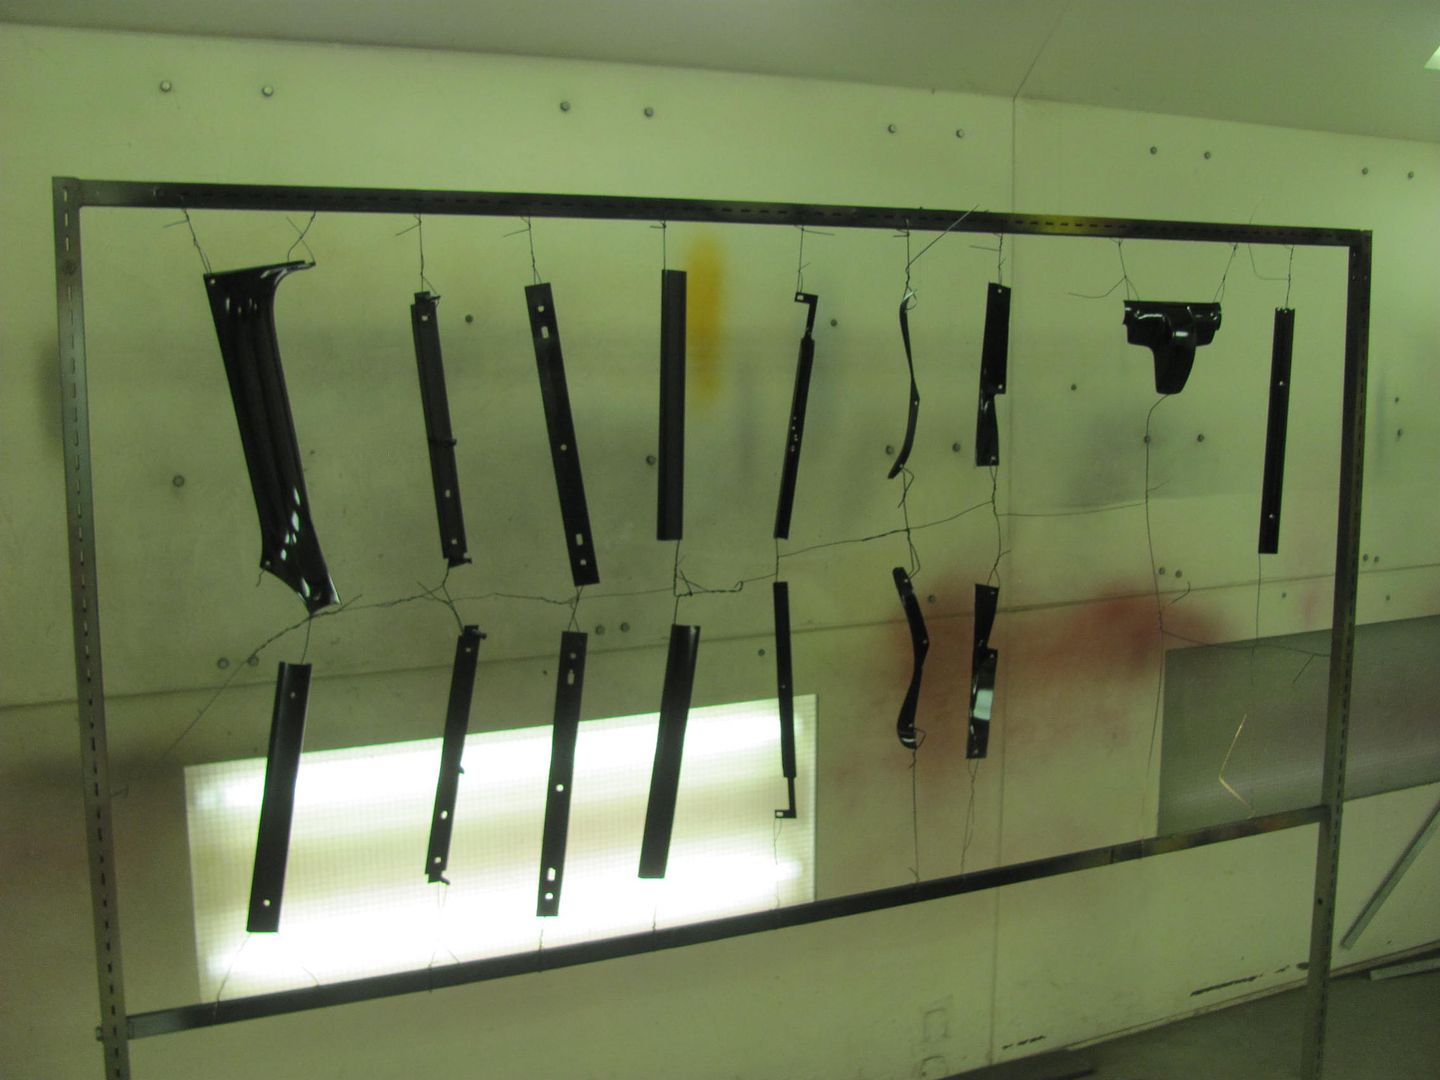 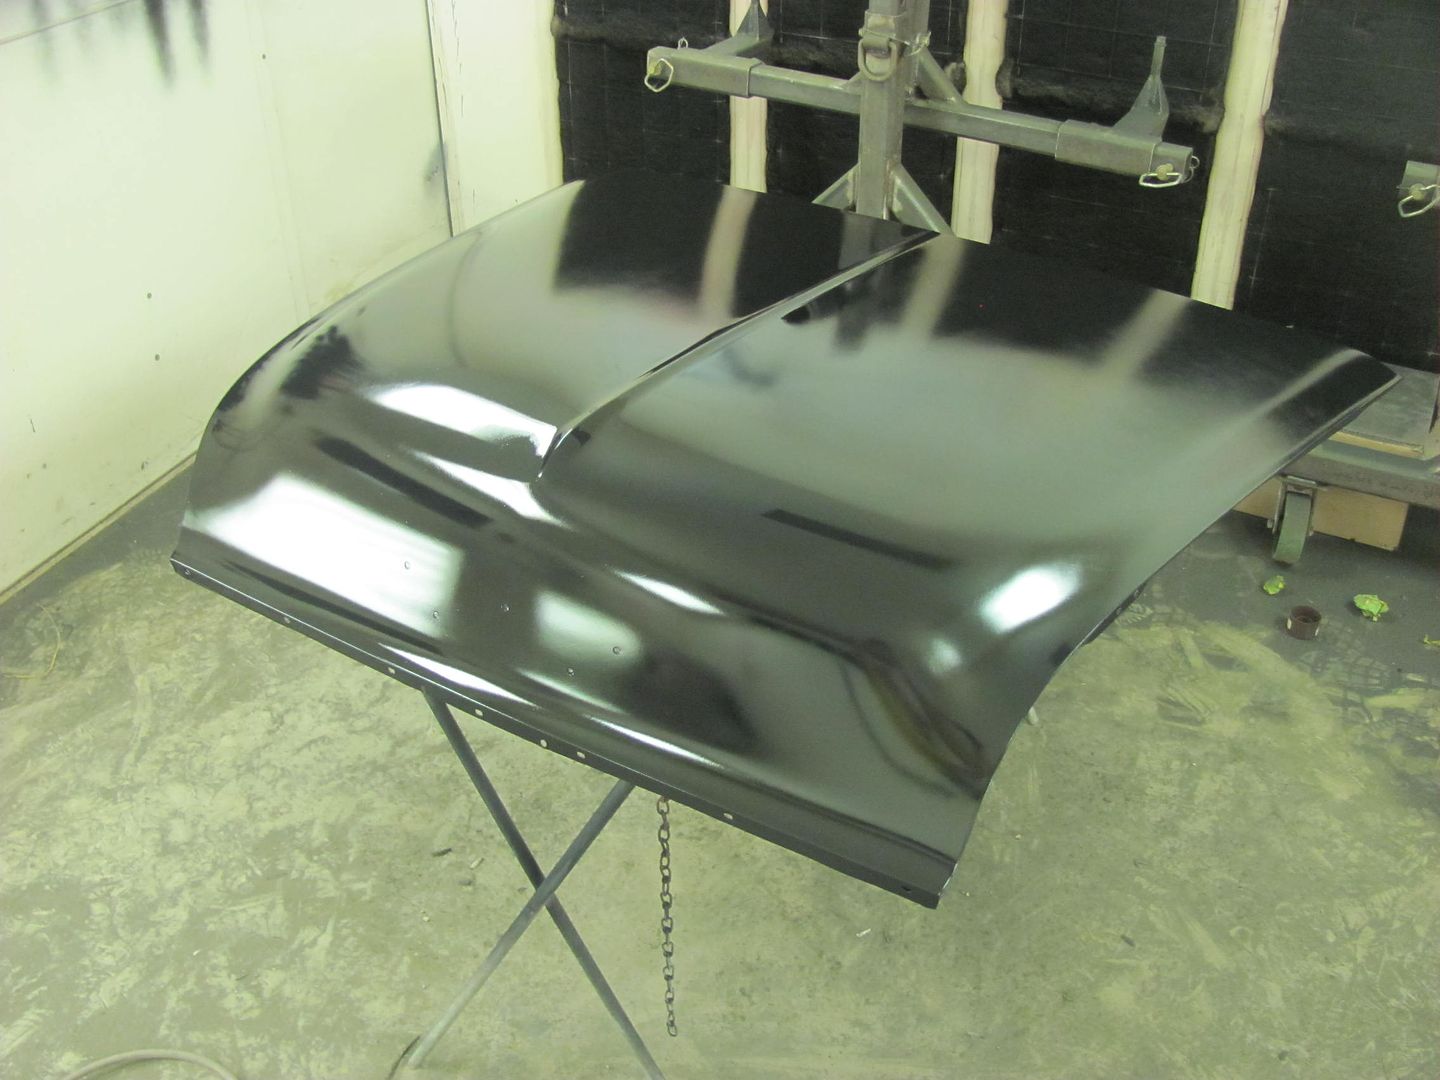 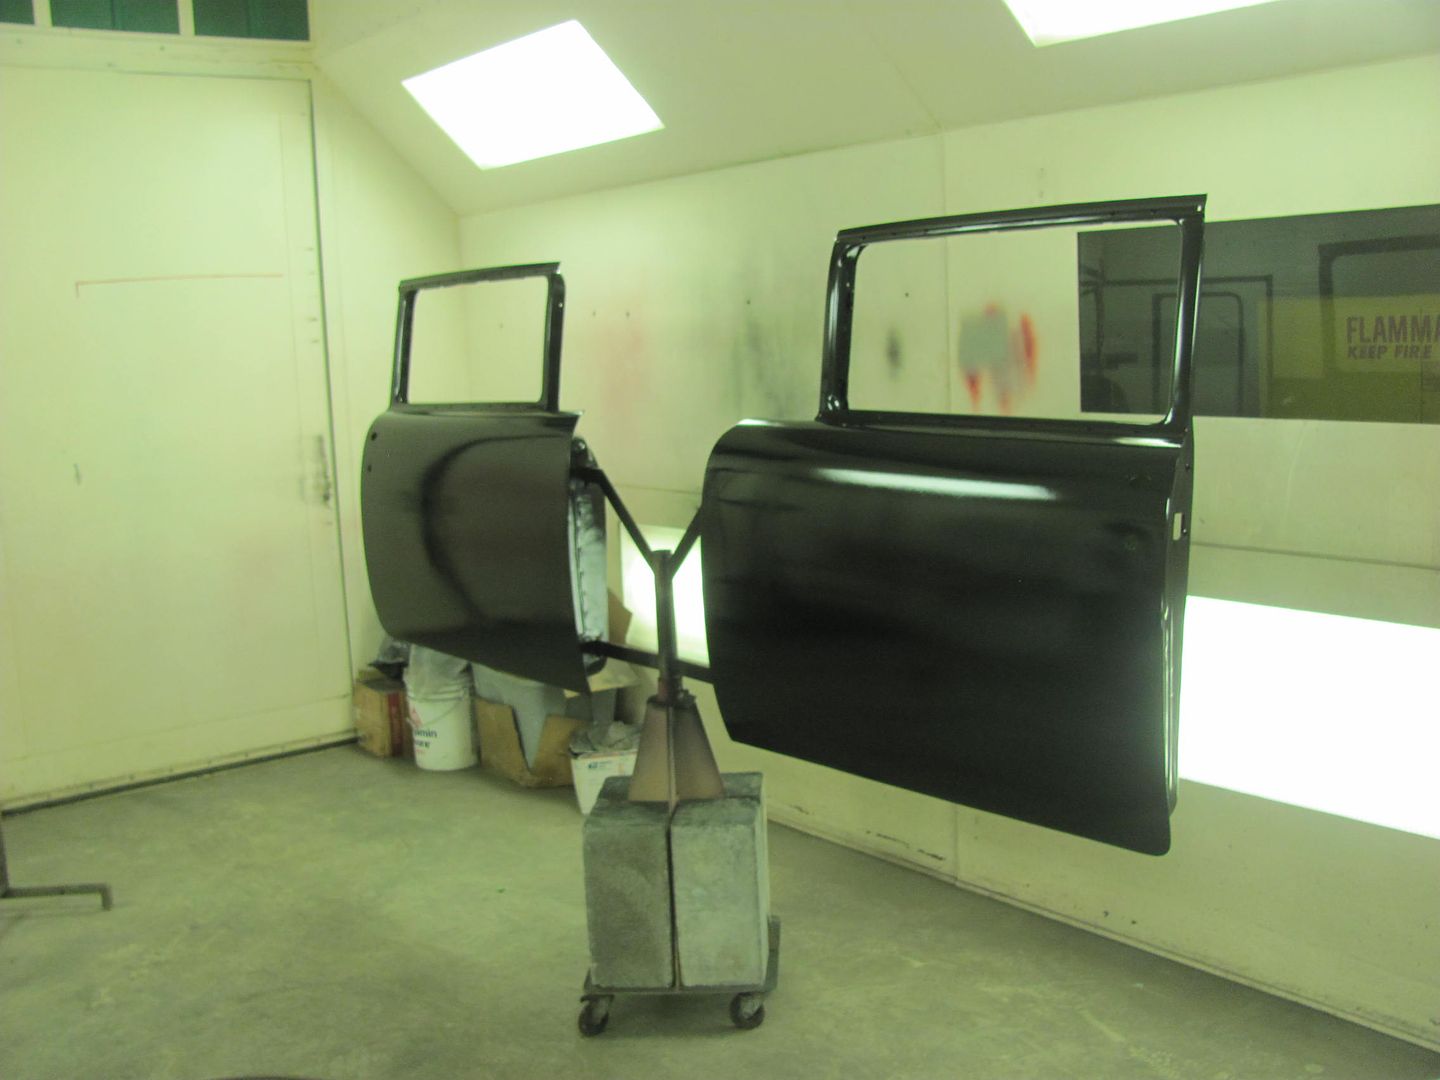
__________________
Robert |
|
|
|
|
07-10-2015, 09:49 AM
|
#478 |
|
Registered User
Join Date: Oct 2014
Location: VIRGINIA BEACH
Posts: 140
|
Re: 55 Wagon Progress
Ok so I have sat here for probably 2 hours reading through this entire thread! Hahahah.
First i have to say what everyone else has lead with as well. Your attention to detail makes me happy and it isnt even my car! I consider myself quite novice with this type of work, but at the same time, I have put a few "notches in my belt" and have some decent projects behind me. I have started to make a good name for myself and my attention to detail is what has made it happen. So as I said before.... I love the attention to detail.... Thousandths of an inch details that most would never notice obviously bother you... Its nice to witness is all. Beyond that... the making of tools is another "hobby" I am fond of. To see your creative mind find solutions to some of the tight spaces, or how to accomplish a particular shape is inspiring. Lastly, thanks for showing all of the steps in your process and methods. Ill be honest I have been in a bit of a "writers / builders block" on the 28 Ford Roadster I am building for a friend because of the designs and shaping I presented to him. He loved it, and I have been hesitant to start as I wasnt sure with my limited tools that I could accomplish them. After reading through this I am ready to slide out from behind my desk right this moment and head home to start it back up! Your thread and methods have motivated me and I already feel confident that I can make it happen.  So a huge thank you from yet another on looker! Your helper is one lucky guy to have you as a personal one on one mentor for this art!
__________________
64 LWB to SWB Step build. Daily driven! http://67-72chevytrucks.com/vboard/s...d.php?t=647168 |
|
|
|
|
07-15-2015, 12:26 AM
|
#479 |
|
Registered User
Join Date: Jan 2013
Location: Leonardtown, MD
Posts: 1,636
|
Re: 55 Wagon Progress
Thanks for taking time to post fellas!
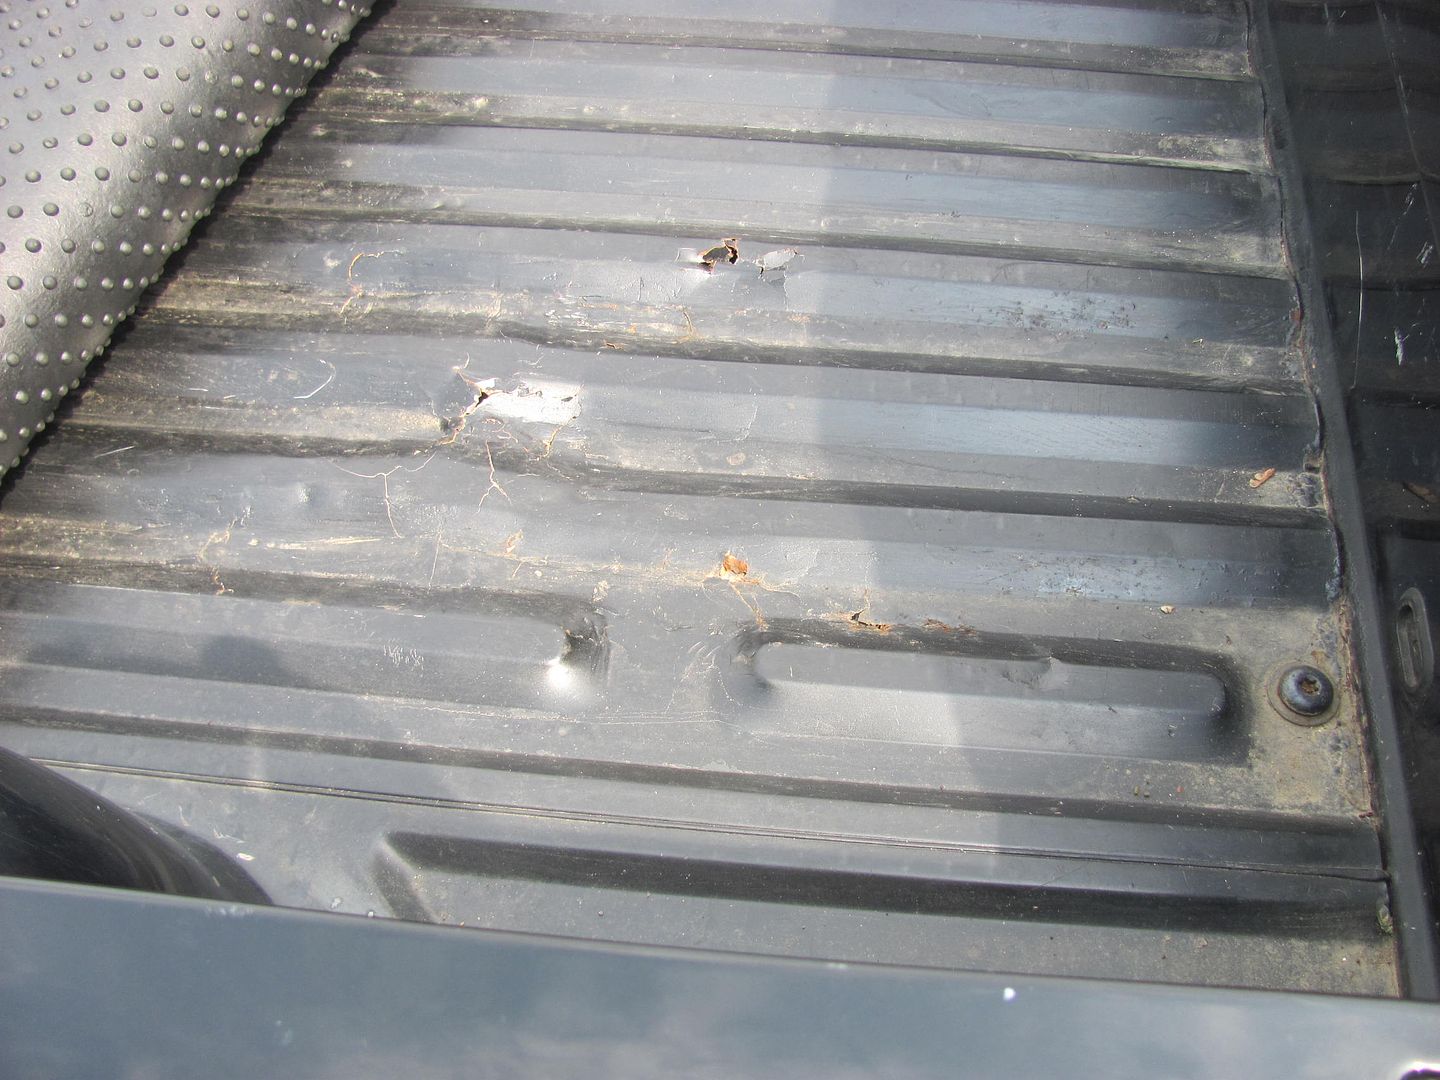
Doesn't seem like much to show, we're still sanding away.... 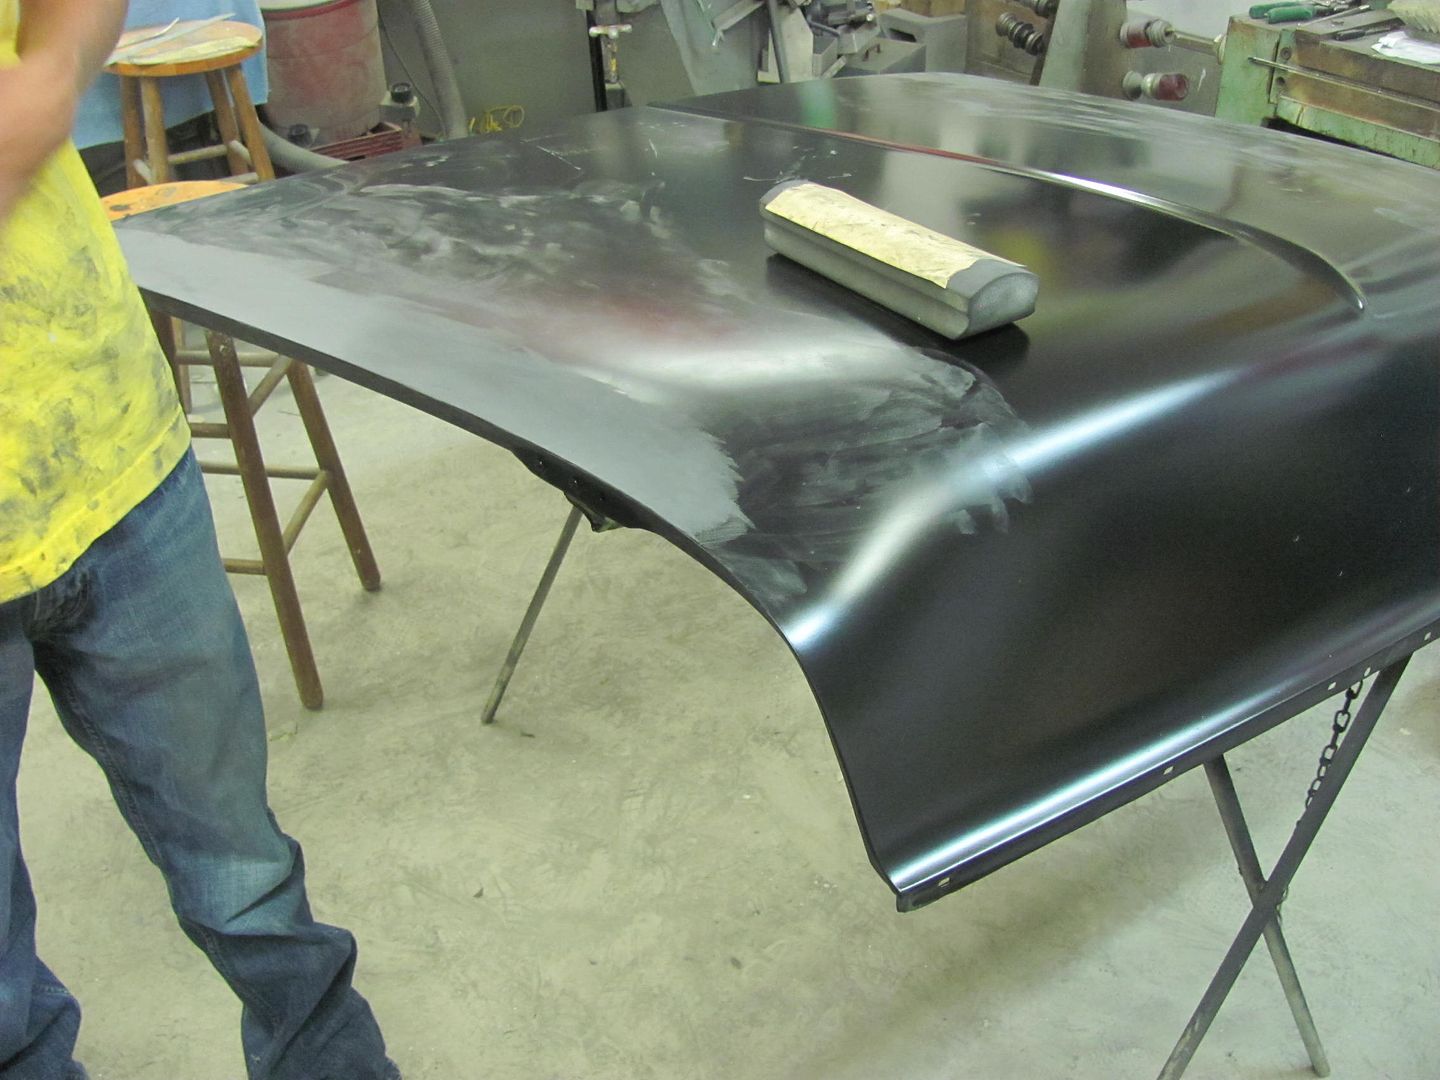 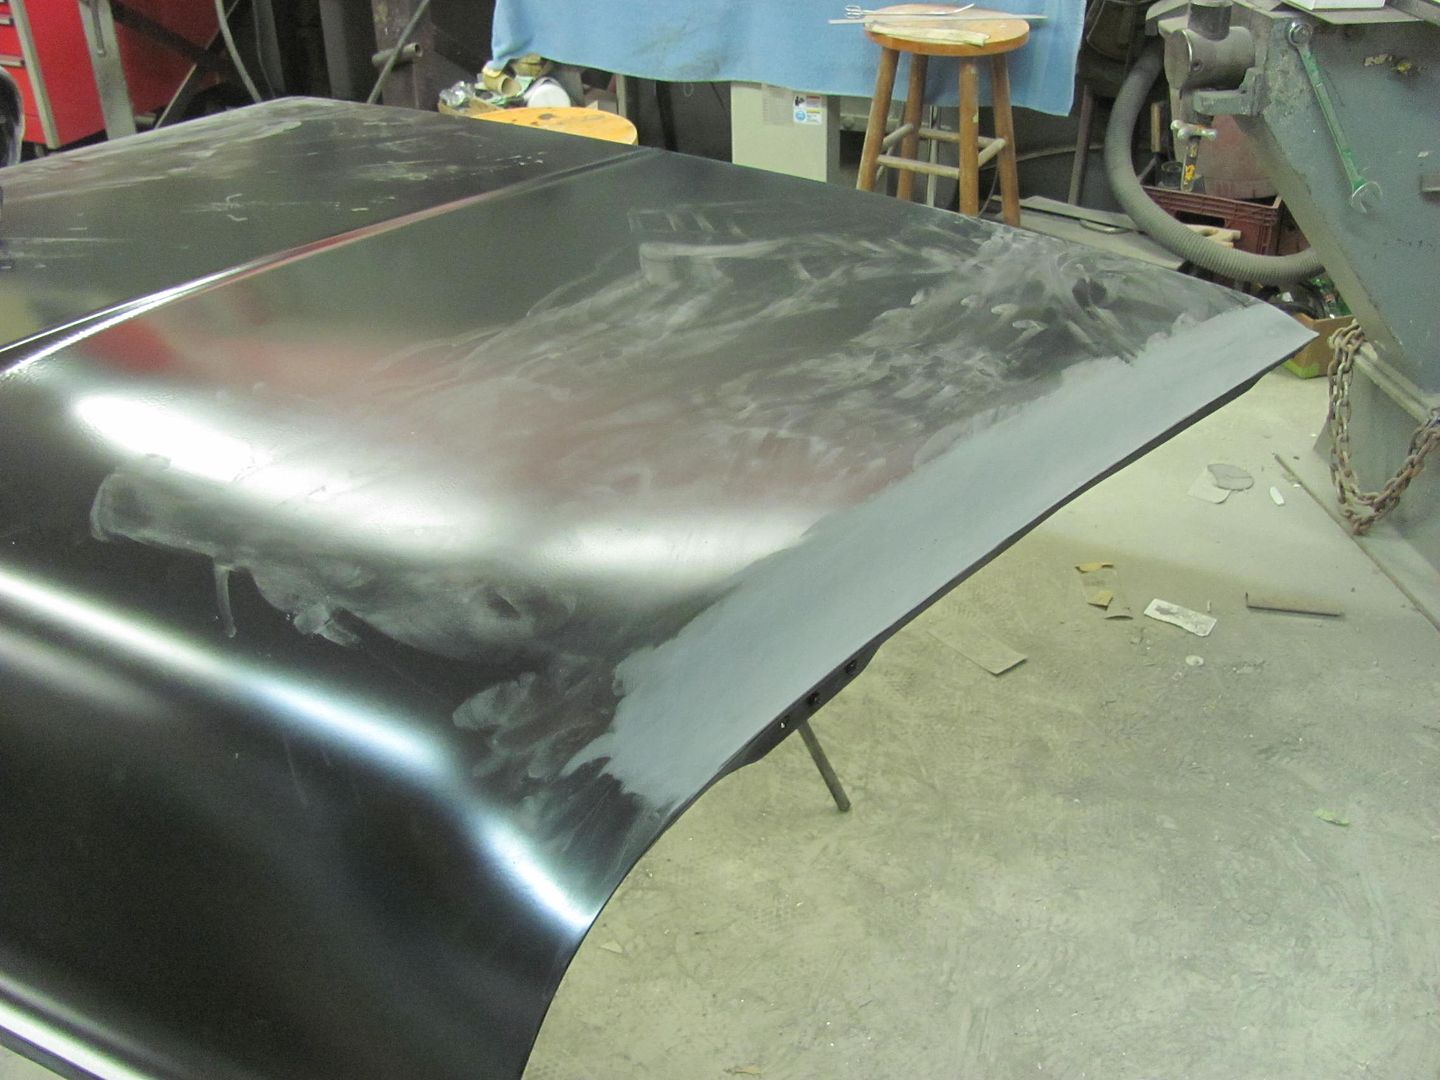 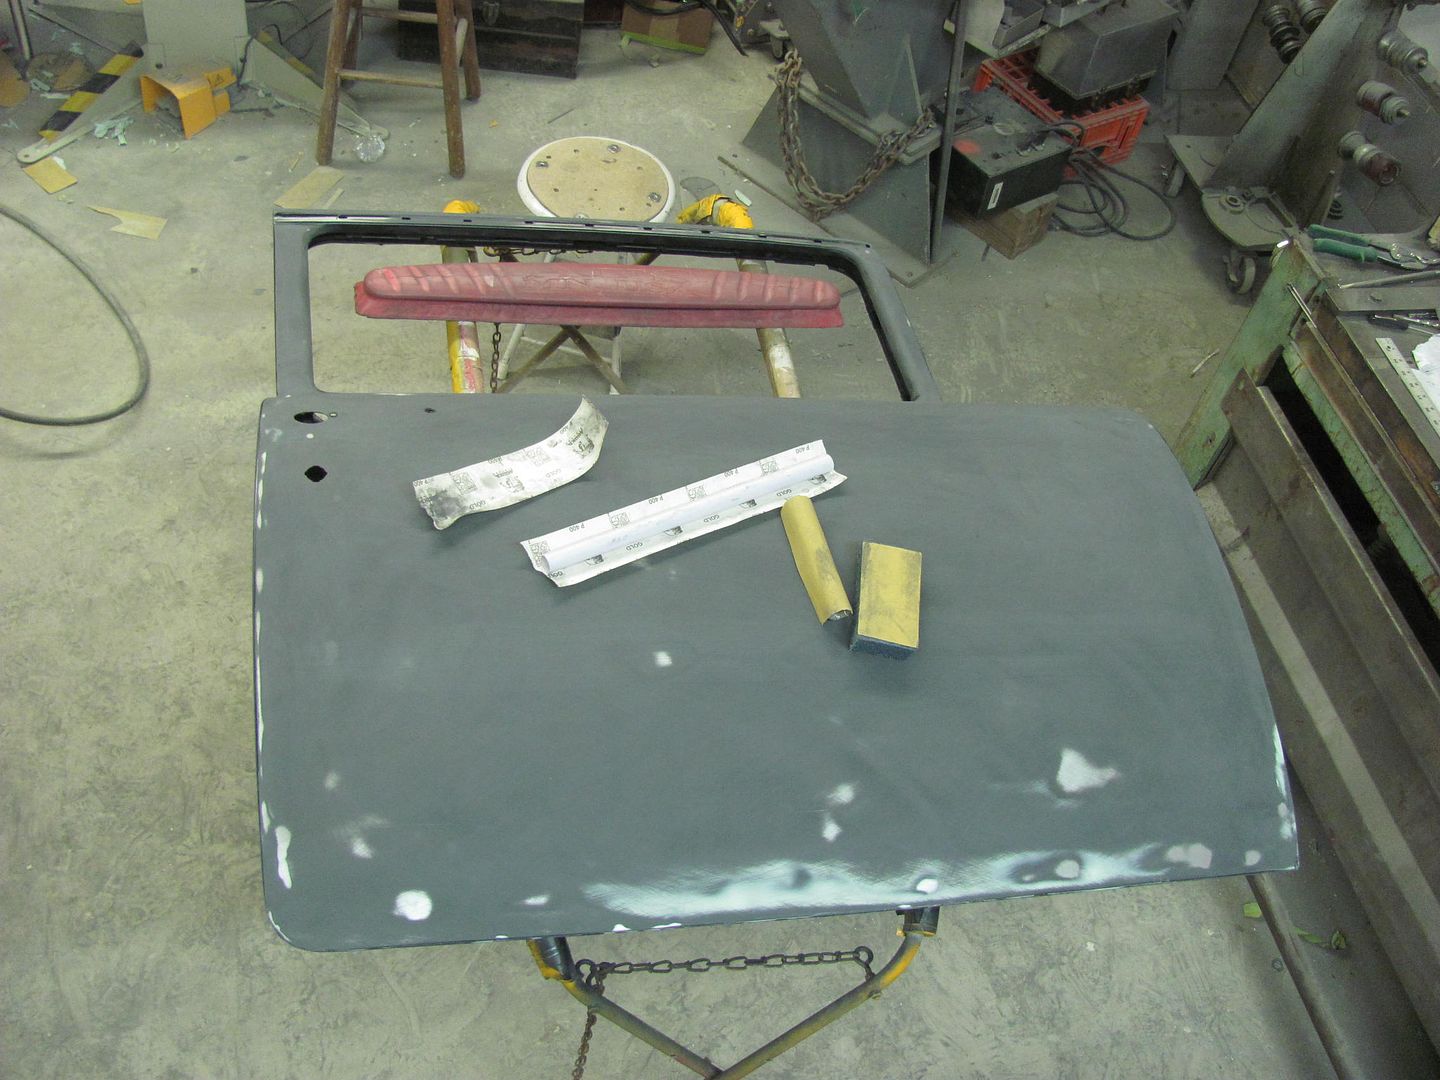 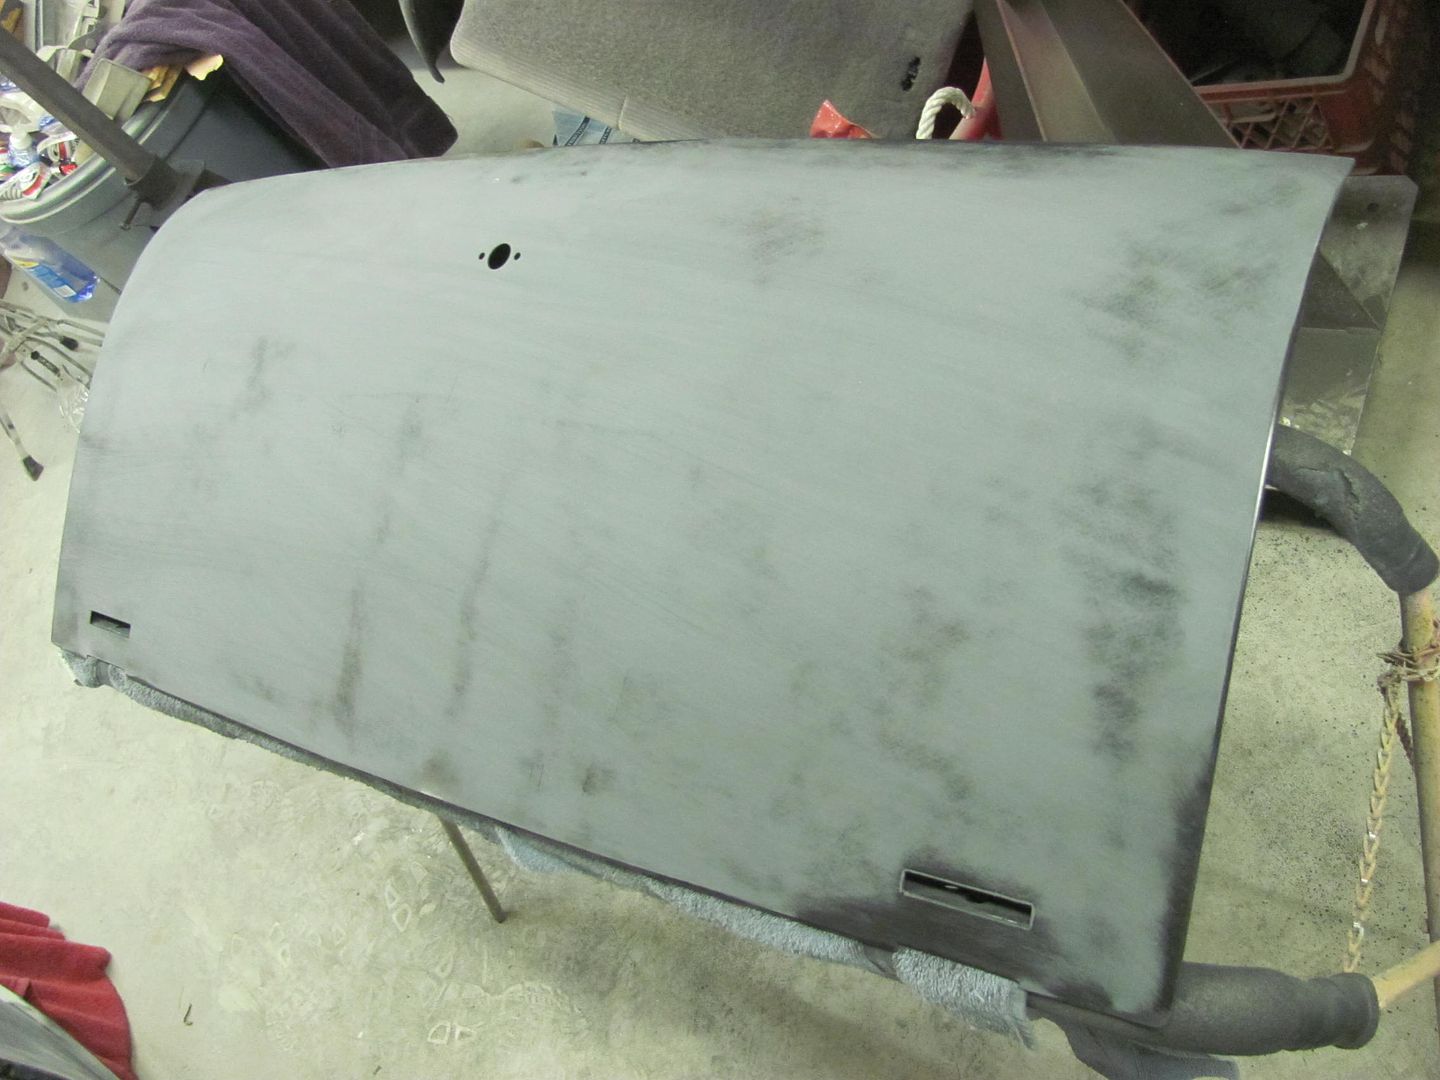 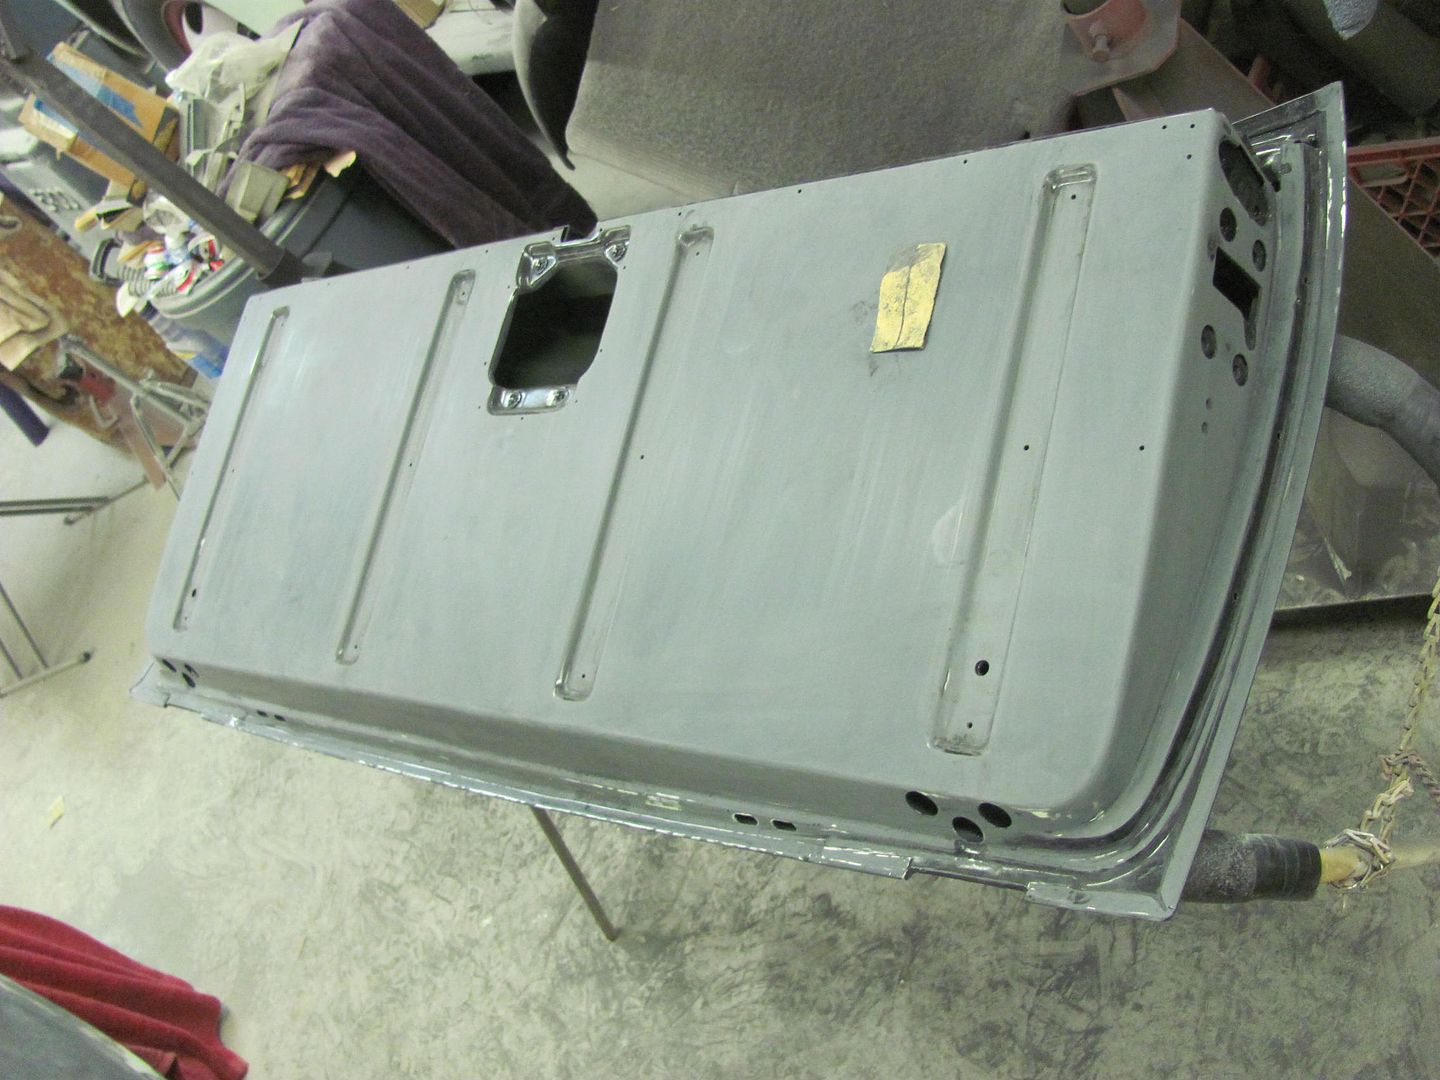 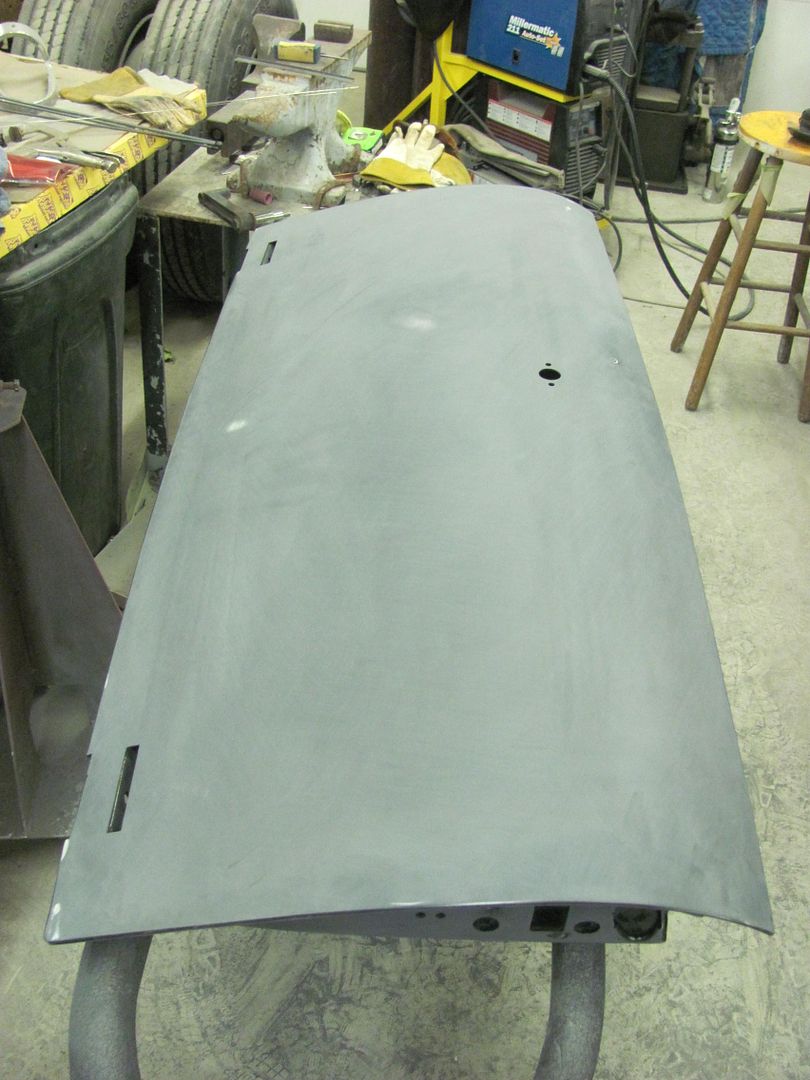 Got about half done with the tail gate and remembered we needed some holes drilled in the new skin for the emblem. Only issue was that I had done some spring cleaning earlier this year and the original skin with the hole pattern and location was now gone. So I sent an email to Mikey at The Stainless Shoppe, as he had an original, and he got me squared away... Thanks Mikey! 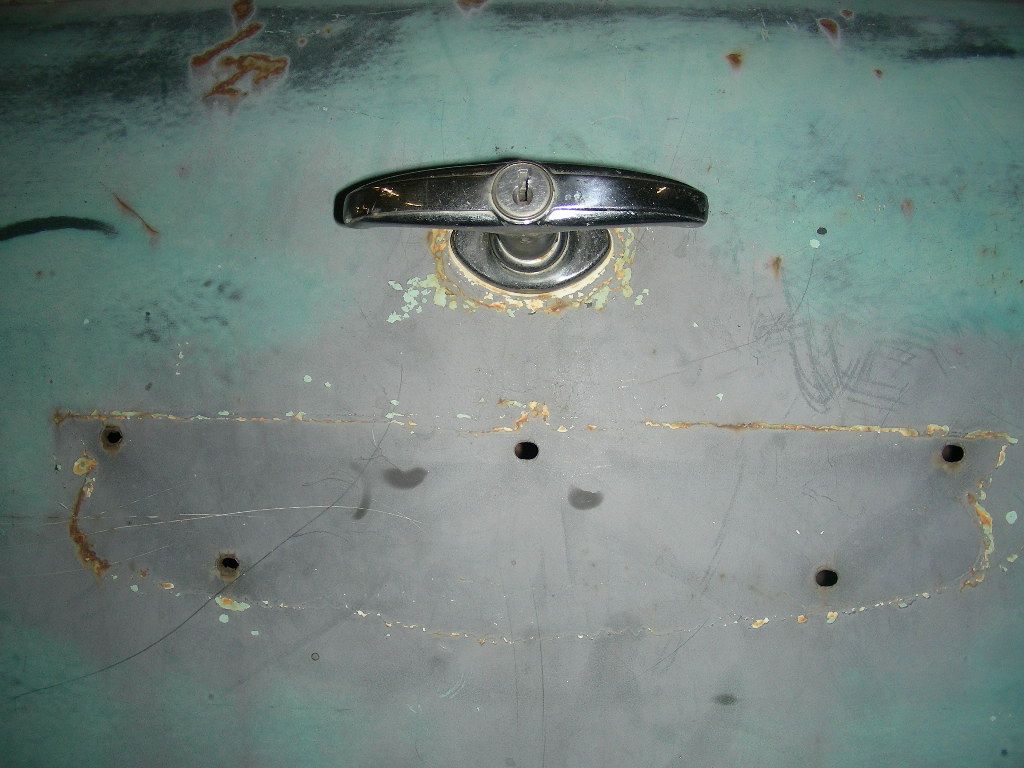 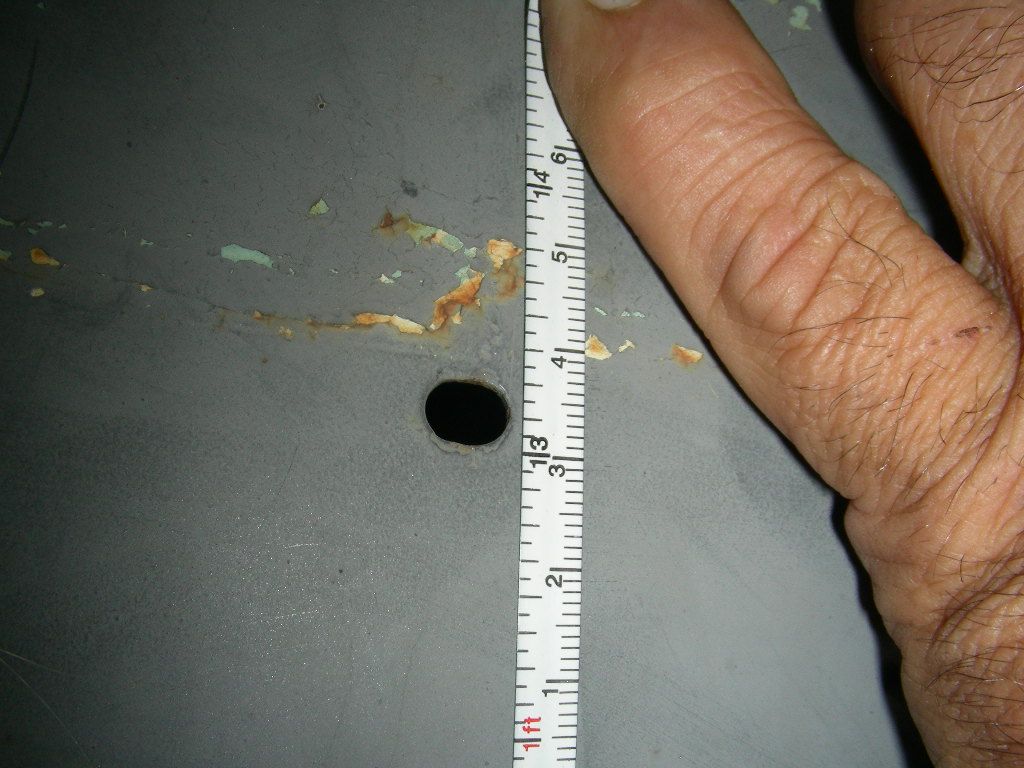 I located the hole for the center alignment pin first, and planned on using some spotters for the remaining 4 holes... Some measurements were taken to insure the emblem was on straight, and then some "backstops" used. The spotters come in a set of various sizes, and typically you never find the exact size you need... 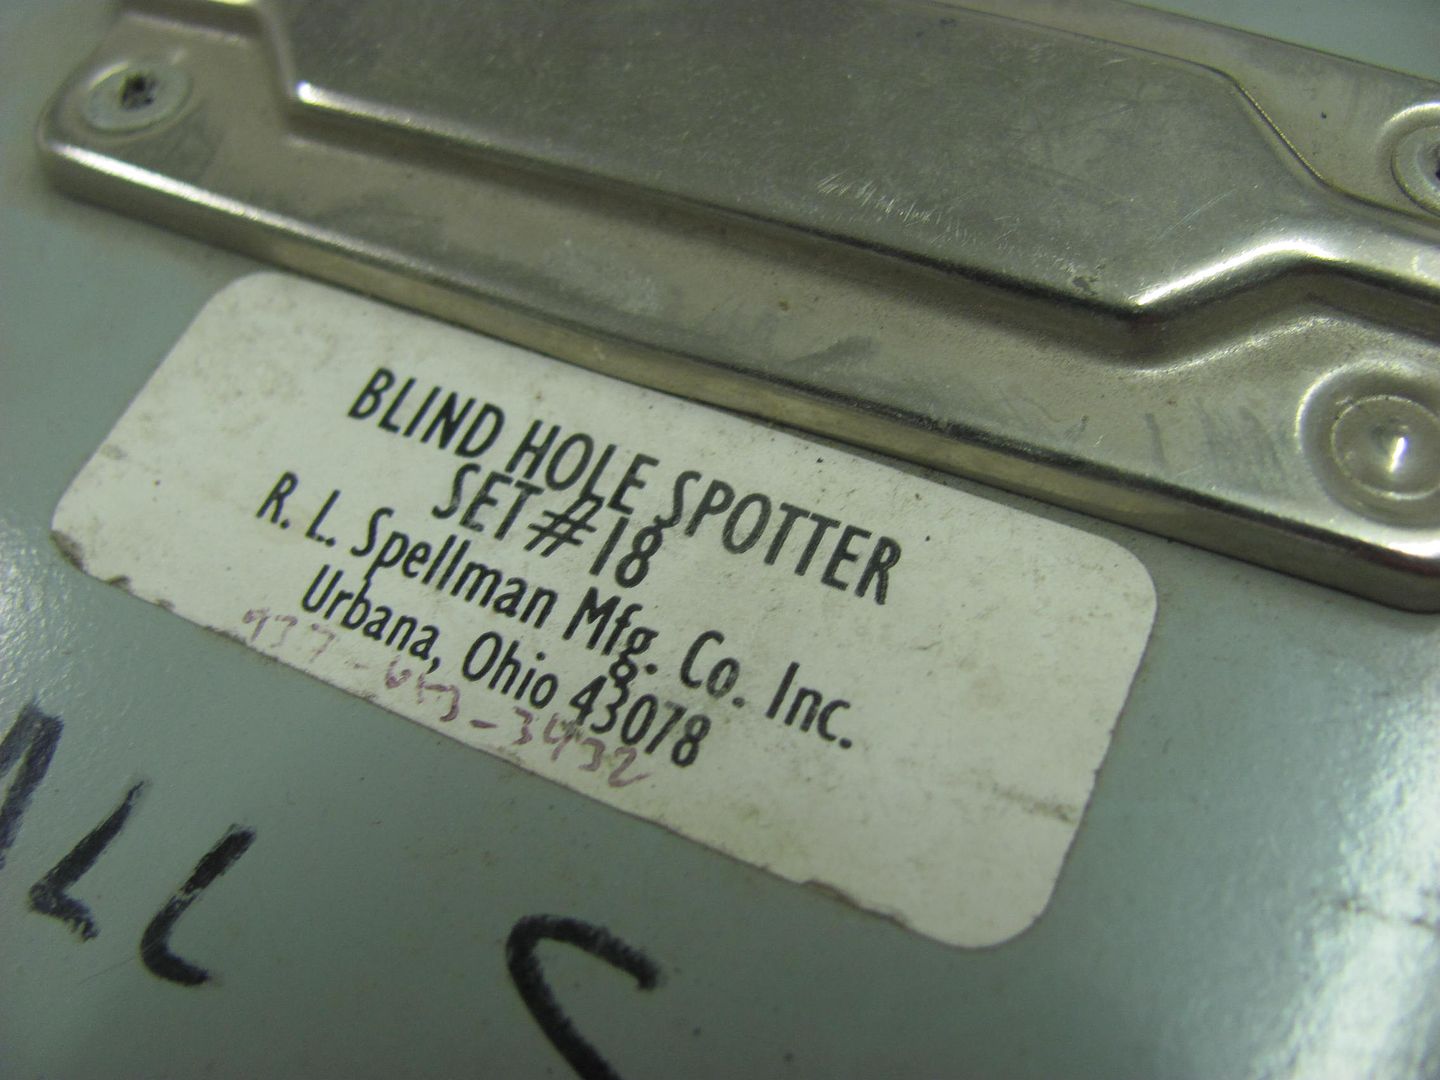 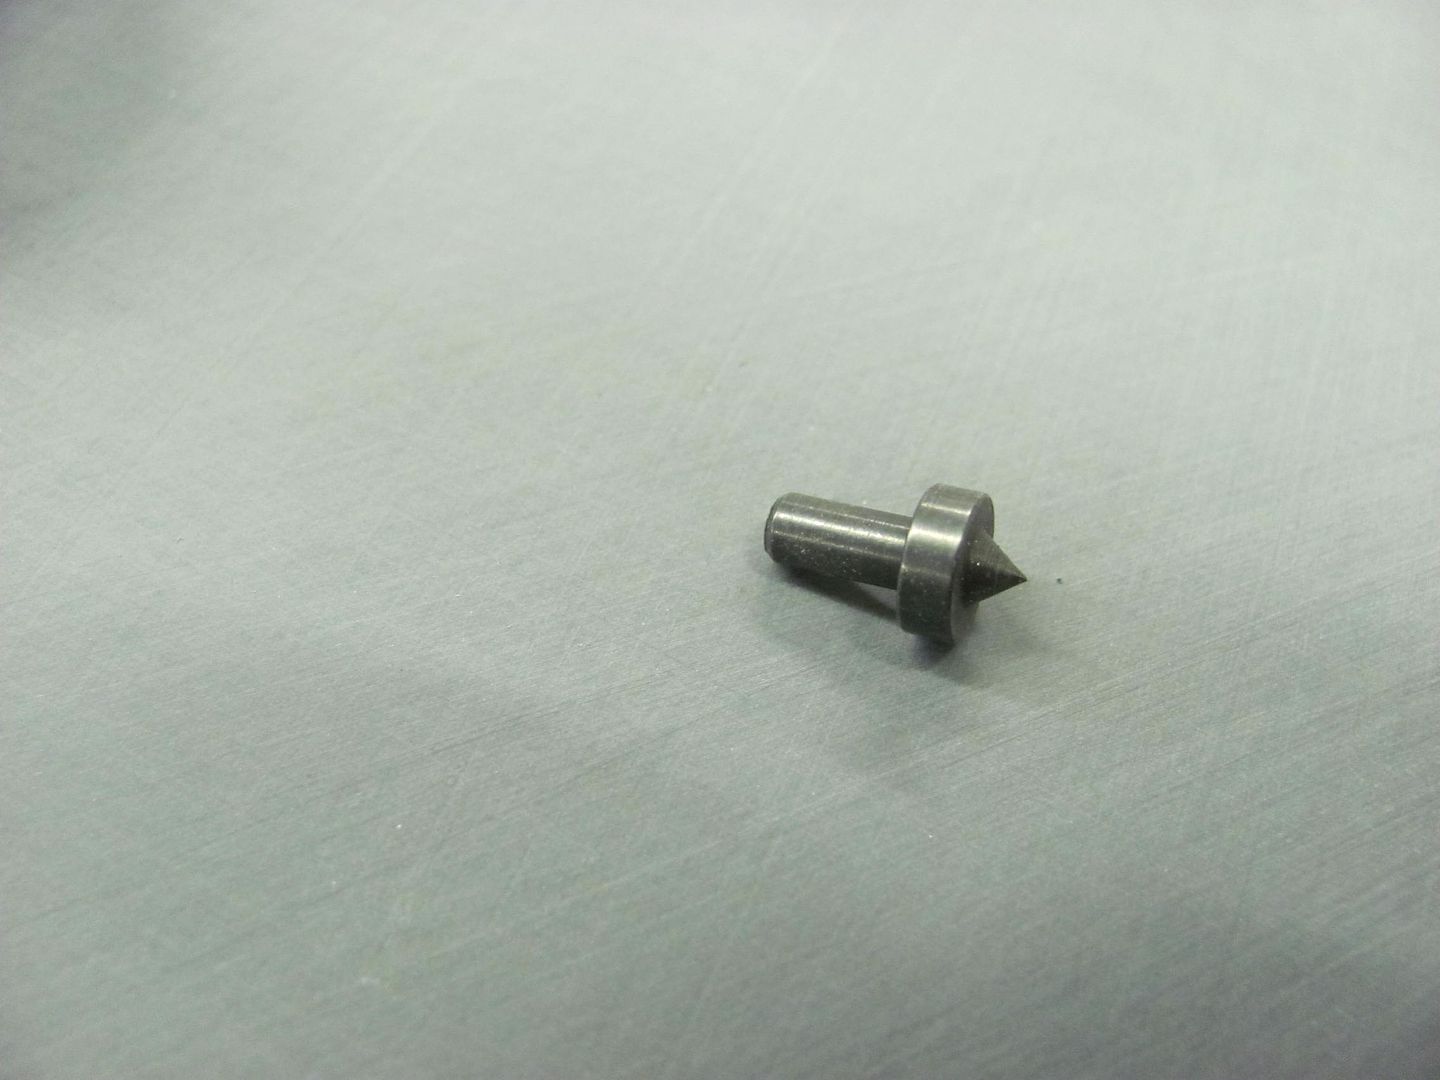 These will go in some 10-24 threaded holes on the emblem. The closest size was the 1/8" spotters, so we'll need to adjust the fit.. 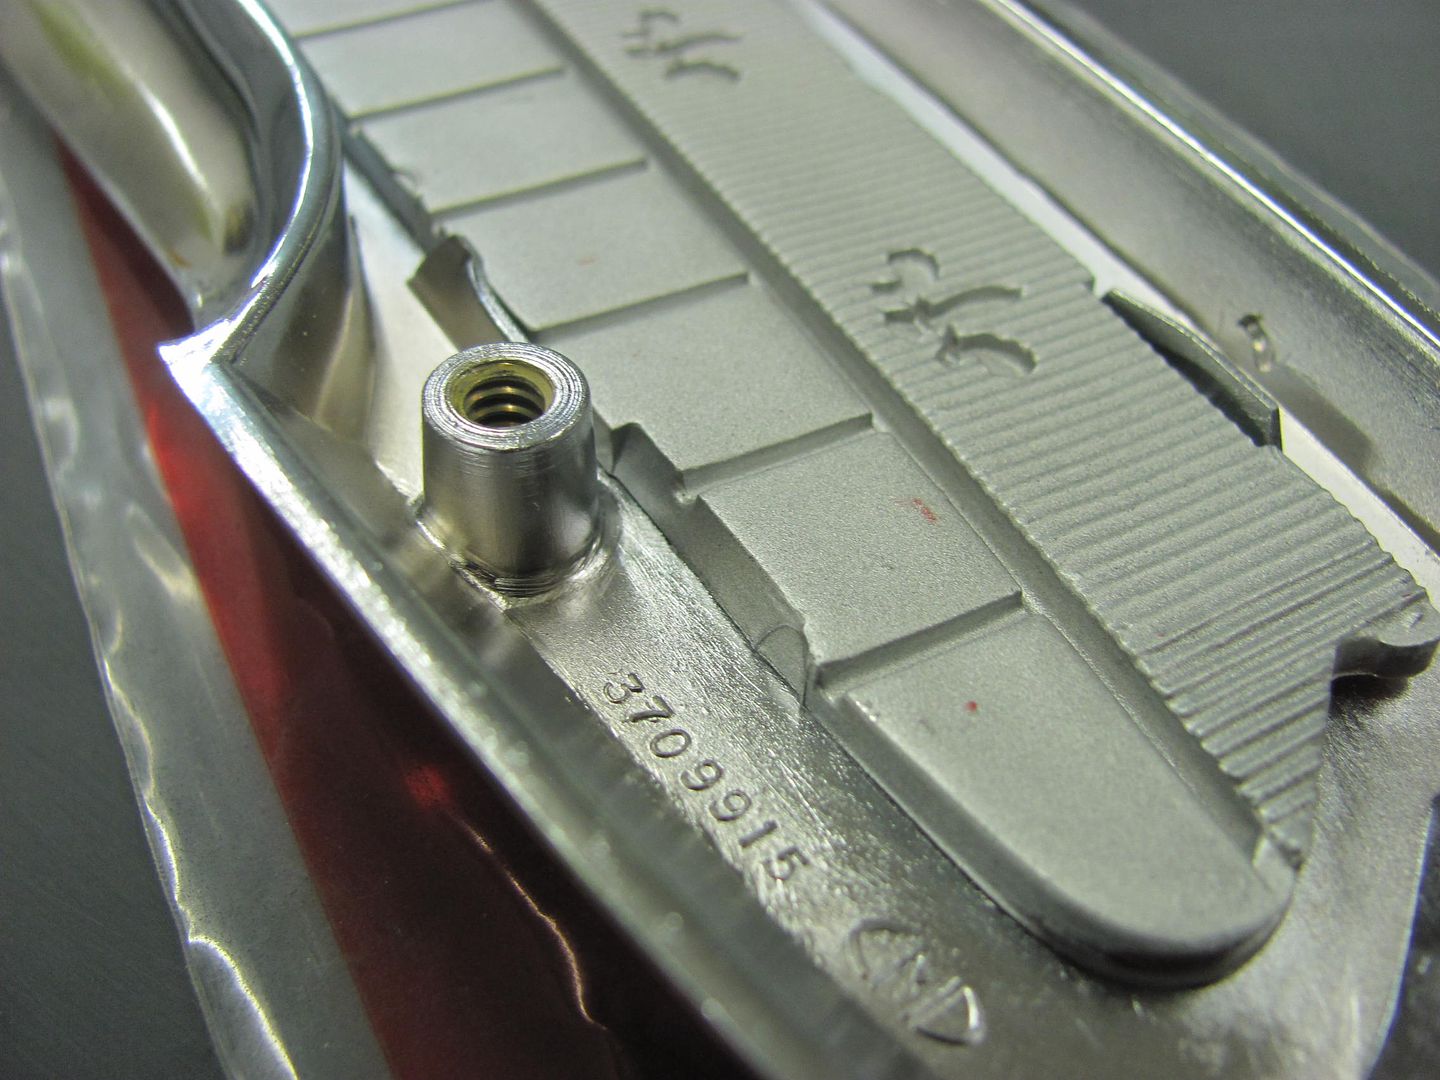 A couple wraps of fineline tape and we now have a snug fit so the spotters don't fall out.. 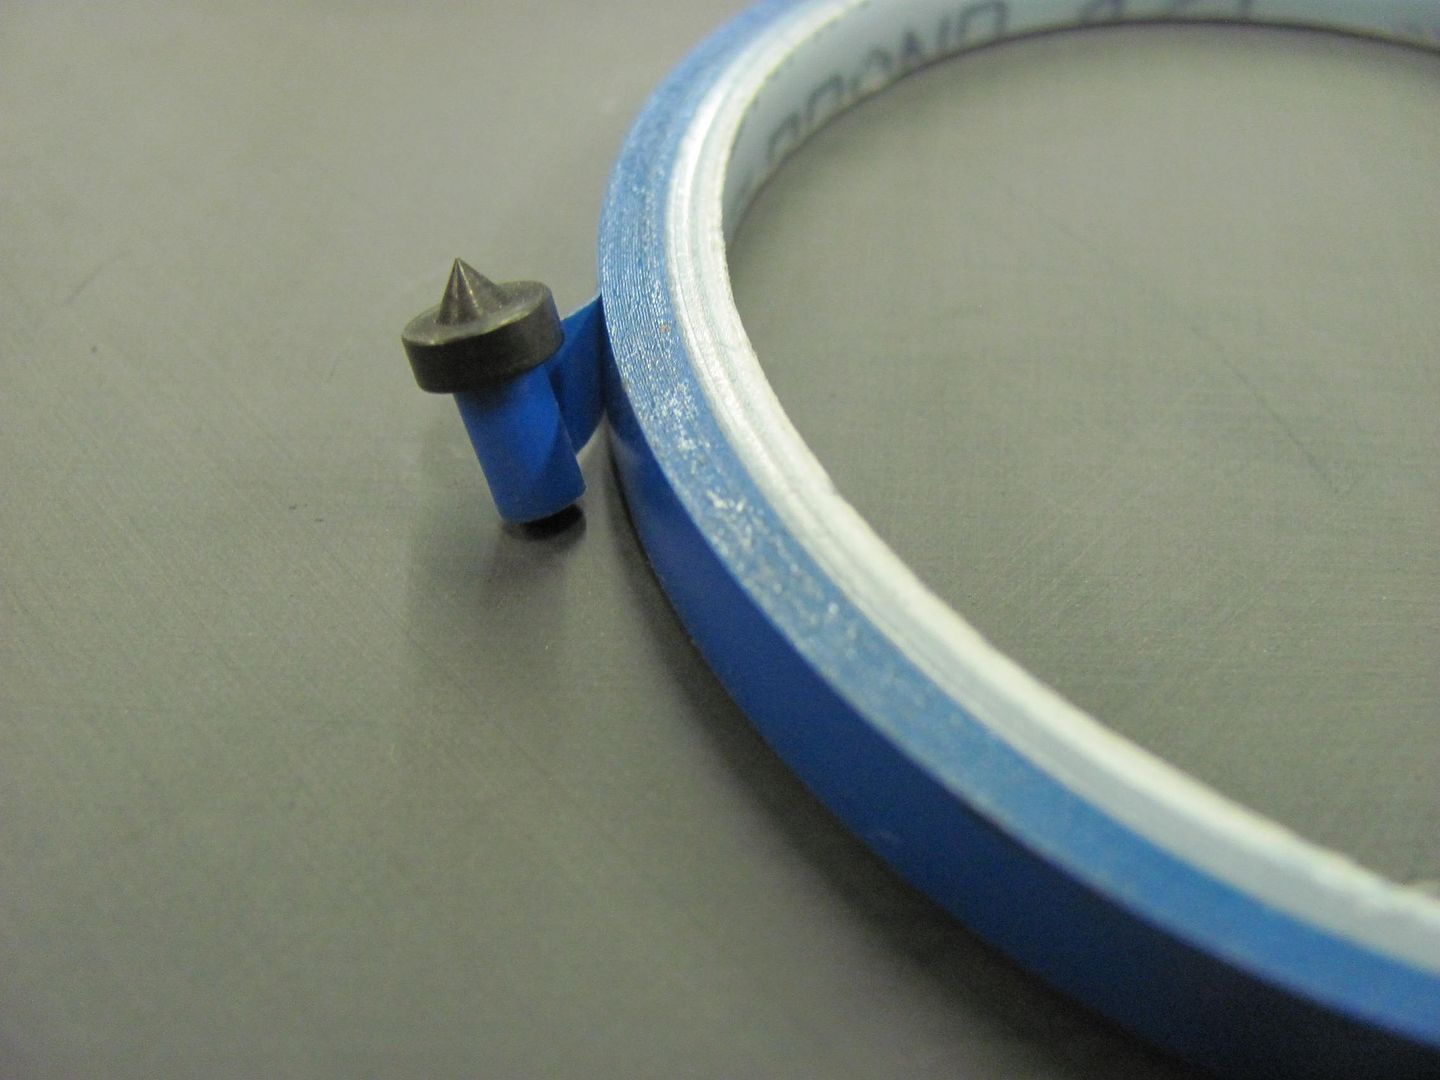 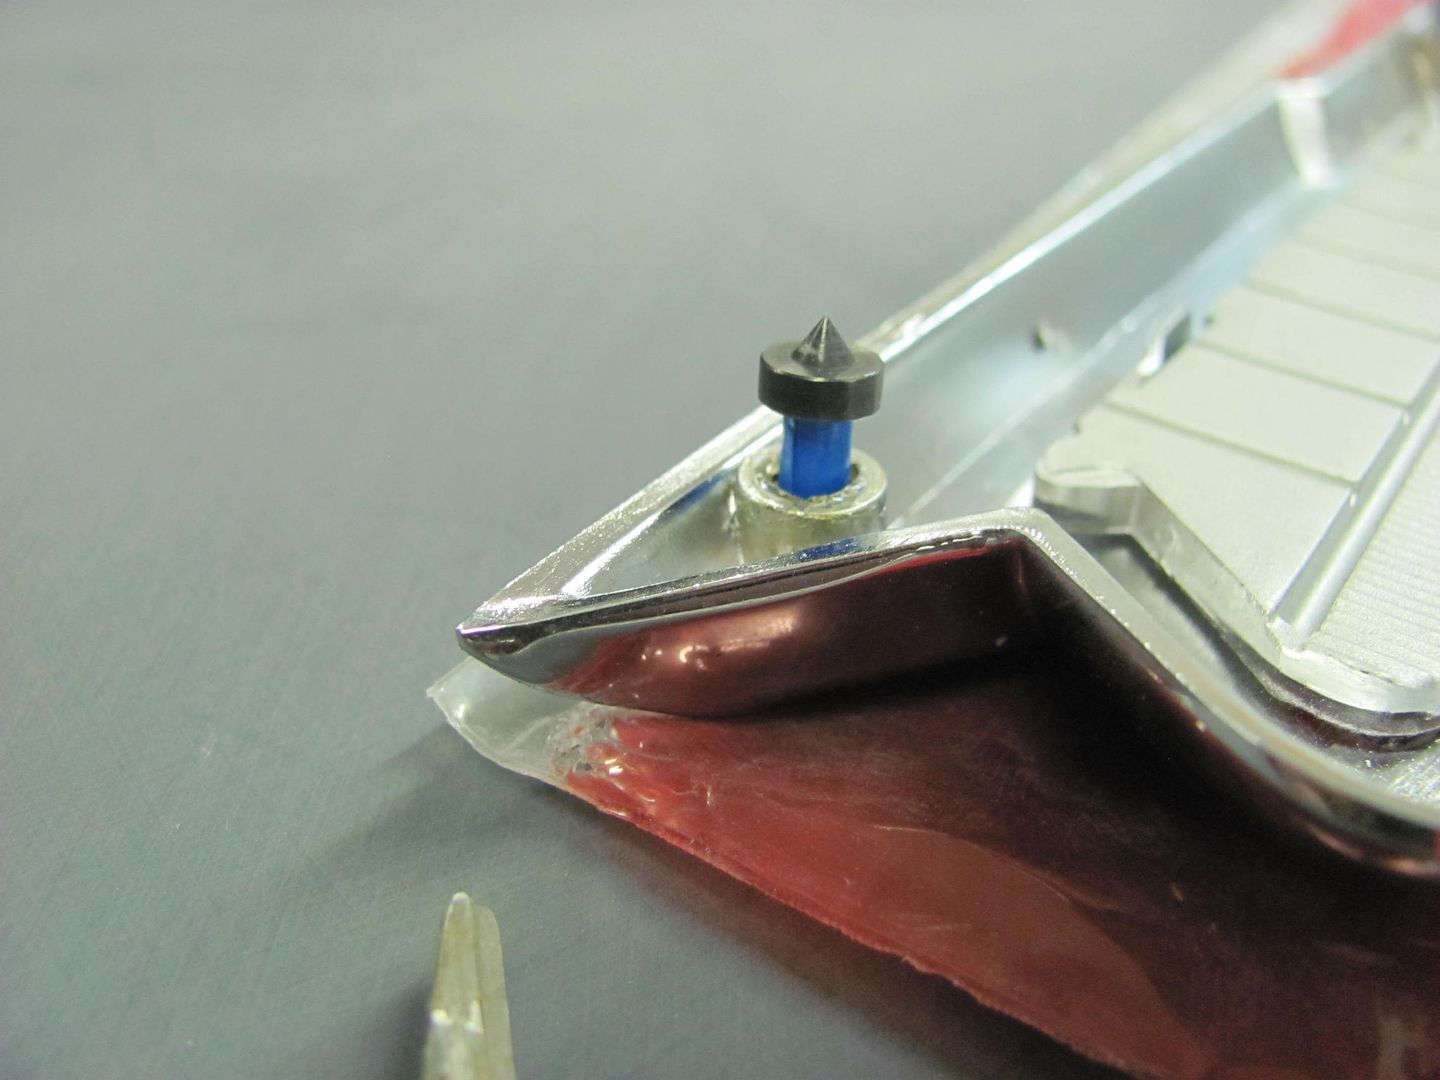 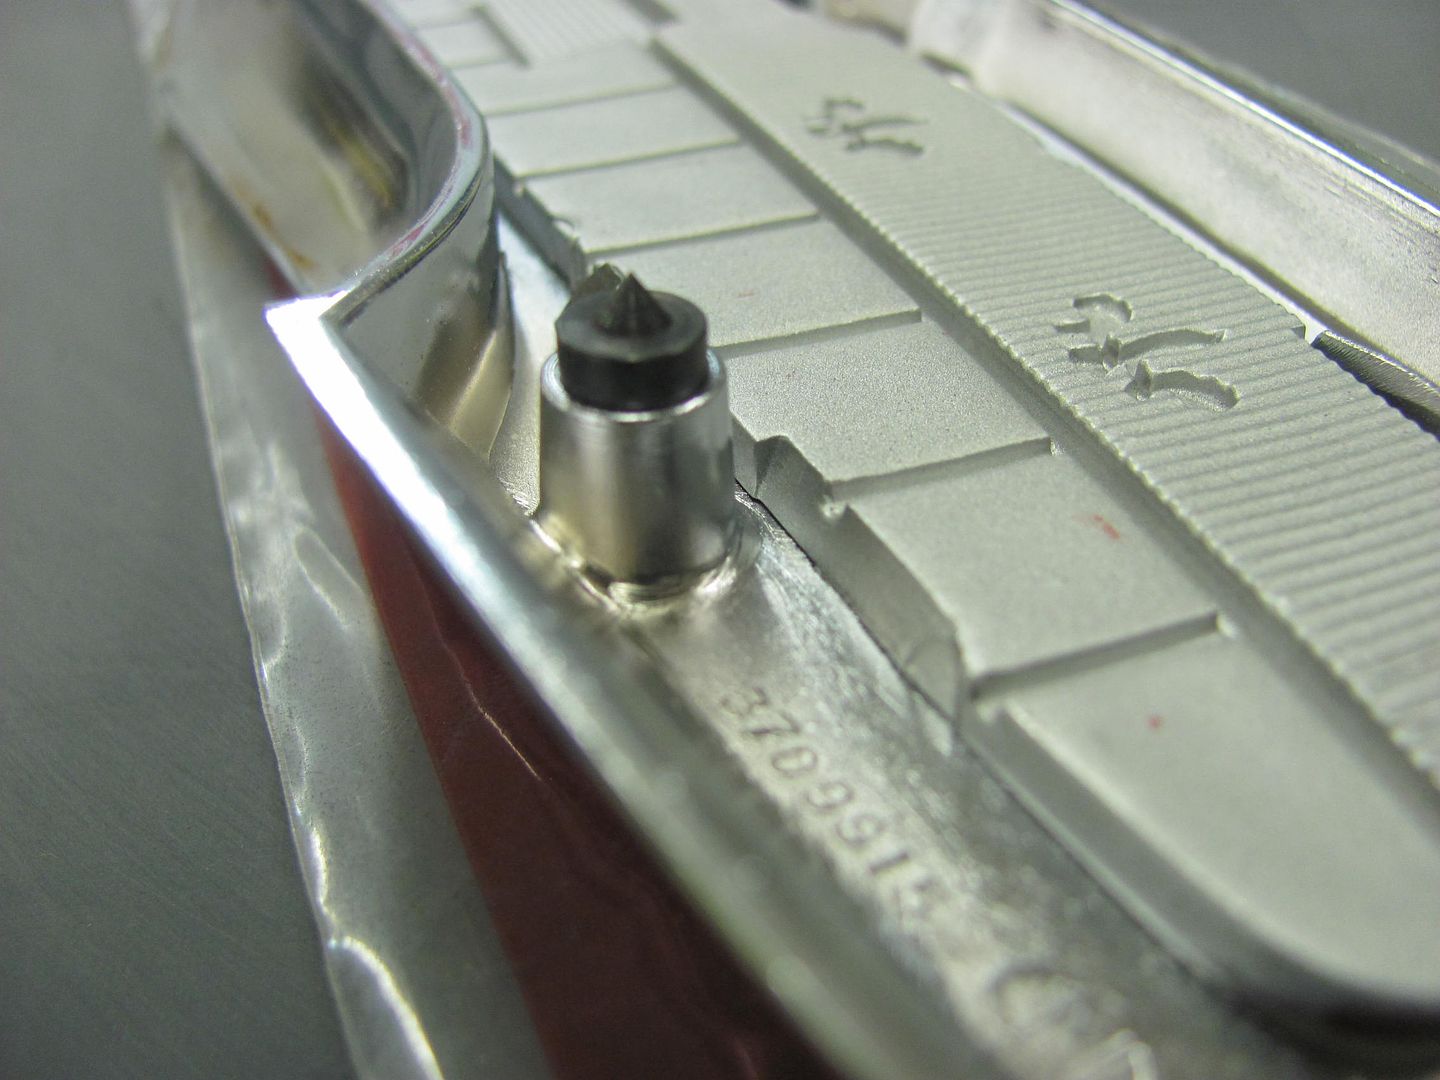 Then the emblem is located on the tail gate with the center alignment pin, then the back stops. The emblem is pressed onto the tail gate, and the spotters leave their mark on the epoxy paint finish.. 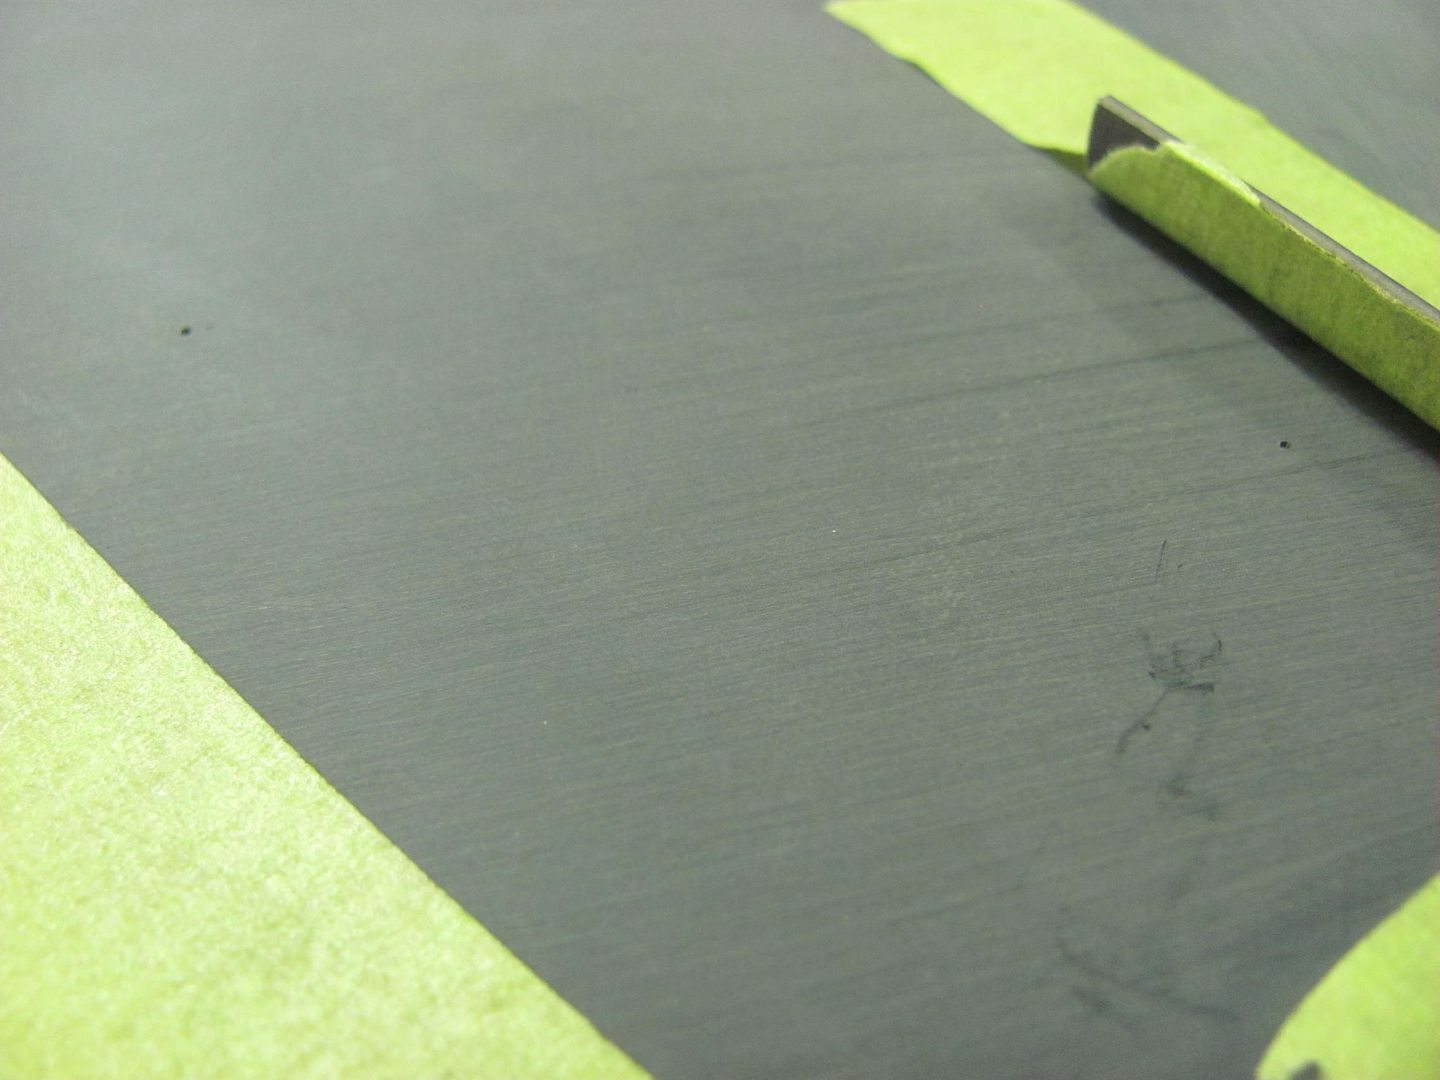 Next, the studs are installed finger tight using sleeve retainer. This will hopefully keep them from spinning inward any further risking possible damage to the chrome bezel... 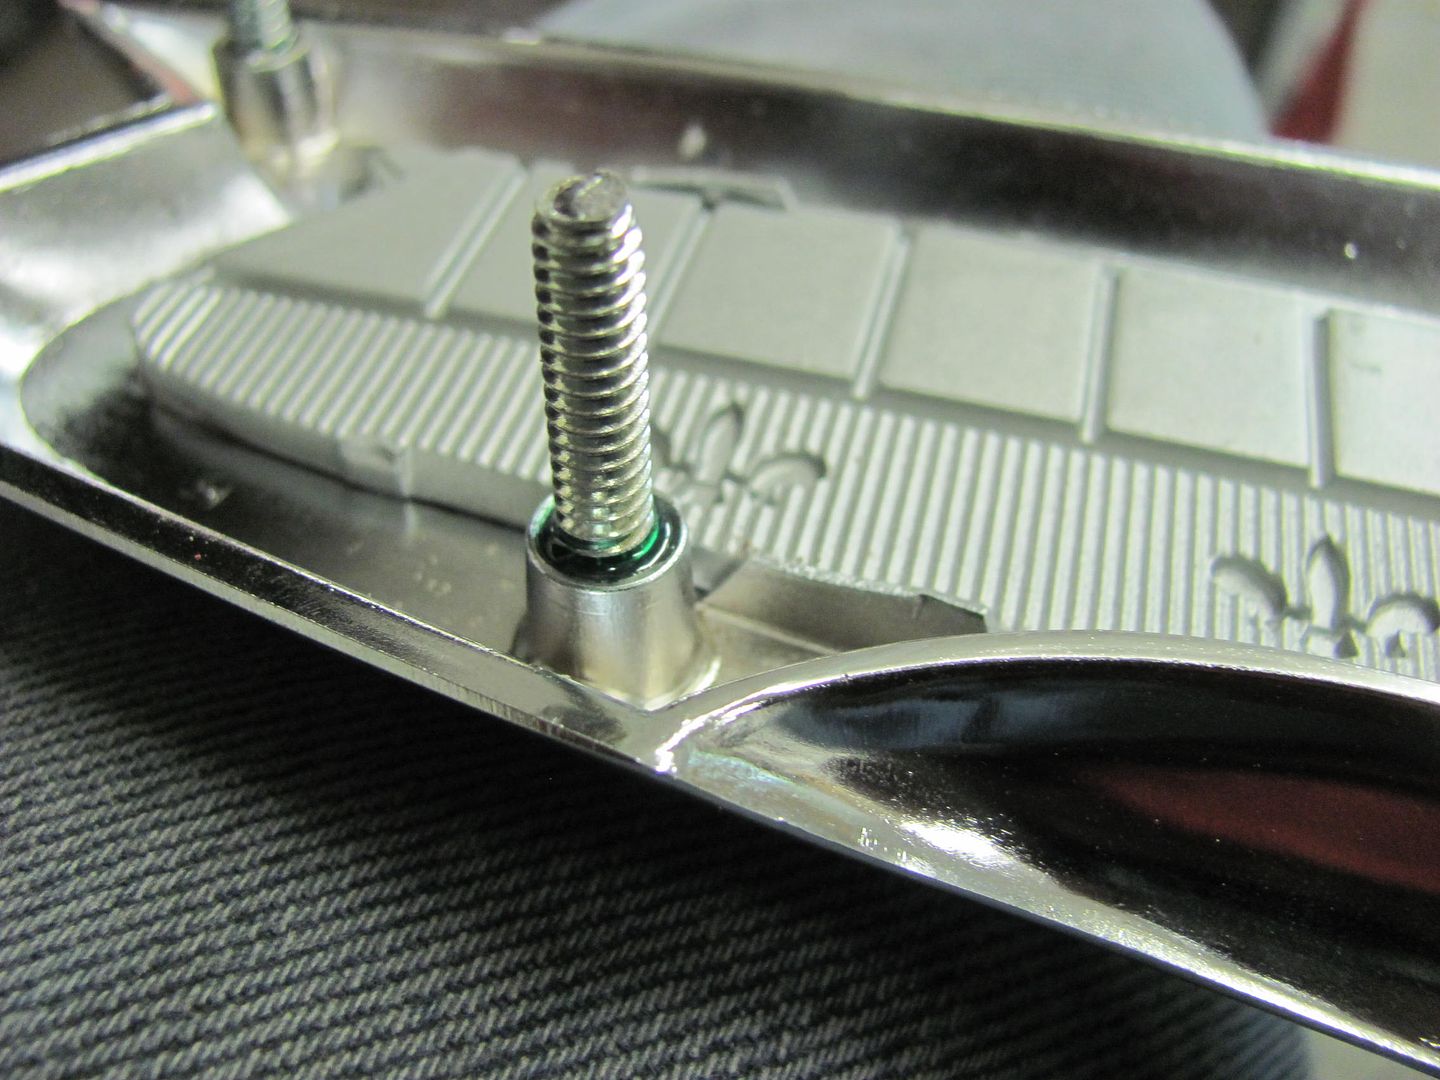 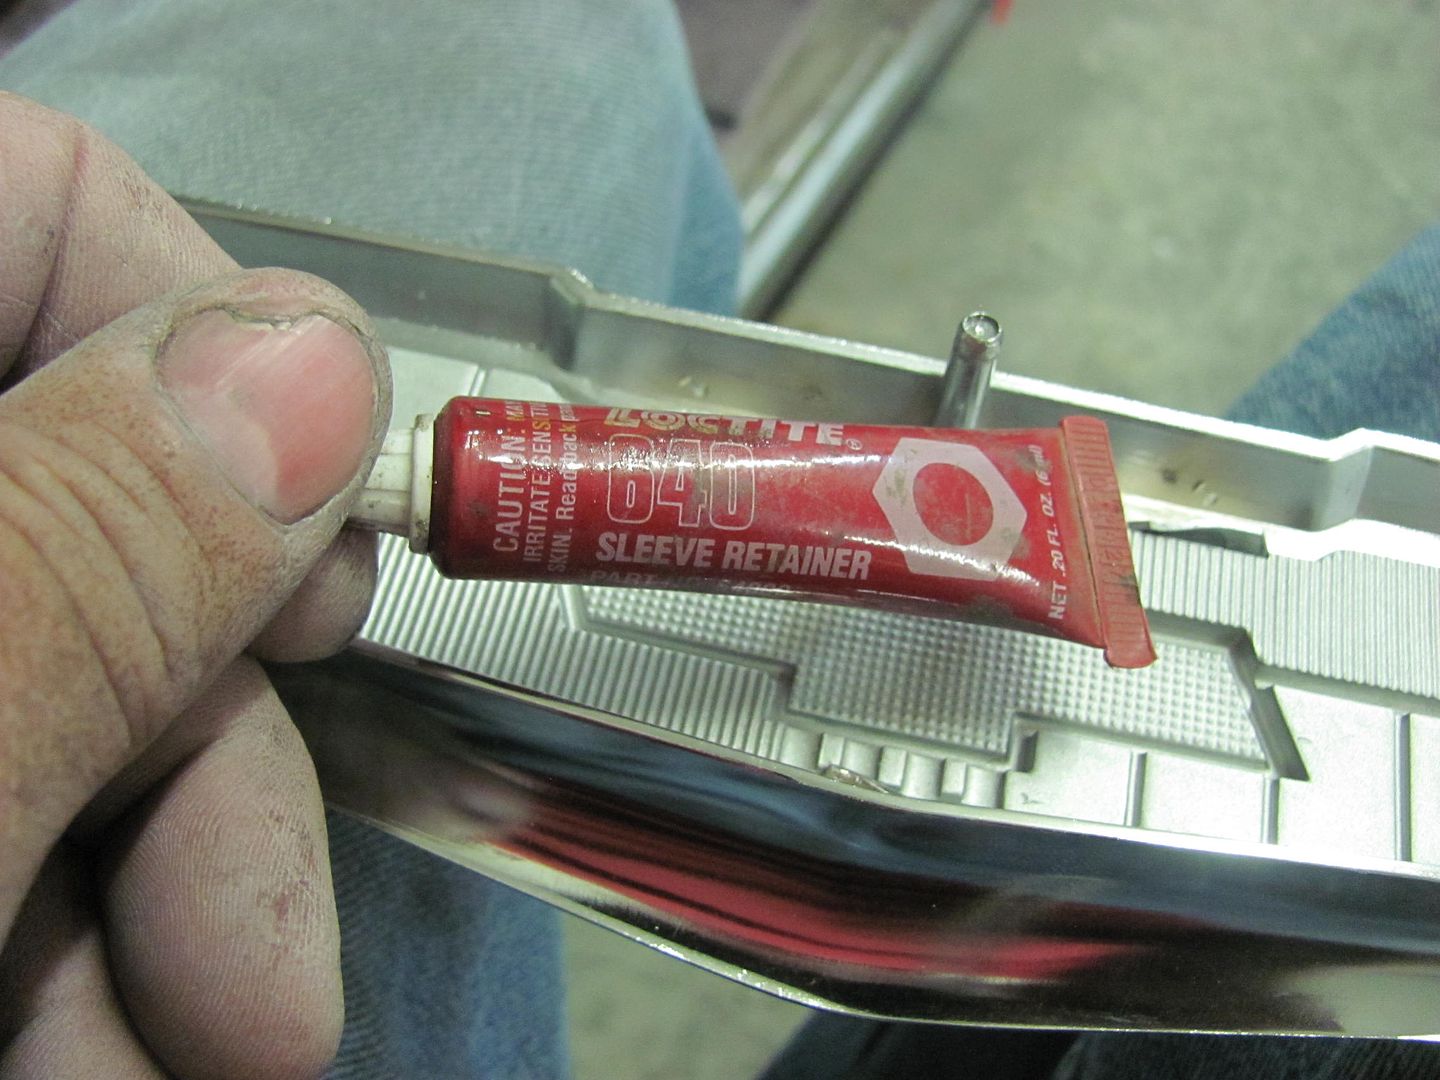 The nuts that come with the emblem are the split thread variety, and I had some threaded ones left over from the Fairlane build, that also are slightly larger in diameter, which may help out as the emblem also serves as a lift handle.. 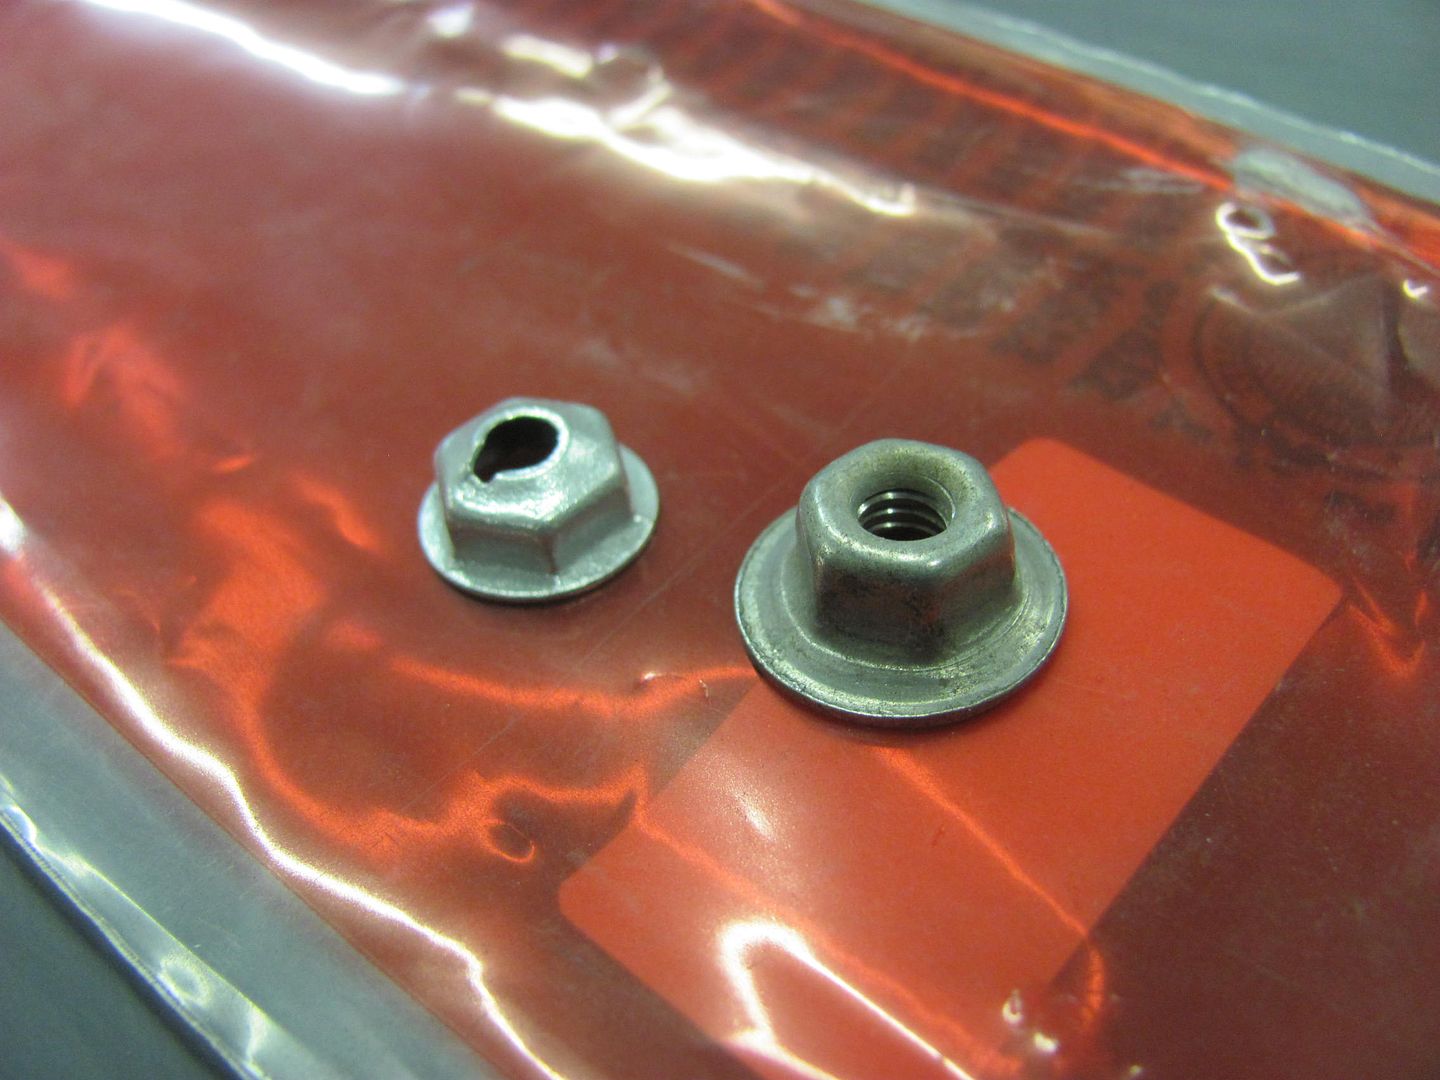 Holes drilled and emblem fitted 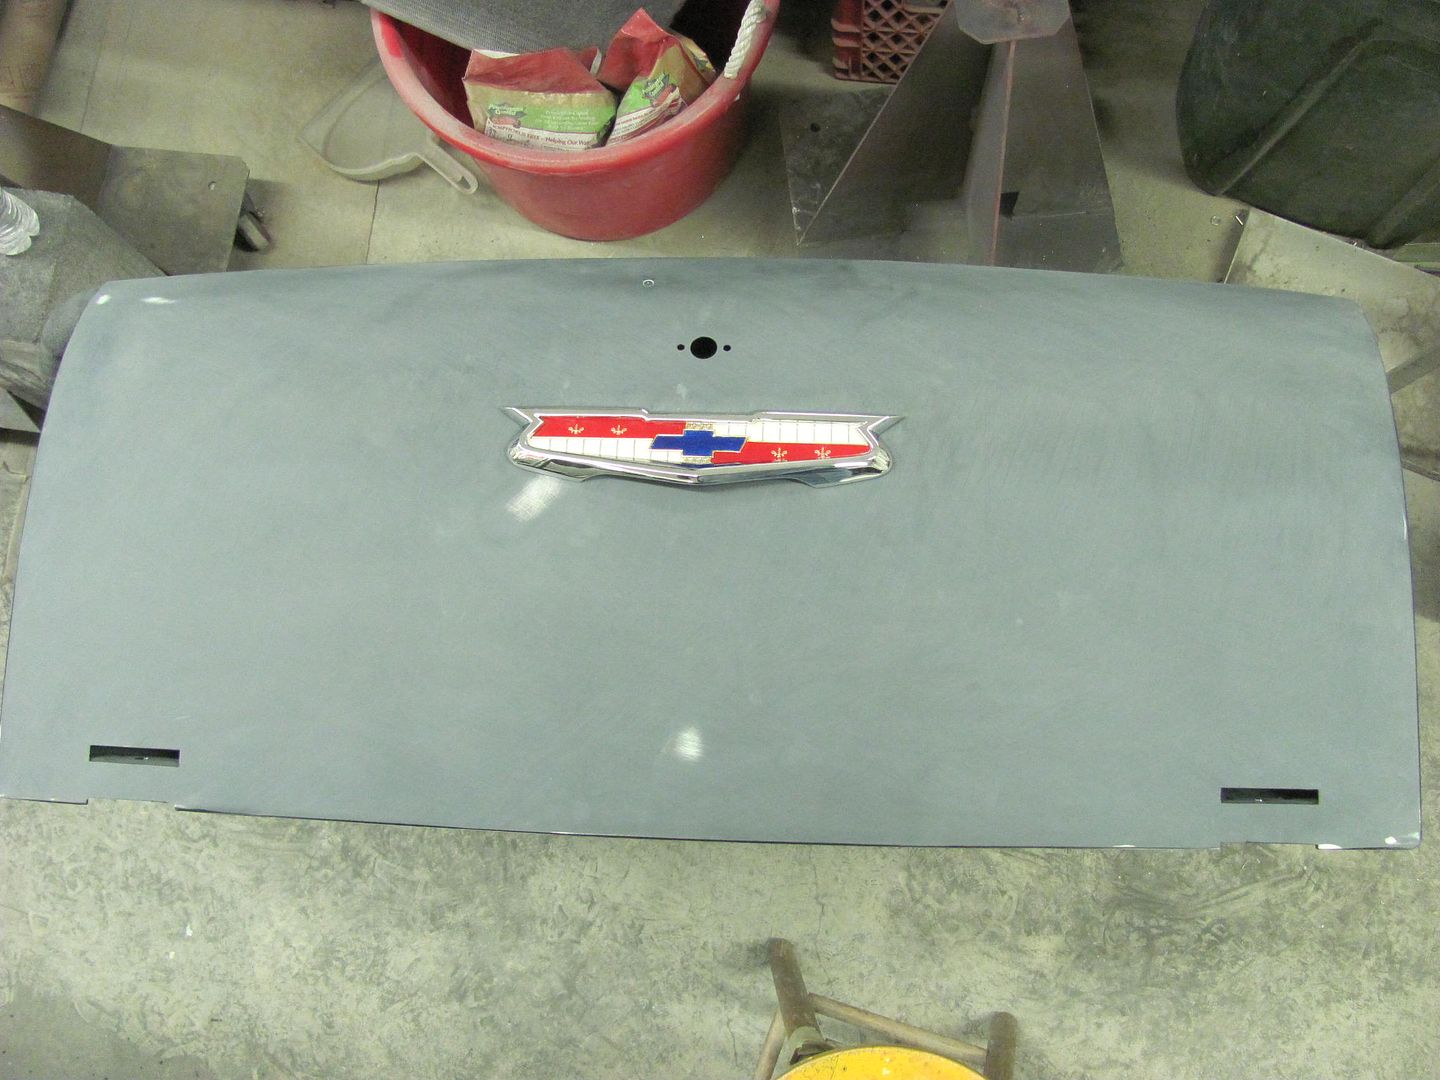
__________________
Robert |
|
|
|
|
07-15-2015, 08:54 AM
|
#480 |
|
Senior Member
 Join Date: Mar 2011
Location: West Plains, Missouri
Posts: 7,555
|
Re: 55 Wagon Progress
Panels looking good, and the emblem came out great...Jim
__________________
my build thread: http://67-72chevytrucks.com/vboard/s...d.php?t=459839 Jimbo's long bed step build:http://67-72chevytrucks.com/vboard/s...t=464626<br /> |
|
|
|
|
07-15-2015, 08:57 PM
|
#481 |
|
Registered User
Join Date: May 2007
Location: Deale Md
Posts: 4,663
|
Re: 55 Wagon Progress
Huh blind hole spotter who knew, definitely not me, learn so many cool little tricks.
__________________
James 63 GMC V6 4speed carryall 65 chevy swb bbw V8 auto 68 K20 327/4 speed, buddy buckets 2002 GMC CC Dually Duramax 64 GMC lwb 3/4 V6 4speed SOLD 66 GMC swb bbw buddy buckets SOLD IG duallyjams The only thing that stays the same is constant change! |
|
|
|
|
07-18-2015, 08:27 PM
|
#482 |
|
Registered User
Join Date: Jan 2013
Location: Leonardtown, MD
Posts: 1,636
|
Re: 55 Wagon Progress
I was blocking out the tailgate the other day and had a "halo" effect appear in the epoxy, shown below just to the right of the latch hole. This has a light skim of Evercoat 416 beneath the epoxy in that area. It was nice and flat while in bare metal, after spraying epoxy, after blocking the Evercoat/ before spraying the last coat of epoxy. I was baffled at what would cause such a nicely formed circle in the paint...
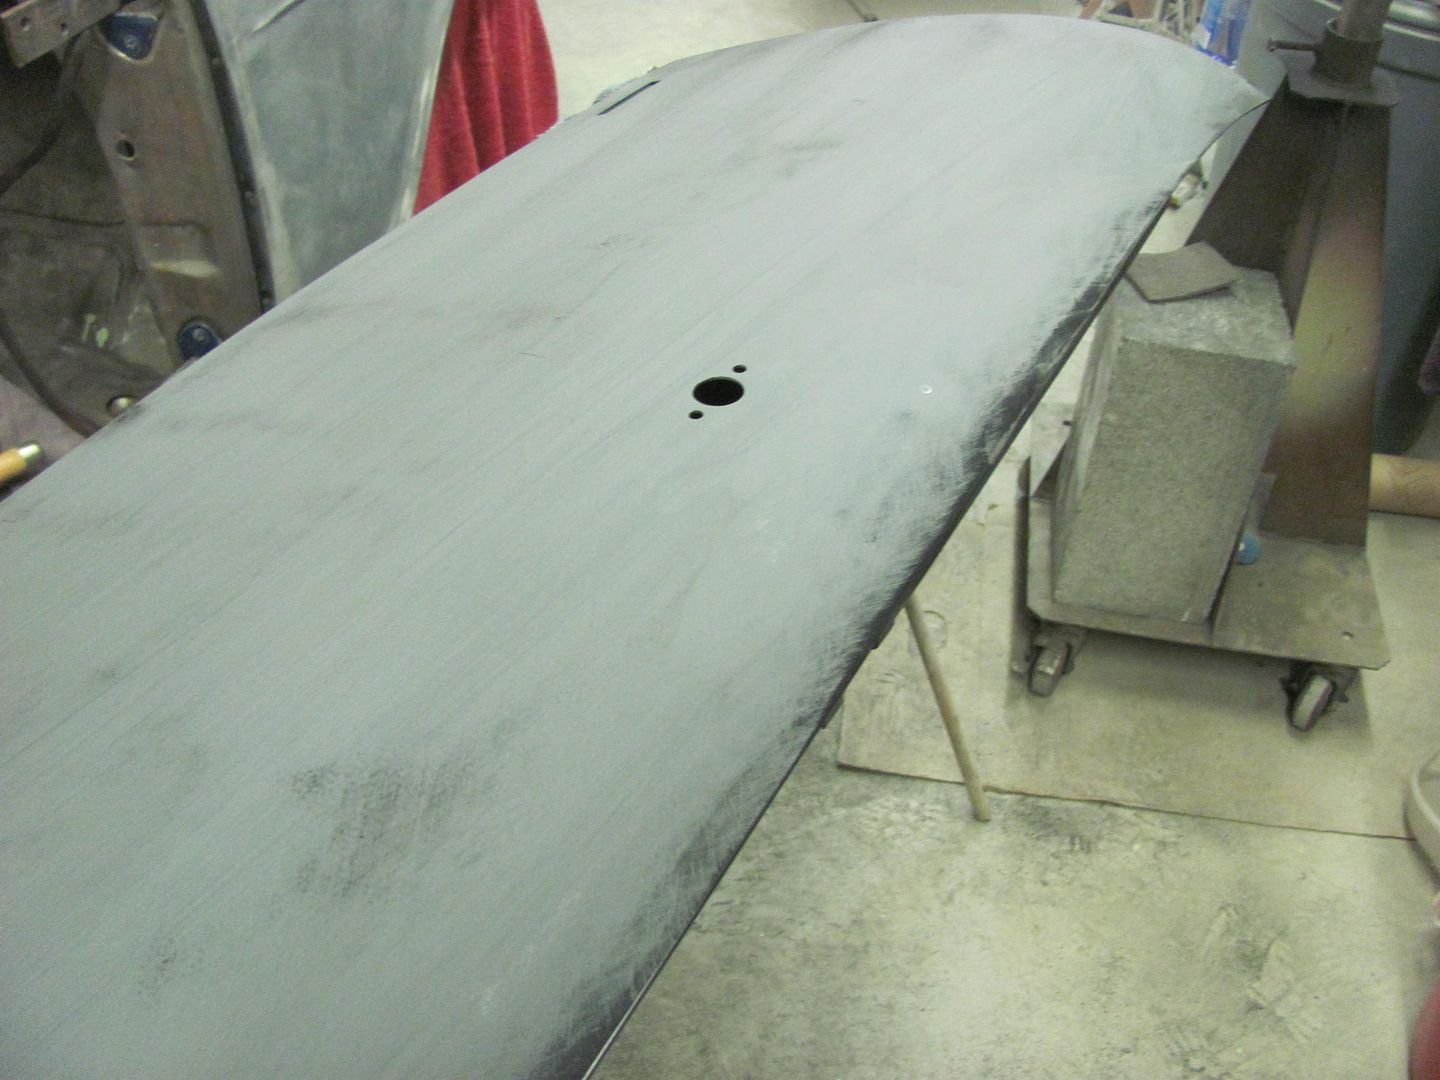  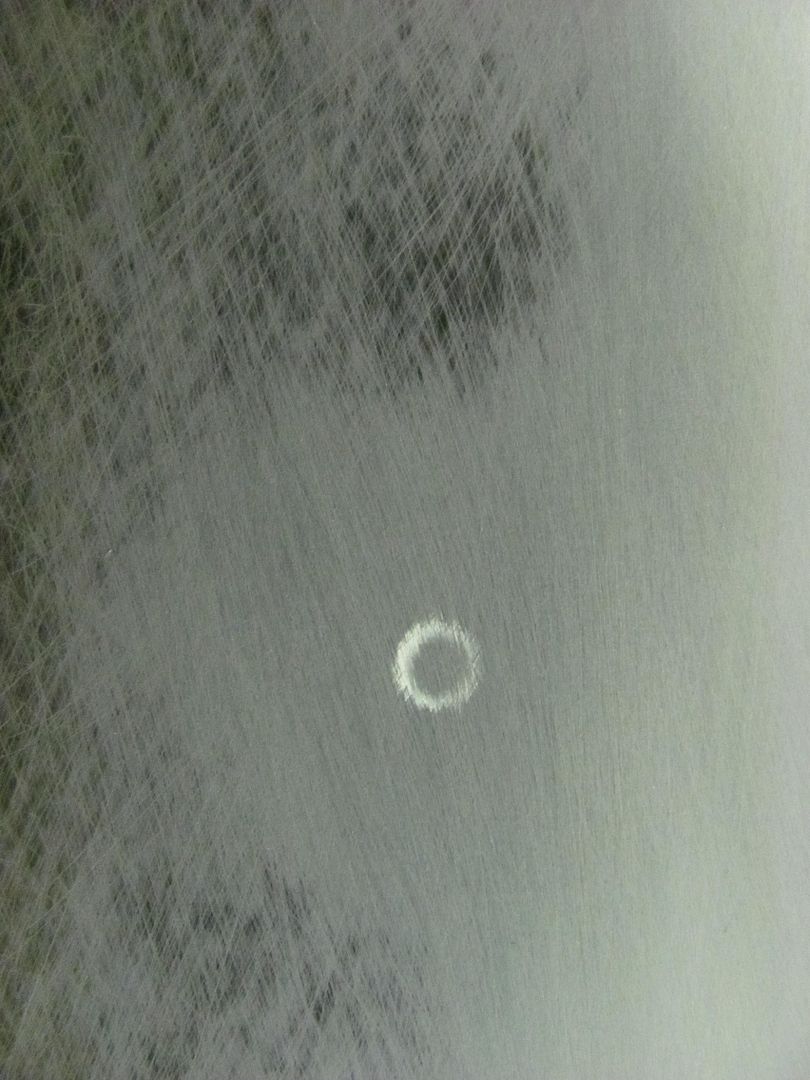 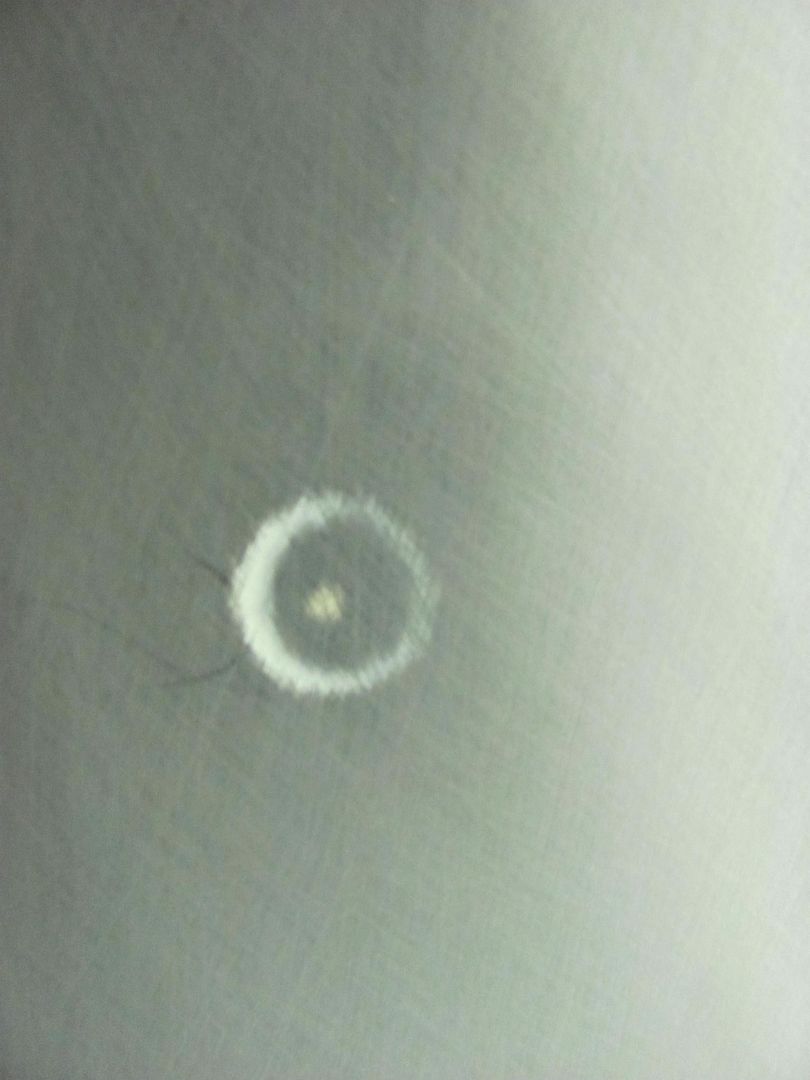 Even scratched the area to see if there was any softness to the Evercoat, but no.. 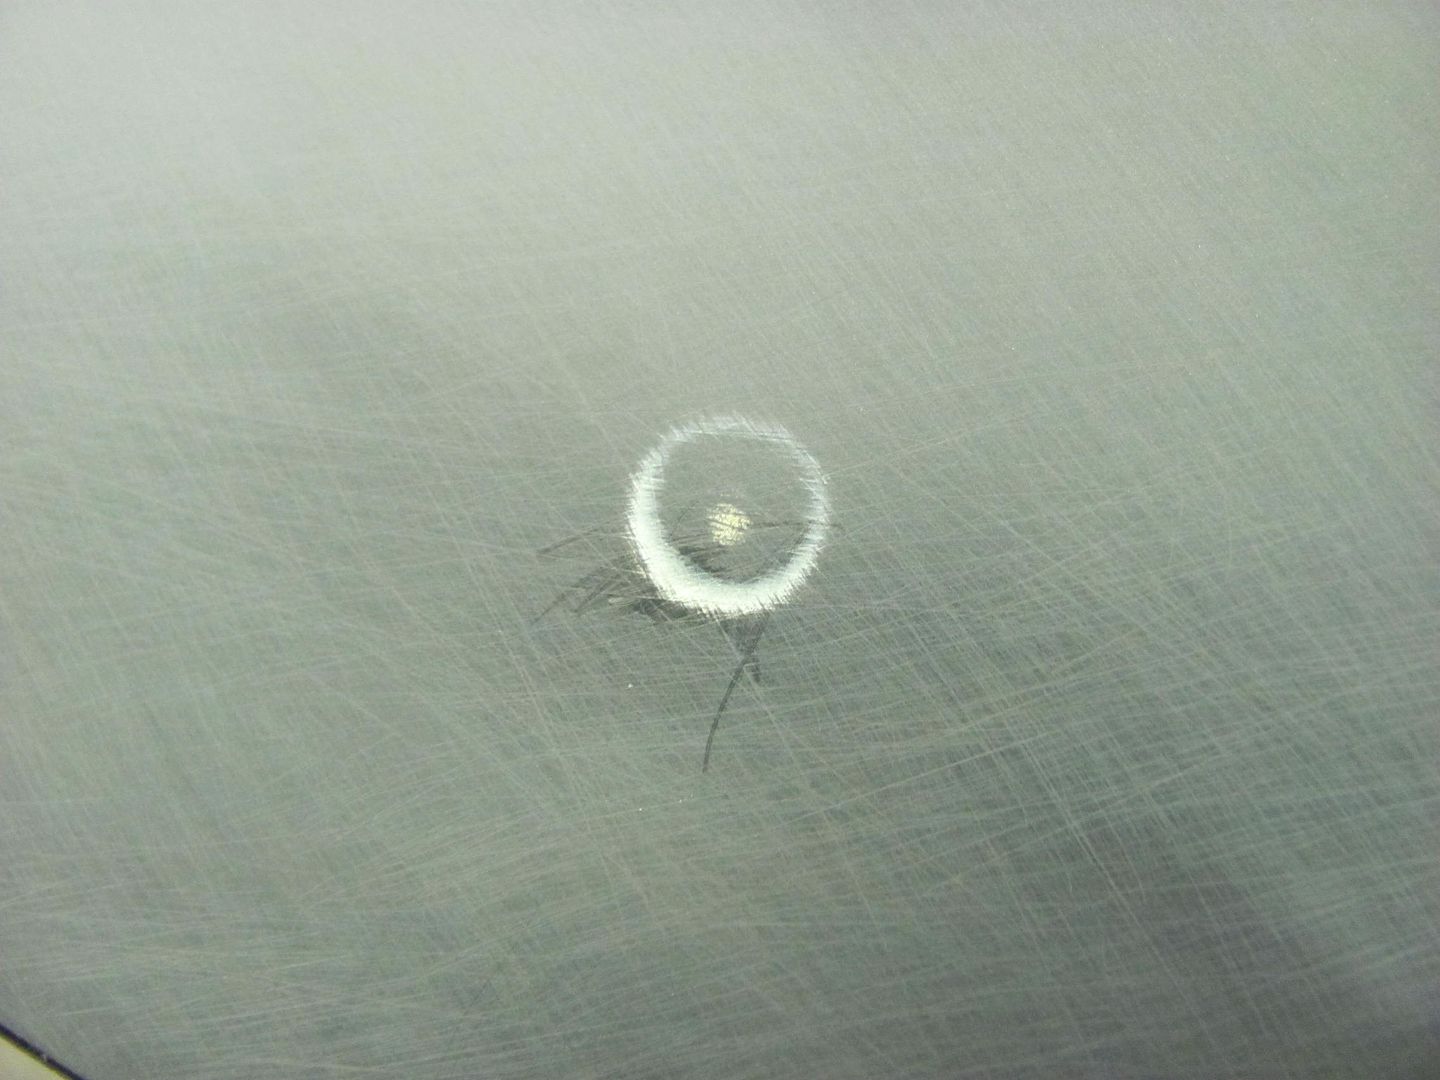 Here's the panel in bare steel before paint and after first coat of epoxy... 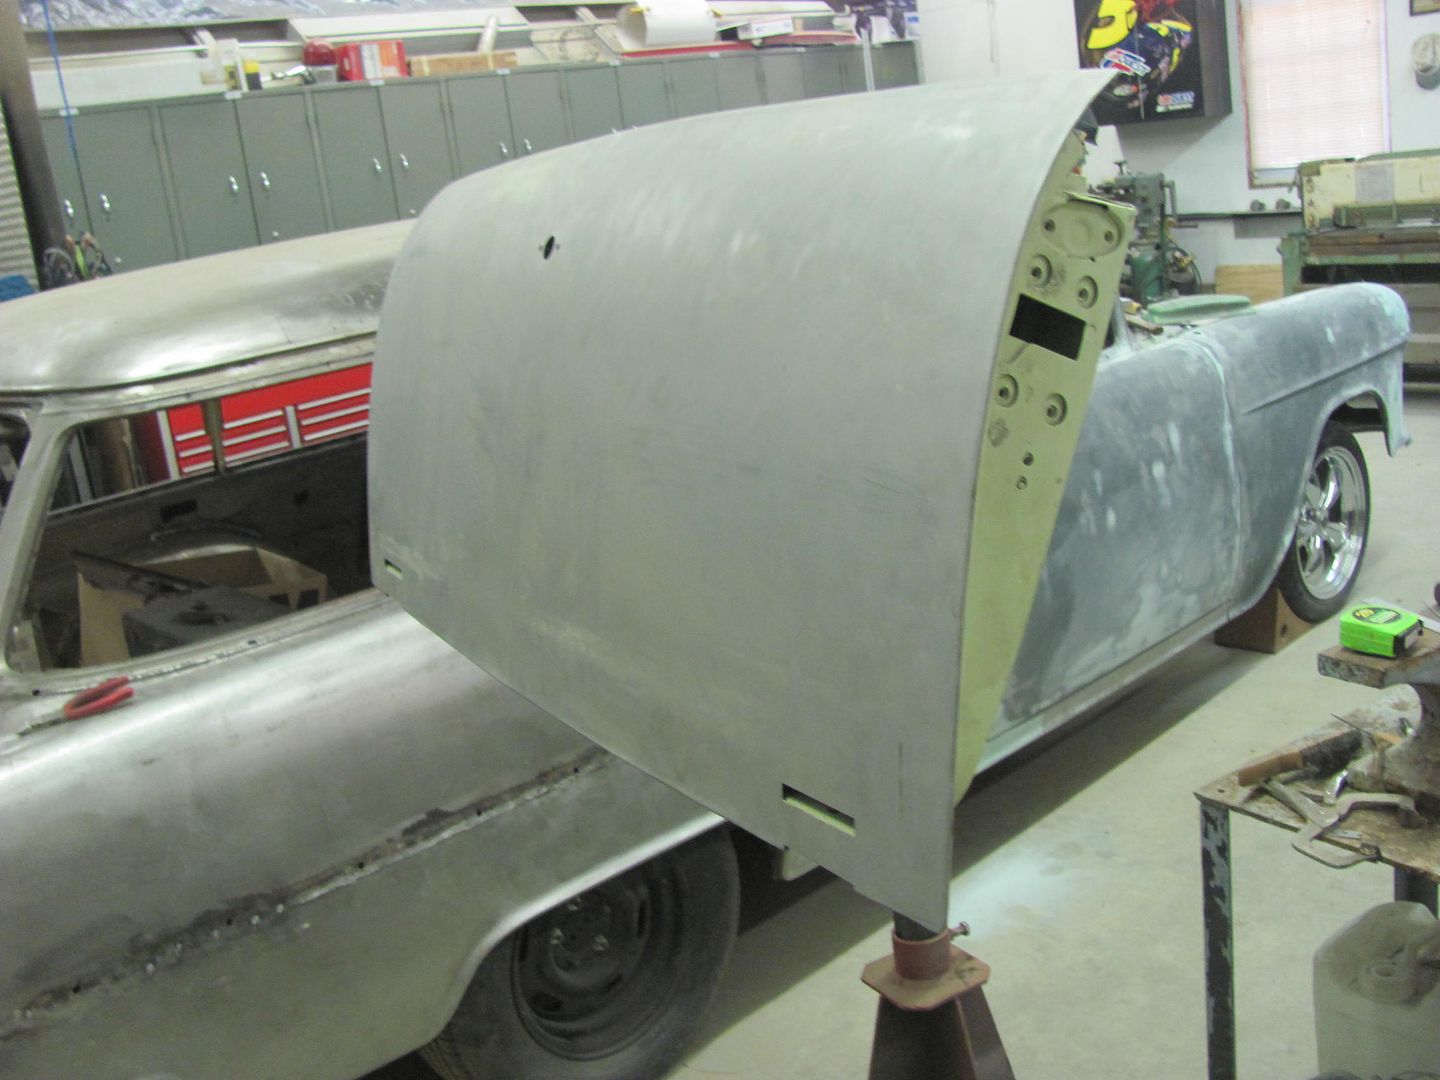 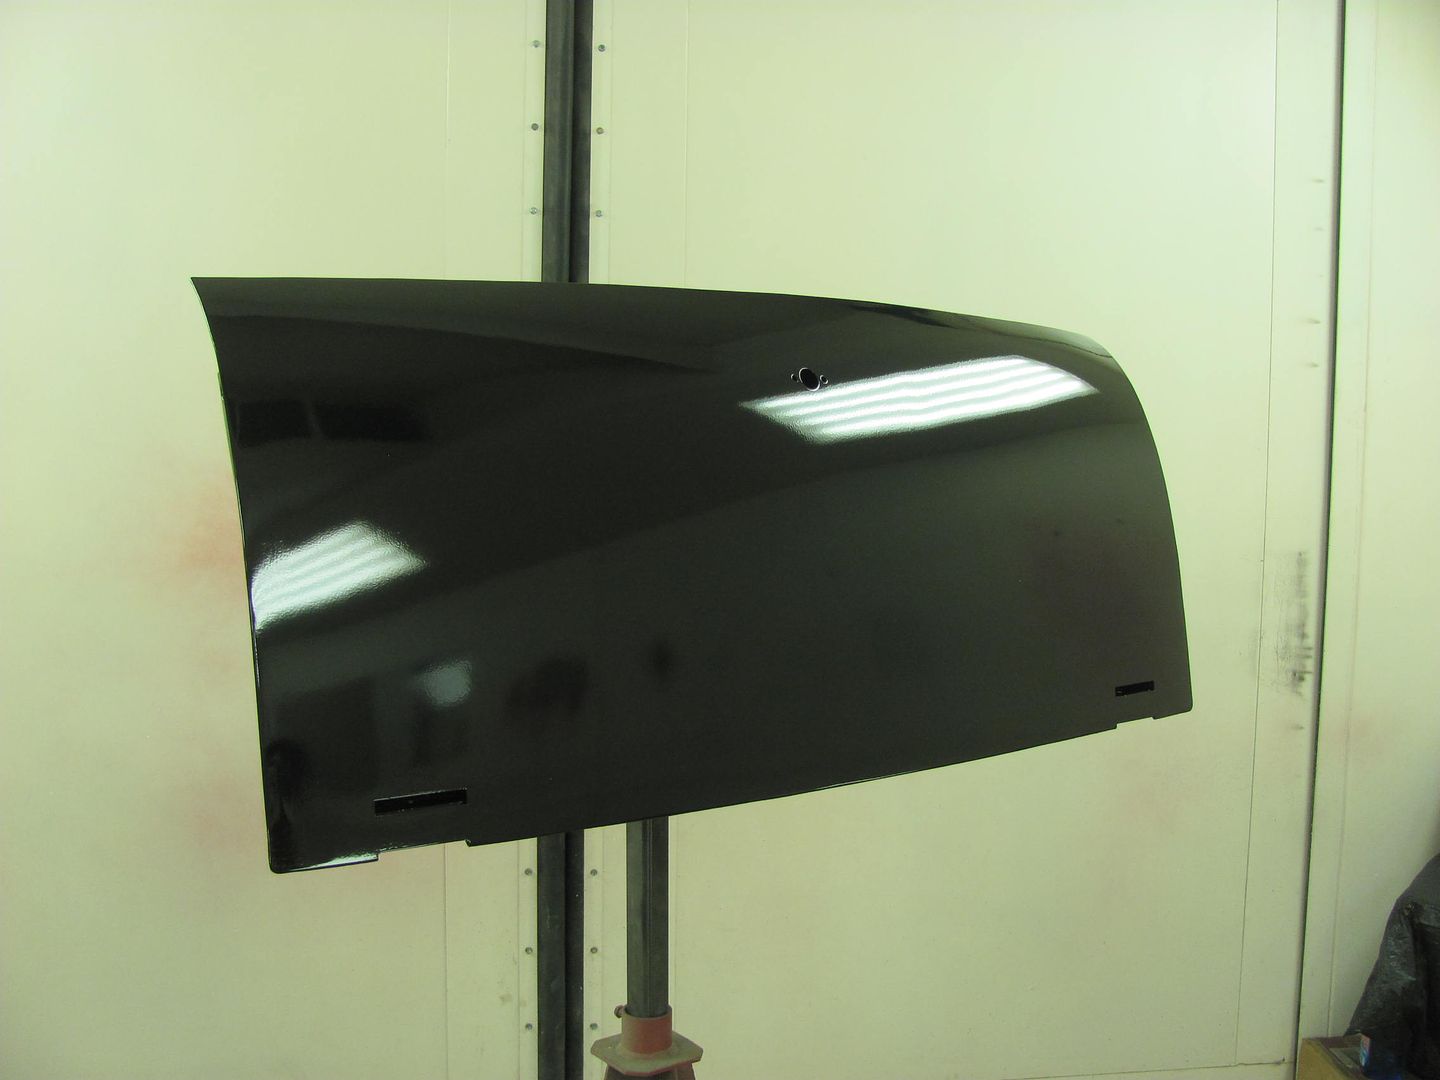 No dings, or defects otherwise seen. I had posted a query on the SPI forum to see if anyone had ever run into this. I don't know why I didn't think of this first, but it was suggested to: 1) look inside 2) only time this type of defect had been seen was dropping screwdriver inside door and left similar mark on outside of door bottom after sanding. So in full investigative mode, I first measured the distance of the defect from the turn latch hole.. The Halo is approx. 3" away from the handle hole.. 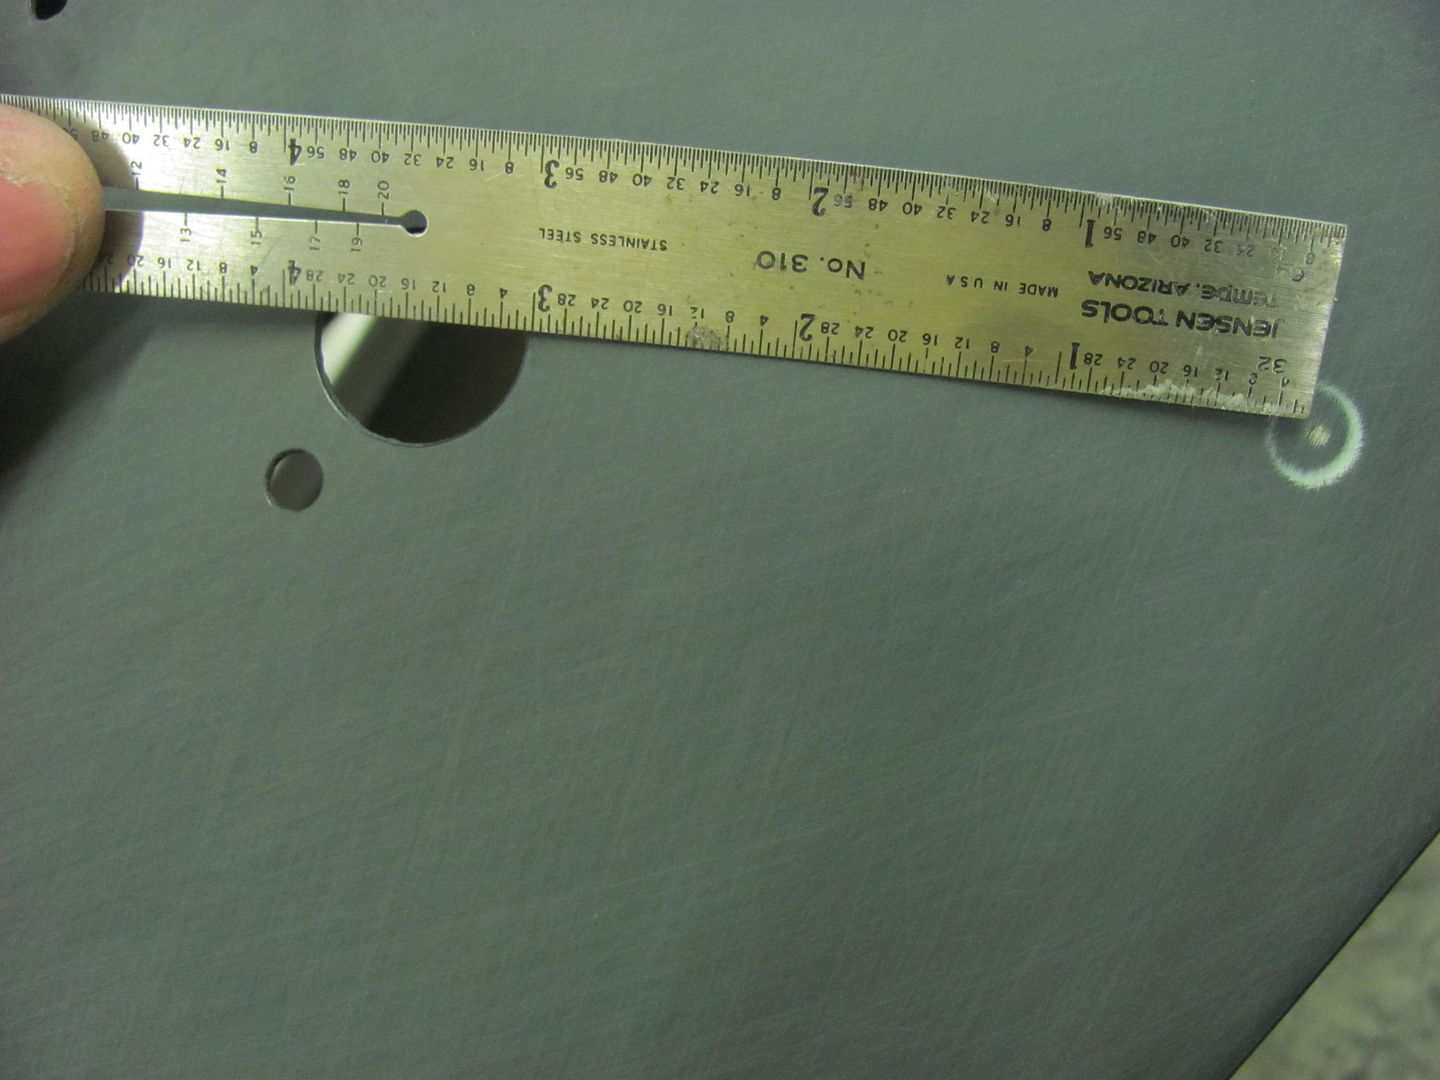 Measuring that distance on the inside shows.....oh wait....what's that bare metal? 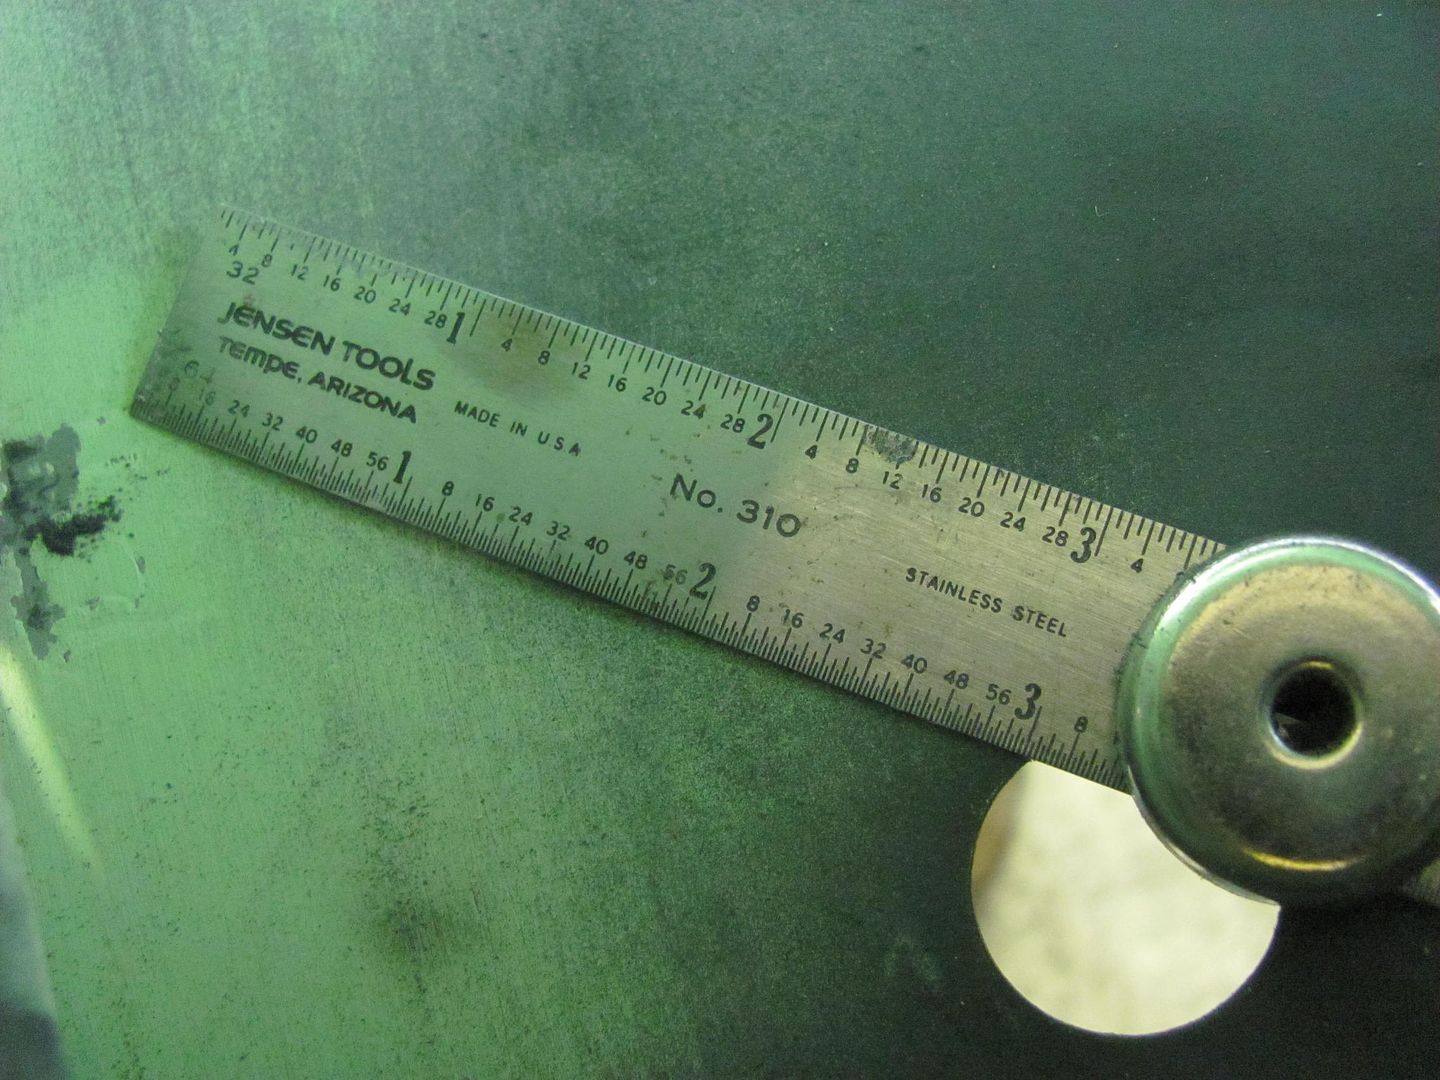 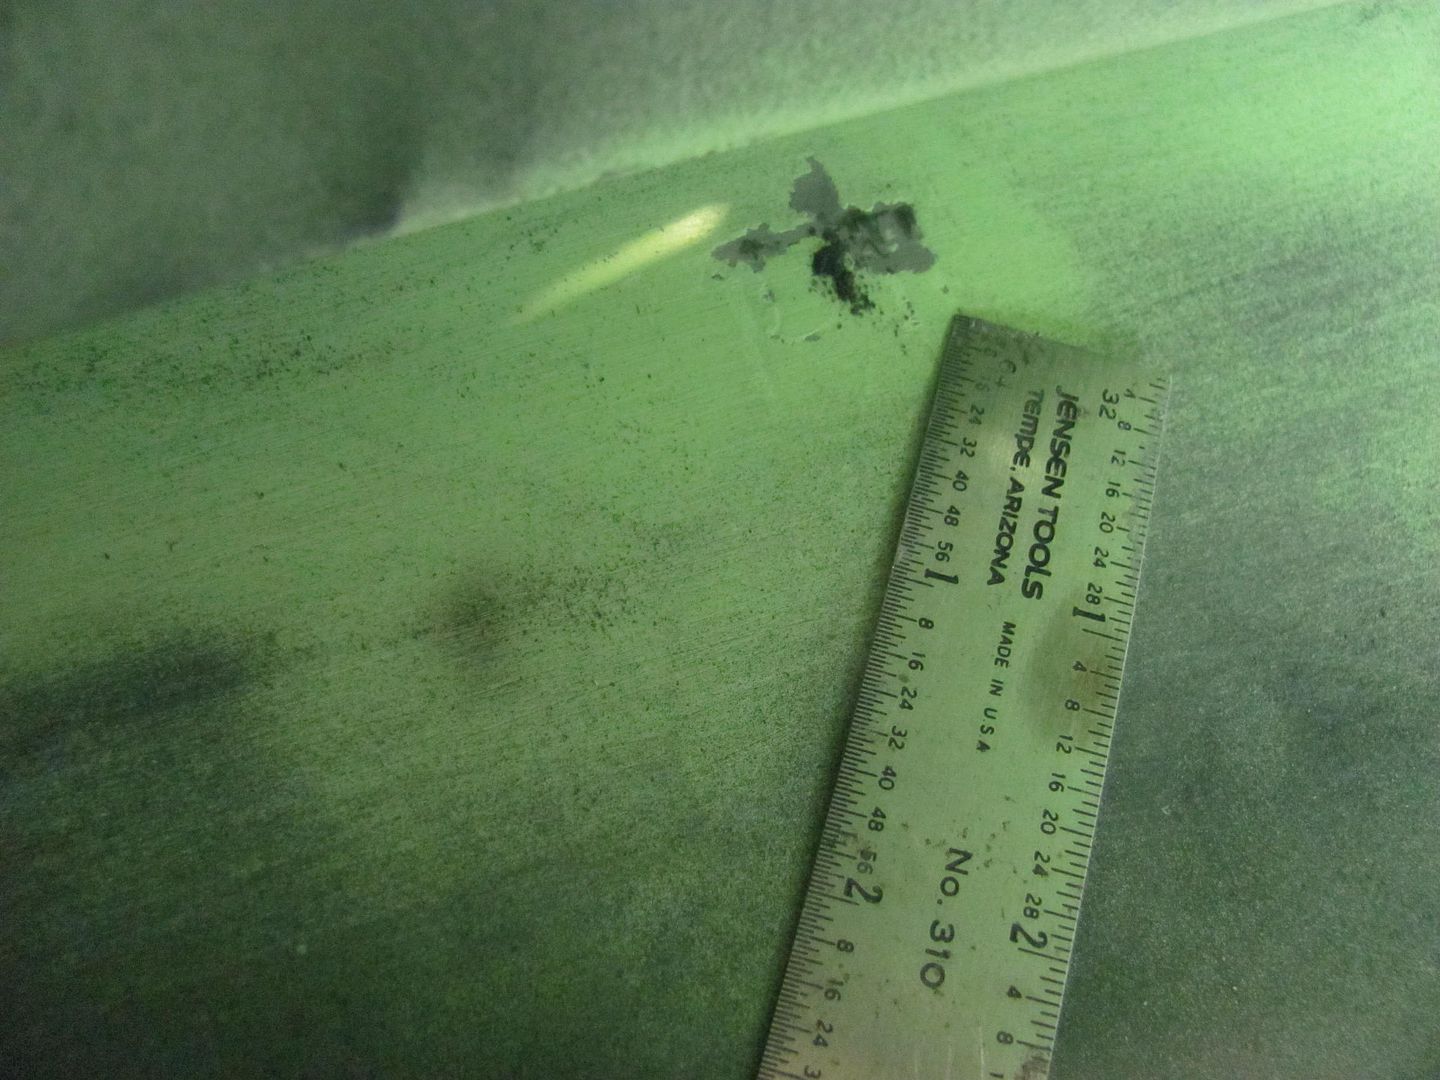 As soon as I saw this I realized there had only been one thing inside that could have caused it... the painting fixture we made.. 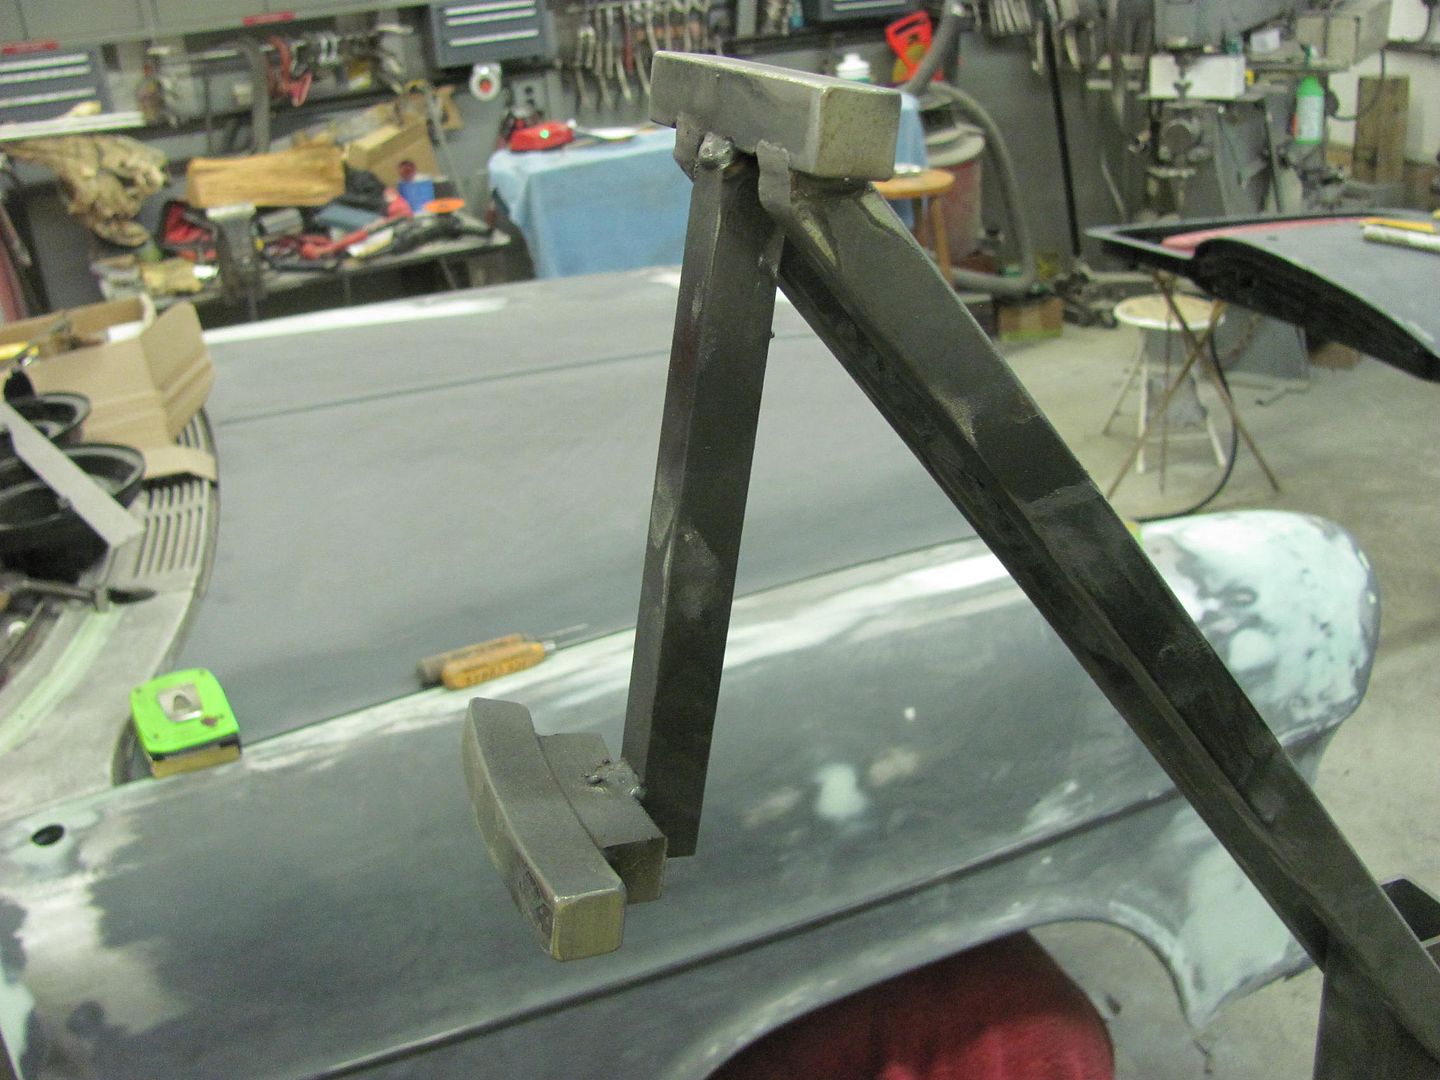 This was made to hold the tail gate in correct alignment as on the car for painting. I had radiused the lower bar but failed to do so on the top one. A check of the skin with body sweeps shows that a #15 sweep is about correct, so it was used to verify some relief grinding on the top bar... 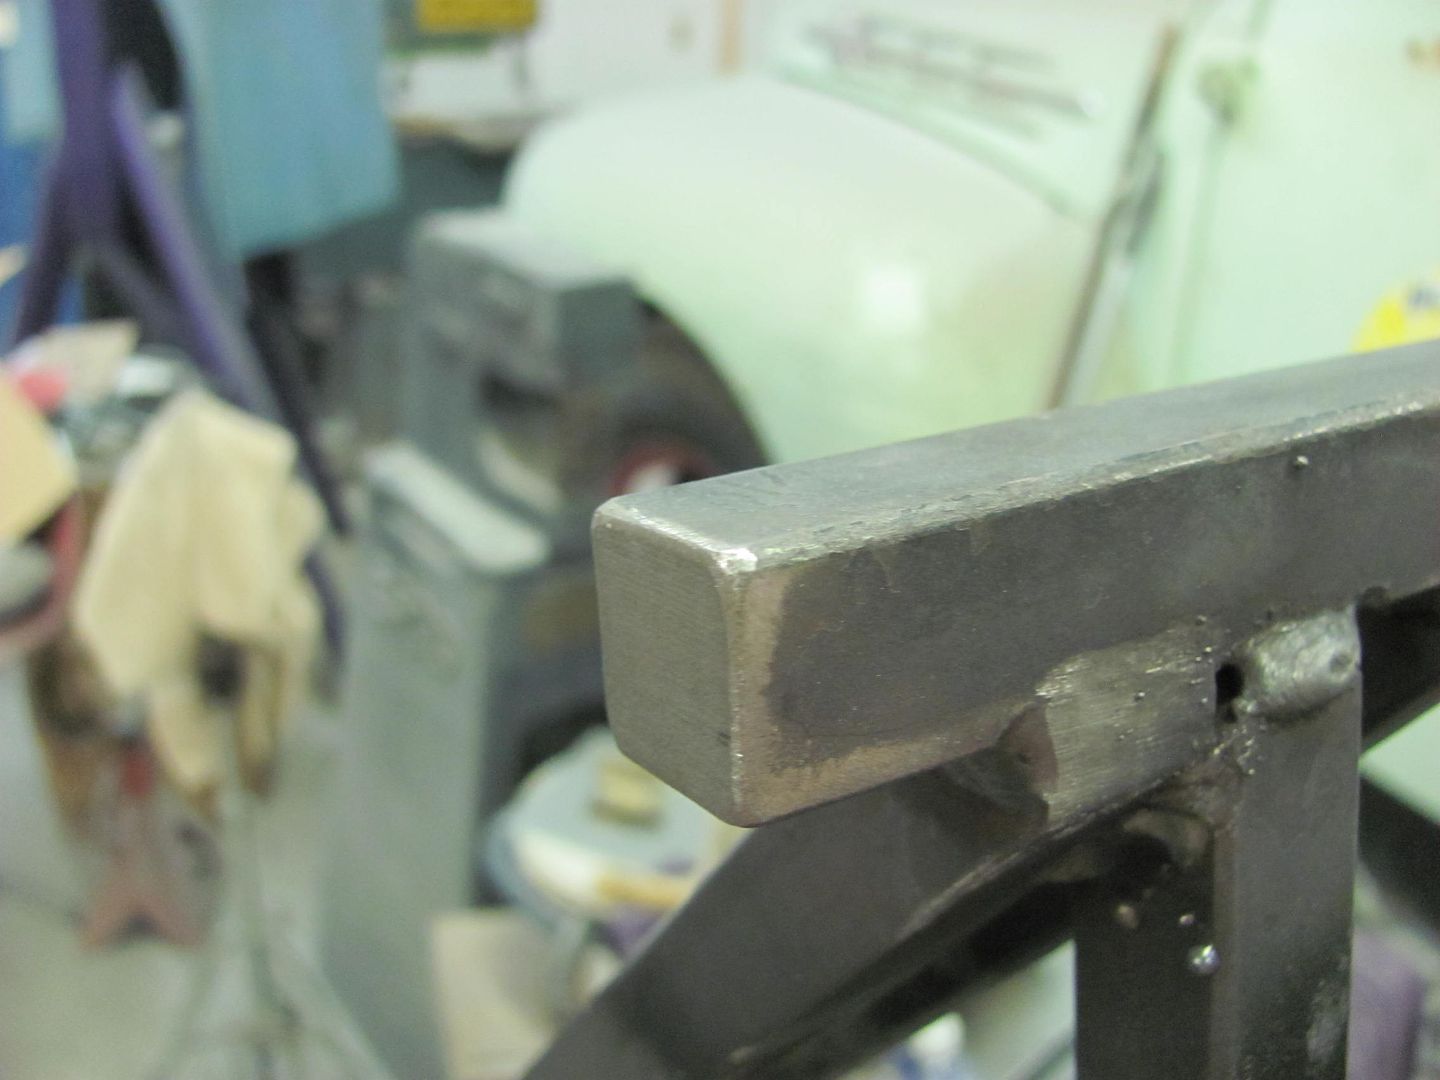 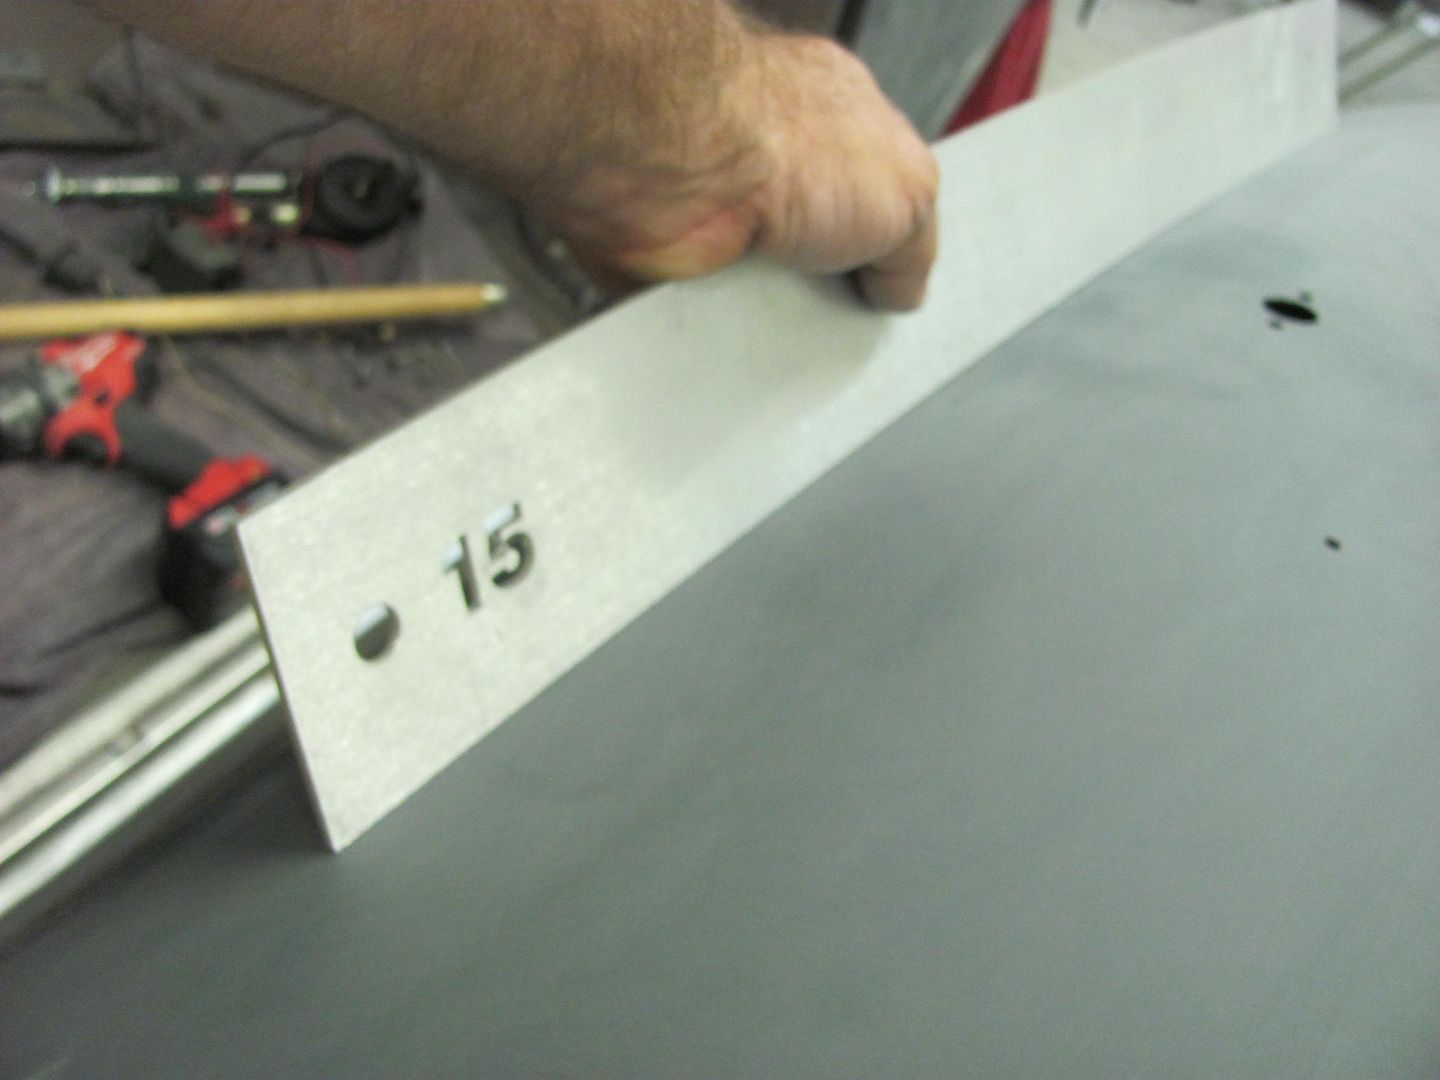  As added insurance, some truck cap gasket seal was added to further isolate the issue on both top and bottom bar....  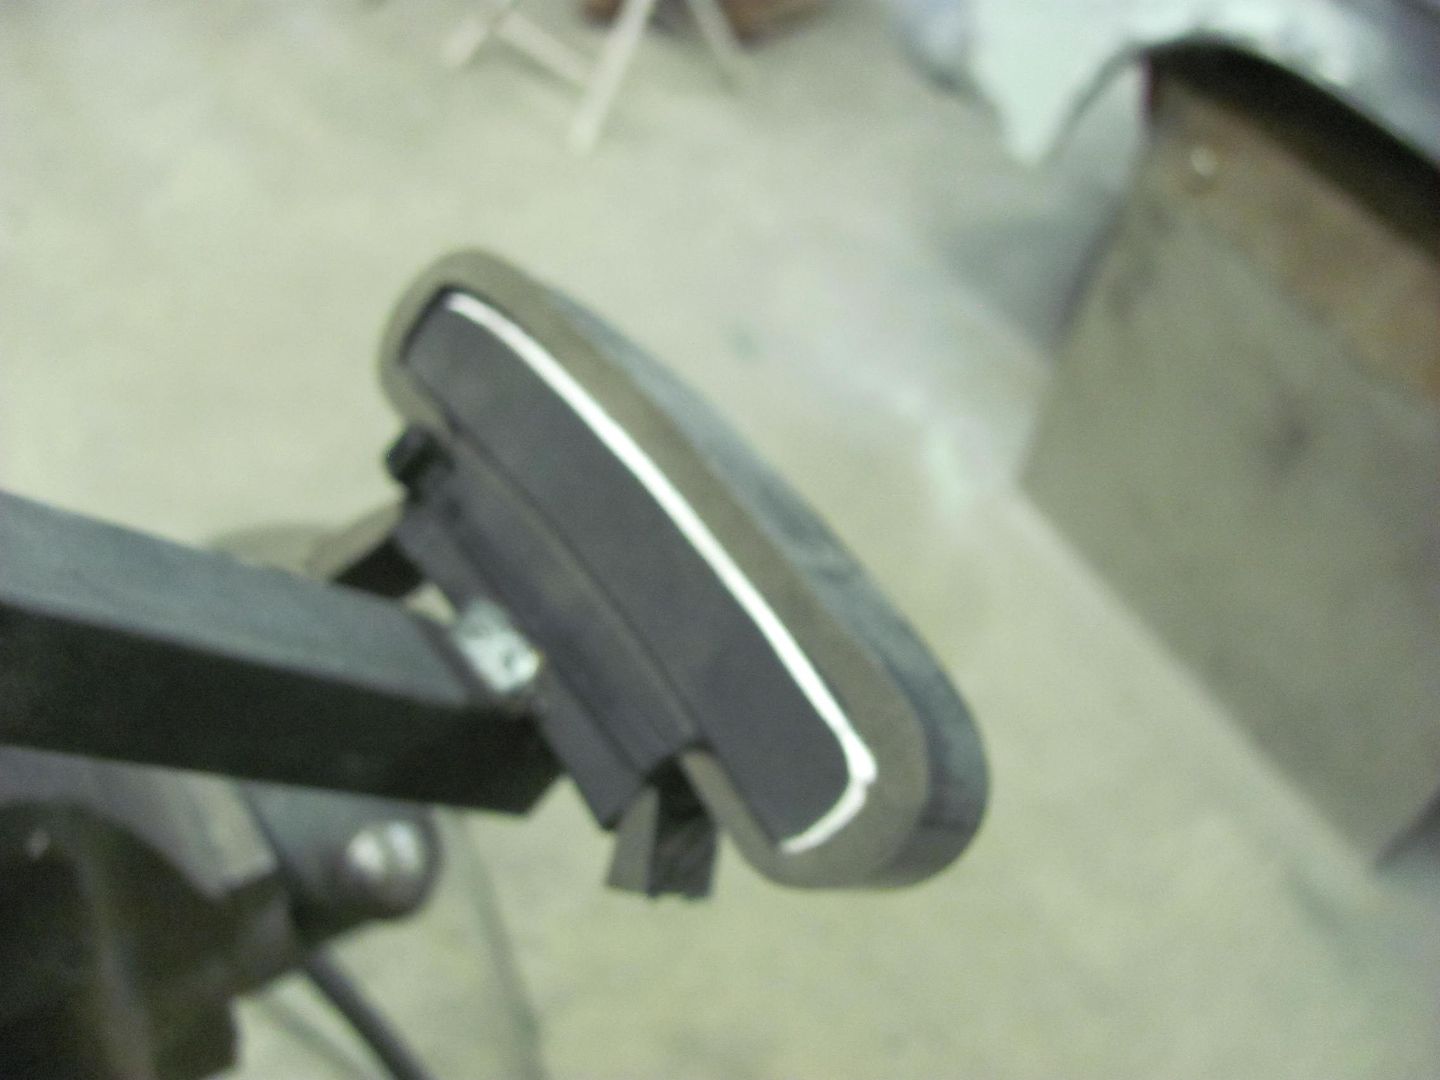 On a positive note, glad to find this issue in the primer stage...... But let's back up a second and look at this picture, it should have been my red flag. Where the second mark to the left in the picture was not as round, looking at it now does show a rather symmetrical device was causing this.. So please use my lesson in dumassery to prevent a similar occurrence. 
__________________
Robert |
|
|
|
|
07-19-2015, 05:20 PM
|
#483 |
|
Registered User
Join Date: Jan 2013
Location: Leonardtown, MD
Posts: 1,636
|
Re: 55 Wagon Progress
Another job in the shop, here's one of the downfalls of the insulation blankets the factory used above exhaust systems...
  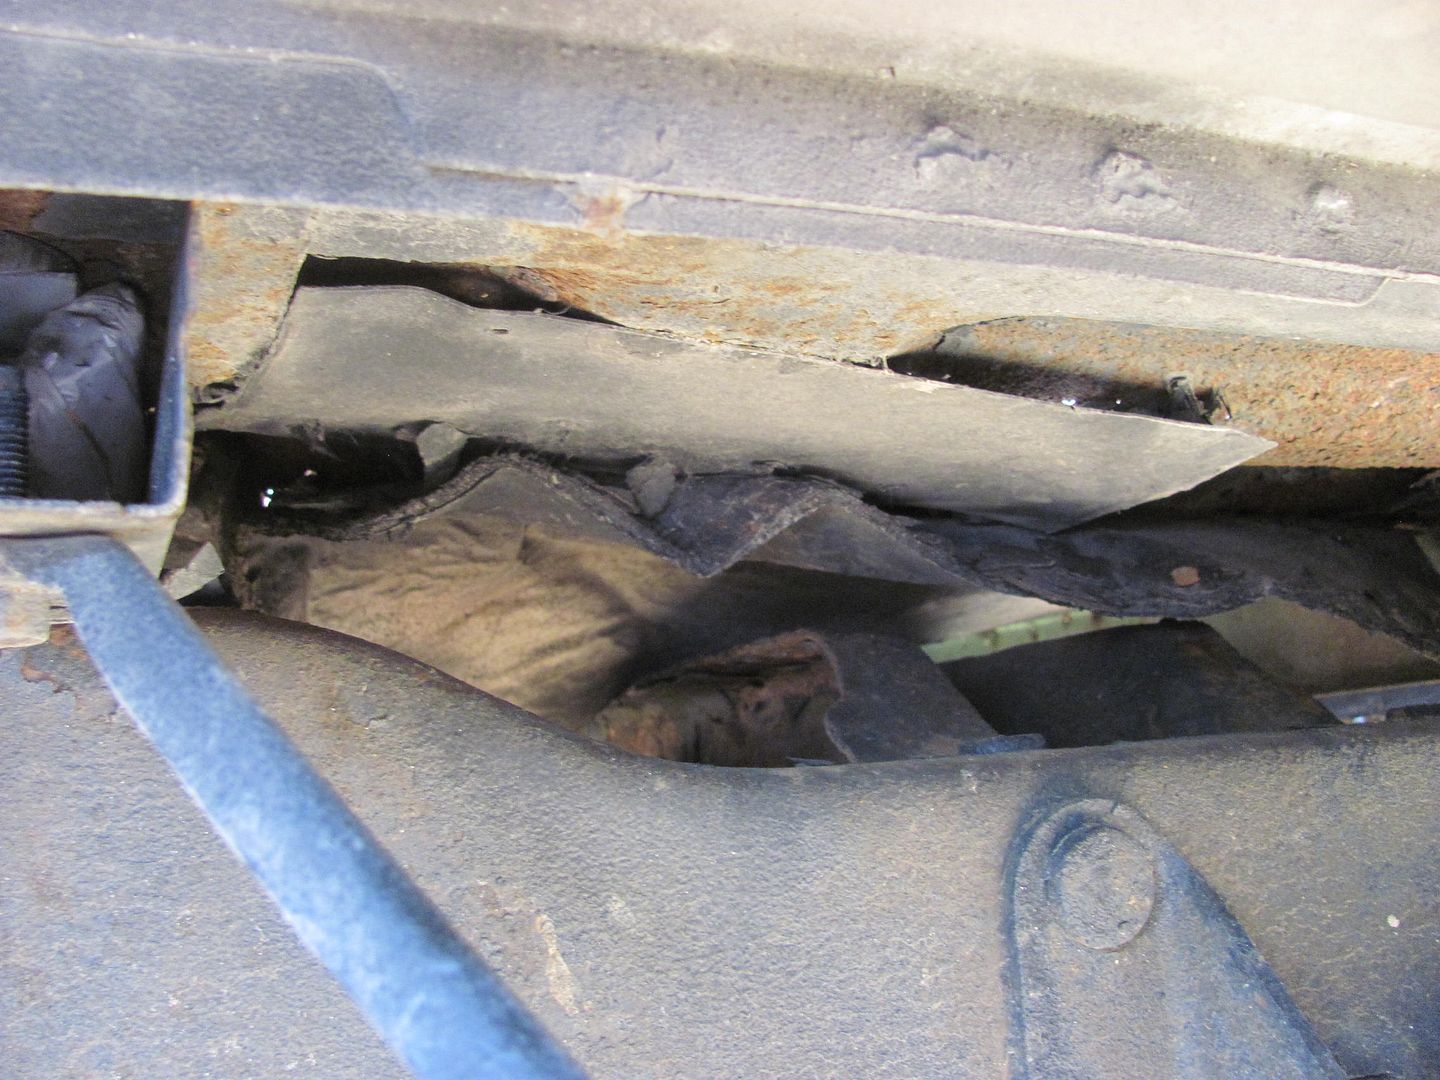 Nice moisture traps and rust generators. All the used beds found either had similar rust issues or the lower quarters rounded under where the salvage yards had removed them and set them down on the ground. So we went back to the local dealer and ordered the bed floor and new cross members. We have a couple cross members that still haven't arrived, but we can get started in prepping for epoxy primer on the parts we do have.. Scuffing up the floor using 400 grit. Here's the new apprentice for this job, my niece Katie. (her truck) She's not afraid of work and needed little instruction. 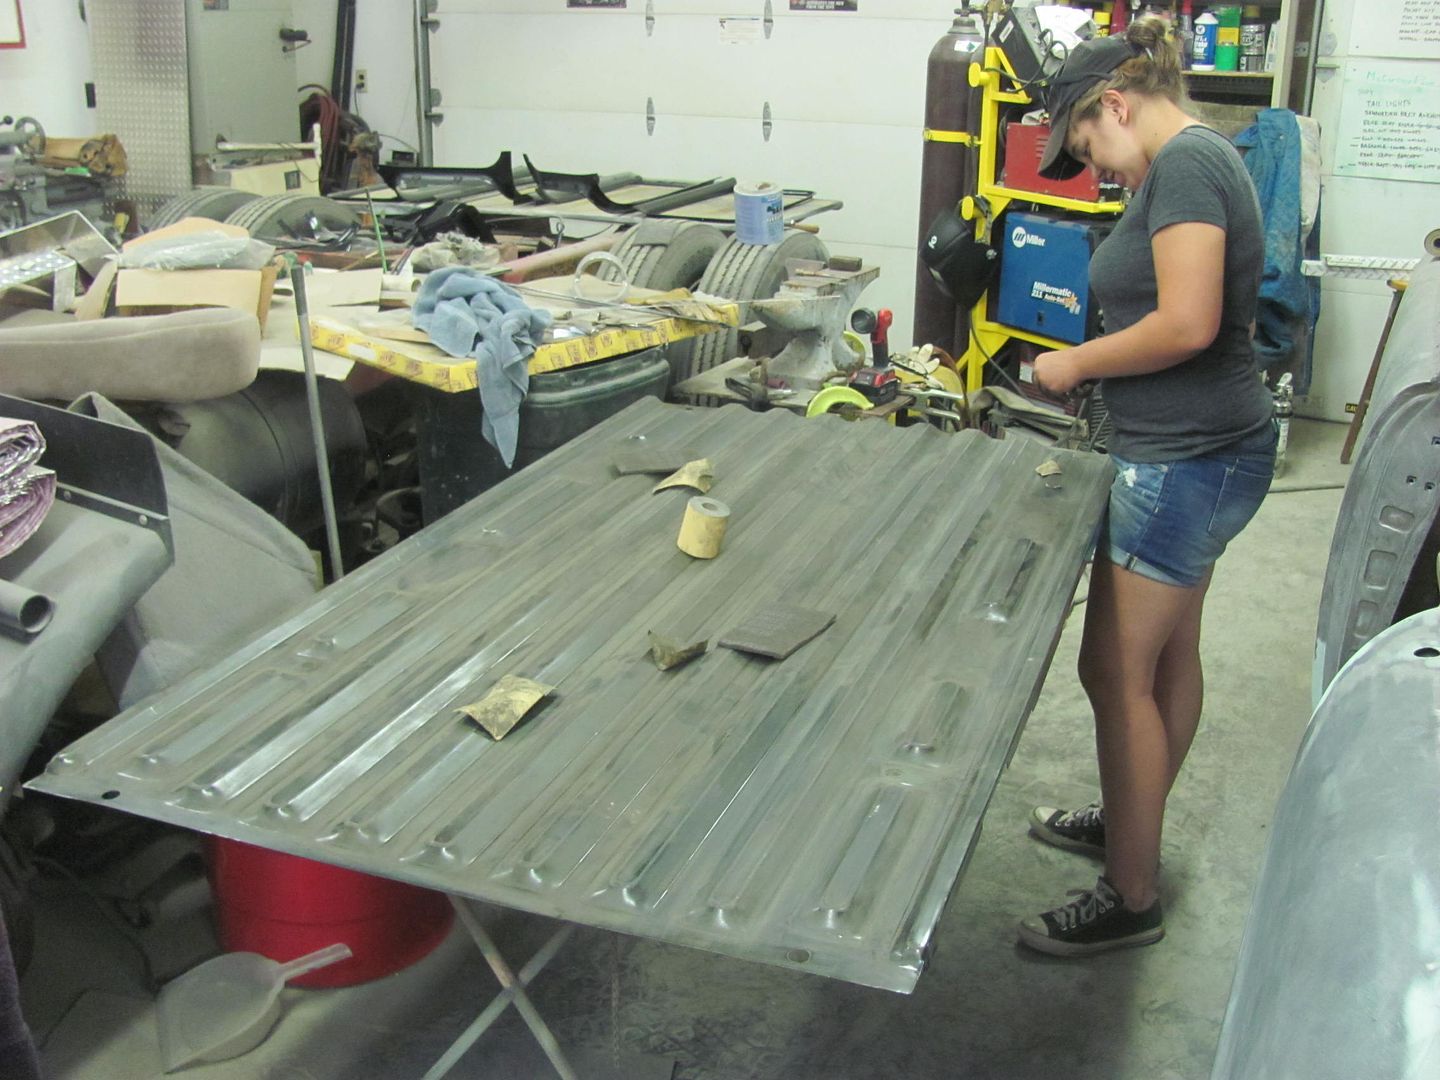 All scuffed, now to wait on the cross members to come in.. 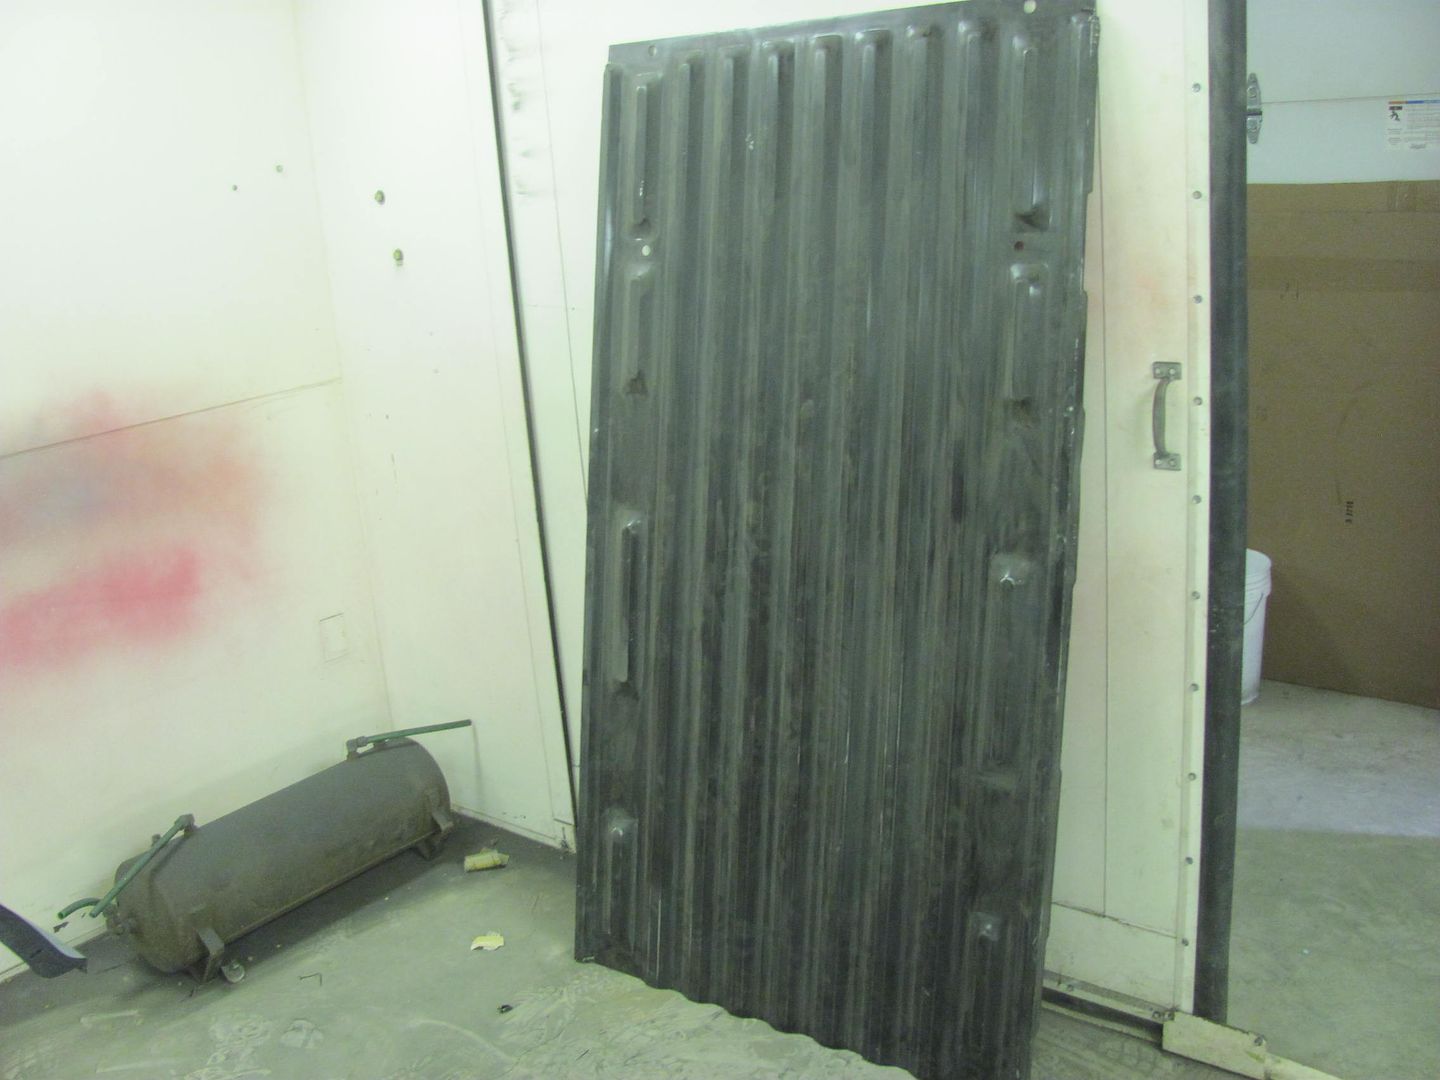 Meanwhile Kyle and I have continued blocking body parts for another dose of epoxy... 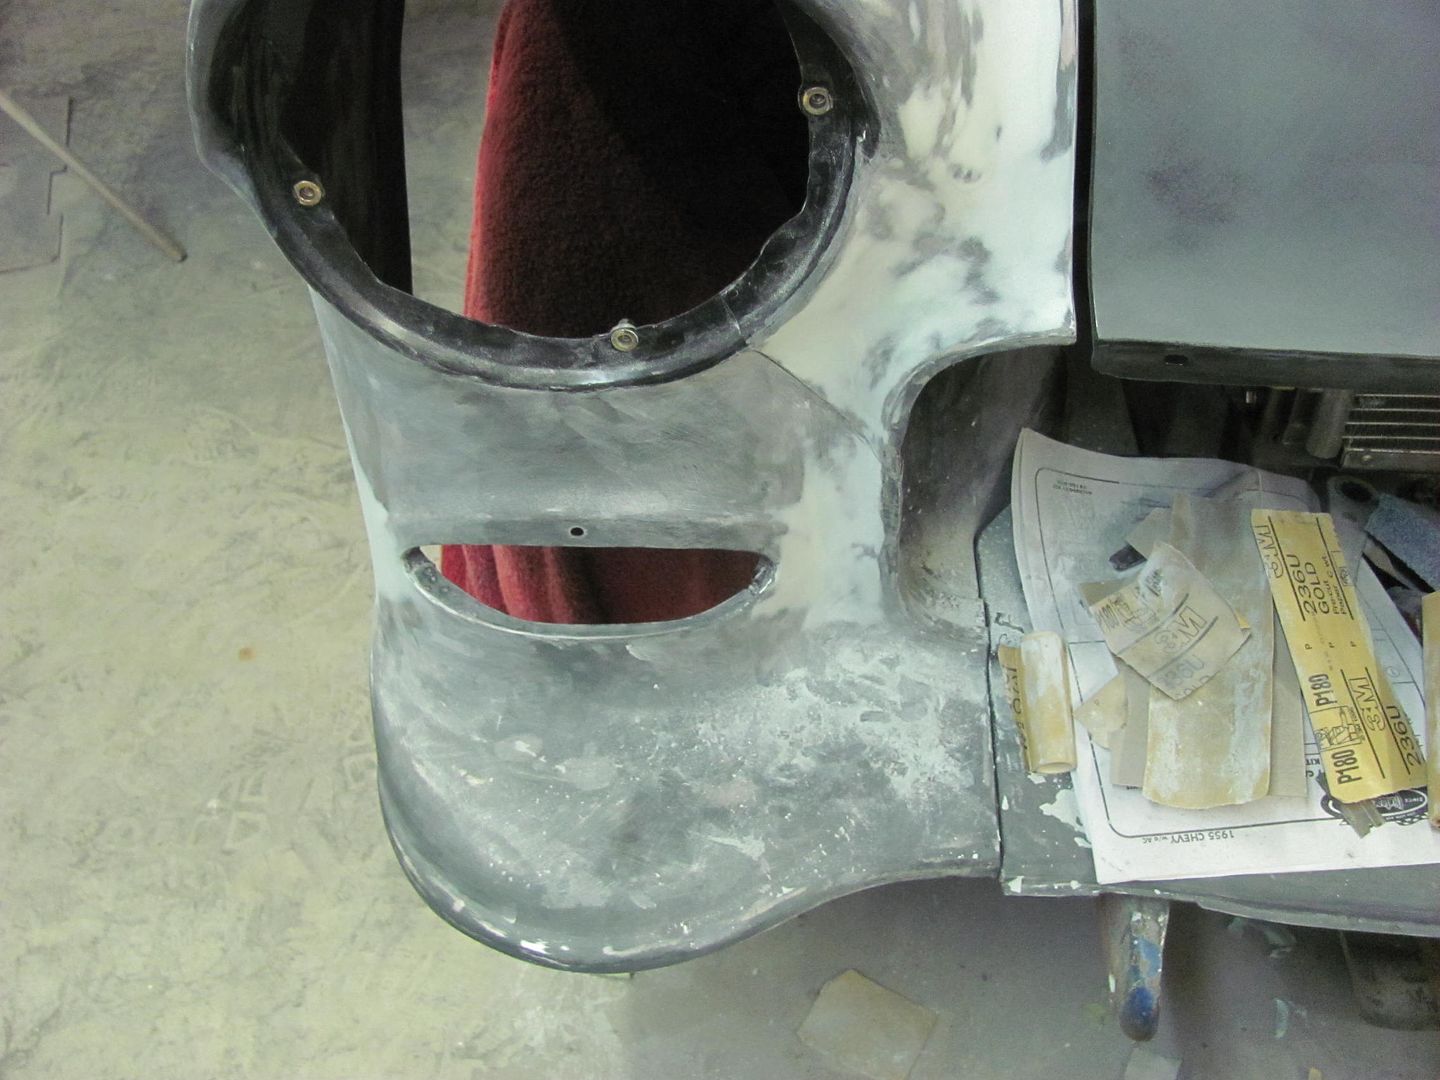 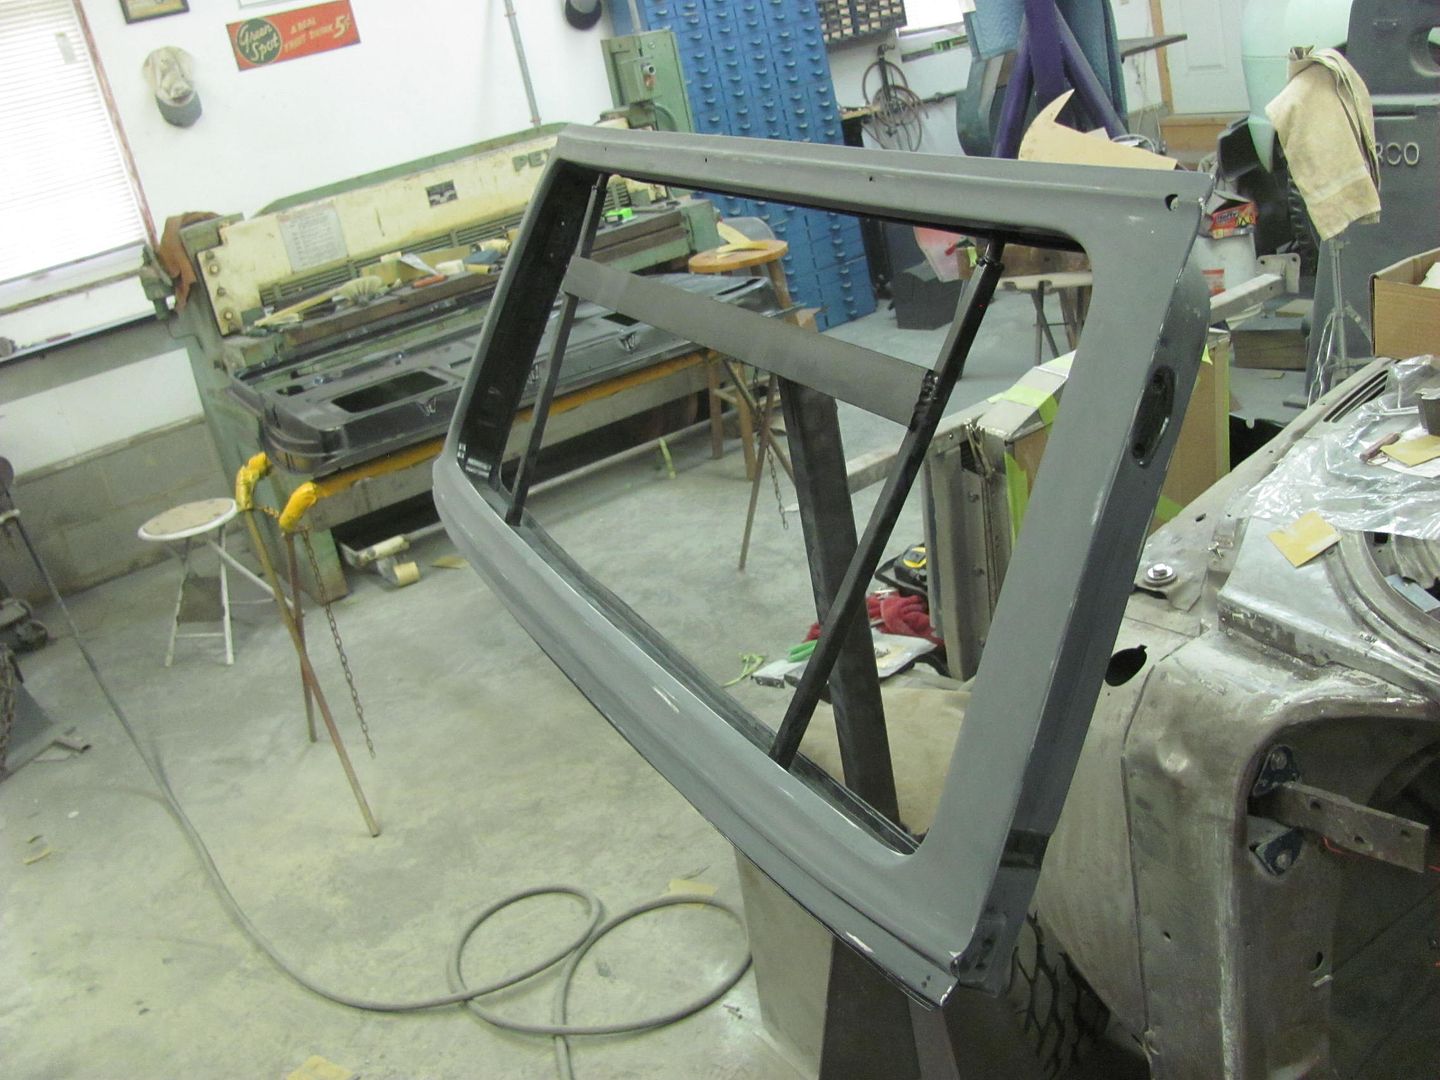 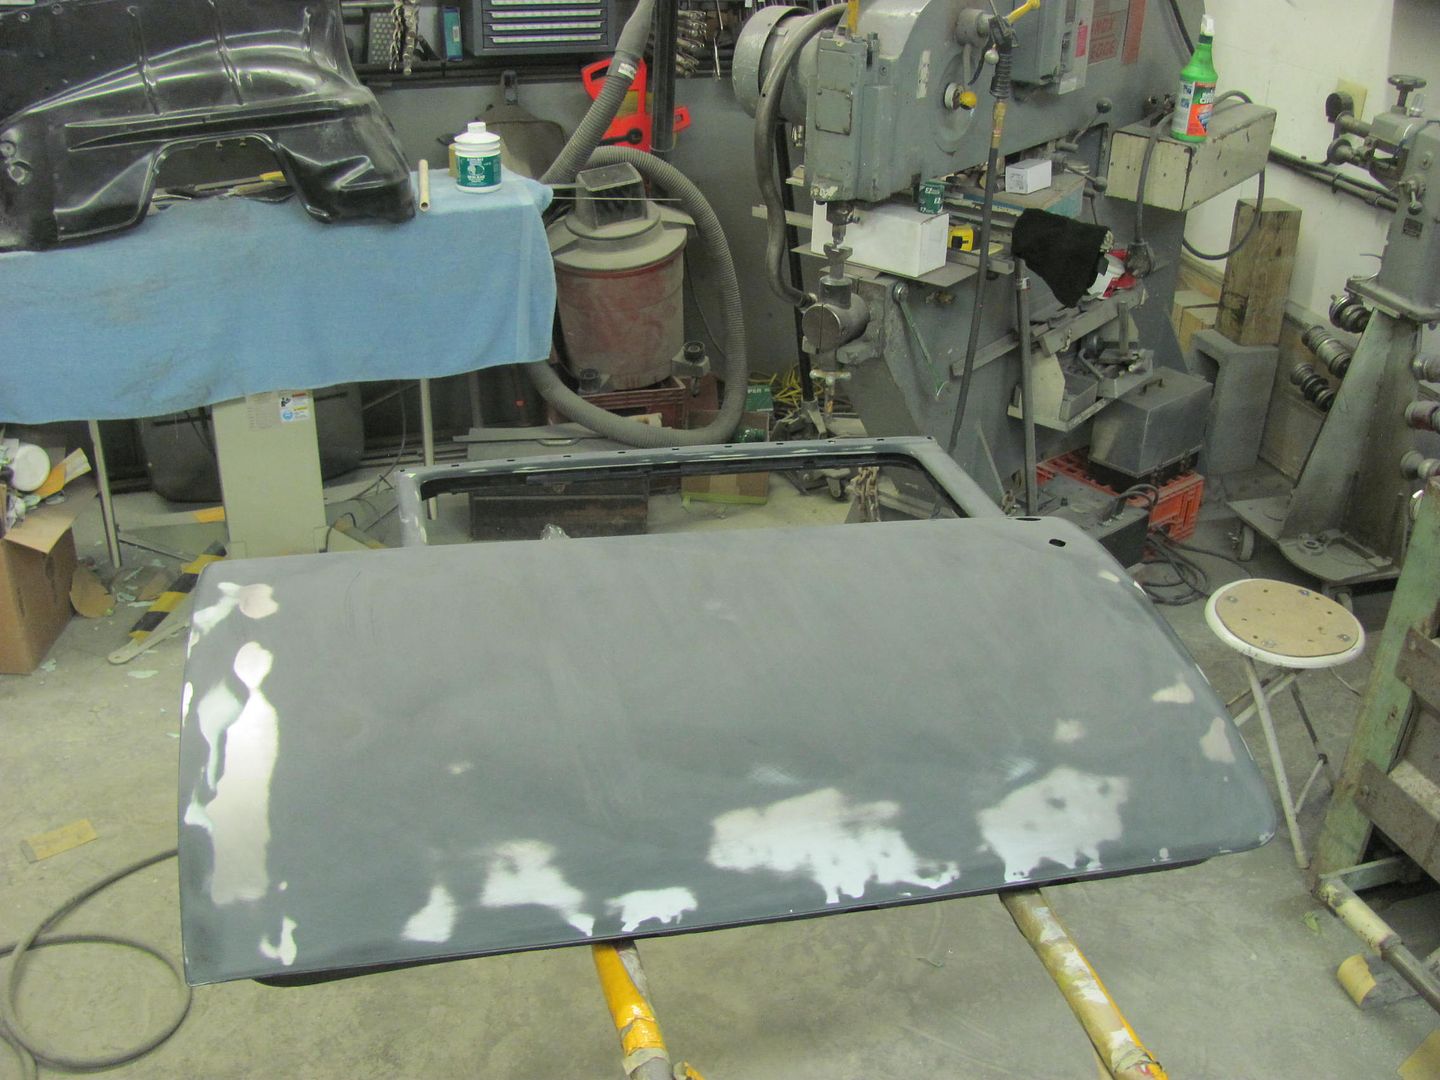 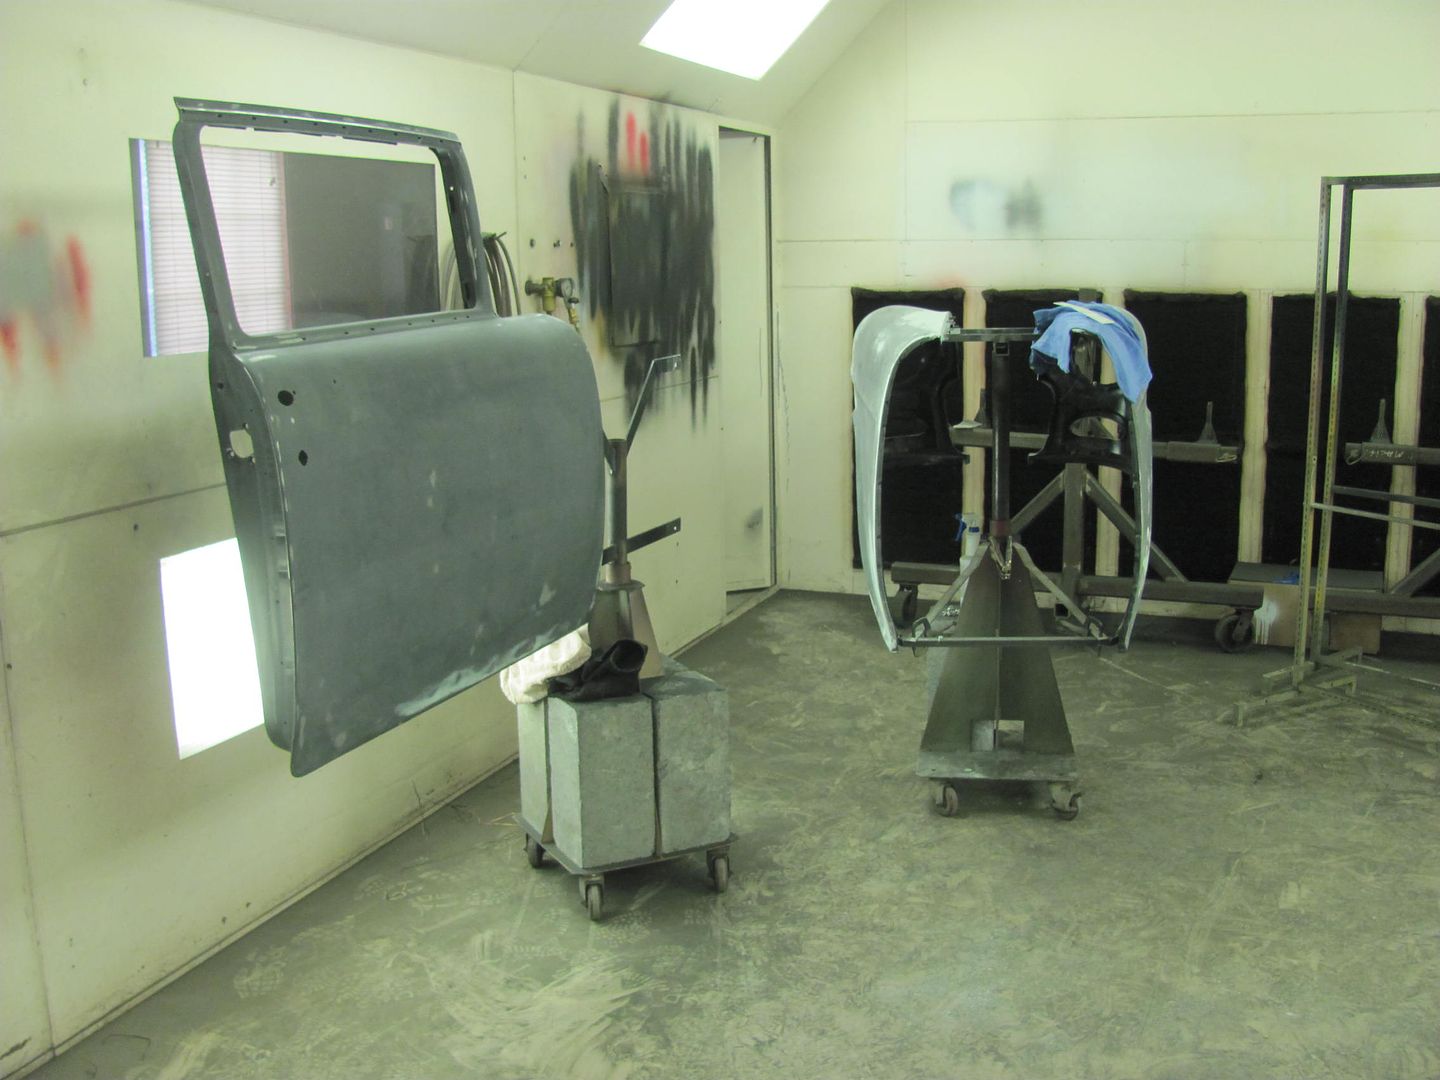
__________________
Robert |
|
|
|
|
07-19-2015, 09:25 PM
|
#484 |
|
Registered User
Join Date: May 2007
Location: Deale Md
Posts: 4,663
|
Re: 55 Wagon Progress
So if your name starts with a K you can hang out in the shop with Robert and have fun while learning.
__________________
James 63 GMC V6 4speed carryall 65 chevy swb bbw V8 auto 68 K20 327/4 speed, buddy buckets 2002 GMC CC Dually Duramax 64 GMC lwb 3/4 V6 4speed SOLD 66 GMC swb bbw buddy buckets SOLD IG duallyjams The only thing that stays the same is constant change! |
|
|
|
|
07-24-2015, 09:32 PM
|
#485 |
|
Registered User
Join Date: Oct 2007
Location: Spanaway
Posts: 8,451
|
Re: 55 Wagon Progress
Been a while but just caught up. Nice work aws always!
__________________
Mike. Swamp Rat build thread : http://67-72chevytrucks.com/vboard/s...d.php?t=595019 72 3/4T 4X4 4" BDS Lift 33" BFG's |
|
|
|
|
07-25-2015, 01:51 PM
|
#486 |
|
Senior Member
Join Date: Jul 2012
Location: Oblong, Illinois
Posts: 7,017
|
Re: 55 Wagon Progress
Tons of great work, cool ideas and useful tools. Thanks again for continuing to share.
|
|
|
|
|
07-26-2015, 11:40 PM
|
#487 | |
|
Registered User
Join Date: Jan 2013
Location: Leonardtown, MD
Posts: 1,636
|
Re: 55 Wagon Progress
Quote:
Thanks for the comments guys! Got some more SPI Epoxy sprayed, here's the parts for Katie's truck that she prepped... 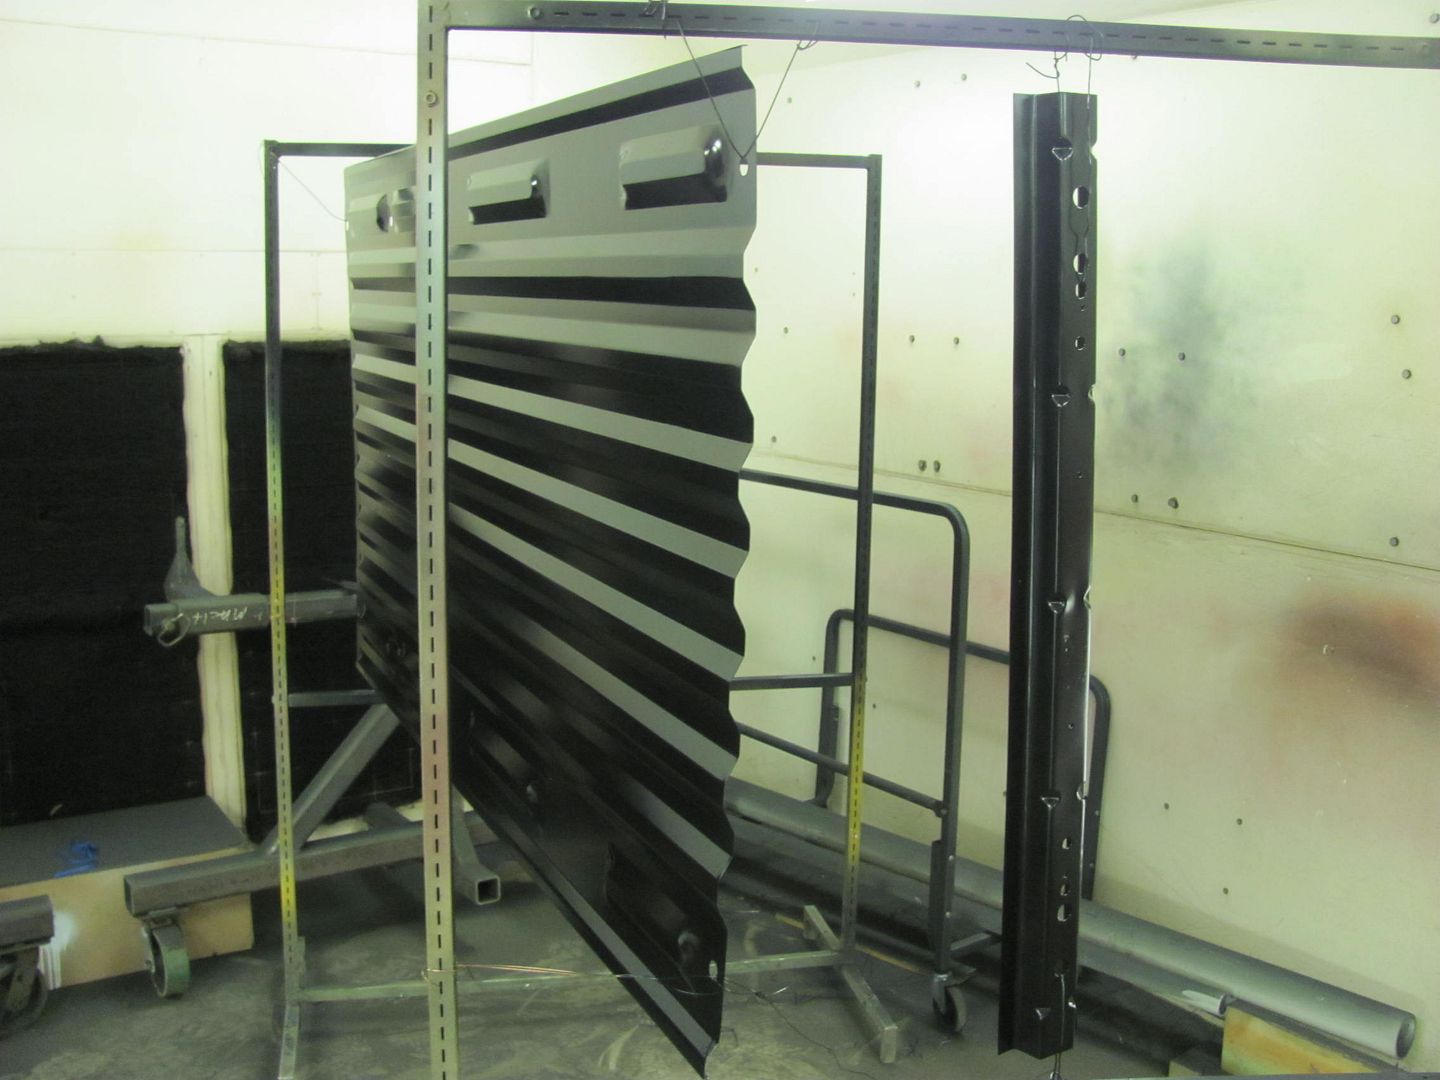 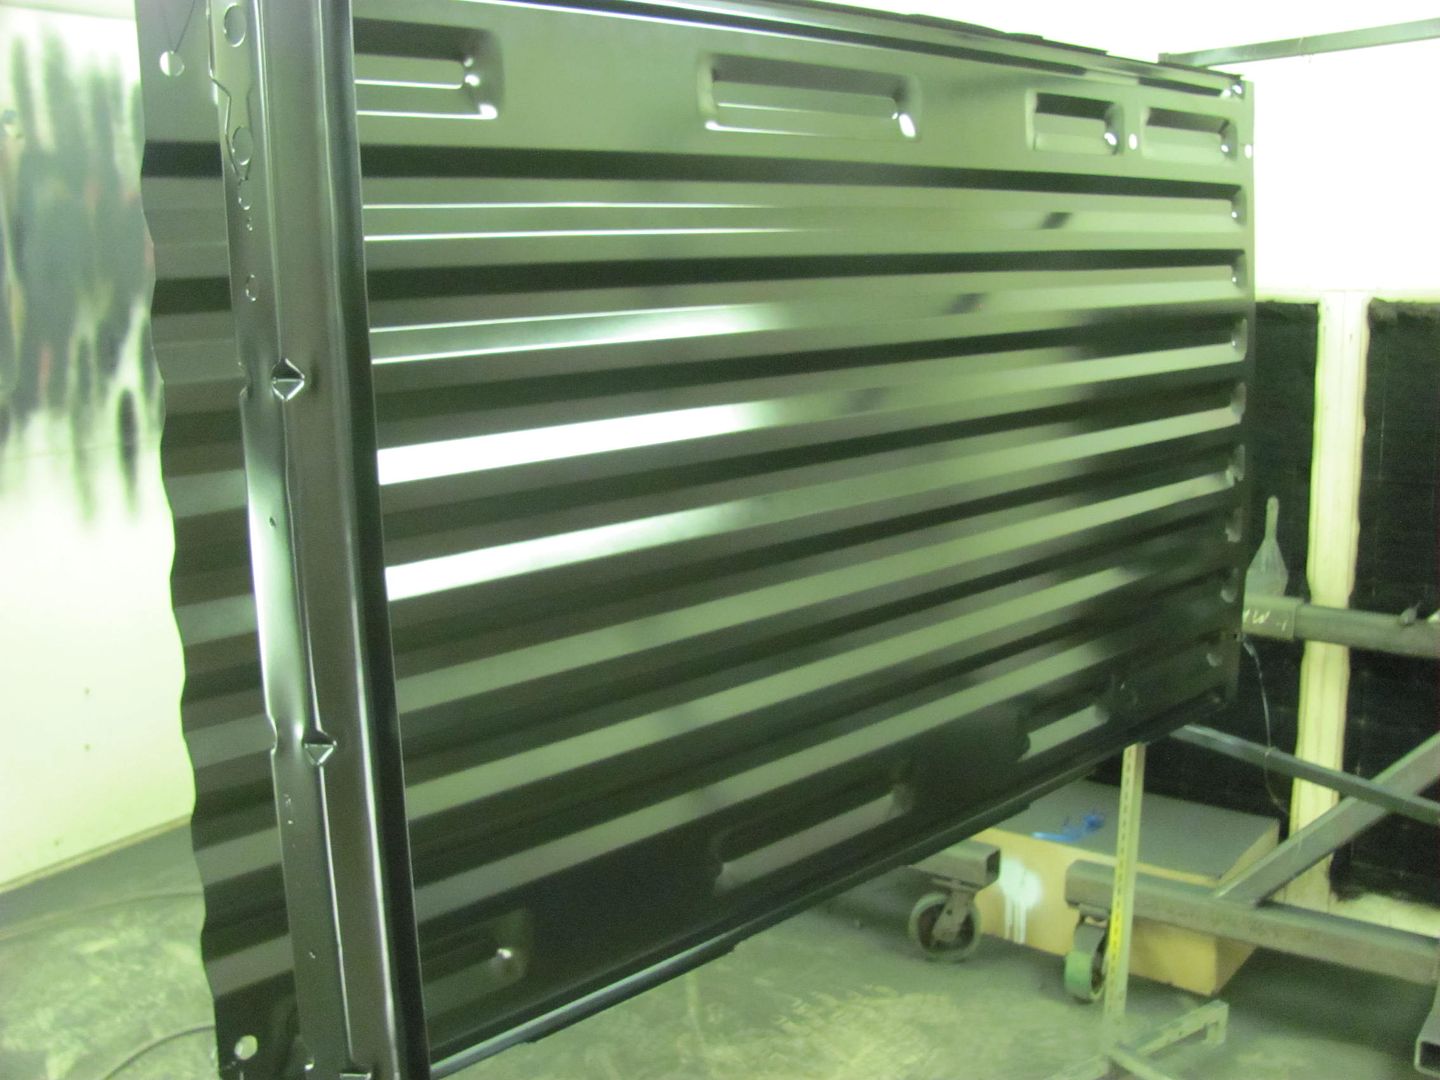 ....and some more on the wagon parts.... 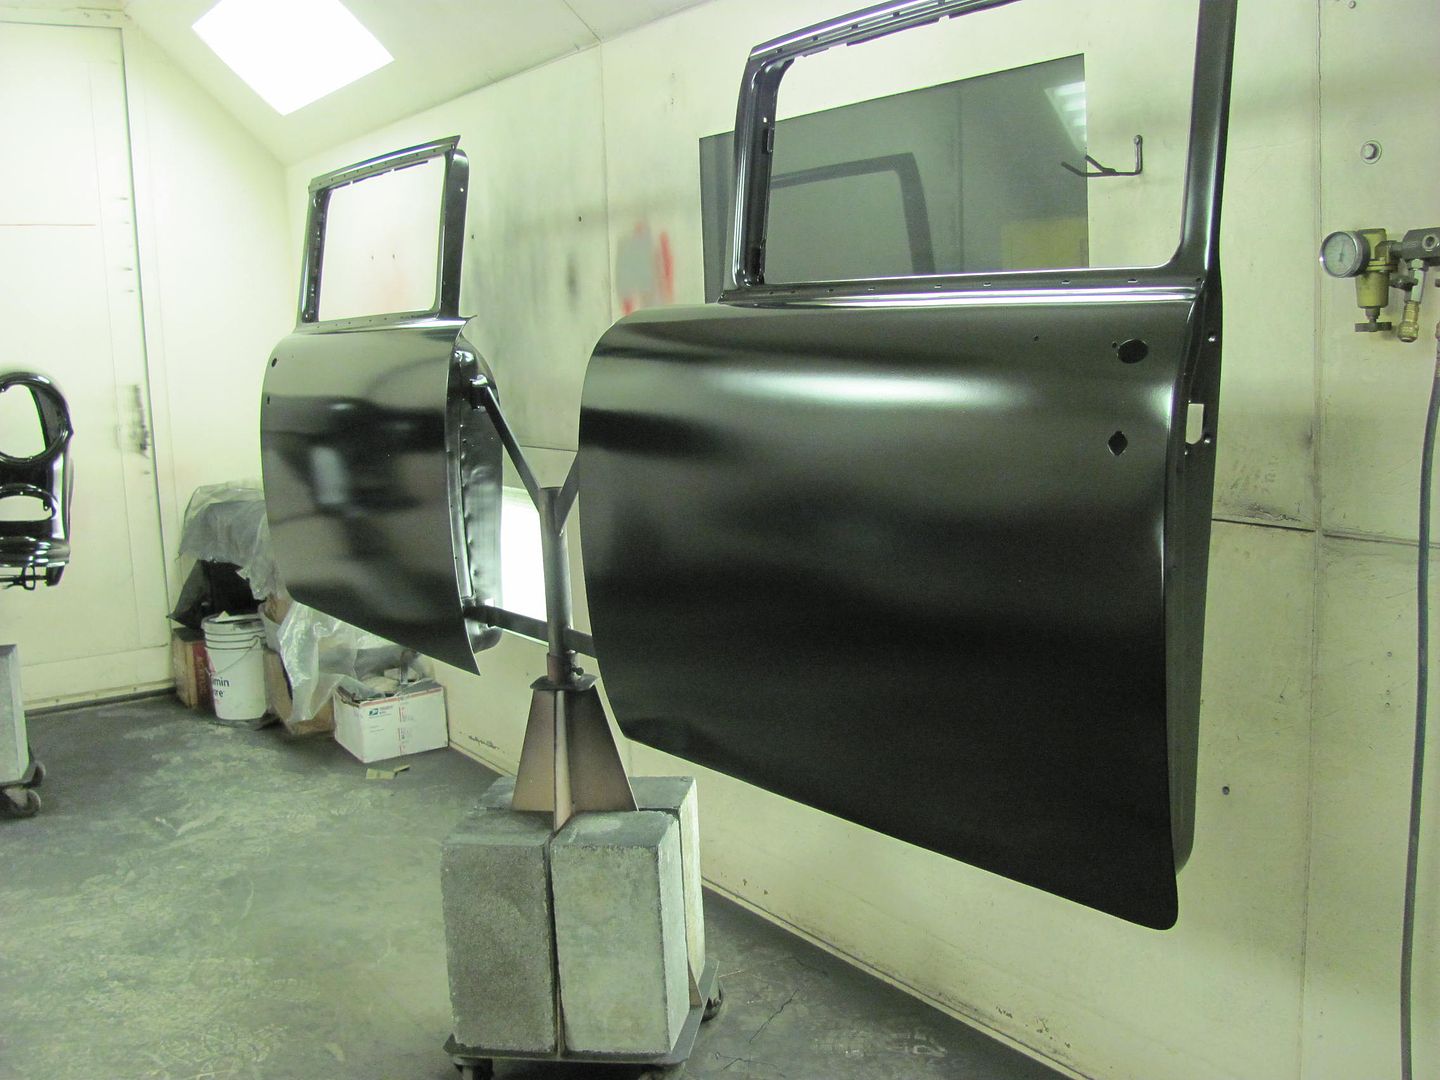 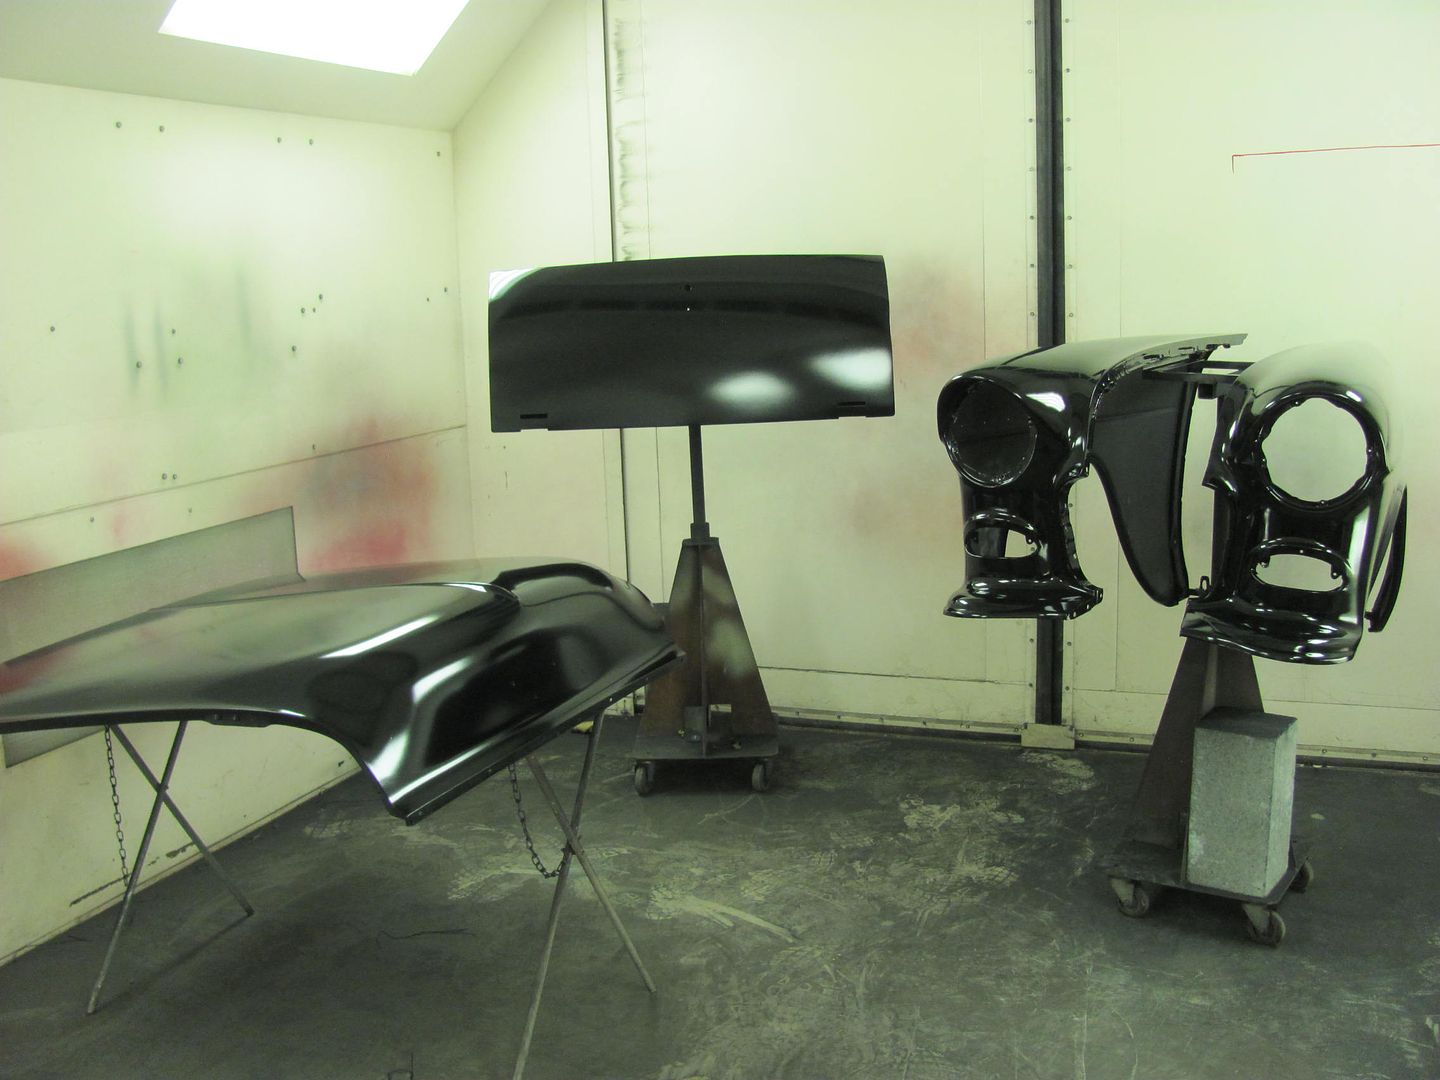 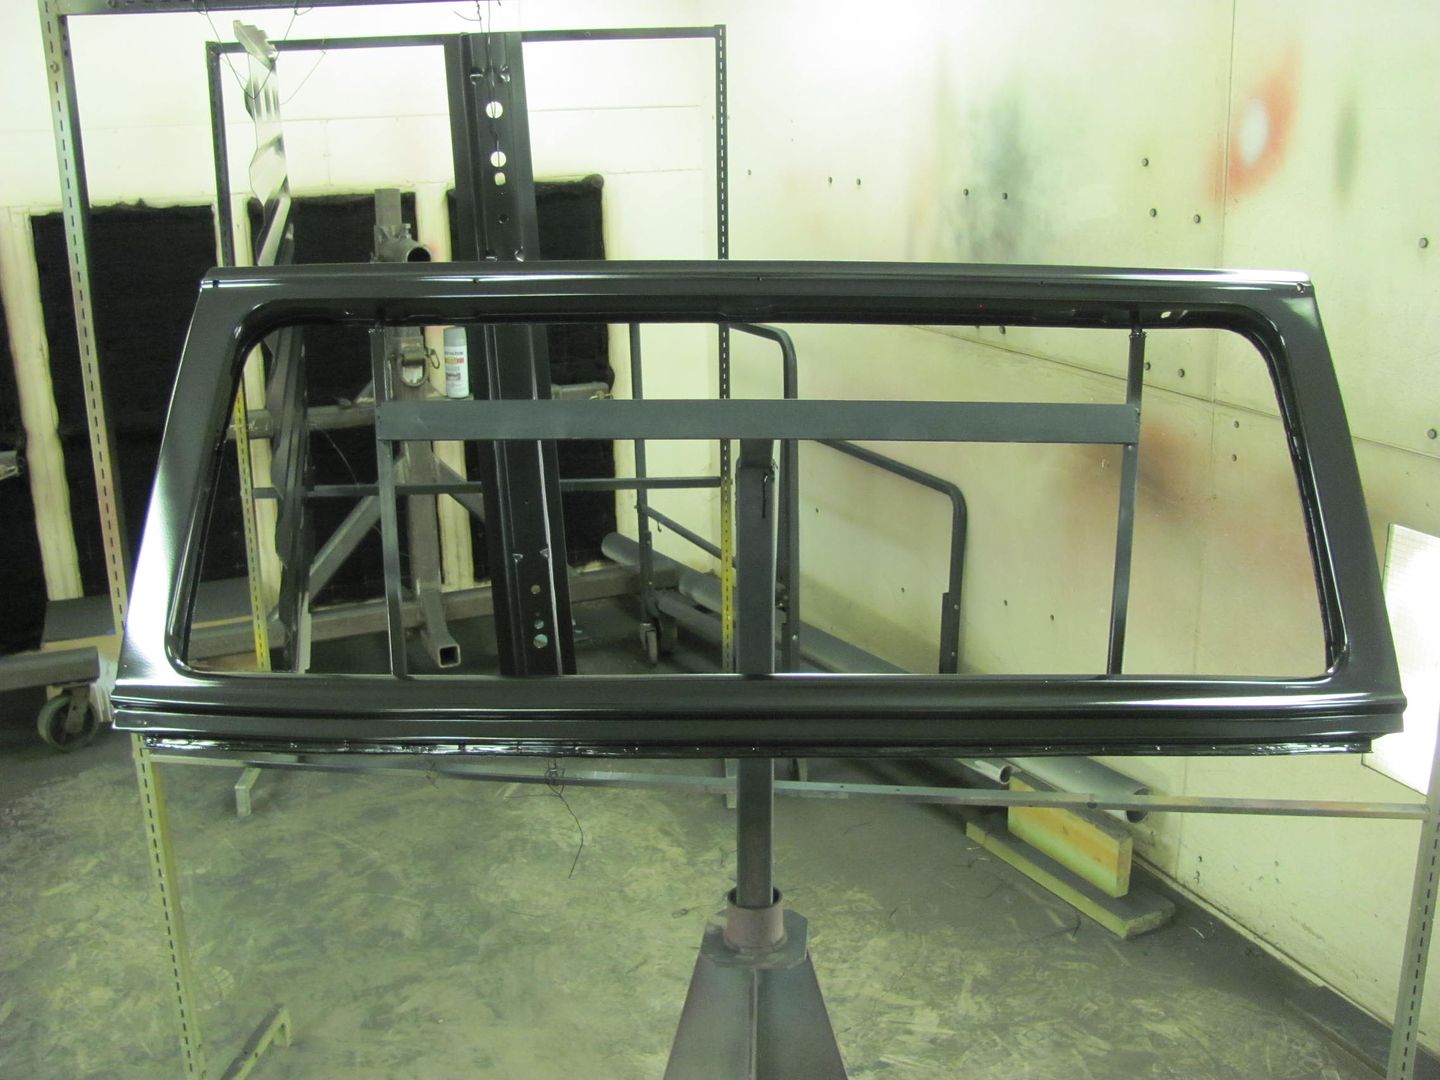  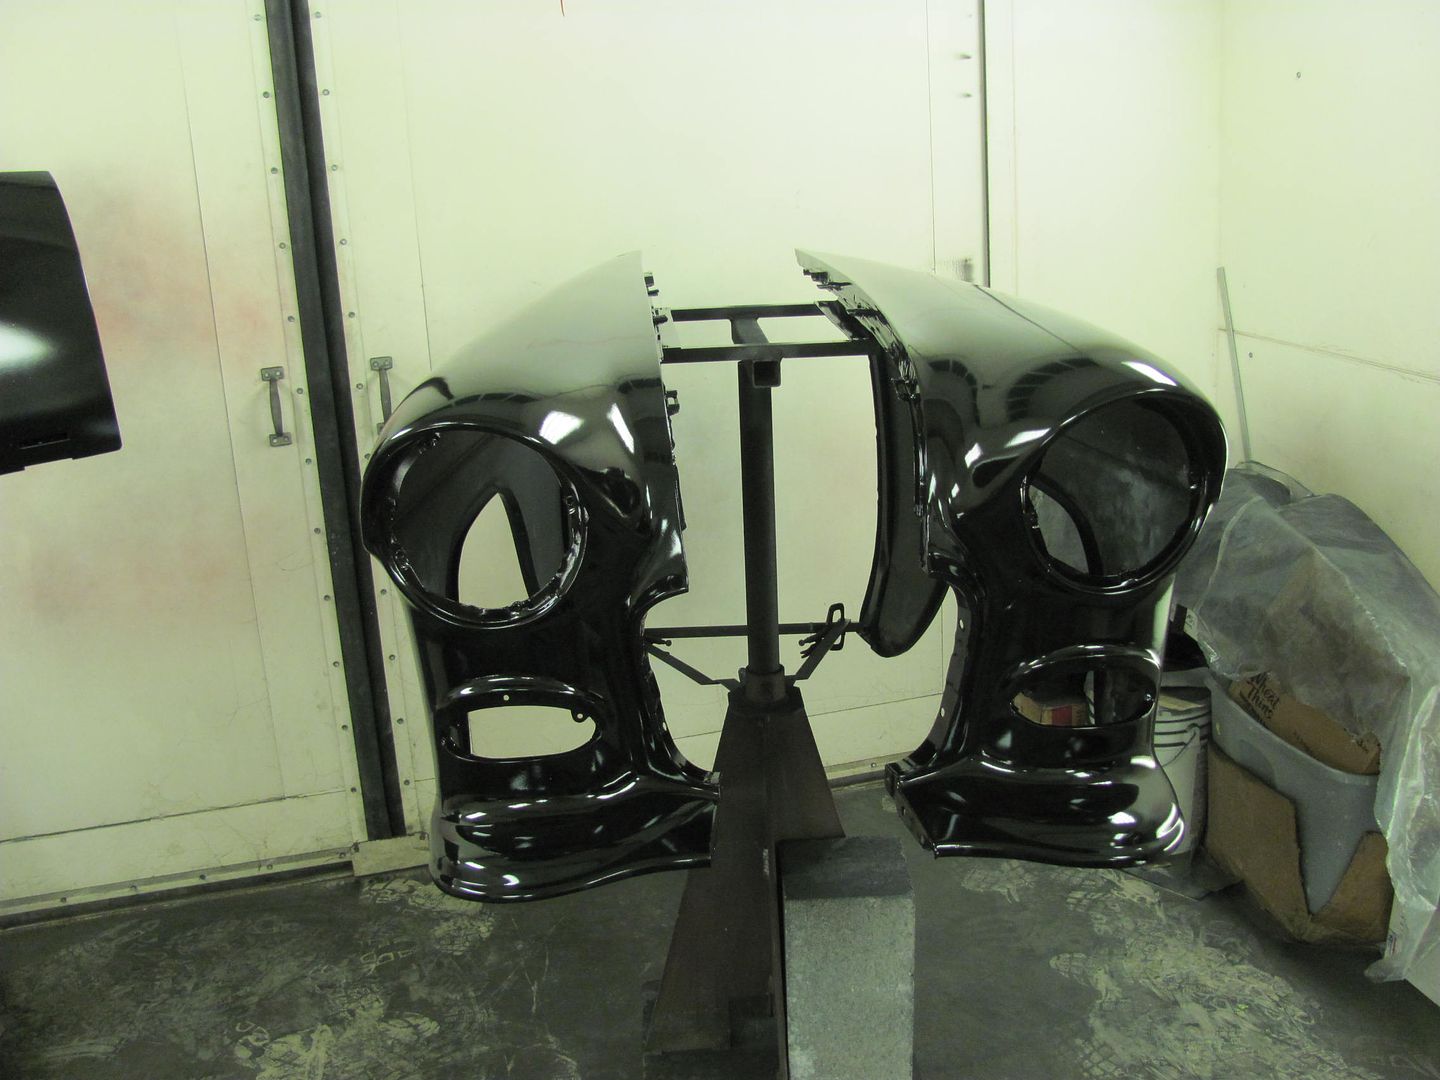
__________________
Robert |
|
|
|
|
|
07-27-2015, 08:56 AM
|
#488 |
|
Senior Member
Join Date: Mar 2011
Location: West Plains, Missouri
Posts: 7,555
|
Re: 55 Wagon Progress
Parts look good...Jim
__________________
my build thread: http://67-72chevytrucks.com/vboard/s...d.php?t=459839 Jimbo's long bed step build:http://67-72chevytrucks.com/vboard/s...t=464626<br /> |
|
|
|
|
08-04-2015, 10:40 PM
|
#489 |
|
Registered User
Join Date: Jan 2013
Location: Leonardtown, MD
Posts: 1,636
|
Re: 55 Wagon Progress
Thanks Jim!
Tonight's post offers some blocking pointers. We had already done a couple sessions of priming/blocking the door across to the quarter and to the fender, all installed on the car. After this, more primer and put a perimeter of tape on the door skin. Now block separately, and the tape allows you to block the door and keep off the edge to prevent losing your match to the fender/quarter. 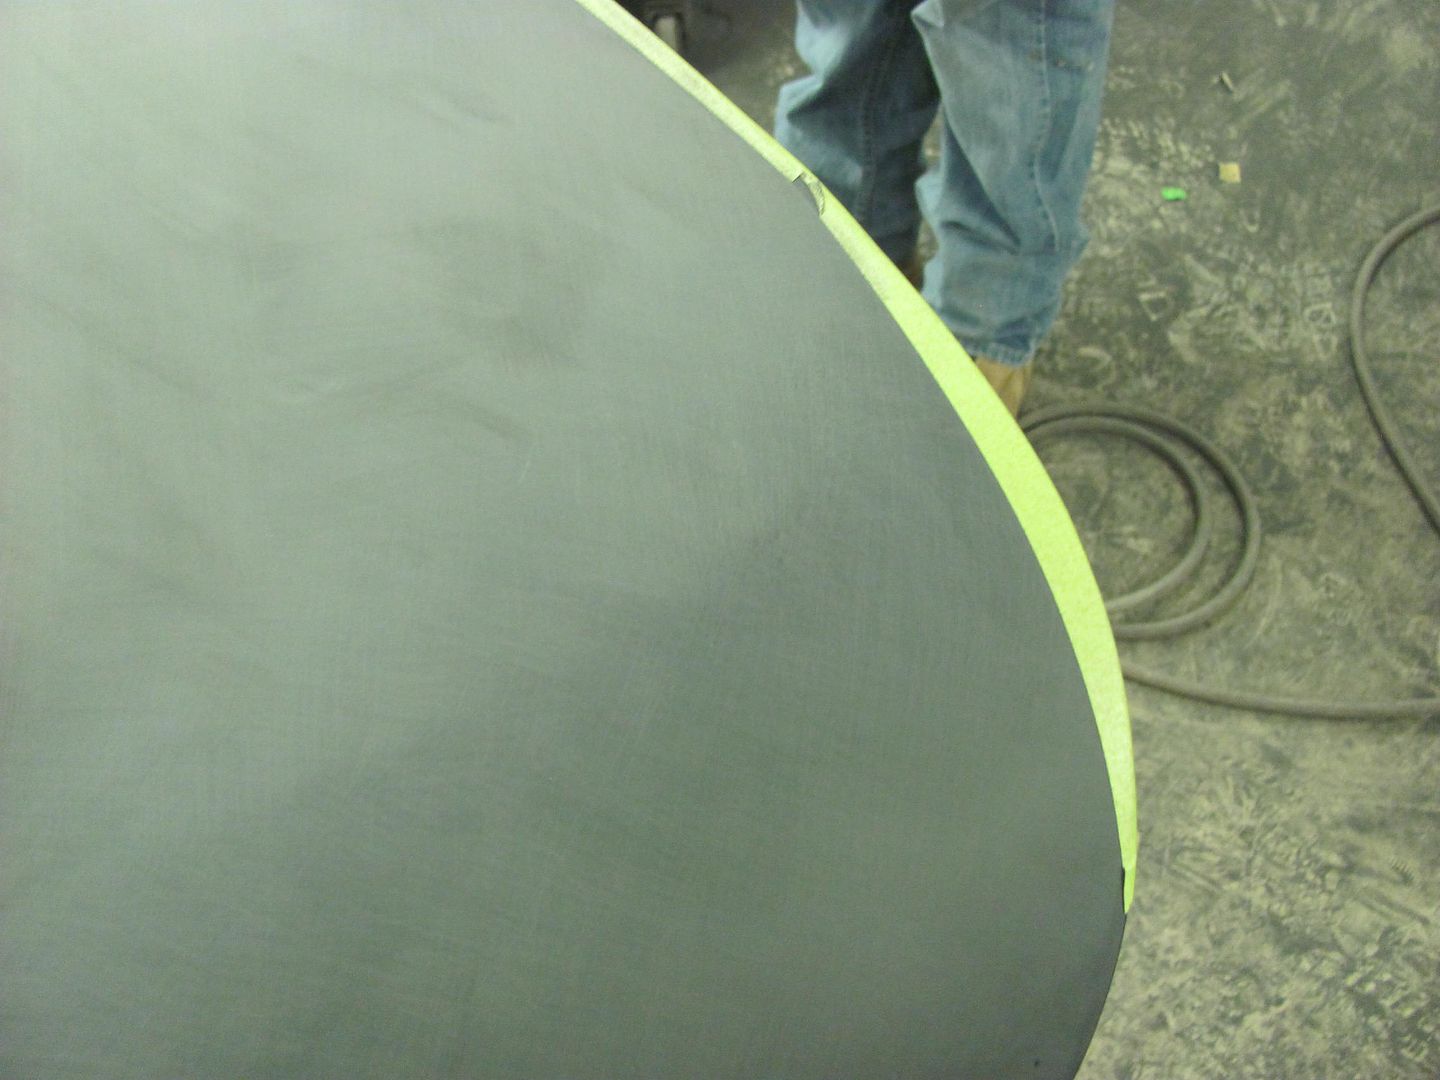 I don't stick with 45* angles, if you want to keep a long direction flat, you need the long block to better follow that direction. So change up to some sharper angles, about 30* off the long direction every now and then. Work one end to the other, consistent spacing, consistent angle, end to end. Then alternate to passes in the opposite direction. Once done, and the inner part is good and blocked, now remove the tape and GENTLY block to the edge, taking care to not pull down at the edge and round things back off again. Whatever hand is holding the block make sure it is minimal pressure and stays on the door skin. In other words, no pressure pulling down past the edge. 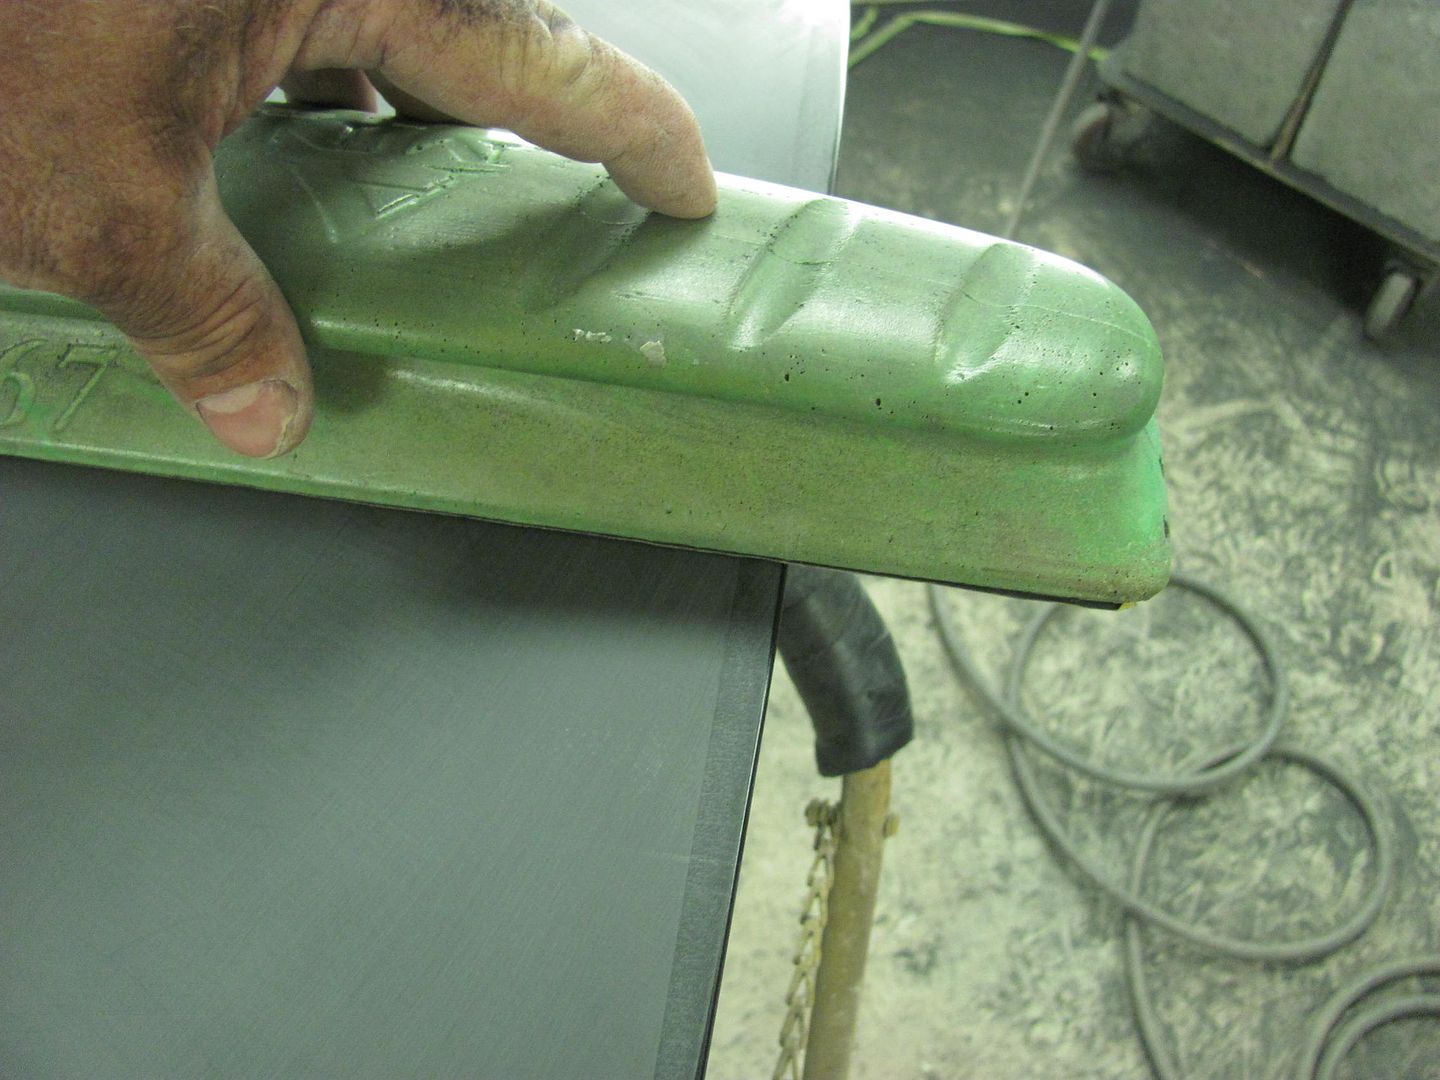 One other point, to keep the inner end of the sanding block from sanding out all your hard work in the center of the door, put a wrap of tape around the end of the sanding block that is towards the center of the door. This helps that end to glide across the center of the door without cutting primer there. 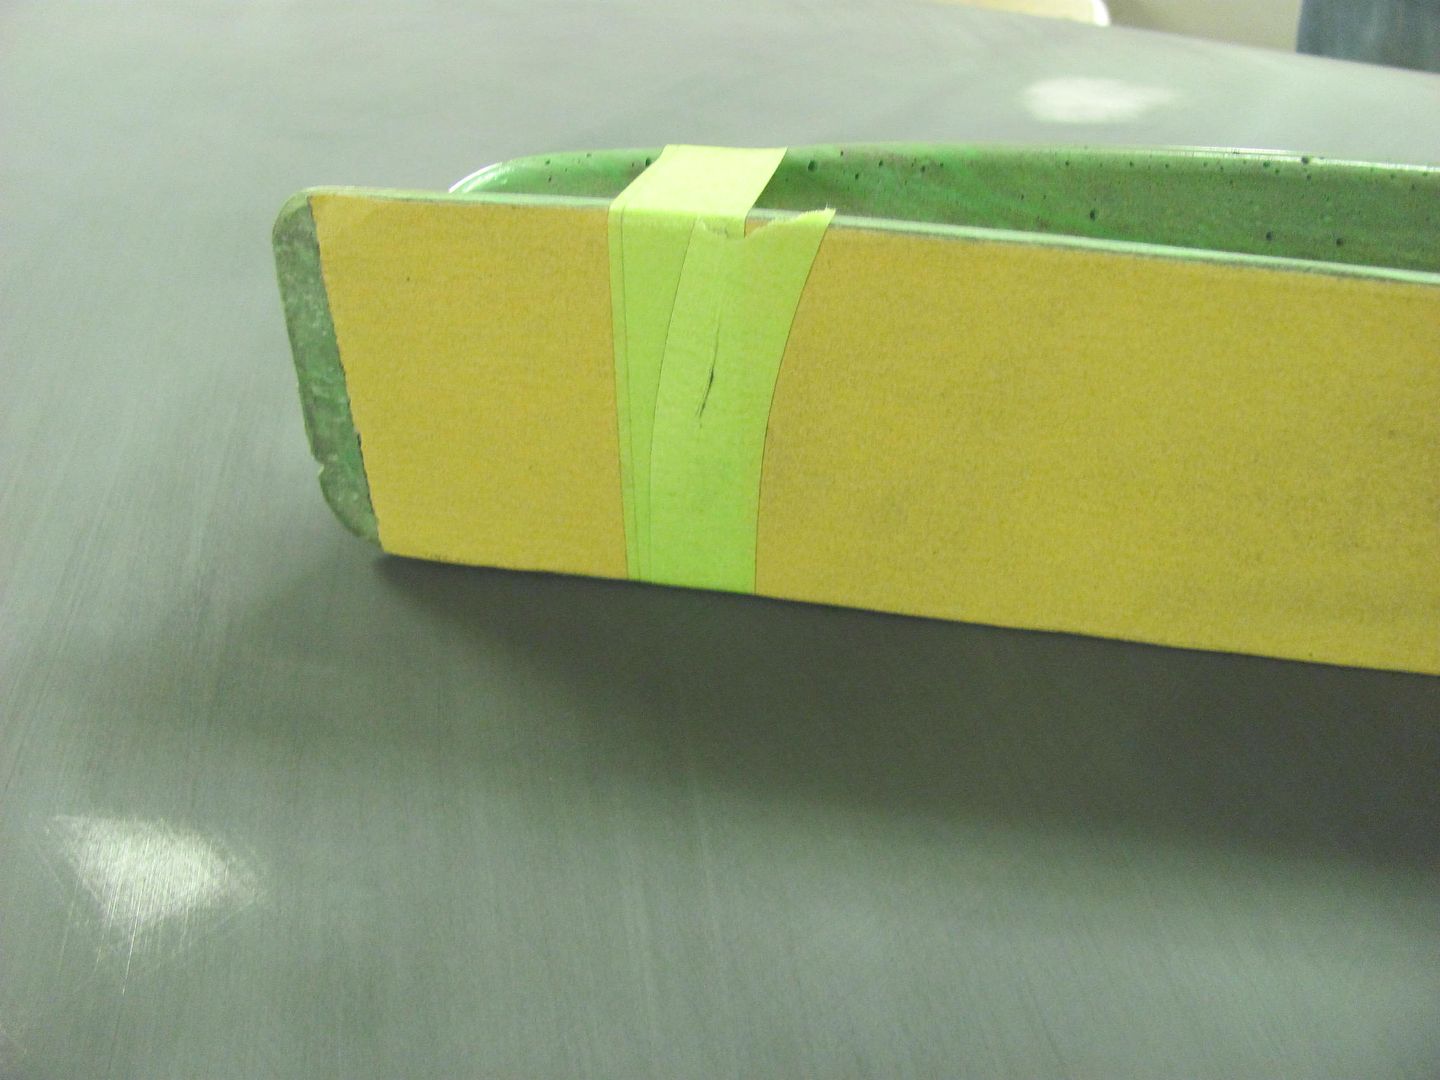 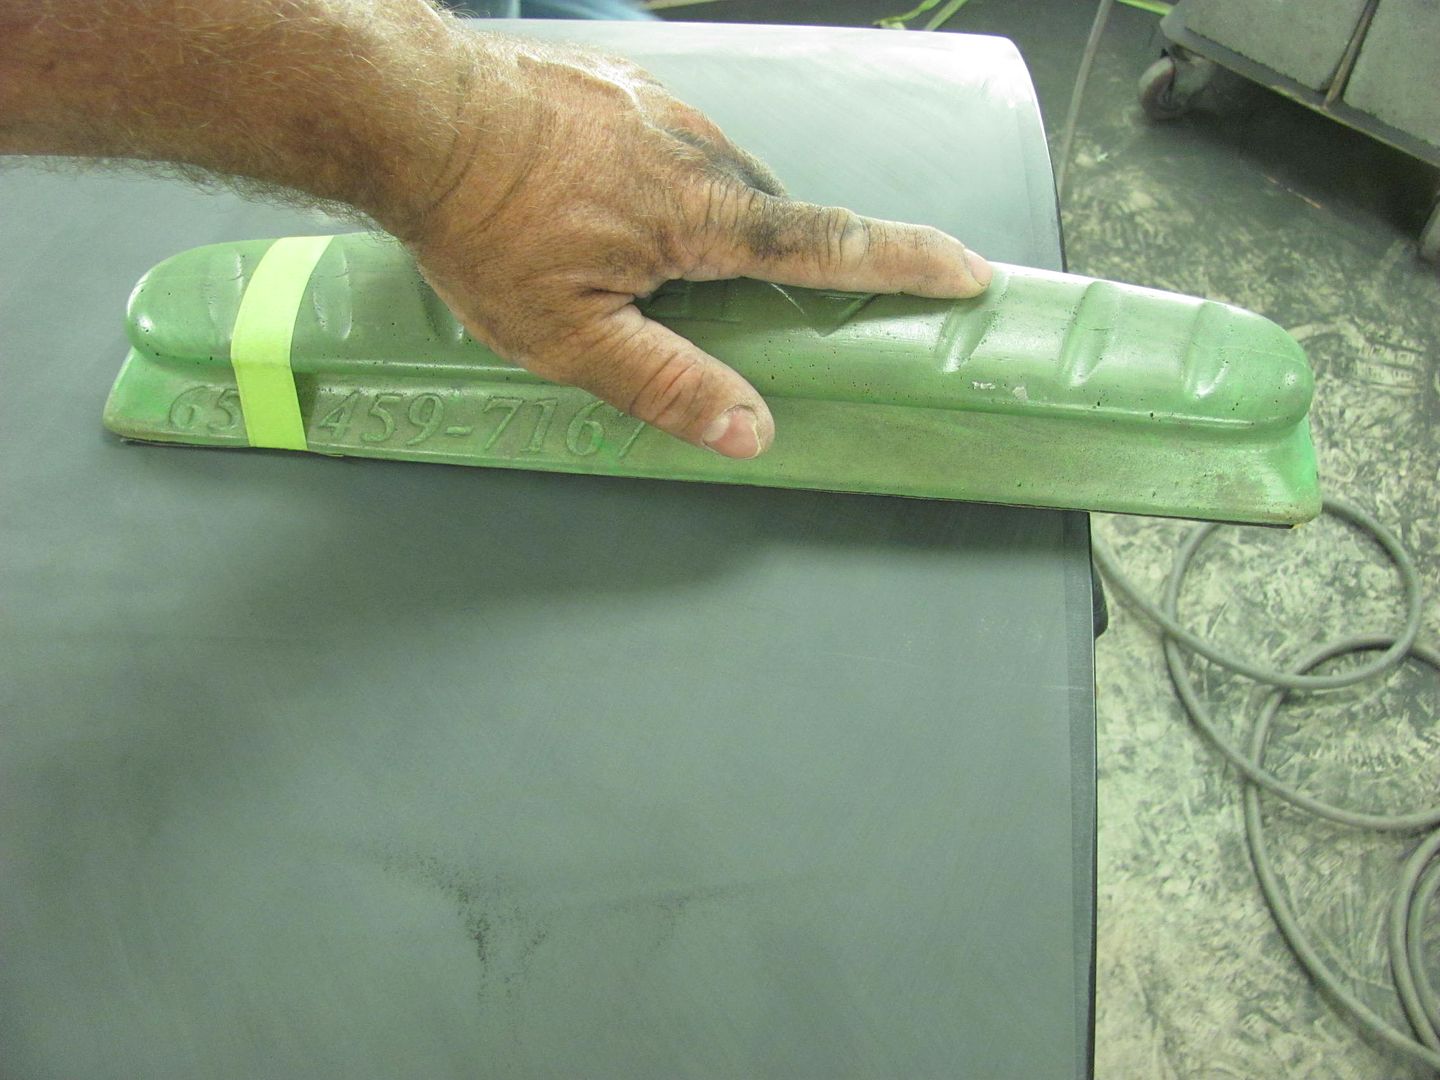 Now to show the importance of the long board.. We had done some blocking with the 27" AFS and seemed to have two high spots with a low in the middle of the door.. Note the high areas marked by the green tape... 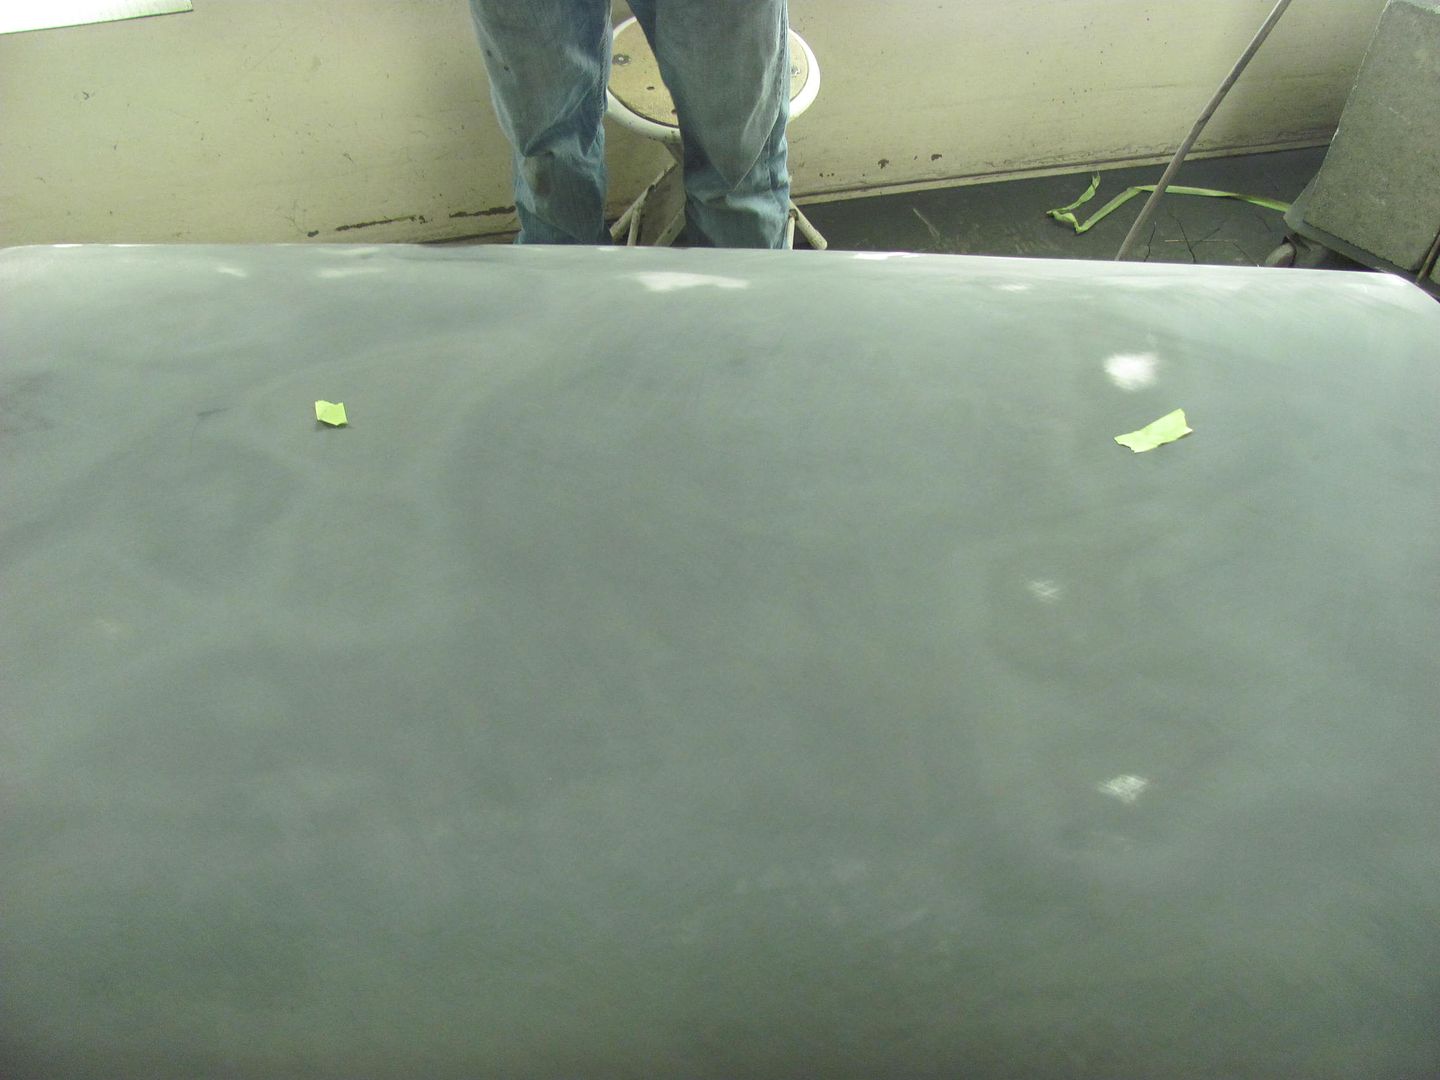 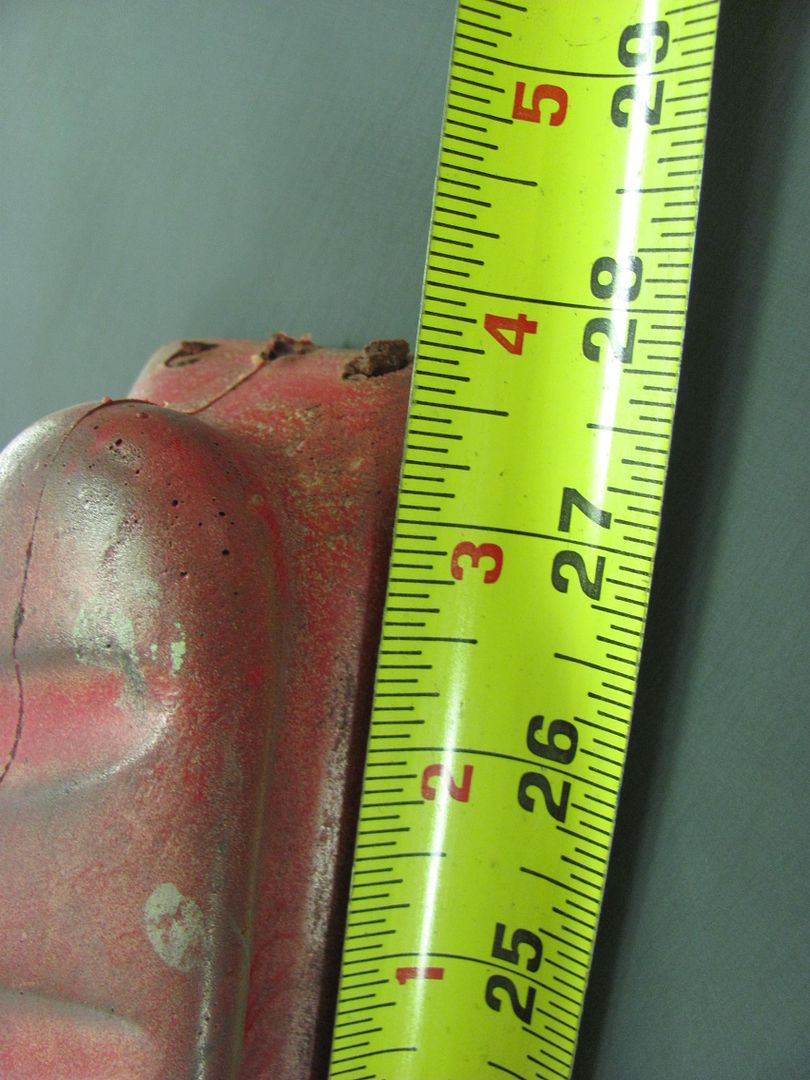 Now we can see that as the sander is moved to the left, the left portion of the AFS is over the high spot on the left, and a bit more movement and the right portion of the AFS will start dropping into the low void. Effectively, this is still cutting material out of the low, keeping it low.  Looking at the next size up, a 36" AFS.... 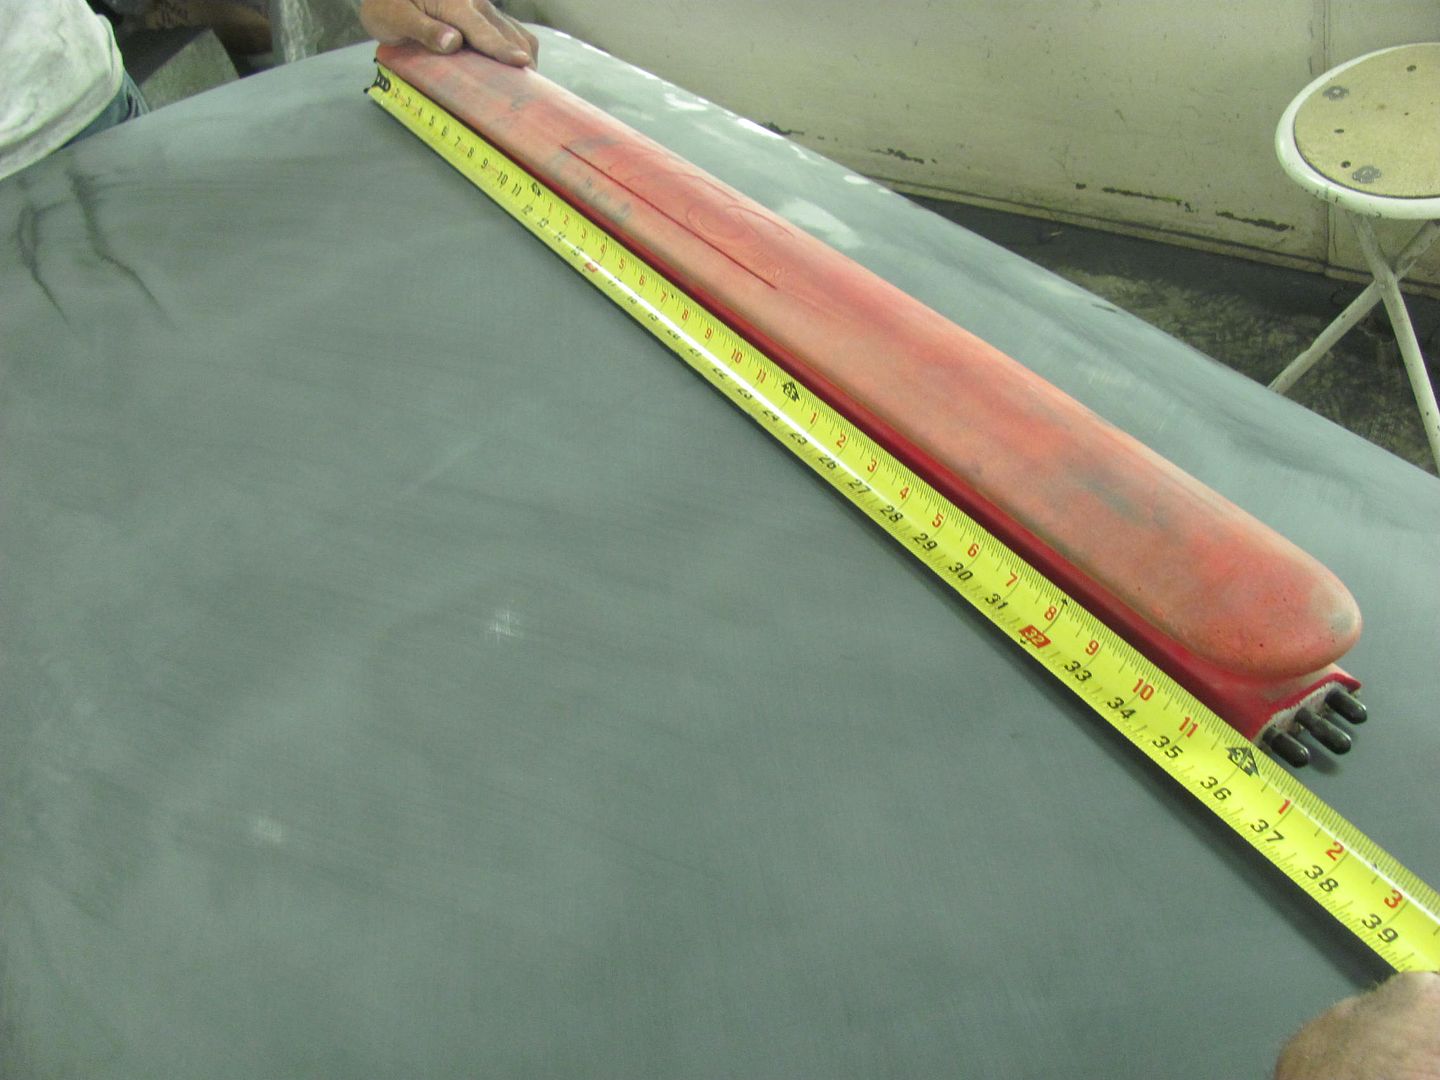 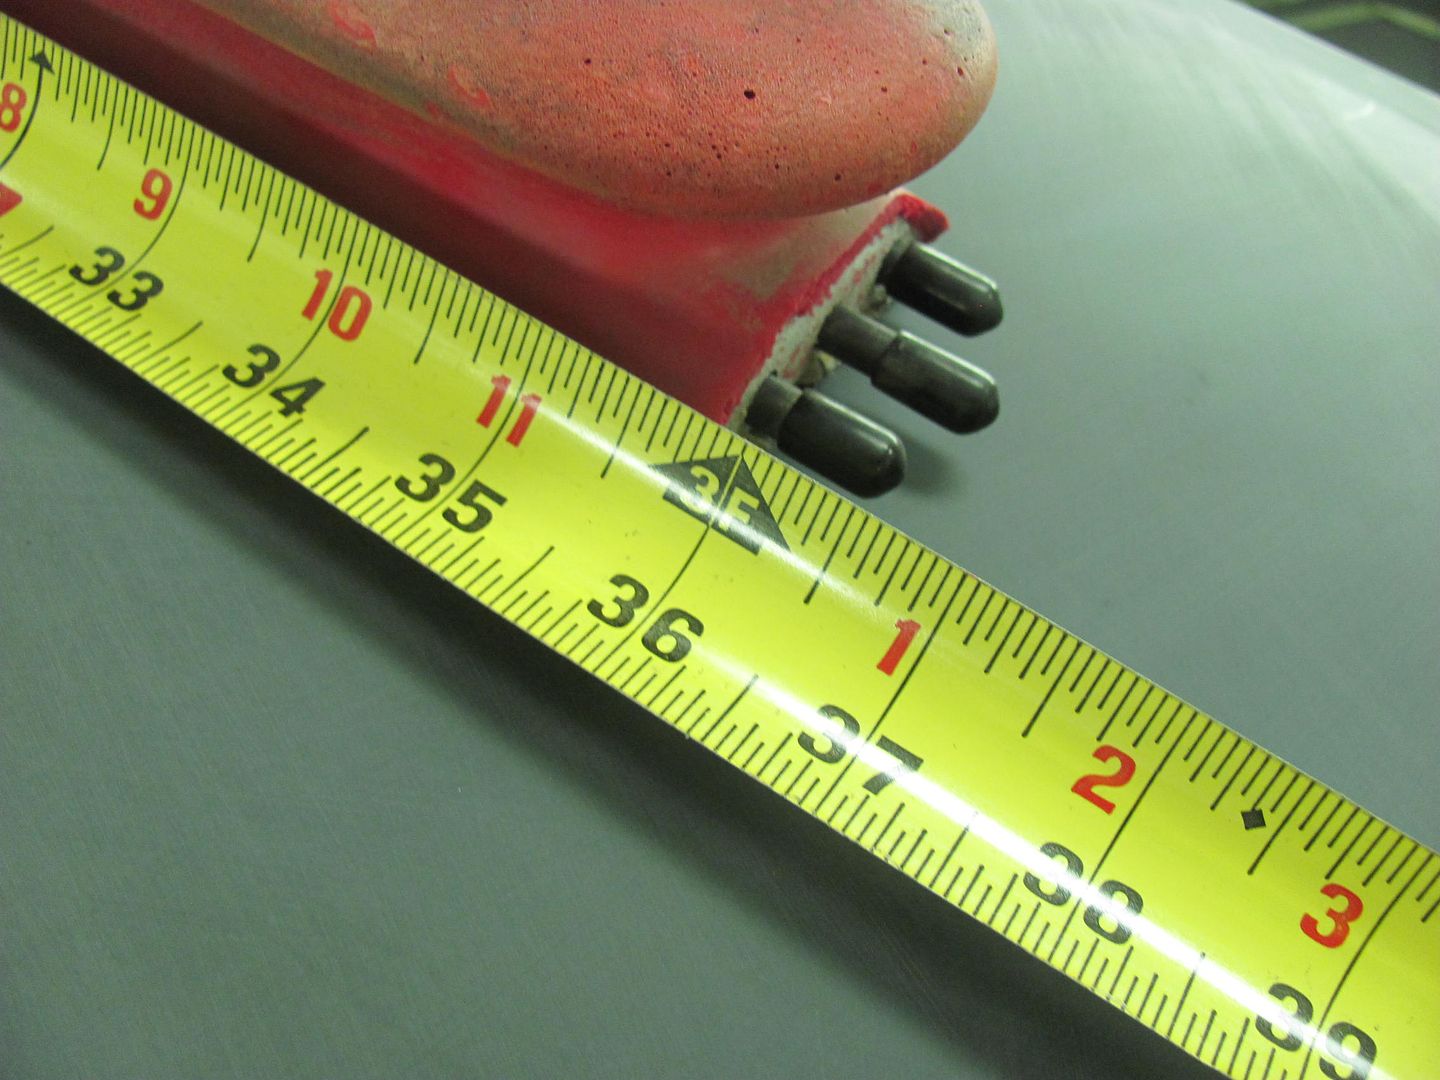 Here we can see this one does a much better job of spanning the high spots and staying up on top, for a more effective job of knocking down the highs and leaving the low in the center alone...  After a few horizontal passes at slight angles, like so with the 36"....... 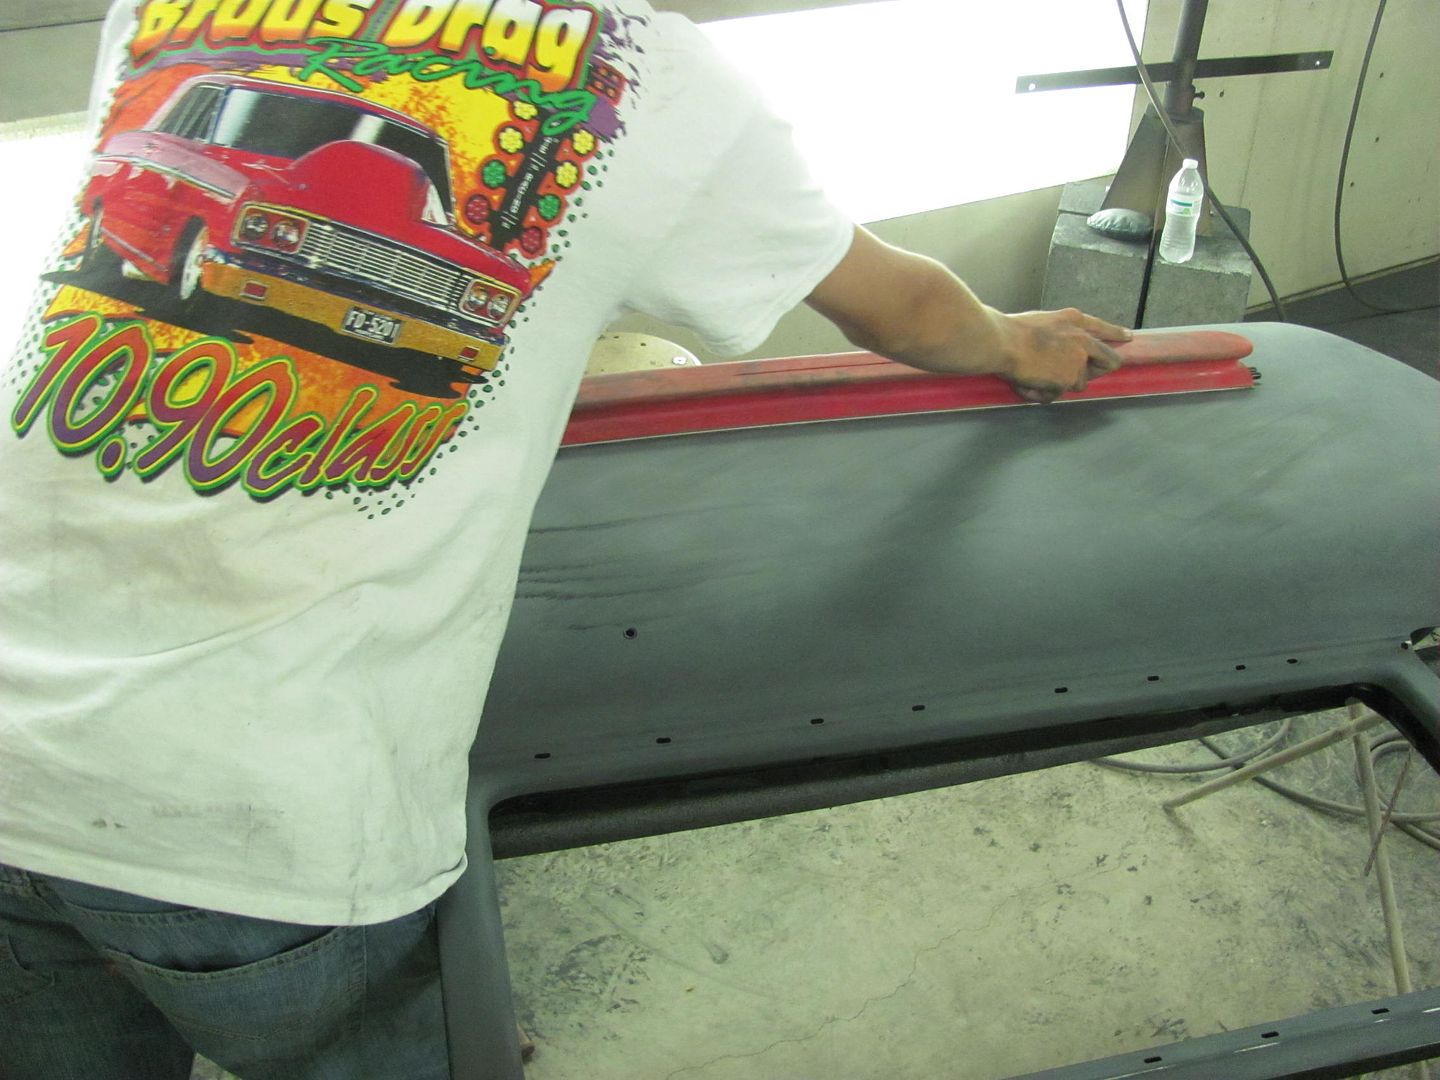 We follow up with some vertical passes at slight angles with the 27".... all rods removed to better follow the contour. Then alternate back to the 36 and another horizontal session.. 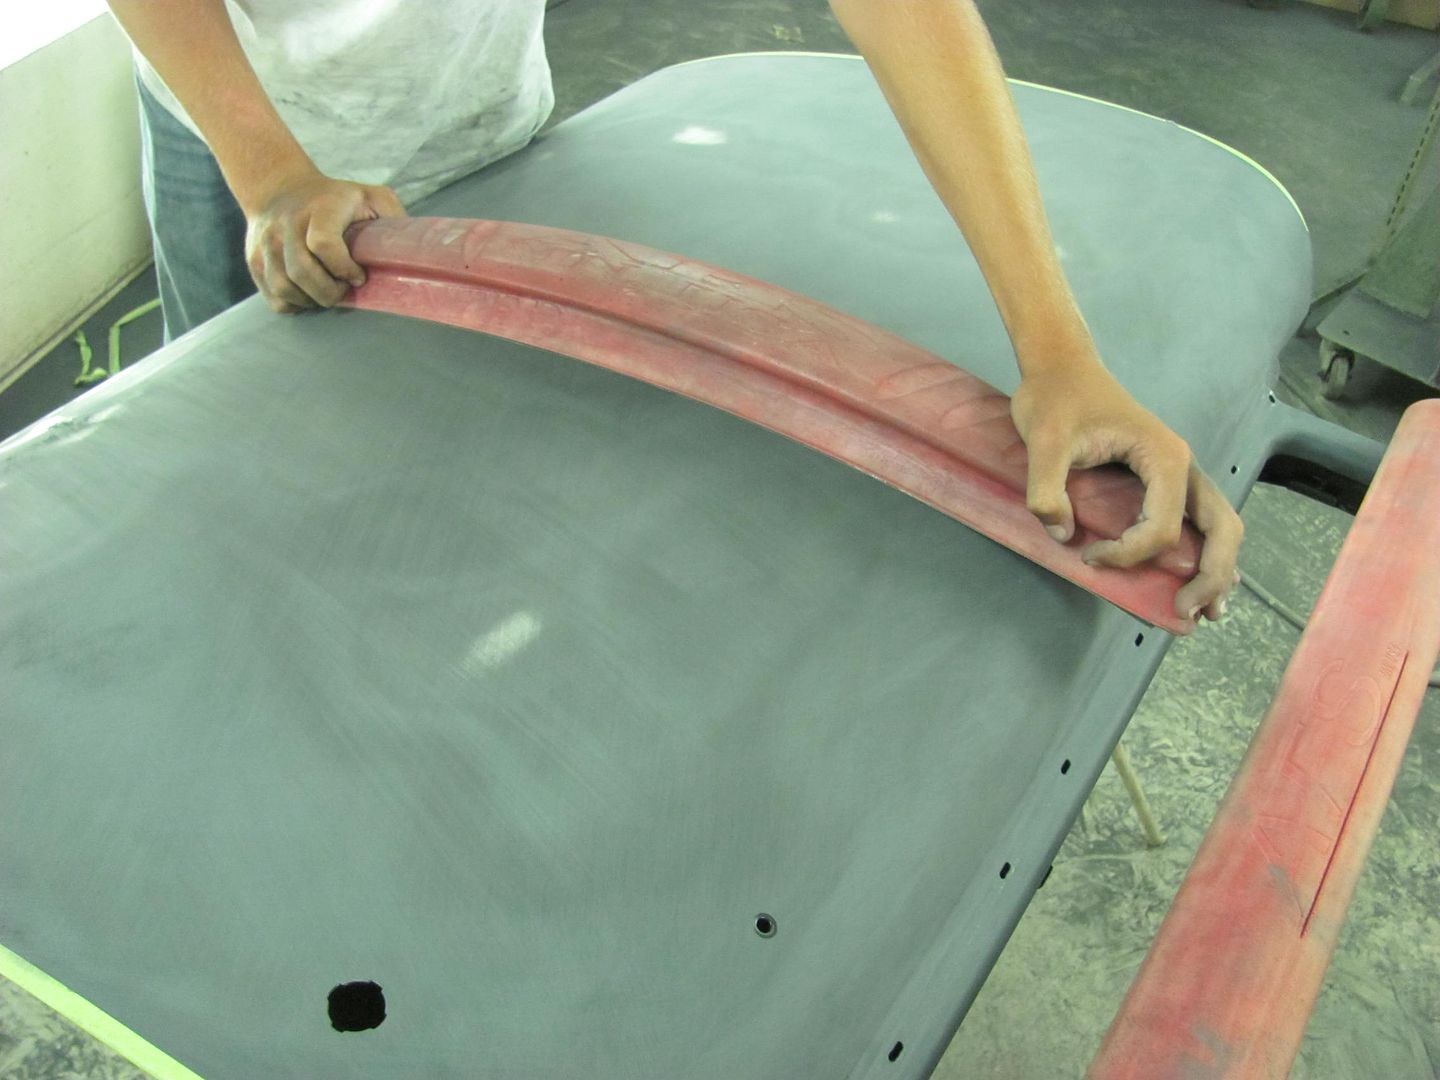
__________________
Robert |
|
|
|
|
08-06-2015, 01:31 AM
|
#490 |
|
Registered User
Join Date: Oct 2007
Location: Spanaway
Posts: 8,451
|
Re: 55 Wagon Progress
Nice work, wish you could do my truck next.
__________________
Mike. Swamp Rat build thread : http://67-72chevytrucks.com/vboard/s...d.php?t=595019 72 3/4T 4X4 4" BDS Lift 33" BFG's |
|
|
|
|
08-09-2015, 07:18 AM
|
#491 |
|
Registered User
Join Date: Jan 2013
Location: Leonardtown, MD
Posts: 1,636
|
Re: 55 Wagon Progress
Got a 54 Divco milk truck coming in next, sorry.
Well, the shop truck has left the building.. 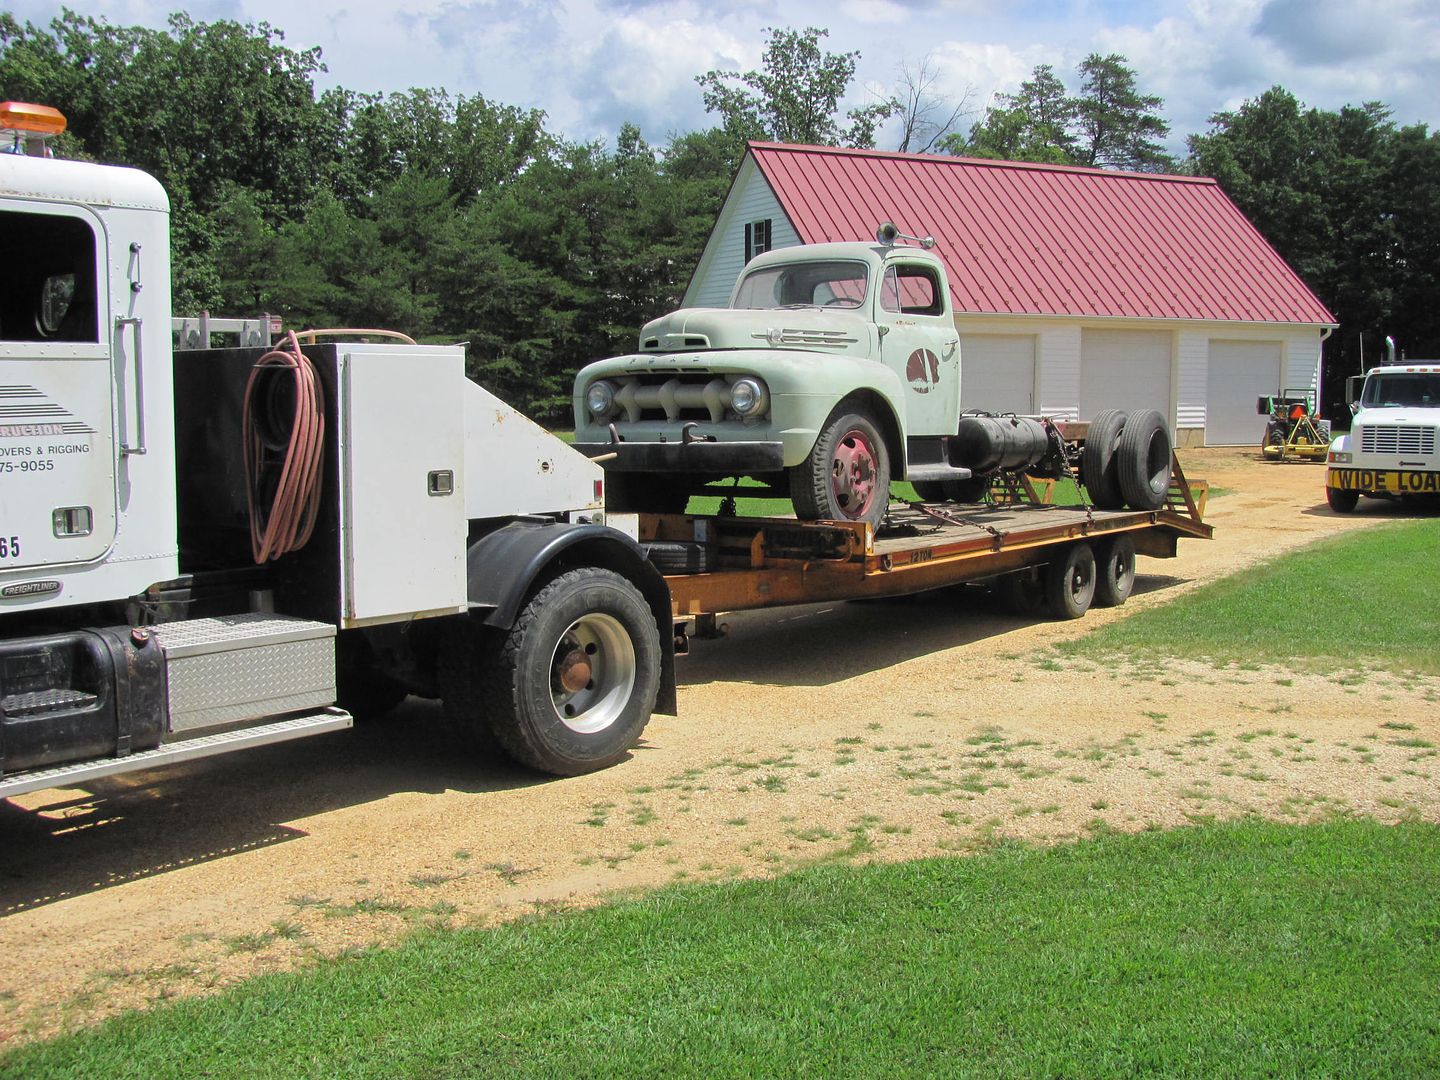 Sold it today, now have a bit more breathing room in the shop.. 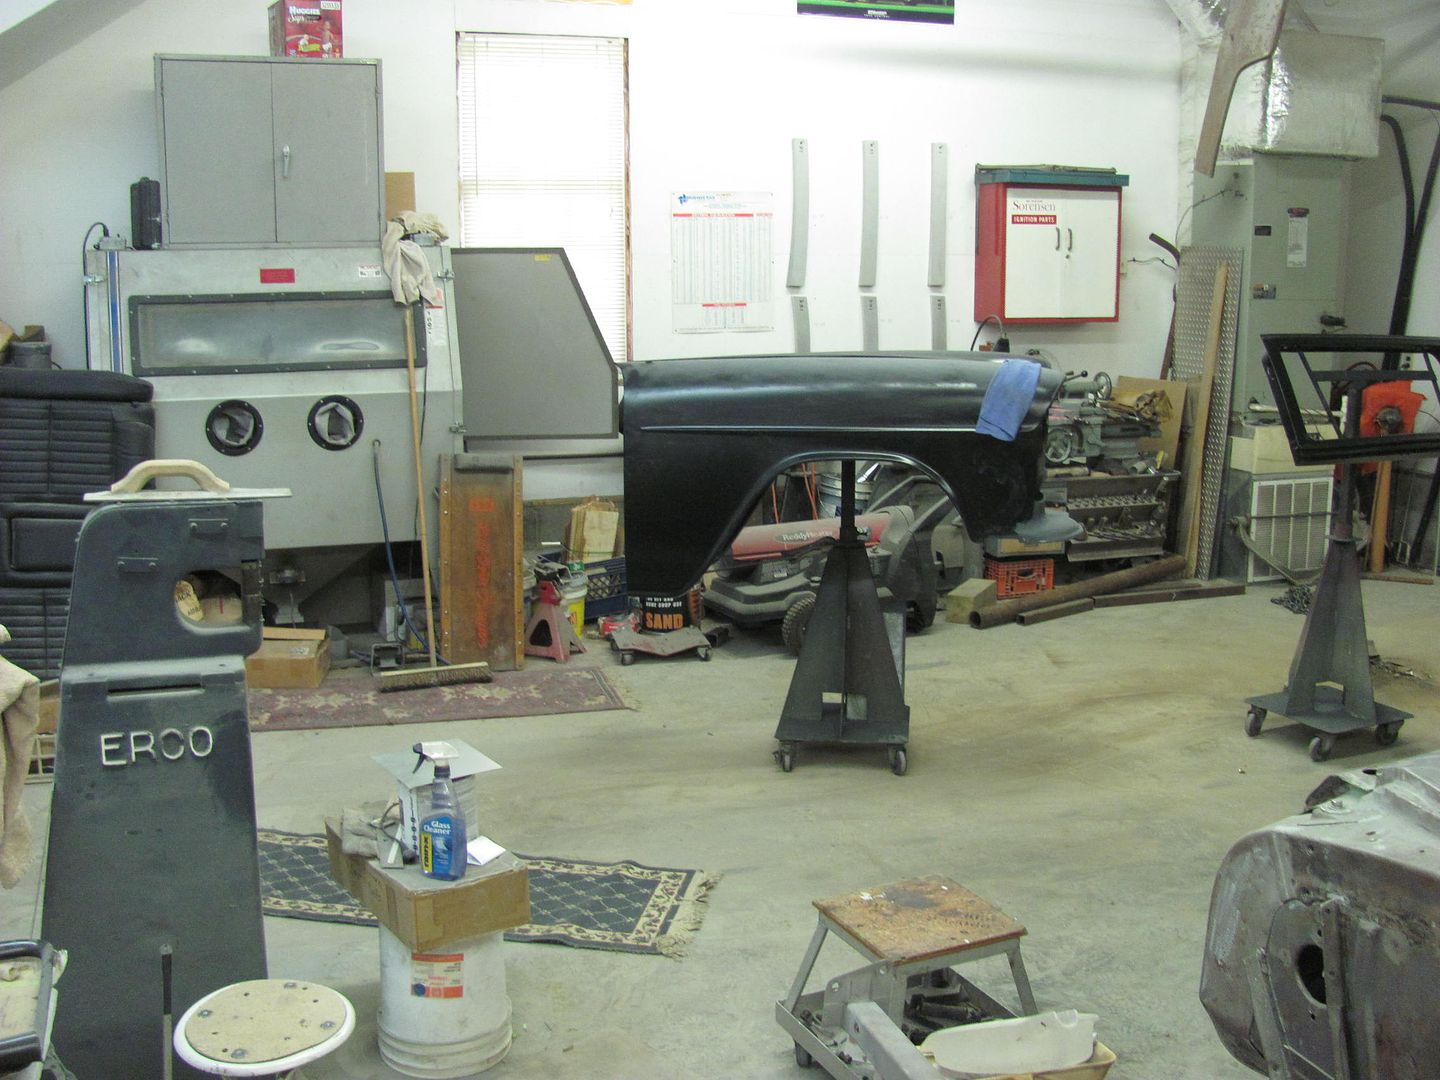 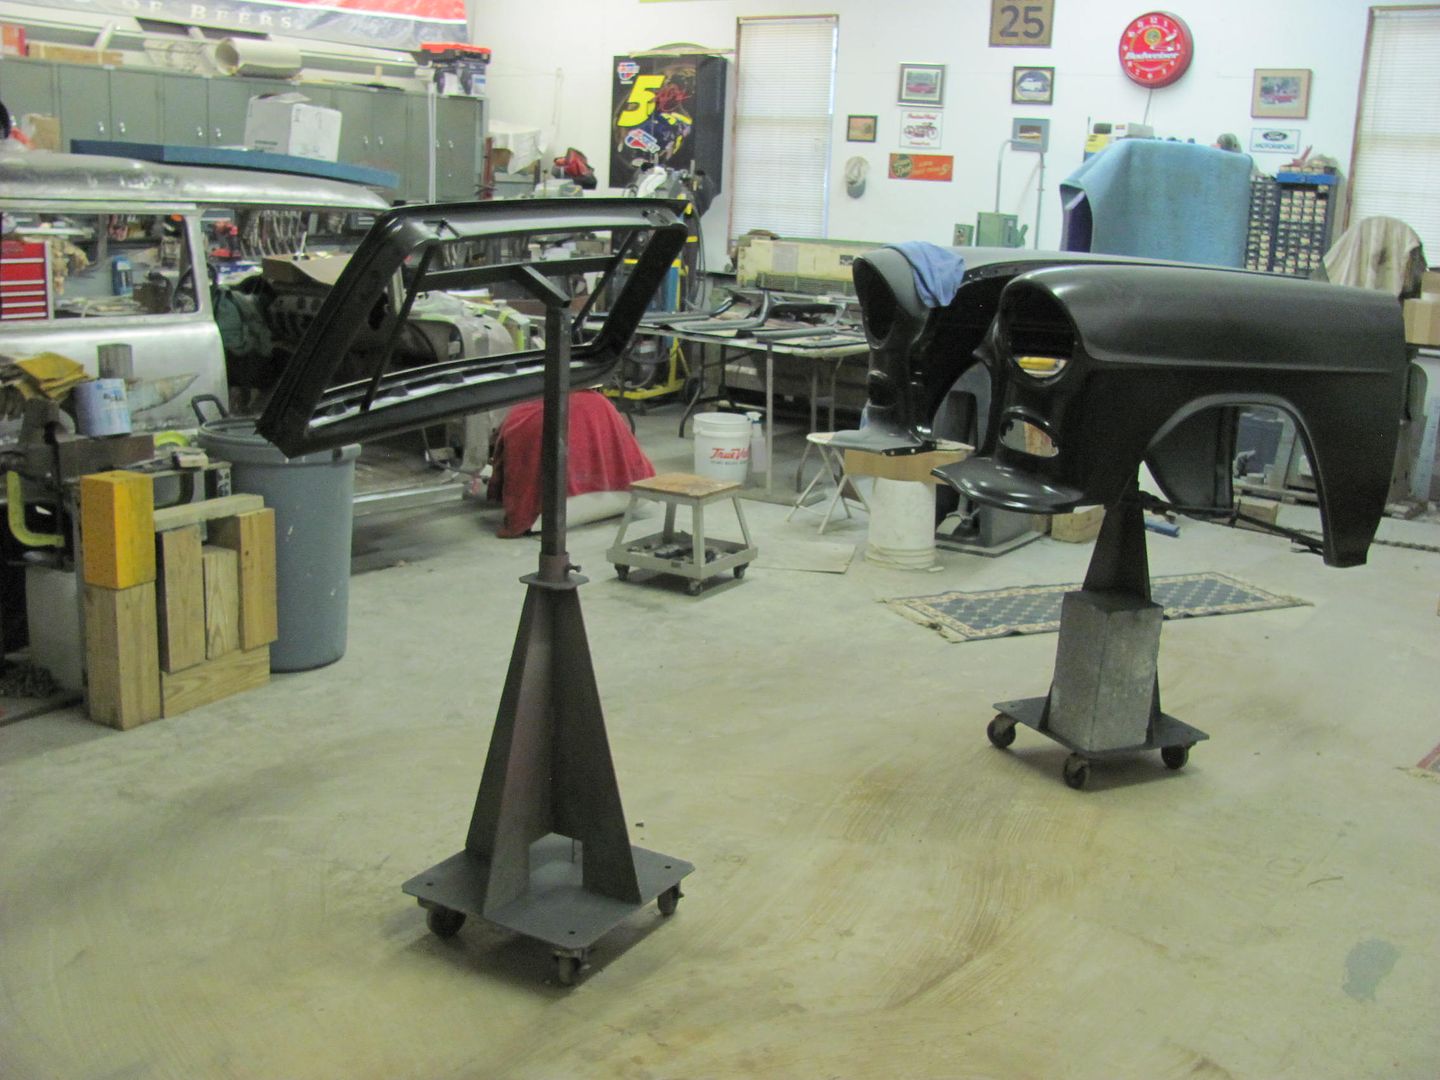 .....and another dose of epoxy  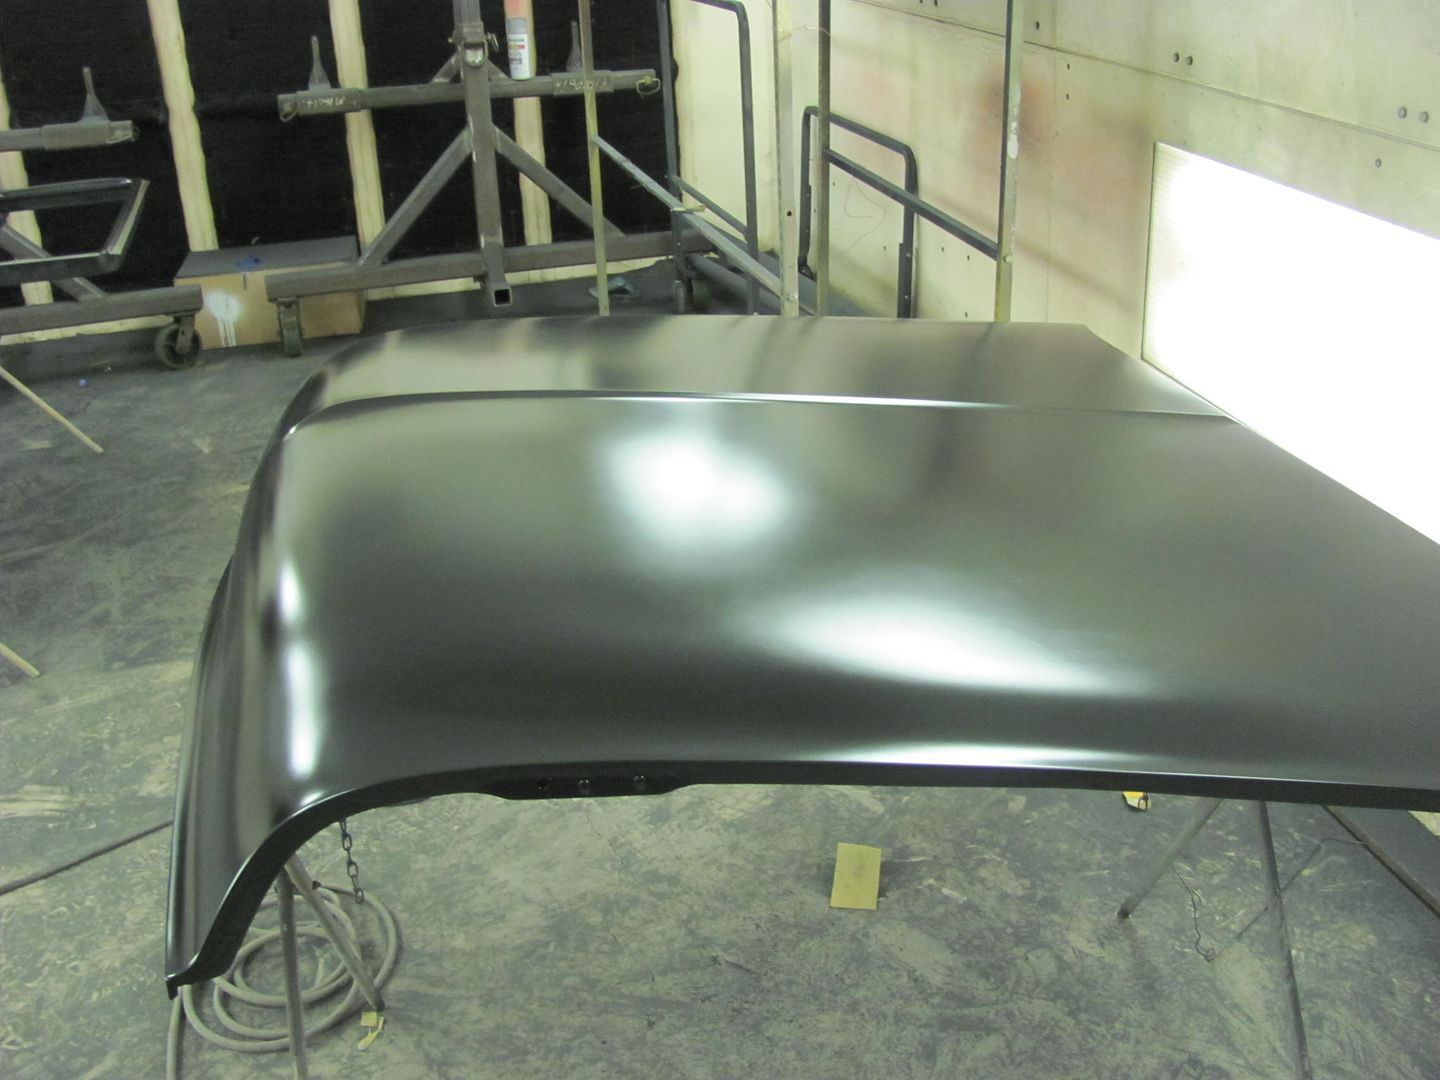 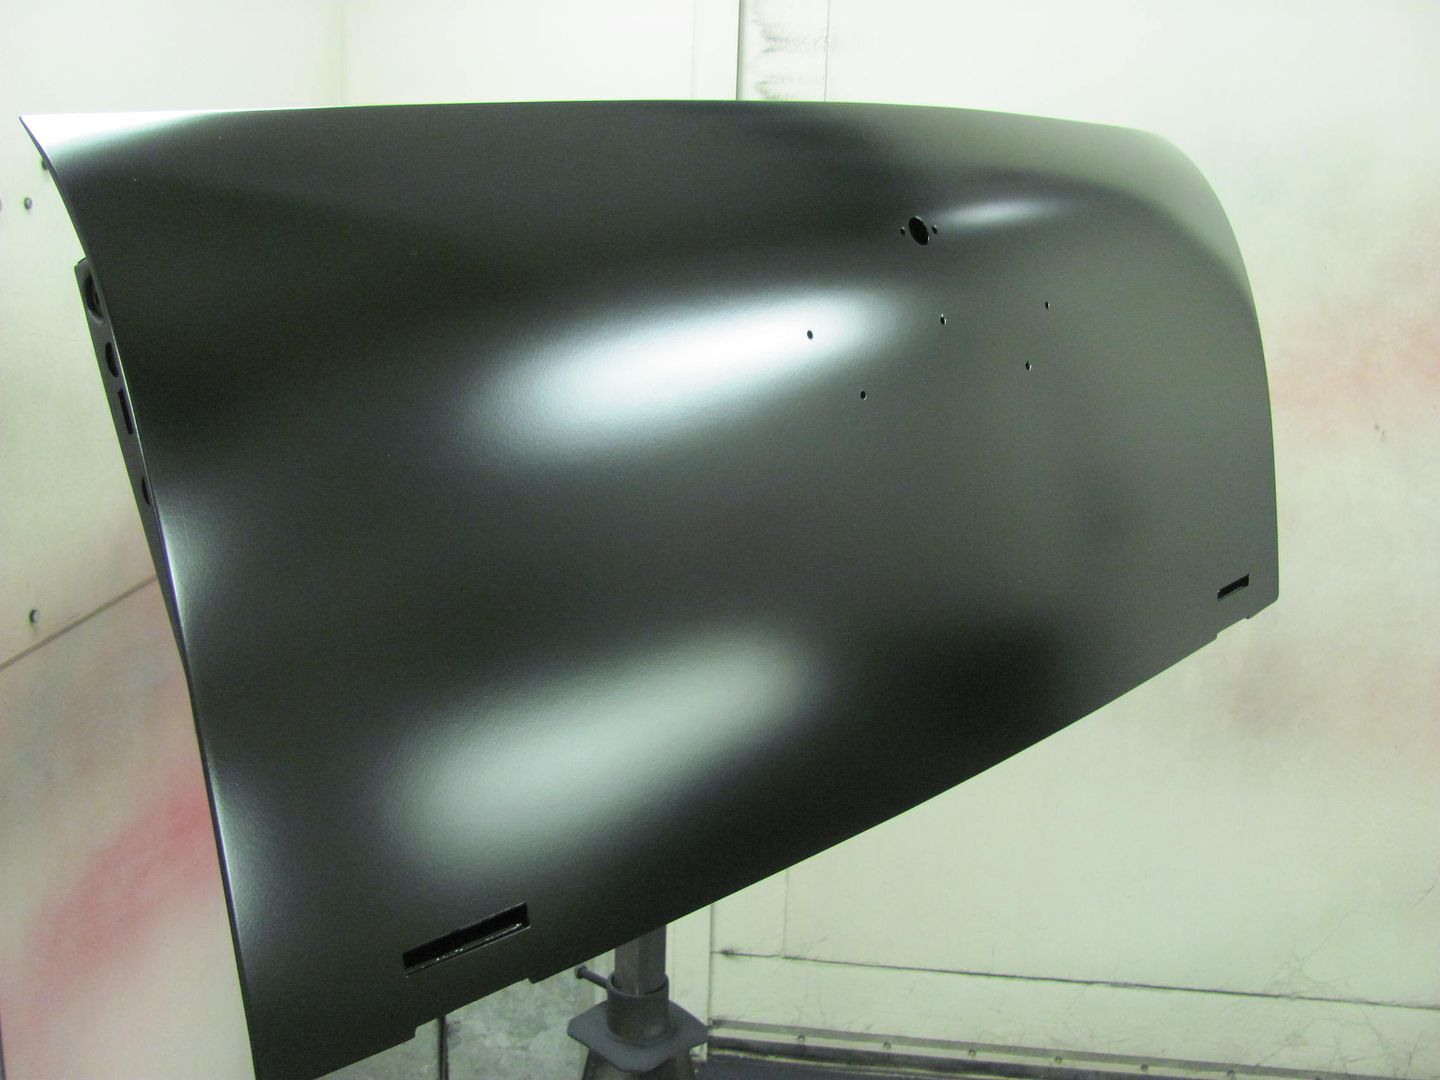 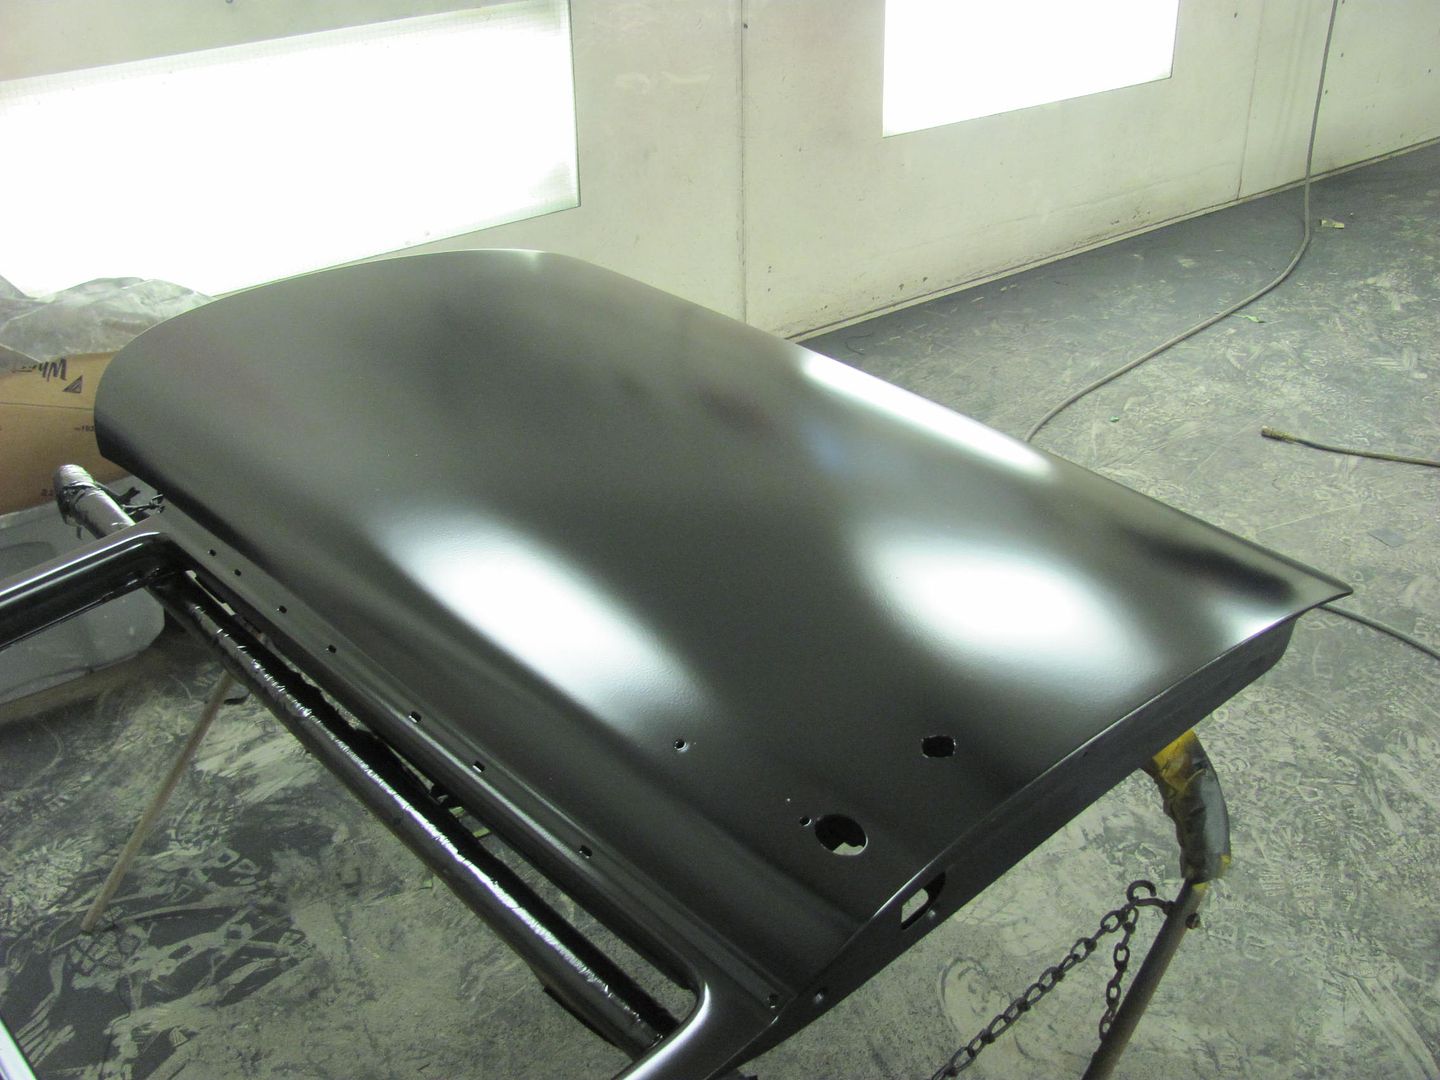
__________________
Robert |
|
|
|
|
08-22-2015, 11:38 PM
|
#492 |
|
Registered User
Join Date: May 2011
Location: Anderson SC
Posts: 3,870
|
Re: 55 Wagon Progress
So you're not using high build? Just make the filler work slick enough and then epoxy? Or does the SPI epoxy build more than other epoxies? Been wanting to try SPI epoxy...
__________________
Project Goldilocks '66 C10 Short Fleet BBW Build '65 C10 Highly Detailed Stock Restoration Thread '78 Camaro Targa Roof Build '55 International Metal/Body/Paint Work '66 F100 Full Rotisserie Restoration '40 Packard 120 Convertible Coupe Restoration How To Restore and Detail an Original Gauge Cluster How To Detail Sand Body Panels, Edges, Corners, Etc |
|
|
|
|
08-23-2015, 12:45 AM
|
#493 |
|
Registered User
Join Date: Oct 2013
Location: HOUSTON
Posts: 355
|
Re: 55 Wagon Progress
AWESOME. You have MAD SKILLS..
|
|
|
|
|
08-23-2015, 07:25 AM
|
#494 |
|
Registered User
Join Date: Jan 2013
Location: Leonardtown, MD
Posts: 1,636
|
Re: 55 Wagon Progress
John, I've found both H/K and SPI to have a decent amount of build. Not as much as spraying Slick Sand, but I'd venture a guess that SPI on SPI would have less adhesion issues and be more stable overall than mixing products.
Thanks Nasty!
__________________
Robert |
|
|
|
|
08-25-2015, 02:43 PM
|
#495 |
|
Registered User
Join Date: Apr 2003
Location: Indep, MO
Posts: 5,893
|
Re: 55 Wagon Progress
That's good to know- Nason's epoxy is only good for a scratch coat. About the consistency of basecoat. Parts look fantastic.
__________________
Boppa's Old Yeller Truck Build, Old Yeller's New Heart! Project Buzz Bomb Flyin' Low! |
|
|
|
|
08-26-2015, 10:22 AM
|
#496 | |
|
Registered User
Join Date: May 2011
Location: Anderson SC
Posts: 3,870
|
Re: 55 Wagon Progress
Quote:
__________________
Project Goldilocks '66 C10 Short Fleet BBW Build '65 C10 Highly Detailed Stock Restoration Thread '78 Camaro Targa Roof Build '55 International Metal/Body/Paint Work '66 F100 Full Rotisserie Restoration '40 Packard 120 Convertible Coupe Restoration How To Restore and Detail an Original Gauge Cluster How To Detail Sand Body Panels, Edges, Corners, Etc |
|
|
|
|
|
08-26-2015, 12:58 PM
|
#497 | |
|
Registered User
Join Date: Apr 2003
Location: Indep, MO
Posts: 5,893
|
Re: 55 Wagon Progress
Quote:
__________________
Boppa's Old Yeller Truck Build, Old Yeller's New Heart! Project Buzz Bomb Flyin' Low! |
|
|
|
|
|
09-12-2015, 05:48 PM
|
#498 |
|
Registered User
Join Date: Jan 2013
Location: Leonardtown, MD
Posts: 1,636
|
Re: 55 Wagon Progress
Well there has been a slight break in the updates, as I've been in Okinawa for about a month. Not to fear, Kyle has been plugging away on the wagon, it even has a floor in it, as you can see here...
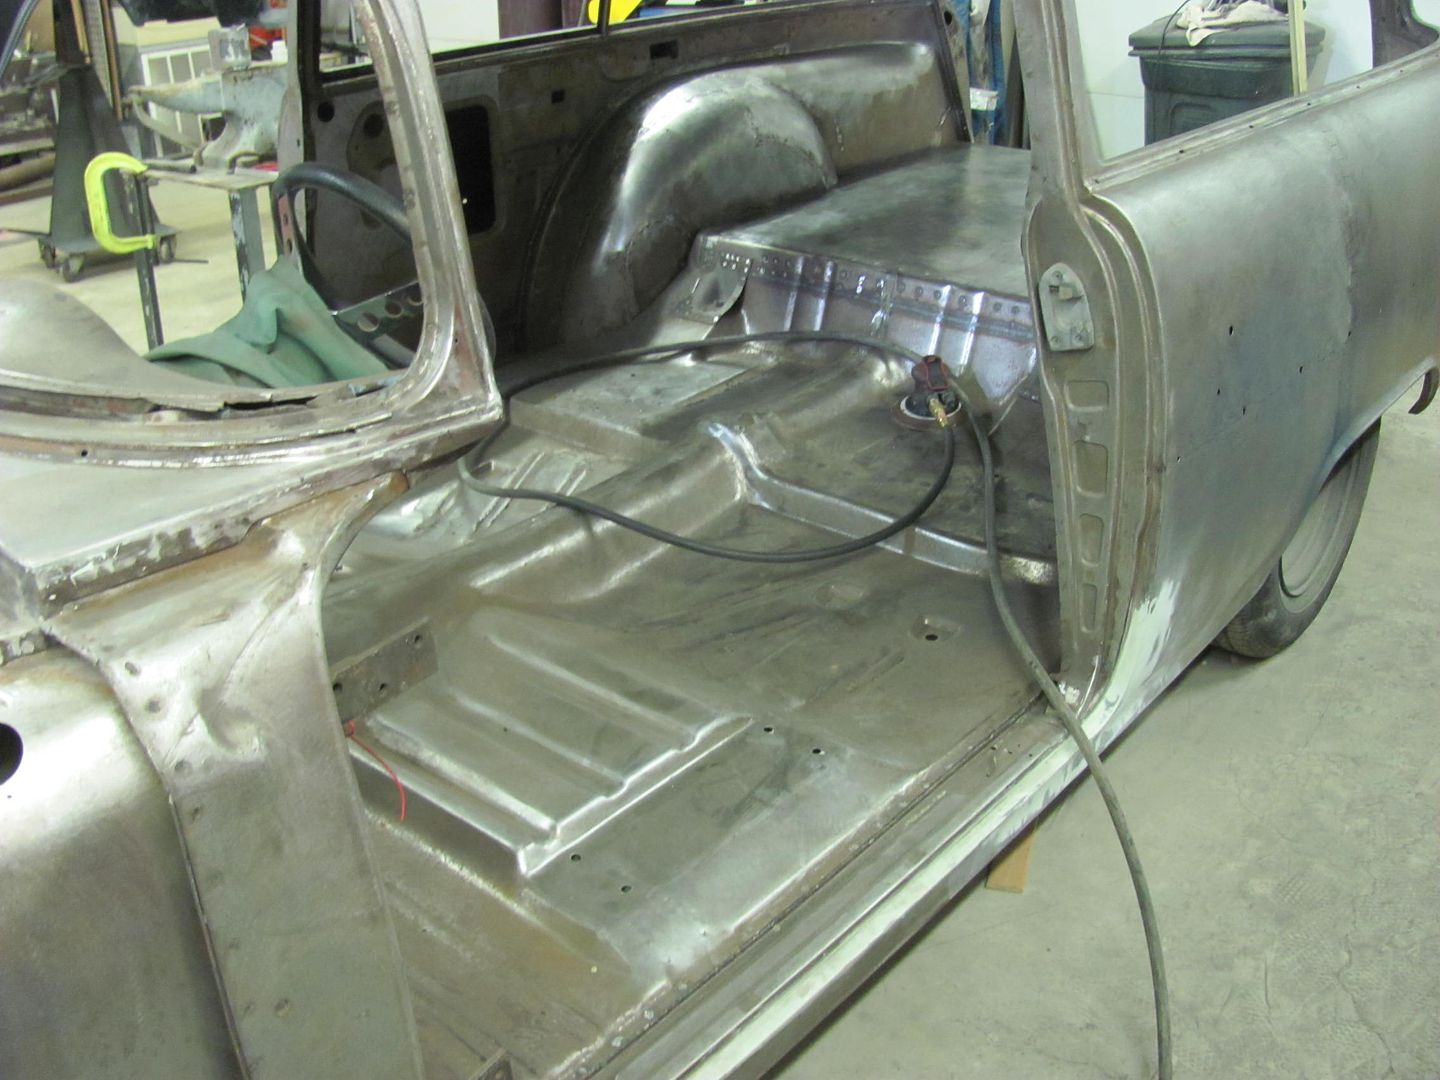 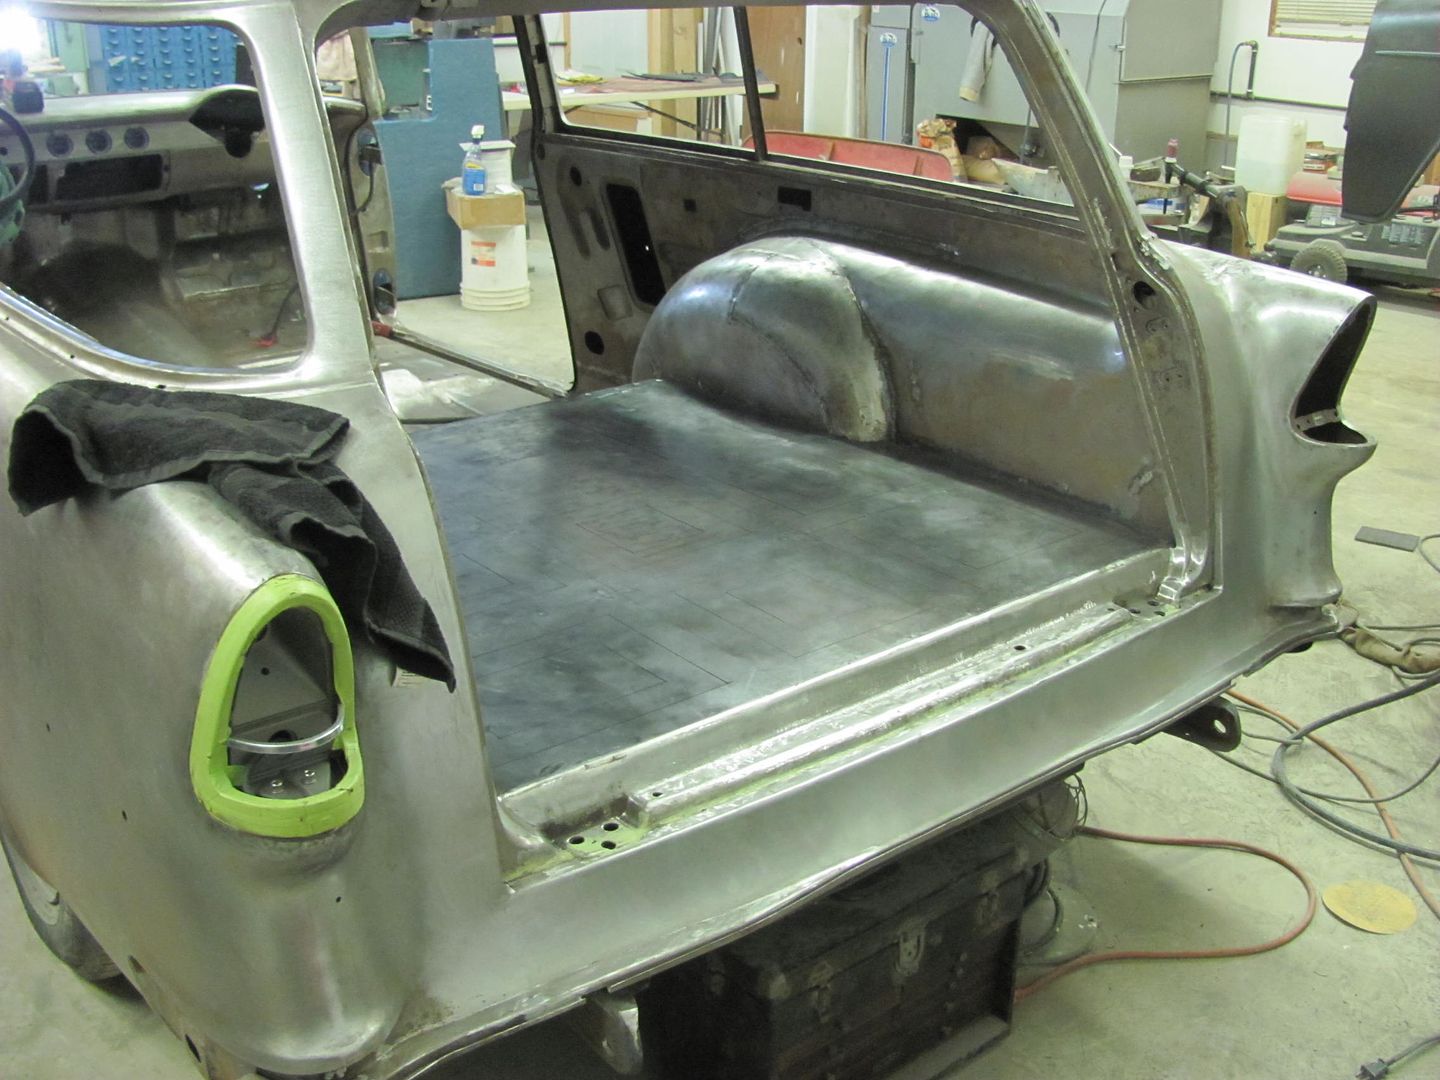 He did get a quite a bit of blocking done while I was gone.... 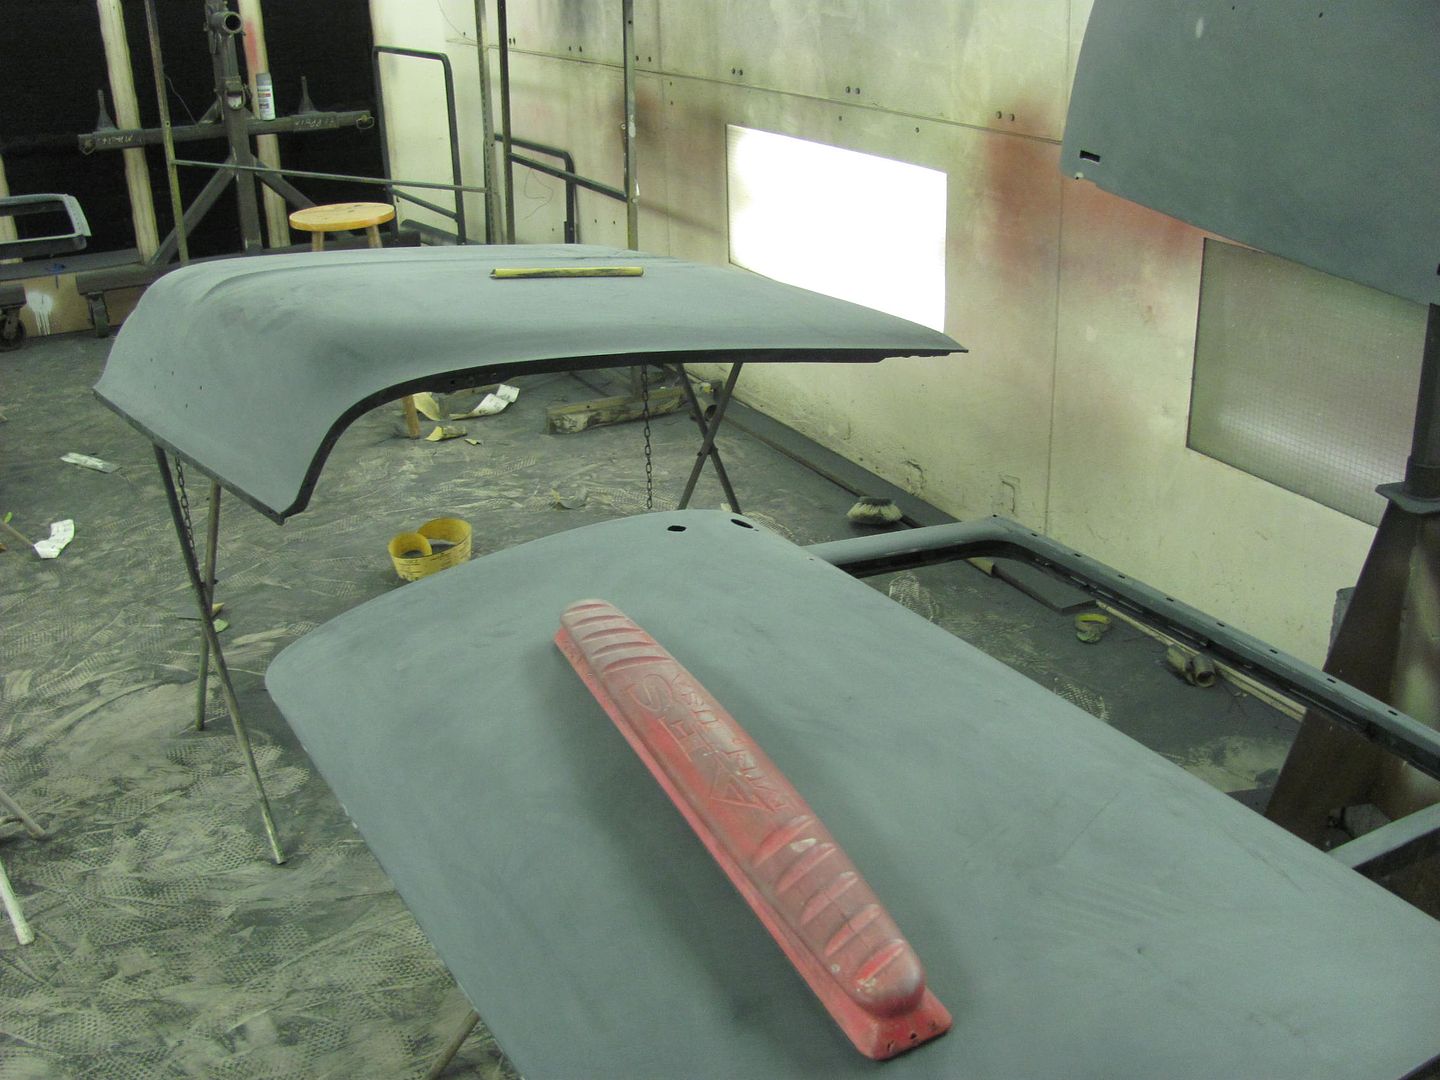 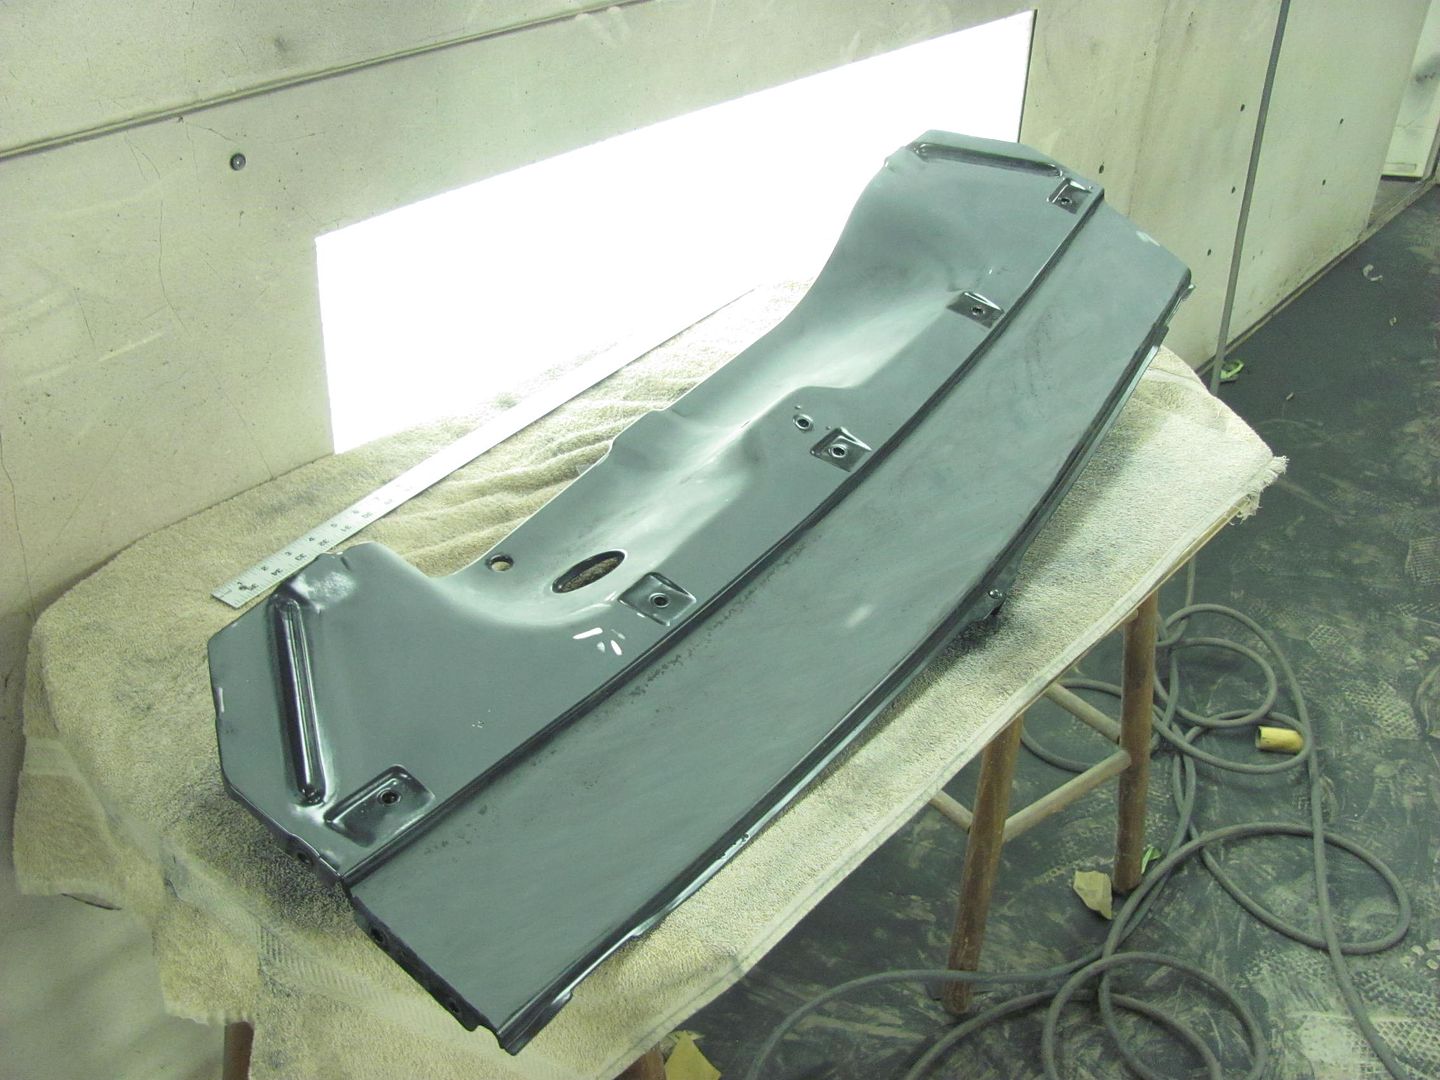 And did get some wet sanding done on a few of the interior trim pieces. Today he started on the rear floor, part of the problem with welding a flat plate is that it doesn't stay flat. The plug welds to secure the floor to the bracing beneath caused some shrinking, which resulted in the metal between bulging outward, some up, some down. Looks about like the Atlantic on a calm day. 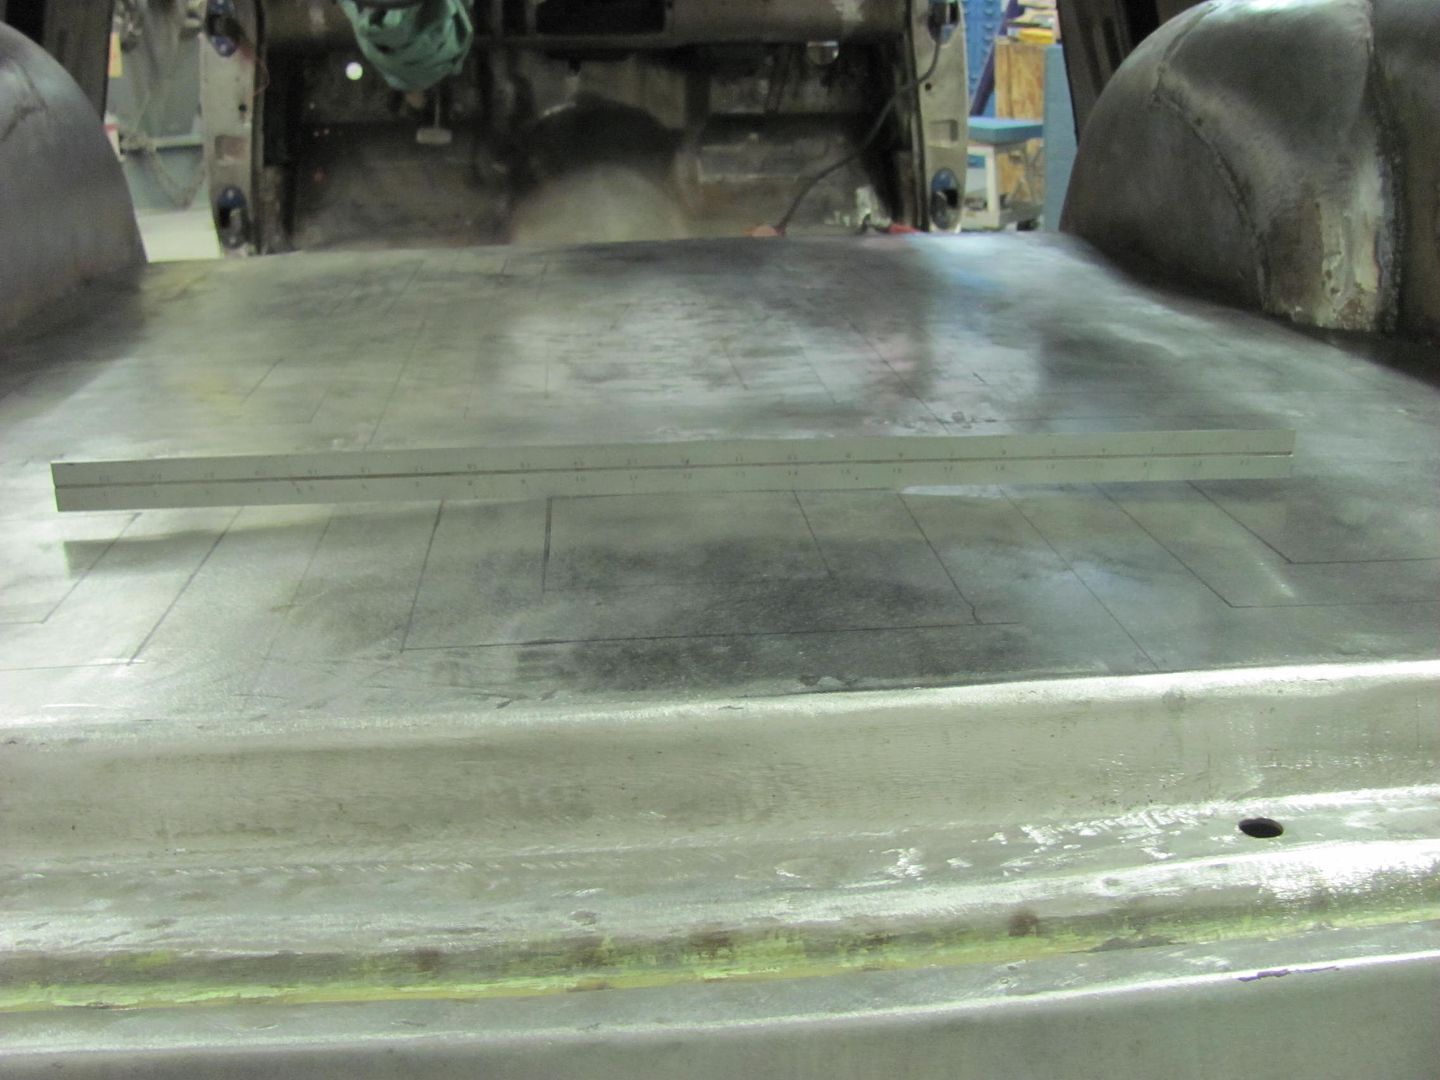 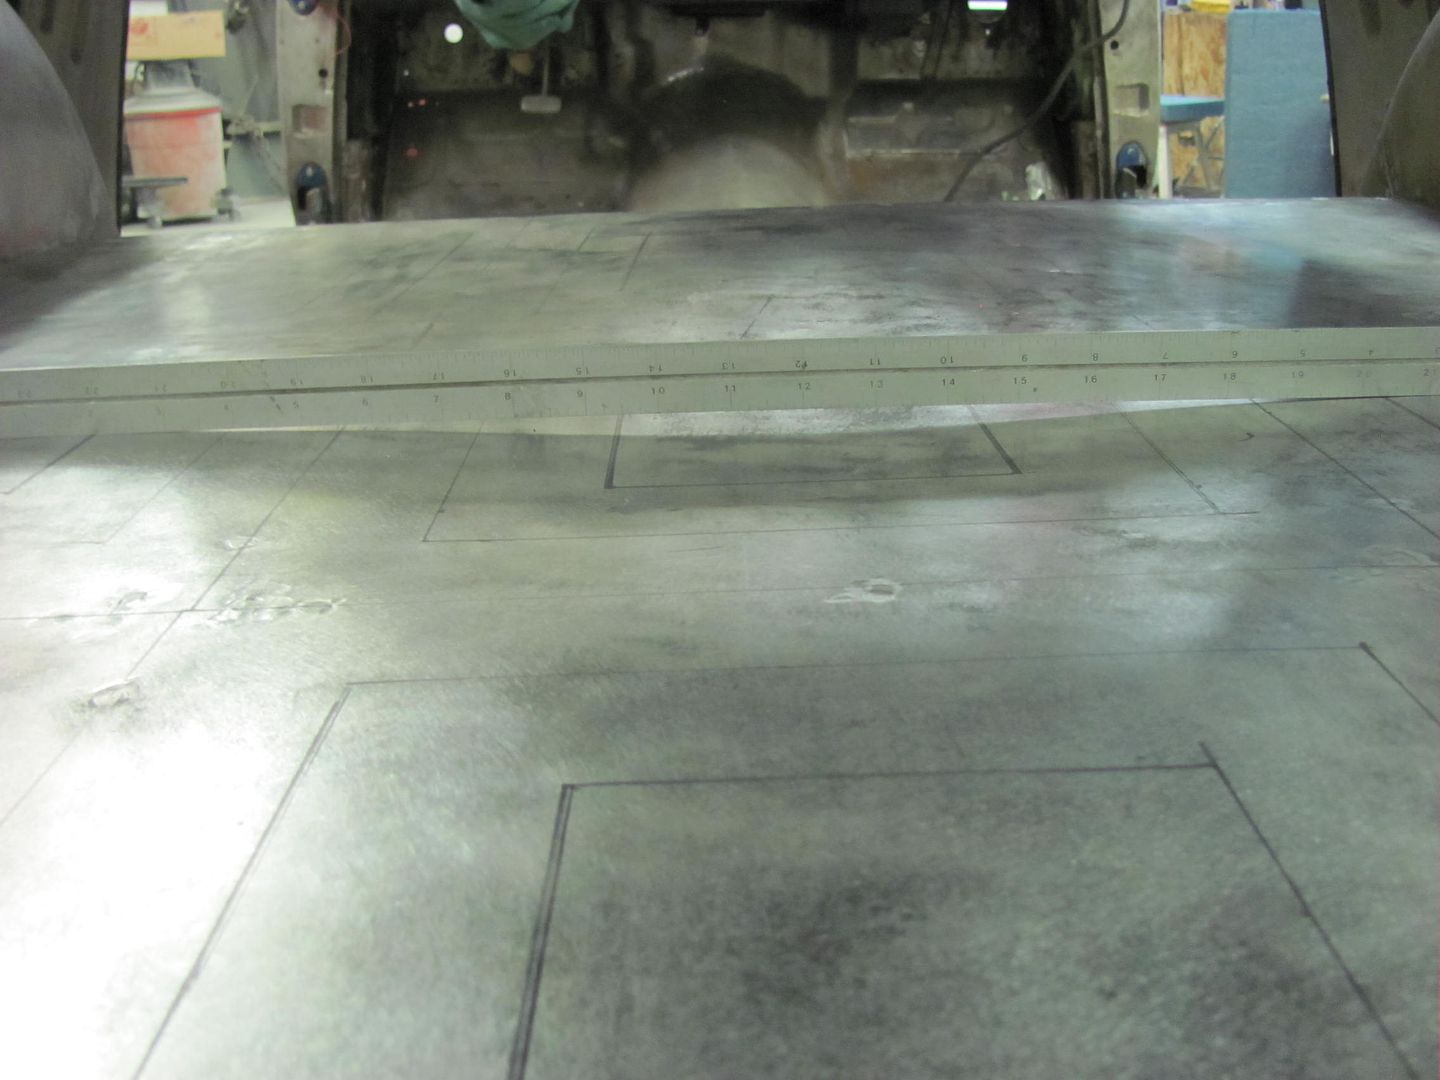 Today, as I was going to be wet sanding, he was going to try some torch shrinking. To better make this a one person job with minimal risk of open flame, we thought to give the "electric" torch a go. 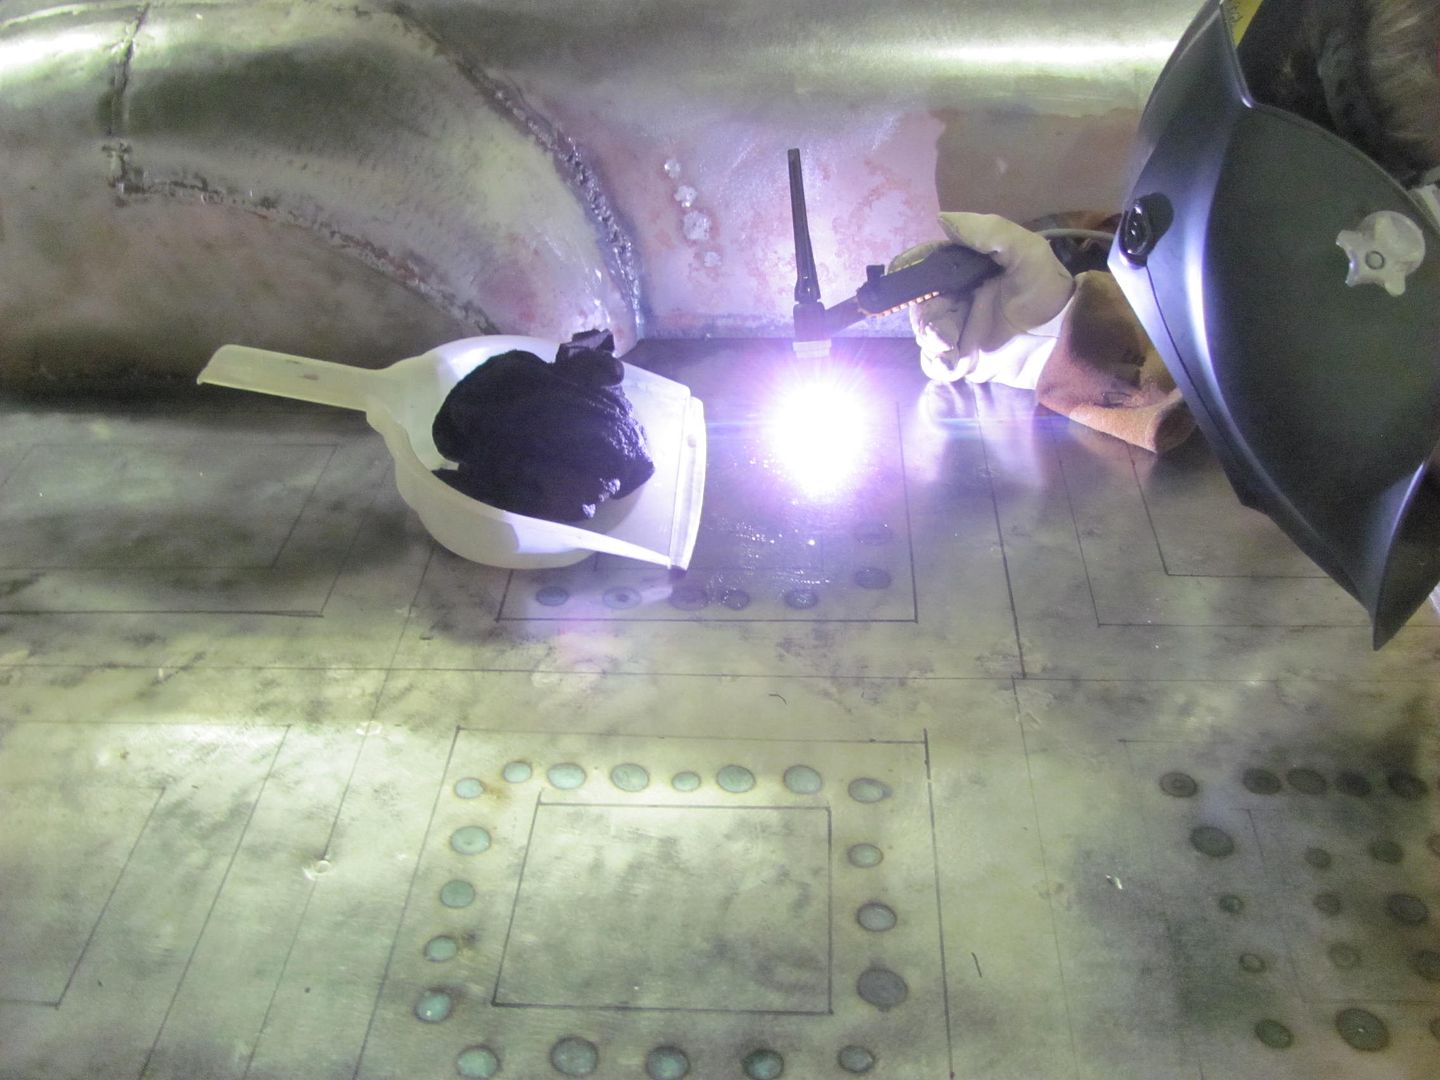 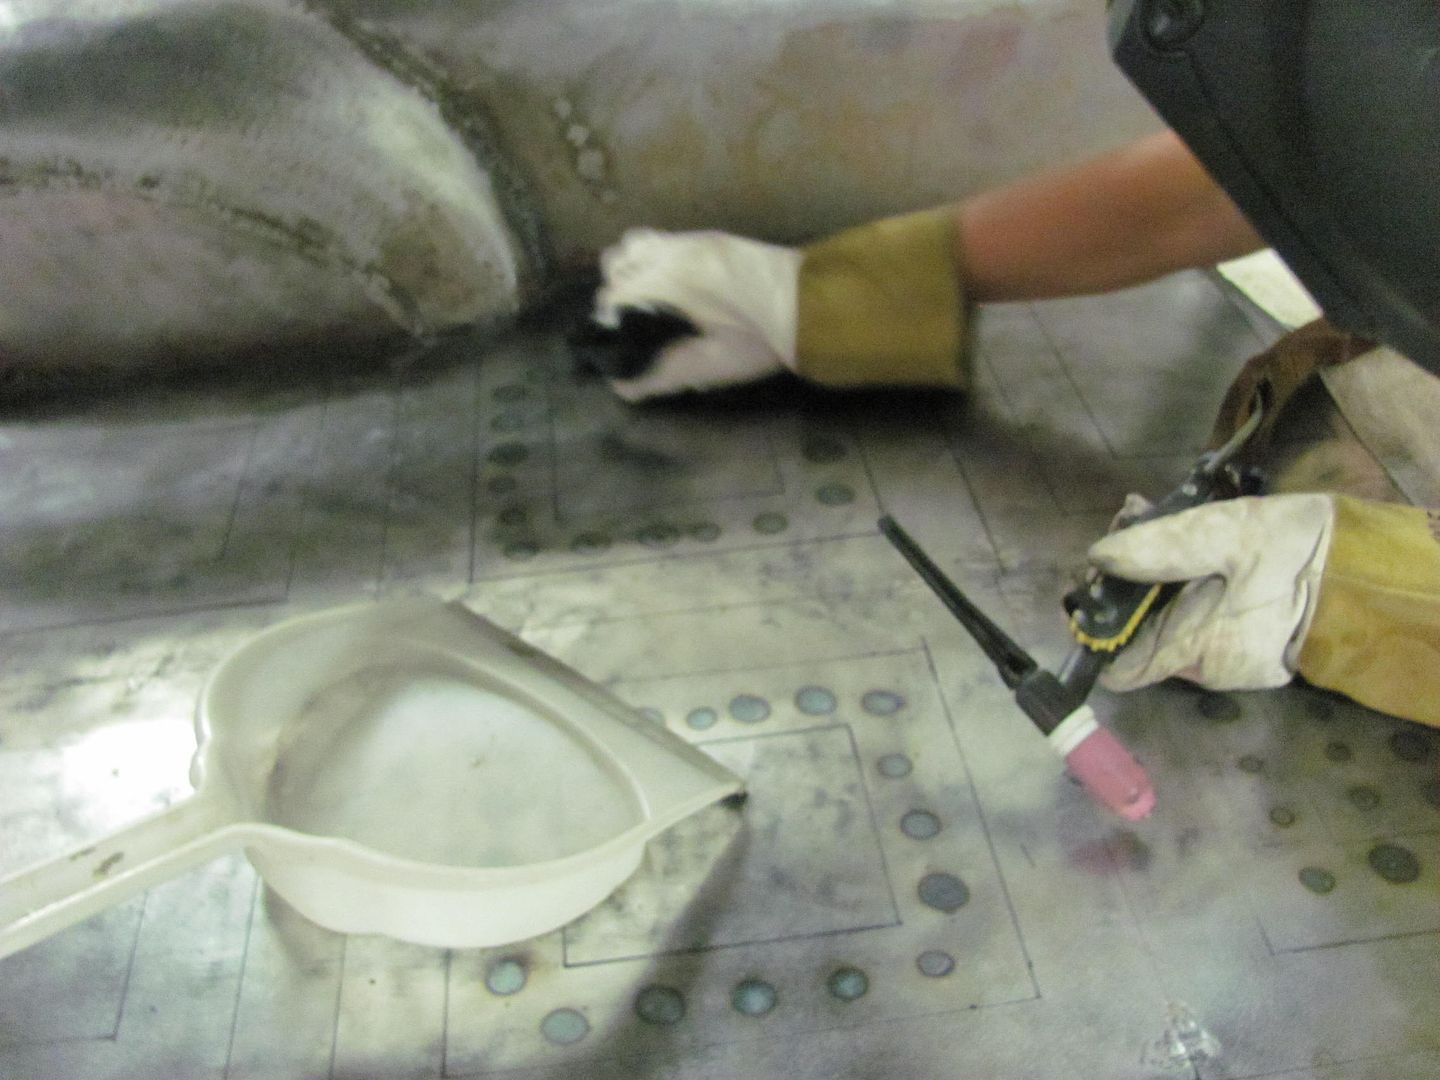 The plastic dust pan served as a tray to hold the wet rag, keeping it in closer proximity to where it was needed and attempt to limit the amount of water elsewhere. The results showed quite an improvement, and it's in need of some bumping at this point.. 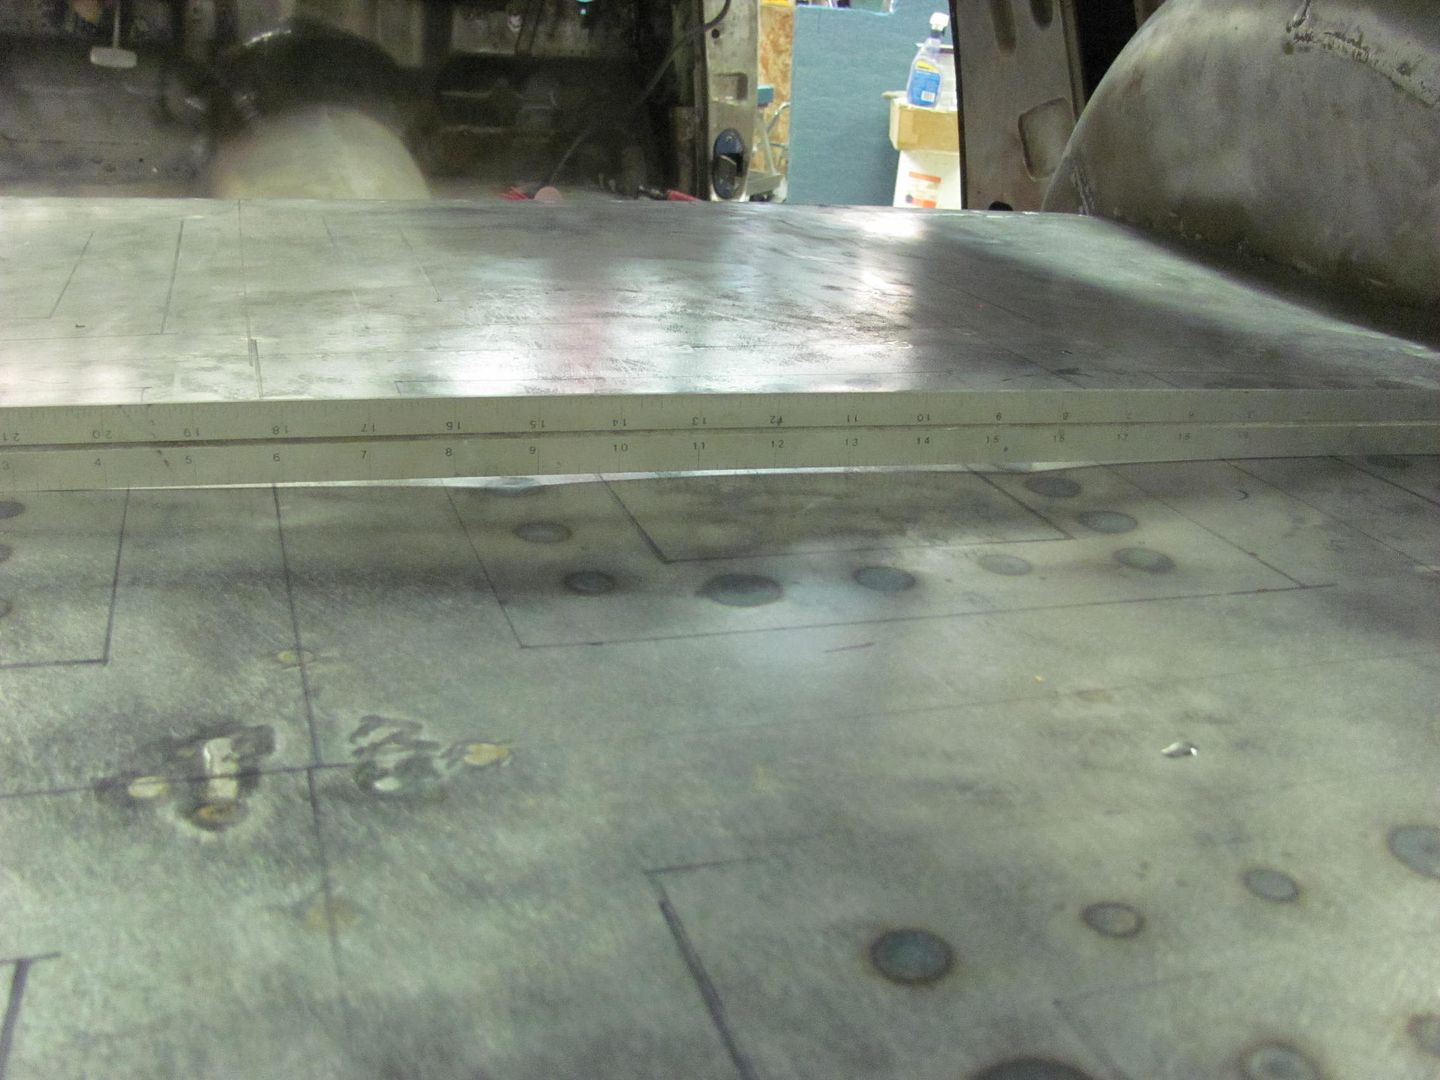 But alas, the gas tank is in the way, so we will likely get the body back on the rotisserie here soon in an effort to get the remaining prep prior to paint completed. Meanwhile, I was wet sanding and couldn't find the squeegee, so a trip to the local Ace Hardware at lunch, and we had a replacement. Works well, and no metal hardware on this new one to add any scratches.... 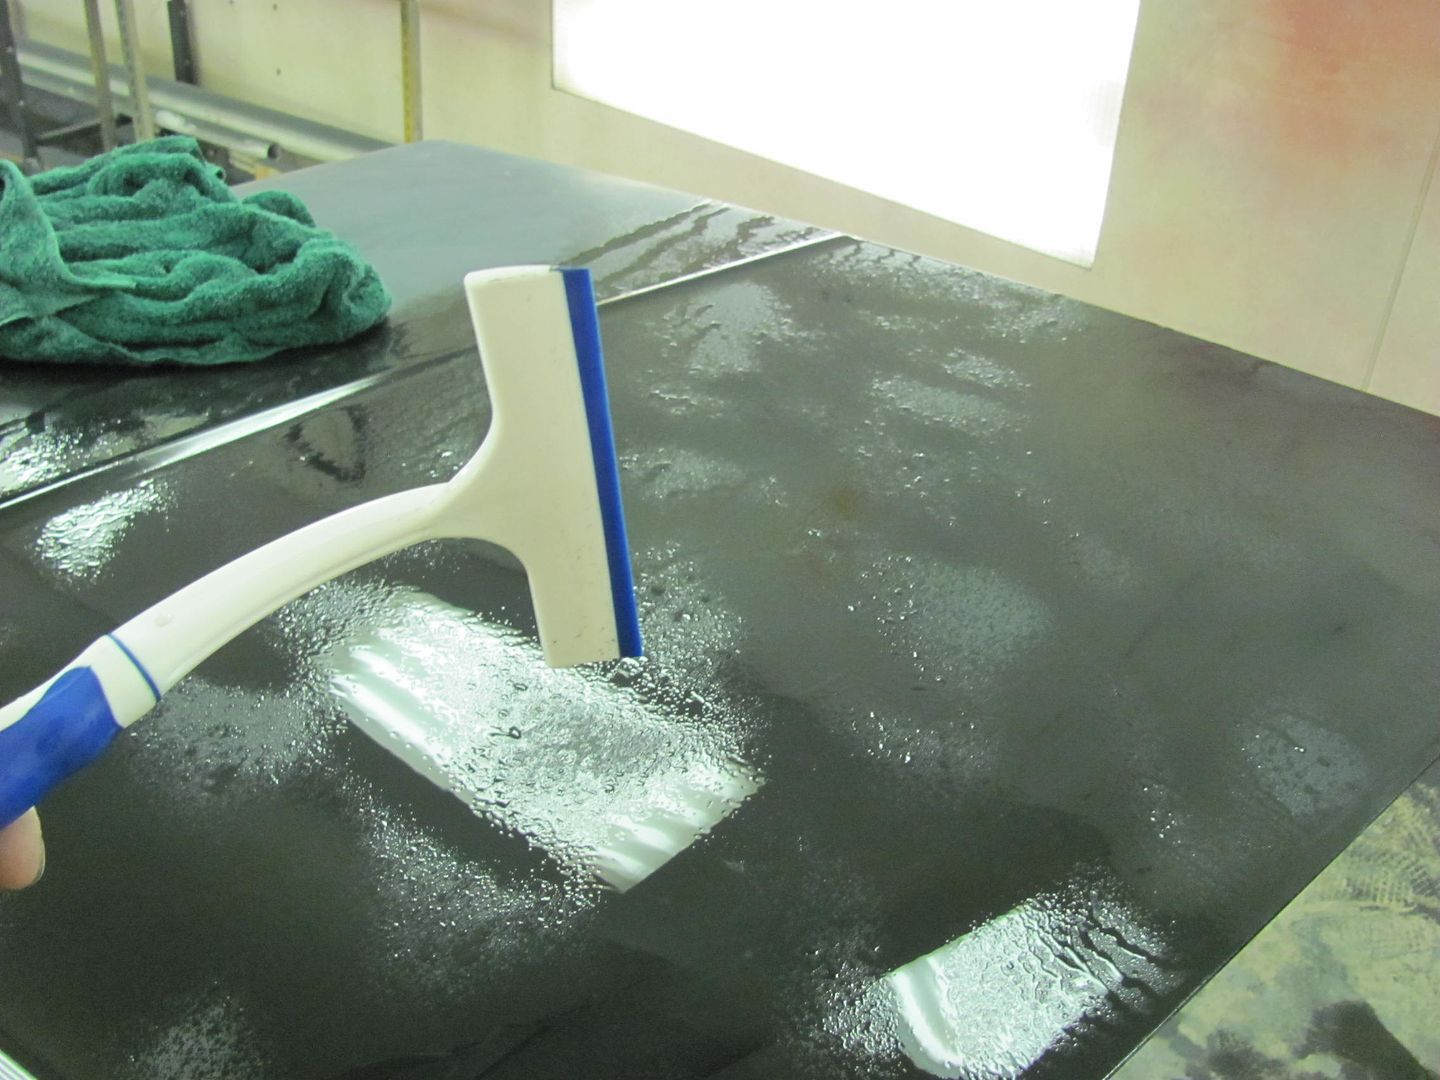 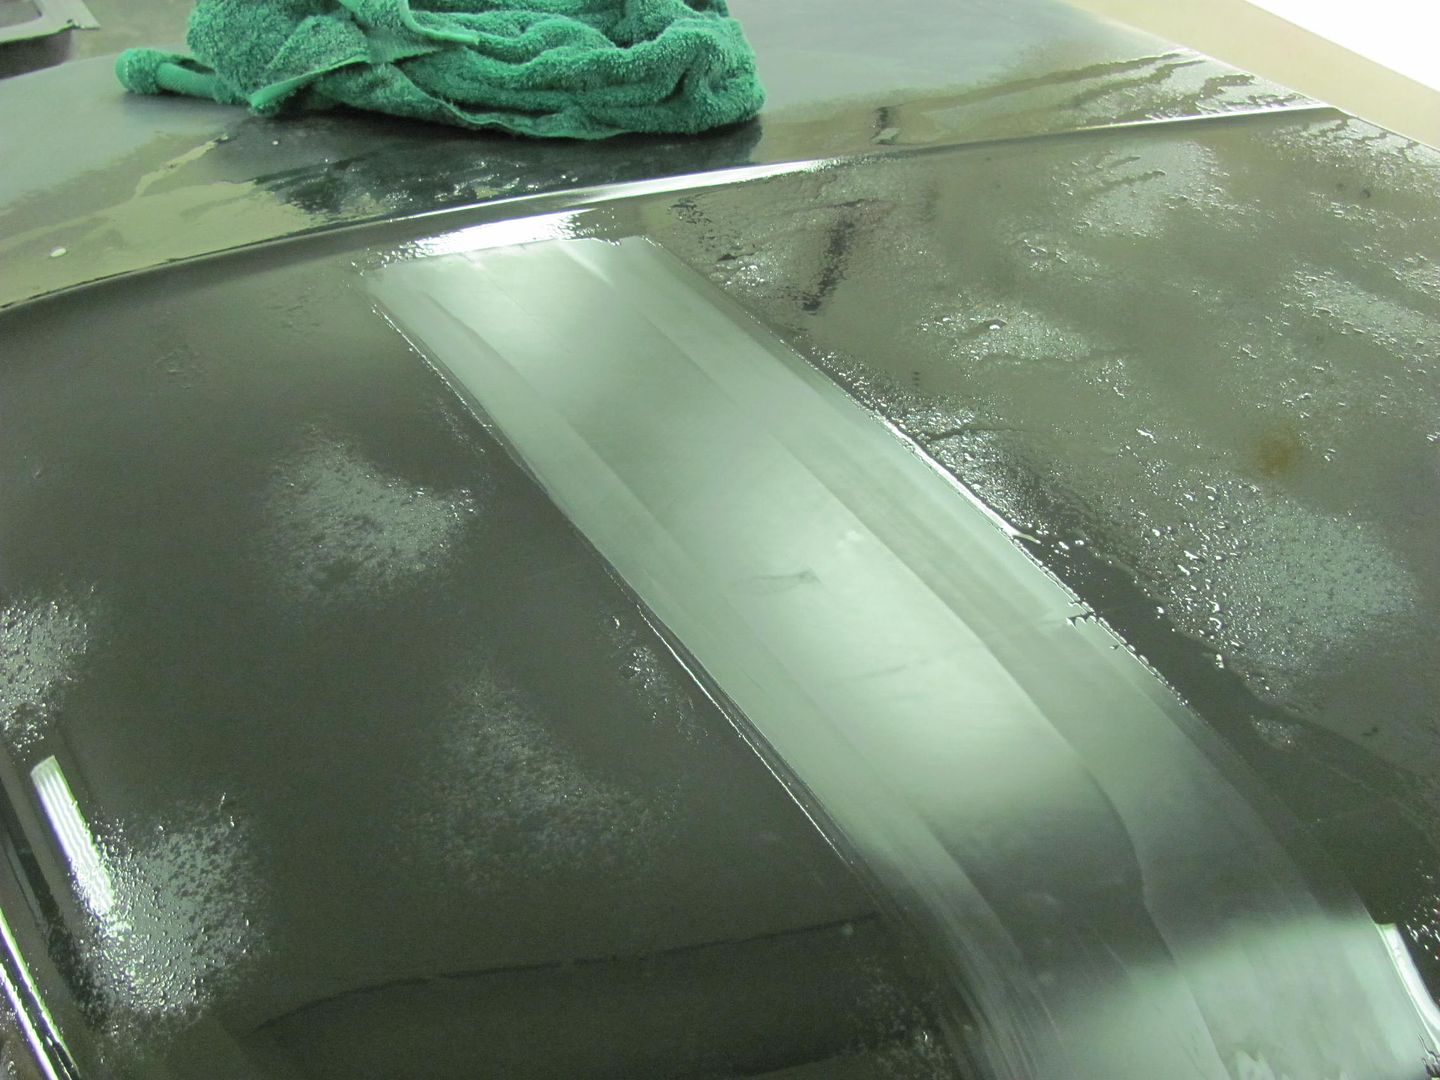 Exterior of the hood is about done...  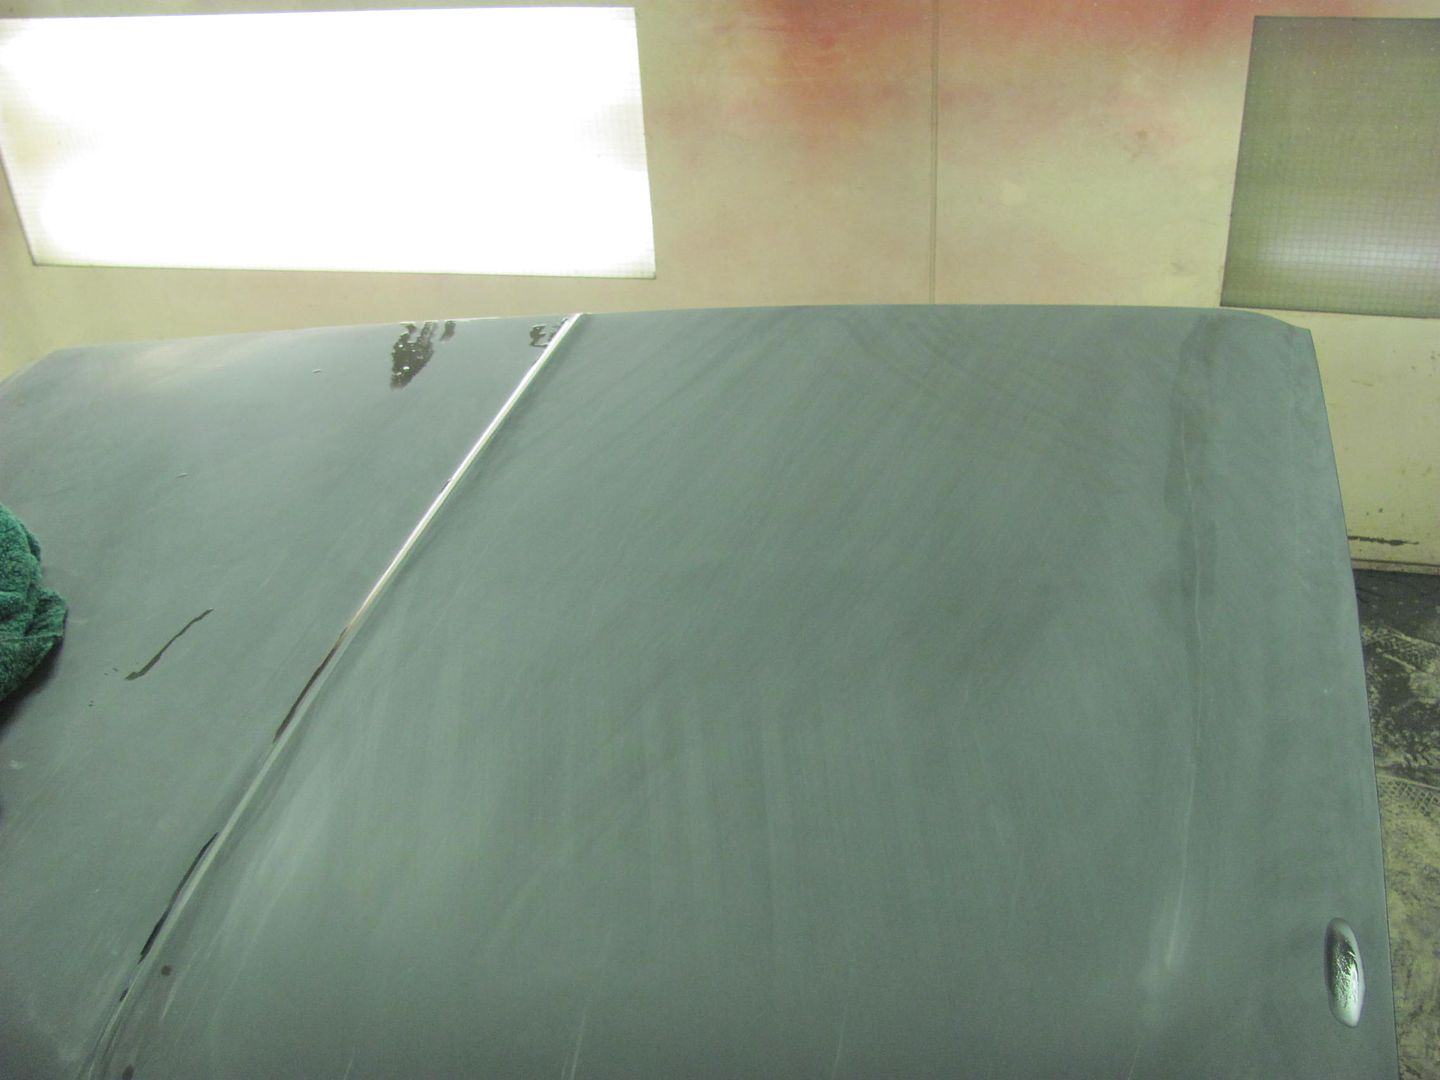
__________________
Robert |
|
|
|
|
09-12-2015, 07:47 PM
|
#499 |
|
Registered User
Join Date: May 2007
Location: Deale Md
Posts: 4,663
|
Re: 55 Wagon Progress
I was just thinking today, wonder how Kyle progress was coming along, get home from work and poof there's a update.
__________________
James 63 GMC V6 4speed carryall 65 chevy swb bbw V8 auto 68 K20 327/4 speed, buddy buckets 2002 GMC CC Dually Duramax 64 GMC lwb 3/4 V6 4speed SOLD 66 GMC swb bbw buddy buckets SOLD IG duallyjams The only thing that stays the same is constant change! |
|
|
|
|
09-12-2015, 11:53 PM
|
#500 |
|
Registered User
Join Date: Apr 2011
Location: .
Posts: 3,104
|
Re: 55 Wagon Progress
Looks great. Was thanking you'all today when I was welding in my dash modifications, blending & bumping.
Thanks for all the helpful tips |
|
|
|
 |
| Bookmarks |
|
|


 Linear Mode

