
|
|
|
 11-17-2015, 11:58 PM
|
#1 |
|
Registered User
Join Date: Jan 2013
Location: Leonardtown, MD
Posts: 1,637
|
Re: 55 Wagon Progress
Still working on the frame, Kyle was prepping the frame for welding on the strengthening plates while I drilled the plates for plug welds..
Plug welding.... 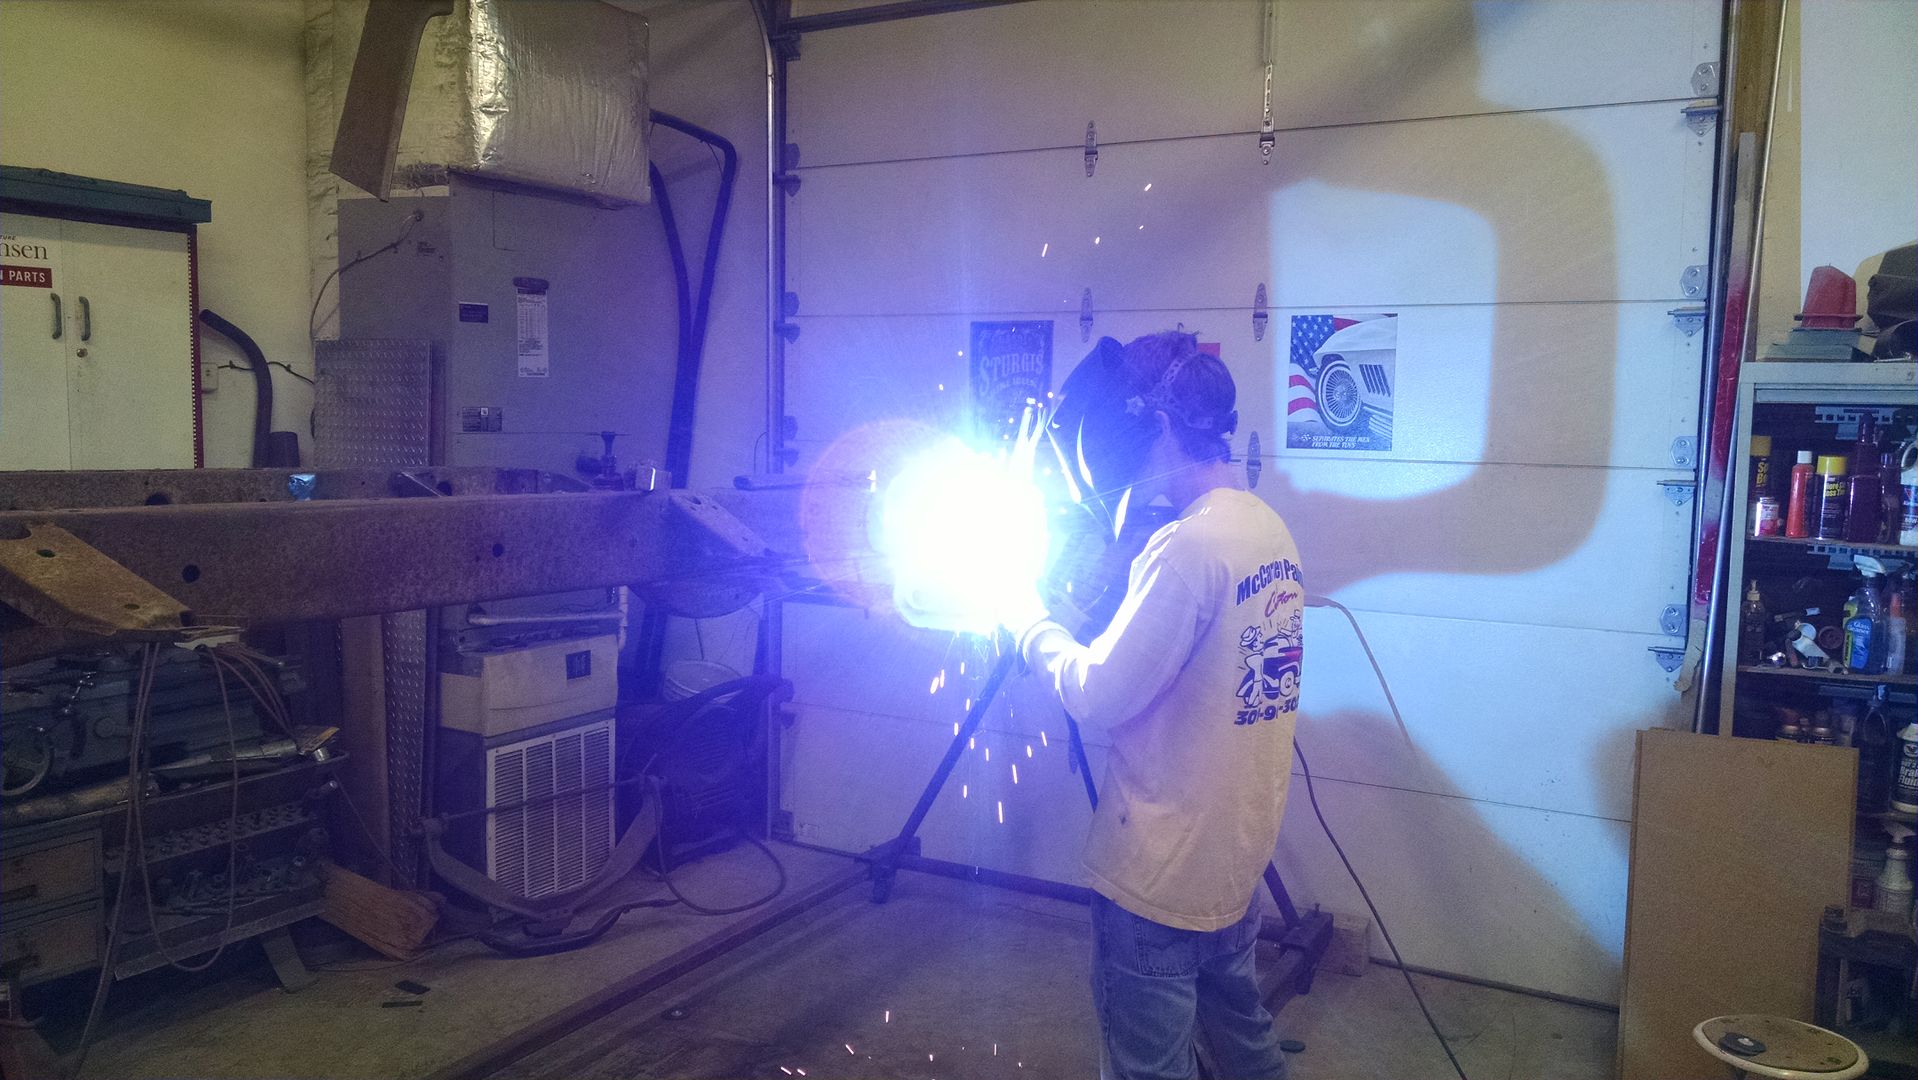 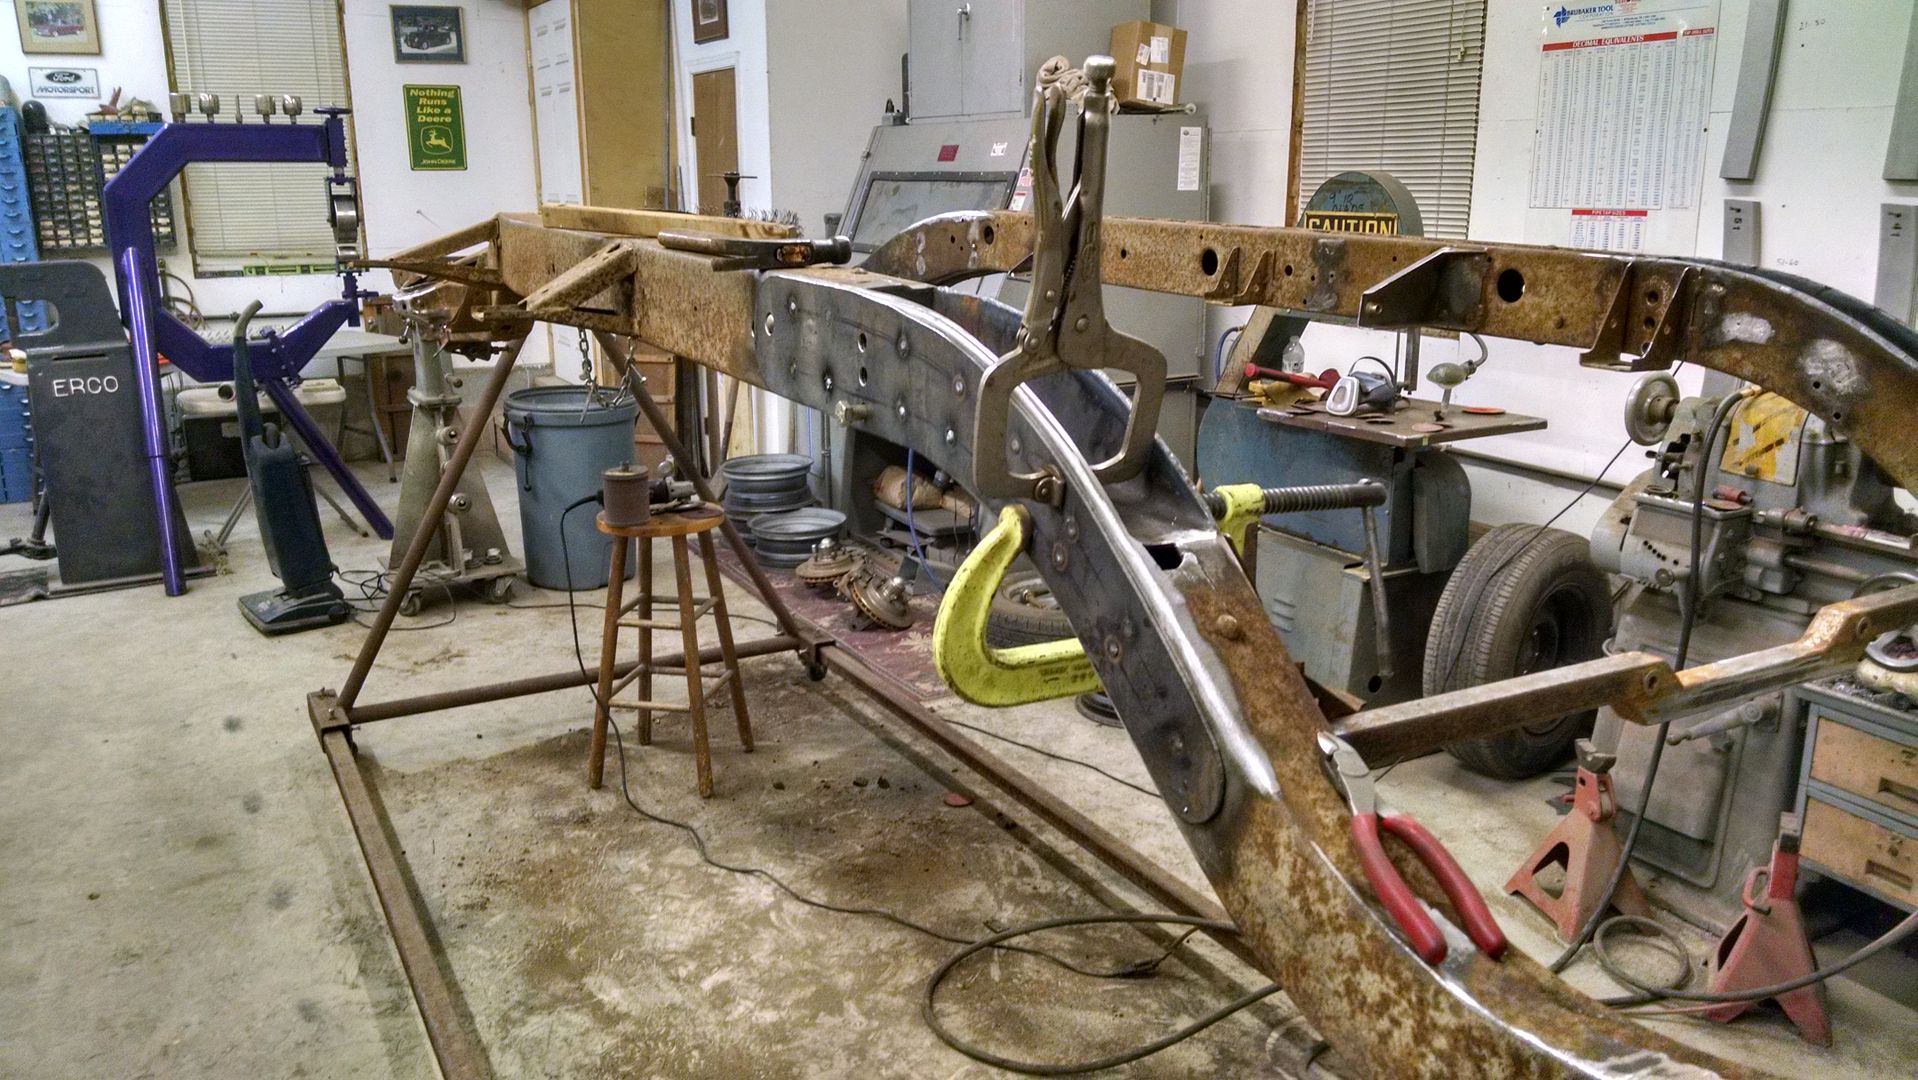 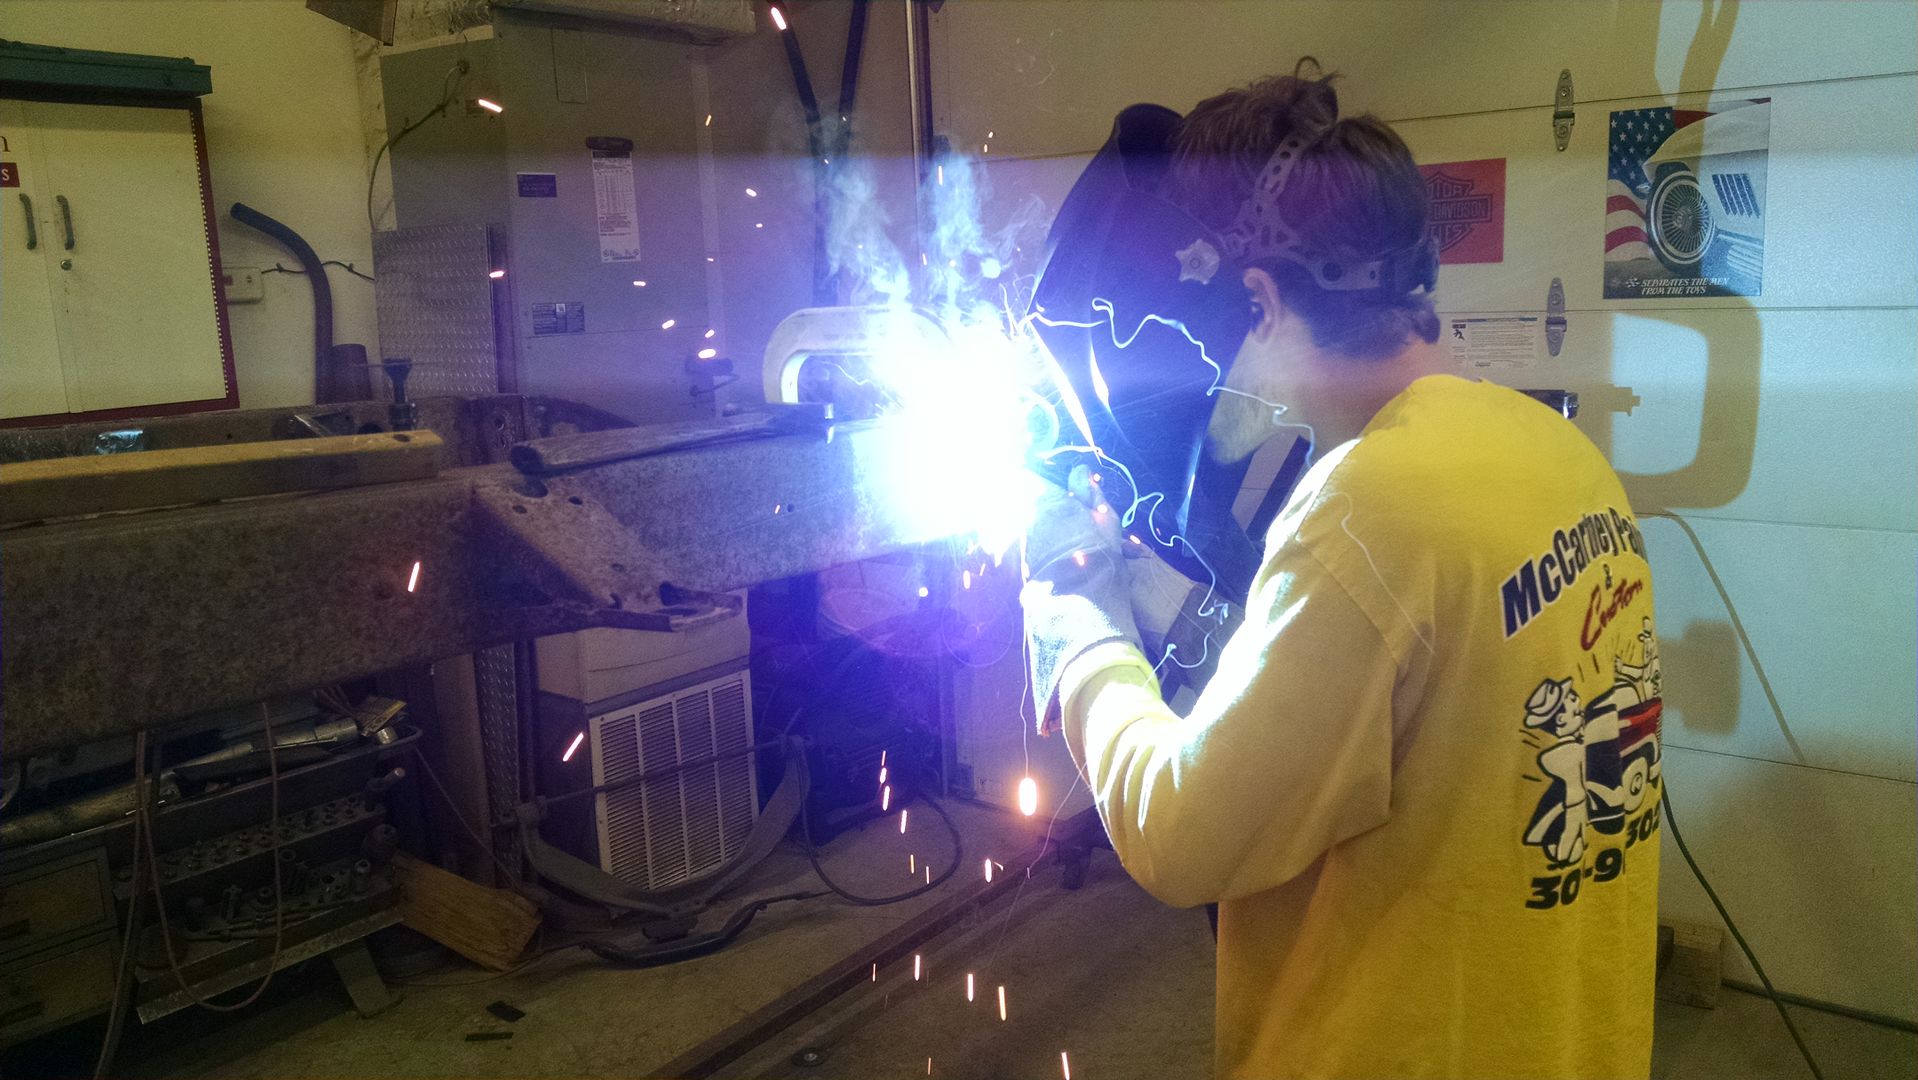 The outer perimeter will be Tig welded...
__________________
Robert |

|

|
|
11-18-2015, 08:57 PM
|
#2 |
|
Senior Member
 Join Date: Jul 2012
Location: Oblong, Illinois
Posts: 7,017
|
Re: 55 Wagon Progress
Continued nice work. Reinforcing the frame along the pocket is a good idea. Logical and I haven't noticed it done before.
|
|
|
|
|
11-20-2015, 12:54 AM
|
#3 |
|
Registered User
Join Date: Jan 2013
Location: Leonardtown, MD
Posts: 1,637
|
Re: 55 Wagon Progress
Thanks, I just wasn't keen on the pocket kit alone, a little added security blanket, if you will..
Still working the frame, here's the driver's side plate all clamped up and ready to go.. Hindsight and all that, should have made the plates about 2" longer and we wouldn't have those pesky holes in the way at the front end.. 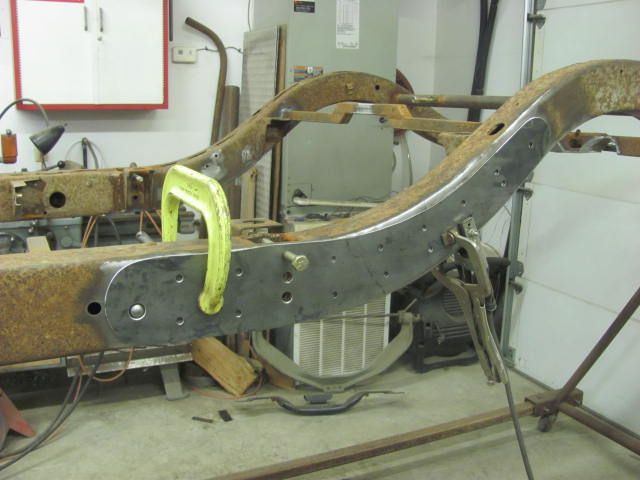 So we decided to cut out some 14 gauge and fill in those holes. Cut a piece the same width as the hole, and rounded the end. Then used the band saw to cut a vee on the back side of the "plugs" and continued to clean up the radius with the 3" Roloc sander. Once close, a bit more on the band saw and break off the remaining, then fine tune with the sander.. 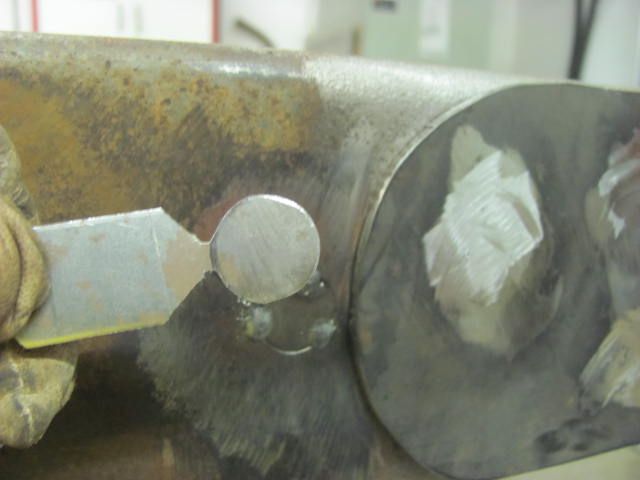 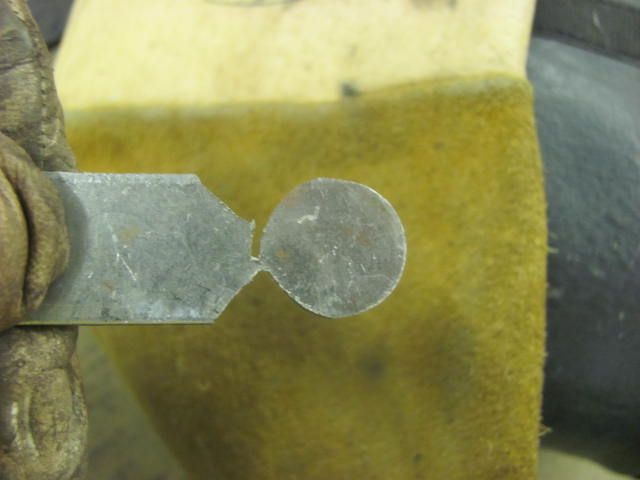 Magnet used to hold in place for tacking.. 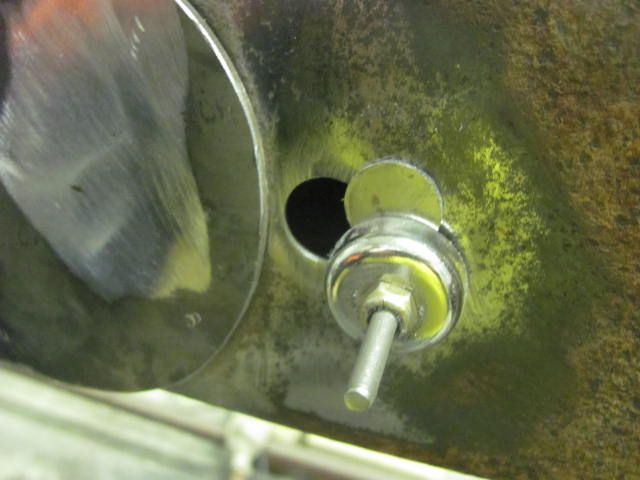 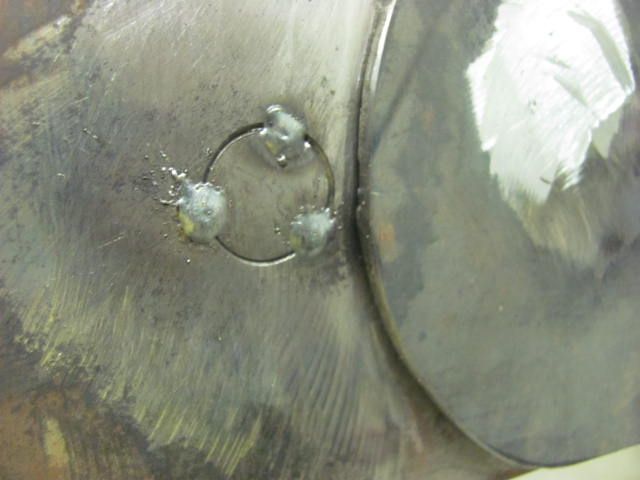 For TIG welding the perimeter of the plates, we decided to make up a "crutch" that we could rest our hand on for better holding the torch... 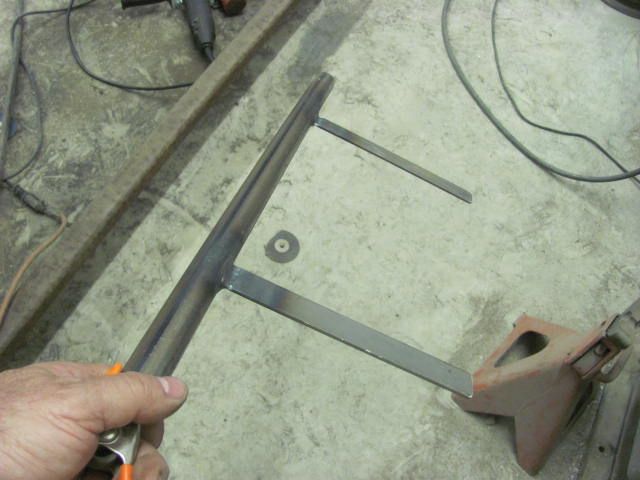 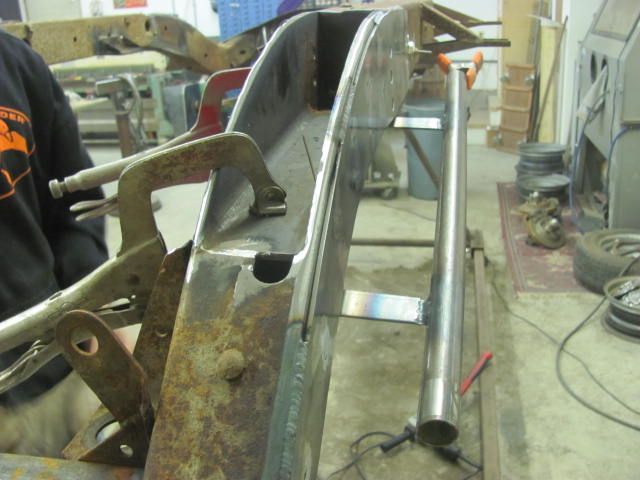 Kyle is getting a pretty good hold on this welding stuff... 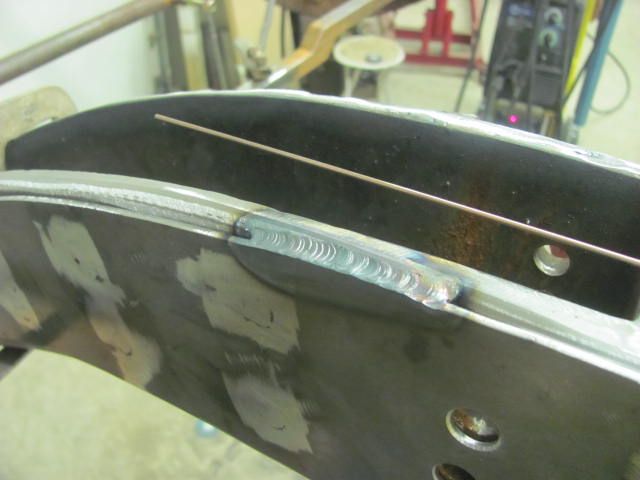 He even let me get in some practice.... 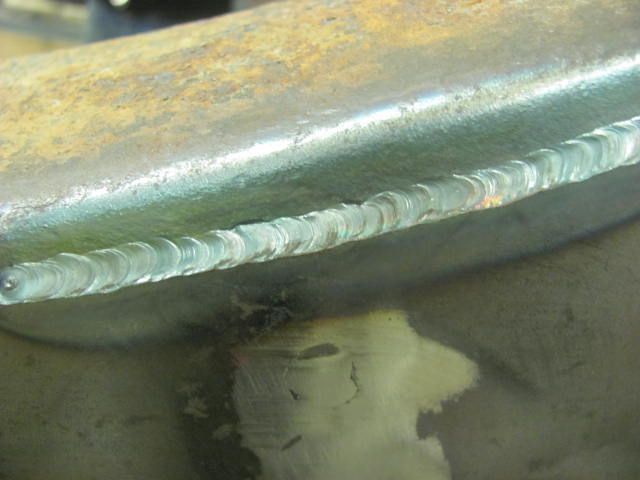
__________________
Robert |
|
|
|
|
11-20-2015, 10:22 AM
|
#4 |
|
Senior Member
Join Date: Mar 2011
Location: West Plains, Missouri
Posts: 7,555
|
Re: 55 Wagon Progress
Looking great as always...Jim
__________________
my build thread: http://67-72chevytrucks.com/vboard/s...d.php?t=459839 Jimbo's long bed step build:http://67-72chevytrucks.com/vboard/s...t=464626<br /> |
|
|
|
|
11-21-2015, 07:54 PM
|
#5 | |
|
Registered User
Join Date: Sep 2013
Location: Glendale, AZ
Posts: 289
|
Re: 55 Wagon Progress
Quote:
I just read the whole thread.. Really nice attention to details, I've learned allot,, thank you for the time it takes to do the images and post the information also |
|
|
|
|
|
12-02-2015, 12:19 AM
|
#6 |
|
Registered User
Join Date: Jan 2013
Location: Leonardtown, MD
Posts: 1,637
|
Re: 55 Wagon Progress
No, they are dragging their feet and in the meantime the dirt is piling up
 Kyle got the welds finished up on the frame plates... 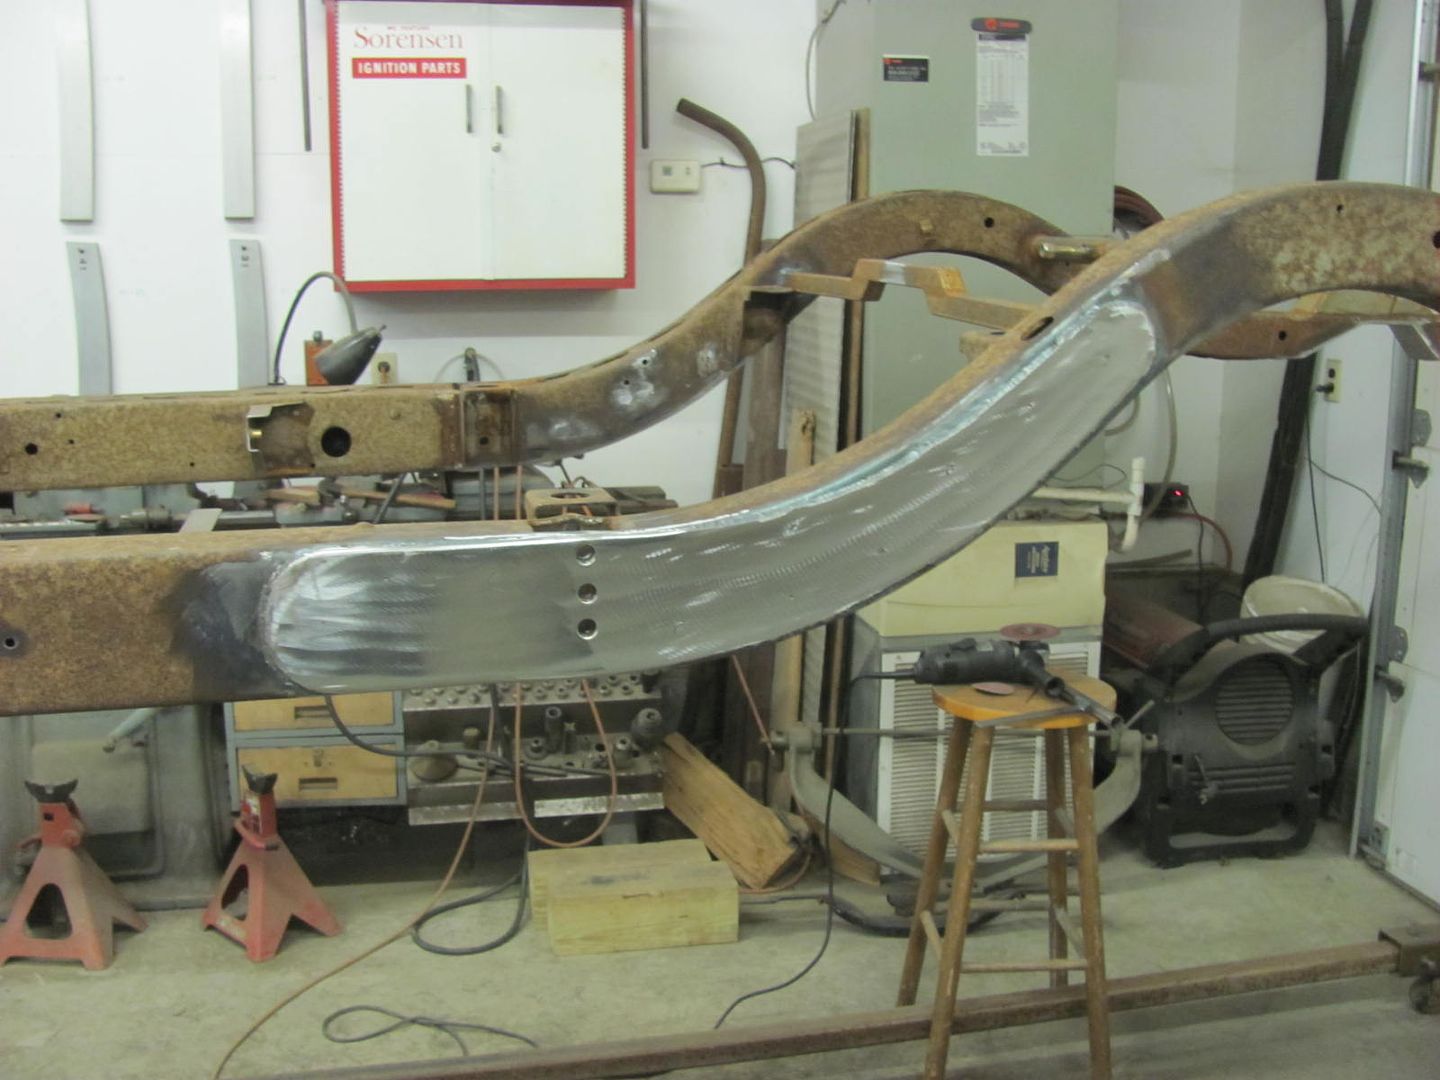  Frame is ready to send to get media blasted... 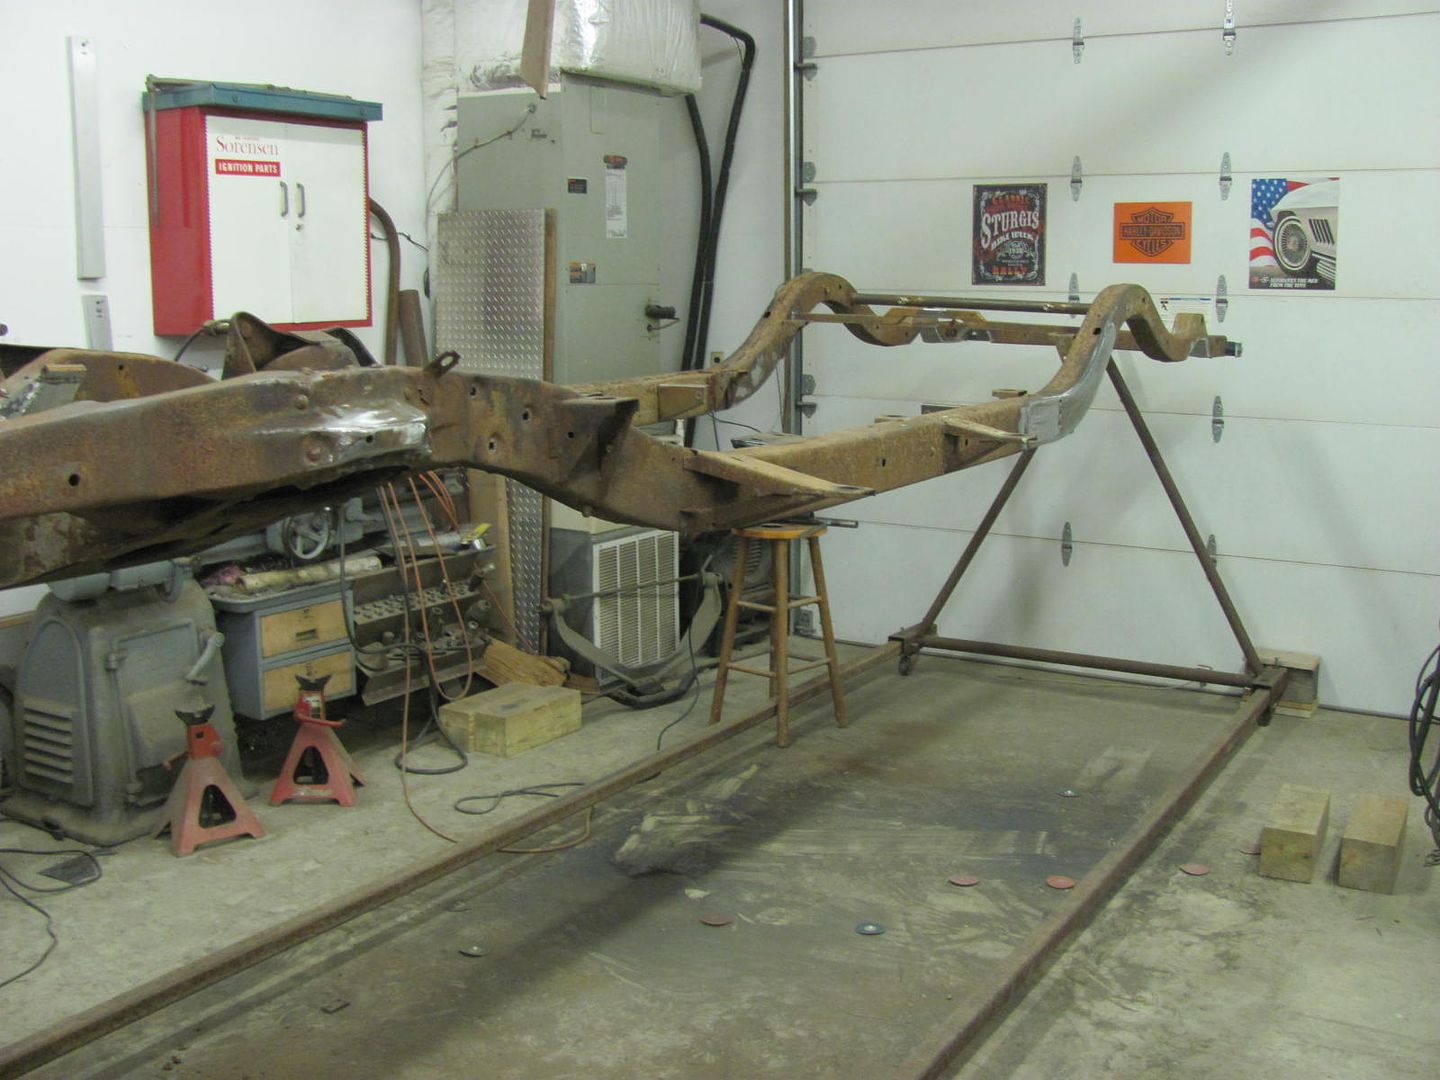 And the rear was busted apart for some media blasting as well 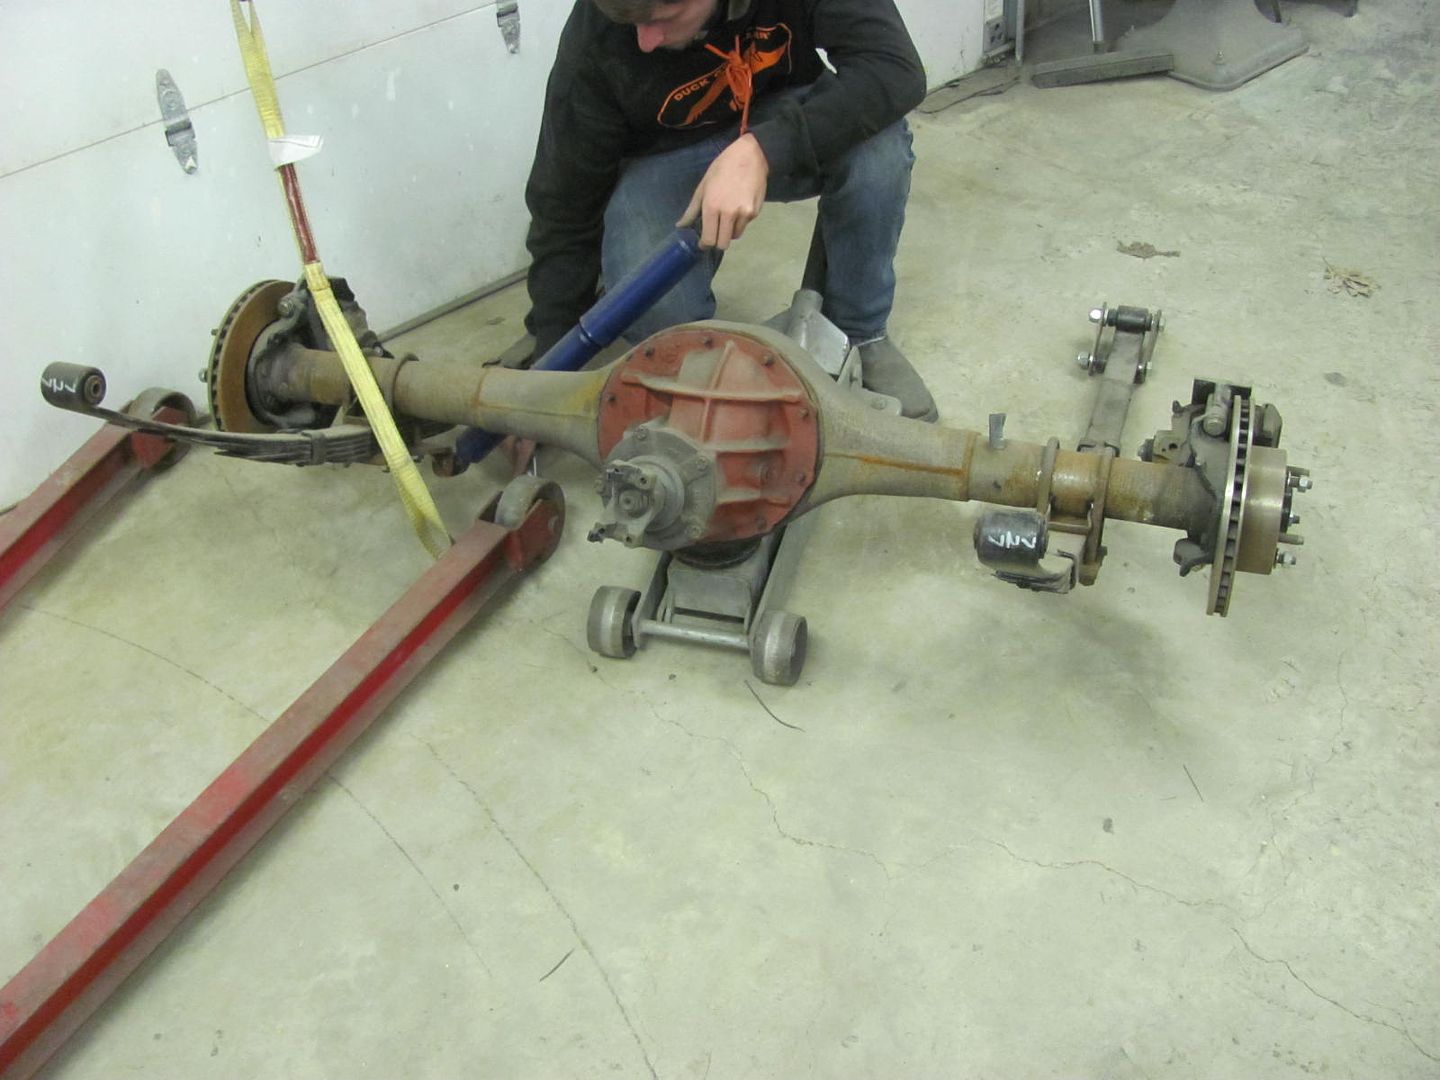 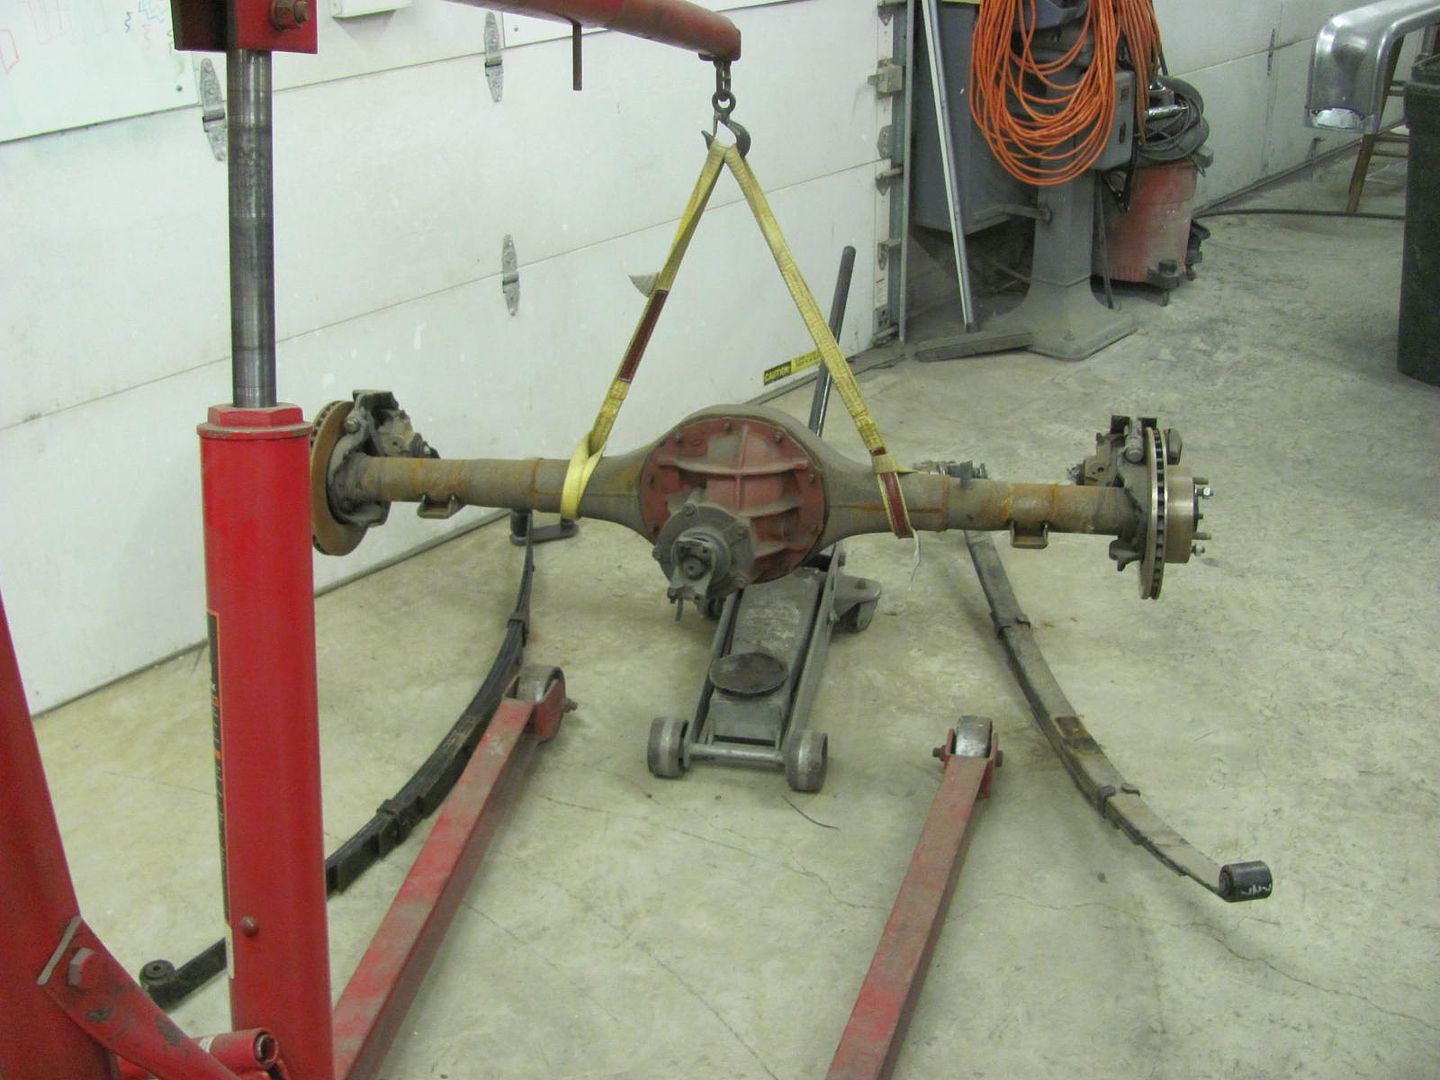 Getting the bus parts prepped for paint, the owner had a used bumper in stock so it will get repainted... 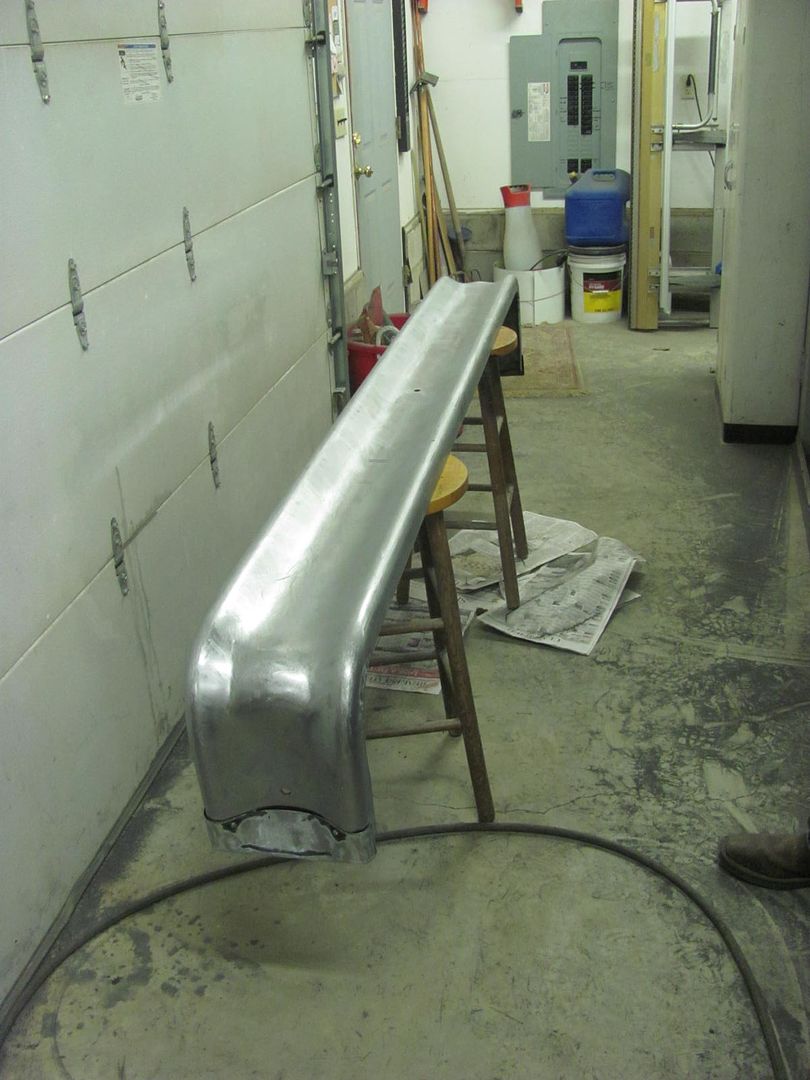 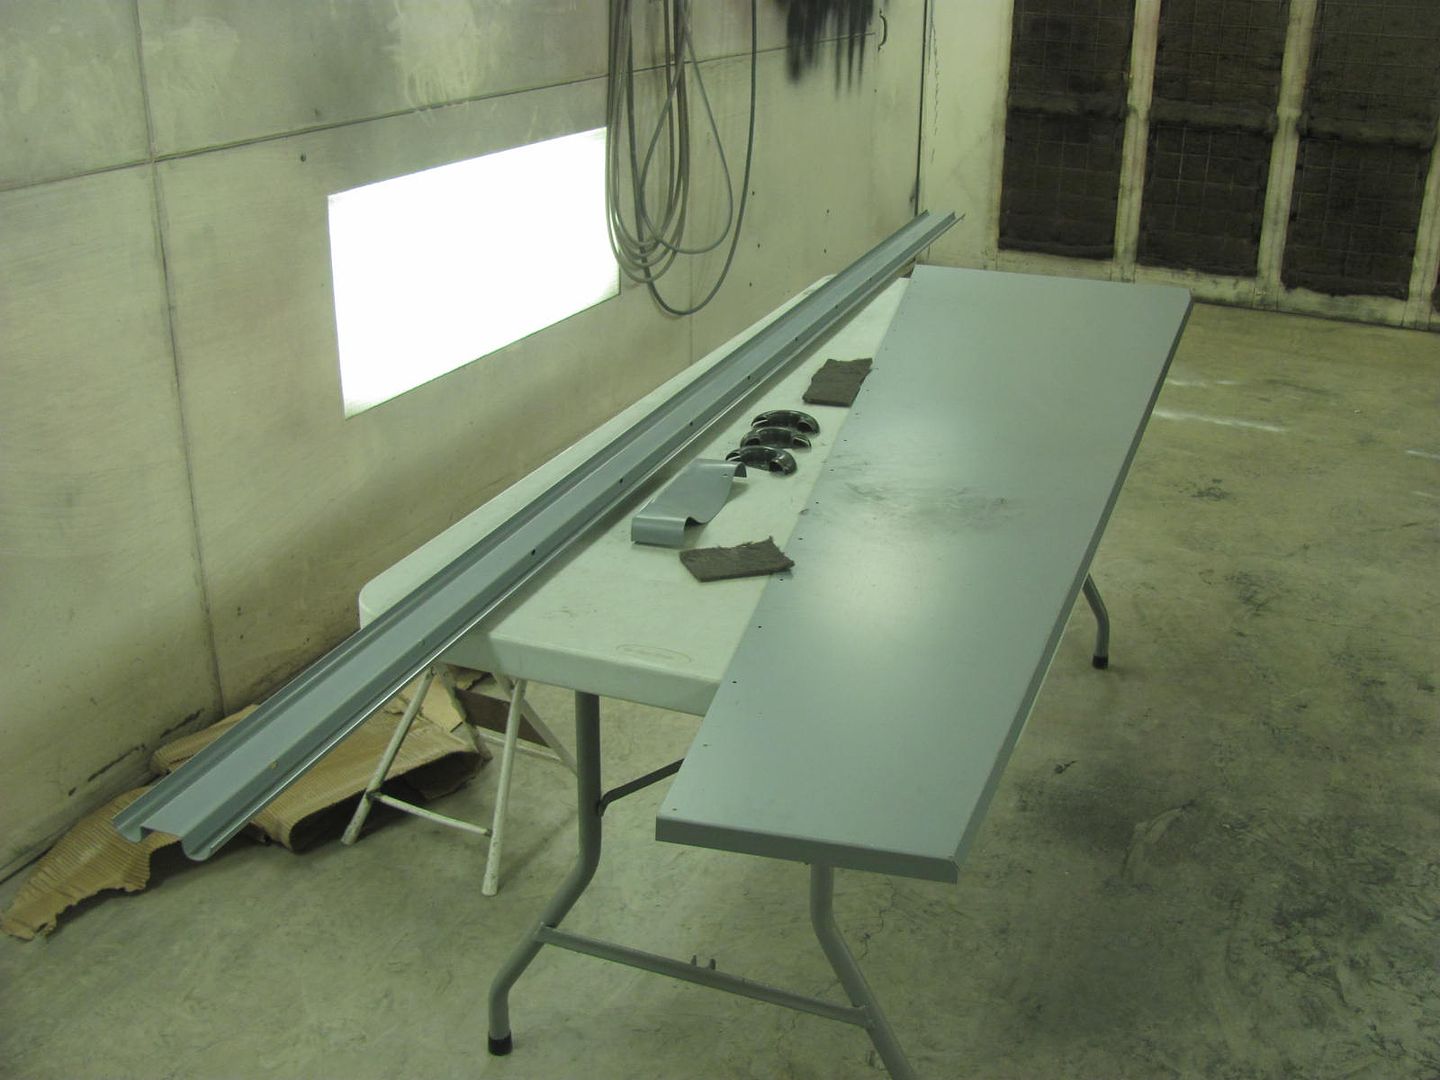
__________________
Robert |
|
|
|
|
12-05-2015, 12:26 AM
|
#7 |
|
Registered User
Join Date: Jan 2013
Location: Leonardtown, MD
Posts: 1,637
|
Re: 55 Wagon Progress
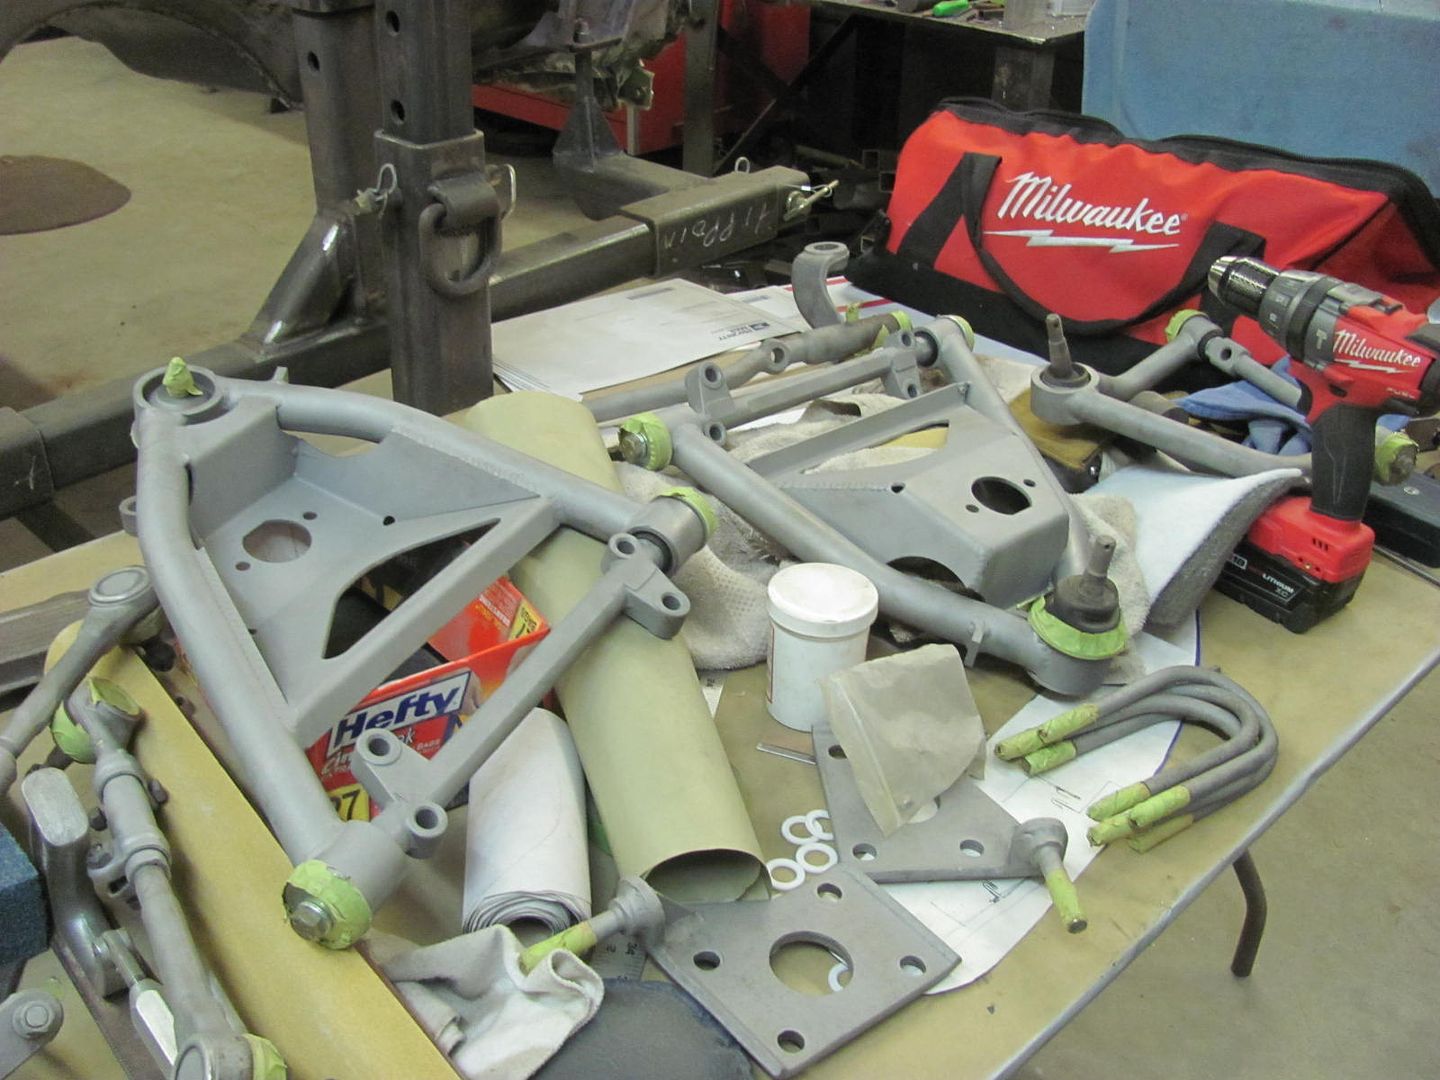
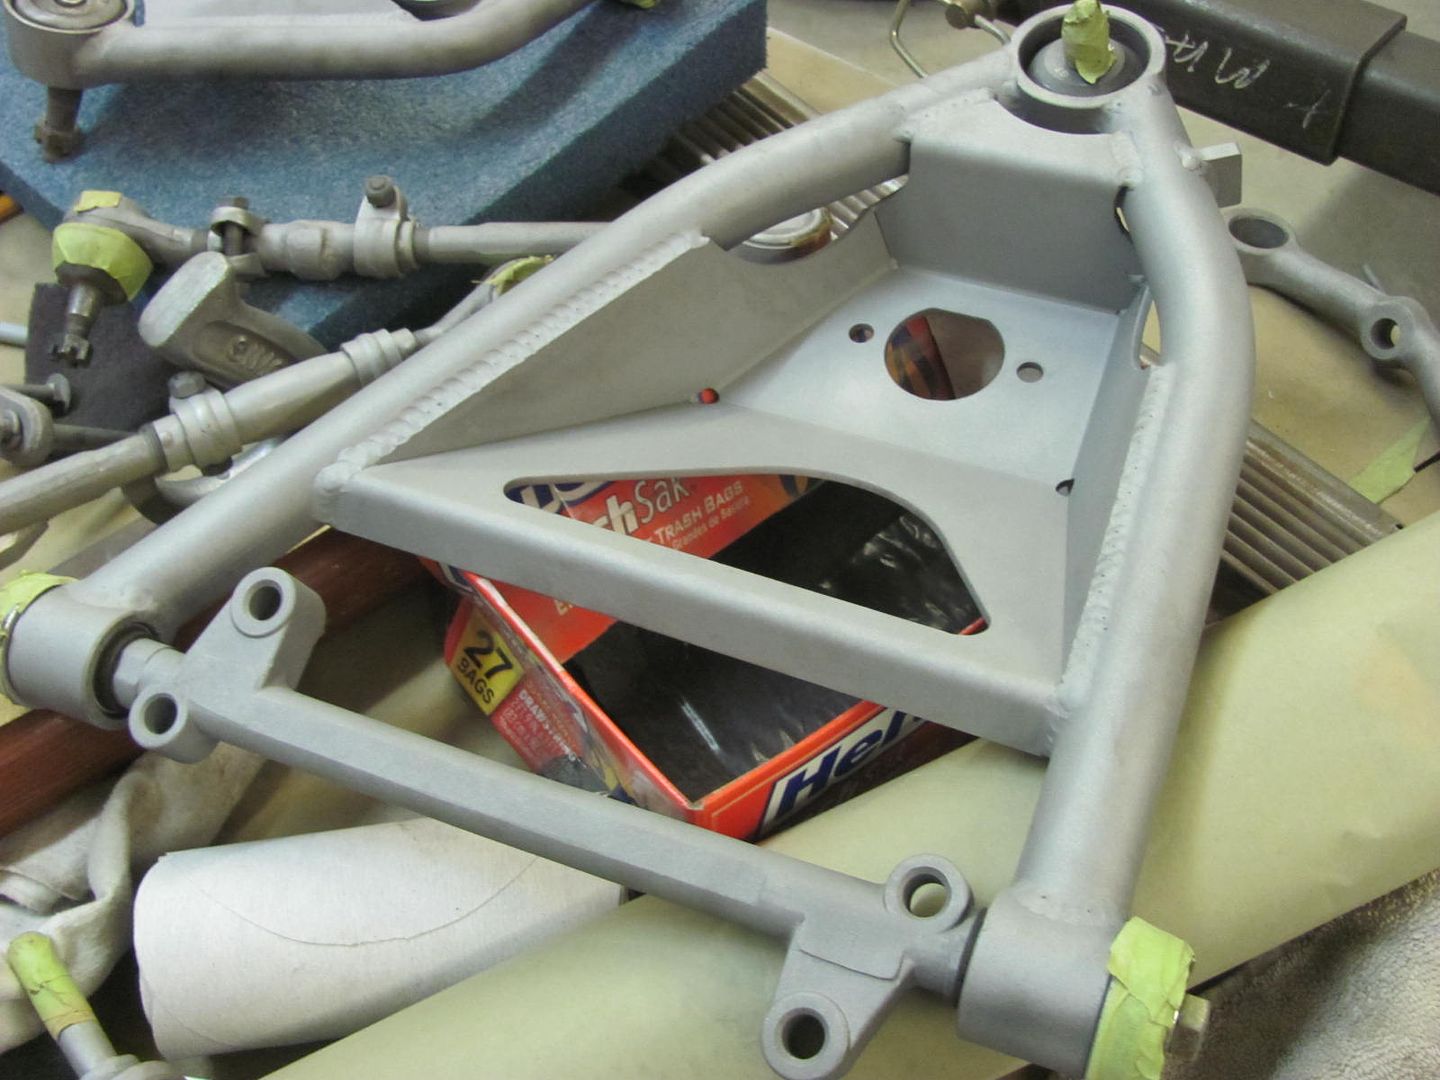
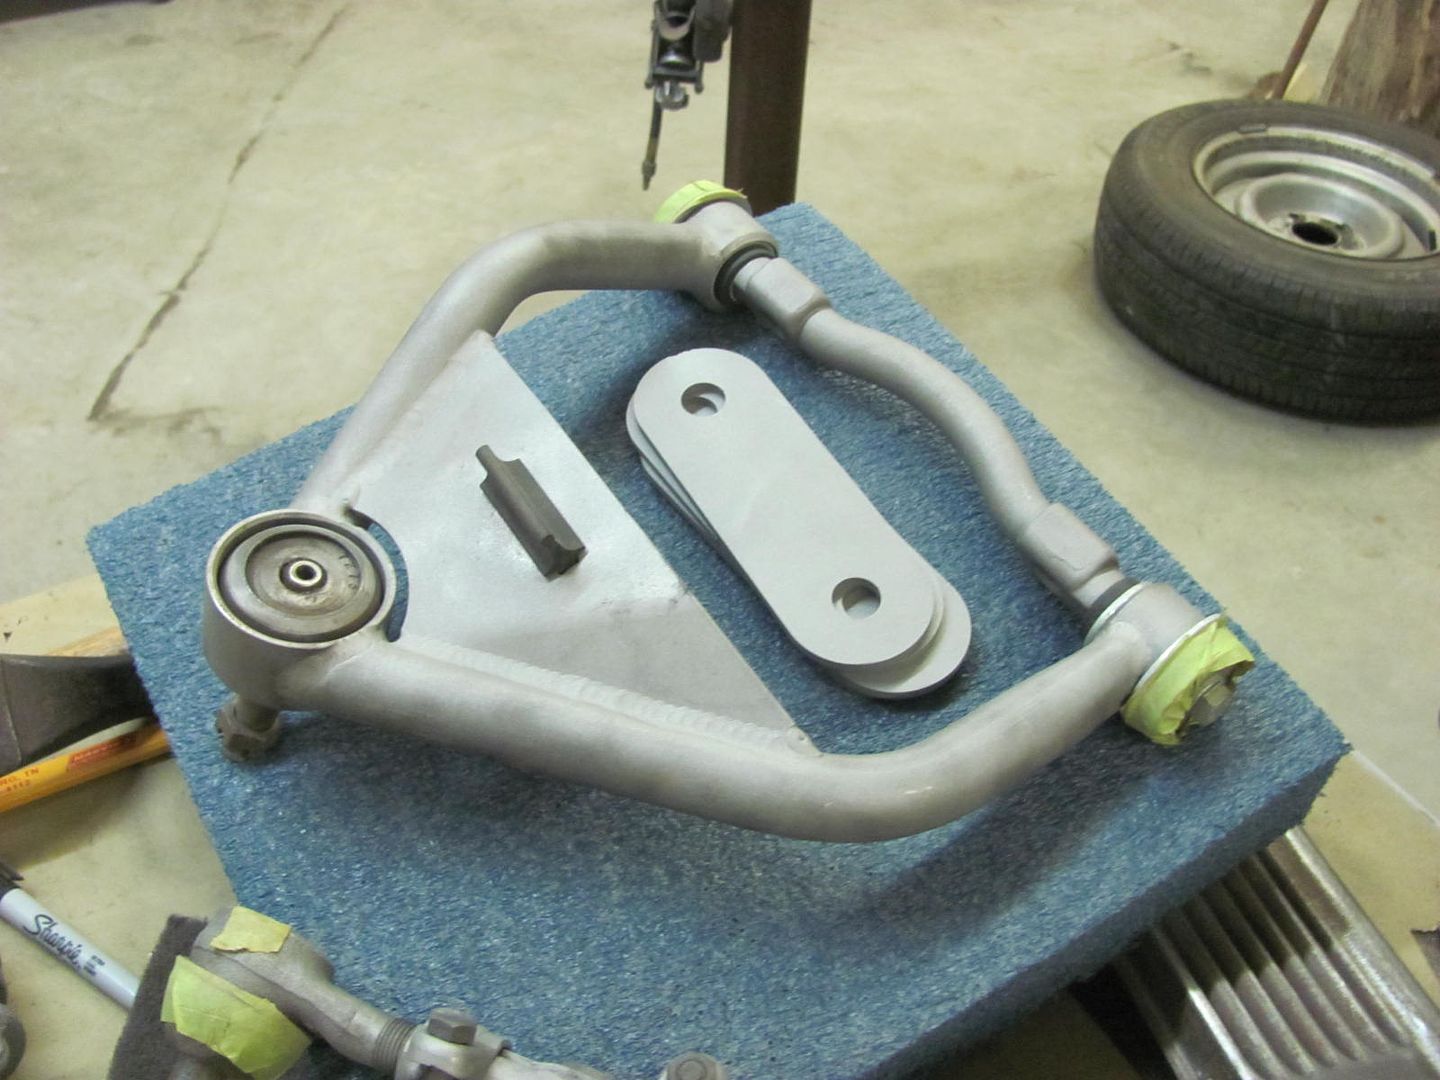
We've been waiting for an opening at the machine shop's blasting booth, we're going to get the frame done first. They have some large platform in there now for the US Navy, so it looks like another couple weeks.. So in the meantime, Kyle has been prepping some front end components for paint..
    ......and we should have this showing up tomorrow, need to get some metal cut out of the side and new replacement made up... 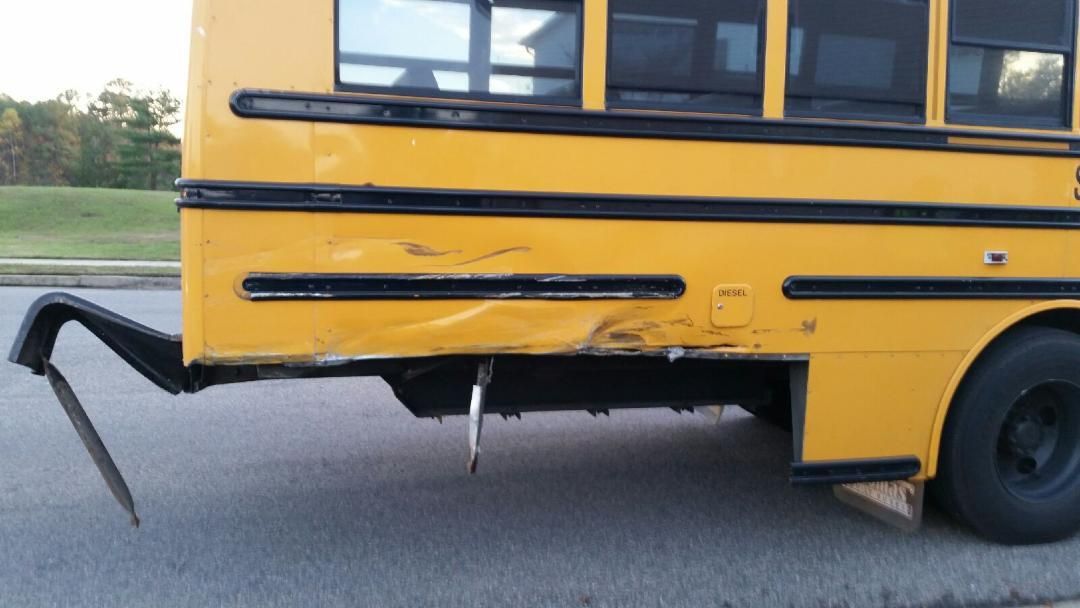
__________________
Robert |
|
|
|
|
12-05-2015, 10:24 PM
|
#8 |
|
Registered User
Join Date: Jan 2013
Location: Leonardtown, MD
Posts: 1,637
|
Re: 55 Wagon Progress
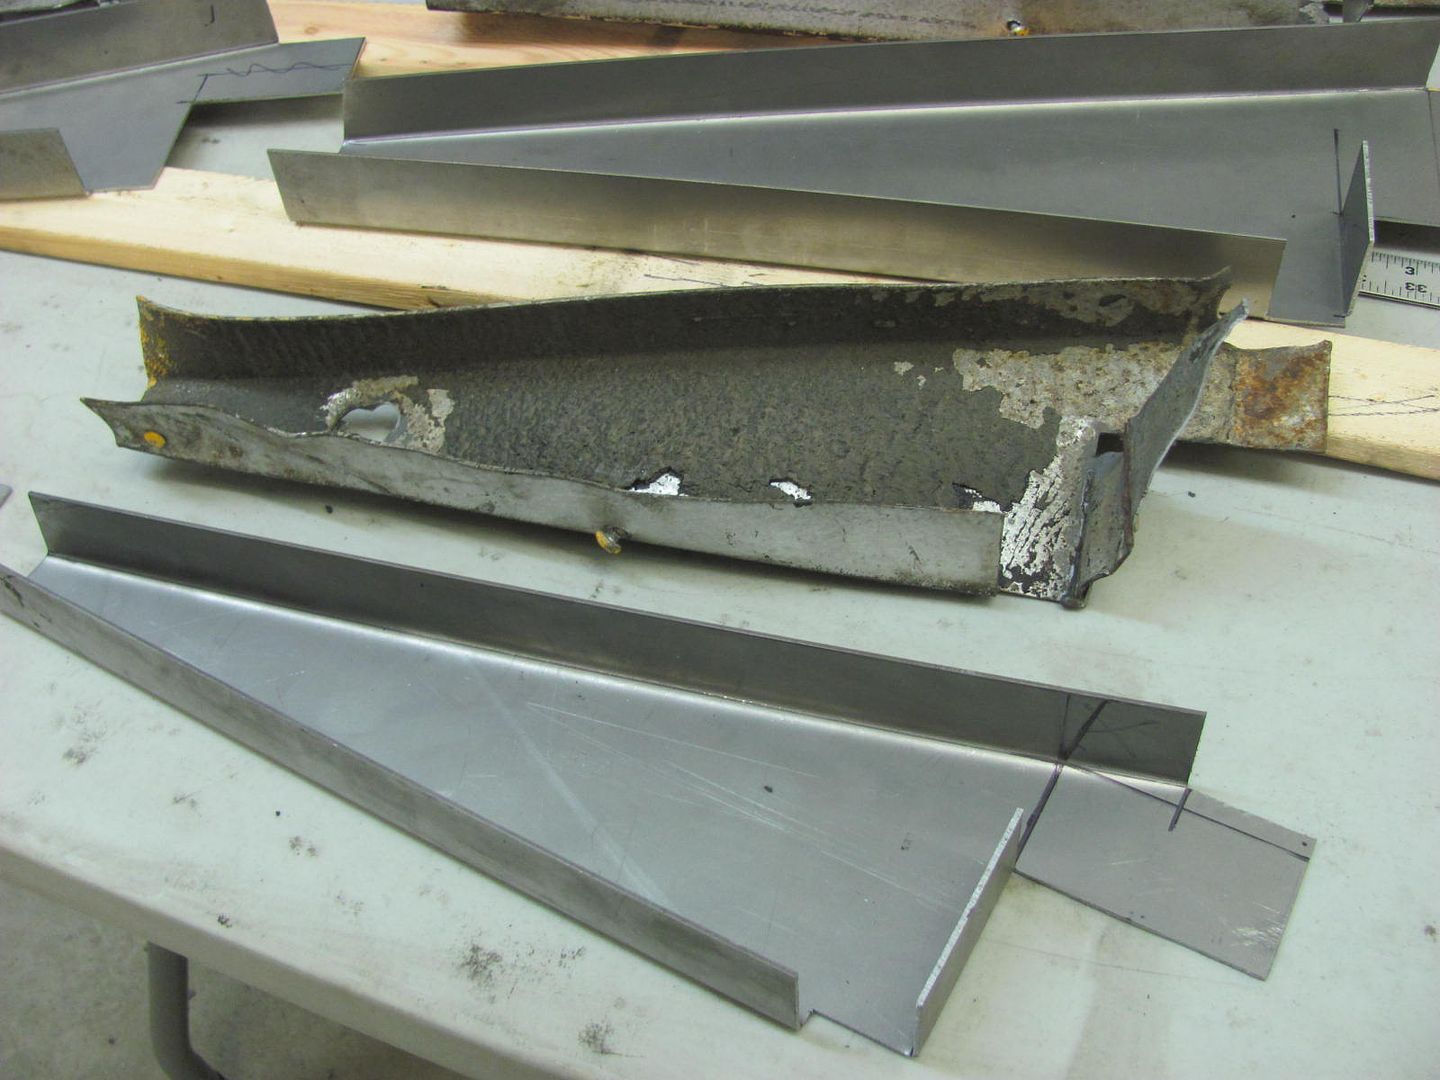
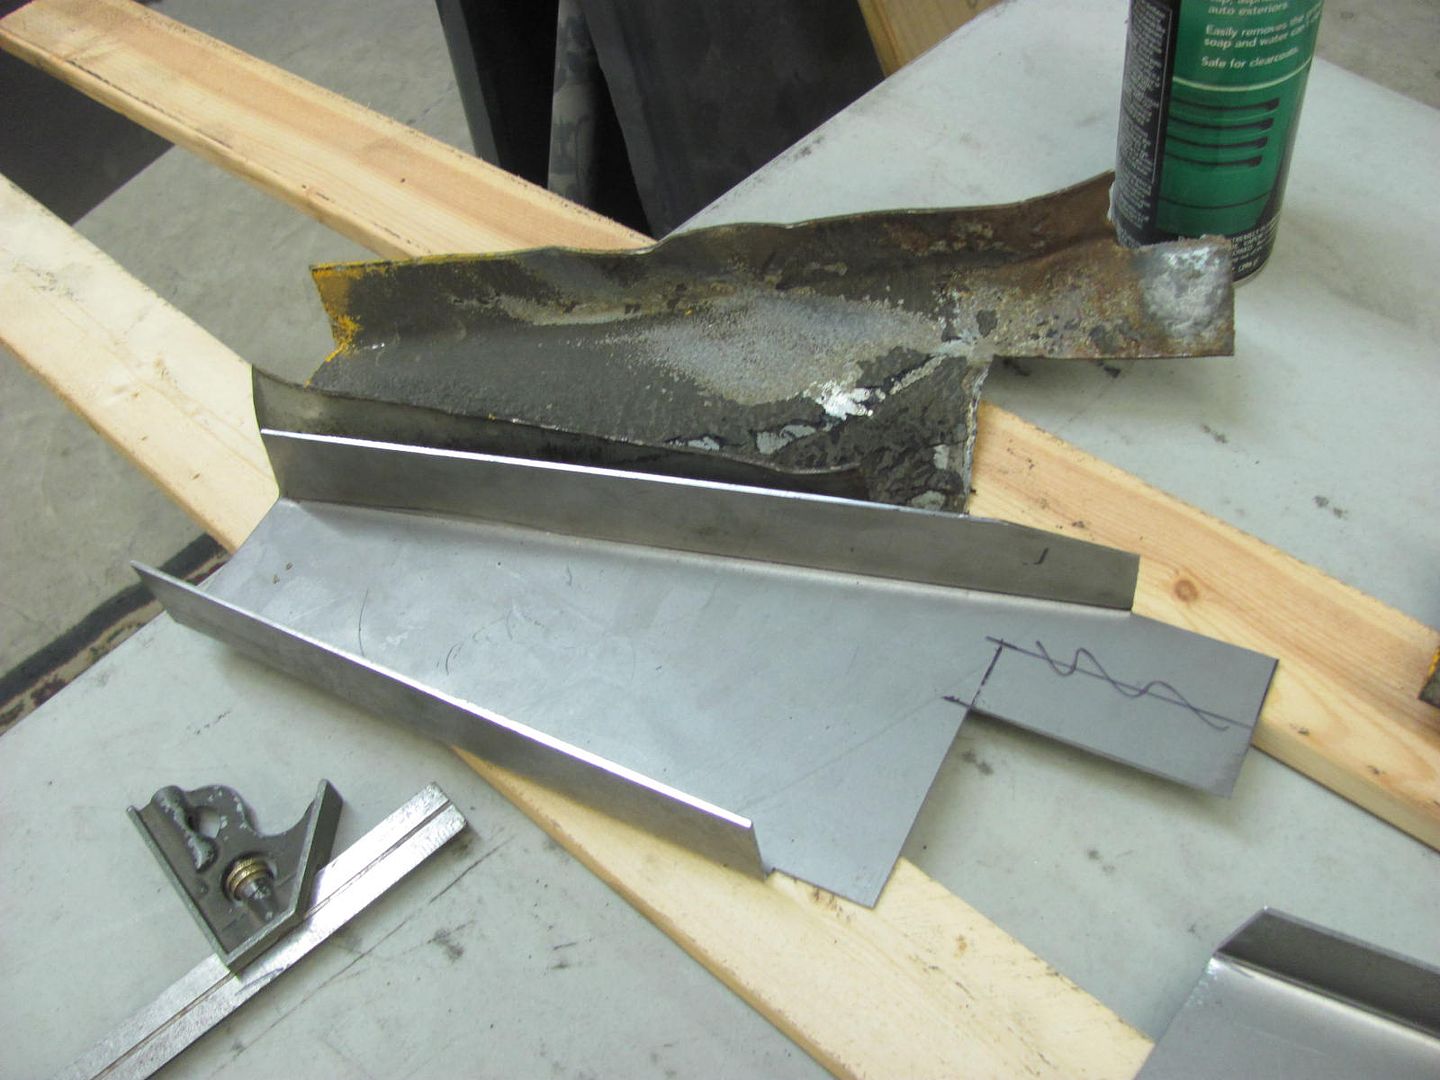
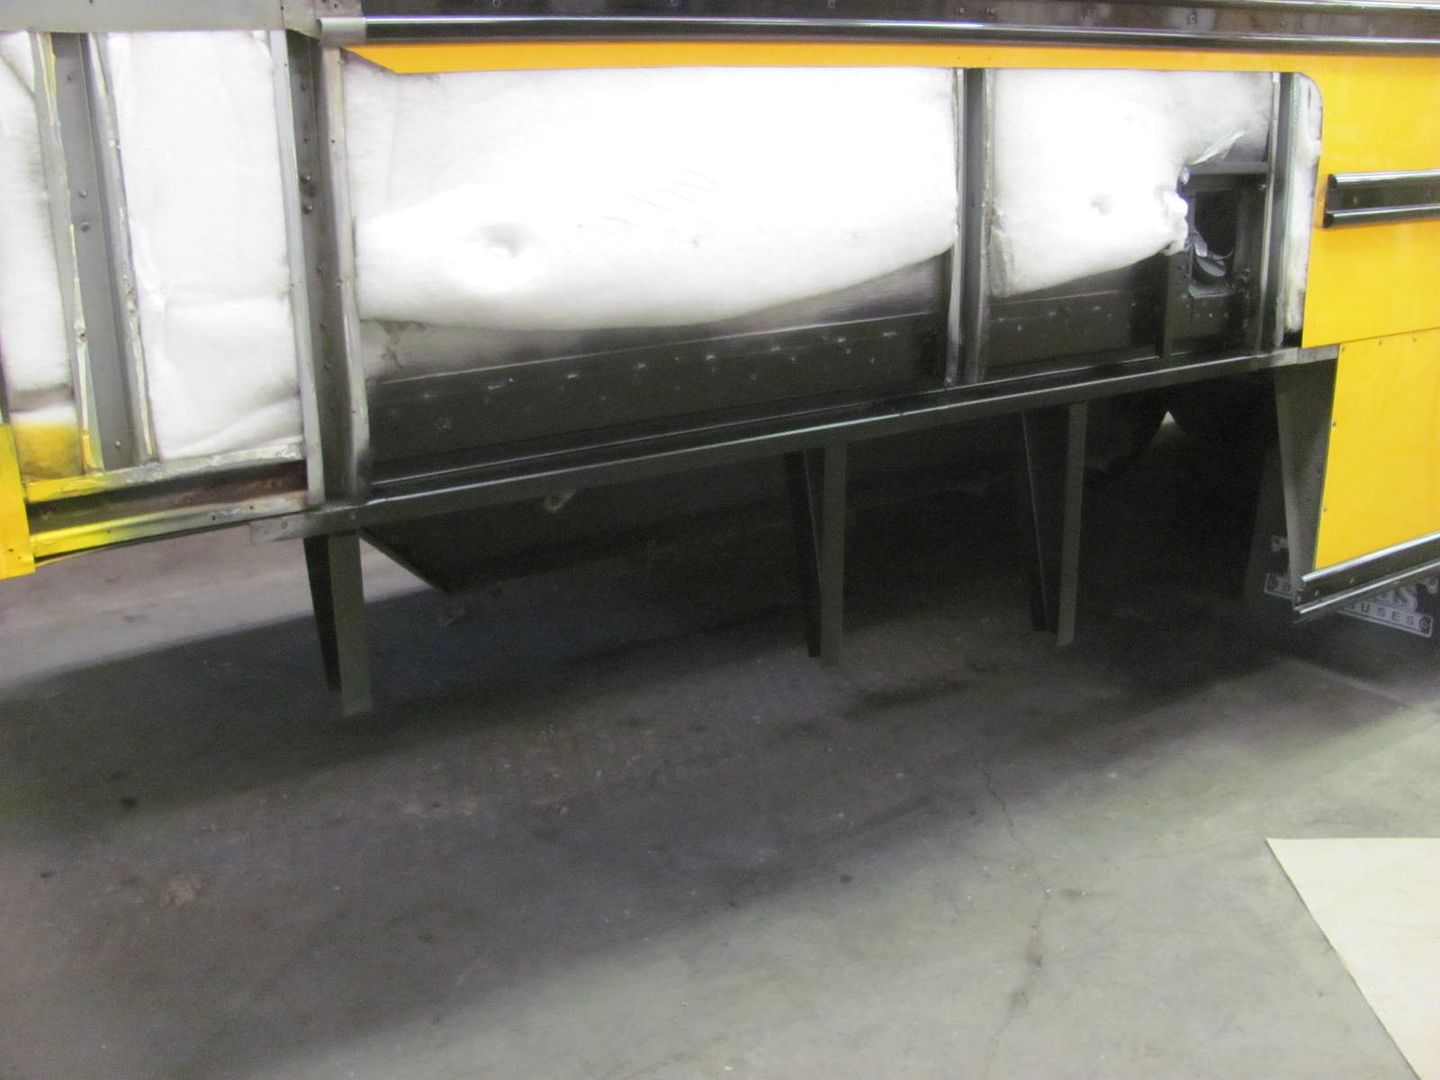
Here's what we had to contend with on the bus. Some can opener effect going on....
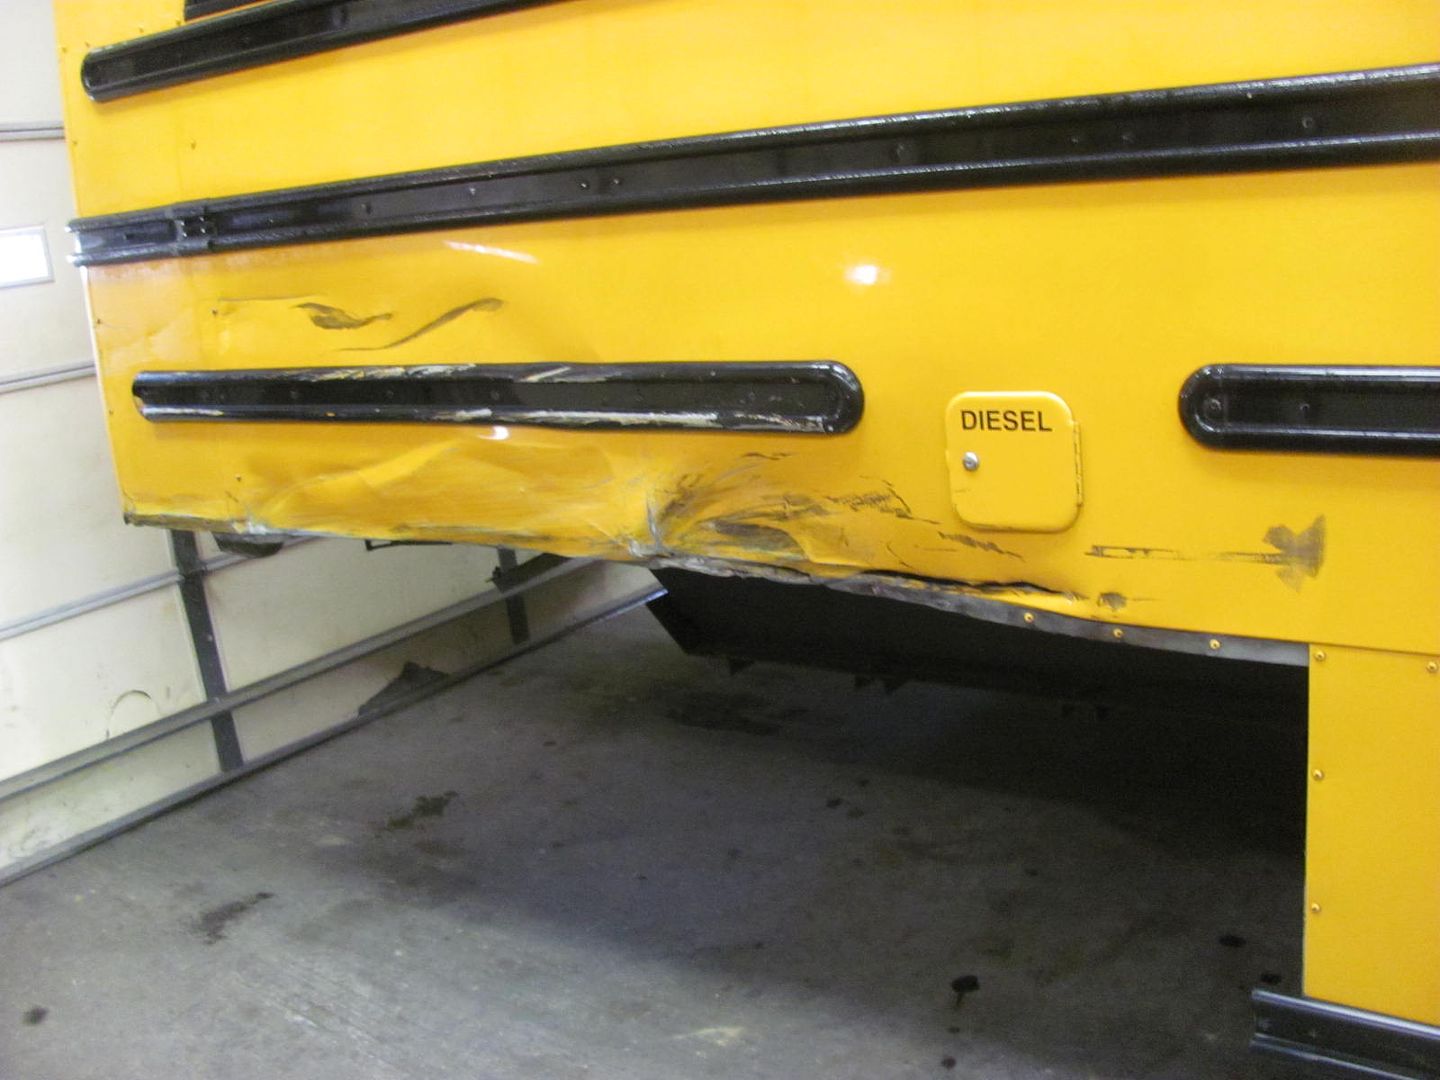  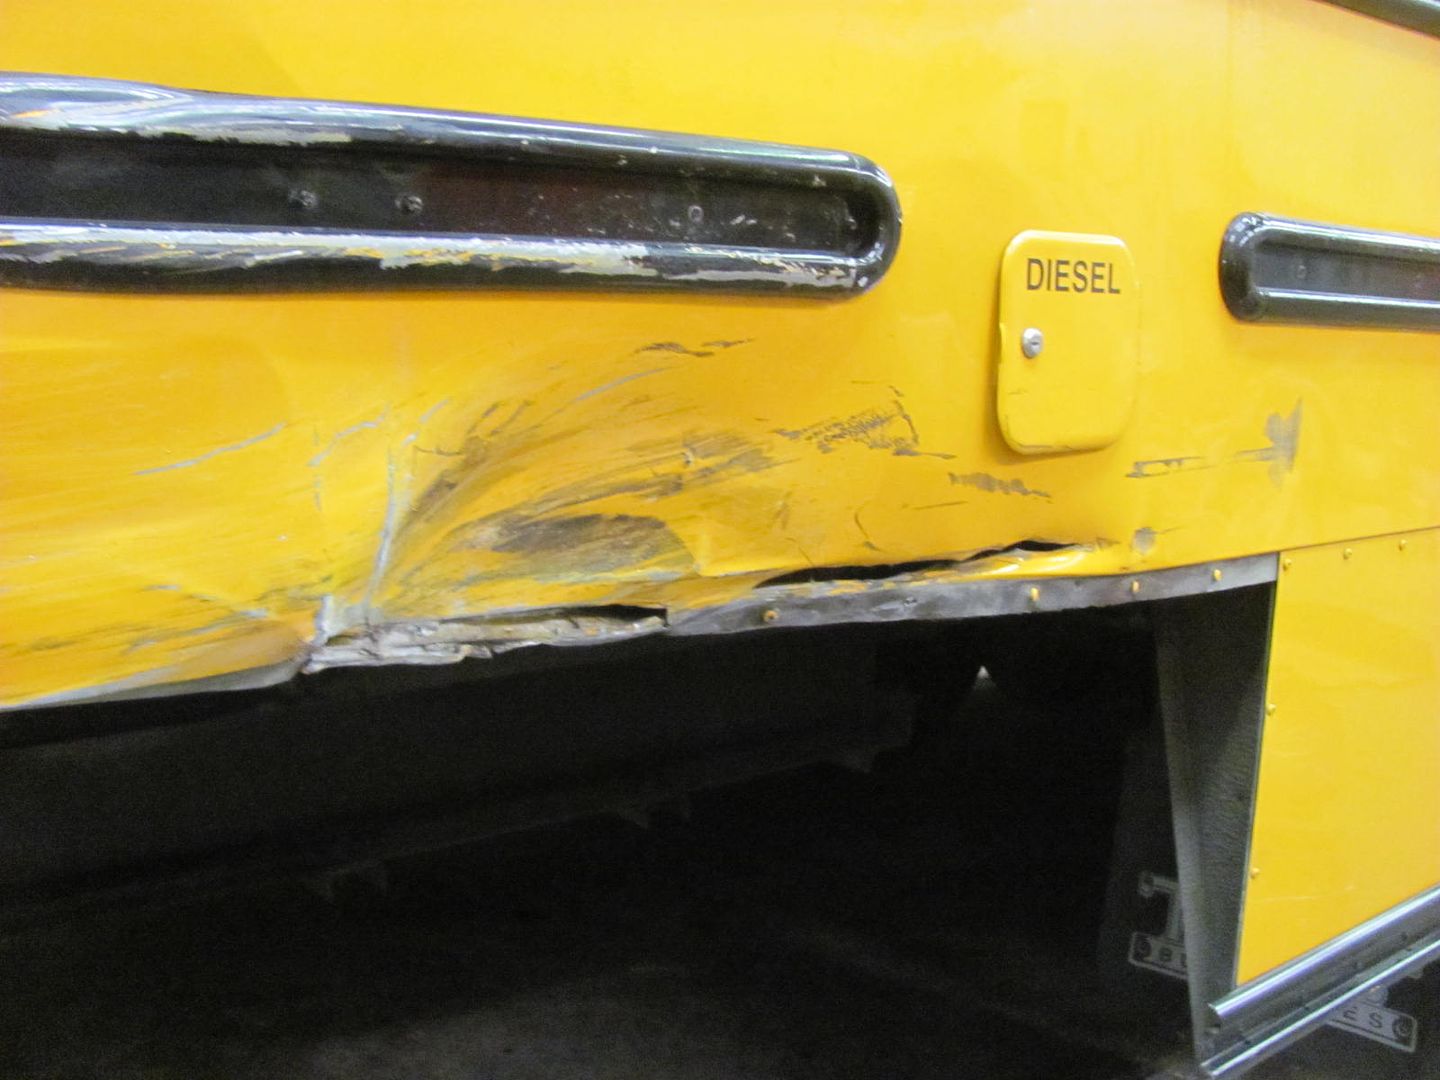 After cutting some of the mangled mess out of the way......... 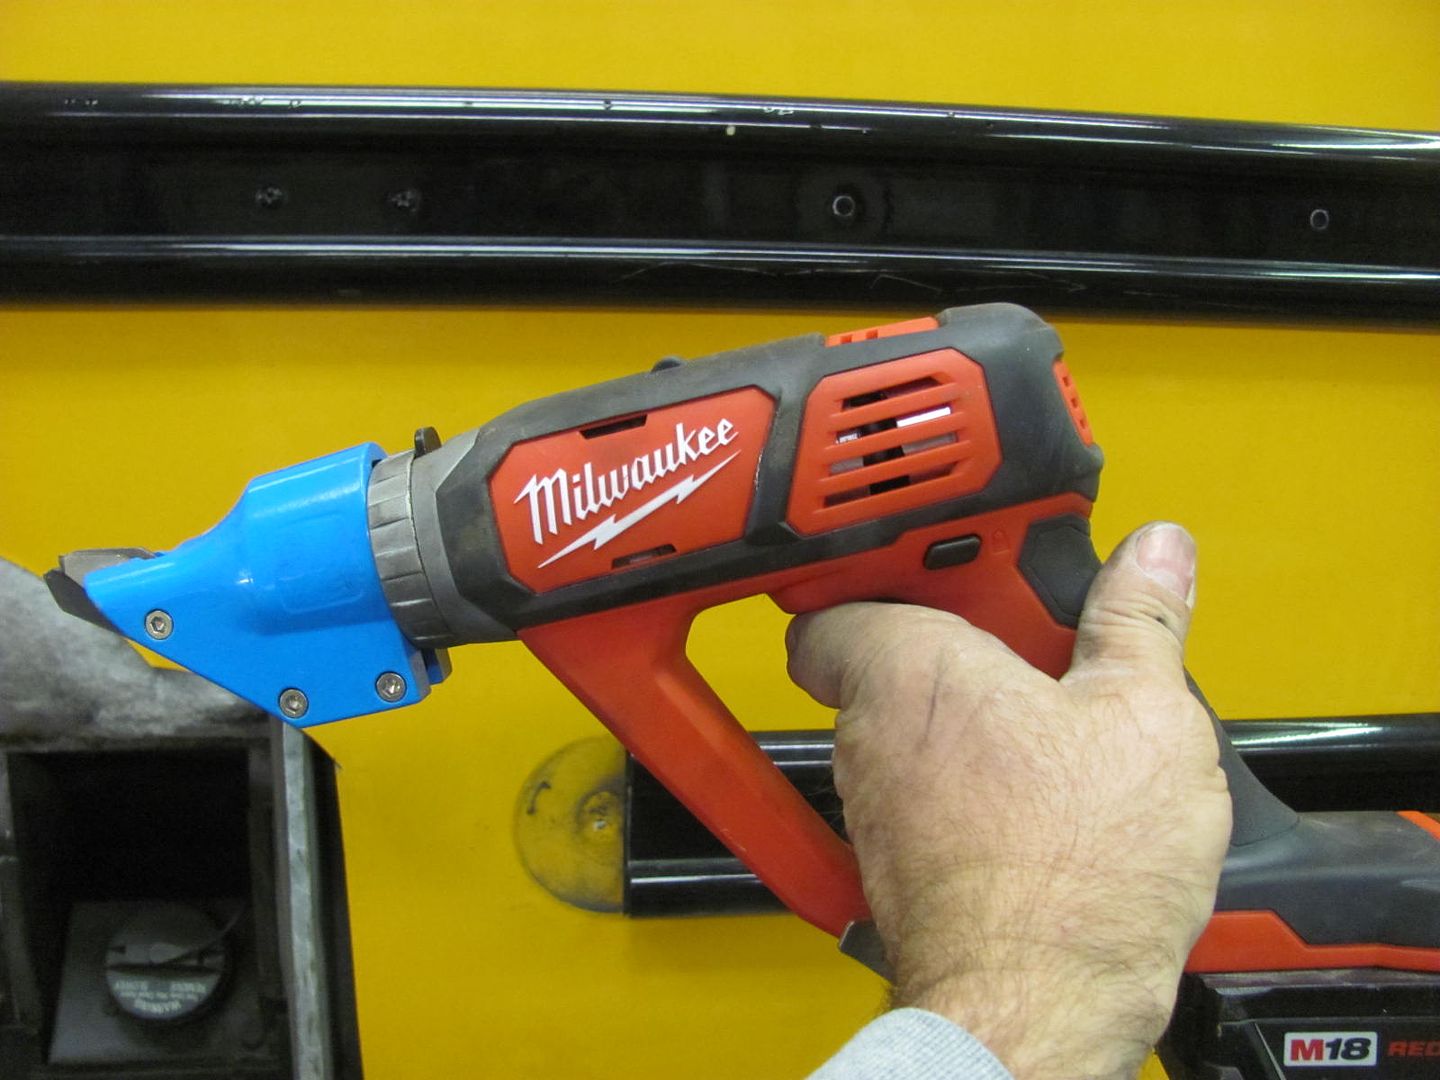 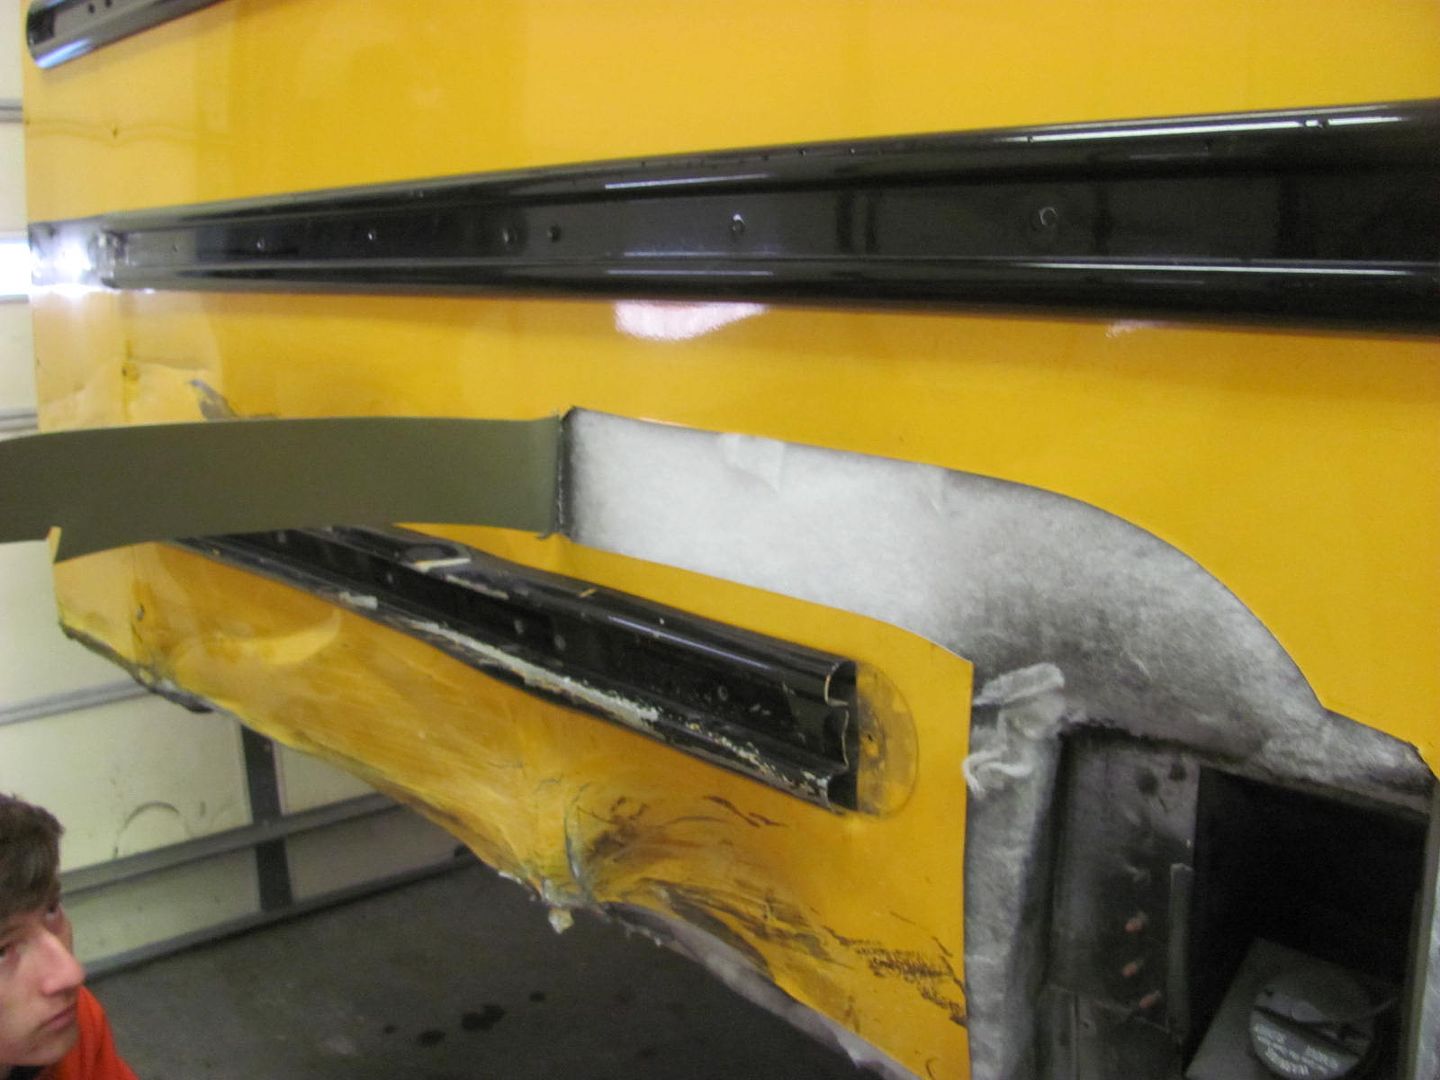  ......we saw that the bottom structural member was not going to cooperate. The horizontal section behind the weld tear at the top used to be vertical... So to save some time, we'll cut this out and make a replacement. This is 16 ga, and is there to keep vehicles out of the passenger compartment. It did it's job, so let's put in a new one to restore the integrity.. 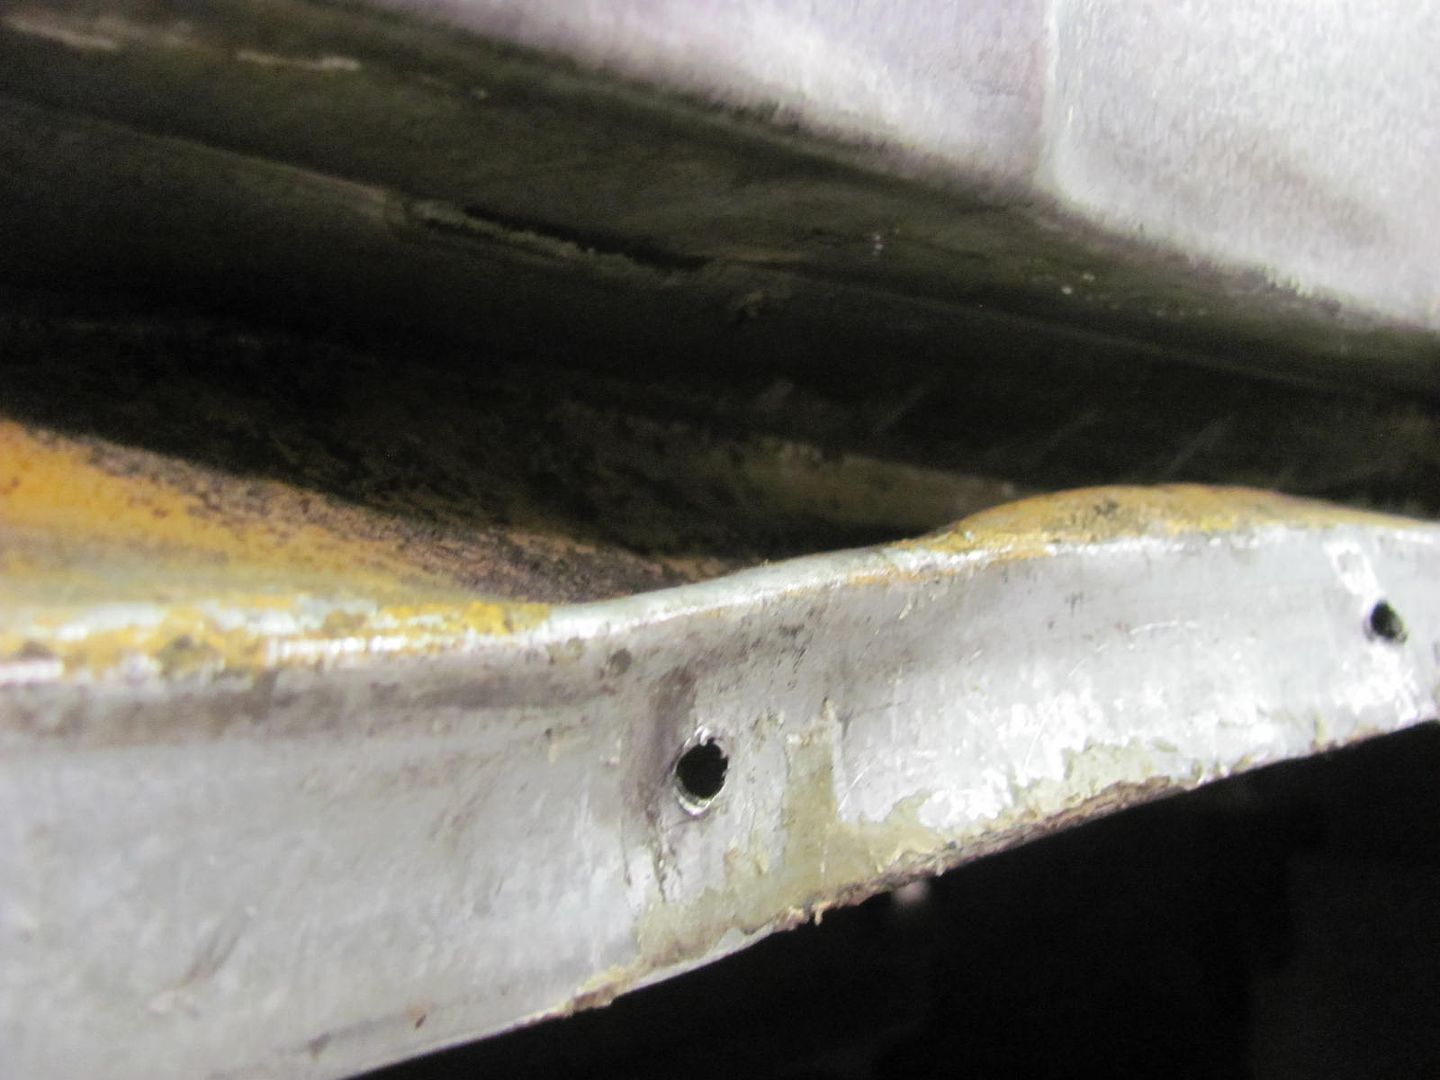 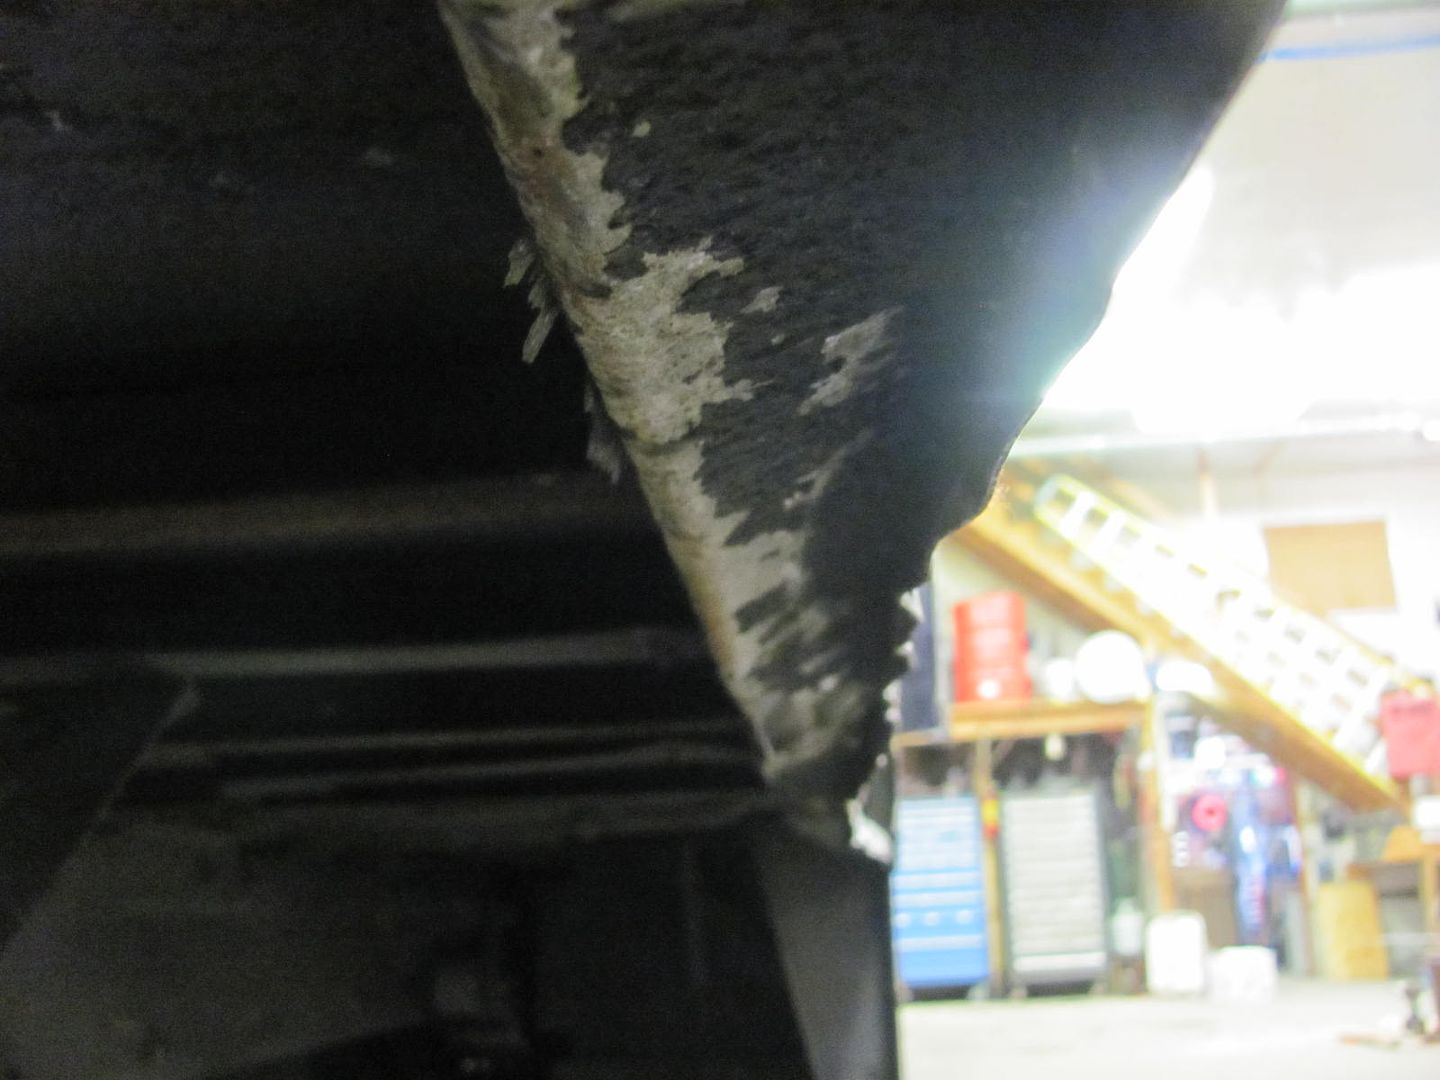 Here the bottom flange is pushed in over an inch..  Here's the replacement we made up.. 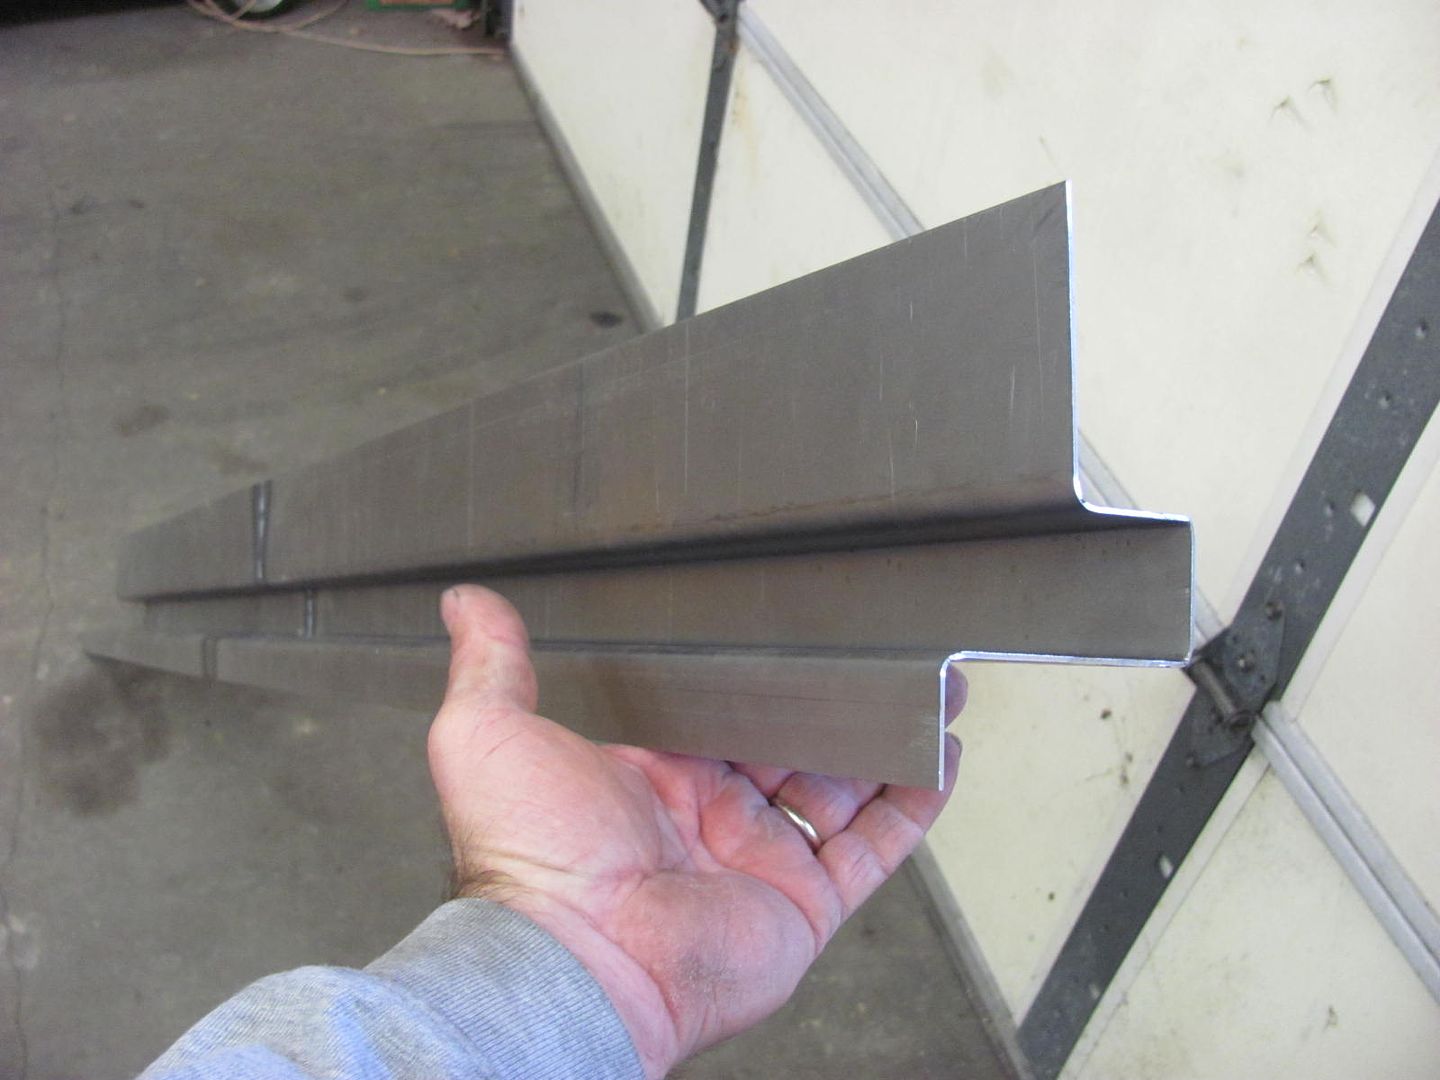 Comparison.... 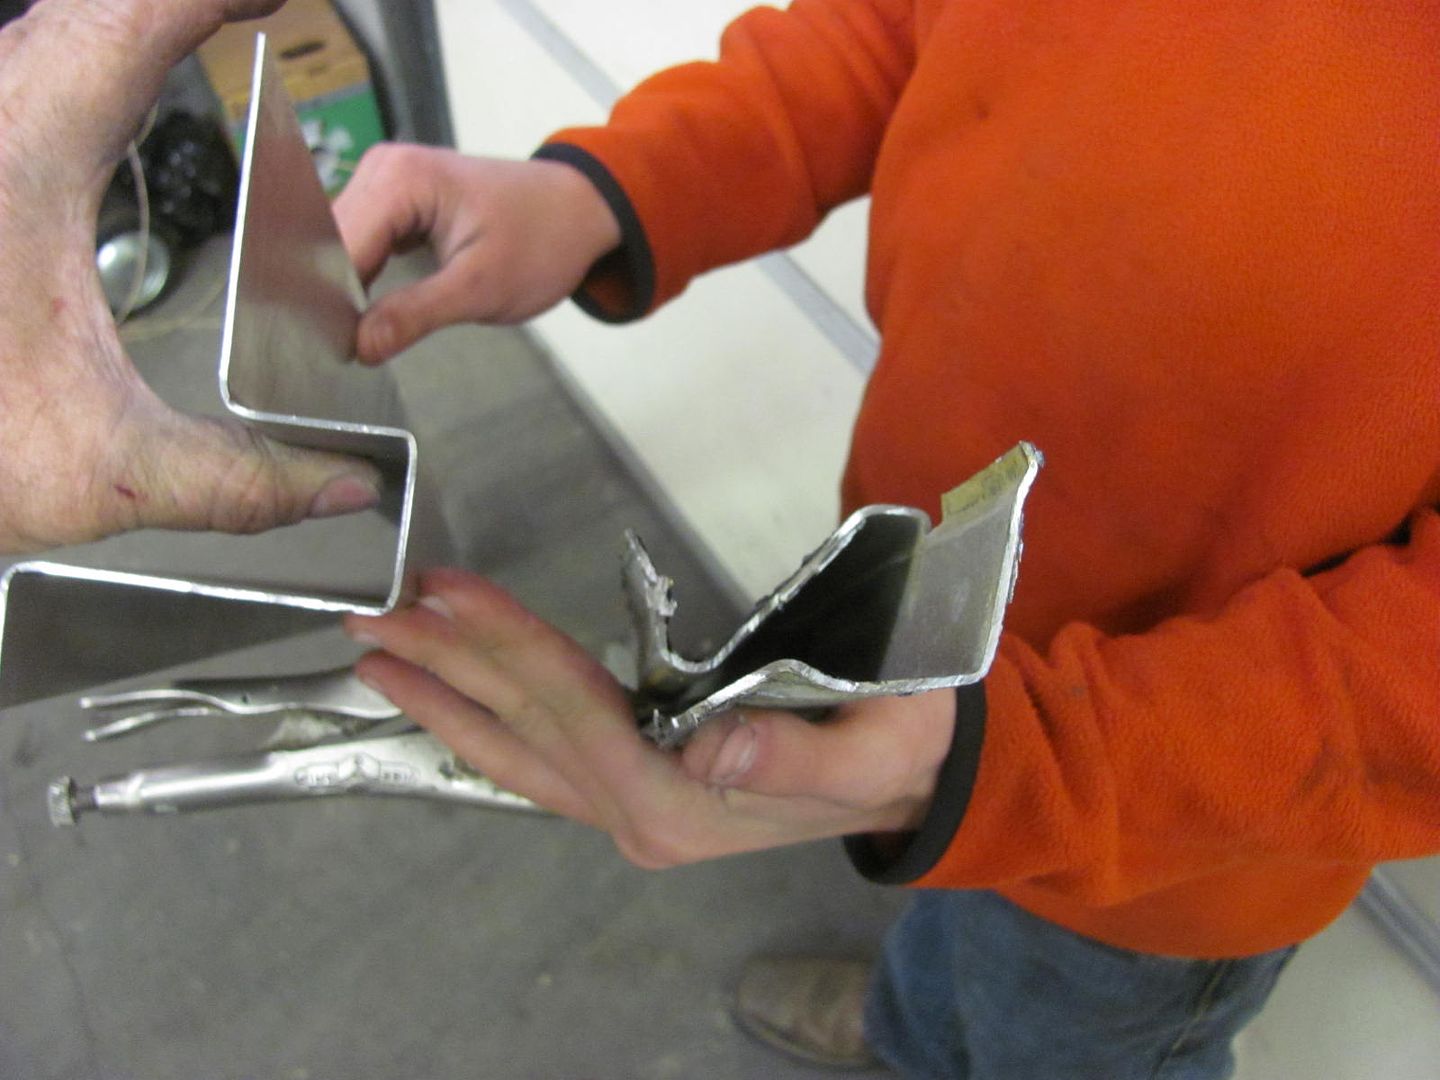 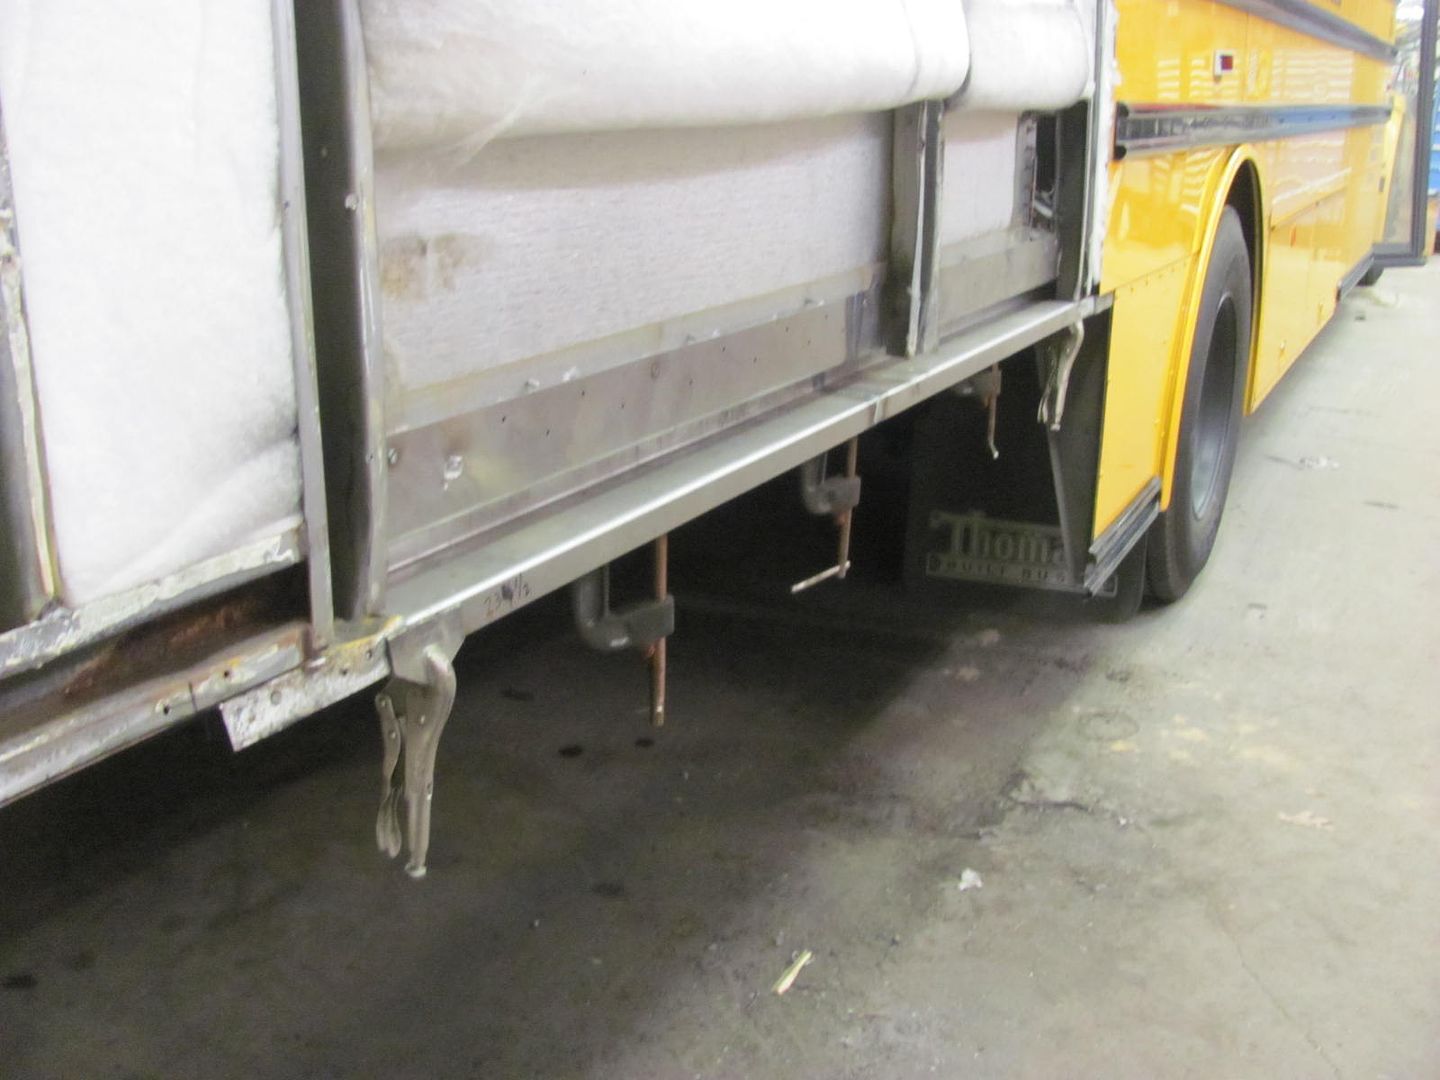 All trimmed, we'll get the replacement panel formed and fitted Tuesday.. 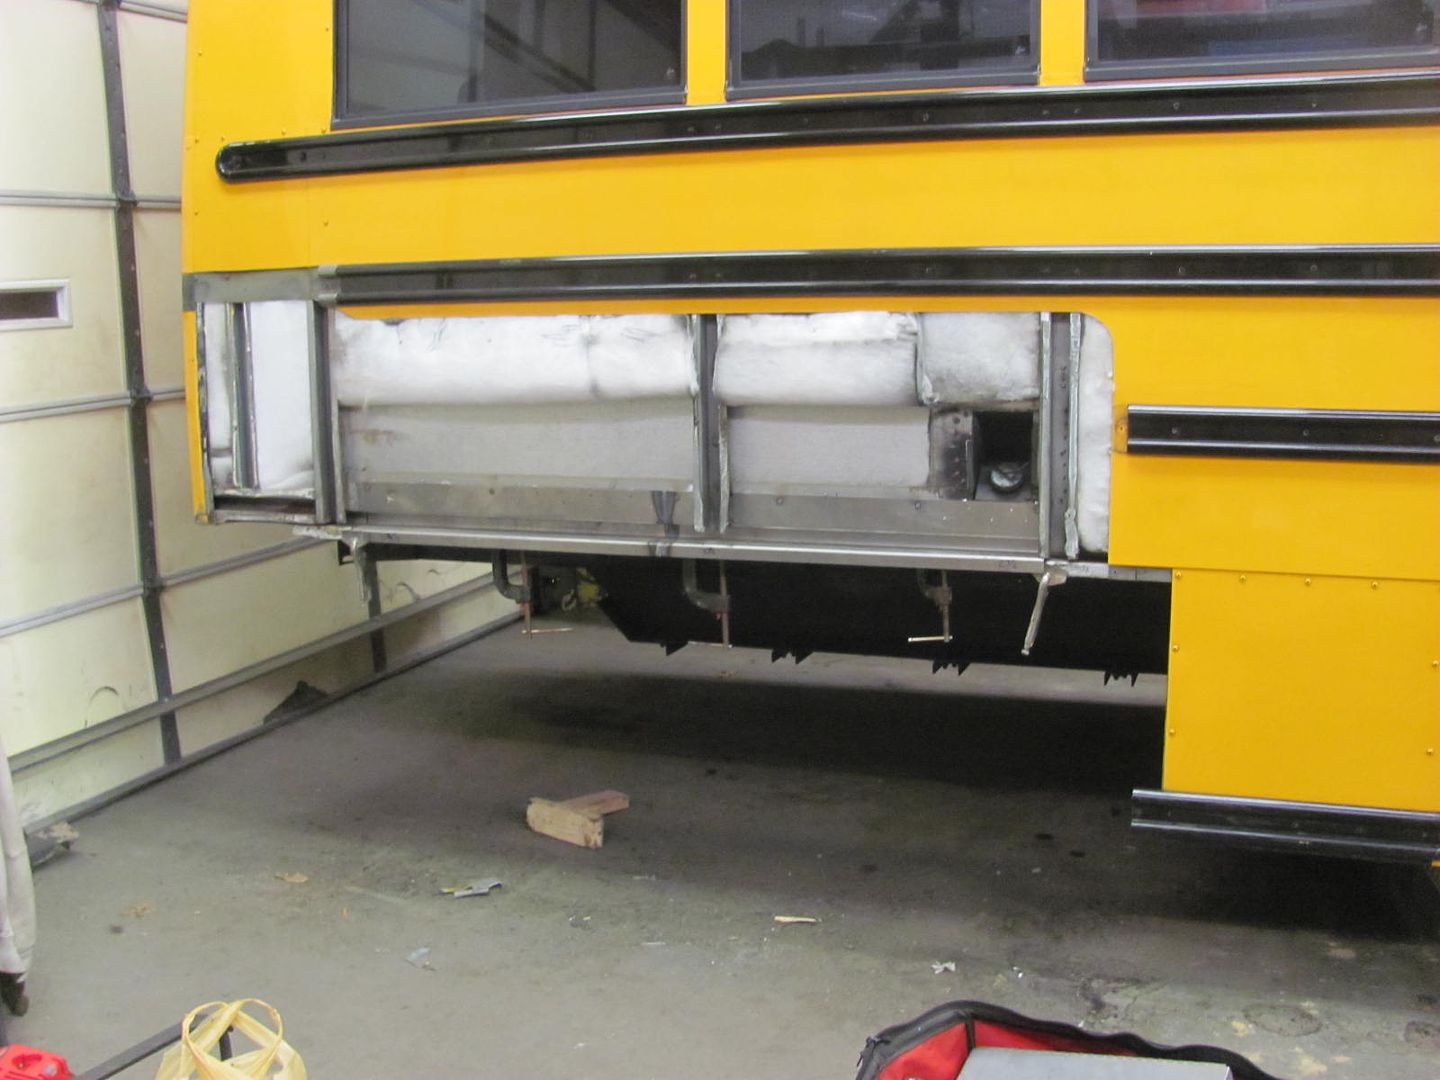 Spare parts... 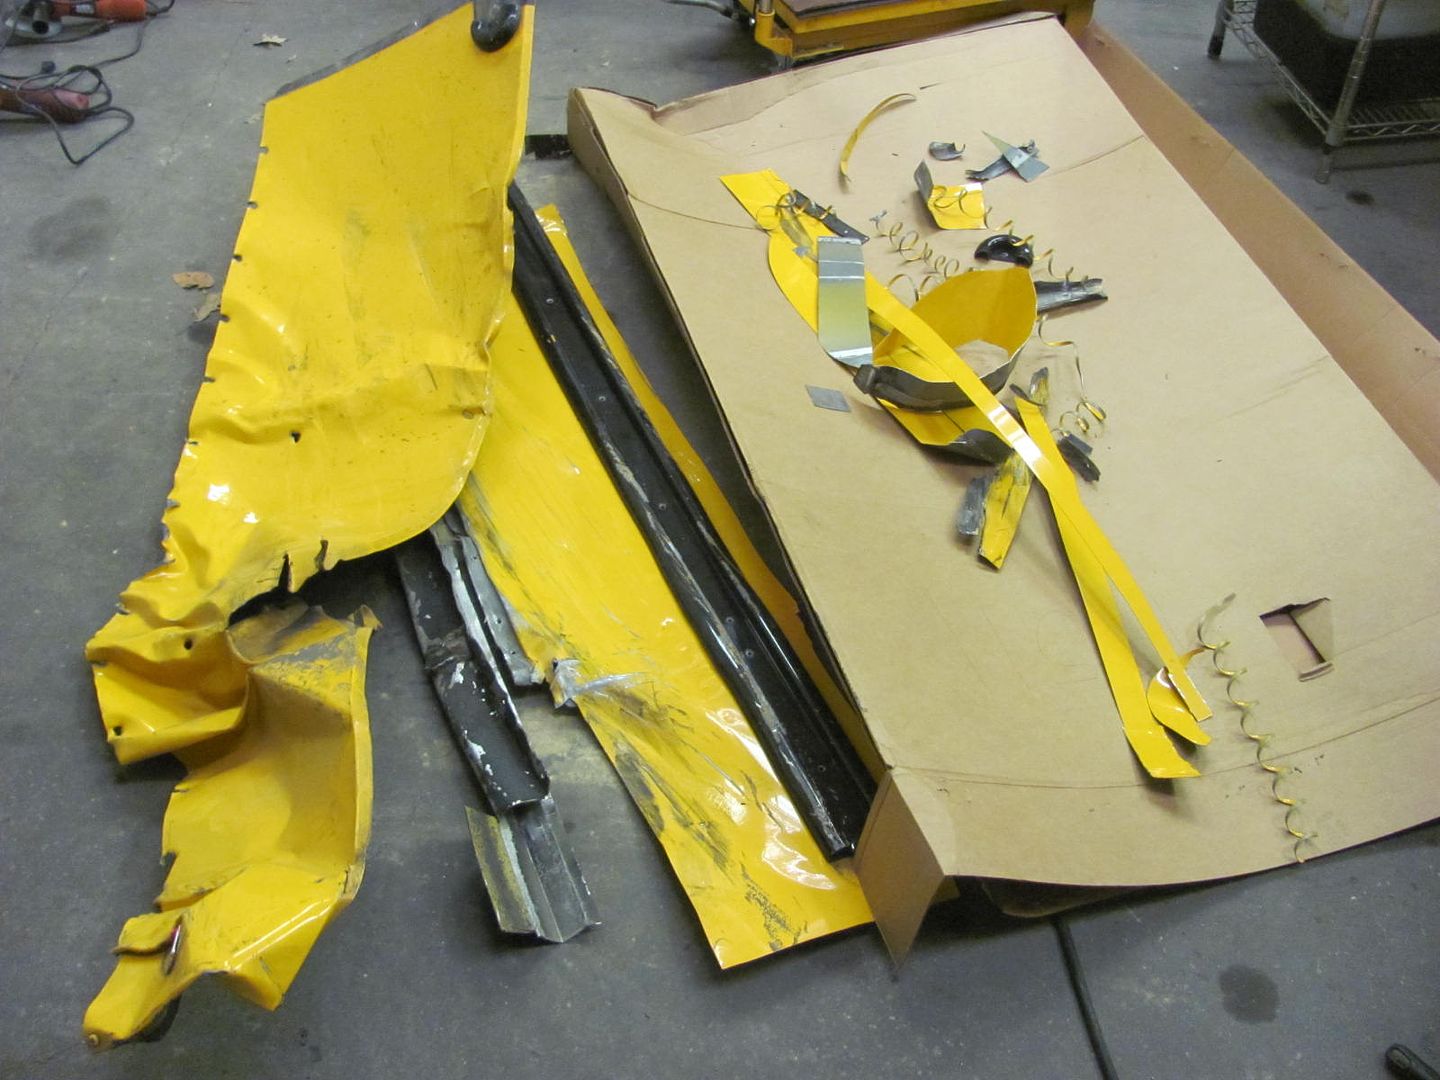
__________________
Robert |
|
|
|
|
12-08-2015, 12:03 AM
|
#9 |
|
Registered User
Join Date: Jan 2013
Location: Leonardtown, MD
Posts: 1,637
|
Re: 55 Wagon Progress
Well our bus side panel is just shy of 8' long and about 24" wide. We did a light pass on the wheeling machine just enough to break the grain, figured it would have less chance of waves that way... We found out real quick that 8' is a bit long, so some 1x2's were pony-clamped under the outside edges to provide a bit of support. We tried to make a pass through the bead roller for the stepped flange at the bottom, with less than stellar results, a bit wavy up and down. Good thing we had the other half of the sheet. More wheeling, and used the offset / step dies in the Lennox Tru-Edge.
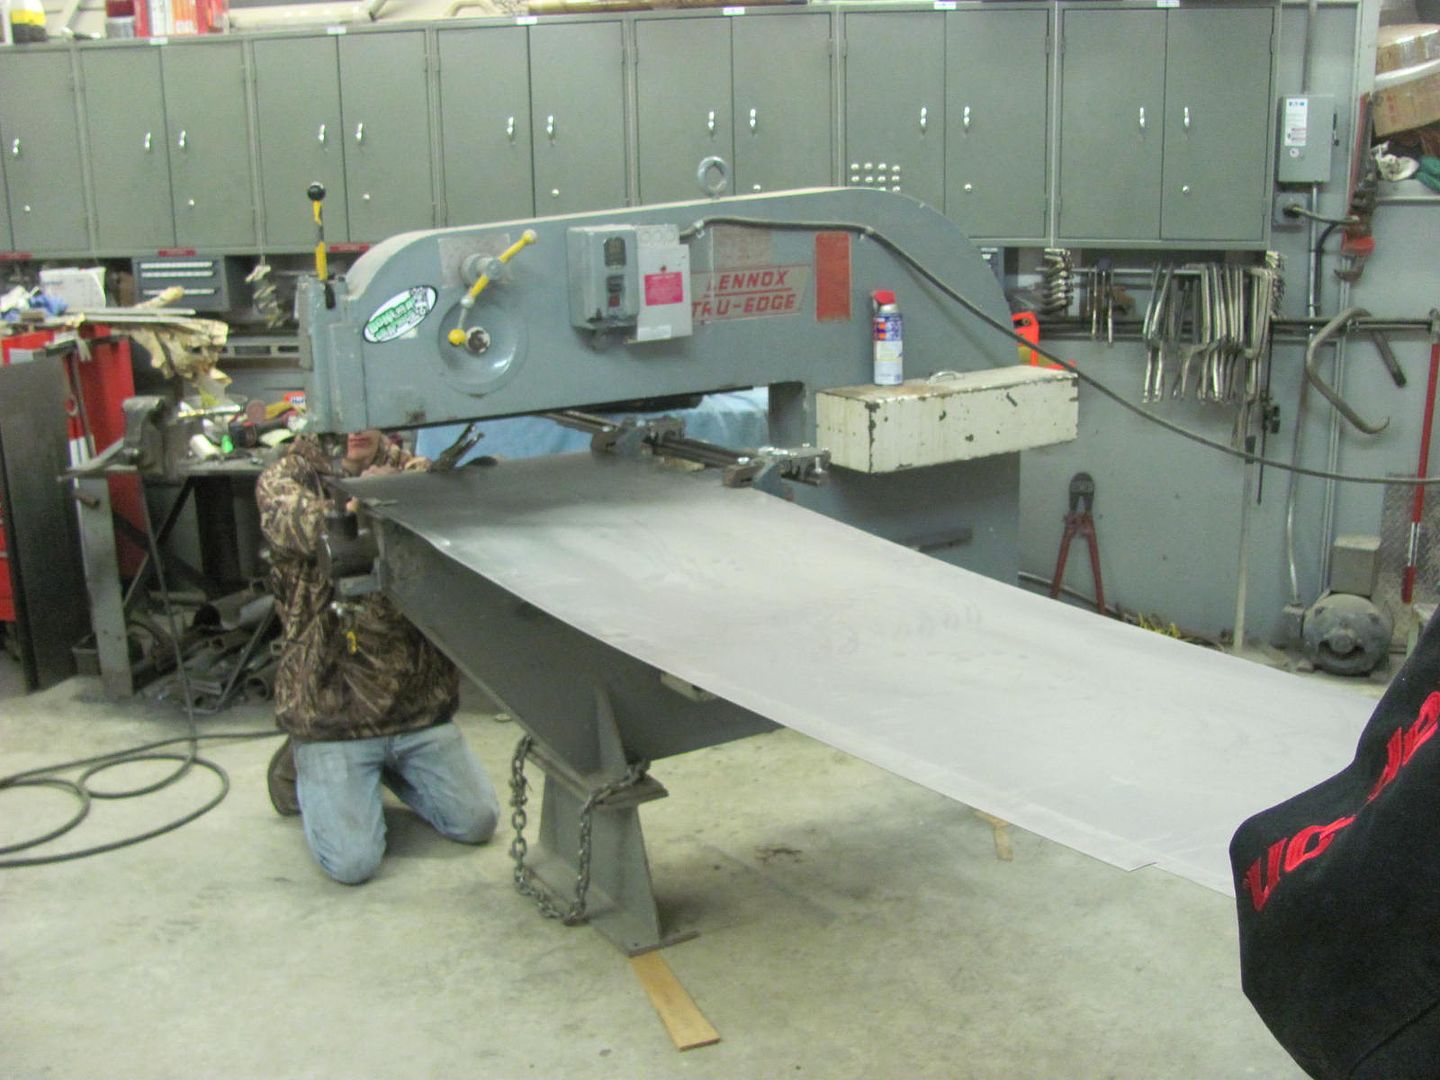 Given our challenges with the long panels, we had to call in reinforcements. Regardless of the late hour that Scott's attire suggests, it was only 8 at night! 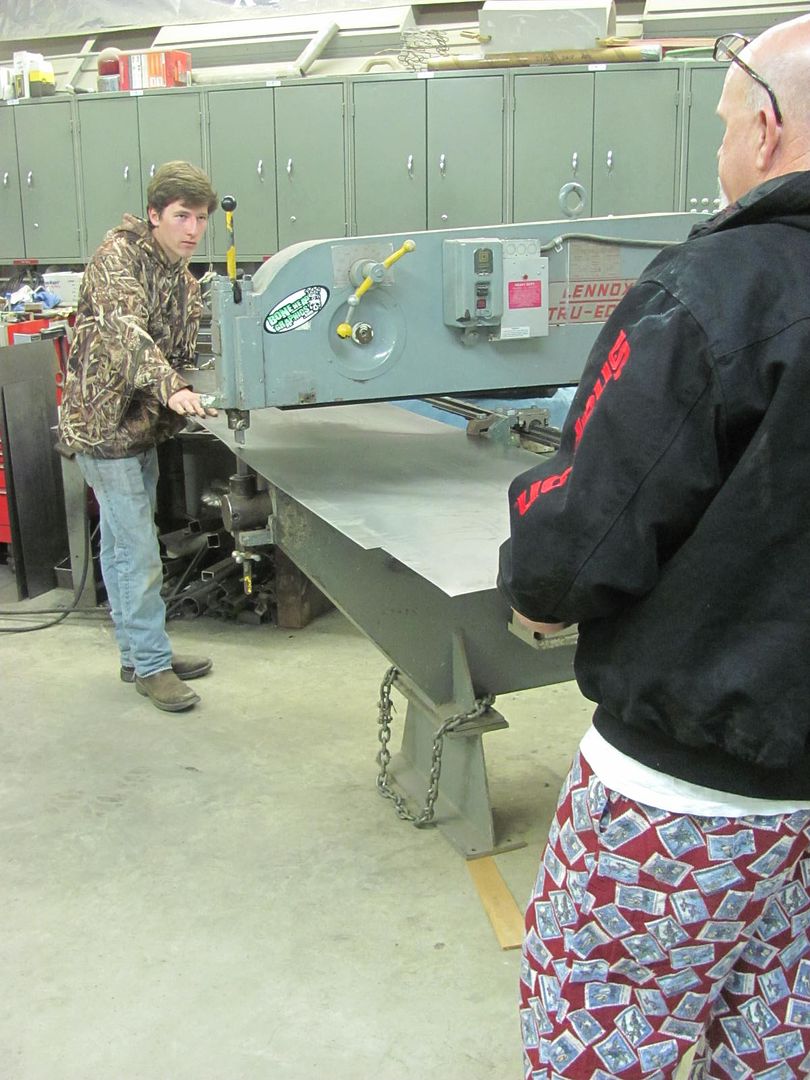 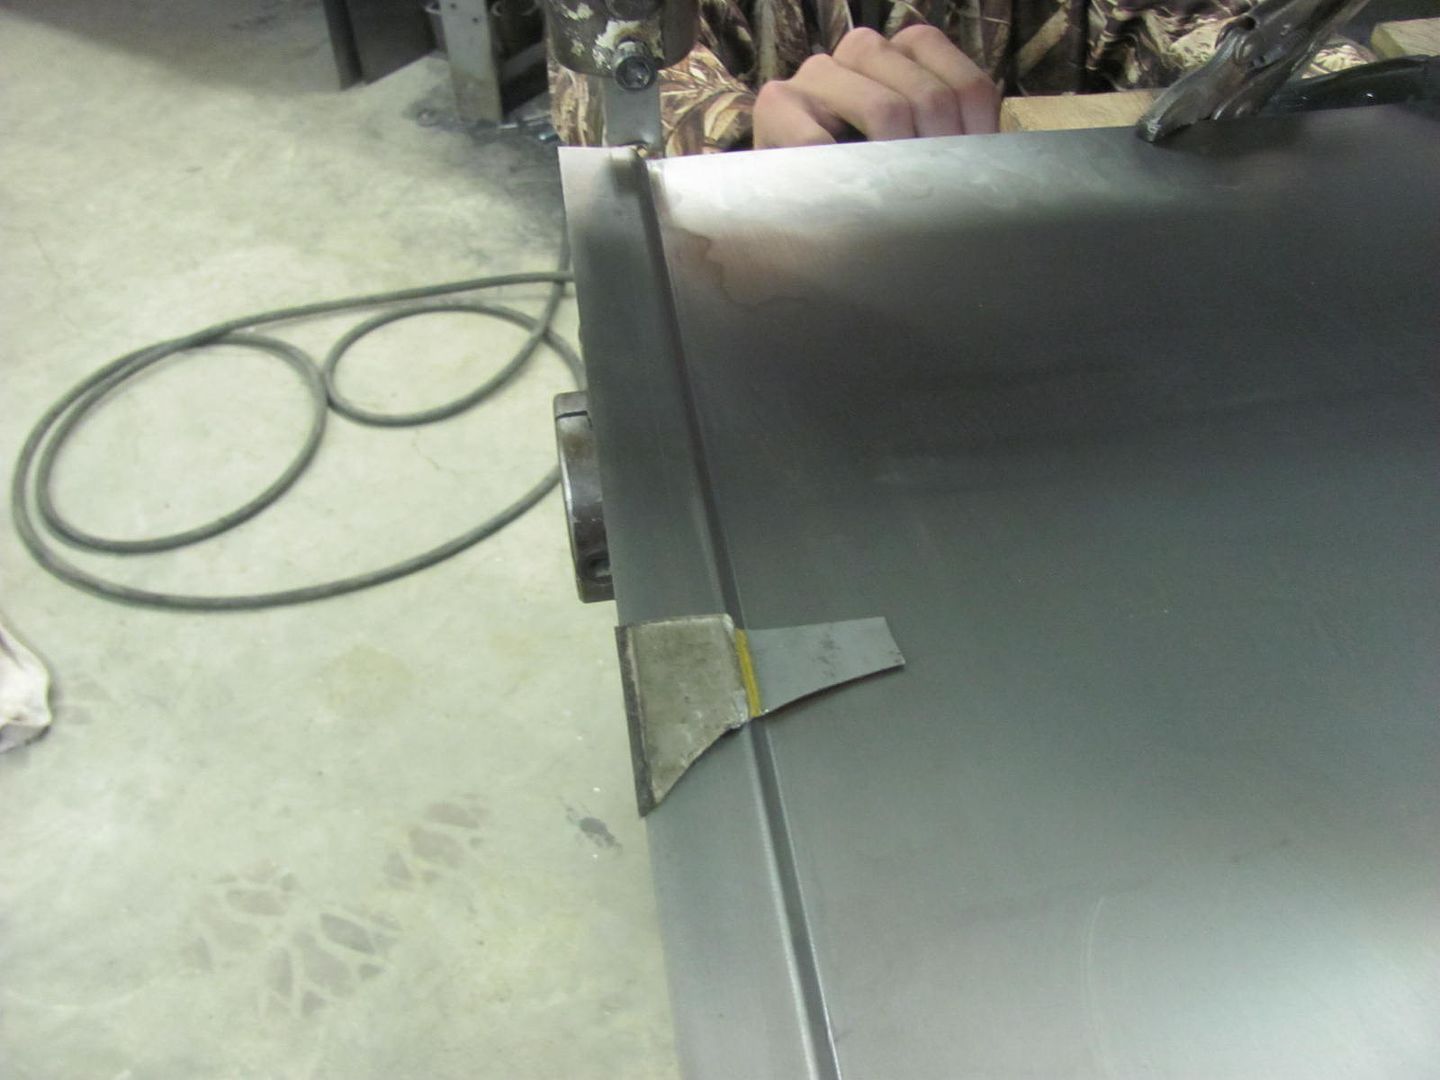 Linear slides really came in handy, nice straight detail this go round.. 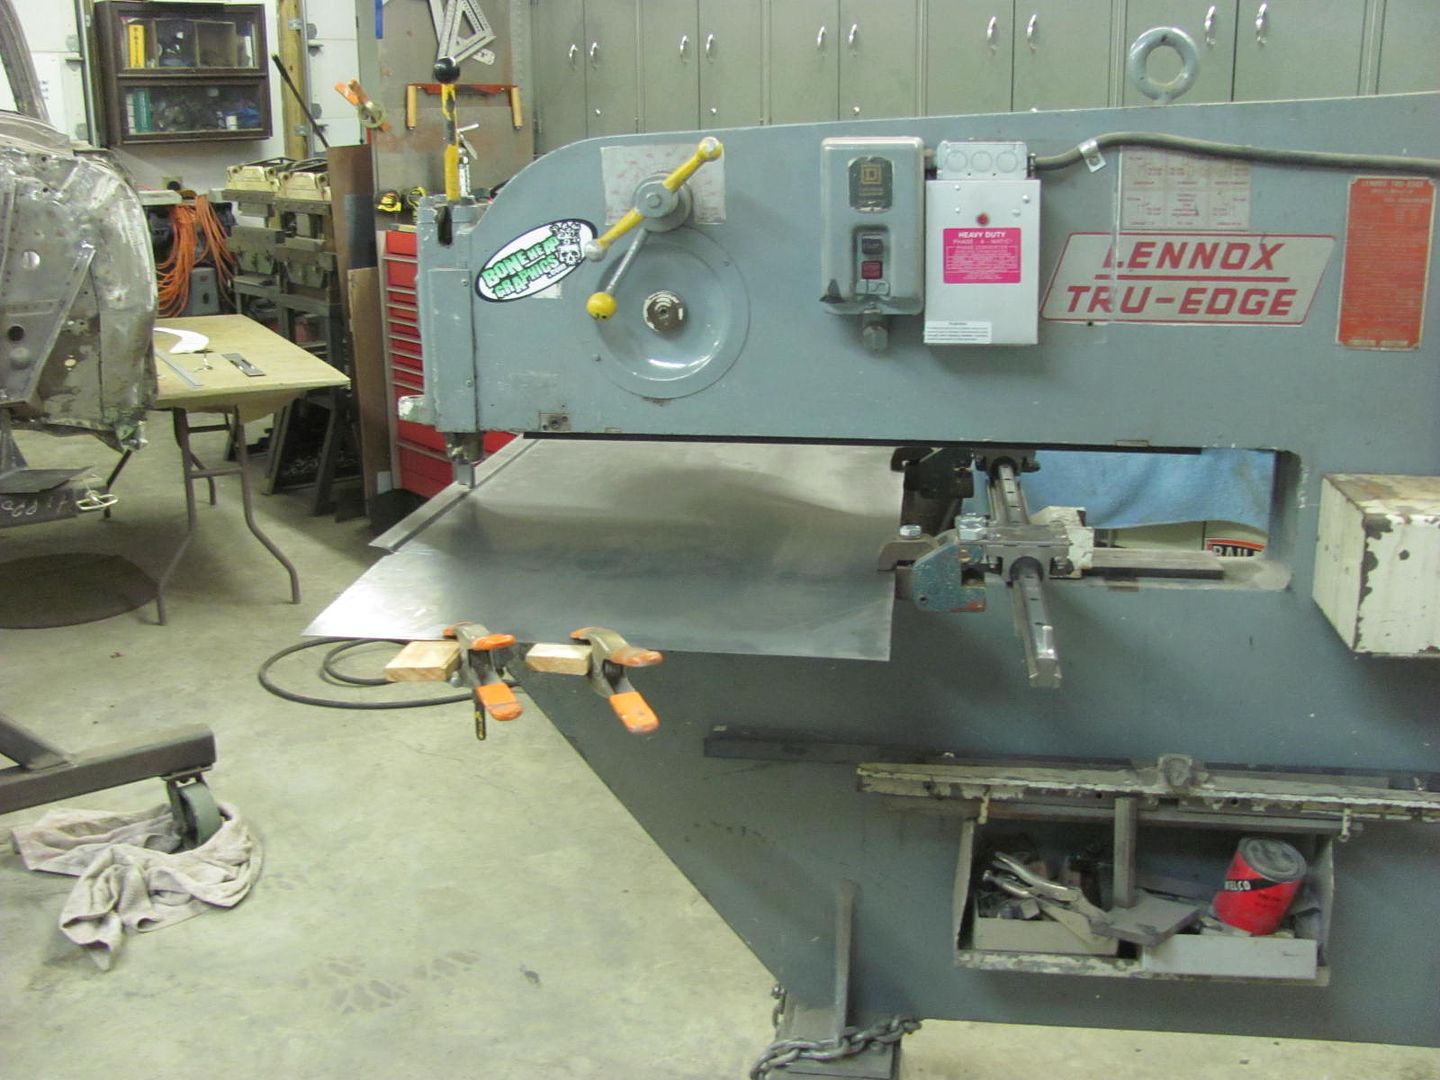 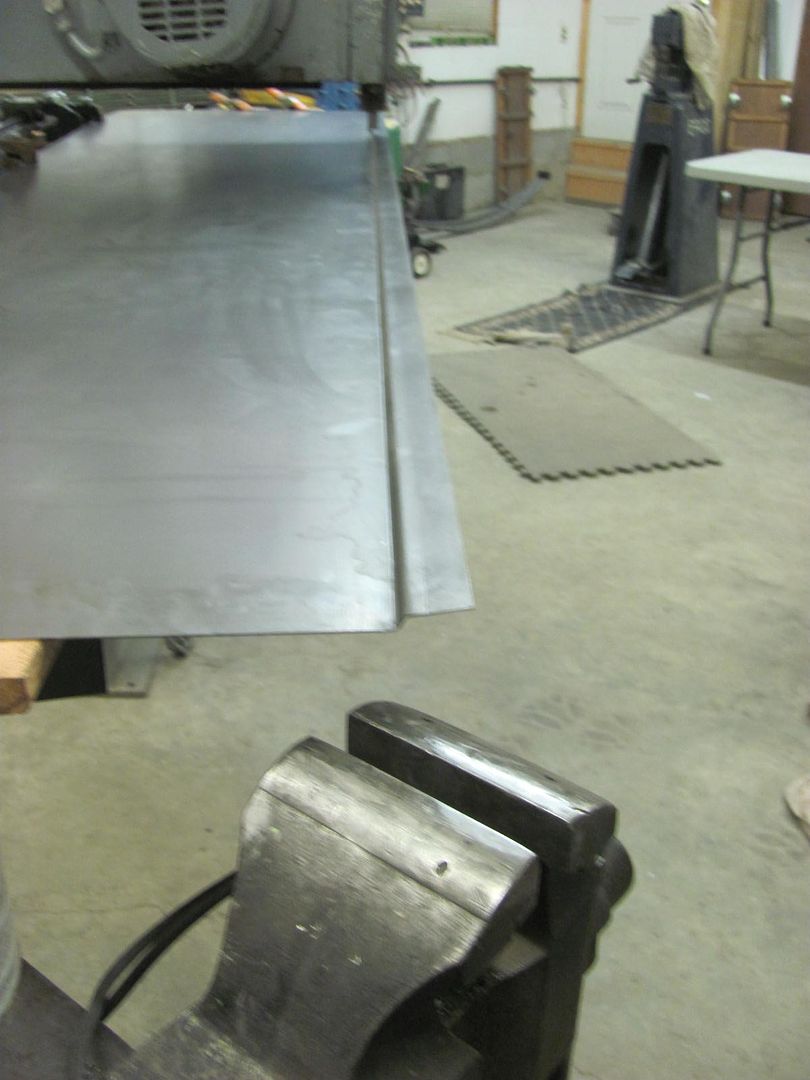 Comparing the bend relief above the rear bumper ear... 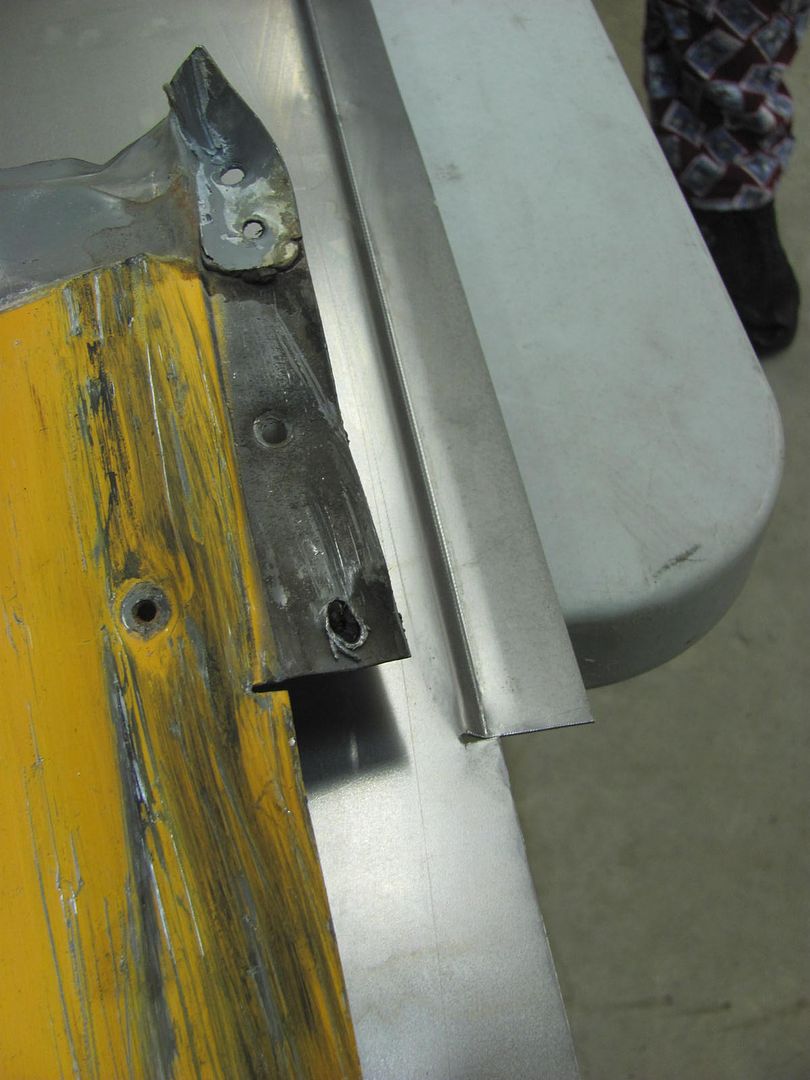 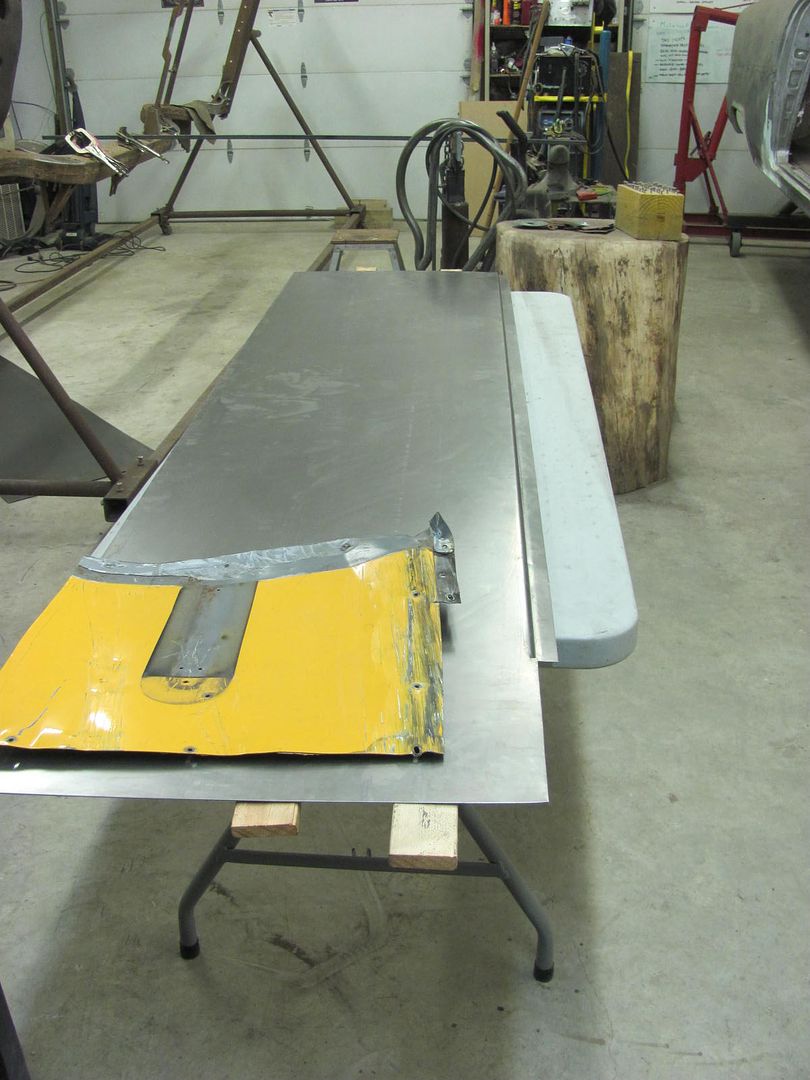 Tomorrow evening well get it fitted to the bus and final trimmed..
__________________
Robert |
|
|
|
|
12-09-2015, 12:22 AM
|
#10 |
|
Registered User
Join Date: Jan 2013
Location: Leonardtown, MD
Posts: 1,637
|
Re: 55 Wagon Progress
Finished the welding of the lower structural member on the bus repair...
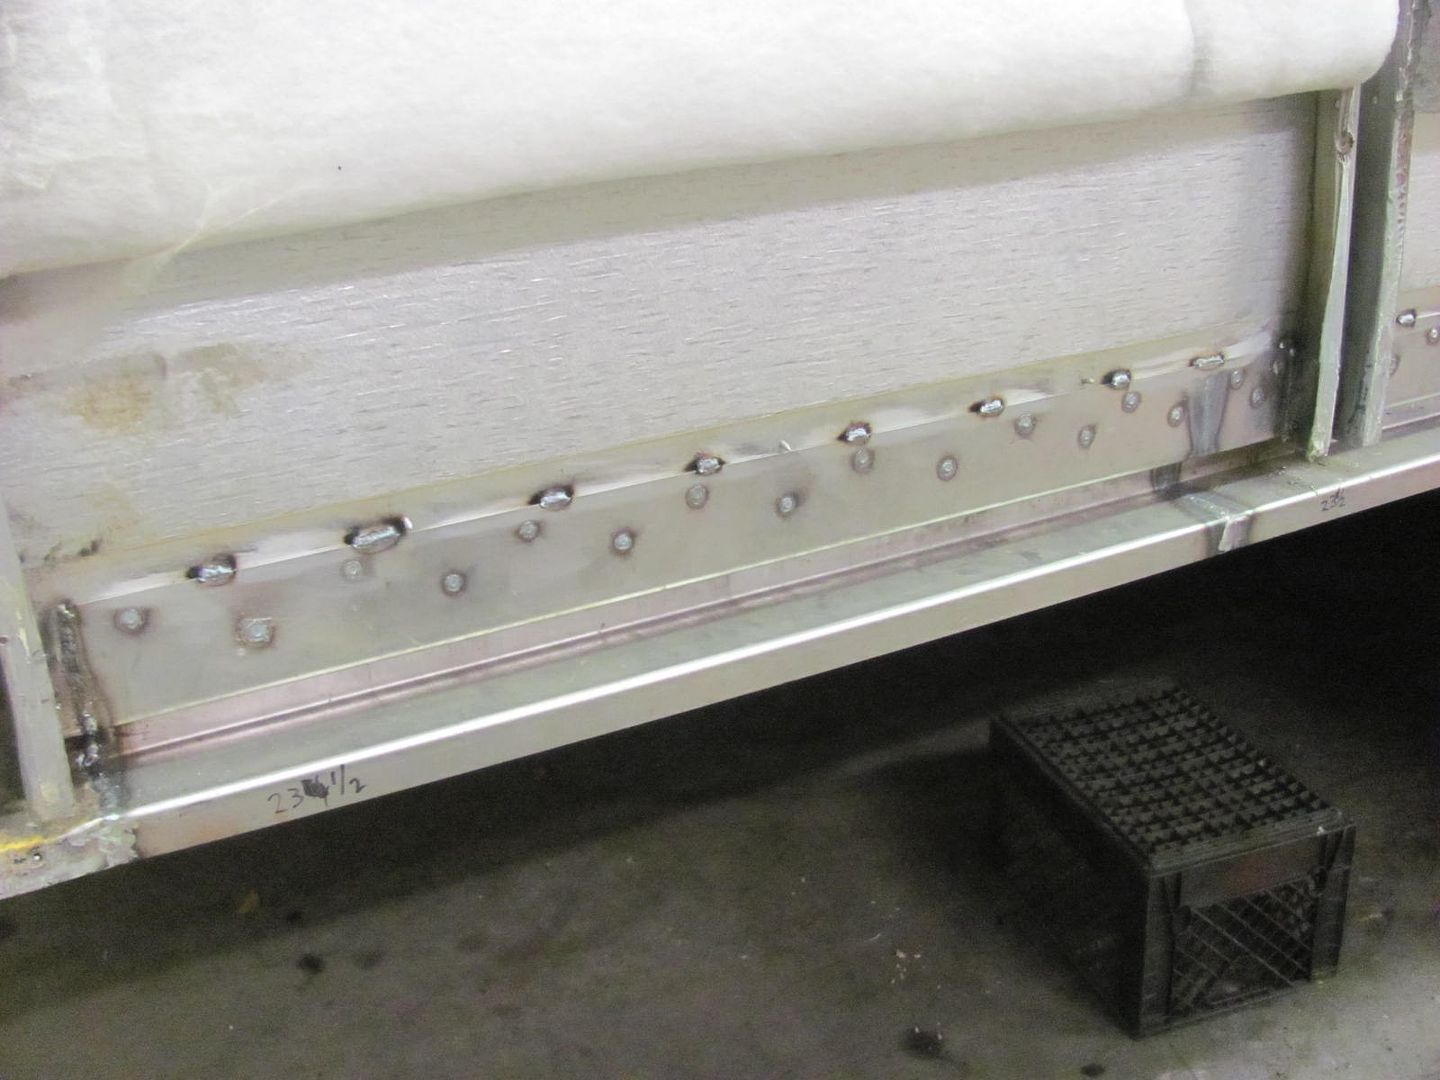 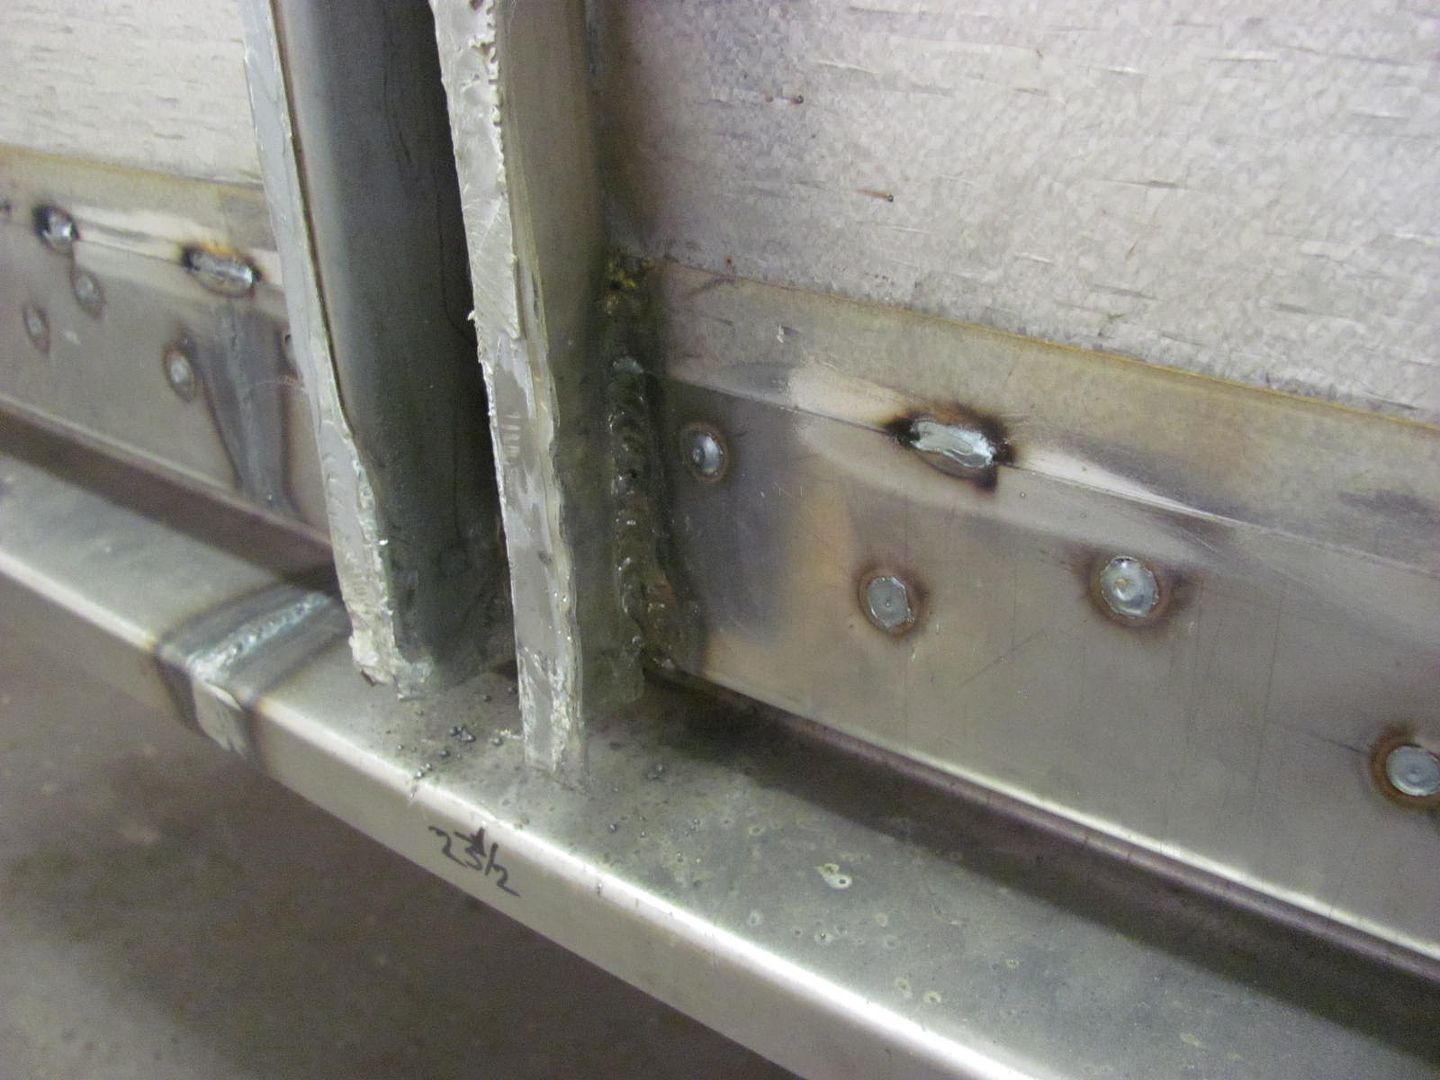 .....and underneath it is tied to the floor cross members 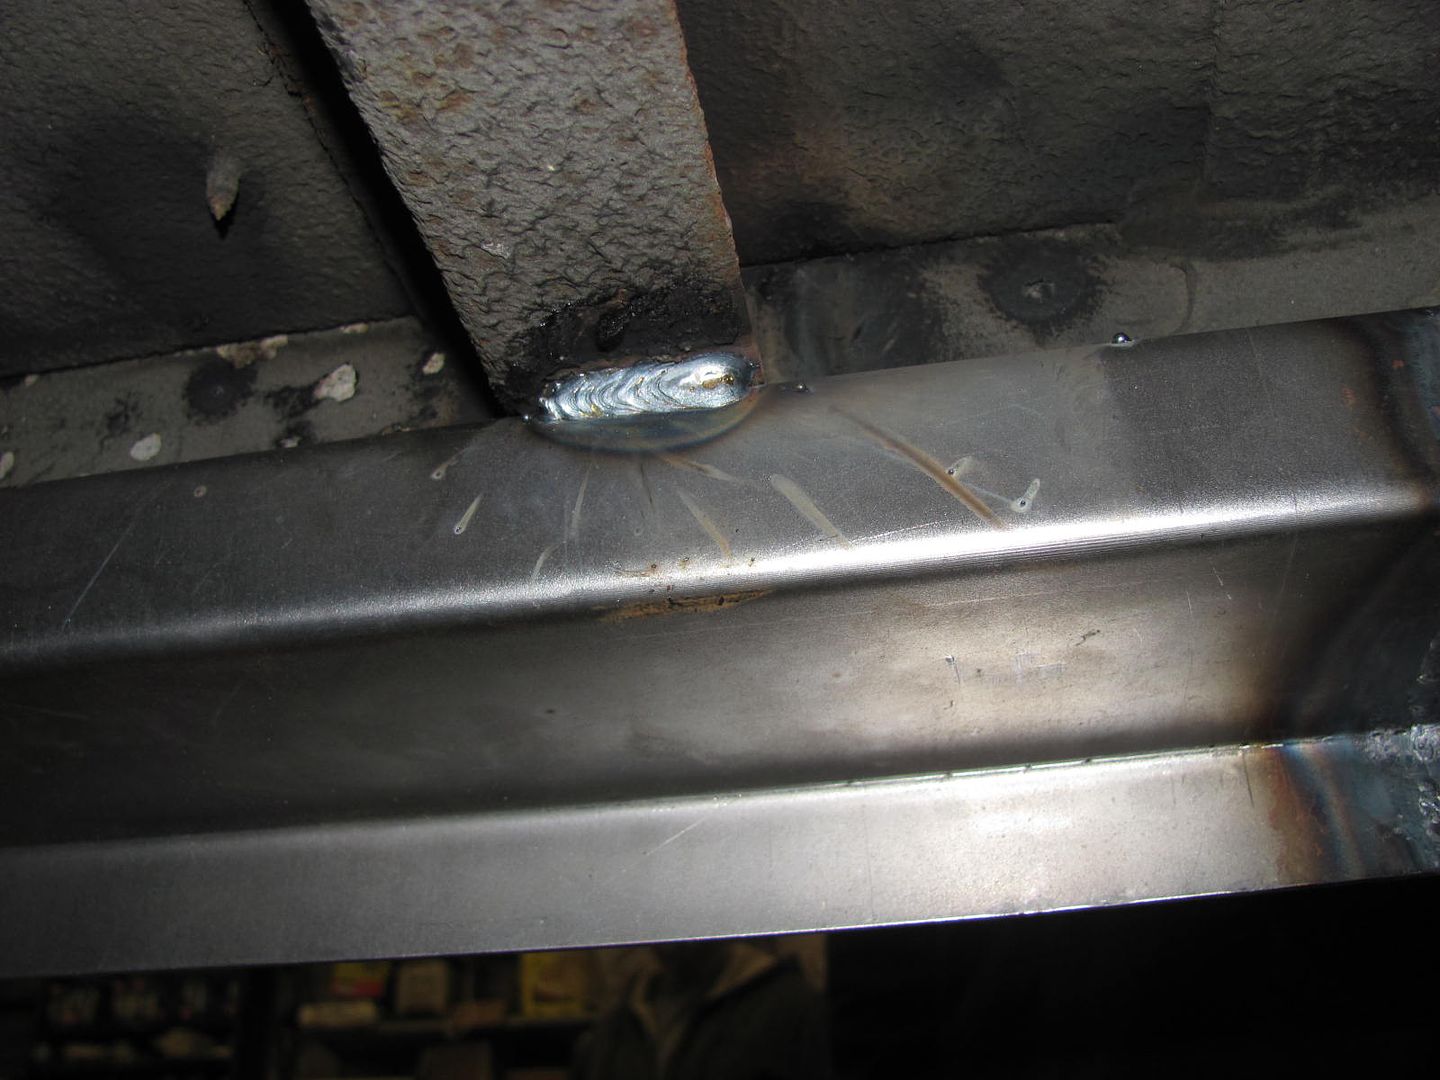 Added the frame around the fuel door, this helps prevent the side panel from flopping around as the fuel door is pushed closed.. 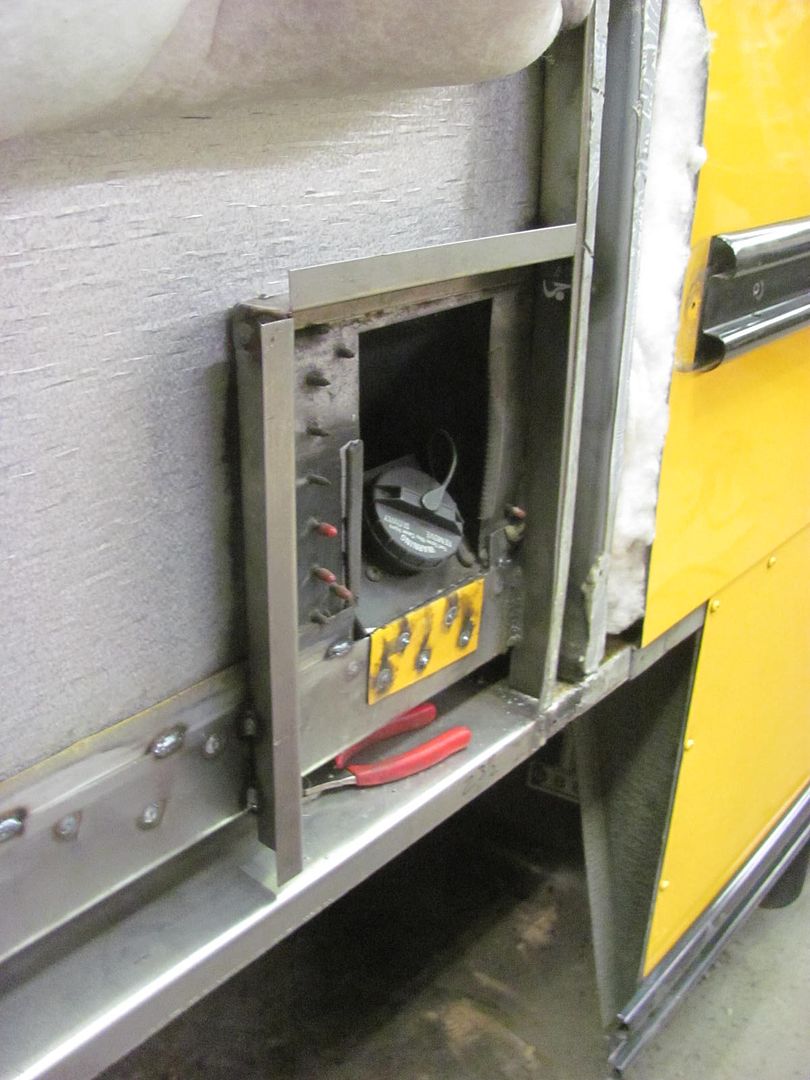 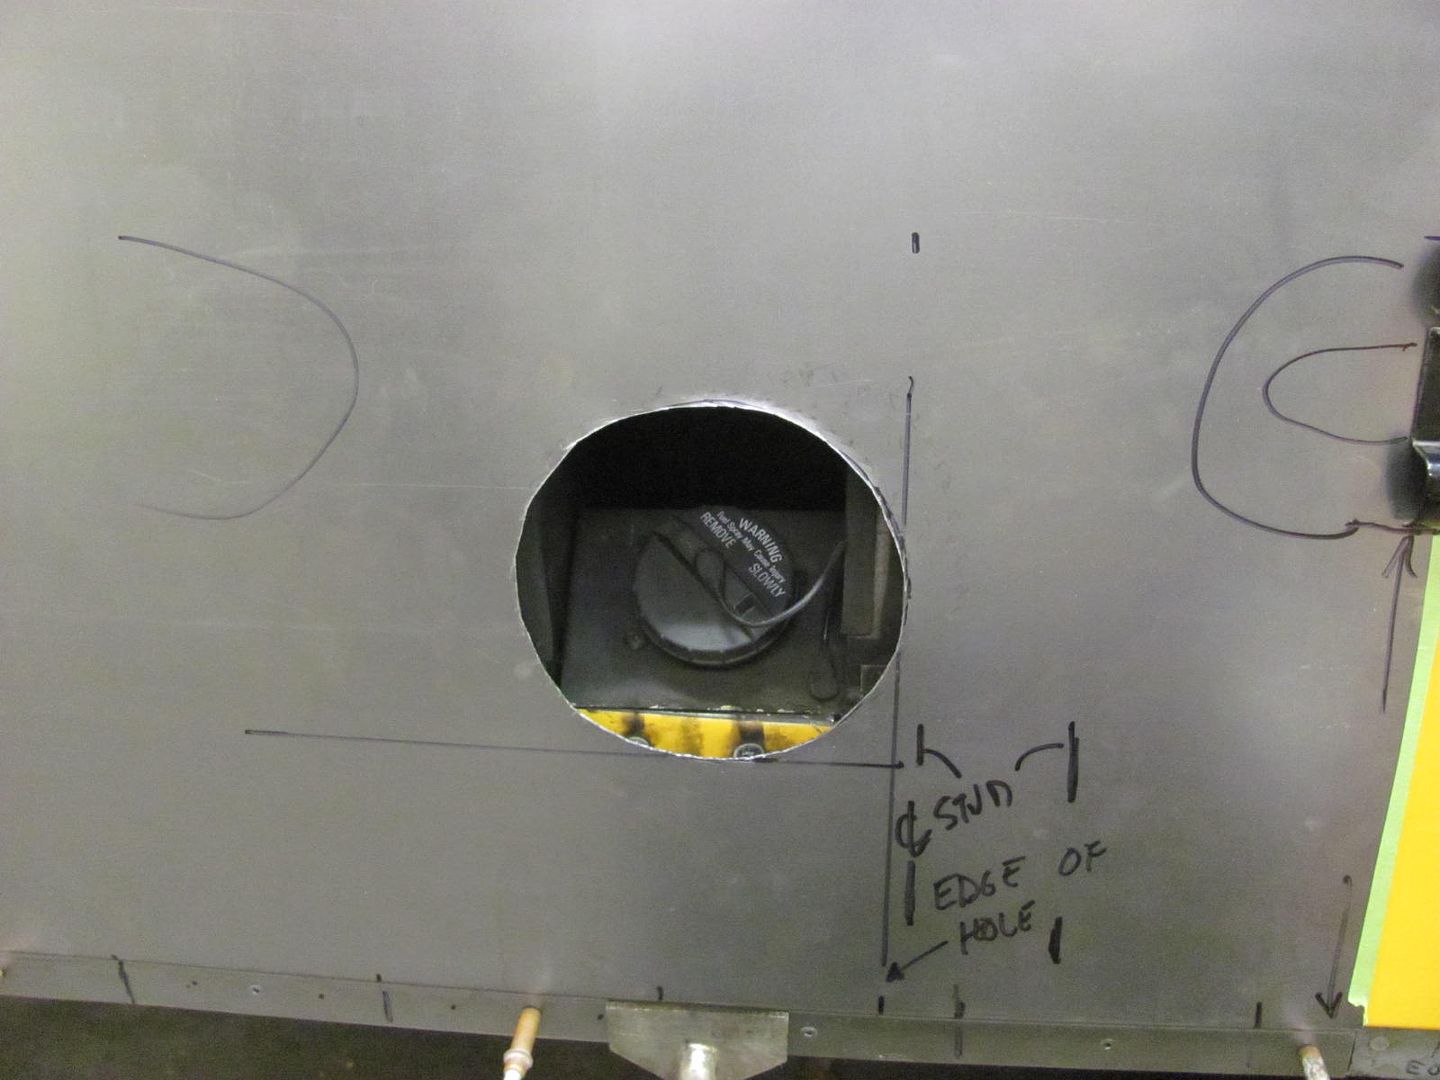 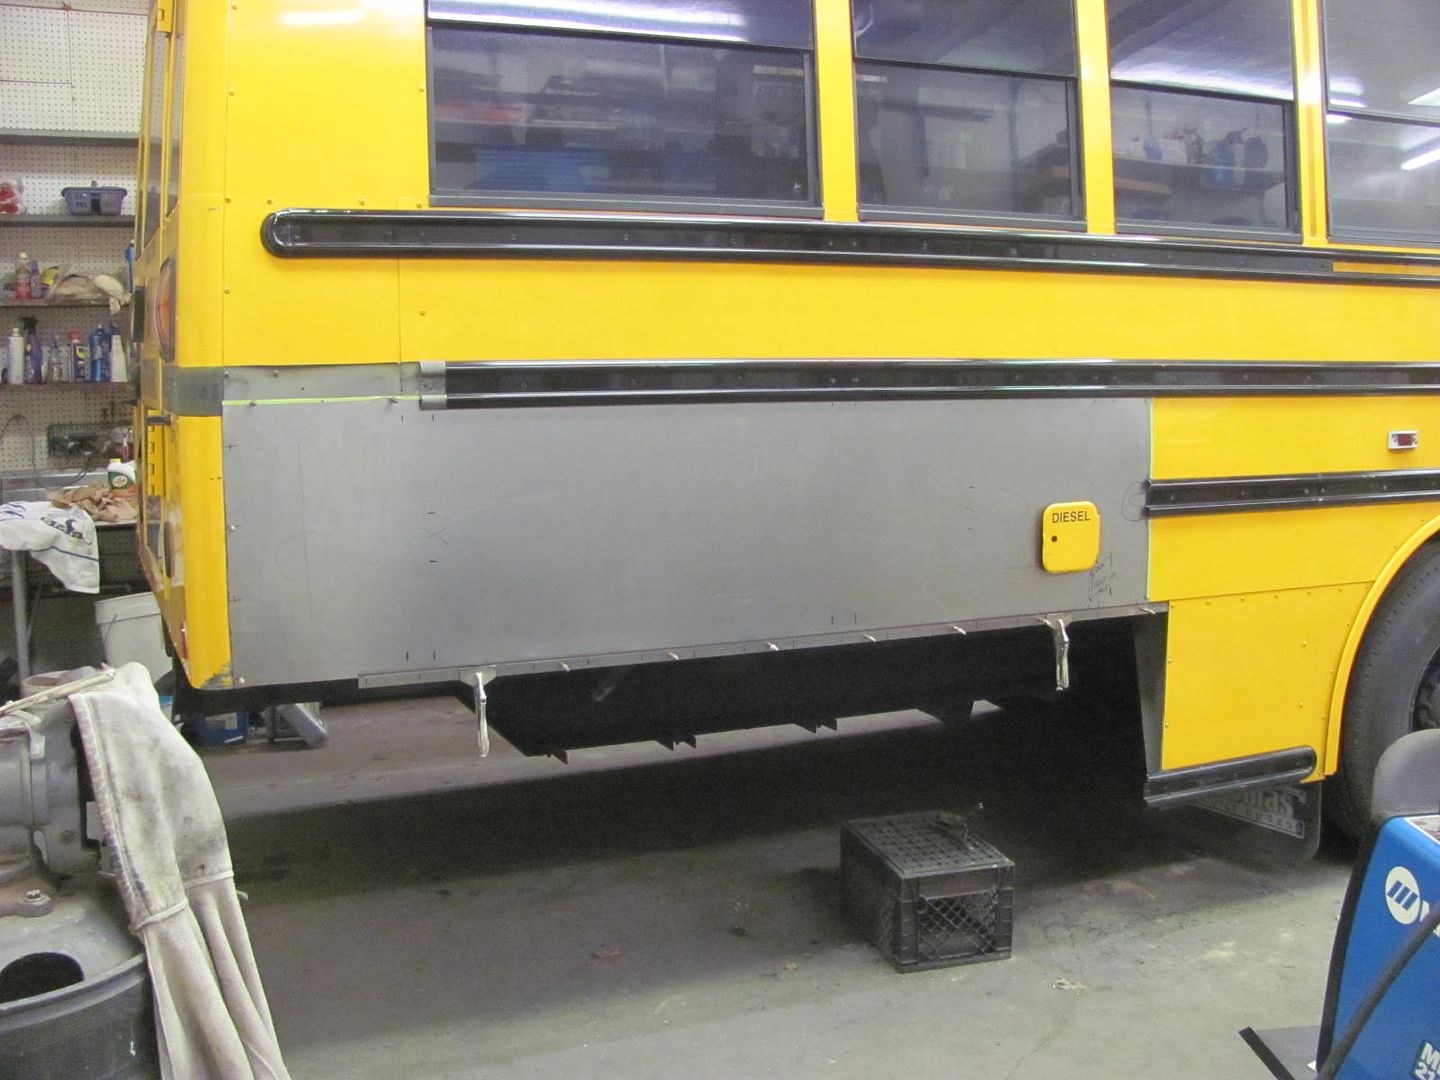 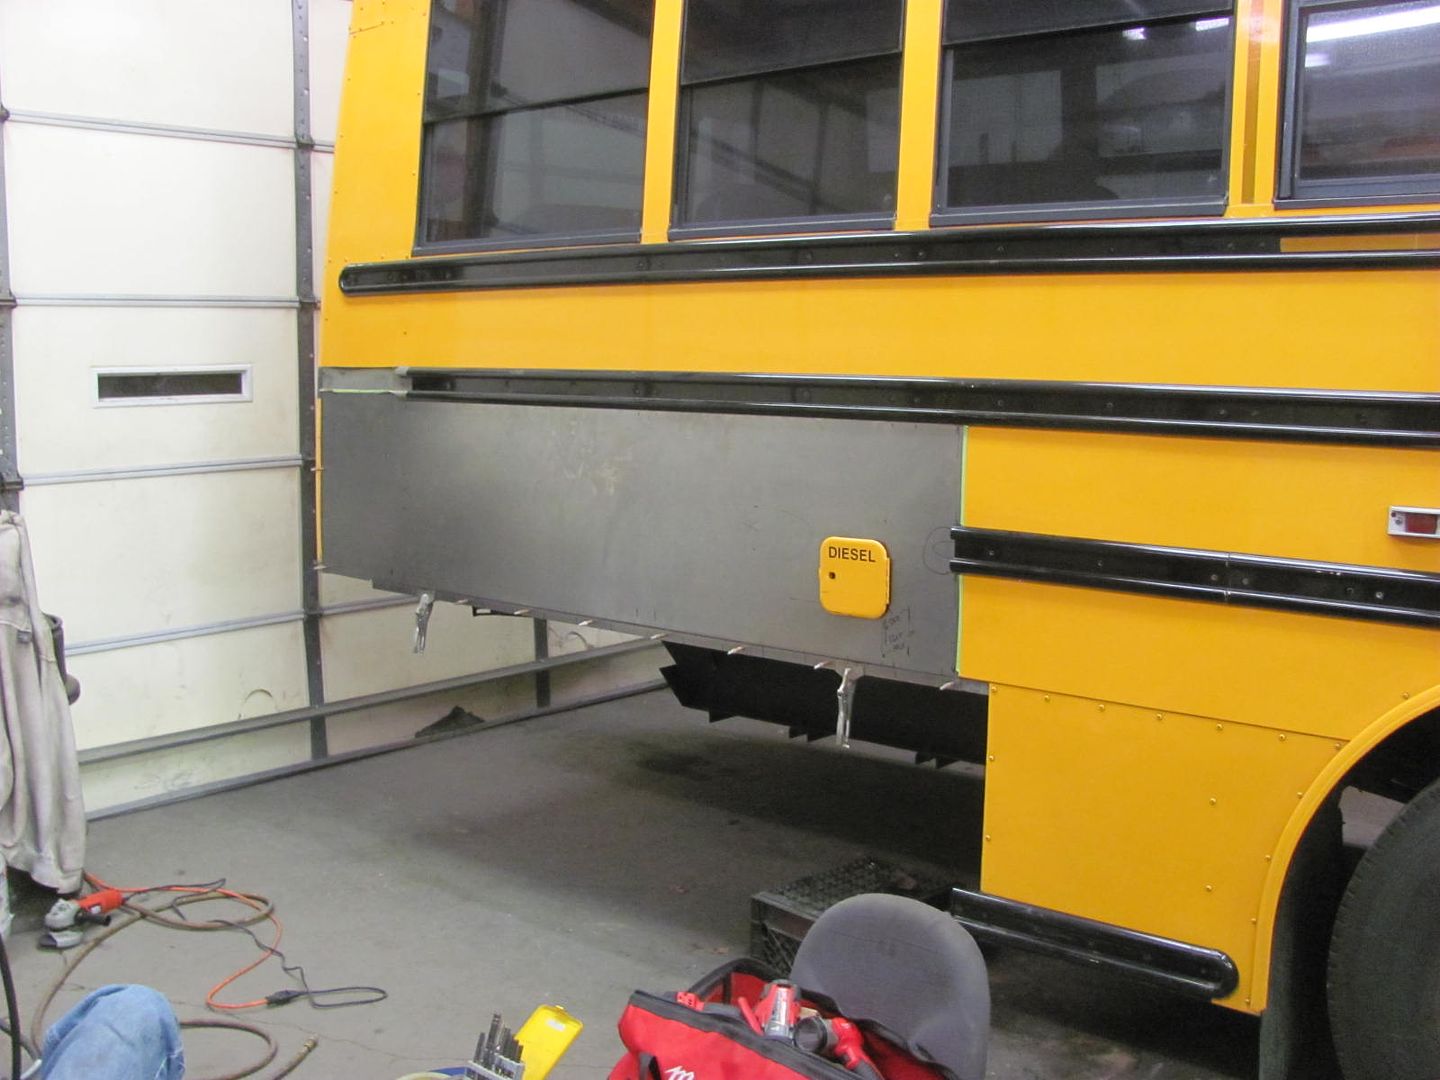 Thursday evening we'll get all the holes pre-drilled for the skirting and start prepping for paint..
__________________
Robert |
|
|
|
|
12-09-2015, 02:28 AM
|
#11 |
|
Senior Member
Join Date: Jul 2012
Location: Oblong, Illinois
Posts: 7,017
|
Re: 55 Wagon Progress
Nice clean fix going on there. The channels came out really well. How did you make them? Almost looks like press brake work and am thinking they are too narrow for that.
|
|
|
|
|
12-09-2015, 07:36 AM
|
#12 |
|
Registered User
Join Date: Jan 2013
Location: Leonardtown, MD
Posts: 1,637
|
Re: 55 Wagon Progress
The channels are 16 ga cold rolled, they were bent on the Baileigh magnetic brake.
__________________
Robert |
|
|
|
|
12-10-2015, 09:02 AM
|
#13 |
|
Registered User
Join Date: Jan 2013
Location: Leonardtown, MD
Posts: 1,637
|
Re: 55 Wagon Progress
Took delivery yesterday of a Blocking Hammer from Peter Tommasini. To give you an idea of the size of this beast, the stump is 24" in diameter..
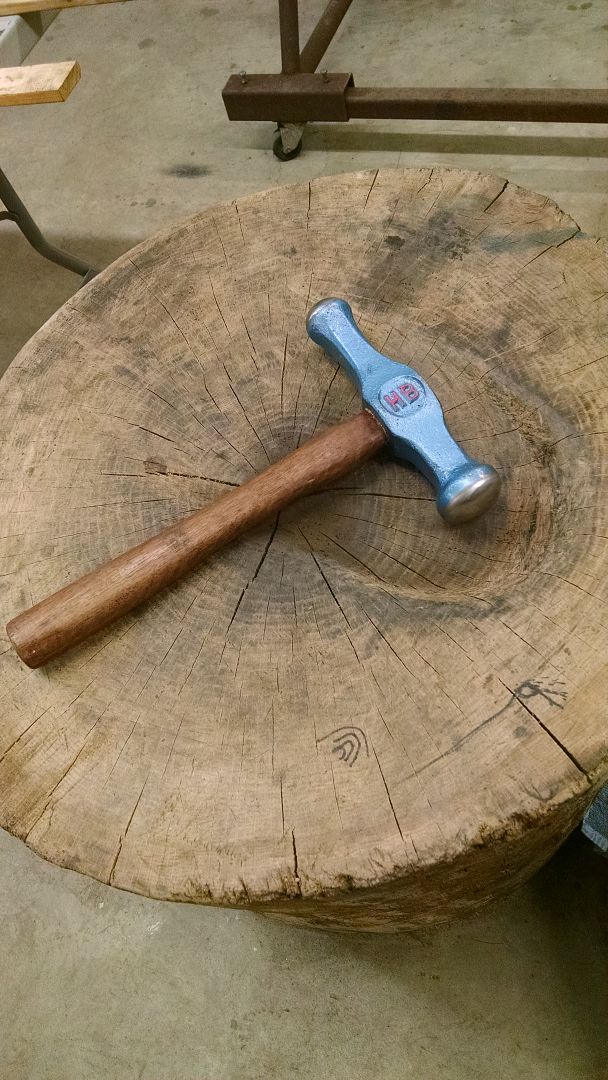 This should come in handy in making the 16 ga repair panels for the front fenders on John's Beiderman truck.. 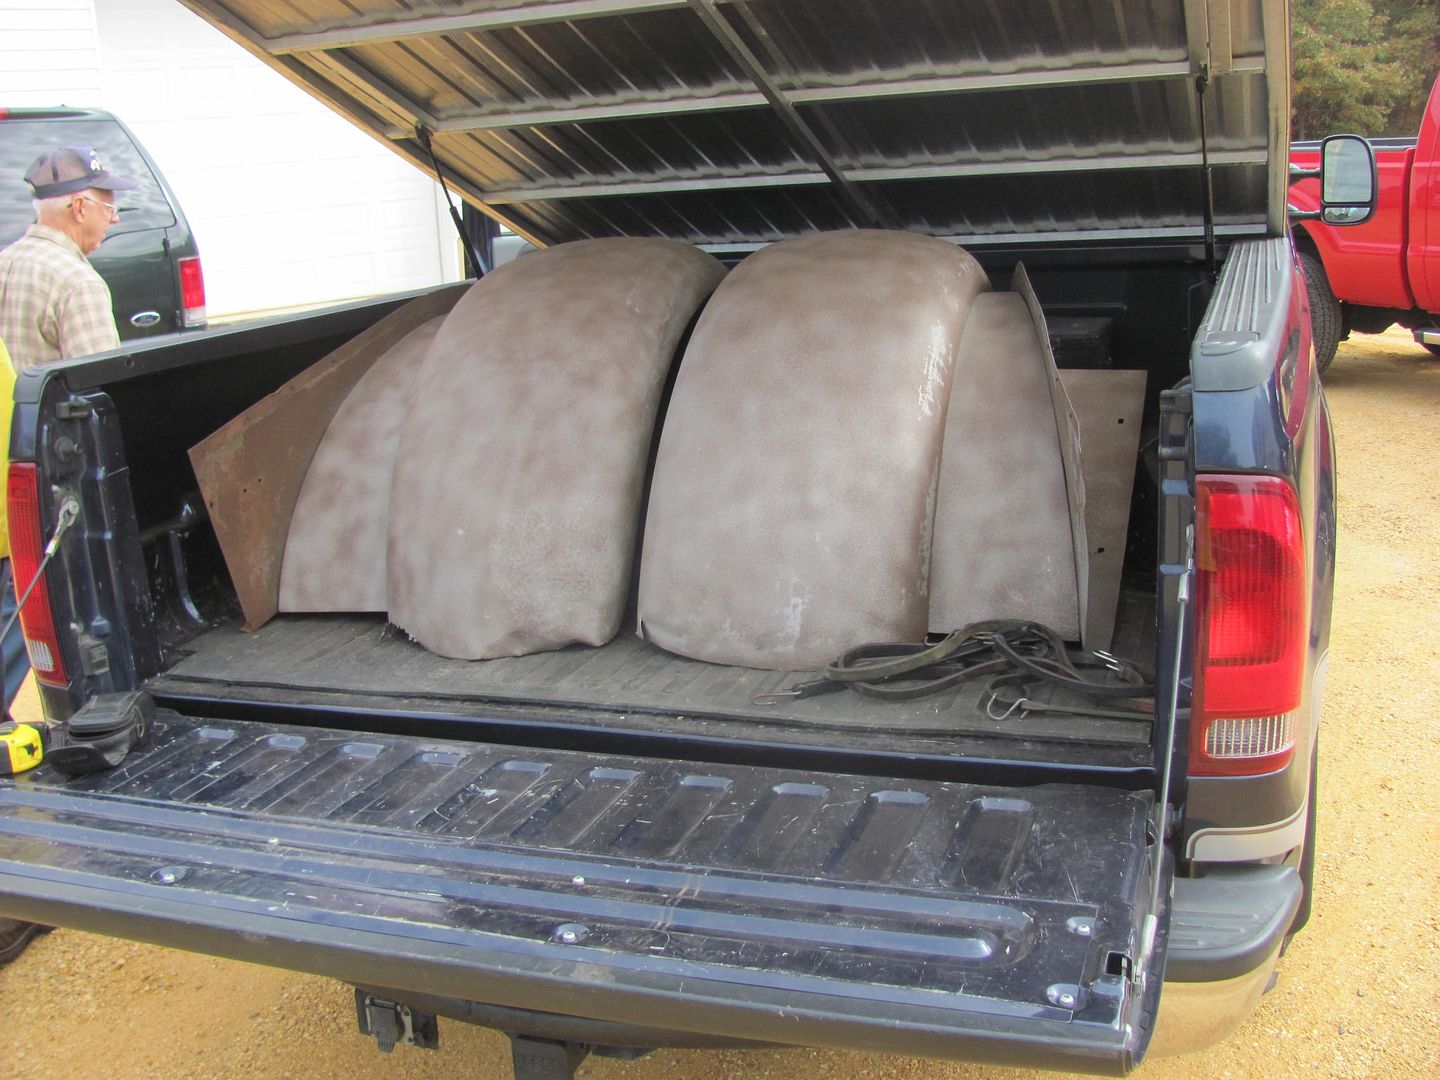 
__________________
Robert |
|
|
|
|
12-10-2015, 11:46 PM
|
#14 |
|
Registered User
Join Date: Jan 2013
Location: Leonardtown, MD
Posts: 1,637
|
Re: 55 Wagon Progress
The braces for behind the lower skirt were mangled pretty well, had to untwist the pretzels to get accurate measurements..
  Getting all the holes prepped... 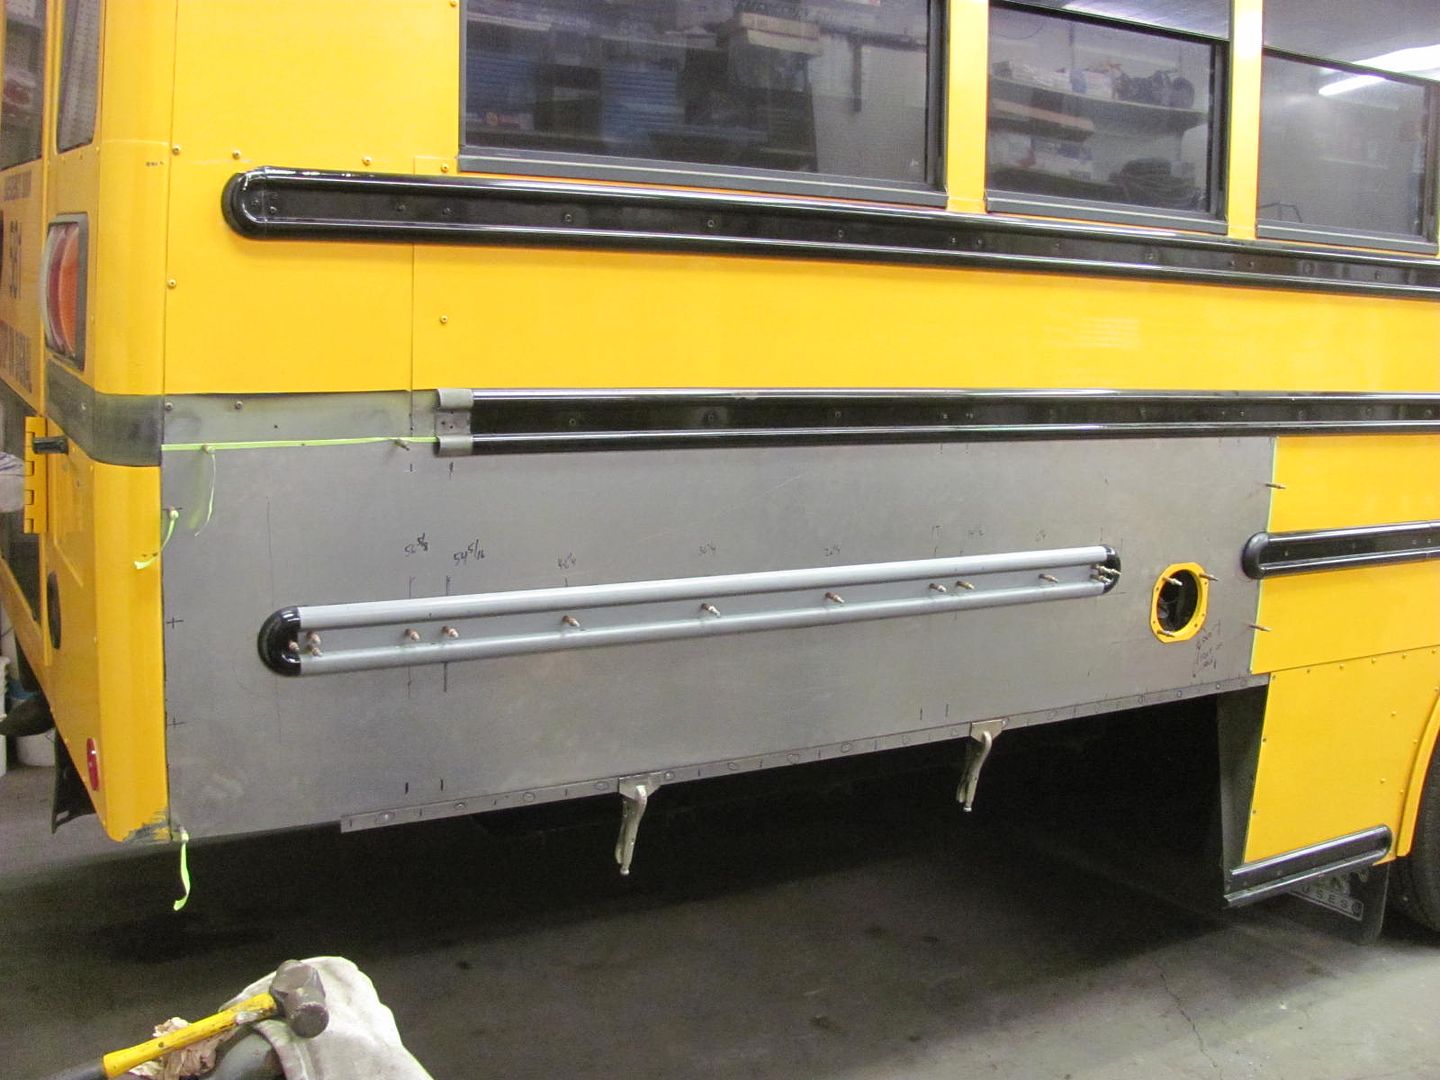 Welding in the new braces.. 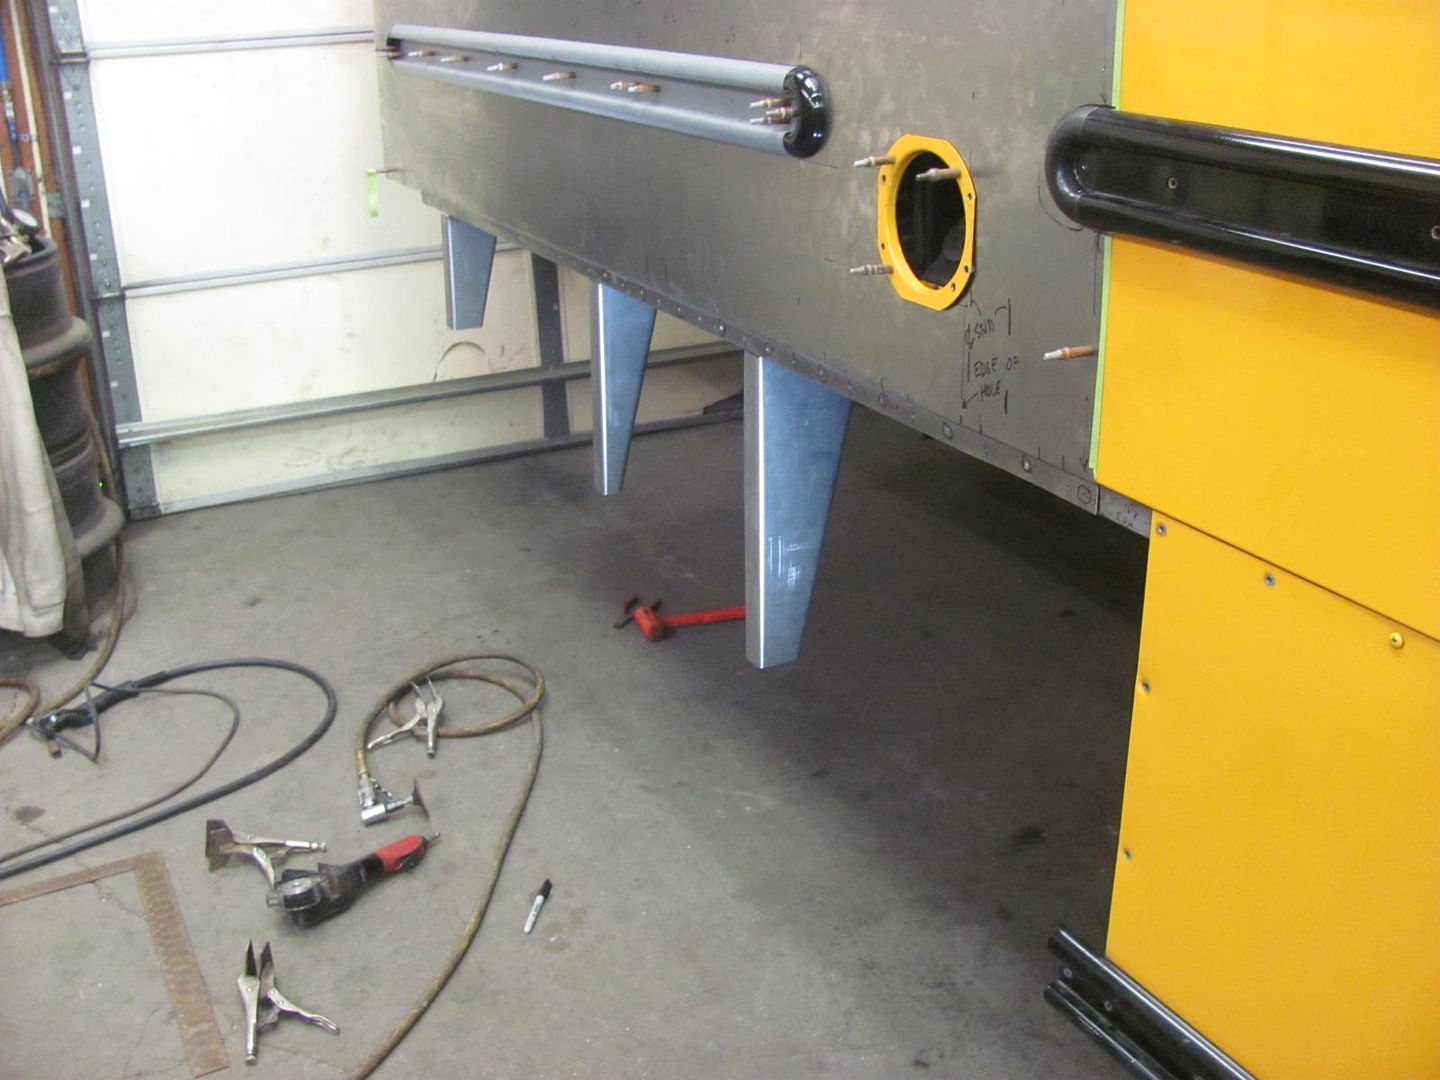  All the pieces of the puzzle... Well, almost.. 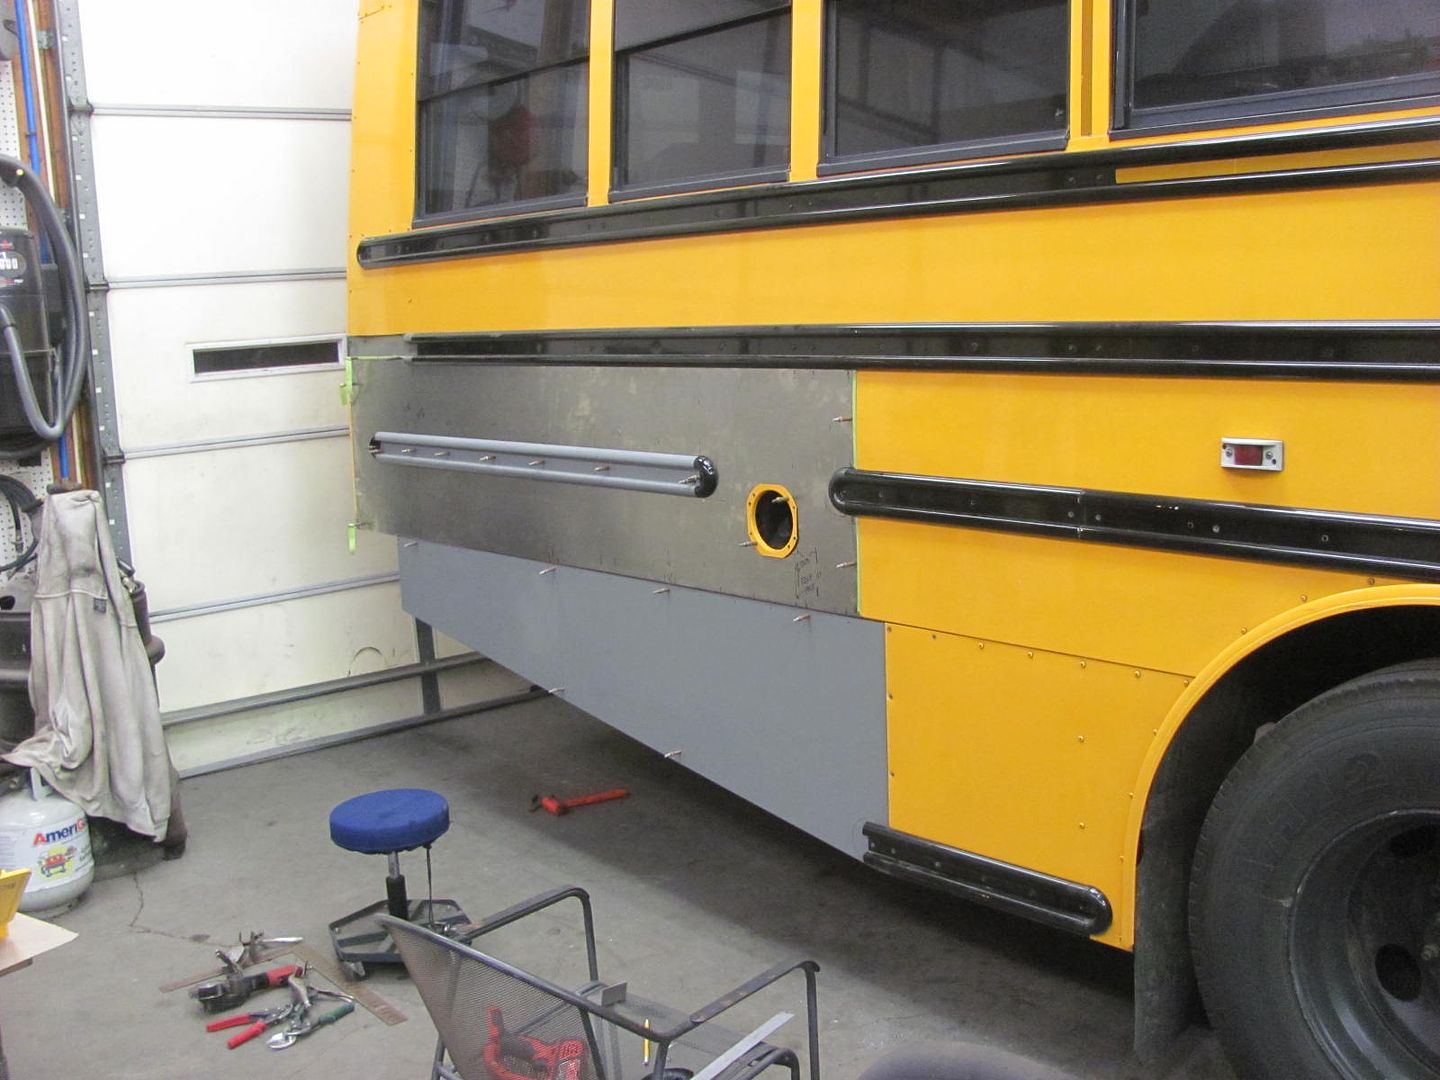 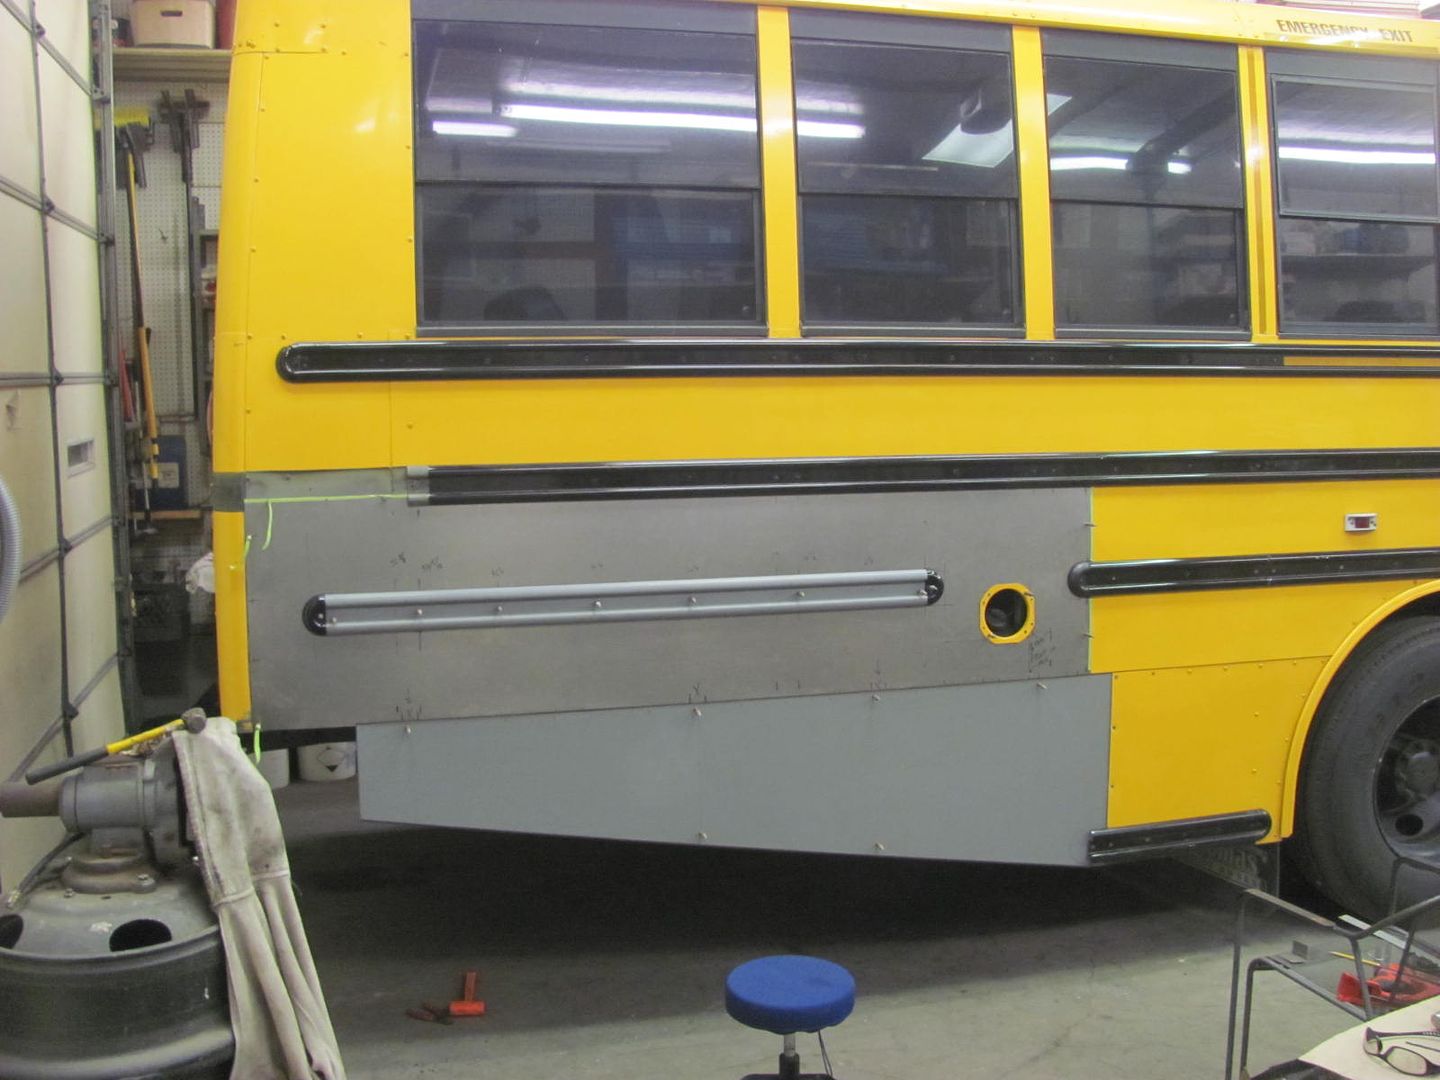 Now to bust it apart for paint prep..
__________________
Robert |
|
|
|
|
12-11-2015, 12:20 AM
|
#15 |
|
Senior Member
Join Date: Mar 2011
Location: West Plains, Missouri
Posts: 7,555
|
Re: 55 Wagon Progress
Sure looks alot better...Jim
__________________
my build thread: http://67-72chevytrucks.com/vboard/s...d.php?t=459839 Jimbo's long bed step build:http://67-72chevytrucks.com/vboard/s...t=464626<br /> |
|
|
|
|
12-12-2015, 08:38 PM
|
#16 |
|
Registered User
Join Date: Jan 2013
Location: Leonardtown, MD
Posts: 1,637
|
Re: 55 Wagon Progress
Well, only one more piece to make for the bus, we need a cap to join together two pieces of rub rail....
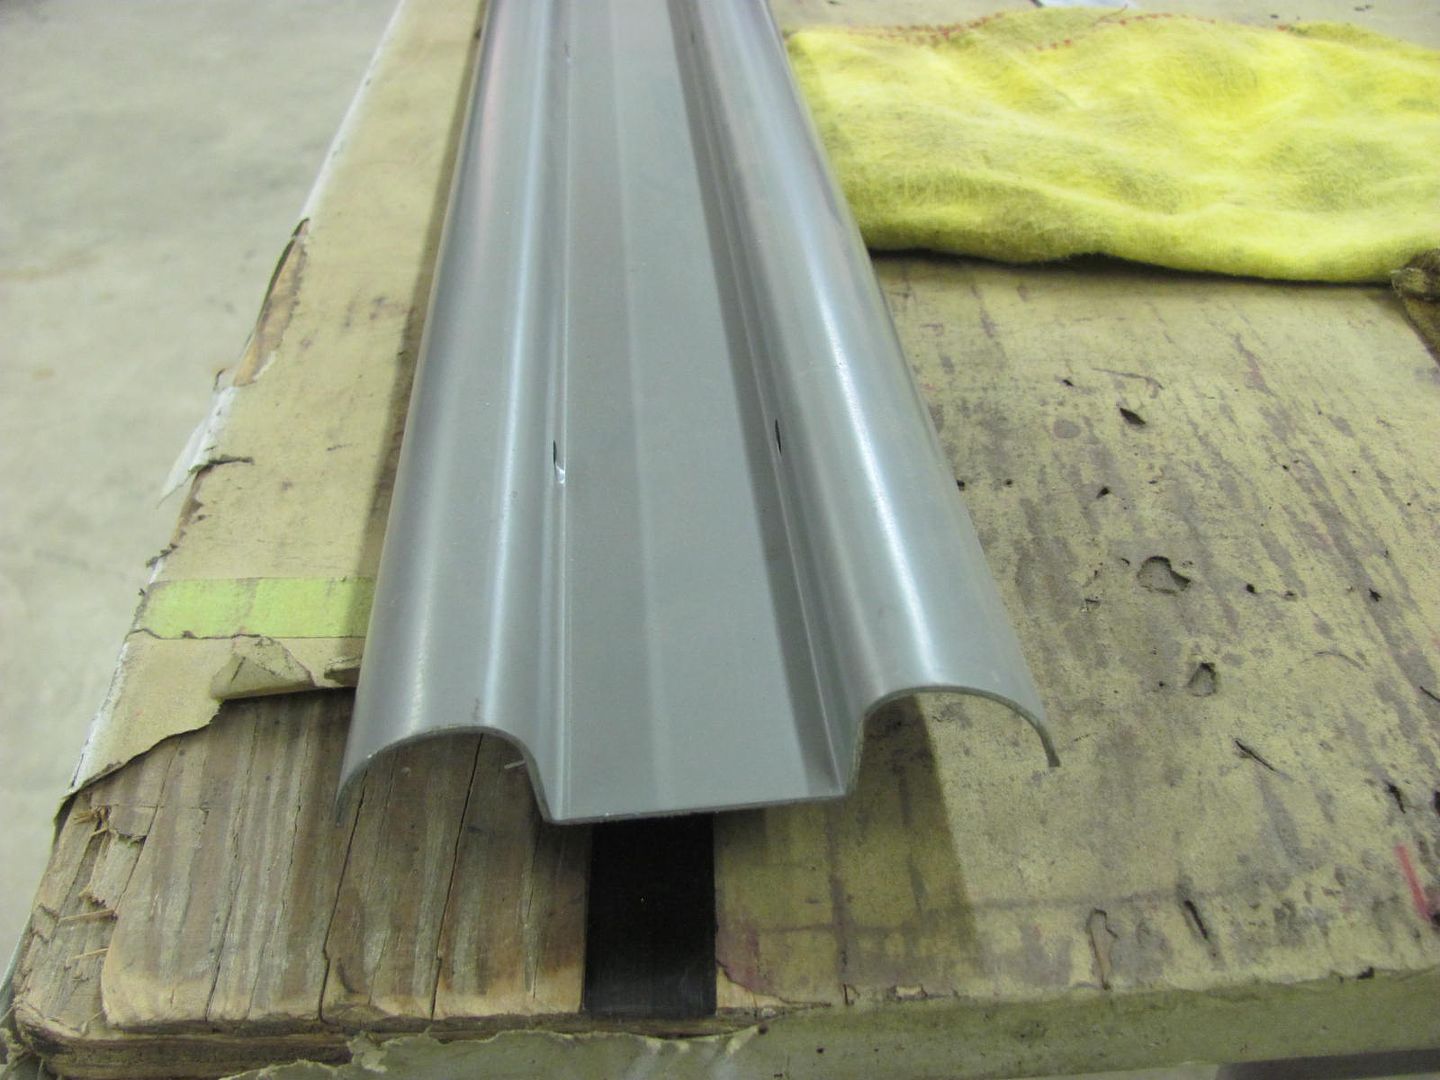 Bent up some 18 ga on the Baileigh magnetic brake... 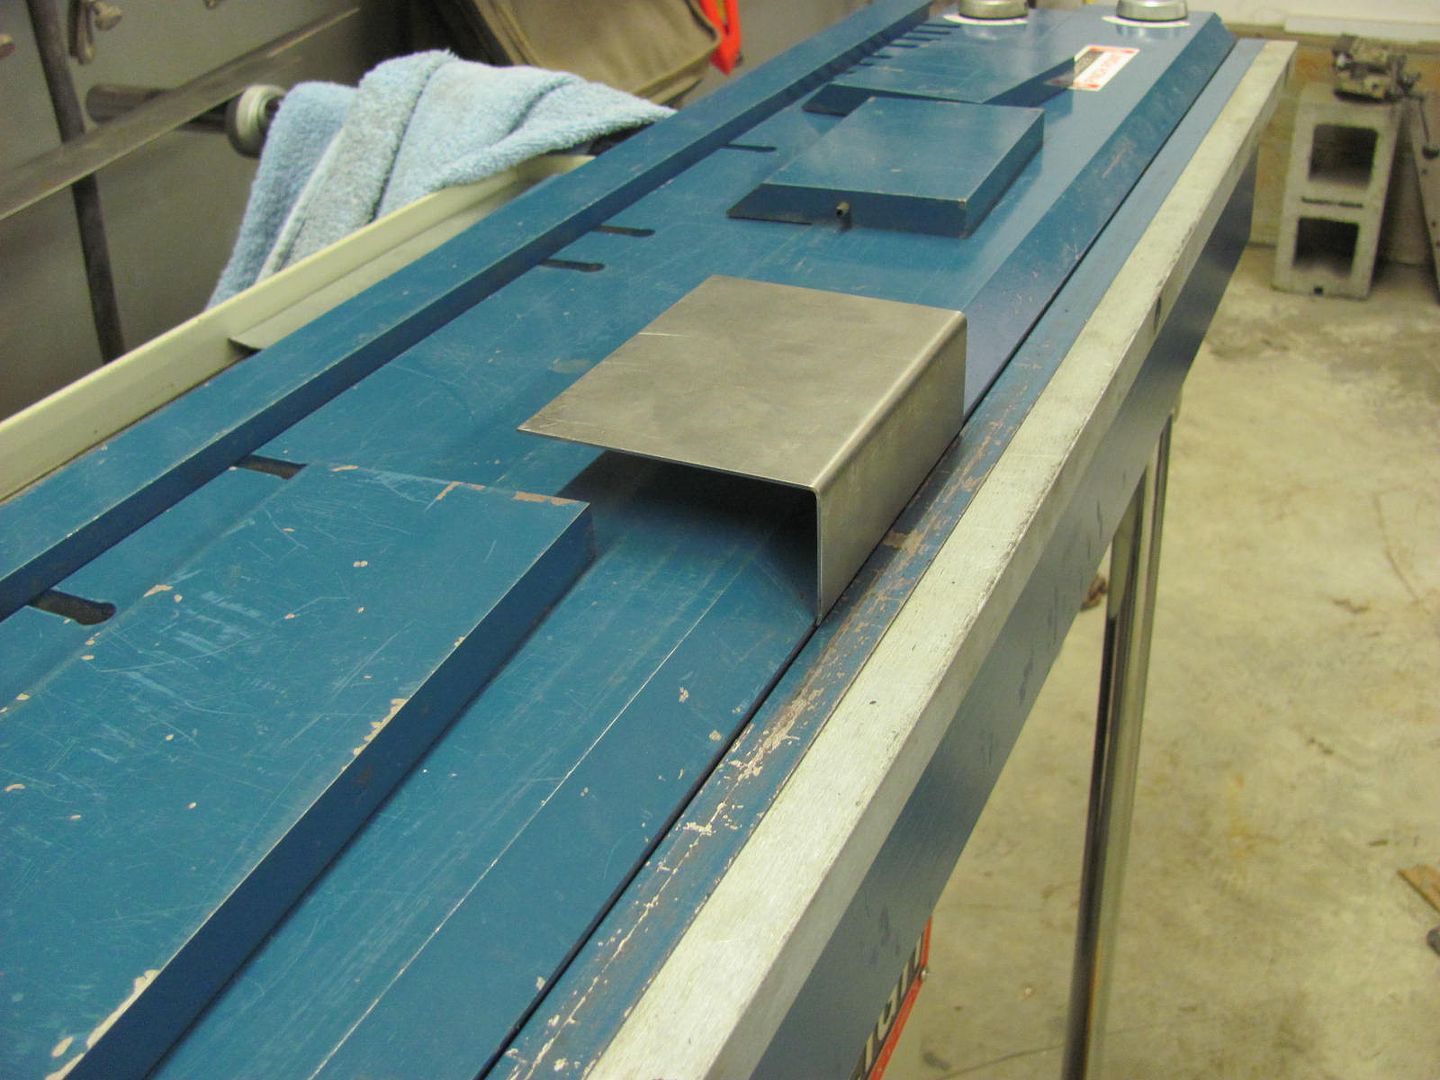 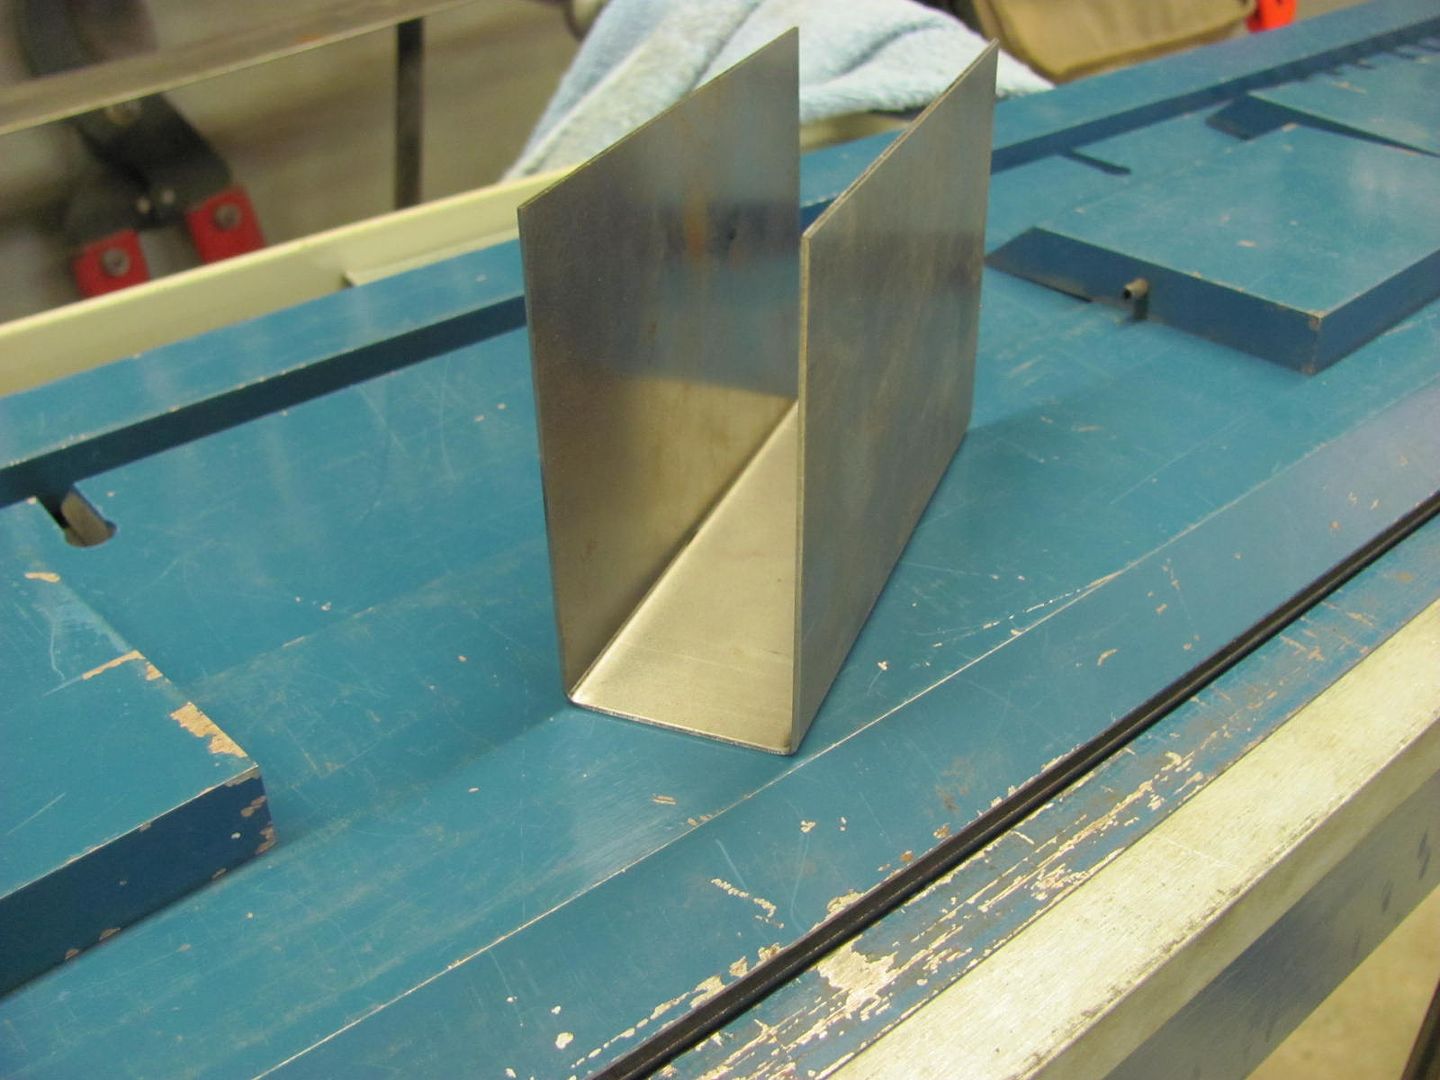 Then for the highly technical stuff, bent the rest using vise grips to clamp it in place and a dead blow to incrementally tap the ears around... 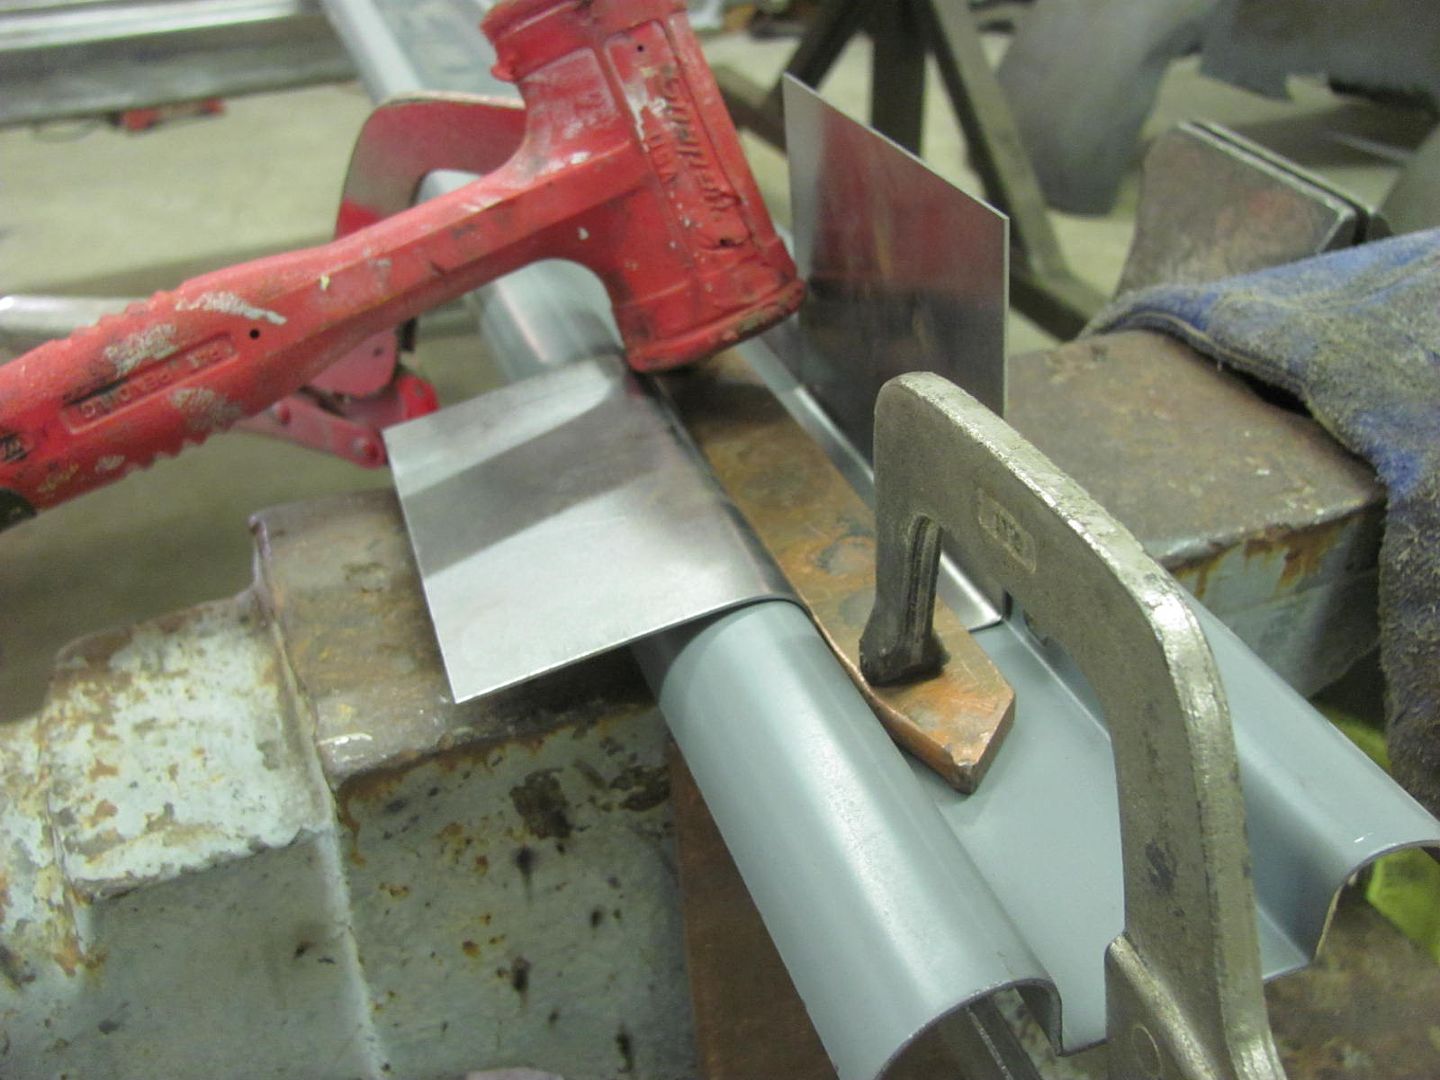 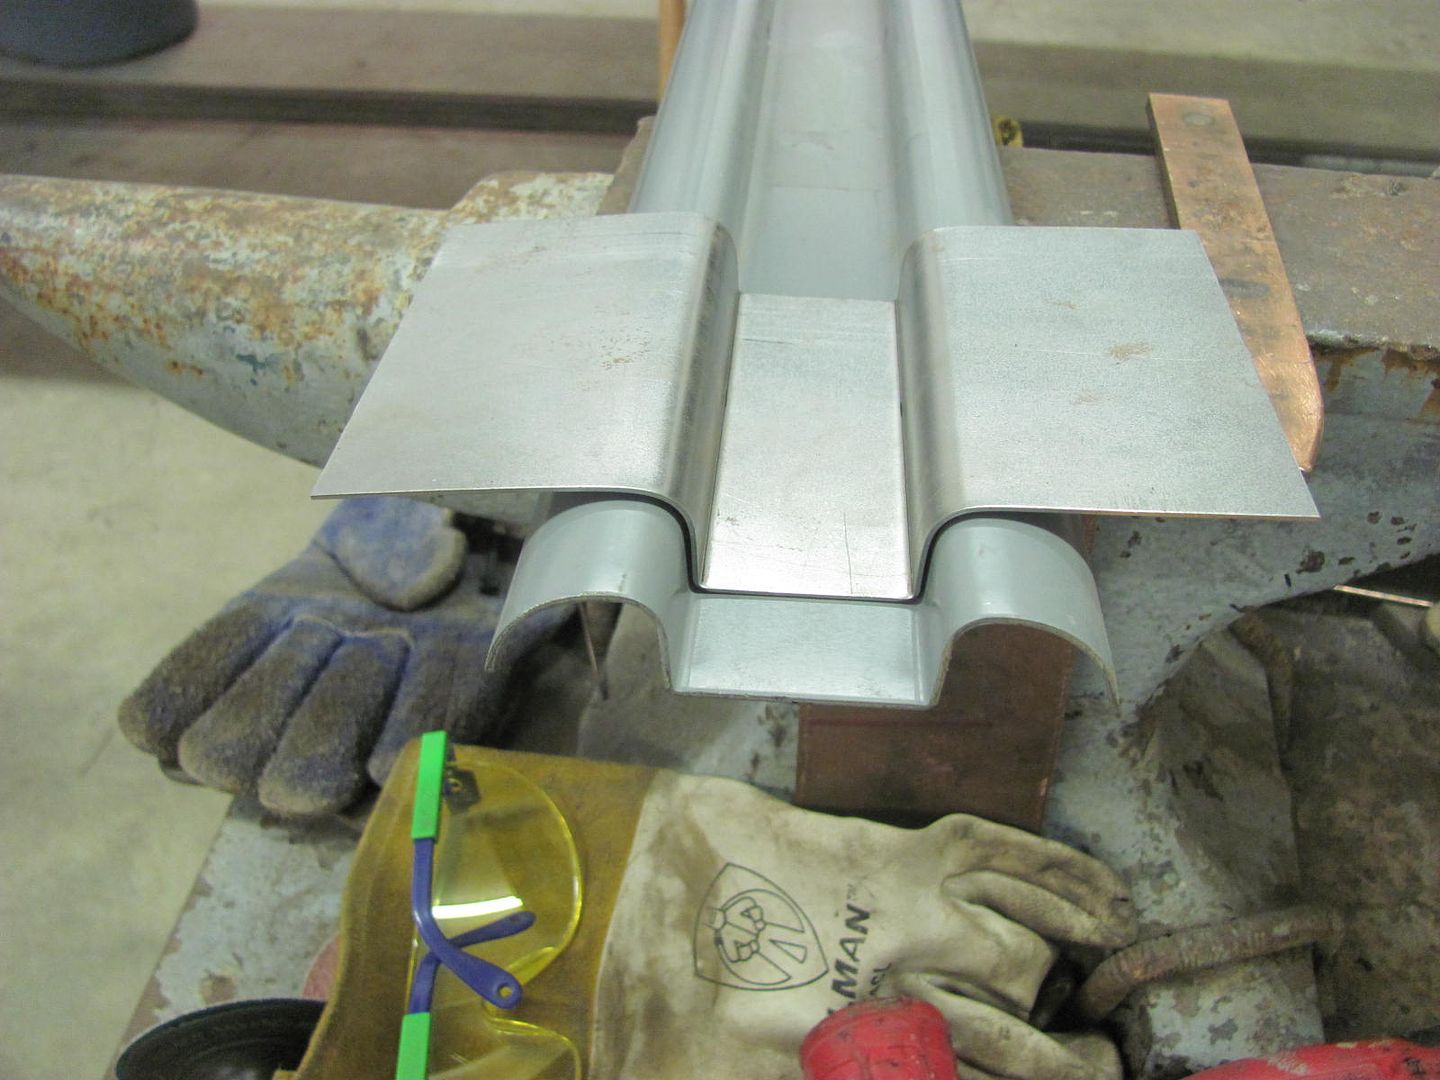 Continued to use the hammer to tap it around, then tightened up the radius on this die/post dolly 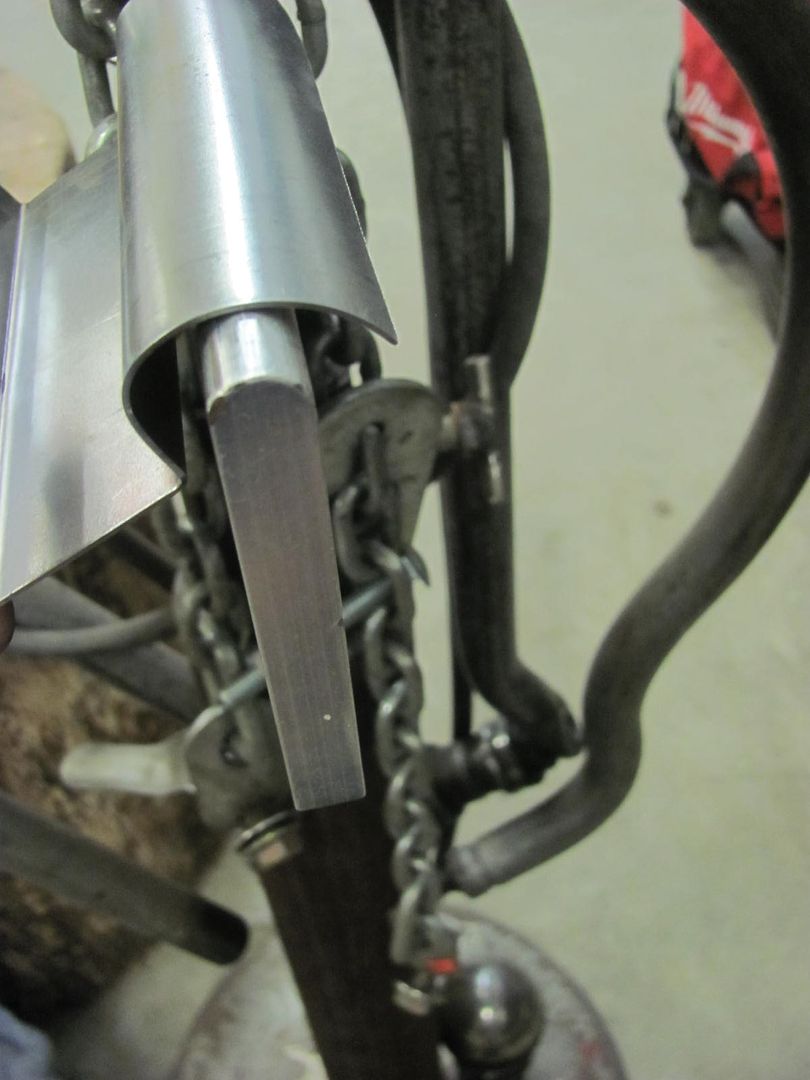 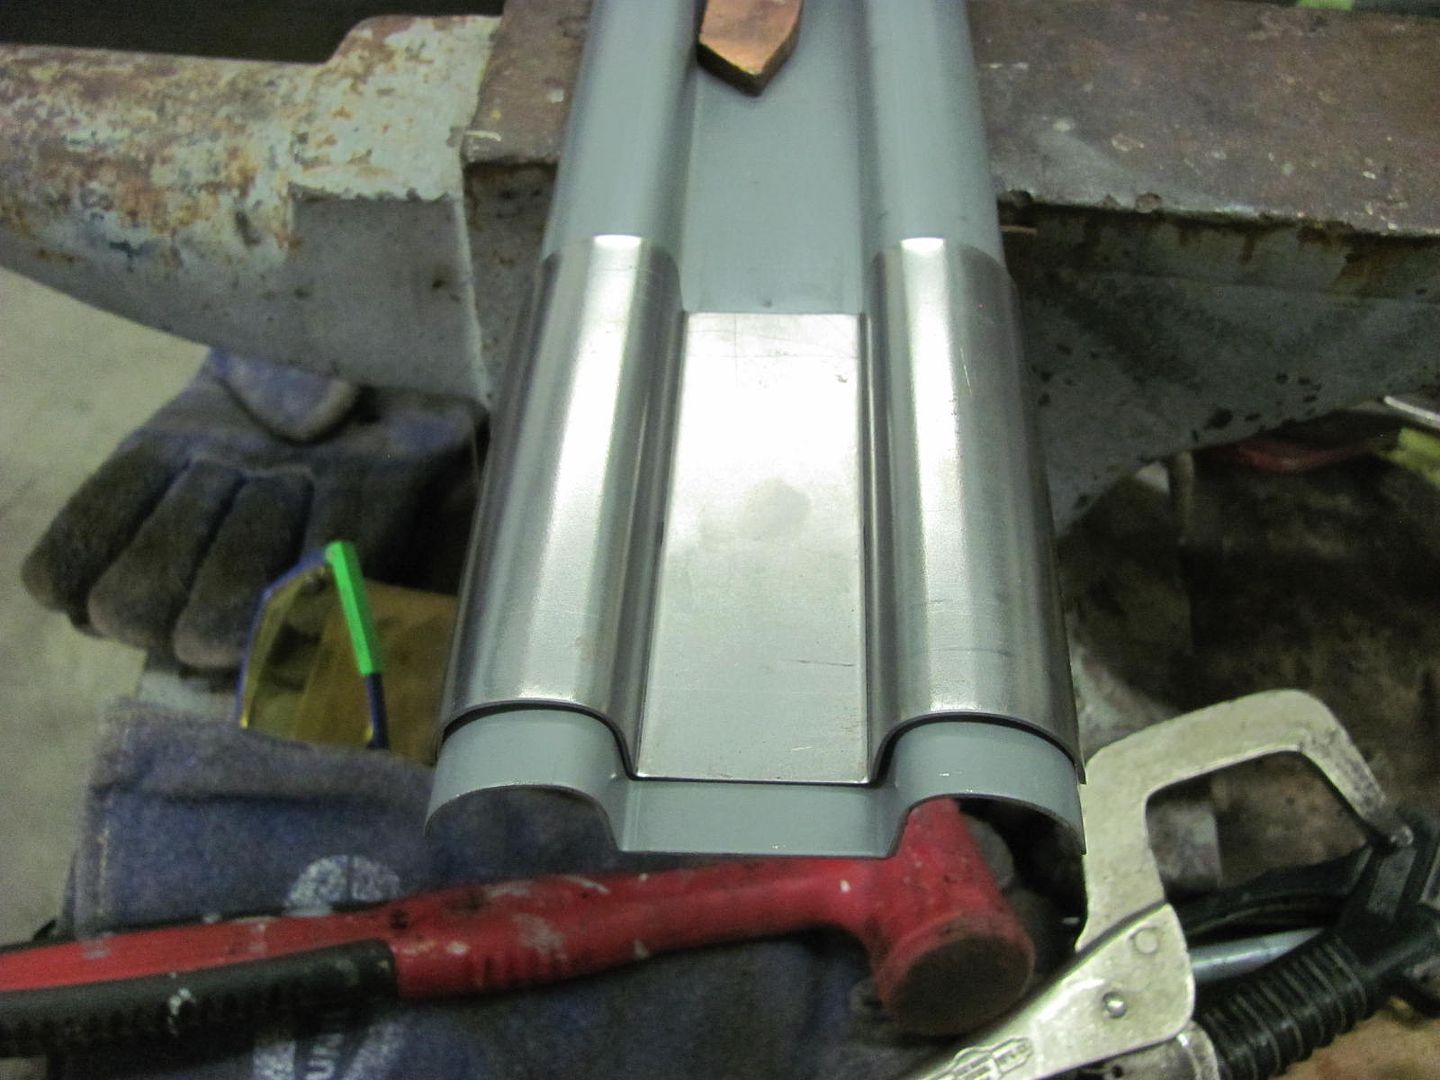 We'll get some paint on the bus parts tomorrow..
__________________
Robert |
|
|
|
|
12-12-2015, 09:17 PM
|
#17 |
|
Registered User
Join Date: Jan 2013
Location: Leonardtown, MD
Posts: 1,637
|
Re: 55 Wagon Progress
Duplicate post
__________________
Robert Last edited by MP&C; 12-12-2015 at 09:37 PM. |
|
|
|
|
12-17-2015, 12:34 AM
|
#18 |
|
Registered User
Join Date: Jan 2013
Location: Leonardtown, MD
Posts: 1,637
|
Re: 55 Wagon Progress
Got some paint on the bus parts tonight....
 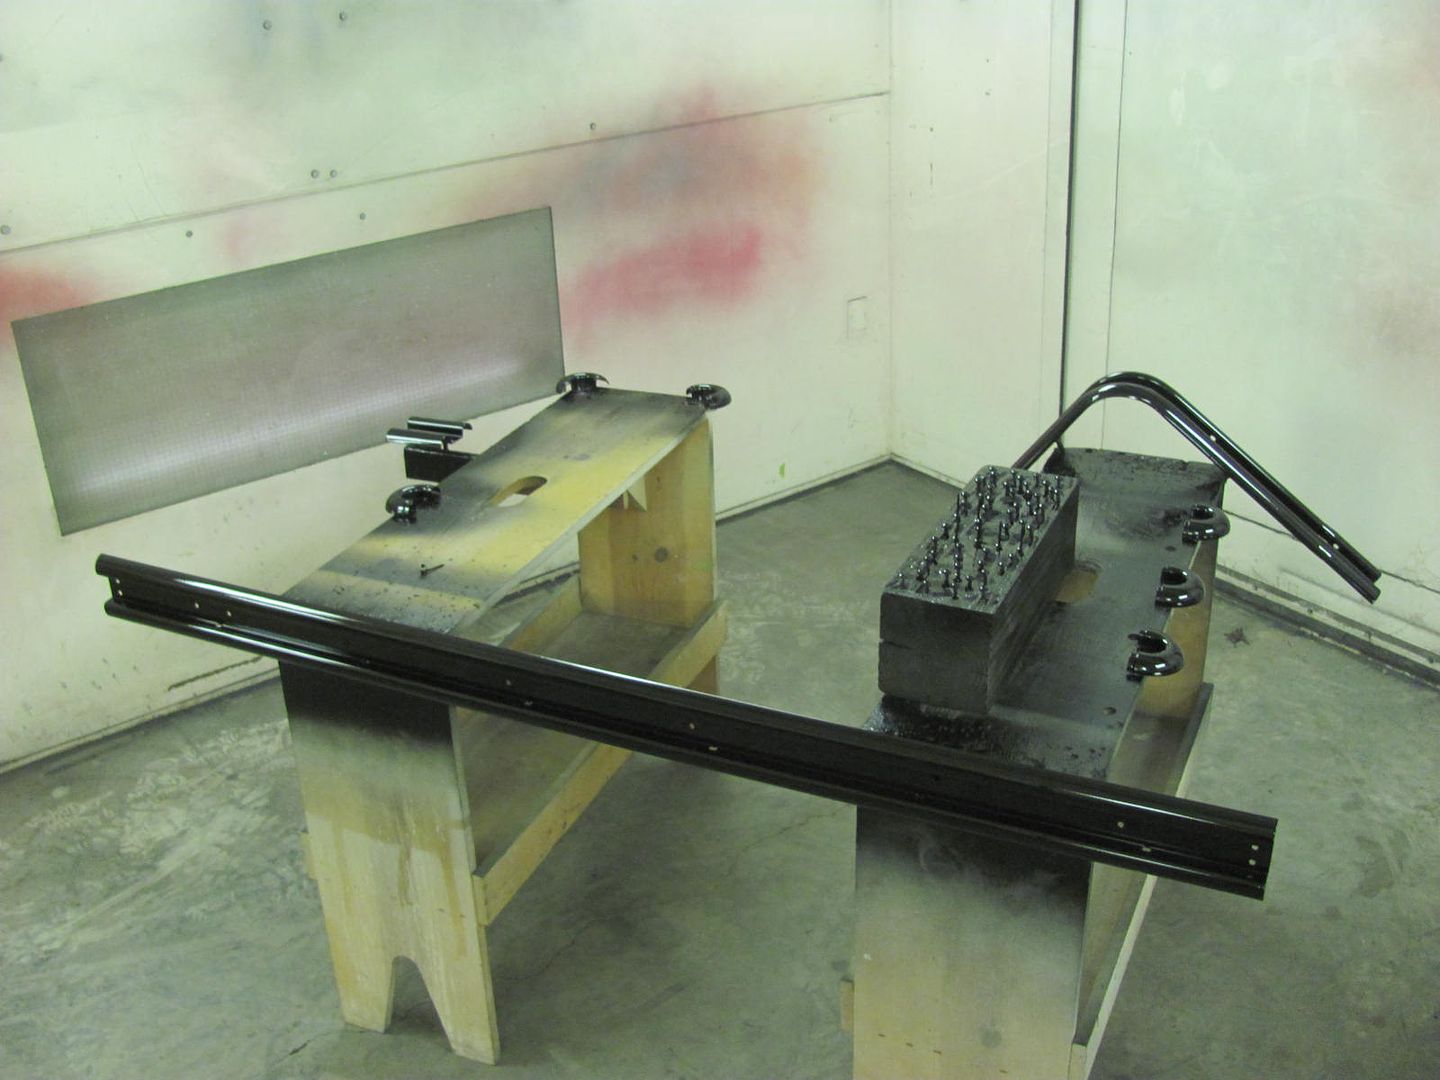  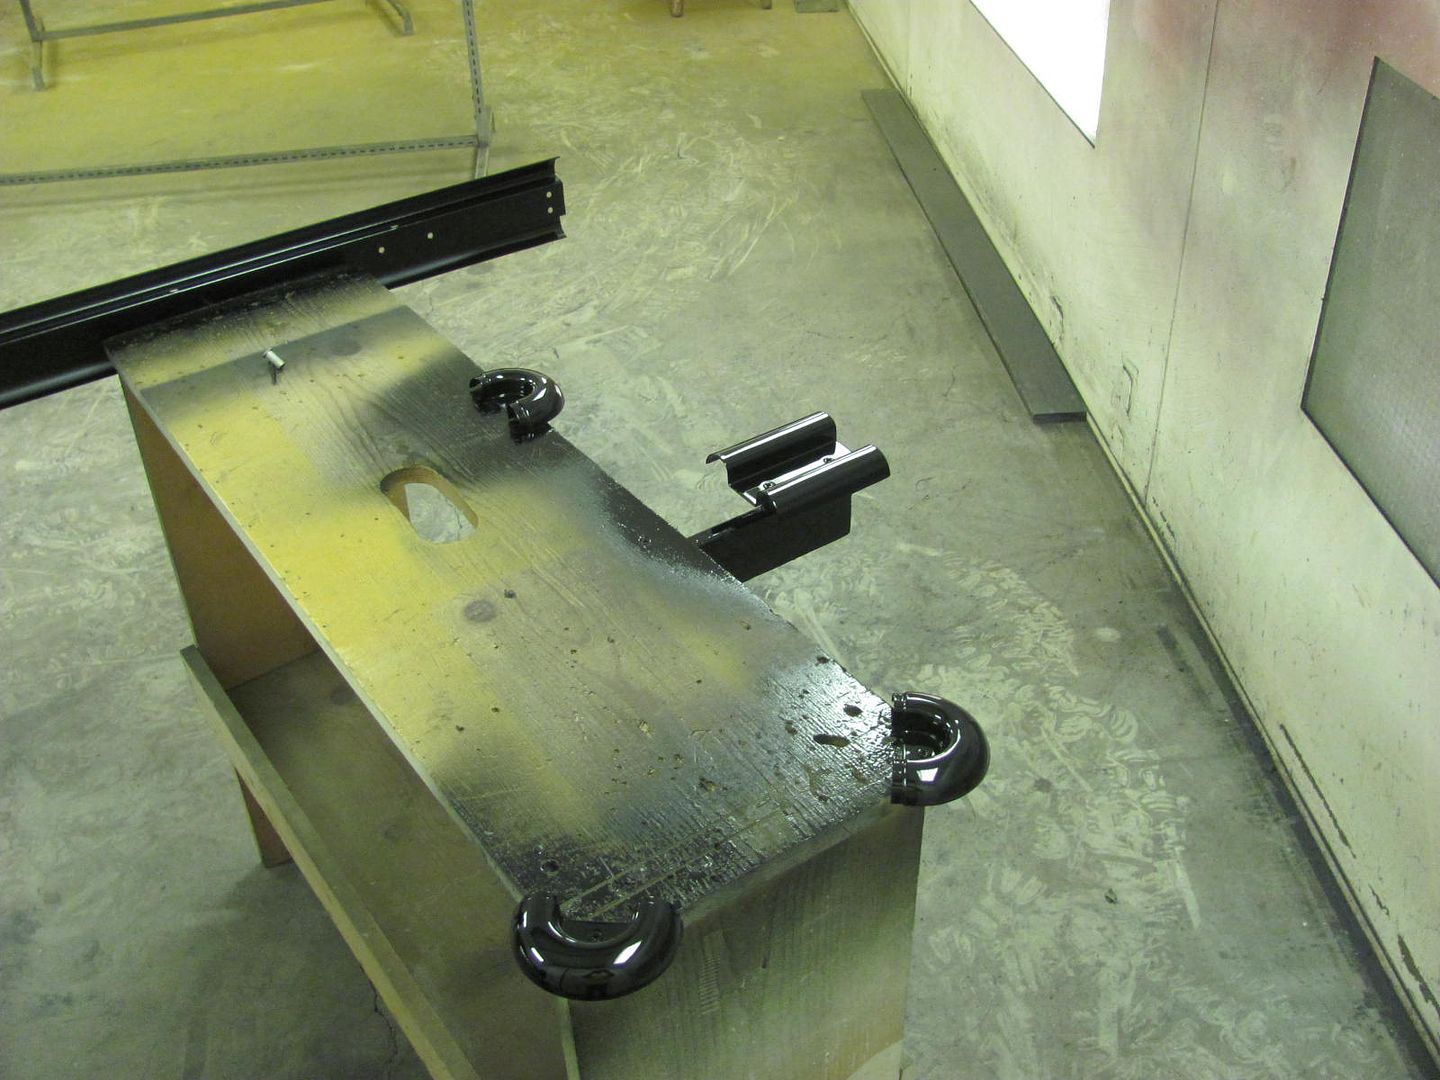 For the hardware, we media blast the heads and then paint.... 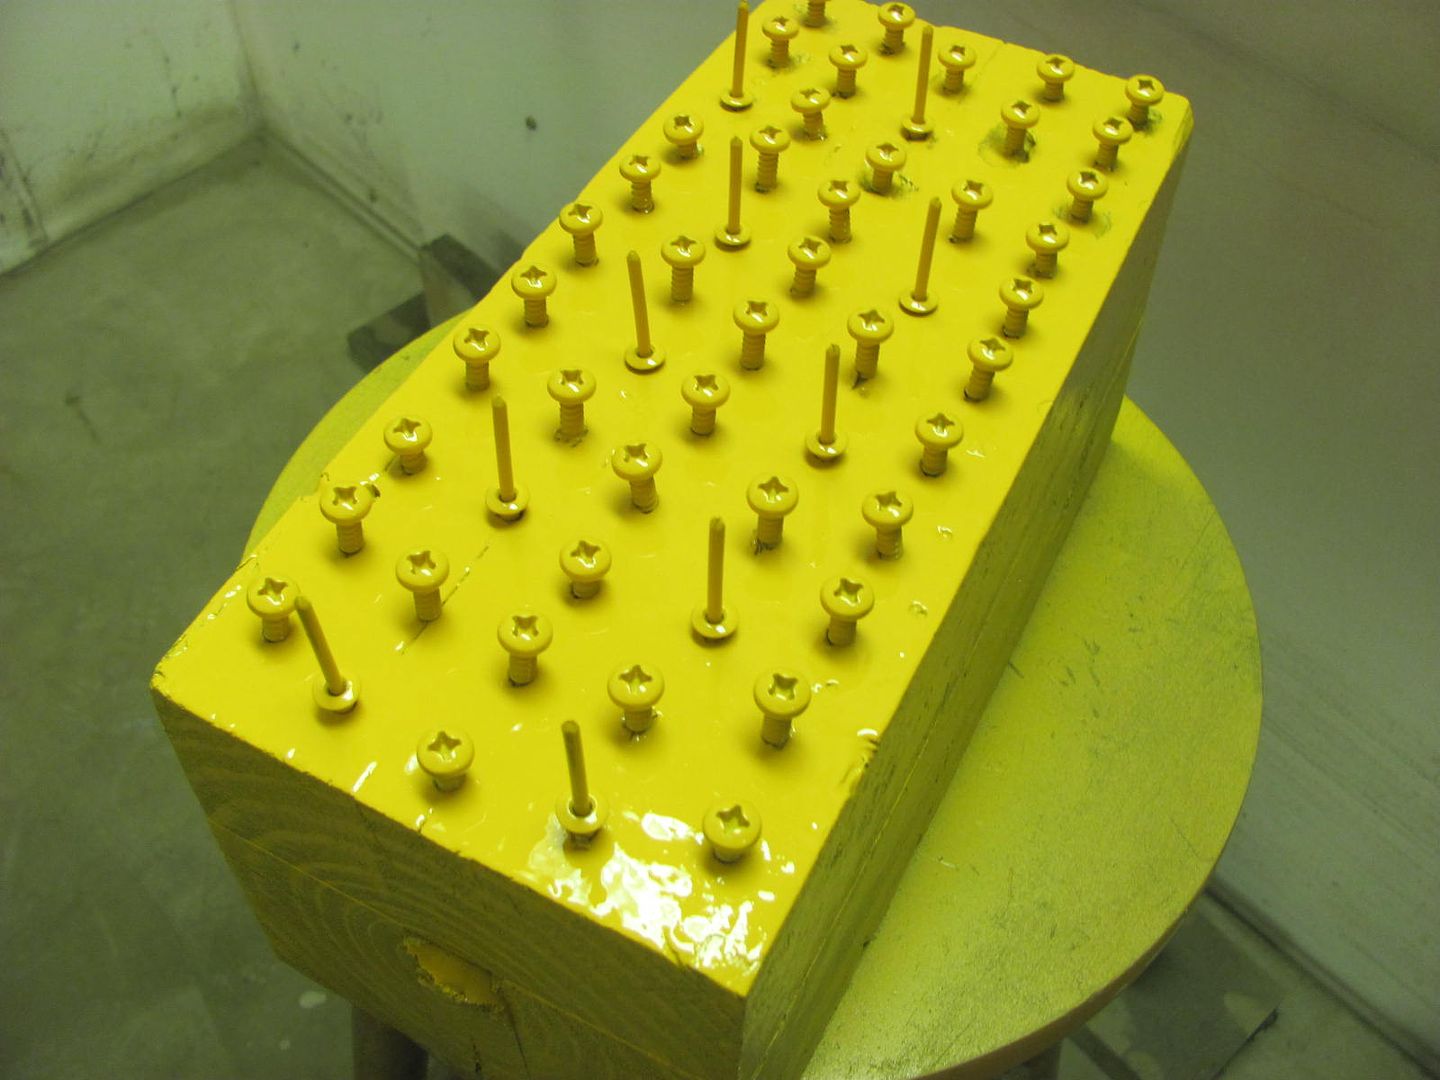
__________________
Robert |
|
|
|
|
12-17-2015, 04:34 PM
|
#19 |
|
Senior Member
Join Date: Mar 2011
Location: West Plains, Missouri
Posts: 7,555
|
Re: 55 Wagon Progress
Looks good...Jim
__________________
my build thread: http://67-72chevytrucks.com/vboard/s...d.php?t=459839 Jimbo's long bed step build:http://67-72chevytrucks.com/vboard/s...t=464626<br /> |
|
|
|
|
12-18-2015, 11:40 AM
|
#20 |
|
Registered User
Join Date: Jan 2013
Location: Leonardtown, MD
Posts: 1,637
|
Re: 55 Wagon Progress
Thanks Jim!
__________________
Robert |
|
|
|
|
12-19-2015, 07:21 PM
|
#21 |
|
Registered User
Join Date: Jan 2013
Location: Leonardtown, MD
Posts: 1,637
|
Re: 55 Wagon Progress
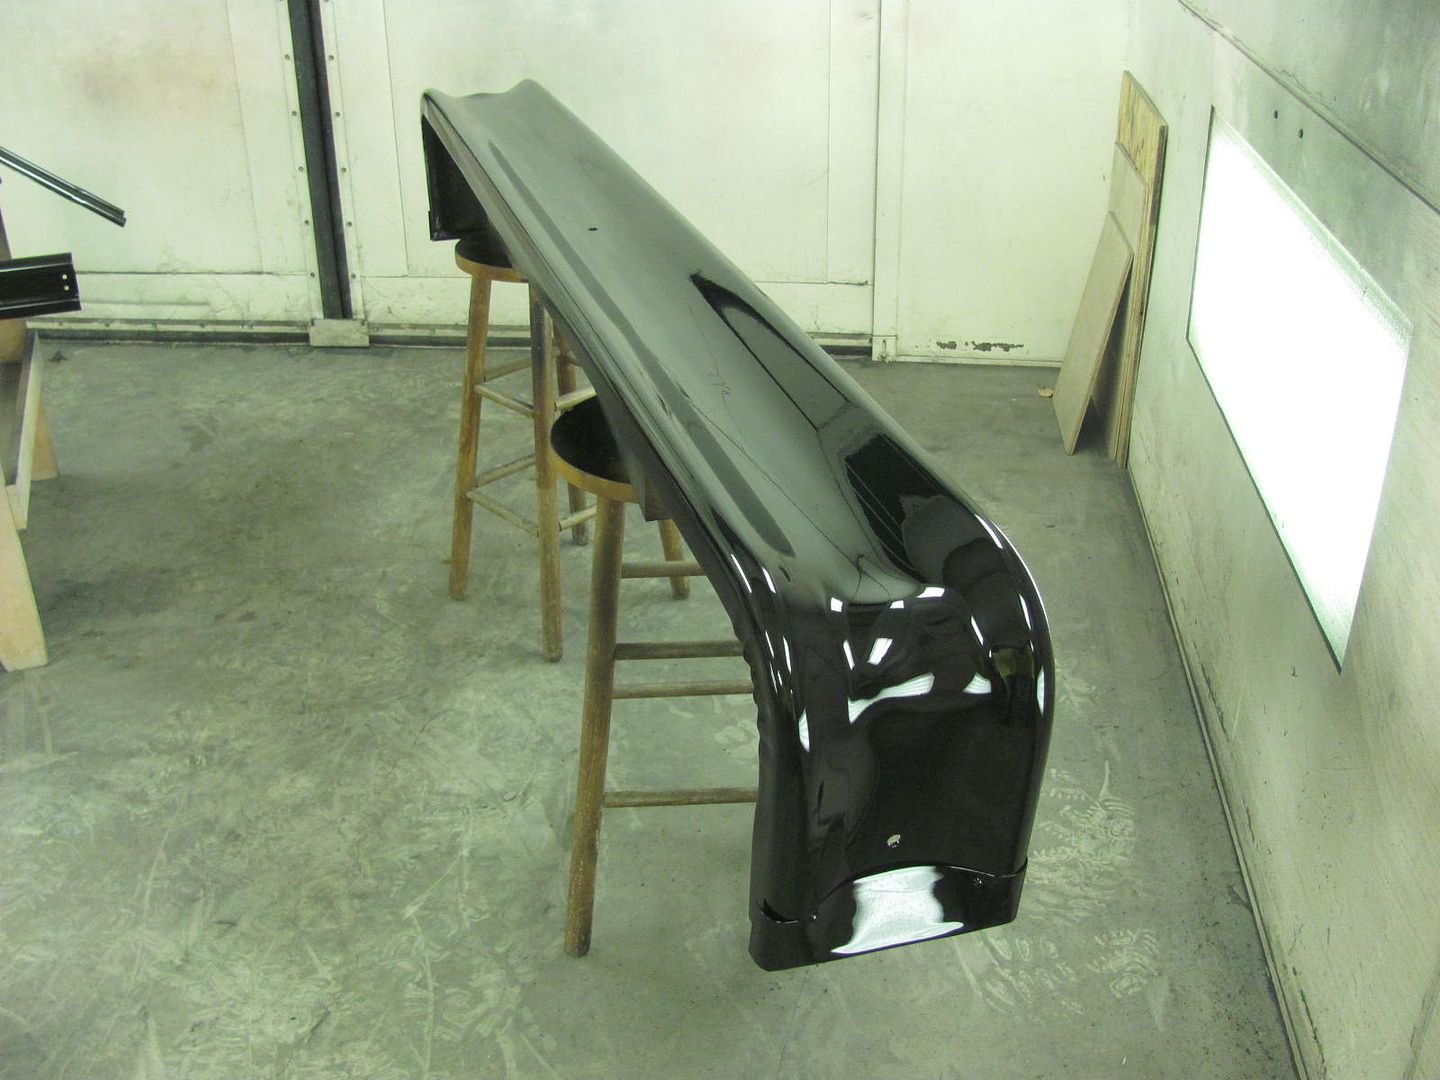
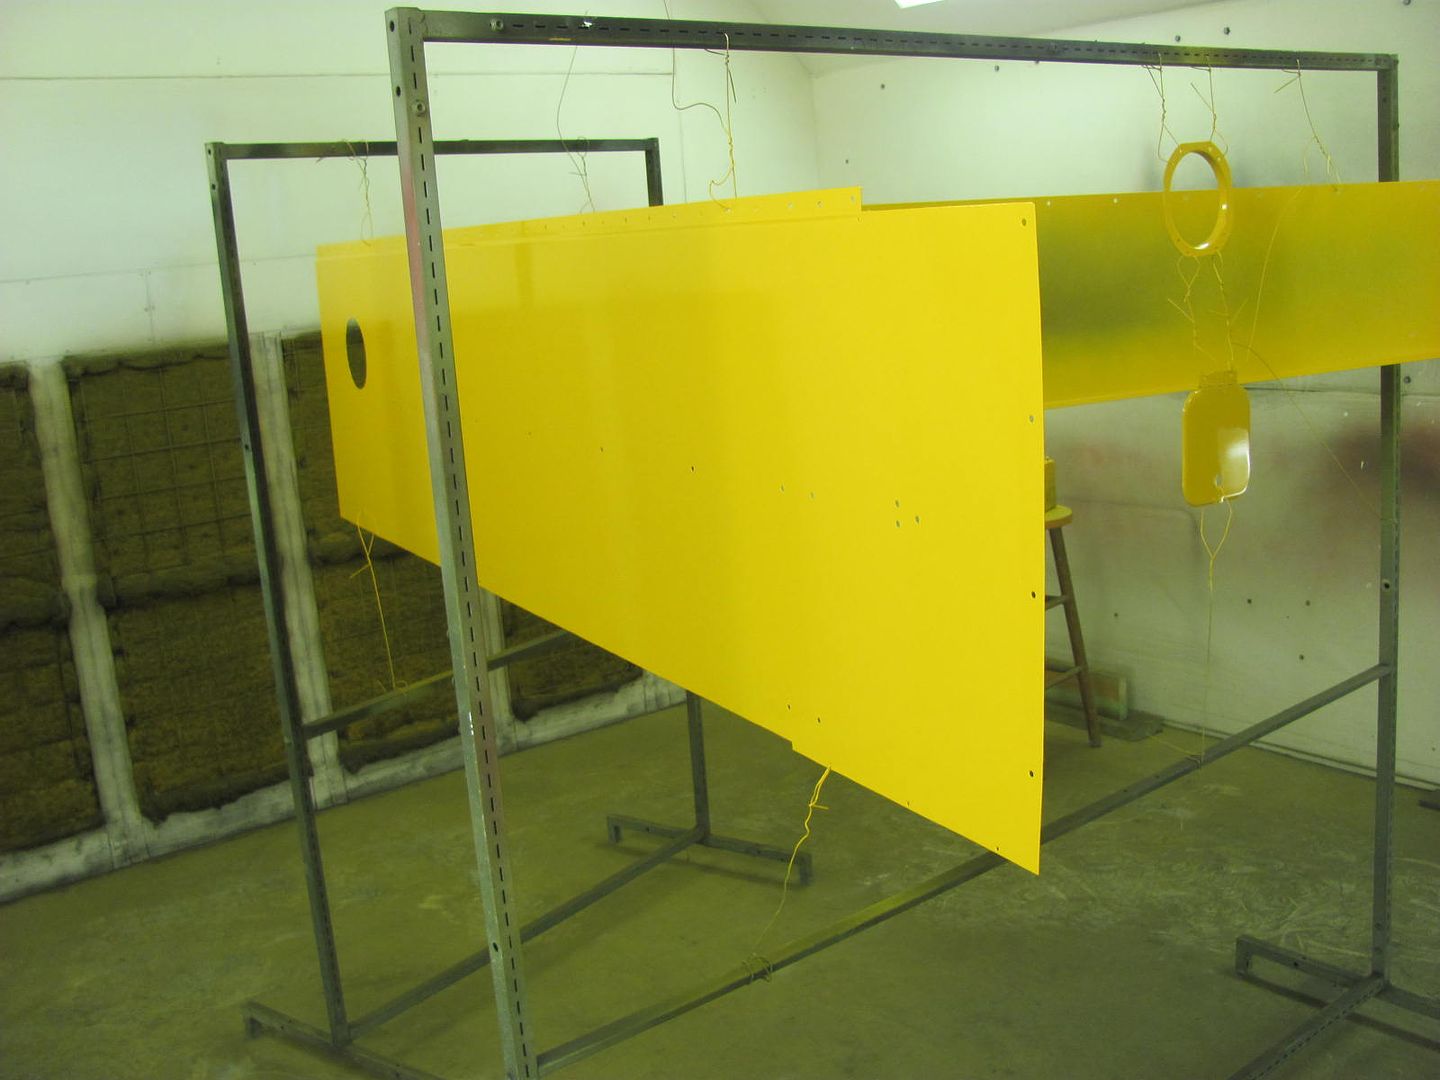
The other night while spraying parts, I made a couple trips over to the bus location with the spray gun... in between coats, to get some primer on the bare steel we put in... SPI epoxy on the structural components..
 .....and some epoxy AND yellow added to the nice scraped up lower corner.. 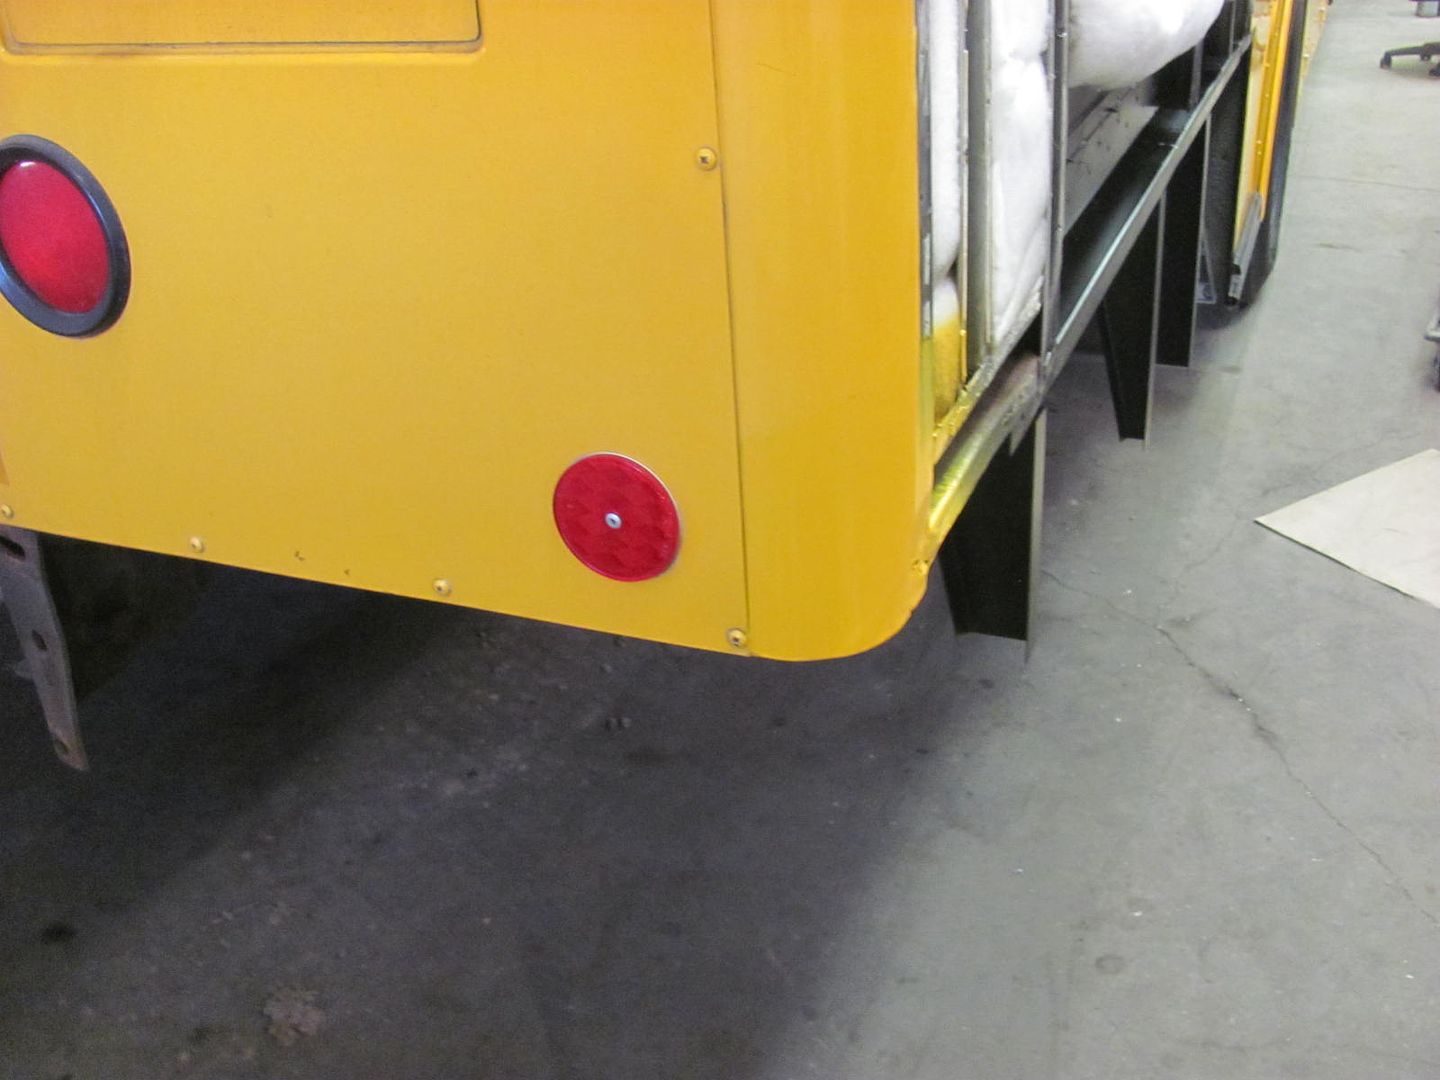 Coming together... 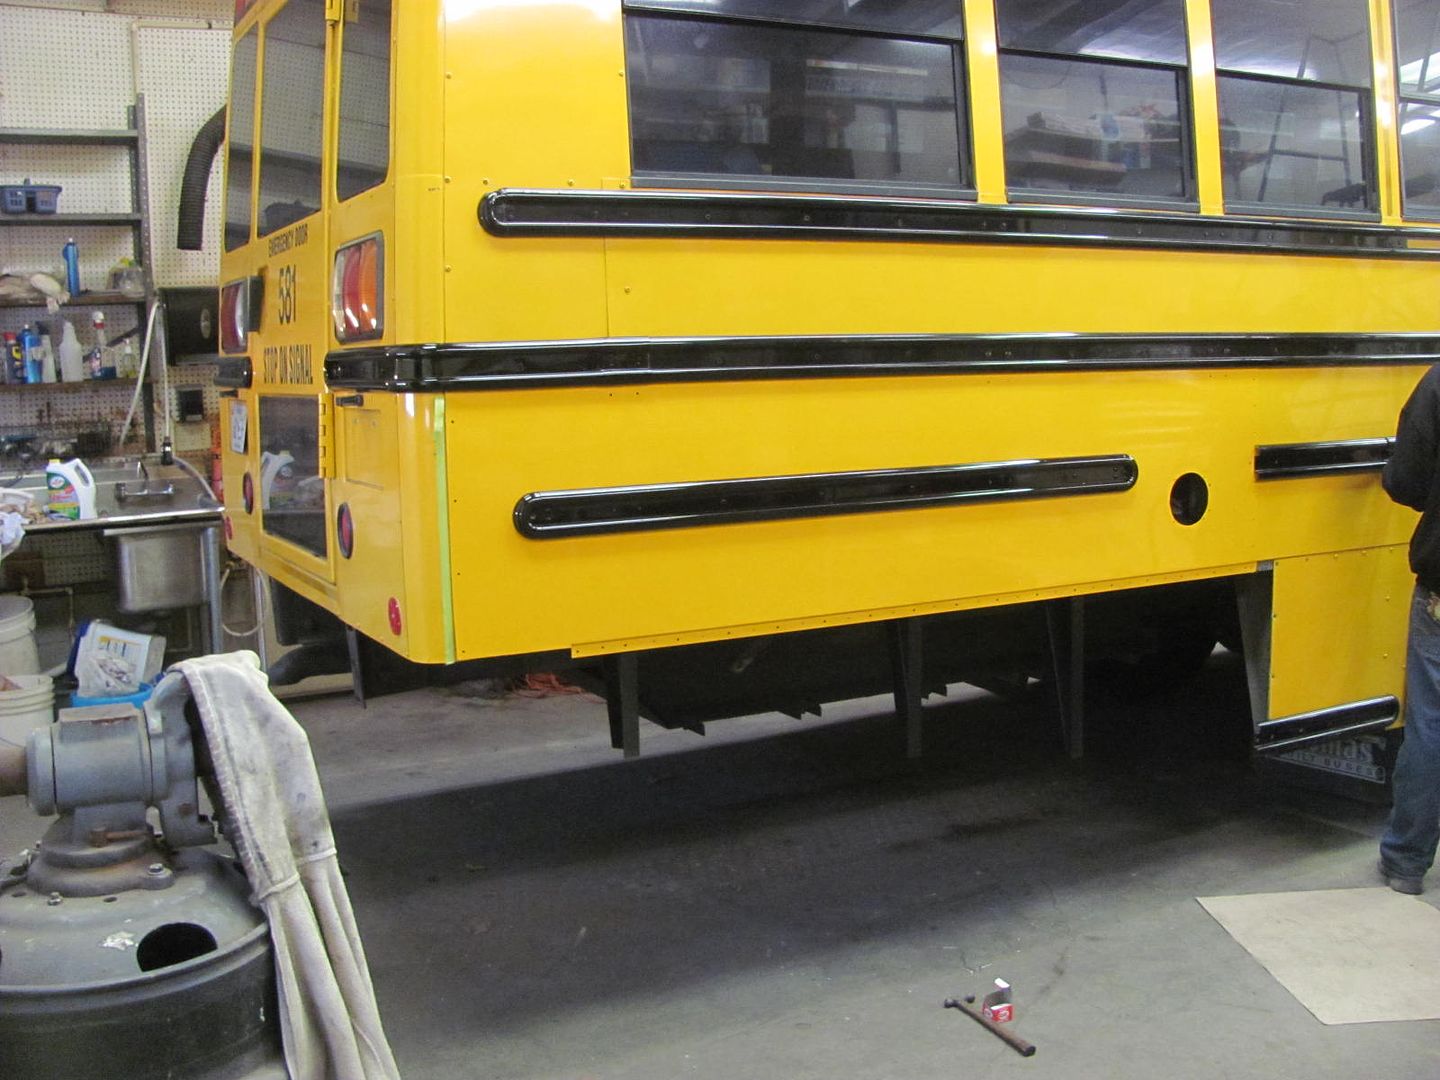 Rivets were media blasted and urethane only, just like the screws. This shows how well the paint holds up to the installation "abuse"... 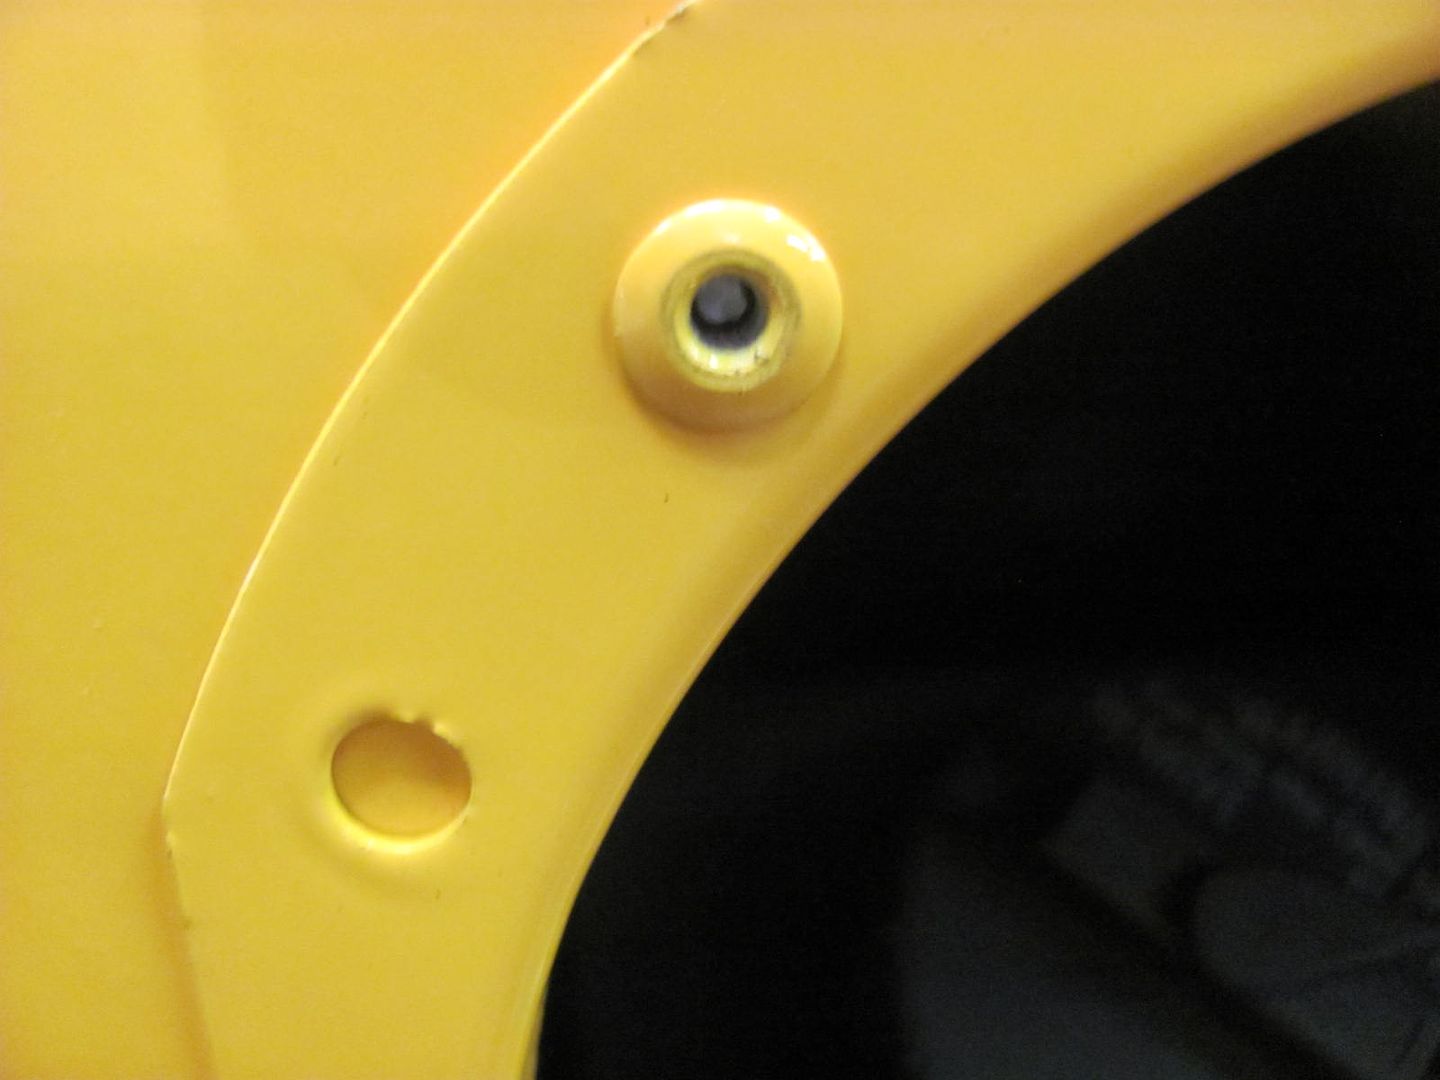 Done! 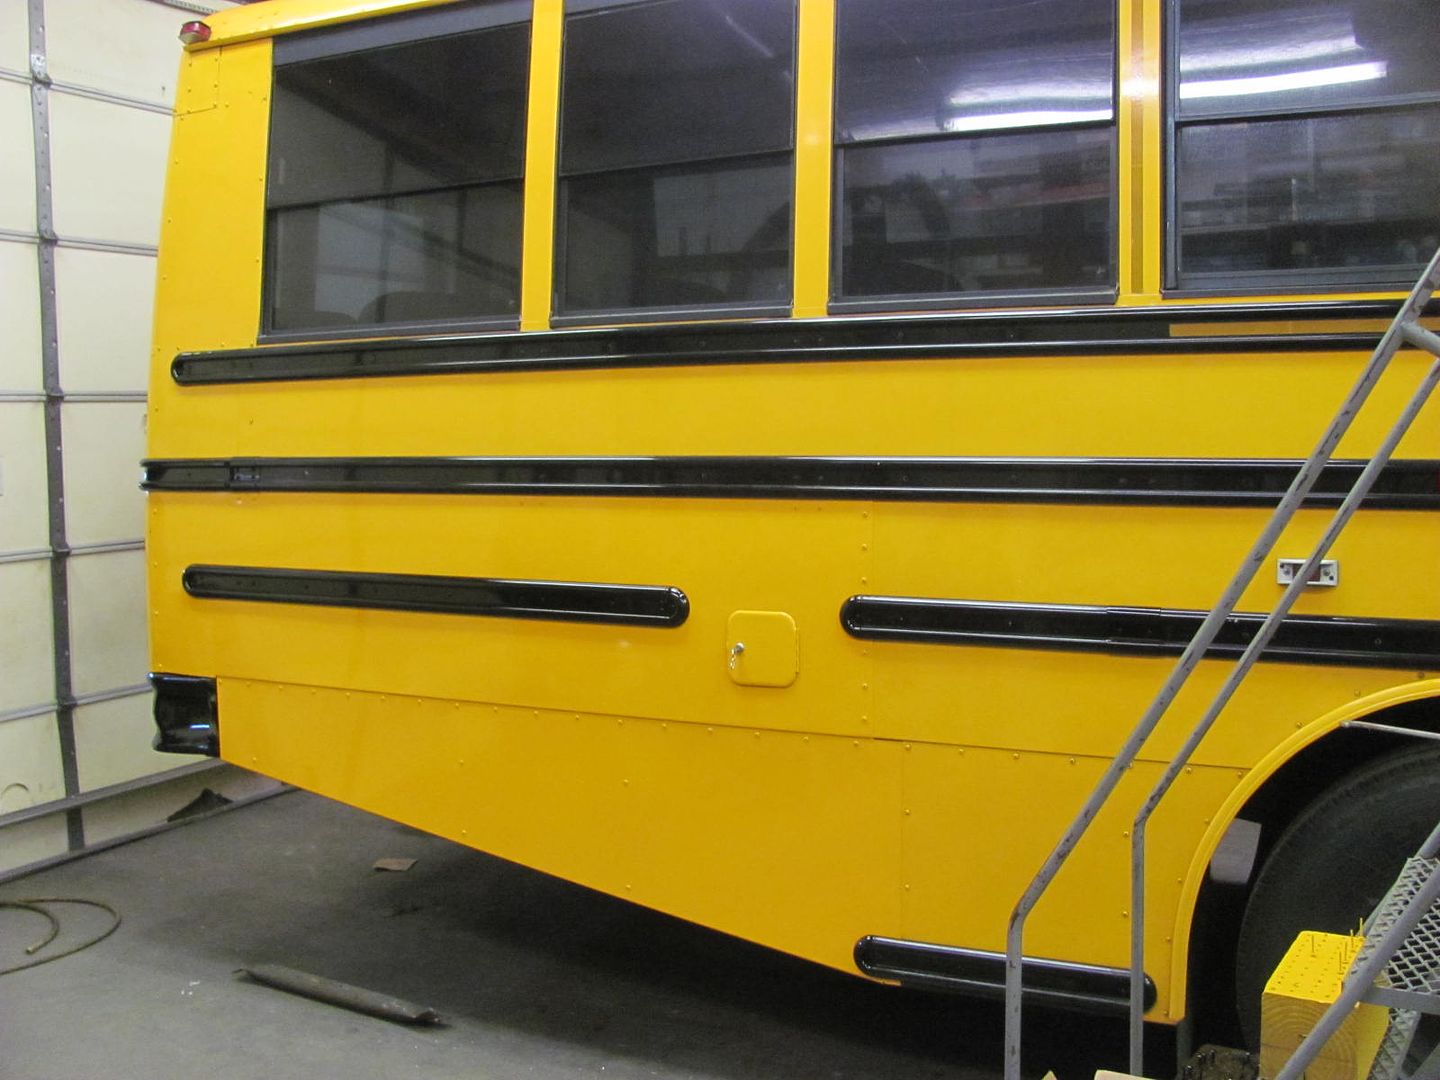 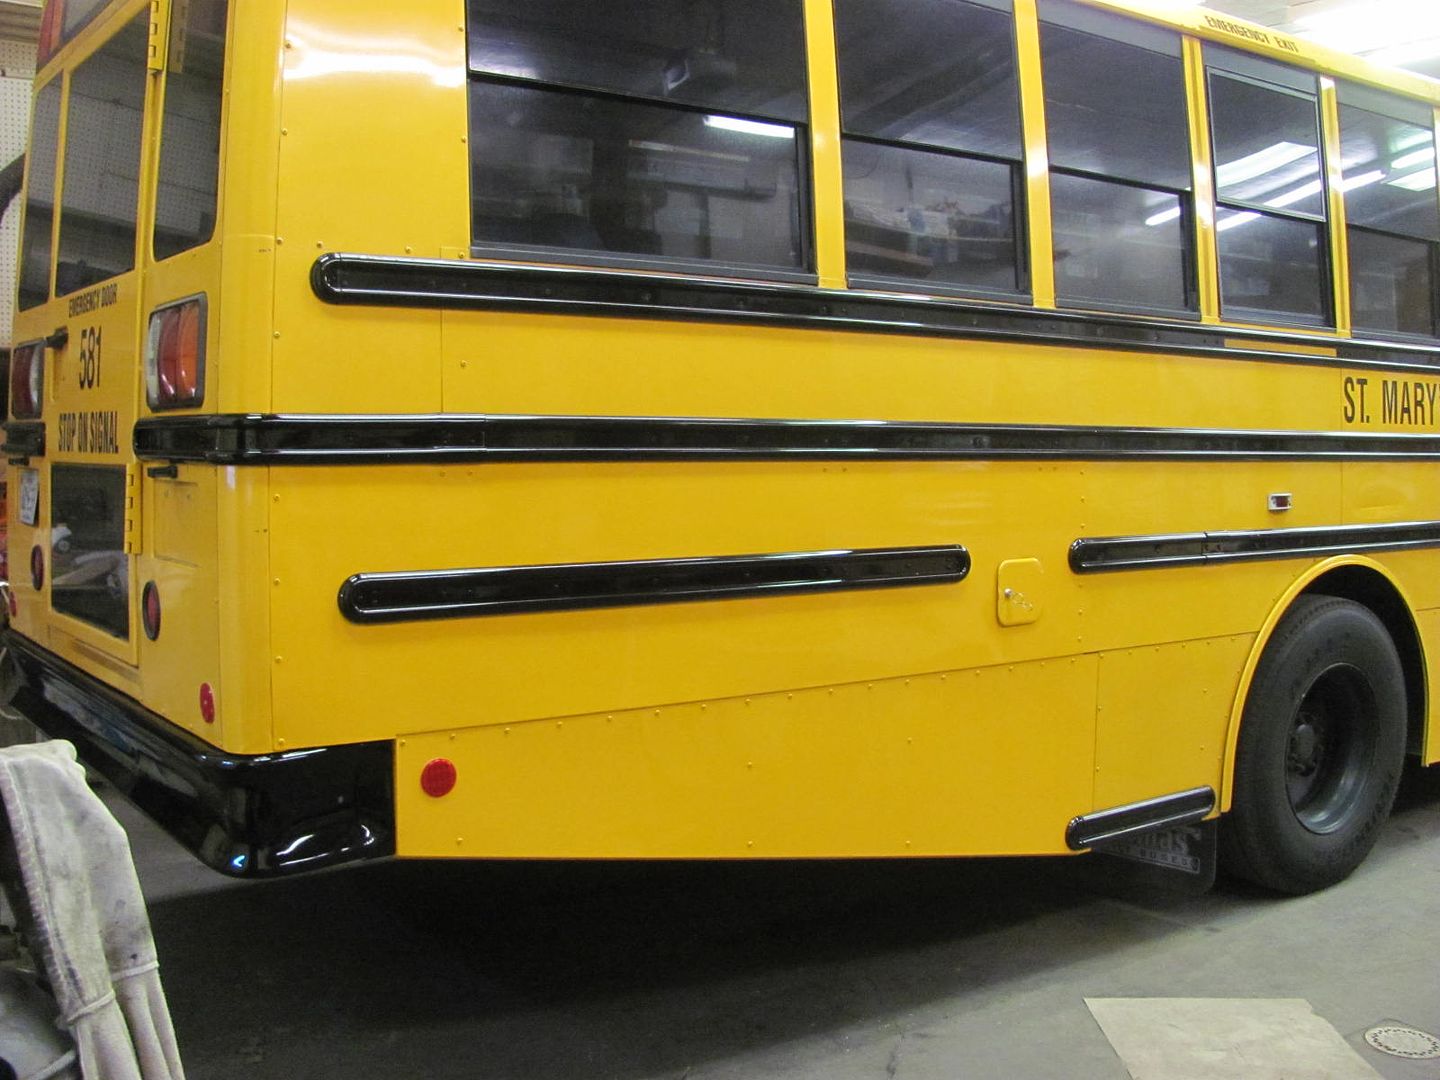
__________________
Robert |
|
|
|
|
12-19-2015, 07:56 PM
|
#22 |
|
Senior Member
Join Date: Jul 2012
Location: Oblong, Illinois
Posts: 7,017
|
Re: 55 Wagon Progress
Nice work Robert.
|
|
|
|
|
12-19-2015, 09:29 PM
|
#23 |
|
Registered User
Join Date: Oct 2007
Location: Spanaway
Posts: 8,451
|
Re: 55 Wagon Progress
We knew you could do it!

__________________
Mike. Swamp Rat build thread : http://67-72chevytrucks.com/vboard/s...d.php?t=595019 72 3/4T 4X4 4" BDS Lift 33" BFG's |
|
|
|
|
12-20-2015, 12:52 AM
|
#24 |
|
Senior Member
Join Date: Mar 2011
Location: West Plains, Missouri
Posts: 7,555
|
Re: 55 Wagon Progress
Turned out great...Jim
__________________
my build thread: http://67-72chevytrucks.com/vboard/s...d.php?t=459839 Jimbo's long bed step build:http://67-72chevytrucks.com/vboard/s...t=464626<br /> |
|
|
|
|
12-20-2015, 08:42 AM
|
#25 |
|
Registered User
Join Date: May 2013
Location: Centerville,Ma.
Posts: 1,223
|
Re: 55 Wagon Progress
Nice work, I bet the original builder wasn't that concerned with priming behind the panels.
|
|
|
|
 |
| Bookmarks |
|
|


 Hybrid Mode
