
|
 02-12-2016, 11:12 AM
|
#651 |
|
Registered User
Join Date: Jan 2013
Location: Leonardtown, MD
Posts: 1,637
|
Re: 55 Wagon Progress
Sorry, meant to say Inverted flare
__________________
Robert |

|

|
|
02-12-2016, 01:43 PM
|
#652 |
|
Senior Member
 Join Date: Jul 2012
Location: Oblong, Illinois
Posts: 7,017
|
Re: 55 Wagon Progress
Robert, I went with a tab welded on the axle tube to allow for caliper movement and kept them (tabs and hoses) away from the jounce bumpers.
|
|
|
|
|
02-13-2016, 07:00 PM
|
#653 |
|
Registered User
Join Date: Jan 2013
Location: Leonardtown, MD
Posts: 1,637
|
Re: 55 Wagon Progress
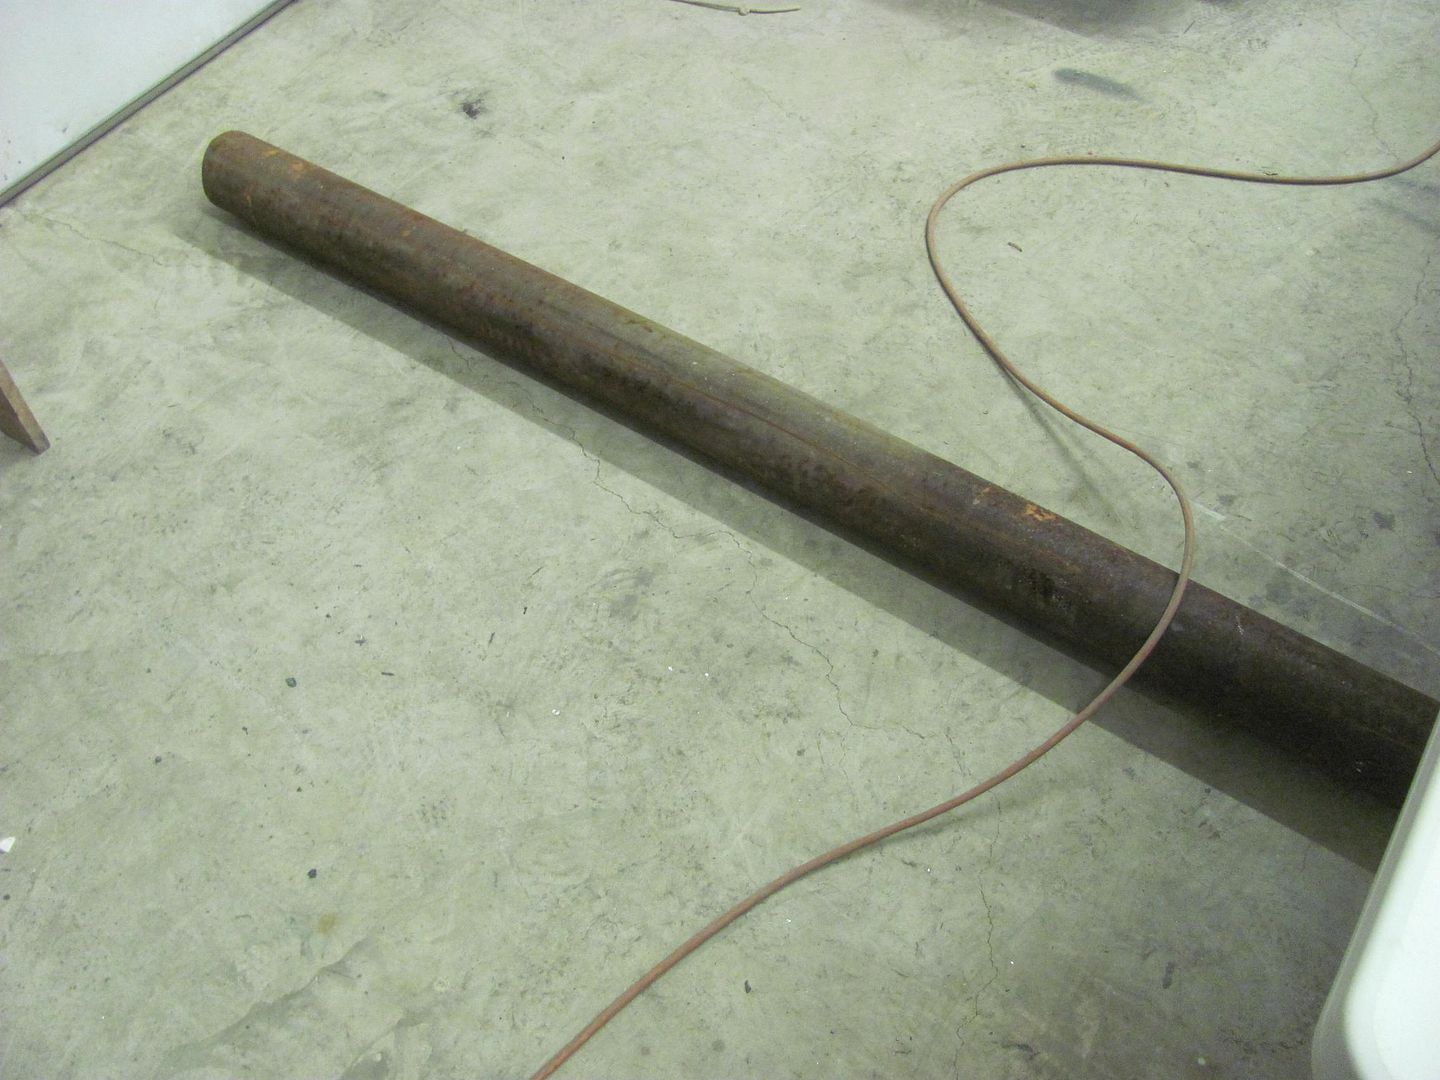
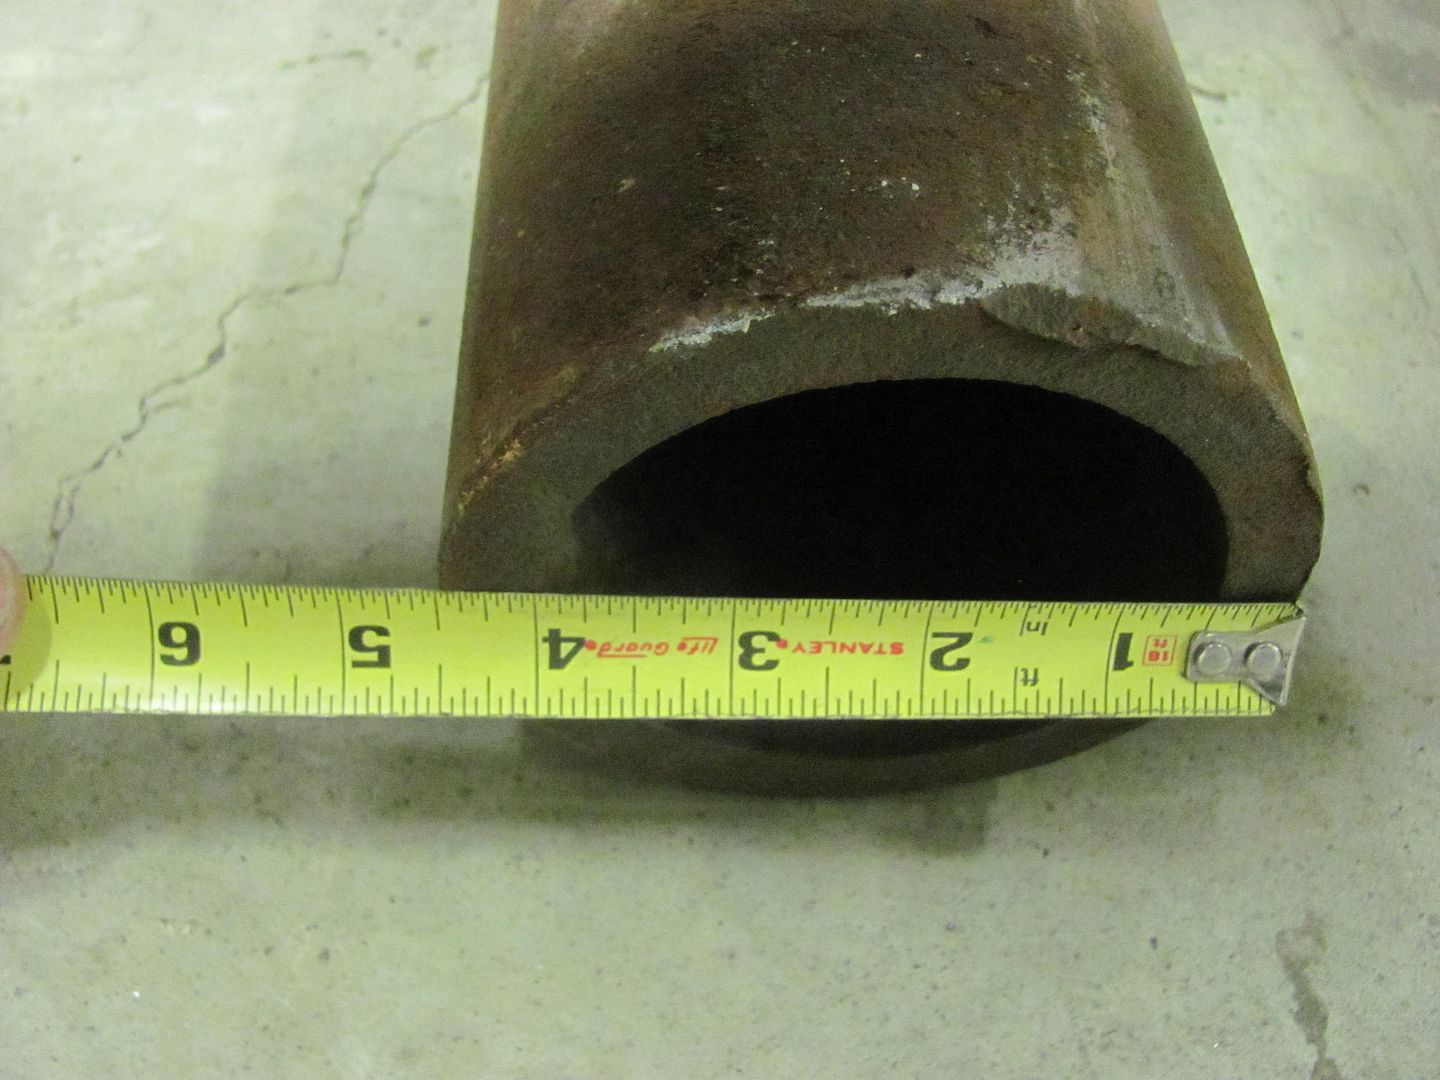
Yesterday we took delivery on an 8' piece of pipe, 4-1/2" OD with 1/2" wall thickness. Will come in handy as the column for the pedestal planishing hammer build..
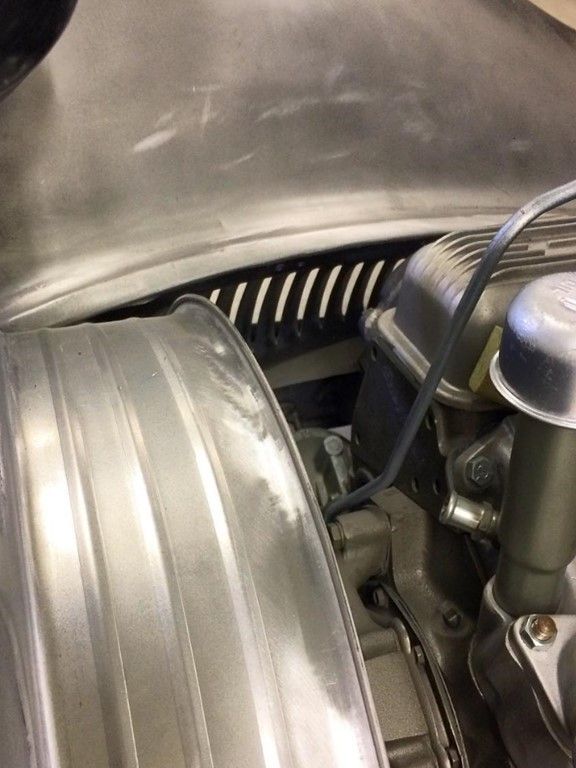
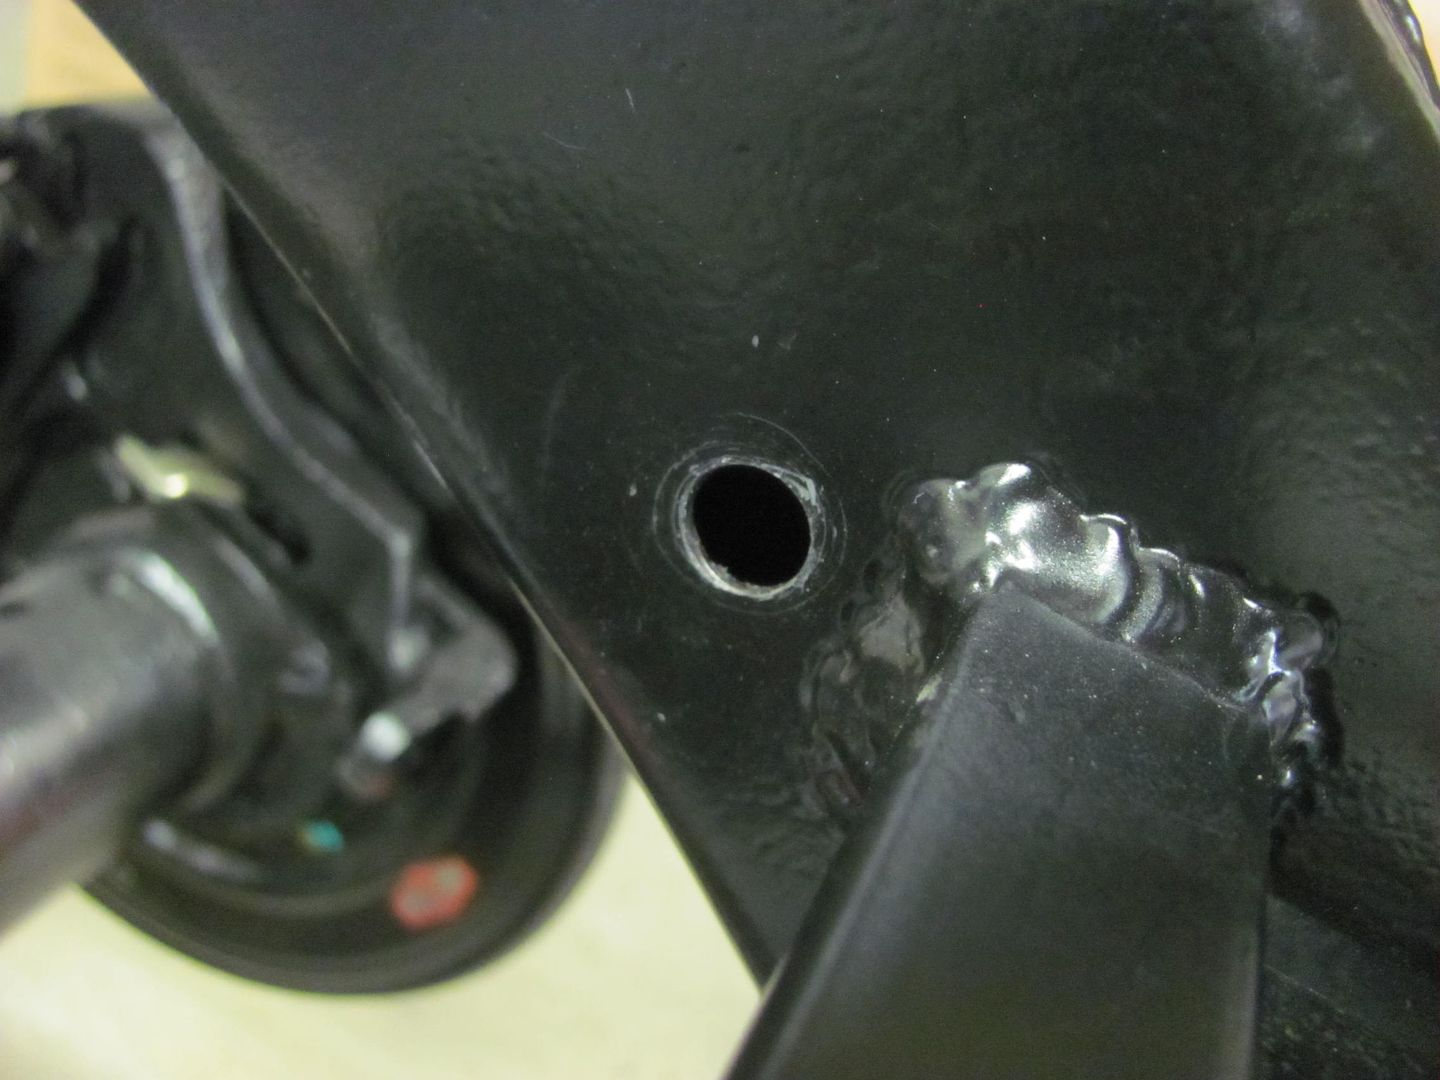
  A bit more clearancing for the header tube. Perhaps this fine tuning will also add a few HP...   Didn't show too much detail on the Explorer brake install last week, so let's see if we can do better today.. The "kit" was designed for the big bearing rear housing with the Torino ends. As luck would have it, the Lincoln Versailles used a big bearing early style, so we'll need to align and enlarge some holes.. 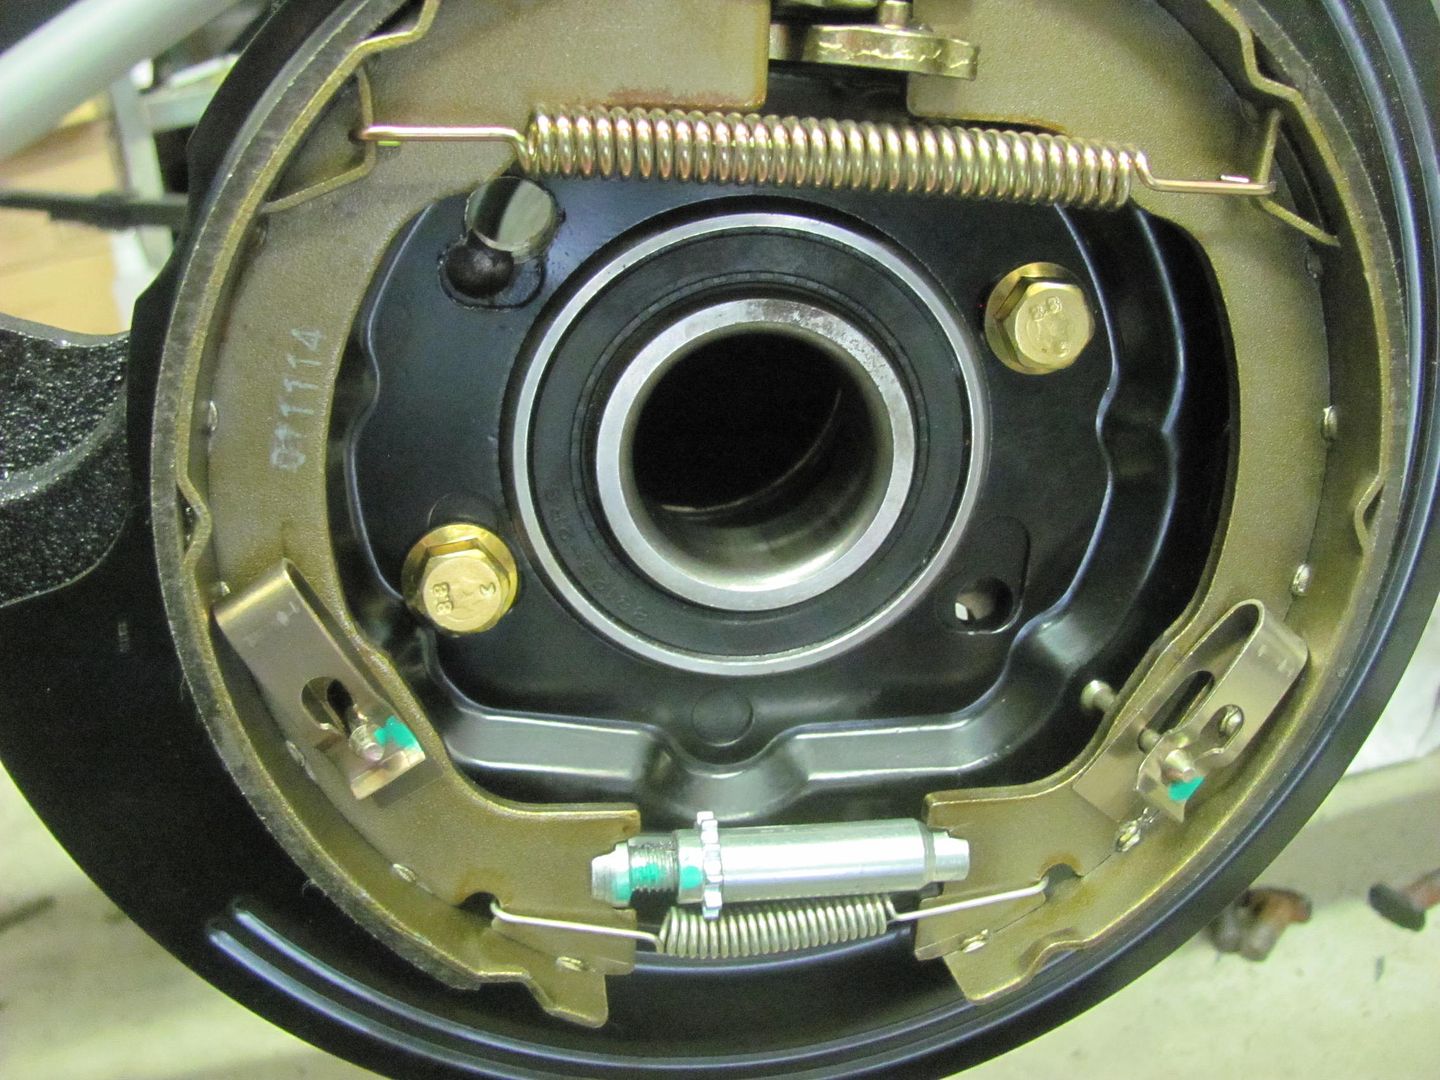 Bolted in place using two opposite holes and the included metric bolts, we used the axle bearing as an alignment tool for the backing plates.. 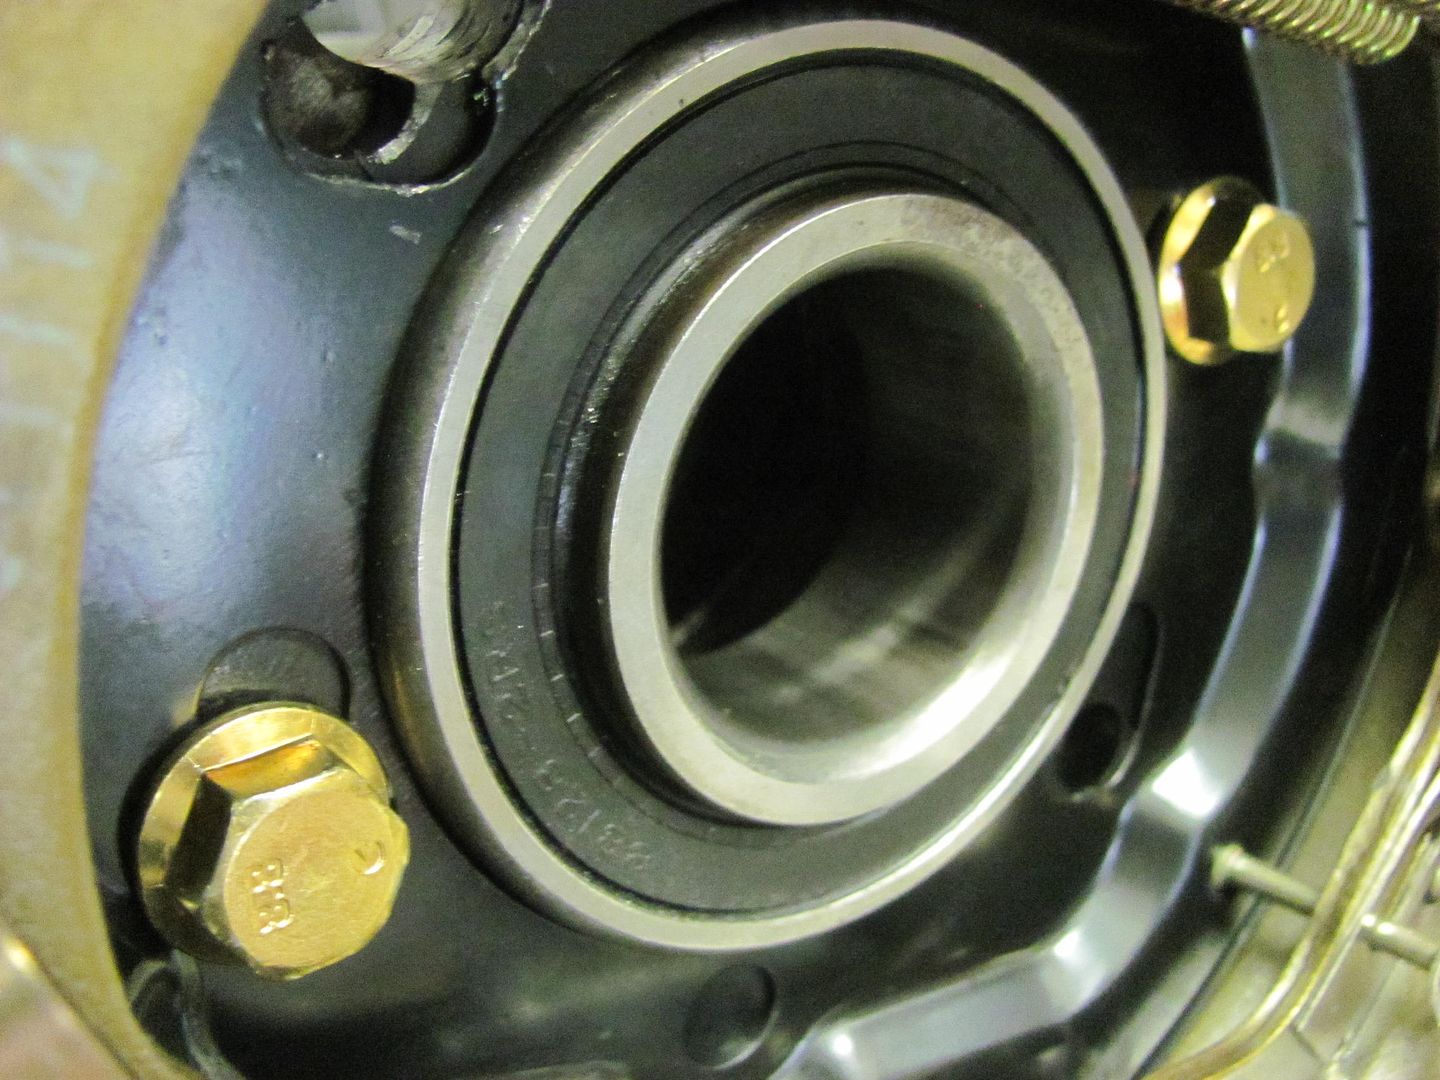 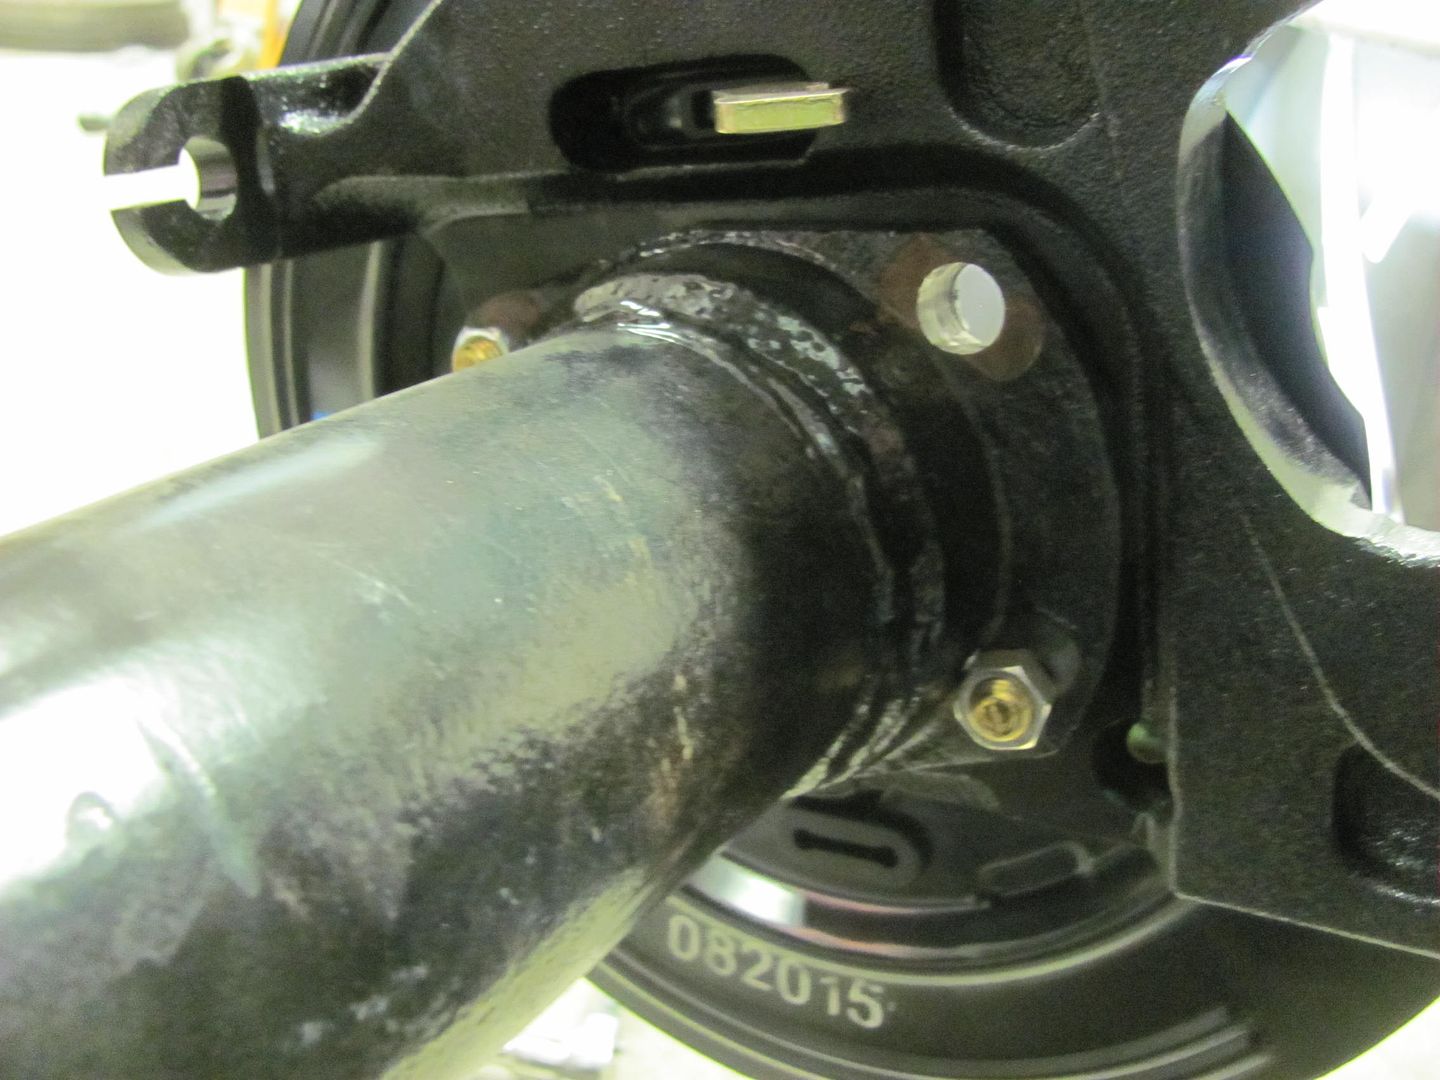 Then used a right angle drill for better access in drilling the holes.. 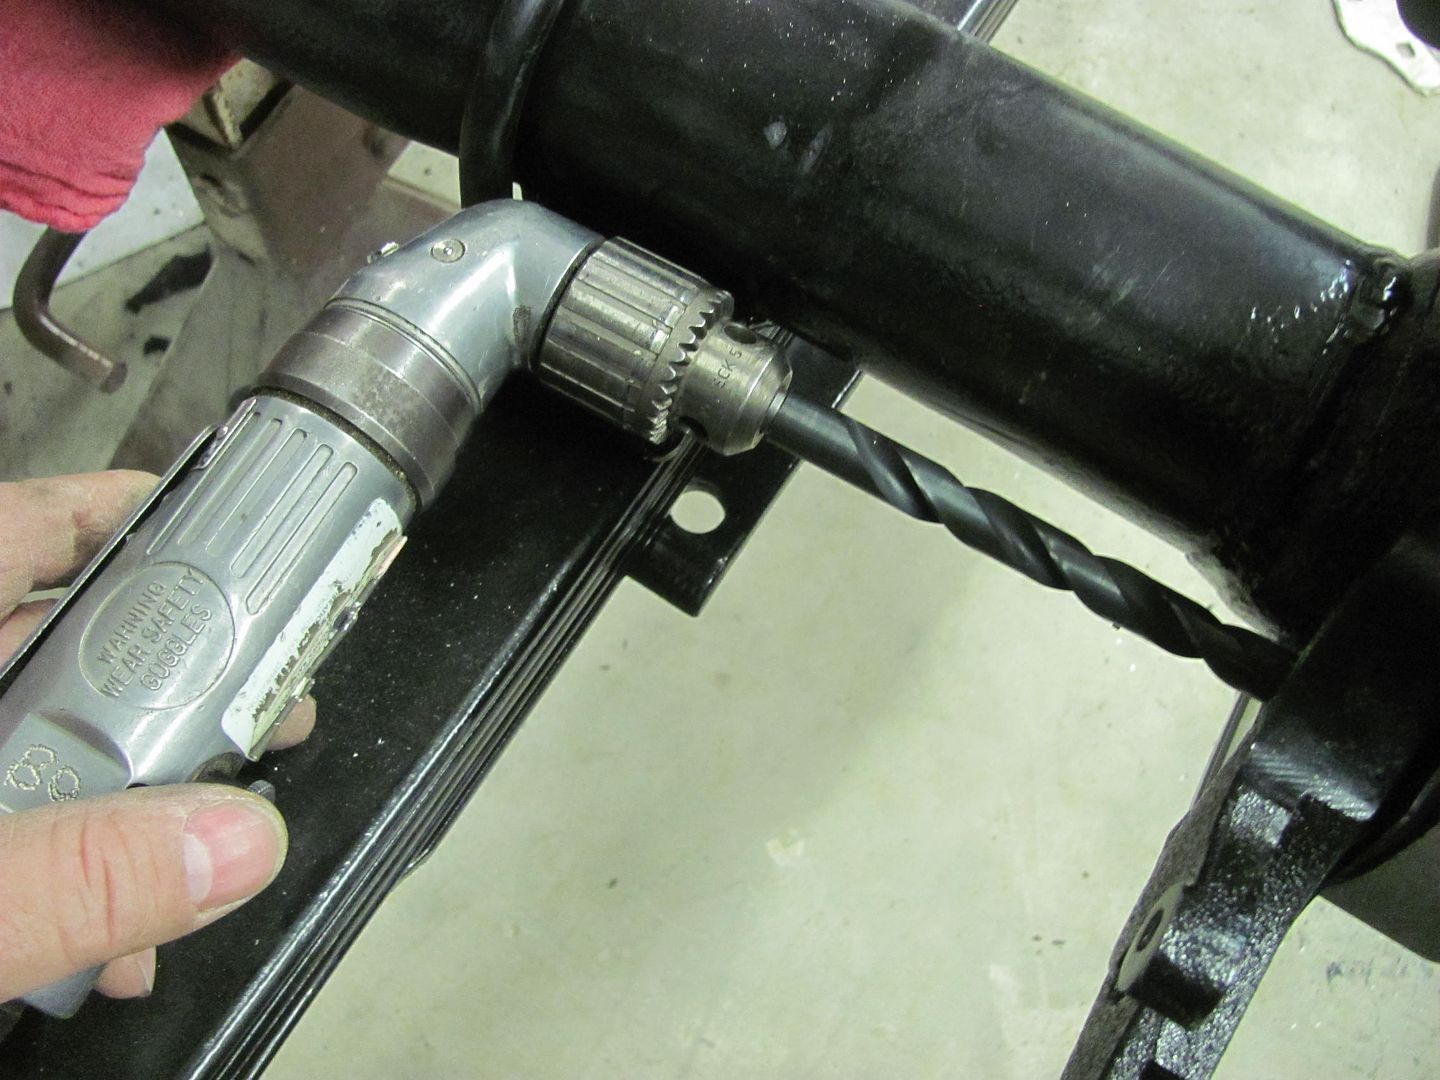 This worked for all but one hole that was directly in line with the axle pad.. So we had ordered some shorty 1/2" bits, and still had to take another inch off the length and step the diameter for the drill chuck. 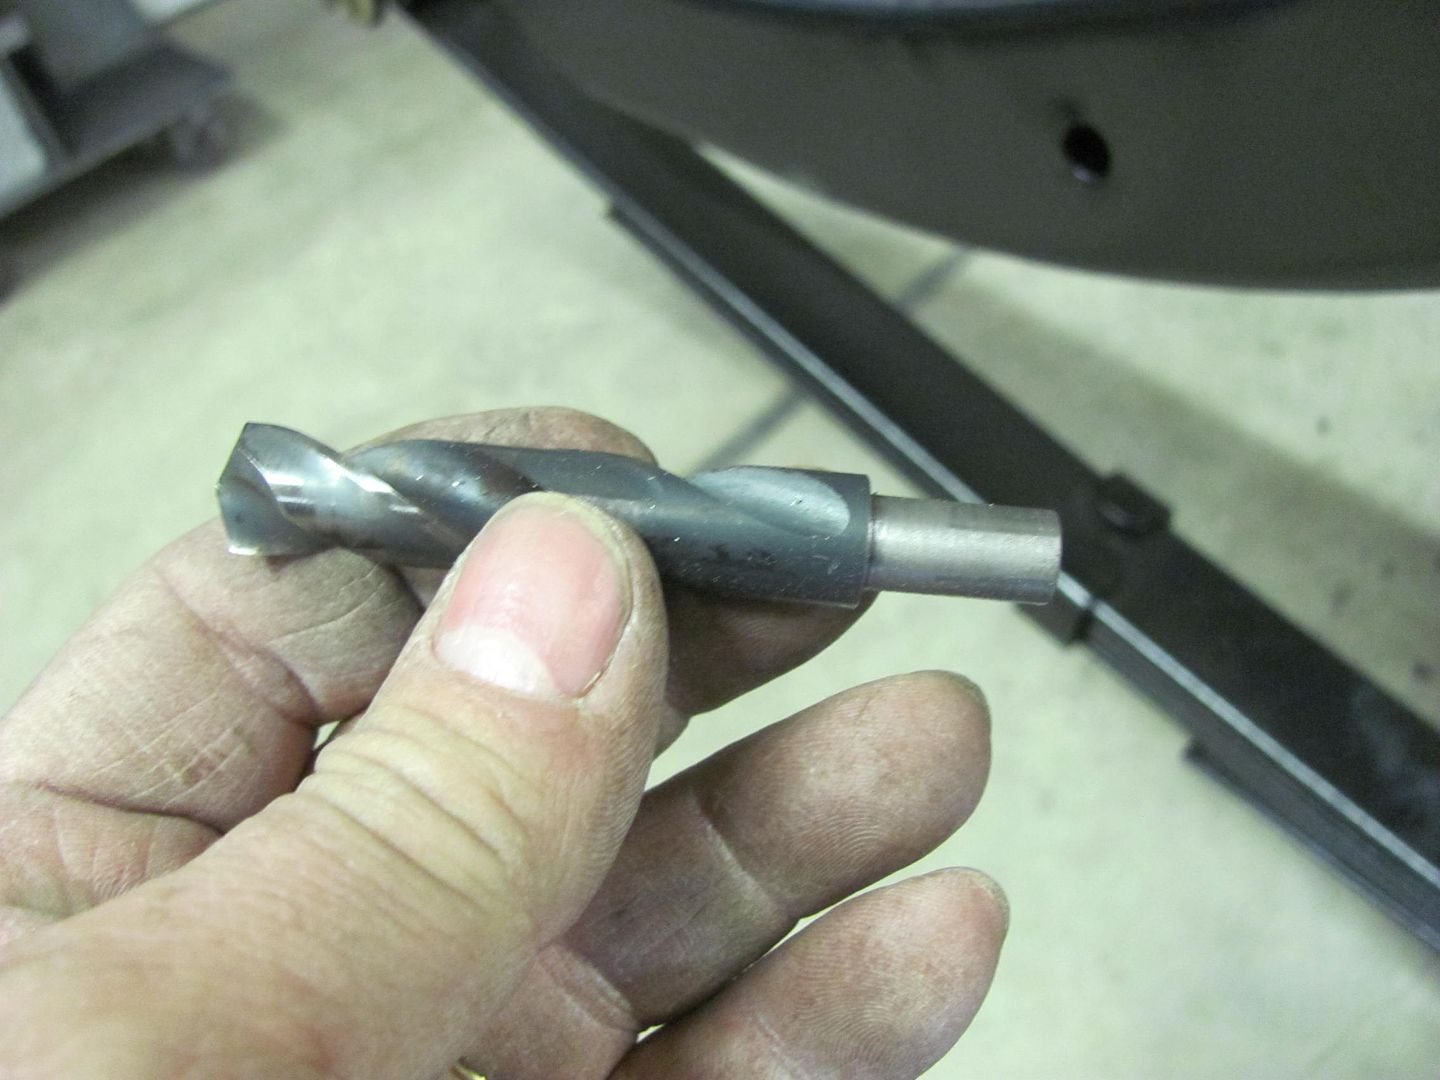 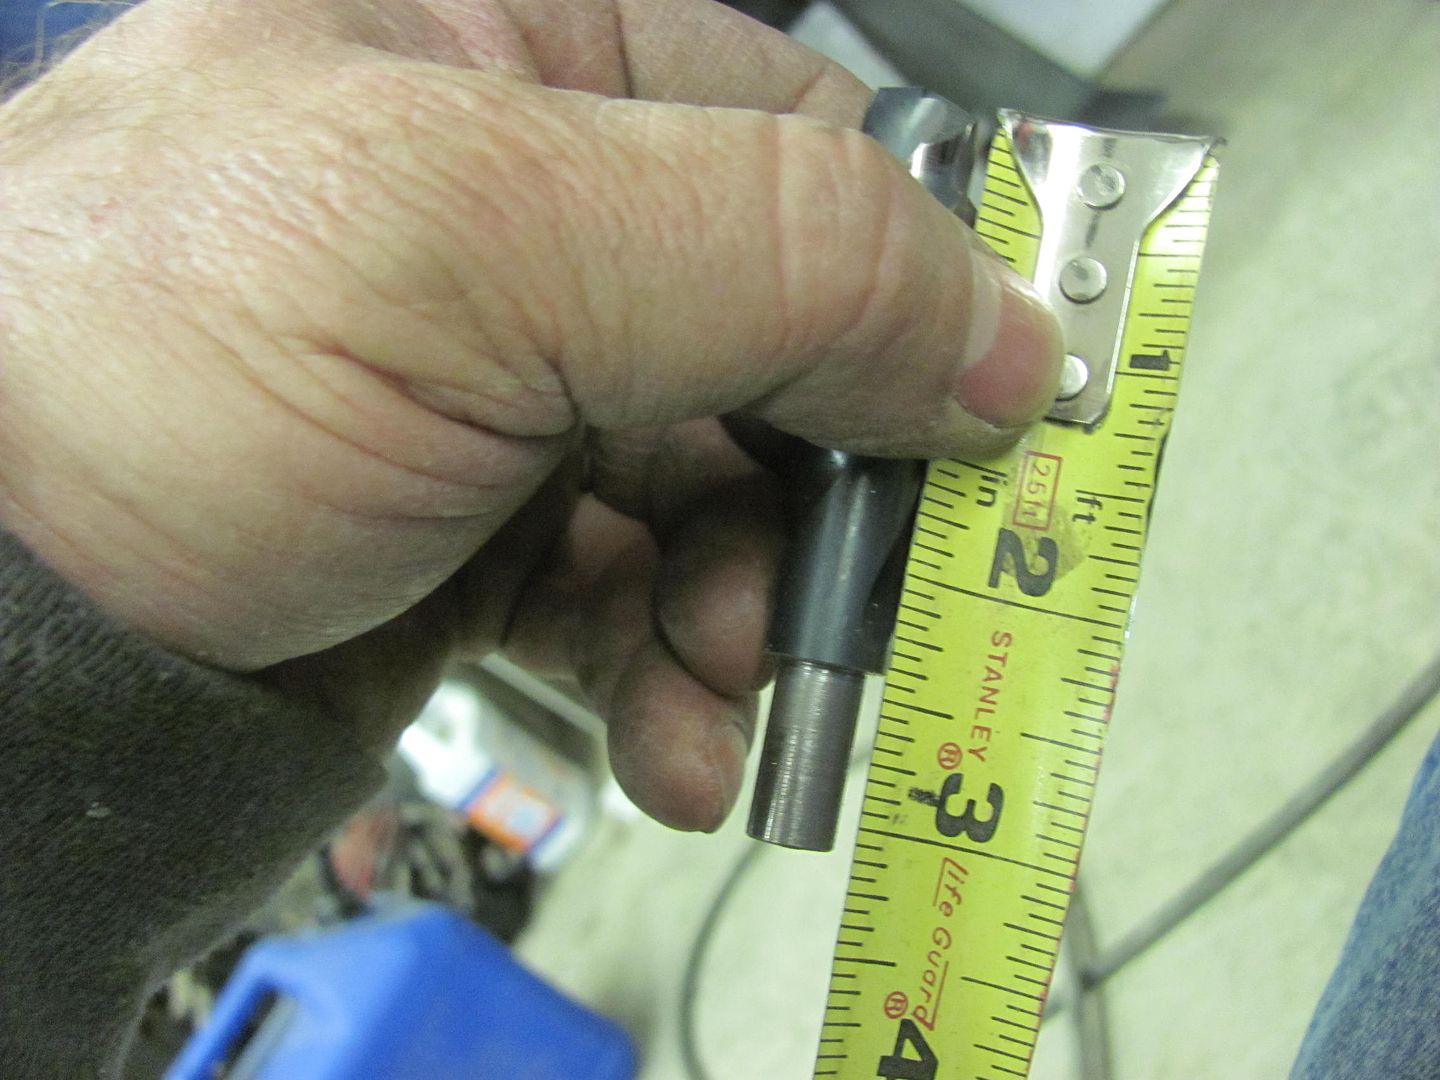 Backed into a corner? No problem! 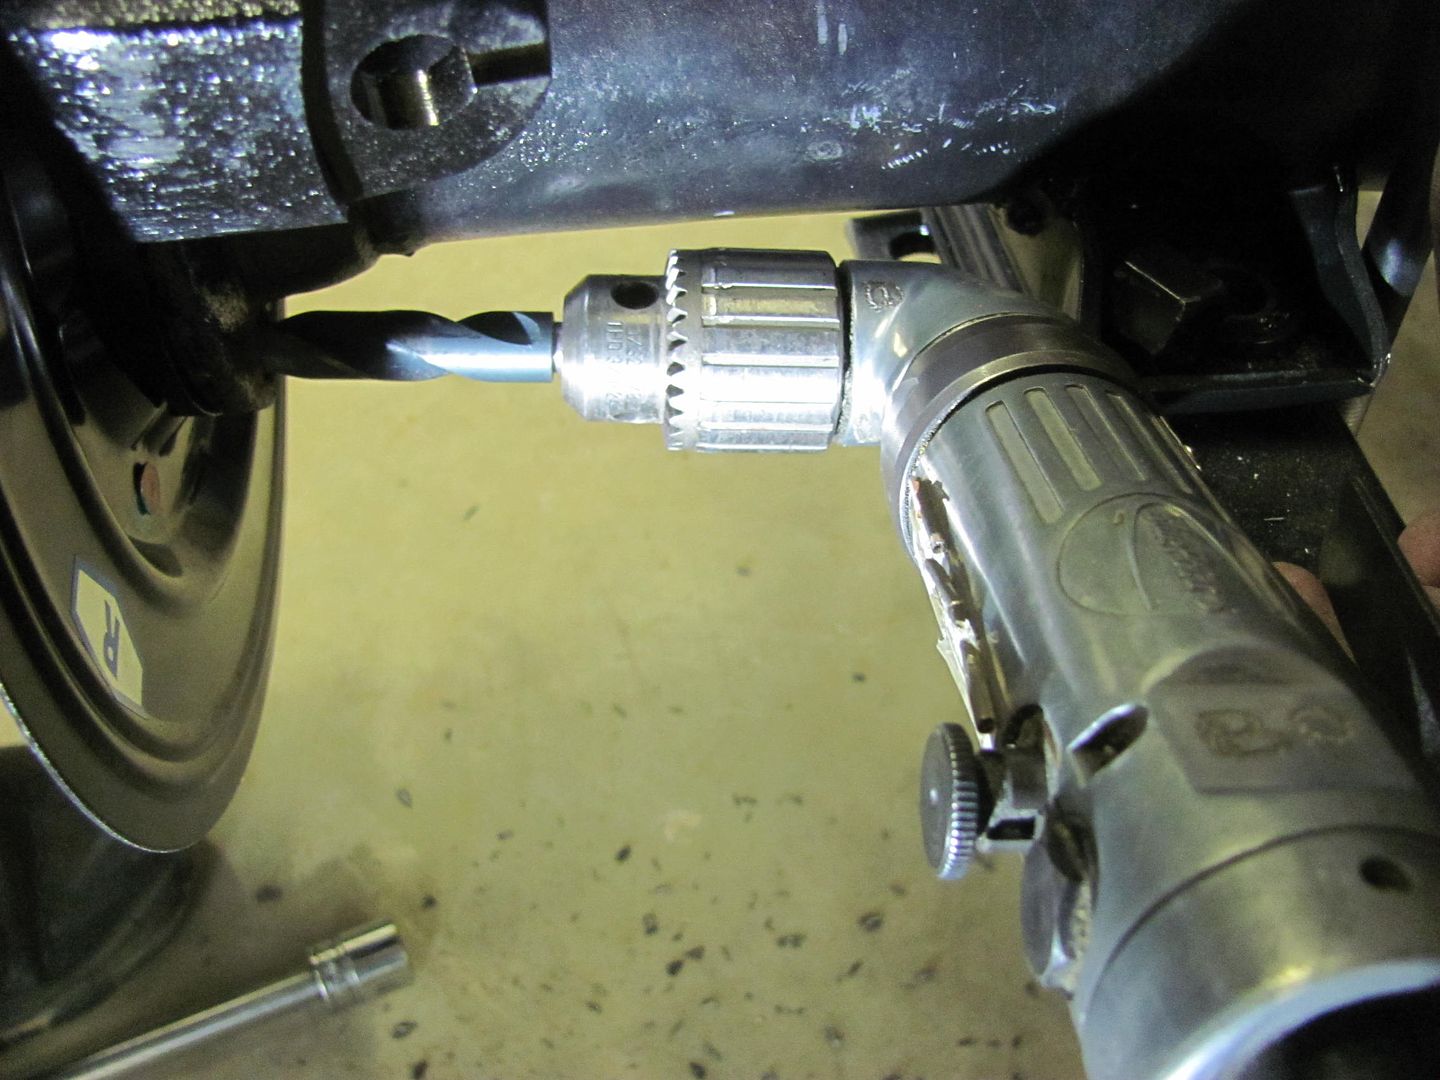 And here's our final version on the brake hose anchor bracket, by popular demand! 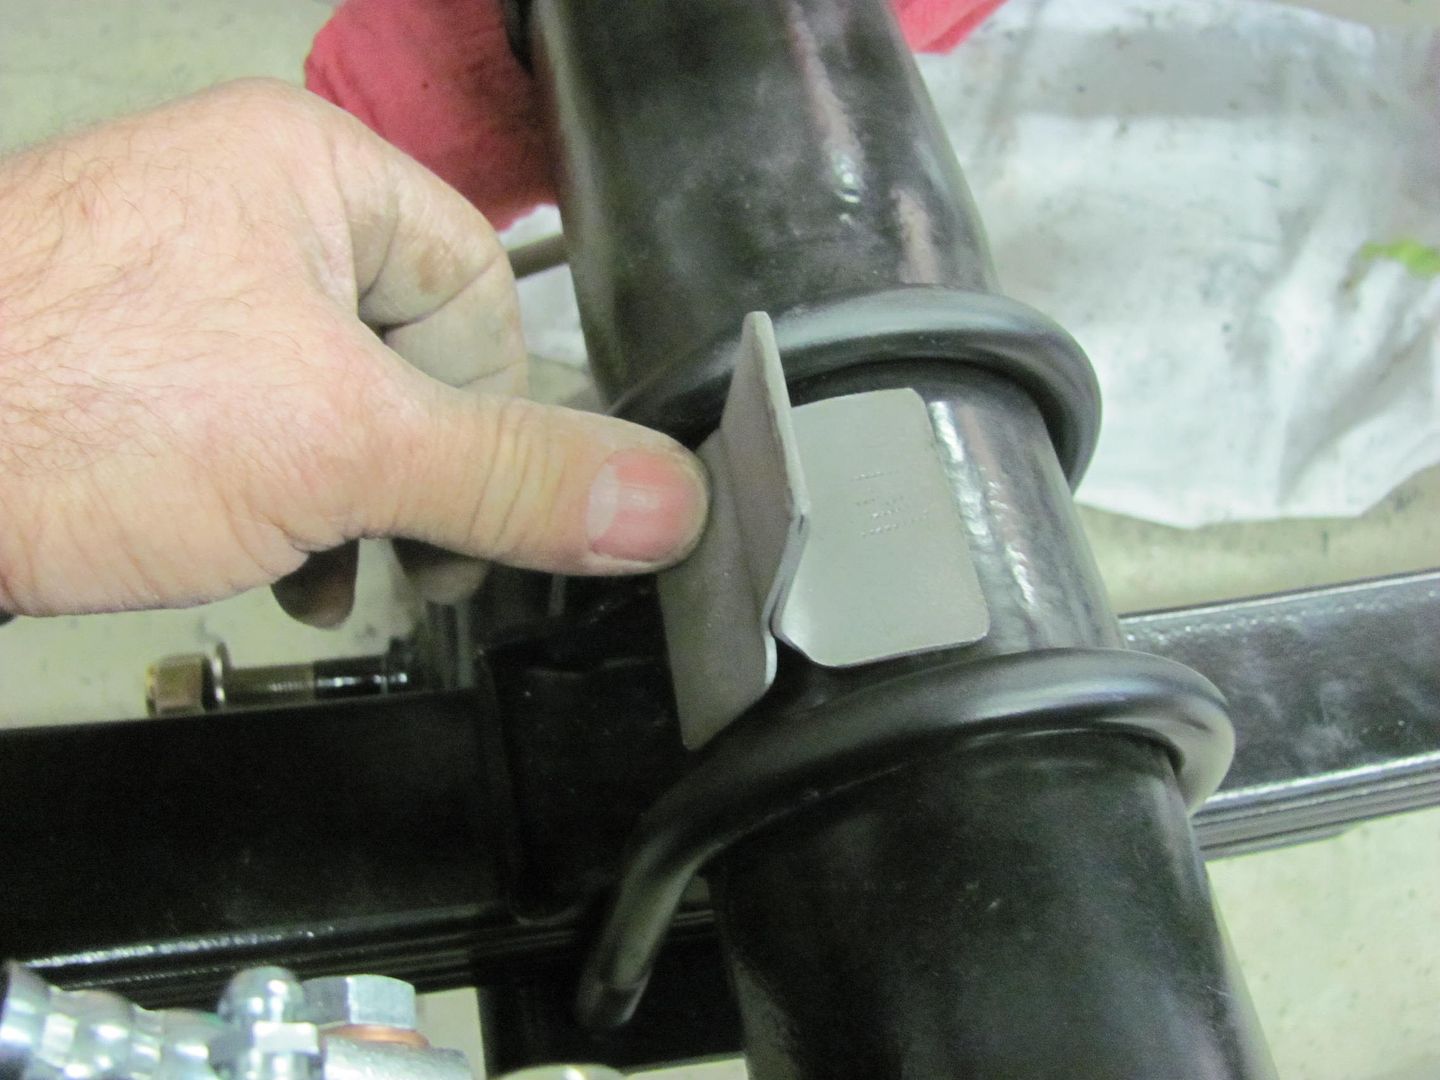 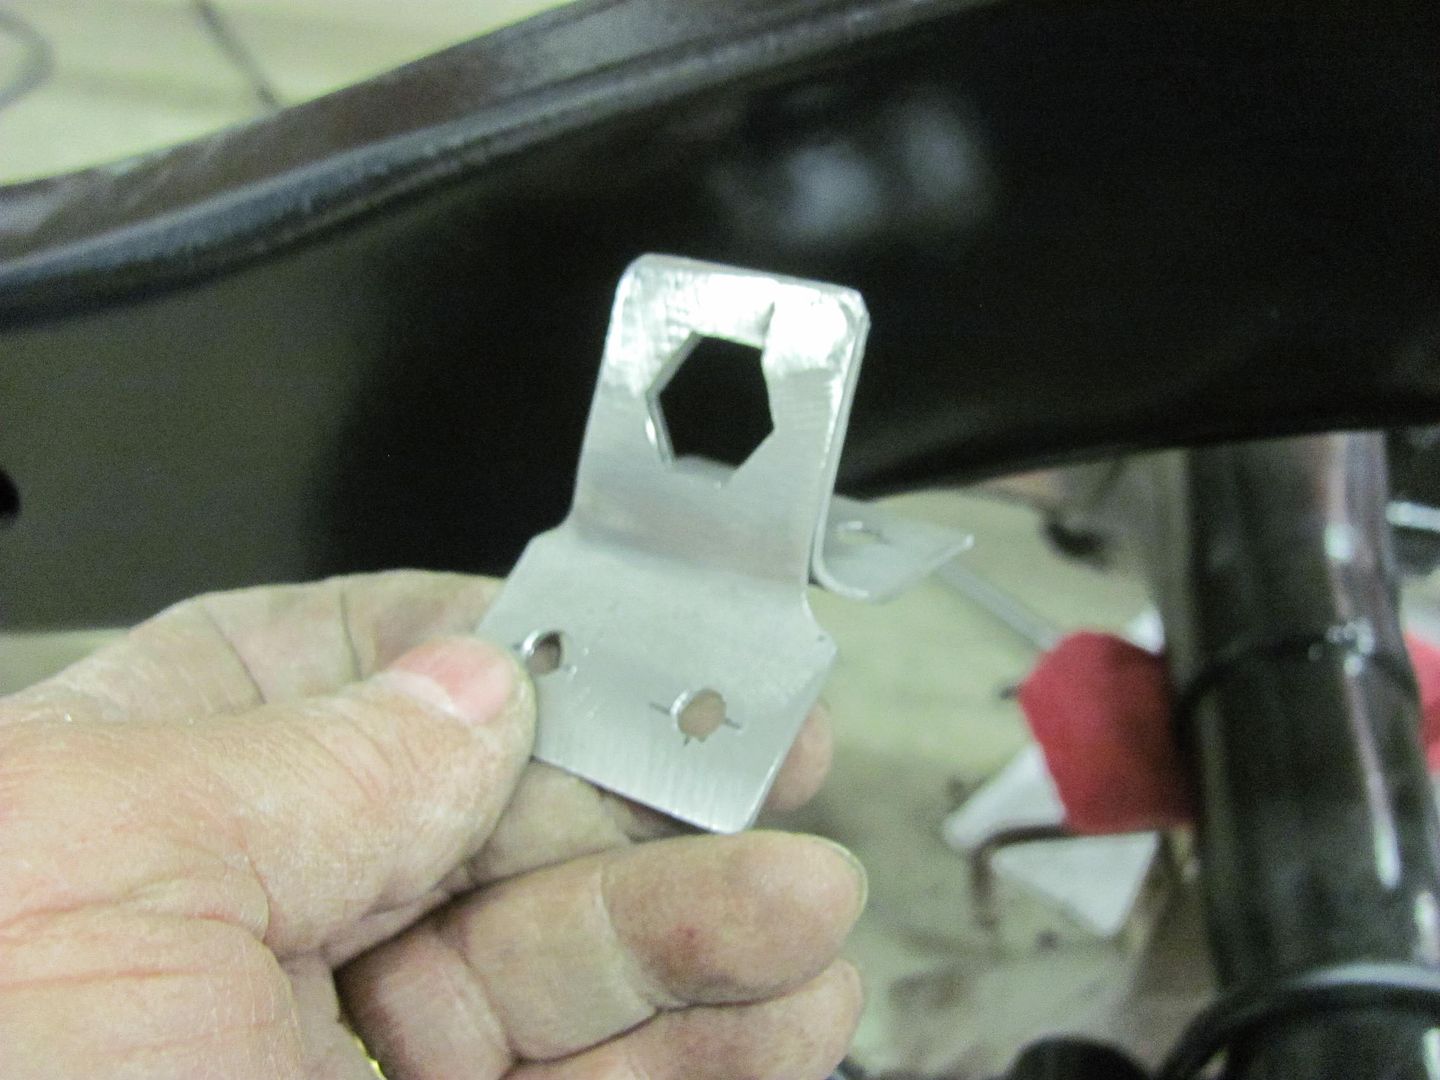 Then this will get epoxy primed along with the other bare brake parts and we'll just touch up the plug welds after welding in place.. 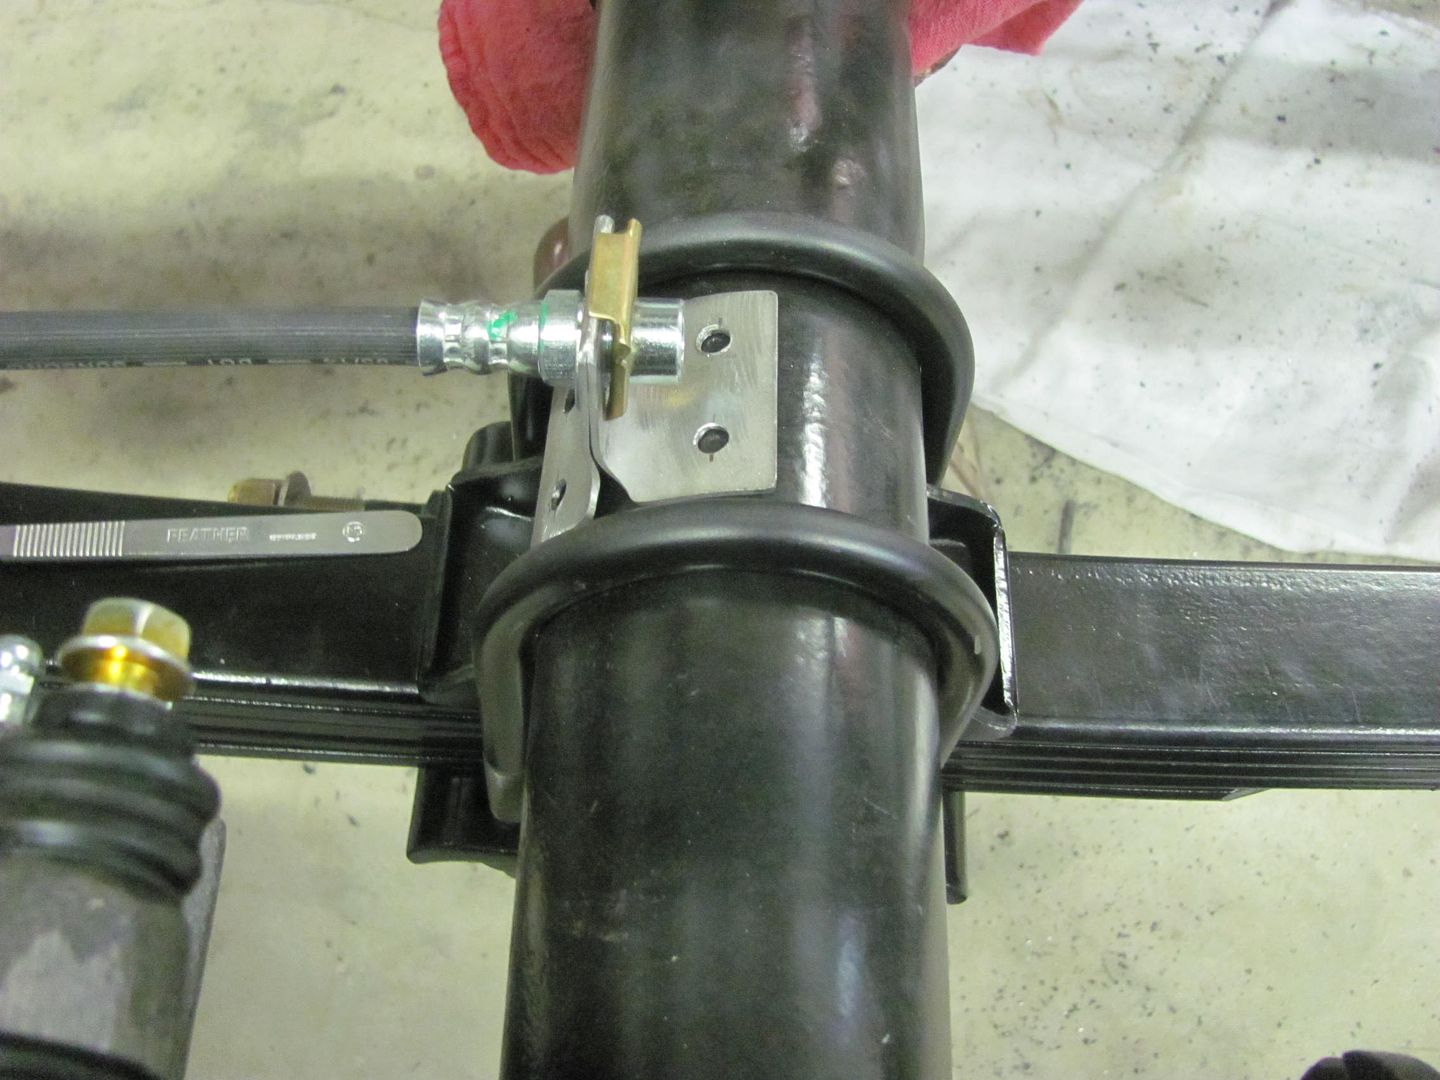 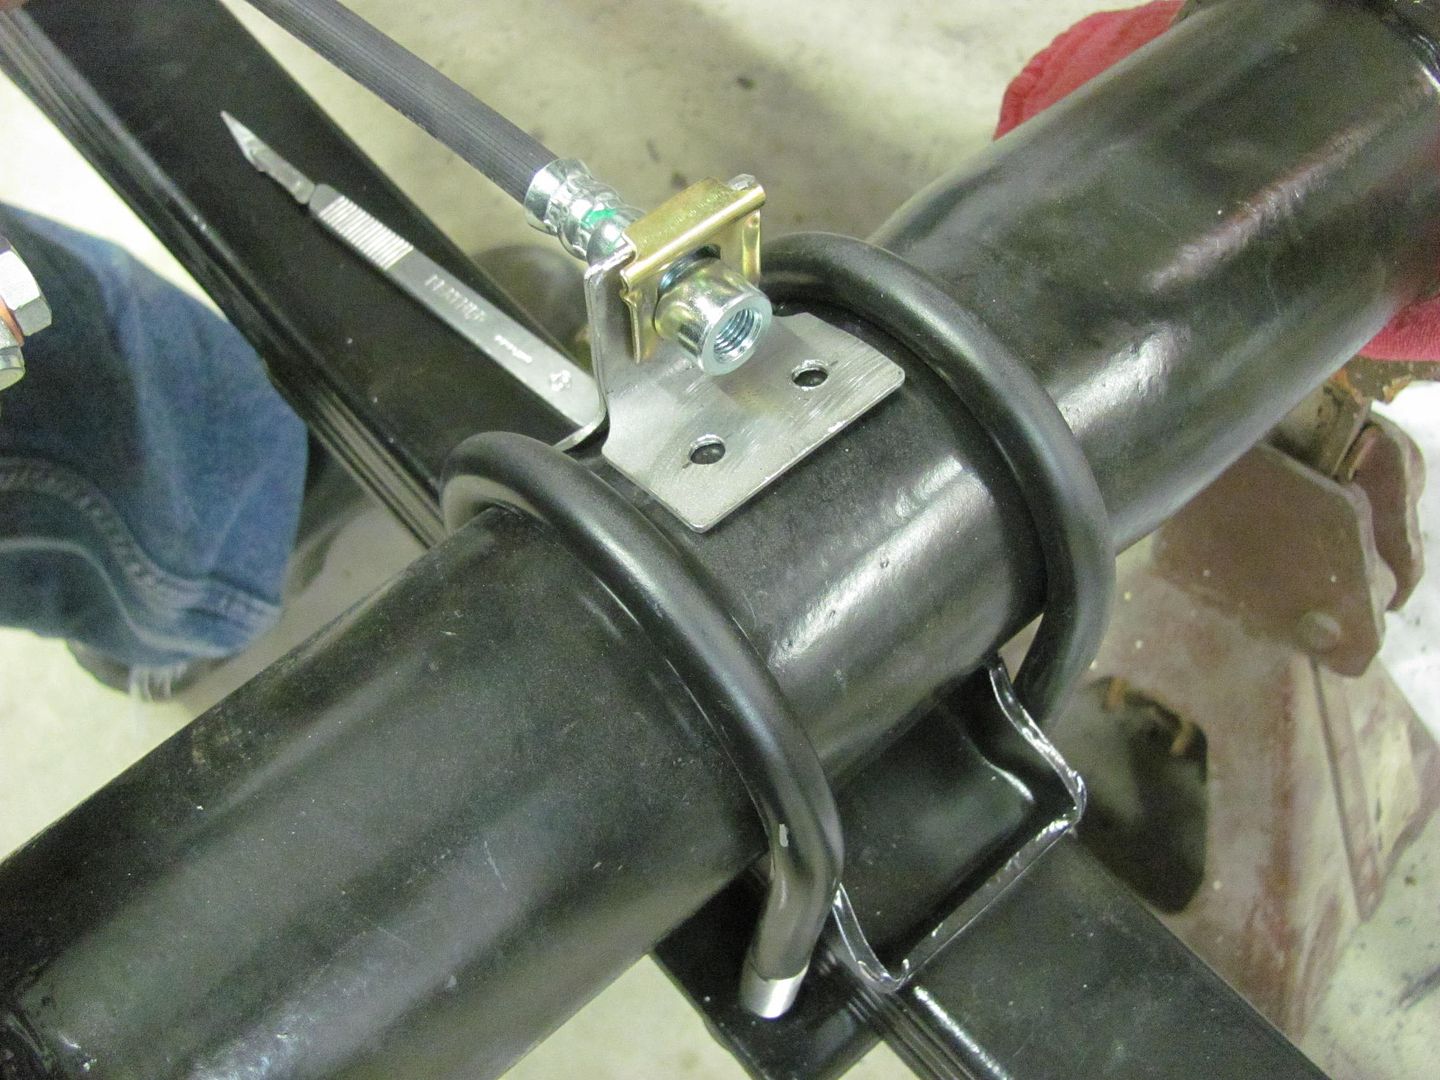
__________________
Robert |
|
|
|
|
02-15-2016, 10:31 PM
|
#654 |
|
6>8 Plugless........
 Join Date: Sep 2007
Location: Prairie City, Ia
Posts: 17,141
|
Re: 55 Wagon Progress
Great work on building that bracket. Do you use a file to get those crisp corners like that?
__________________
Ryan 1972 Chevy Longhorn K30 Cheyenne Super, 359 Inline 6 cylinder, Auto Trans, Tilt, Diesel Tach/Vach, Buckets, Rare Rear 4-link and air ride option Build Thread 1972 GMC Sierra Grande Longhorn 4x4 1972 Chevy Cheyenne Super K20 Long Step side tilt, tach, tow hooks, AC, 350 4 speed 1972 C10 Suburban Custom Deluxe 1969 Chevy milk truck 1971 Camaro RS 5.3 BTR STG3 Cam Super T10 1940 Ford 354 Hemi 46RH Ford 9" on air ride huge project Tired of spark plugs? Check this out. |
|
|
|
|
02-15-2016, 11:37 PM
|
#655 |
|
Registered User
Join Date: Jan 2013
Location: Leonardtown, MD
Posts: 1,637
|
Re: 55 Wagon Progress
Used a step drill to open the hole up to the size of across the flats, then triangular file to make the corners...
__________________
Robert |
|
|
|
|
02-17-2016, 12:16 AM
|
#656 |
|
Registered User
Join Date: Jan 2013
Location: Leonardtown, MD
Posts: 1,637
|
Re: 55 Wagon Progress
With the new brake parts all prepped for paint, and the owner not too keen on blue Monroe shocks (I told her it was Ford blue just to instigate), time for some more Epoxy this evening..
Meanwhile Kyle worked on repairing the cross piece for my brother in law's press that we tore up the other night. seems the "peg" hanging down didn't have room for the long axle under, so I put it next to it. We cracked the weld around the peg and pushed it in pretty good. So to make sure he'd let us use it again, we got some replacement parts...   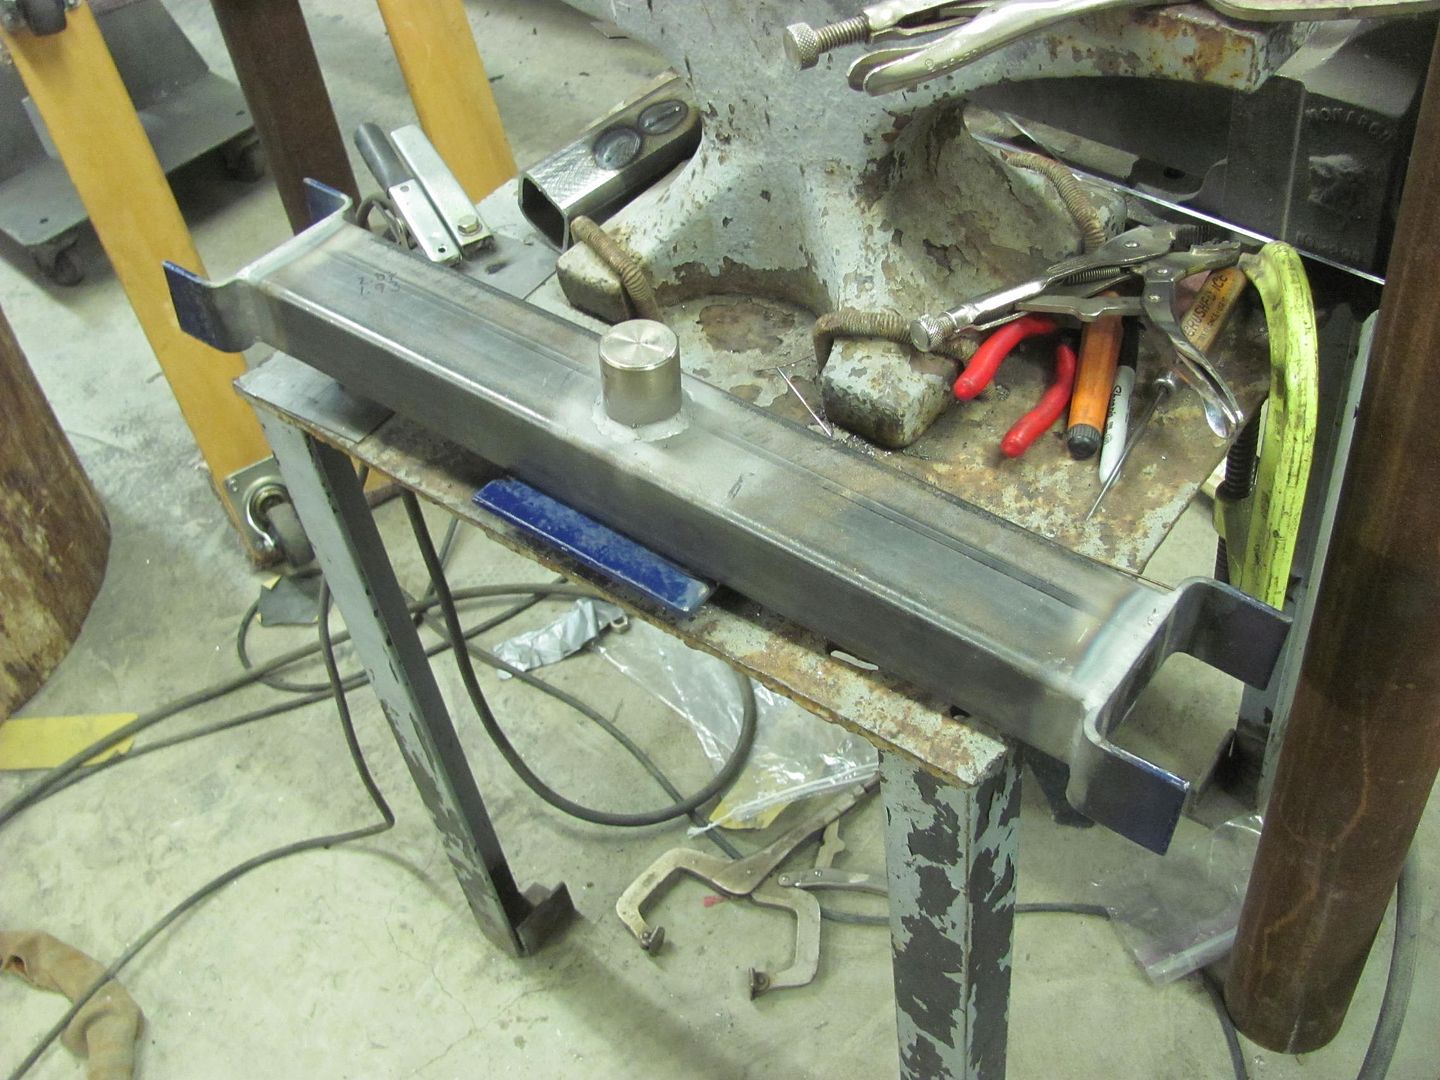 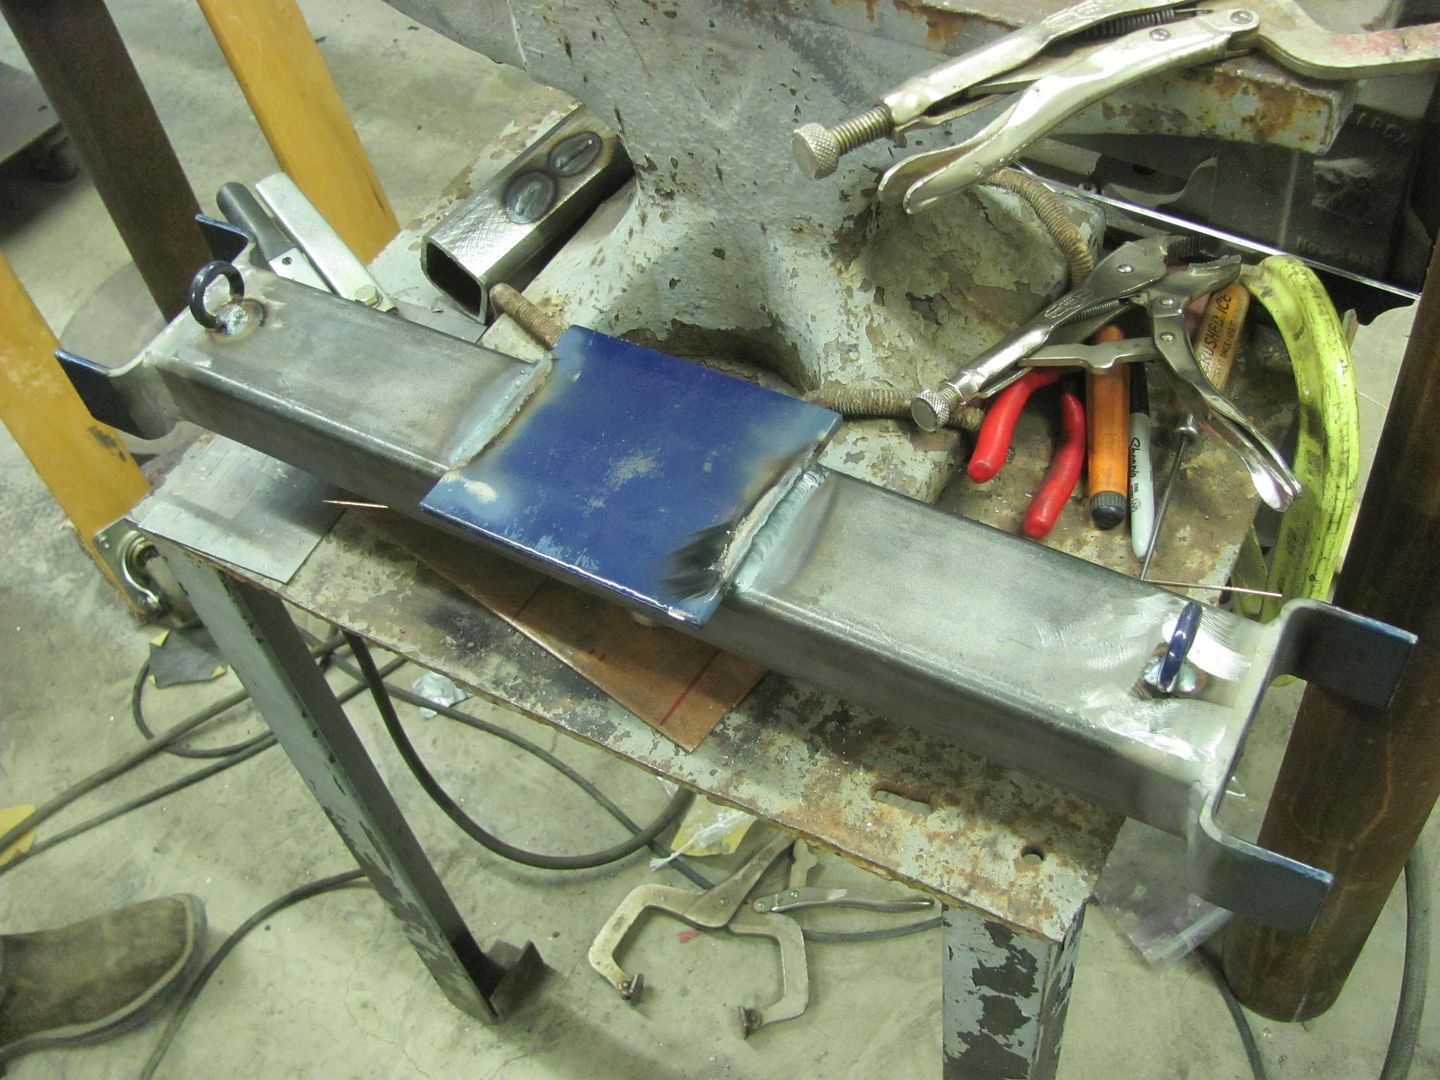 The brake anchor brackets had been spread apart and a quick coat of SPI sprayed on the inside, then clamped closed with NNVG for the remaining spray session.  Quite the clamping conglomeration... 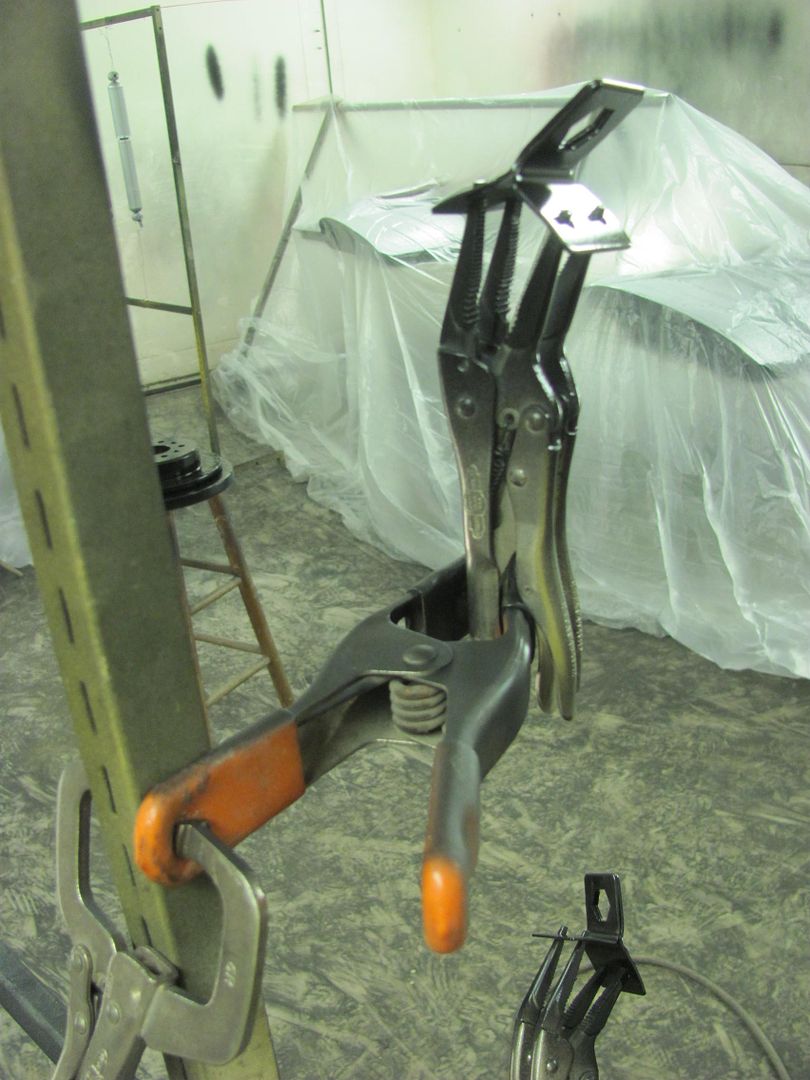 ....and the rest of the parts... 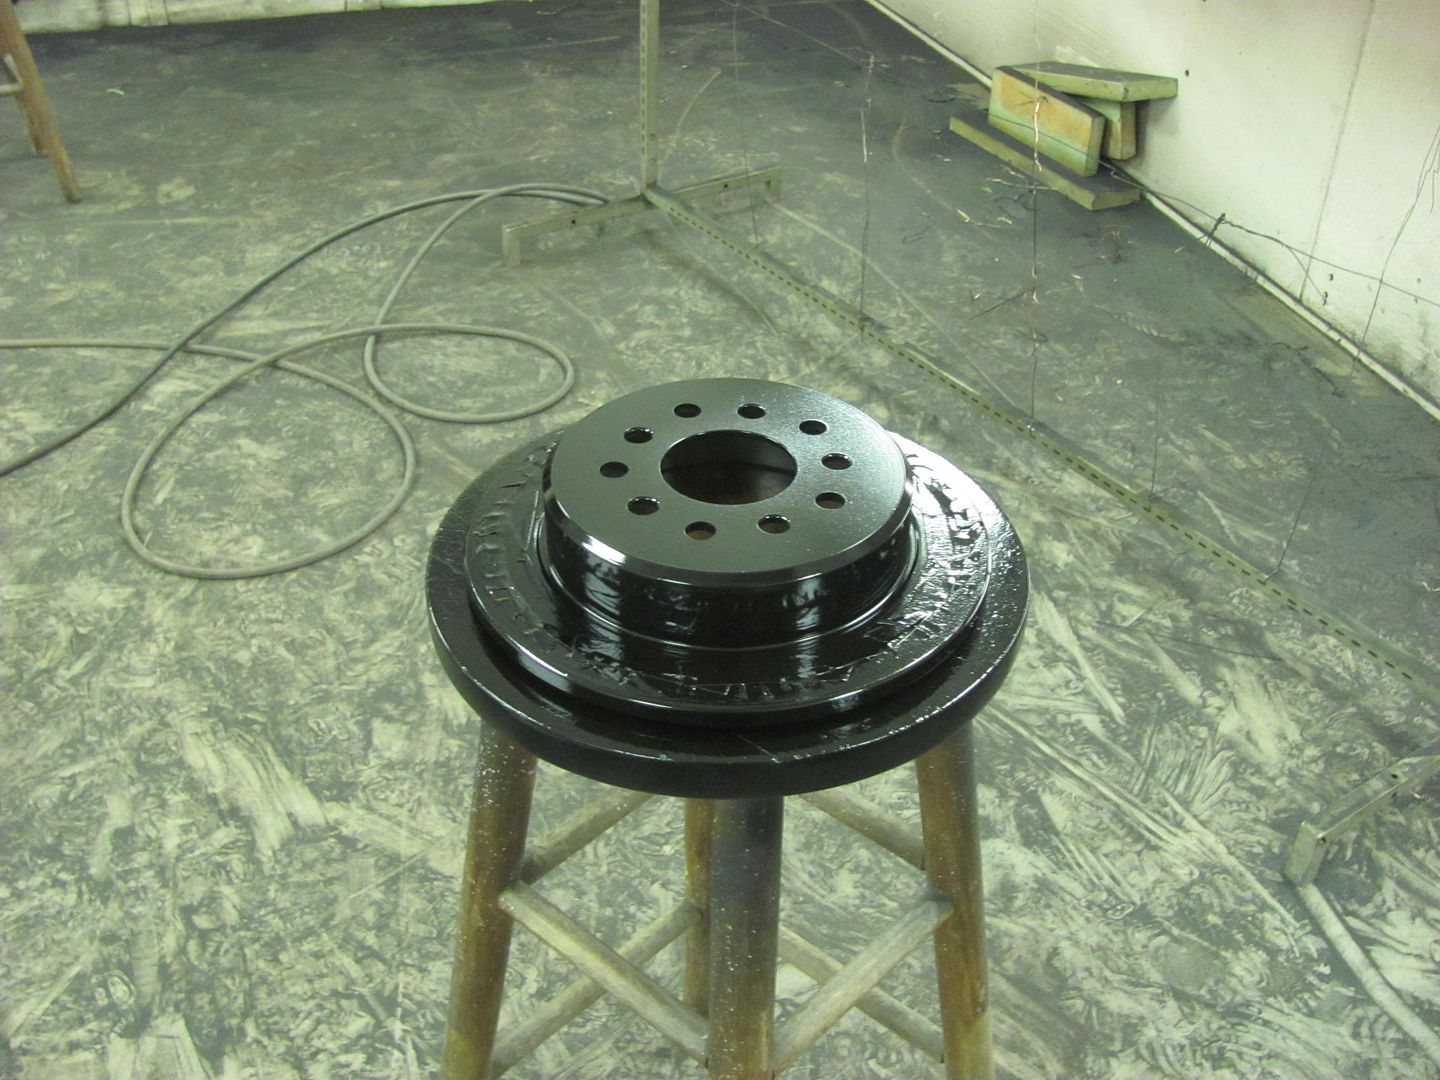 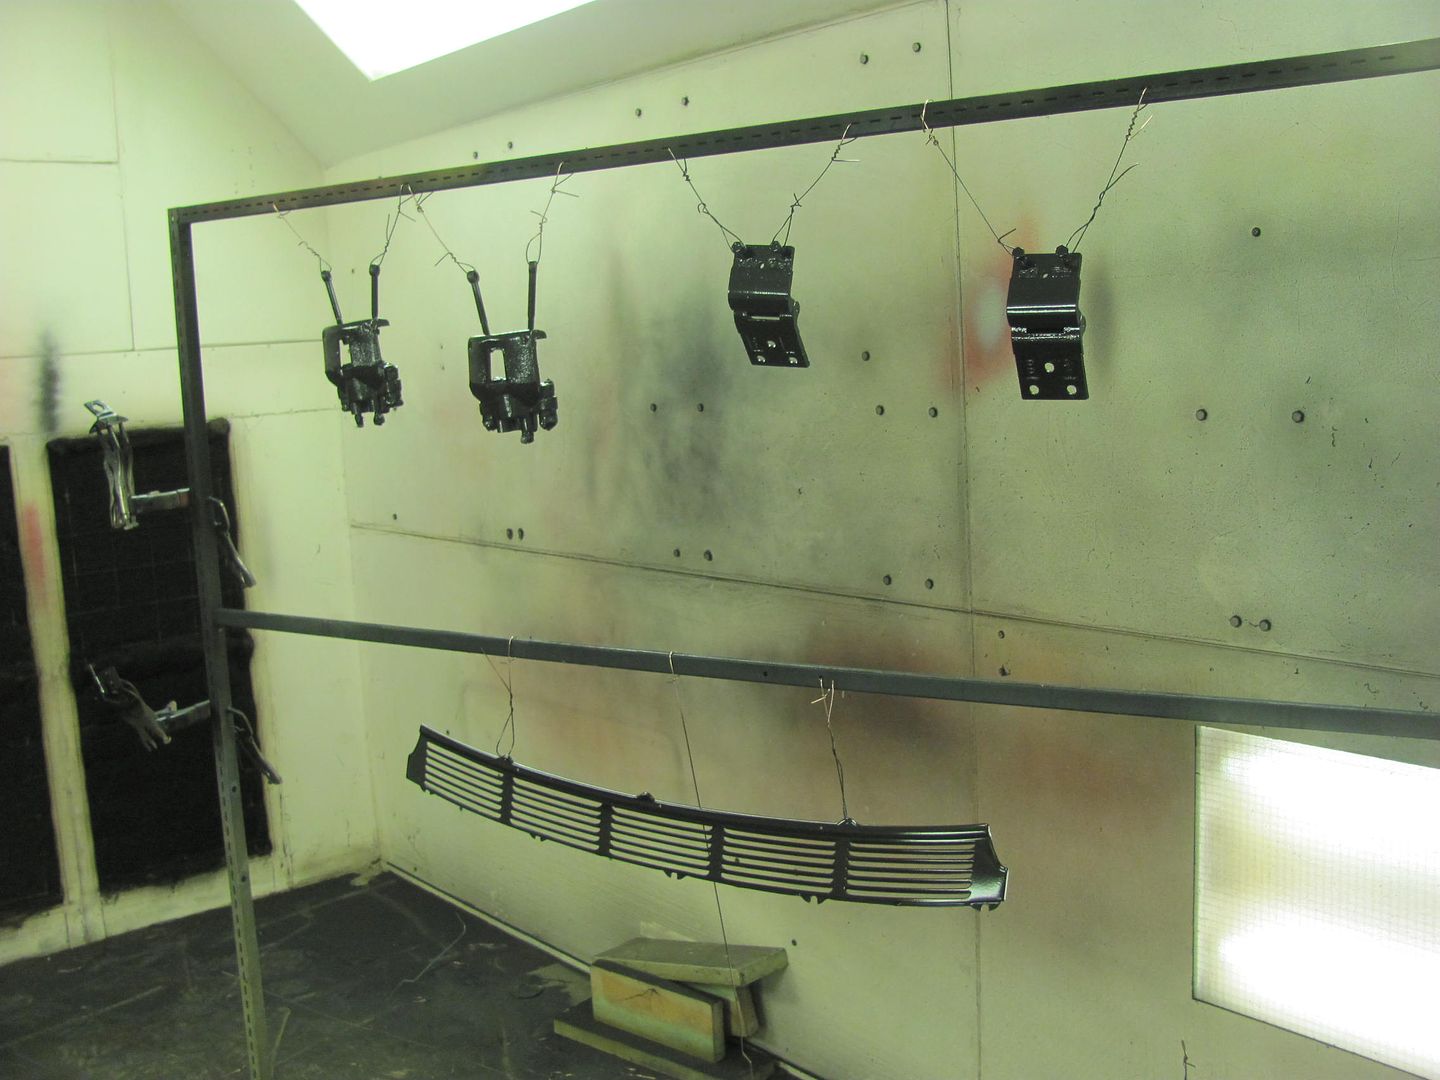 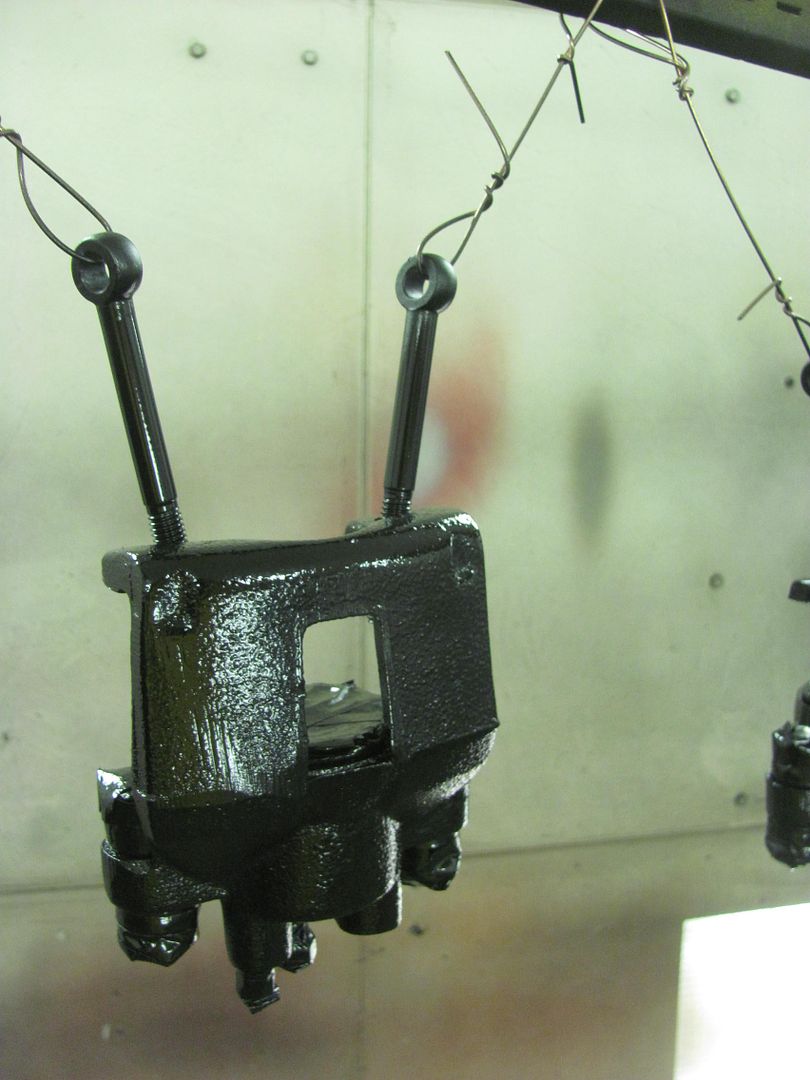 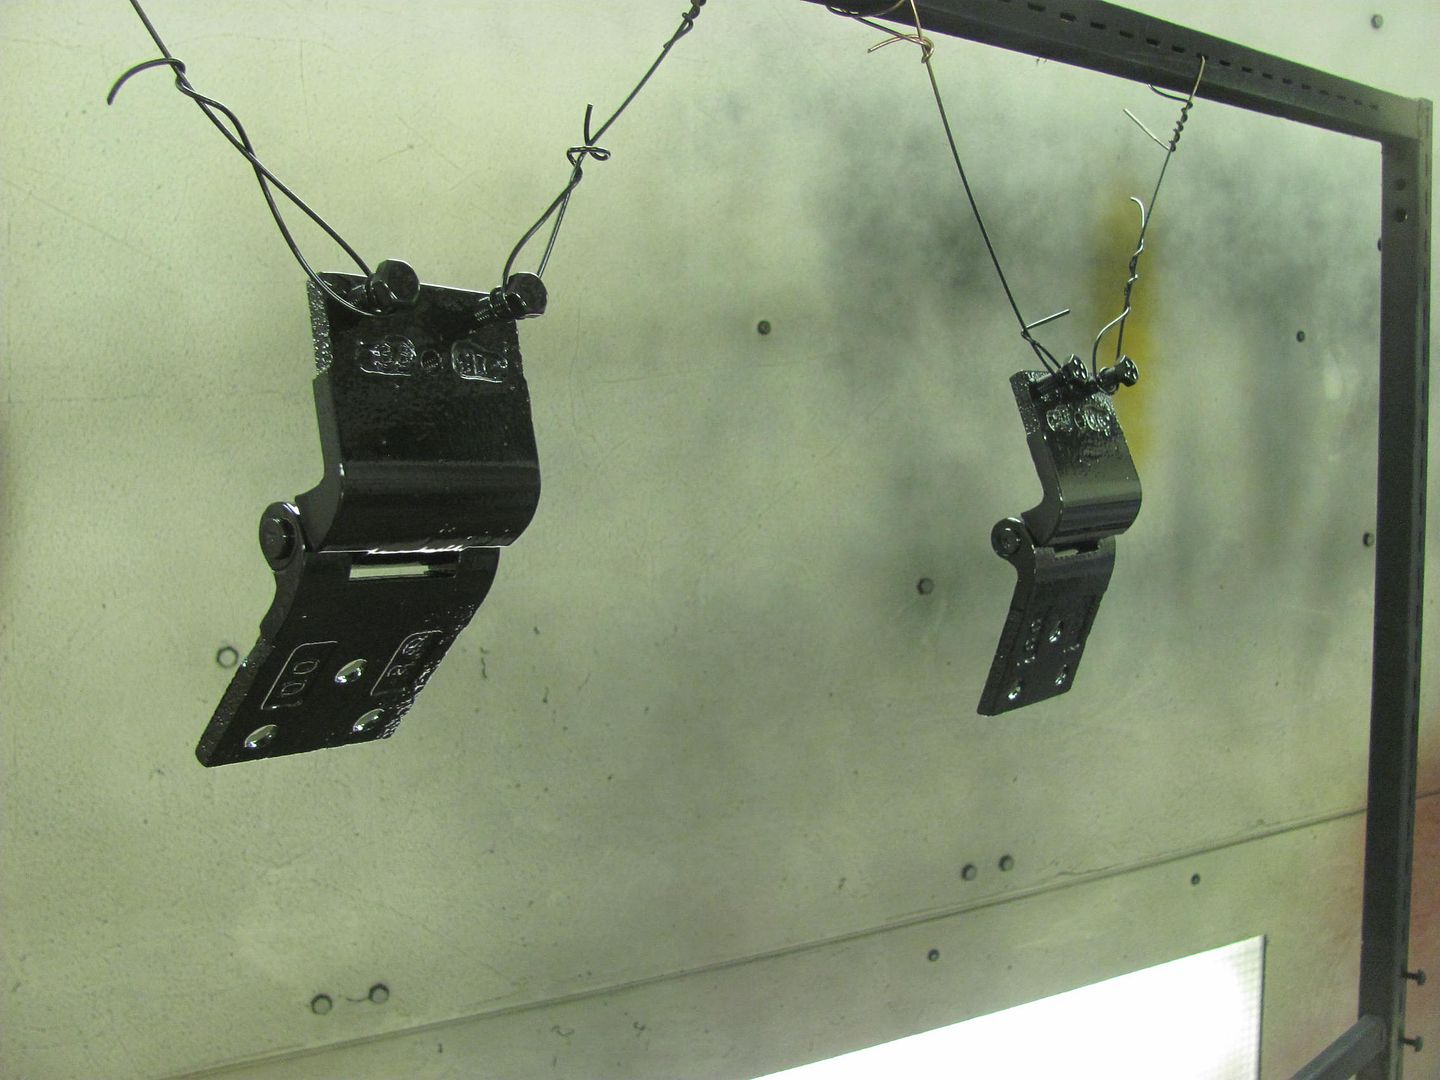 After the shocks first coat of epoxy had flashed, they got two coats of the silver Imron... 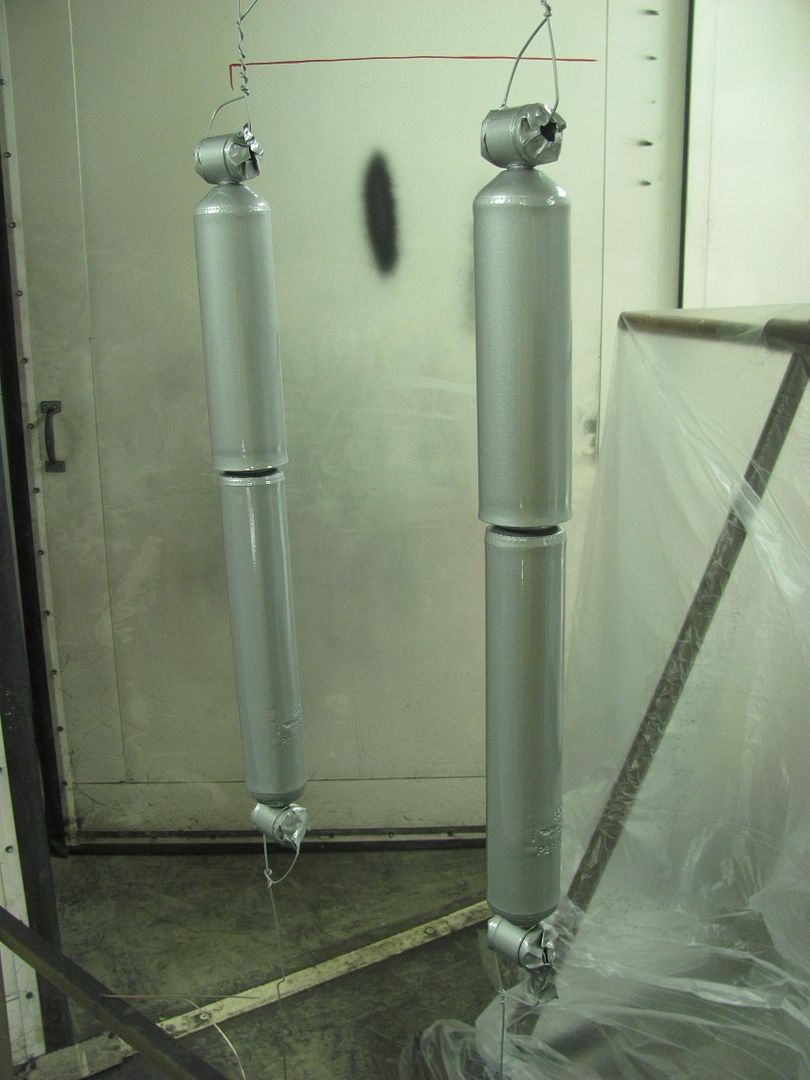
__________________
Robert |
|
|
|
|
02-21-2016, 08:13 PM
|
#657 |
|
Registered User
Join Date: Jan 2013
Location: Leonardtown, MD
Posts: 1,637
|
Re: 55 Wagon Progress
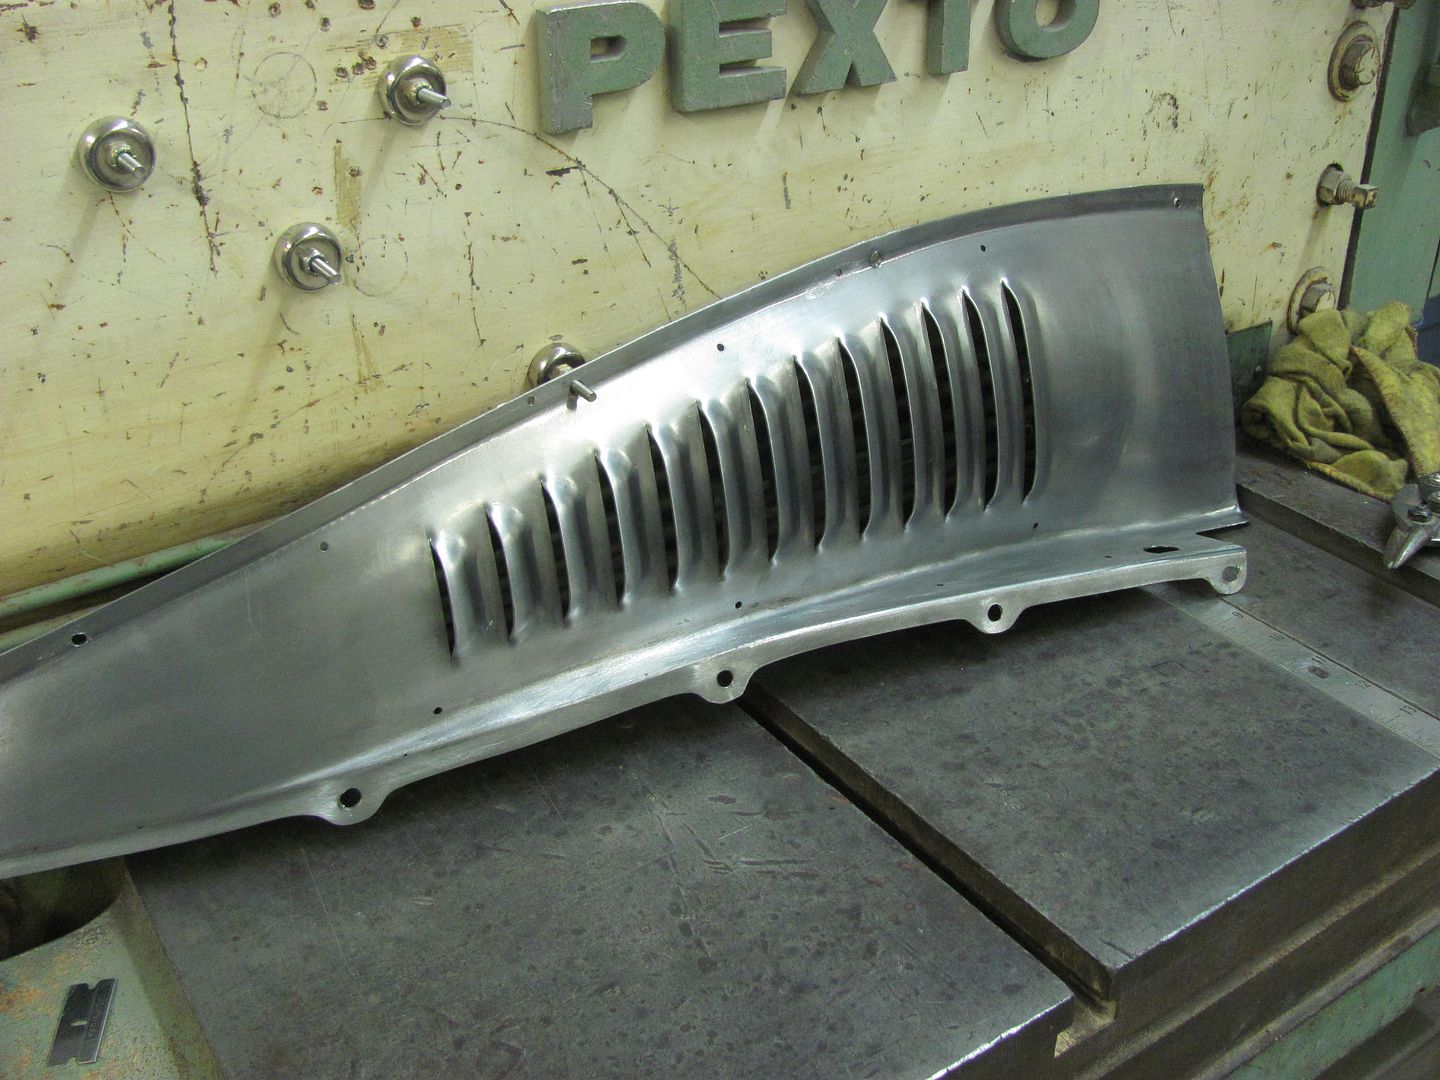
Well soon after the 35 Chevy returned from GNRS, Cody had it blown apart again to tackle more items on the to-do list.. One of them being inner fenders, which he had asked if we would punch some louvers in those as well. He hand fabricated these parts, seen here:
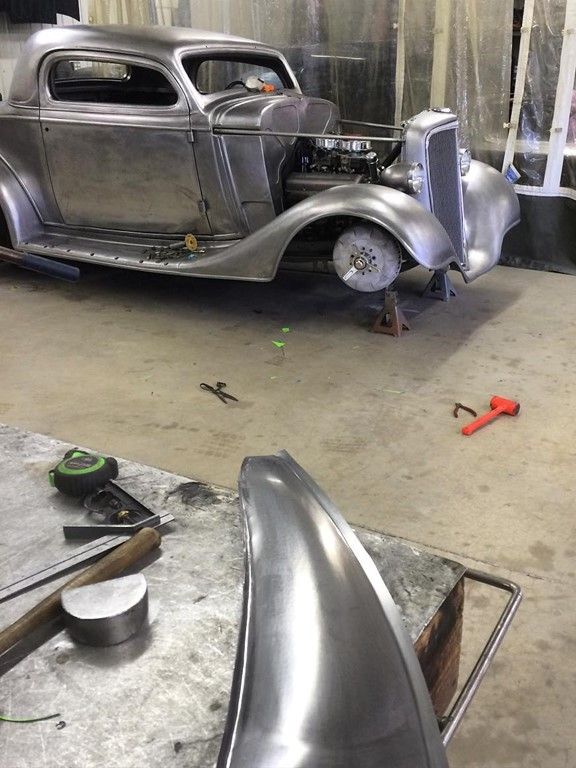  He had quite a bit of work in these and had suggested shipping them down, but we aren't that far apart so I suggested meeting in the middle to pass off the parts rather than trust them to shipping. So we guessed on Parole, MD as being close to a good midpoint, and picked the Double TT Diner to grab some breakfast and catch up on his trip to Pomona. Kyle and I arrived and had made about one lap through the parking lot when Cody pulled in, so this worked to be a good halfway point between Southern MD and Milford DE. Here's what we picked up.... 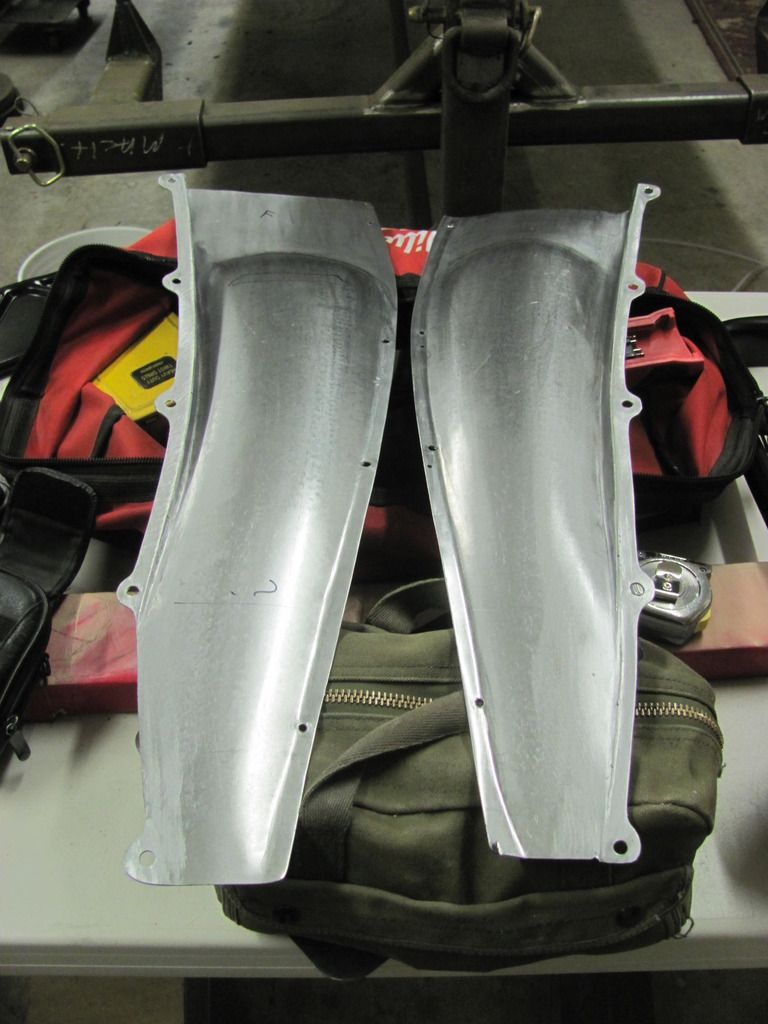 This has a tighter radius than what we had done for the hood sides, so for the punch to better follow the contour, or sit perpendicular to the point of punch, we plan on a rotational fixture attached to the linear slide that the "trough" of the inner fender can be rolled from side to side.. More on that to come.. On the way home from Parole, we made a stop to look at an old fire truck that was slated for a total restoration. We did a quick survey of the truck and made some recommendations to the owner.. While we were there, also stumbled across another 35 Chevy. These 35's are coming out of the woodwork it seems..  Back in the shop, getting ready to re-assemble the rear. Test fitting the rear axle bearings, as the brake kit had come with some .250 thick spacers... 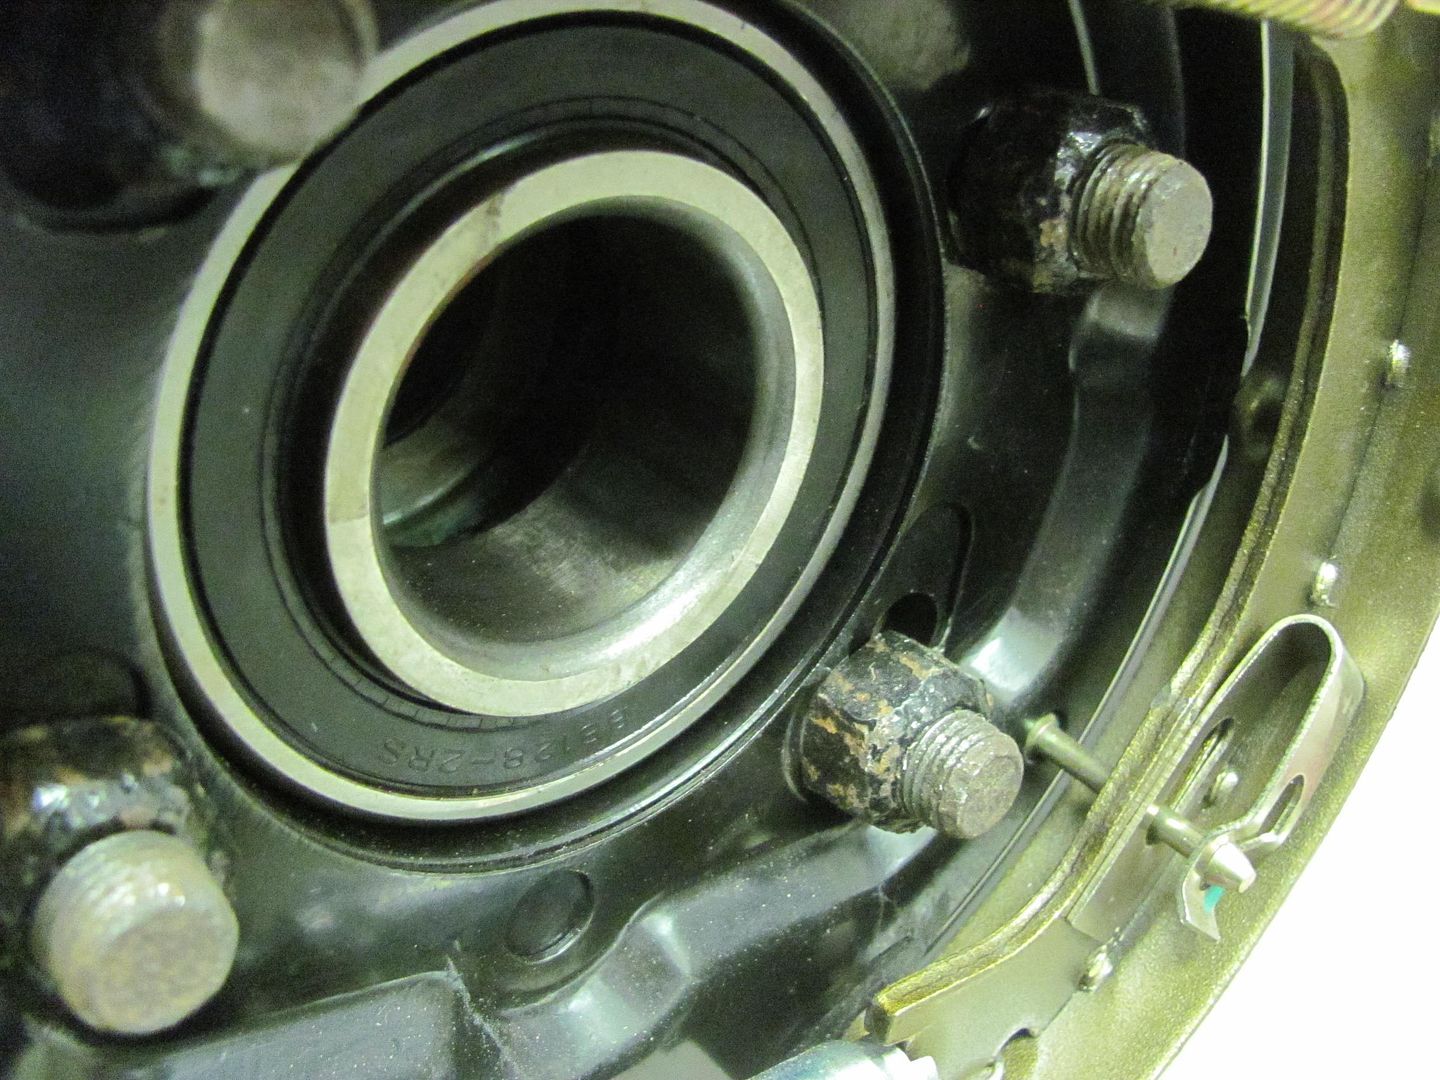 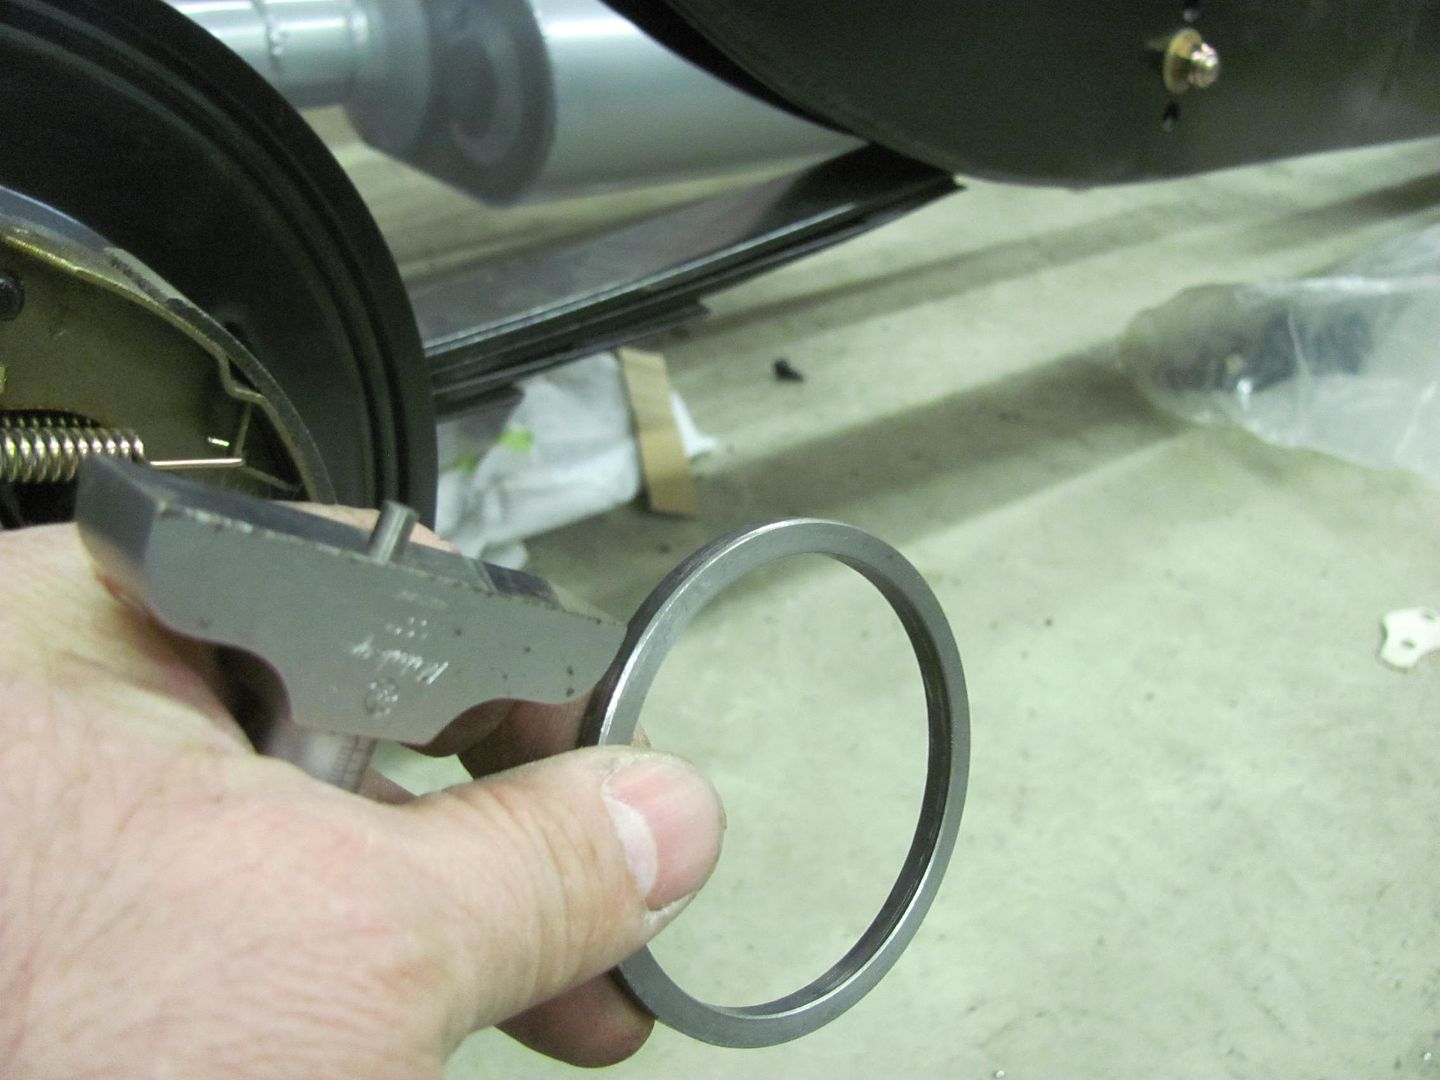 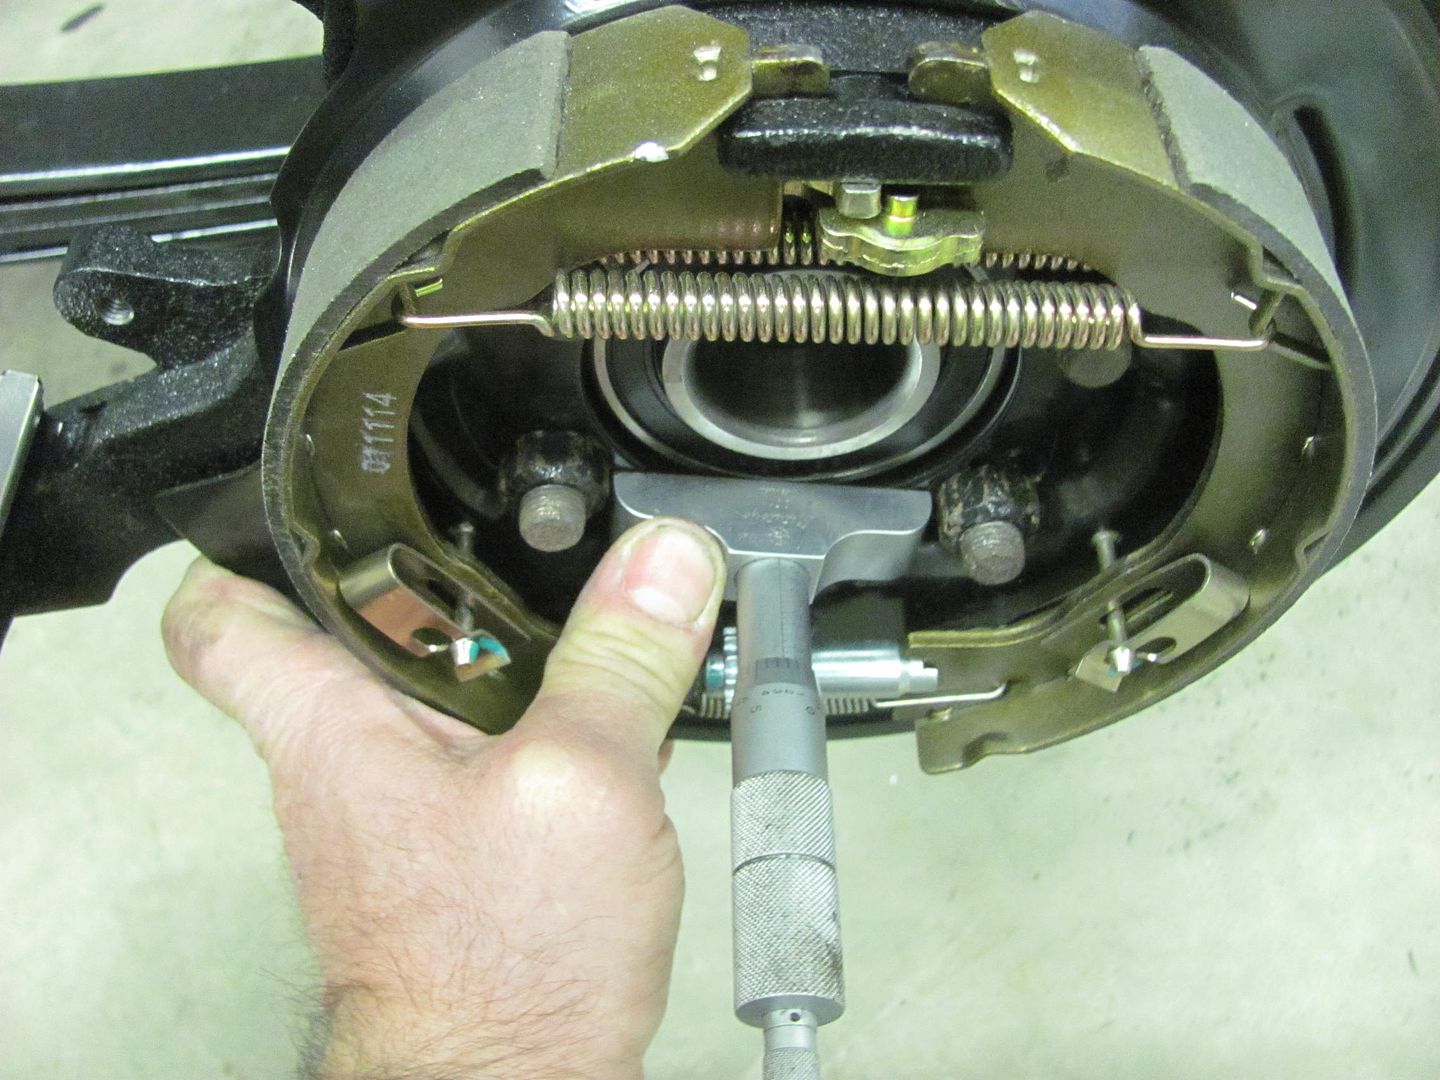 My vernier depth gauge showed that the actual distance was .203, so some trimming was in order... 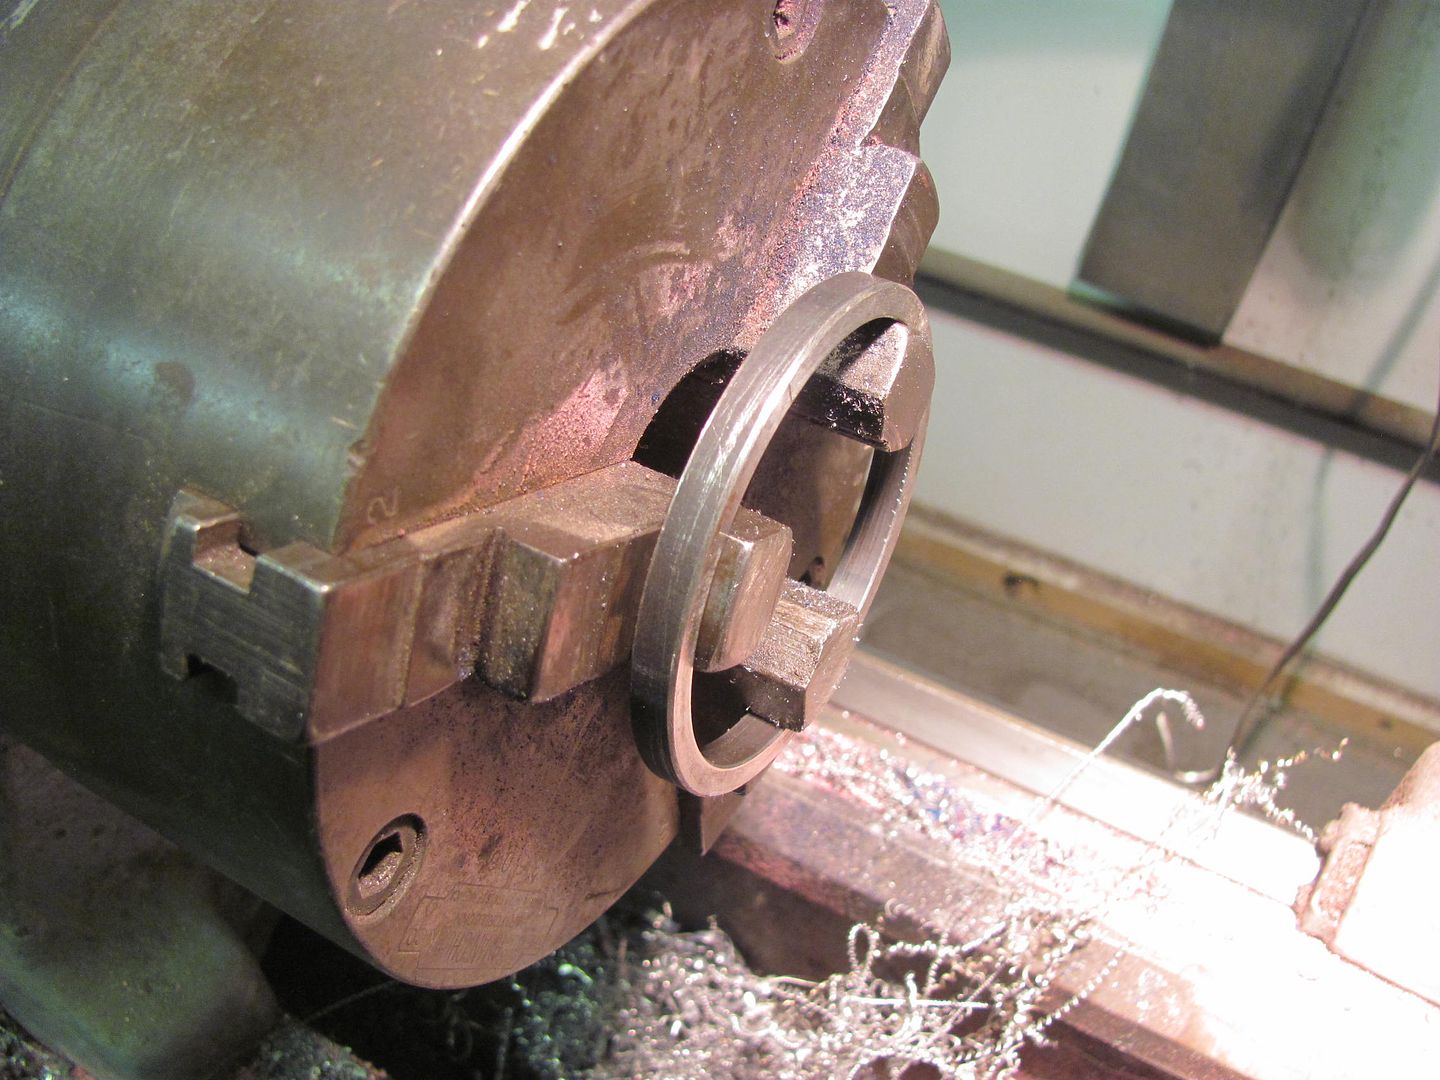 With all the parts now test fitted, we took the rebuilt press parts back and gave them a trial run... 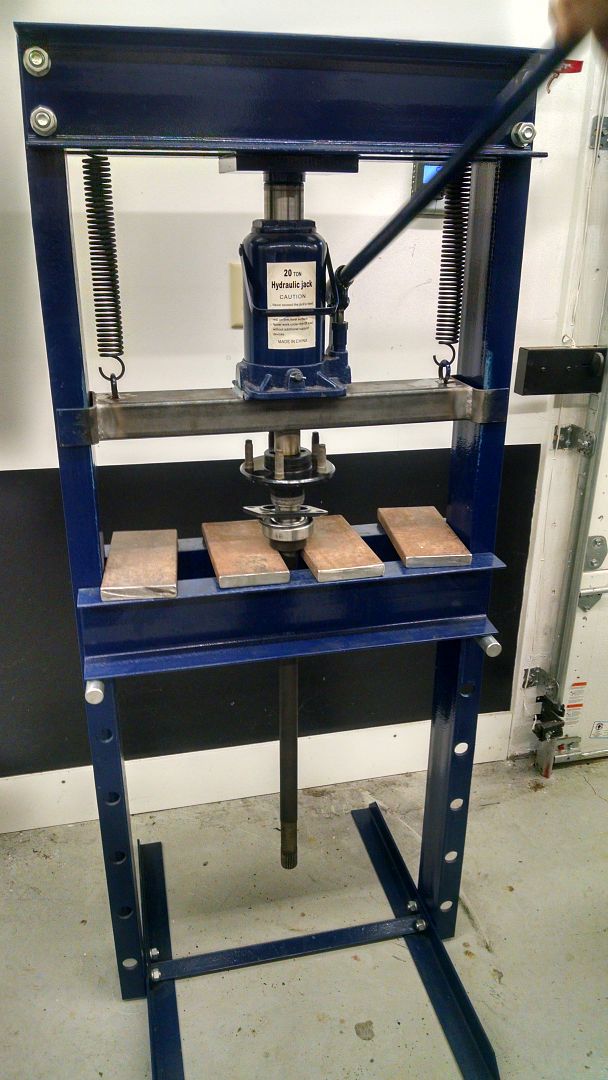 With the press back in business, the only thing left to do there is to add it in the mix the next time we spray some epoxy, and I generously offered some of the leftover orange from the trailer wheel painting, but my brother-in-law seems a bit apprehensive. Brake line brackets were removed from the paint stand, and this is the first time I noticed these Vise Grips had a Gene Winfield fade paint job on them.. 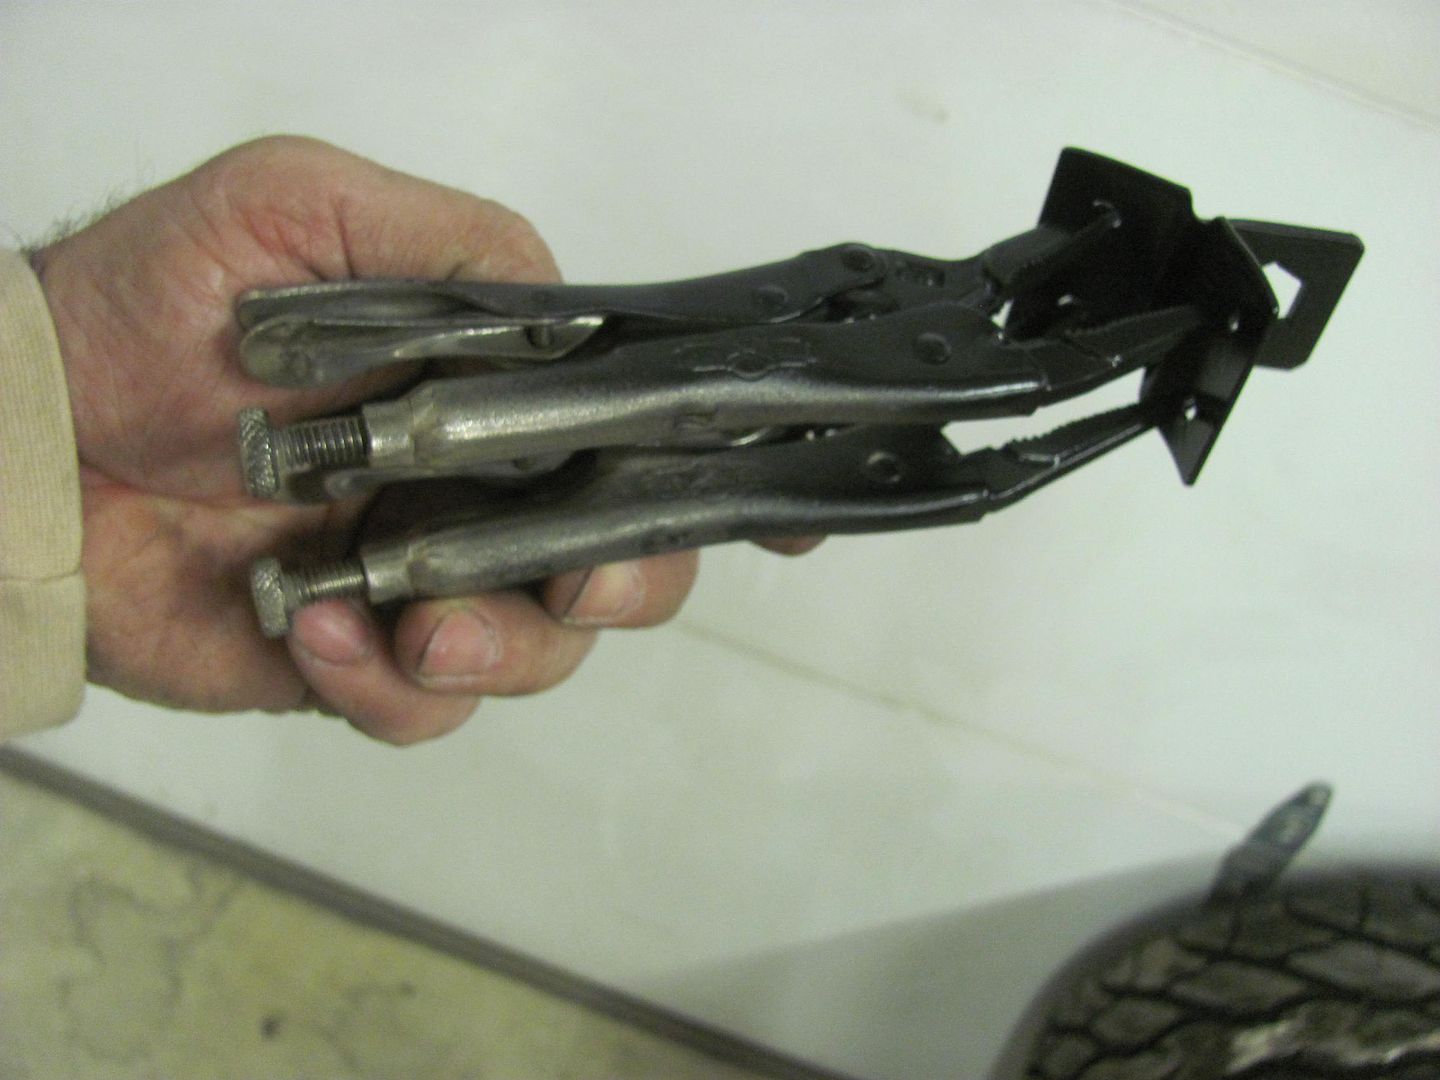 Brackets were plug welded to the housing, welds scuffed and touched up with some SPI epoxy.. 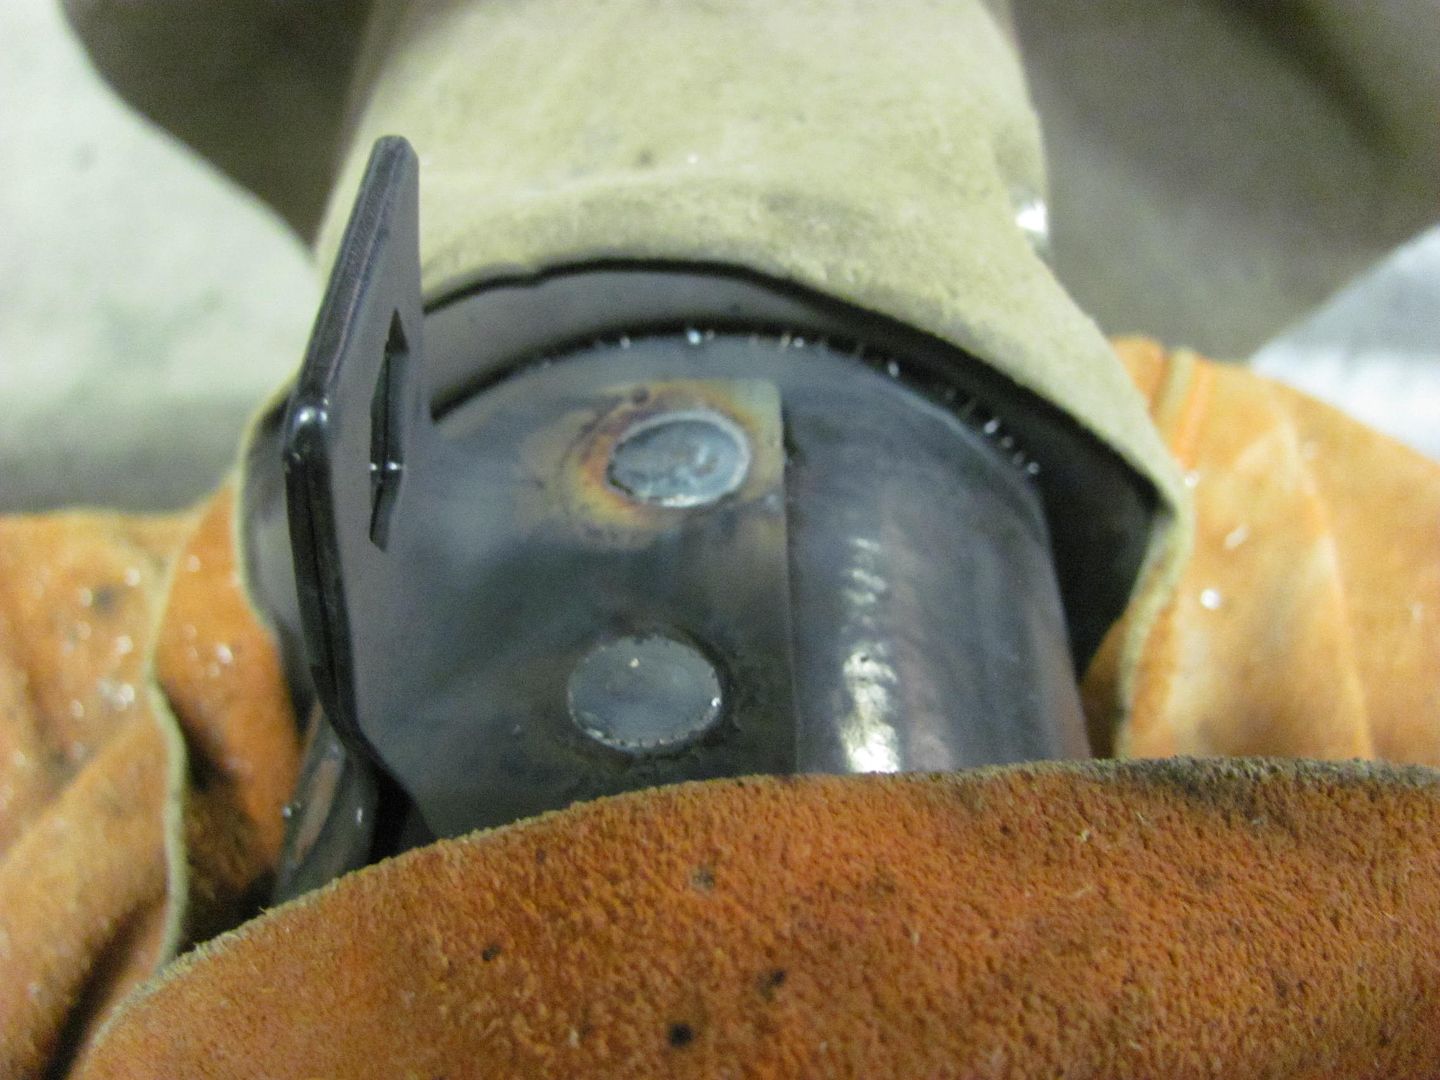 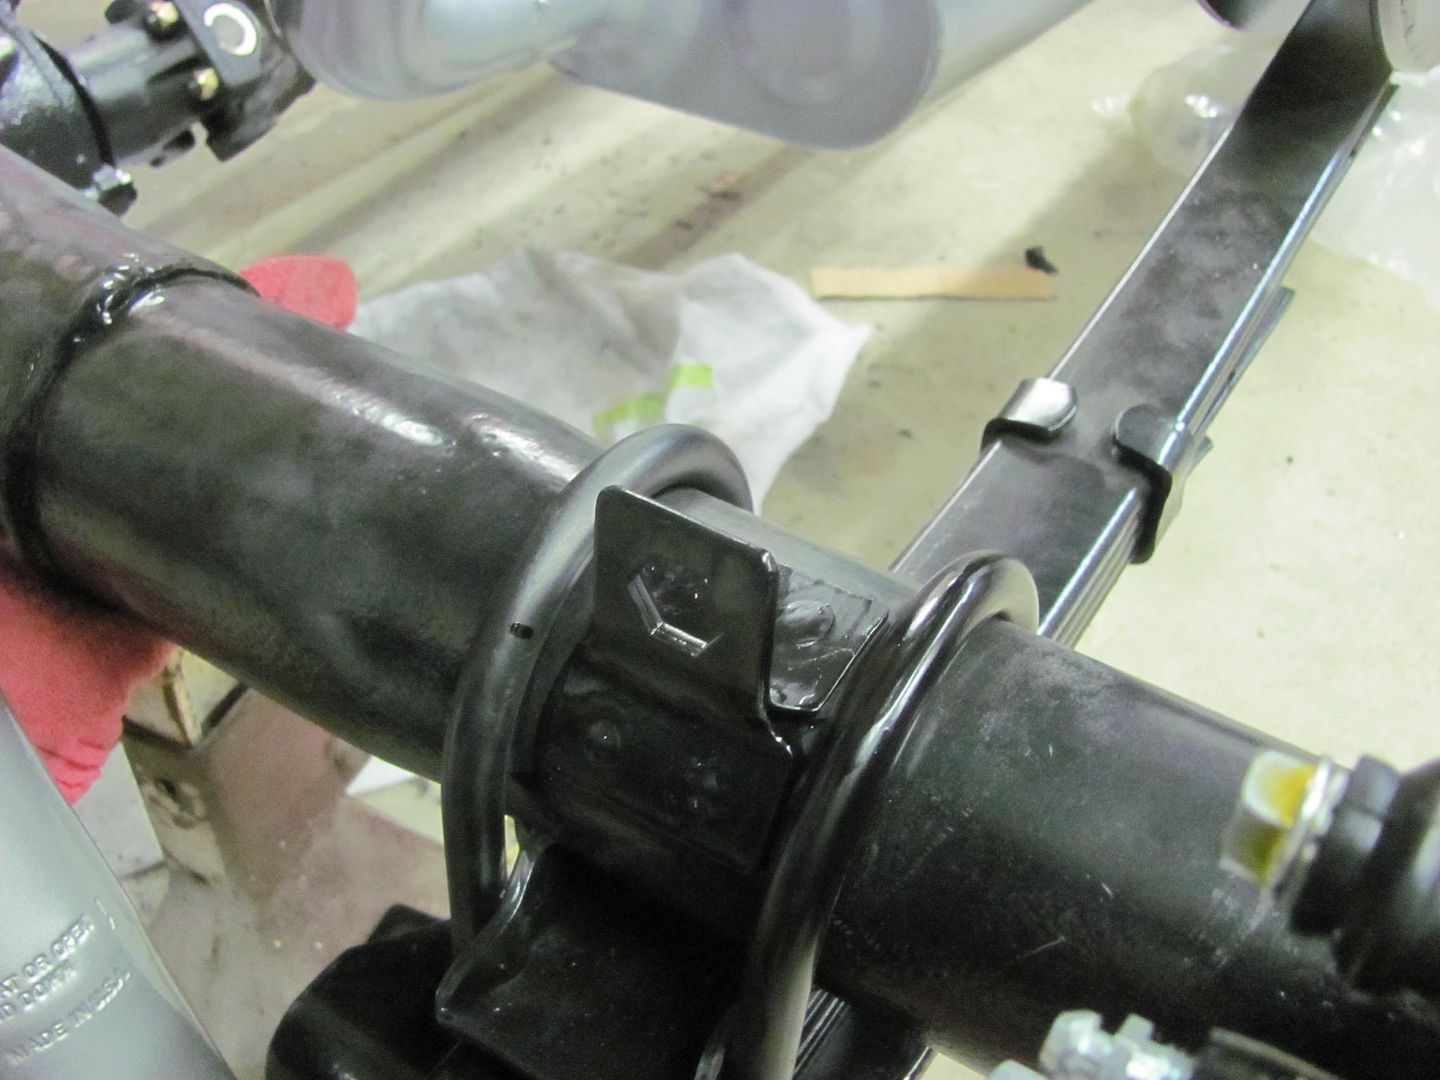 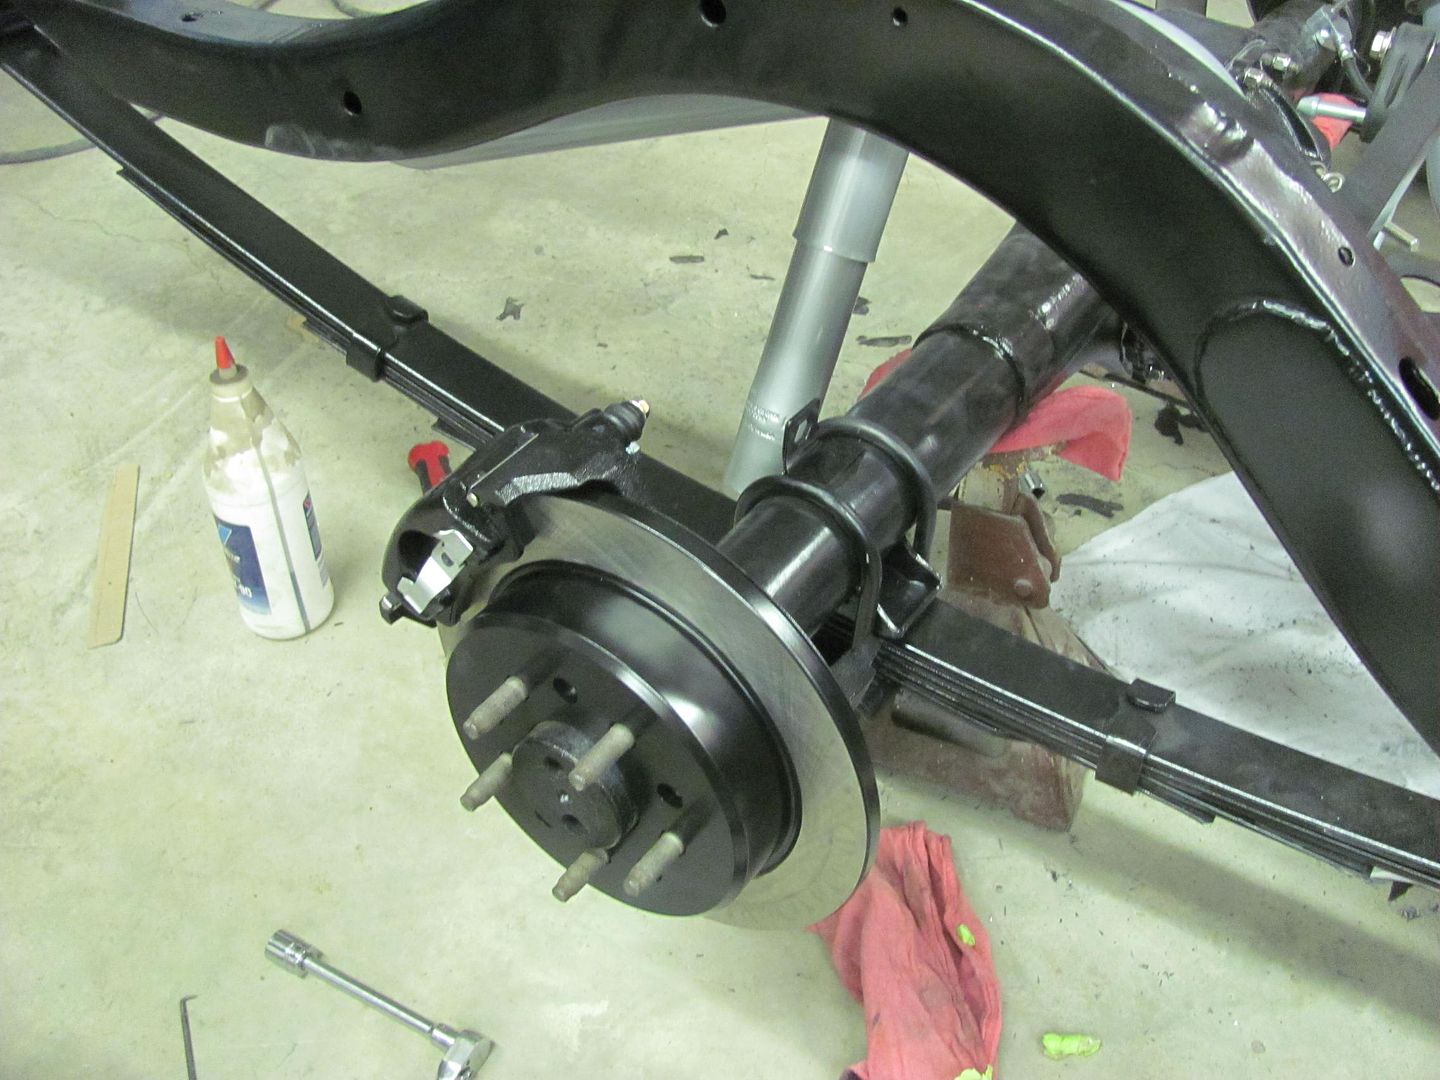 Newly painted shocks were reinstalled, and rear brake parts all installed..  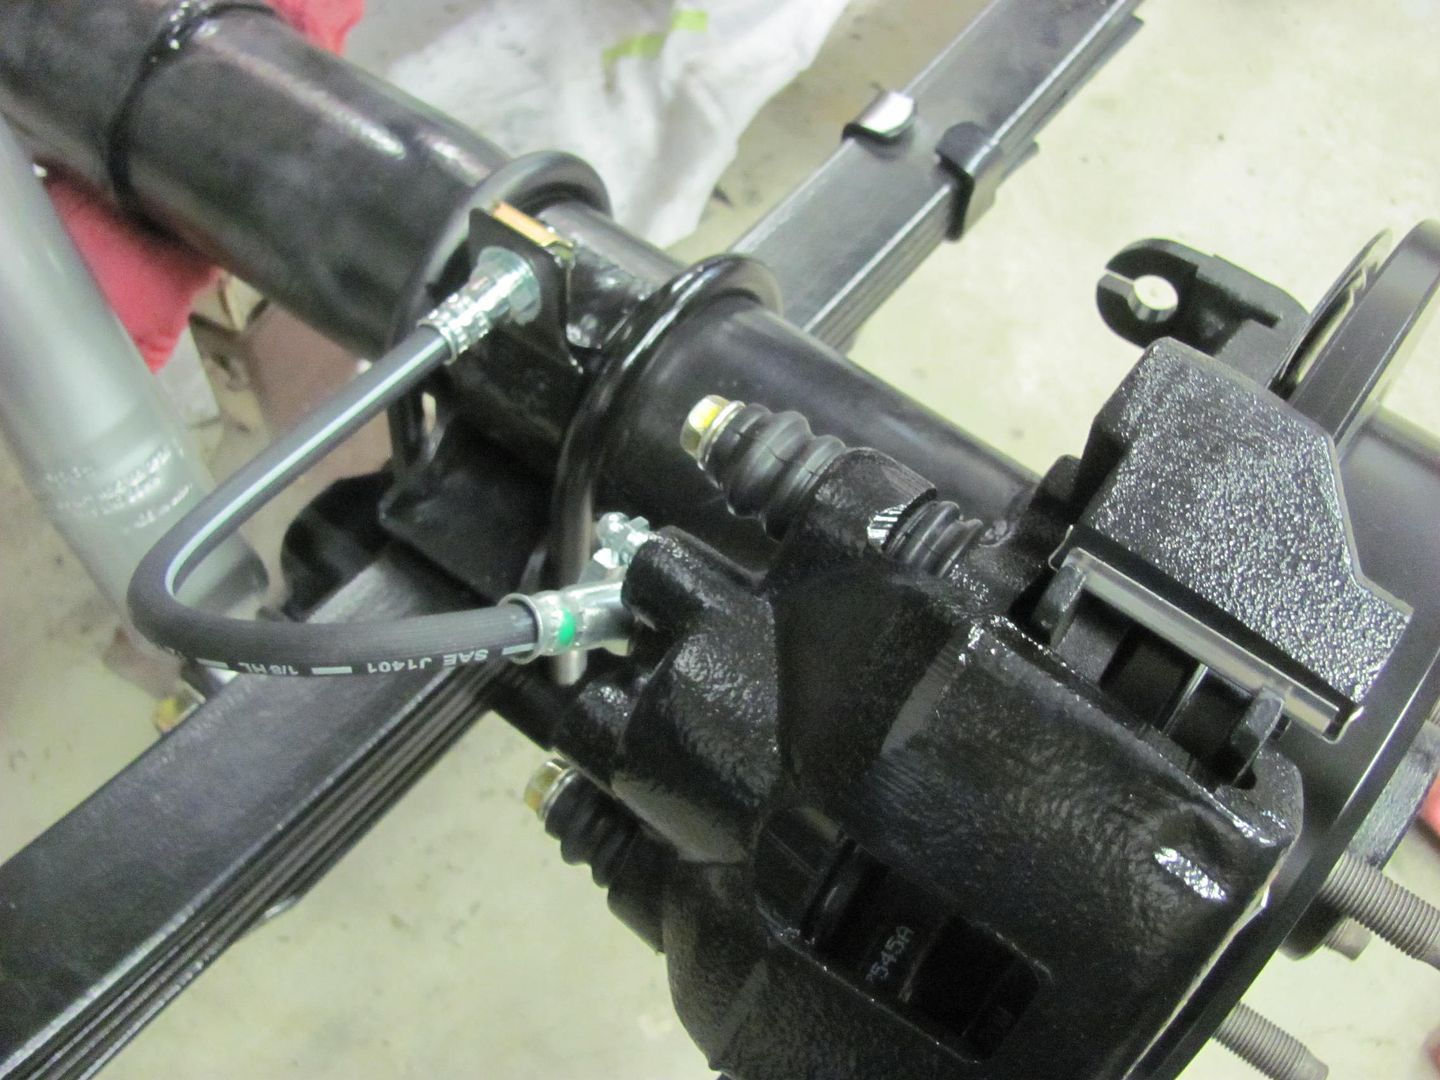 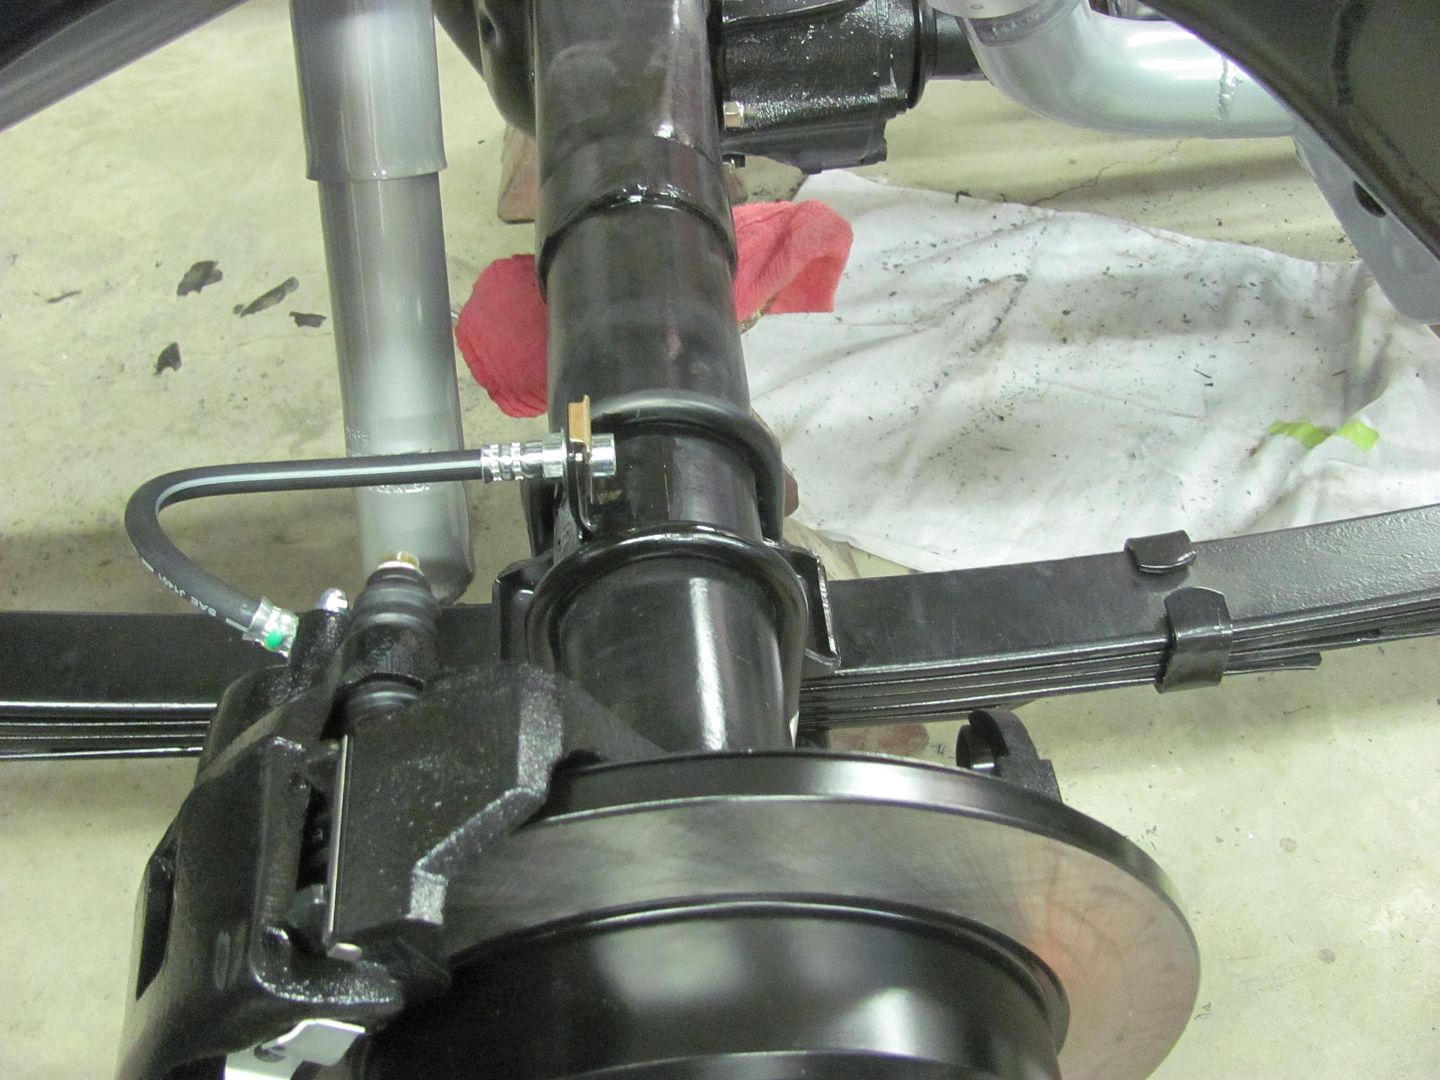 A bit closer....
__________________
Robert |
|
|
|
|
02-23-2016, 11:41 PM
|
#658 |
|
Registered User
Join Date: Jan 2013
Location: Leonardtown, MD
Posts: 1,637
|
Re: 55 Wagon Progress
The Mini Cooper wheel bearing/hub assembly had come in yesterday (looks like this)
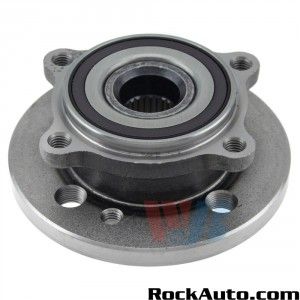 ....so the first order of business was to void the warranty. Made a trip over to David's shop to make sure the press was still operational, and pressed the hub out of the bearing. We need a flat surface for the new material clamps, so Kyle worked on the lathe to get rid of the excess metal here: 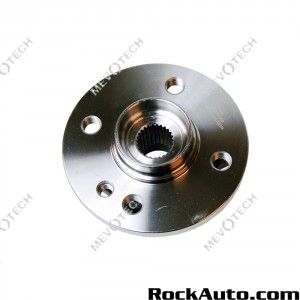 He got this far tonight...  These are the new clamps we'll be using, the single 8mm bolt will connect it to the flange Kyle it working on..  Meanwhile, I cut out the plate to hold the bearing... 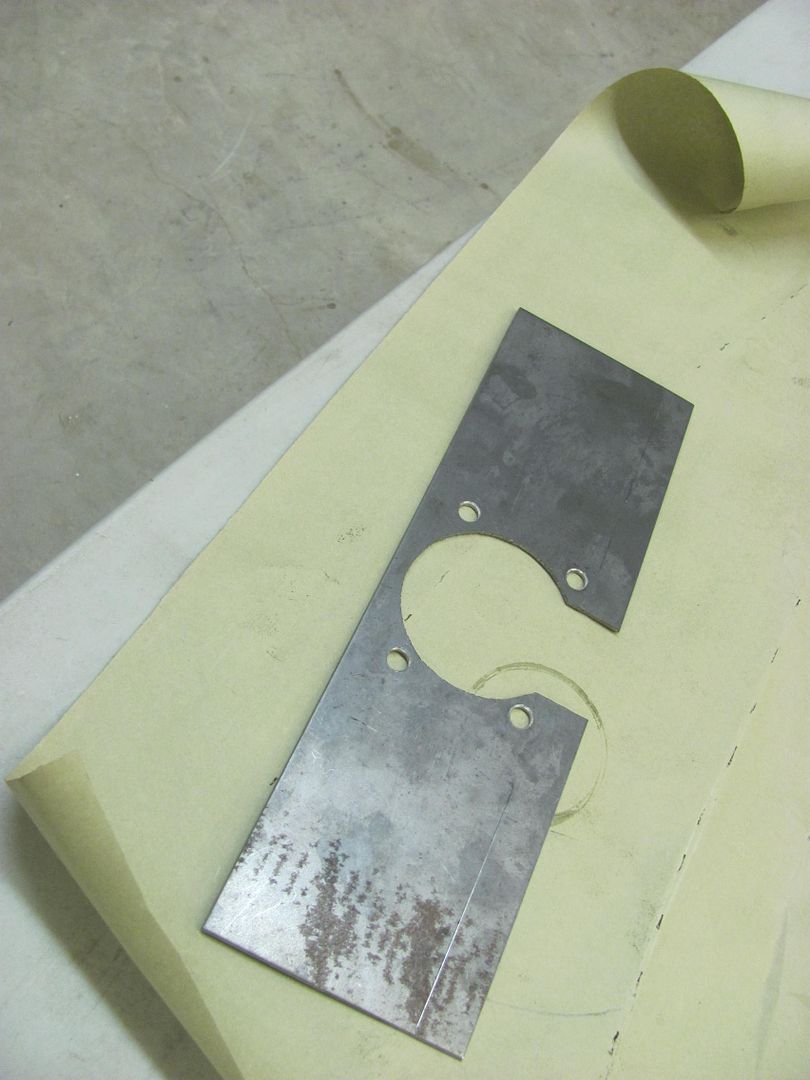 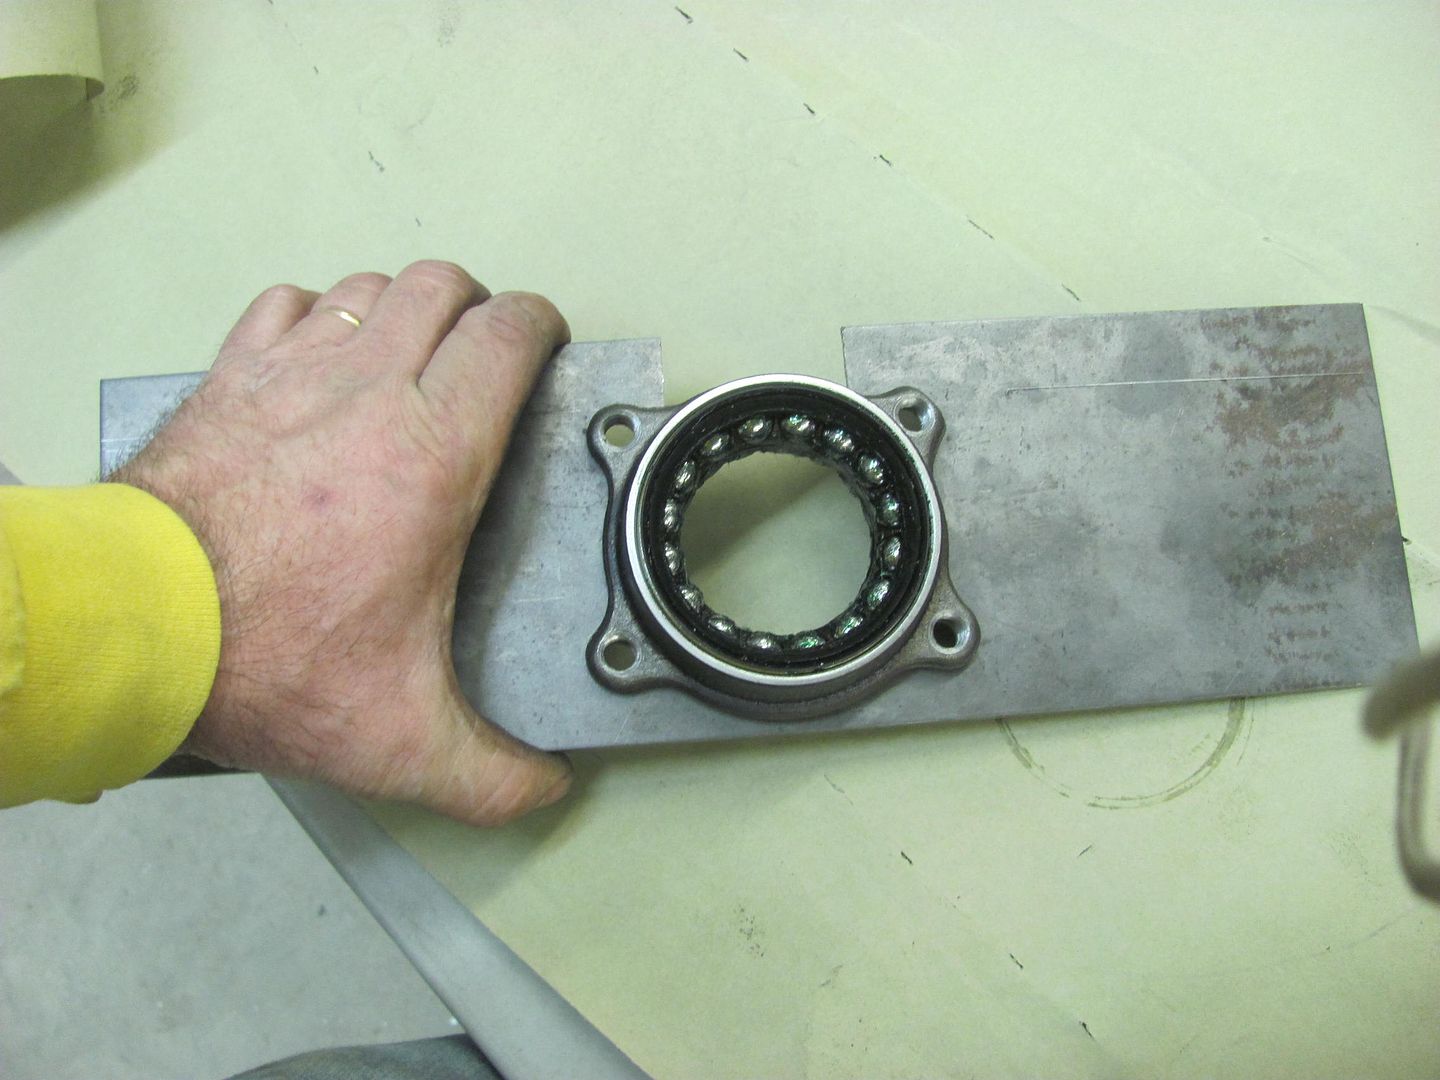 The top will be folded 90* and that flange bolted to the top of the glide blocks here... 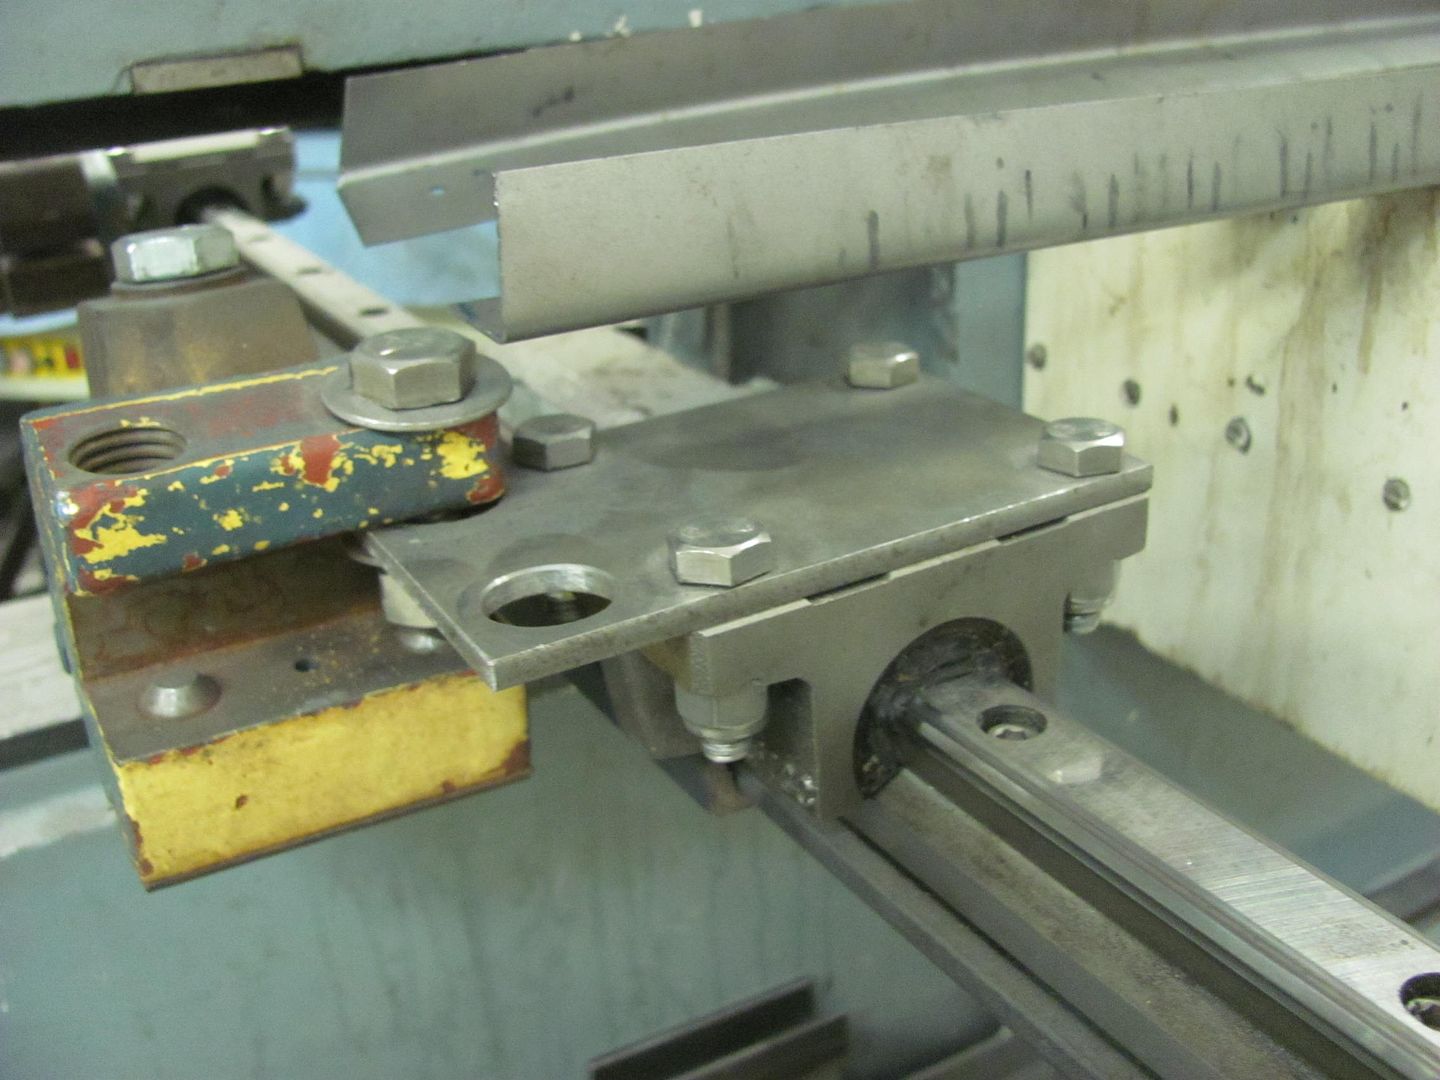 Once complete this should allow us to rotate the inner fenders as we punch the louvers. Oh, and finally, looking at the bare spot in the floor here....  The English Wheel has left the building. It is headed to a Porsche restoration shop on Eastern shore, should be putting out some 356 parts soon..
__________________
Robert |
|
|
|
|
02-25-2016, 11:18 PM
|
#659 |
|
Registered User
Join Date: Jan 2013
Location: Leonardtown, MD
Posts: 1,637
|
Re: 55 Wagon Progress
With the wheel hub faced, the flange is trimmed...
 The attachment bracket....  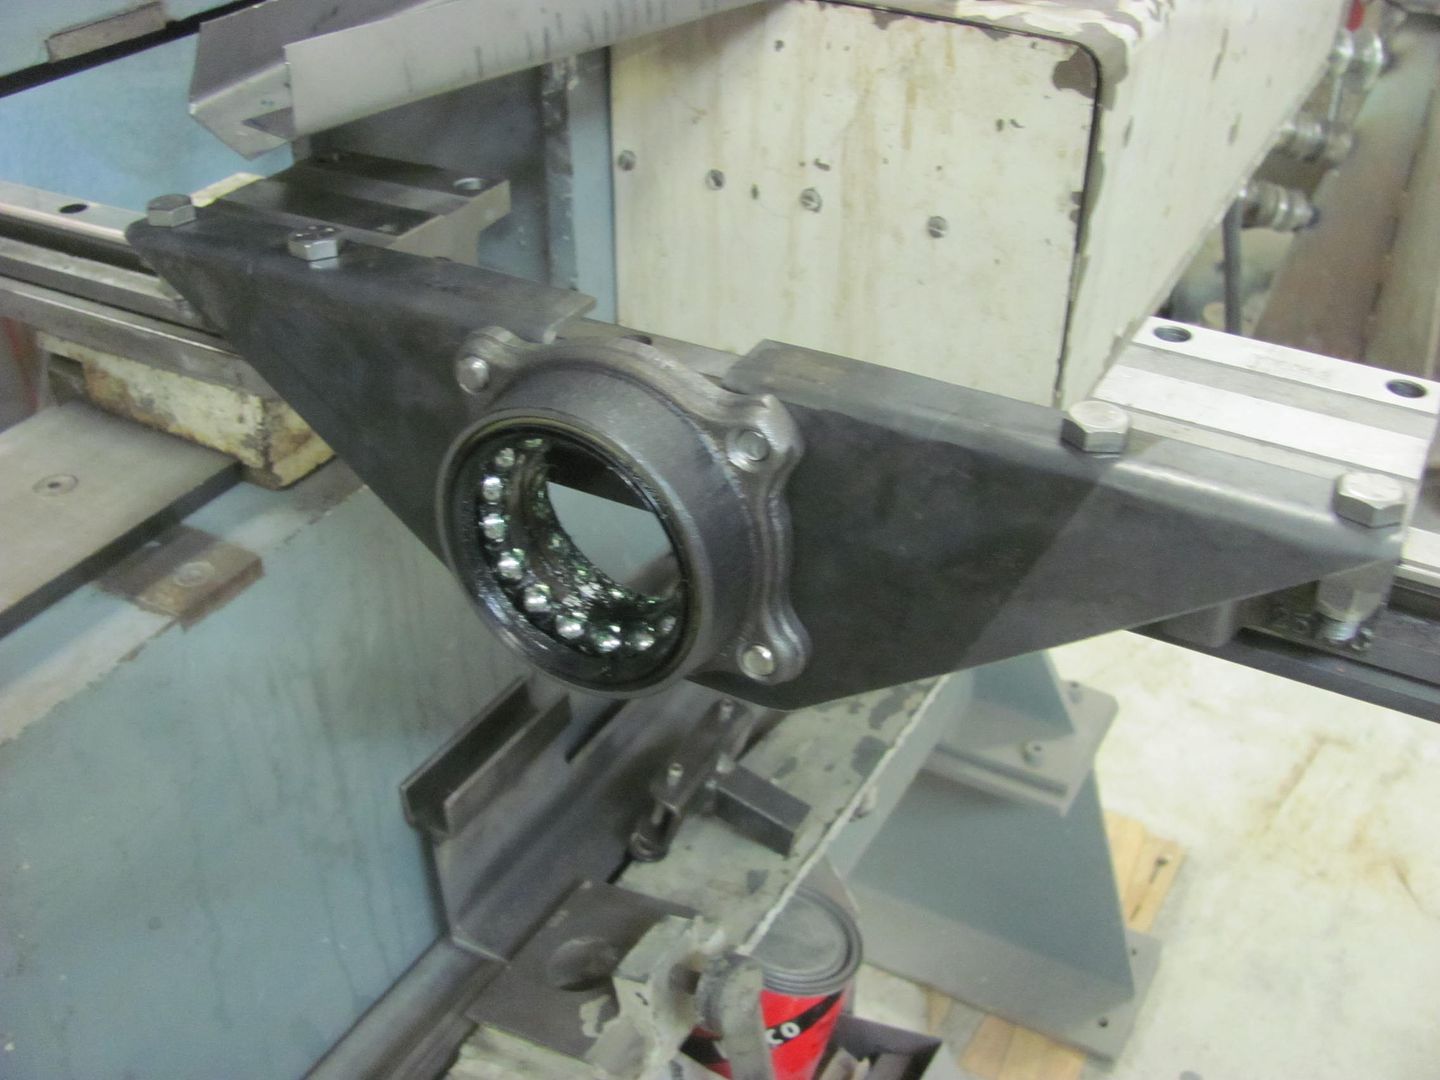 Pressed back together... 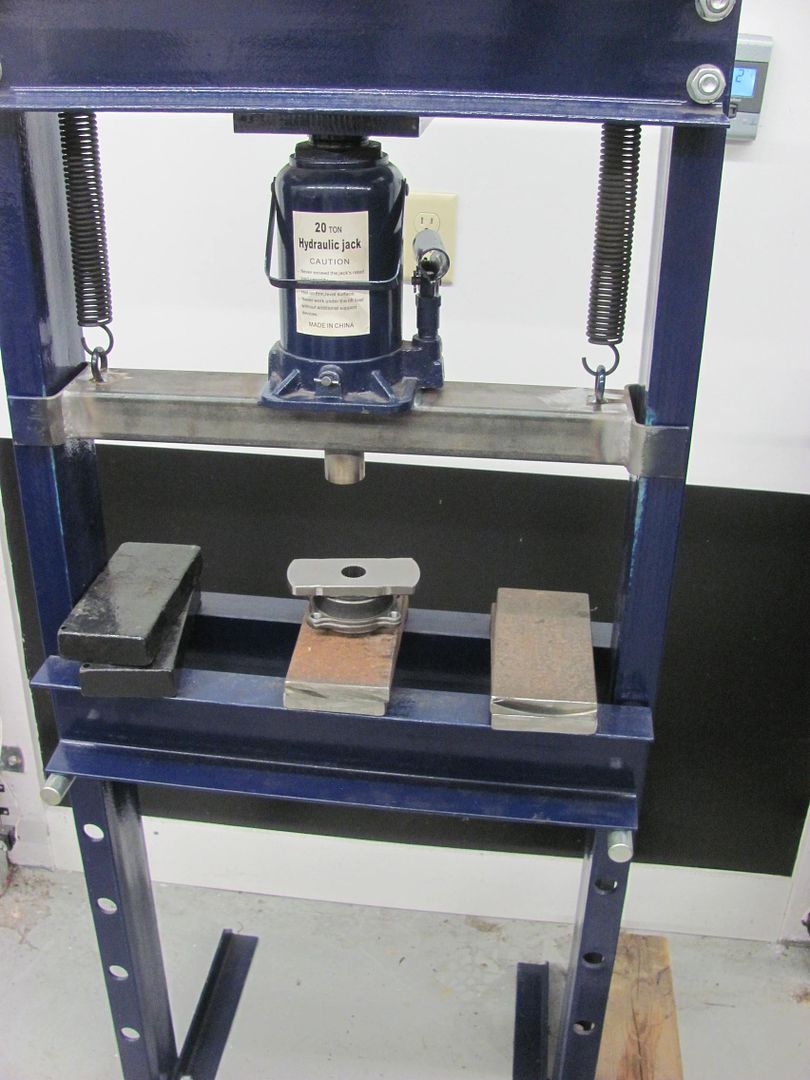 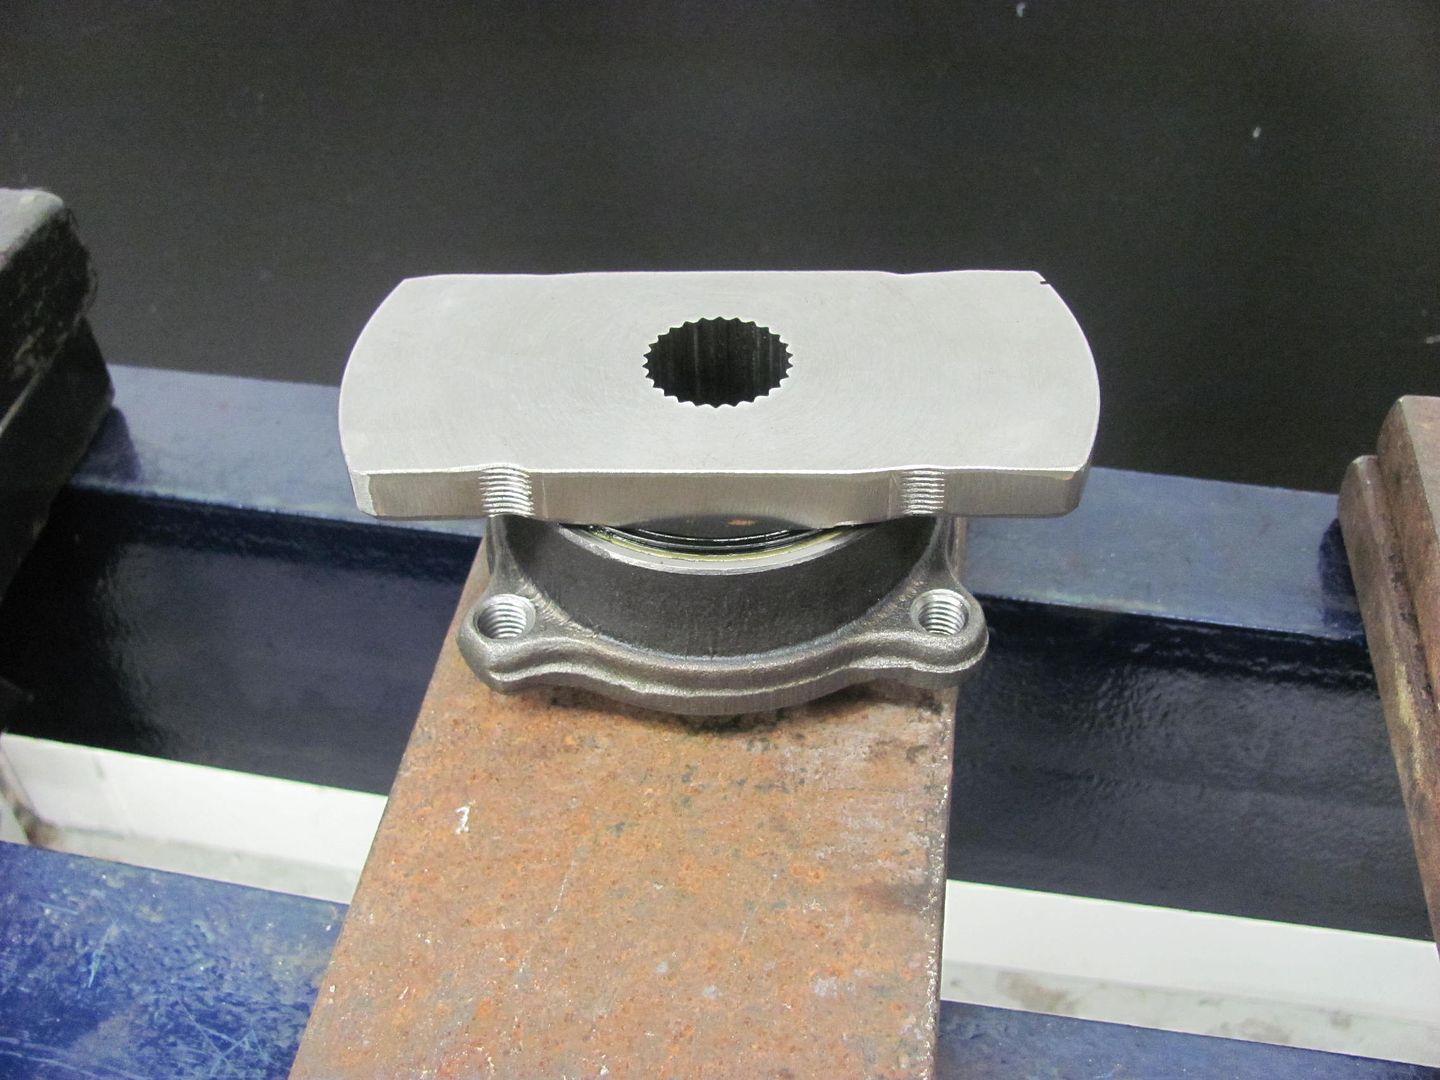 "test run" videos: https://youtu.be/zsDe02QEmyo https://youtu.be/1JB4kHLbjQc 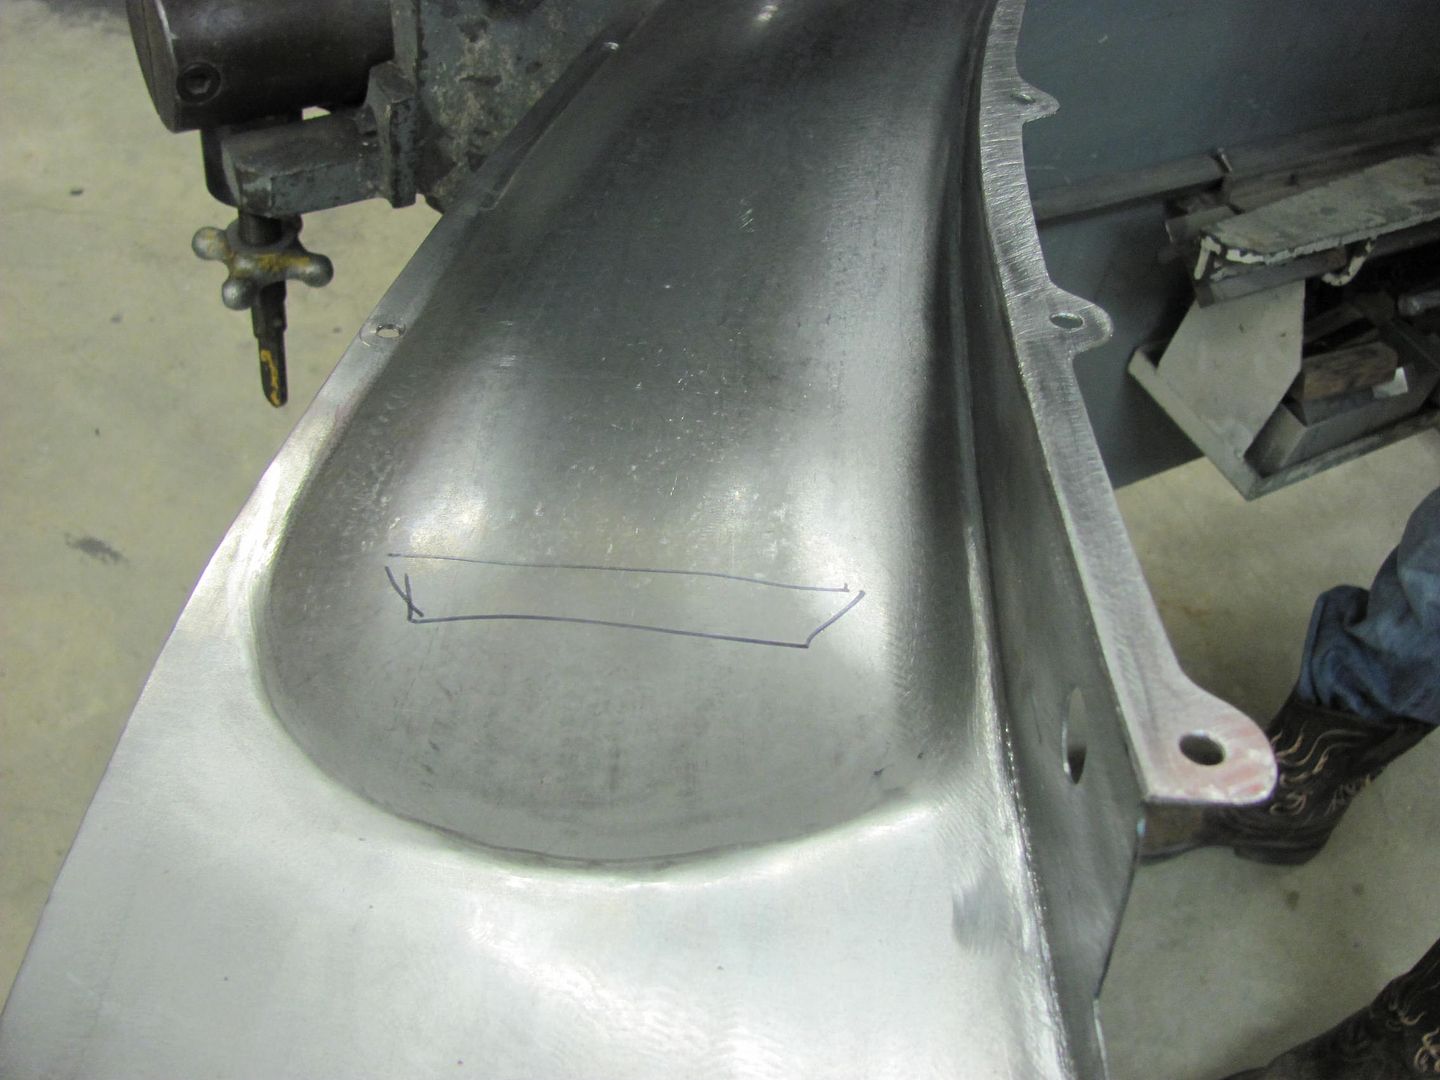 Material clamps should be here tomorrow, so we'll try and get some louvers punched next week.
__________________
Robert |
|
|
|
|
02-26-2016, 11:52 AM
|
#660 |
|
Registered User
Join Date: Jul 2012
Location: Rosenberg, Texas
Posts: 3,506
|
Re: 55 Wagon Progress
That's pretty clever. It's cool seeing it in action, even if it is a "test run". I bet that makes things easier this time around.
__________________
-Duane C/10 Club Texas member 1971 Chevy C10 "Brutus" SWB Fleetside 2016 6.0L (L96) 6L90E (driver/project) 1965 Pontiac GTO "Royal Goat" 400/TH400 w/AC (my baby) |
|
|
|
|
02-26-2016, 12:08 PM
|
#661 |
|
Registered User
Join Date: Apr 2011
Location: .
Posts: 3,104
|
Re: 55 Wagon Progress
Nice set up.
dig the cowboy boots. |
|
|
|
|
03-01-2016, 11:57 PM
|
#662 |
|
Registered User
Join Date: Jan 2013
Location: Leonardtown, MD
Posts: 1,637
|
Re: 55 Wagon Progress
Thanks for the comments guys.
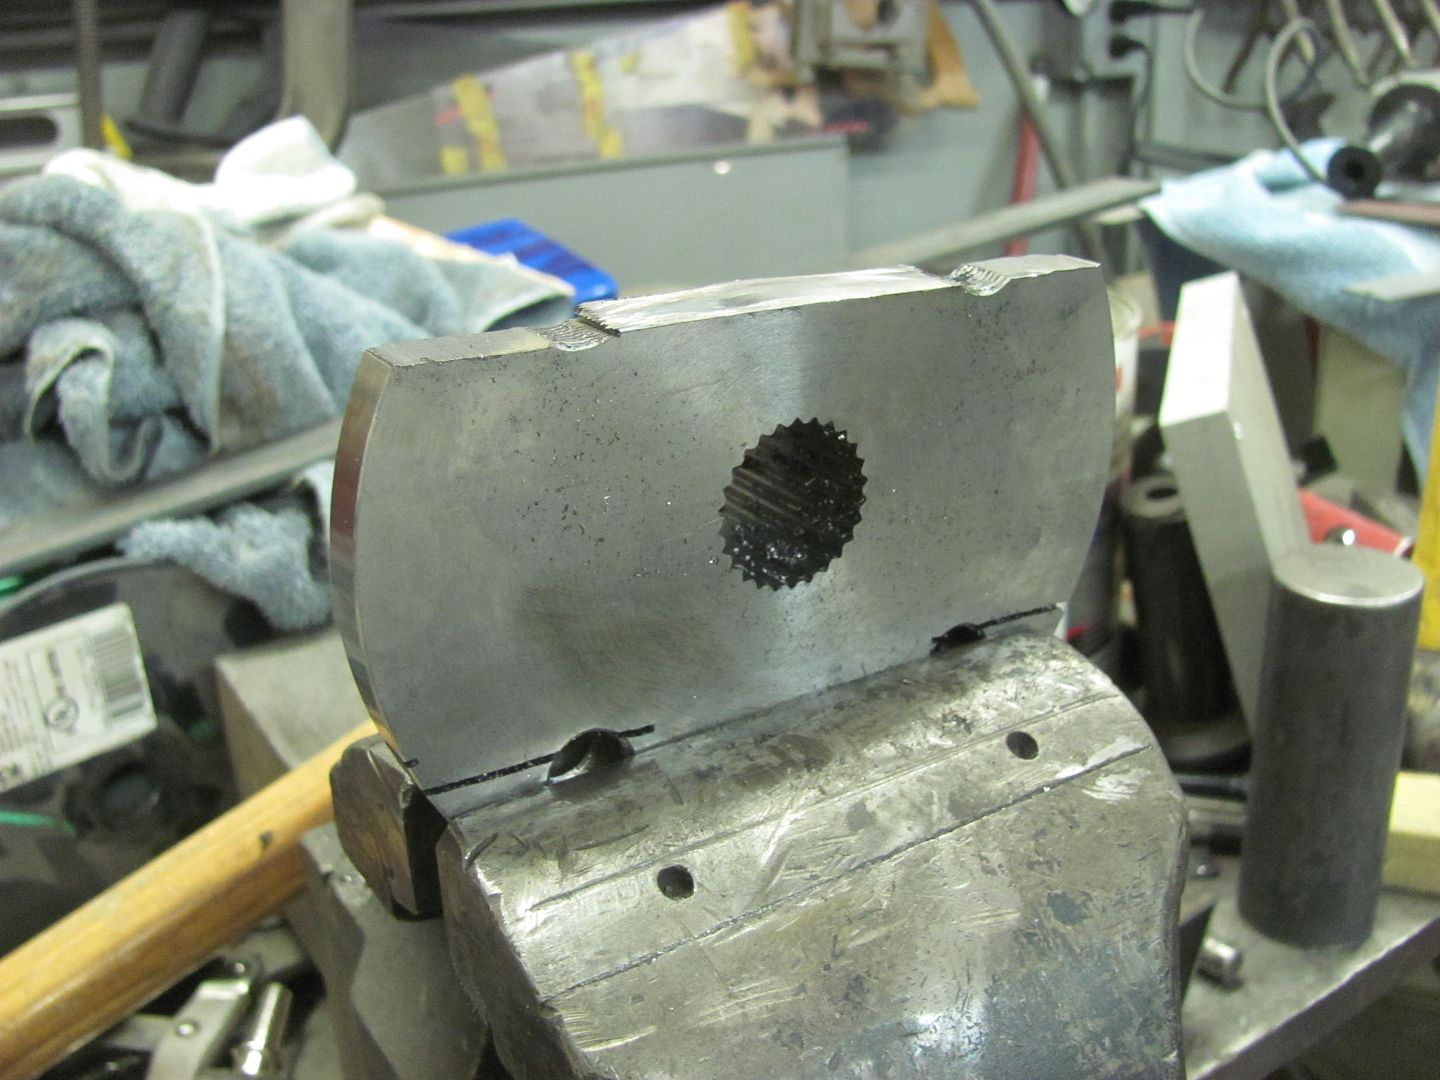
Worked on some louvers tonight, wanted to get some practice pieces done to see how well our "theory" might fare. Kyle cutting an inside lip off the clamp before cutting it in half.. 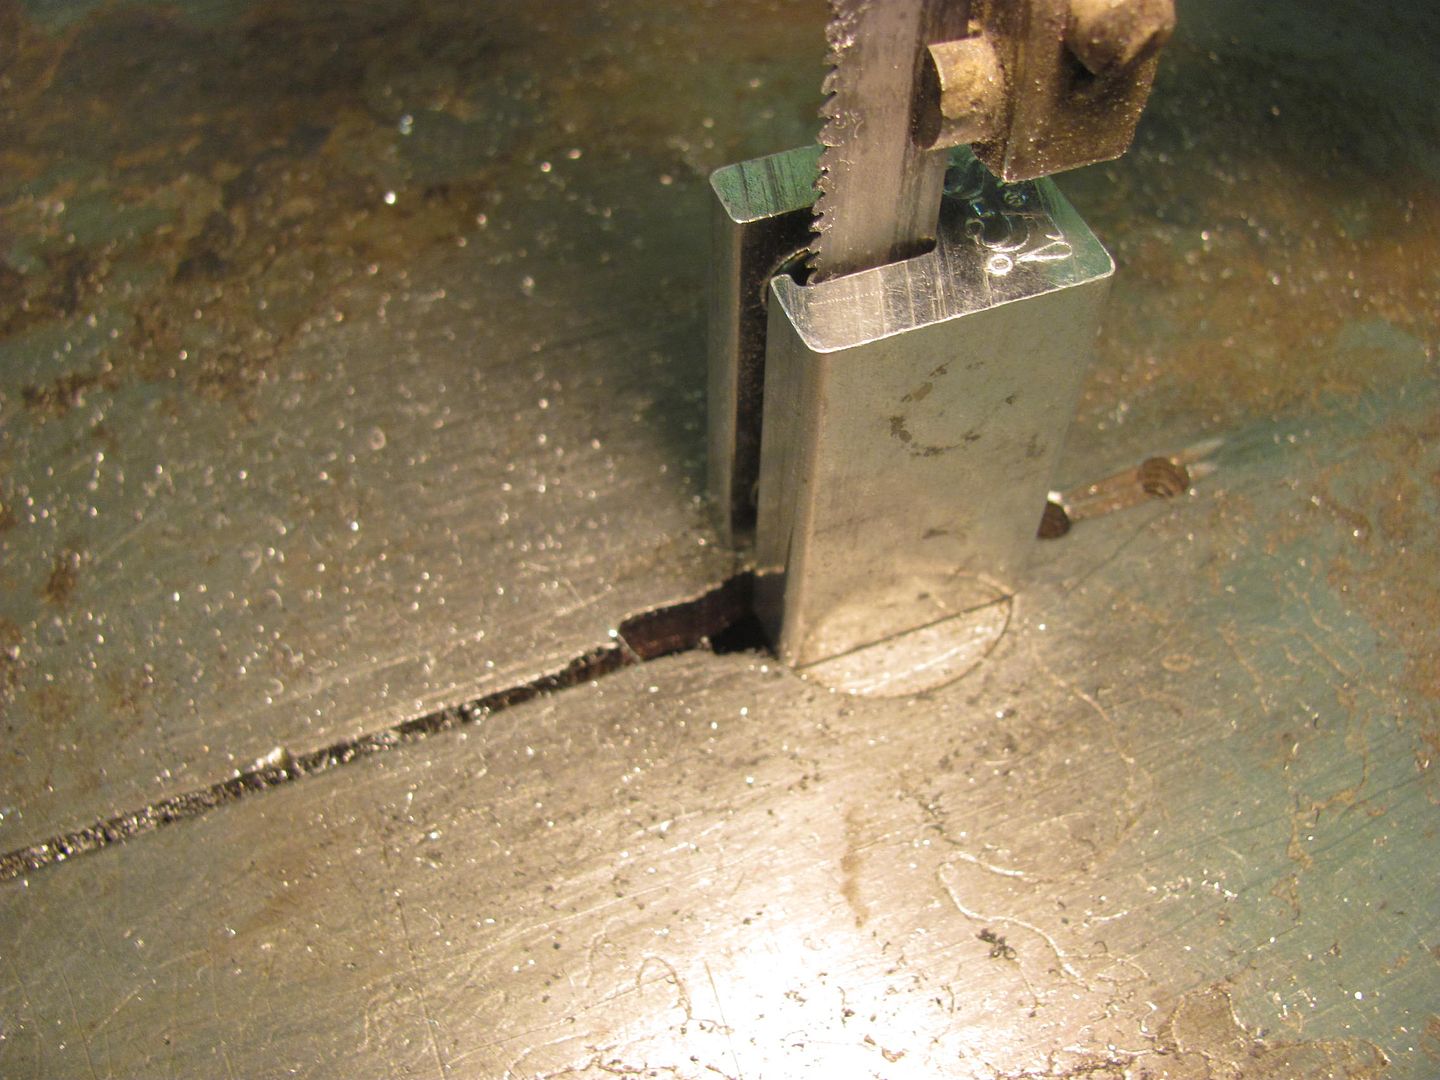 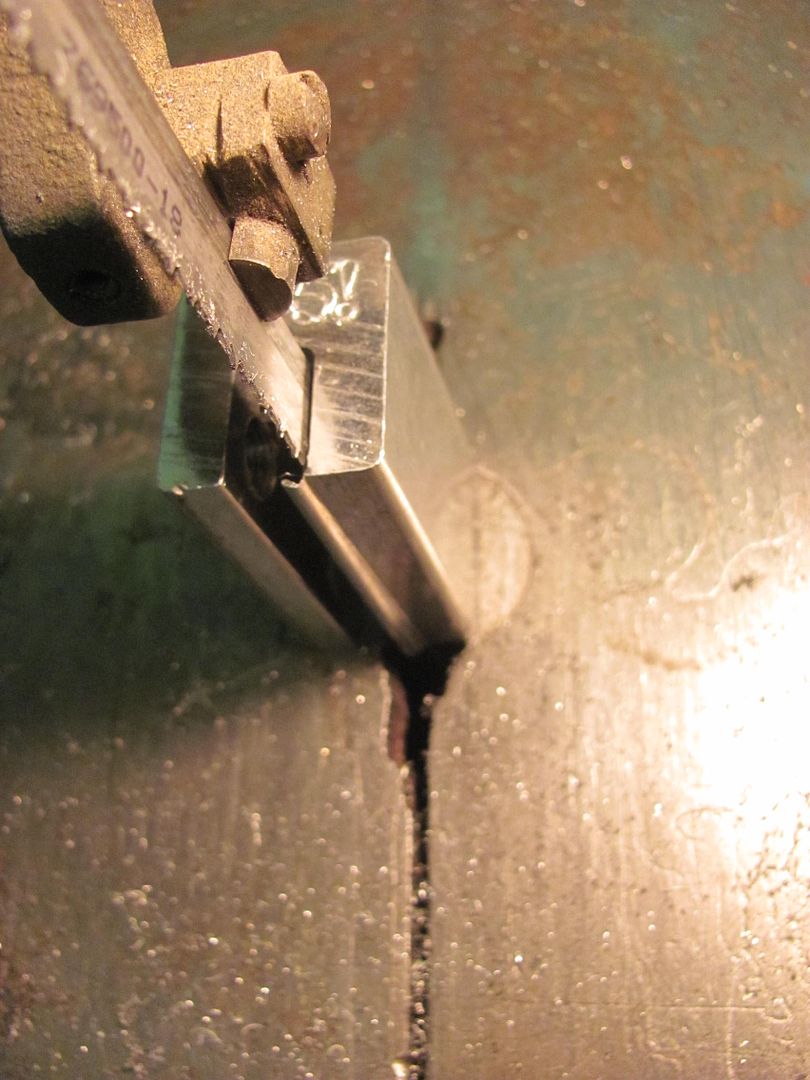 Meanwhile I got the holes (and some spares for height adjustment) drilled in the wheel hub flange... 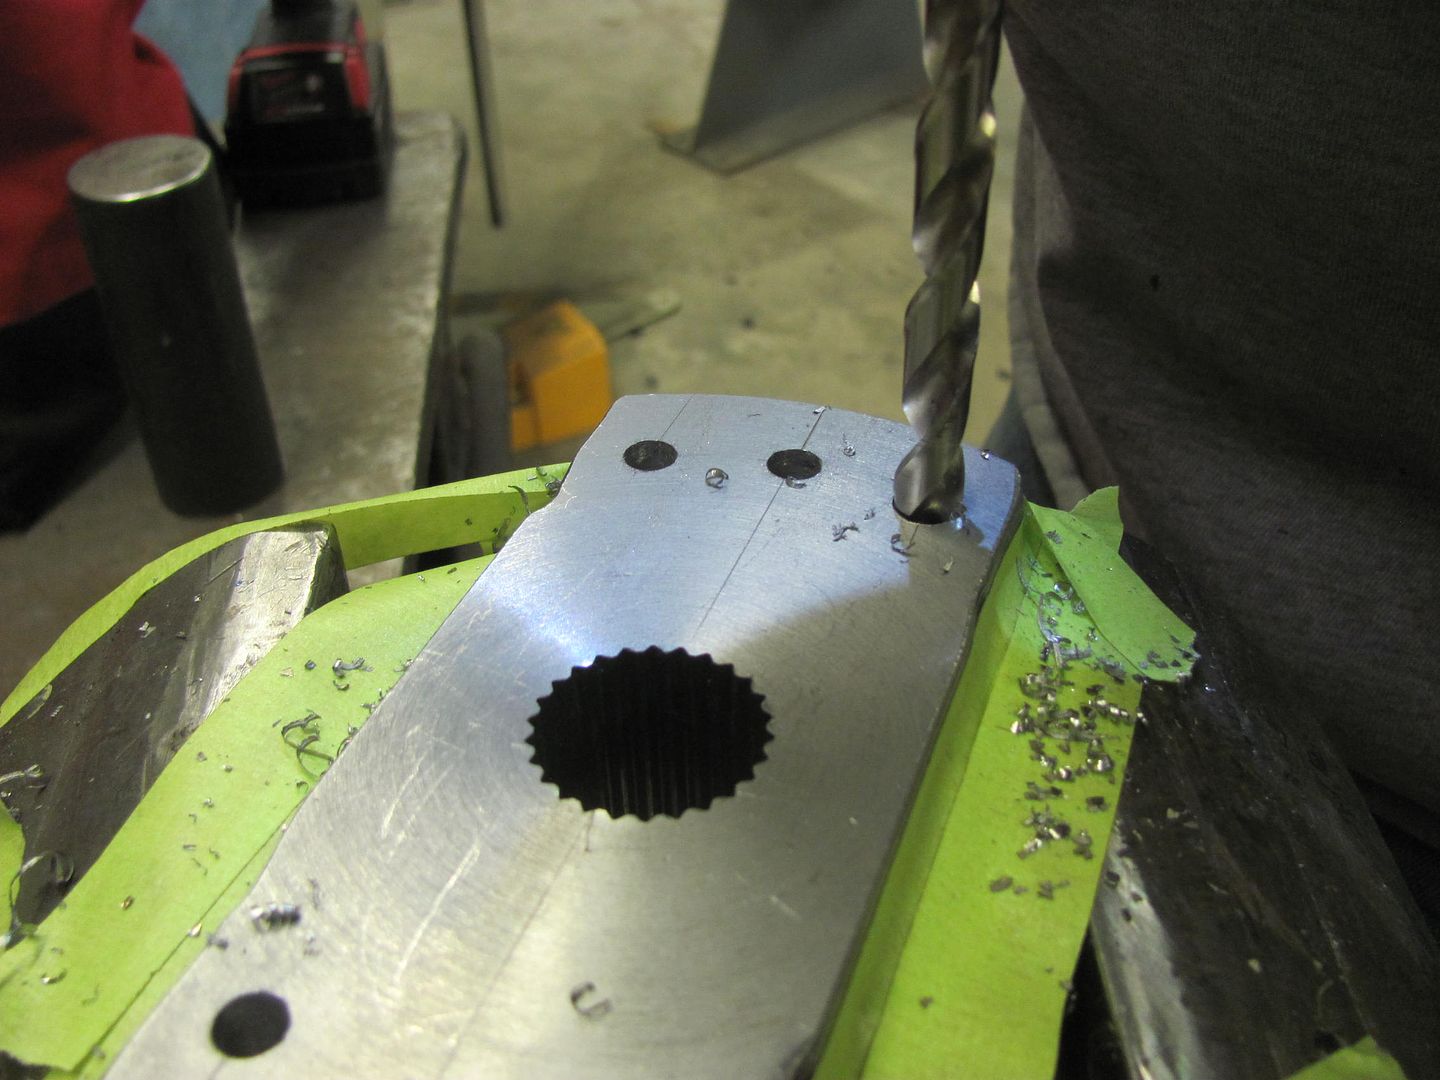 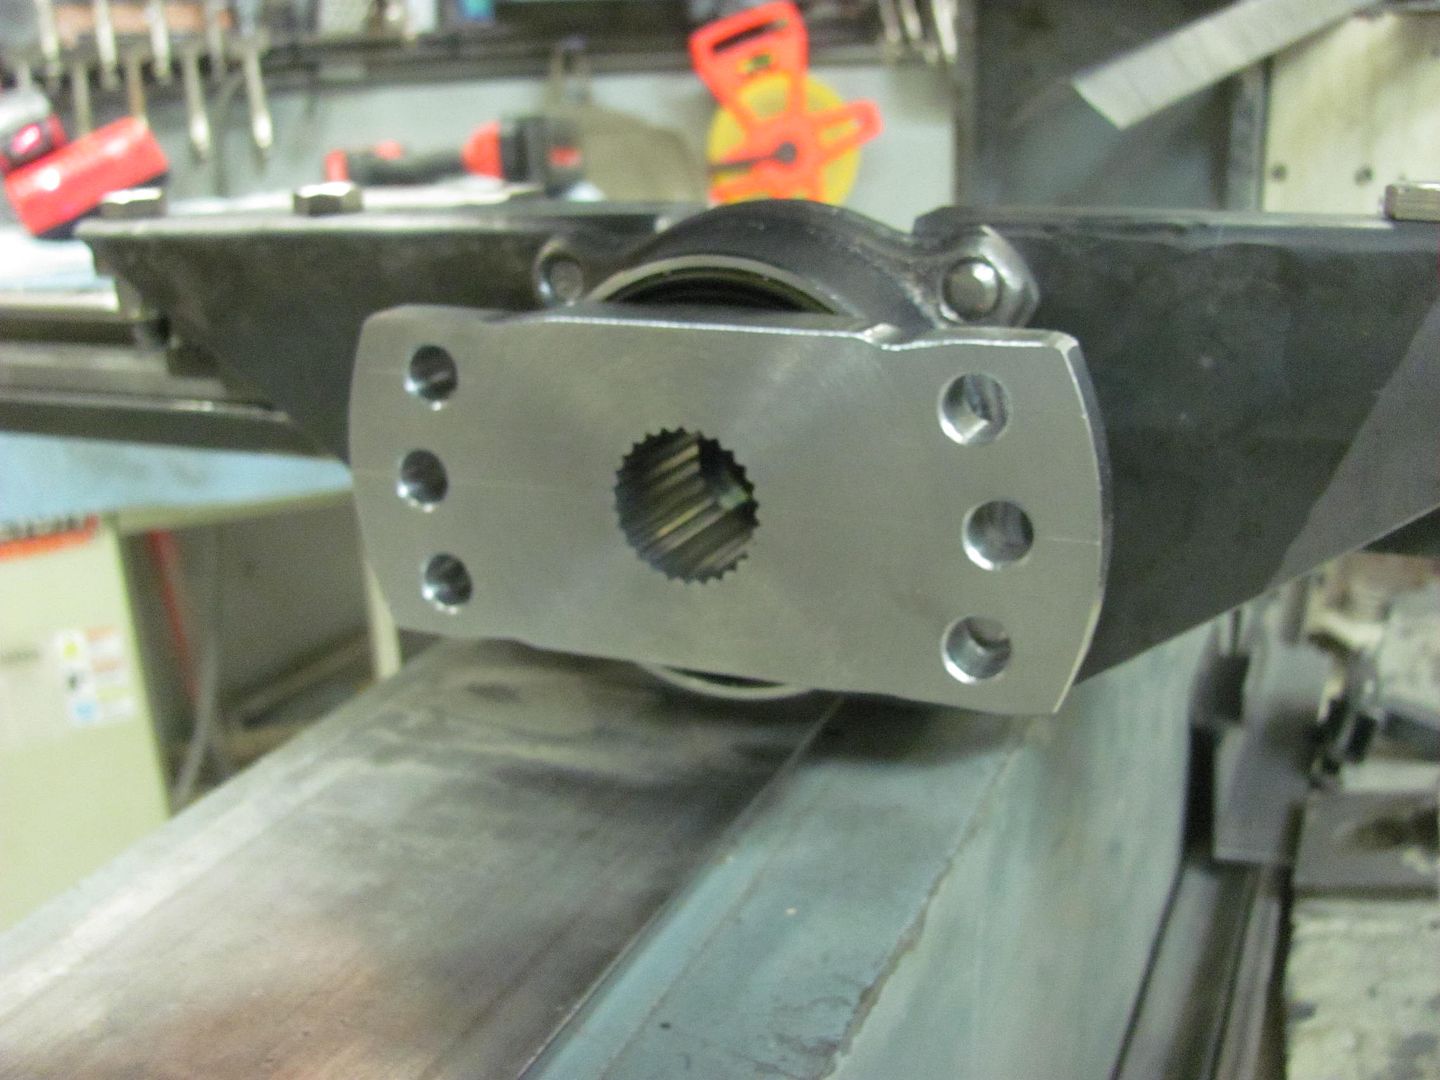 Clamps added... 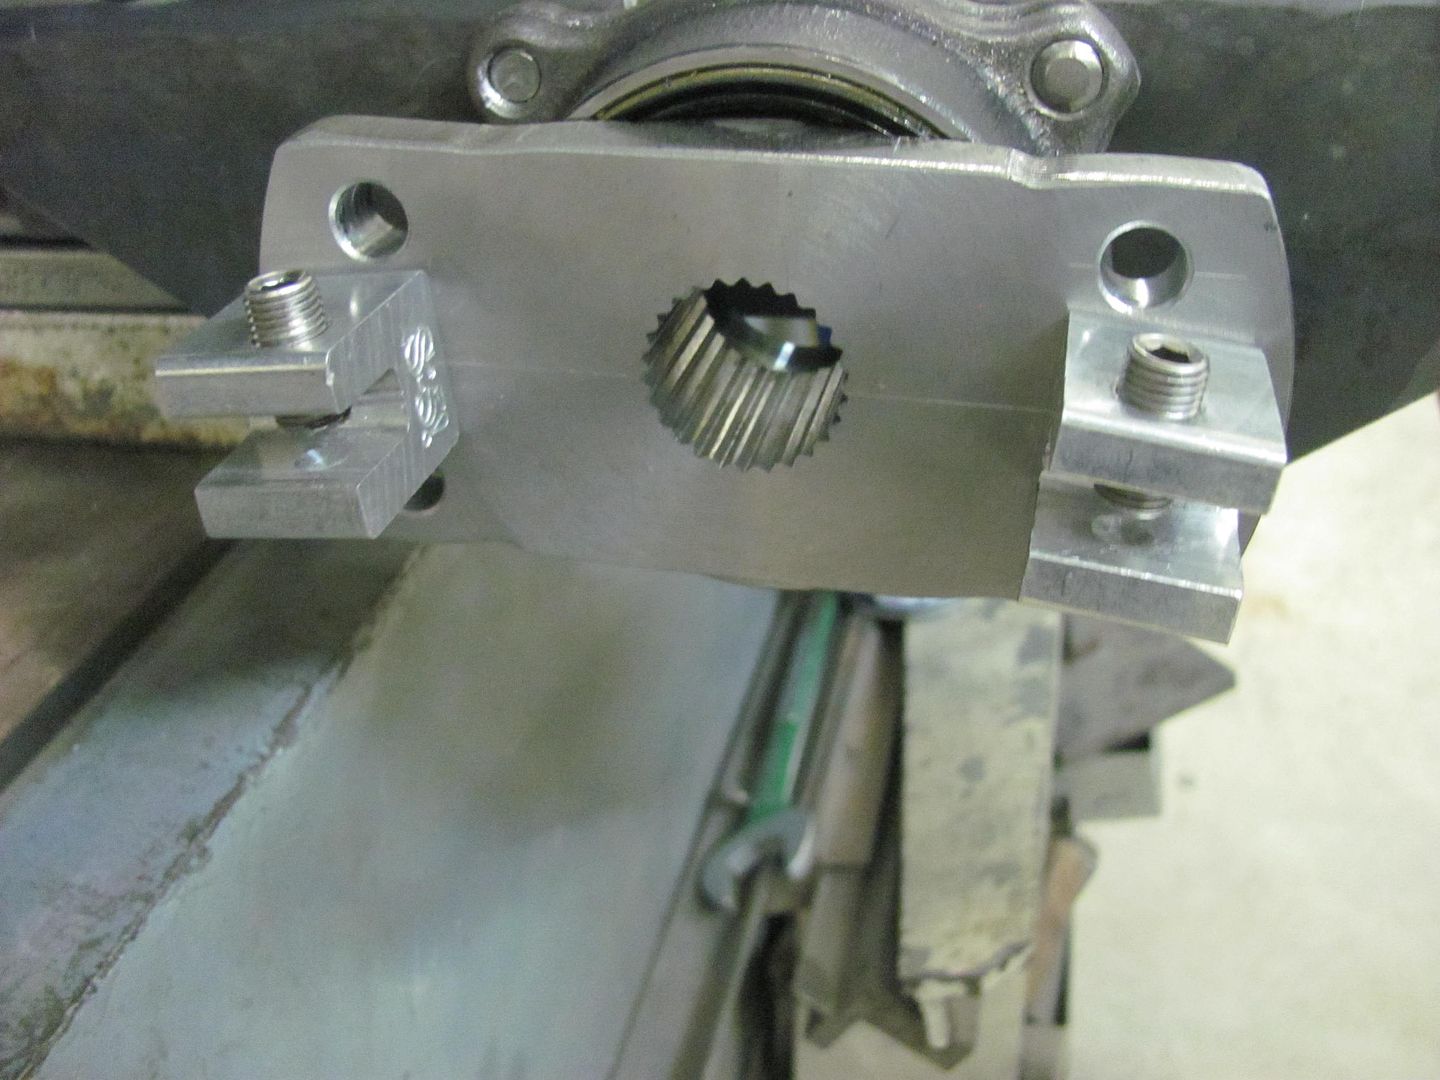 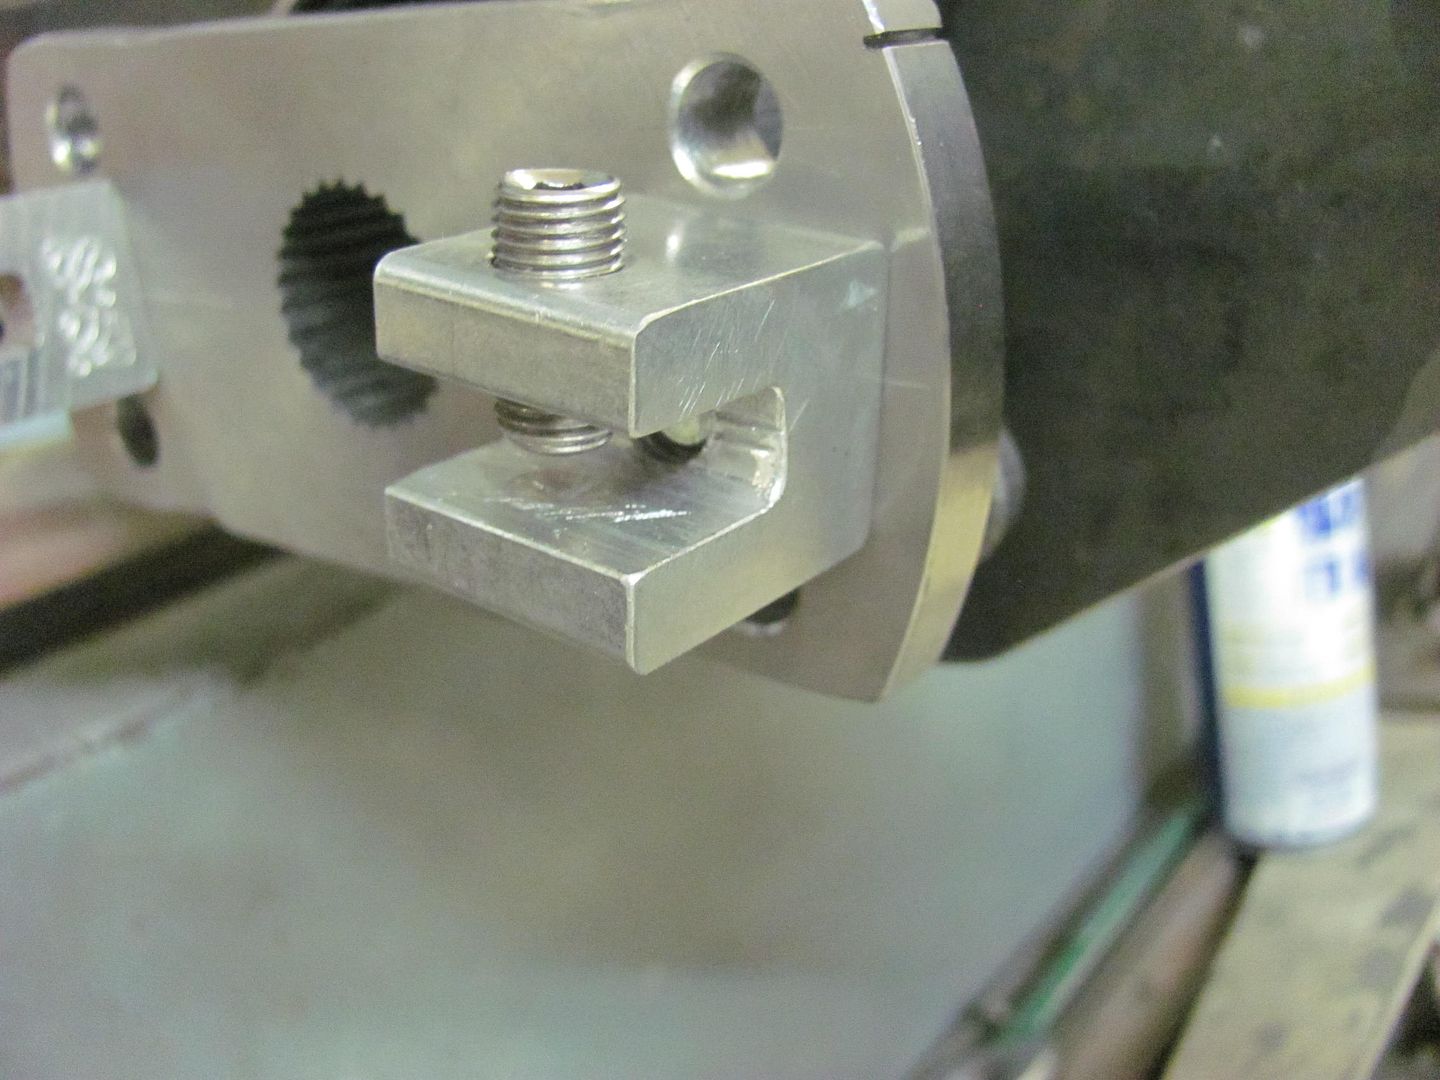 We used a "squaring plate" to align the panel for louver angle.. 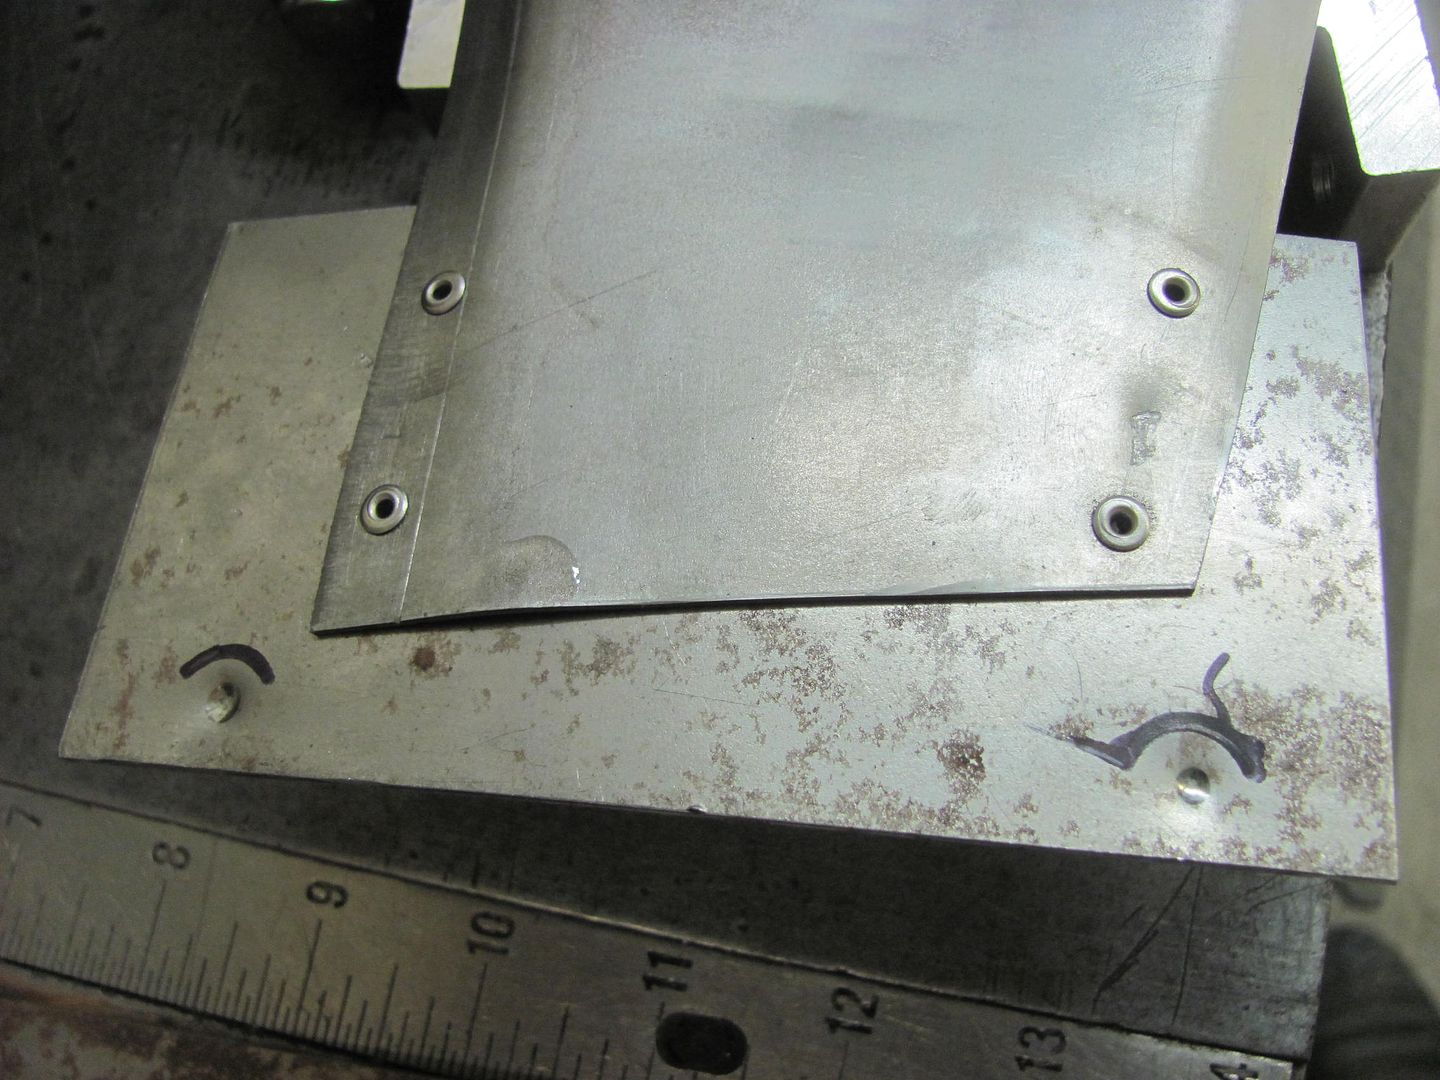 The punch needed some relieving to insure the corners didn't hit the inside radius of the panel... 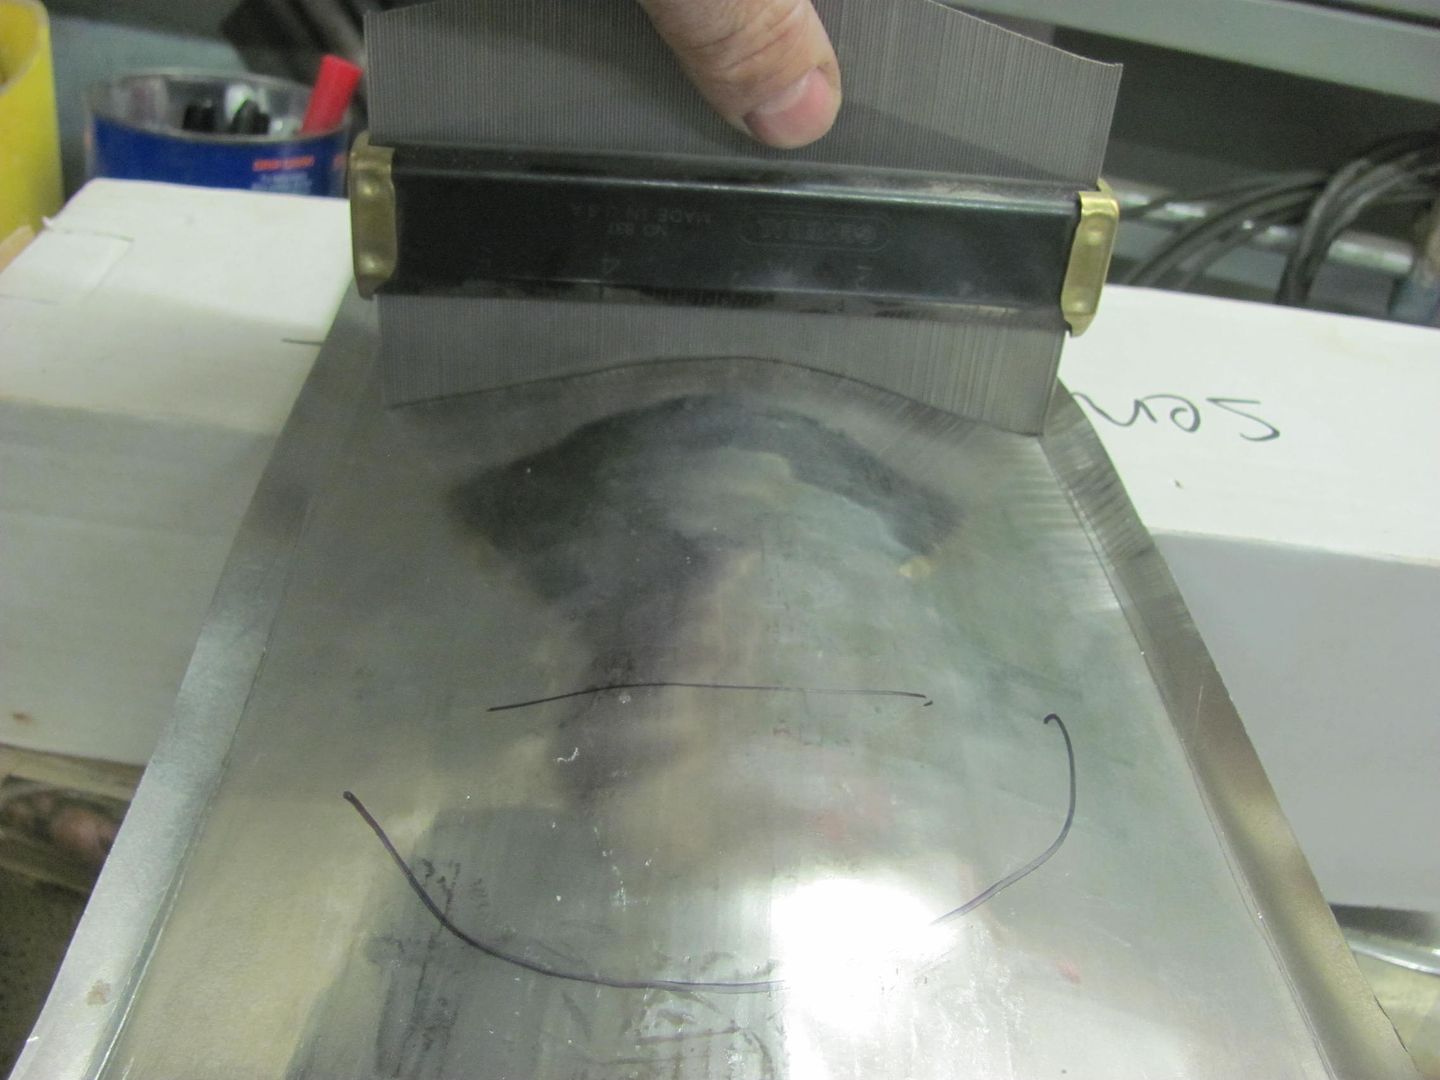 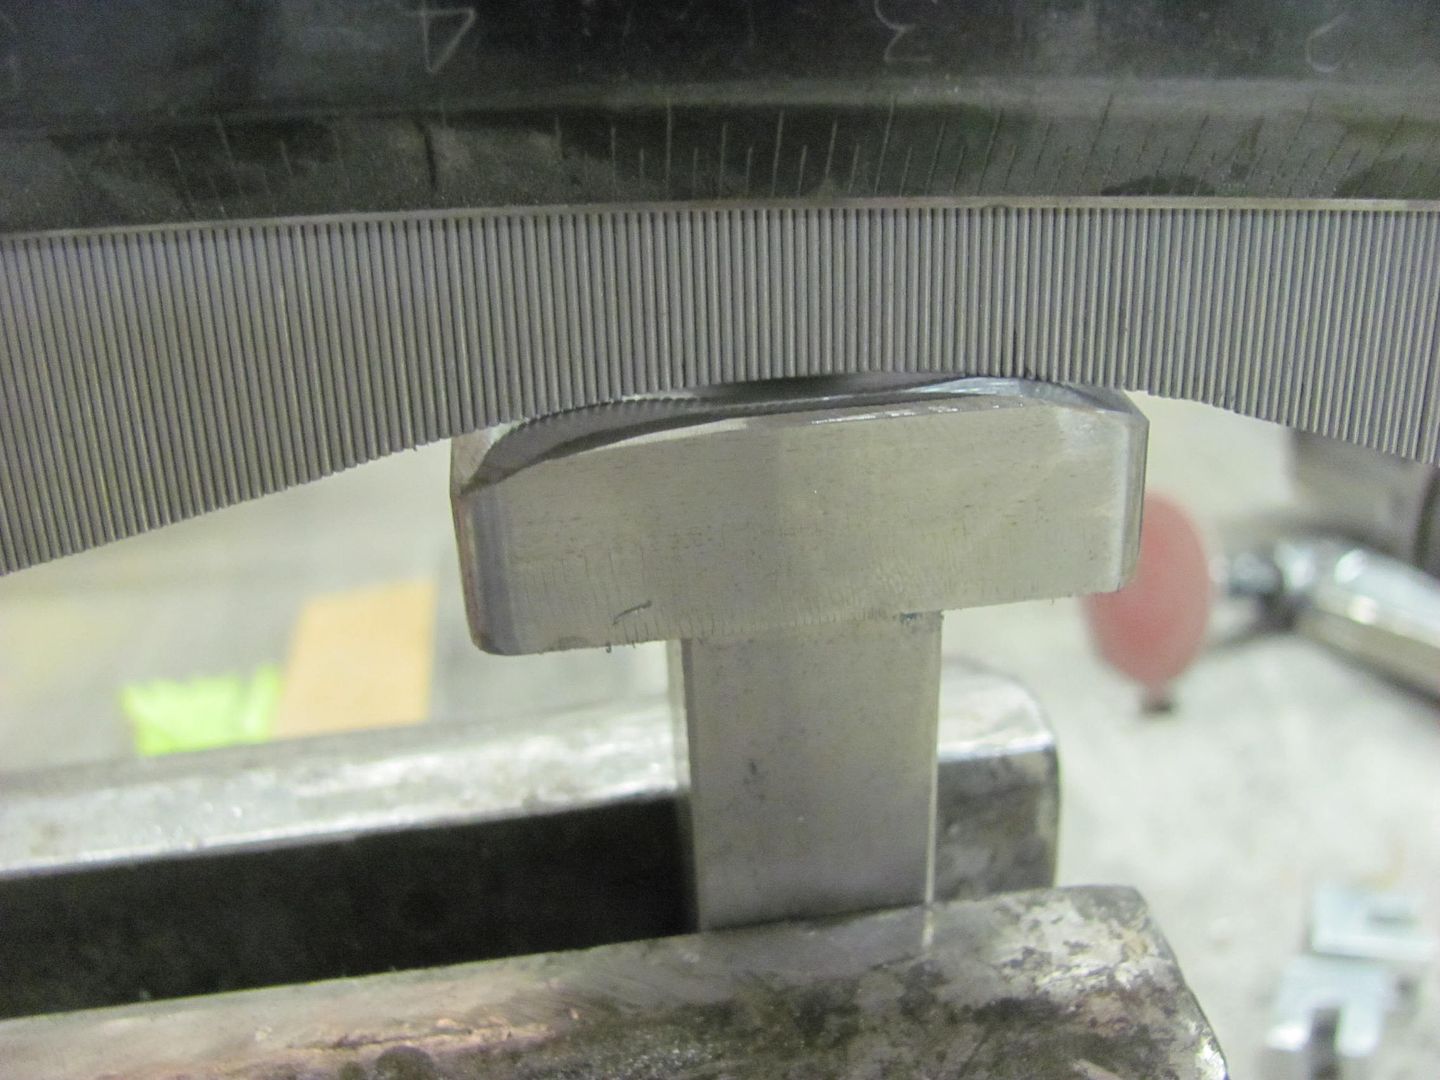 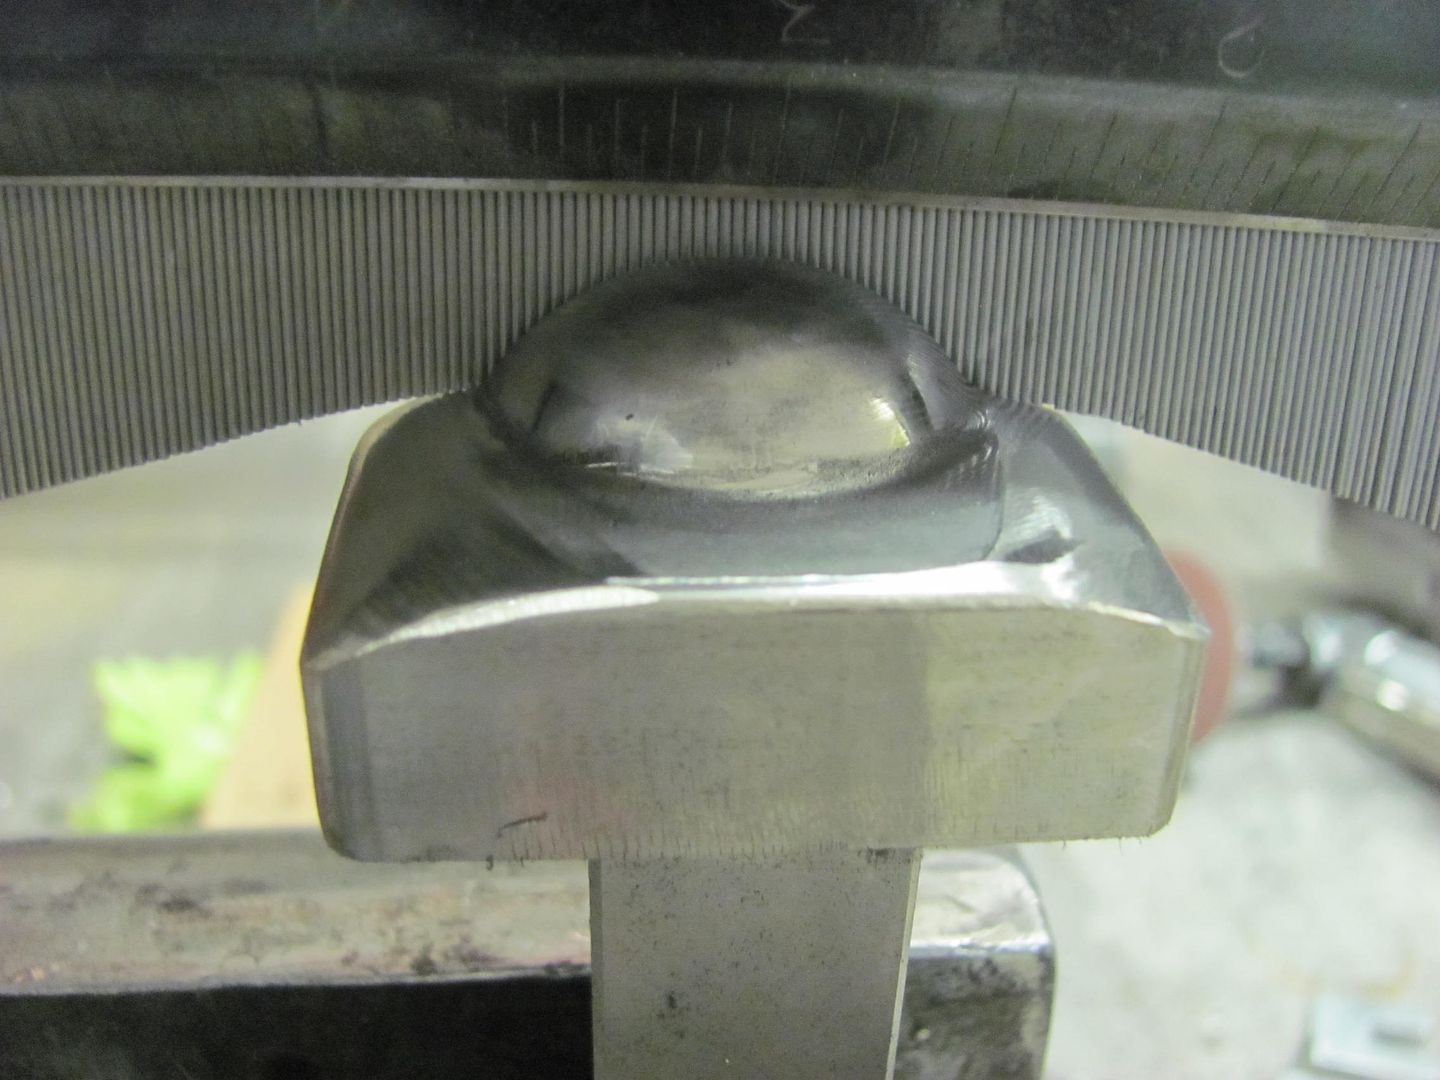 Cleaned up the grinder marks with a Scotchbrite pad.. 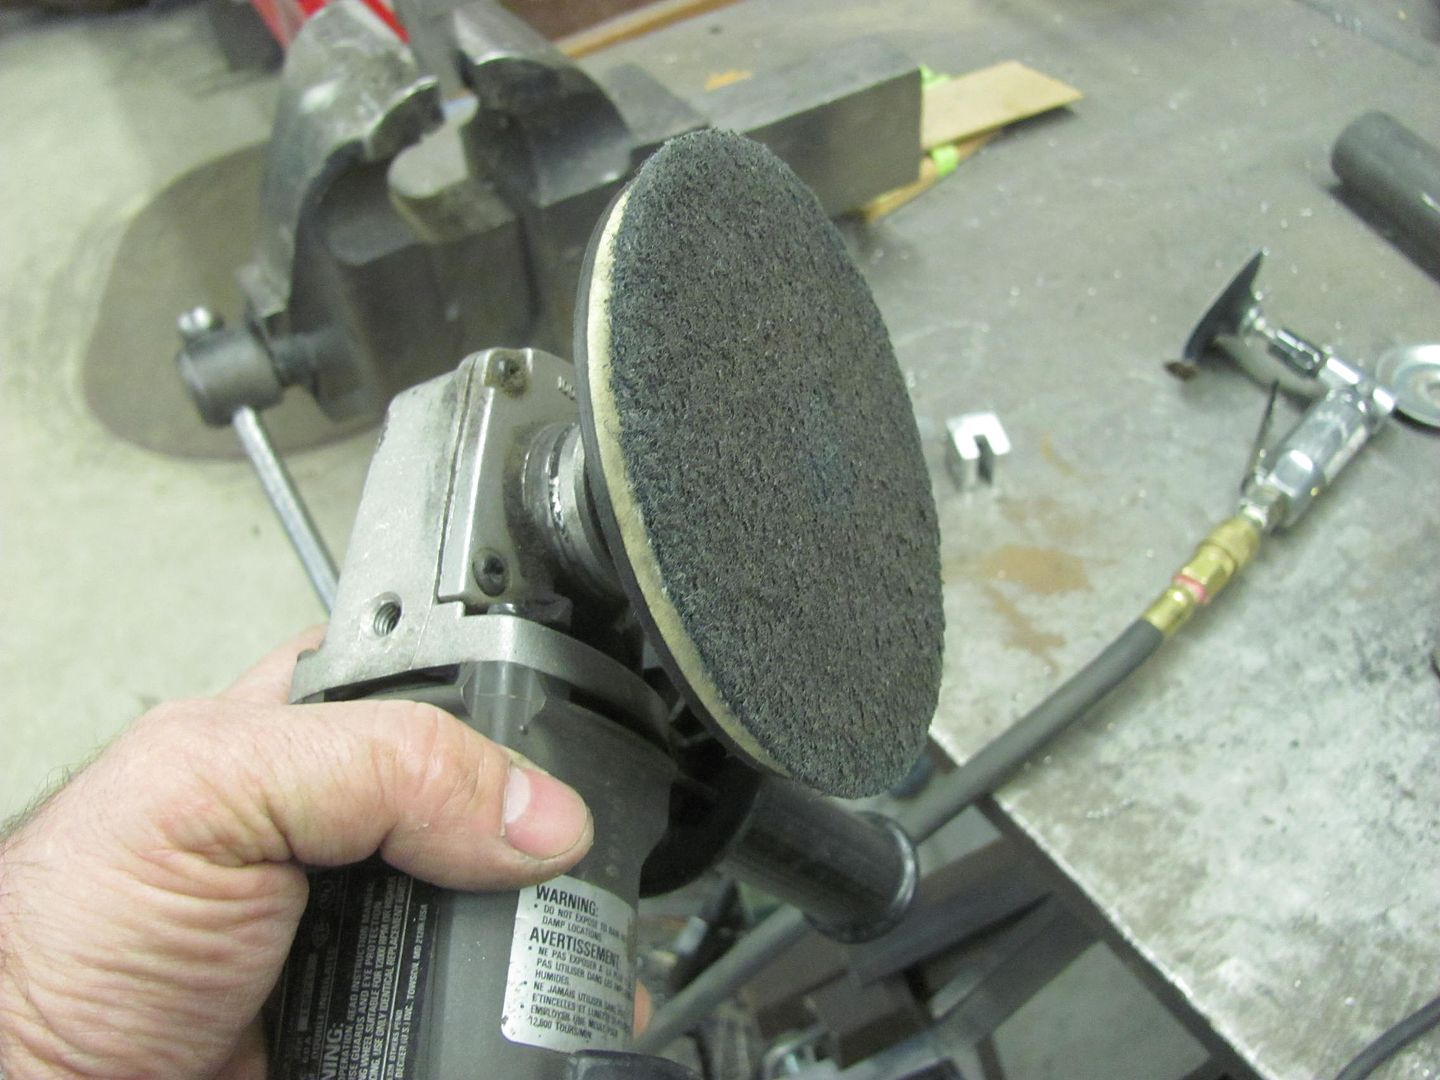 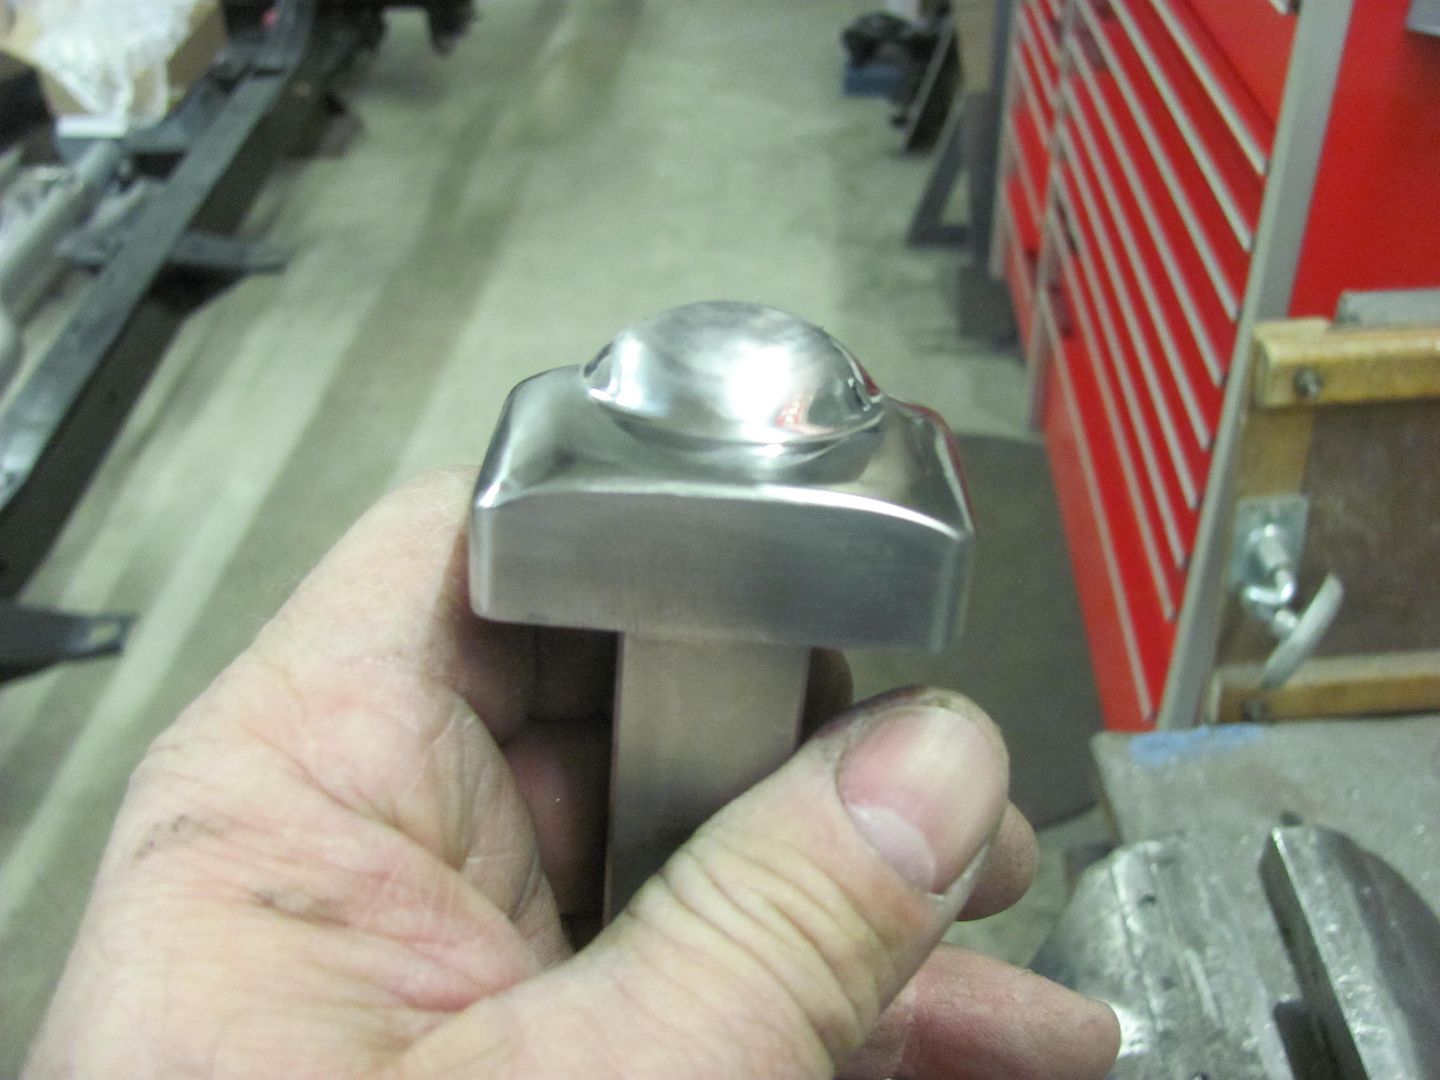 Looking at the louvers... Action shots: https://youtu.be/EEyI10qb4BI 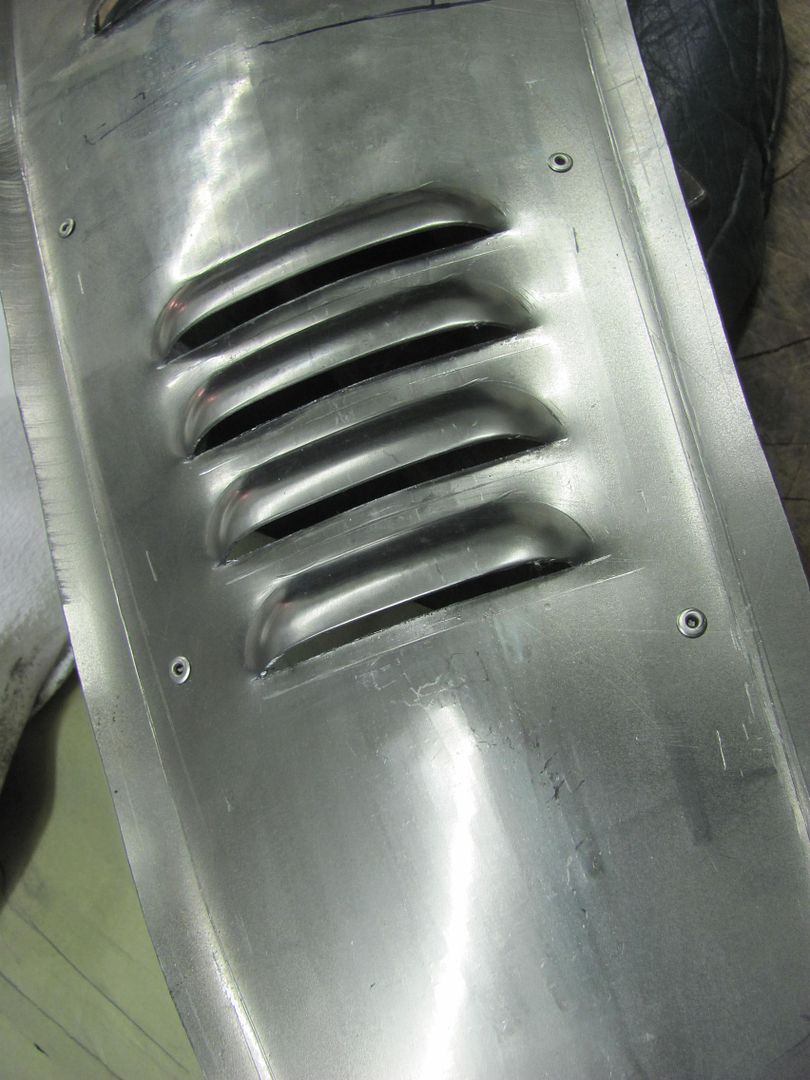  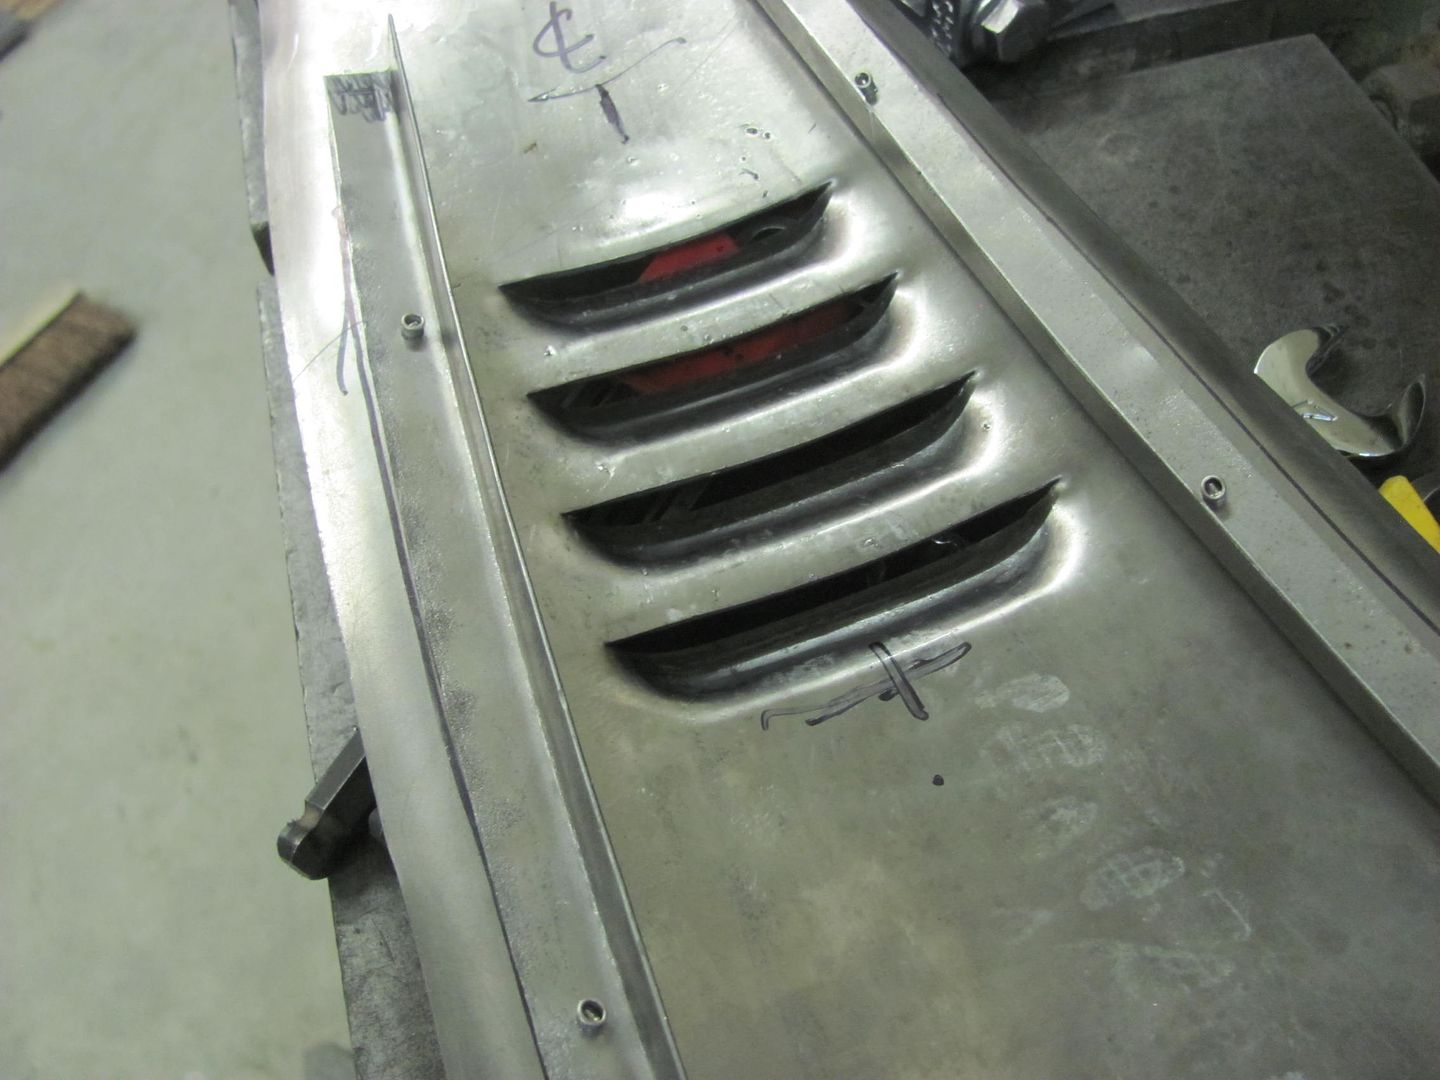 We have some more relieving to do on the tooling to eliminate some marking, then we'll do one more practice piece before breaking into the good stuff..
__________________
Robert |
|
|
|
|
03-02-2016, 01:55 AM
|
#663 |
|
Registered User
Join Date: Apr 2011
Location: .
Posts: 3,104
|
Re: 55 Wagon Progress
Incredible. Thanks for the how to.
|
|
|
|
|
03-03-2016, 11:49 PM
|
#664 |
|
Registered User
Join Date: Jan 2013
Location: Leonardtown, MD
Posts: 1,637
|
Re: 55 Wagon Progress
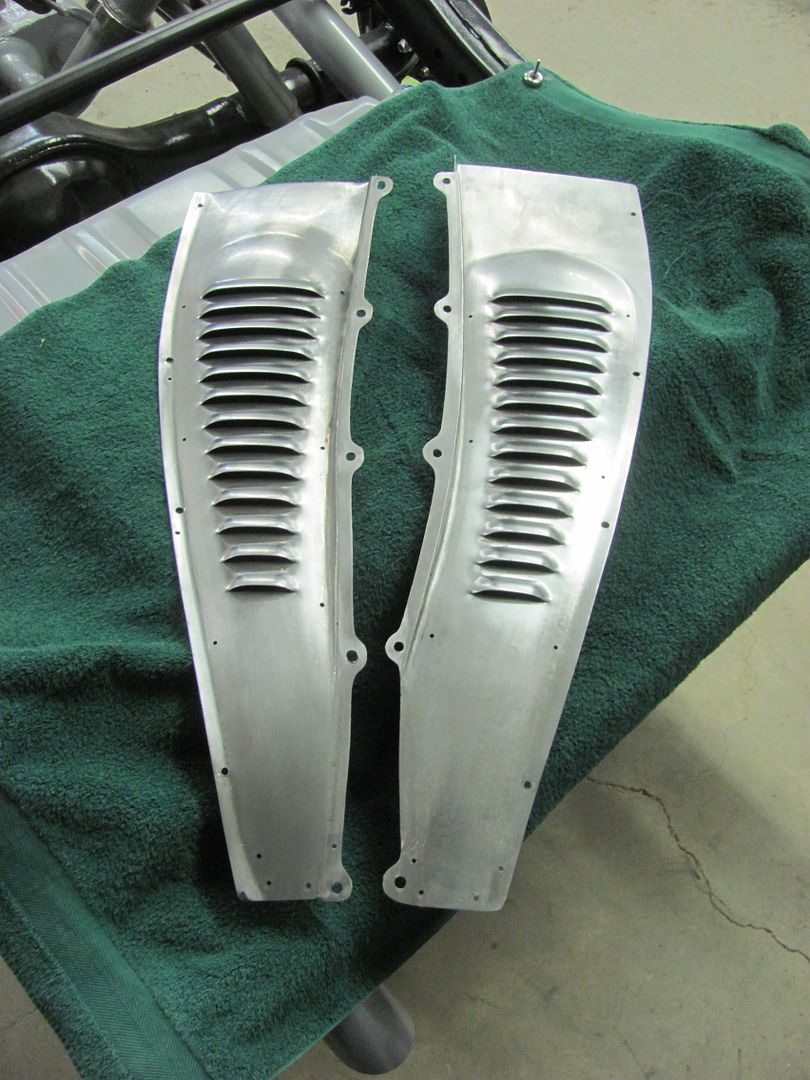
Here's the next practice panel as compared to Cody's inner fender panel..
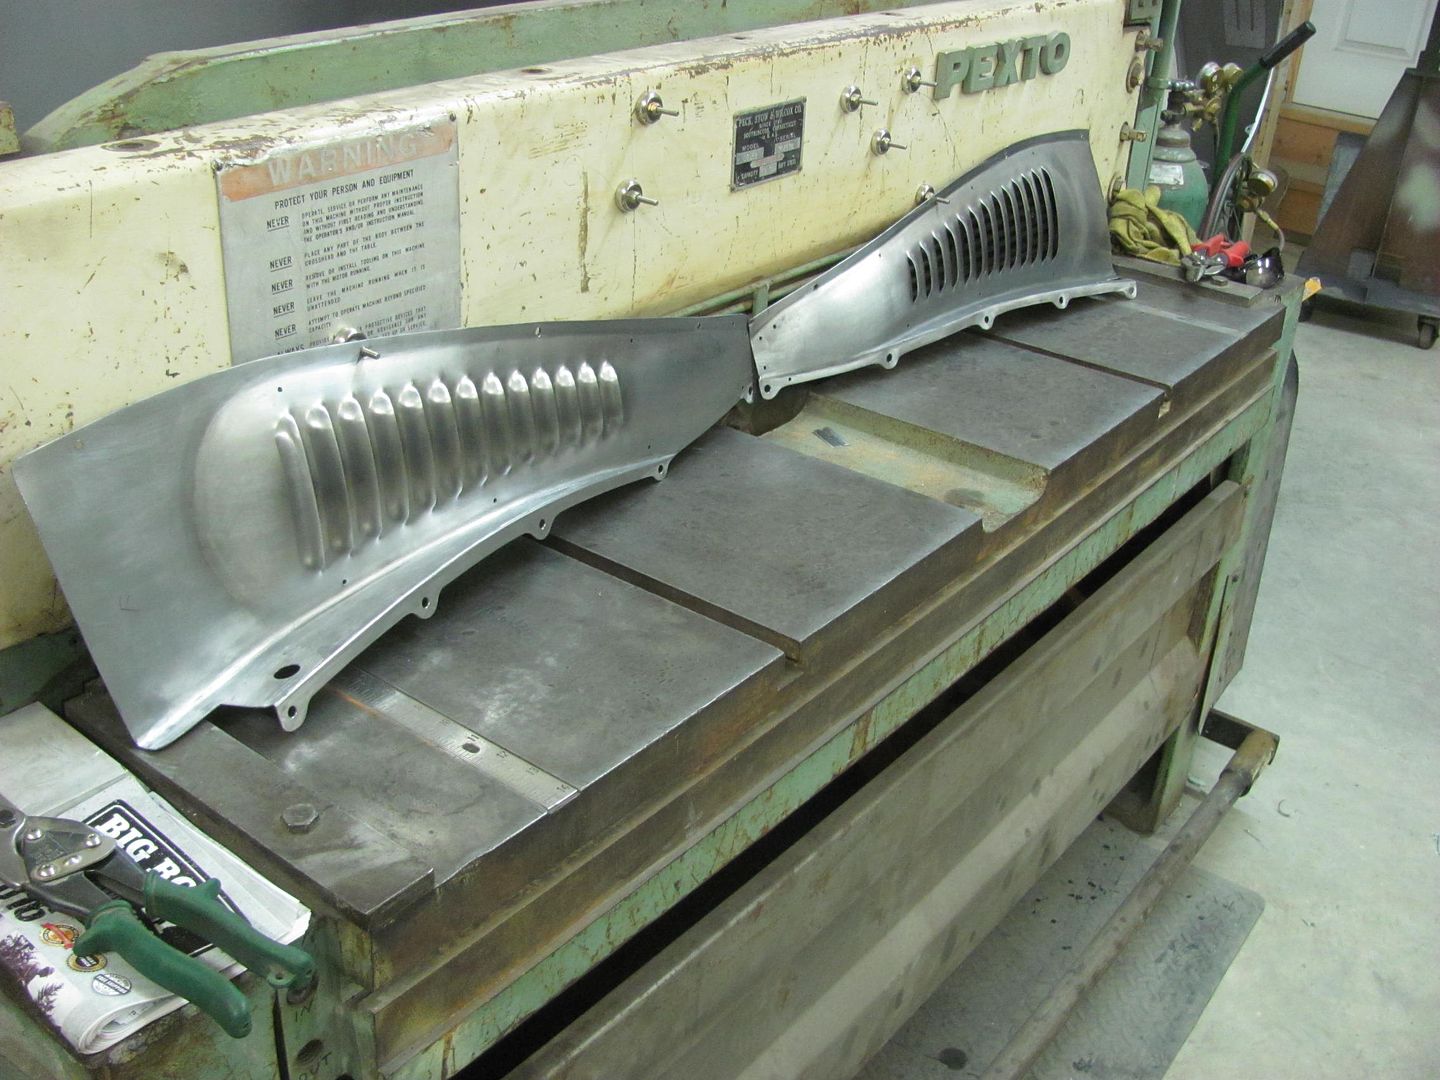
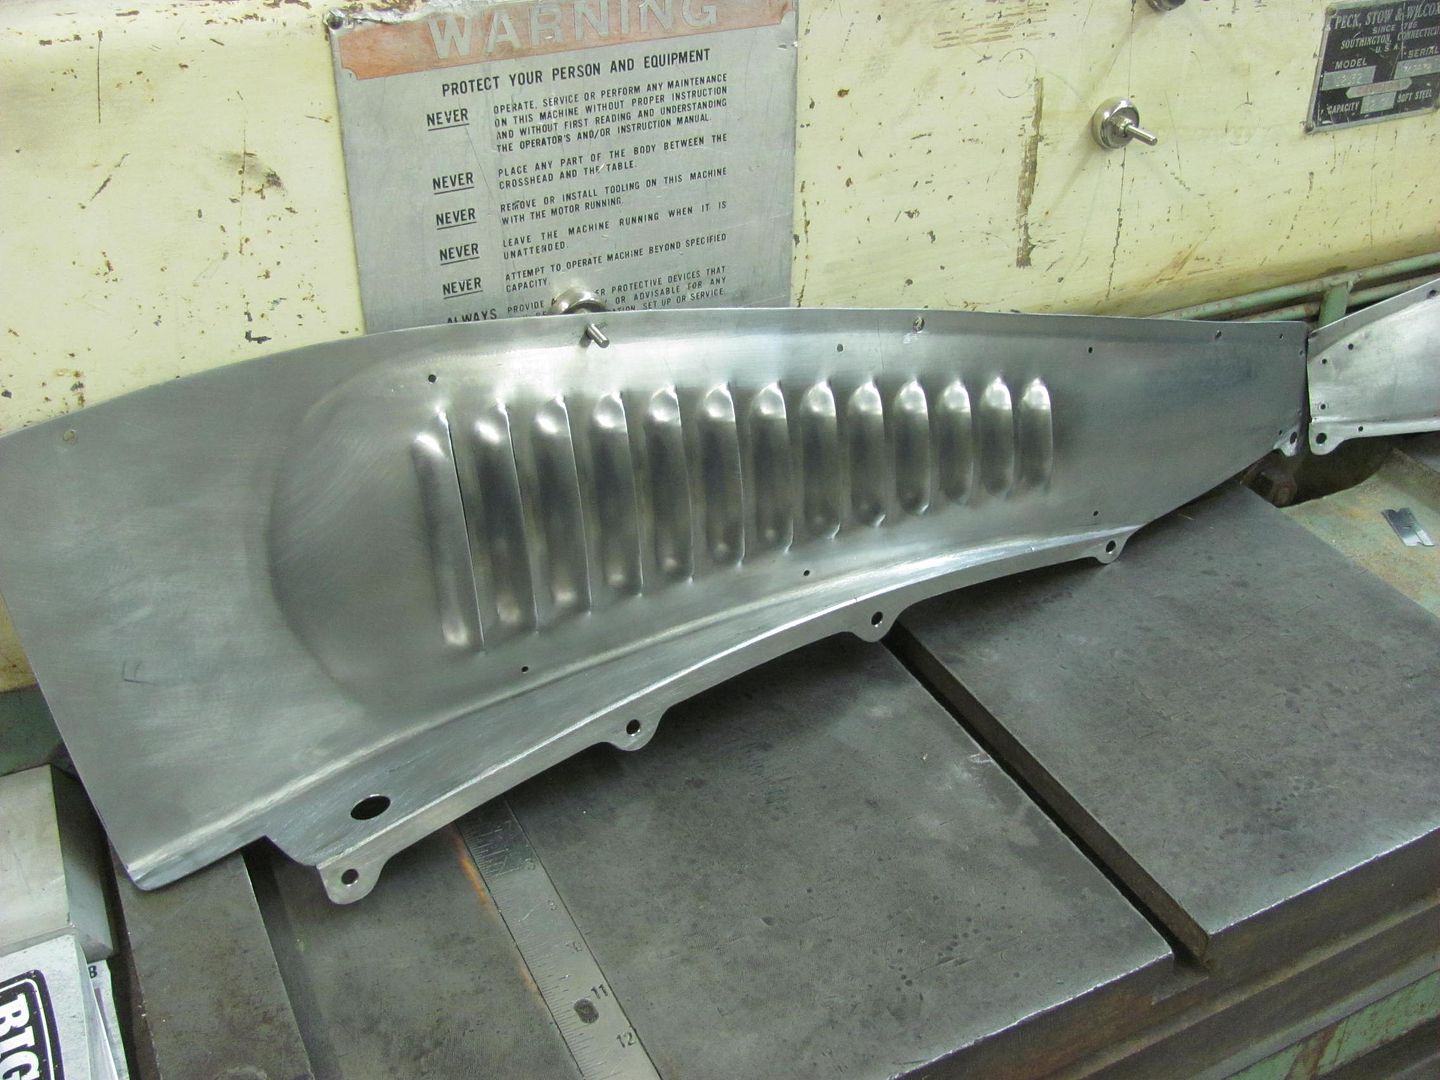
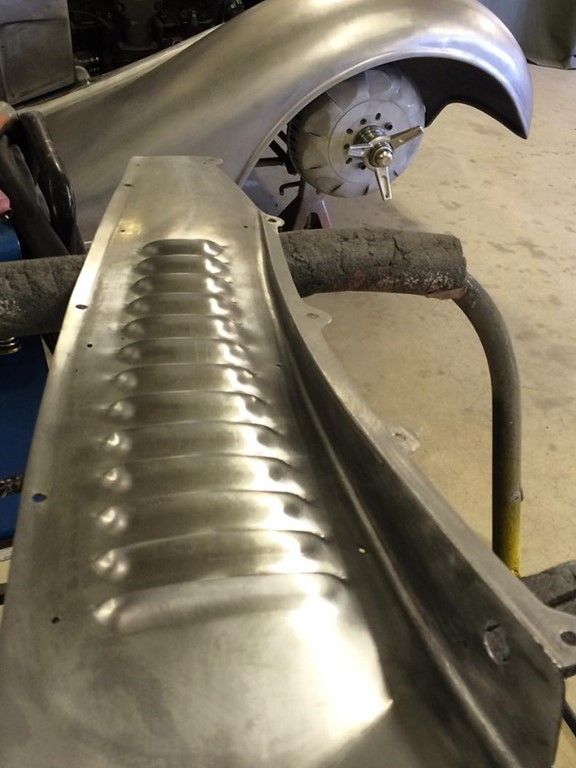
 Punching the louvers in the practice panel.. https://youtu.be/n3NVTILslbE https://youtu.be/sHr2P60cqt8 Here's the moment of truth, the inner fender ready for punching... 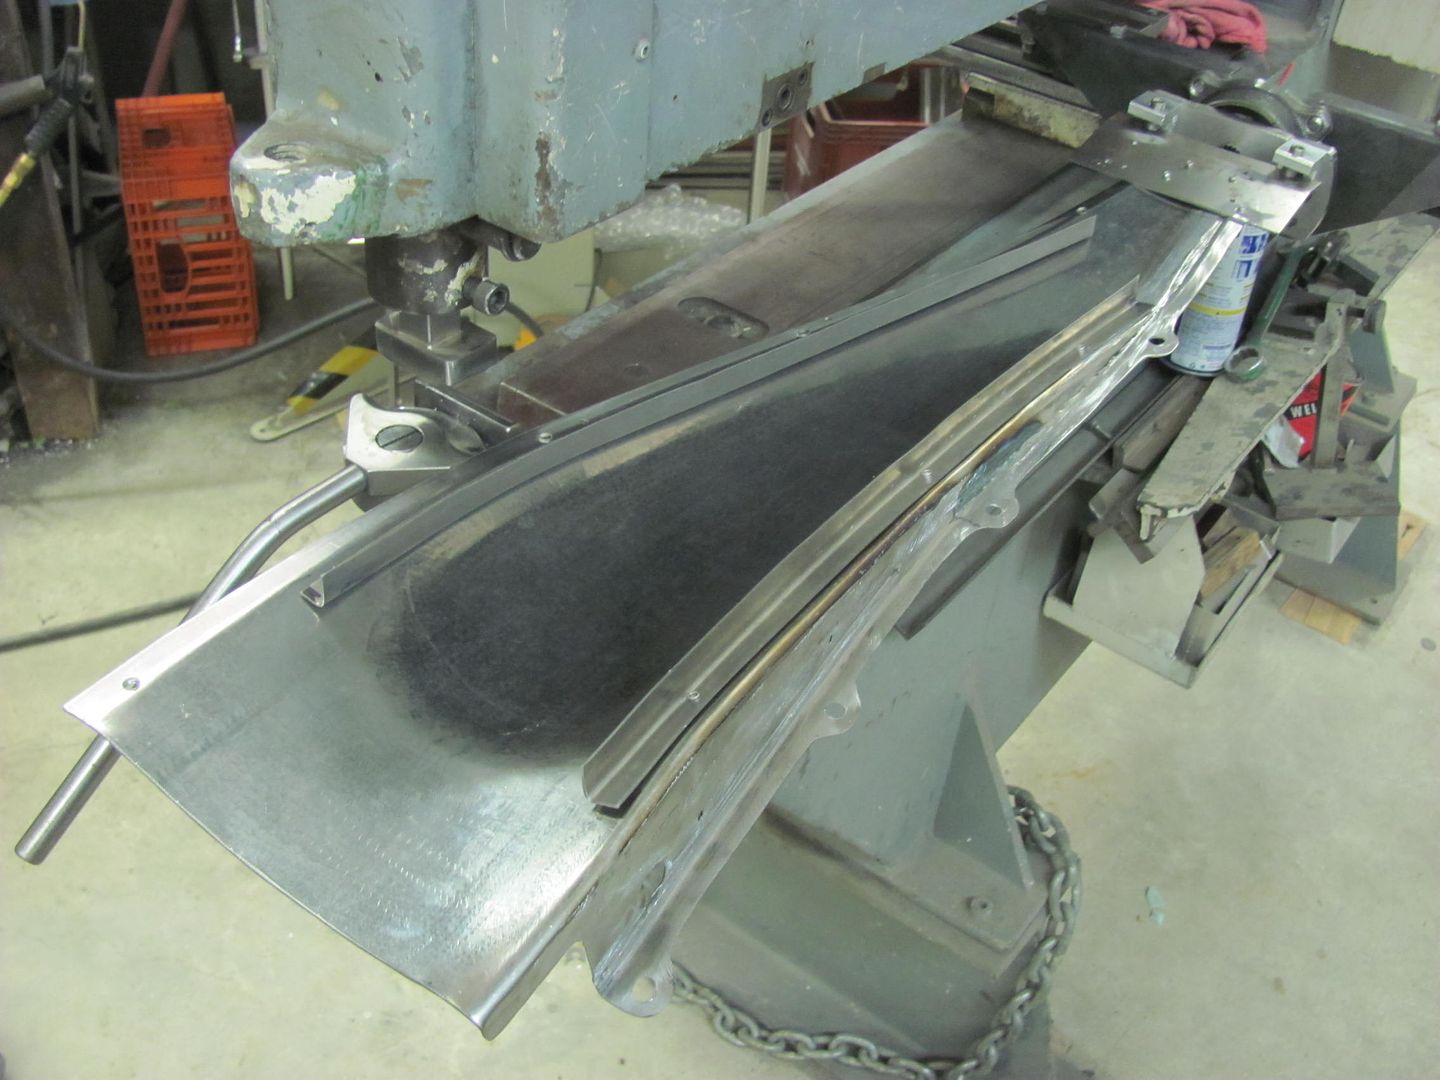 Looks like our crown still exists! 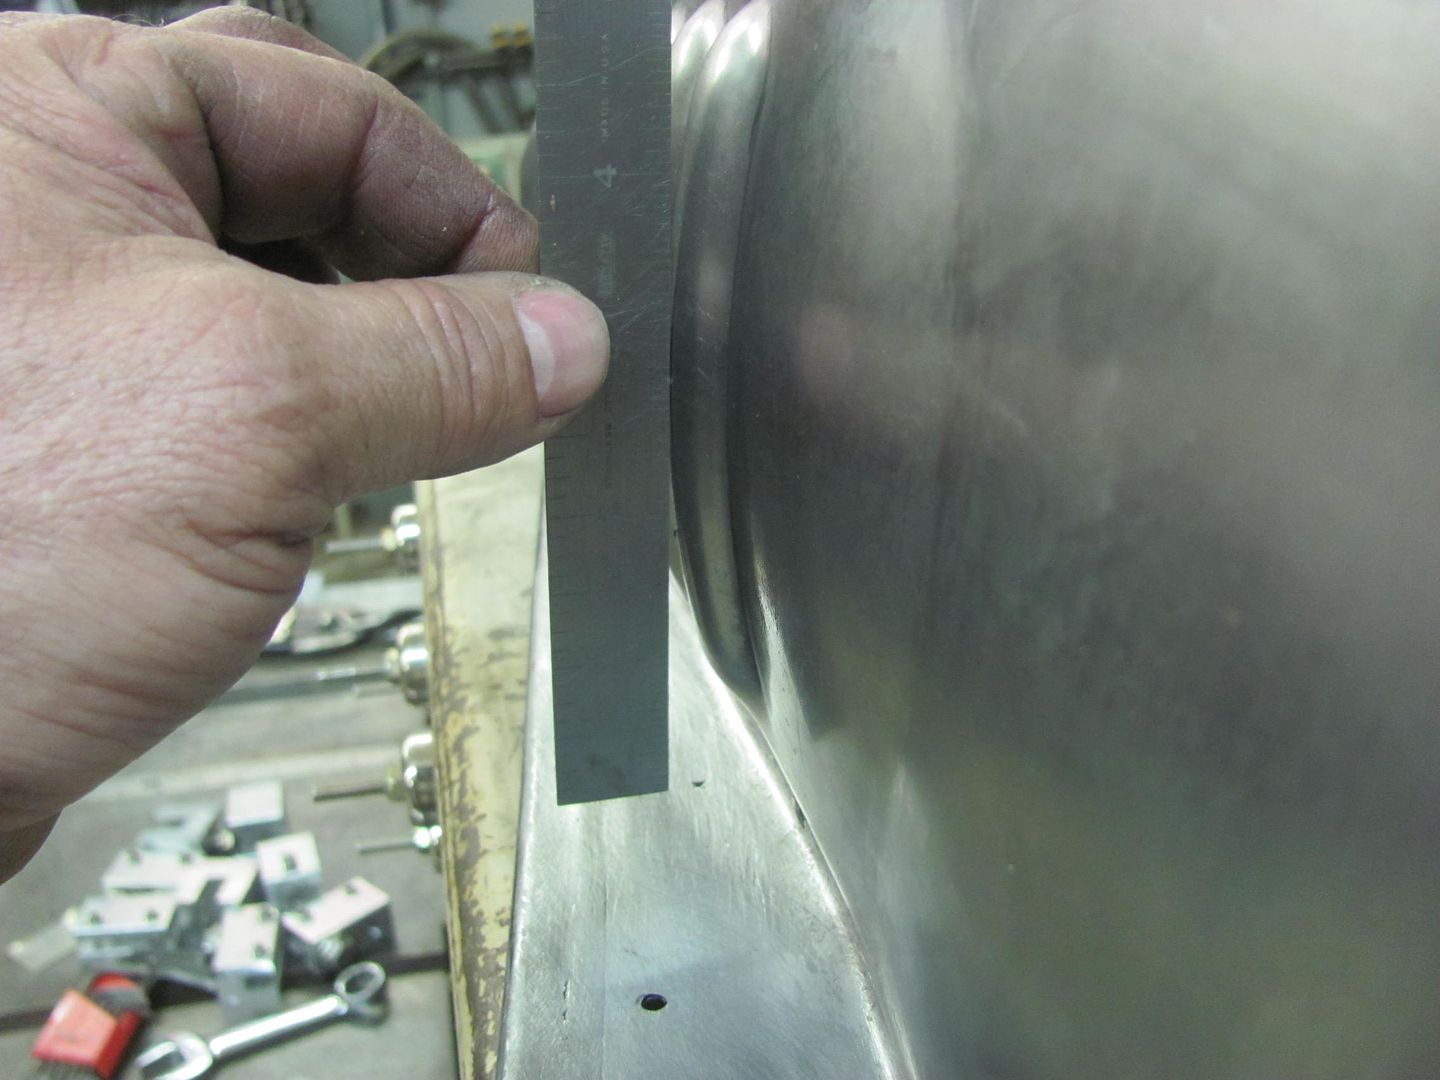  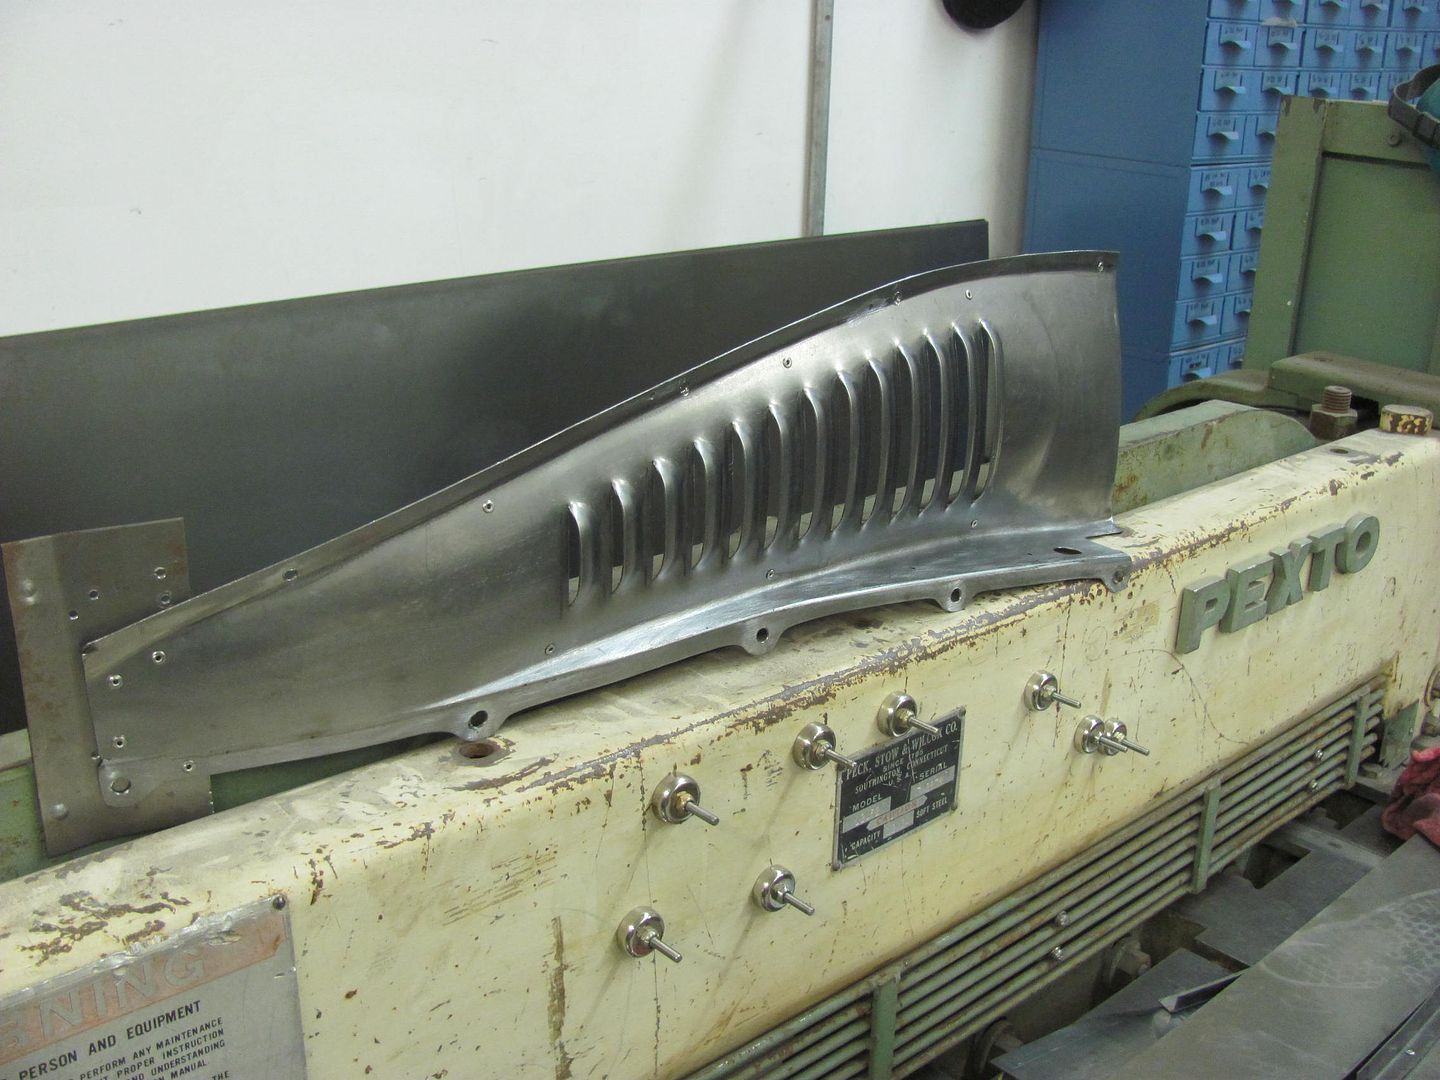 another view.... https://youtu.be/7tcYNZ29WTg One down, one to go..
__________________
Robert |
|
|
|
|
03-05-2016, 08:34 PM
|
#665 |
|
Registered User
Join Date: Jan 2013
Location: Leonardtown, MD
Posts: 1,637
|
Re: 55 Wagon Progress
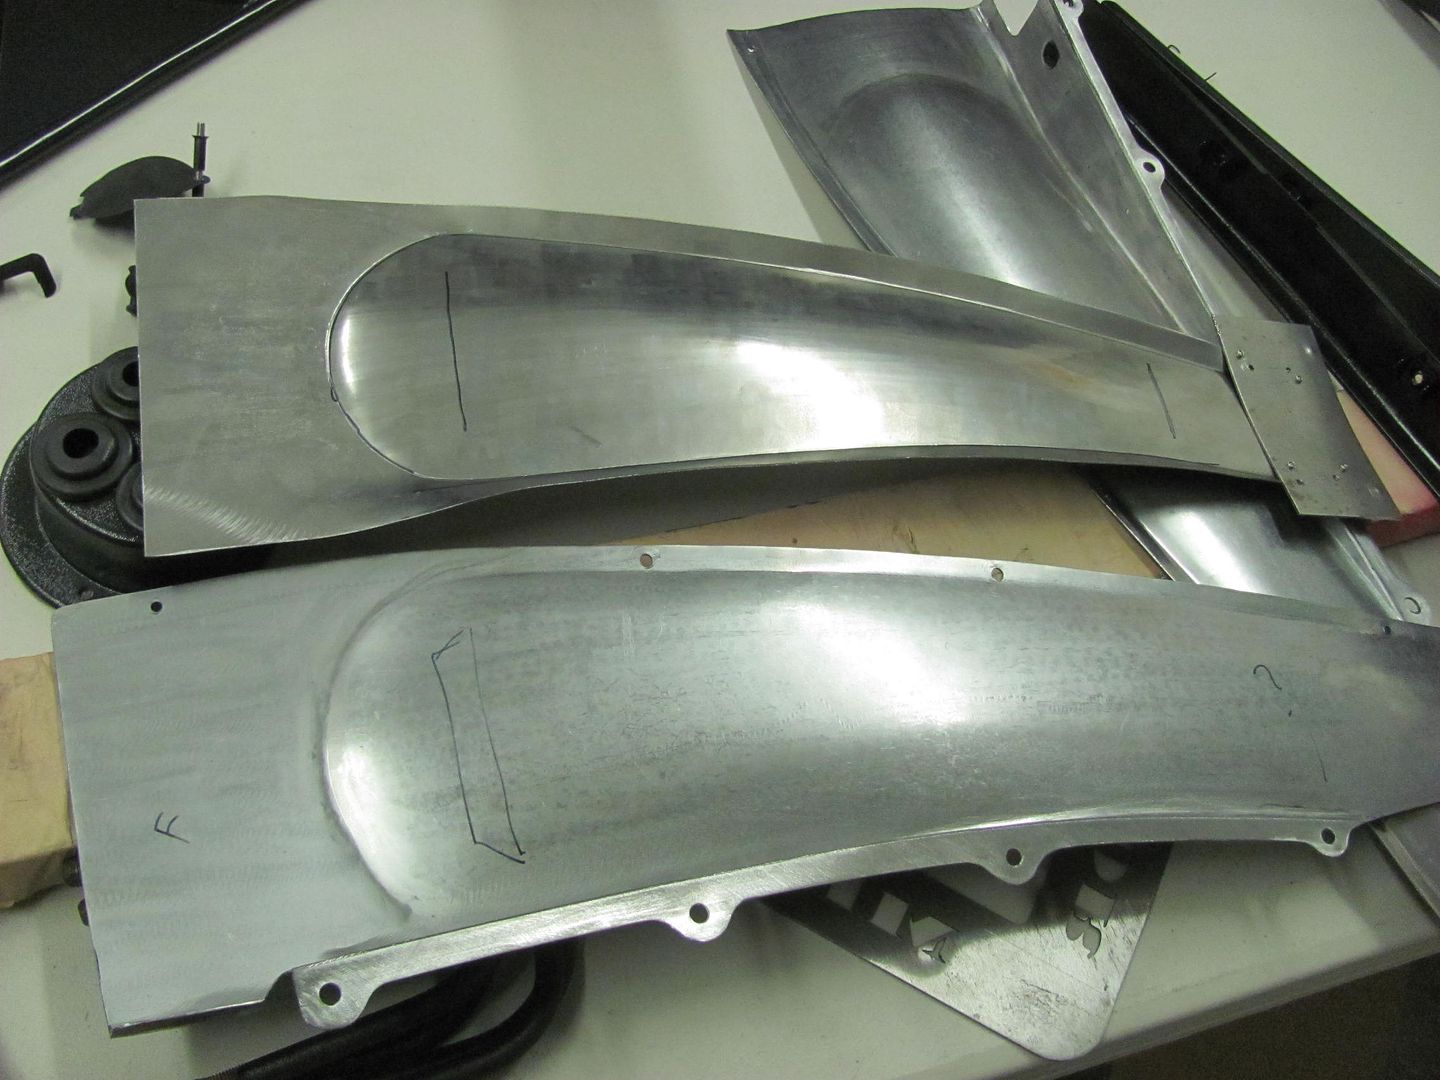
Finished the driver's side inner fender this morning..
    Now to get them back to Cody so he can do some more re-assembly.. After finishing the louvers this morning, we turned our attention back to the wagon. We started installing the brake lines and found the "kit" the owner had purchased was far from a direct fit. here's the booster and master cylinder we're using...  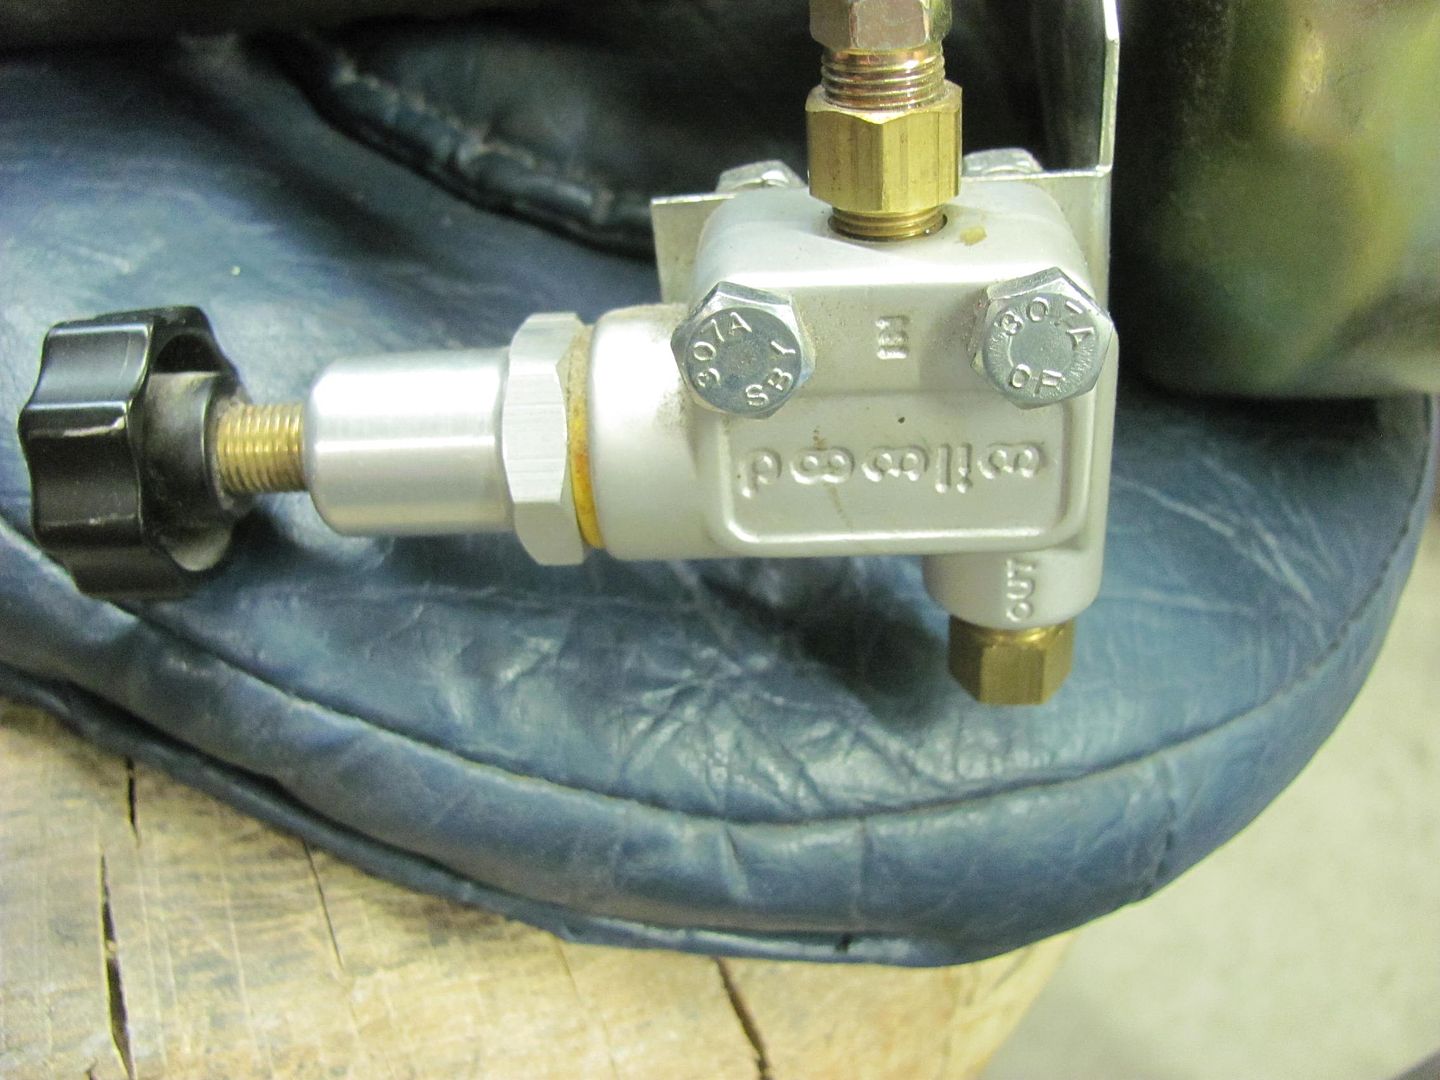 As the kit had no lines to fit a 9" rear, we used a stick of stainless tubing that was left over from the Fairlane job and bent our own. 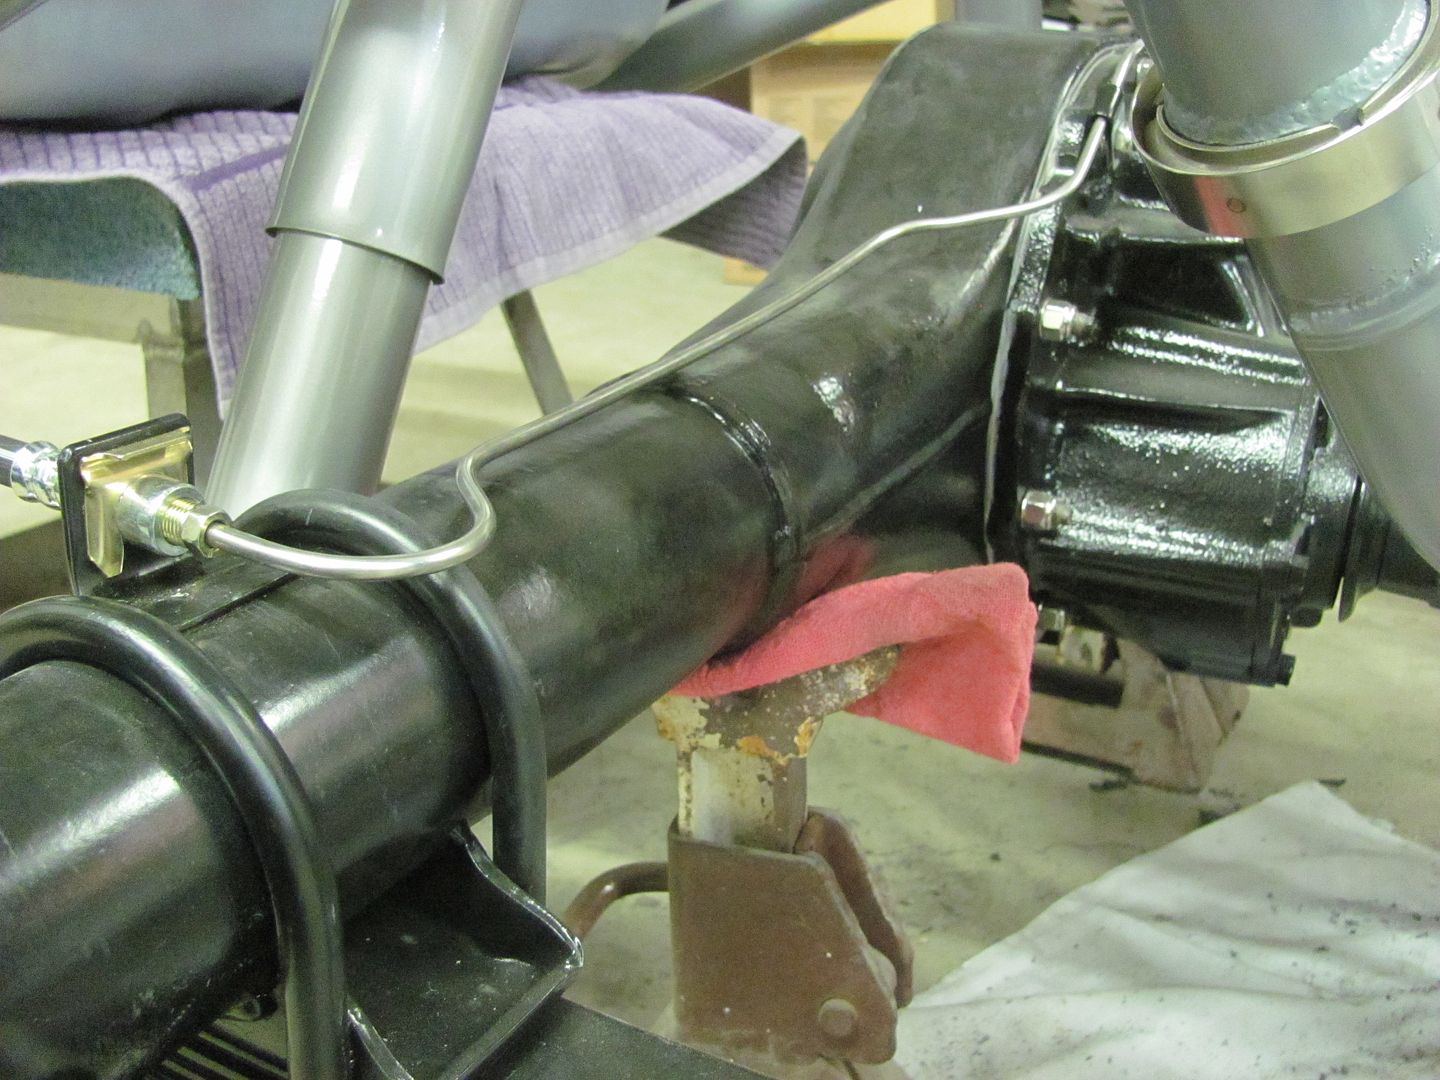 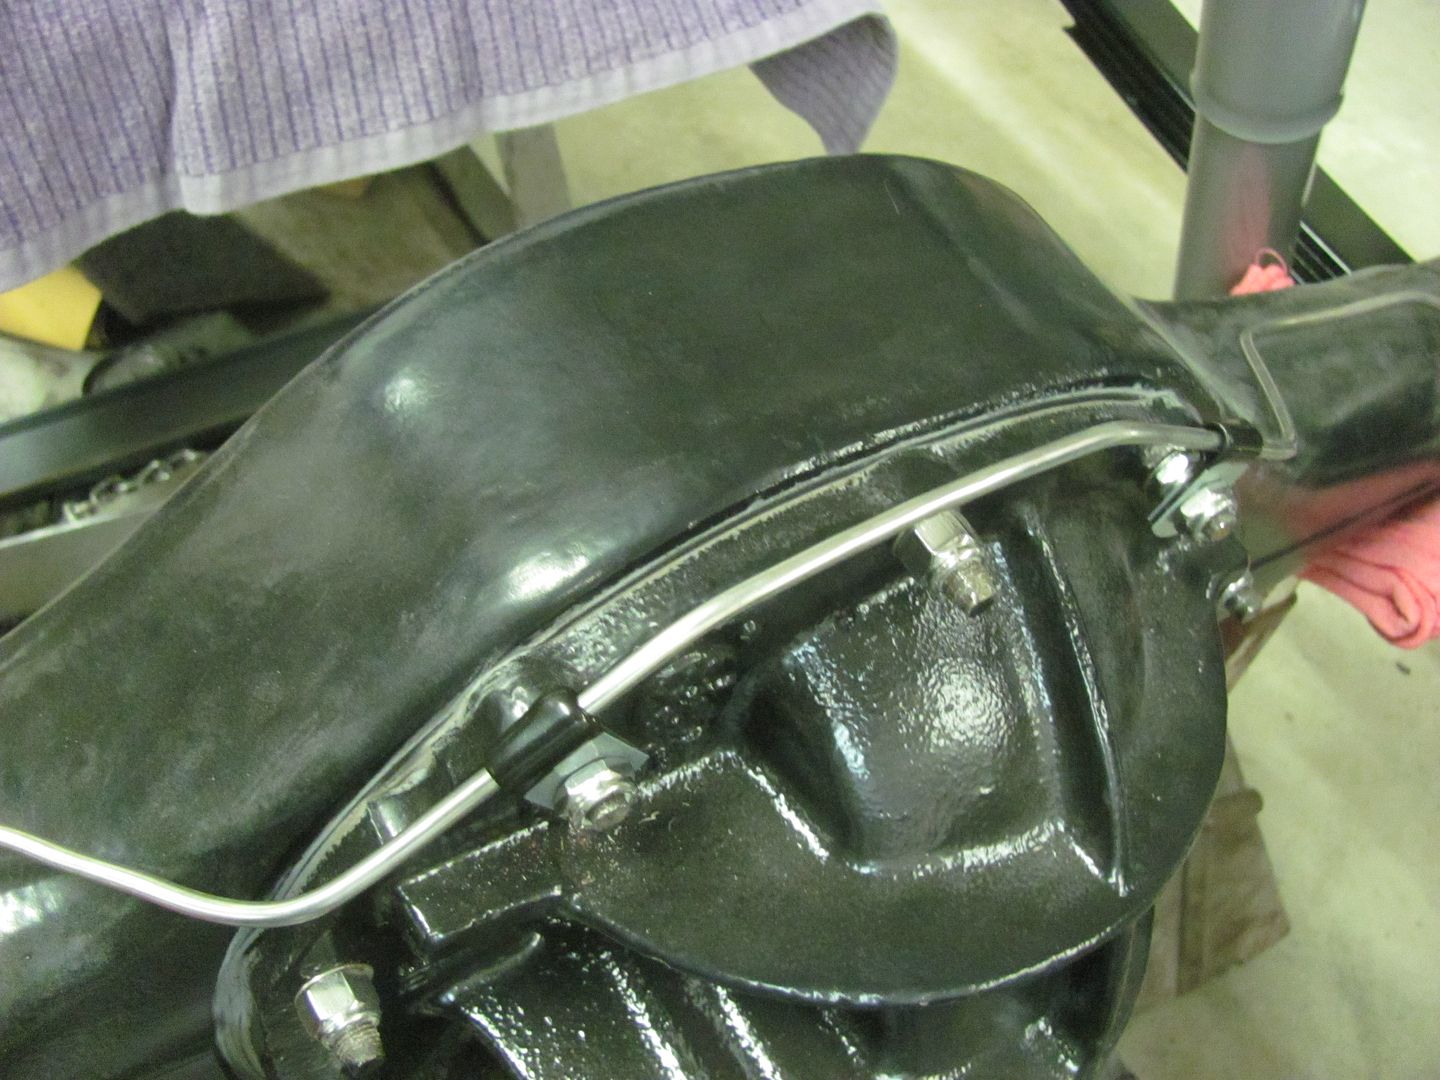 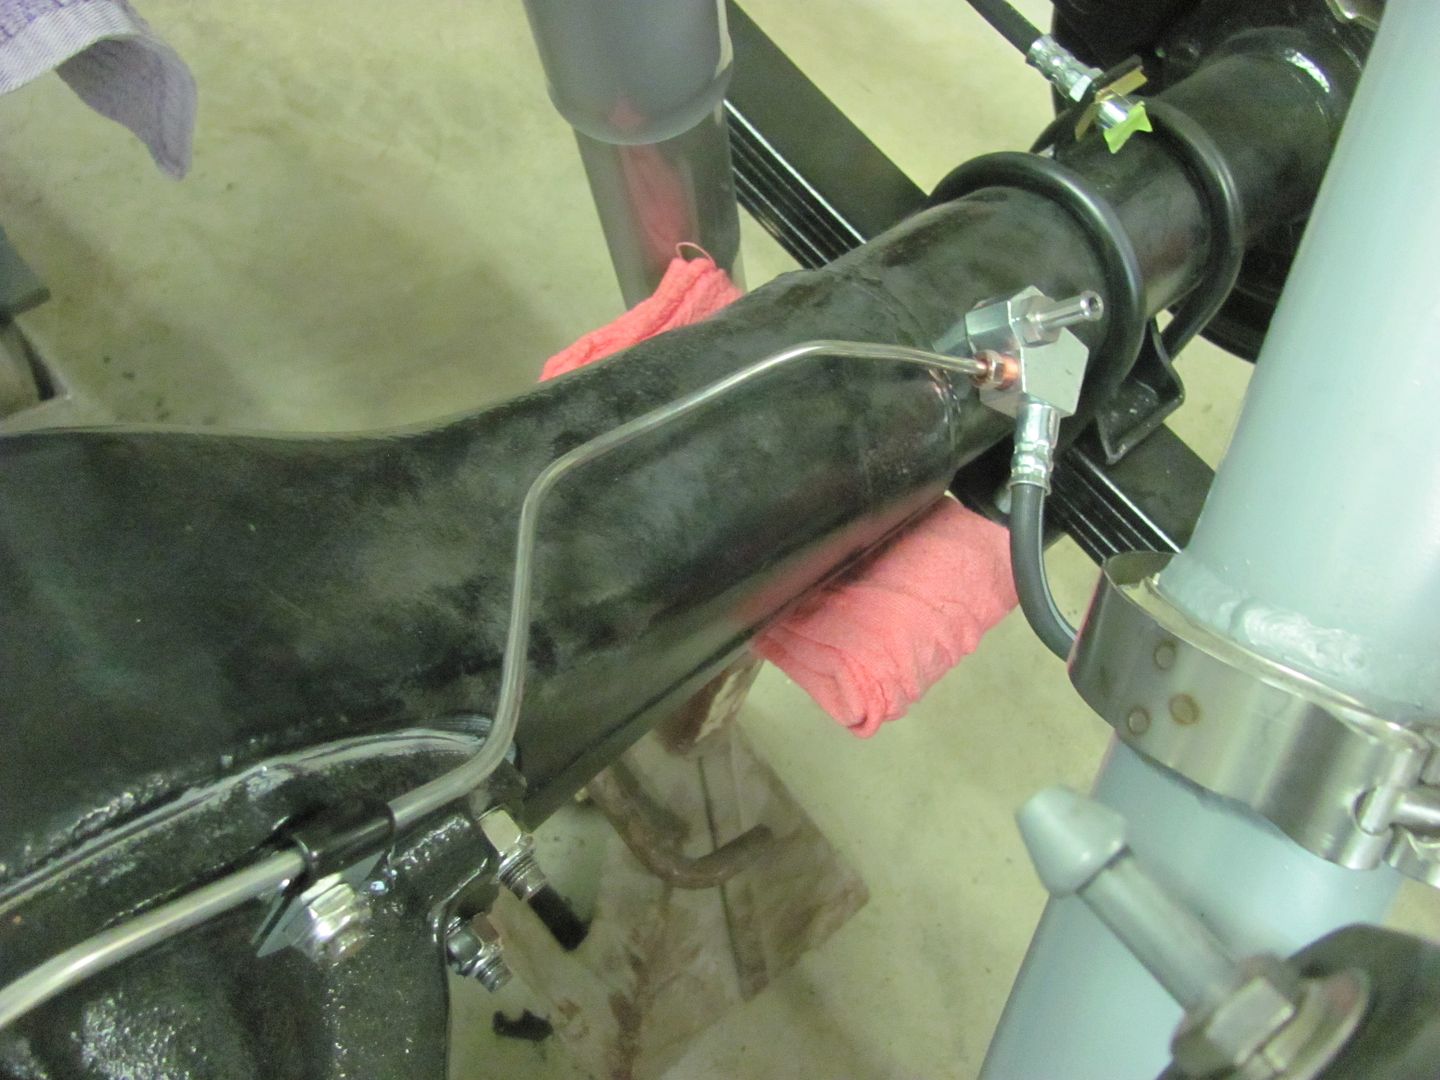
__________________
Robert Last edited by MP&C; 03-05-2016 at 08:54 PM. |
|
|
|
|
03-06-2016, 11:54 AM
|
#666 |
|
Registered User
Join Date: Apr 2003
Location: Indep, MO
Posts: 5,893
|
Re: 55 Wagon Progress
Nice tight work! Love the louvering, great stuff!
__________________
Boppa's Old Yeller Truck Build, Old Yeller's New Heart! Project Buzz Bomb Flyin' Low! |
|
|
|
|
03-06-2016, 08:37 PM
|
#667 |
|
Registered User
Join Date: May 2007
Location: Deale Md
Posts: 4,663
|
Re: 55 Wagon Progress
What degree did you flare the stainless brake line ?
__________________
James 63 GMC V6 4speed carryall 65 chevy swb bbw V8 auto 68 K20 327/4 speed, buddy buckets 2002 GMC CC Dually Duramax 64 GMC lwb 3/4 V6 4speed SOLD 66 GMC swb bbw buddy buckets SOLD IG duallyjams The only thing that stays the same is constant change! |
|
|
|
|
03-06-2016, 10:53 PM
|
#668 |
|
Registered User
Join Date: Jan 2013
Location: Leonardtown, MD
Posts: 1,637
|
Re: 55 Wagon Progress
I used my hydraulic tool to perform the double flare, not sure on the angle, think it a 45* ???
__________________
Robert |
|
|
|
|
03-07-2016, 01:42 PM
|
#669 |
|
Registered User
Join Date: Jan 2013
Location: Leonardtown, MD
Posts: 1,637
|
Re: 55 Wagon Progress
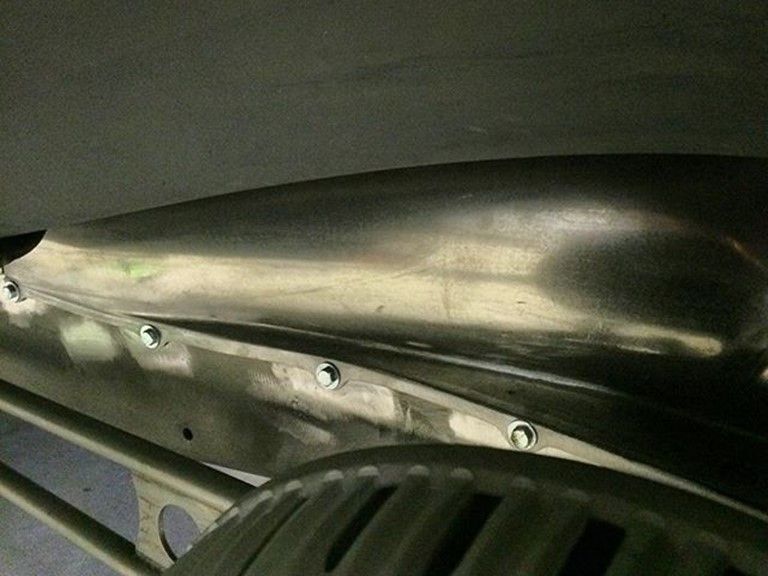
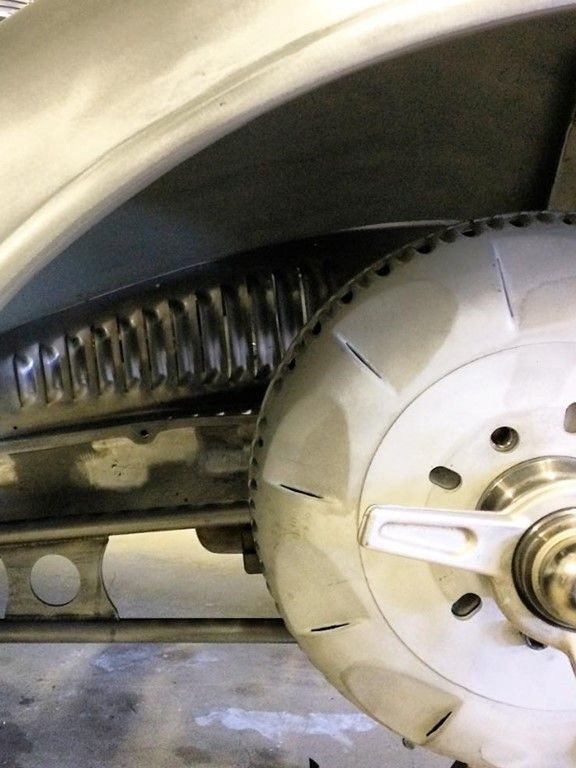
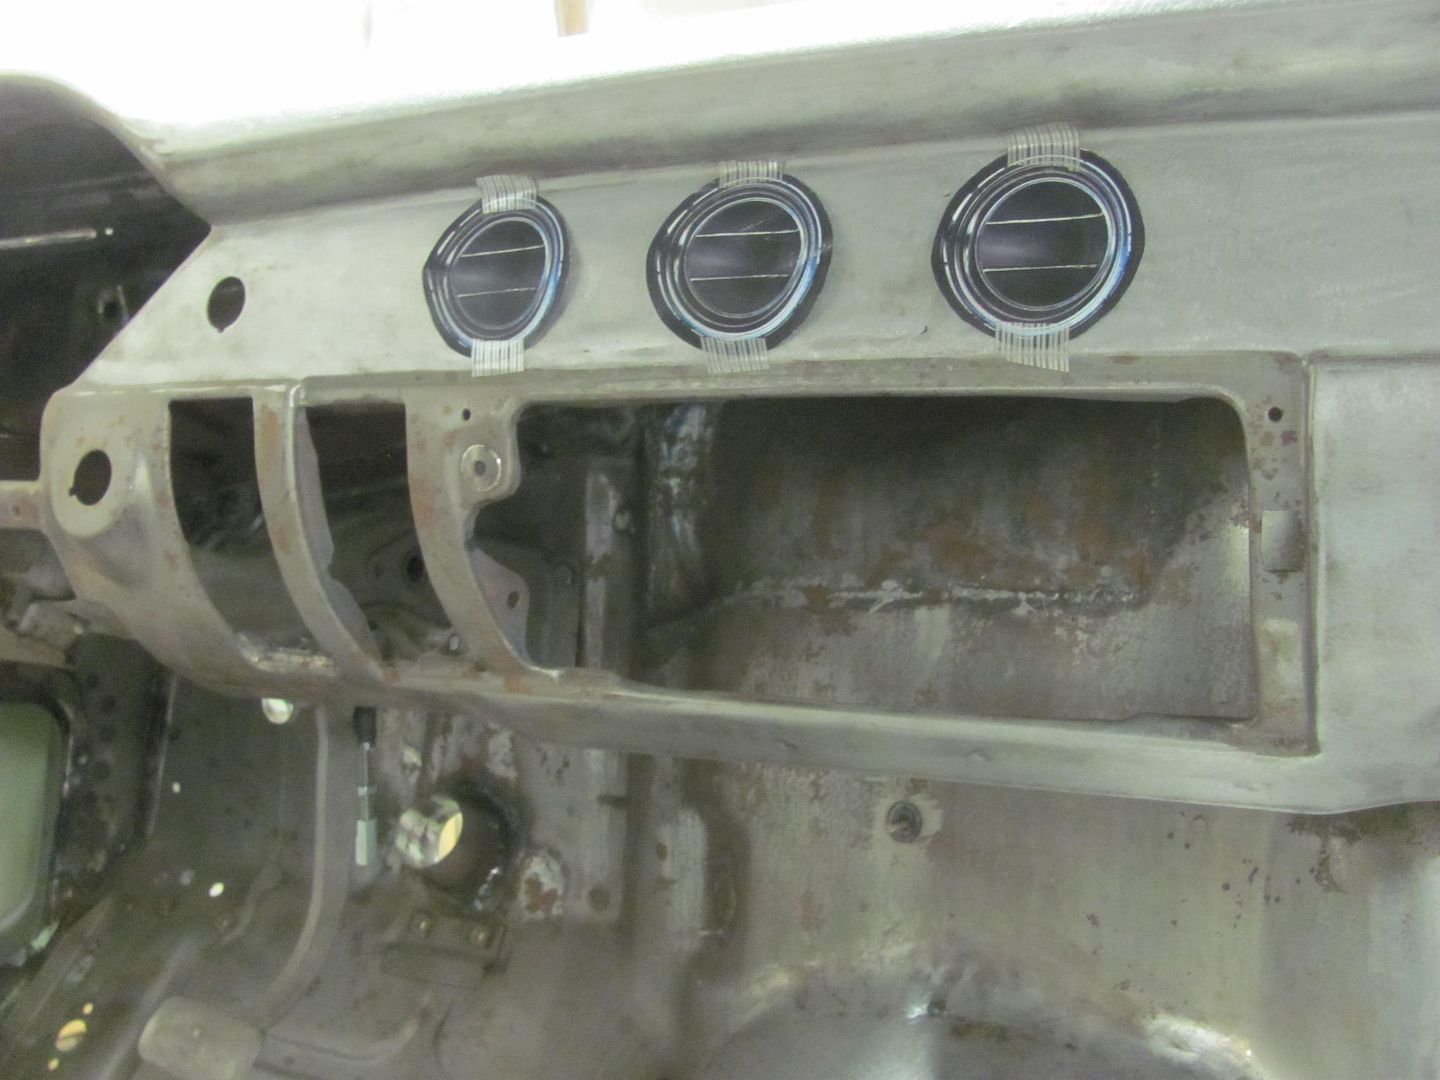
Well most small jobs I do like this you never see the part installed (like the Studebaker dash parts) so I was happy to see Cody post up some pictures this morning. Here's a shot of the passenger side installed.. It was nice to take on a challenge like this and see it actually work..
   I think Kyle enjoyed the break from blocking epoxy primer.. Now back to the old grind..
__________________
Robert |
|
|
|
|
03-07-2016, 02:09 PM
|
#670 |
|
Registered User
Join Date: Jun 2008
Location: Moss Point,Ms.
Posts: 1,439
|
Re: 55 Wagon Progress
They should help a lot with the engine cooling being right at the exhaust ports!
Nice work as always Robert. Mike. 
|
|
|
|
|
03-07-2016, 02:43 PM
|
#671 |
|
Registered User
Join Date: Jan 2013
Location: Leonardtown, MD
Posts: 1,637
|
Re: 55 Wagon Progress
Thanks Mike! Yeah, I think it will need all the help in cooling that it can get. No Heat, no AC, no PS, no frills. Drive and go.
__________________
Robert |
|
|
|
|
03-08-2016, 10:45 PM
|
#672 |
|
Registered User
Join Date: Jan 2013
Location: Leonardtown, MD
Posts: 1,637
|
Re: 55 Wagon Progress
Adding the rear axle vent hose, we needed a spot to anchor the second vent fitting to keep the hose from flopping around...
 Which is threaded with a 7/16-20 thread 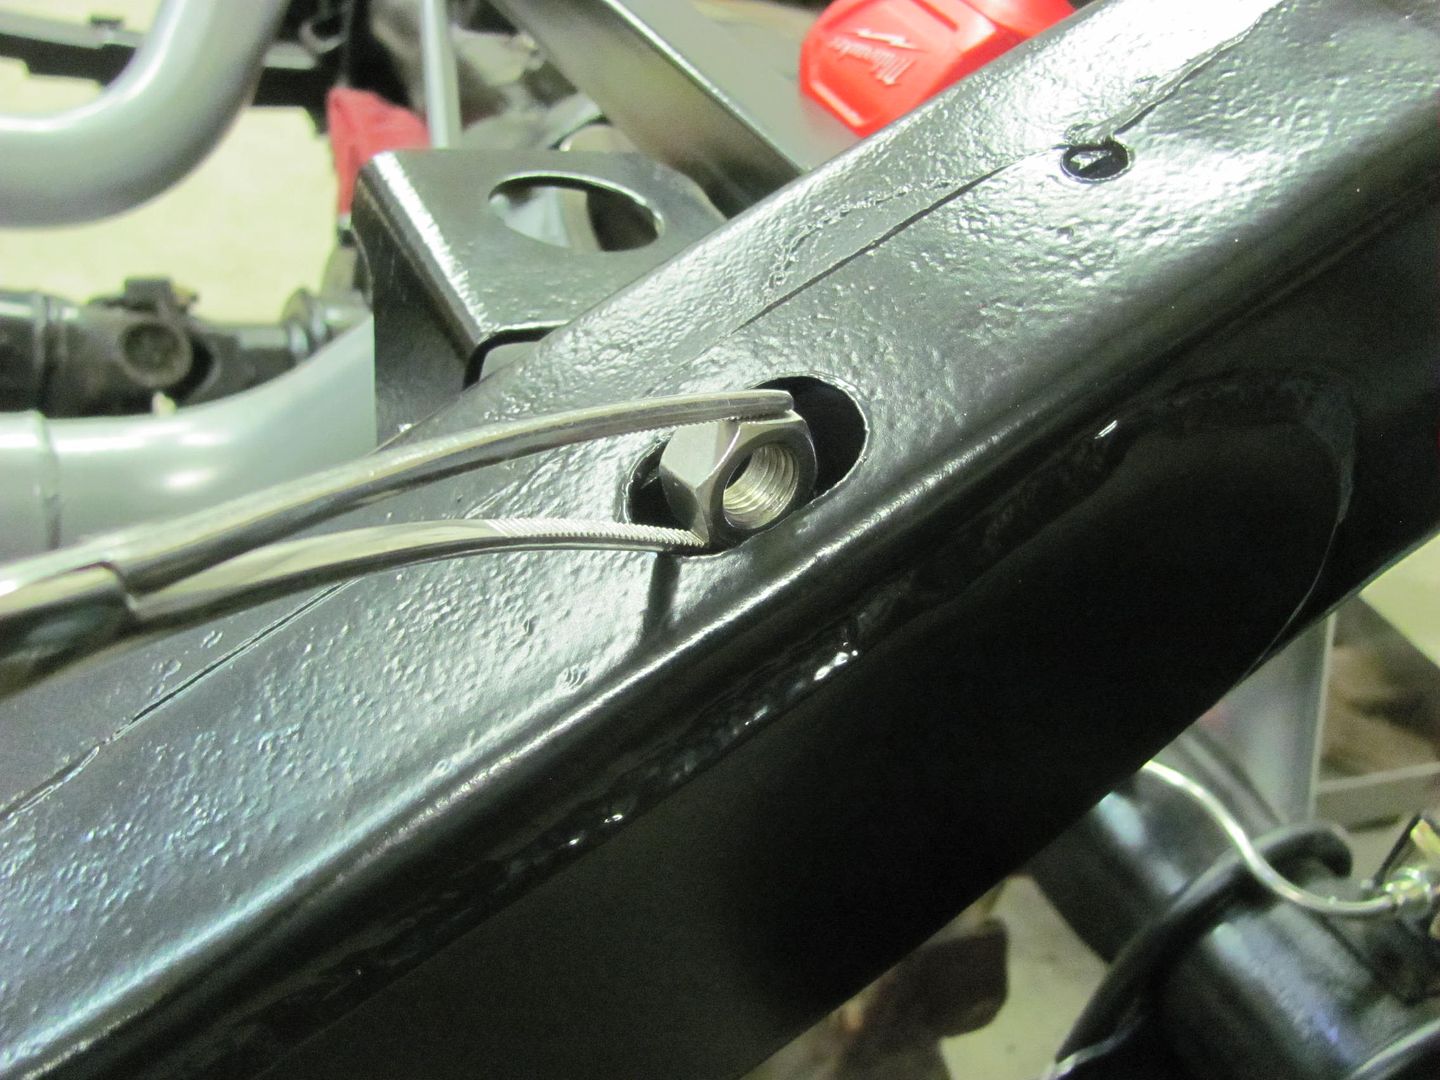 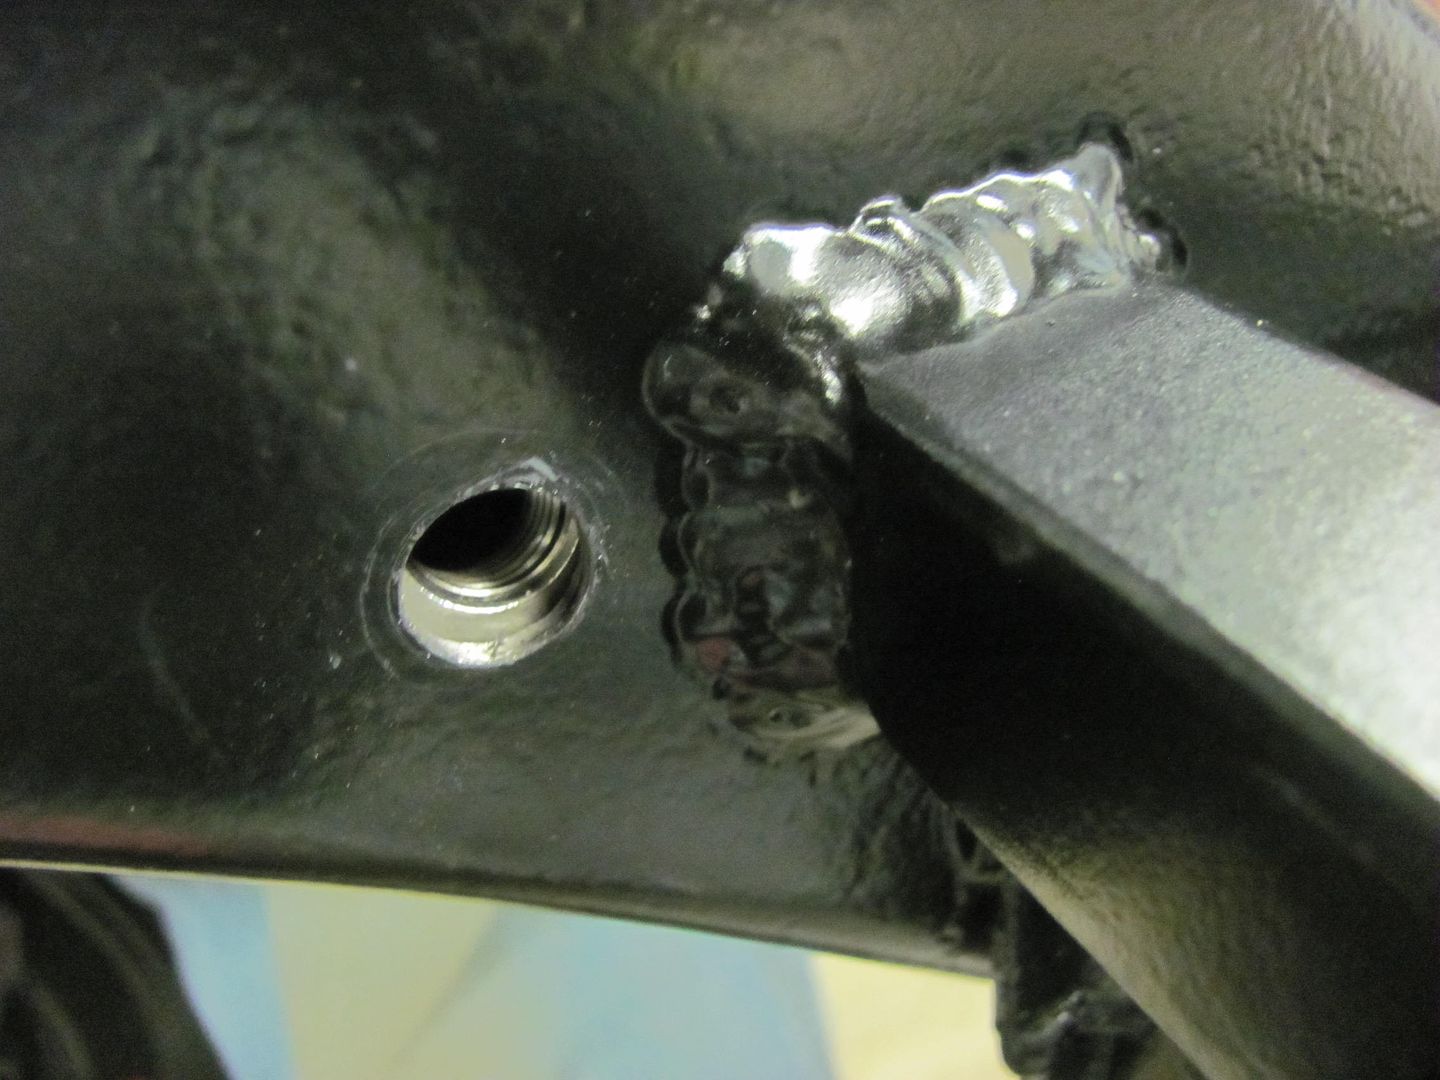 With Loctite added to the threads... 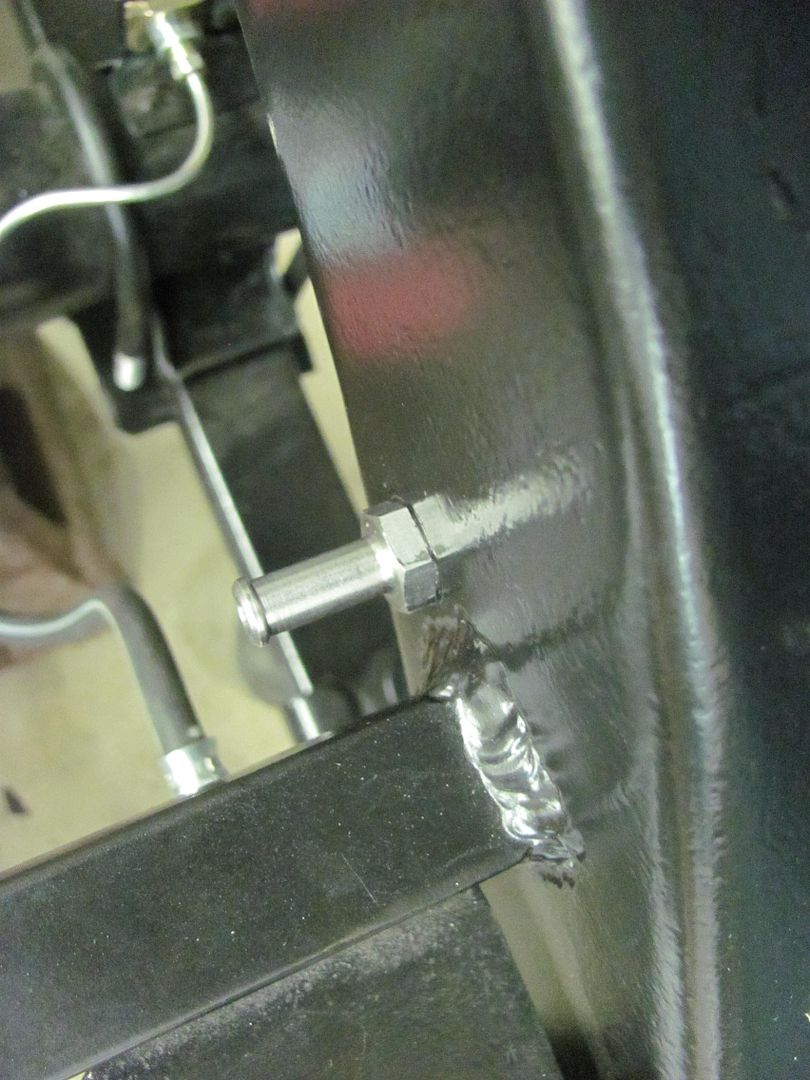 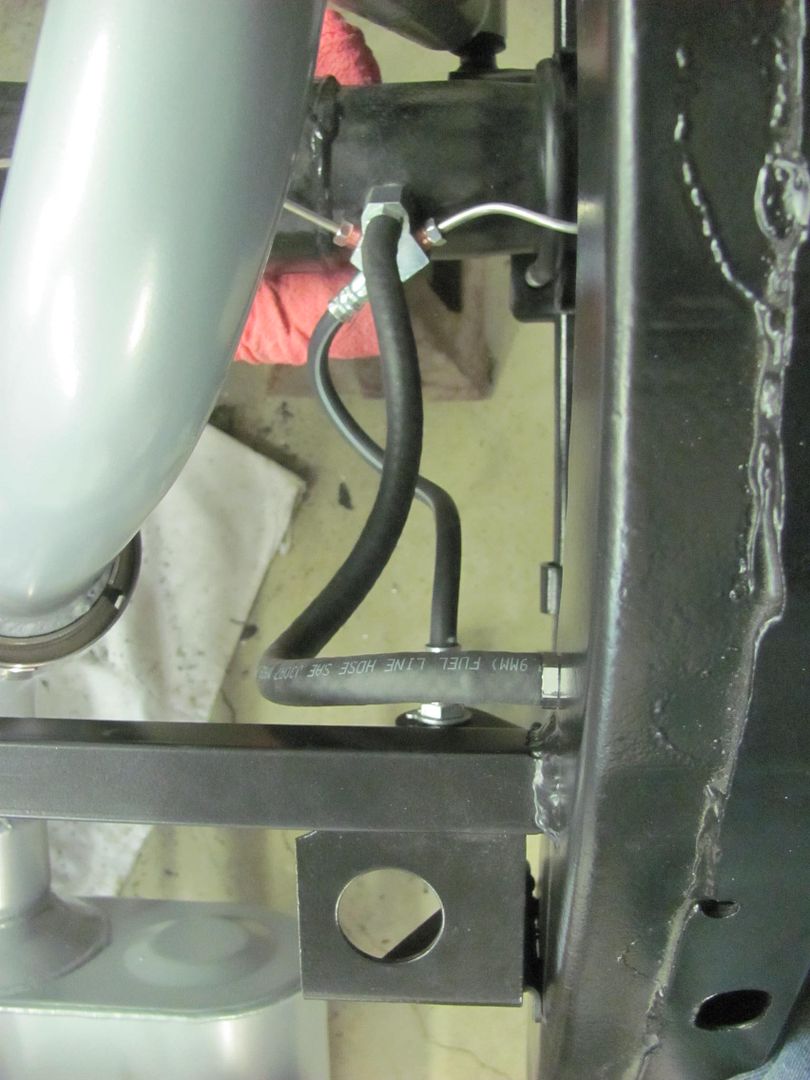 More SS brake lines... 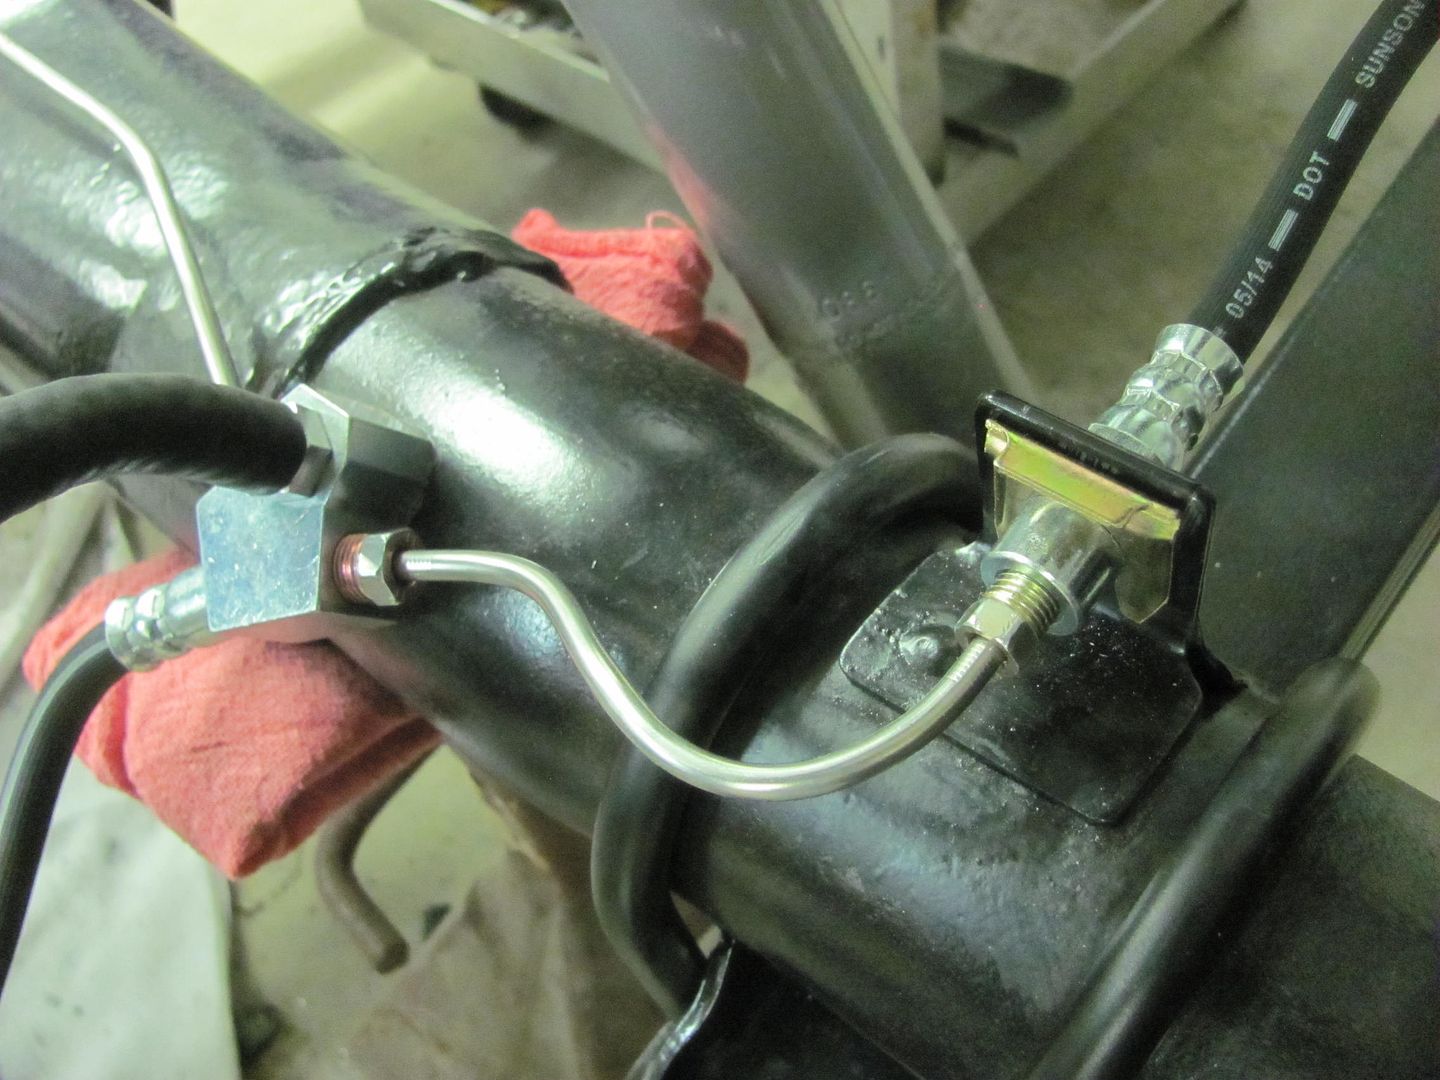 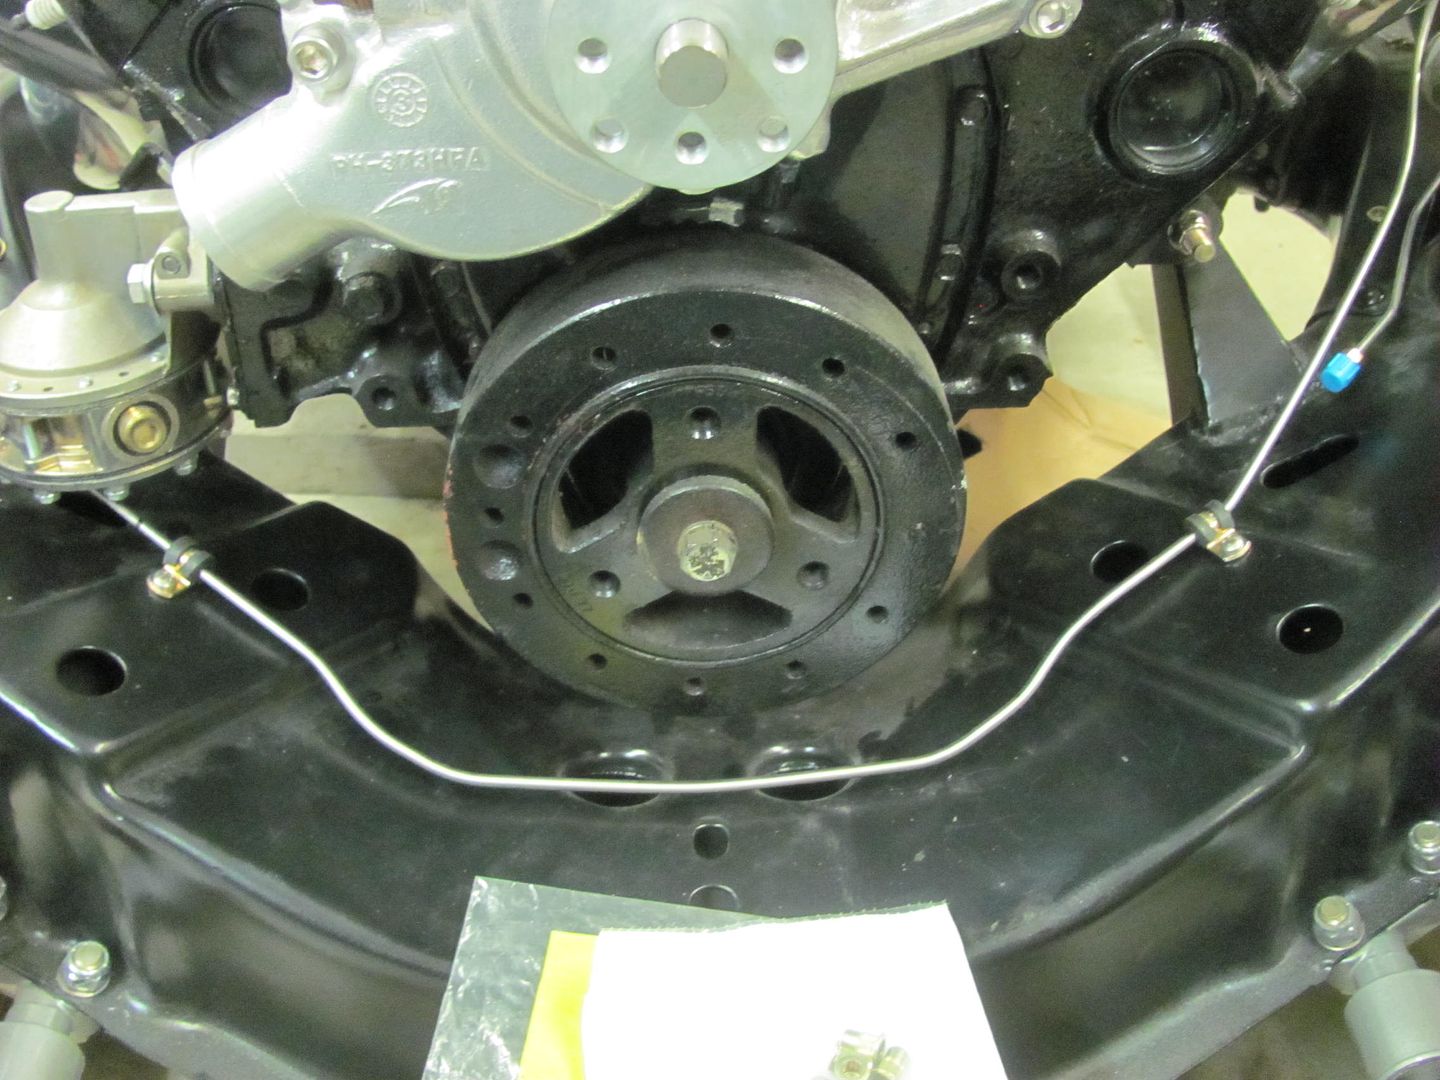 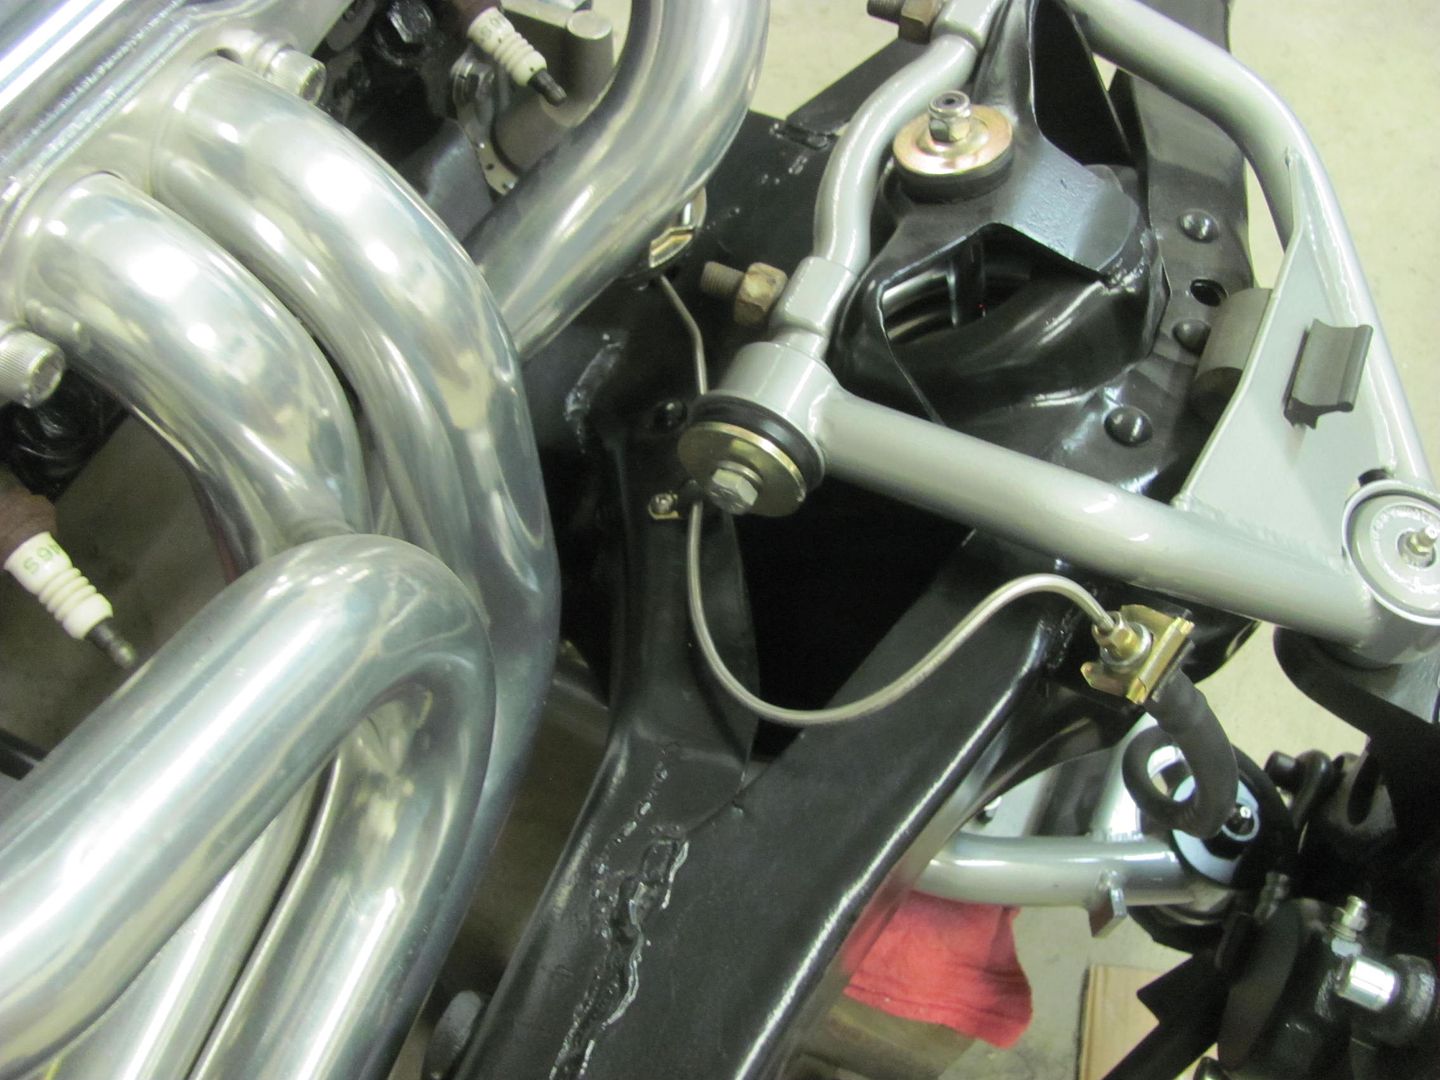 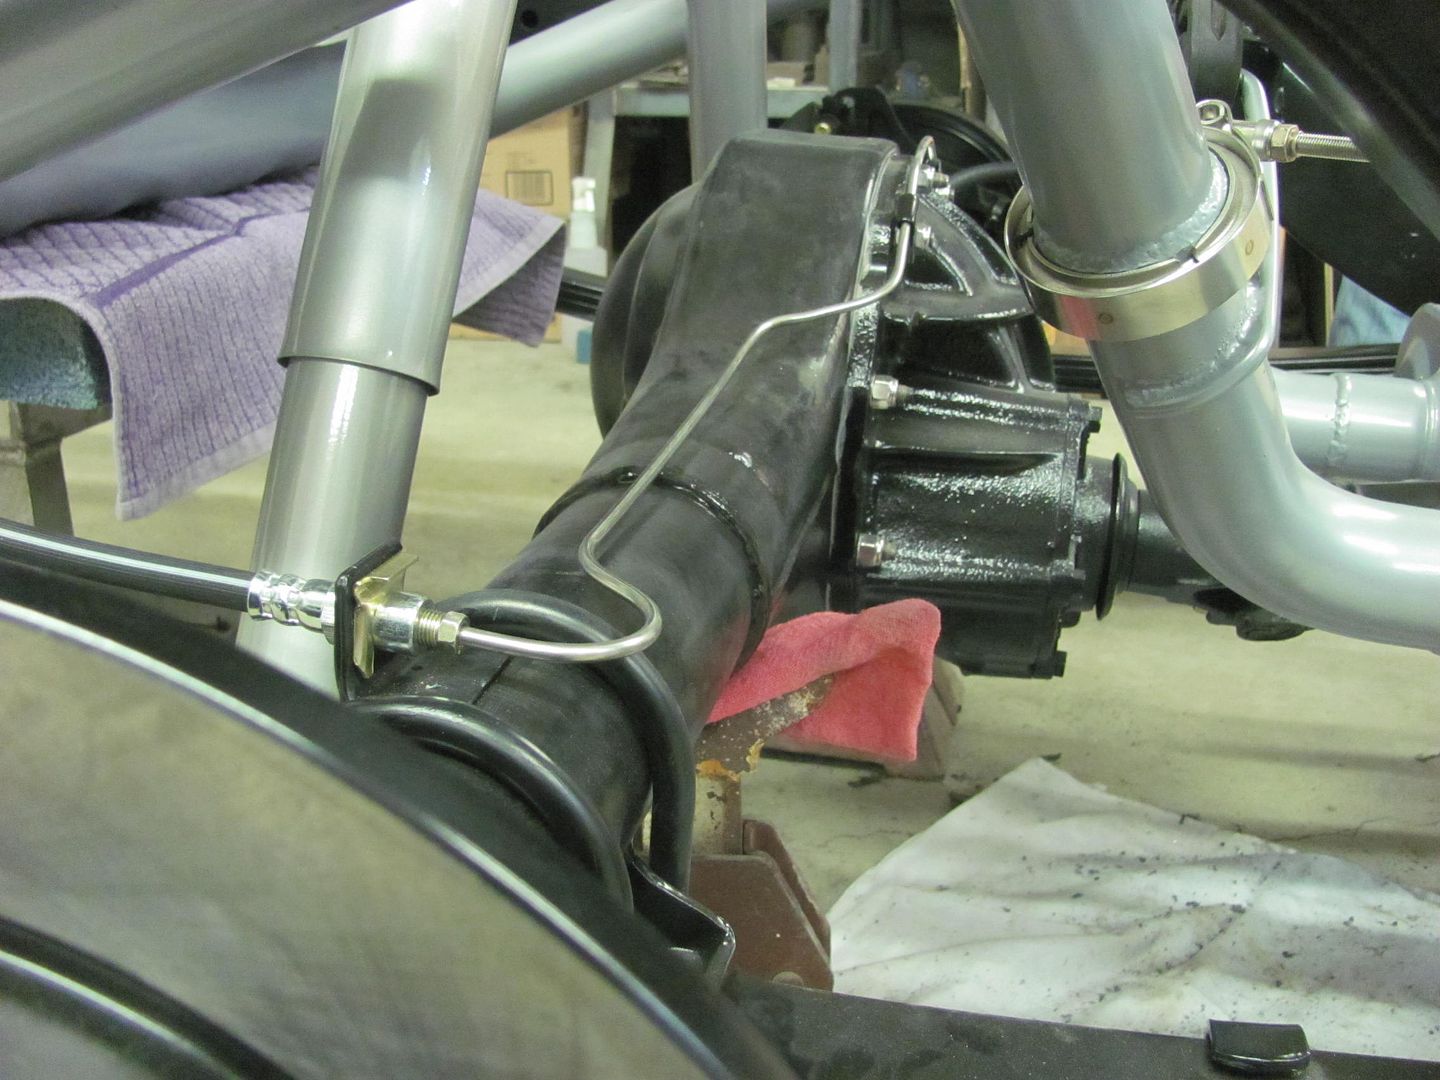 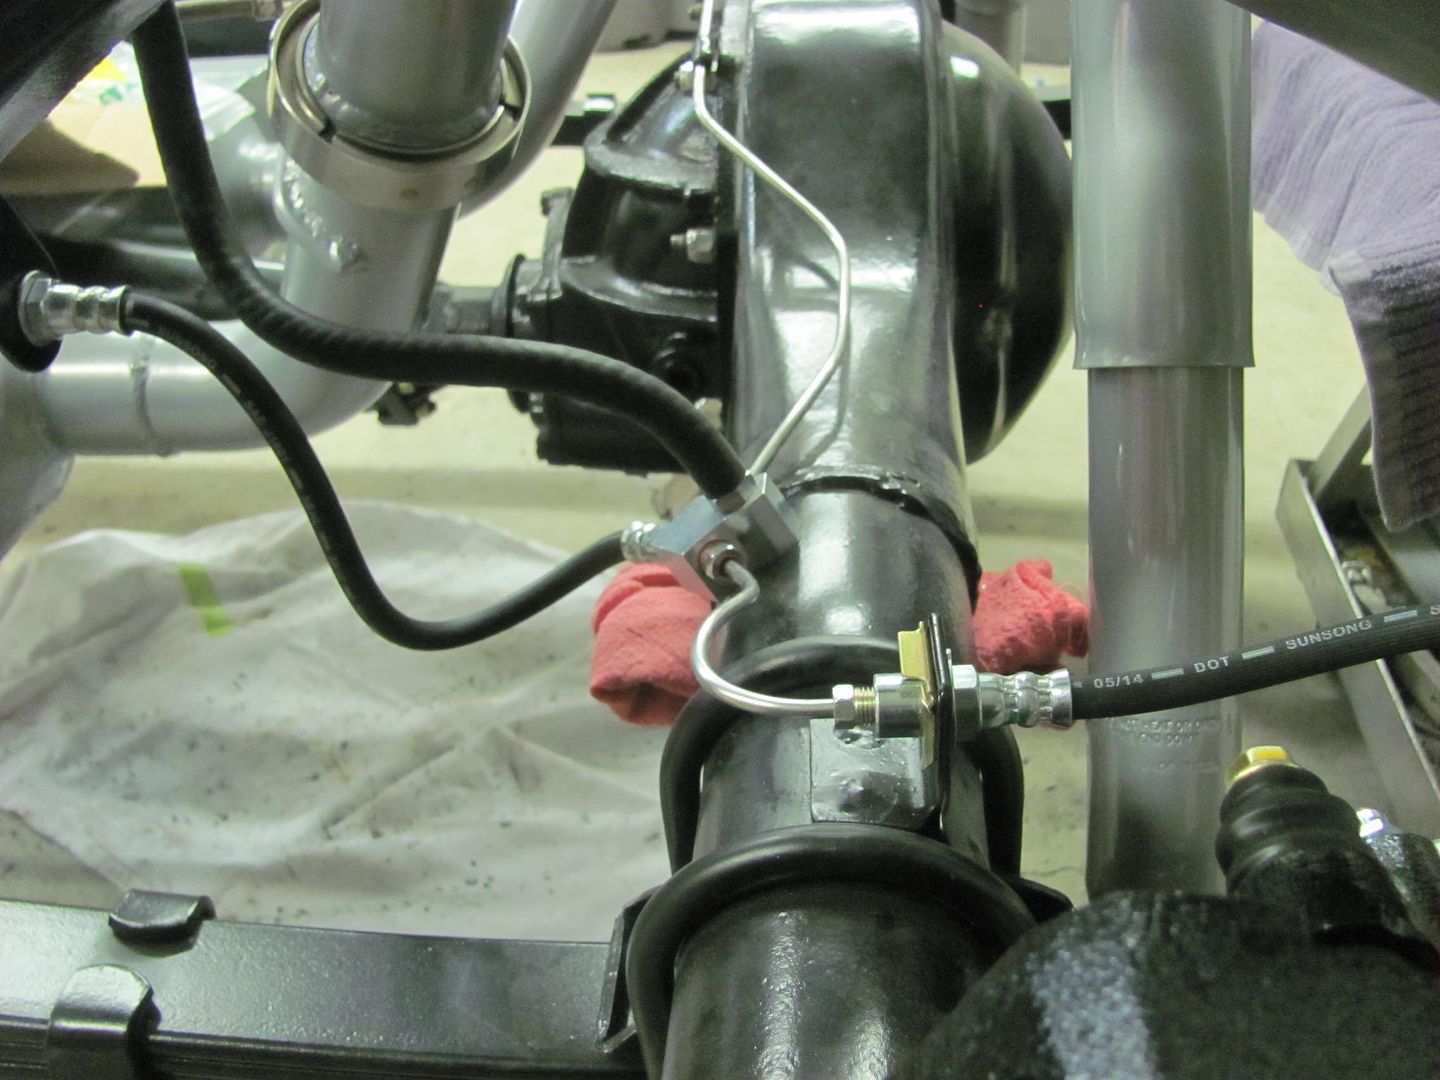 With the rear brake lines complete, the rear wheels were bolted back up.. 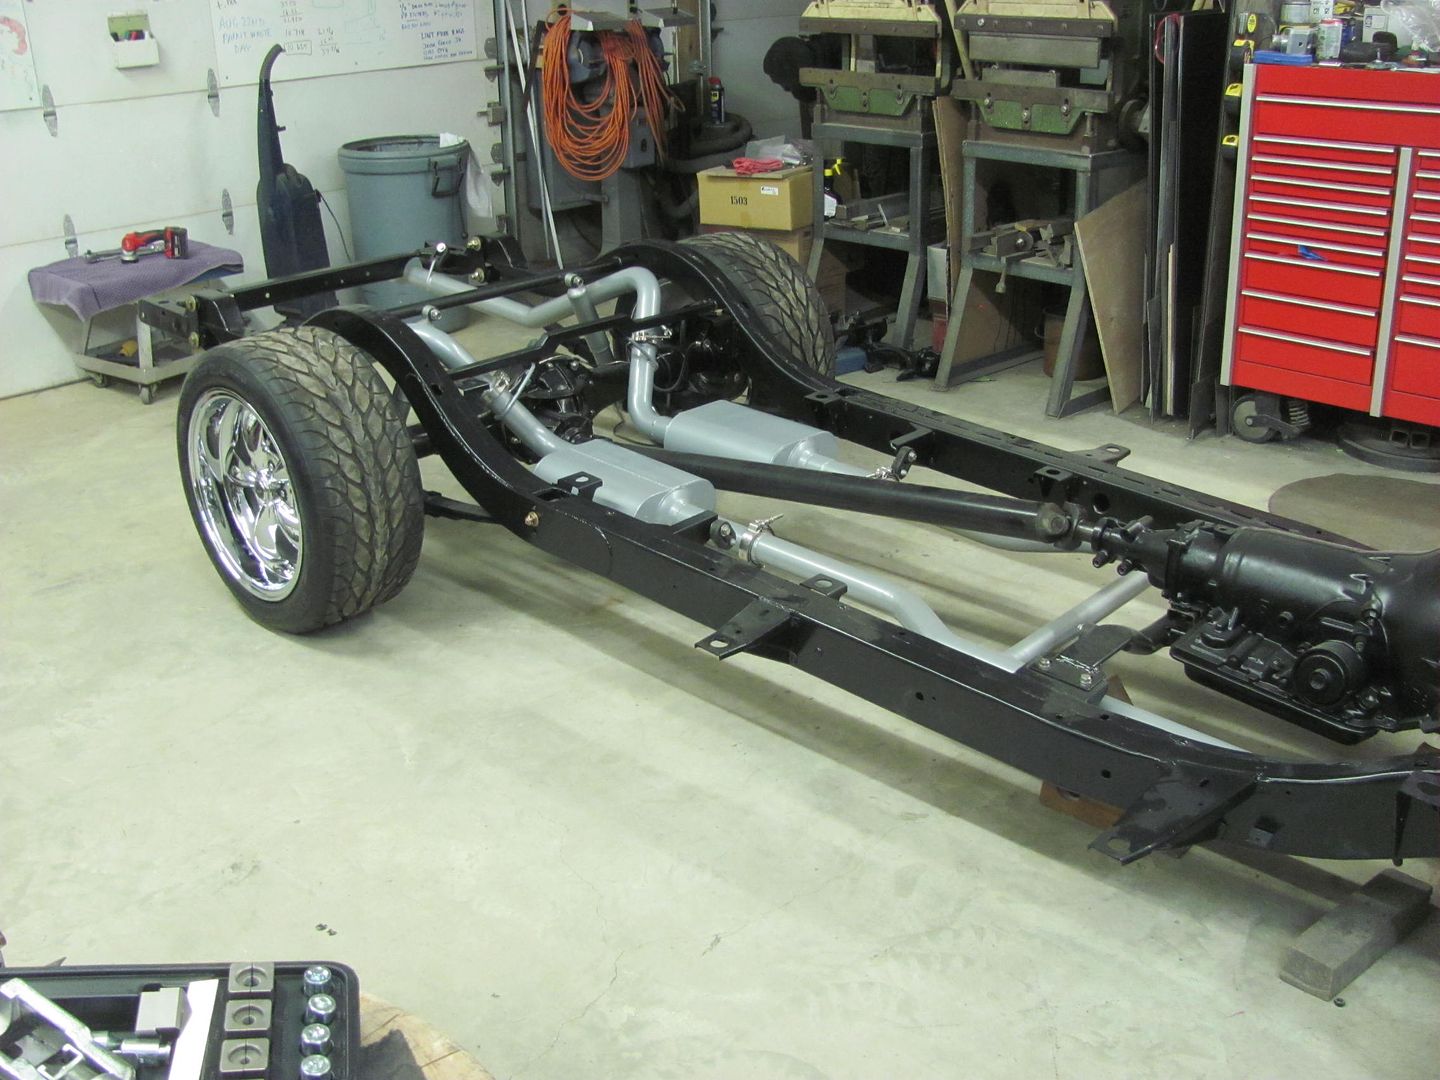 And for our lessons learned, this is what happens when you cut 12 gauge steel with a square on the other end of the shear. Dan, the blades are still sharp! 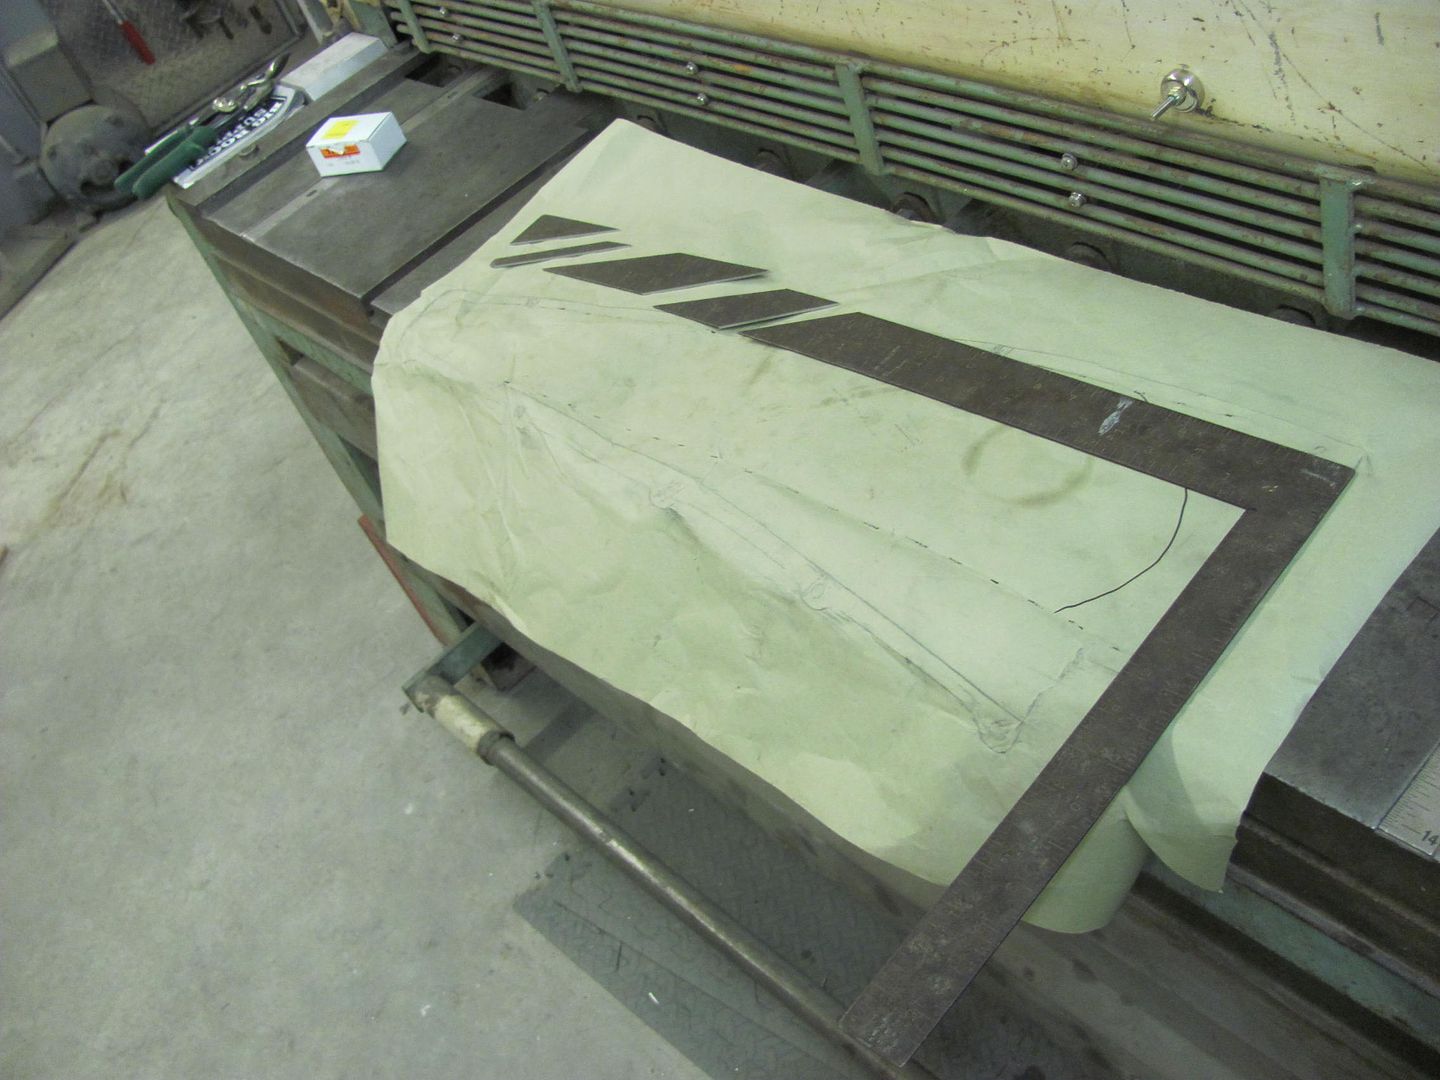 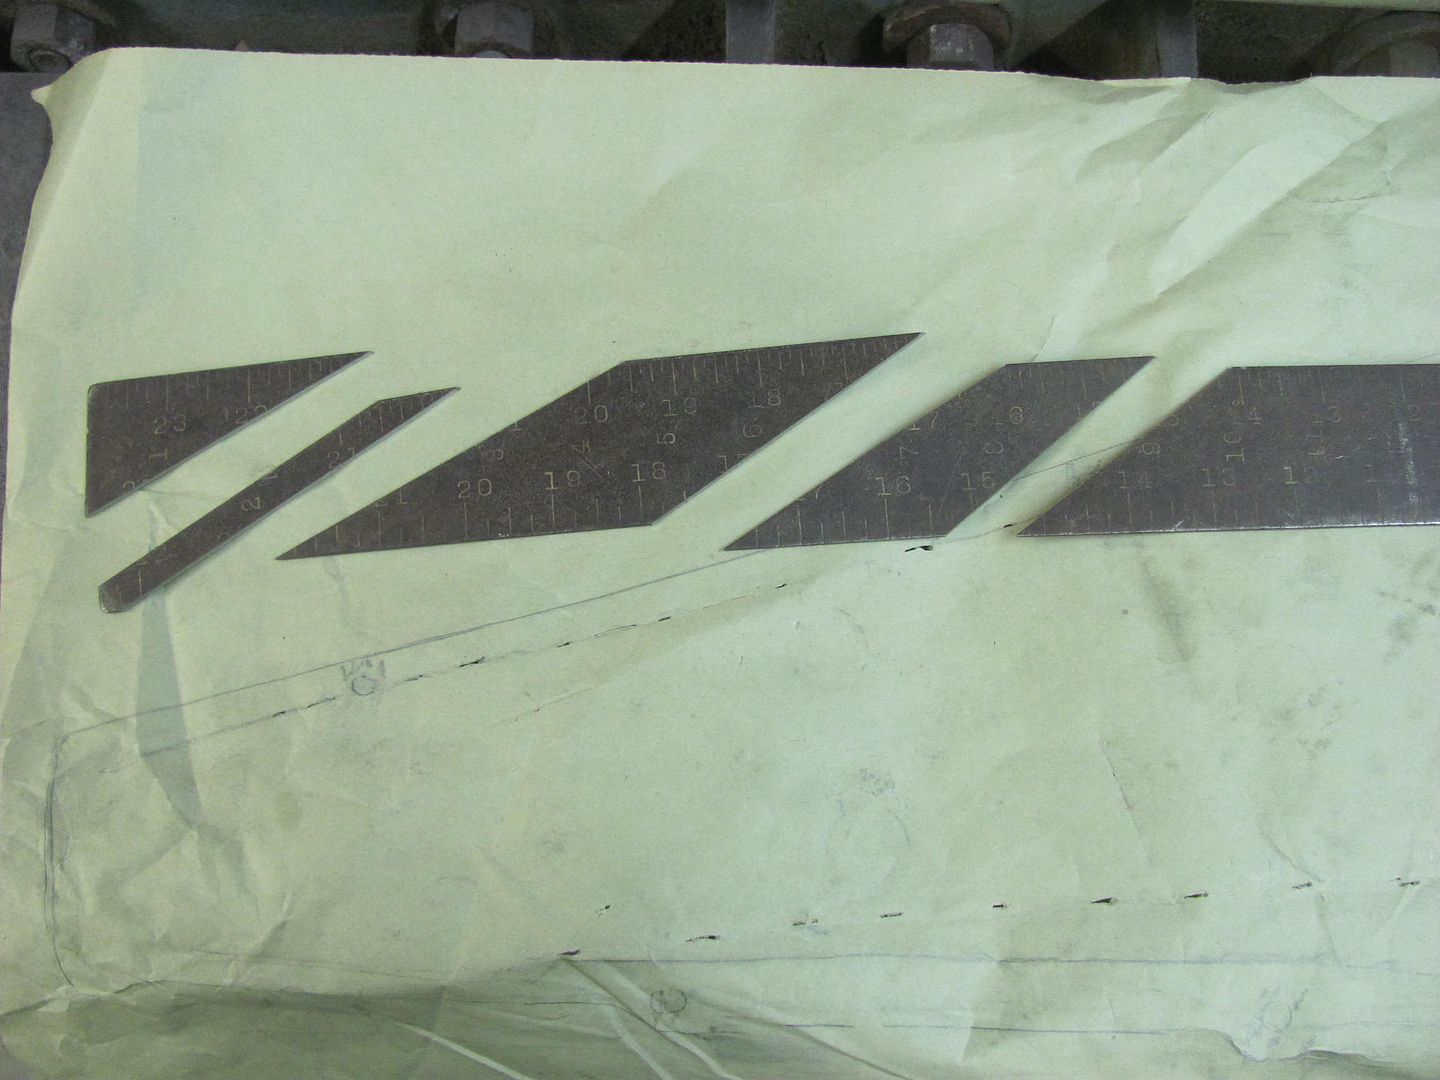
__________________
Robert |
|
|
|
|
03-09-2016, 12:01 AM
|
#673 |
|
Registered User
Join Date: Apr 2011
Location: .
Posts: 3,104
|
Re: 55 Wagon Progress
Thanks for posting. I swear every time I tune in I learn something.
|
|
|
|
|
03-10-2016, 02:26 AM
|
#674 |
|
Registered User
Join Date: Oct 2007
Location: Spanaway
Posts: 8,451
|
Re: 55 Wagon Progress
I have a couple nice shear modified scales myself, got a 2.1 and a 3.0..... now...

__________________
Mike. Swamp Rat build thread : http://67-72chevytrucks.com/vboard/s...d.php?t=595019 72 3/4T 4X4 4" BDS Lift 33" BFG's |
|
|
|
|
03-12-2016, 10:44 PM
|
#675 |
|
Registered User
Join Date: Jan 2013
Location: Leonardtown, MD
Posts: 1,637
|
Re: 55 Wagon Progress
We started on an ashtray delete mod for the wagon, starting with this...
 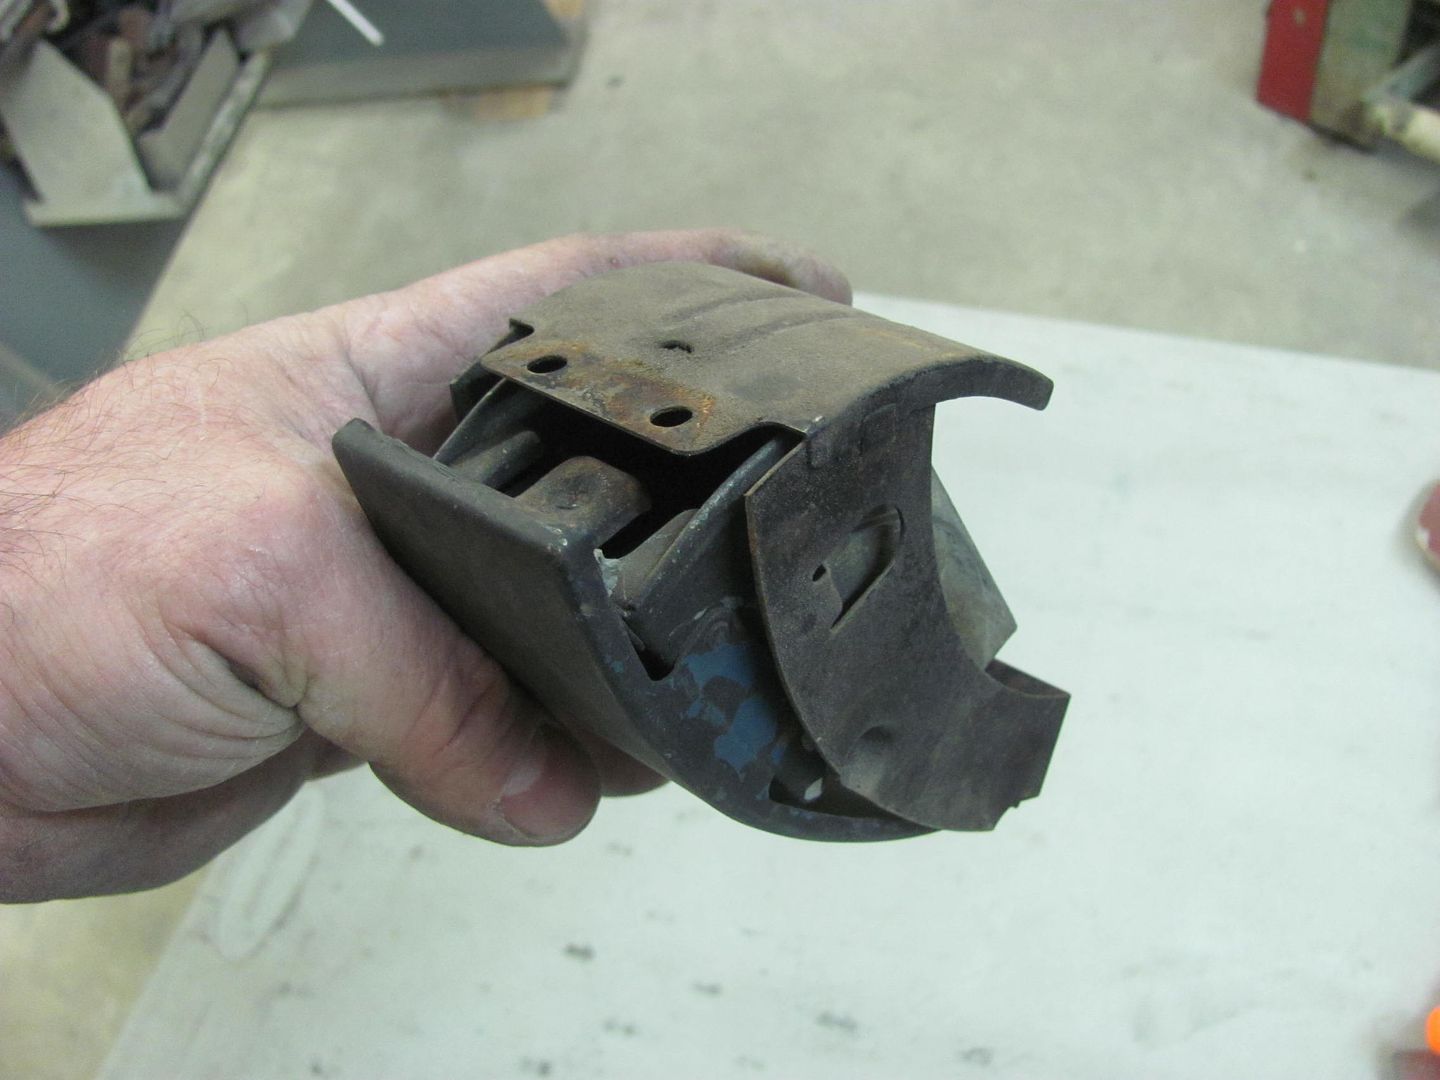 a bit wider opening... 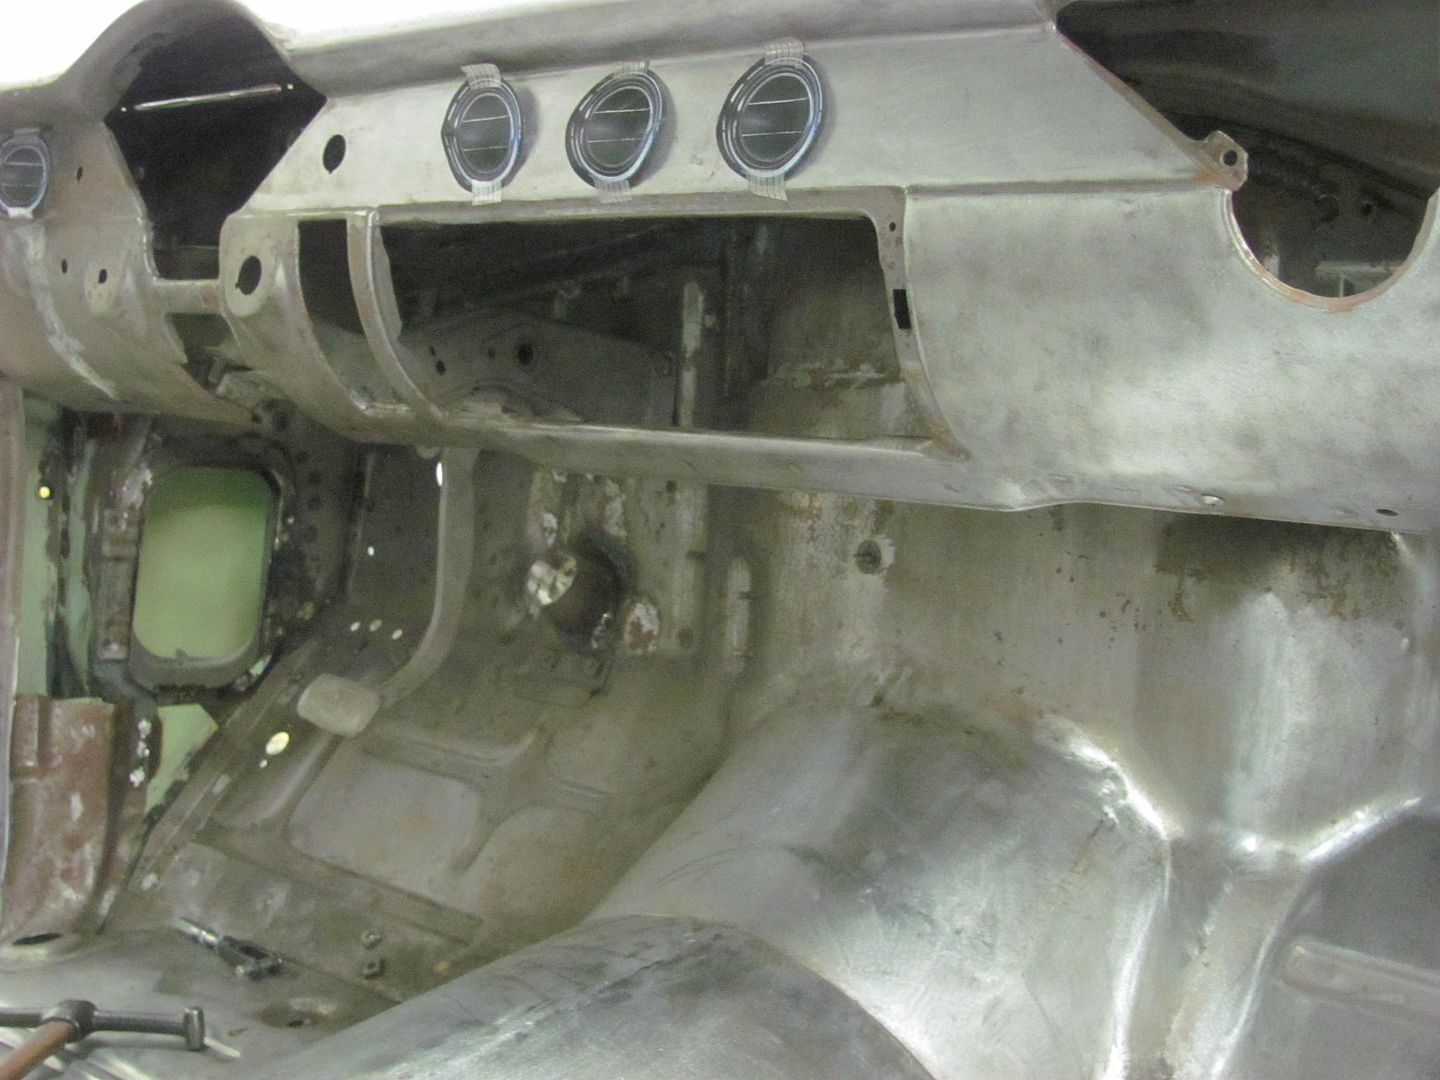 Now to remove the glove compartment door "skin"...... 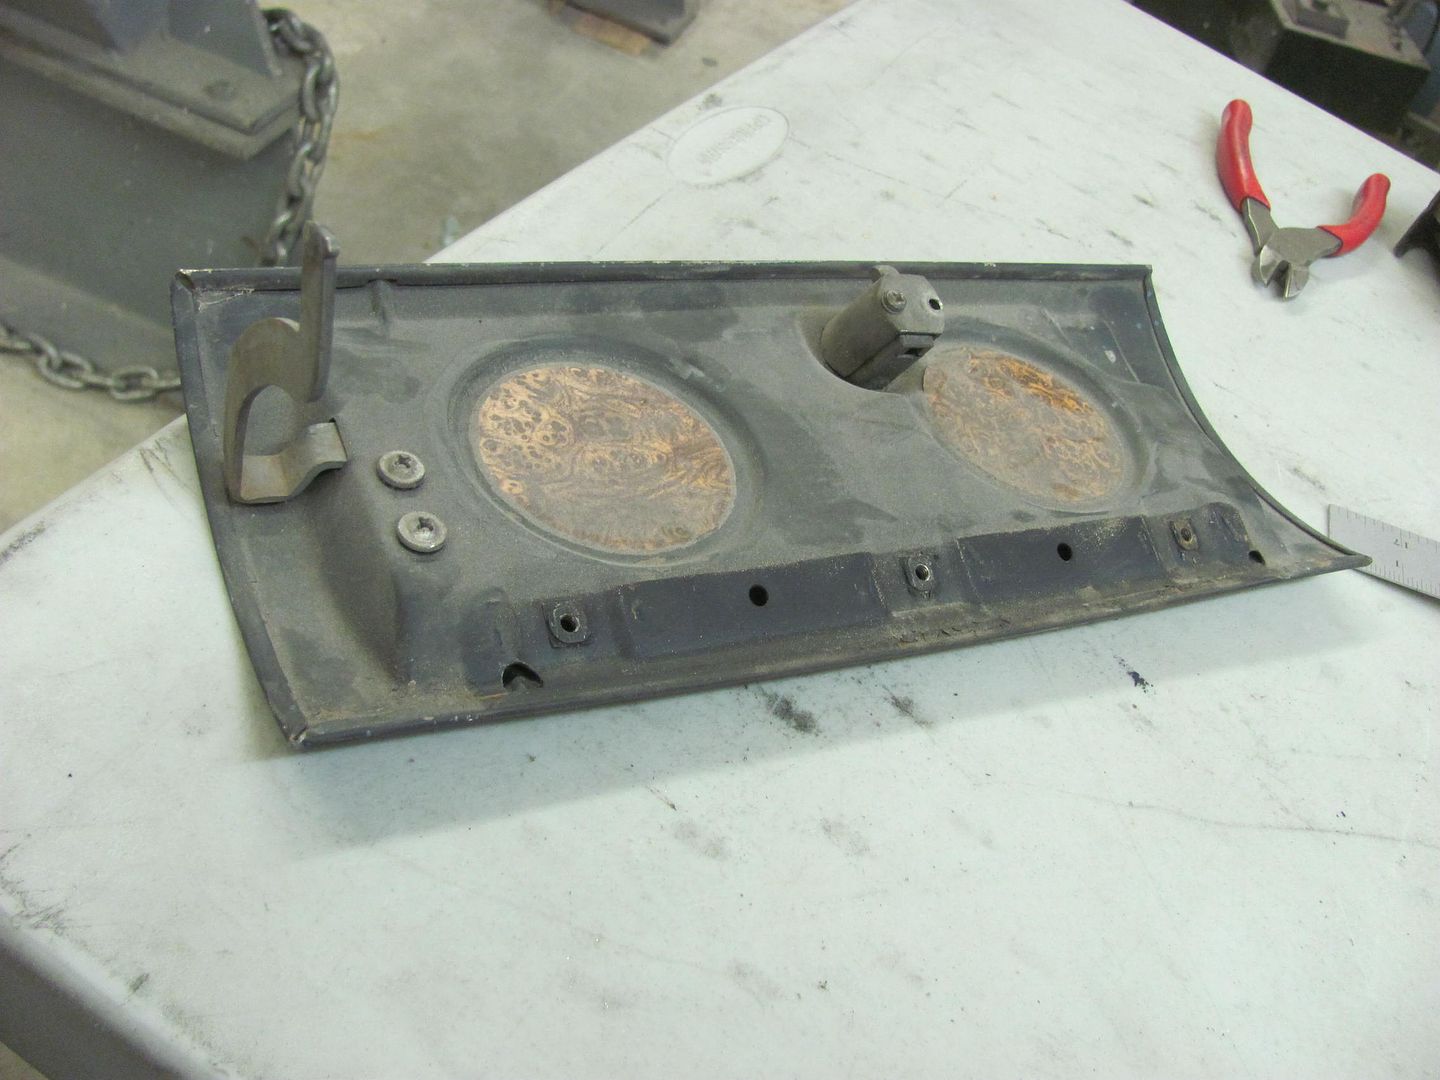 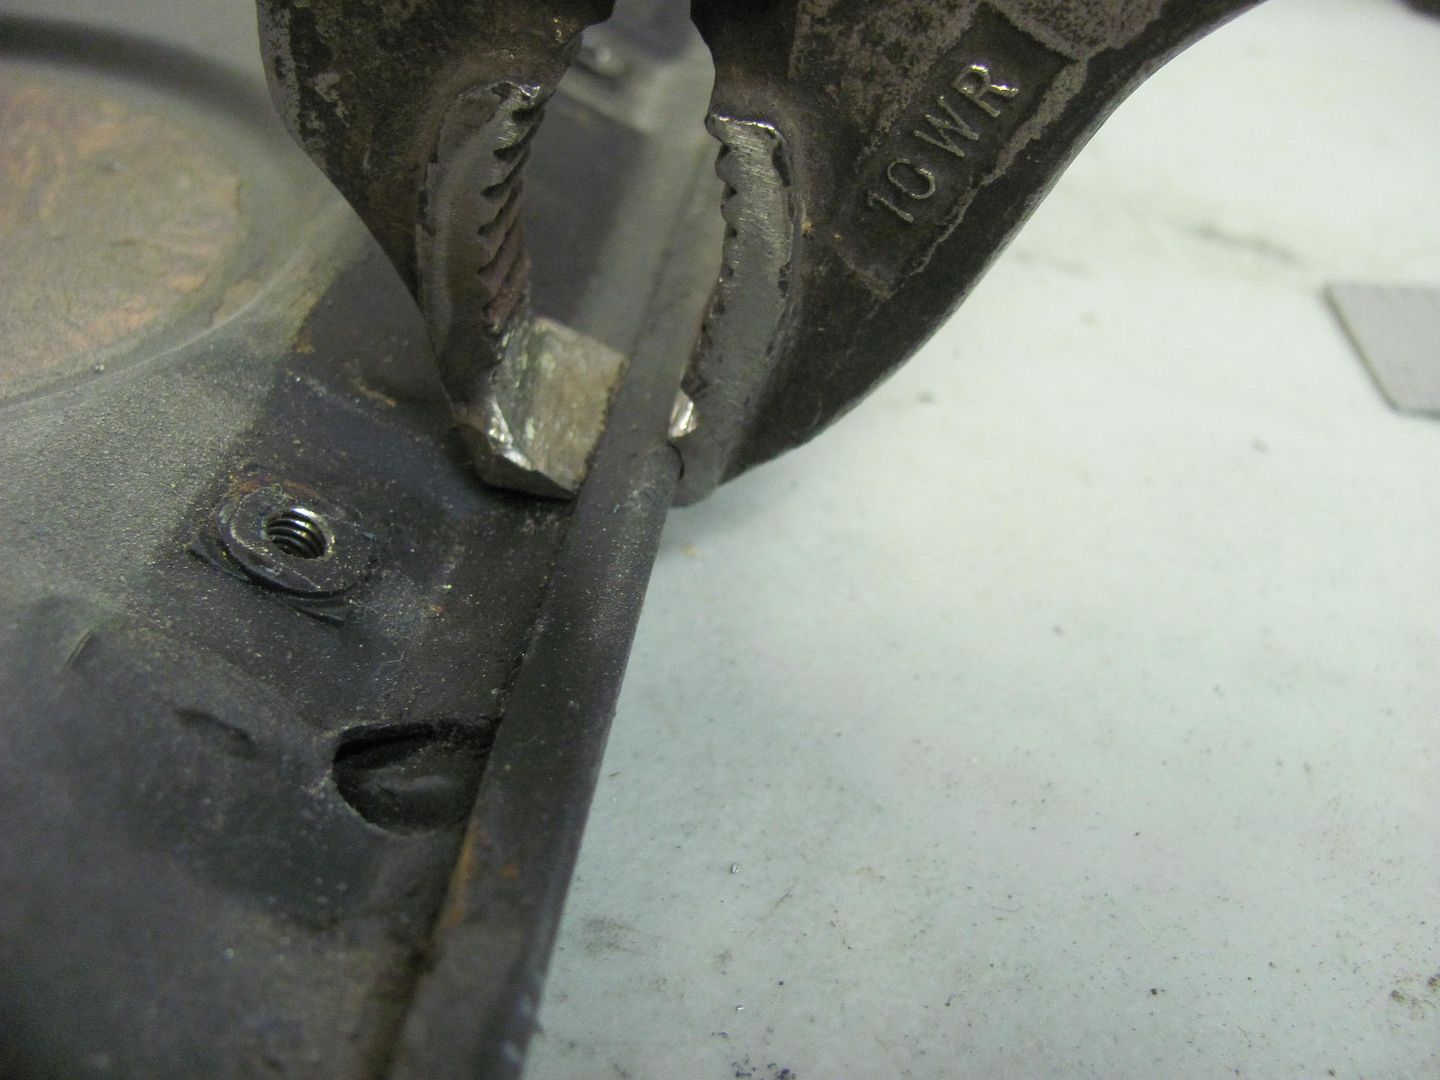 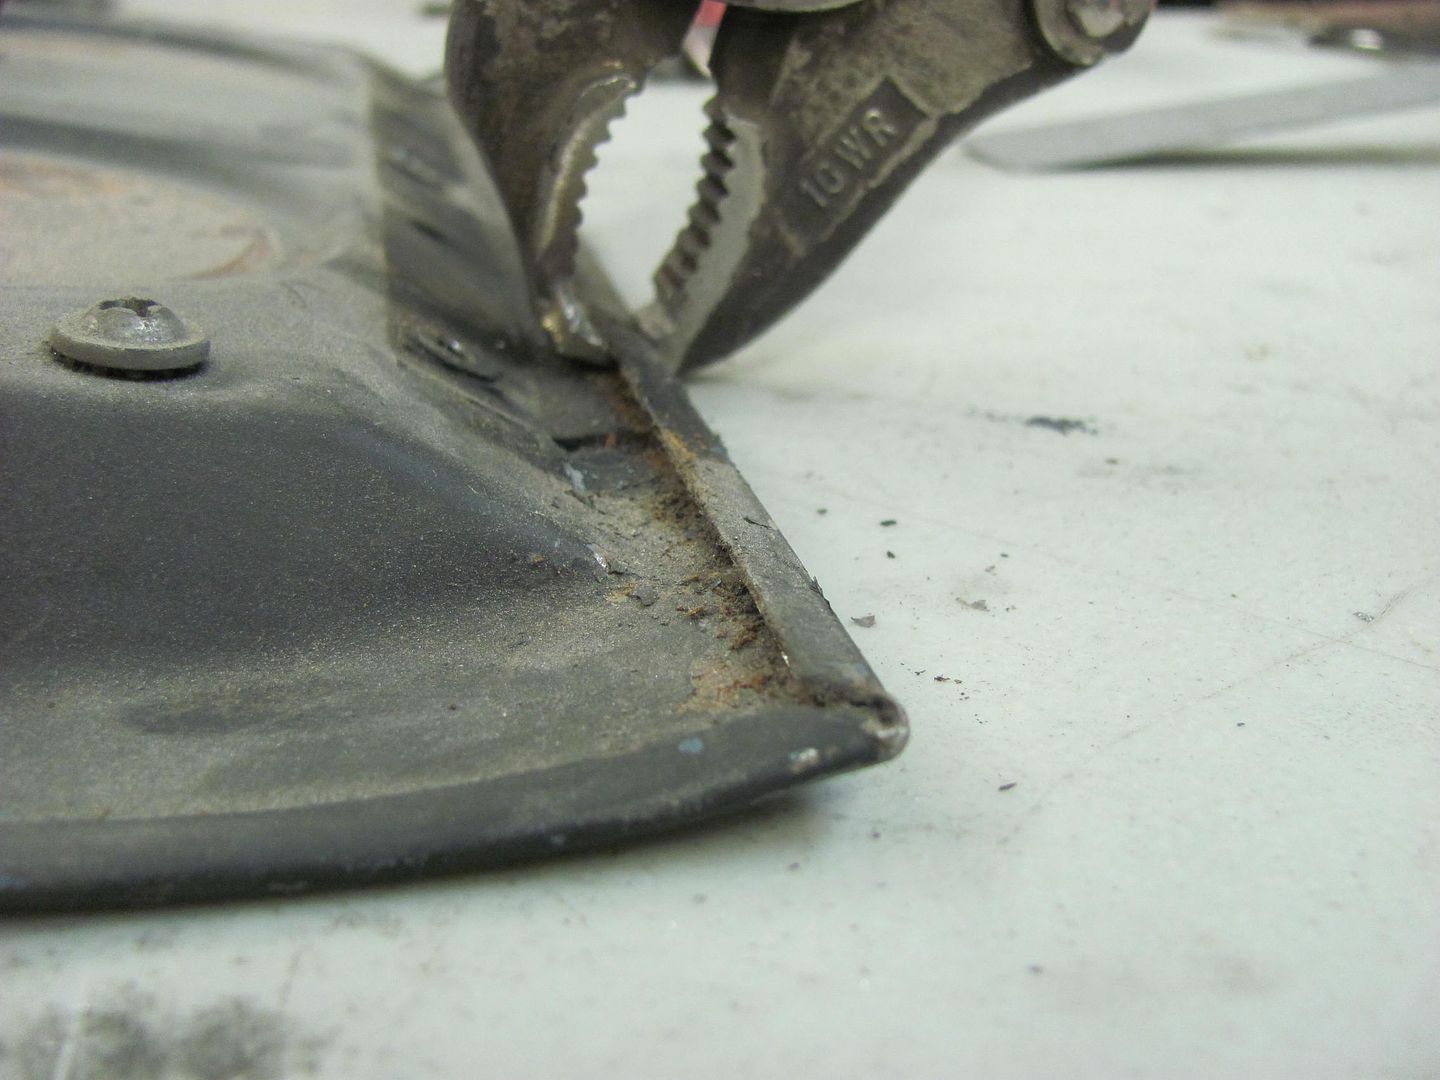 Then used these to flatten out the flanges... 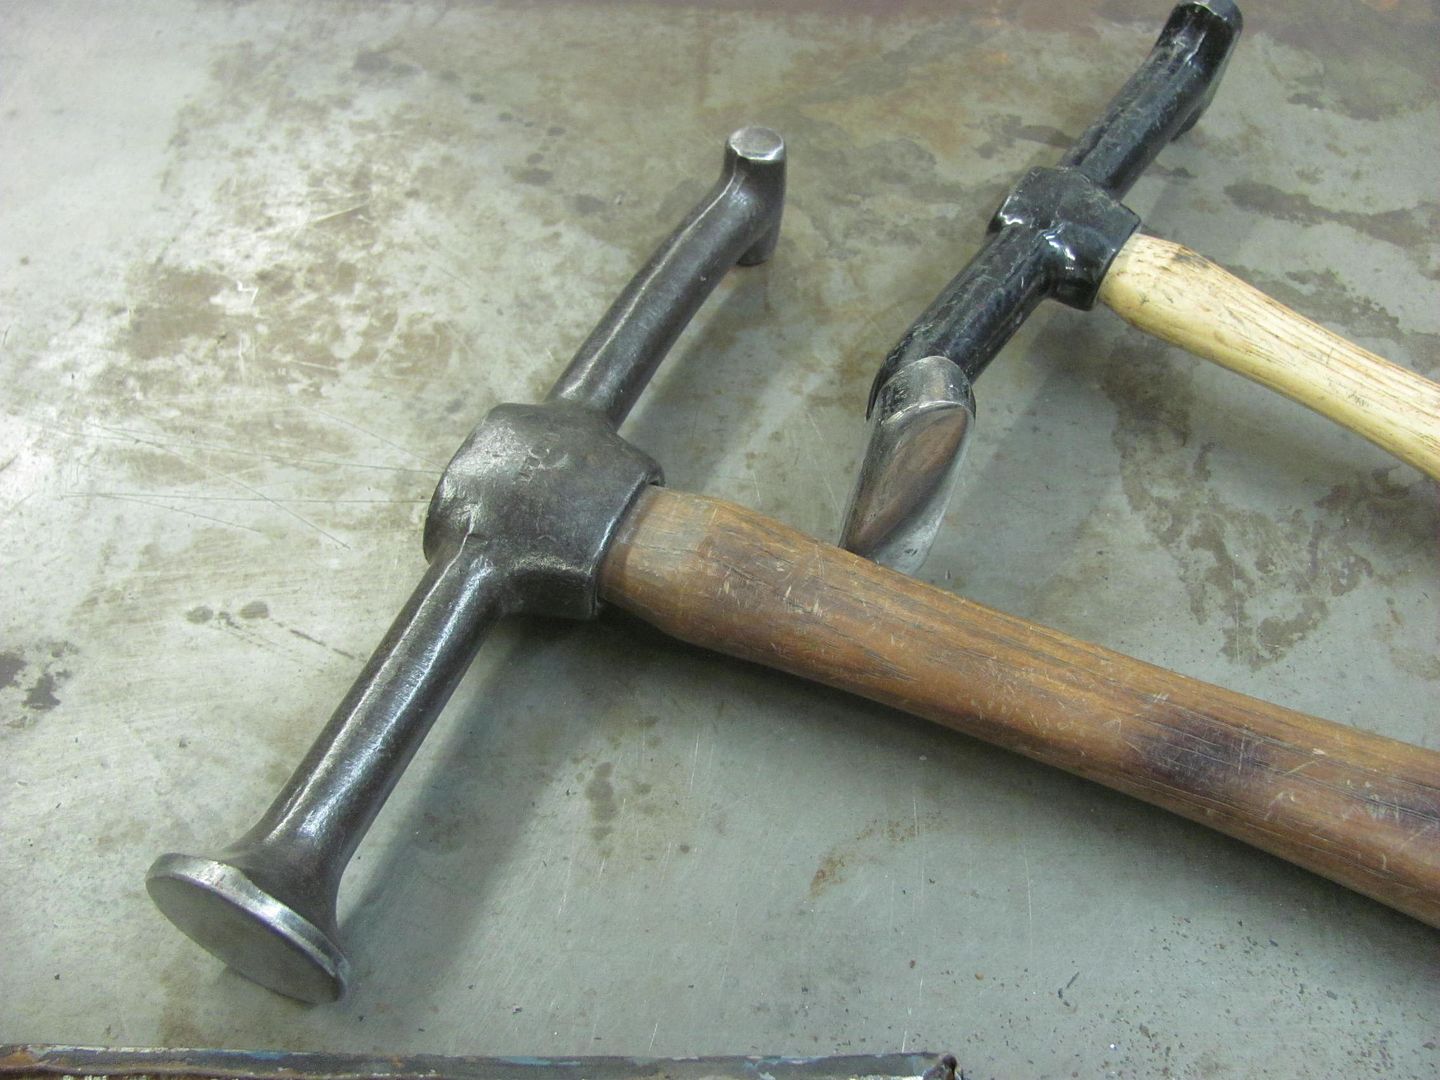 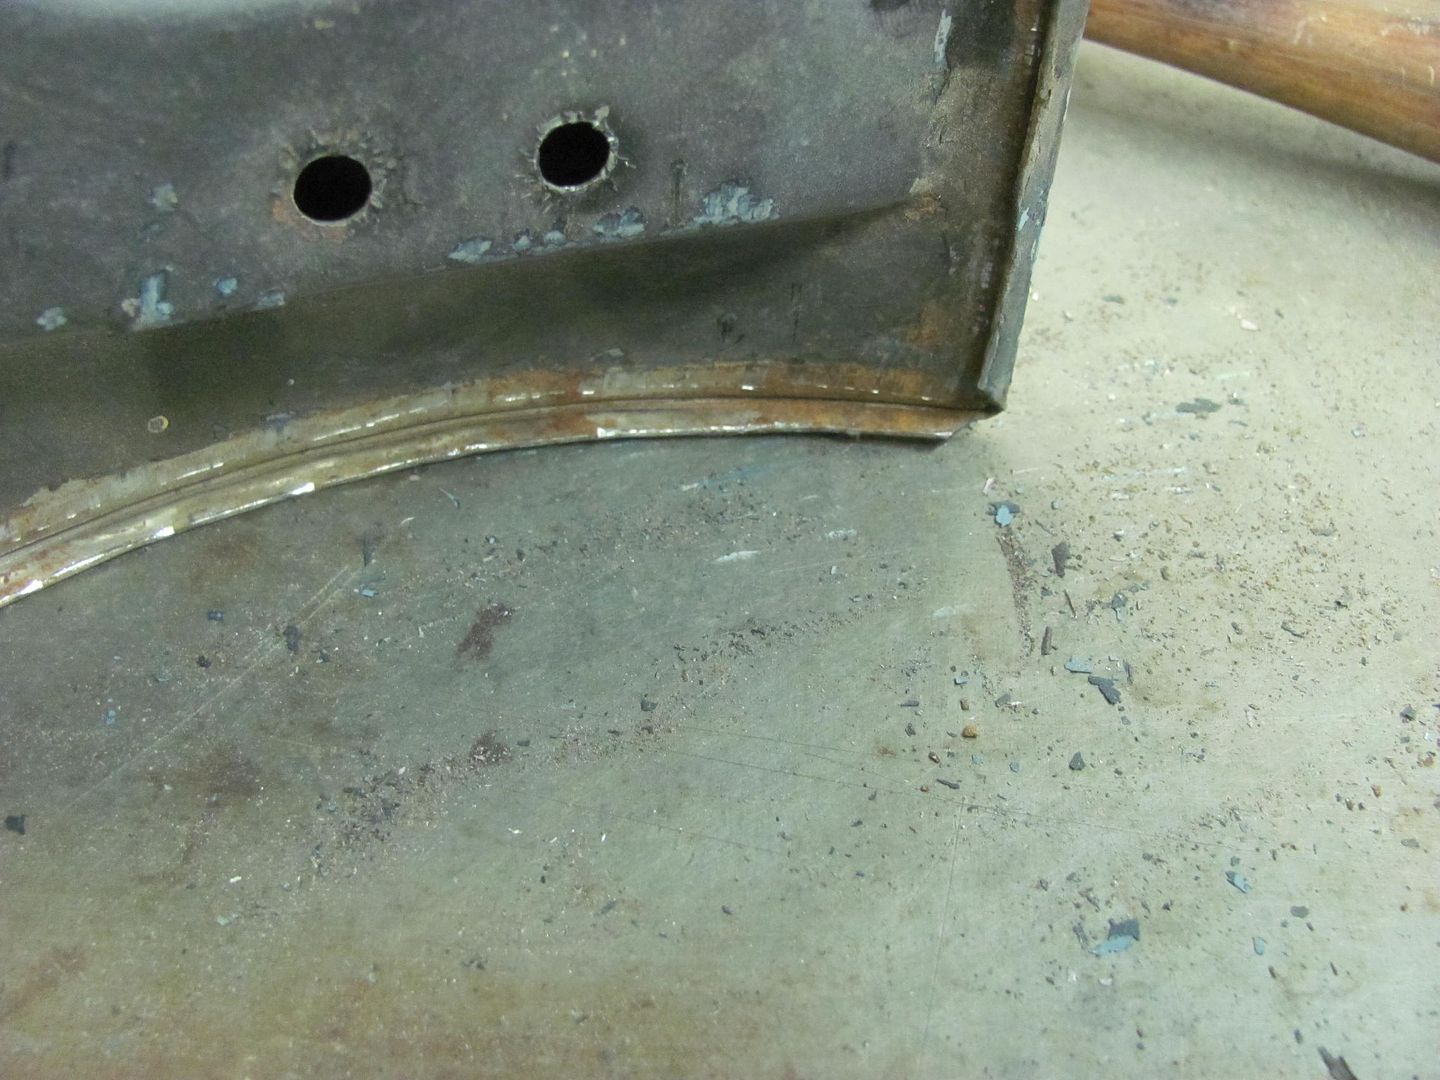 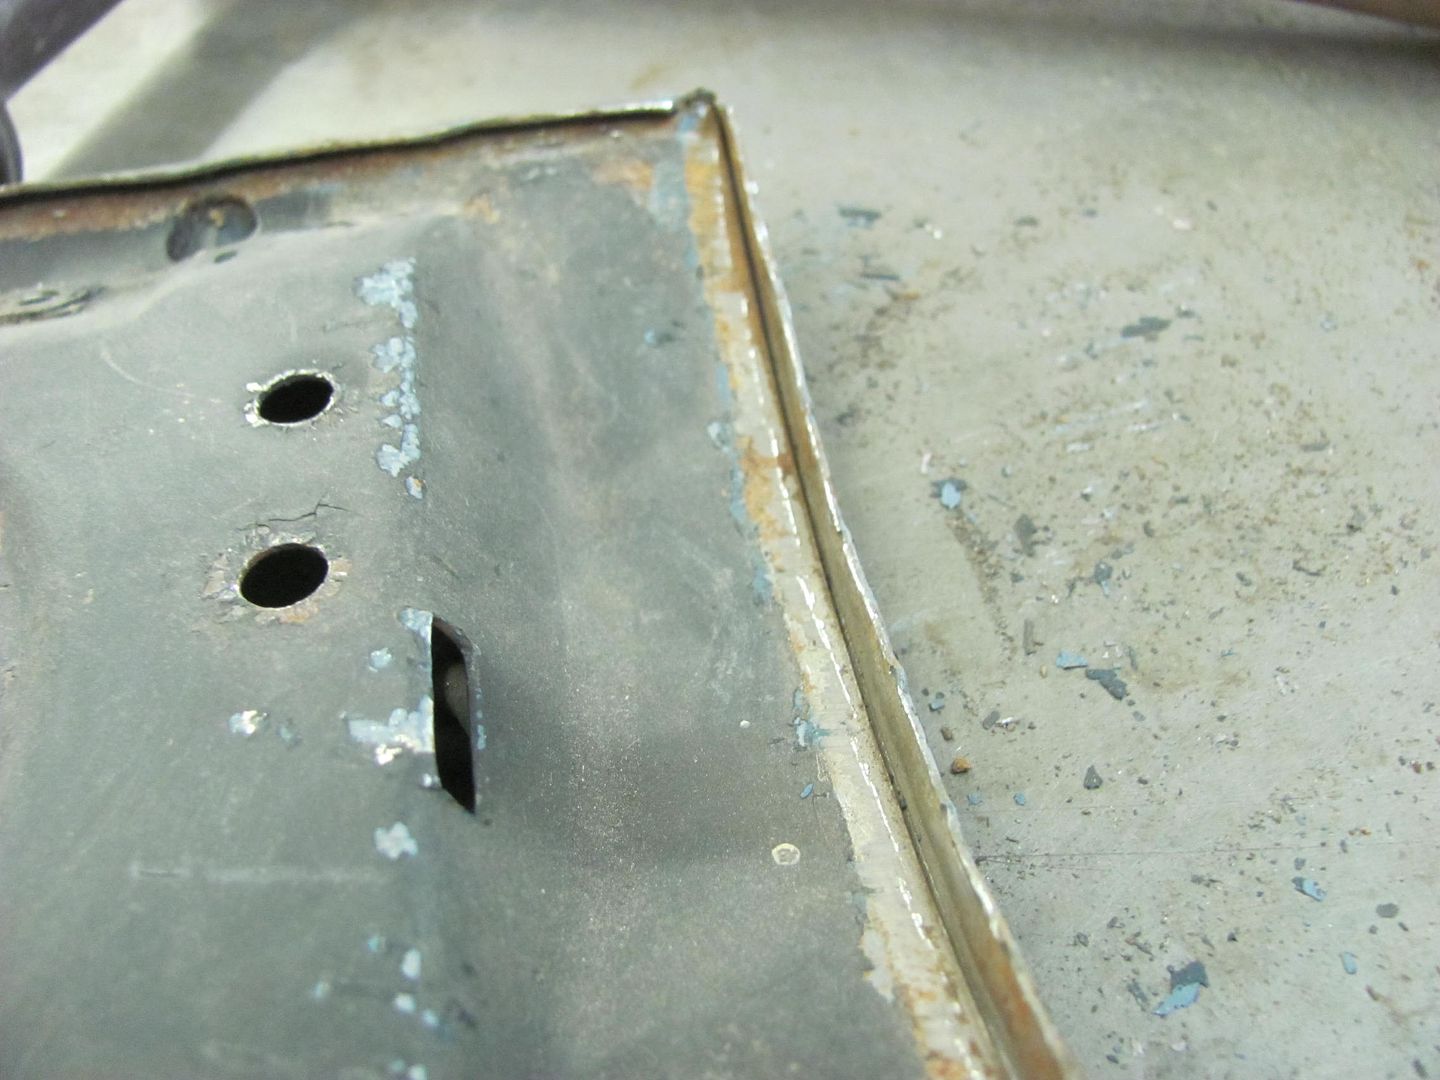 Looks like someone may have kneed the glove box at some point... 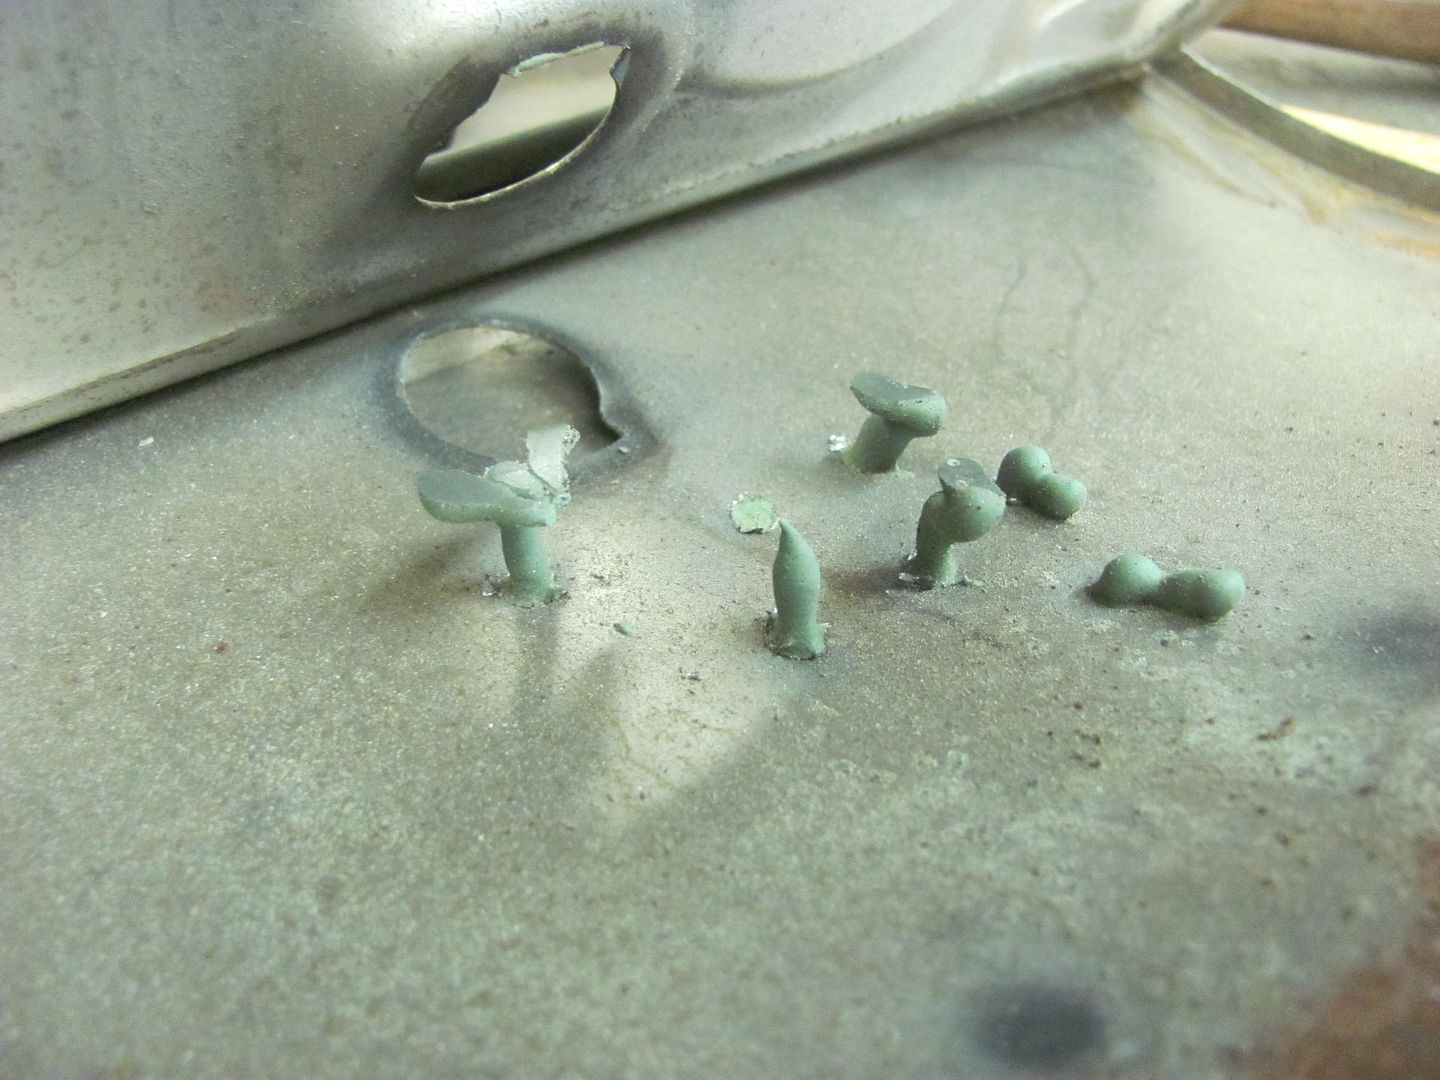 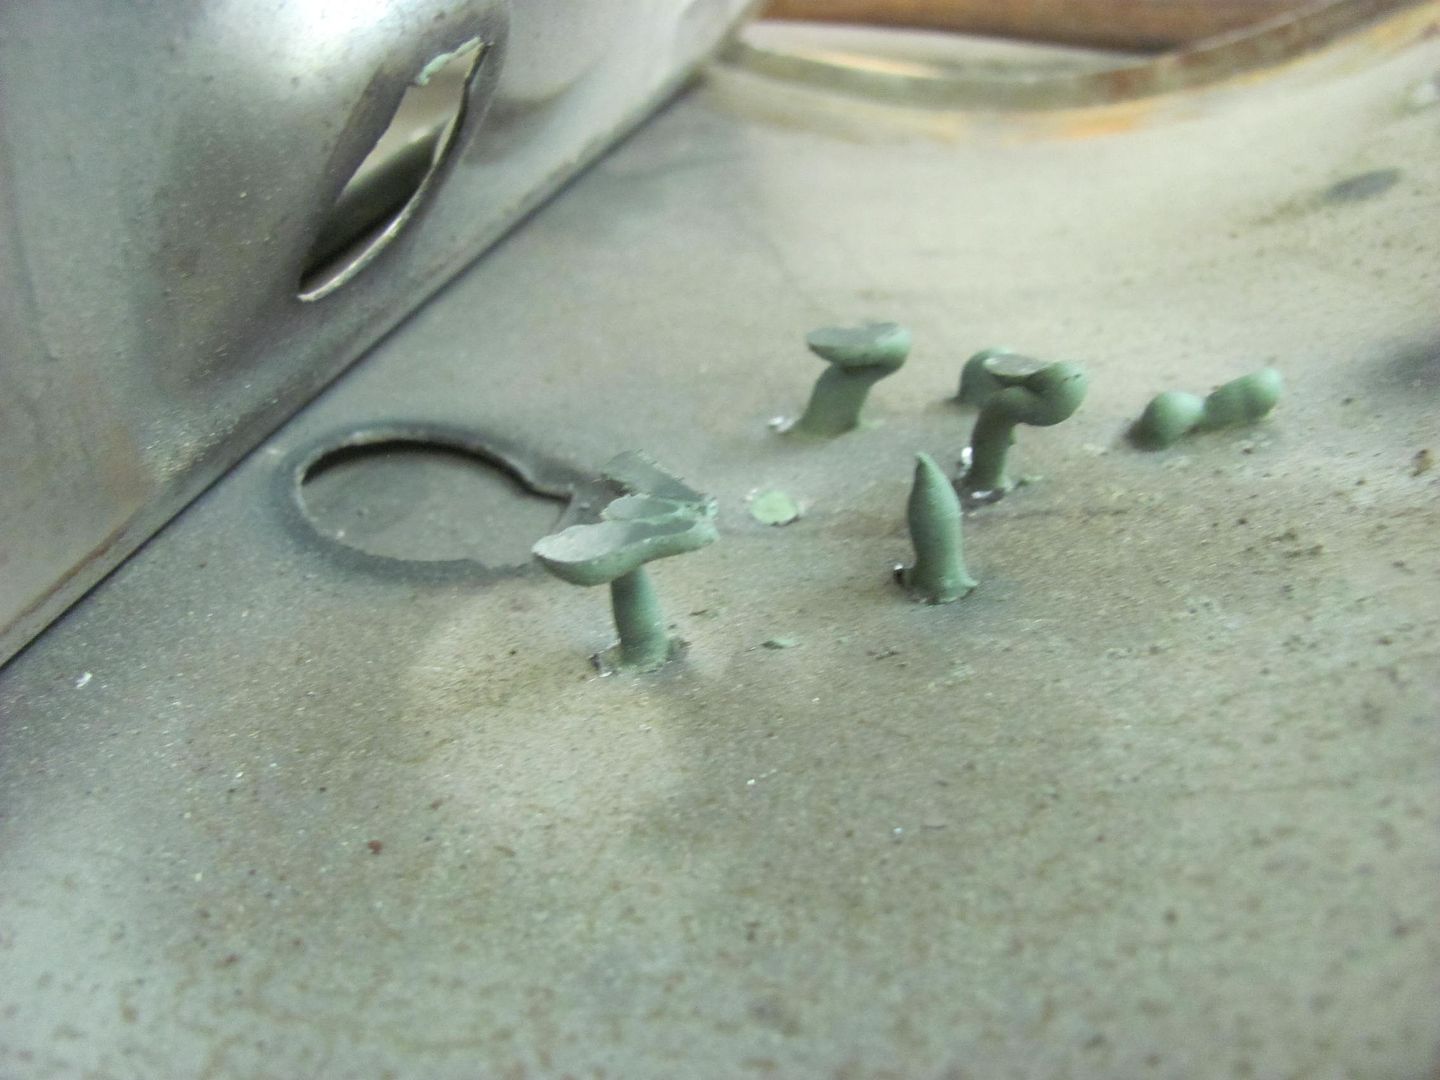 The inside looks real nice for 61 year old metal, still shining! 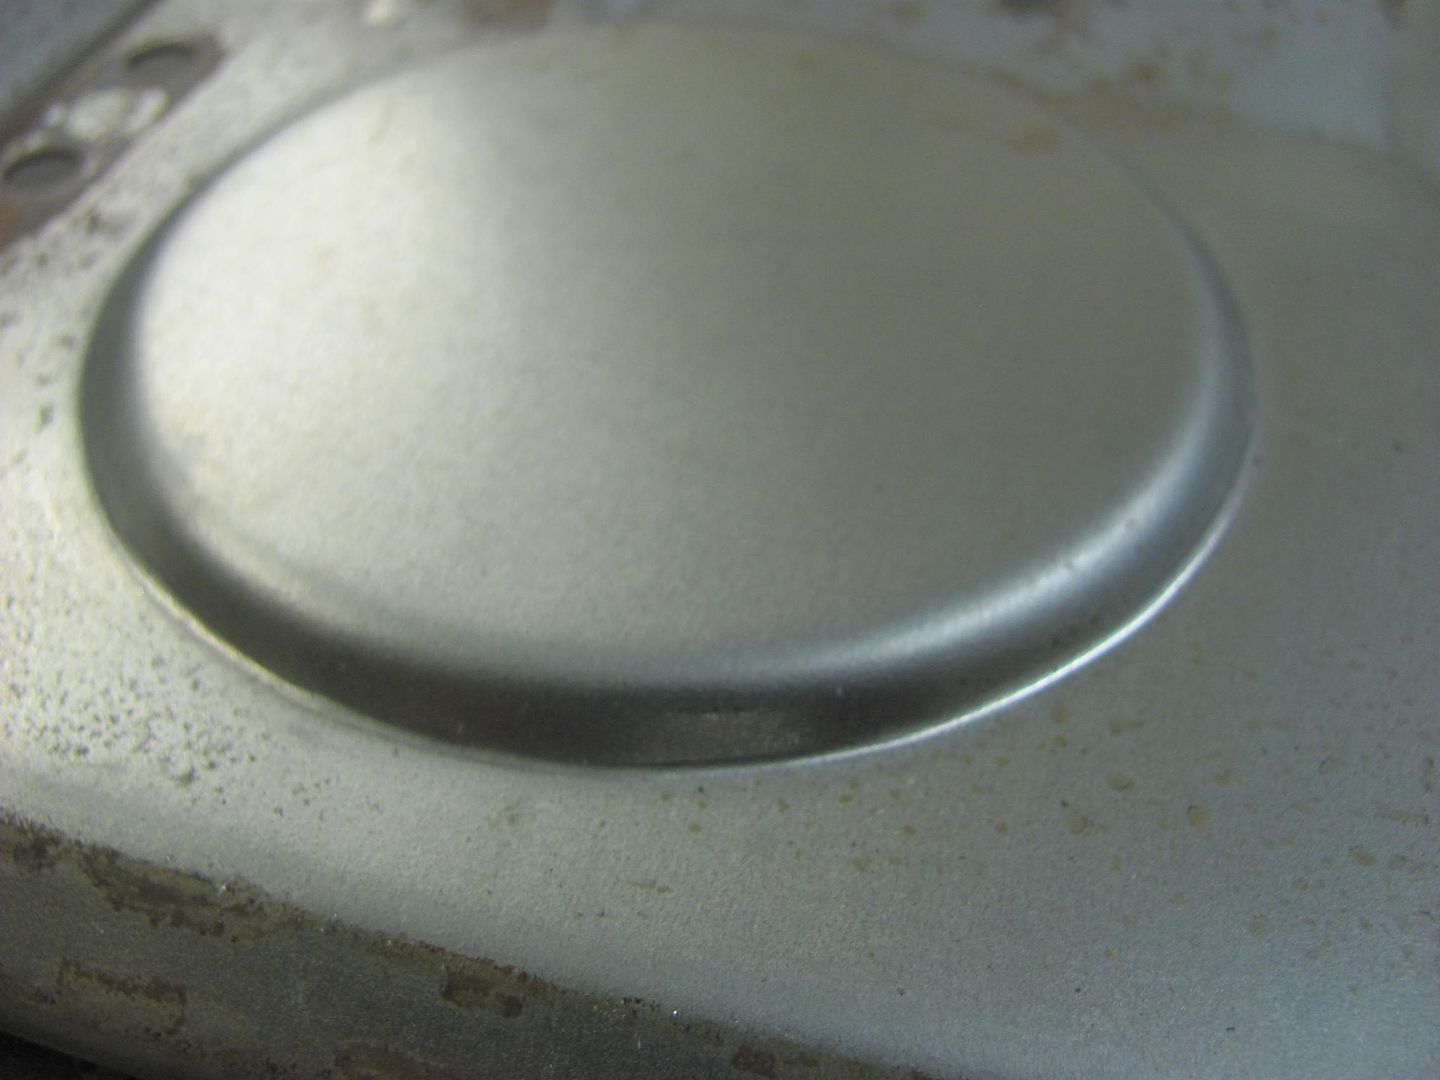 Now time for the post anvil... 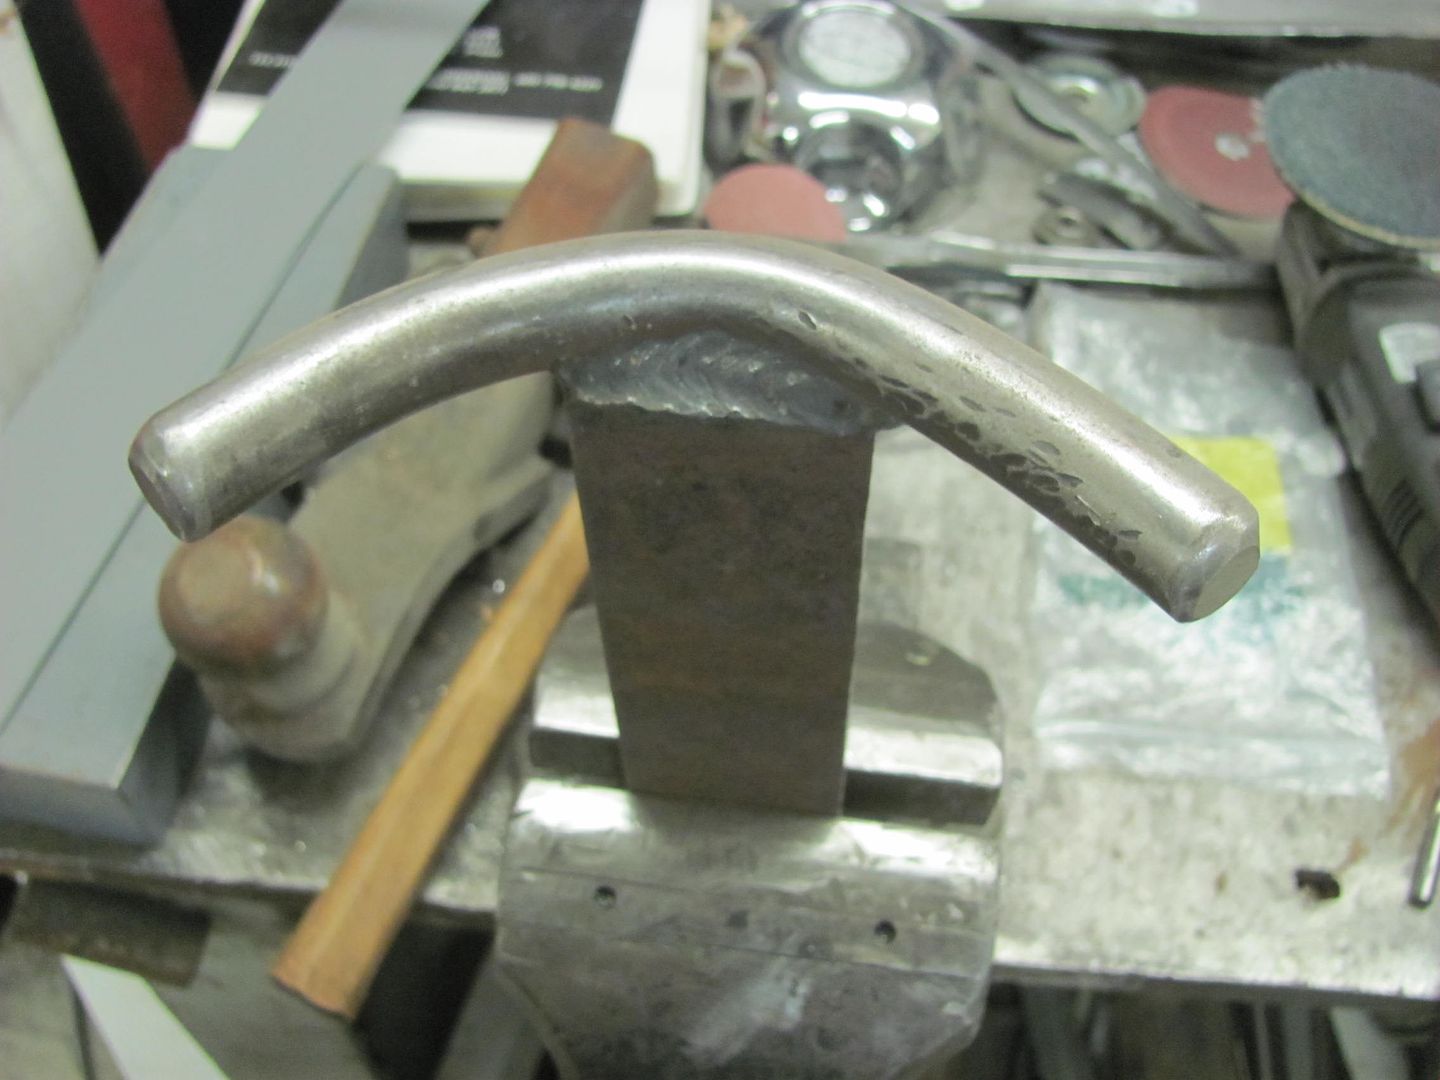 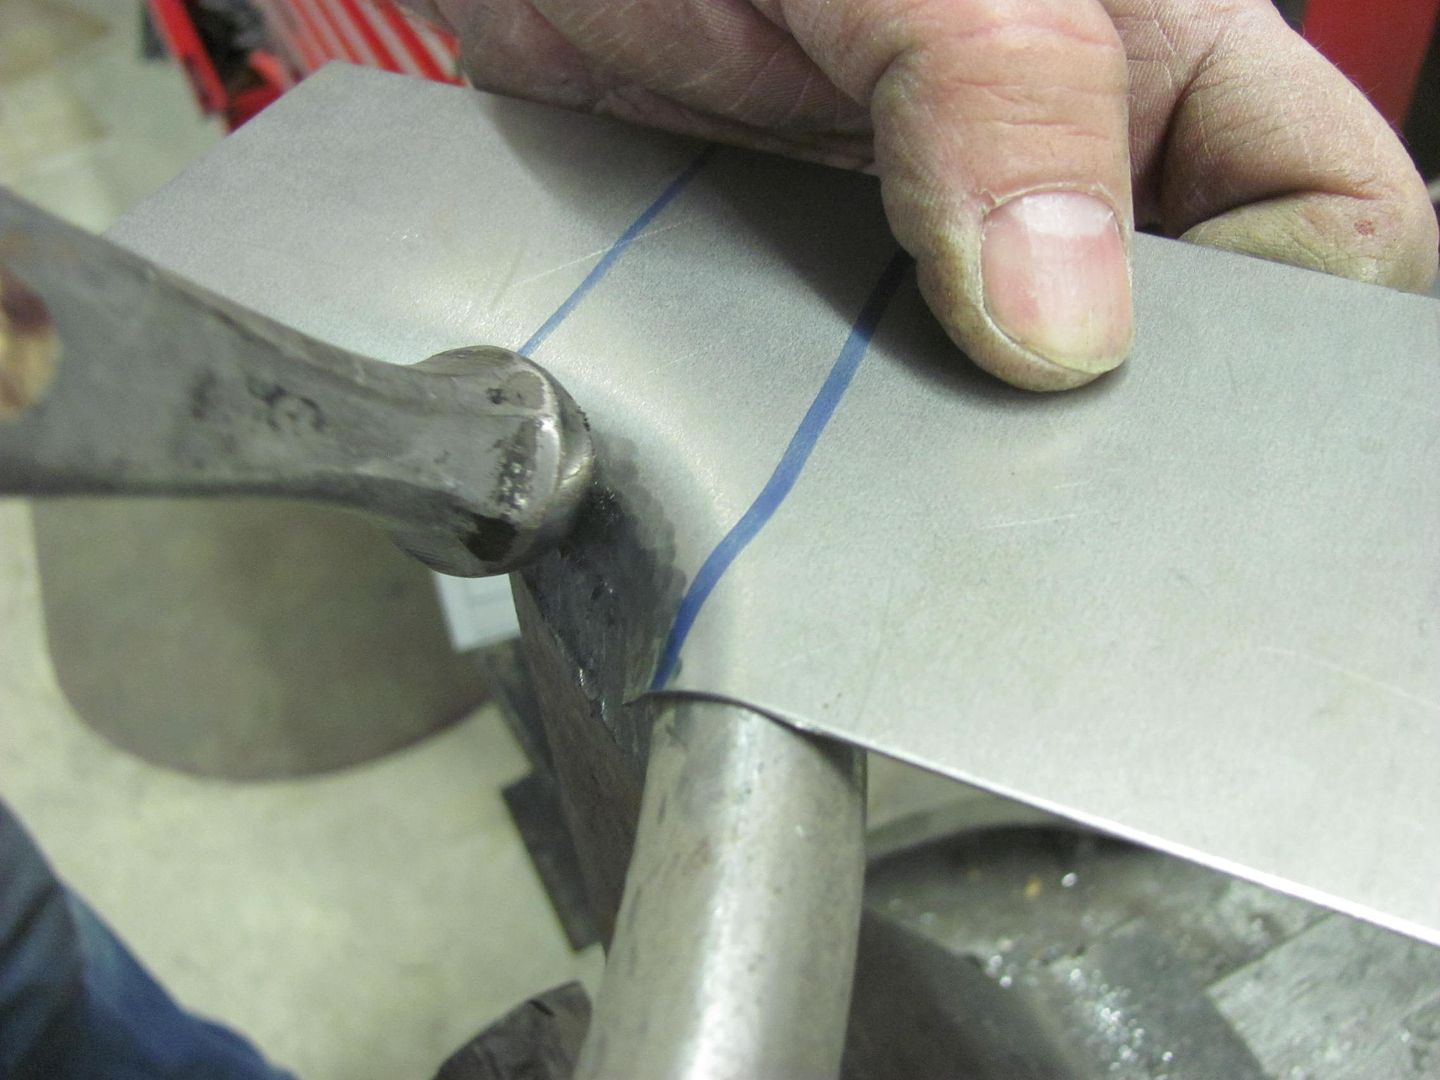 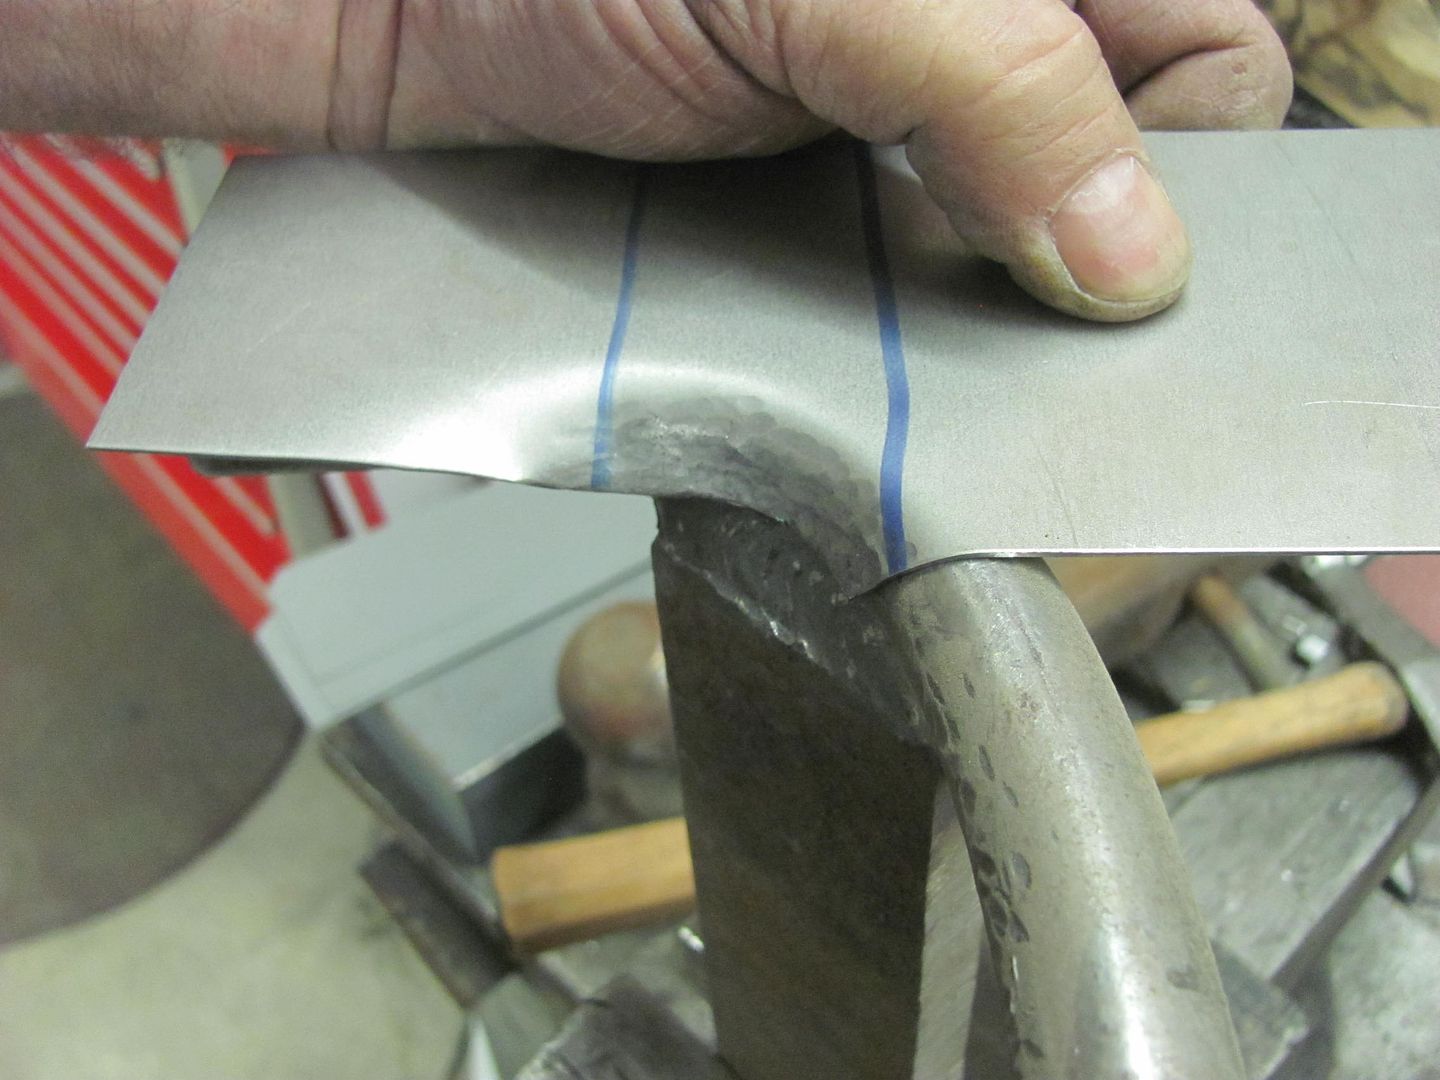 Here's our widening method for the inner door and the outside will get a new skin made up.. 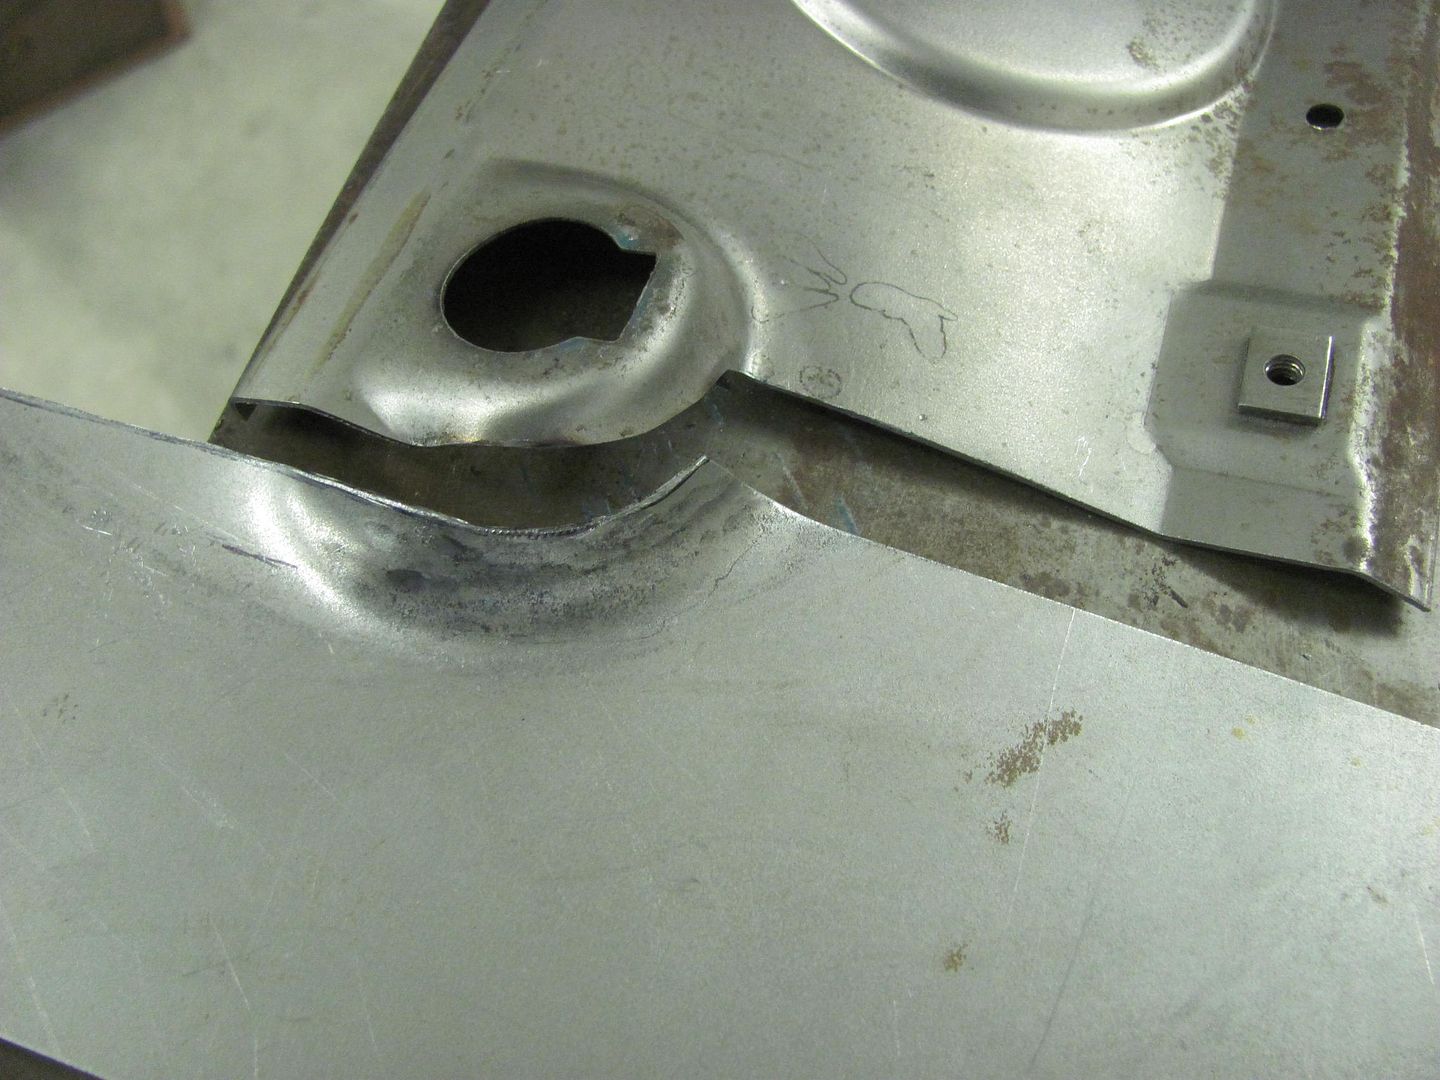 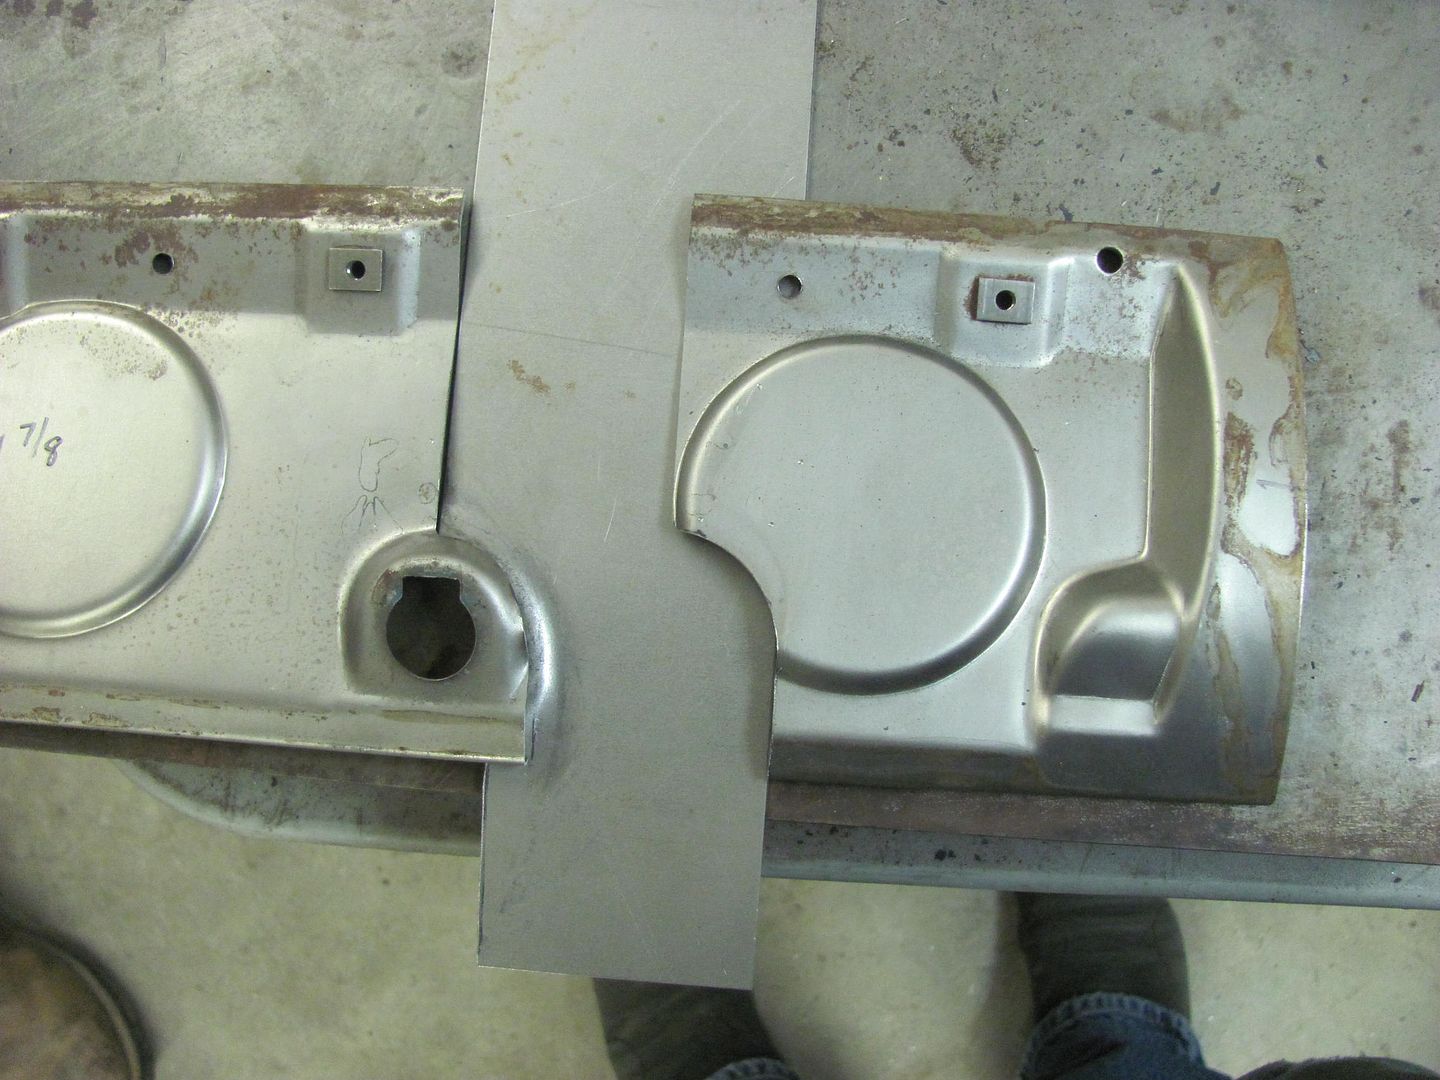
__________________
Robert |
|
|
|
 |
| Bookmarks |
|
|


 Linear Mode

