
|
Register or Log In To remove these advertisements. |
|
|
|
|||||||
 |
|
|
Thread Tools | Display Modes |
|
|
 07-30-2017, 05:48 PM
|
#1 |
|
Senior Member
 Join Date: May 2007
Location: Doodah Kansas
Posts: 7,748
|
Re: Kell's Two Cents - 1946 build
I ran for the hills when I saw how much work putting a windshield together was too, bought mine from bowtie bits completely assembled except the seal. props to you for assembling one yourself, I paid as fast as I could for the assembled unit.
__________________
the mass of men live lives of quiet desperation if there is a problem, I can have it. new project WAYNE http://67-72chevytrucks.com/vboard/s...d.php?t=844393 |

|

|
|
08-01-2017, 01:47 AM
|
#2 | |
|
Registered User
Join Date: Nov 2014
Location: Oakland, CA
Posts: 114
|
Re: Kell's Two Cents - 1946 build
Quote:
|
|
|
|
|
|
08-01-2017, 02:34 AM
|
#3 |
|
Registered User
Join Date: Nov 2014
Location: Oakland, CA
Posts: 114
|
Re: Kell's Two Cents - 1946 build
alright fellas, I guess I have a partial update as I'm still kinda in the middle of things but hey, got a lot done today
So the cowl vent bracket had been so rusted it never budged. Think I pulled it 2 years ago and haven't touched it since, but as usual your mind kinda works on things over time so... I drilled out the rivets, stripped and sprayed it, got it a little lubed and reassembled. These parts have to move so I installed all the moving parts with nylon lock nuts just snug enough to allow smooth movement. 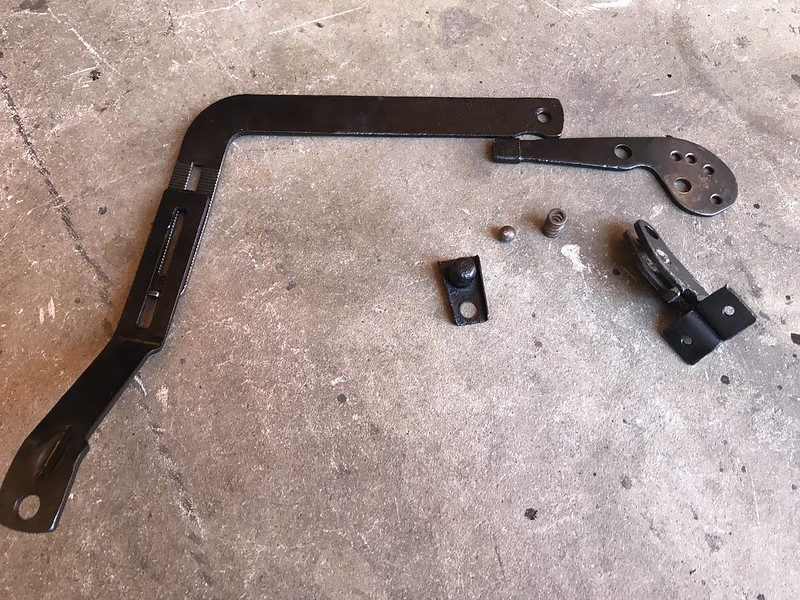 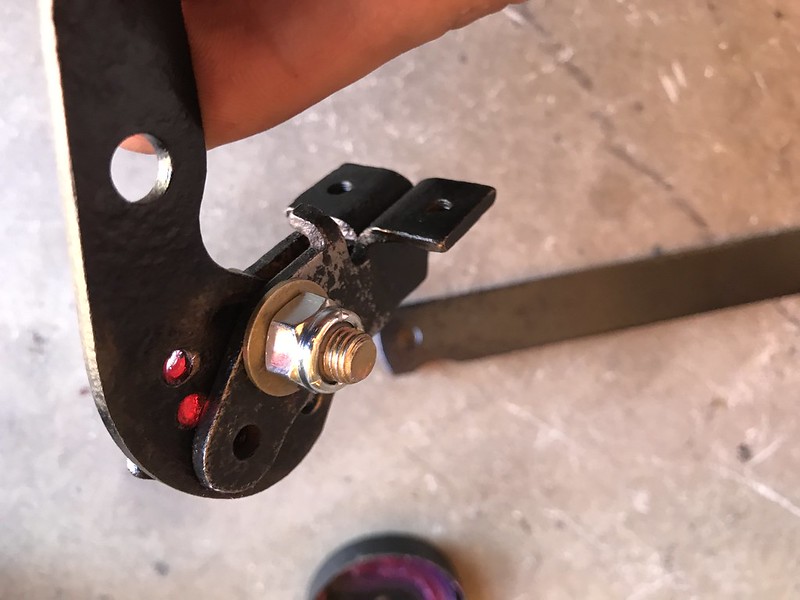 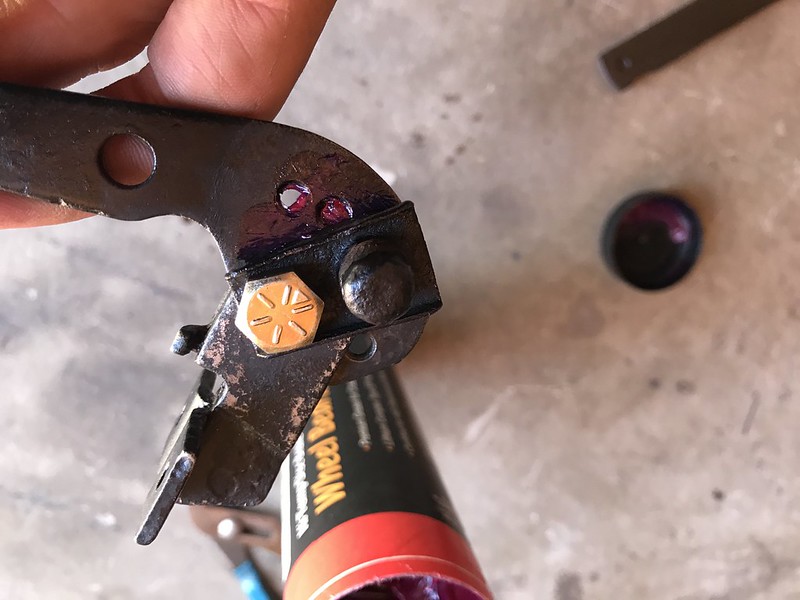  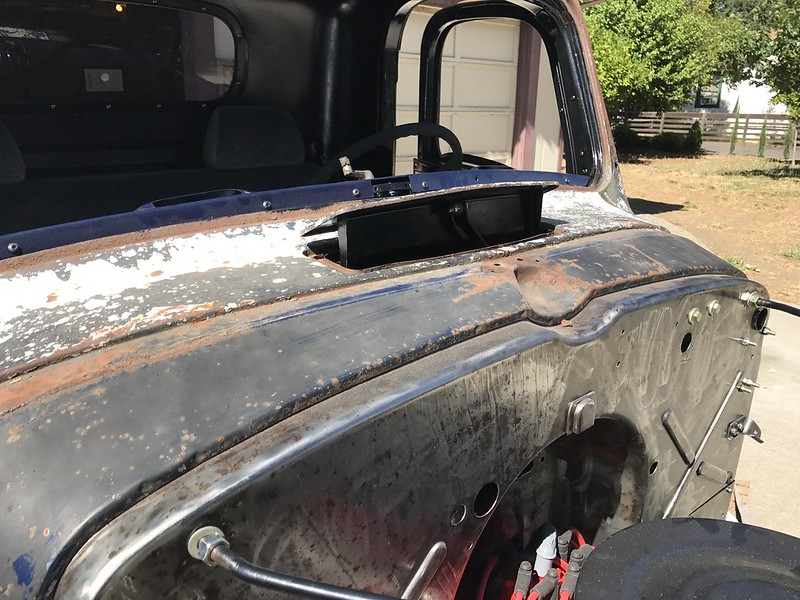 Sorry,it's always a pain getting under dash shots... but the vent works great. Very smooth and sturdy I've been messing with the carb throttle bracket, got one ordered and wasn't quite sure if it was going to fit or not, but once it came it worked alright with just slight modification. I filed it out to clear the throttle brackets on the carb, sprayed it and got it on. I got the spring and throttle cable adjusted, trans kick down is right about where it should be but I'm still waiting on the little trans kick down knob in the mail. Now the issue that I'm really having with it is that I don't have enough stroke in the gas pedal to get the full movement that I need. The 46 floor board is so steep that you lose a full range motion that is capable with the pedal base when mounted to something with less of an angle. I'm throwing ideas around about adding a base to raise the pedal away from the floor board and gain some range, so I'll have to report back on it. 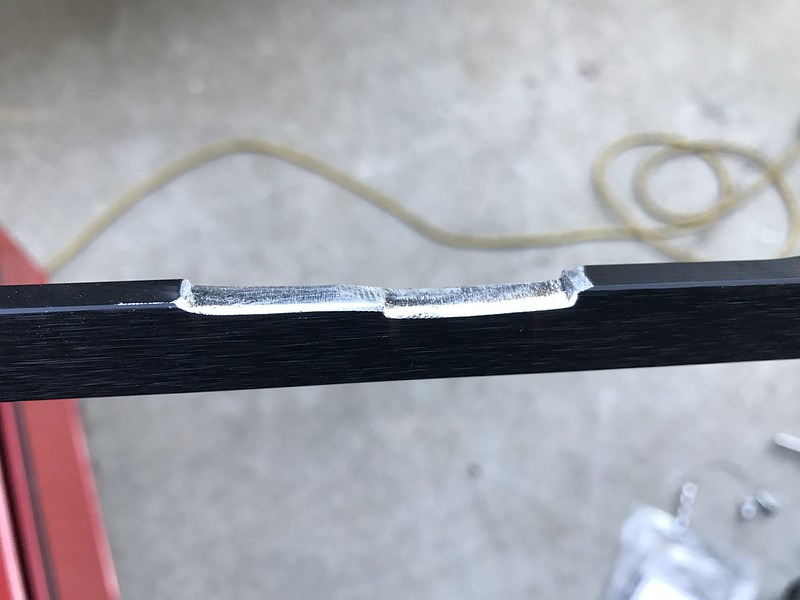 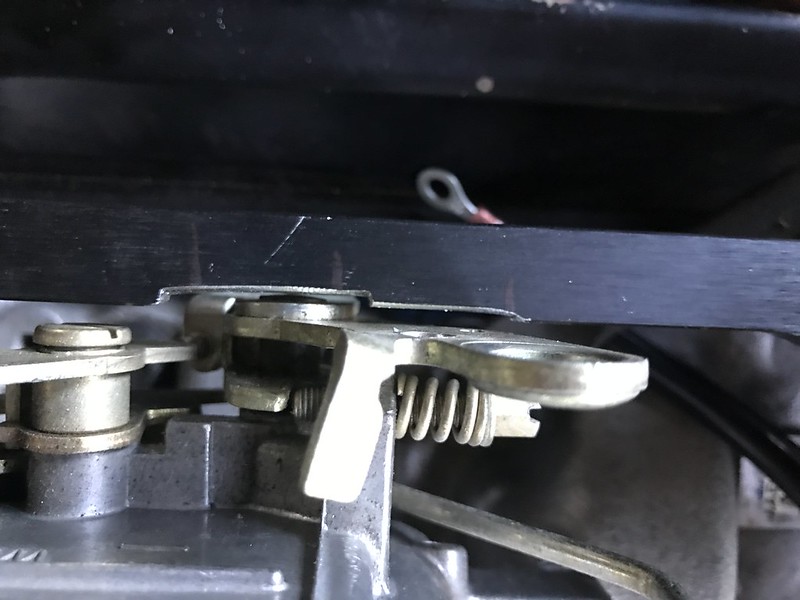 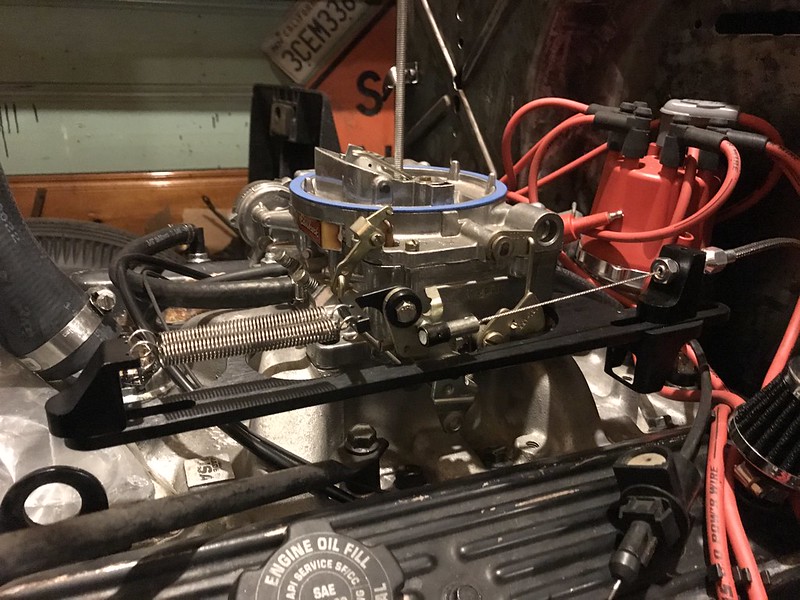 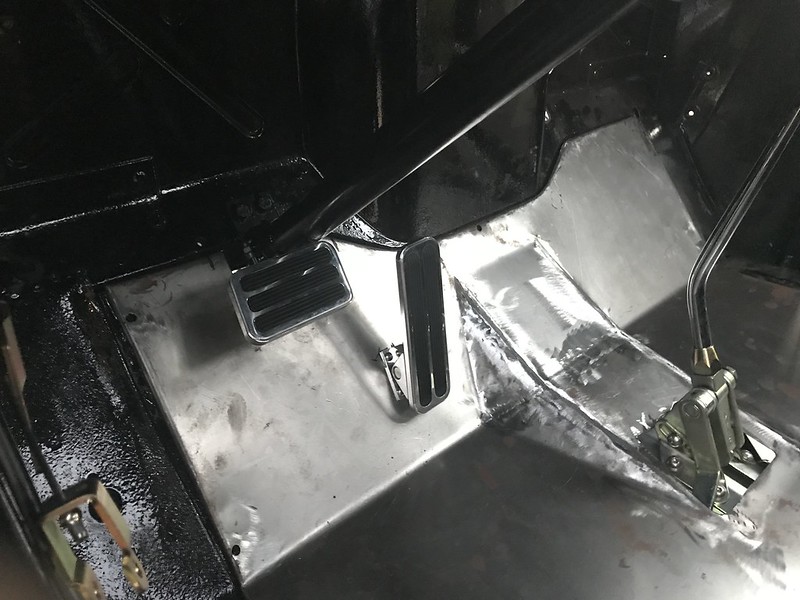
|
|
|
|
|
08-01-2017, 03:21 AM
|
#4 |
|
Registered User
Join Date: Nov 2014
Location: Oakland, CA
Posts: 114
|
Re: Kell's Two Cents - 1946 build
Now, I've been mentally preparing myself to start wiring this dang thing and I finally cracked into it today. I think I have just about everything I need and I'm getting excited because once it's wired I'll be very very close to getting it fired up so I can start working out any other little kinks that are gonna come up.
As stated previously in this thread, I wanted to keep the truck as basic as possible when it came to electronic accessories. I did opt for an electric choke, for the sake of simplicity. I went with an electric radiator fan, and due to me using a tbi sbc and putting a carb on it the mechanical fuel pump wasn't an option, so I had to go with electronic fuel pump. But that's about it. So I went with the basic Route 9 wiring harness from American Autowire and it seems perfect for what I'm doing. It doesn't have a ton of excess features, but it's complete and plug and play enough to ease installation for even a first timer like myself. So today I started with wiring the instrument panel. With it being a central piece I figured it would be a good warm up before getting the harness into the truck and really digging into it. I got an 8 pin weather proof connector from my local car audio shop because I wanted the whole instrument cluster to be removable with a single clip. I still have a little cleaning up to do but here's a photo of the gist of it. On one end of the plug I have ignition power and ground, then on the other end I have headlight switch power and ground, with gauge inputs filling up the middle. In the 8th slot I went ahead and included the tach wire, though I'm not currently running one, but either way in the future if I decide to or it will be there if I need to add something else. 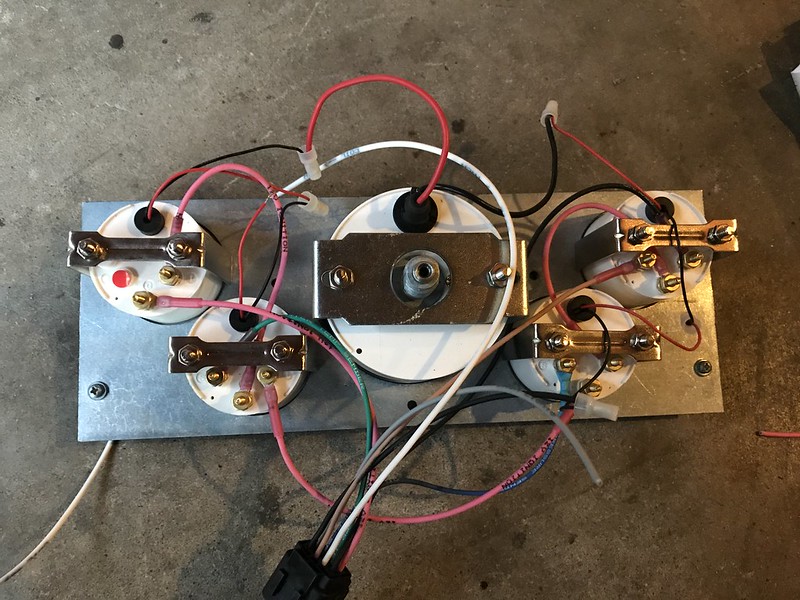  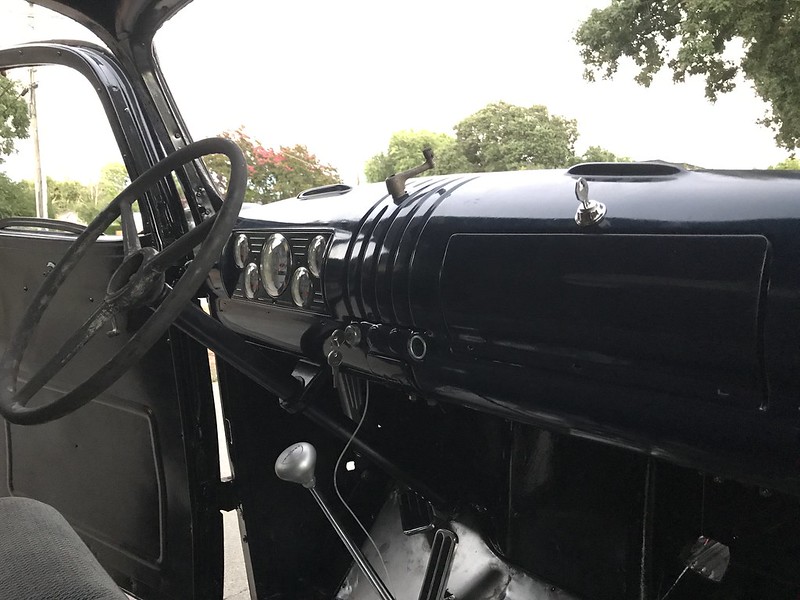 Beyond that my dash is starting to look pretty complete! Things are coming together. Thanks guys, update coming this weekend |
|
|
|
|
08-01-2017, 06:12 AM
|
#5 |
|
Registered User
Join Date: Dec 2010
Location: washington NJ
Posts: 766
|
Re: Kell's Two Cents - 1946 build
Kell, How does your throttle pedal feel with those 2 return springs hooked up? I had to take one off of mine so that I could press the pedal down. The pedal seemed to be way to stiff with both springs.
I'm not sure I am going to stay with that return spring setup. I may try the basic Holley bracket and spring. |
|
|
|
|
08-02-2017, 02:41 AM
|
#6 |
|
Senior Member
Join Date: May 2007
Location: Doodah Kansas
Posts: 7,748
|
Re: Kell's Two Cents - 1946 build
my vent has a broken pivot bolt, thanks for the reminder.
 interior is looking super sweet though!
__________________
the mass of men live lives of quiet desperation if there is a problem, I can have it. new project WAYNE http://67-72chevytrucks.com/vboard/s...d.php?t=844393 |
|
|
|
|
08-04-2017, 02:17 AM
|
#7 |
|
Registered User
Join Date: Nov 2014
Location: Oakland, CA
Posts: 114
|
Re: Kell's Two Cents - 1946 build
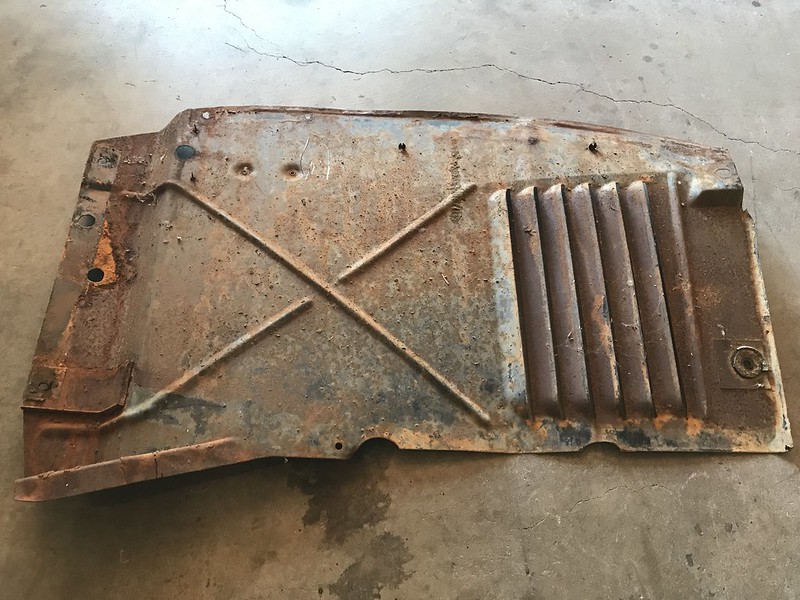
Lord forgive me for what must be done to this original, perfect condition artifact of American vehicular history
|
|
|
|
|
08-04-2017, 08:32 AM
|
#8 | |
|
Registered User
Join Date: Dec 2010
Location: washington NJ
Posts: 766
|
Re: Kell's Two Cents - 1946 build
Quote:
I have a pair that have already been cut up so the control arms clear. I will give them to you. |
|
|
|
|
|
08-04-2017, 04:47 PM
|
#9 | |
|
Senior Member
Join Date: May 2007
Location: Doodah Kansas
Posts: 7,748
|
Re: Kell's Two Cents - 1946 build
Quote:
I bought out a dead project, only for the parts I needed and the rest was getting hauled off the next day, so deals were had. One thing I wanted but didnt have time to remove were these weird home made splash covers for the bottom of the engine, the exhaust went through one and they looked really cool, but again, no time. fast forward a year and see a set on ebay described as original parts that "everyone took off". selling for unobtanium kind of money. sh*t.
__________________
the mass of men live lives of quiet desperation if there is a problem, I can have it. new project WAYNE http://67-72chevytrucks.com/vboard/s...d.php?t=844393 |
|
|
|
|
|
08-24-2017, 10:40 AM
|
#10 |
|
Registered User
Join Date: Jan 2010
Location: Titusville, PA
Posts: 3,585
|
Re: Kell's Two Cents - 1946 build
I'm in on this build. I really really like this truck and what you are doing with it. I have a question too, back on post #55 p.3 where did you get that steering column saver? I have seen them bf but I never noticed one that was threaded like that.
__________________
51' 99toLife finished 2011,355 sbc,5speed, patina, redoing whole truck, inter, bags, etc http://67-72chevytrucks.com/vboard/s...d.php?t=382481 49Hardtimes s/10 susp- bagged, vortec sbc, 5 speed, patina, sold http://67-72chevytrucks.com/vboard/s...d.php?t=594874 VIDEOS https://youtu.be/E8zHhjgS_lA https://youtu.be/E8zHhjgS_lA Geronimo 54' LS engine, static drop IFS, Client build, just about done http://67-72chevytrucks.com/vboard/s...62#post7399162 52' 3100 Slowly in progress, will be painted two toned, have 235 with a t-5, lowered OG frame Other projects, 49' farmuse 3100, killer Patina, will be slammed, LS engine, full done interior up next! www.coffeeandcustoms.com |
|
|
|
|
08-24-2017, 07:45 PM
|
#11 | |
|
Registered User
Join Date: Nov 2014
Location: Oakland, CA
Posts: 114
|
Re: Kell's Two Cents - 1946 build
Quote:
Hey I really appreciate the support, especially from you as I'm a big fan of that '51 of yours. Awesome truck 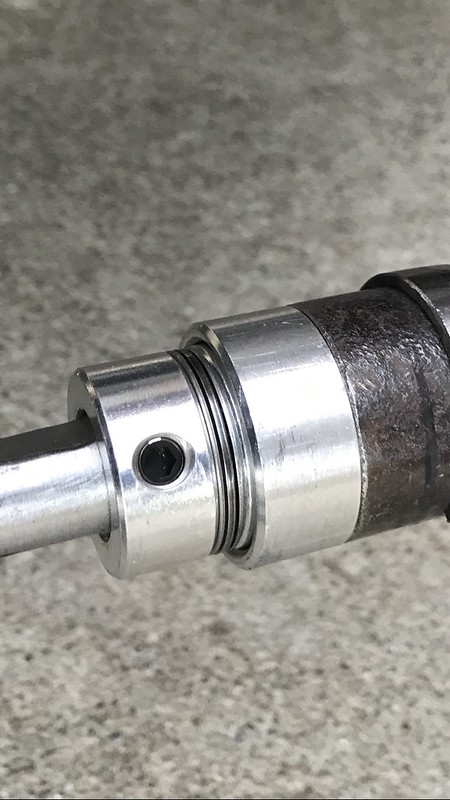
|
|
|
|
|
|
08-24-2017, 08:54 PM
|
#12 |
|
Registered User
Join Date: Nov 2014
Location: Oakland, CA
Posts: 114
|
Re: Kell's Two Cents - 1946 build
Hey guy's, so I've been working on the truck absolutely nonstop and haven't been able to catch up and give an update.
I'm trying to put my frustration into words without having to sound melodramatic, but seriously the brakes have been absolutely kicking my ass! SO frustrating. It took me about 4 days solid to get even any resistance in the pedal, but I'm glad to say I think I finally got it I'm heading out of town now until Labor Day, so that Monday I should get another day on the truck and should know for sure where I'm at, and beyond that I can catch up with everything that I've been working on and give an update. -HOWEVER- The truck IS running! I did just a few adjustments, shot a quick vid, then shut it down and started messing with the brakes for what seemed like the worst stretch of my adult life... and now I just wanted to give you guys a quick update to hold it over as I'll be gone for the next week and a half. After just a few tweaks it actually fired up pretty nice. I'll mess with it more when I get back http://www.youtube.com/watch?v=dkq1z...ature=youtu.be Thanks for checking it out guys. Catch y'all Labor Day Last edited by gokellurself; 08-24-2017 at 09:06 PM. |
|
|
|
|
08-24-2017, 09:04 PM
|
#13 |
|
Registered User
Join Date: Dec 2010
Location: washington NJ
Posts: 766
|
Re: Kell's Two Cents - 1946 build
So what was the fix on the brakes as all of us with an under cab power booster seem to have the same troubles??????????????????????
|
|
|
|
|
08-24-2017, 09:09 PM
|
#14 |
|
Registered User
Join Date: Nov 2014
Location: Oakland, CA
Posts: 114
|
Re: Kell's Two Cents - 1946 build
Damn this youtube embed. I tried taking the "s" out of http as this forum suggests but to no avail
I'll have to wait till labor day to really verify that I'm good to go but after having a very hard time bleeding the rear, I think the ultimate thing was the booster-mc gap. From what I measured it had nearly 1 5/16" to start with. I got a longer bolt and got it down to 1/4" |
|
|
|
|
08-24-2017, 09:11 PM
|
#15 | |
|
Registered User
Join Date: Dec 2010
Location: washington NJ
Posts: 766
|
Re: Kell's Two Cents - 1946 build
Quote:
|
|
|
|
|
|
08-24-2017, 09:19 PM
|
#16 |
|
Registered User
Join Date: Nov 2014
Location: Oakland, CA
Posts: 114
|
Re: Kell's Two Cents - 1946 build
The adjustment bolt on the back of the booster rod, which activates the cylinder, was only like 3/4" in total length so I wasn't able to extend it out far enough to close the gap that I needed. I replaced it with a longer bolt in order to have it extend out farther. A photo would really go a long ways here, and who knows I might be doing it all wrong but I was really moving trying to wrap it up today and didn't snap any shots
|
|
|
|
|
08-24-2017, 09:28 PM
|
#17 | |
|
Registered User
Join Date: Nov 2014
Location: Oakland, CA
Posts: 114
|
Re: Kell's Two Cents - 1946 build
Quote:
guys please somebody let me know if I should not have done this for any reason. I was just trying to close the gap up 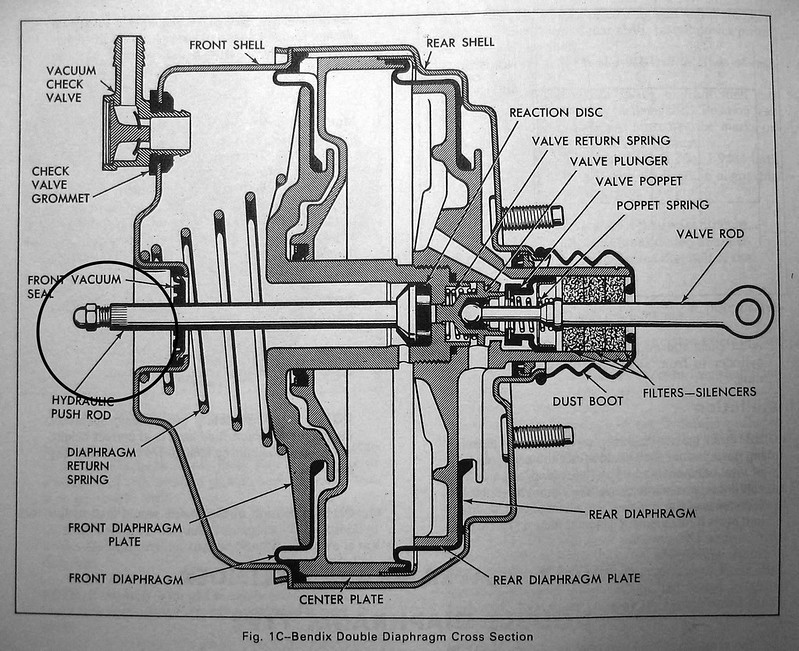 [/url] [/url]
|
|
|
|
|
|
08-24-2017, 10:03 PM
|
#18 | |
|
Senior Member
Join Date: May 2007
Location: Doodah Kansas
Posts: 7,748
|
Re: Kell's Two Cents - 1946 build
Quote:
well, you have to take out the "s" AND delete the ampersand and everything after the ampersand that isnt part of the link. Code:
http://www.youtube.com/watch?v=dkq1z58jbPg edit: sounds great!
__________________
the mass of men live lives of quiet desperation if there is a problem, I can have it. new project WAYNE http://67-72chevytrucks.com/vboard/s...d.php?t=844393 |
|
|
|
|
|
08-24-2017, 10:37 PM
|
#19 | |
|
Registered User
Join Date: Nov 2014
Location: Oakland, CA
Posts: 114
|
Re: Kell's Two Cents - 1946 build
Quote:
|
|
|
|
|
|
08-24-2017, 09:10 PM
|
#20 |
|
Registered User
Join Date: Sep 2012
Location: Midway, NC
Posts: 3,275
|
Re: Kell's Two Cents - 1946 build
I'm late to the party but man I'm digging your build.
__________________
http://67-72chevytrucks.com/vboard/s...d.php?t=581873 The low buck build threads. Check'em out! http://67-72chevytrucks.com/vboard/s...d.php?t=666022 My build thread Crossmembers CC |
|
|
|
|
08-24-2017, 09:20 PM
|
#21 | |
|
Registered User
Join Date: Nov 2014
Location: Oakland, CA
Posts: 114
|
Re: Kell's Two Cents - 1946 build
Quote:
|
|
|
|
|
|
08-24-2017, 10:45 PM
|
#22 |
|
Registered User
Join Date: Jan 2010
Location: Titusville, PA
Posts: 3,585
|
Re: Kell's Two Cents - 1946 build
Did you bench bleed your MC? They call it bench bleed for a reason, as your MC pushrod won't push in as far as you can with it on the bench. You need to bleed all the air out of it and make sure you eliminate that issue first. as for pushrod length, to me it looks like your pedal is too close to the floor. I had a similar issue with a clutch on my 51'. It would bottom out bf the pushrod could go as far as it needed to. So maybe you can lengthen your pedal, should be easy to do. If you notice on stock pedals they stick up quite a bit off floor.
__________________
51' 99toLife finished 2011,355 sbc,5speed, patina, redoing whole truck, inter, bags, etc http://67-72chevytrucks.com/vboard/s...d.php?t=382481 49Hardtimes s/10 susp- bagged, vortec sbc, 5 speed, patina, sold http://67-72chevytrucks.com/vboard/s...d.php?t=594874 VIDEOS https://youtu.be/E8zHhjgS_lA https://youtu.be/E8zHhjgS_lA Geronimo 54' LS engine, static drop IFS, Client build, just about done http://67-72chevytrucks.com/vboard/s...62#post7399162 52' 3100 Slowly in progress, will be painted two toned, have 235 with a t-5, lowered OG frame Other projects, 49' farmuse 3100, killer Patina, will be slammed, LS engine, full done interior up next! www.coffeeandcustoms.com |
|
|
|
|
09-08-2017, 03:27 AM
|
#23 |
|
Registered User
Join Date: Nov 2014
Location: Oakland, CA
Posts: 114
|
Re: Kell's Two Cents - 1946 build
Alright whats up fellas... I had promised an update after Labor Day but I ended up getting back into town Monday night instead of Sunday night like I had planned so I did't get the full day on it like I was looking forward to. I finally got over there tonight though and had a chance just to get reacquainted and reprioritize my To-Do List, and this Sunday I'll be getting a solid day on it as well.
I did get a couple hours on it tonight though and got a couple photos, so I want to update on the wiring a little bit As stated before, I went with the American Autowire Route 9 kit, which is just a really stripped down basic kit, but they hook it up and give you a really high quality, complete set up that makes it easy to wire. Their instructions were the best I had seen online, and the two times I called the tech line to clarify some decisions I was making they were totally cool and extremely helpful. I gathered up all the paper work I had filed away on any wiring components I had purchased and I set to work First off, I set aside a lot of sustained time to complete this part of the job and I am so grateful that I did as it made all the difference. I wouldn't say it was more work than I expected it to be, or even more difficult than I expected it to be, but trying my best to be meticulous with wire routing and bundling, and trying to get the whole thing to come together as cleanly as I could was so much more time consuming than you could imagine. Trying to do this under pressure would have just totally pissed me off and would have made for a frustrating experience, but with time set aside it was actually pretty fun getting as particular as I could muster and zoning in on it. That being said, I still ended up with a few minor things that I think I would have changed if I were starting all over again. I put everything under the dash, but for some reason I thought it would be cleanest bunching all of my components really close together... So then after mounting the fuse box, the battery distribution block, the fan relay, the horn relay, then running all the wiring, it was all so close that it really made that area look congested. I think spacing things out and planning for that aspect could have helped clean it up a lot One thing I was frustrated about with the kit itself was that I knowingly bought it in part because it had a 30 Amp fuse for the Heater/AC, and being that I wasn't running either of those, my electric fan called for a 30 Amp fuse, so I just thought that was perfect. After talking with the tech line though they basically said that they really don't recommend that I run it like that and that that much of a draw could damage other parts of the fuse panel connected to the same bus on the inside, etc, etc... So I figured I had a slam dunk but instead in my already congested area I was pushed into having to add a 30 Amp inline fuse between the battery distribution block and the fan relay. I spent a lot, a lot of time organizing the wiring and I think my diligence paid off as even if it's not perfect, I might fool a couple people with how tight and clean the rest of it looks. I bought a decent pair of Irwin wire stripper/crimpers and I used a lot of heat shrink connectors. At the end of it all I had very little trouble shooting to do and it all pretty much worked out 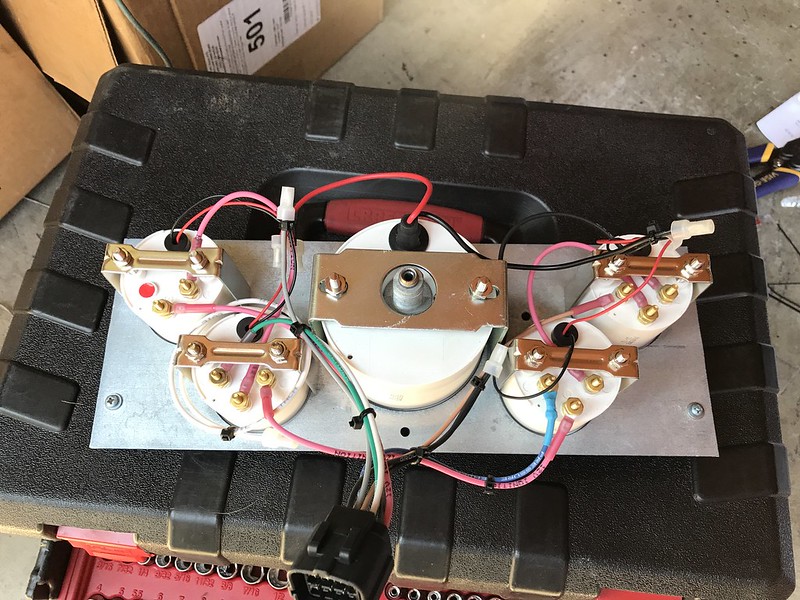 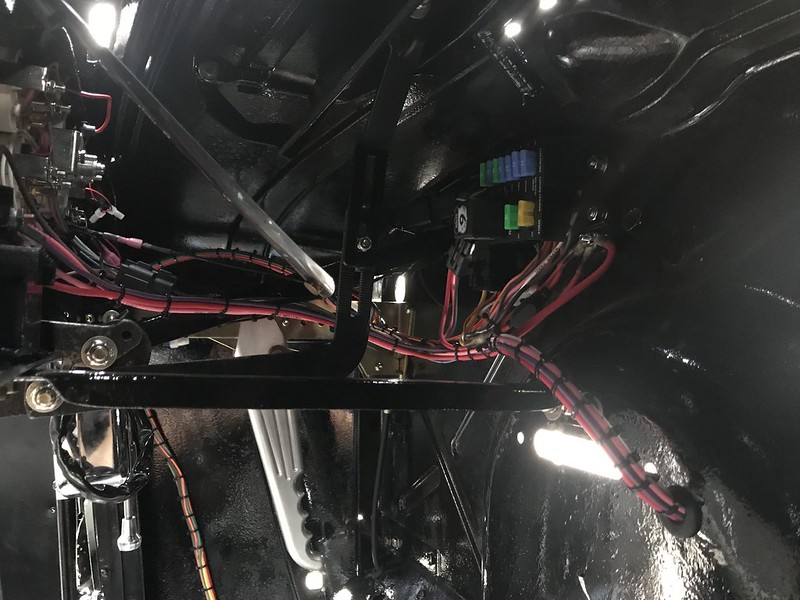  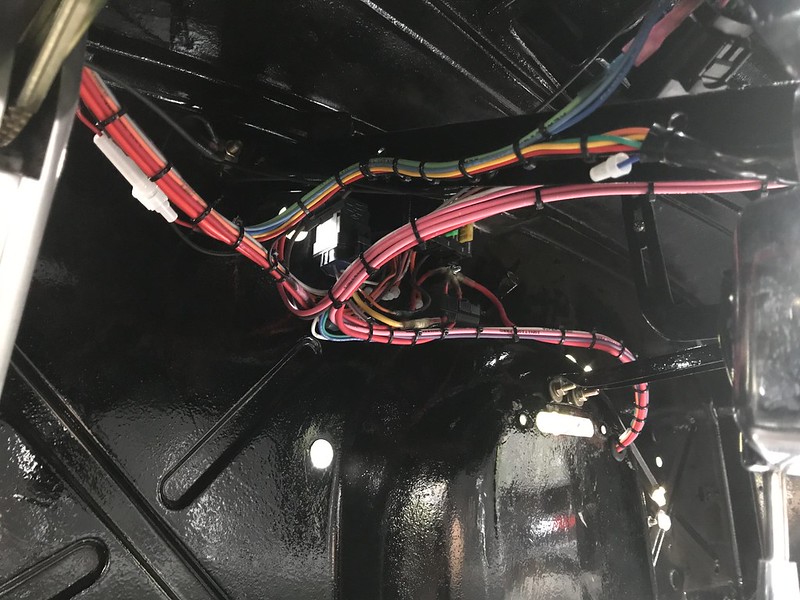  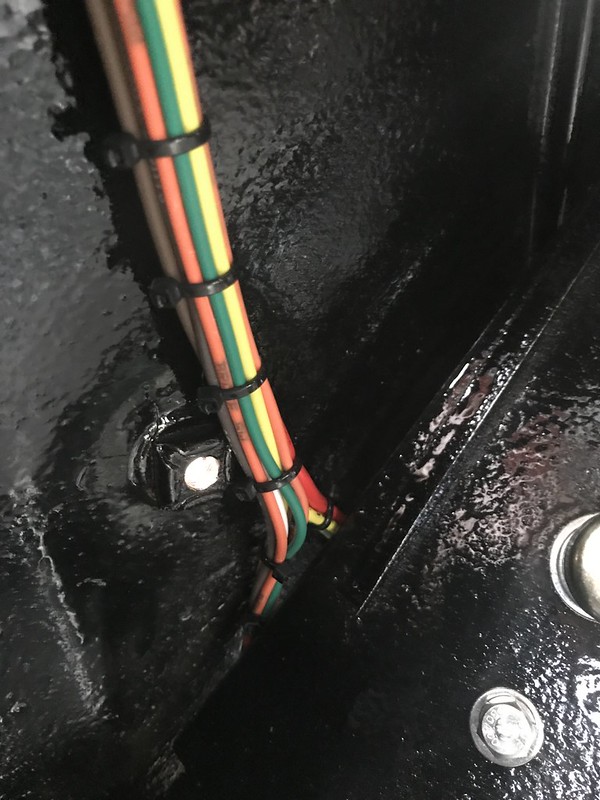  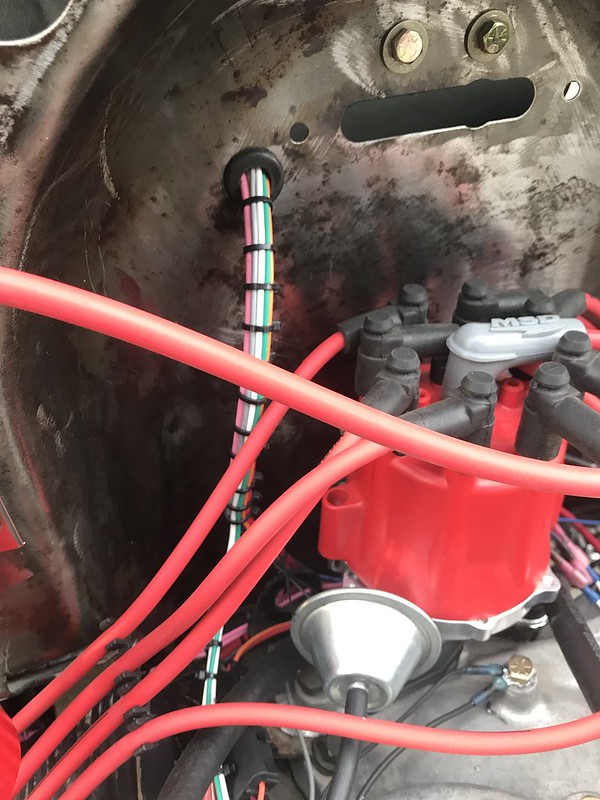
|
|
|
|
|
09-08-2017, 04:07 AM
|
#24 |
|
Registered User
Join Date: Nov 2014
Location: Oakland, CA
Posts: 114
|
Re: Kell's Two Cents - 1946 build
Alright so I also bought some pretty heavy duty cable from the local stereo shop (which might be overkill, but hey) and I went ahead and crimped, then soldered, then heat shrinked these connections. I have the positive lead running along the passenger frame rail to the starter, then I have the ground going to frame, a solid ground from block to frame, then another one from block to body. It wounds like people recommend one from frame to body as well?? But I felt as if it was all grounded sufficiently, so somebody let me know if I should really add that final one.
Months and months ago, after getting the engine all totally together I remember spending a thorough amount of time trying to not mess up and get my initial timing setup pretty decently, so once I double checked everything I could, I got my fire extinguisher ready, and had a friend on standby with me I went ahead and hit the key to the ignition on.. No explosion so far... so once I double checked a couple things and verified that I was getting fuel and spark we went ahead and tried to crank it Now you can tell when an engine is trying to fire up, and this thing absolutely, positively sounded nothing like that. It would just crank, and backfire, and crank... Nowhere even close. I double checked a couple things and I knew about the possibility of having the distributor in 180 degrees off, so after cranking a couple times I just wanted to verify that first. I got the #1 piston to TDC then I peaked under the distributor cap and confirmed that it was pointed toward the #1 cylinder. It was. So I put it back together, crank it a few times and of course I get the exact same. So this time I decide I'm going to pull the cap completely and go all through the initial timing set up routine again and see what the hell's going on. I pull the valve cover and confirm the #1 cylinder at TDC again, then I pull the wires off the cap and pull it off and VOILA, it was pointed at exactly 180 degrees the wrong way! Turns out I just so happened to set it 180 degrees off in the very beginning, then when after cranking it several times and checking it again, it just so happened to still appear to be correct. Now by this third time it finally appeared to be 180 degrees off, so I pulled it, rotated it and hooked it all back up. This time when I cranked it immediately you could tell the difference. Right away you could hear that it was chugging and trying to fire up, and from then on I was all settled and felt like I had it under control. For a minute there I was starting to get nervous and feeling so incompetent because it seemed nowhere close to running and I did't know what to do because everything seemed right... but sure enough after a few cranks and pumping the pedal a few times it was up and running like a champ. I adjusted the idle screw a little and messed with the timing light a little and it seems to be running really clean and the engine sounds super crisp.  feeling like a boss ass mastermind truck builder feeling like a boss ass mastermind truck builderImmediately after that I shut it down and proceeded to get a beat down by the braking system for the next 4 days... but thats a story for another time lol 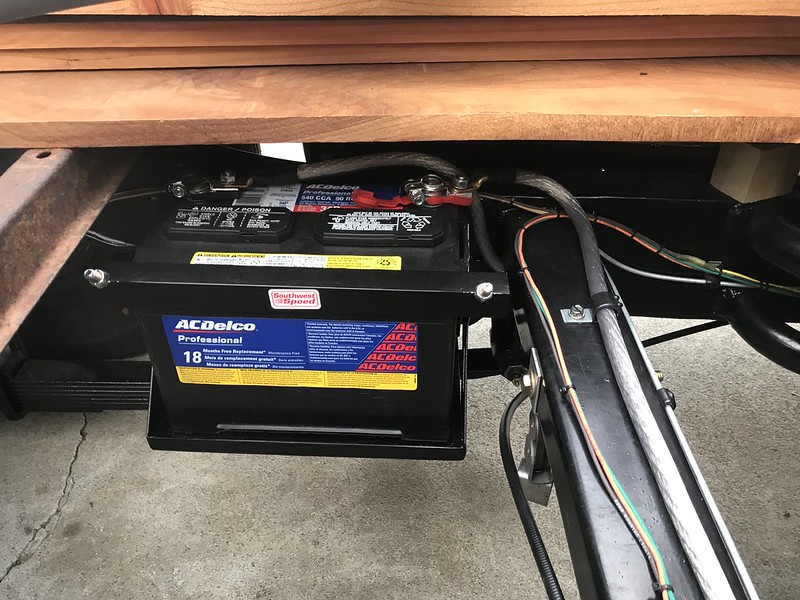 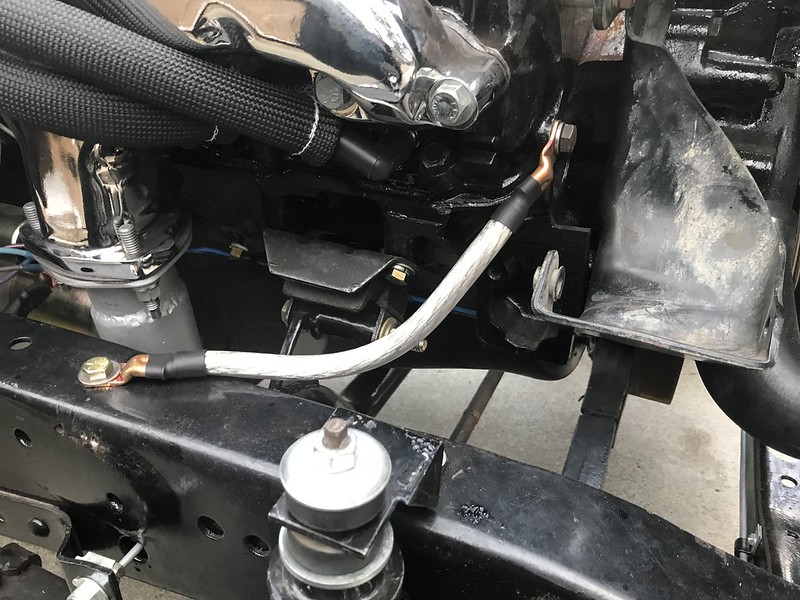
Last edited by gokellurself; 09-10-2017 at 05:02 AM. |
|
|
|
|
09-08-2017, 04:28 AM
|
#25 |
|
Registered User
Join Date: Nov 2014
Location: Oakland, CA
Posts: 114
|
Re: Kell's Two Cents - 1946 build
I do have some quick questions however. I still have some wiring to finalize outside of the cab for lighting and etc and I'm just waiting on some cloth wire loom + dual filament running lights. I was doing some reading and it was recommended that I electrical tape the full length of the wire before pulling it into the wire loom though, and really I don't care to do this... does anybody have thoughts on this?
Also, in the vent in the center of the dash, above the ignition and the cigarette lighter, there is a bracket that looks as if it originally held a dash light socket. I haven't found a part number for this yet and I'm curious if anybody knows if there is one or what this used to be, or how I could utilize something else to make it work. I had been looking forward to having the vent being illuminated and think it'd be cool to get this in. Might have to go with an LED strip or something if I can't figure out an original Anyways, I appreciate the input and I apologize for the long-winded entries over here. More updates to come, thanks for checking it out 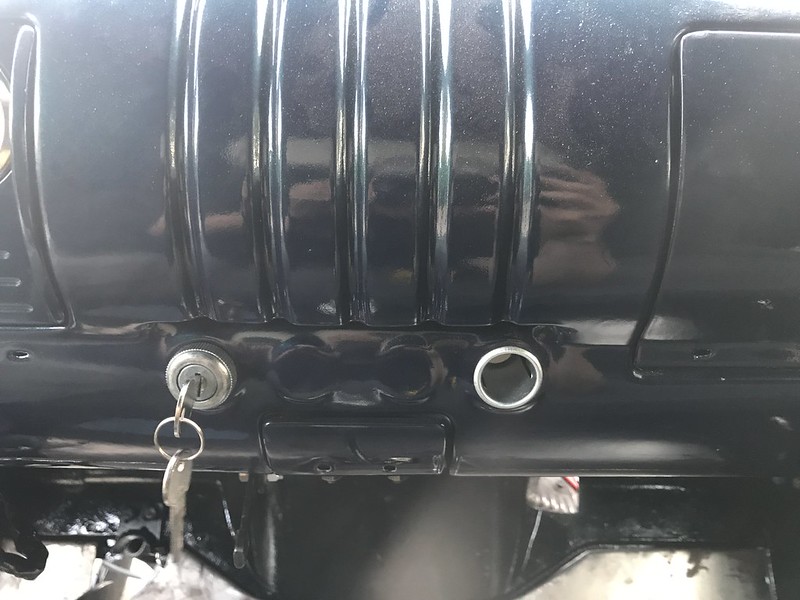  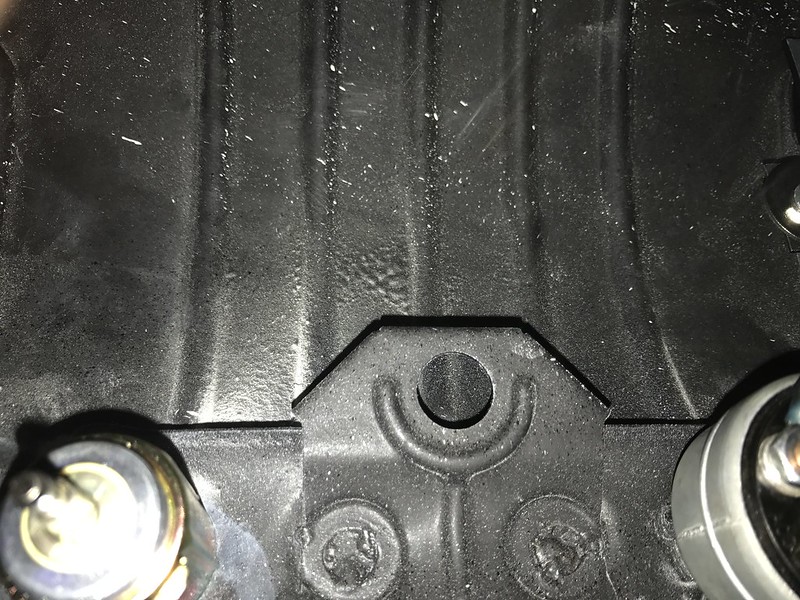
Last edited by gokellurself; 09-10-2017 at 05:02 AM. |
|
|
|
|
| Bookmarks |
|
|


 Hybrid Mode
