
 |
|
|
#851 | |
|
Senior Member
Join Date: Apr 2004
Location: sw colorado
Posts: 2,720
|
Re: 72 k20 project
Quote:
i havent looked into the green to much. i really doubt that i go with a monochrome interior. i like it for the body color, but i think it might be to much for me inside if the seats and everything are green. i have an extra nice black steering column and the original green column. the green door panels are usable but i need a dash pad and the seat have to get recovered anyhow. given that i need to replace several parts anyhow it gives me a nice reason to church it up a little inside. matching the SPID went out the window a long time ago, but i still want the interior to look mostly OE at a glance. and i find the OE buckets rather comfy anyhow. i did finally get the brackets in the cab the other day, had a panic session when i realized i had hidden that box of brackets you sent from myself! luckily it was an easy find! Last edited by ryanroo; 04-05-2014 at 03:42 PM. |
|
|
|

|
|
|
#852 |
|
Registered User
 Join Date: May 2013
Location: wall,nj
Posts: 865
|
Re: 72 k20 project
I hear what you guys are saying.
My GMC came with parchment interior and sandlewood accents.I know i will not find the sandlewood parts.Would have to paint match all that. Been leaning towards parchment again with black accents and some parchment highlander bucket covers.All fancy like.  I'am too worried about keeping it clean,but not enough to stop me ! Ryan the houndstooth would look sweet.
__________________
Tom 71 K2500 71 K5 Jimmy |
|
|

|
|
|
#853 | |
|
Senior Member
Join Date: Apr 2004
Location: sw colorado
Posts: 2,720
|
Re: 72 k20 project
Quote:
|
|
|
|

|
|
|
#854 |
|
Senior Member
Join Date: Apr 2004
Location: sw colorado
Posts: 2,720
|
Re: 72 k20 project
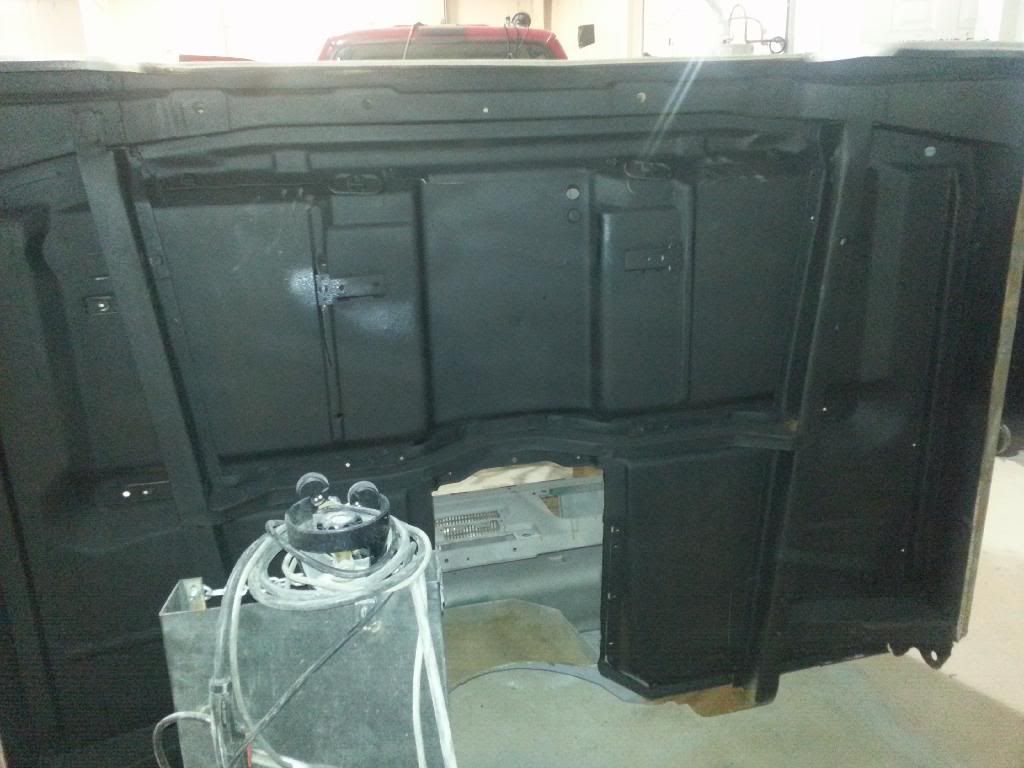
stopped by the body shop to make my presence known. the bottom of the cab has been coated. still waiting on green paint...
 and i got the the upper gasket kit. hope to pull the engine down and do the hone and re-ring + main and rod bearings maybe next weekend. 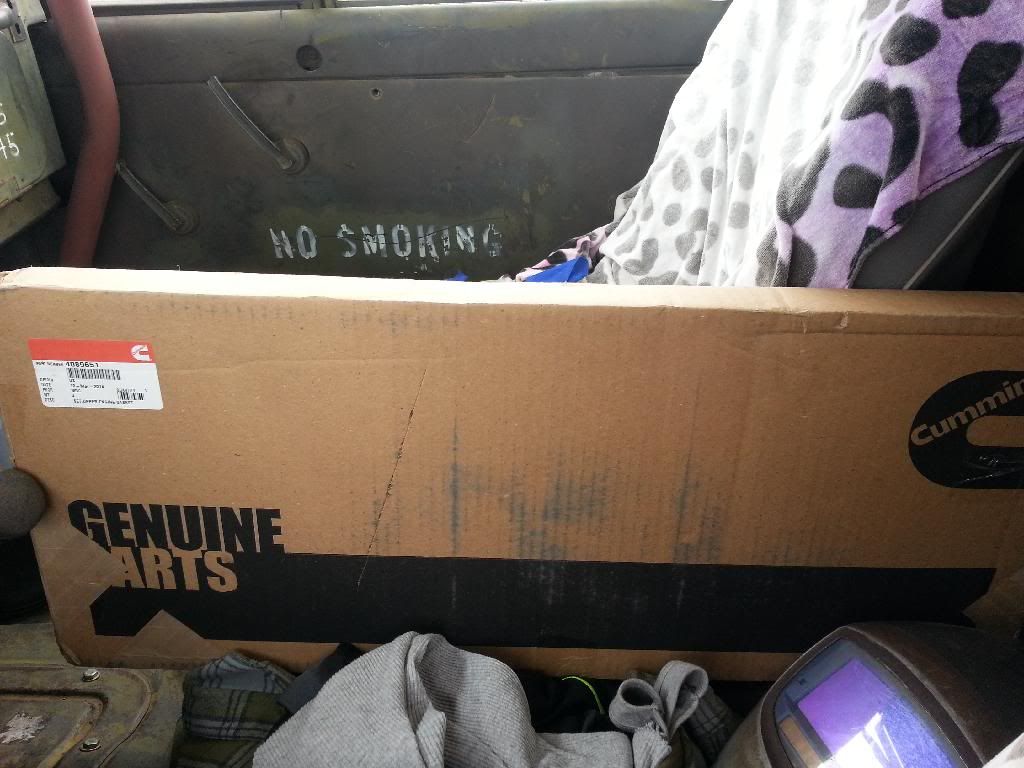 the bearings were usable. i figured for the relatively low cost of parts i may as well do the rebuild. plus i can install new cooling nozzles while i am there. lower main. 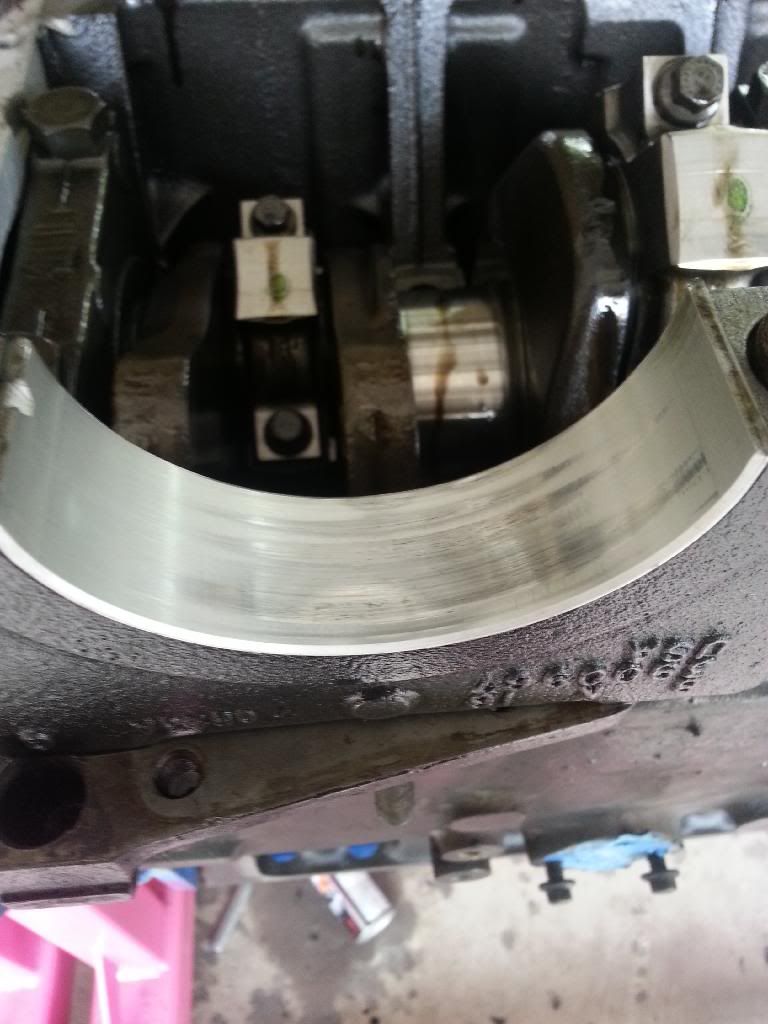 rod 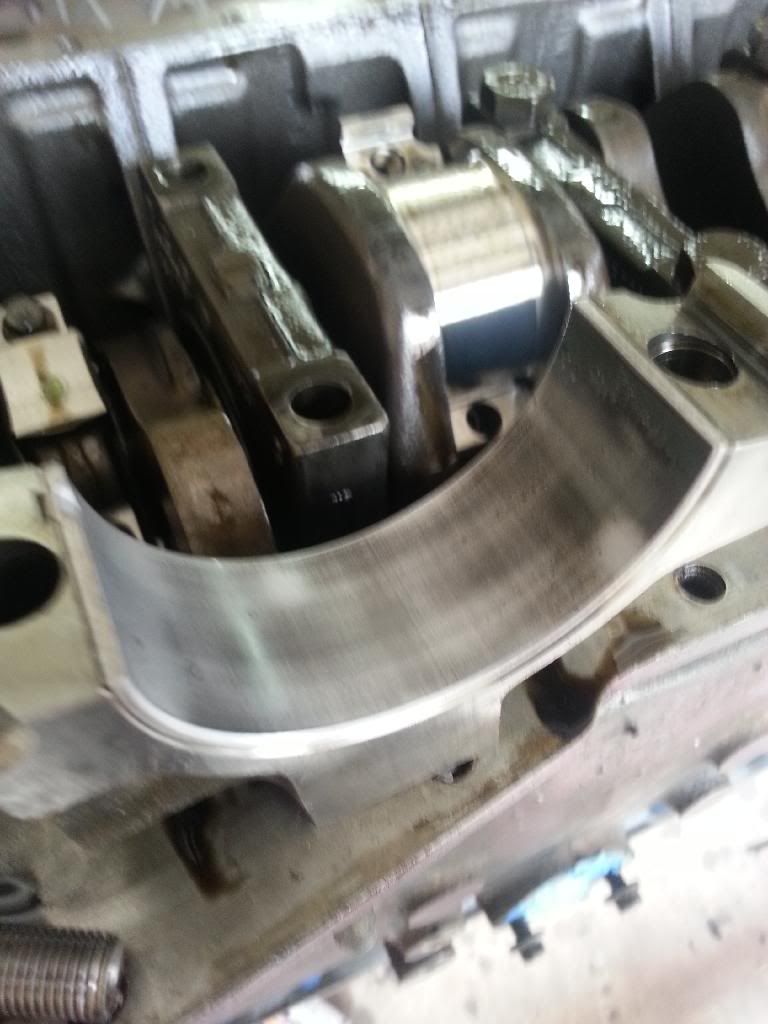 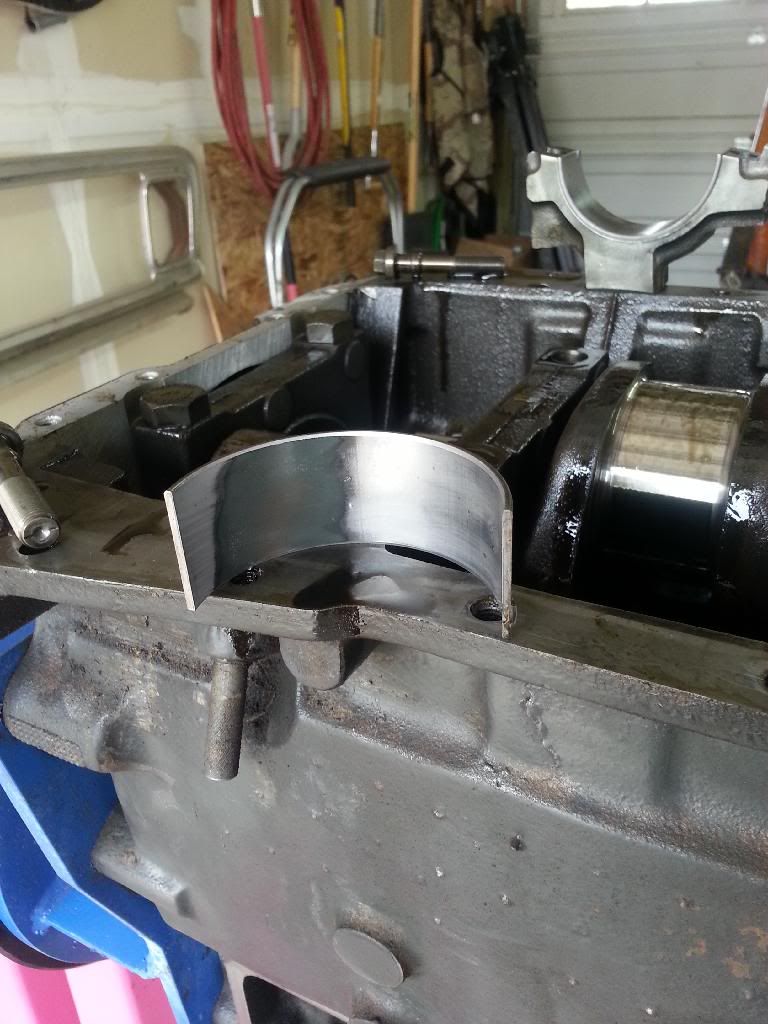 and a sneak peak at the front crossmember. still have to layout the piece that ties the two tubes together. 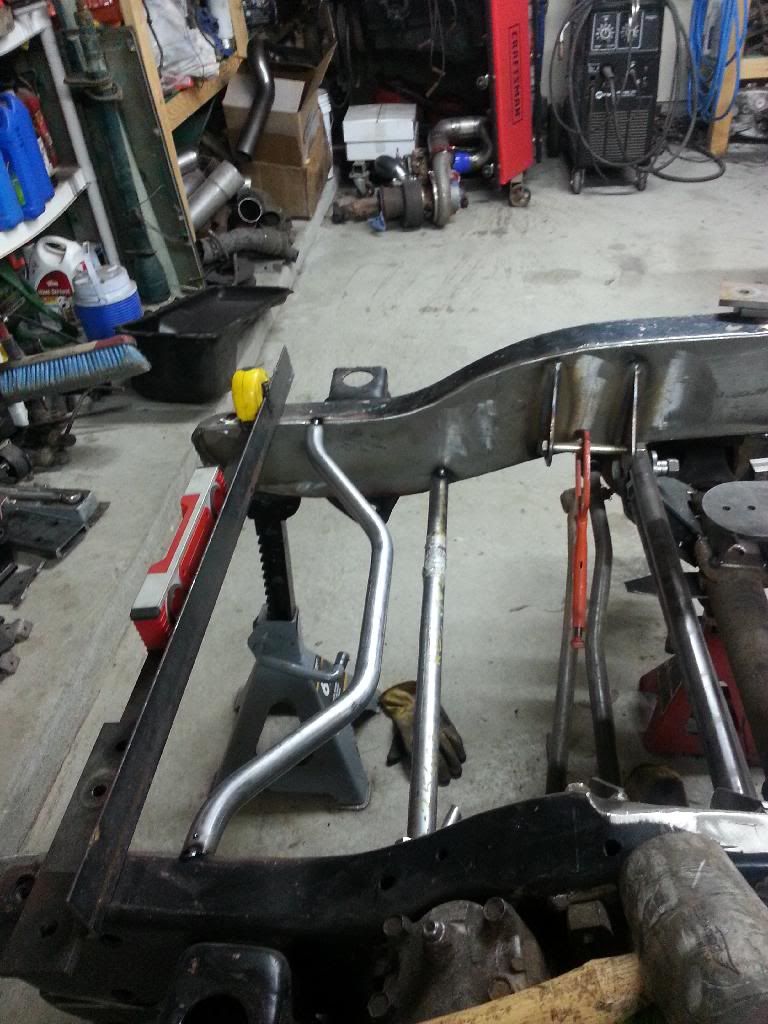
|
|
|

|
|
|
#855 |
|
Senior Member
Join Date: Apr 2004
Location: sw colorado
Posts: 2,720
|
Re: 72 k20 project
i also called the coatings guy. i think i will pull apart the turbos and take the manifold in and get a quote for ceramic coating the ex housings and manifold as well as the hot pip and turbo flange. but i still have to weld the WG outlet onto the mounting plate and i havent decided if i want to go with a 14cm^2 housing for the hx35 or not. i guess i better get to deciding
|
|
|

|
|
|
#856 |
|
Senior Member
Join Date: Apr 2004
Location: sw colorado
Posts: 2,720
|
Re: 72 k20 project
i figured that while the engine was out and the cab was gone, I would be retard if i did not take the opportunity to rebuild the front axle as well. i bought the master and new Spicer gearset last year sometime, just waiting on the opportune moment.
so out it came. 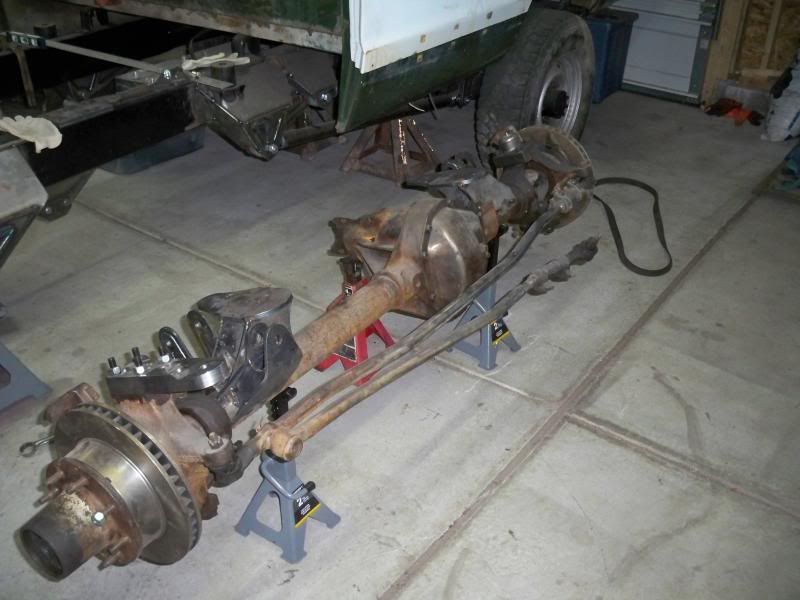 i was a gung ho yesterday to rip it apart. grab the spindle nut socket and what do you know, the nut is the four pronger. i have dissasembled a few 60s, but this was the first i ran into with the 4 slot nut. i have the six... given that it was sunday afternoon, i decided i could wait till today. one(more) 54$ socket and i am good to go. 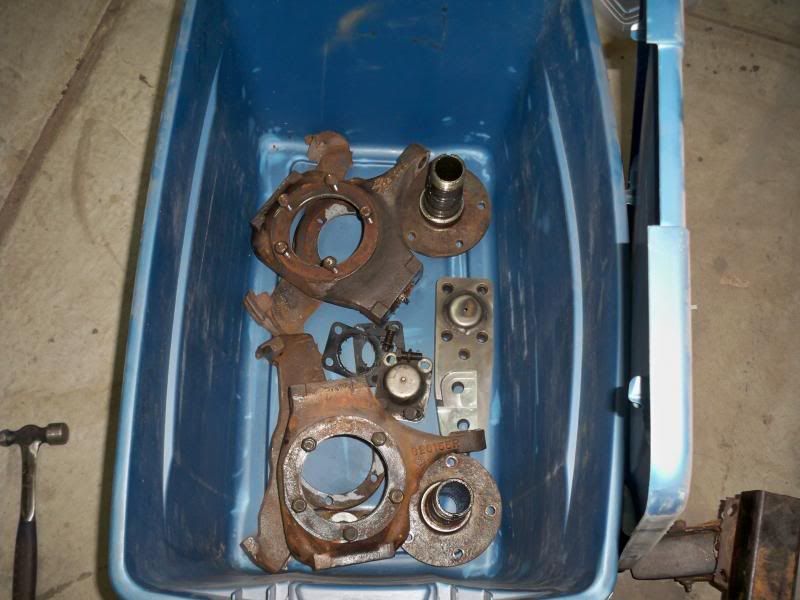 these are the big boy stubs. 35spl. the inners are the OEM silly neck down style. they will get ran until a large bang noise happens. probably last forever. 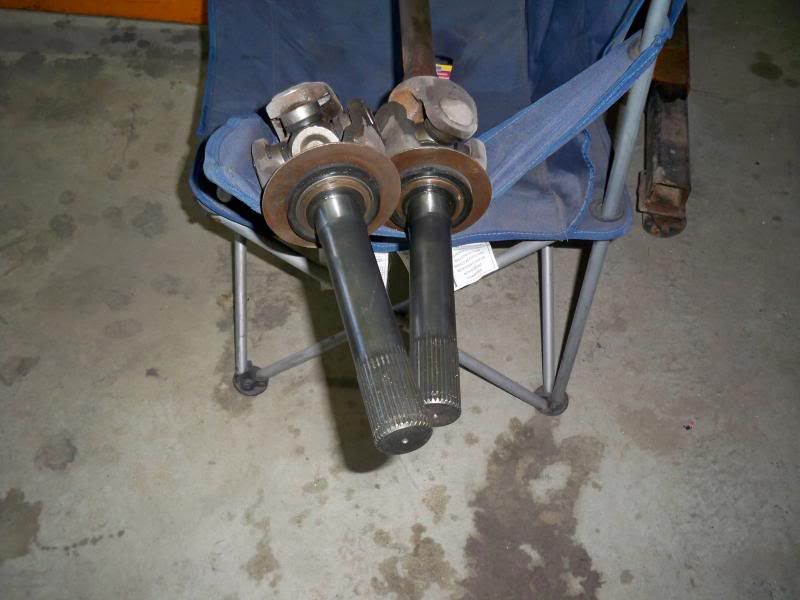 as you may remember, i have a small D60 hoarding fetish. i guess not a hoarding issue, but as of now, i own nothing that doesnt have a 60f. anyhow, i picked up this axle a while back to compliment the other 78-9 ford D60f i had already installed in the truck when it had leaf springs. so when i built the bag/link stuff, i did it on this axle. i knew it had the 35 spline stubs, but outside of that, i asked no questions. it came from a buddy and i wasnt worried about it. it also has a lock rite, that i have not decided if i will keep or use in my jeep or elsewhere. i had planned on gutting the housing and either taking it to the blaster, or doing some blasting myself at work. as luck would have it, the wheel bearings and seals are BFN. the kingpins are BFN. basically all the stuff i needed to remove to blast it was new. the dilemma, wreck all the stuff pulling it apart and buy new so it could be blasted or not. i decided to go to town with a wire wheel instead and save a few bucks. i attacked it until my wire end brush launched all of its wires. still have some more to do and some rag and solvent cleaning to do as well, but it cleaned up well so far. in this picture is the BFN kingpin, and my extra manly 7/8" hex key. just having that thing in the tool box adds five man points! 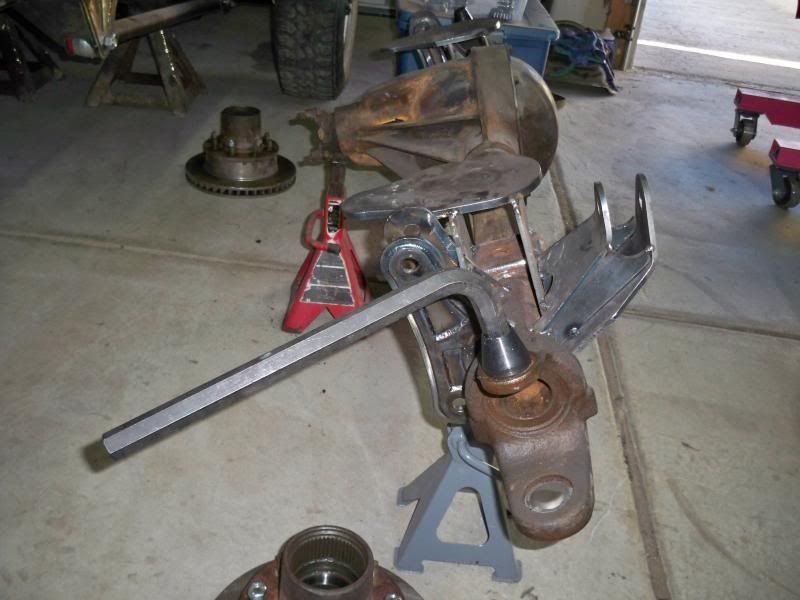 cleaning up well 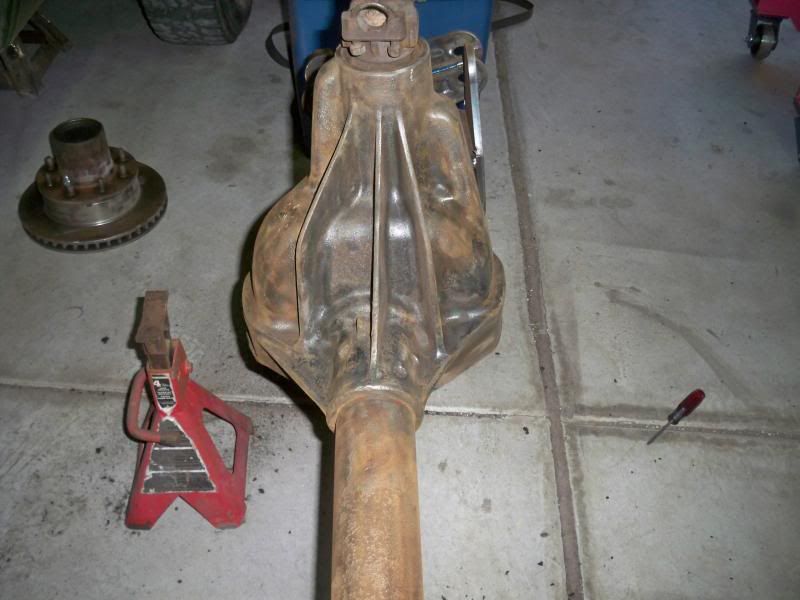 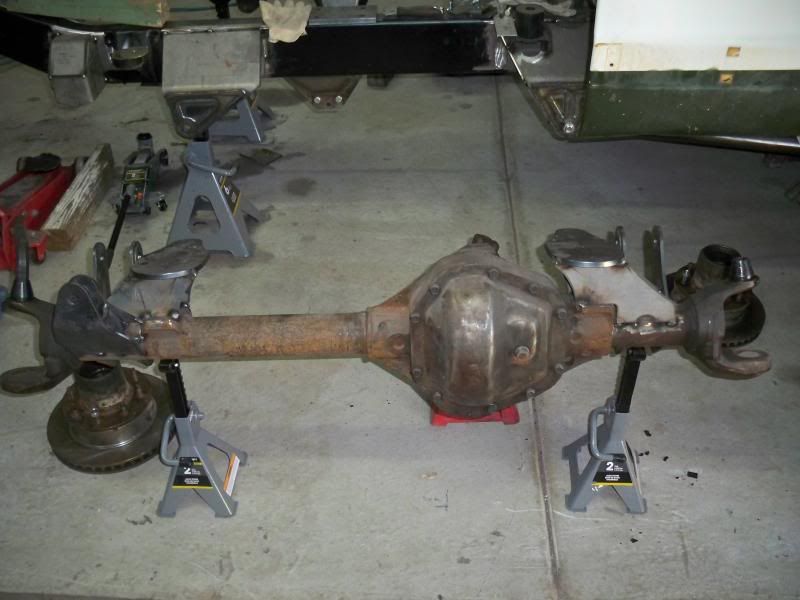
|
|
|

|
|
|
#857 |
|
6>8 Plugless........
 Join Date: Sep 2007
Location: Prairie City, Ia
Posts: 17,140
|
Re: 72 k20 project
You really scored on the new parts and big stubs!
__________________
Ryan 1972 Chevy Longhorn K30 Cheyenne Super, 359 Inline 6 cylinder, Auto Trans, Tilt, Diesel Tach/Vach, Buckets, Rare Rear 4-link and air ride option Build Thread 1972 GMC Sierra Grande Longhorn 4x4 1972 Chevy Cheyenne Super K20 Long Step side tilt, tach, tow hooks, AC, 350 4 speed 1972 C10 Suburban Custom Deluxe 1969 Chevy milk truck 1971 Camaro RS 5.3 BTR STG3 Cam Super T10 1940 Ford 354 Hemi 46RH Ford 9" on air ride huge project Tired of spark plugs? Check this out. |
|
|

|
|
|
#858 |
|
I had a V-8
Join Date: May 2003
Location: Phoenix AZ
Posts: 1,116
|
Re: 72 k20 project
My 60 was not full of new parts, but all of the original parts were still perfect. I damaged one lower kingpin cap taking it apart. That was the only hard part I replaced. Other than that, it was just kingpin seals and gaskets. I did replace the nylon bushings and springs on the upper and added the fender washers just for giggles, but the originals were still fine.
As far as the lockrite goes, I would gladly pass that on to the 715. If you want something in the front, I'd highly recommend a selectable locker. I know I have been in several situations that a front locker that was locked would have created more issues than it would have solved. Even the Detroit in the rear created more problems than it solved. Knowing that you might be running with hubs locked just because of snow, etc, I'd run it open or an ARB.
__________________
1972 K20 Suburban, 5.9L Cummins, Banks Power Pack, NV4500HD, NP205, H.A.D., D60/14FF ARB Link To Build: HERE. |
|
|

|
|
|
#859 | |
|
Senior Member
Join Date: Apr 2004
Location: sw colorado
Posts: 2,720
|
Re: 72 k20 project
given what i have invested in this axle, you are not wrong!
Quote:
i agree on the selectable locker idea. what i may do is shelve the damn thing and wait till i build something that warrants its use. i have a detroit in the 715 and while it has never proven unworthy in any sense, it is a pain in the b-hole on the street. given that i am considering an ARB for the rear there, it goes against my better judgement to install a non selectable in the front as well. the 72 will be wearing drive pucks. no lock outs for me, so i cant really justify leaving the locker in this axle. luckily, the open diff parts that are removed for the lock rite were included with the axle! the rear is also open, and i have no problems with that. i suppose if i find that detrimental i can ARB it at some point, but i doubt i care in this truck |
|
|
|

|
|
|
#860 |
|
Registered User
Join Date: Dec 2013
Location: Northern, MT
Posts: 569
|
Re: 72 k20 project
Ryan - I was going to PM and let you know that my D60 ended up being a 4 prong 2 1/2" axle nut. It looks a lot like mine except the drop and of course yours is a lot cleaner than mine. Looks good.

|
|
|

|
|
|
#861 |
|
Junk Yartist
Join Date: Jul 2009
Location: Greeley, CO
Posts: 2,203
|
Re: 72 k20 project
All this talk about Spindle nuts on front D60's from Cummins guys and no one's mentioned the 2-9/16" hex that Dodge used.
Ryan, I know YOU can probably break that king pin loose by hand with an allen, but do you have issues taking the axle with you around in circles when it's not mounted to the truck?
__________________
-Jeremy YOU ONLY FAIL IF YOU STOP TRYING 70 Crew Cab Build Link 70 GMC Suburban 4X4 build thread 95 Yukon Daily Driver Rebuilding an NP205 |
|
|

|
|
|
#862 | |
|
Senior Member
Join Date: Apr 2004
Location: sw colorado
Posts: 2,720
|
Re: 72 k20 project
Quote:
um, ive never had a kingpin i could break loose by hand, even with all the veins in my head and neck at full attenion. that allen has had a few feet of pipe on it before though! usually to get them out they need to be heated. they should be lock tighted in and torqued to fifteen million. haha. when doing axles out of the truck, ive always either impact and hex drive socket hammered them or chained the axle to something heavy and used the pipe and hex key. they are a total pain with the axle loose. i didnt pull these, i just tossed the key in there for the sake of its manliness. |
|
|
|

|
|
|
#863 |
|
Senior Member
Join Date: Apr 2004
Location: sw colorado
Posts: 2,720
|
Re: 72 k20 project
So, this weekend i was a little distracted by the Mcmaster-Carr website. that happens from time to time... haha
we have a few hardware stores locally, but they never have the good stuff and the normal stock of bolts is not the best stuff anyhow. we also have a hardware and industrial supplies company that makes a run to the shop weekly, but it gets to be a total hassle dealing with the sales guy. the totally awesome salesman retired a few years ago... one of the sadder days of my life... hahaha. anyhow, i prefer the look of button heads in a lot of places and i like the black coated over the normal shiny zinc stuff. i also prefer to use flange head bolts instead of loose washers for most things as well. lucky for me mcmaster has it ALL! i got a lot of bolts for the engine and front frame area. i also found some regular grade 8 black oxide flat head(countersink) bolts for the bumper. now i have 70 bucks worth of stainless bolts i wont use, but ill just keep that a secret. the main thing i was going to buy was the Marson nutsert gun. it came with some smaller sheet metal sized mandrels and i picked up a 1/4"-20 and 3/8"-16 mandrel as well. nutserts make plumbing and wiring on a boxed frame much nicer! 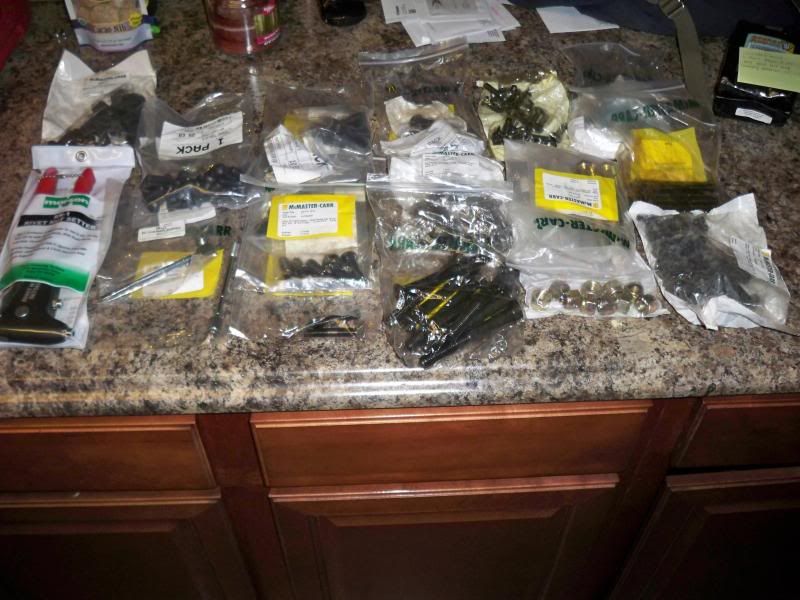 now i have to start stocking the cart at mcmaster for the next go round... |
|
|

|
|
|
#864 |
|
Collector of Projects
Join Date: Apr 2003
Location: Las Vegas
Posts: 3,106
|
Re: 72 k20 project
I have the same nutsert gun and same size nutserts... love that thing....
I'm pretty sure you' fabed brackets over the holes, but did you see any double threaded (course/fine) studs for the D60? |
|
|

|
|
|
#865 |
|
Senior Member
Join Date: Apr 2004
Location: sw colorado
Posts: 2,720
|
Re: 72 k20 project
i didn't look. usually when i do those, i just buy a fine thread bolt, cut the head off and thread the other end in the threading machine at work.
|
|
|

|
|
|
#866 |
|
Junk Yartist
Join Date: Jul 2009
Location: Greeley, CO
Posts: 2,203
|
Re: 72 k20 project
 I swapped these onto the D70 rear in my 1st gen. They came off of a Dodge Dana 60 front (85 or so), and the nuts are reusable... unlike the one-use originals. Edit: Dorman 05306
__________________
-Jeremy YOU ONLY FAIL IF YOU STOP TRYING 70 Crew Cab Build Link 70 GMC Suburban 4X4 build thread 95 Yukon Daily Driver Rebuilding an NP205 Last edited by jbclassix; 04-10-2014 at 12:14 AM. |
|
|

|
|
|
#867 |
|
6>8 Plugless........
 Join Date: Sep 2007
Location: Prairie City, Ia
Posts: 17,140
|
Re: 72 k20 project
That's odd, I have done 2 Dodge D60's in the last year. Both were late 90's axles though a 92 and a 93, and both had the same style nuts as the fords and chevys I've done. The big 4 tang round nut. Nice of spicer to have so many.
 And yes, the D70 nuts on the dodges is so jacked. They couldn't do it like a regular FF axle? Ford went to the safety nut in around 86 or 87 I think, which is just as bad IMO. And yes, the D70 nuts on the dodges is so jacked. They couldn't do it like a regular FF axle? Ford went to the safety nut in around 86 or 87 I think, which is just as bad IMO. 
__________________
Ryan 1972 Chevy Longhorn K30 Cheyenne Super, 359 Inline 6 cylinder, Auto Trans, Tilt, Diesel Tach/Vach, Buckets, Rare Rear 4-link and air ride option Build Thread 1972 GMC Sierra Grande Longhorn 4x4 1972 Chevy Cheyenne Super K20 Long Step side tilt, tach, tow hooks, AC, 350 4 speed 1972 C10 Suburban Custom Deluxe 1969 Chevy milk truck 1971 Camaro RS 5.3 BTR STG3 Cam Super T10 1940 Ford 354 Hemi 46RH Ford 9" on air ride huge project Tired of spark plugs? Check this out. |
|
|

|
|
|
#868 |
|
Senior Member
Join Date: Apr 2004
Location: sw colorado
Posts: 2,720
|
Re: 72 k20 project
I completed the welding on the axle. so i wire wheeled some more until i was happy with the cleanliness and then wiped it down with surface prep. it wasnt as clean as a blaster would have done, but i figure rustoleum will fix any minor oxidation i left. i will leave it in primer until i get the gearset installed so i can touch it up if necessary. gotta love red primer. this thing should never rust. i used an entire can of primer for the axle. Ha
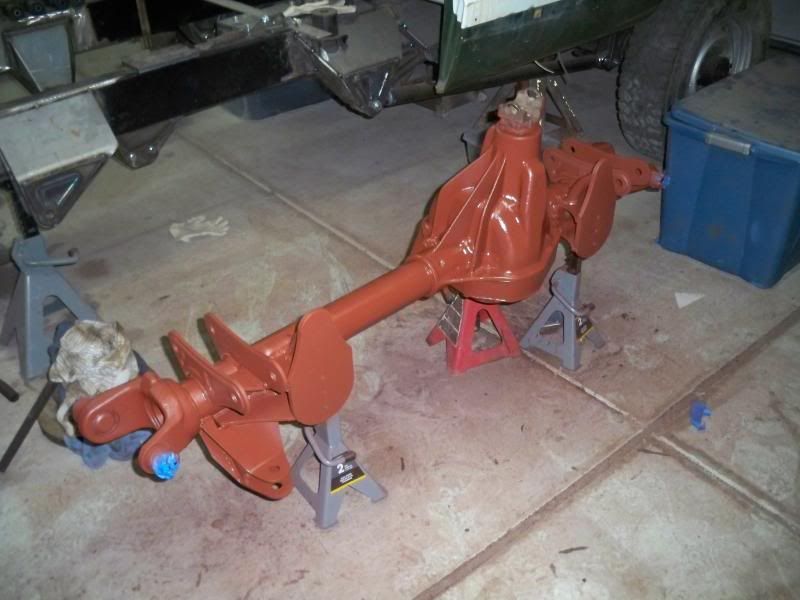 here you can see the gussets for the bump stop pad. i totally forgot to cut them on the plasma table before i left work, so i improvised. i am glad i did it this way. has a little more class. 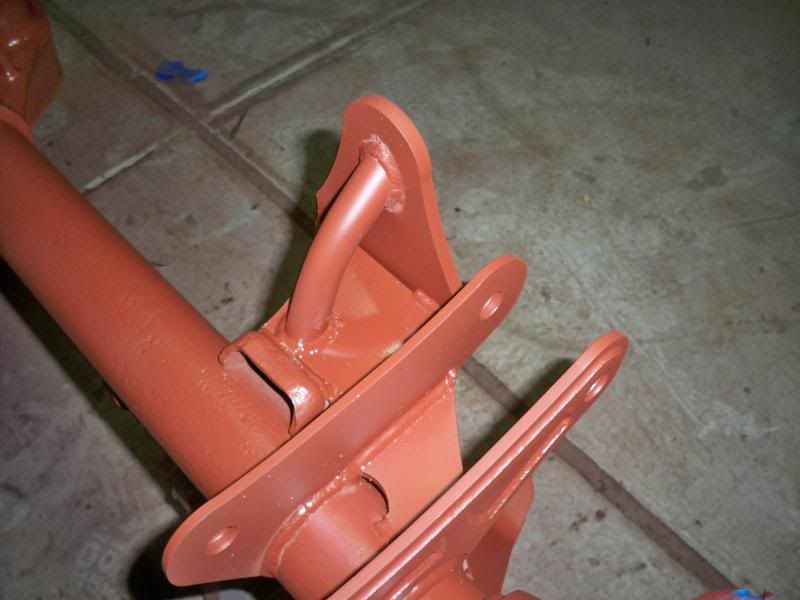 i also finished up the caliper brackets for the big brakes. i left the previous ones on the other axle. i will attack the knuckles with solvent and the wire wheel next. but as it was, i ran out of primer... 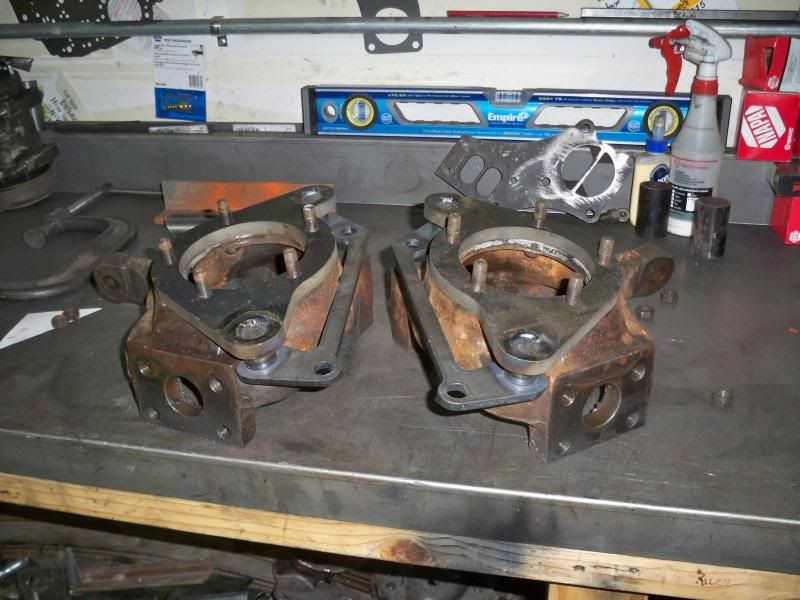
|
|
|

|
|
|
#869 |
|
Registered User
Join Date: Jun 2013
Location: Hubbard OR
Posts: 67
|
Re: 72 k20 project
Looking good.
|
|
|

|
|
|
#870 |
|
Registered User
 Join Date: May 2013
Location: wall,nj
Posts: 865
|
Re: 72 k20 project
Very nice Ryan.
I will be at the point of wire wheeling my axles in about a week. I hope.  Gonna go the rustoleum route too.Need to spend dinero elsewhere. Looking forward to the motor build,and i like where the crossmember is going.
__________________
Tom 71 K2500 71 K5 Jimmy |
|
|

|
|
|
#871 |
|
Senior Member
Join Date: Apr 2004
Location: sw colorado
Posts: 2,720
|
Re: 72 k20 project
Thanks guys!
i took the hubs in and turned the flange down for the slip on rotor. just for my own reference, the diameter that worked well was 8.178" i needed to pull the seals to access the back of the hub to chuck it in the lathe, so i pulled the bearings they got a solvent wash clean. along with the other internal parts. i got a couple good squirts of grease from the gun and got one bearing packed. then the gun went to pot and i found my grease had separated from the bottom up. drat. here they are, waiting a fresh tube of grease. 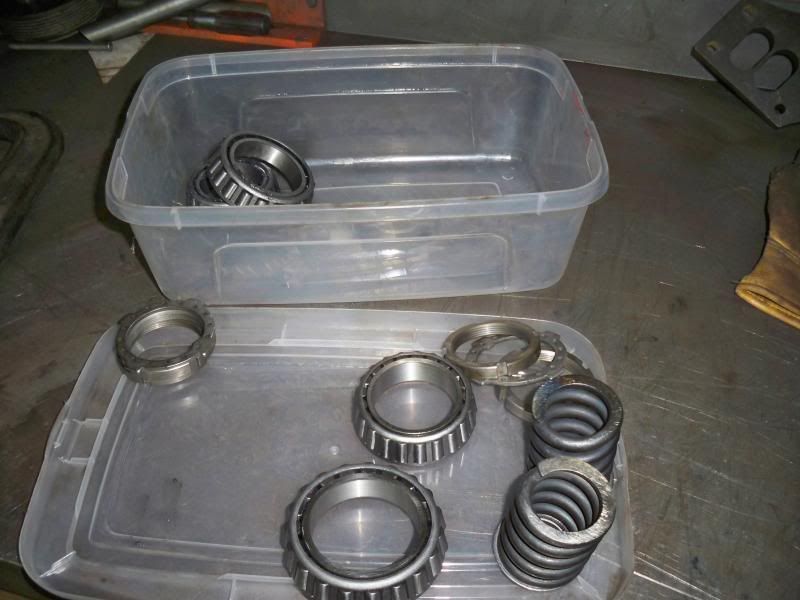 and here is the nice thick nasty crap that was left in the tube. 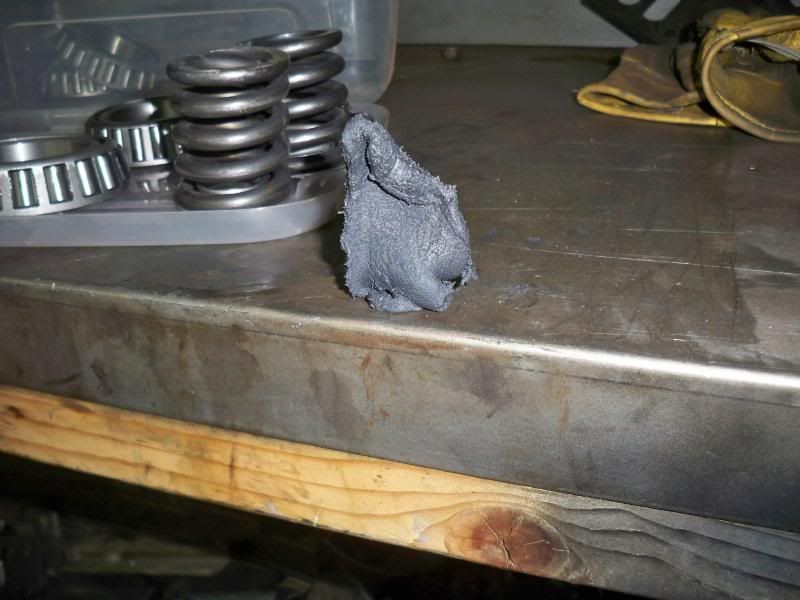 i continued with the cleaning and painting of parts. 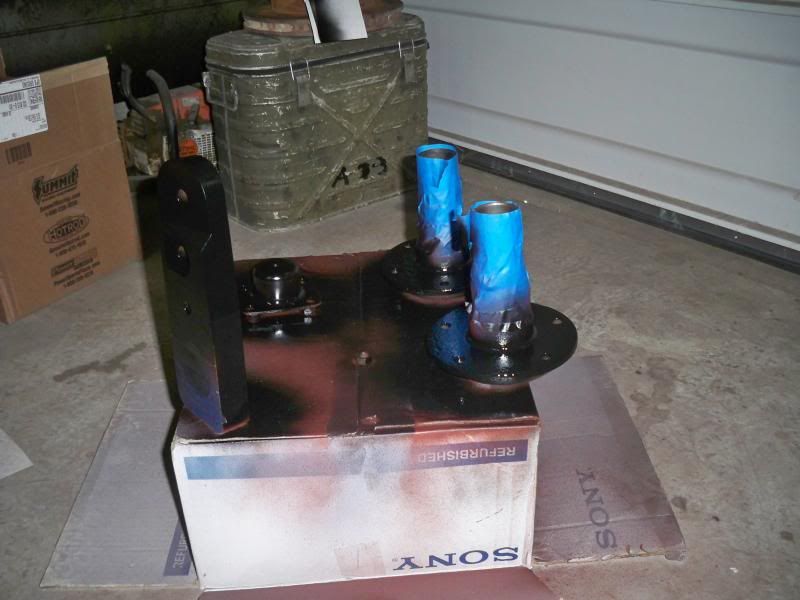 Hubs, knuckles, caliper brackets. as you can see, my skills with the paint can are one or two notches less than stellar. you cant win them all. i have since added more black paint.  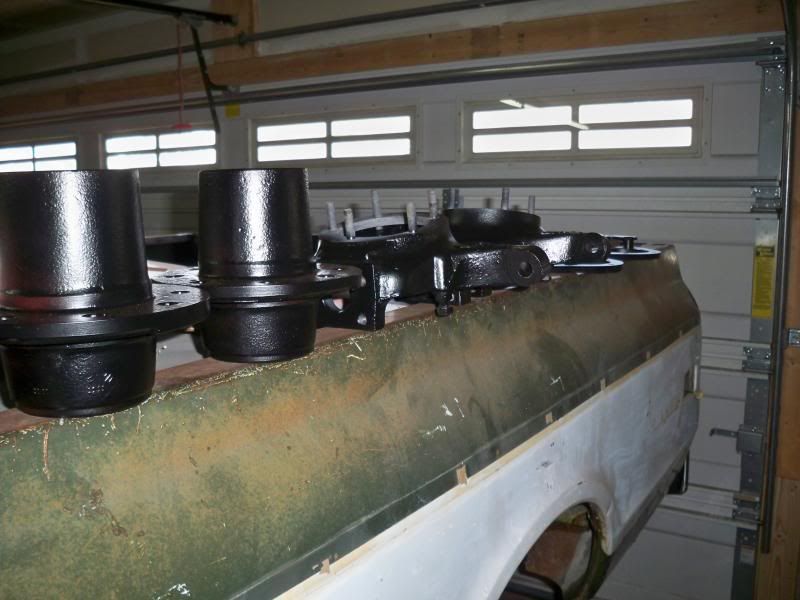 i used the housing to help me fog the axle ends. i am generally opposed to painting stuff without taking it apart. but i didnt want to fiddle with the obviously brand new spicer u-joints so i made an exception to my neurotics. i'm sure it will bother me. 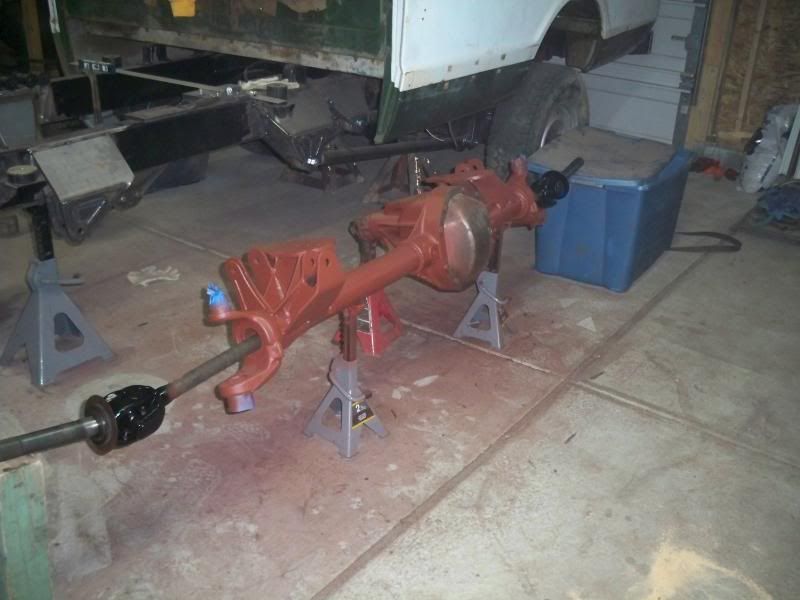 i also go a little shipping stand made for the engine so i can haul it to my buddies shop where we are doing the overhaul. i almost made this out of metal since i grow six new thumbs when i try to make anyting out of dimensional lumber, but i got it... 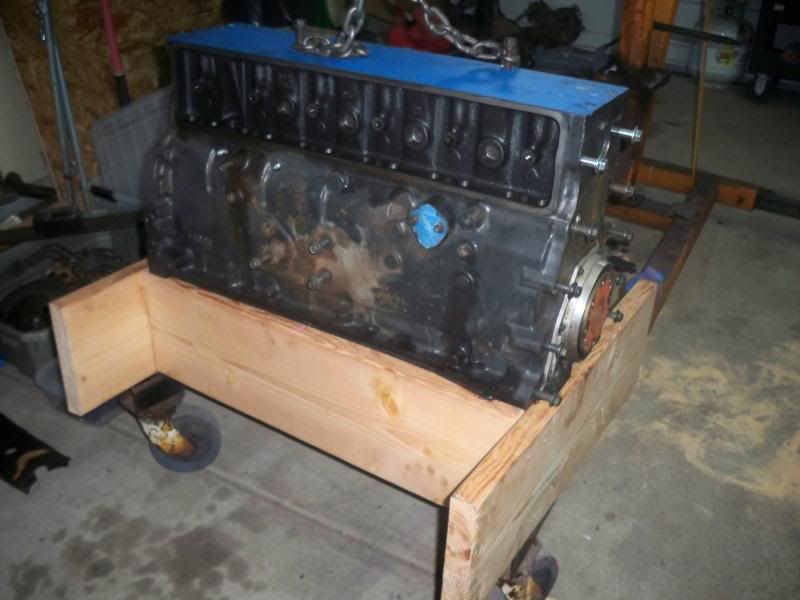 i have 16 new wheels studs, or rotor bolts as they are called. at $4+ bucks apiece. that was a nice chunk. i was also very surprised at how poorly centered the machine work was done on the casting blanks. it was pretty silly. you can tell that this axle must have lived in the rust zone at some point. some of the pitting is pretty nasty. at some point when i have run out of things to buy, i will replace the knuckles hubs and spindles with new. they aren't unusable but it will make me happy to get the new stuff. i also want to buy the EBC hotrod brakes, but i will see how it pans out. it might get stock stuff at first. |
|
|

|
|
|
#872 |
|
Senior Member
Join Date: Apr 2004
Location: sw colorado
Posts: 2,720
|
Re: 72 k20 project
washed the weird grease out of the one bearing and repacked everything with fresh.
the plan was to redo the gears this week, but that has been postponed. going to try for next week. i got word that my rings and bearings showed up. so i may try to get on the engine at some point. we'll see how the scheduling works. |
|
|

|
|
|
#873 |
|
Junk Yartist
Join Date: Jul 2009
Location: Greeley, CO
Posts: 2,203
|
Re: 72 k20 project
What studs are you using for the front? are they going to match the D80 rear?
__________________
-Jeremy YOU ONLY FAIL IF YOU STOP TRYING 70 Crew Cab Build Link 70 GMC Suburban 4X4 build thread 95 Yukon Daily Driver Rebuilding an NP205 |
|
|

|
|
|
#874 |
|
Registered User
Join Date: Dec 2012
Location: Coldwater On. Canada
Posts: 551
|
Re: 72 k20 project
Hey Ryan . Give me your two cents on this . I just got a new master cyl for my 56 . I got the one for a 1 ton dodge so the volume would be rite to work the brakes on my D60 and D70. Im wondering if the brake pedal should put a bit of preload on the master or if the plunger should just touch the piston with no play ? My travel is limited just a touch because of the old under floor style pedal and master . If I could preload the master a bit that whould help for sure with the travel.
__________________
56 gmc 4X4 Cummins 5 spd 60F 70R 2005 Ram 3500 DRW cummins 4X4. 2006 Conolift 9/15. 2011 F 350 winter beater New 2018 ram 3500 drw 4x4. Makes my 2005 Look as if it's been running on 4 cyl since new ! My Build http://67-72chevytrucks.com/vboard/s...d.php?t=556908 |
|
|

|
|
|
#875 |
|
Vintage 4x4s
Join Date: Sep 2010
Location: Prior Lake, MN
Posts: 4,305
|
Re: 72 k20 project
Looking good! I'm tuned in more than ever since I've got 3 cummins w250's now, and at least 2 are just donors. Where does one get a 7/8" hex key, I love that!
Edit: thinking about picking one of these tool sets up, opinions? http://www.ebay.com/itm/231185666827...84.m1423.l2649
__________________
67 GMC K1500 Custom- 305V6 SM420, PTO, Ram Assist, yellow (the outcast) (project period correct upgrades) 67 GMC C2500 351V6 TH400, AC, PS, PB (can't decide what to do with. Update, decided to keep and will restore  ) )86 CHV K30 502 th400, apple red NEW 71 CHV K20 350 SM465, ochre (saved work truck) 71 CHV K20 292 SM465, white, tach, PTO, (future project) 72 CHV K20 350 350th, medium blue (project stocker) 01 CHV K2500hd crew, indigo blue ^3 dont run and the others don't see winter either '86 K30 Cummins "Fireside" thread: http://67-72chevytrucks.com/vboard/s...d.php?t=649649 '71 K20 "get driveable" thread: http://67-72chevytrucks.com/vboard/s...d.php?t=590642 '72 K20 Build Thread: http://67-72chevytrucks.com/vboard/s...=493477&page=6 Last edited by Vintage Windmills; 04-15-2014 at 10:05 PM. |
|
|

|
 |
| Bookmarks |
|
|