
|
 08-08-2012, 09:55 PM
|
#126 |
|
Registered User
Join Date: Aug 2007
Location: Corona, California
Posts: 7,998
|
Re: My '59 Apache
I wish I had a lift in my garage.
Kim |

|

|
|
08-13-2012, 10:20 PM
|
#127 |
|
Senior Member
 Join Date: May 2011
Location: Cypress, Tx.
Posts: 1,504
|
Worked on brake bracket today
Finally got back to my truck today, but cannot believe how often my cell phone rings! Just when I pull my welding hood down to weld, Mom calls. It's like a switch! I pull the hood down- phone rings!! Lol ; )
Today I started on a bracket to hold my power booster/ mc. I don't have a photo to show other than the one below. I used some scrap angle iron to build the bracket. If I can get a few more hours, I can complete it. Then, I can work on how im going to run the brake lines to the front brakes. I need to figure the brake lines and fuel line before boxing my front frame rails in! In fact, I'm not sure how I'm going to run the brake lines, inside the boxed frame or outside. I'll get some photos tomorrow. Just wanted to write in my build thread. Note: I will not be using the tranny mount in this photo. This photo just shows that the booster/mc will be 5.5" further back, this will place the mc in a more accessible area underneath the seat via a trap door. I'll make a nice trap door to access the mc. 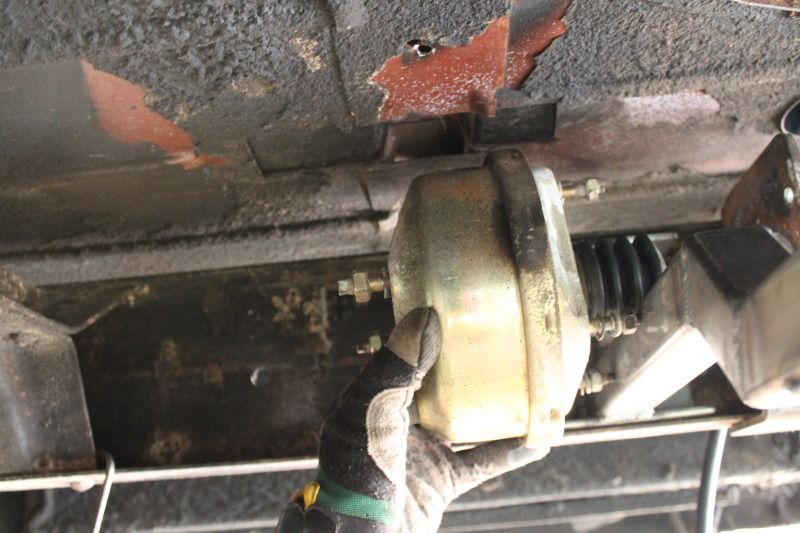 Posted via Mobile Device Posted via Mobile Device |
|
|
|
|
08-13-2012, 11:49 PM
|
#128 |
|
Registered User
Join Date: Jun 2006
Location: Idaho
Posts: 8,800
|
Re: My '59 Apache
I don't take my phone into the shop unless my wife is out running around. When you build your bracket make sure you run a diagonal from the part closest to the drive shaft back to the piece that will bolt to the frame. I thought I had made mine stout with full penetration welds but when I pushed the pedal the piece perpendicular to the frame moved and I had to add a piece of flat bar. Lots of leverage.
__________________
1959 Chevy Short Fleetside w/ 74 4WD drive train (current project) OrrieG Build Thread 1964 Chevelle Malibu w/ 355-350TH (daily driver) Helpful AD and TF Manual Site Old Car Manual Project |
|
|
|
|
08-14-2012, 05:08 PM
|
#129 |
|
Senior Member
Join Date: May 2011
Location: Cypress, Tx.
Posts: 1,504
|
my mc/booster bracket
It wasn't too bad to fabricate~ kind of fun. I love my Systematic welding machine for the heavier metal! ; )
Now I just need to figure out how to lengthen the rod going to the power booster. ACE Hardware didn't have anything that would work. I'll removed the brake bracket assembly soon and clean it up/ maybe put a grease fitting where the brake arm pivots. The master cylinder was "new", but leaks and is quite rusty~ would Oreilly's need a part number, or could I also put a different master cylinder? 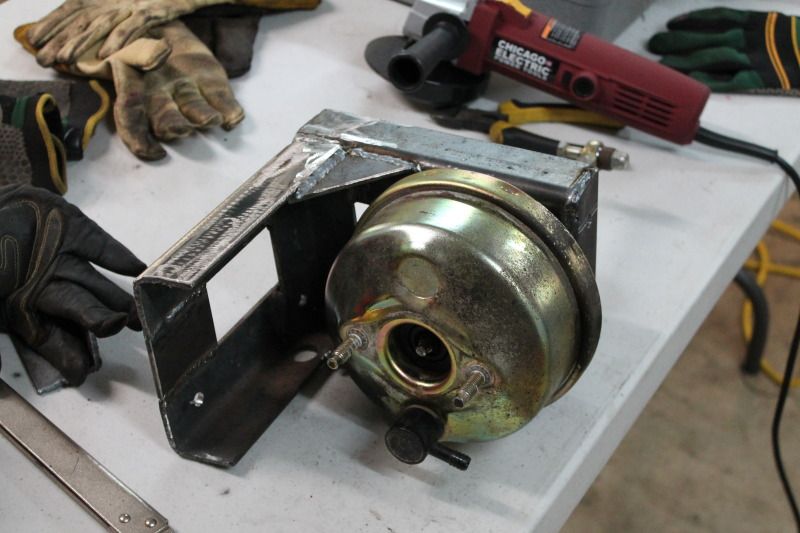 I'll be making some metal straps to go from the new bracket to the old bracket for added strength. I drilled holes along the side of my new bracket to accomodate this idea. 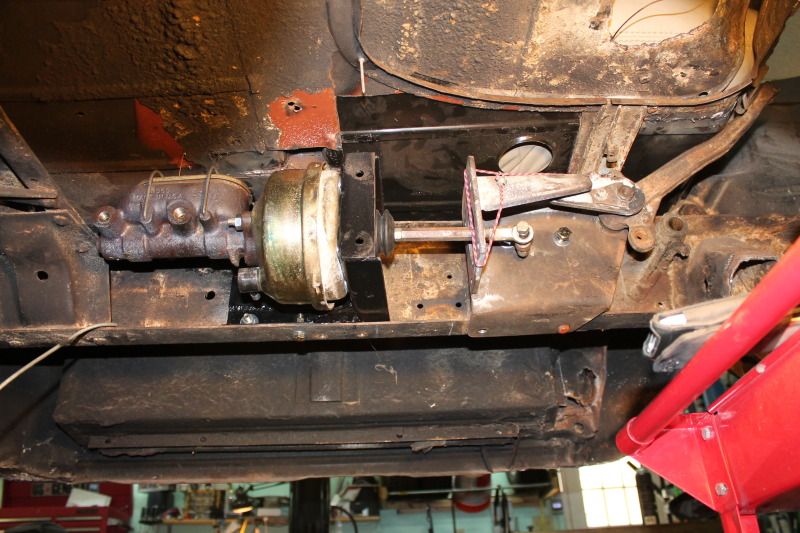
|
|
|
|
|
08-14-2012, 07:21 PM
|
#130 |
|
Registered User
Join Date: Jun 2006
Location: Idaho
Posts: 8,800
|
Re: My '59 Apache
Don't think to hard. 1/2" emt conduit (NOT thinwall) with nut to match booster threads jambed and welded in one end, fabricated bracket fitted into a slot and welded on the other. jb weld to make it pretty. you might be able to use the bracket end from your, mine was crappy metal and would not weld, I did not want to mess with a potential brake failure.
__________________
1959 Chevy Short Fleetside w/ 74 4WD drive train (current project) OrrieG Build Thread 1964 Chevelle Malibu w/ 355-350TH (daily driver) Helpful AD and TF Manual Site Old Car Manual Project |
|
|
|
|
08-14-2012, 07:33 PM
|
#131 |
|
Registered User
Join Date: Jan 2012
Location: Motown
Posts: 7,677
|
Re: My '59 Apache
looks good denee

__________________
cool, an ogre smiley Ogre's 58 Truk buildhow to put your truck year and build thread into your signature shop air compressor timer |
|
|
|
|
08-14-2012, 08:10 PM
|
#132 |
|
Registered User
Join Date: Aug 2007
Location: Corona, California
Posts: 7,998
|
Re: My '59 Apache
Nice job.
Kim |
|
|
|
|
08-14-2012, 09:14 PM
|
#133 |
|
Senior Member
Join Date: May 2011
Location: Cypress, Tx.
Posts: 1,504
|
Thanks guys! ;)
It feels so good when I do something to get the "good job" from my peers! ; )
Orrie, it dawned on me, the adjuster nut between the brake arm and booster is left hand thread on one side and normal thread on the other end. I think i may be able to use that nut looking adjuster. Maybe I can cut it in half and get the tubing like you mentioned and extend that nut and maintain the adjustment the way it was designed. oh, well, tomorrow I need to spend time at moms, fixing stuff over there. I'm a handylady! lol |
|
|
|
|
08-14-2012, 09:34 PM
|
#134 |
|
Registered User
Join Date: Aug 2007
Location: Corona, California
Posts: 7,998
|
Re: My '59 Apache
Denee
You may be able to get a turnbuckle and solve your problem. They come in different lengths and have left and right hand threads. You should be able to get one that fits the booster threads and then have some adjustment in it. Kim |
|
|
|
|
08-15-2012, 08:31 AM
|
#135 |
|
Senior Member
Join Date: May 2011
Location: Cypress, Tx.
Posts: 1,504
|
Re: My '59 Apache
Thanks Kim, I'll look into that today! ; )
Posted via Mobile Device |
|
|
|
|
08-15-2012, 10:41 AM
|
#136 | |
|
Registered User
Join Date: Jan 2012
Location: Motown
Posts: 7,677
|
Re: Thanks guys! ;)
Quote:
i'd look into doing just that
__________________
cool, an ogre smiley Ogre's 58 Truk buildhow to put your truck year and build thread into your signature shop air compressor timer |
|
|
|
|
|
08-15-2012, 04:09 PM
|
#137 | |
|
Senior Member
Join Date: May 2011
Location: Cypress, Tx.
Posts: 1,504
|
Re: Thanks guys! ;)
 great minds? I like that! great minds? I like that! Quote:
|
|
|
|
|
|
08-15-2012, 09:36 PM
|
#138 |
|
Senior Member
Join Date: May 2011
Location: Cypress, Tx.
Posts: 1,504
|
I'll probably use this
I had some heavy duty metal pipe in my garage, (actually from a steering column out of a 72 impala) so I cut it to fit, I will weld it together tomorrow. Kind of fat, but should be functional. There is no problem with clearance. Funny, I would have bet 5 bucks that one side was left hand thread! ; both were right hand thread. Oh, to center the nut inside the tube since the tube was a bit larger, I wrapped the nut with mig wire until it fit tight and so it self centered. Just have to eyeball it to get it straight.
Amazing the little things that take up time; ) Oh, I mentioned that the master cylinder on this setup is "new", but it leaks out the back and is really rusty! How do I go about buying a new master cylinder? Is there a less gaudy mc that would fit this booster? 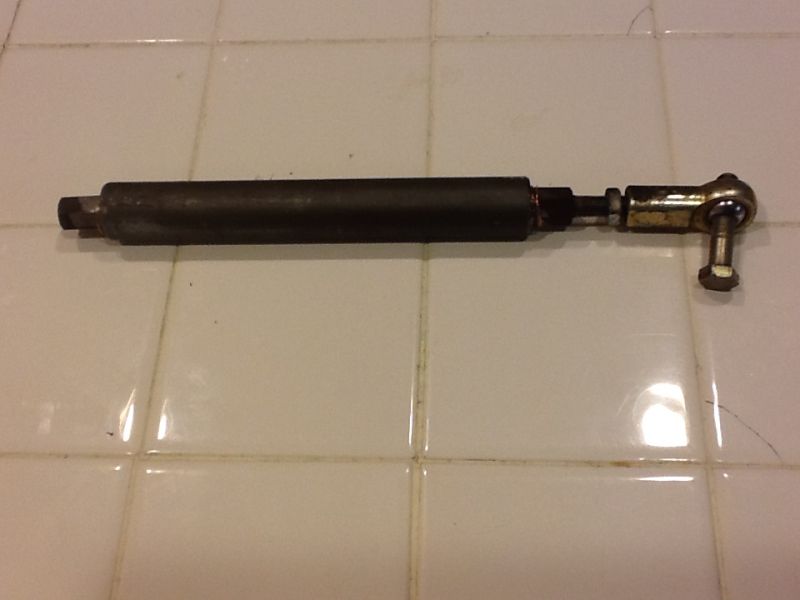 Posted via Mobile Device Posted via Mobile Device Last edited by Denee007; 08-15-2012 at 09:39 PM. Reason: Added info |
|
|
|
|
08-21-2012, 08:02 PM
|
#139 |
|
Senior Member
Join Date: May 2011
Location: Cypress, Tx.
Posts: 1,504
|
Remote reservoir and other parts, and MOM
HI! I've been busy with Mom(86), she's having health issues and in the hospital with suspected pneumonia, but they have it under control and she should be home tomorrow. So I'll be spending time with her to try and get her healthy and get her back on her lawn tractor moving her acreage!
Ok, I needed a master cylinder but I had a question or two for Justin at Scottshotrods. So you can see in the photo I bought stuff! I don't know if I moved the master cylinder in vain or not! But I think I may still need access to the top of the master cylinder to install the remote reservoir top. The pretty little polished looking thing at the lower left of the photo is the brake fluid reservoir which will be mounted on the firewall~ pretty slick! Not sure where I'll mount the adjustable proportioning valve. But it will probably be next week before I can get back at it. What I really need and Justin is working on it, is the steering column drop! Once I get that figured out, I can remove the seat out of the truck and still make the access to the top of the master cylinder, just in case! I really like Justin, but costs me every time I talk with him OH, my husband has prompted me and helping me to make a blog or website of stuff that I've done, doing, or going to do. I haven't had one hit and kind of depresses me~ it's a lot of work and time consuming to put together a blog. I wish they could have picked a better name than Blog! Anyway, it's www.classiccarsandtools.com , it's kind of fun, but keeps me away from making any progress in the garage. 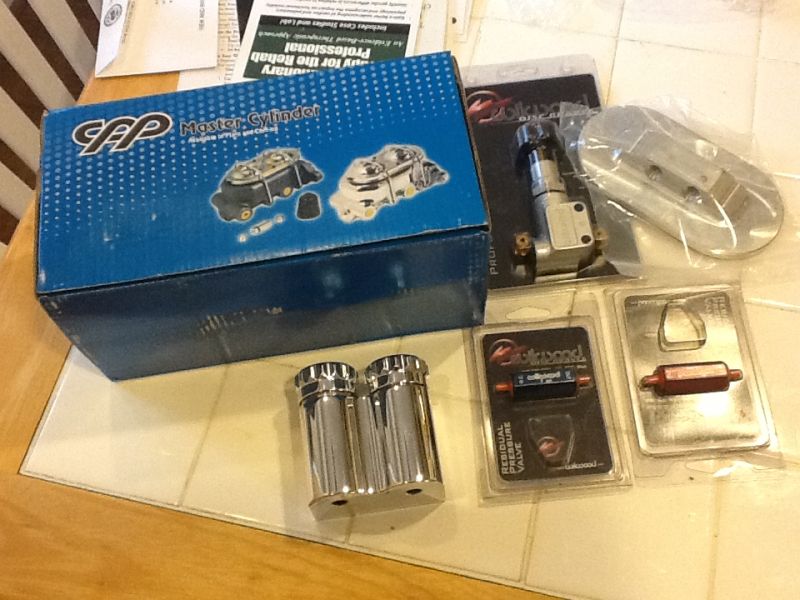 For the front brake lines, I used the little diverting block that was on the truck and mounted in front of the front crossmember. From here, I ran the lines (inside) the frame, which isn't boxed in yet, and a longer length to the master cylinder~ wherever it's going to wind up. I will secure the lines somehow so they won't rattle or wear. That's where I am right now~ guess I'll bee bop around our site and see what's going on! no, the picture is not upside down, this was mounted on the other side of the front cross member. And I'll pretty the lines up with little brake line brackets. 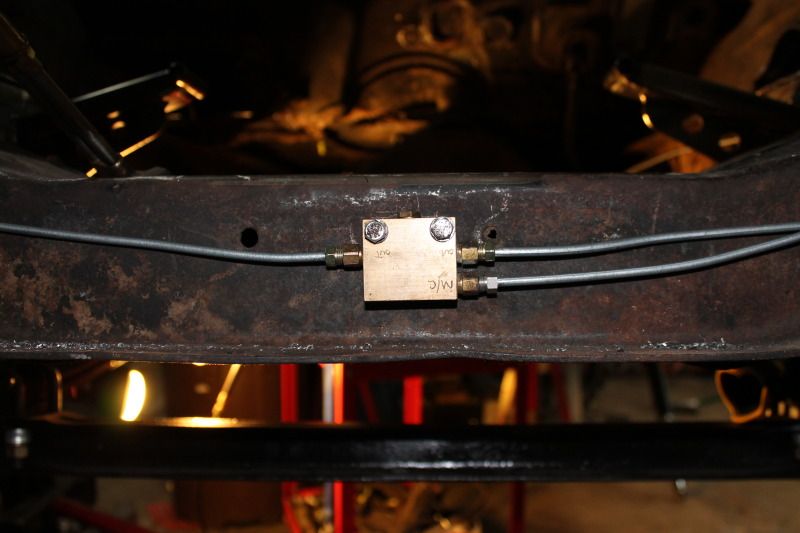
|
|
|
|
|
08-21-2012, 08:28 PM
|
#140 | |
|
Registered User
Join Date: Jul 2011
Location: Auburn ca.
Posts: 2,886
|
Re: I'll probably use this
Quote:
Looks good Denee 
|
|
|
|
|
|
08-30-2012, 08:50 AM
|
#141 |
|
Senior Member
Join Date: May 2011
Location: Cypress, Tx.
Posts: 1,504
|
radio panel and steering column mount
Hi~ I'm back again! If I get a day, I can make some progress! ; )
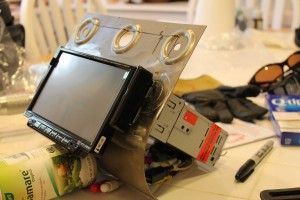
I know it may be against the grain for most for installing an aftermarket radio or a modern radio, but it's my truck, and my 4 y/o grandaughter will like the 7" screen~ I need to make memories with my grandaughter! Here's the finished metal work, it's fitted and ready to weld in. Just didn't have time yesterday. 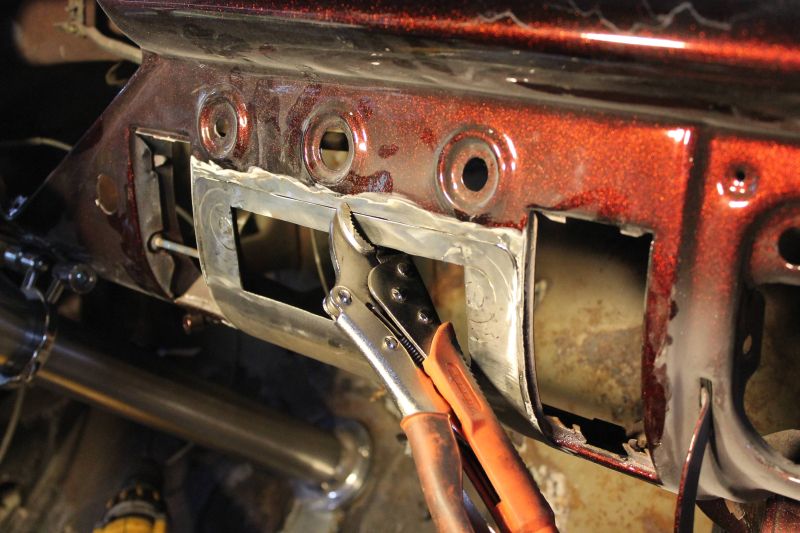 I'm dressed for the occasion! 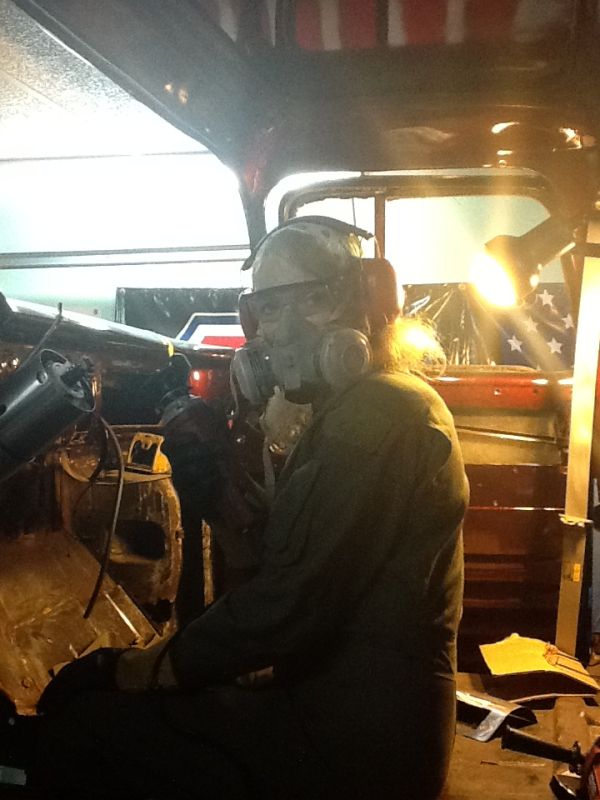 This was just a test fit. The cradle that holds the radio has to be a tight fit.  A cool tool from Harbor Freight is an electric cut-off tool! It's kind of bulky compared to an air operated cut-off tool, but it's pretty powerful and doesn't run the heck out of my compressor. However, pushing it too hard will result in popping the reset switch on the unit. Not a biggy. A short video(if it will open) of it cutting. I don't know why I called it a Chicago pneumatic tool, it is a Chicago electric! Can't beat it for 20 bucks! http://smg.photobucket.com/albums/v4...6ac6461f42.mp4 I'm happy with my column drop from Scottshotrods, now my column sits at the right height! 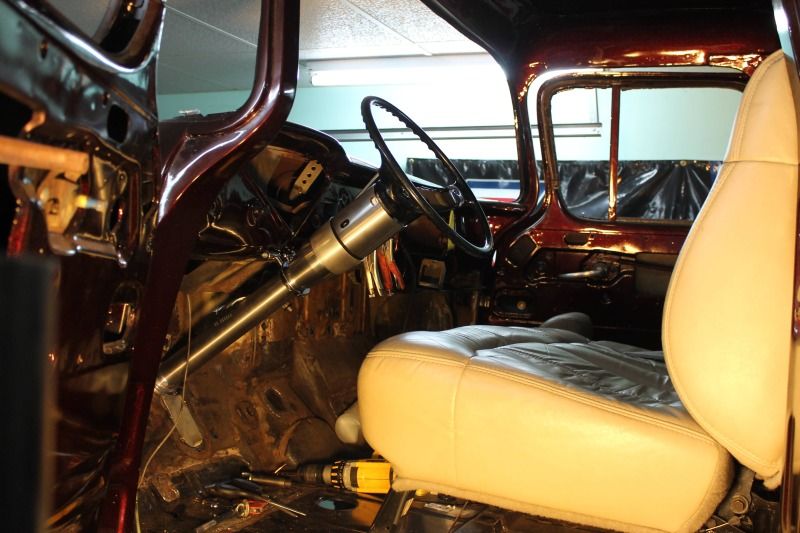 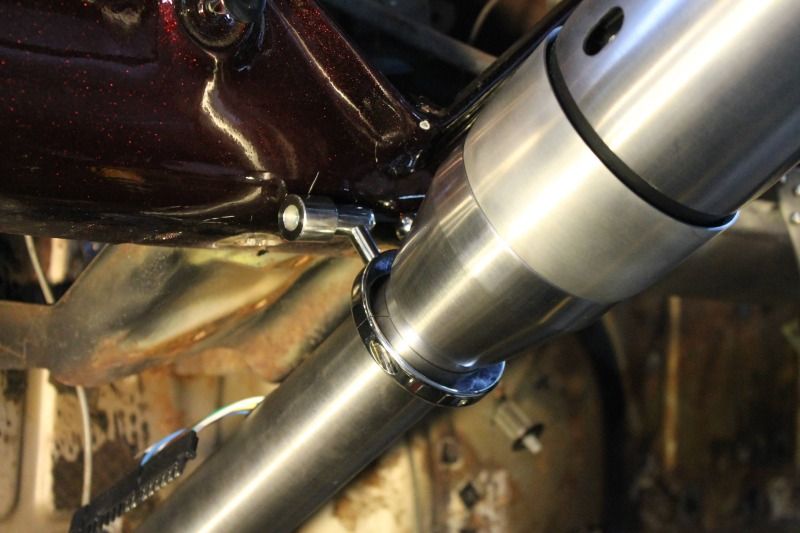 I'm getting closer to figure out what color to paint the interior! ; ) |
|
|
|
|
08-30-2012, 09:38 AM
|
#142 |
|
Registered User
Join Date: Oct 2011
Location: Riverside, CA
Posts: 12
|
Re: My '59 Apache
Great project. Your progress is amazing. The work looks great and good to see you have good people around you to get things done.
|
|
|
|
|
08-30-2012, 09:53 AM
|
#143 |
|
Senior Member
Join Date: May 2011
Location: Cypress, Tx.
Posts: 1,504
|
Re: My '59 Apache
Hi, priyeshp? and welcome to my build thread(and your truck is cool! ; ) I know I don't look very glamorous in the photos, but I rarely wear a dress anymore! I work alone, I have no help, and honestly only need advice from this awesome forum. My husband doesn't offer help~ he knows better anyway! lol
oh, don't forget to checkout my blog! It's taking alot of time to put this thing together! and leave a comment~ no one has written anything yet  For me, it seems complicated to the user looking on the site, maybe it's how blogs work? For me, it seems complicated to the user looking on the site, maybe it's how blogs work?www.classiccarsandtools.com This is me and my ex-bmw~: ( Why the hell did I sell this bike! argh! 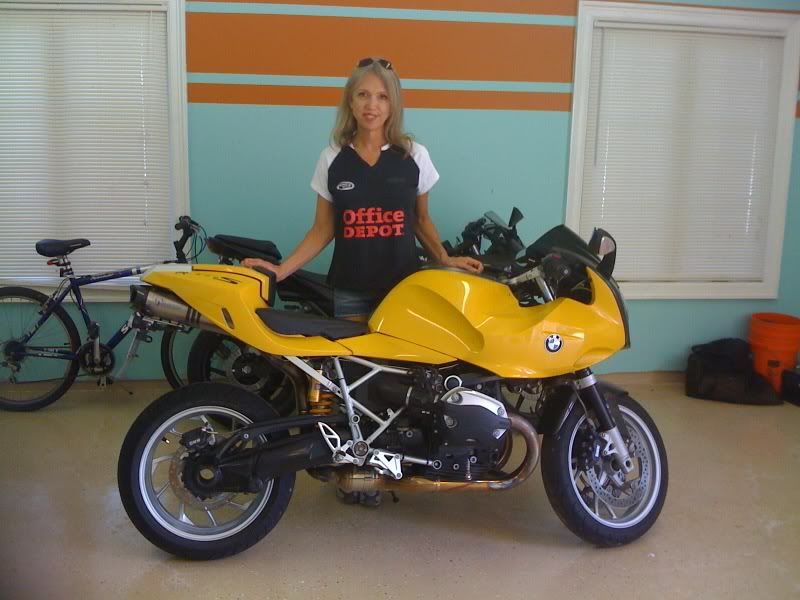
|
|
|
|
|
08-30-2012, 10:12 AM
|
#144 |
|
Registered User
Join Date: Aug 2007
Location: Corona, California
Posts: 7,998
|
Re: My '59 Apache
Looking good Denee.
Kim |
|
|
|
|
08-30-2012, 10:36 AM
|
#145 |
|
Registered User
Join Date: Sep 2005
Location: Glendale Arizona
Posts: 1,188
|
Re: My '59 Apache
Great job on your dash, it is going to be a nice set up!

__________________
http://67-72chevytrucks.com/vboard/s...d.php?t=436442 |
|
|
|
|
08-30-2012, 10:58 AM
|
#146 |
|
Registered User
Join Date: Dec 2010
Location: Dallas Texas
Posts: 158
|
Re: My '59 Apache
looking very good i know what you mean about the bike wish i never sold my harley.Once again very good job on the truck,as soon as my health lets me ill be back on mine.
|
|
|
|
|
08-30-2012, 12:09 PM
|
#147 |
|
Registered User
Join Date: Jan 2012
Location: Motown
Posts: 7,677
|
Re: My '59 Apache
yes it is your truck, make it like you want it
i think you'll be happier with the single din set up make sure you weld a stud for the support bracket in the back to support the weight of the head unit as you bounce down the road.
__________________
cool, an ogre smiley Ogre's 58 Truk buildhow to put your truck year and build thread into your signature shop air compressor timer |
|
|
|
|
08-30-2012, 12:56 PM
|
#148 | |
|
Senior Member
Join Date: May 2011
Location: Cypress, Tx.
Posts: 1,504
|
Re: My '59 Apache
Thanks everyone! I'm tickled the way it's turning out! I'll be looking at where to make that support tomorrow. It wouldn't take a double din anyway, the windshield arms are in the way.
Larry, I hope you get well soon!!!! Quote:
 Posted via Mobile Device Posted via Mobile Device |
|
|
|
|
|
08-30-2012, 01:11 PM
|
#149 |
|
Registered User
Join Date: Jul 2012
Location: indy
Posts: 55
|
Re: My '59 Apache
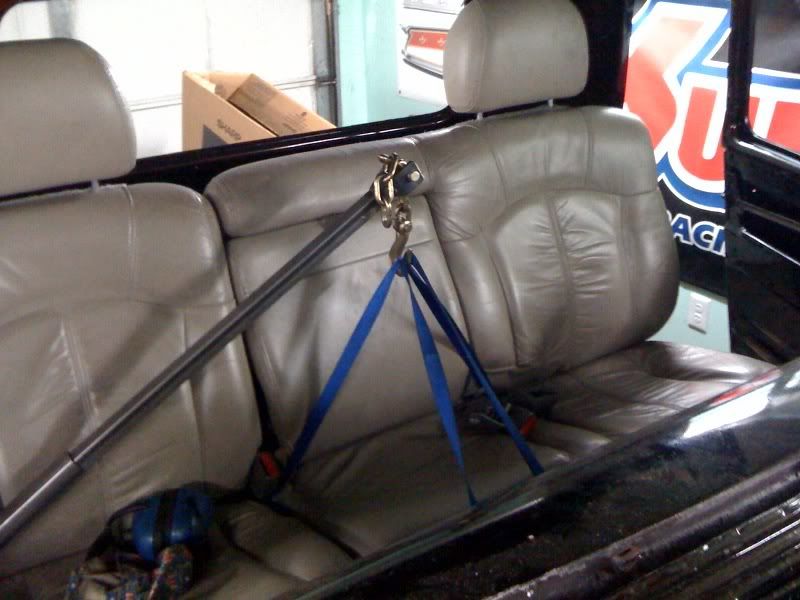
Denee, the new drop loops much better! I like how tight it is now. I did a quick look and I can't find a mention of your seats, what are they from? They look nice.
-sean |
|
|
|
|
08-30-2012, 01:23 PM
|
#150 | |
|
Senior Member
Join Date: May 2011
Location: Cypress, Tx.
Posts: 1,504
|
2nd row Tahoe seat (Sean asked)
Thanks Sean! I think I may have said somewhere that this seat is the 3rd row seat out of an early 2000 (not sure of the exact year)Tahoe, but it's a second row. Now it's a little wider than the narrower seats and the driver seat doesn't actually line up quite right with the steering wheel, but with my little butt, I fit fine by moving over a little bit. In fact, with center console down, I nudge up against it and I fit fine. I'll be the only driving it more than likely~ I may allow my husband to drive is he'll give me more money for my projects! lol ; ) but the seat is so plush, I could never part with it!
Quote:
|
|
|
|
|
 |
| Bookmarks |
|
|


 Linear Mode

