
|
 07-07-2017, 10:27 PM
|
#851 |
|
Registered User
Join Date: Jan 2013
Location: Leonardtown, MD
Posts: 1,633
|
Re: 55 Wagon Progress
Been a while for any updates, been driving around seeing the countryside. Happened across this nice v-dub today...
John, it was great finally getting to meet, you have some nice projects going on in your shop. Holler if you ever venture north!
__________________
Robert |

|

|
|
07-12-2017, 08:07 PM
|
#852 |
|
Registered User
Join Date: May 2011
Location: Anderson SC
Posts: 3,868
|
Re: 55 Wagon Progress
It was great to finally meet you too! Appreciate you taking the time to stop by and hang out for awhile.
__________________
Project Goldilocks '66 C10 Short Fleet BBW Build '65 C10 Highly Detailed Stock Restoration Thread '78 Camaro Targa Roof Build '55 International Metal/Body/Paint Work '66 F100 Full Rotisserie Restoration '40 Packard 120 Convertible Coupe Restoration How To Restore and Detail an Original Gauge Cluster How To Detail Sand Body Panels, Edges, Corners, Etc |
|
|
|
|
07-18-2017, 08:01 AM
|
#853 |
|
Registered User
Join Date: Jan 2013
Location: Leonardtown, MD
Posts: 1,633
|
Re: 55 Wagon Progress
After travelling the countryside, it was back to the grind, took delivery of the bus with the cracked hood this past Wednesday.
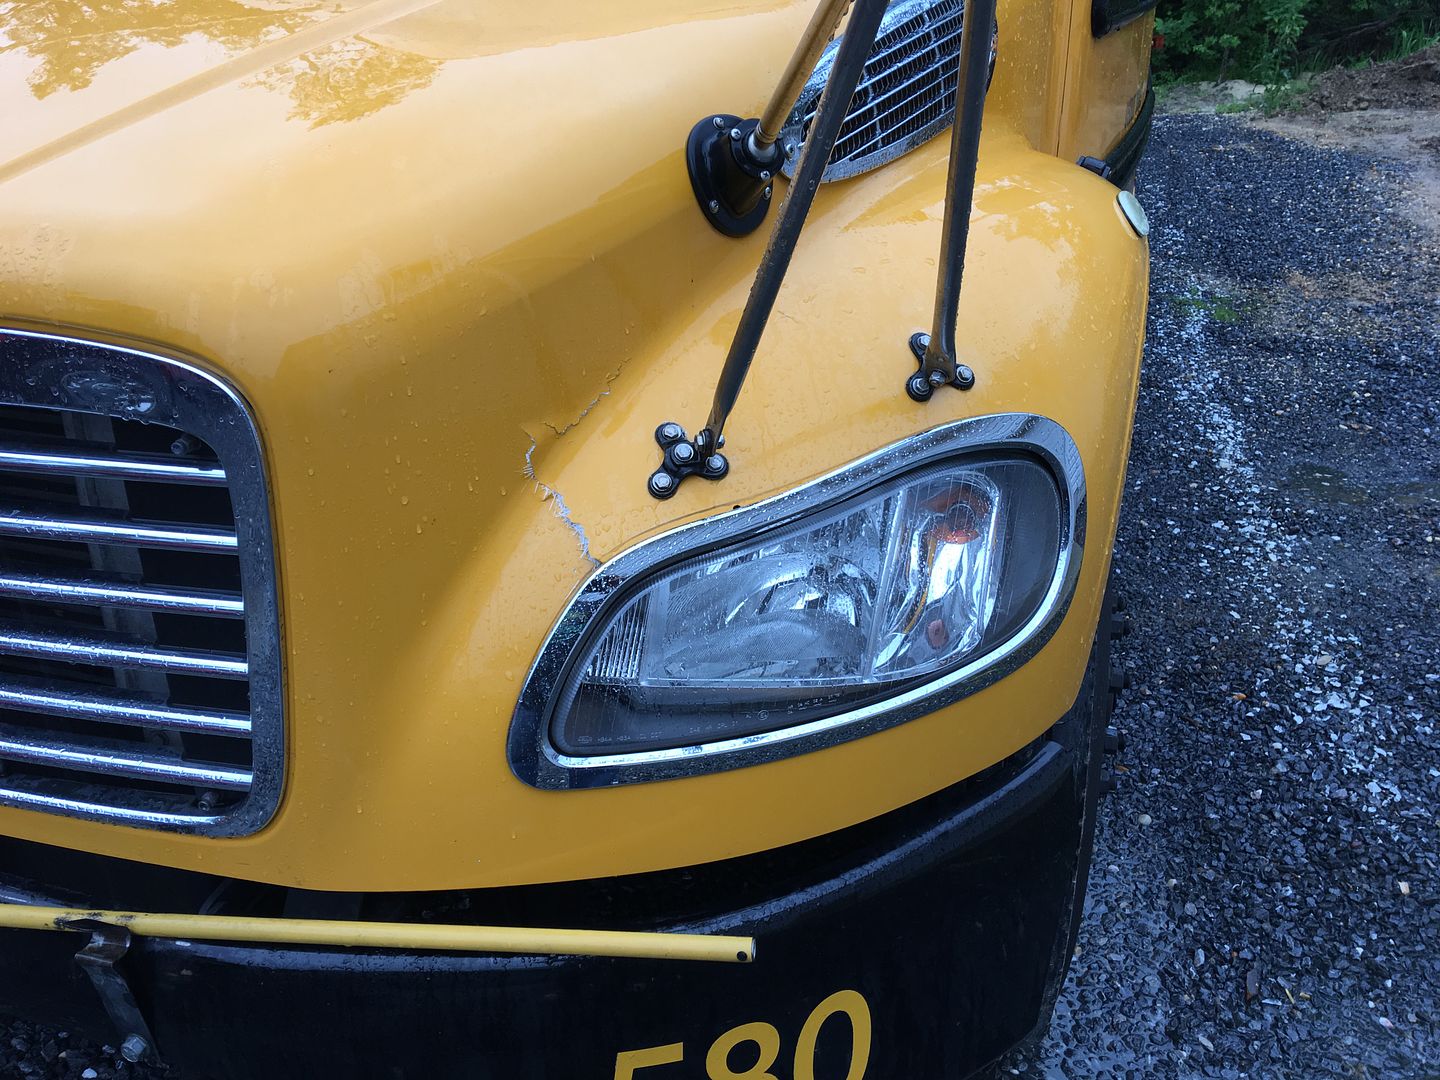 After removing headlights, I ground out the cracked areas, which relieved the tension and allowed the panels to lay flat again. Epoxy was used between the outer and inner layers, clamped, and let things set up.  After a couple layers added.... 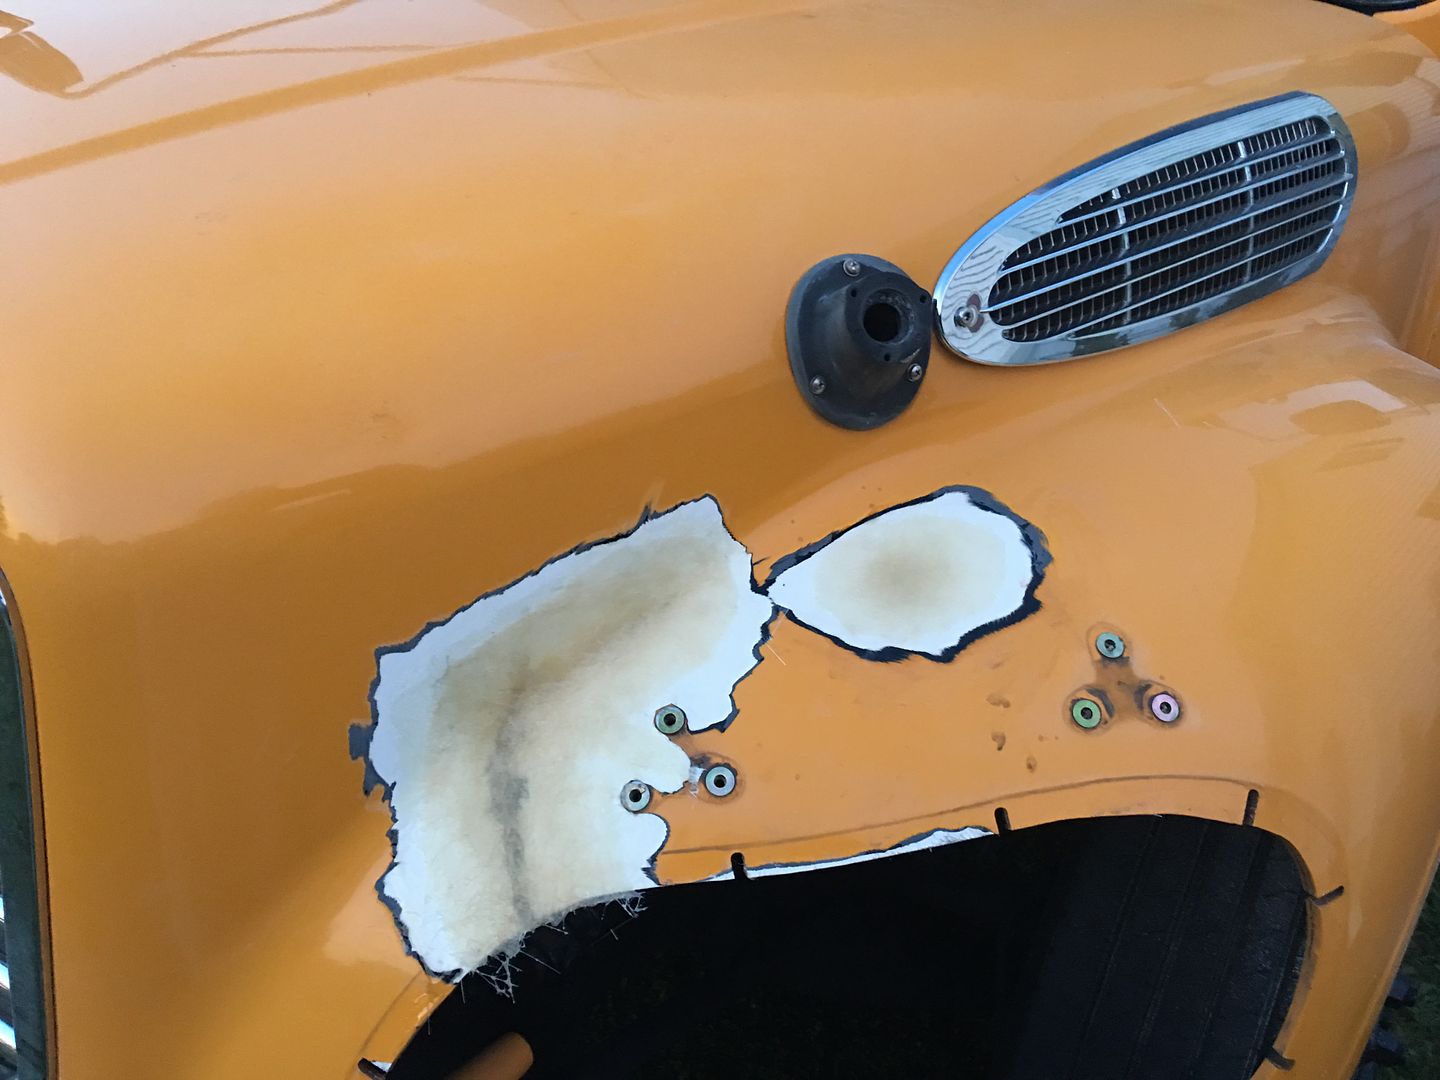 Left this to cure in the sun for a couple days, then back at it on Saturday. Ground smooth and hopefully the last layer added... 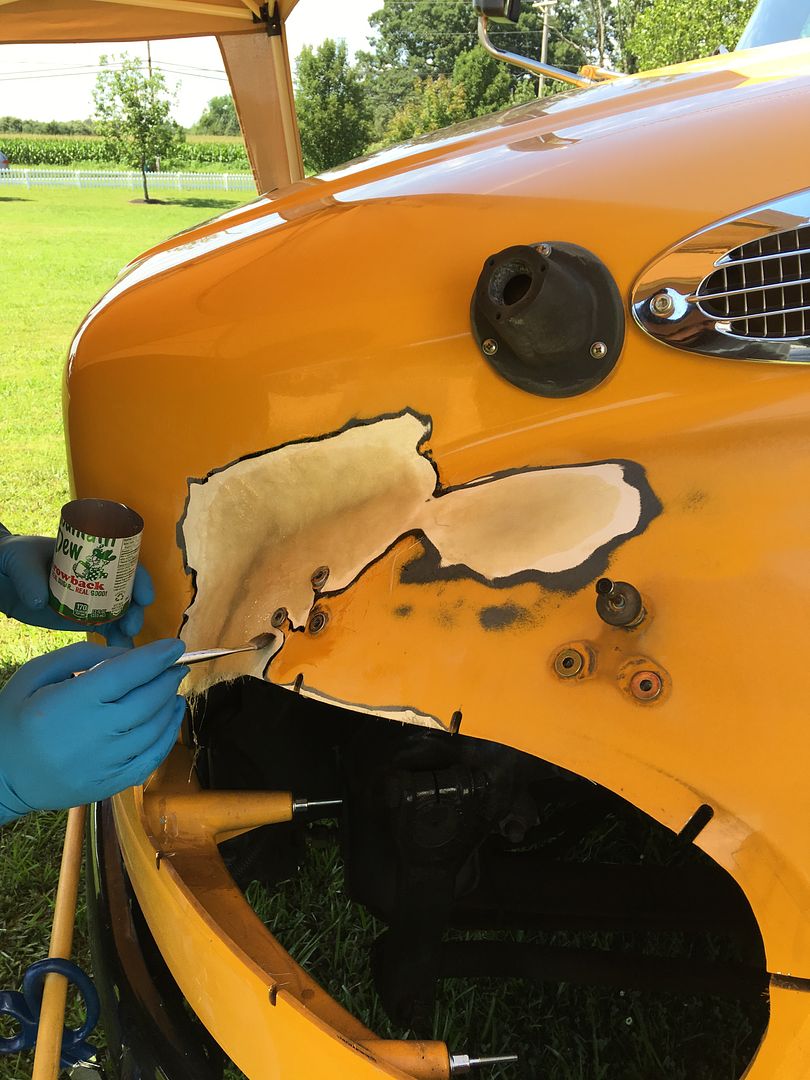 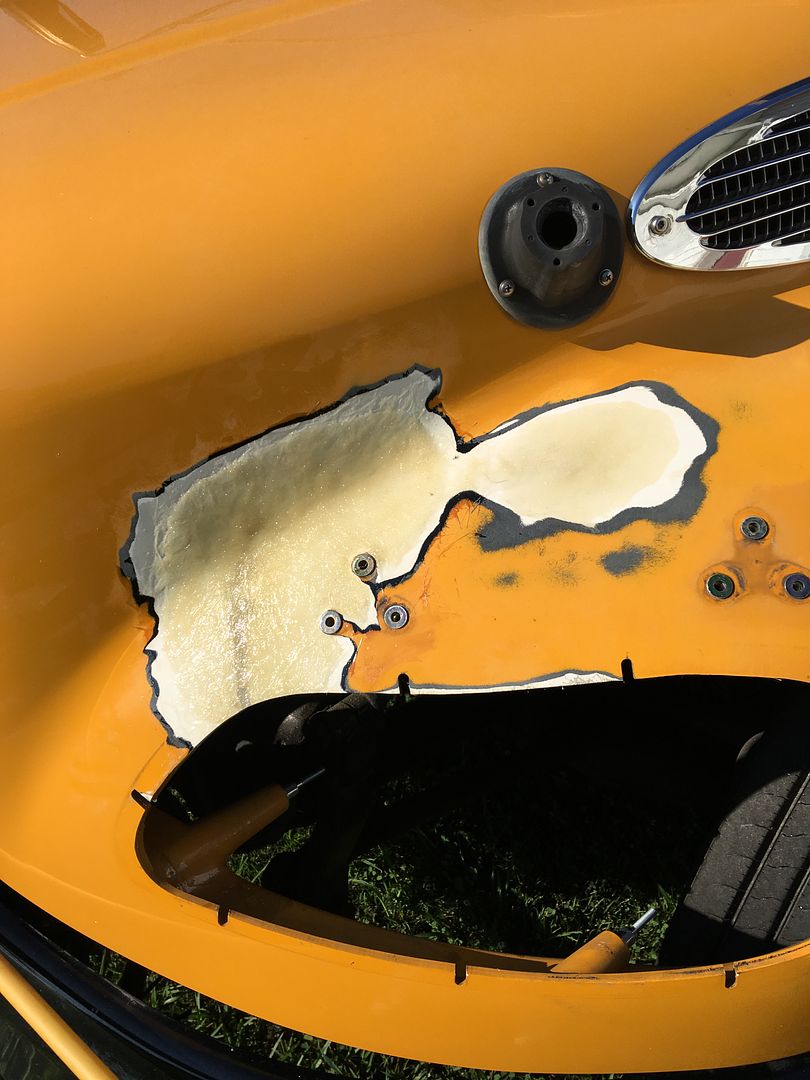 Back on the wagon, we needed to close off the back side of the rear seat.. We have some square tubing to use but needed a radius bender. The upper part of the buffer stand looks like it may work. As I've told Mike, everything is a tool.. 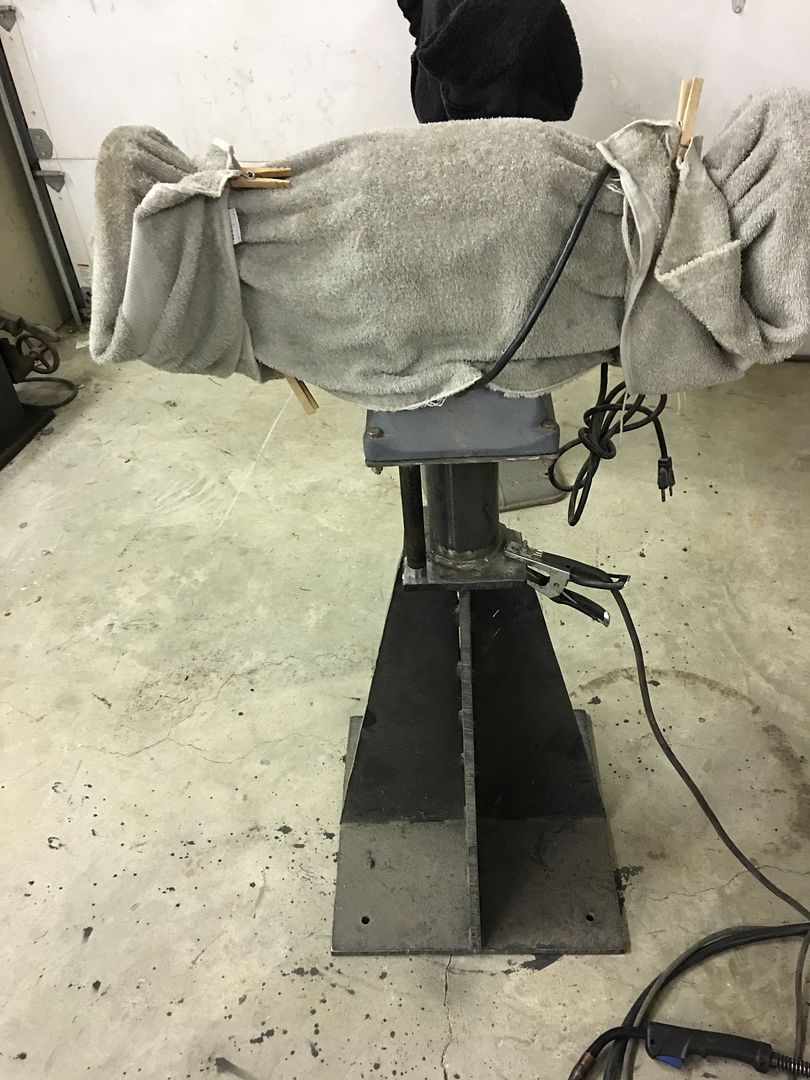 Add a welder and a piece of round stock for an anchor... 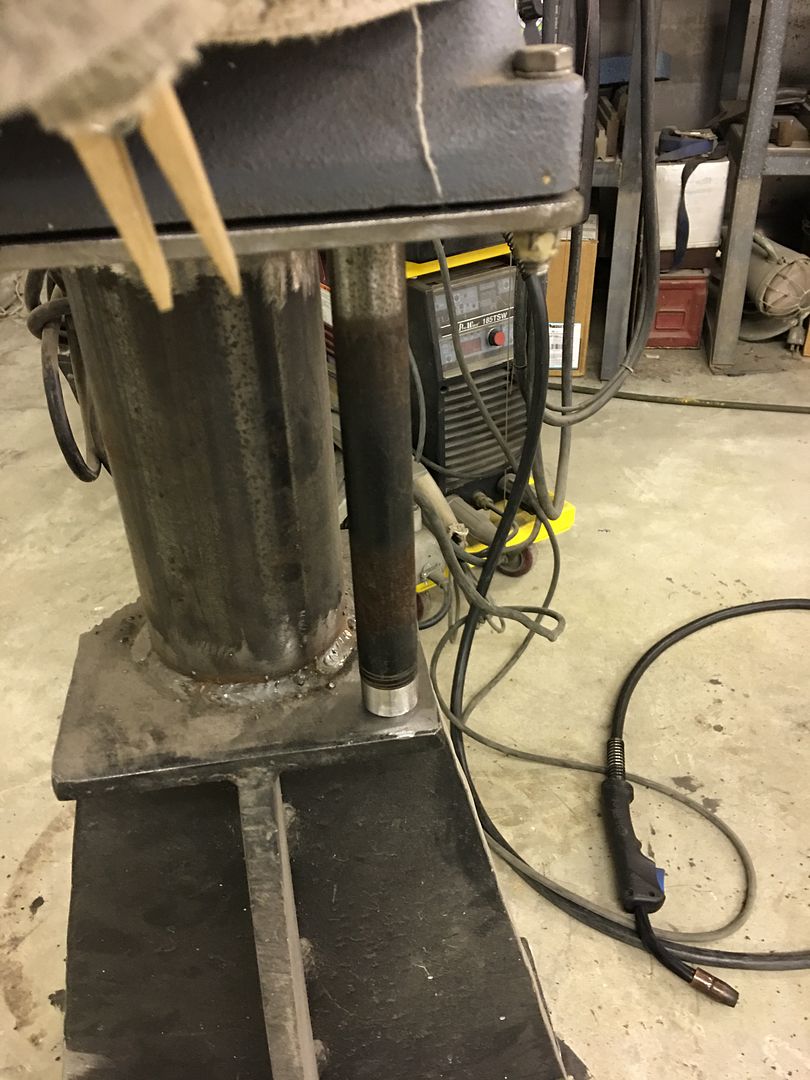 First test... 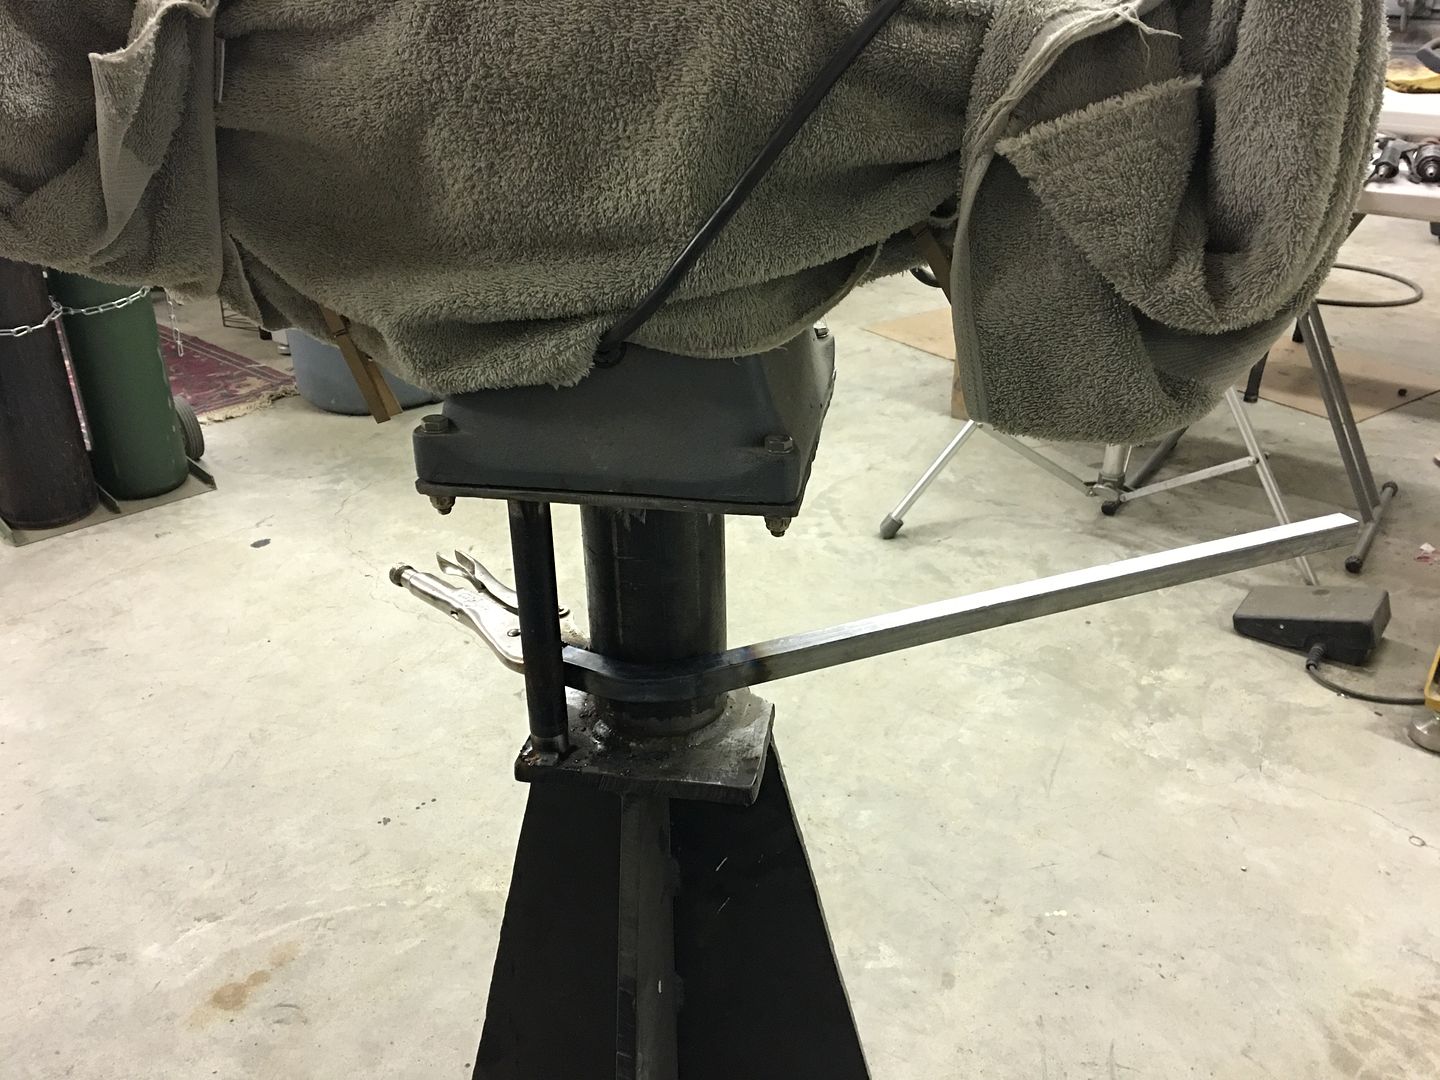 Four pieces needed... 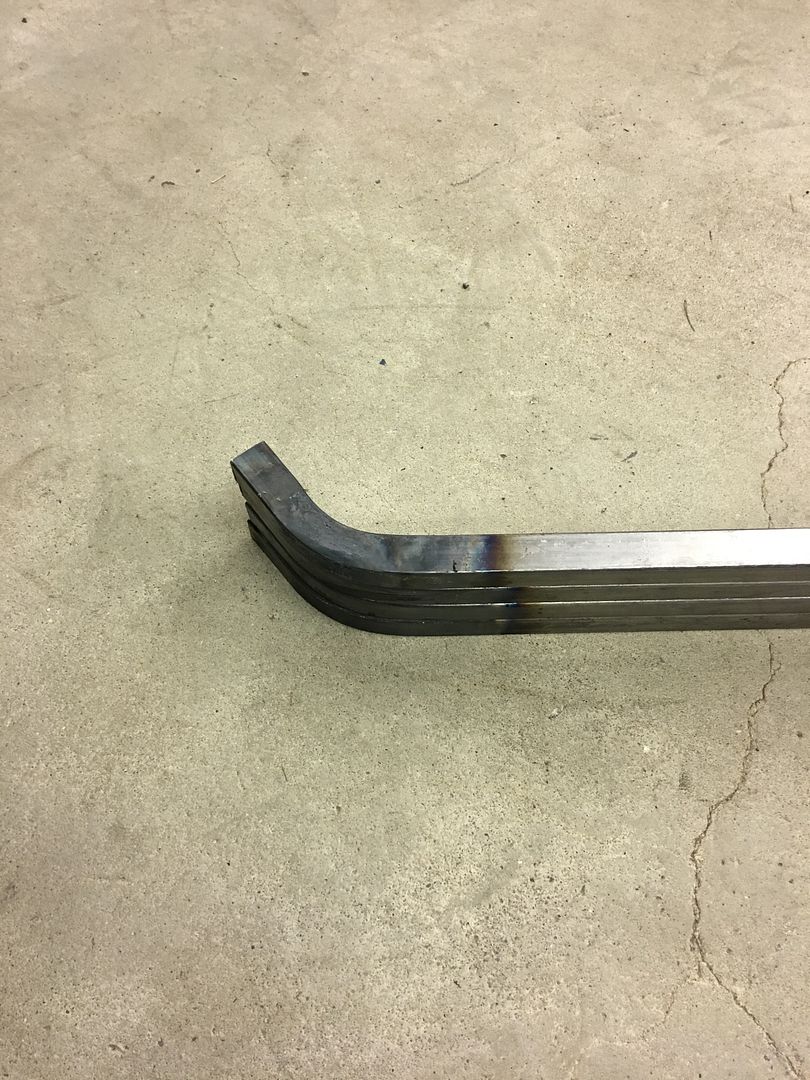 All TIG welded together... 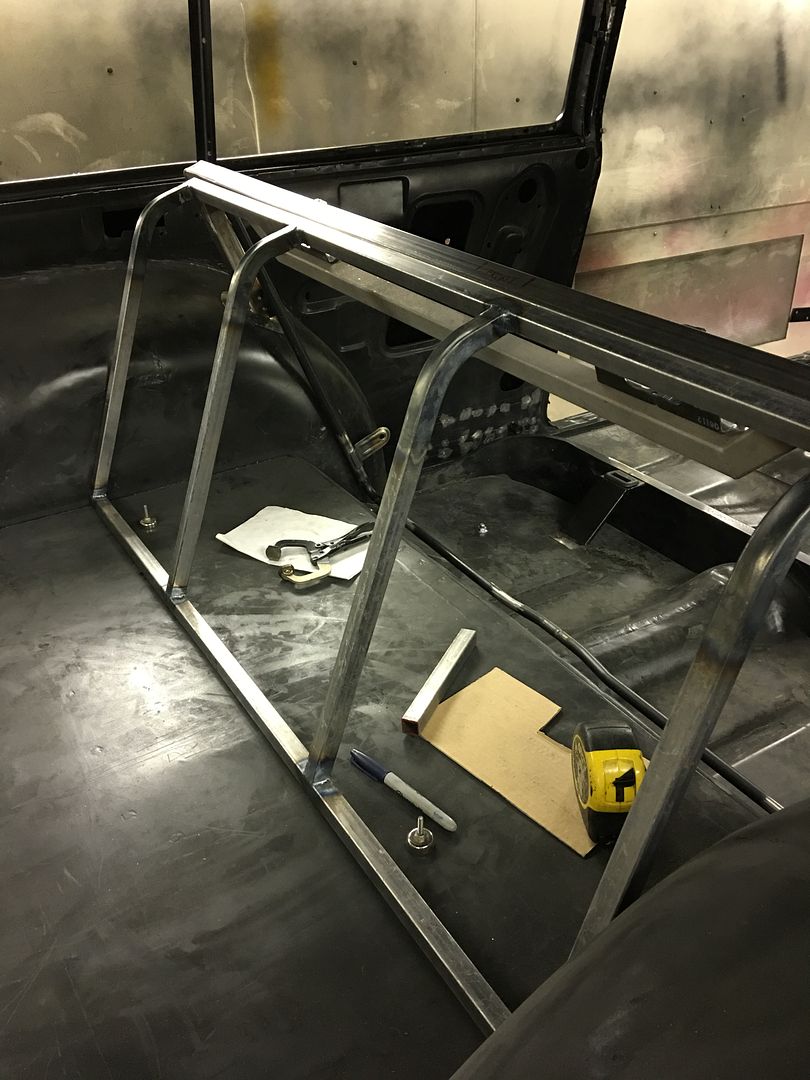
__________________
Robert |
|
|
|
|
07-18-2017, 09:38 AM
|
#854 |
|
Senior Member
 Join Date: Mar 2011
Location: West Plains, Missouri
Posts: 7,553
|
Re: 55 Wagon Progress
Nice closure for the back seat, will have a few feet for storage...Jim
__________________
my build thread: http://67-72chevytrucks.com/vboard/s...d.php?t=459839 Jimbo's long bed step build:http://67-72chevytrucks.com/vboard/s...t=464626<br /> |
|
|
|
|
07-18-2017, 09:42 AM
|
#855 |
|
Registered User
Join Date: Jan 2013
Location: Leonardtown, MD
Posts: 1,633
|
Re: 55 Wagon Progress
Thanks Jim. The sides will have a wrap-around..
__________________
Robert |
|
|
|
|
07-18-2017, 12:20 PM
|
#856 |
|
Registered User
Join Date: Apr 2011
Location: .
Posts: 3,104
|
Re: 55 Wagon Progress
Extra storage compartment or speaker area? hmmm
Diggin' the innovative bender. |
|
|
|
|
07-18-2017, 01:00 PM
|
#857 |
|
Registered User
Join Date: Jan 2013
Location: Leonardtown, MD
Posts: 1,633
|
Re: 55 Wagon Progress
bass speaker, amp, ???
__________________
Robert |
|
|
|
|
07-21-2017, 10:50 AM
|
#858 |
|
Registered User
Join Date: Jan 2013
Location: Leonardtown, MD
Posts: 1,633
|
Re: 55 Wagon Progress
Made a set of C-pillars for a 56 wagon, they weld into the window opening and separate the fixed rear wrap around window from the roll down window for the back seat..
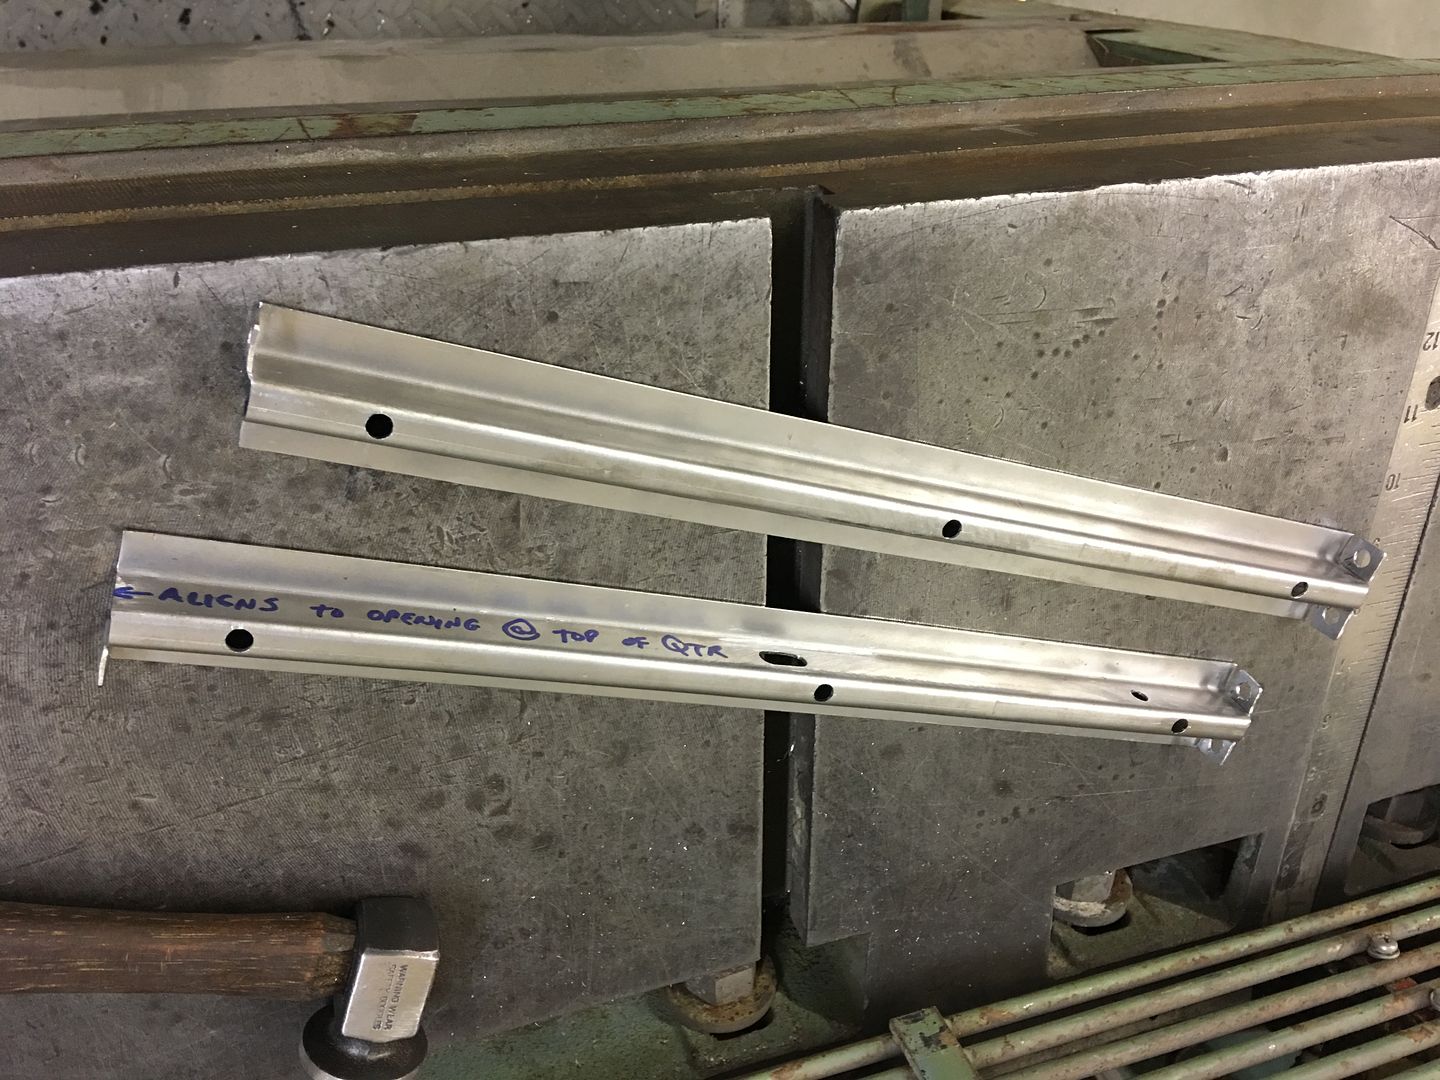 This is where they locate... 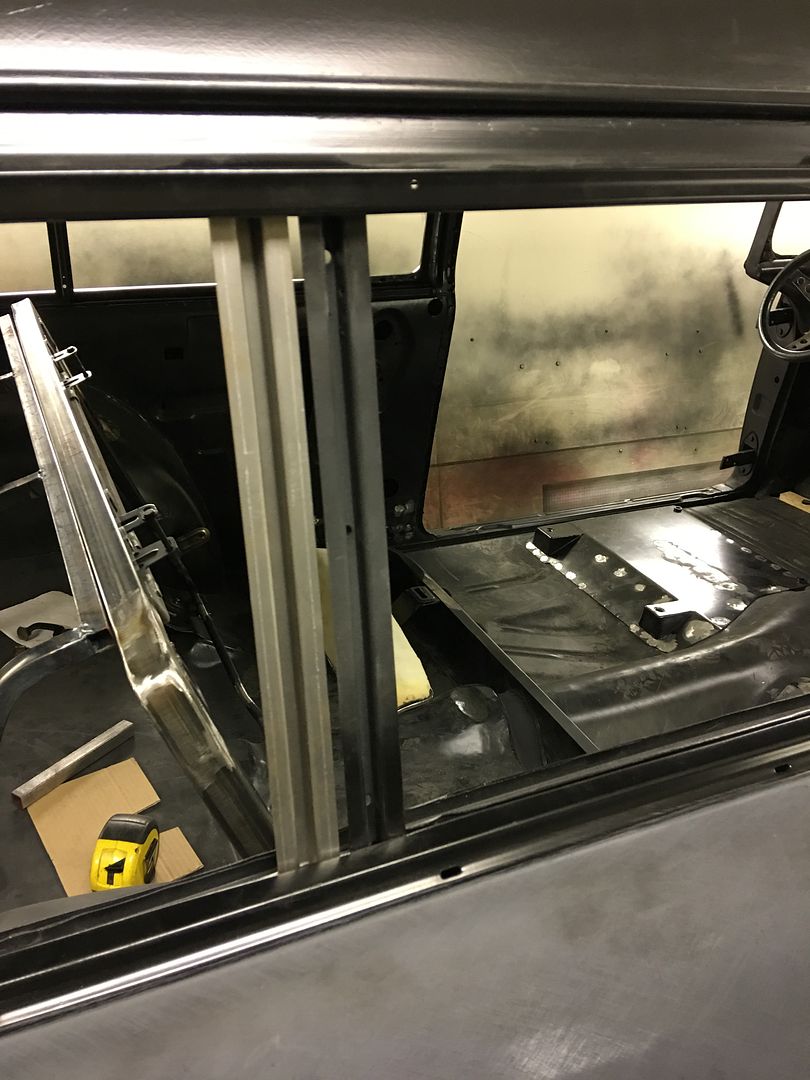 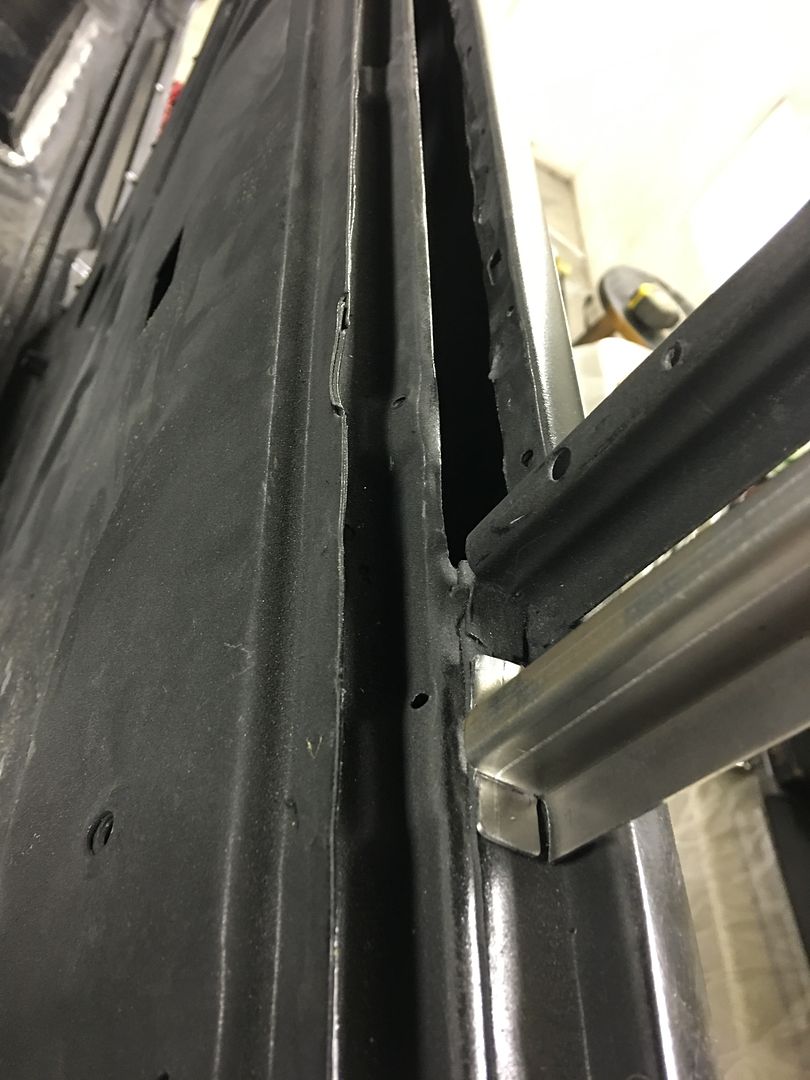 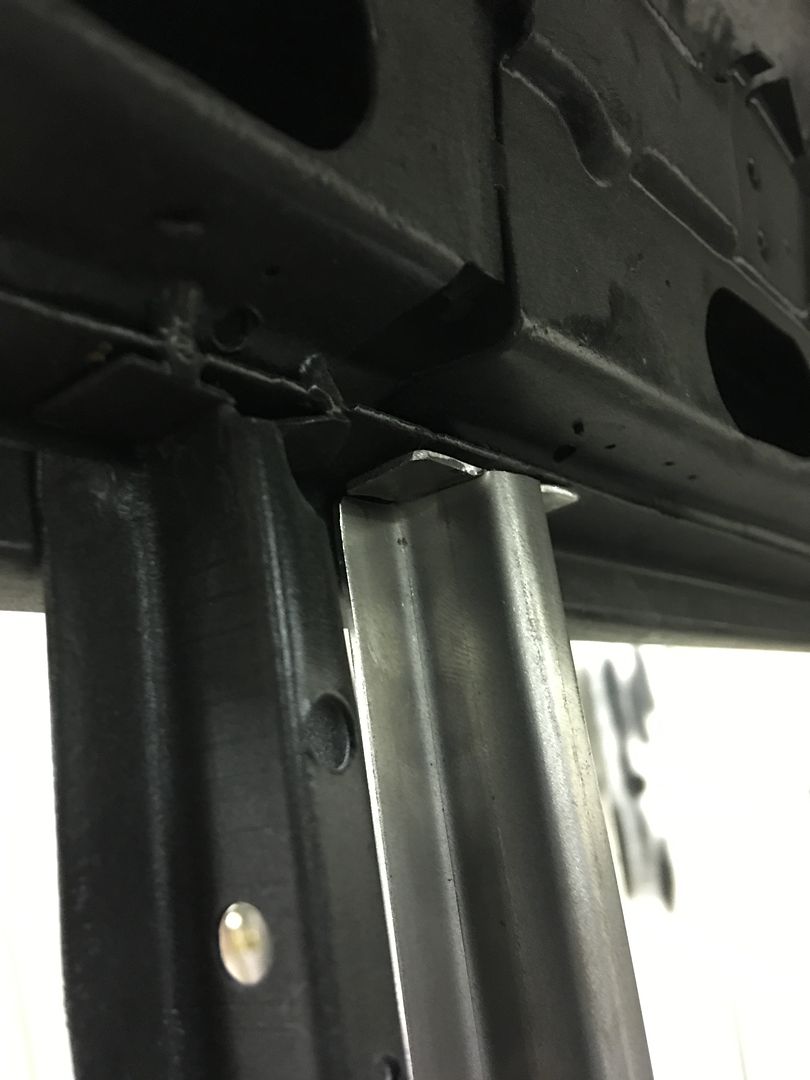 Meanwhile apprentice E is prepping some bus parts for paint, here working on a back bumper... 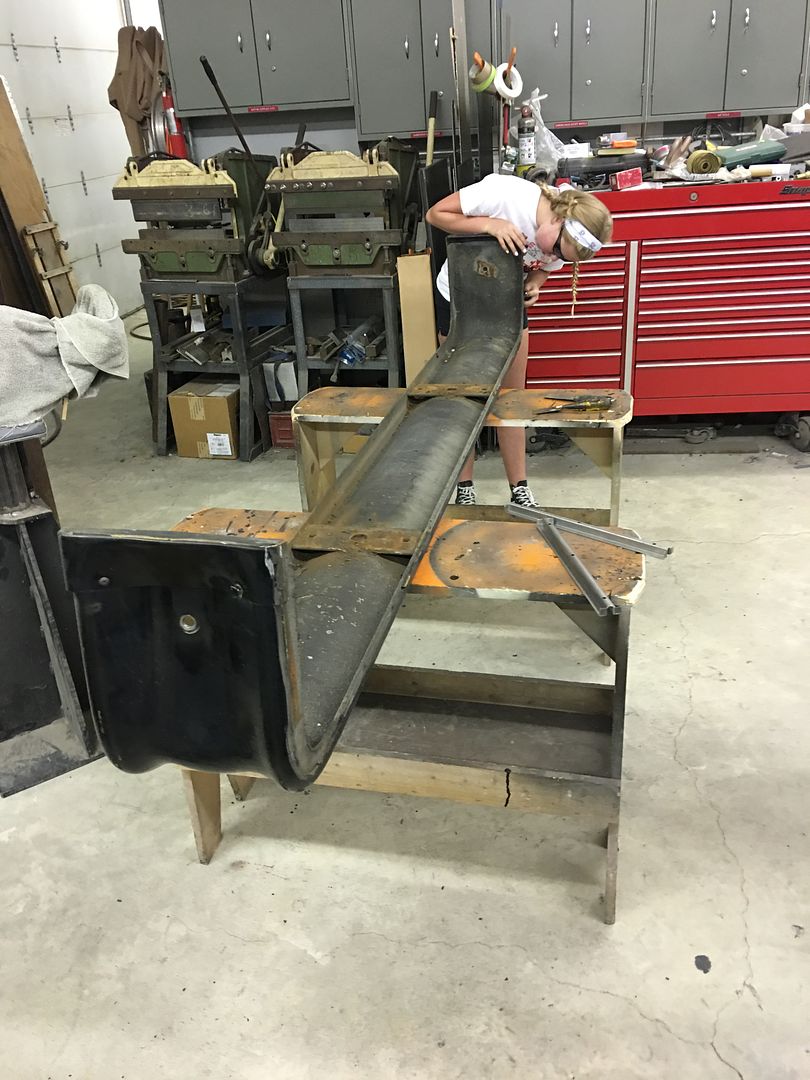
__________________
Robert |
|
|
|
|
07-23-2017, 11:53 AM
|
#859 |
|
Registered User
Join Date: Jan 2013
Location: Leonardtown, MD
Posts: 1,633
|
Re: 55 Wagon Progress
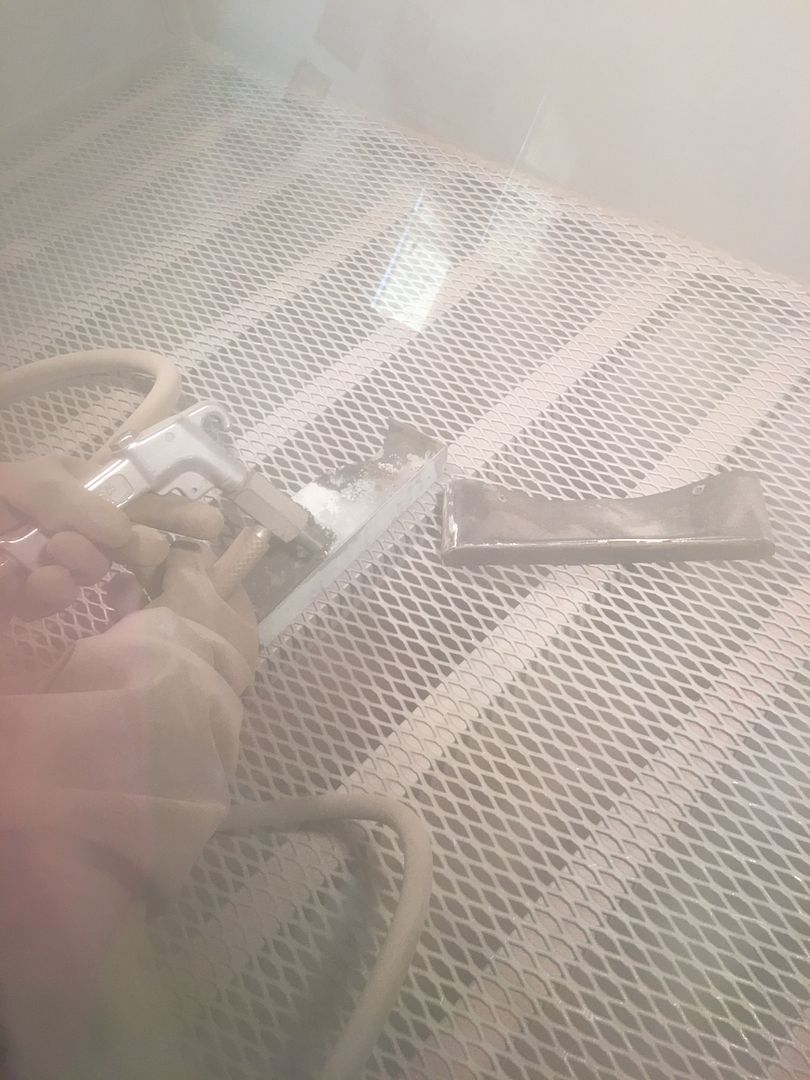
Yesterdays progress.... Apprentice E got the bus bumper end caps removed by drilling out the rivets, and then media blasted the caps so they will be ready for paint...
 We needed some tooling for the next phase of the 55 wagon's interior fabrications, the radius we installed on the rear seat back framework will need to be duplicated onto the sheet metal covering. A trip to Hill Top welding had produced a suitable piece of 4" pipe. The Pexto shear has a t-slot along the front for it's support arms and we'll use this to bolt on a couple angle brackets to support this pipe along the front. A slight gap behind the pipe will allow us to use it as a fulcrum in adding a radius to our panel... Mike worked on adding some end caps to our radius die.... 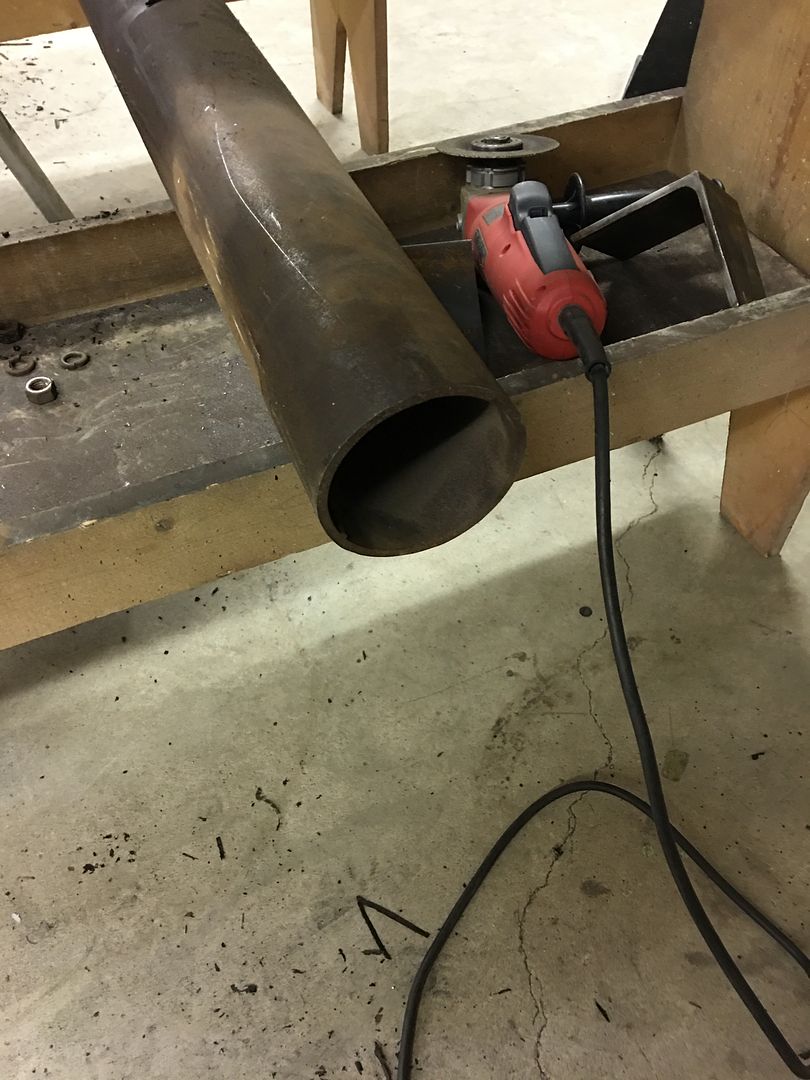 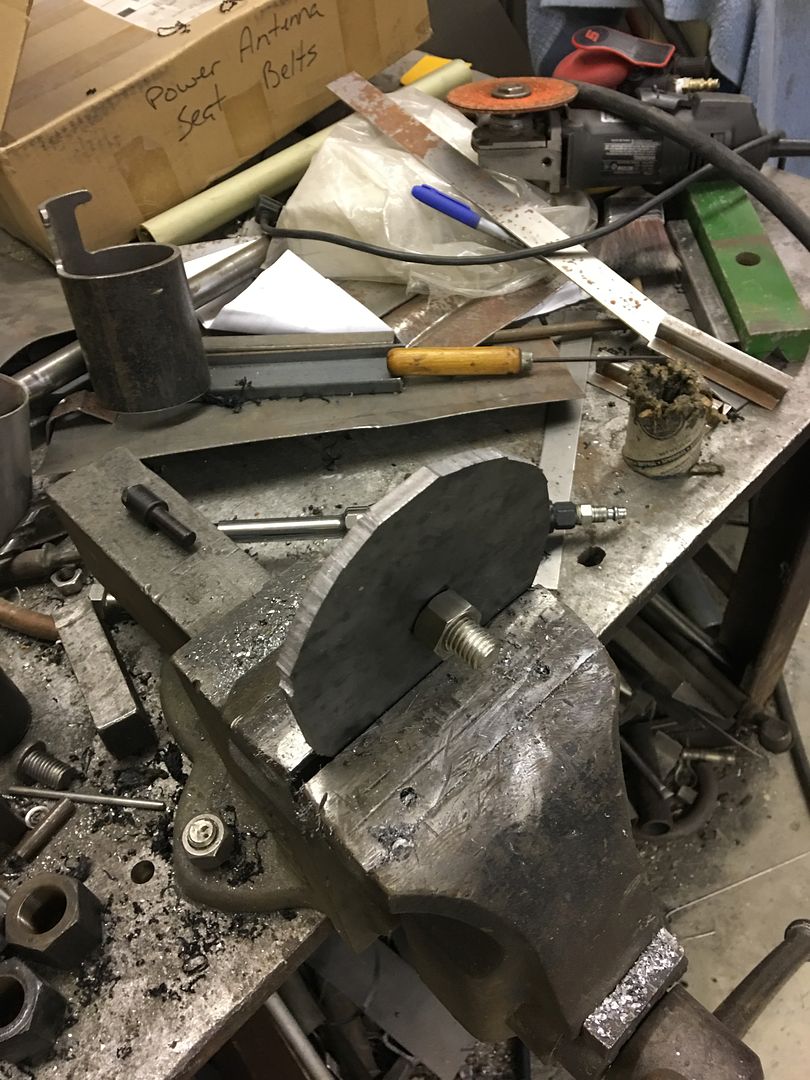   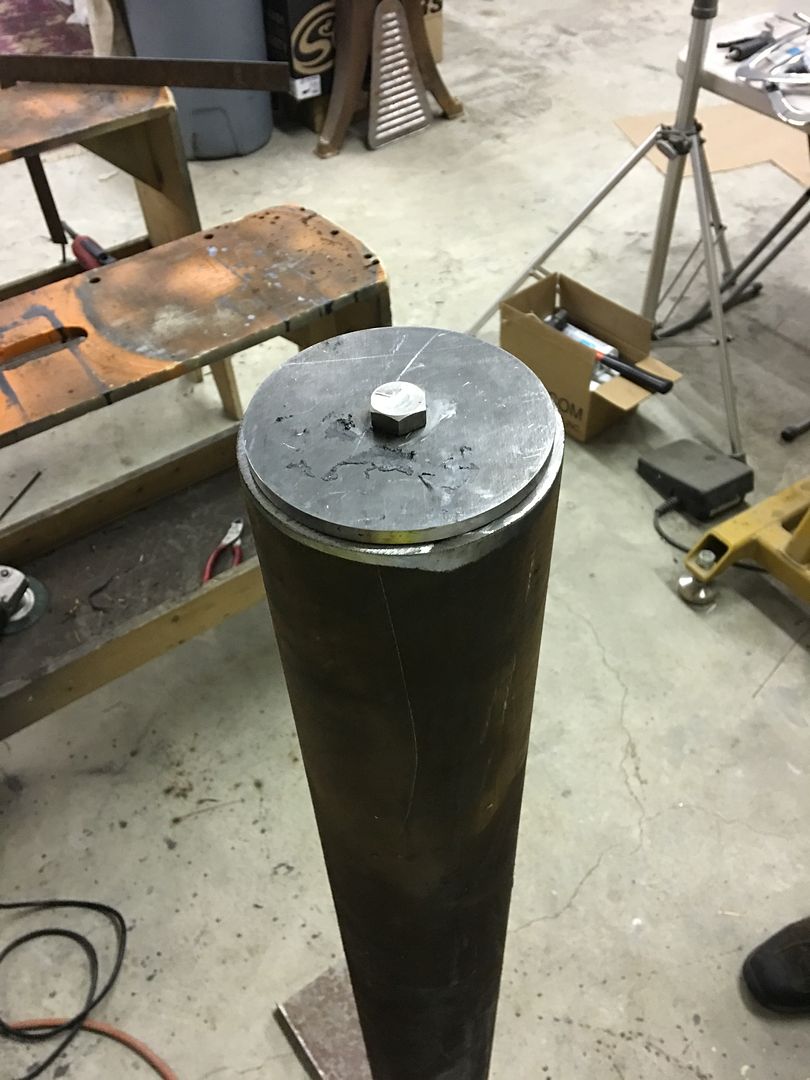 Need a ground clamp for a standing piece of pipe? set it on a flanged piece of sheet metal, instant clamp location.... 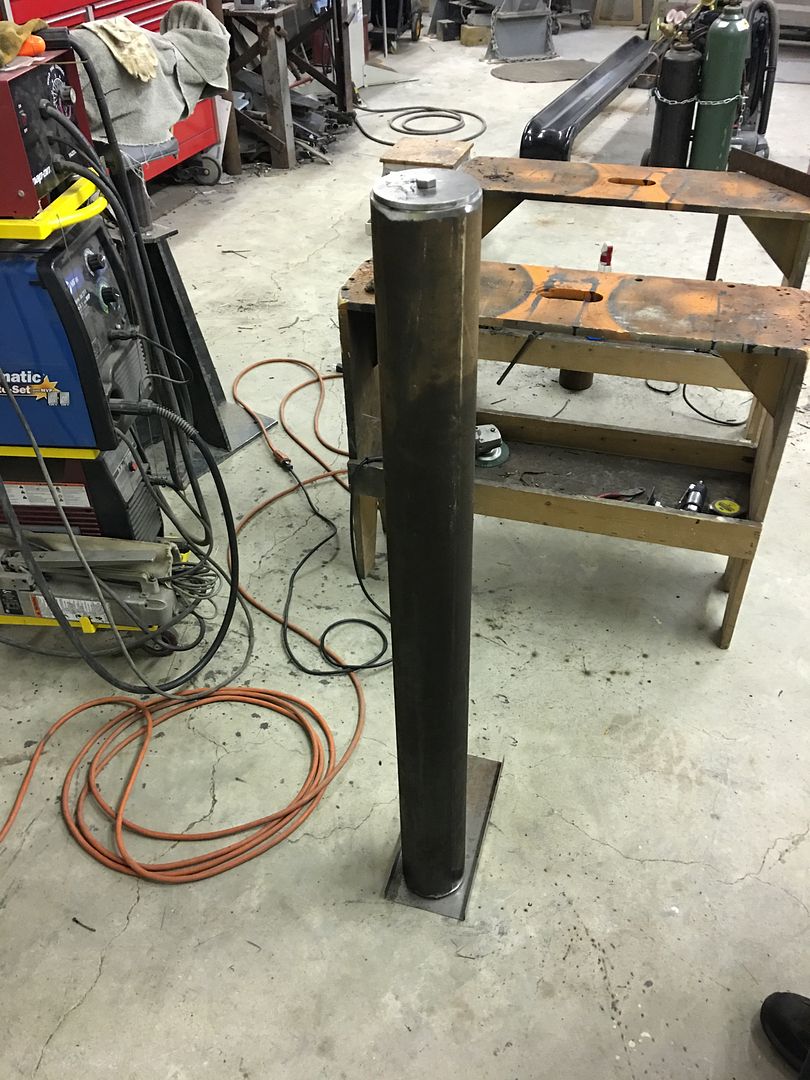 More to come on that.... Meanwhile, our sheet metal panel will also serve to cover the rear bass speaker. Not wanting a grille showing, we plan on using upholstery cloth to conceal the speaker. Rather than a big gaping hole that would more readily show the location regardless, some slots will better support the upholstery cloth. So lets make some nibbling tooling.. This punch will be approx. 3/8 diameter and is made of 4140 oil hardening stock so we can heat treat when complete for better tool life.. 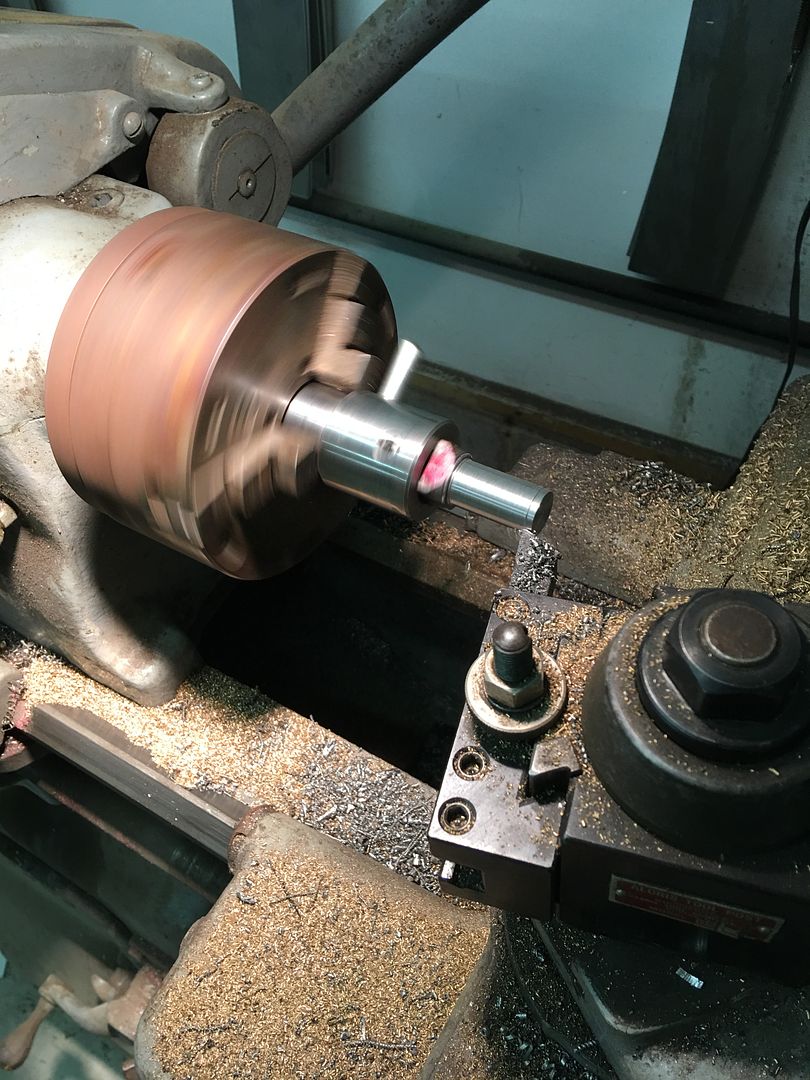 End is formed slightly concave to give a better cutting edge.. 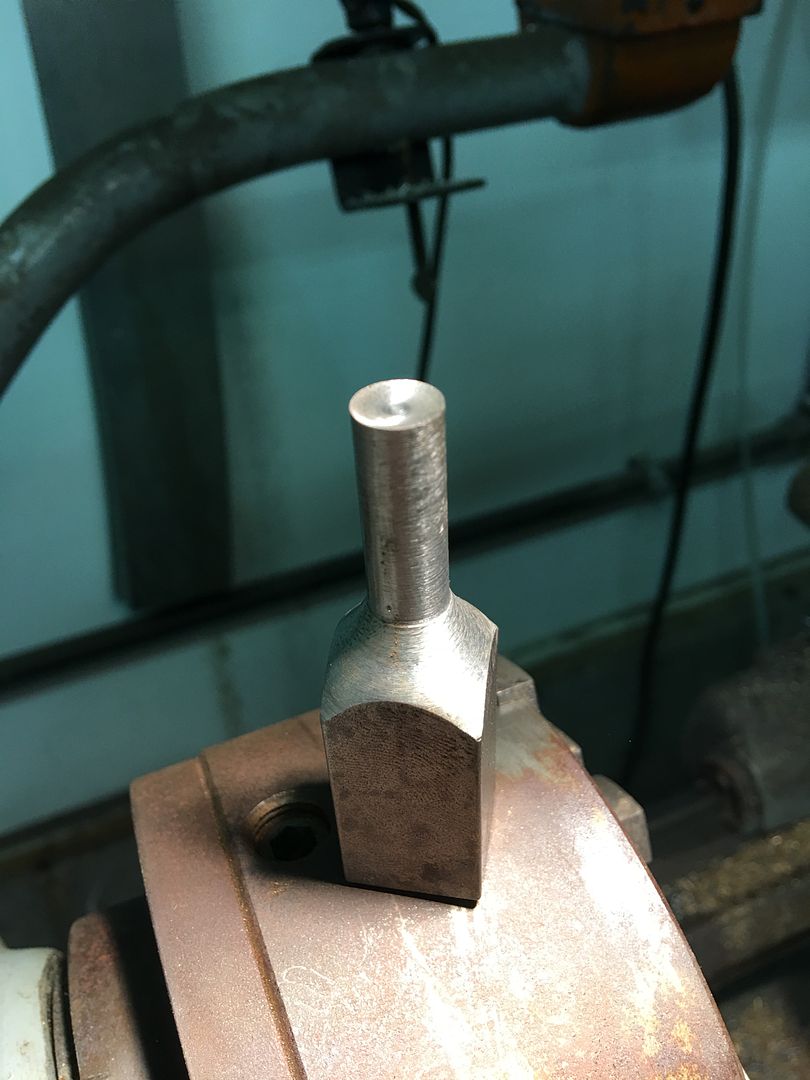 Bottom die gets a clearance hole for the 3/8 punch, then it gets bored from the bottom end using 1/2" bit to within about 1/8" of the top surface. This will allow better gravity flow of any chips passing through our bottom die..  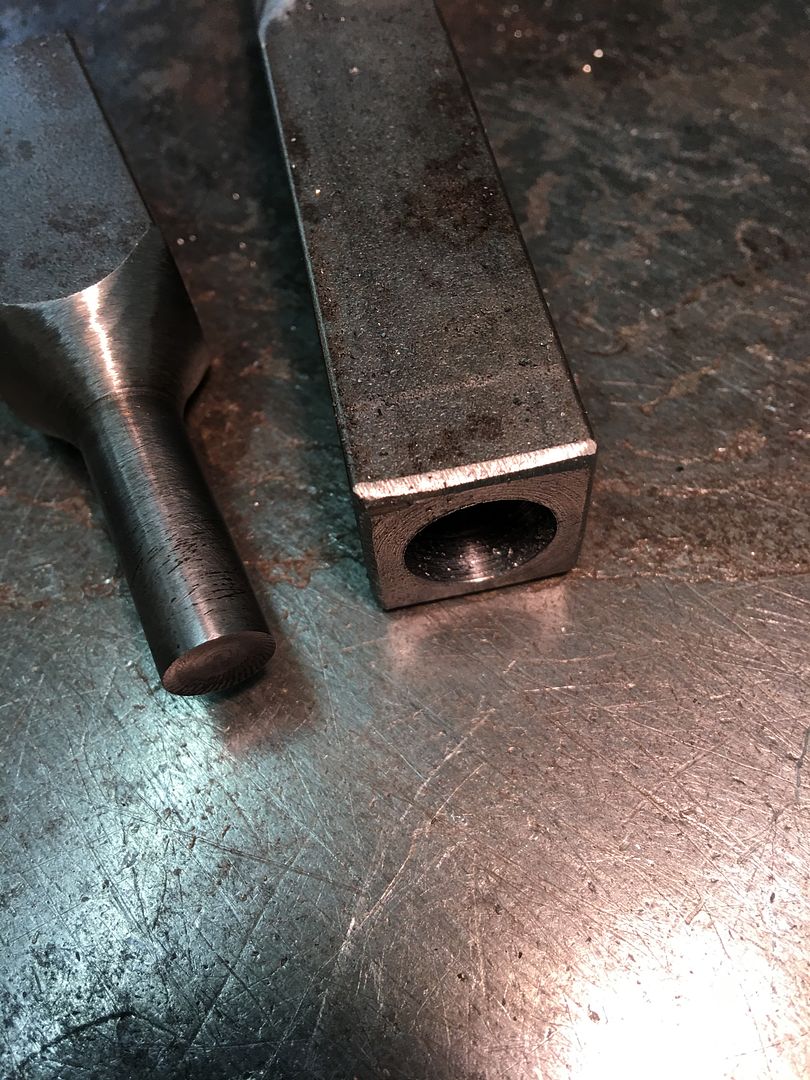 Then we'll need an exit chute, so a 1/2" angled hole is drilled through the side and a 1/2" plug made to fill the remainder... 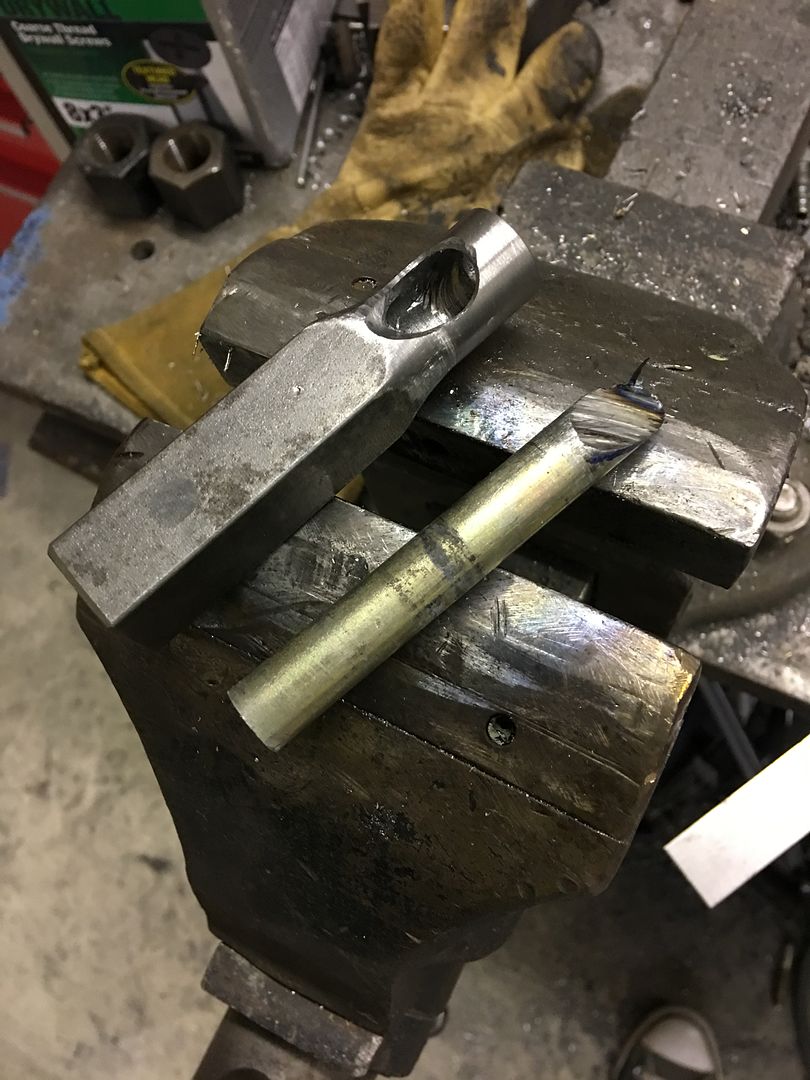 The plug bottom gets chamfered and welded into the bottom die, then a ball end die grinder is used to fine tune the exit chute... 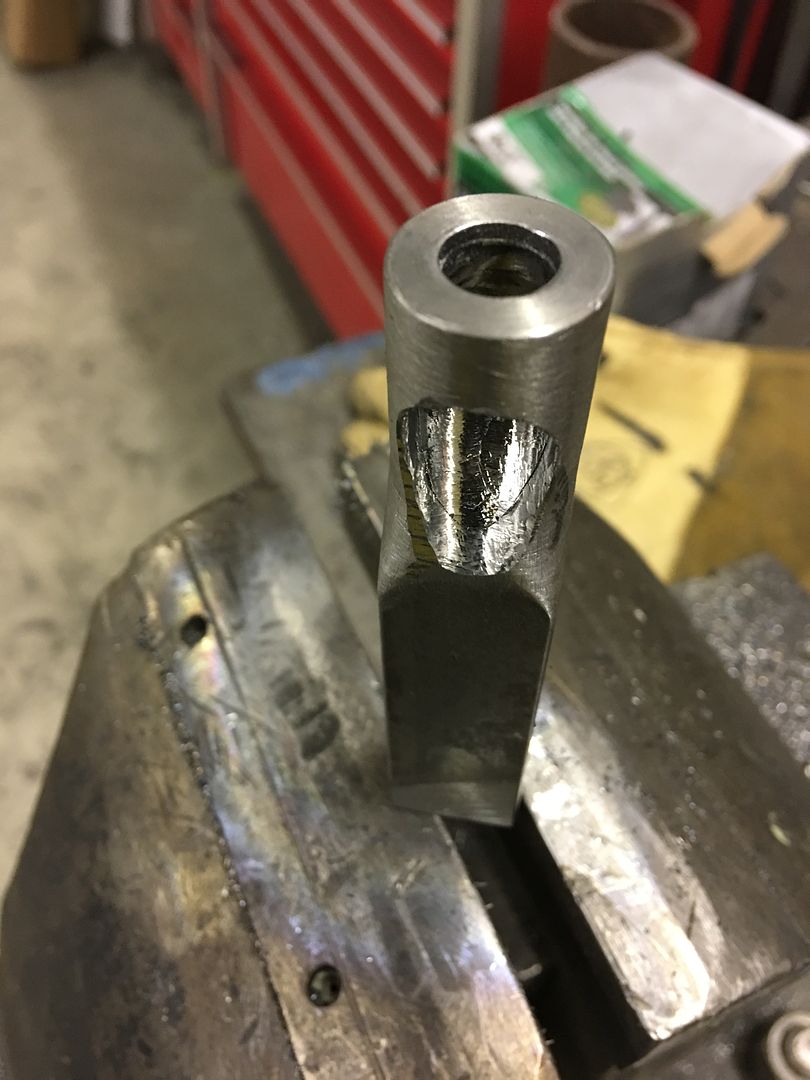 A "shoe" is formed to hold down the workpiece, as otherwise the punch tends to lock onto the panel after the first punch and raise it in the air, thus preventing any material feed... 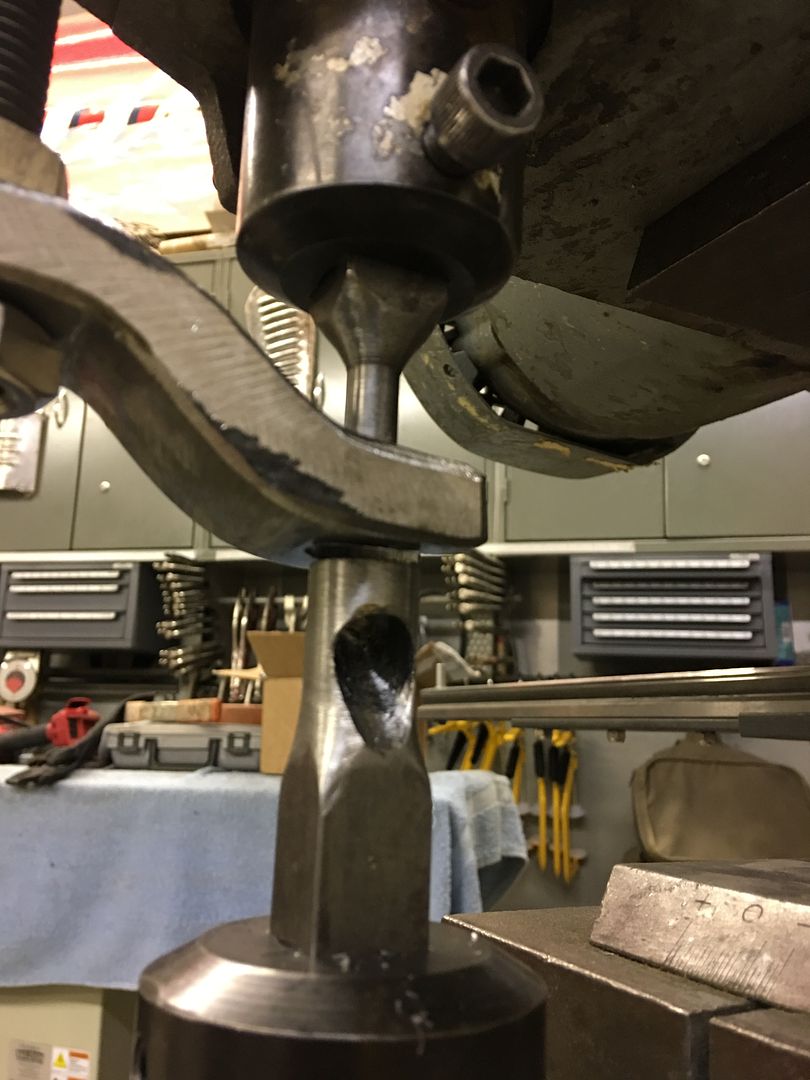 An action video.... https://www.youtube.com/watch?v=Zzh1...ature=youtu.be Our test slot.... this may work yet! 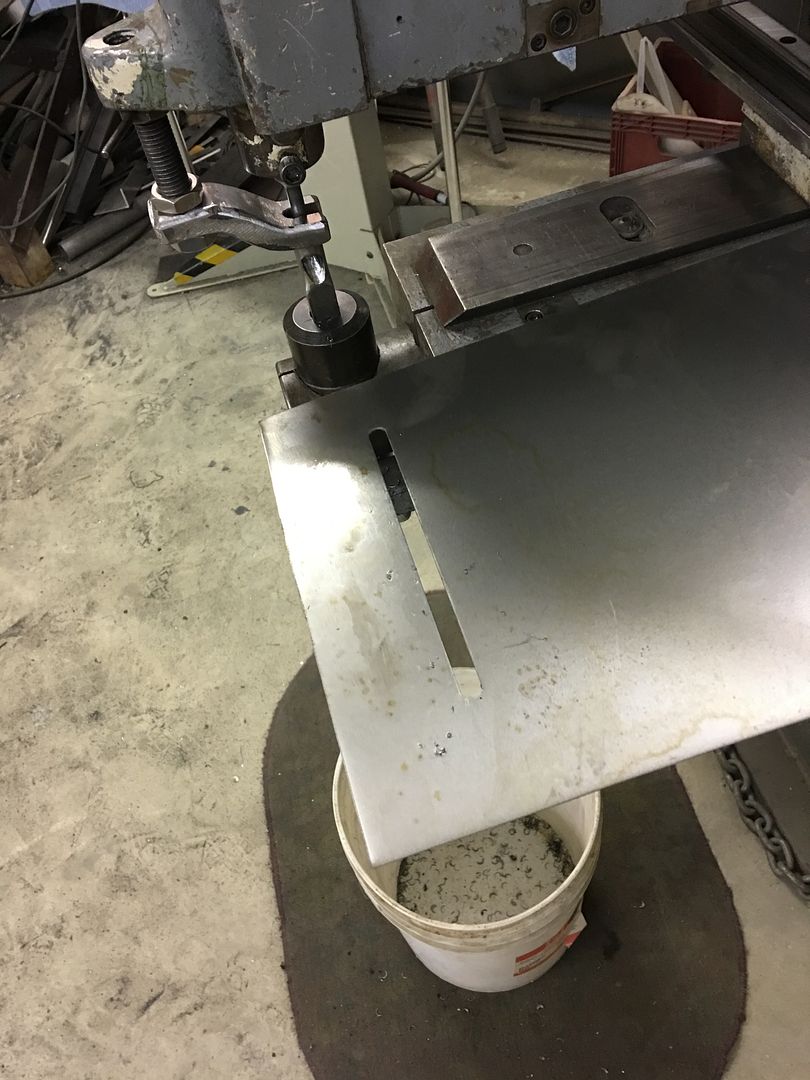
__________________
Robert |
|
|
|
|
07-23-2017, 10:14 PM
|
#860 |
|
Registered User
Join Date: Jan 2013
Location: Leonardtown, MD
Posts: 1,633
|
Re: 55 Wagon Progress
Today I got the pipe and brackets that Mike made up added to the front of the Pexto Shear. The top of the pipe is set up the same height as the surface of the shear, so no interference in using the shear. The pipe is 49" long so it can be used for a full sheet if we have enough oomph to bend it. Here the finished product:
https://www.youtube.com/watch?v=Fm1blt_jX7k Sometimes you get lucky, here's the radius from our 4" pipe as matched to our seat back... 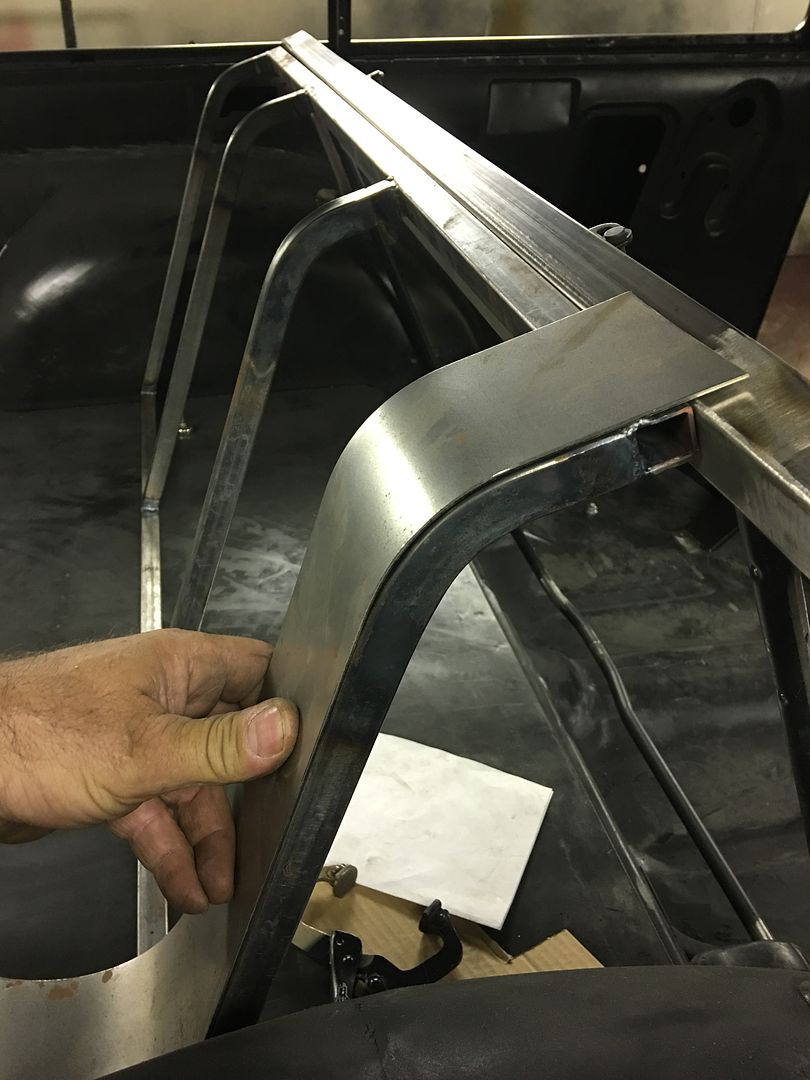 Also made up some patch panels for my brother in law's El Camino. He brought some parts over that he had cut out, so we fabbed up some new parts, here's a sample... 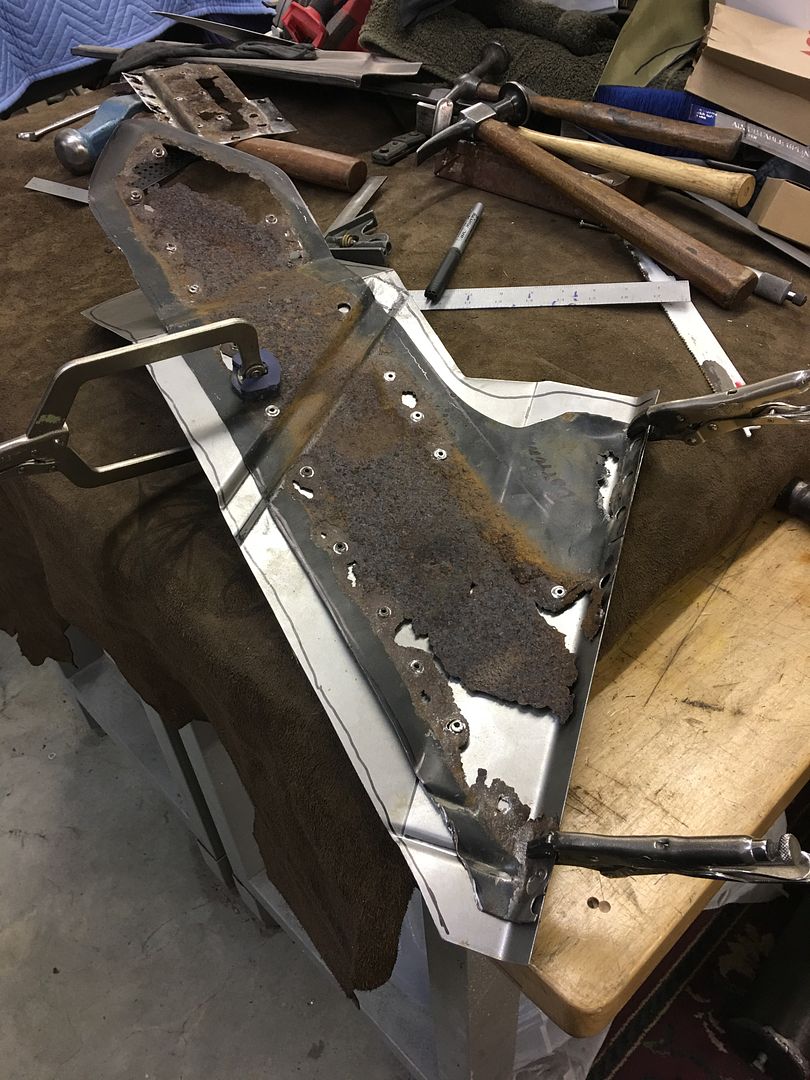
__________________
Robert |
|
|
|
|
07-23-2017, 11:13 PM
|
#861 |
|
Senior Member
Join Date: Mar 2011
Location: West Plains, Missouri
Posts: 7,553
|
Re: 55 Wagon Progress
Robert, nice to see someone make their own tools, and know how to use them. Always happy to see your post, I learn something each time...Jim
__________________
my build thread: http://67-72chevytrucks.com/vboard/s...d.php?t=459839 Jimbo's long bed step build:http://67-72chevytrucks.com/vboard/s...t=464626<br /> |
|
|
|
|
07-24-2017, 06:57 AM
|
#862 |
|
Old member
Join Date: Jan 2002
Location: Liberty, & Garden City S.C. , U.S.
Posts: 19,936
|
Dang man! You have some mad skill! You sir are my hero!
That 55 wagon is un real. 
__________________
1971 LWB Custom, 6.0LS & 4L80E, Speedhut.com GPS speedometer & gauges with A/C. 20" Boss 338's Grey wheels 4 wheel disc brakes. My Driver Seeing the USA in a 71  Upstate SC GM Truck Club 2013,14 and 2016 Hot Rod Pour Tour http://upstategmtrucks.com/ Get out and drive the truck this summer and have some fun! It sucks not being able to hear! LWB trucks rule, if you don't think so measure your SWB! After talking to tech support at Air Lift I have found out that the kit I need is 60811. Per the measurements I gave them. Ride height of truck inside spring and inside diameter of springs. |
|
|
|
|
07-29-2017, 08:37 PM
|
#863 |
|
Registered User
Join Date: Jan 2013
Location: Leonardtown, MD
Posts: 1,633
|
Re: 55 Wagon Progress
Thanks for the props Andy!
More back seat work on the 55. Mike is trimming up our brackets to give us a bit more clearance around the wheel wells so the upholstery can wrap around our panel... 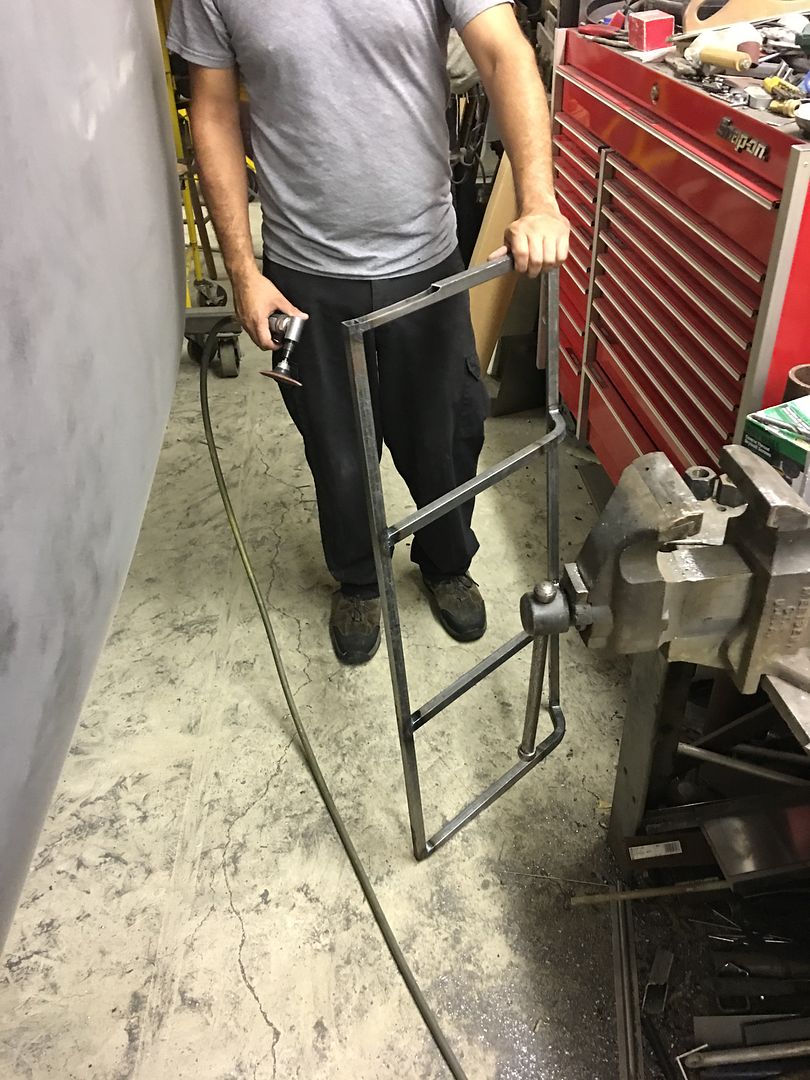 ....and I worked on taking some patterns of the rear corners... 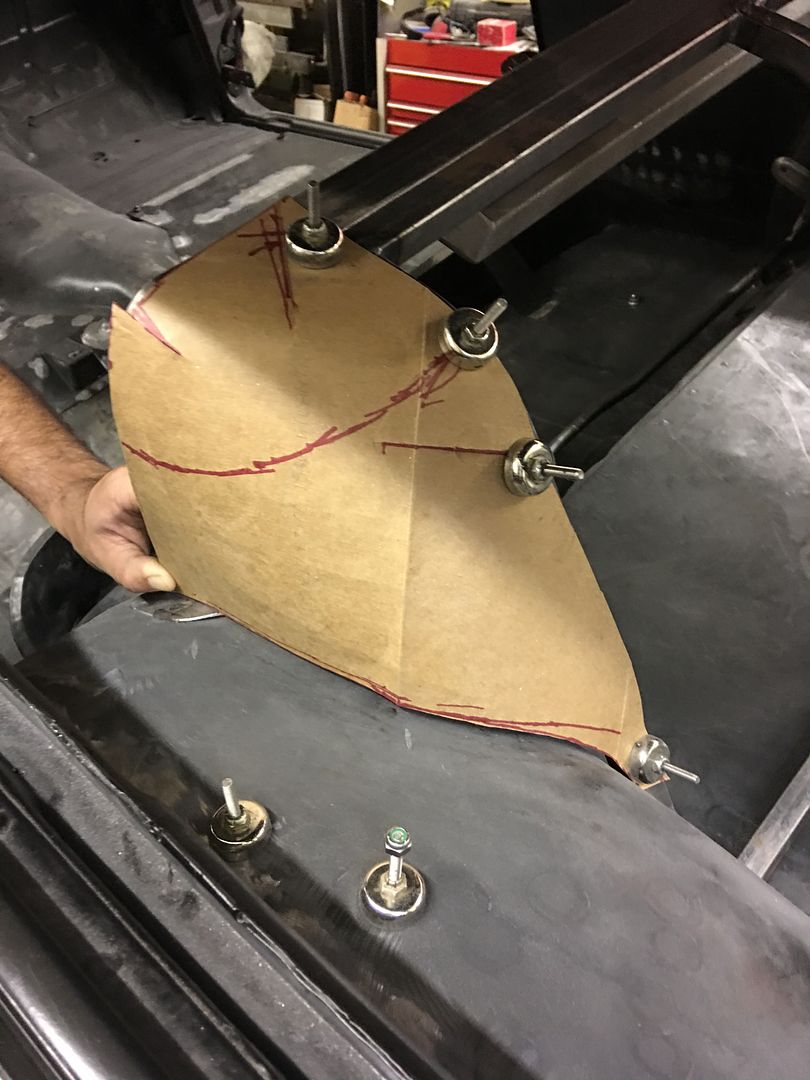 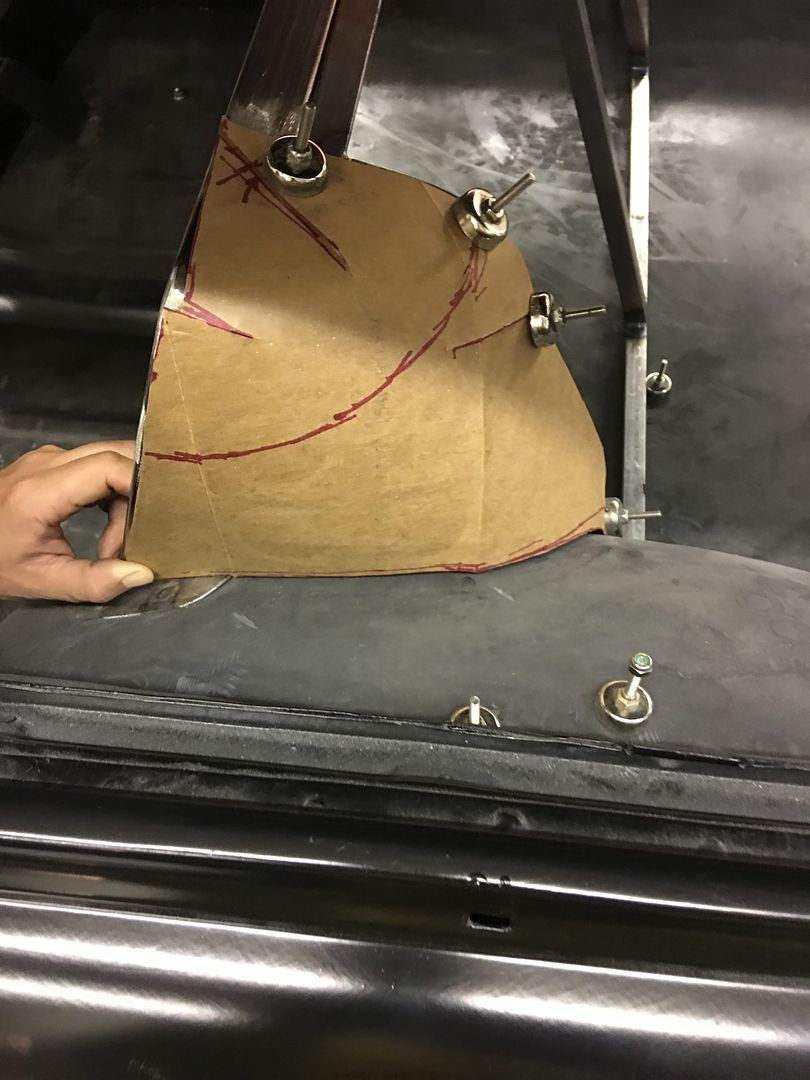 Transferred the pattern to some 18 gauge cold rolled steel and started some shrinking on the Baileigh power hammer.. https://www.youtube.com/watch?v=DII2zSpYT5A Test fit.... 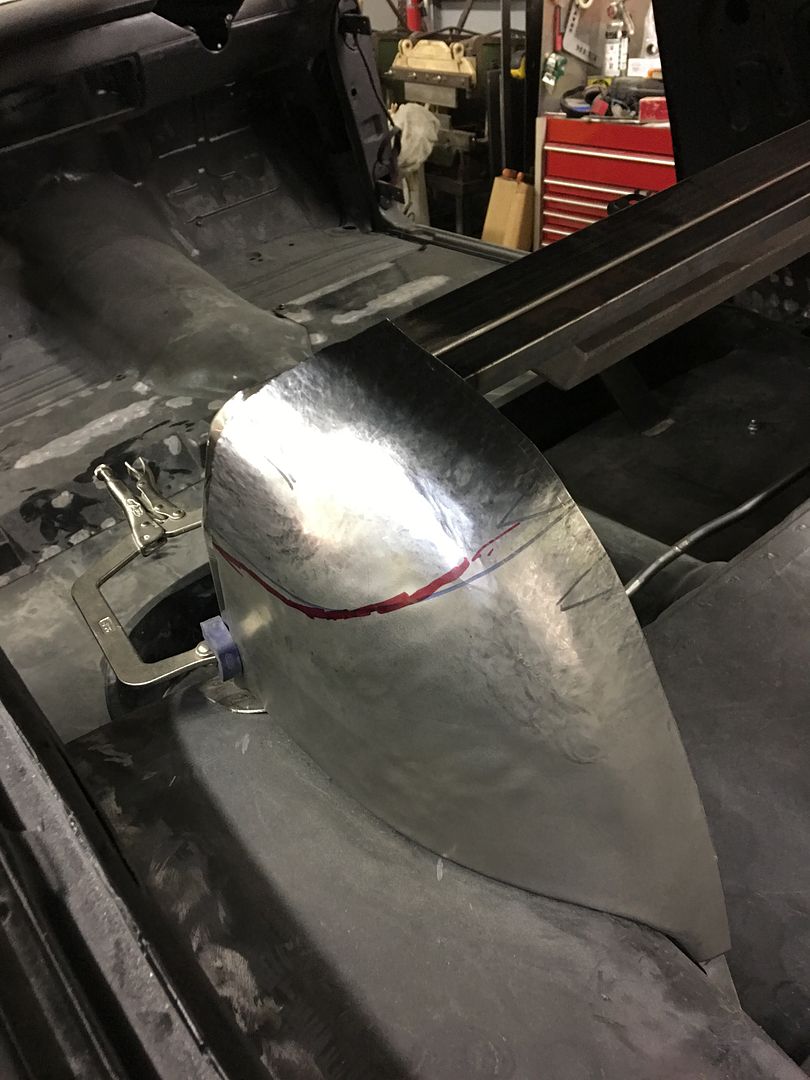 Bottom edge gets hemmed so the upholstery cloth has less chance of cuts... 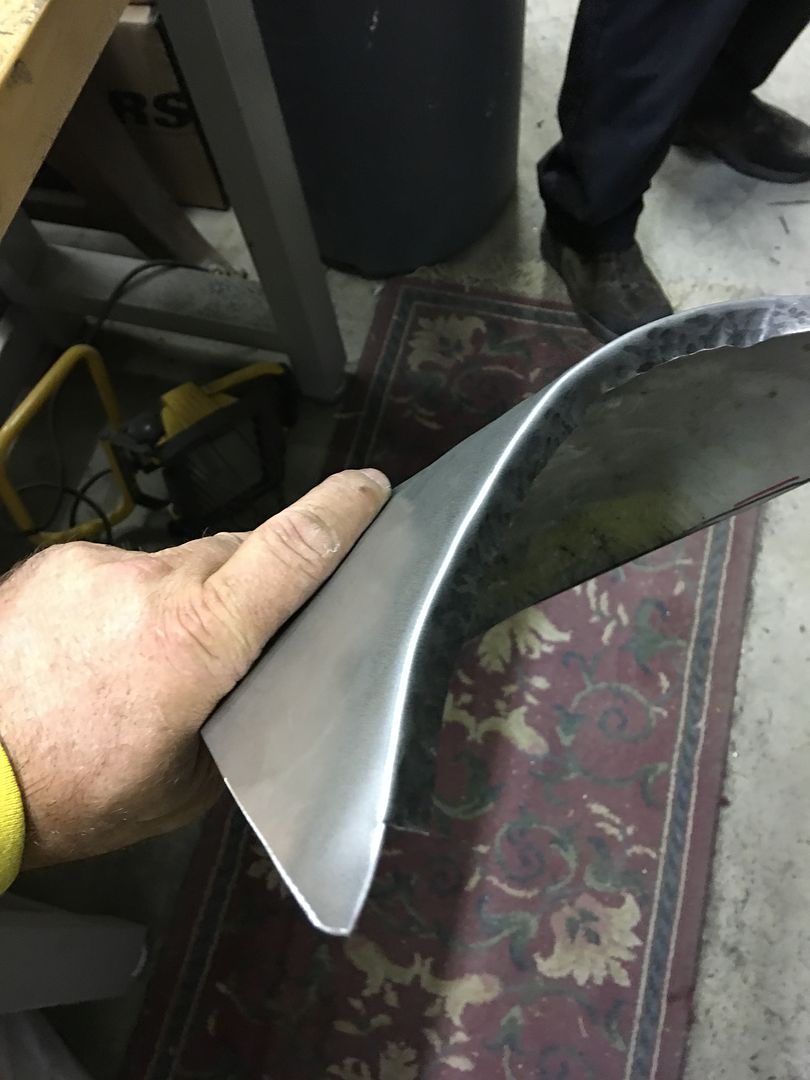 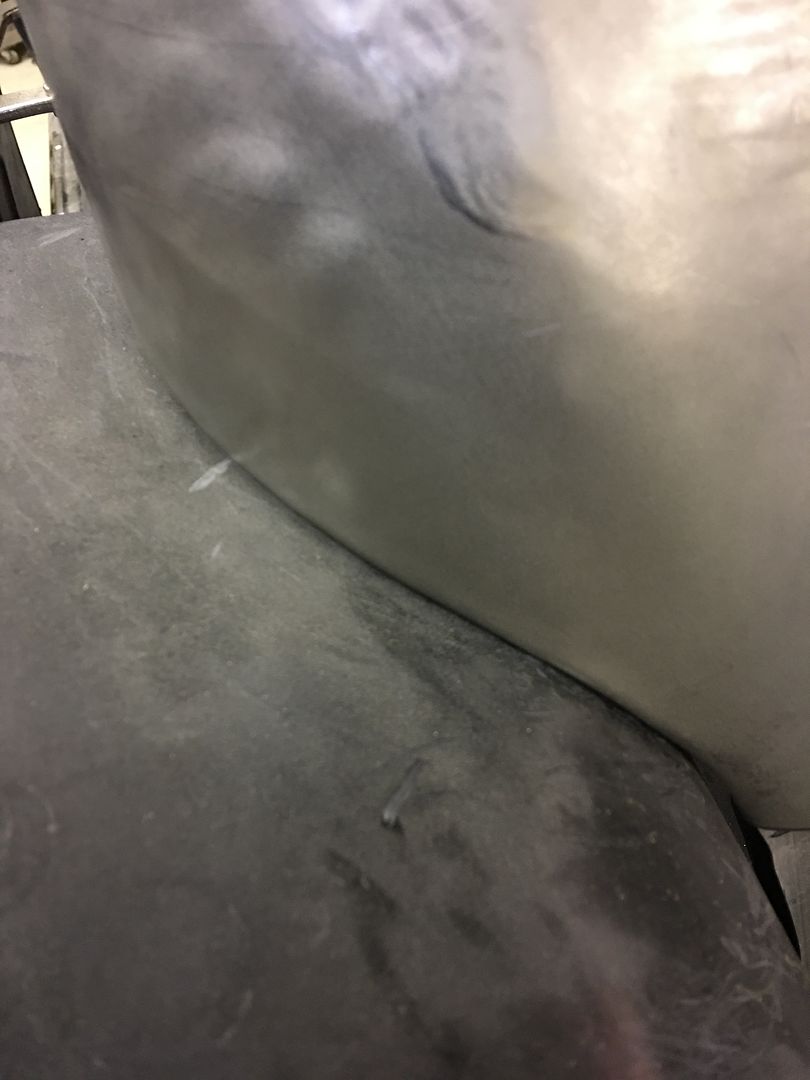  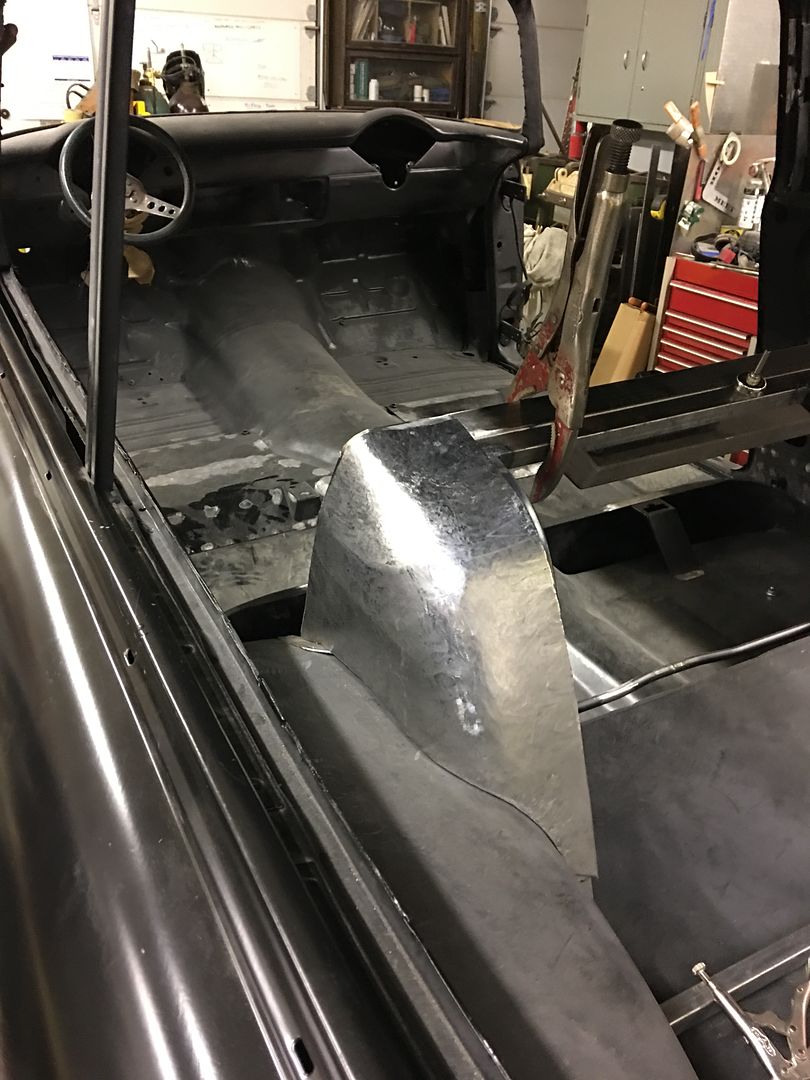 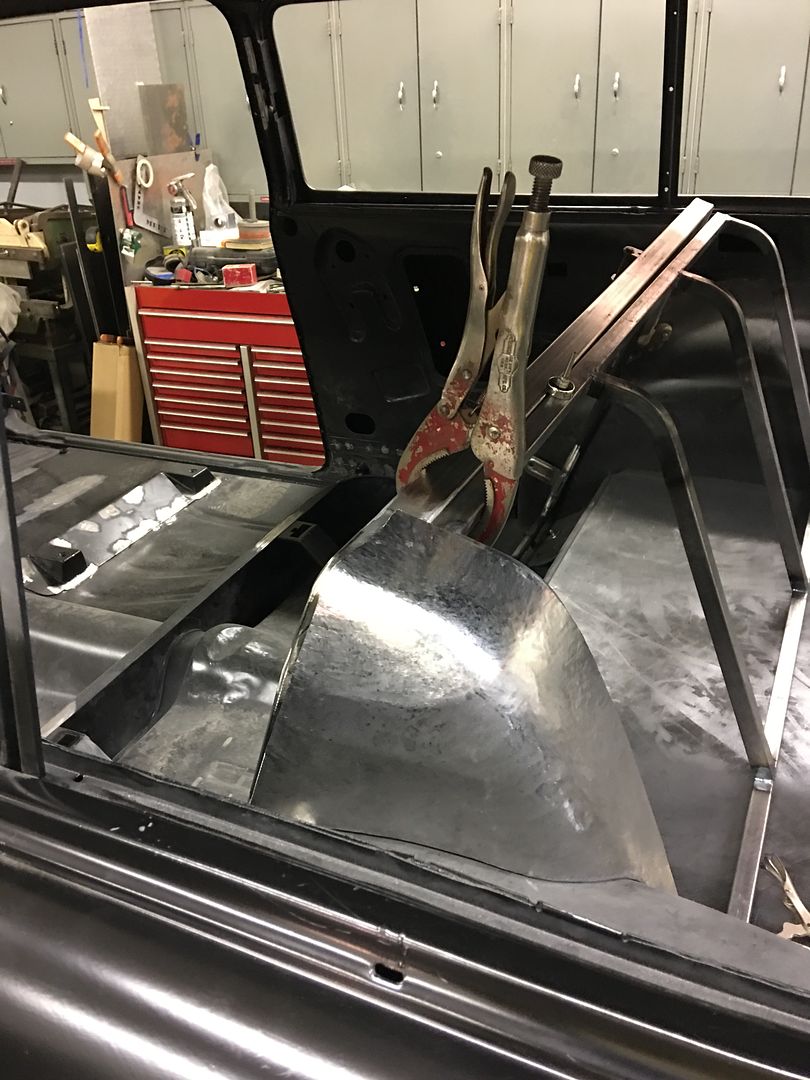 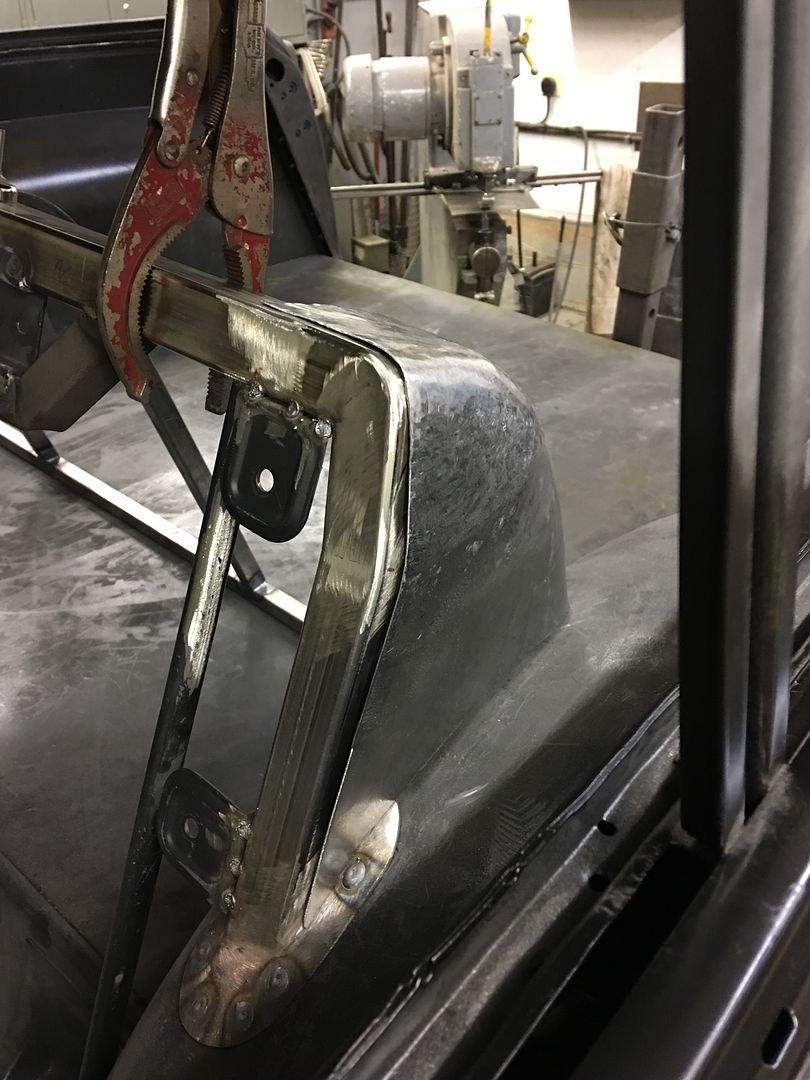 A bit more cleanup work, but I'm real pleased with how this is turning out.. https://www.youtube.com/watch?v=1-S5g5g5J6k .
__________________
Robert |
|
|
|
|
07-29-2017, 09:06 PM
|
#864 |
|
Senior Member
Join Date: Mar 2011
Location: West Plains, Missouri
Posts: 7,553
|
Re: 55 Wagon Progress
Robert, excellent work as always, looks great...Jim
__________________
my build thread: http://67-72chevytrucks.com/vboard/s...d.php?t=459839 Jimbo's long bed step build:http://67-72chevytrucks.com/vboard/s...t=464626<br /> |
|
|
|
|
07-30-2017, 06:33 AM
|
#865 |
|
Registered User
Join Date: Apr 2008
Location: Md
Posts: 2,451
|
Re: 55 Wagon Progress
I don't always comment, but I tune in with the hopes that some of this skill will be absorbed. Always top notch impressive work, Thanks for sharing ...Ed
__________________
http://67-72chevytrucks.com/vboard/s...d.php?t=635605 |
|
|
|
|
08-05-2017, 10:51 PM
|
#866 |
|
Registered User
Join Date: Jan 2013
Location: Leonardtown, MD
Posts: 1,633
|
Re: 55 Wagon Progress
Thanks for the comments guys!
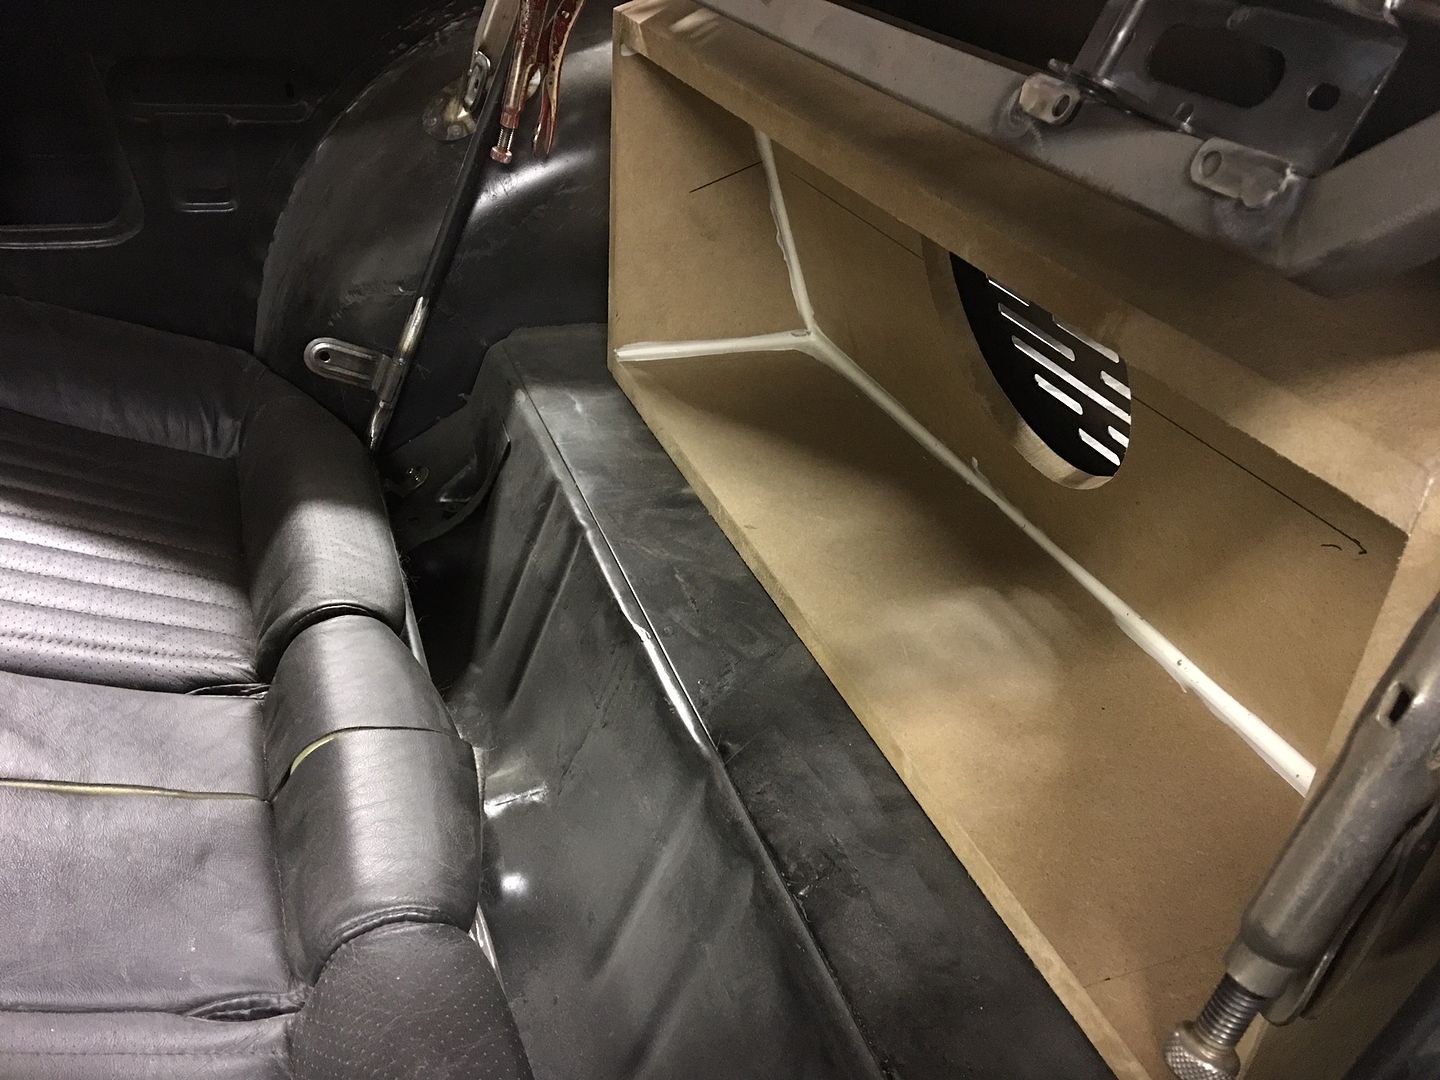
More work on the seat back, a test bend to see how well it matches our corner.... 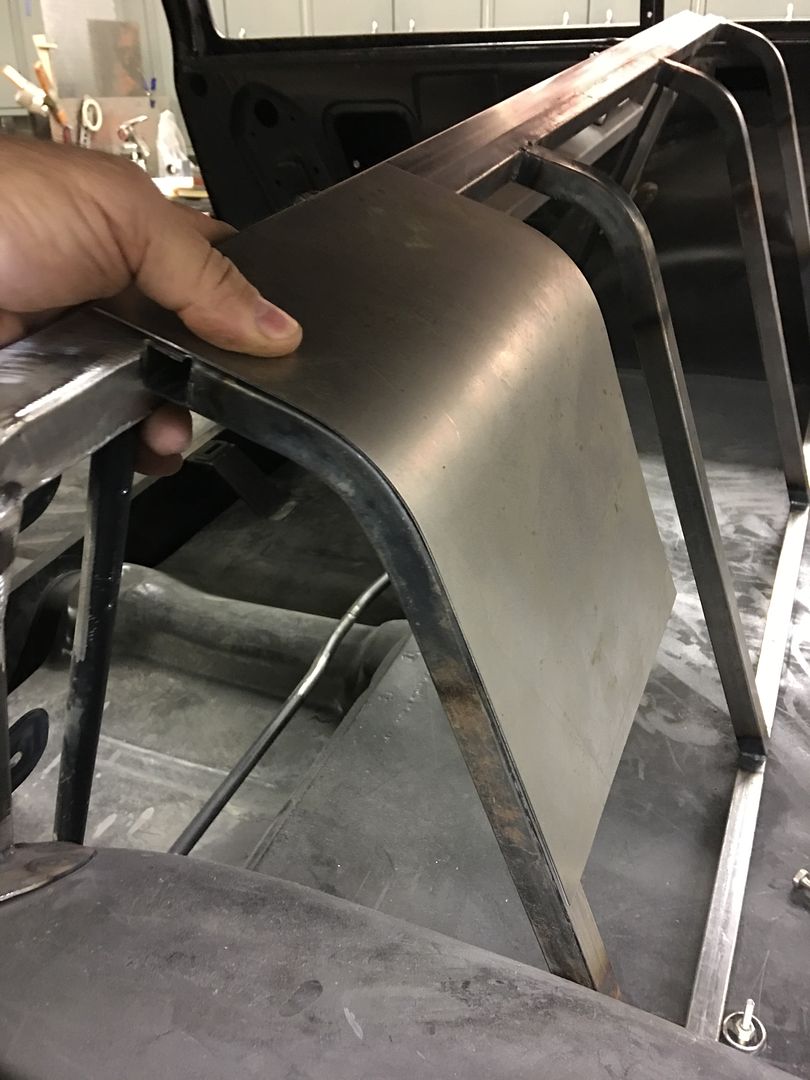 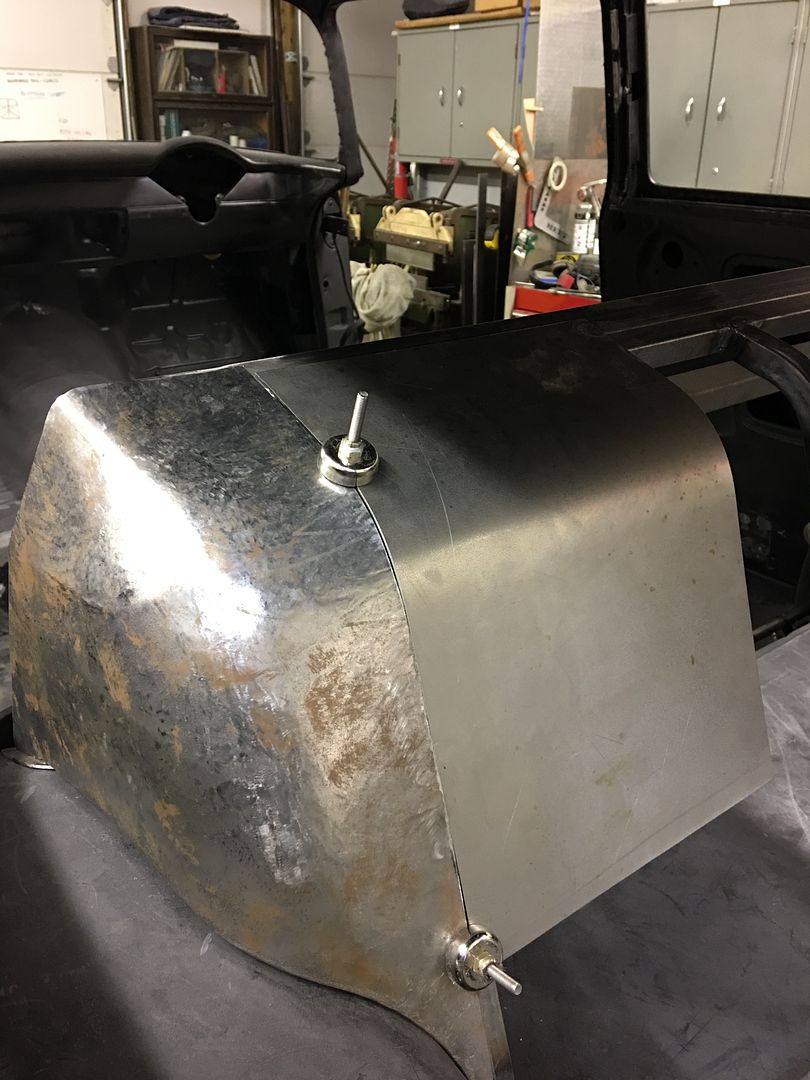 Then to bend the radius on a piece of 19 gauge for the full width... 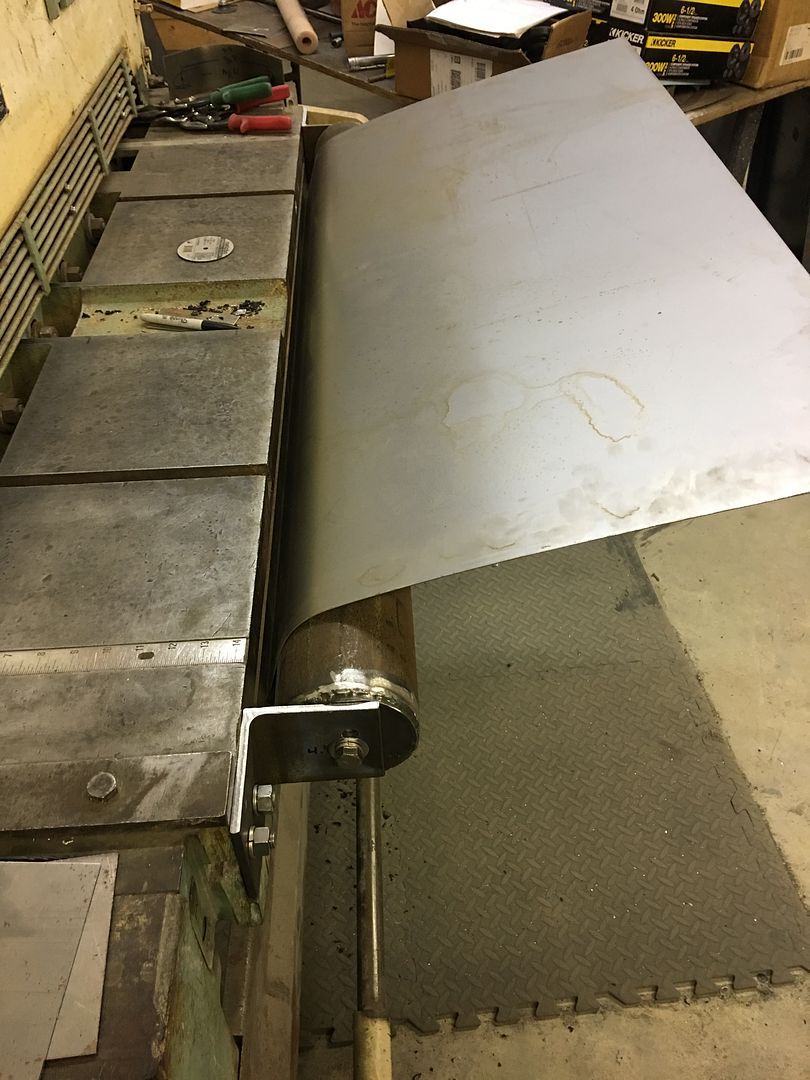 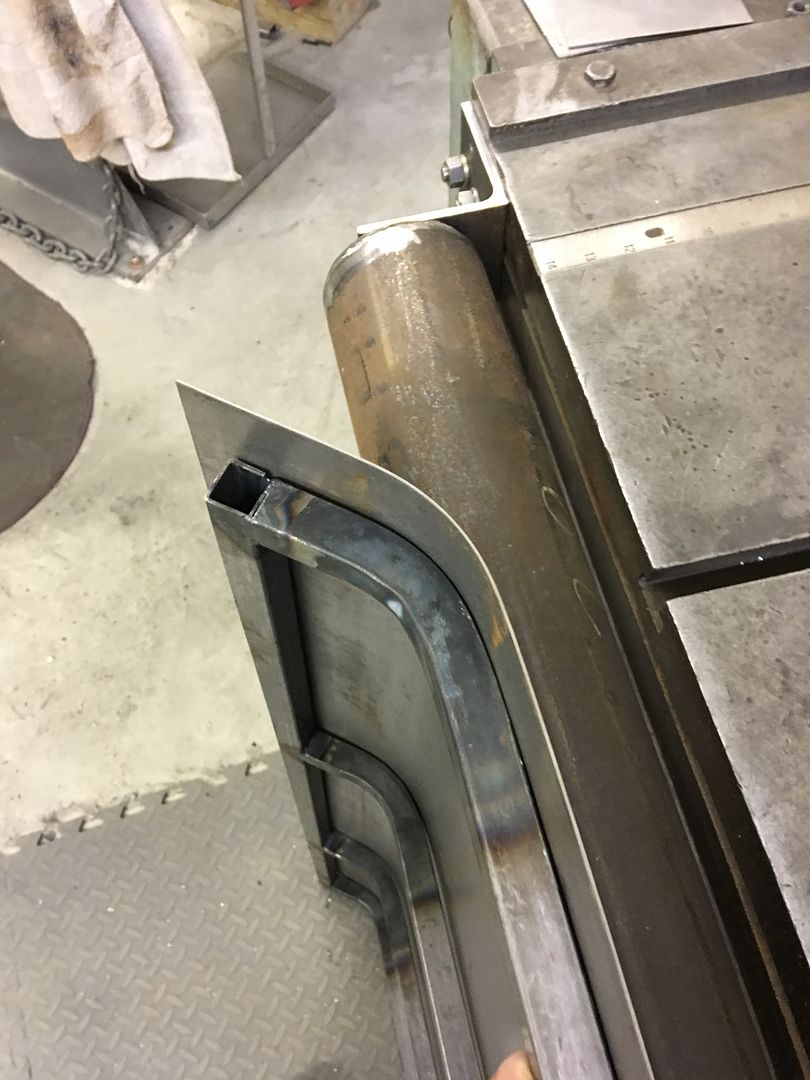 Then to bend down a flange to "hook" the frame.... 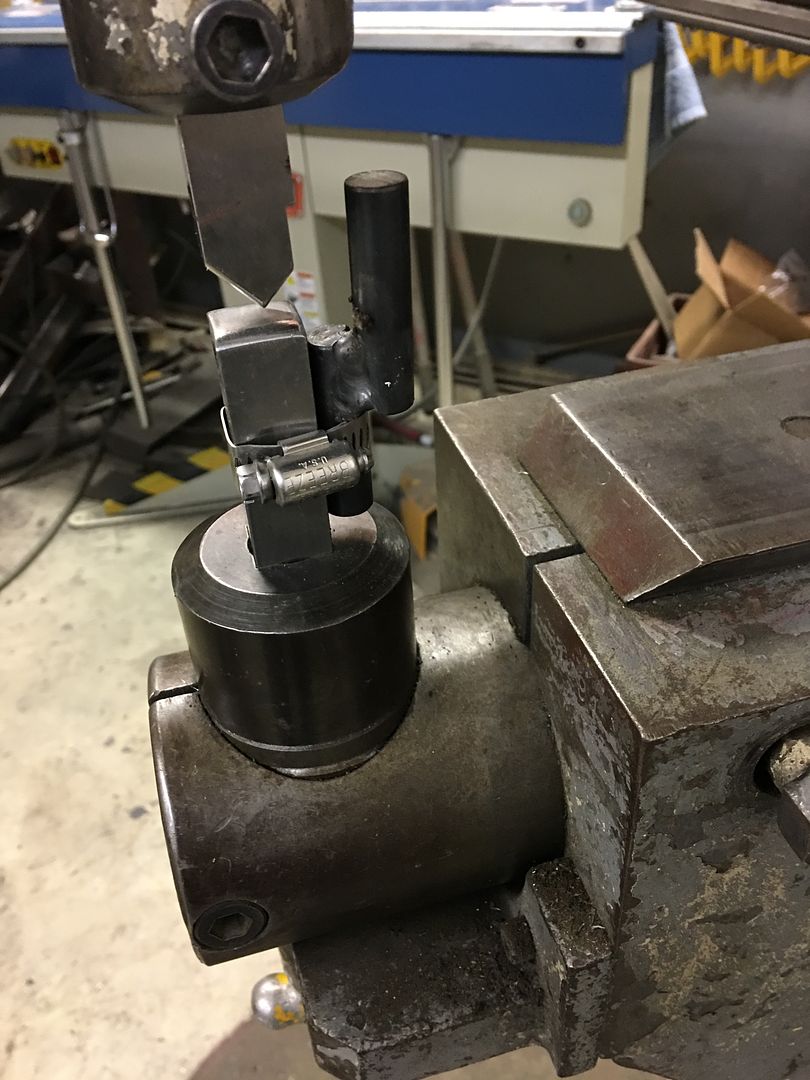 The metal is thinned at the bend line using a tipping die to give us a more crisp bend... 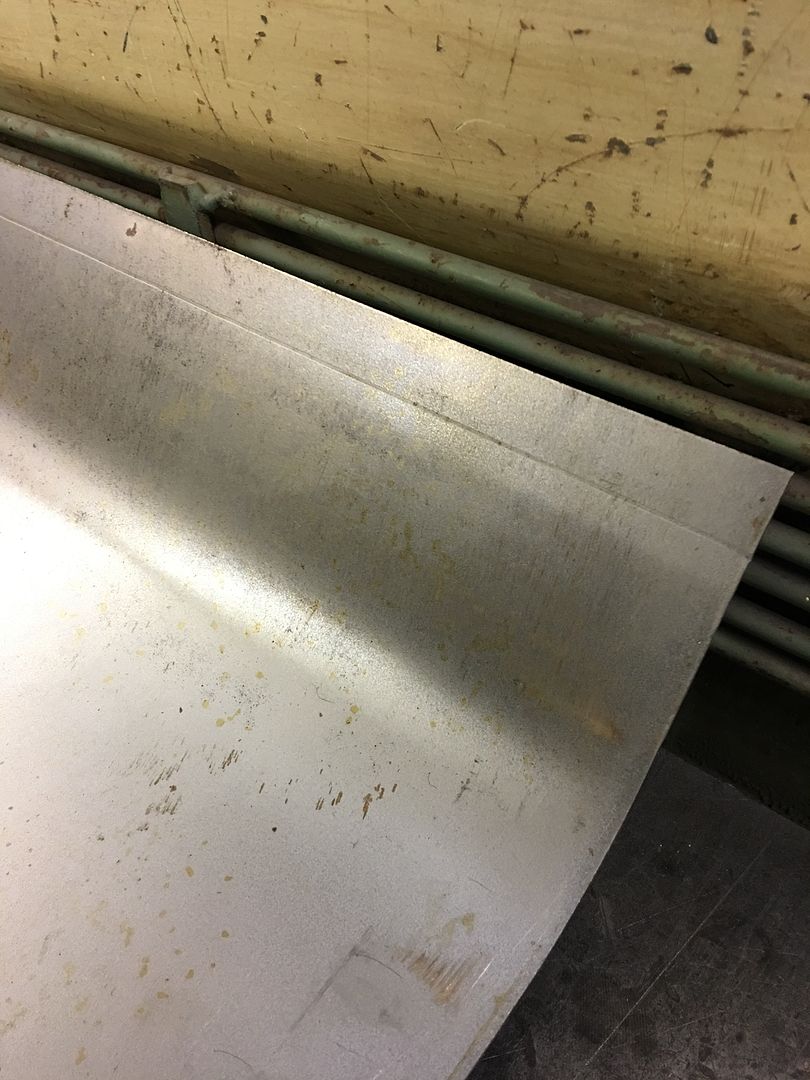 Bent at 90* in the magnetic brake.. 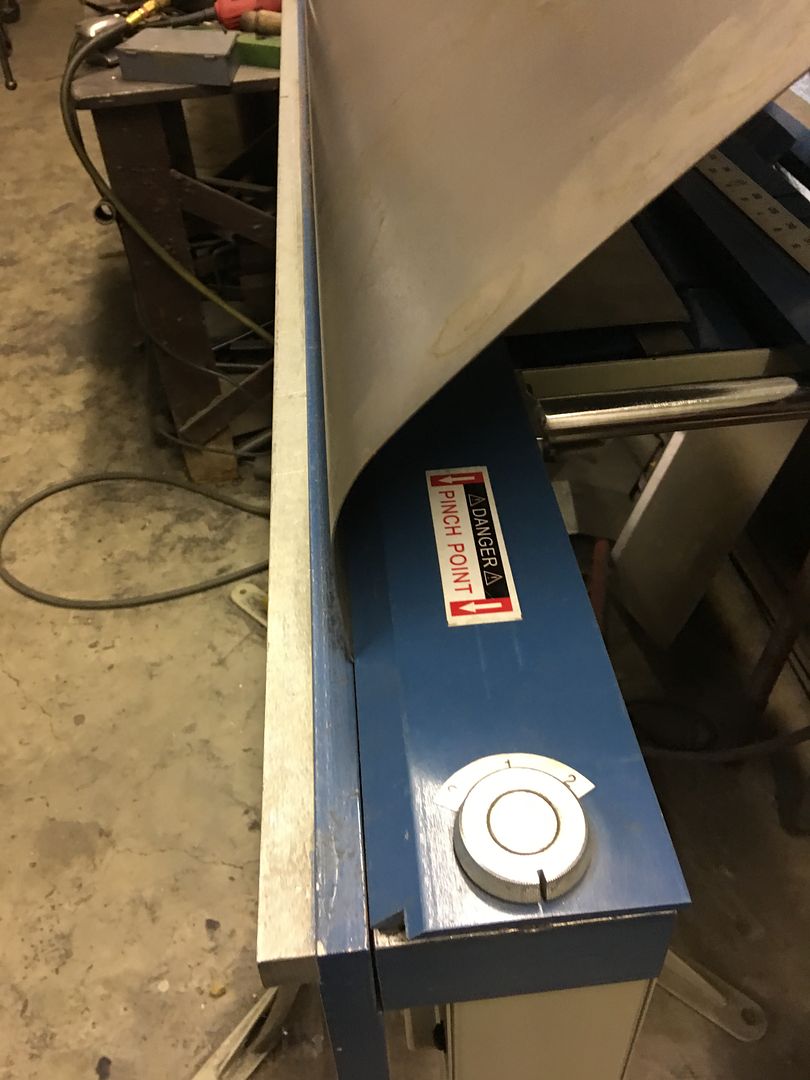 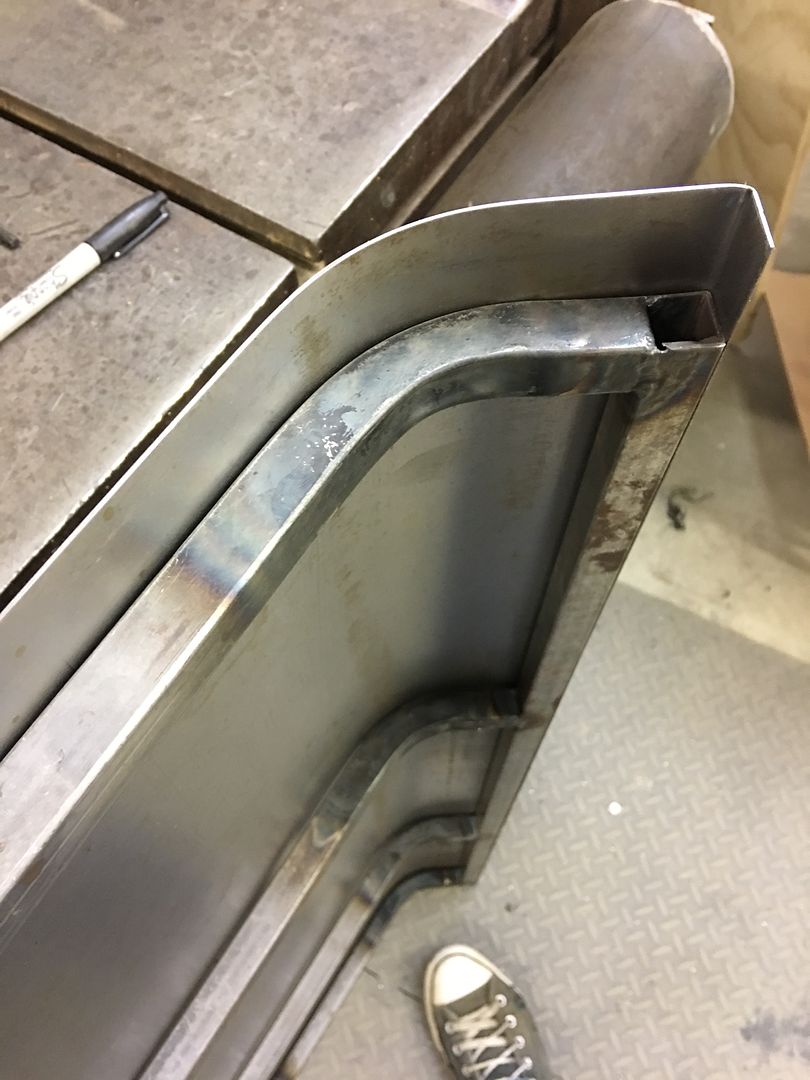 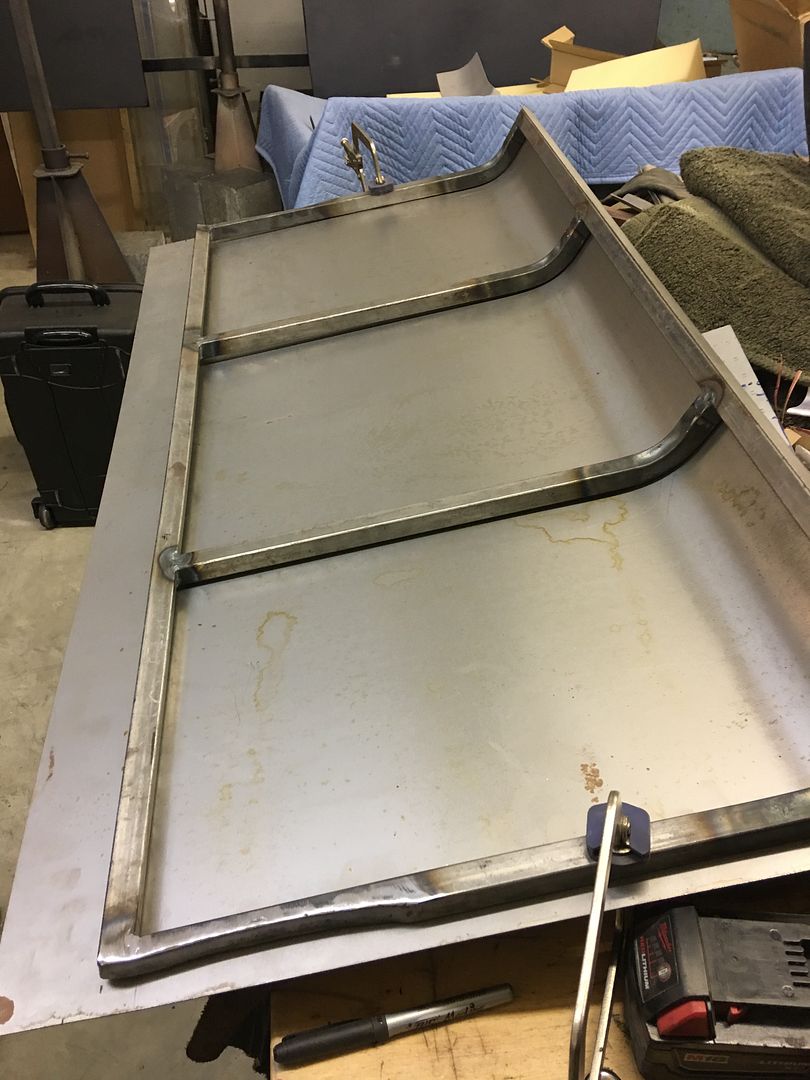 Next we slotted the panel for our 10" bass speaker. This should let out the sound but still support our upholstery material for a more subtle look..  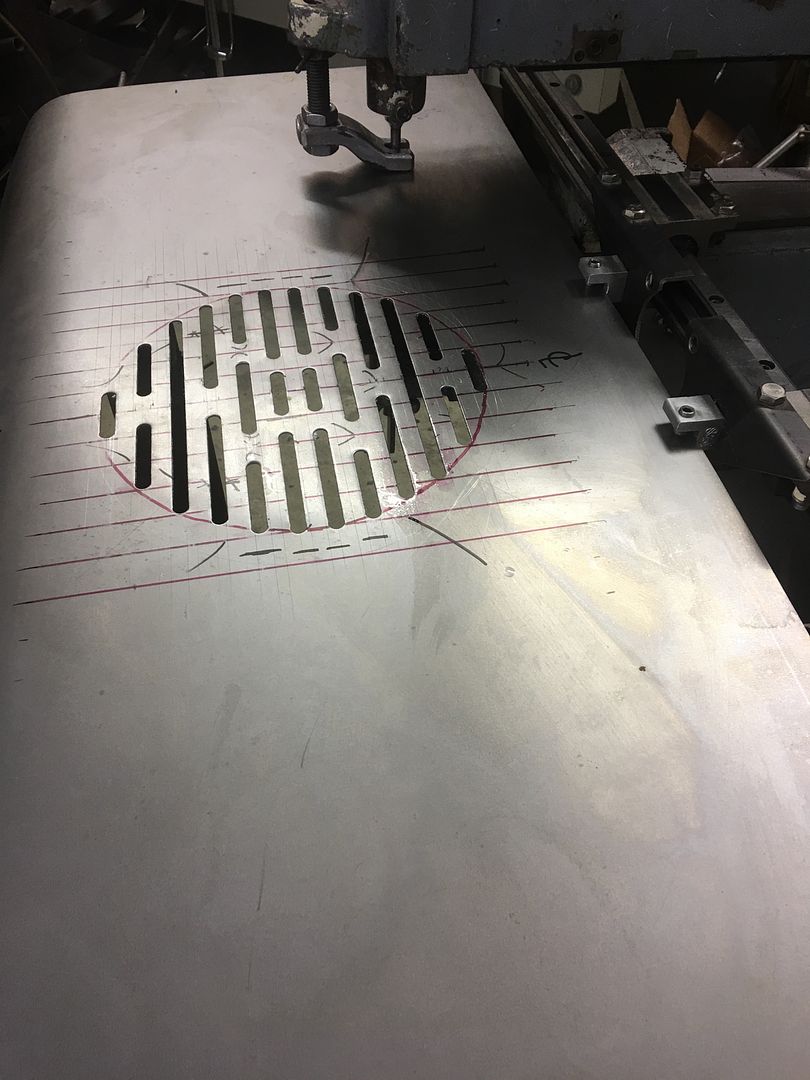 Then the bottom flange is also thinned at the bend and bent on the magnetic brake.. https://youtu.be/krzfbvw9DV8 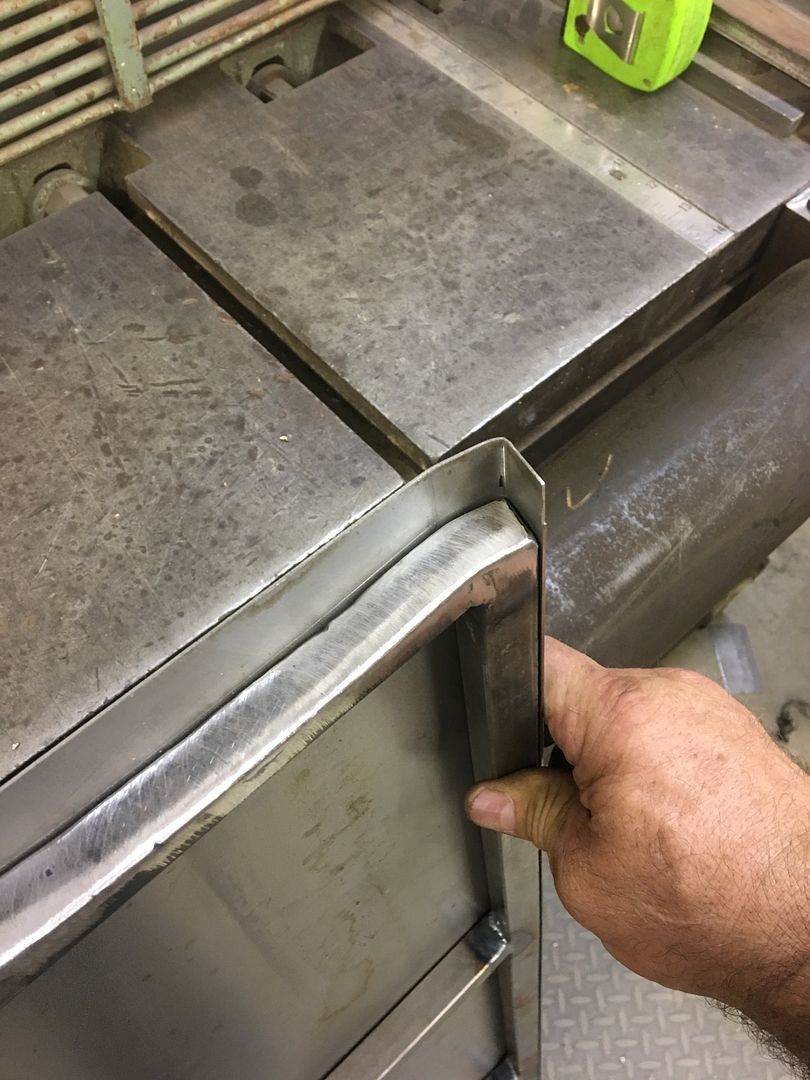 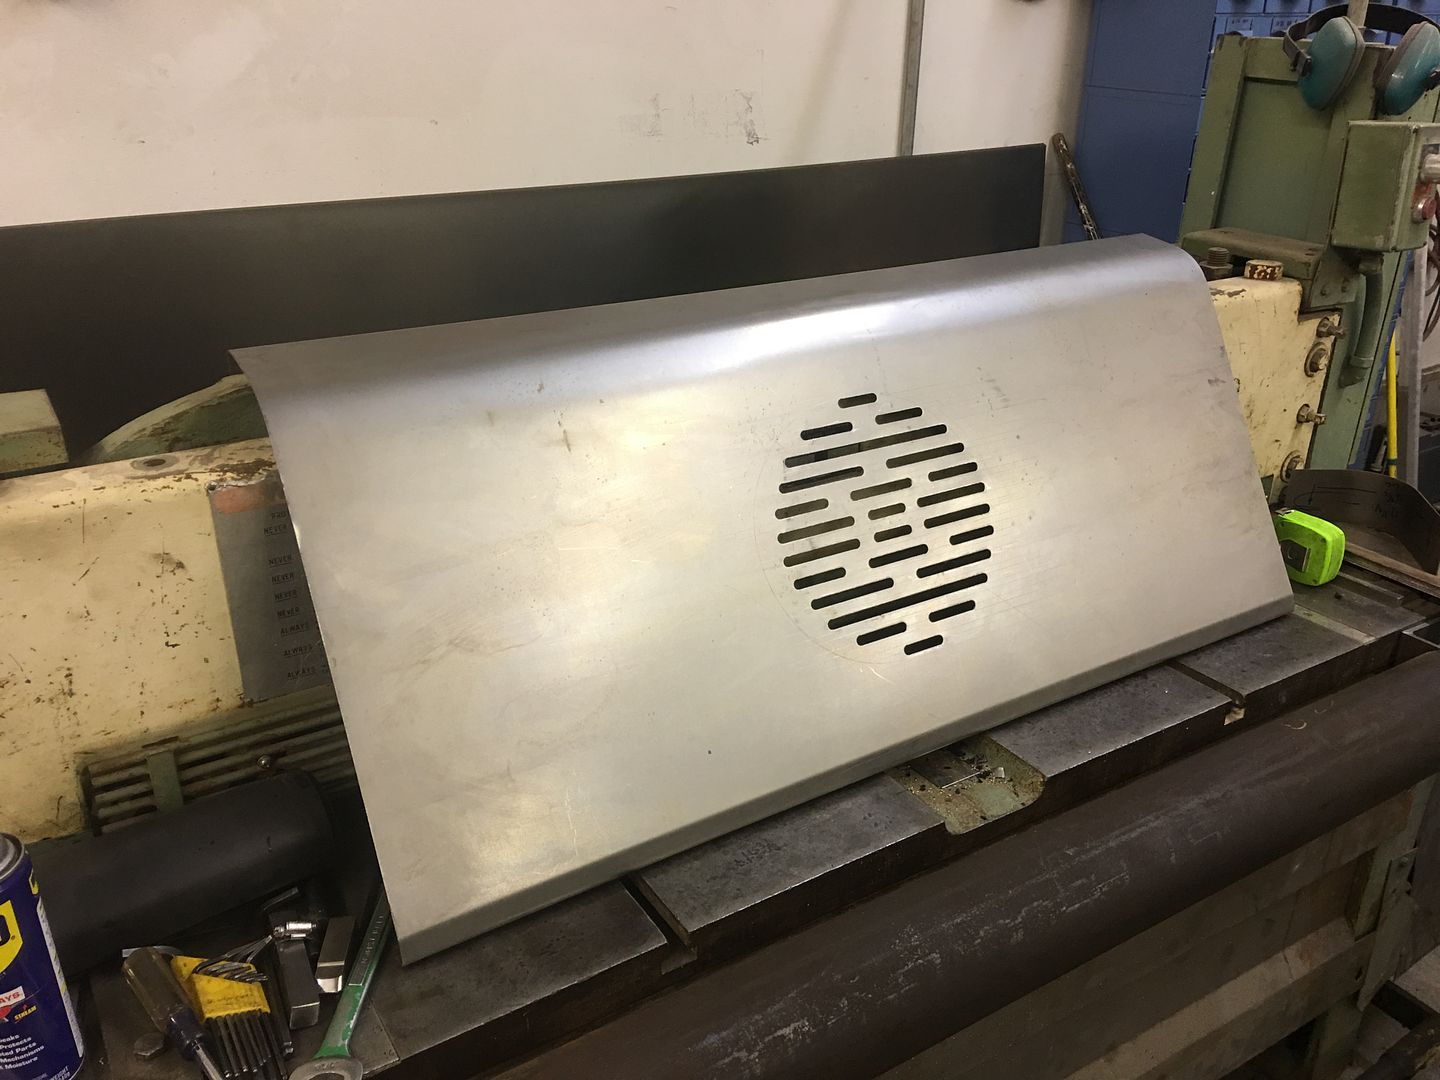 .....and our test fit into the car... 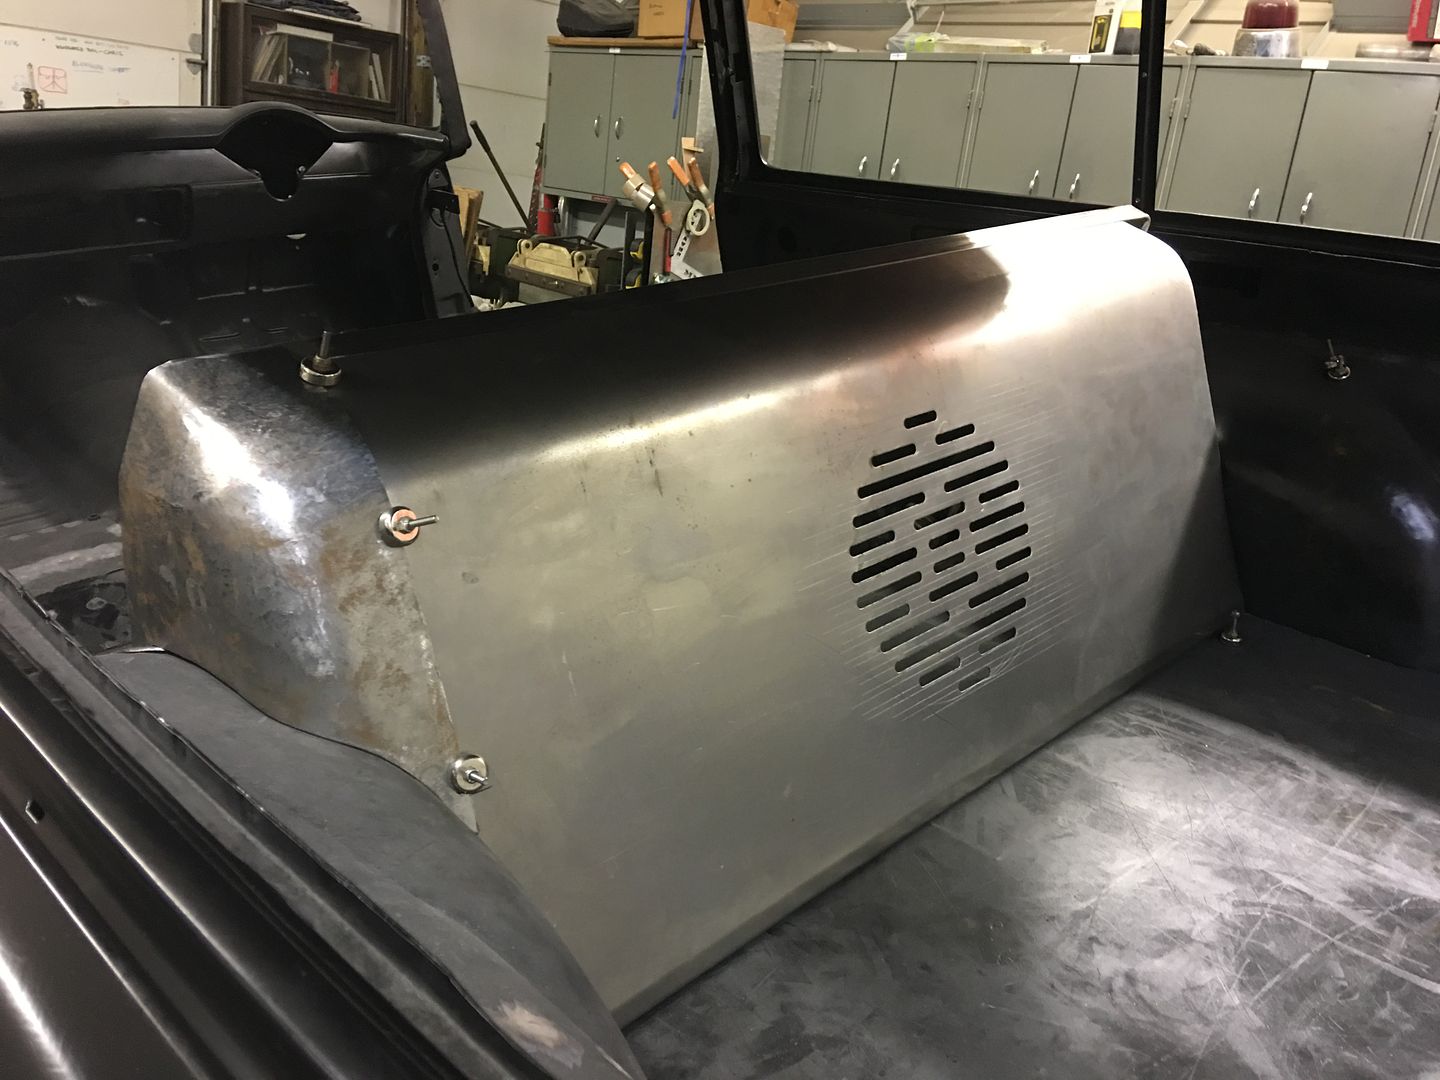
__________________
Robert |
|
|
|
|
08-05-2017, 11:15 PM
|
#867 |
|
Senior Member
Join Date: Mar 2011
Location: West Plains, Missouri
Posts: 7,553
|
Re: 55 Wagon Progress
Very nice...Jim
__________________
my build thread: http://67-72chevytrucks.com/vboard/s...d.php?t=459839 Jimbo's long bed step build:http://67-72chevytrucks.com/vboard/s...t=464626<br /> |
|
|
|
|
08-06-2017, 12:12 PM
|
#868 |
|
Registered User
Join Date: Mar 2006
Location: Pittsburgh
Posts: 1,694
|
Re: 55 Wagon Progress
Hey Robert, very nice fabrication Thanks for taking the time and posting as I enjoy learning techniques from you, Nate
__________________
Nate 1967 short fleet Project Blue Goose 'If it don't bounce back... heeheehee you go hungry!" Blues Brothers Last edited by nds1968; 08-06-2017 at 08:02 PM. |
|
|
|
|
08-07-2017, 06:45 AM
|
#869 |
|
Registered User
Join Date: Jan 2013
Location: Leonardtown, MD
Posts: 1,633
|
Re: 55 Wagon Progress
Thanks for the comments guys. Nate, didn't get a chance to respond to your comments the other day and now I see they've changed, so let me go on memory here.
I appreciate you guys giving feedback, even if you don't care for something. Sometimes a person gets tunnel vision, so outside suggestions come in handy. I'm not sure I even like it, but this needs to be a utilitarian of sorts back seat. The owner has it in her mind she needs a bumping stereo, and also needed a location for amp and speaker. The wagon doesn't give much option for hiding such things without risking tire spray, so behind the seat it was. The original rear seat folded in such a way to give a flat loading area all the way to the back side of the front seats. She would rather use the comfort of the newer seat that came with the buckets over the original, and this was also easier to fit to the mini-tub, so much for hauling plywood  The newer seat does fold toward the front, so this would allow for access to anything inside the void. We are also trying to leave room for the cleaning supplies, out of sight, out of mind. We didn't want to extend the sides into the window area and affect the interior garnish moldings that surround the windows, hence the transition corner pieces that blend into the wheel wells.. In the end, I think the upholstery design is going to make or break it. The newer seat does fold toward the front, so this would allow for access to anything inside the void. We are also trying to leave room for the cleaning supplies, out of sight, out of mind. We didn't want to extend the sides into the window area and affect the interior garnish moldings that surround the windows, hence the transition corner pieces that blend into the wheel wells.. In the end, I think the upholstery design is going to make or break it. Myself, I tried to talk her out of a stereo. A stroker motor with 40 series flowmasters, there will be plenty to listen to. If you don't like the station, roll down the window!
__________________
Robert |
|
|
|
|
08-10-2017, 10:28 PM
|
#870 |
|
Registered User
Join Date: Jan 2013
Location: Leonardtown, MD
Posts: 1,633
|
Re: 55 Wagon Progress
Today was paint day for the remaining bus parts. One hood, three rear skirts, and attaching hardware.. After a sealer coat of SPI Epoxy..
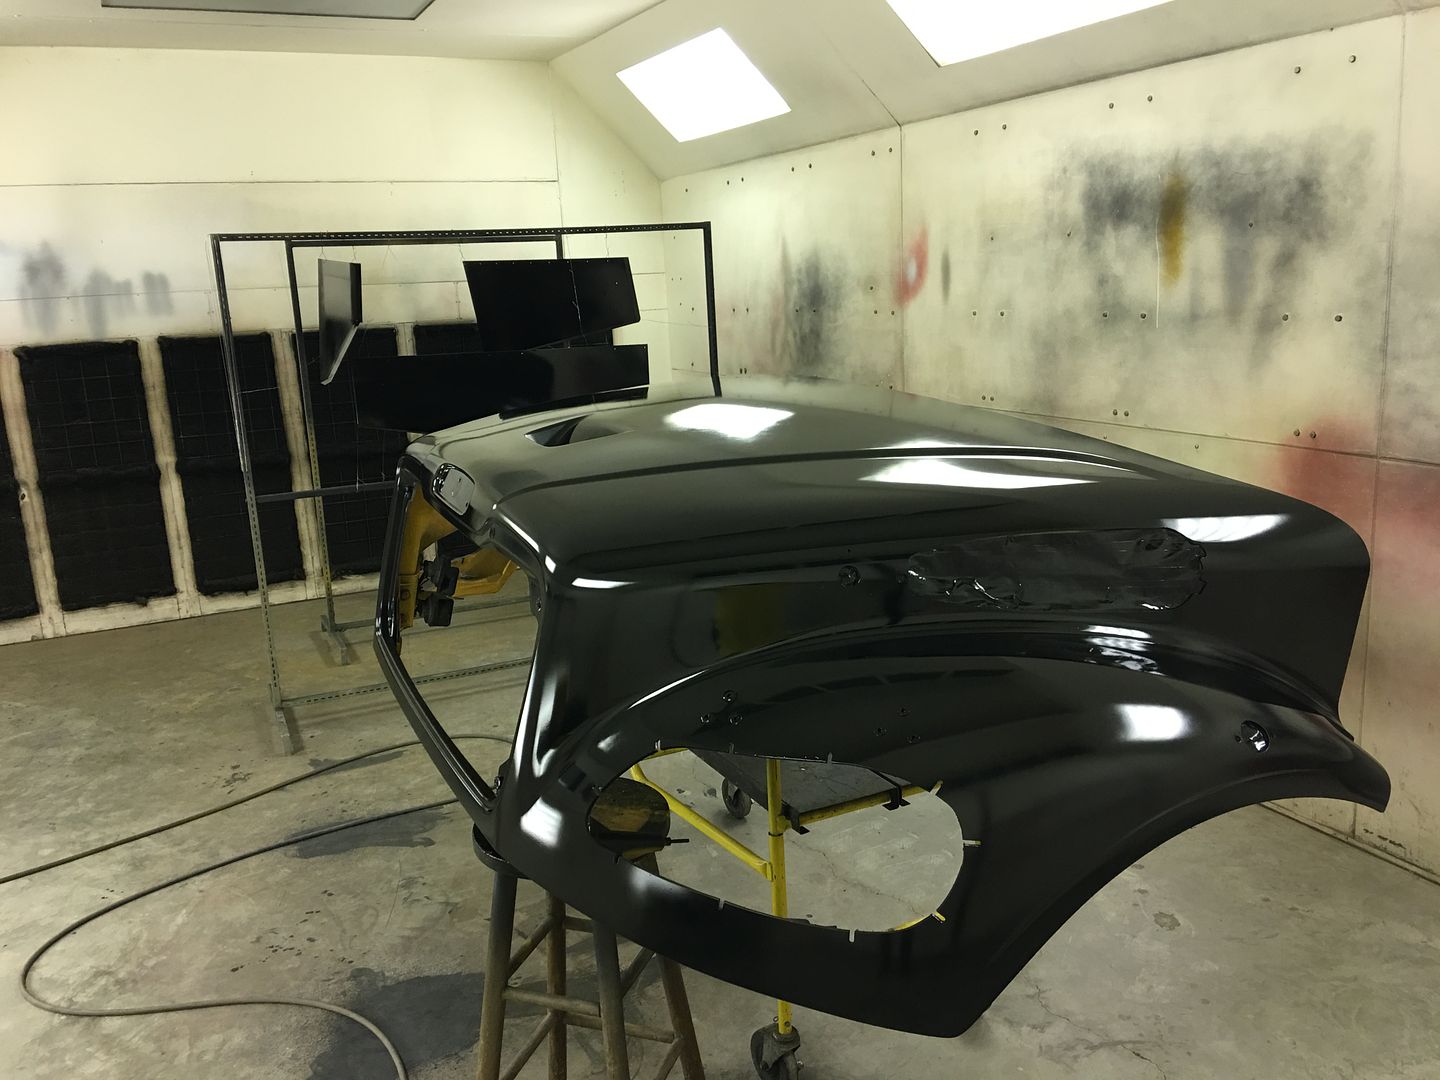 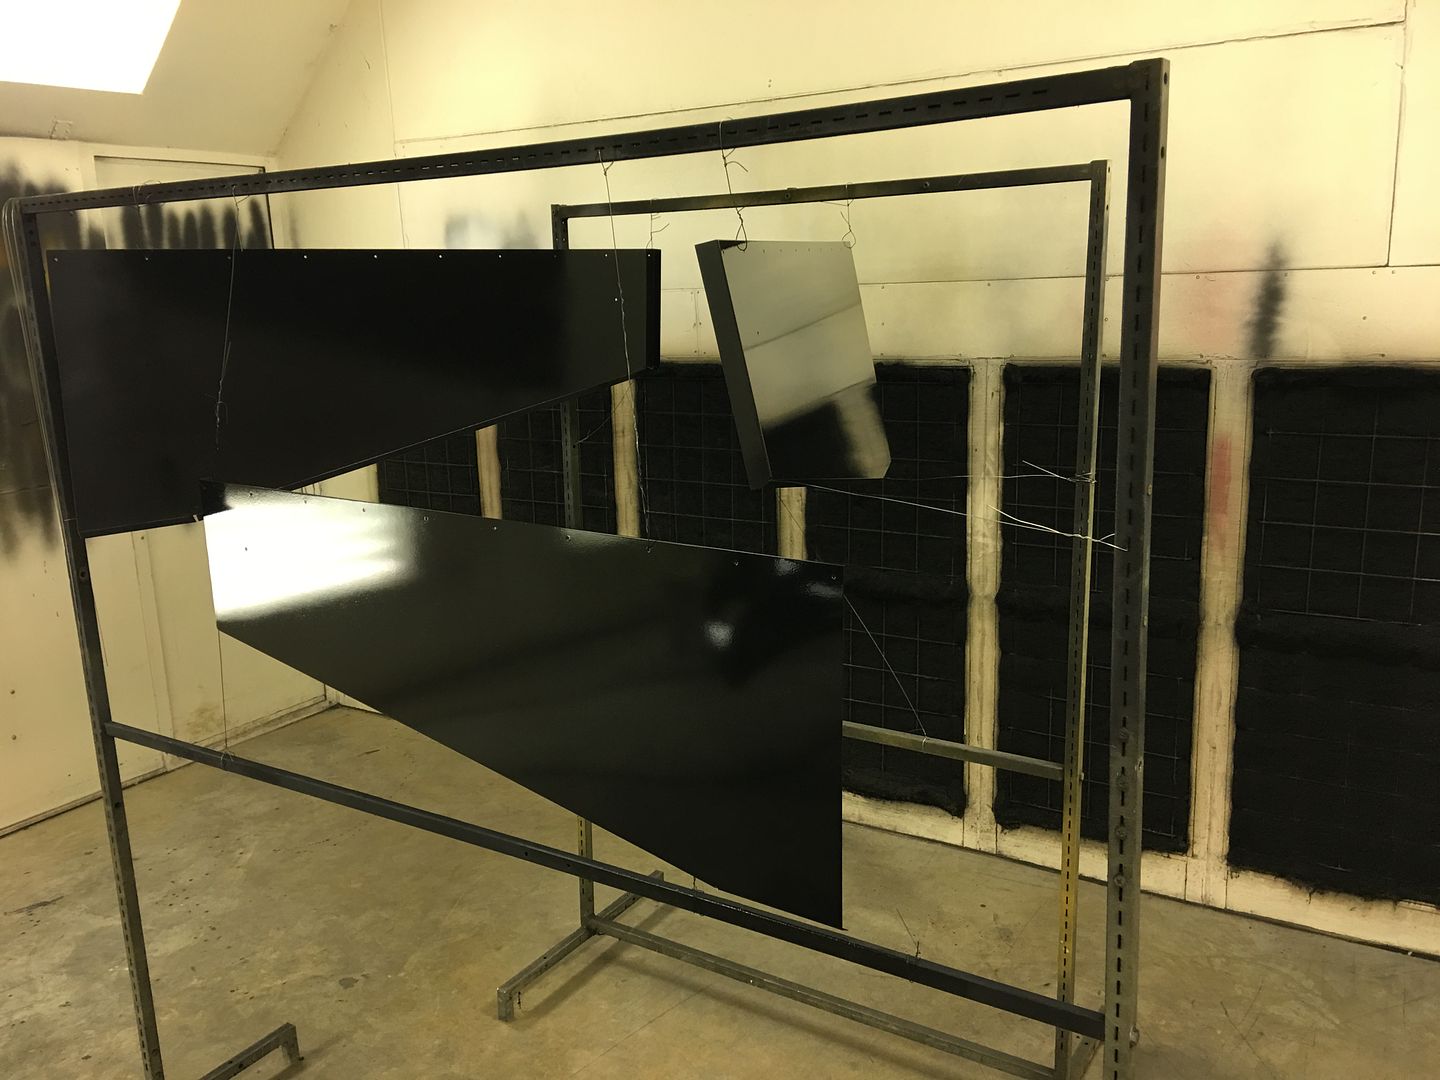 And our yellow...  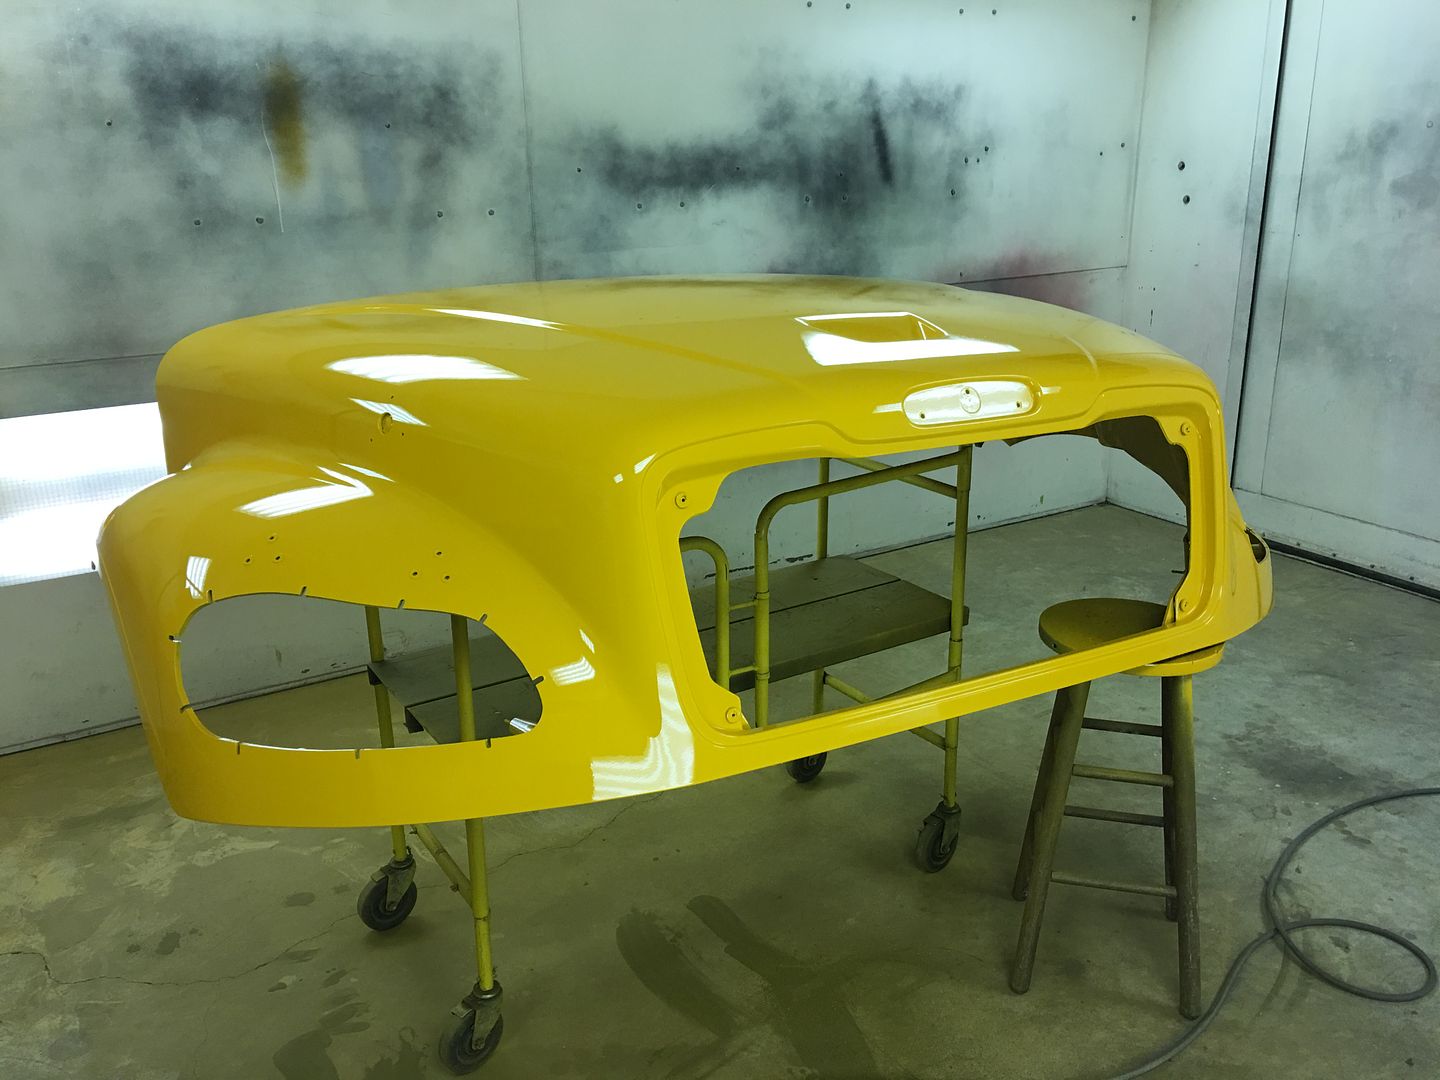 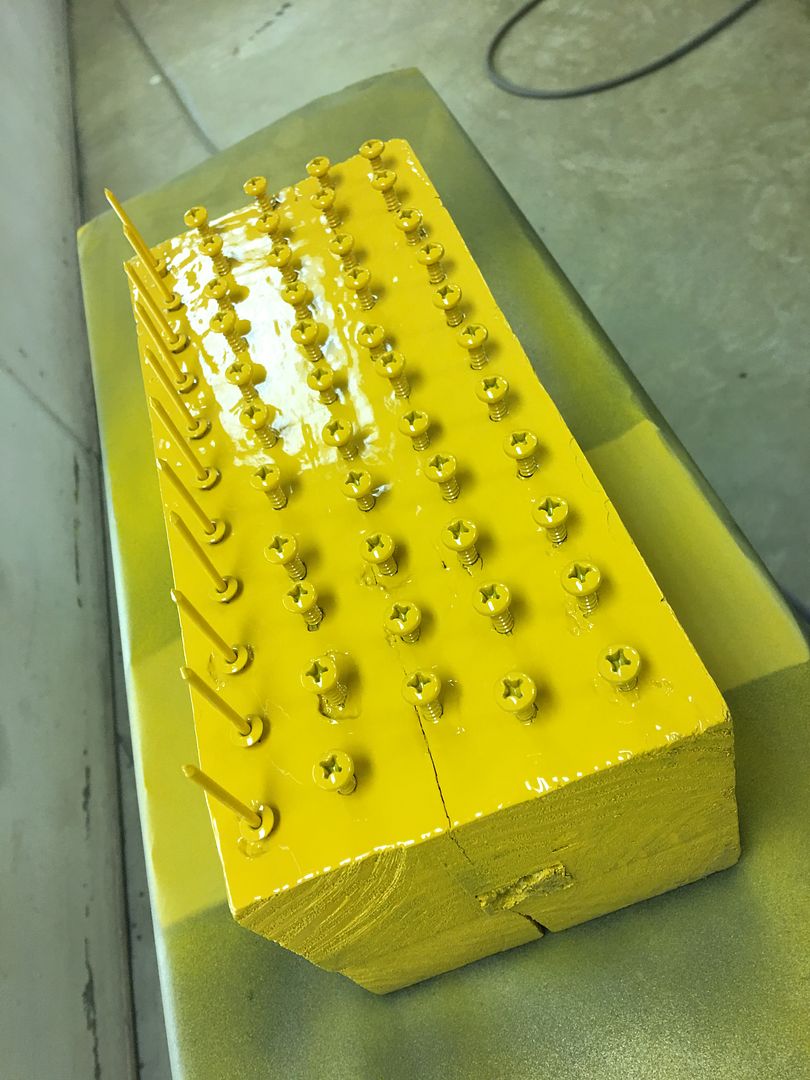 We'll let these cure a bit and get 580 put back together this weekend..
__________________
Robert |
|
|
|
|
08-11-2017, 10:56 PM
|
#871 |
|
Registered User
Join Date: Jan 2013
Location: Leonardtown, MD
Posts: 1,633
|
Re: 55 Wagon Progress
Today the hood was reinstalled, all the bits bolted back together, and the rear skirt replaced..
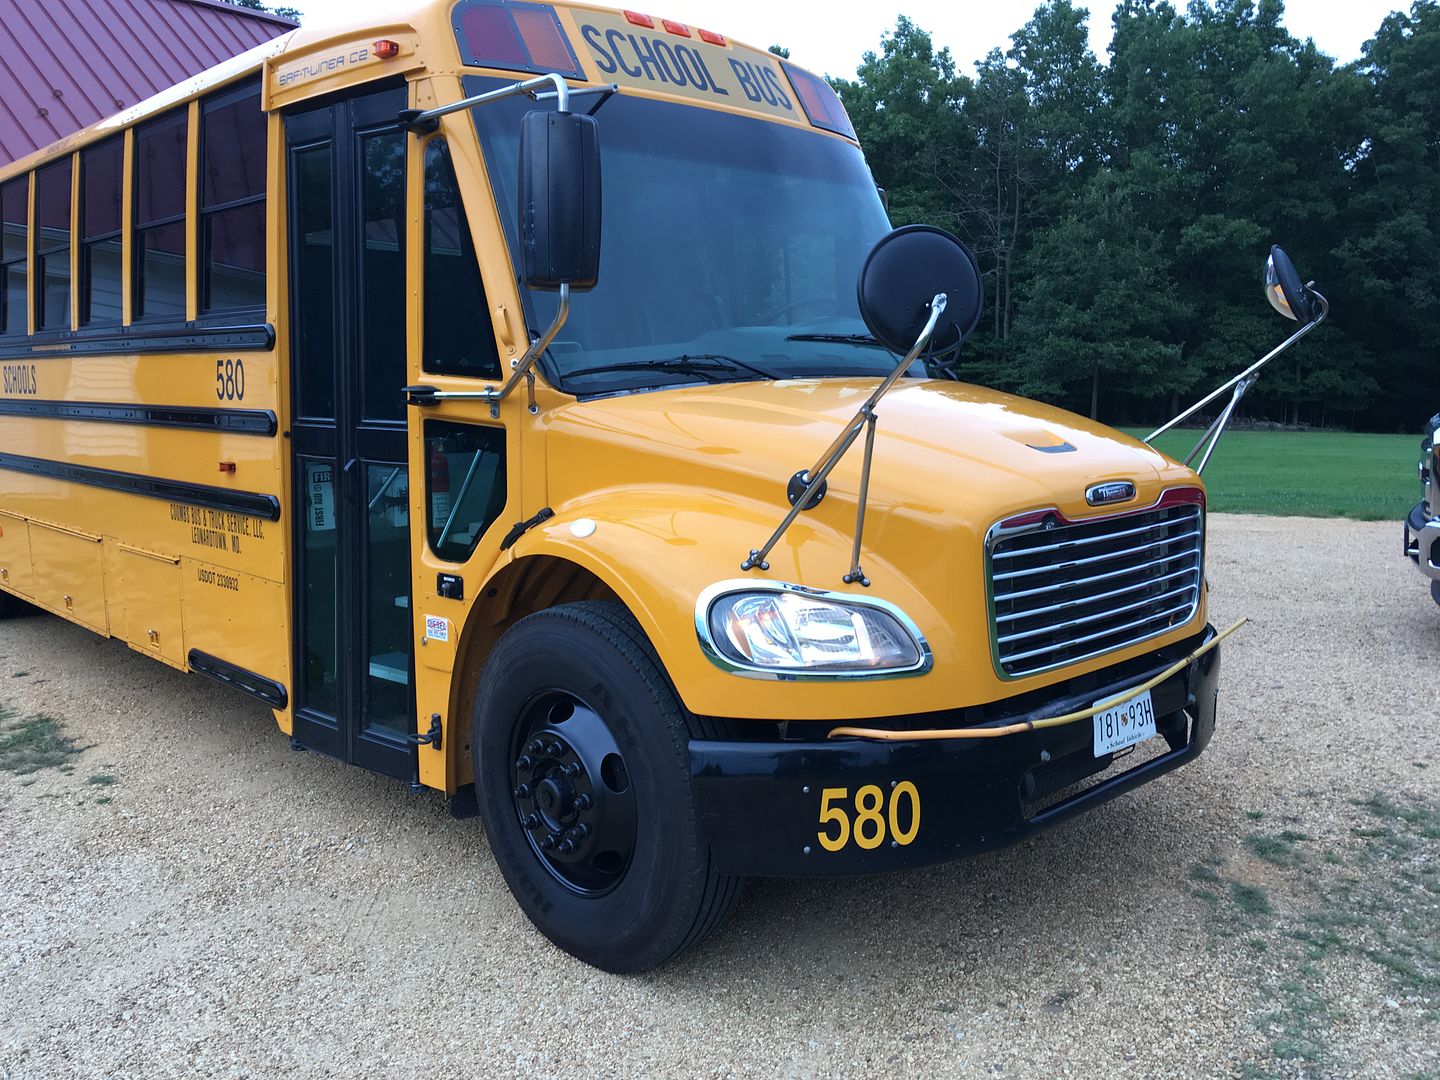 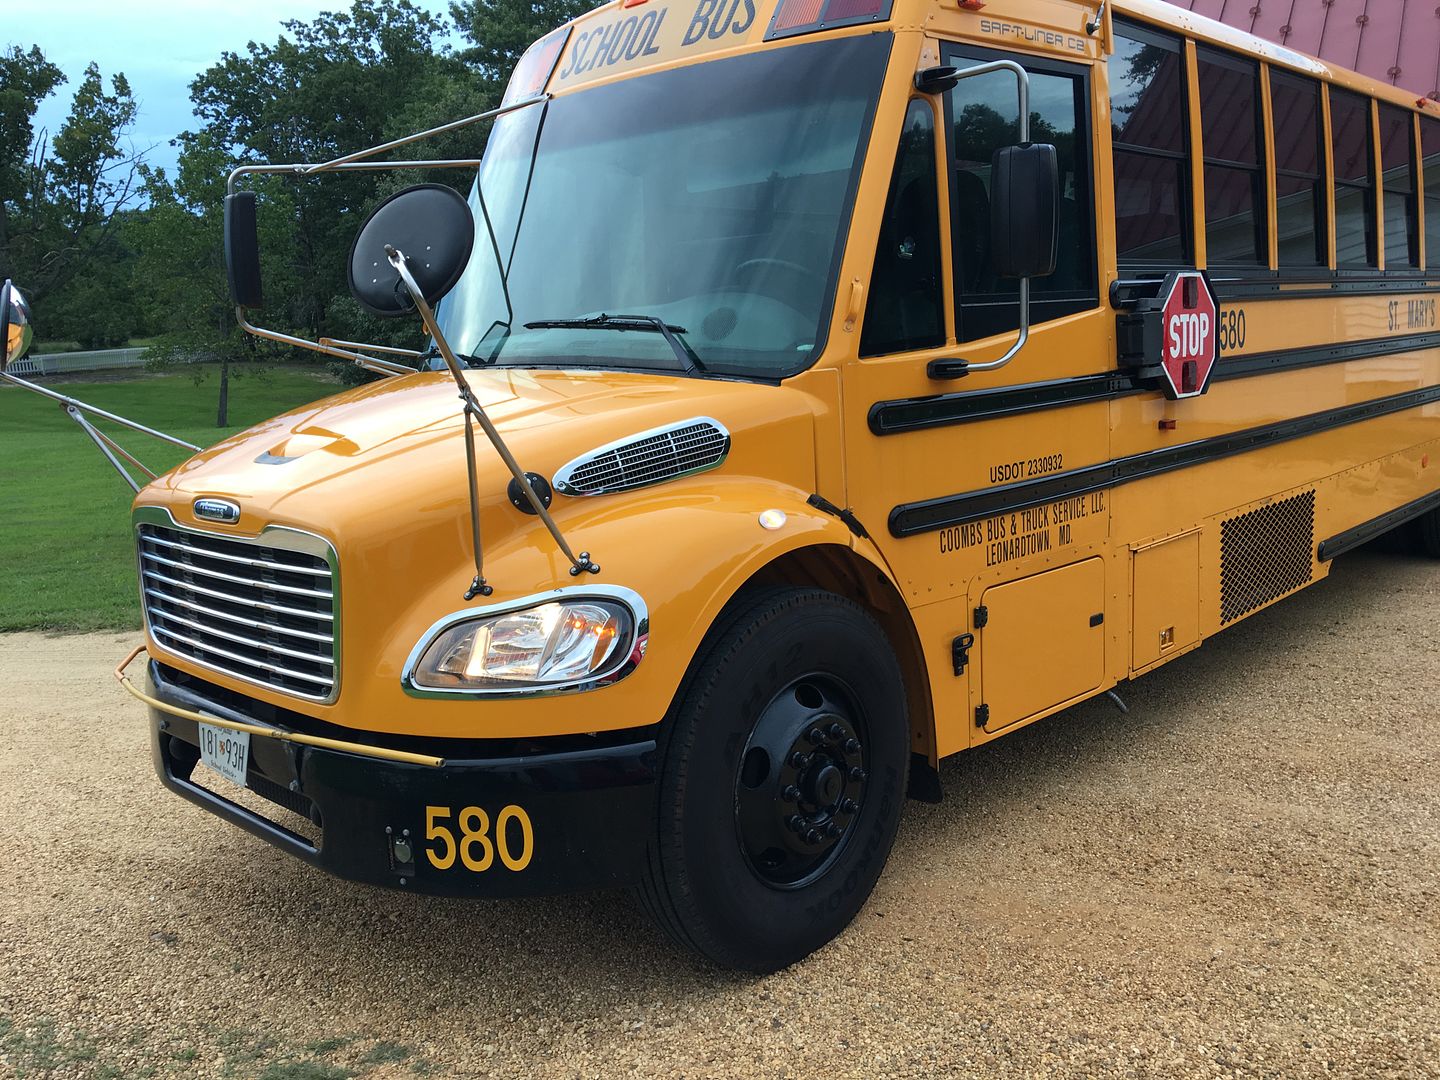 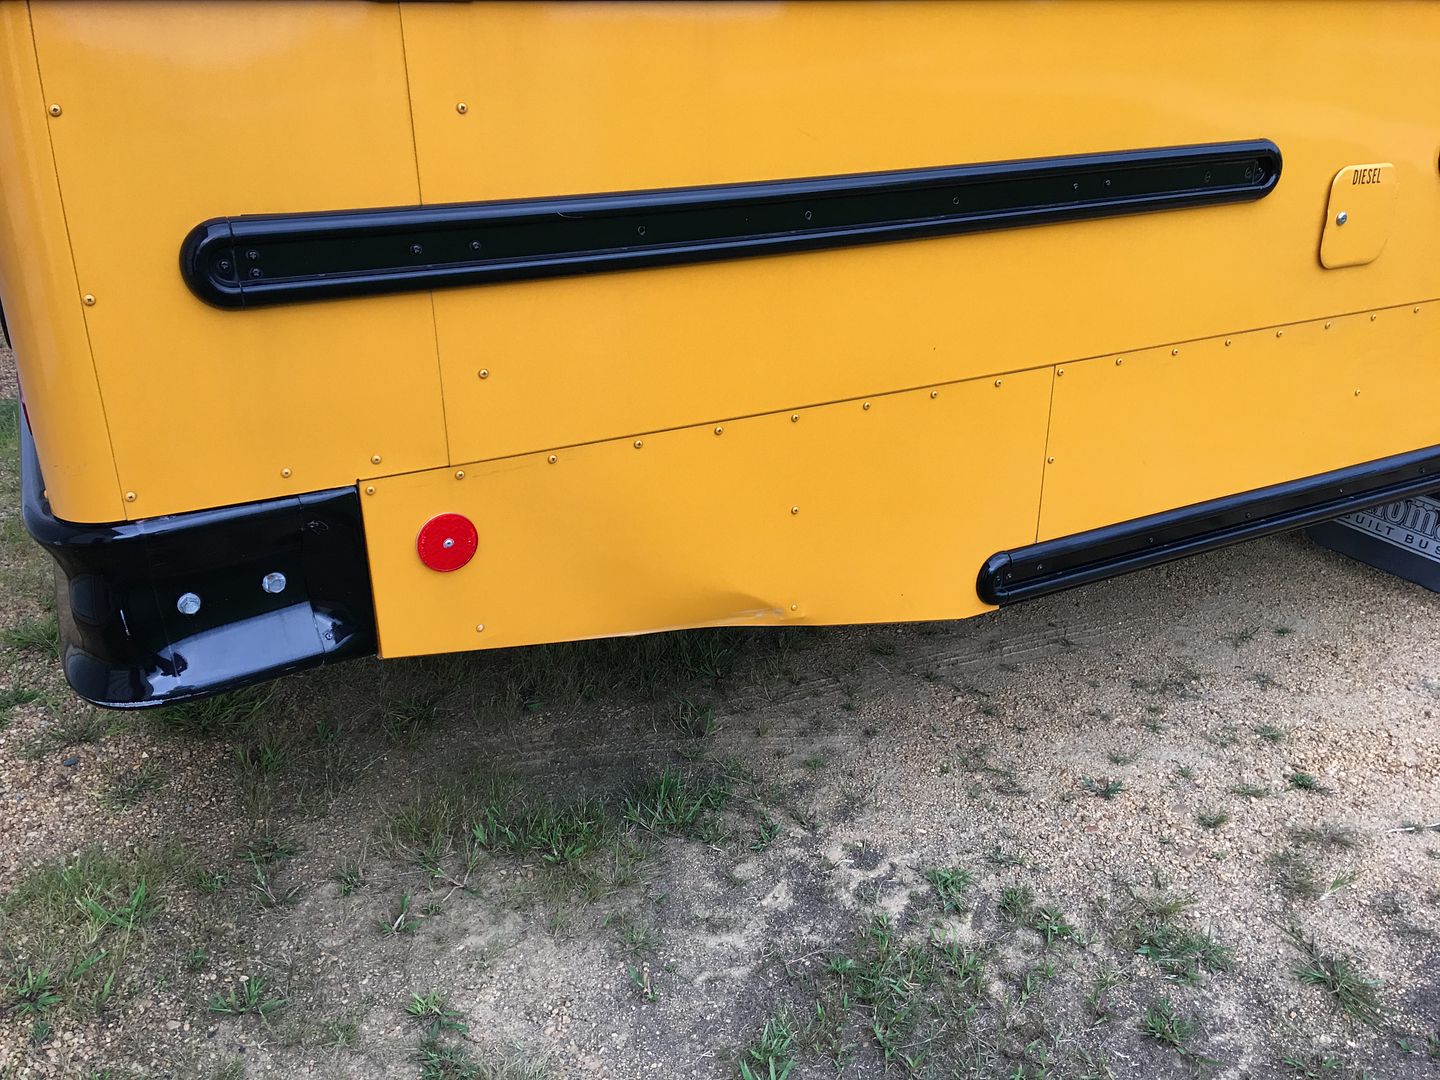 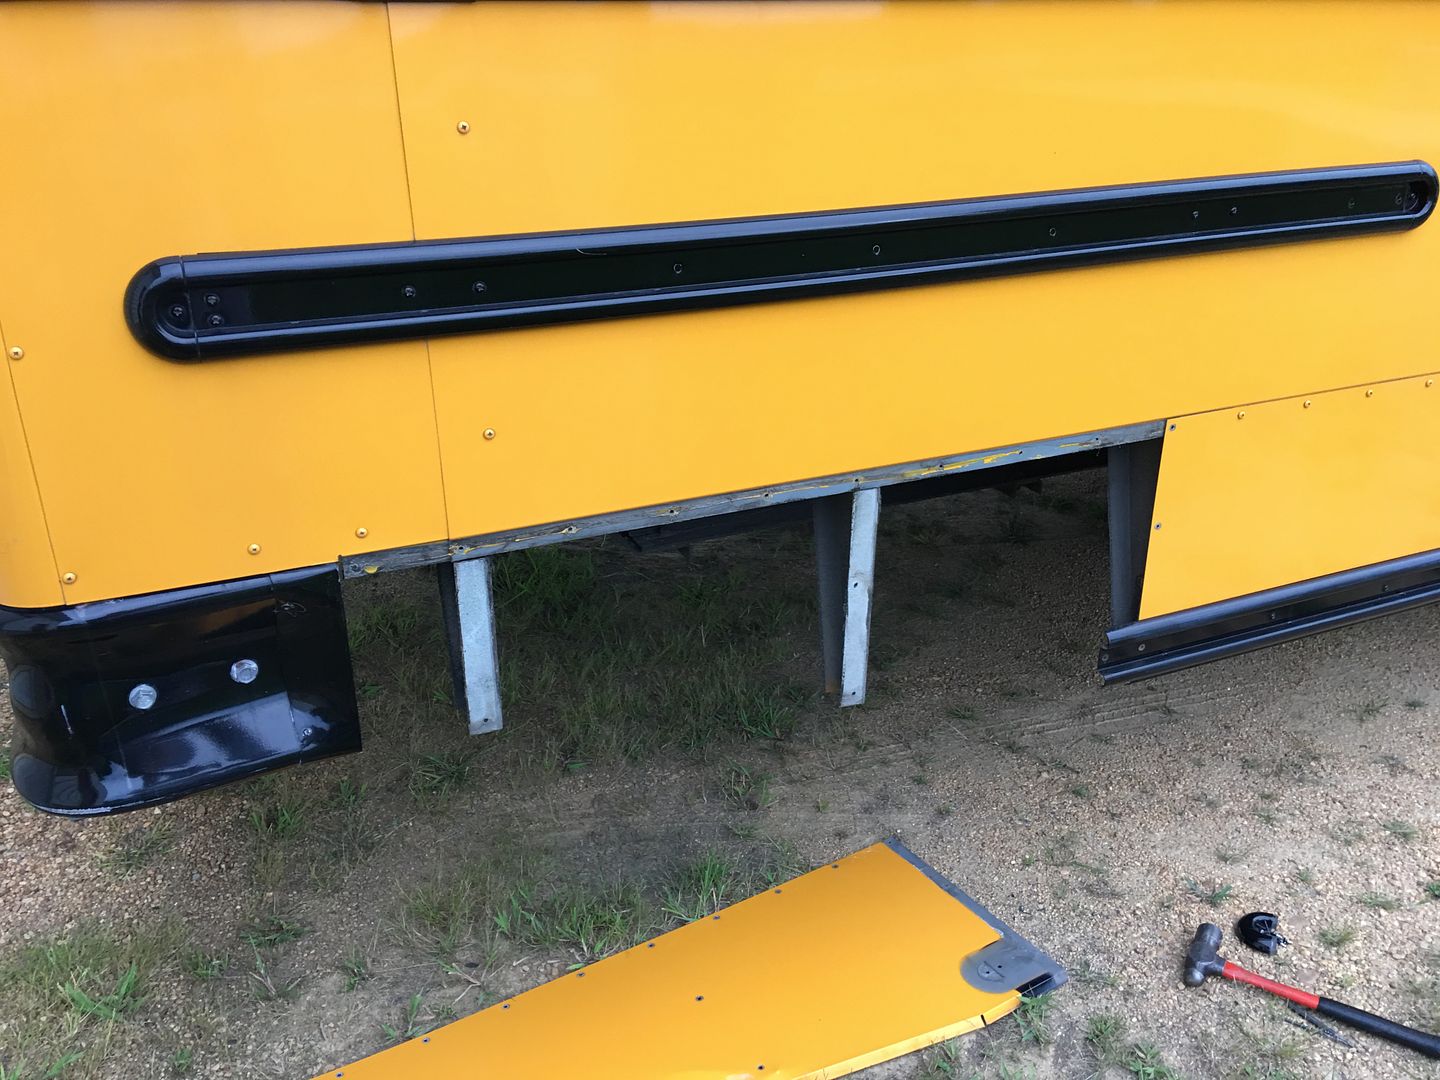 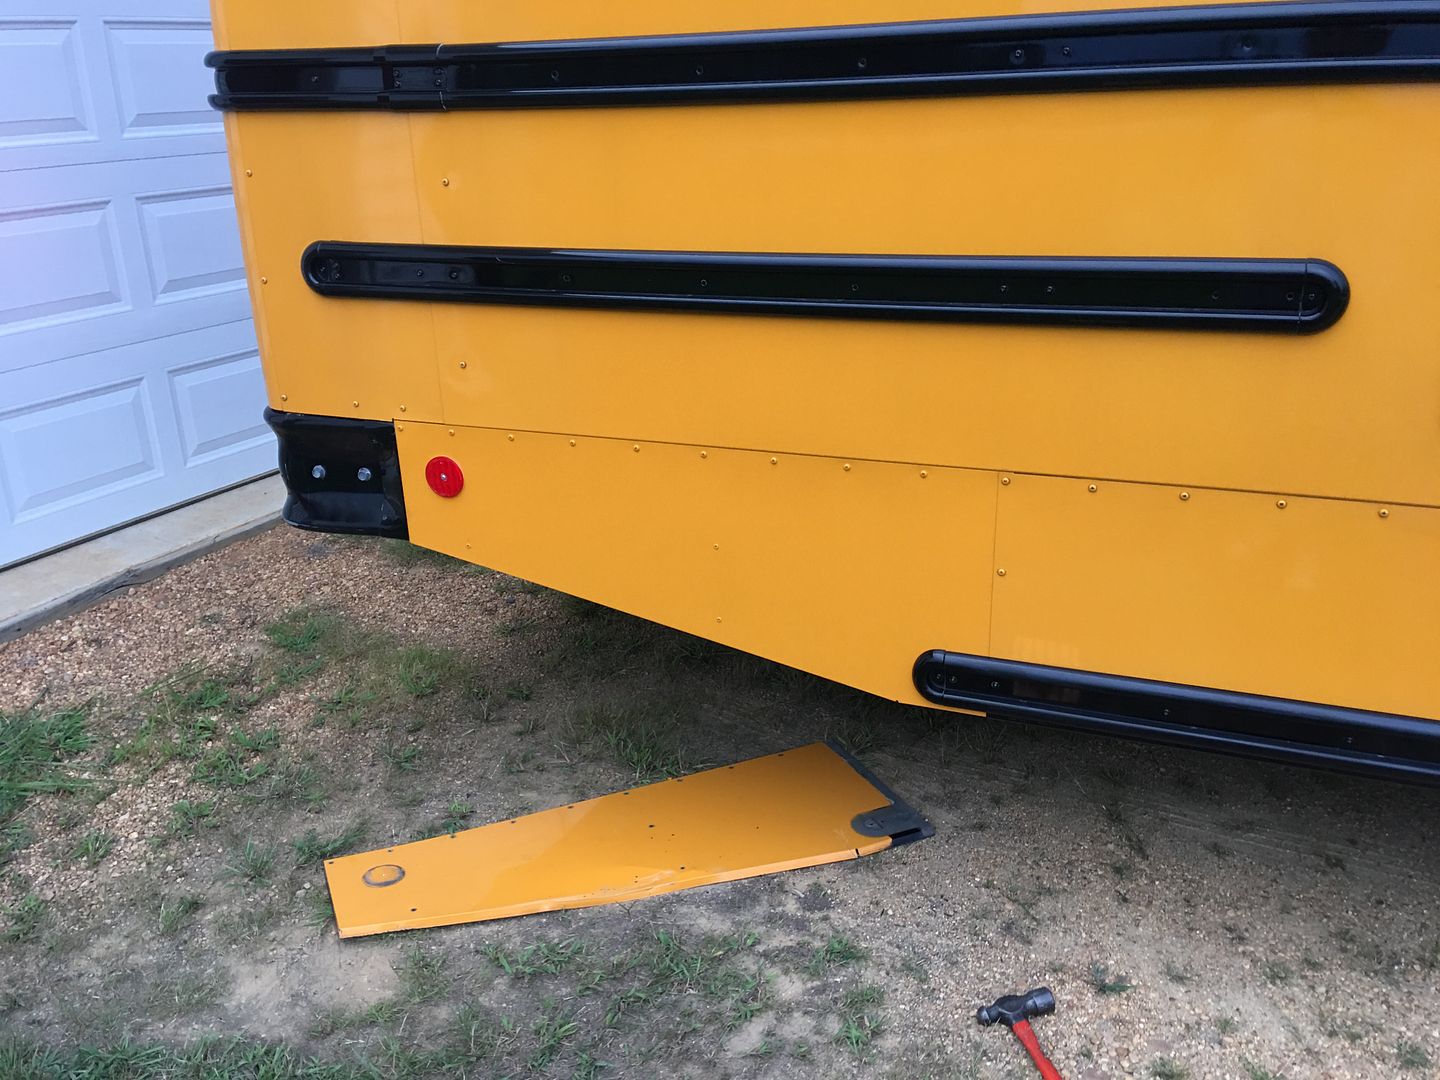 All together and ready for pick up tomorrow.. 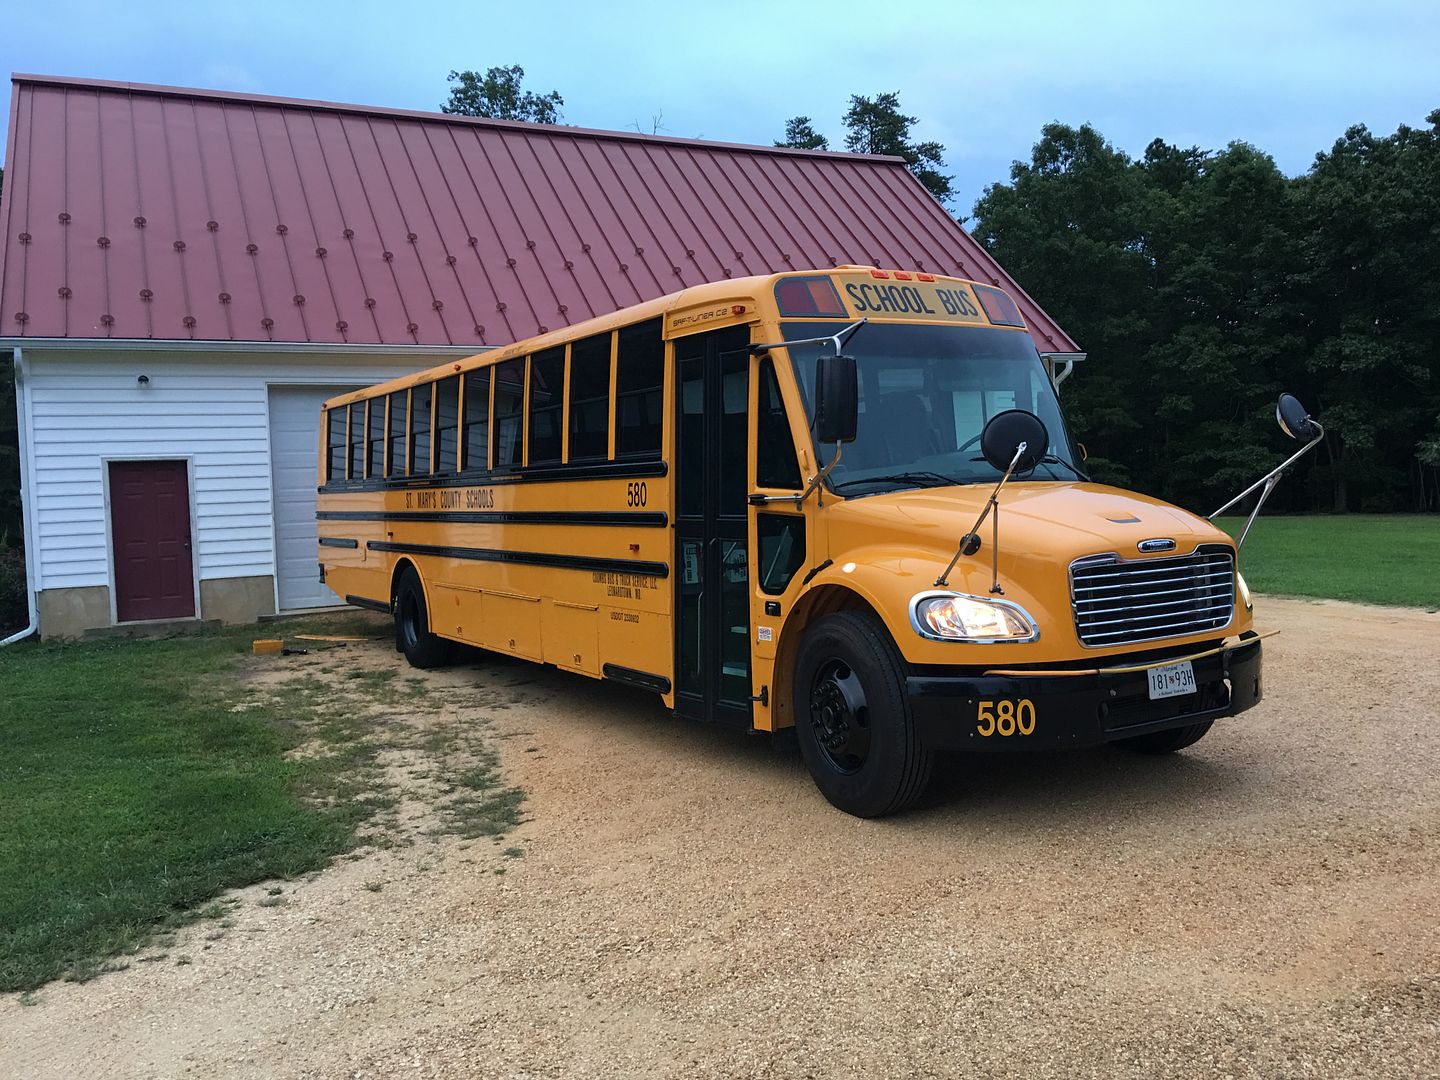 So we can get back to the 55 tomorrow...
__________________
Robert |
|
|
|
|
08-16-2017, 02:45 PM
|
#872 |
|
Registered User
Join Date: Jan 2013
Location: Leonardtown, MD
Posts: 1,633
|
Re: 55 Wagon Progress
Well last night found us carpenterin.... using some 3/4 MDF and some construction adhesive...
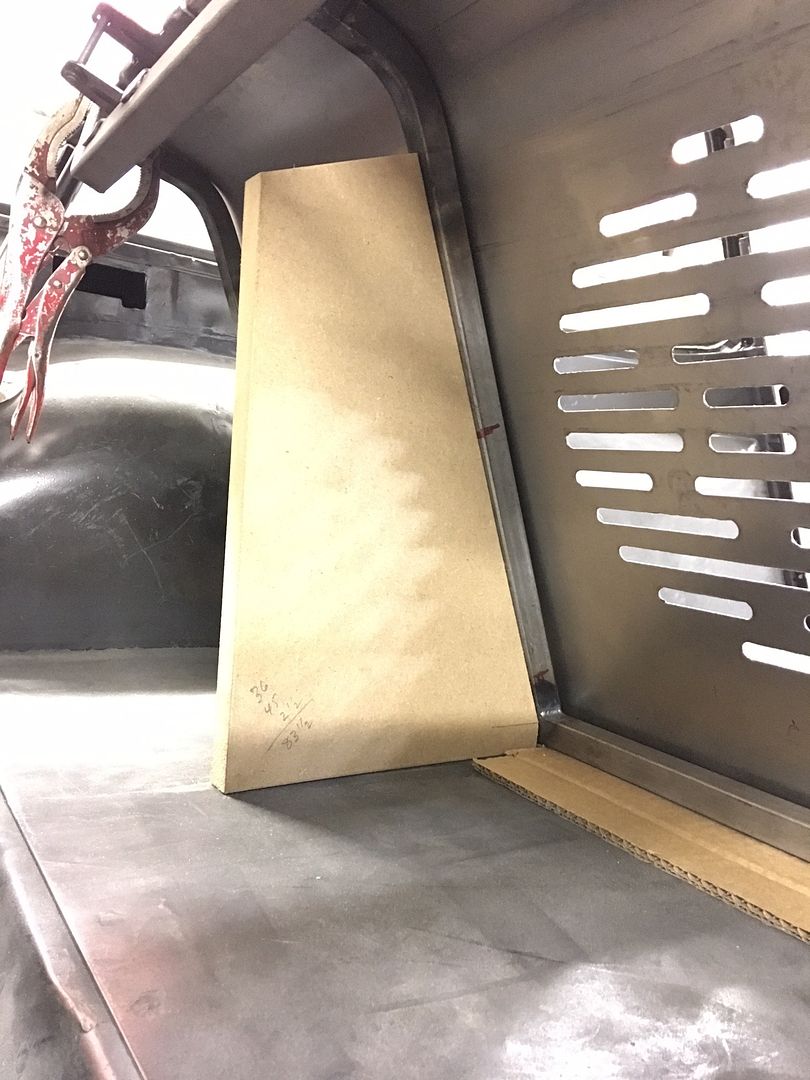 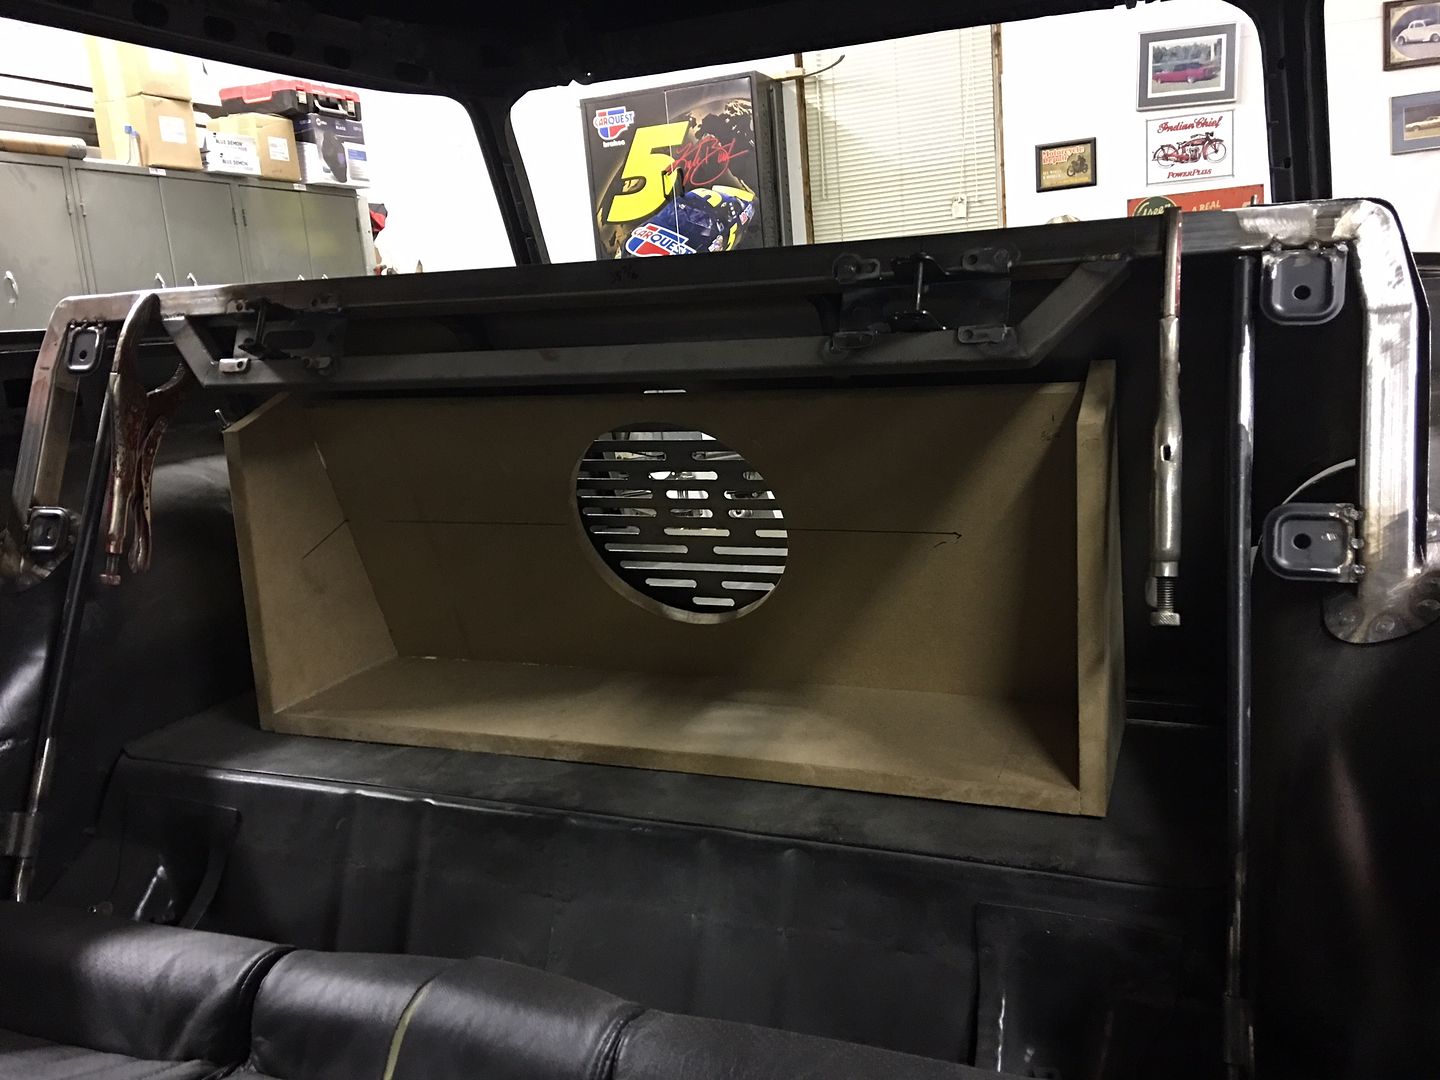 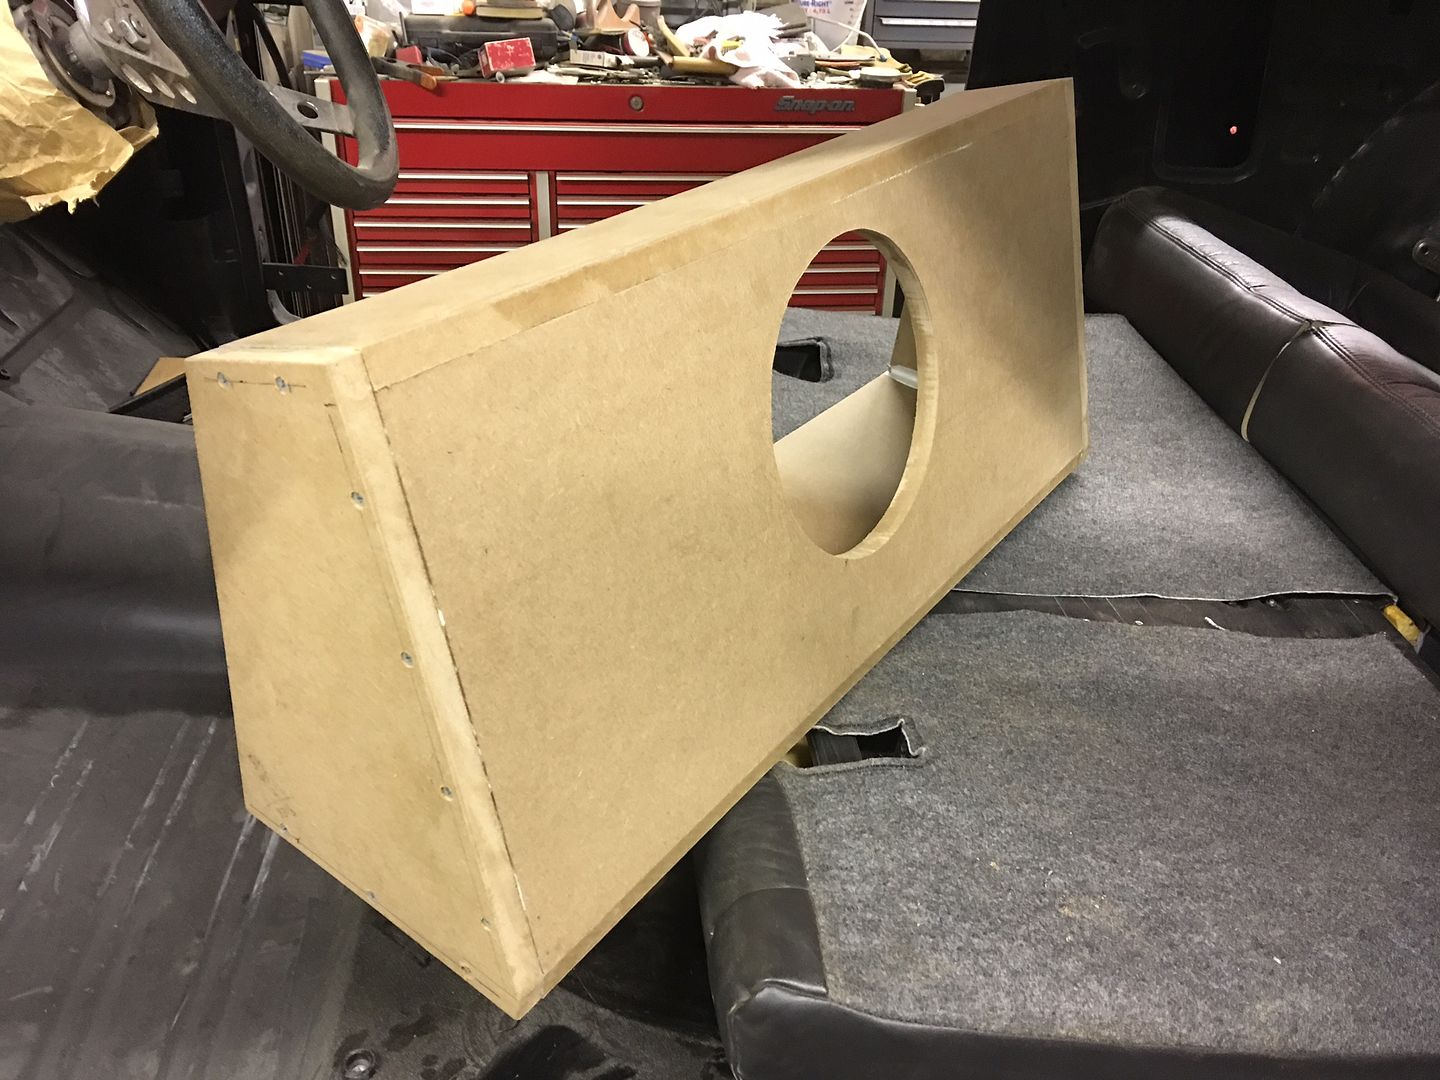 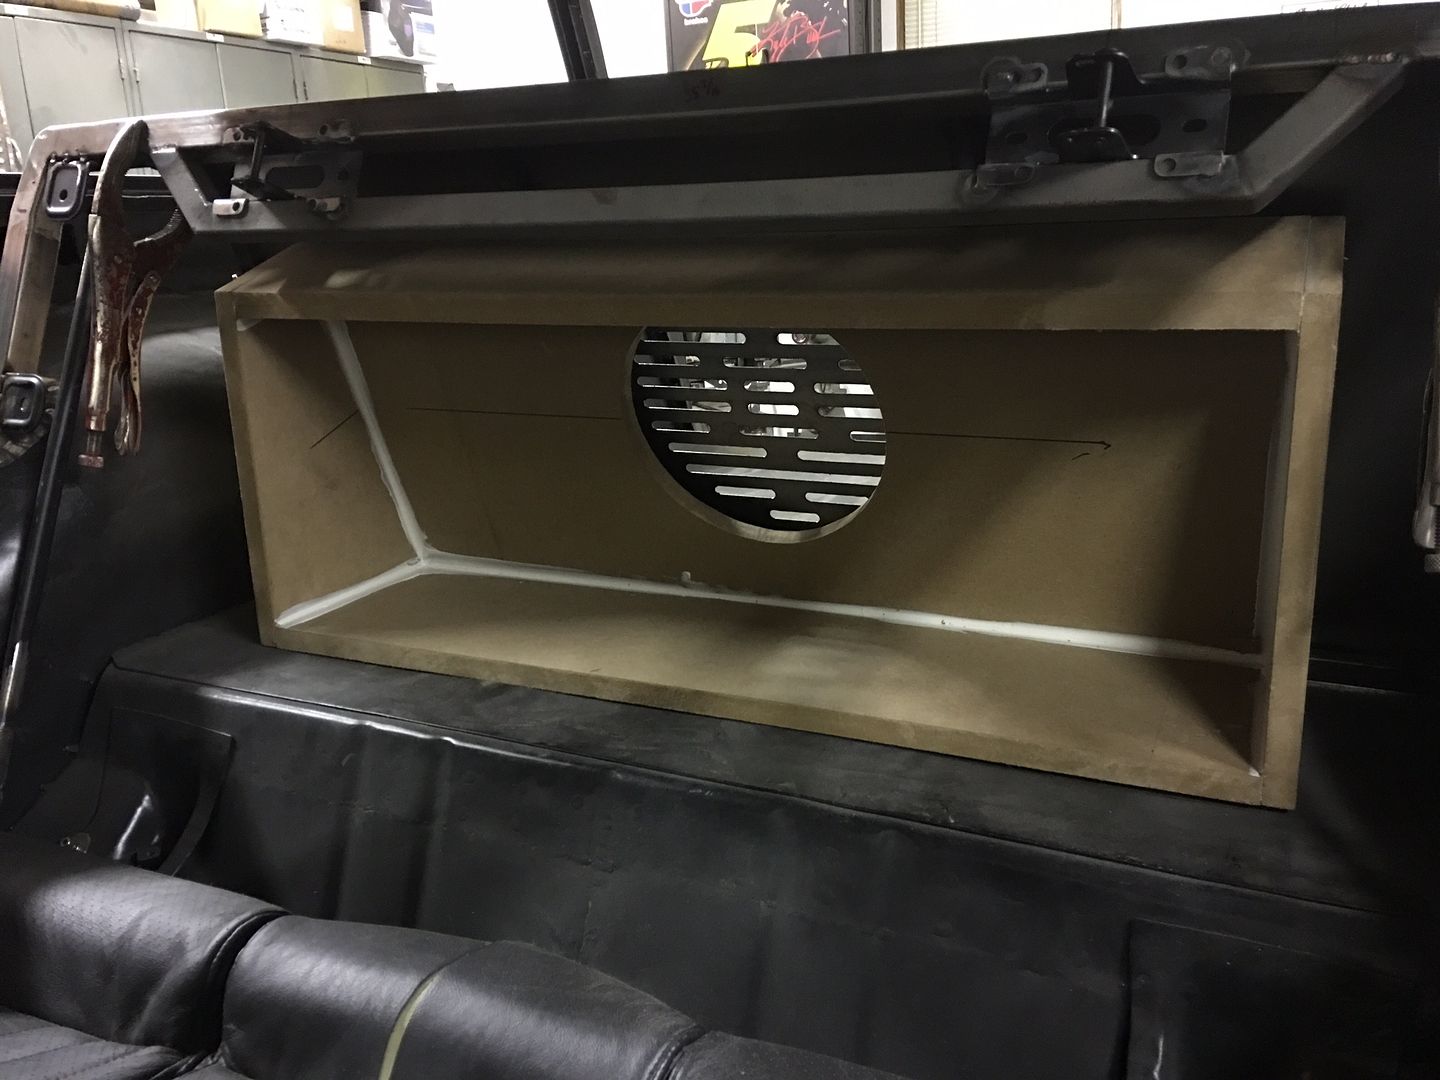  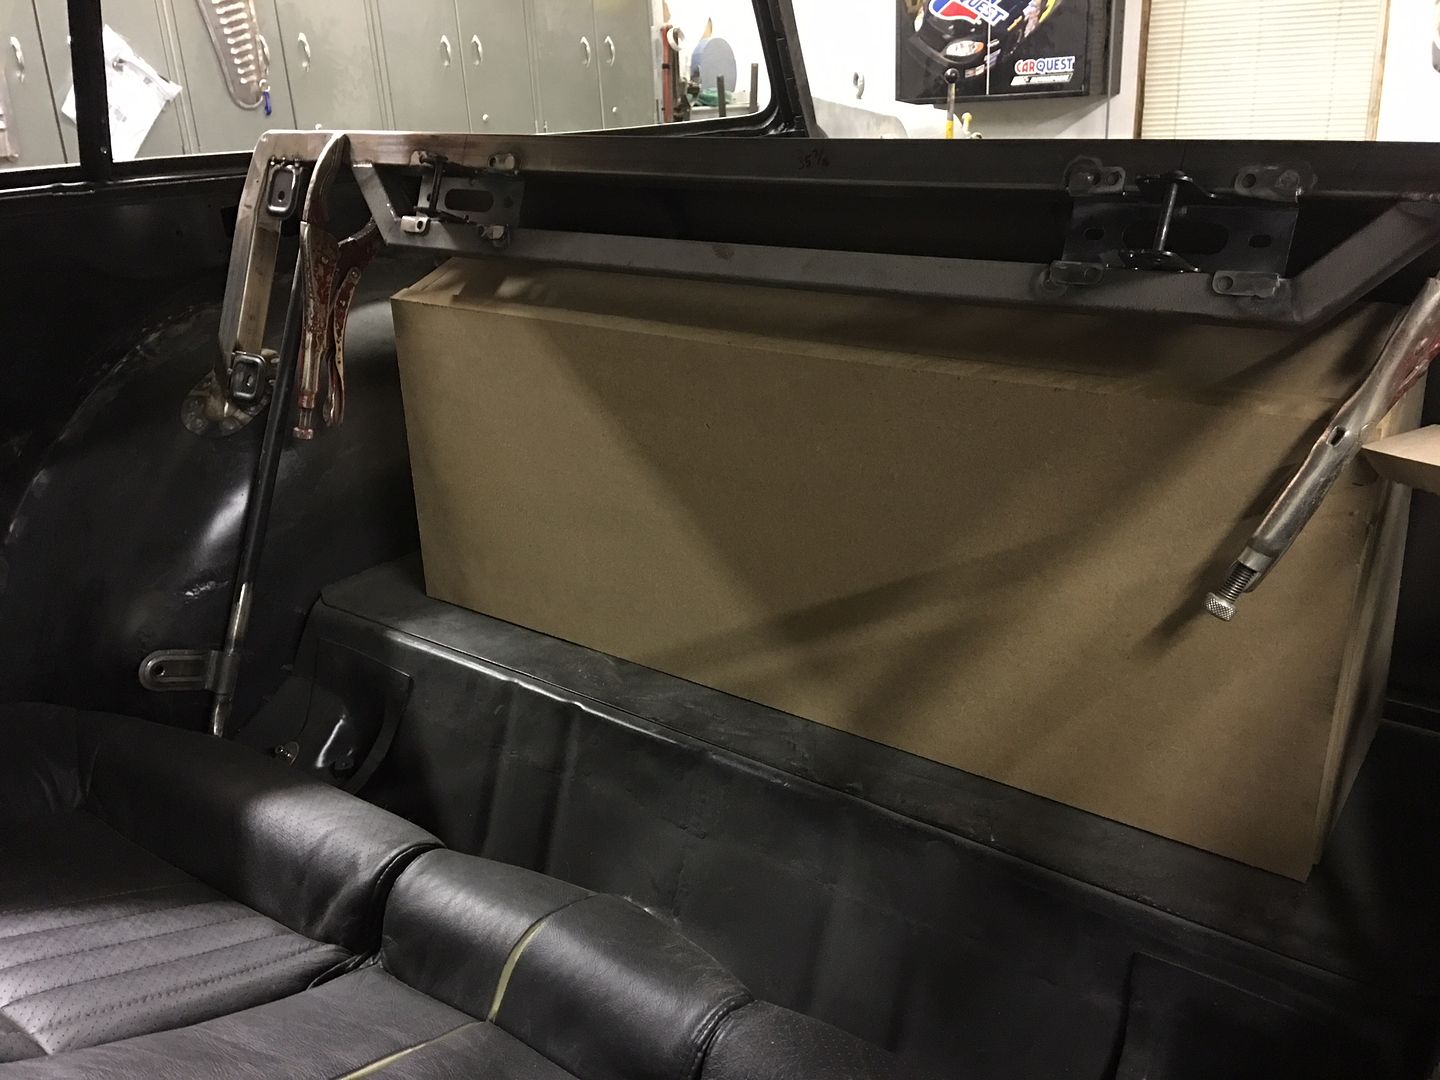 The amp will get mounted on the access cover.
__________________
Robert |
|
|
|
|
08-28-2017, 09:25 PM
|
#873 |
|
Registered User
Join Date: Jan 2013
Location: Leonardtown, MD
Posts: 1,633
|
Re: 55 Wagon Progress
Got the drivers corner for the rear seat back tig welded in place and flange folded. Now for the passenger side.
https://www.youtube.com/watch?v=Z-61G1Q1EWo On a side note, officially gave Photobucket the boot as my subscription expired last Friday. Robert isn't paying their extortion fees. Surprised the pictures are still showing...
__________________
Robert |
|
|
|
|
08-28-2017, 11:24 PM
|
#874 |
|
Senior Member
Join Date: Mar 2011
Location: West Plains, Missouri
Posts: 7,553
|
Re: 55 Wagon Progress
Robert, this photobucket crap stinks, would hate to lose all your great work shown here...Jim
__________________
my build thread: http://67-72chevytrucks.com/vboard/s...d.php?t=459839 Jimbo's long bed step build:http://67-72chevytrucks.com/vboard/s...t=464626<br /> |
|
|
|
|
09-01-2017, 08:01 PM
|
#875 | |
|
Registered User
Join Date: May 2015
Location: texas
Posts: 253
|
Re: 55 Wagon Progress
PB has made itself into the most hated site of this decade. wish there was a hack to correct it. i started using imgur. real easy to upload.
__________________
Black 93 CCLB 3500 6.5 diesel, GV OD, TCI Ez-TCU controlled 4L80E, back on road 10/25/16 after sitting 4 years. 96 ECLB 2500, 6.5 diesel, auto, gone. Quote:
|
|
|
|
|
 |
| Bookmarks |
|
|


 Linear Mode

