
|
 02-01-2014, 10:07 AM
|
#51 |
|
dazed and confused
Join Date: Jul 2008
Location: marion nc
Posts: 1,649
|
Re: My 4/6" ECE lowering install thread - 72 Shorty
Looking good
__________________
members met: redbaron69, billsbowtie,nc67 |

|

|
|
02-02-2014, 02:49 PM
|
#52 |
|
///Relaxed Atmosphere
Join Date: May 2010
Location: Houston,Tx
Posts: 1,266
|
Re: My 4/6" ECE lowering install thread - 72 Shorty
Graham when you put the blocks on take that 1/4"block on drivers side and switch it to passanger side that should make you even on both sides thats what i did on mine.
__________________
71-Cheyenne Super (E.C.E Static Drop 4.5/7". Intro Rally's 20X8.5 5" B.S 255/35/20 (F) 20X10 5.25 B.S 275/35/20 (R) 87-Silverado Static Drop 5/7" Raceline Explosion 5 22X8.5 (F) 22X10 (R) hector _________________________________ 1971 Chevrolet Cheyenne Super 1987 Chevrolet Silverado 2006 Ford Mustang GT 2012 Toyota 4-Runner 2014 Dodge Ram 1500 Sport Crew Cab |
|
|
|
|
02-02-2014, 03:02 PM
|
#53 |
|
Registered User
Join Date: Aug 2013
Location: Calgary, Alberta
Posts: 674
|
Re: My 4/6" ECE lowering install thread - 72 Shorty
Hector, brilliant. And thanks a ton for giving me those 1/2 blocks this morning. Your truck looks AMAZING. So nice.
|
|
|
|
|
02-02-2014, 03:08 PM
|
#54 | |
|
Senior Member
 Join Date: Aug 2008
Location: Cedar Park, Texas
Posts: 7,494
|
Re: My 4/6" ECE lowering install thread - 72 Shorty
Quote:
|
|
|
|
|
|
02-03-2014, 10:00 AM
|
#55 | |
|
///Relaxed Atmosphere
Join Date: May 2010
Location: Houston,Tx
Posts: 1,266
|
Re: My 4/6" ECE lowering install thread - 72 Shorty
Quote:
__________________
71-Cheyenne Super (E.C.E Static Drop 4.5/7". Intro Rally's 20X8.5 5" B.S 255/35/20 (F) 20X10 5.25 B.S 275/35/20 (R) 87-Silverado Static Drop 5/7" Raceline Explosion 5 22X8.5 (F) 22X10 (R) hector _________________________________ 1971 Chevrolet Cheyenne Super 1987 Chevrolet Silverado 2006 Ford Mustang GT 2012 Toyota 4-Runner 2014 Dodge Ram 1500 Sport Crew Cab |
|
|
|
|
|
02-10-2014, 05:41 PM
|
#56 |
|
Registered User
Join Date: Aug 2011
Location: Trumansburg ny
Posts: 230
|
Re: My 4/6" ECE lowering install thread - 72 Shorty
Any update? you must be done by now?
|
|
|
|
|
02-18-2014, 07:37 PM
|
#57 |
|
Registered User
Join Date: Jul 2012
Location: Jonestown, TX
Posts: 469
|
Re: My 4/6" ECE lowering install thread - 72 Shorty
Have you been able to finish the drop yet? We're getting anxious here!!

|
|
|
|
|
02-23-2014, 10:37 PM
|
#58 | ||
|
Registered User
Join Date: Aug 2013
Location: Calgary, Alberta
Posts: 674
|
Re: My 4/6" ECE lowering install thread - 72 Shorty
Quote:
Quote:
|
||
|
|
|
|
03-04-2014, 09:16 PM
|
#59 |
|
Registered User
Join Date: Aug 2013
Location: Calgary, Alberta
Posts: 674
|
Re: My 4/6" ECE lowering install thread - 72 Shorty
Question: I'm putting the front brakes back on but I'm having trouble slipping the caliper back on the rotor with the pads. It feels way too tight. Is the correct way to:
1) With the caliper off the rotor, place the inner and outer brake pad in the caliper. 2) keeping the pads in place against the walls of the caliper with my fingers, slip the caliper onto the rotor. If so, when I try this, there is no space for the caliper & pads to slip on to the rotor. In the photo, I got it started then lightly tapped the caliper with a hammer but this seems wrong and I don't want to ruin the pads. You can see in the photo the pads have a pronounced ridge running down their face. This fits in to a matching groove in the rotor. Already (removing or trying to place) these ridges on the pads are less then perfect. Not sure how critical this is. Rotors are not expensive but if it's no biggie, great. Input? Also, I'm installing a new poly transmission mount. What is the factor torque spec when I'm tightening it up? 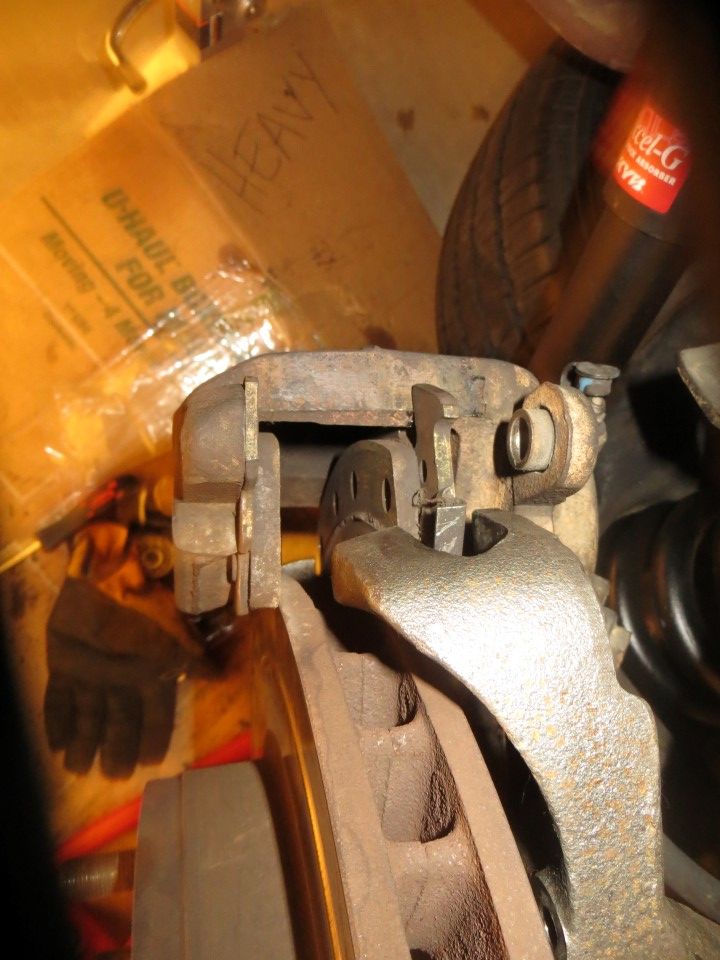
|
|
|
|
|
03-04-2014, 09:22 PM
|
#60 |
|
Registered User
Join Date: Jun 2010
Location: Upland Ca
Posts: 4,139
|
Re: My 4/6" ECE lowering install thread - 72 Shorty
Doesn't look like the piston is all the way in, the inside pad backing should be up against the caliper like the outside one. Looks like the inside pad is pretty mangled up.
__________________
1972 C10 SWB, Air, PS, PB, 350/350THM. Second owner. 1965 Corvette roadster, 44K miles, 327/365 SHP, 4 speed, side exhaust, knockoffs, teak, second owner (bought in 1970), Have ALL numbers matching components. My frame off restoration thread: http://67-72chevytrucks.com/vboard/s...d.php?t=556703 |
|
|
|
|
03-04-2014, 09:30 PM
|
#61 |
|
Registered User
Join Date: Aug 2013
Location: Calgary, Alberta
Posts: 674
|
Re: My 4/6" ECE lowering install thread - 72 Shorty
How do I move the piston in to add clearance? Yea, I'll go get some new pads.
Also, I bought new bearings planning to install them but discovered neither the inner bearing or the outer bearing seat fall out of the rotor easily. I suspect I'd need to bring the rotors somewhere that has a press? |
|
|
|
|
03-04-2014, 11:49 PM
|
#62 |
|
Senior Member
Join Date: Aug 2008
Location: Cedar Park, Texas
Posts: 7,494
|
Re: My 4/6" ECE lowering install thread - 72 Shorty
A purpose built spreader is a available at most parts stores but i just use a big C clamp. Put the pad in up against the piston before compressing.
|
|
|
|
|
03-04-2014, 11:52 PM
|
#63 |
|
Senior Member
Join Date: Aug 2008
Location: Cedar Park, Texas
Posts: 7,494
|
Re: My 4/6" ECE lowering install thread - 72 Shorty
I use a brass drift punch to remove the races. Are you sure the bearings need replacing? You can clean them in solvent and check for pitting wear discoloration or anything out of the ordinary. If they pass just repack them. For years i packed them by hand but recently bought a cone shaped bearing packer that speeds the process dramatically.
|
|
|
|
|
03-04-2014, 11:54 PM
|
#64 |
|
Senior Member
Join Date: Aug 2008
Location: Cedar Park, Texas
Posts: 7,494
|
Re: My 4/6" ECE lowering install thread - 72 Shorty
|
|
|
|
|
03-05-2014, 11:45 AM
|
#65 | ||
|
Registered User
Join Date: Aug 2013
Location: Calgary, Alberta
Posts: 674
|
Re: My 4/6" ECE lowering install thread - 72 Shorty
Quote:
Quote:
|
||
|
|
|
|
03-05-2014, 12:19 PM
|
#66 |
|
Senior Member
Join Date: Apr 2008
Location: Franklinton NC
Posts: 1,309
|
Re: My 4/6" ECE lowering install thread - 72 Shorty
The piston will stay in till you pump the brake pedal. Make sure you pump up the brakes before you try to drive it or you will have no brakes.
|
|
|
|
|
03-05-2014, 01:05 PM
|
#67 |
|
Hittin E-Z Street on Mud Tires
Join Date: Nov 2004
Location: Greenville, SC
Posts: 23,090
|
Re: My 4/6" ECE lowering install thread - 72 Shorty
First thing I would do is have your rotors resurfaced. Based on the looks of that back pad, there's probably a big groove that will ruin the new pads as well.
If the rotors can not be resurface you will need to buy new ones. To compress the caliper, open the bleeder valve and push in. You should be able to do it by had using the old brake shoe once the valve is open.
__________________
Jesse James 1967 C10 SWB Stepside: 350/700R4/3.73 1965 Ford Mustang: 289/T5-5spd/3.25 Trac-Loc 1968 Pontiac Firebird: Project Fire Chicken! 2015 Silverado Double Cab 5.3L Z71 2001 Jeep Wrangler Sport 4.0L 5spd 2020 Chevrolet Equinox Premium 2.0L Turbo 2011 Mustang V6 ~ Wife's ride  American Born, Country by the Grace of God  1967 CST Shop Truck Rebuild! My 1967 C-10 Build Thread My Vintage Air A/C Install Project "On a Dime" Trying my hand at Home Renovation! 1965 Mustang Modifications! |
|
|
|
|
03-05-2014, 01:18 PM
|
#68 |
|
Watch out for your cornhole !
Join Date: Jun 2003
Location: Azle, Texas
Posts: 14,162
|
Re: My 4/6" ECE lowering install thread - 72 Shorty
That stripe in the brake pad is from the factory groove in 71-72 rotors. They are not smooth like 73-87 rotors (and aftermarket replacements) are. That's one way you can spot a 71-2 with original rotors.
__________________
I'm on the Instagram- @Gearhead_Kevin |
|
|
|
|
03-05-2014, 01:23 PM
|
#69 |
|
Project Junkie! Fishing Poor!!
 Join Date: Dec 1999
Location: Olympia,Wa. 98512
Posts: 10,770
|
Re: My 4/6" ECE lowering install thread - 72 Shorty
It kind of looks like to me that the raised line in his pad is created by the stock groove in his rotor. If his rotor were gouged bad enough to make a mark like that, it would be too bad to turn. The pads look good otherwise. I would put it back together as is, just depress the caliper so it will go back onto the rotor. I wouldn't even change the pads. They have lots of life left in them. WES
__________________
On-line catolog Classic Heartbeat Pickup Parts WEHEPP@comcast.net Call us Toll Free (888) 338-2502 Like Us on Facebook No appointment necessary. 72 BB Chevy Custom Deluxe / Custom Camper 67 I-6 (Soon to be 5.7 LS1) Panel 68 BB Chevy Short Bed 72 6.0 LQ9 Short Bed Chevy 4X4 Olympia's fastest growing truck parts supplier. Olympia's home for Wayward Chevys |
|
|
|
|
03-05-2014, 02:20 PM
|
#70 | |
|
Senior Member
Join Date: Aug 2008
Location: Cedar Park, Texas
Posts: 7,494
|
Re: My 4/6" ECE lowering install thread - 72 Shorty
Quote:
Fyi a lot of this is covered elsewhere on the board and internet in general under "how to change front disc brake pads". |
|
|
|
|
|
03-05-2014, 02:22 PM
|
#71 |
|
Hittin E-Z Street on Mud Tires
Join Date: Nov 2004
Location: Greenville, SC
Posts: 23,090
|
Re: My 4/6" ECE lowering install thread - 72 Shorty
Never knew that! That means the suspension I took off a 71 for my 67 had had the rotors replaced at least once then.
__________________
Jesse James 1967 C10 SWB Stepside: 350/700R4/3.73 1965 Ford Mustang: 289/T5-5spd/3.25 Trac-Loc 1968 Pontiac Firebird: Project Fire Chicken! 2015 Silverado Double Cab 5.3L Z71 2001 Jeep Wrangler Sport 4.0L 5spd 2020 Chevrolet Equinox Premium 2.0L Turbo 2011 Mustang V6 ~ Wife's ride American Born, Country by the Grace of God 1967 CST Shop Truck Rebuild! My 1967 C-10 Build Thread My Vintage Air A/C Install Project "On a Dime" Trying my hand at Home Renovation! 1965 Mustang Modifications! |
|
|
|
|
03-05-2014, 02:48 PM
|
#72 | |||
|
Registered User
Join Date: Aug 2013
Location: Calgary, Alberta
Posts: 674
|
Re: My 4/6" ECE lowering install thread - 72 Shorty
Quote:
Quote:
Quote:
|
|||
|
|
|
|
03-05-2014, 02:55 PM
|
#73 |
|
Registered User
Join Date: Jun 2010
Location: Upland Ca
Posts: 4,139
|
Re: My 4/6" ECE lowering install thread - 72 Shorty
Don't open the bleeder, just compress slowly, just enough to slip the pads over the rotor. The piston will stay in until you depress the brake pedal.
__________________
1972 C10 SWB, Air, PS, PB, 350/350THM. Second owner. 1965 Corvette roadster, 44K miles, 327/365 SHP, 4 speed, side exhaust, knockoffs, teak, second owner (bought in 1970), Have ALL numbers matching components. My frame off restoration thread: http://67-72chevytrucks.com/vboard/s...d.php?t=556703 |
|
|
|
|
03-05-2014, 06:16 PM
|
#74 |
|
Watch out for your cornhole !
Join Date: Jun 2003
Location: Azle, Texas
Posts: 14,162
|
Re: My 4/6" ECE lowering install thread - 72 Shorty
Open the bleeder or don't. It doesn't make much difference in the big picture. There are no special tools required. Most guys use large Channellocks or a C clamp.
Personally, I open the bleeder. Over time, the dirty muck in the system migrates to the lowest point, which is the calipers. I like to open the bleeder so it flushes the dirty fluid out and new fluid replaces it. There are also good arguments to definitely open the bleeders on later model vehicles. If you don't, the contaminated fluid can get pushed back up into the uber expensive ABS controller. Not good...
__________________
I'm on the Instagram- @Gearhead_Kevin |
|
|
|
|
03-06-2014, 12:04 AM
|
#75 |
|
Registered User
Join Date: Aug 2013
Location: Calgary, Alberta
Posts: 674
|
Re: My 4/6" ECE lowering install thread - 72 Shorty
Good input. I will likely go back in and do that now that I'm comfortable with taking apart the front suspension.
Aaaaaand, the front is done! So much easier then the rear. Got a $5 caliper spreader on the way home. Didn't need to bleed the brakes. I'll write up the front suspension process details later. All that's left is the install some 1/2 drop blocks on the rear and center the rear with the adjustable rear panhard bar. I'm super happy with the front height. Slight tire tuck. It'll likely get a bit lower after settling. I don't mind the slight rake, but the 1/2" rear blocks will make it perfect for me. 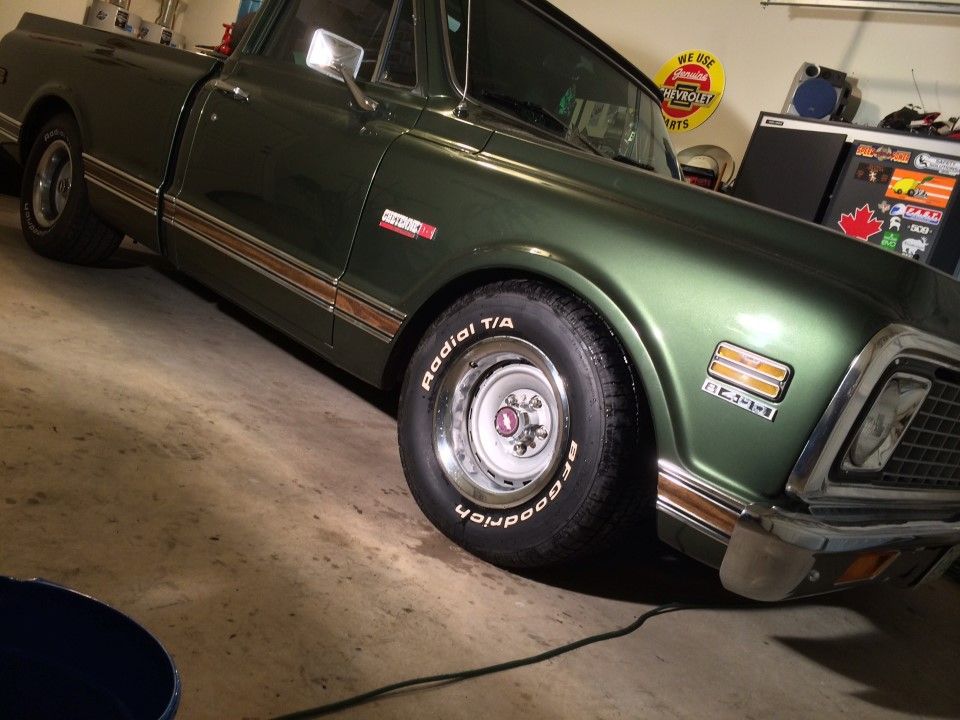 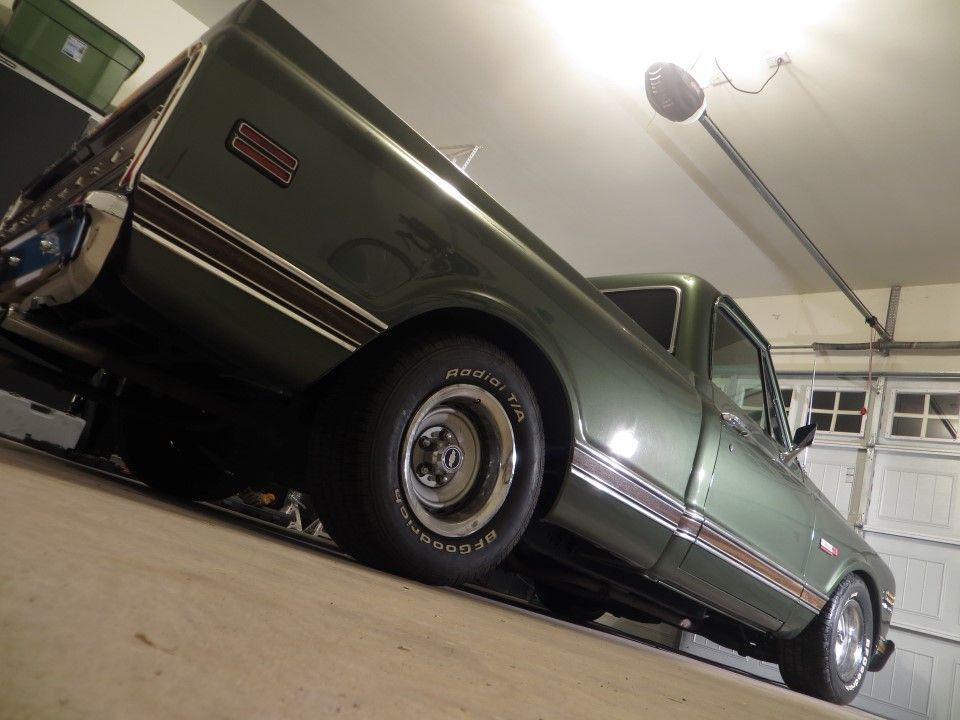 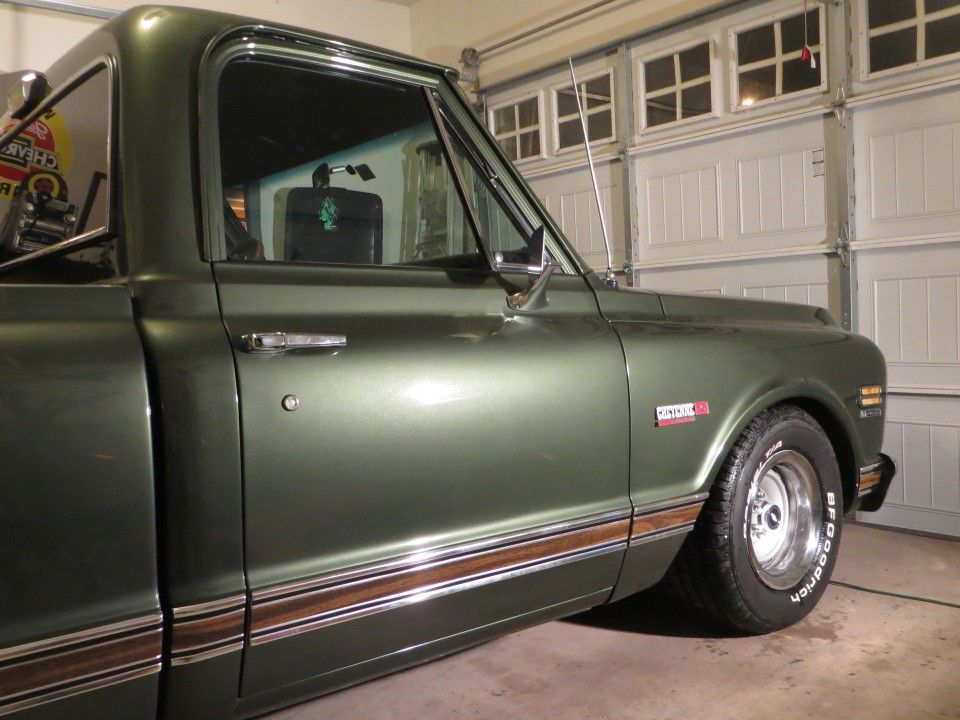 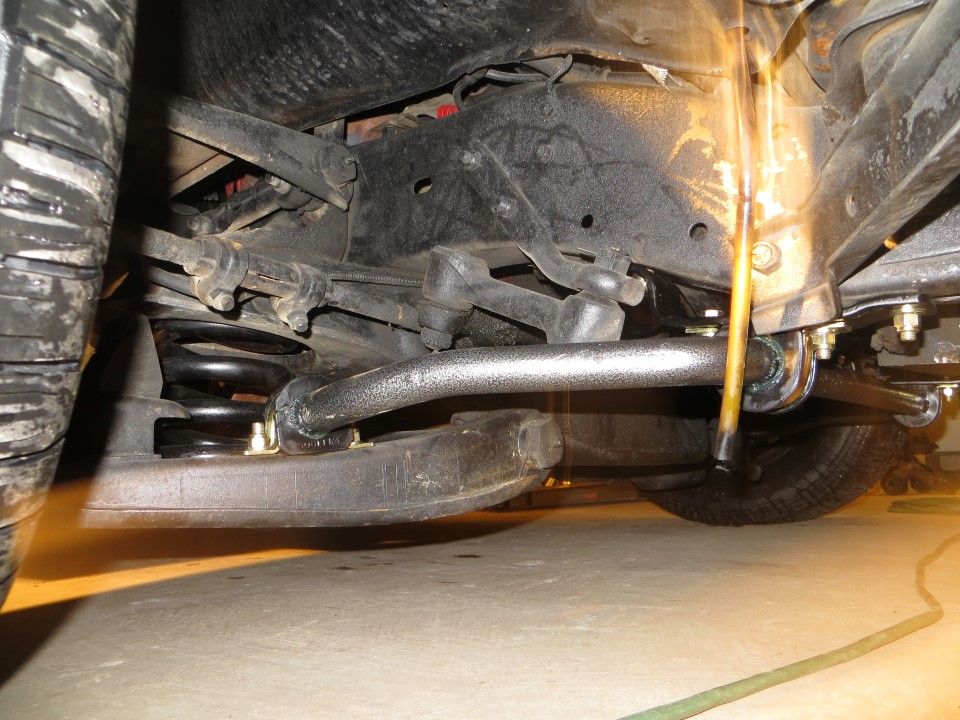
Last edited by Ekliptix; 03-06-2014 at 12:14 AM. |
|
|
|
 |
| Bookmarks |
|
|


 Linear Mode

