
|
 01-21-2015, 12:23 PM
|
#326 |
|
Registered User
Join Date: Jan 2013
Location: Leonardtown, MD
Posts: 1,633
|
Re: 55 Wagon Progress
Thanks for the comments and questions guys!
Jim, after I got done with the tailgate, I started putting all the progress updates in one thread, "55 210 Wagon Progress", same as you see here. Thanks for following along! Rick, I got that last year while attending GatorMeet in Adamstown MD, a three-day workshop on metalshaping here on the east coast.
__________________
Robert |

|

|
|
01-21-2015, 11:38 PM
|
#327 |
|
Registered User
Join Date: Jan 2013
Location: Leonardtown, MD
Posts: 1,633
|
Re: 55 Wagon Progress
Tonight we finished up radius-ing the liftgate opening...
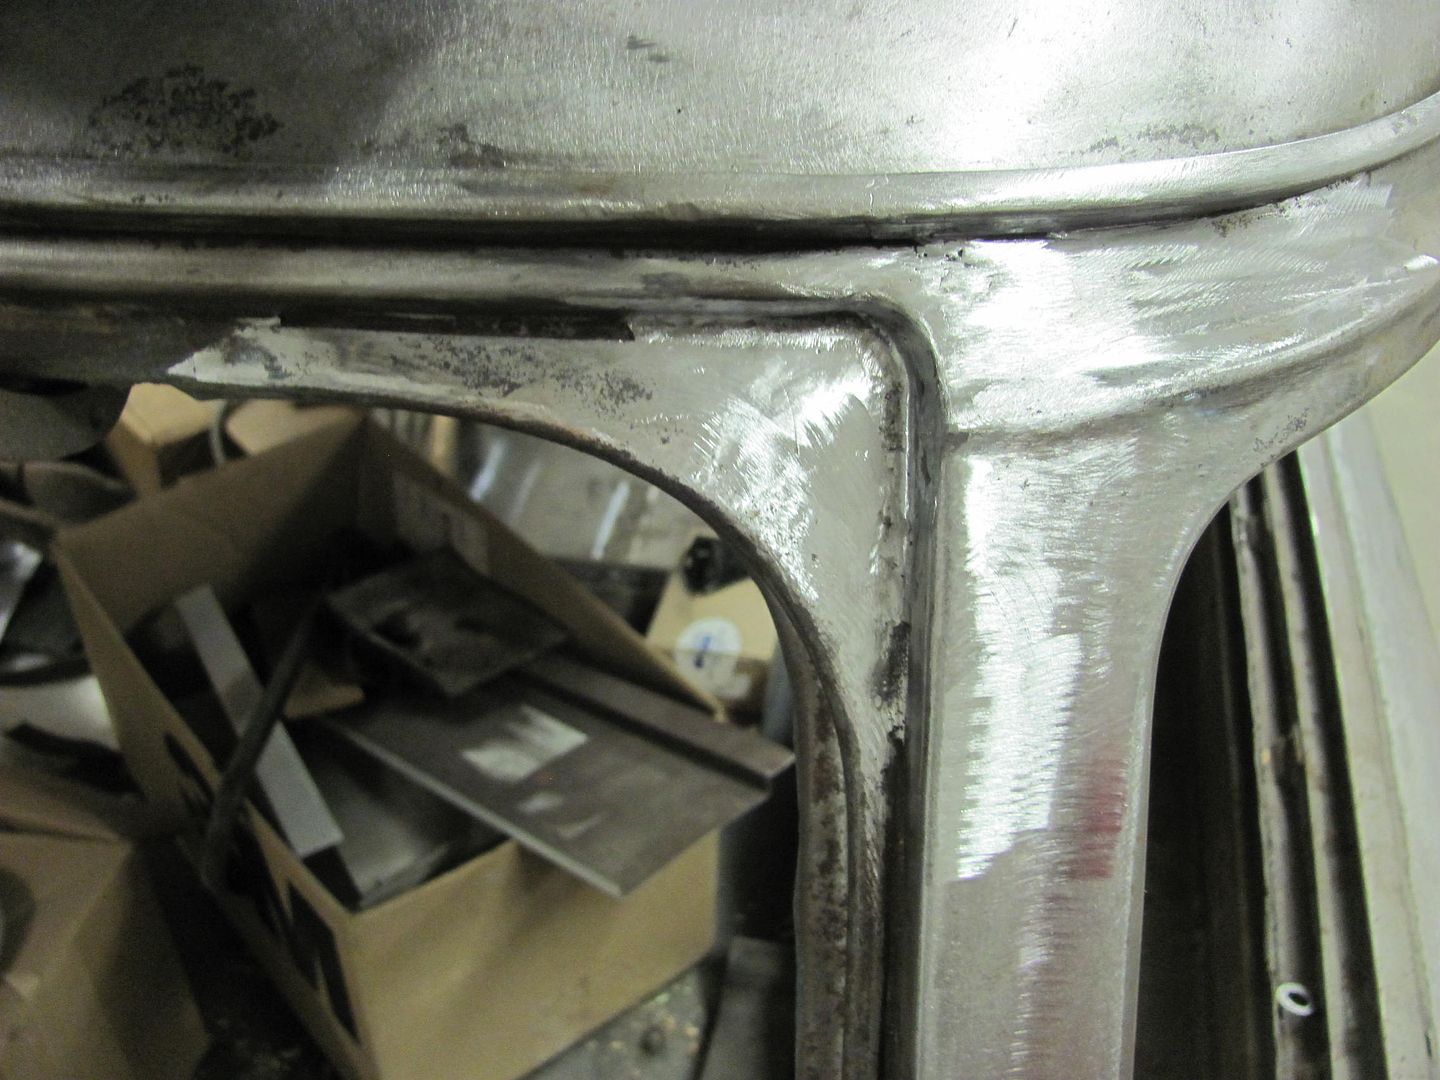 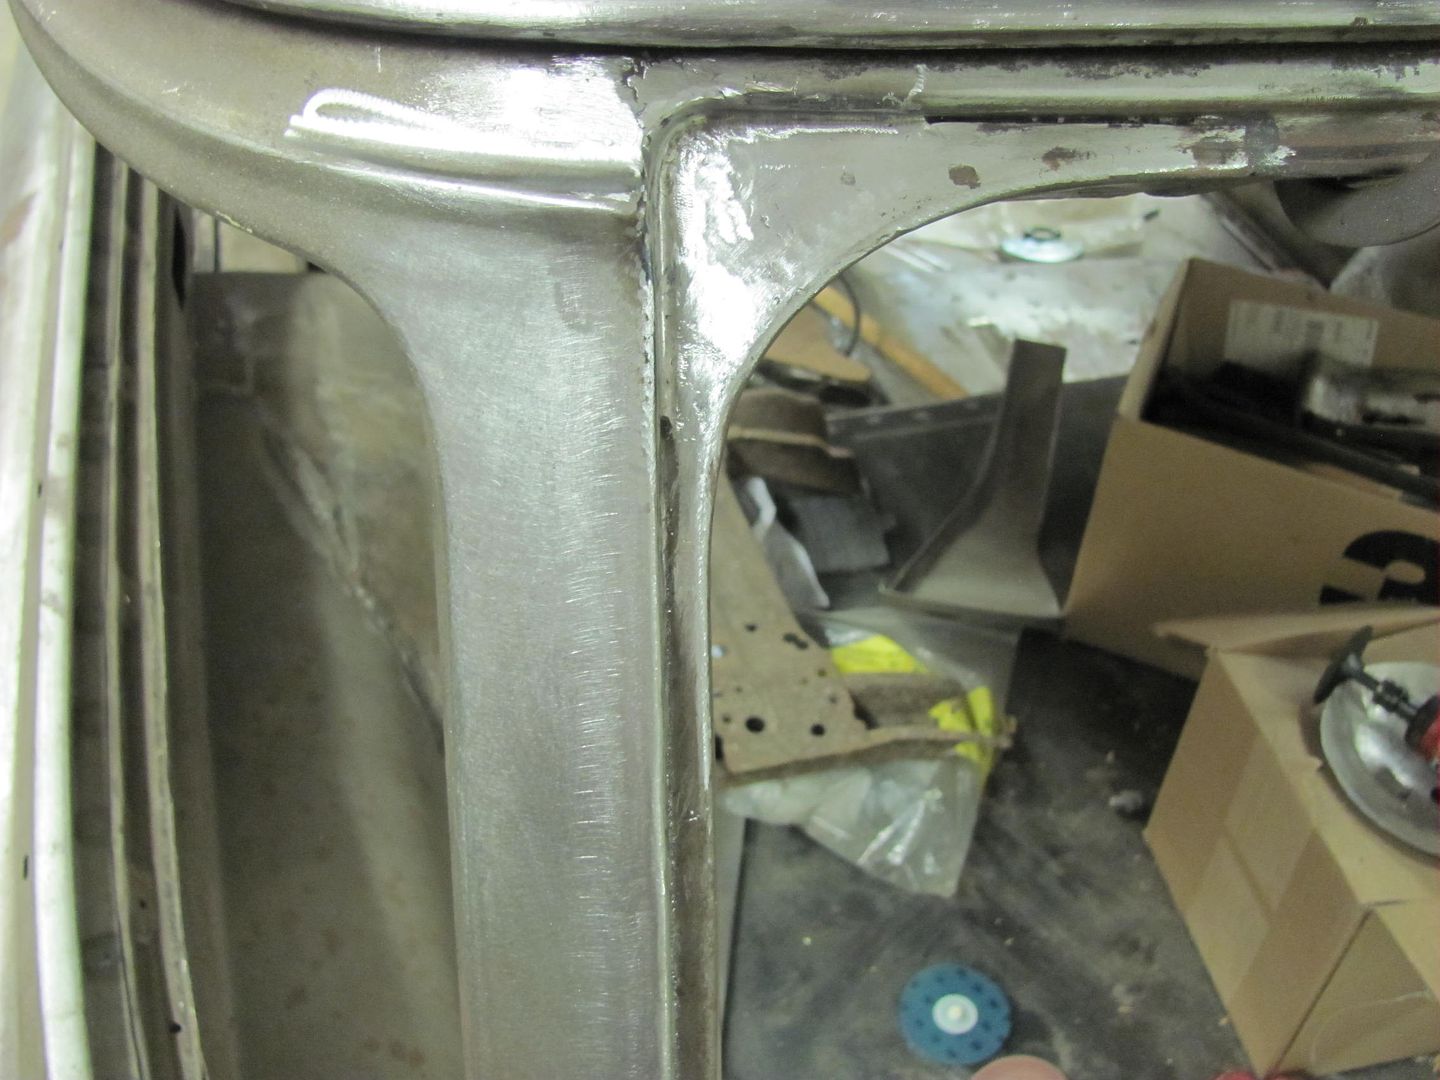 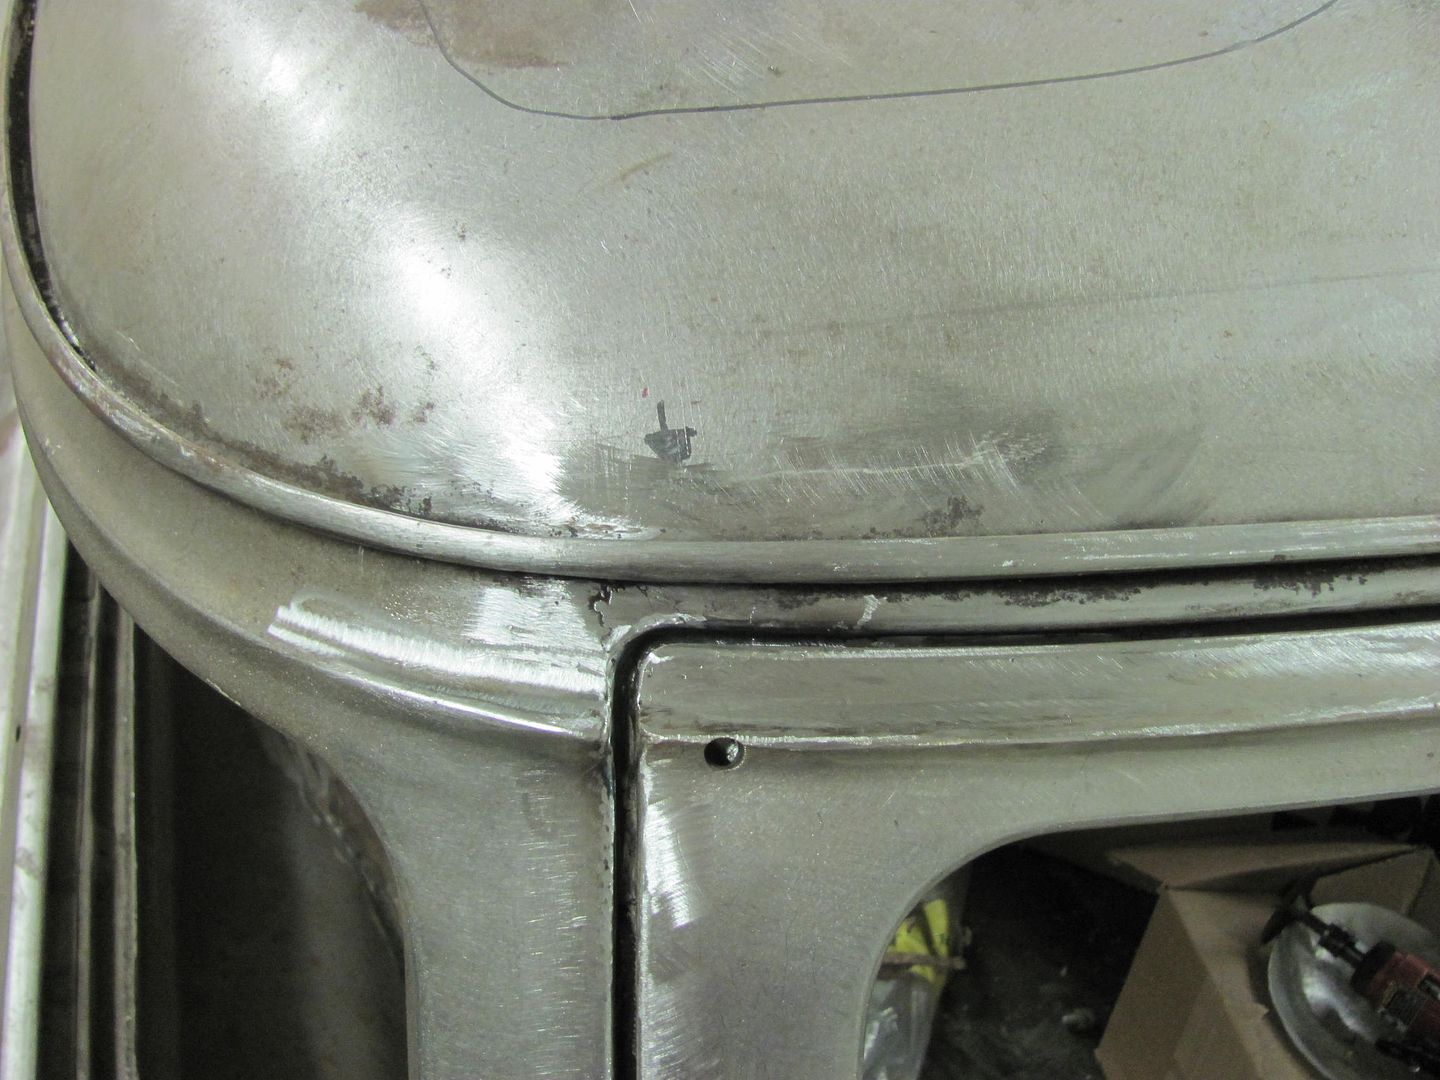 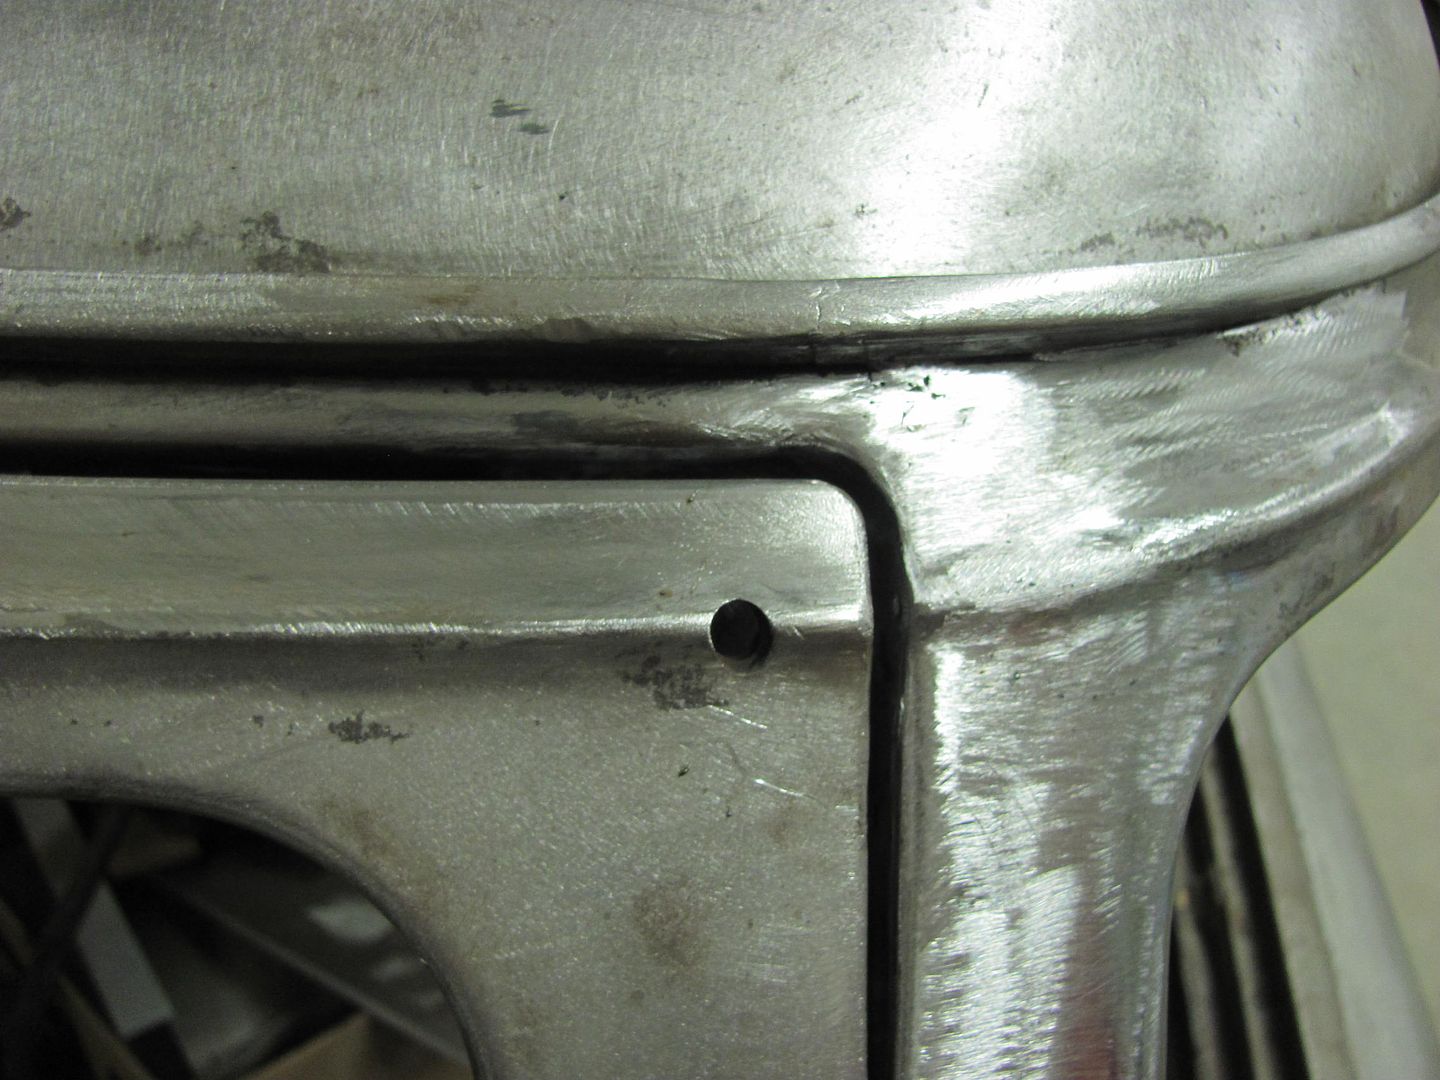 Next, we moved on to de-leading and shaving the last pinch weld seam at the back of the car. We've eliminated all of these to get rid of all the dirt/rust traps that we can... 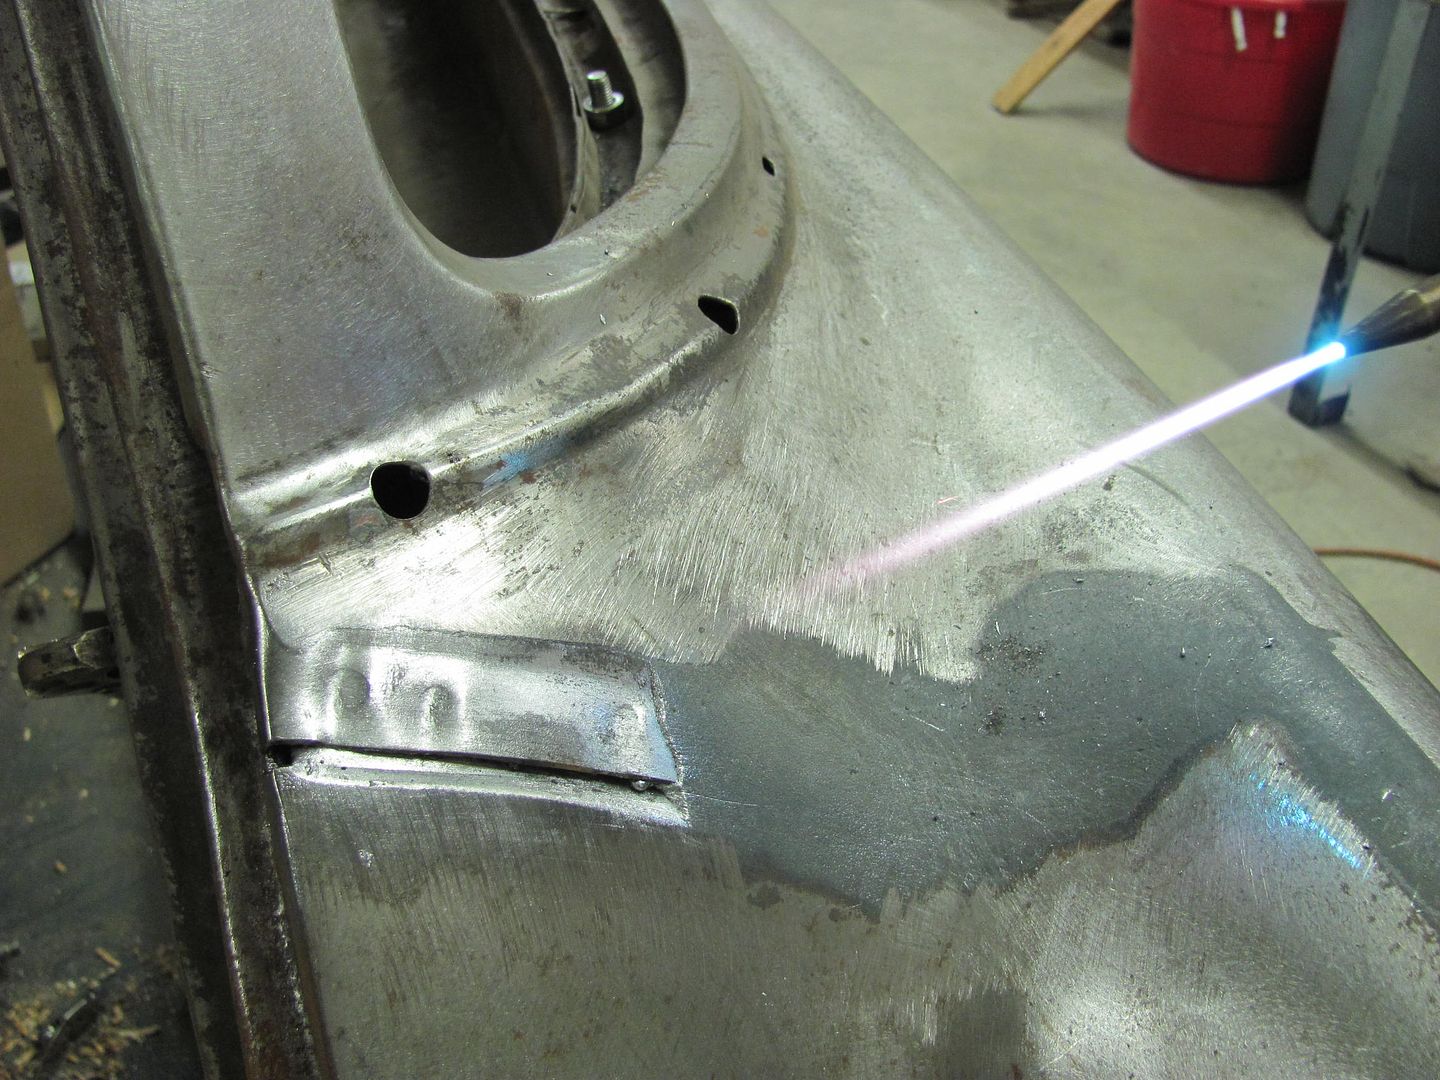 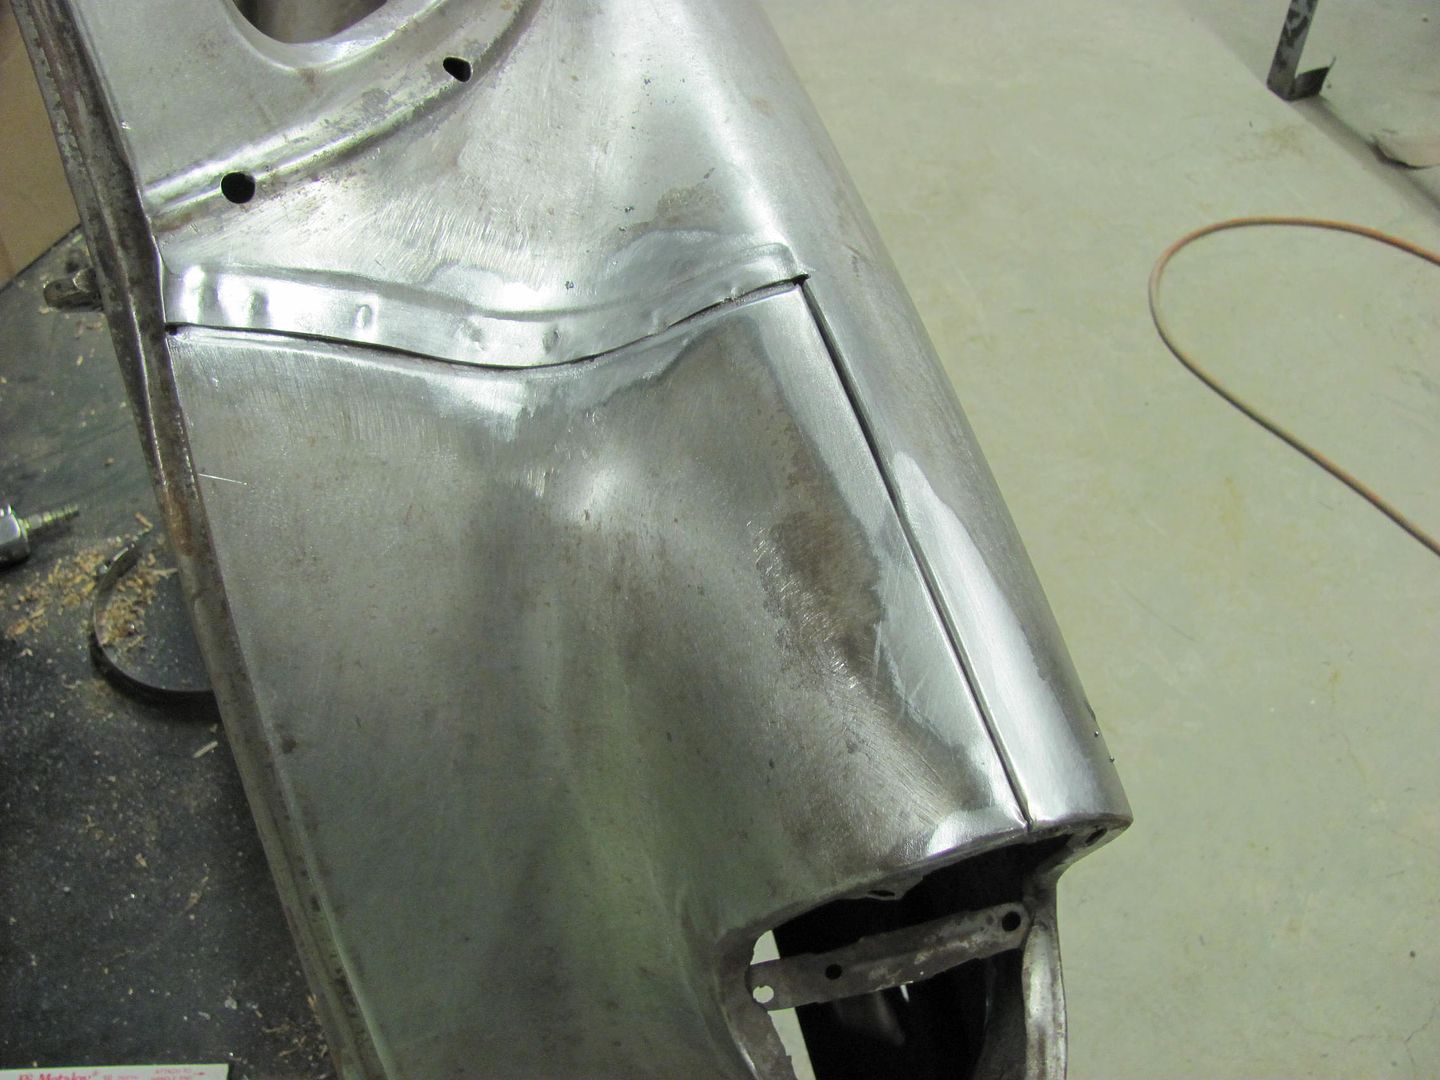 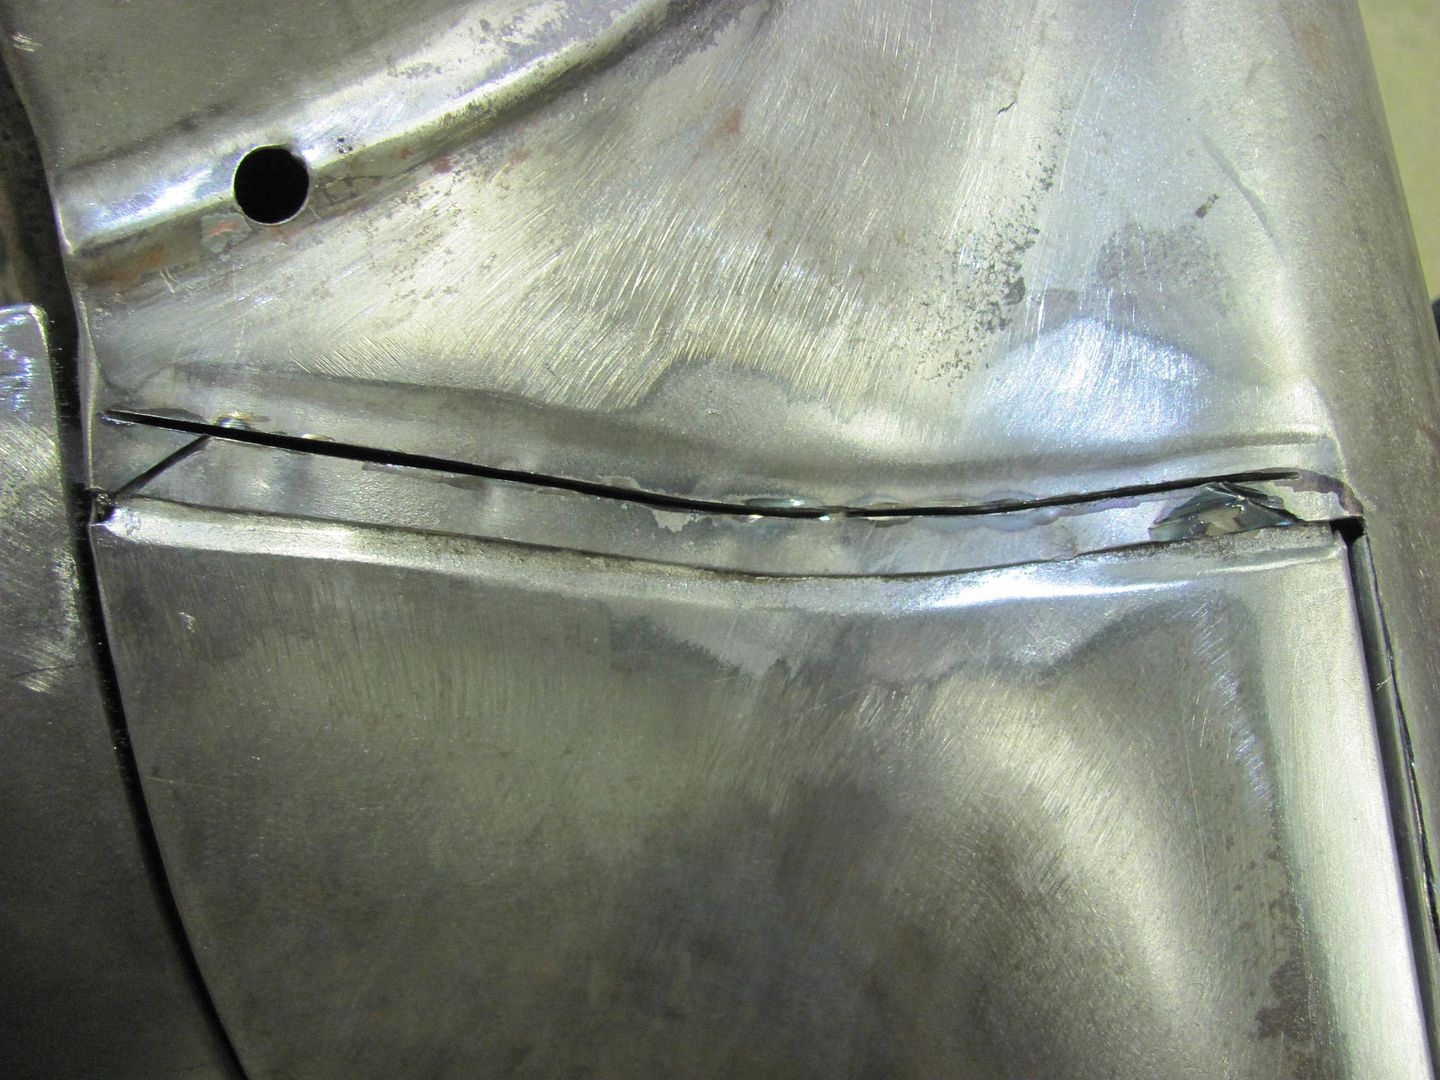 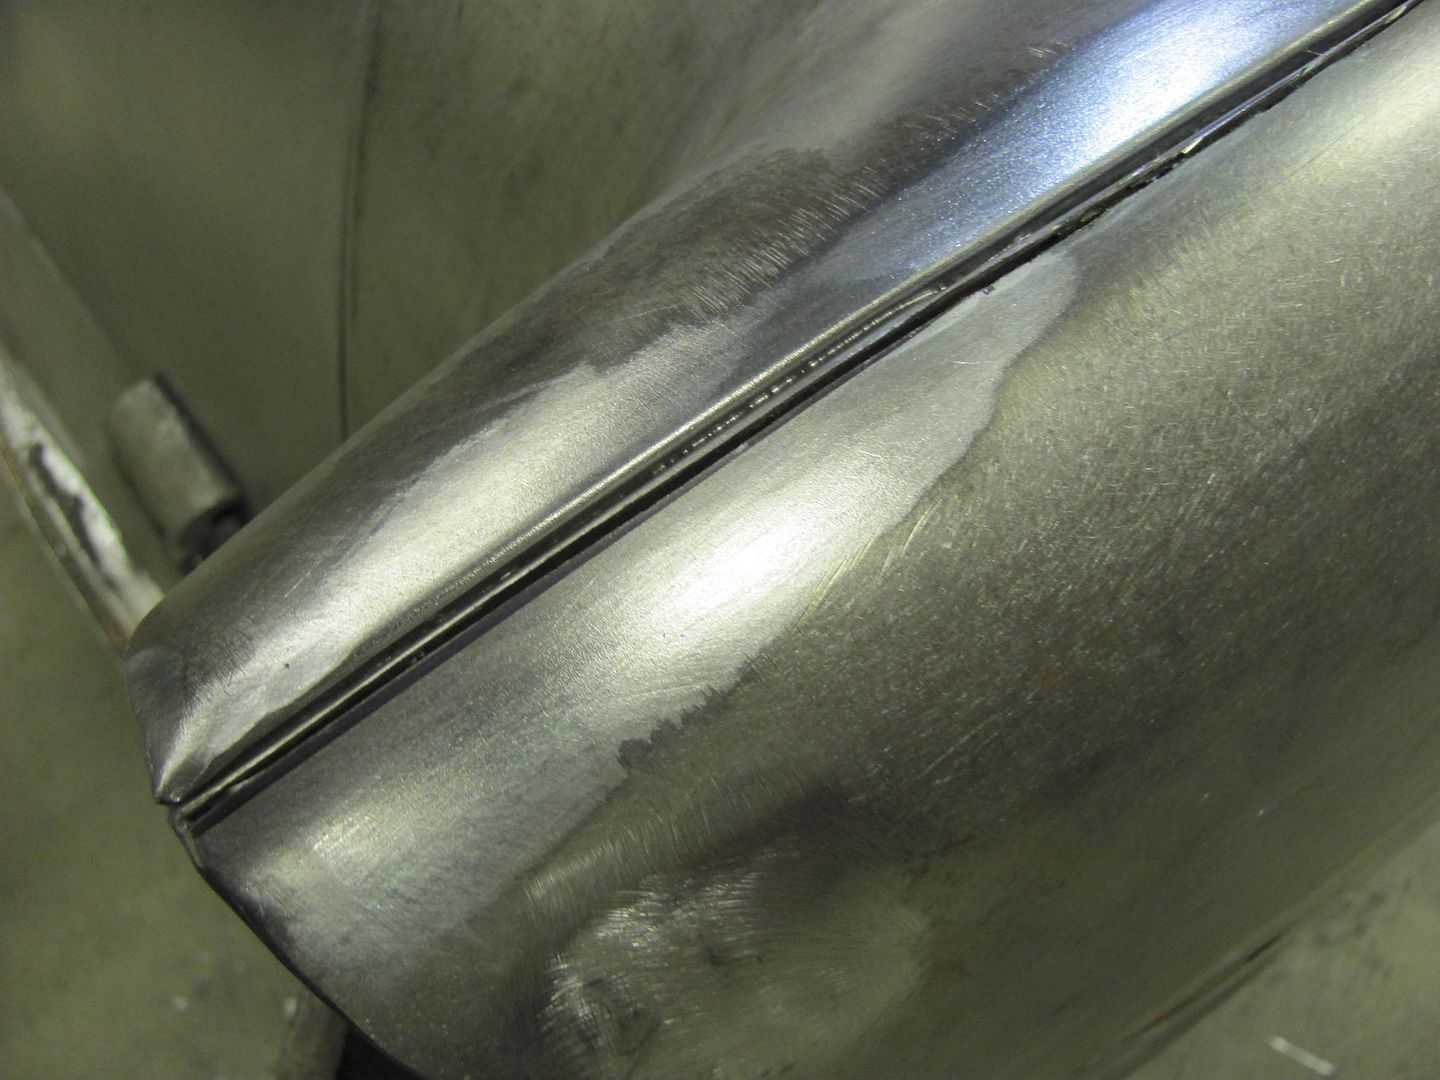 Removing the excess....  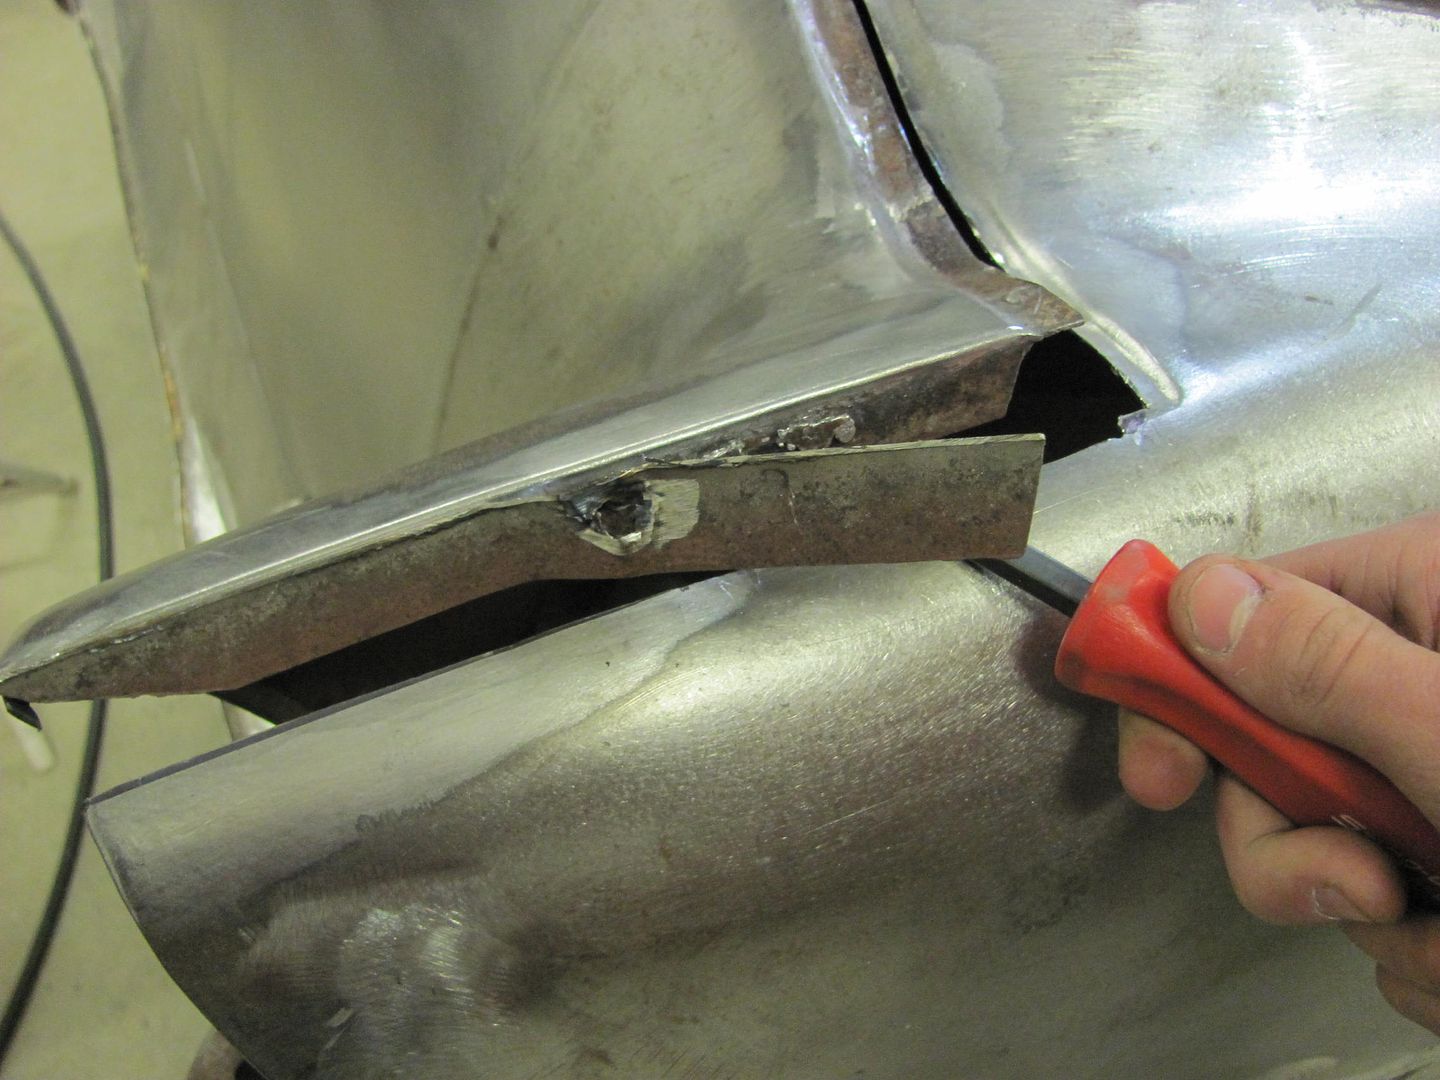 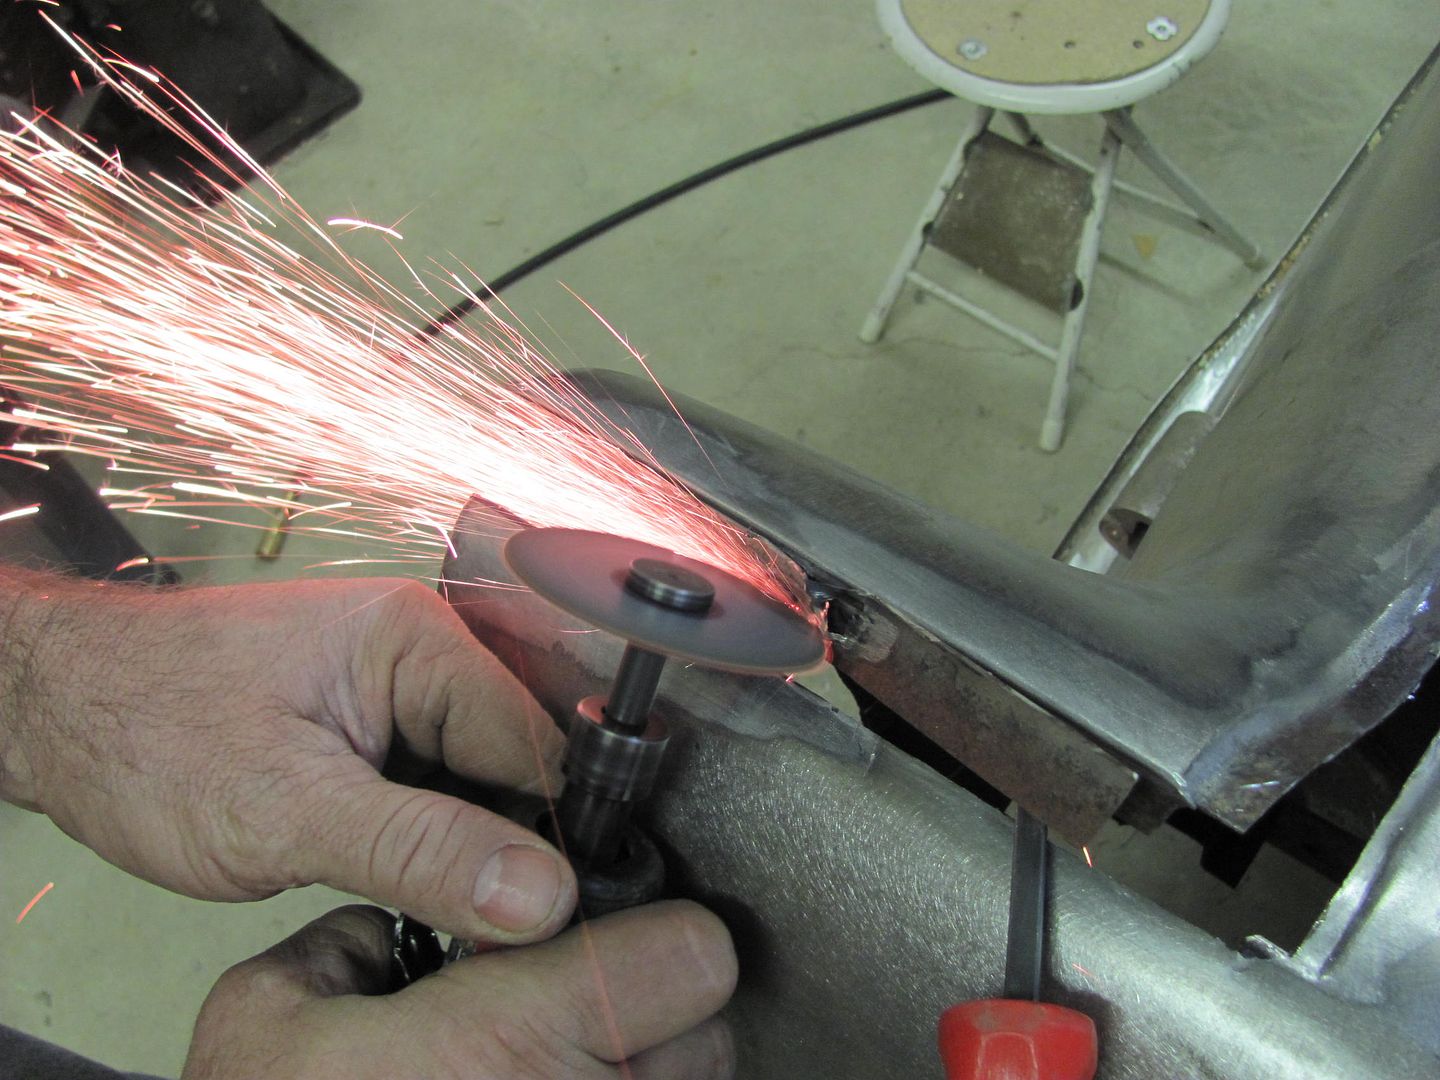 Getting some gap filler..... 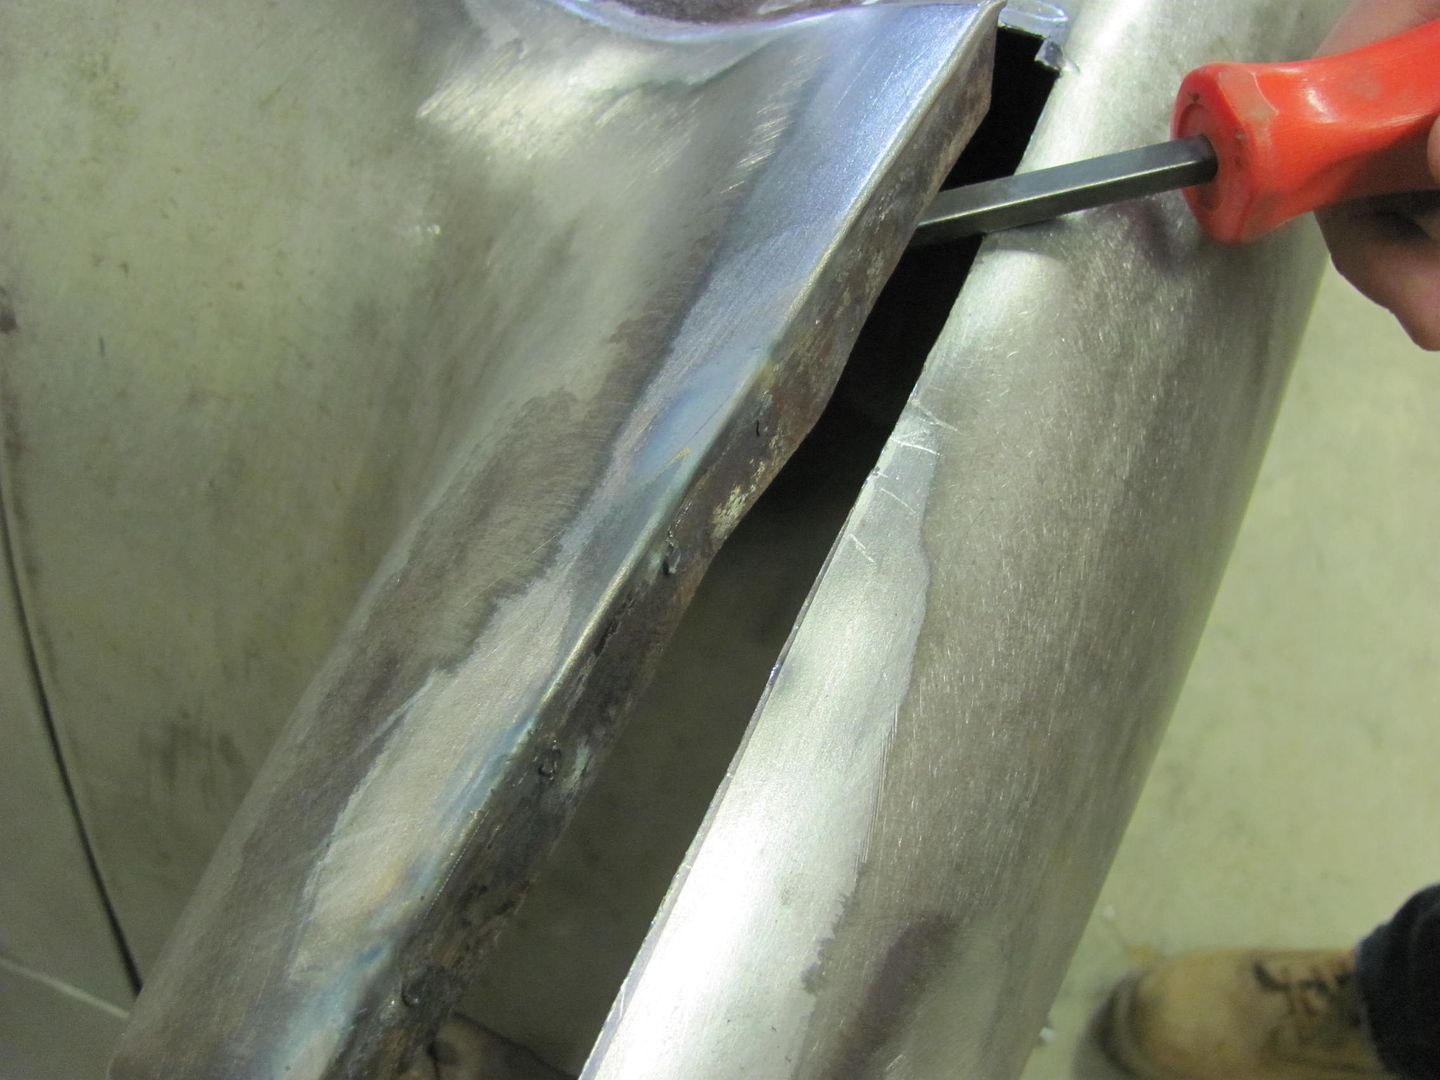 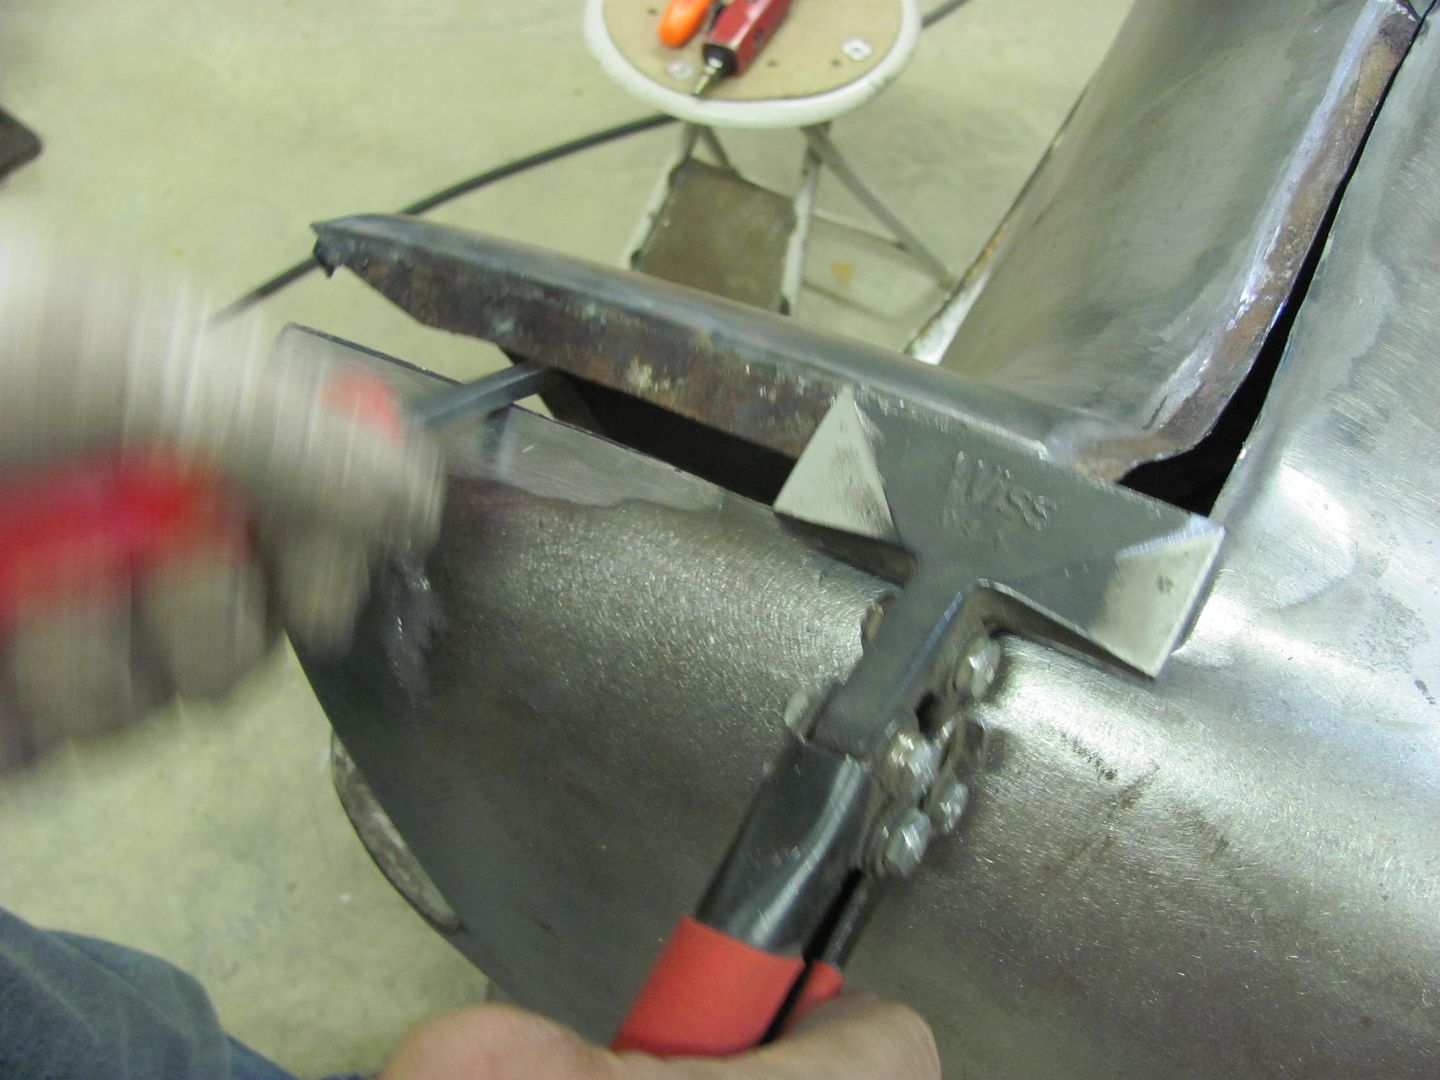 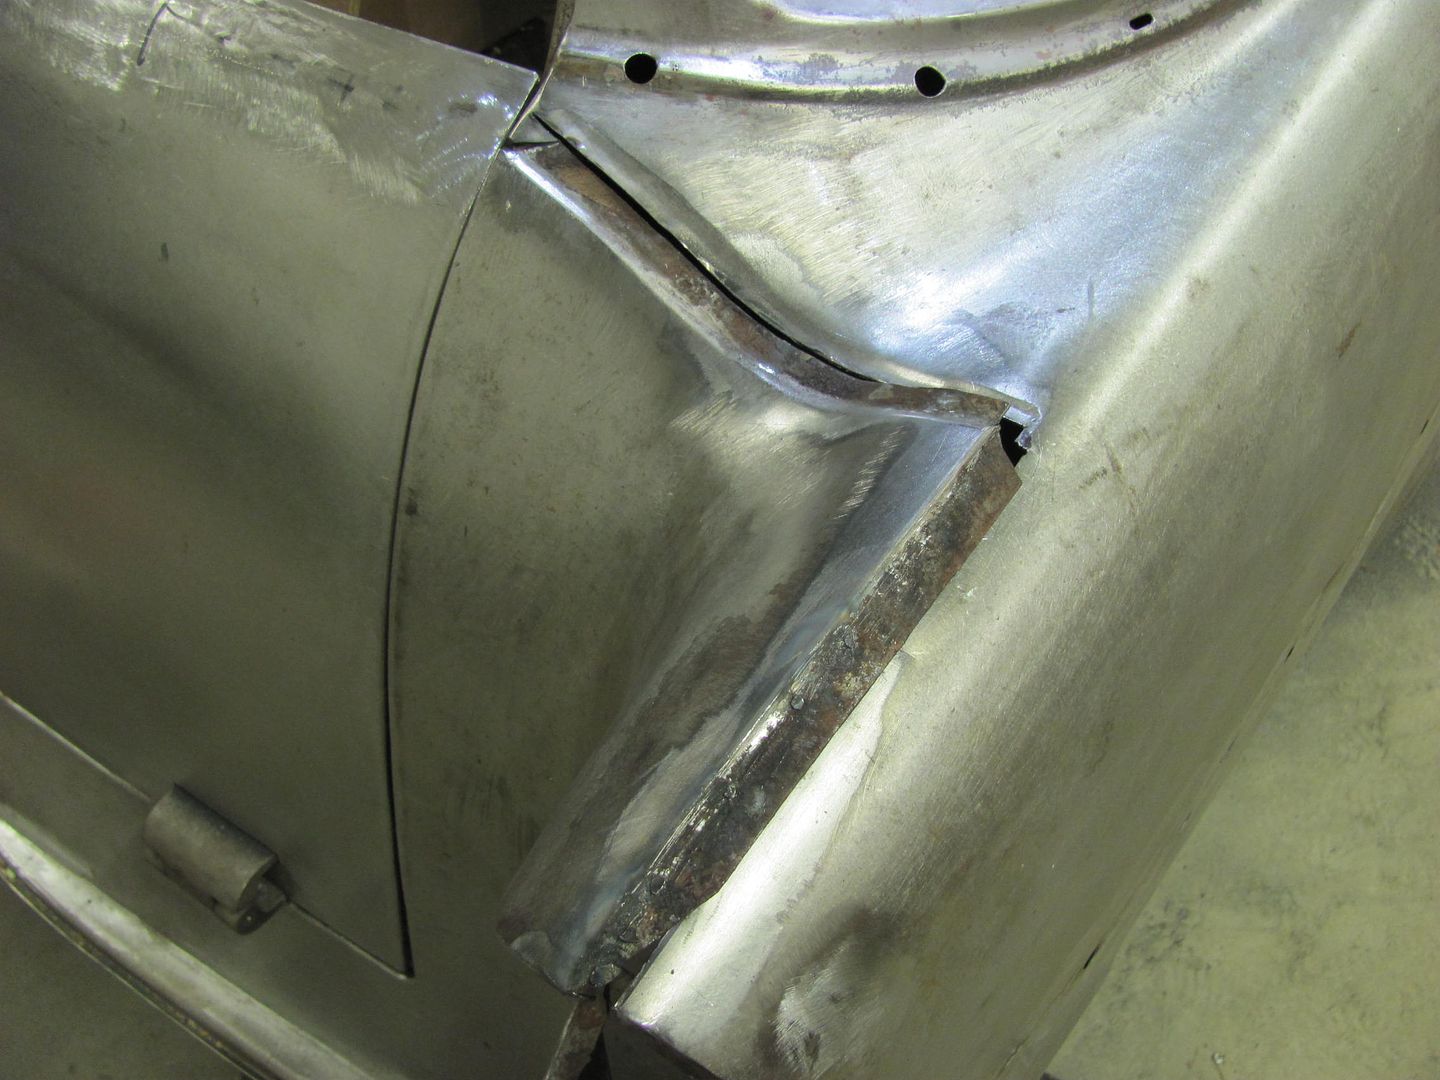 Flattening out the creases.... 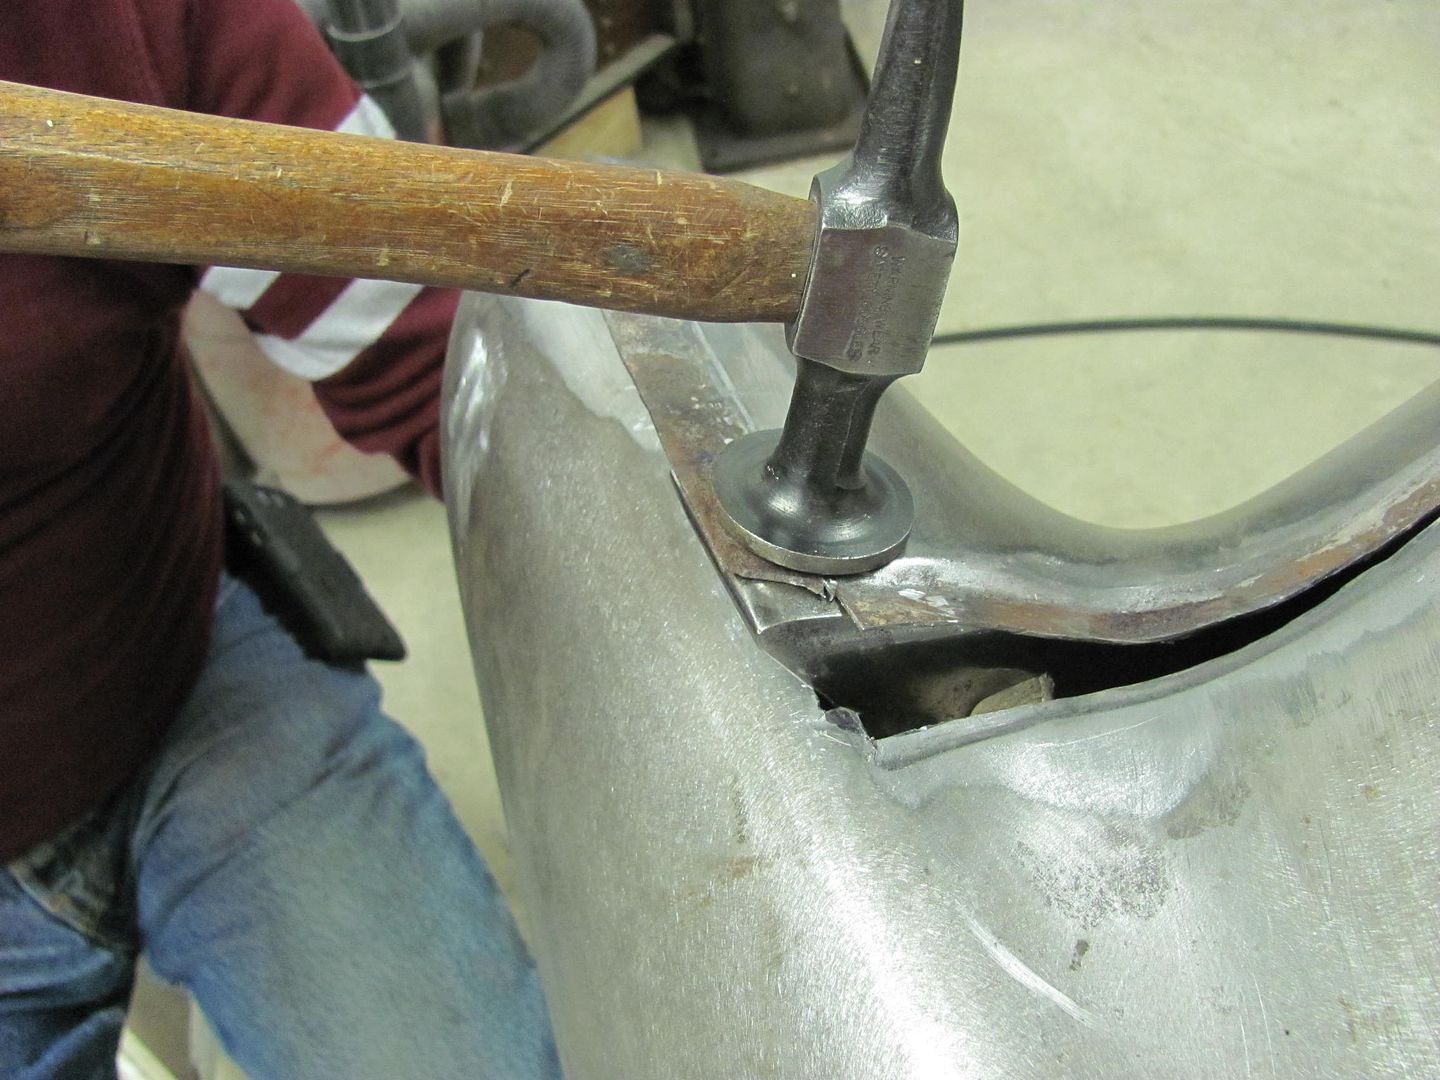 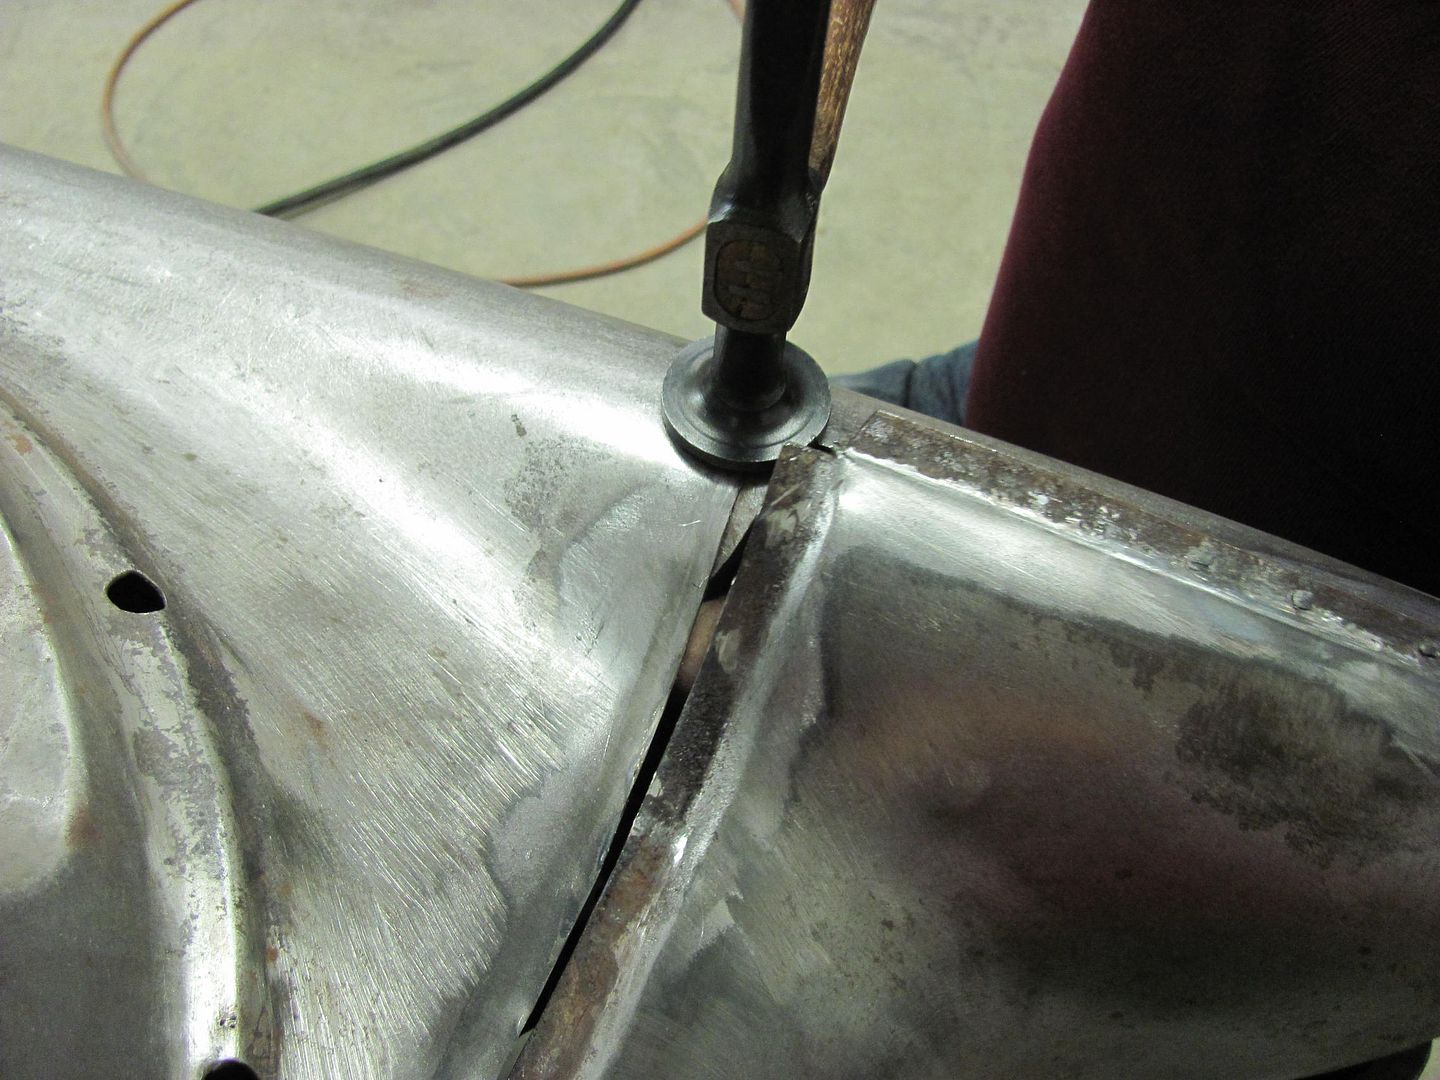 Tacked in place, and test fitting a tail light before trimming our gap filler.... 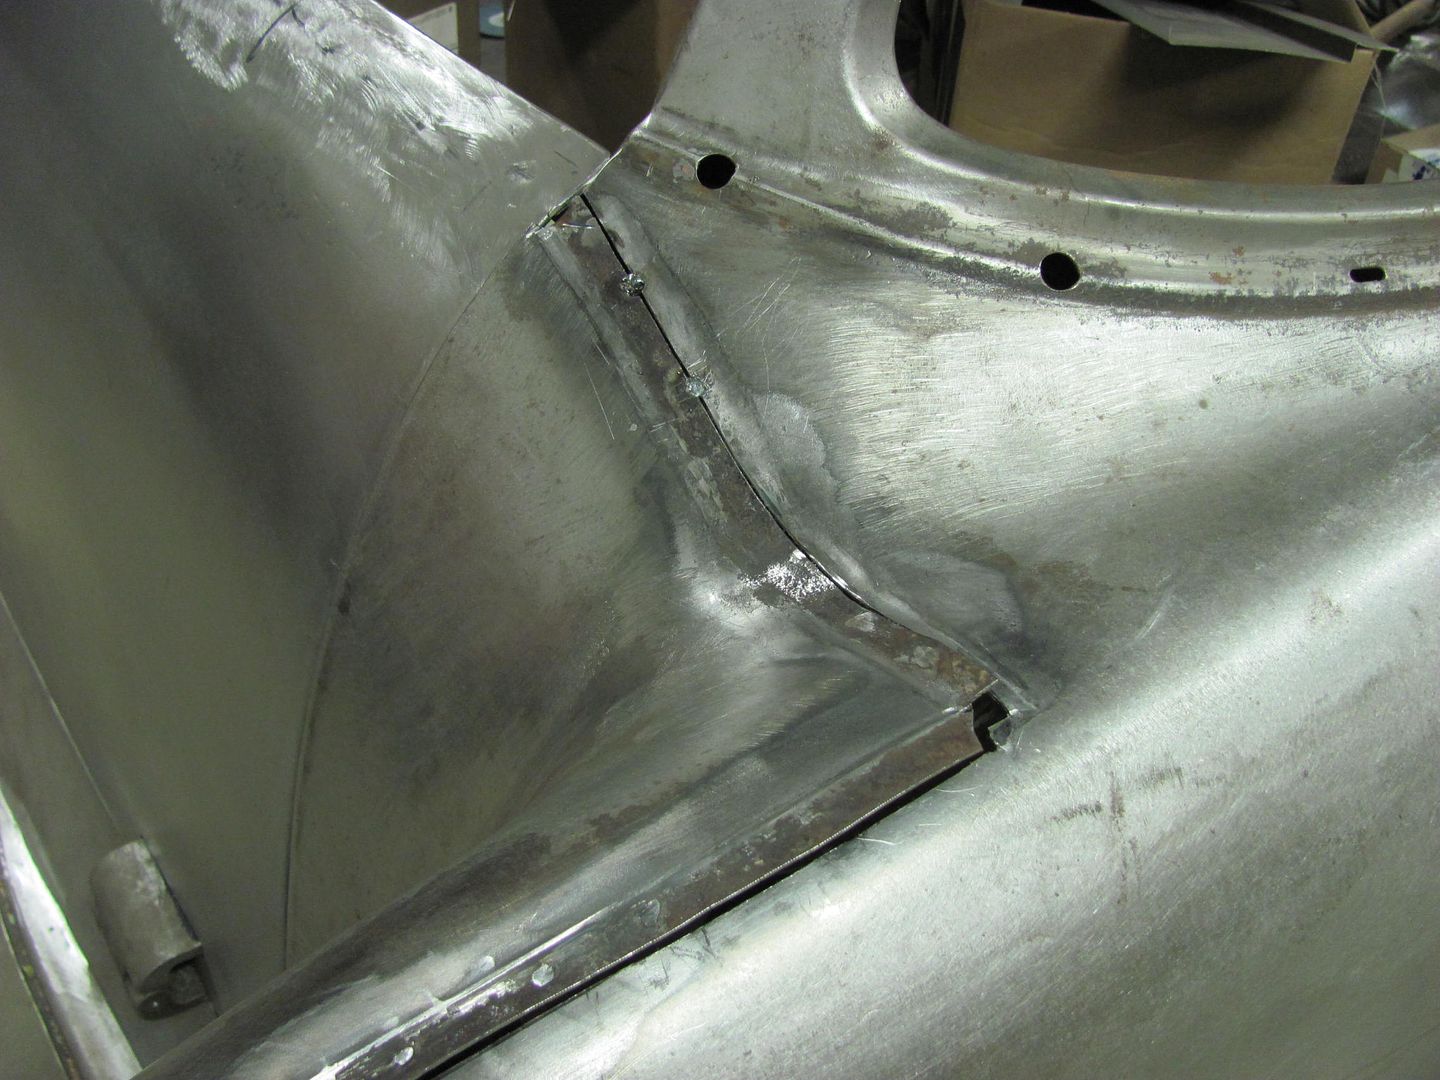 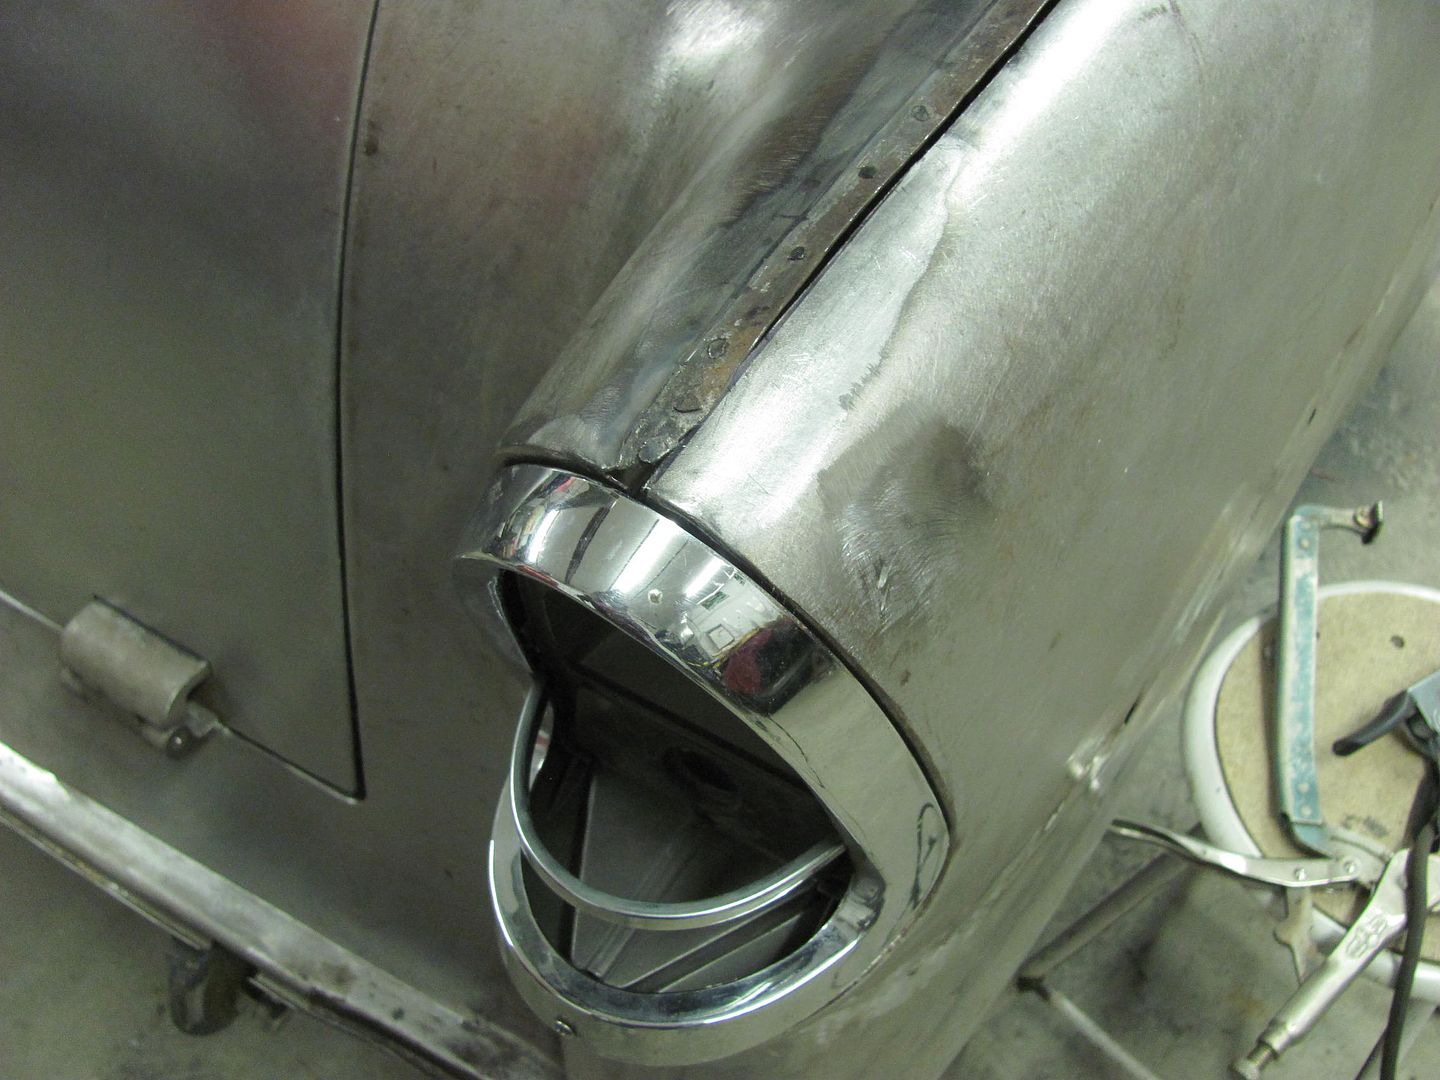 ....and we'll get the rest of the de-leading finished on Saturday...
__________________
Robert |
|
|
|
|
01-25-2015, 08:46 PM
|
#328 |
|
Registered User
Join Date: Jan 2013
Location: Leonardtown, MD
Posts: 1,633
|
Re: 55 Wagon Progress
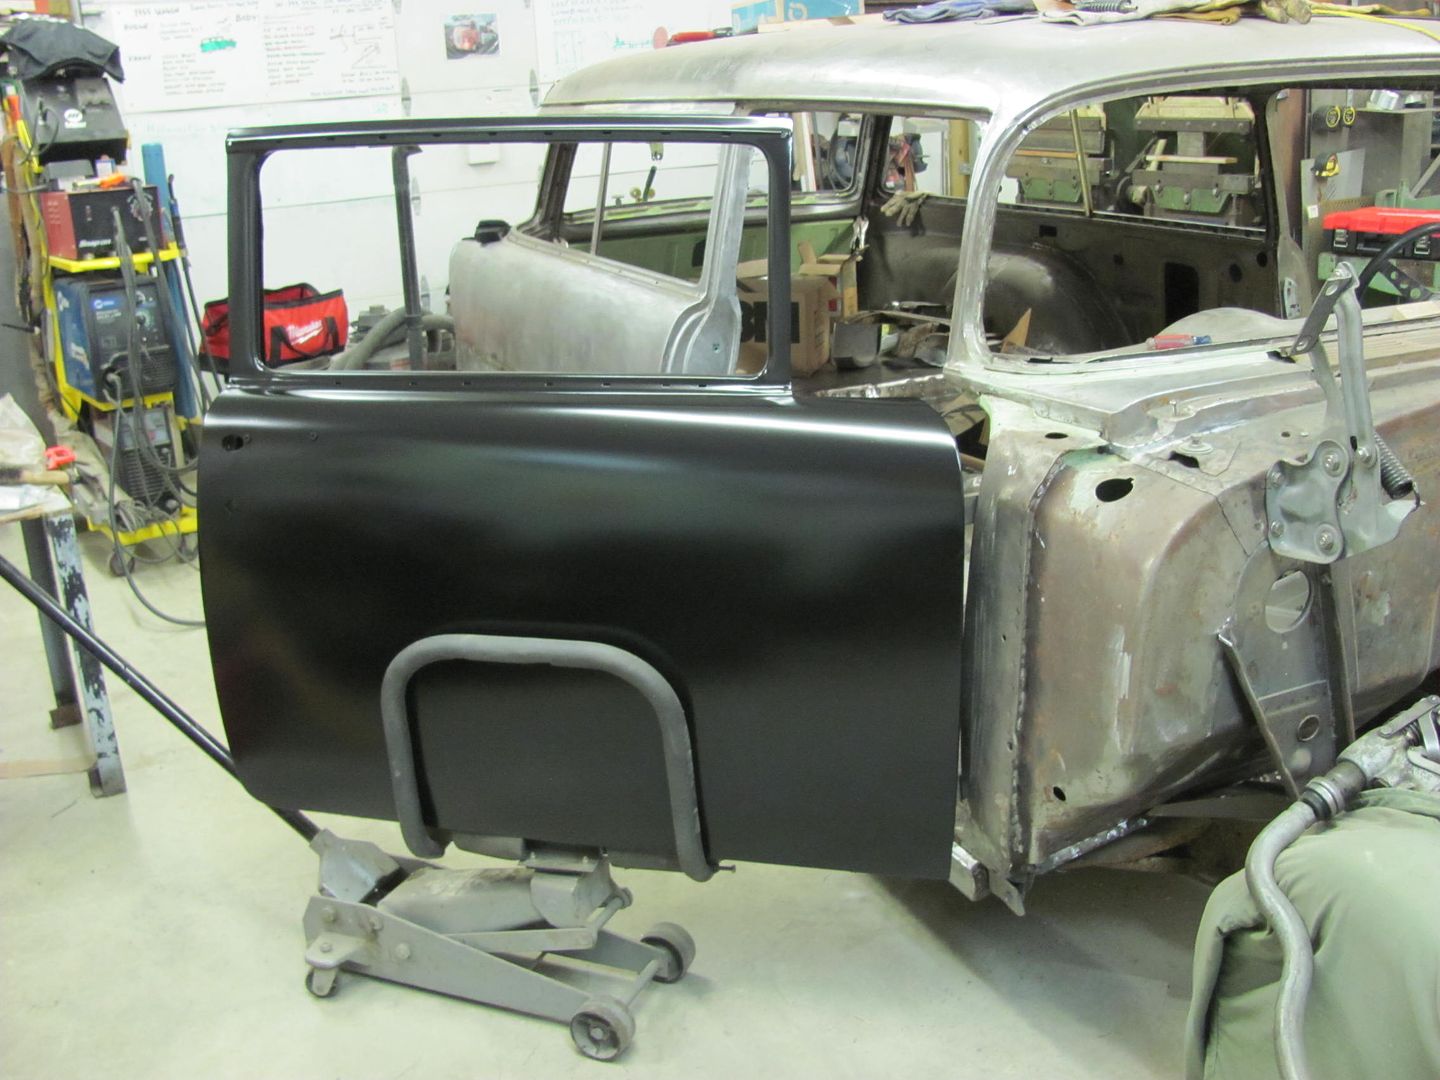
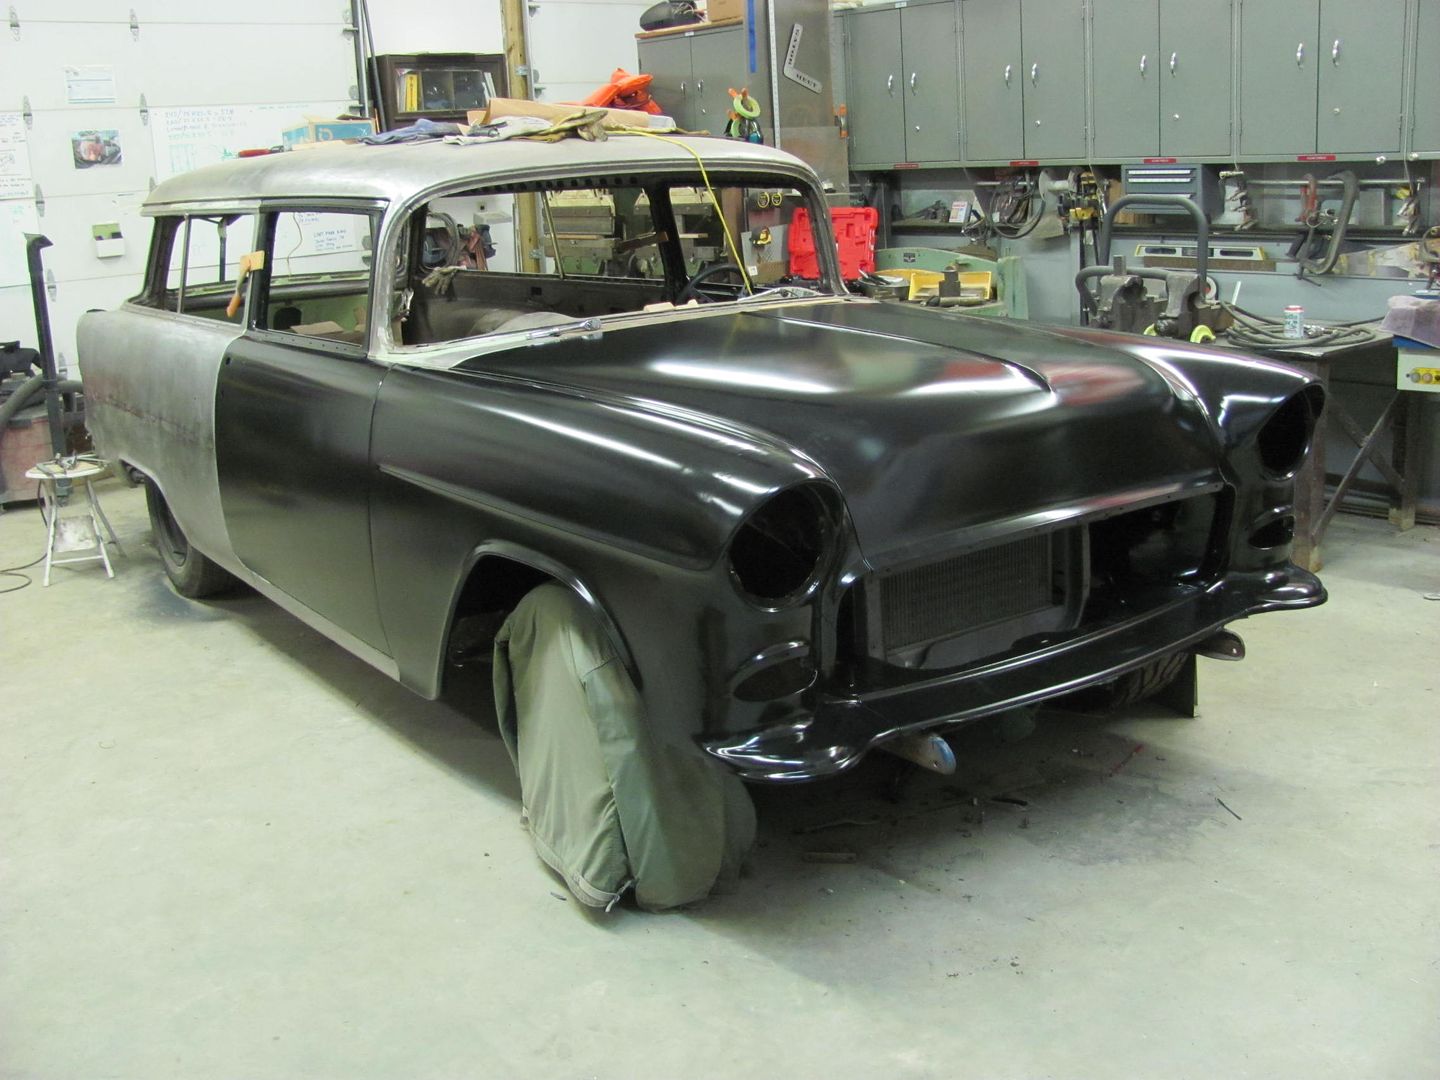
A bit late posting the progress from yesterday.. We were supposed to finish up the passenger rear quarter, but looks like some reproduction tail light bezels are on the way. So just to be on the safe side, we'll post pone that so any final fitment will be to those parts once they get here... In the meantime, we got the primed body parts re-assembled yesterday, here installing the doors.....
     The SPI epoxy does a good job of providing it's own "guide coat". I blocked this with 180 grit... 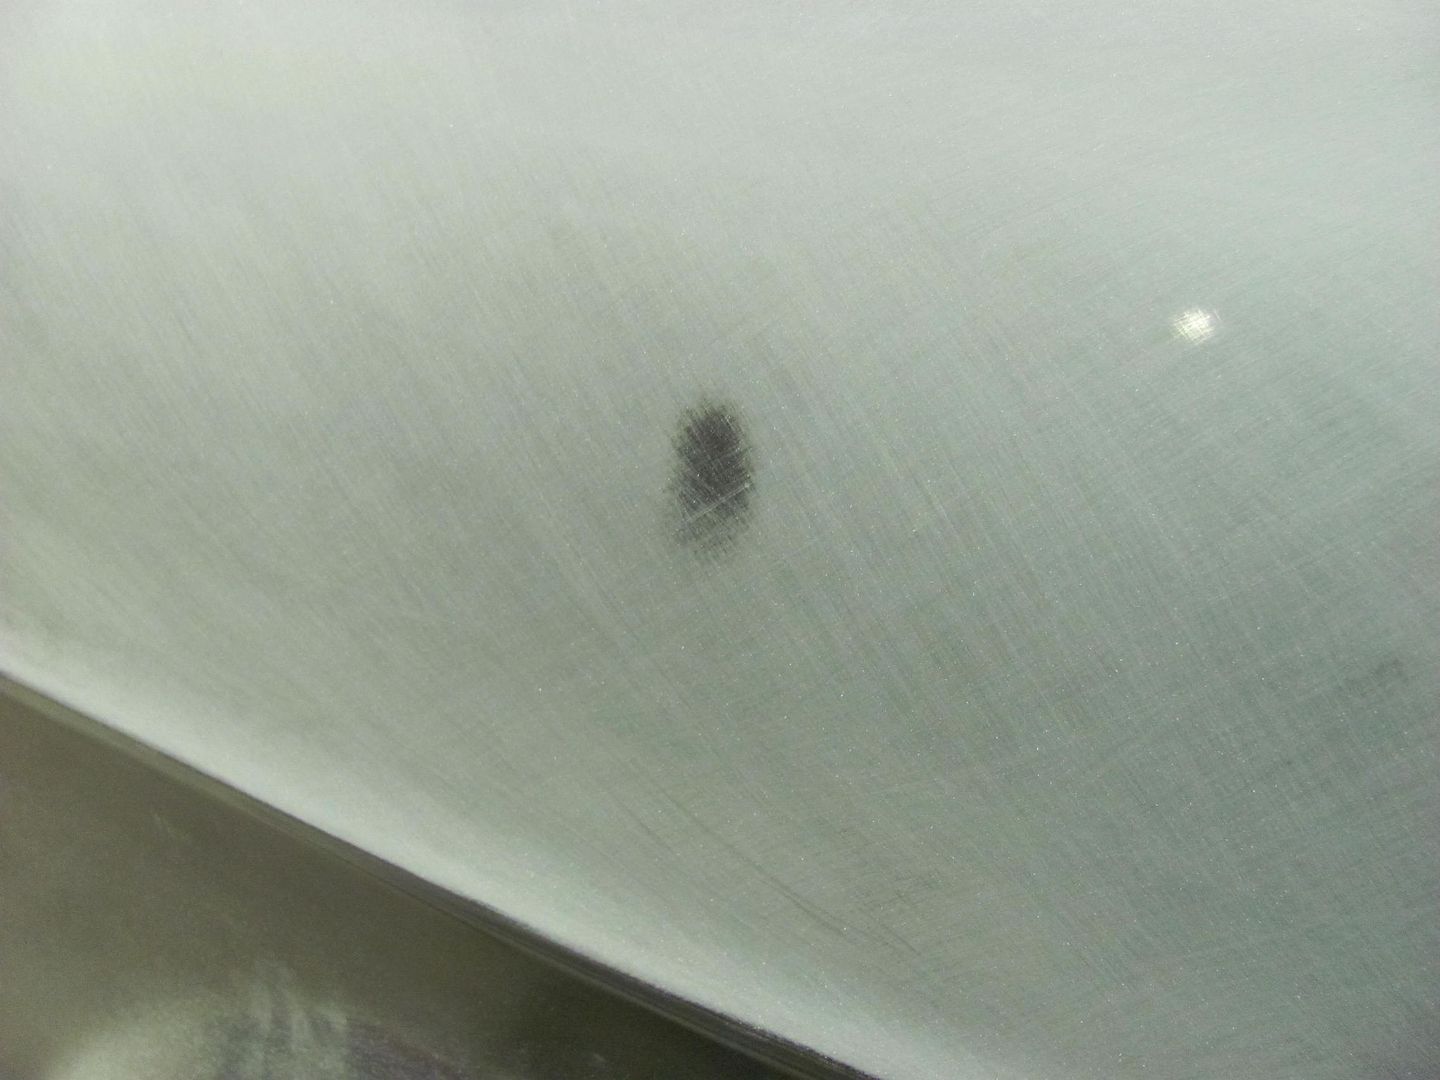 Here's some of the low spots filled with some evercoat... 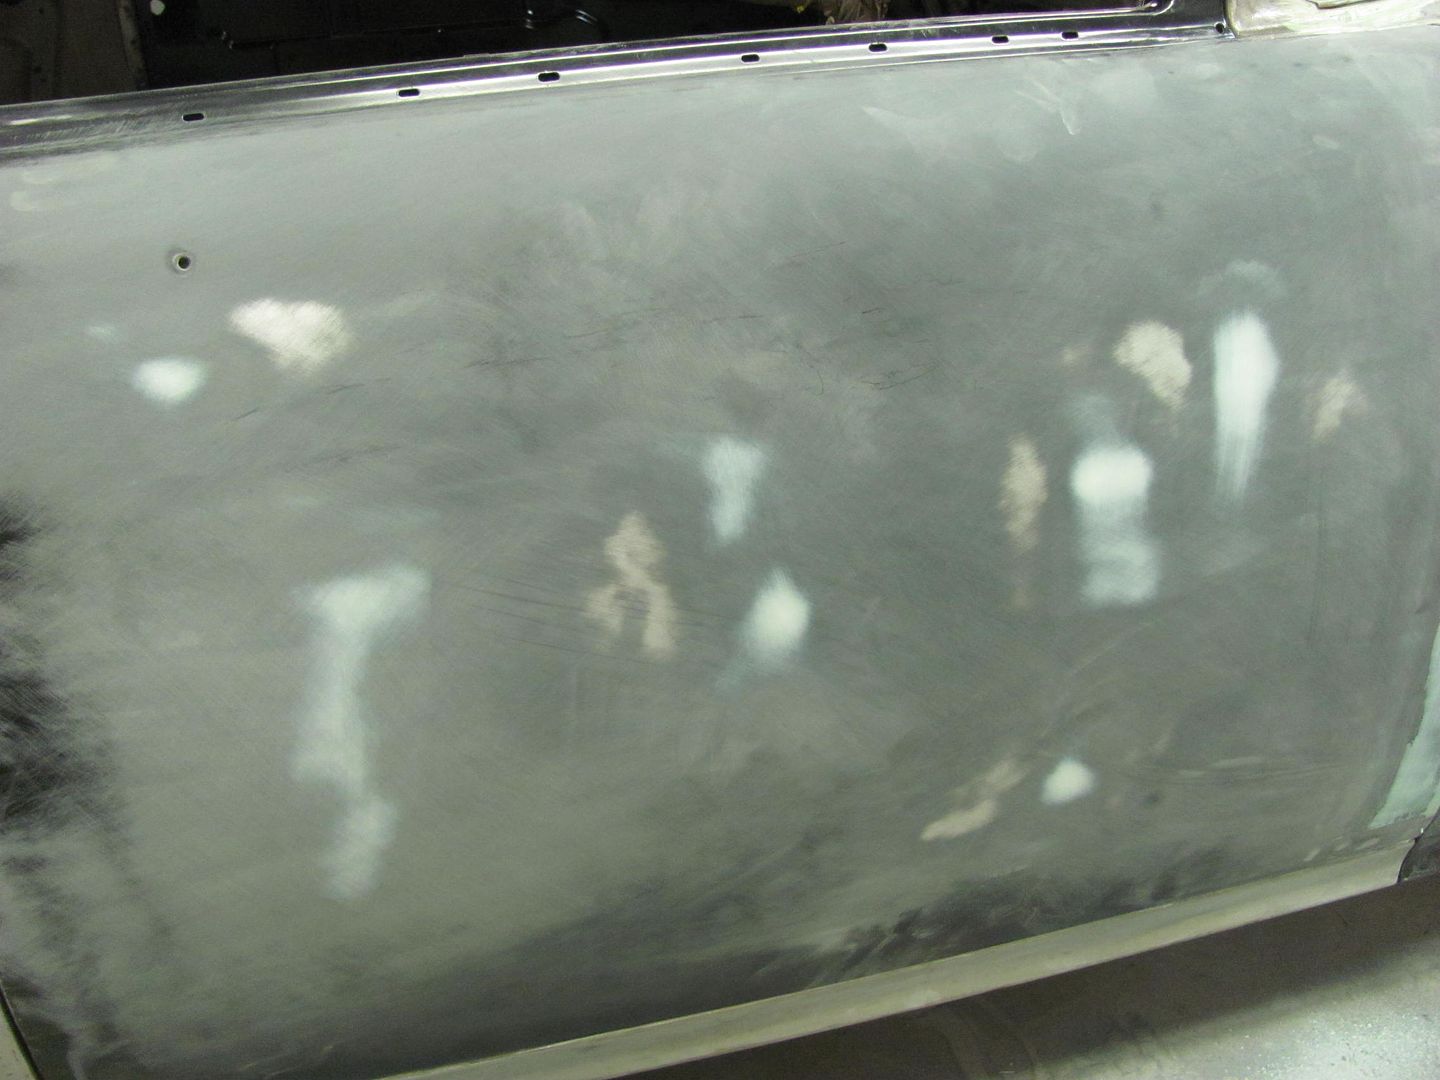 While I was block sanding, Kyle started modifying the hold down bracket for the battery. The post cutouts were on catty corner and didn't match todays battery posts. We had test fit the bracket on a 24F series Interstate today at Big Ed's Tires. Here's the filler piece.... 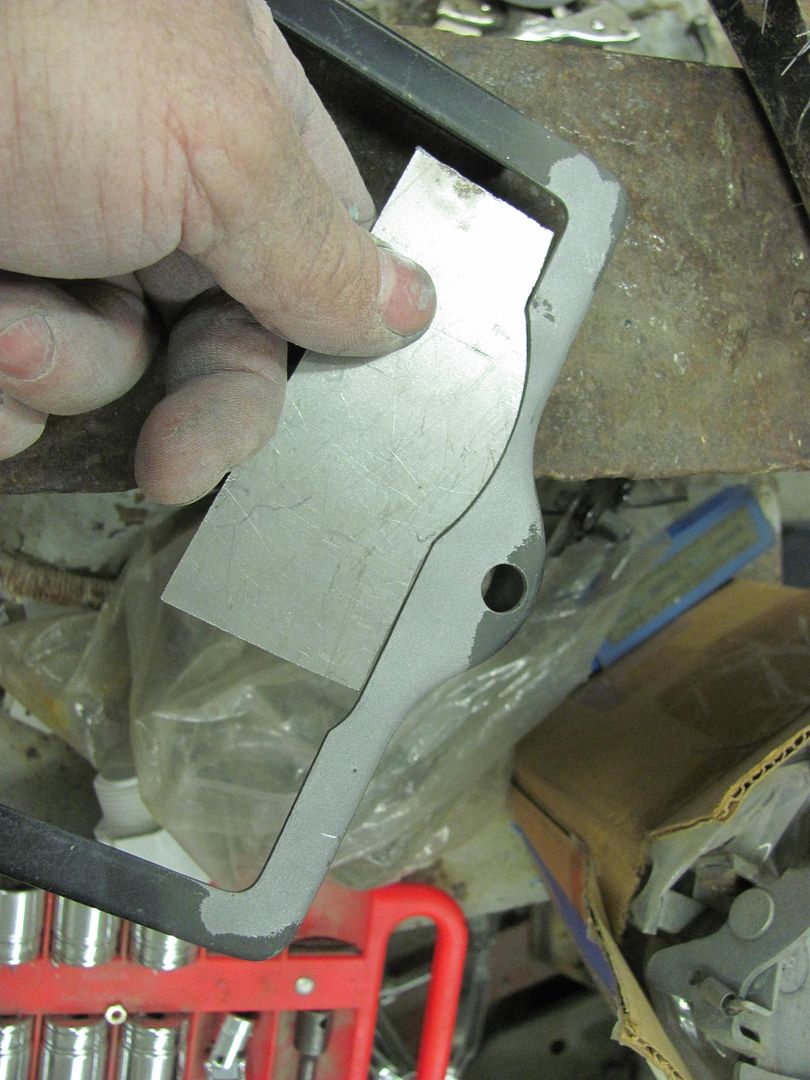 Shown here is the new location... 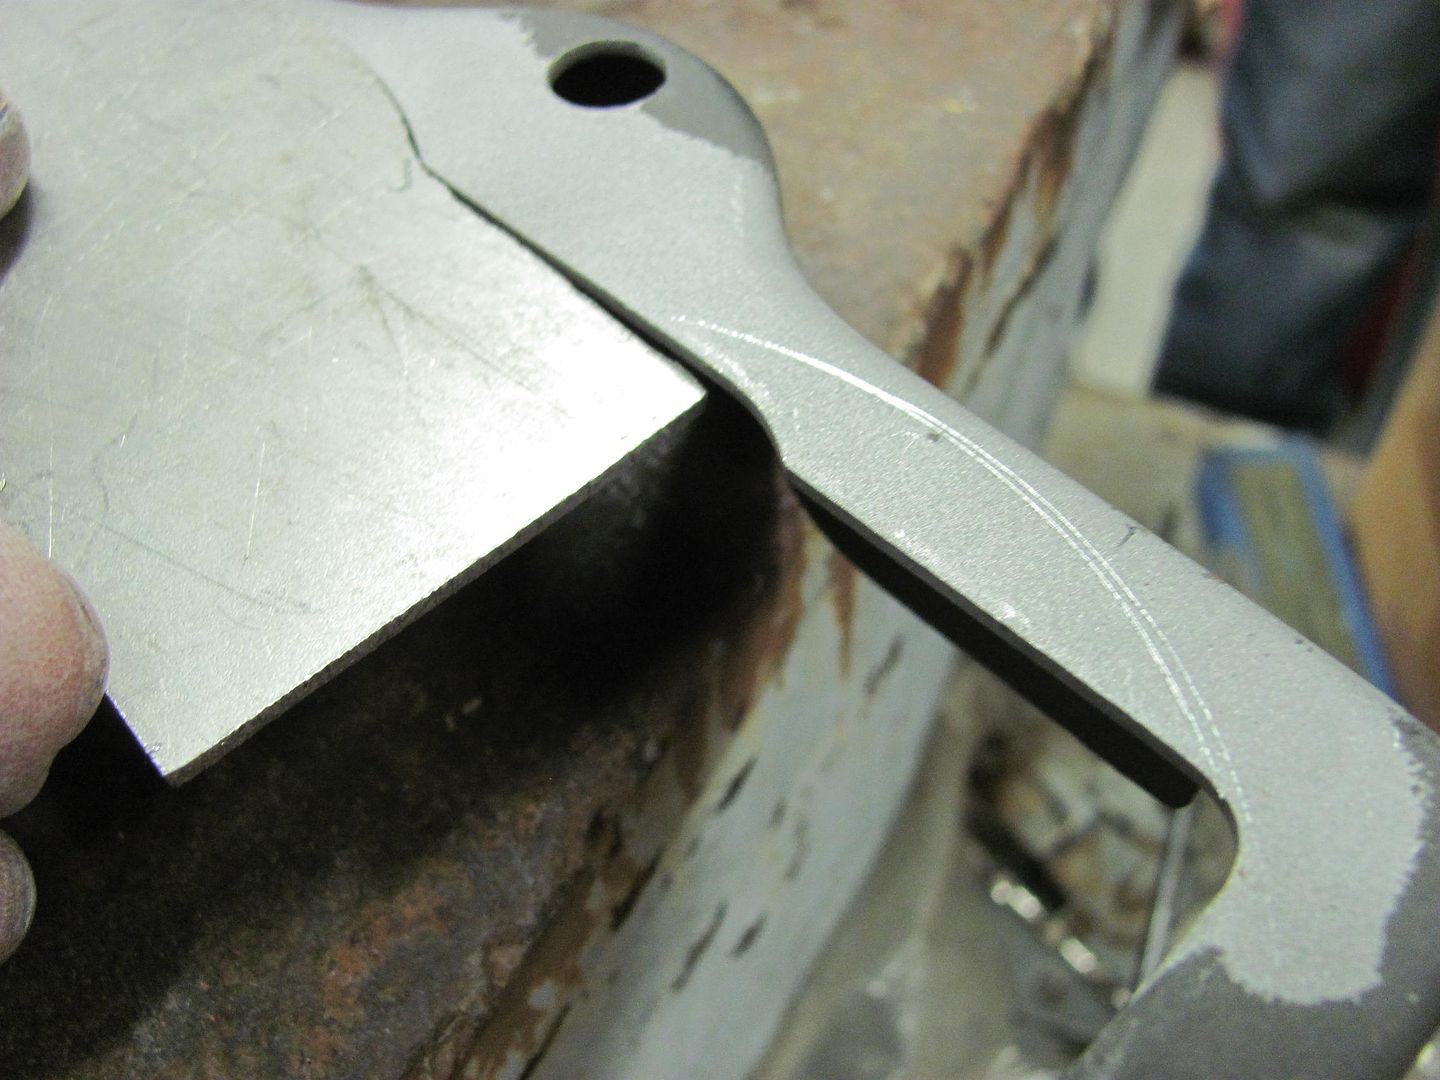 Filler welded in place, and the new relief cut out... 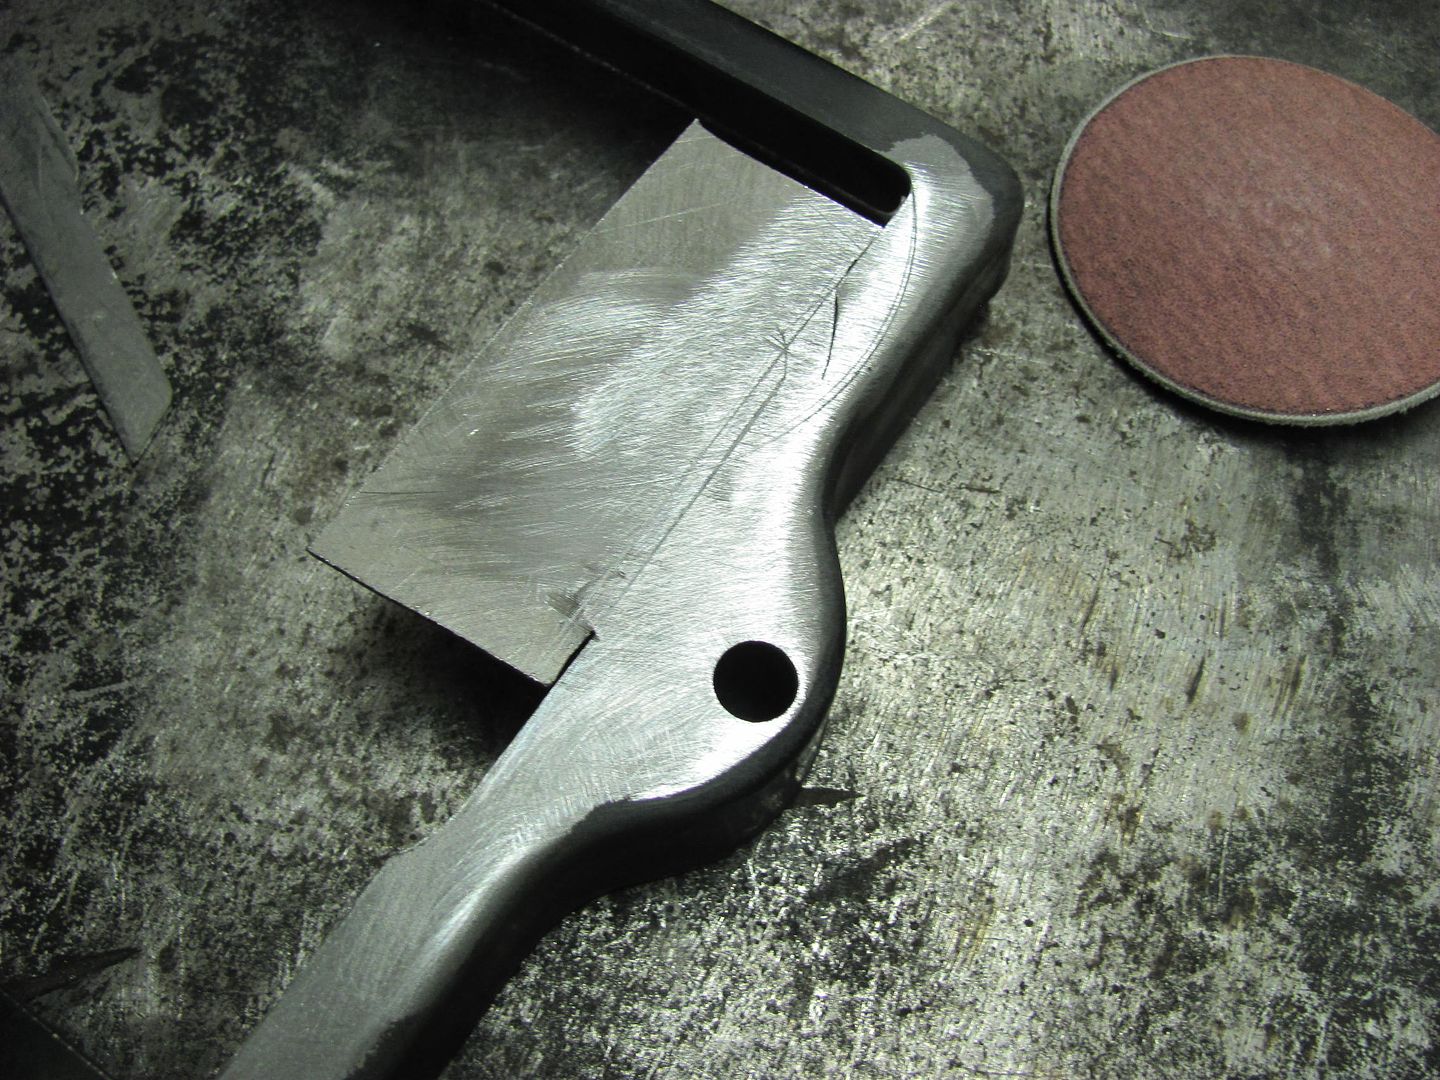 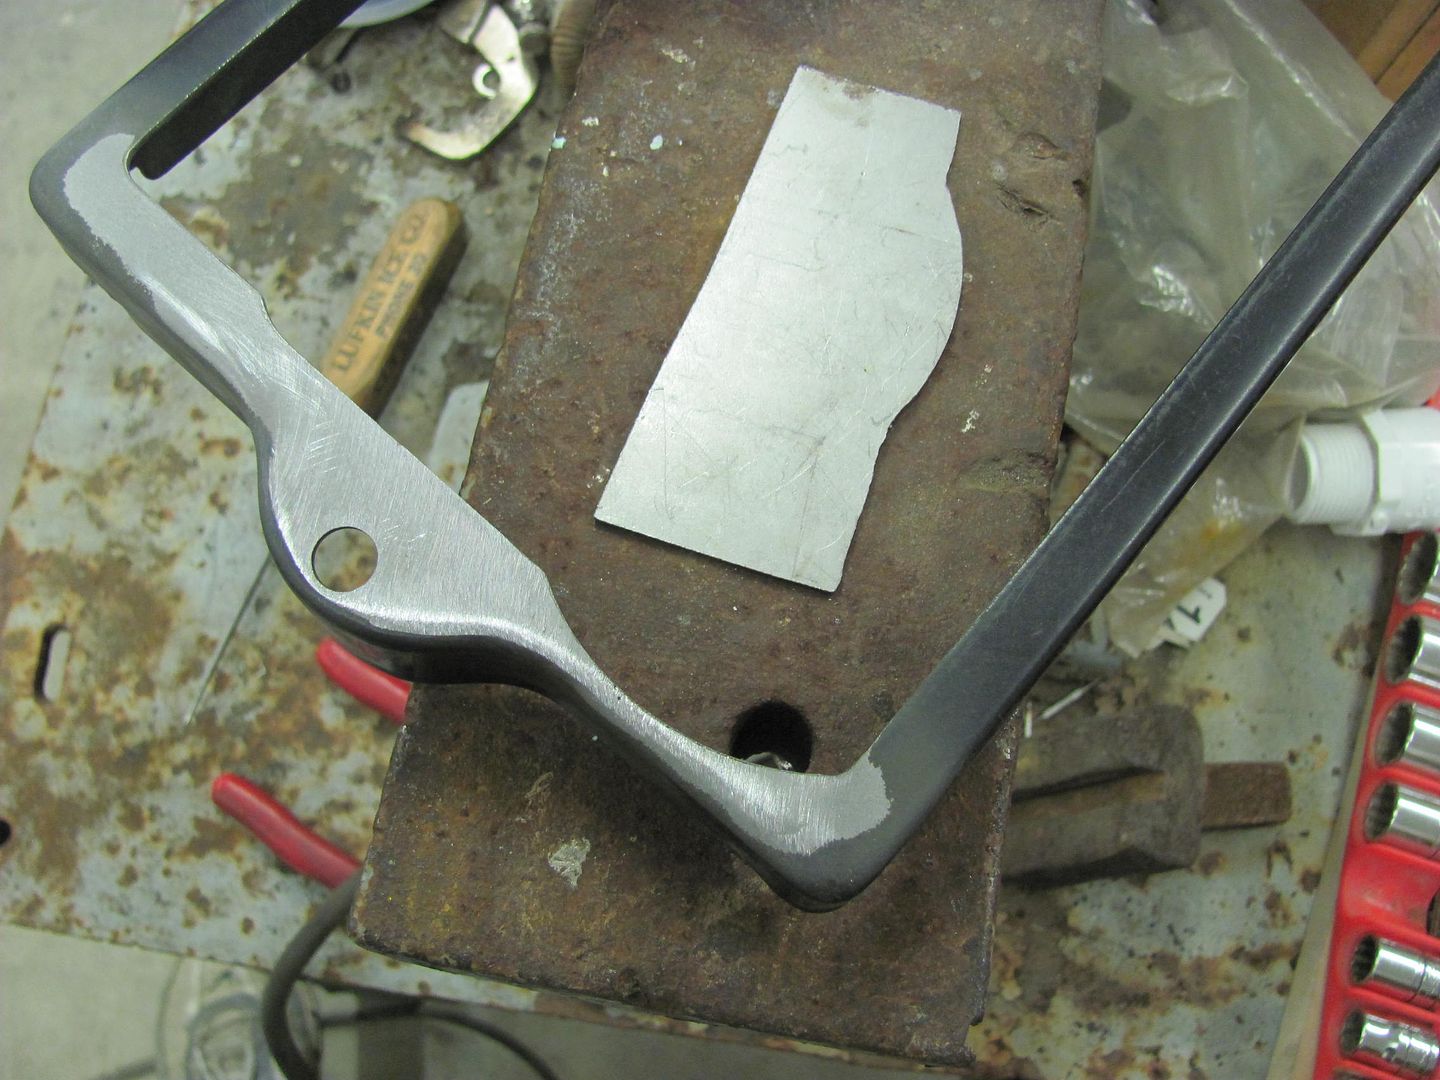 One down, one to go...
__________________
Robert |
|
|
|
|
01-26-2015, 07:36 AM
|
#329 |
|
Registered User
Join Date: Dec 2012
Location: Pendleton, Indiana
Posts: 235
|
Re: 55 Wagon Progress
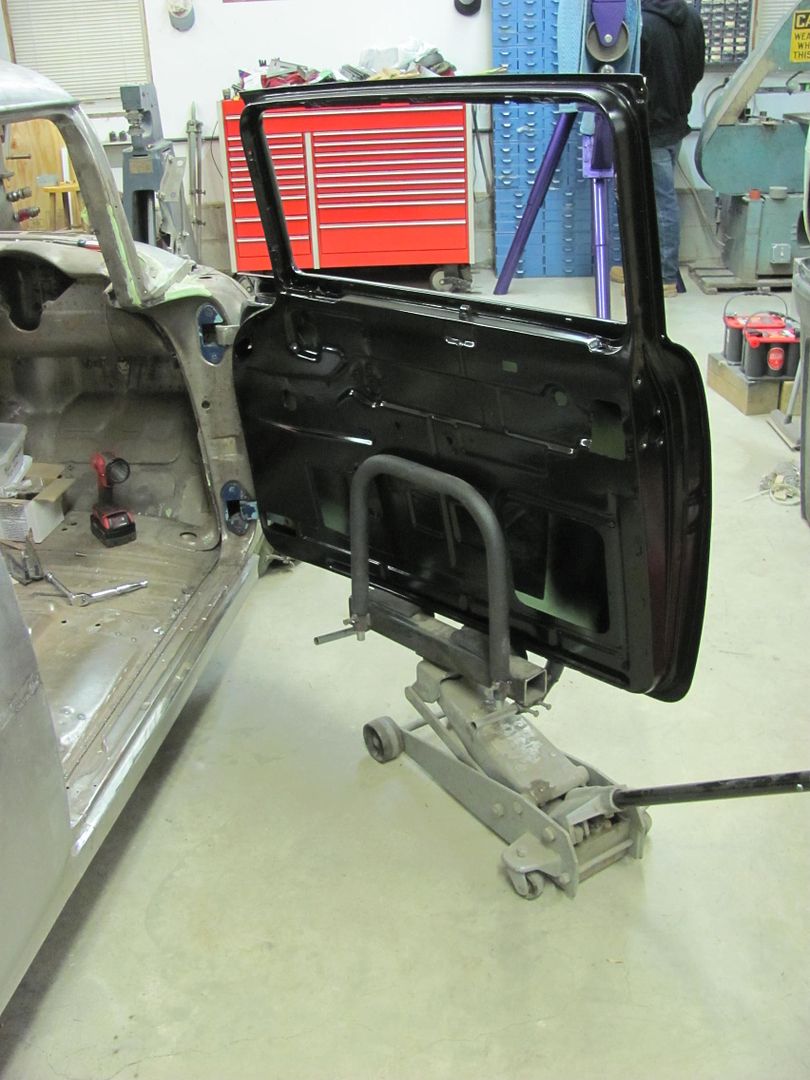
Is the jack mounted door rack something you made or is it a purchased tool? Looks like a very handy item to have.
Rick |
|
|
|
|
01-26-2015, 02:30 PM
|
#330 |
|
Registered User
Join Date: Jan 2013
Location: Leonardtown, MD
Posts: 1,633
|
Re: 55 Wagon Progress
I came up with that while re-assembling the last car we finished in the shop. It' doors were quite heavy and we didn't need any paint chips....
I had seen some of the cradle style that you could add to your floor jack, but I have a problem how the cradle supports the complete weight of the door across the lower edge of a door skin. Too much risk of paint damage in my view. So I came up with another version that would support the weight across a wider area on the inner door, for less risk of damage to any visible area. Here's the basic form, with some pipe receivers using set screws. The support braces are bent from electrical EMT and covered in pipe insulation to protect the finish.. 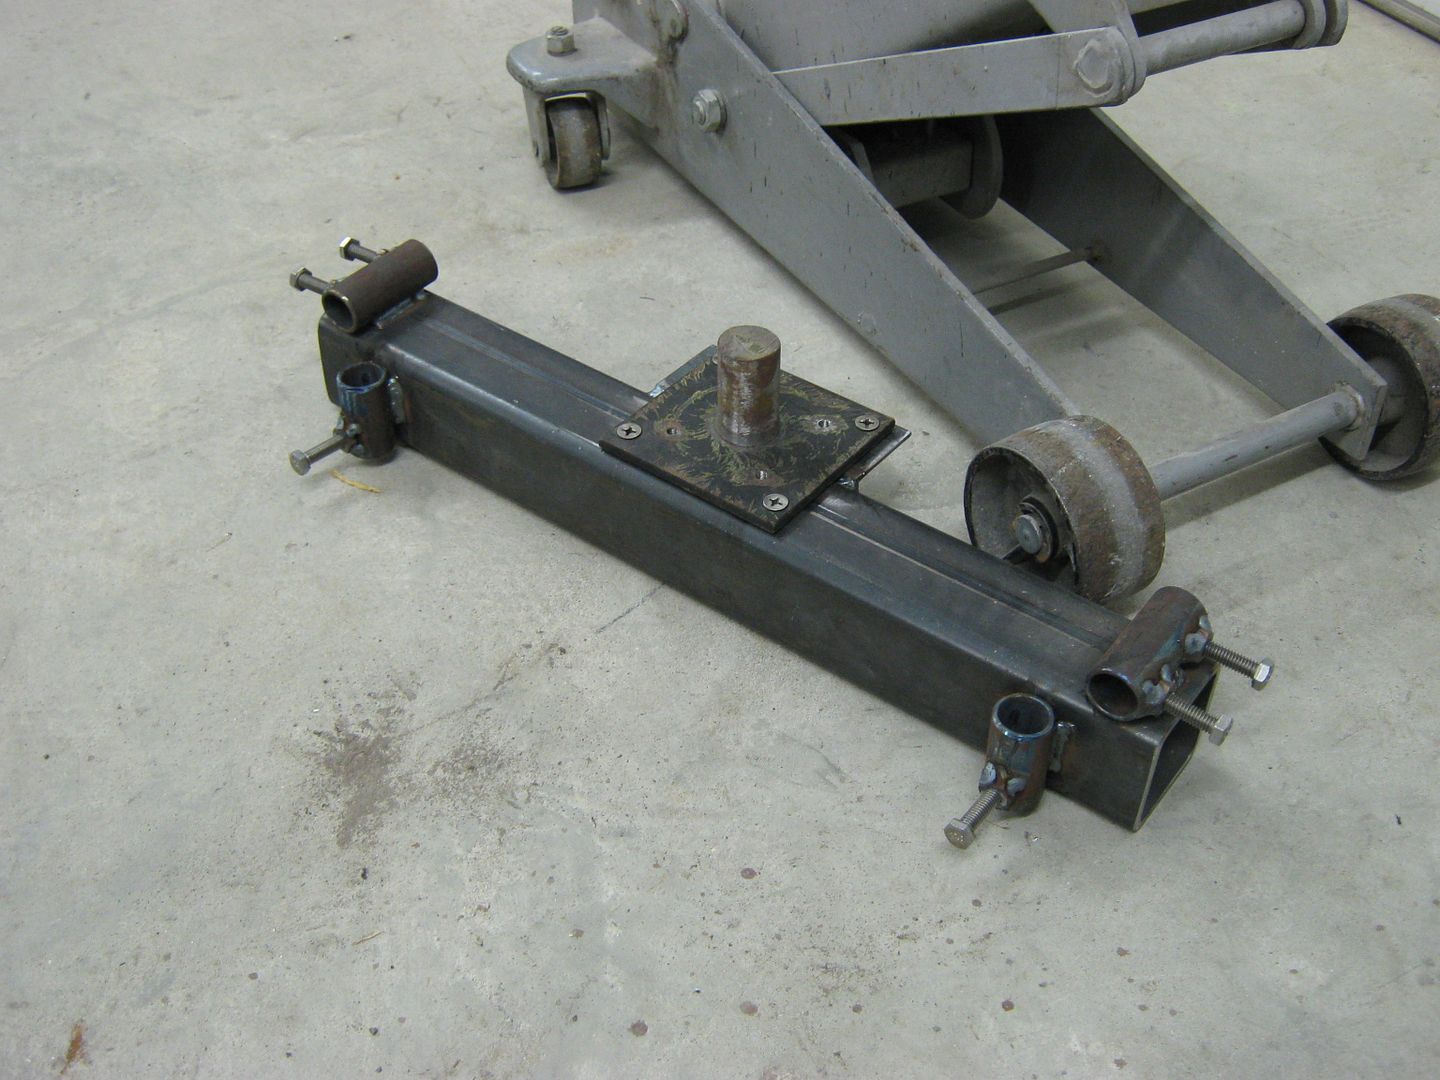 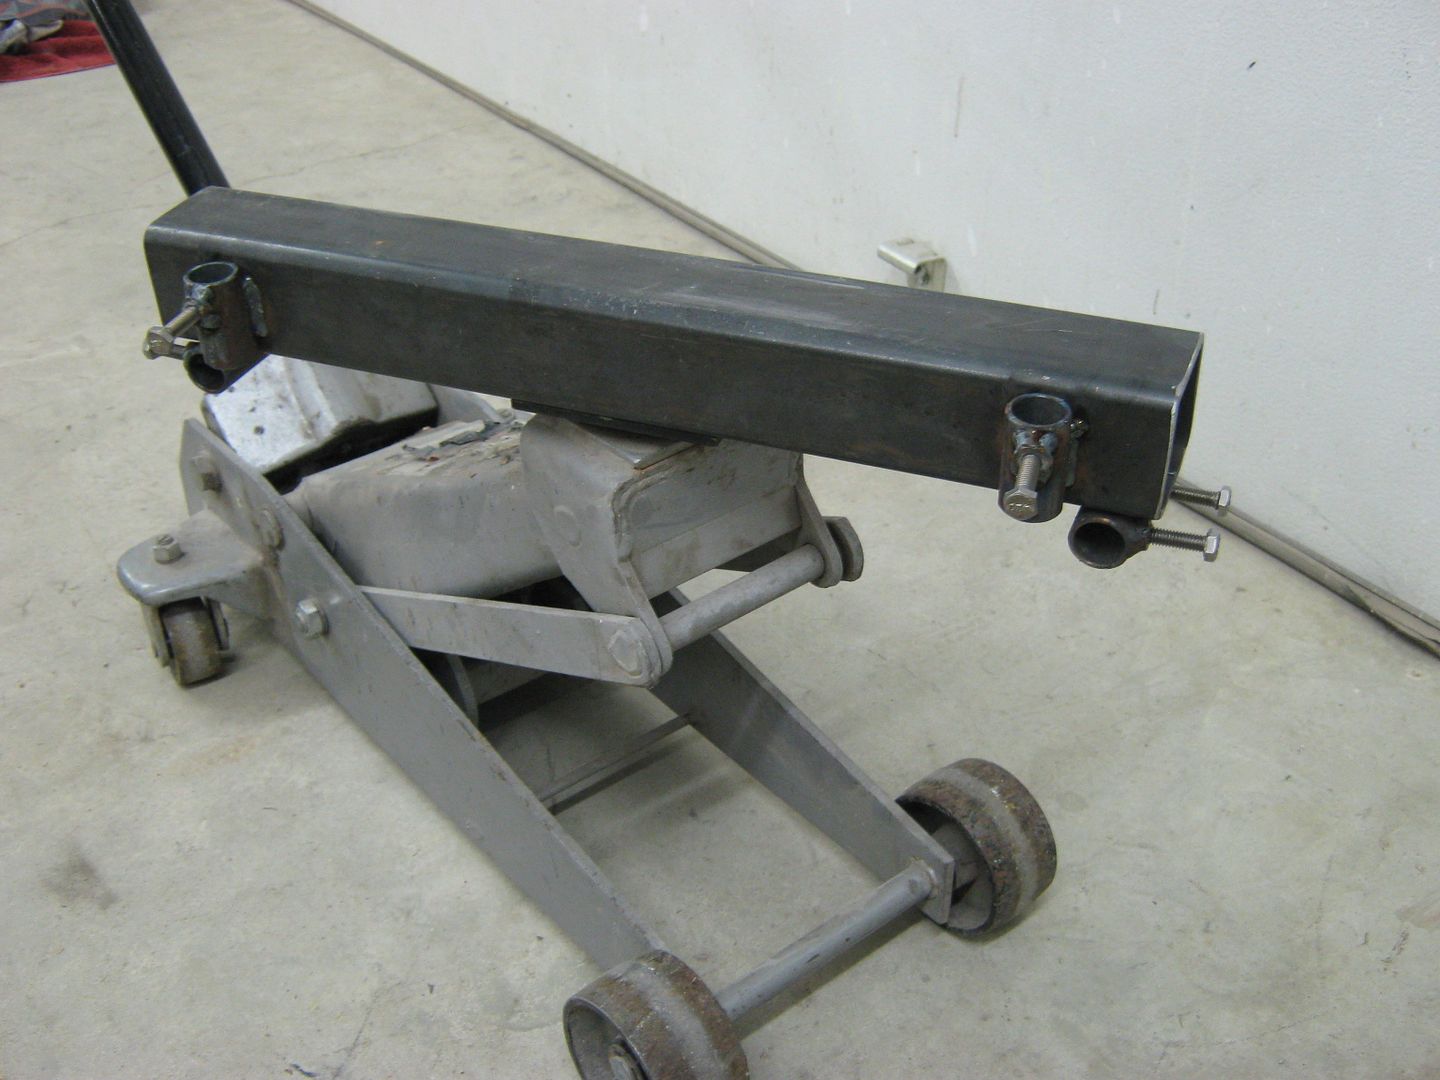 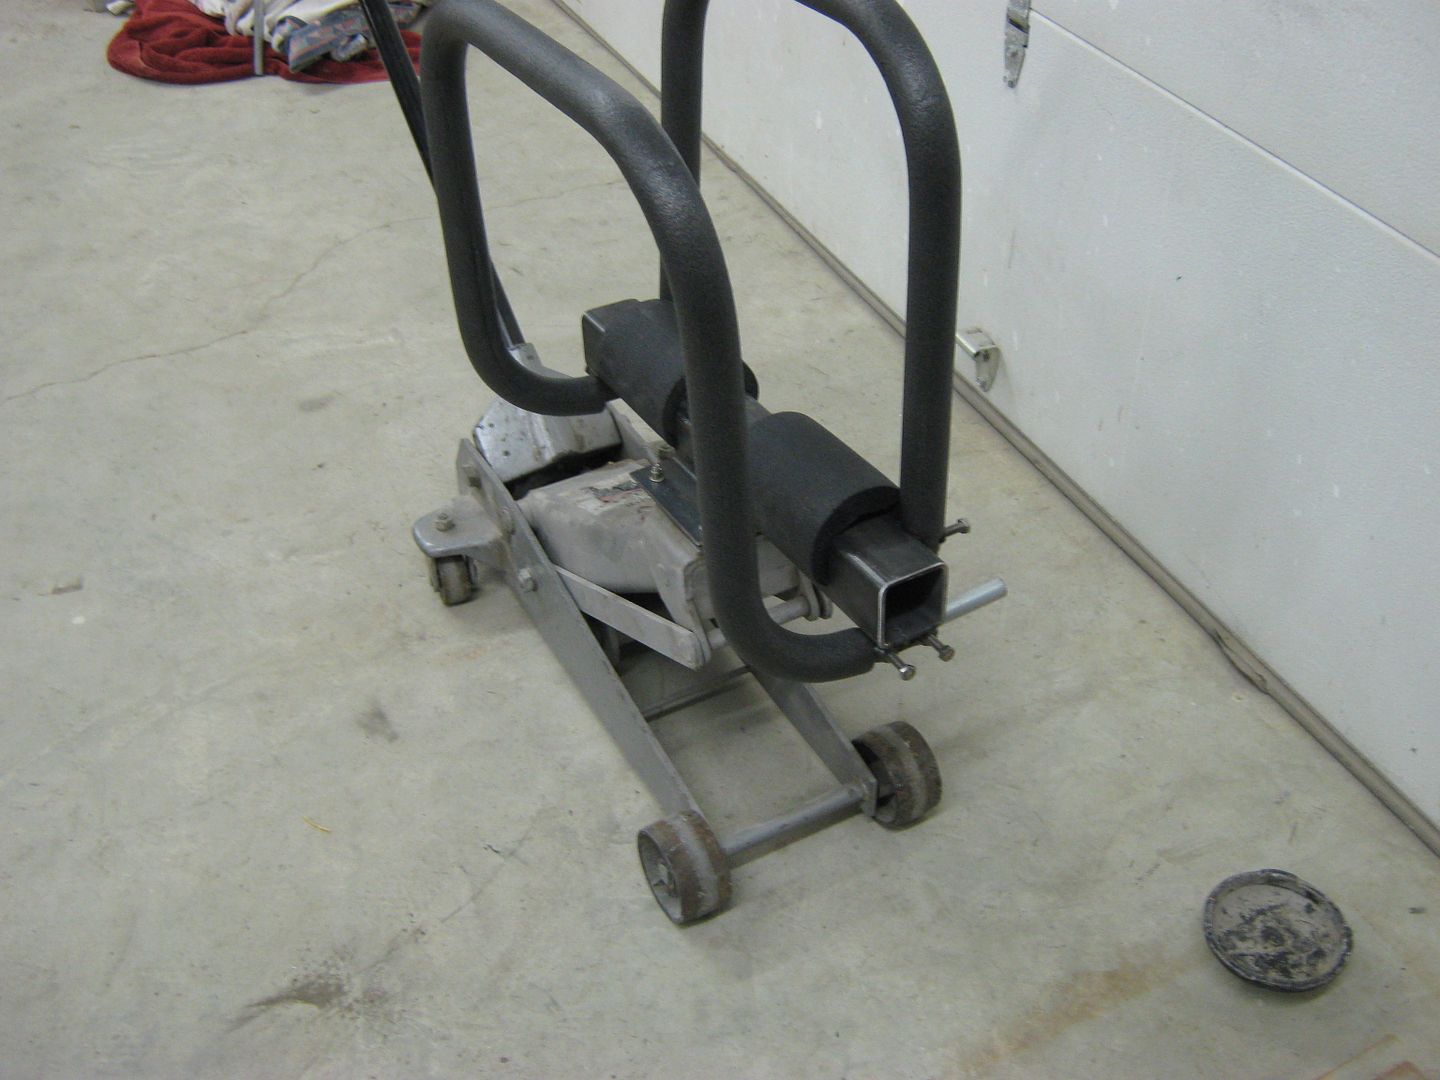 The support braces also help to keep the door oriented in a vertical position, to keep the door from flopping back and forth (as you may experience with the cradle style). This will help prevent paint damage/chips from excessive door movement during the install. 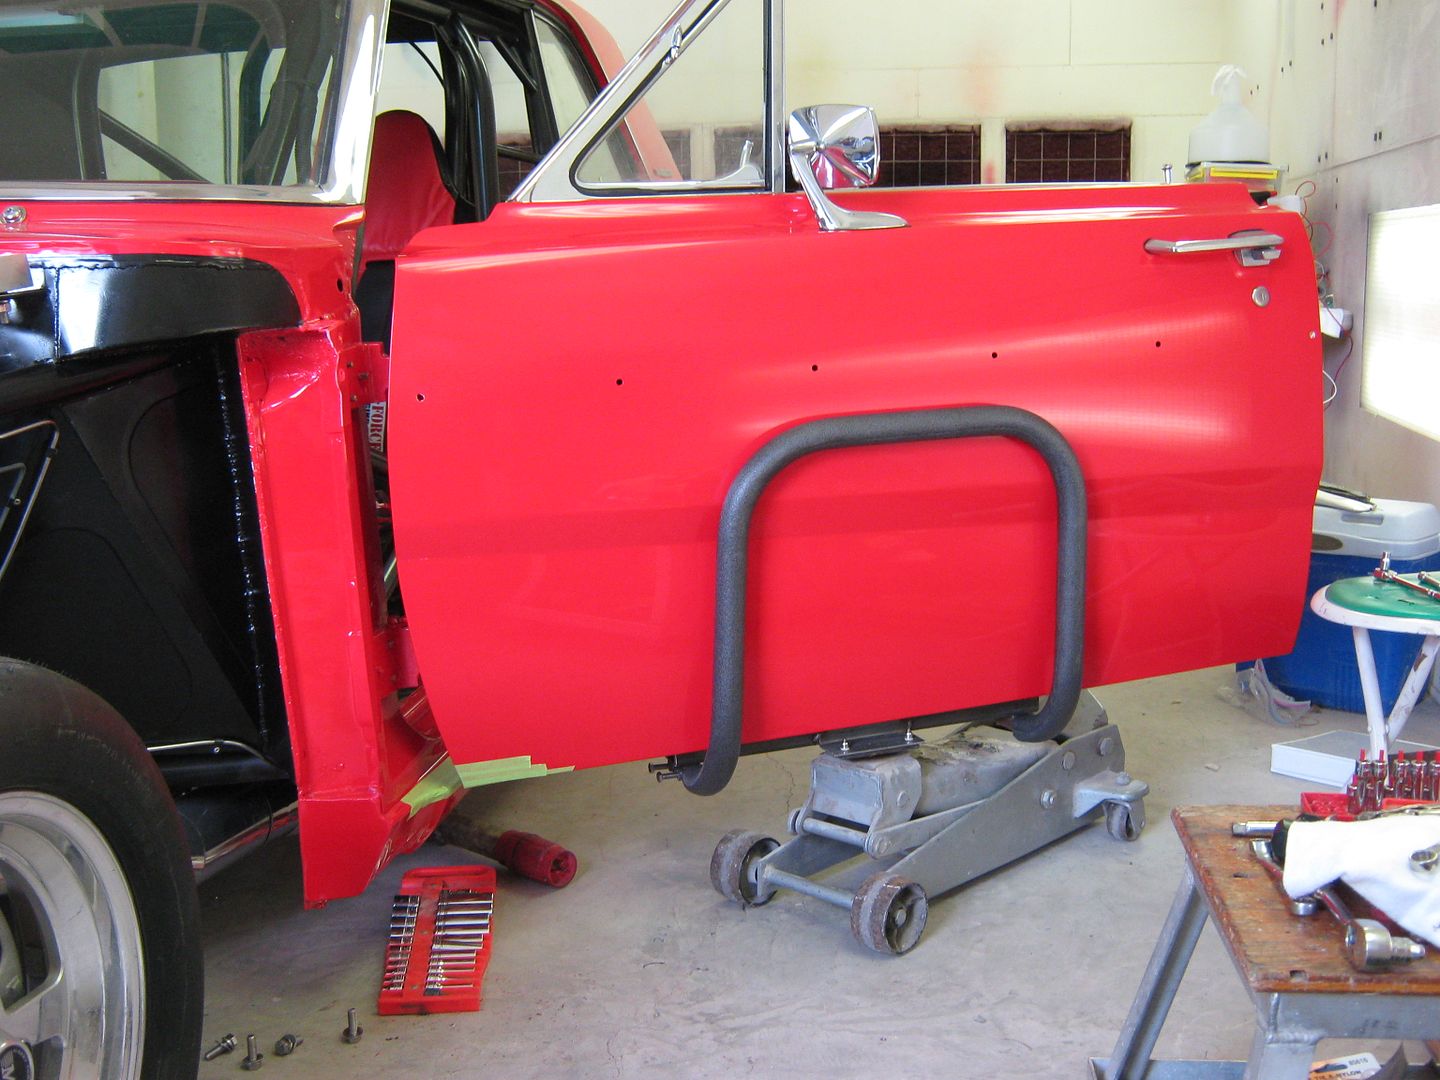 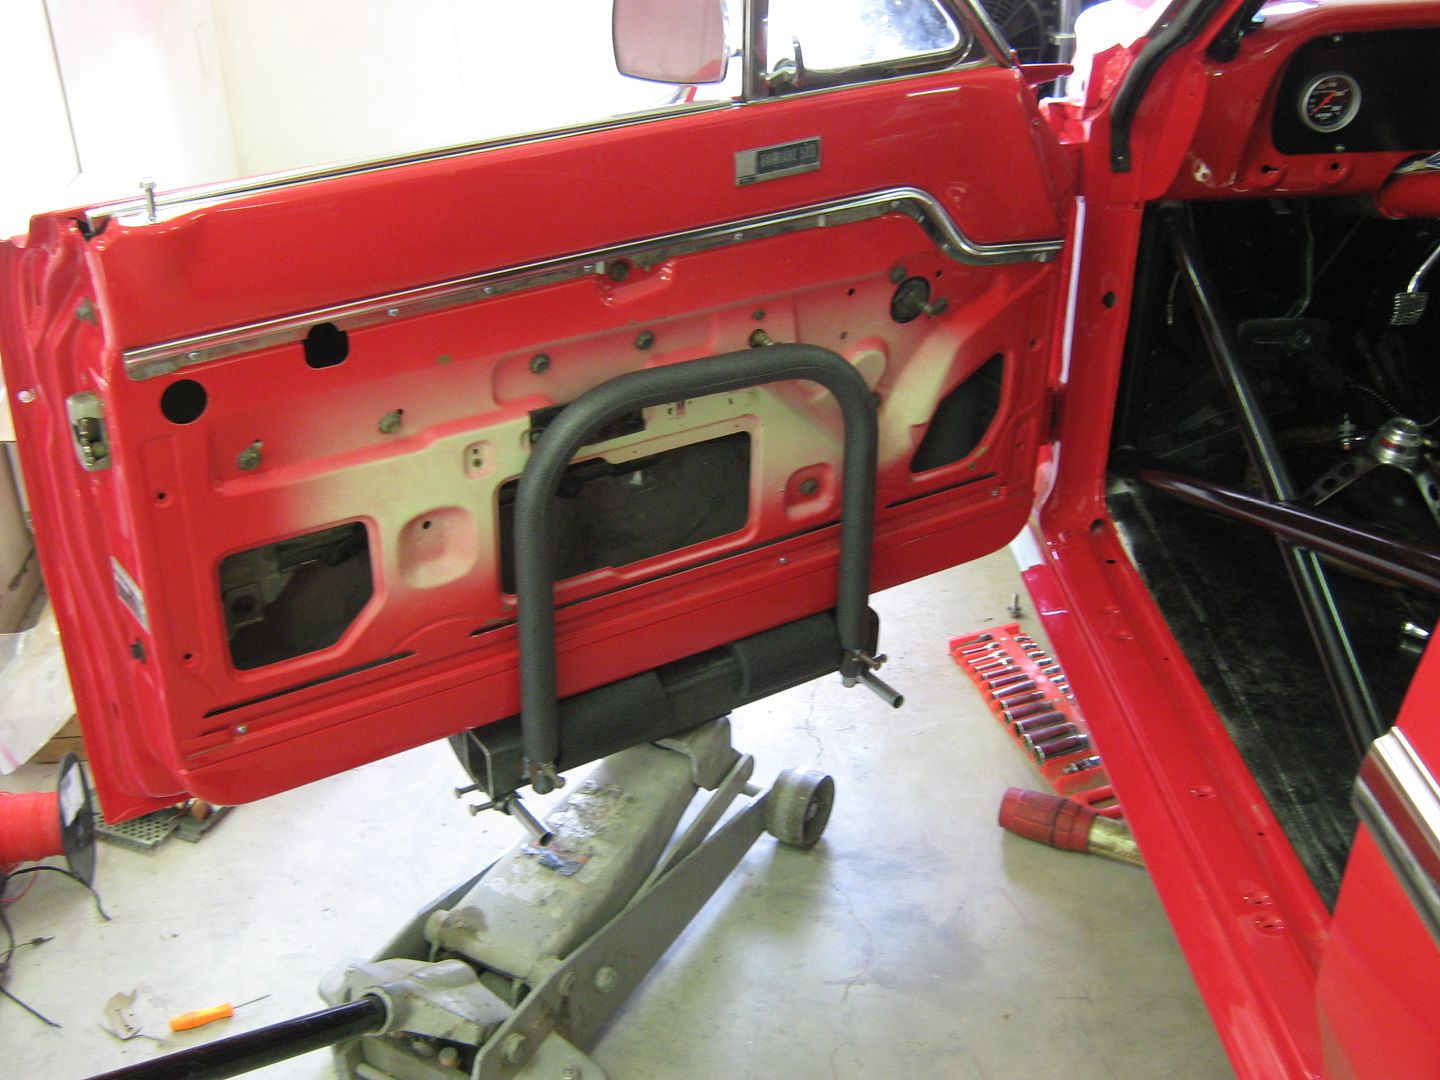 Notice nothing touches the edge of the door skin.... 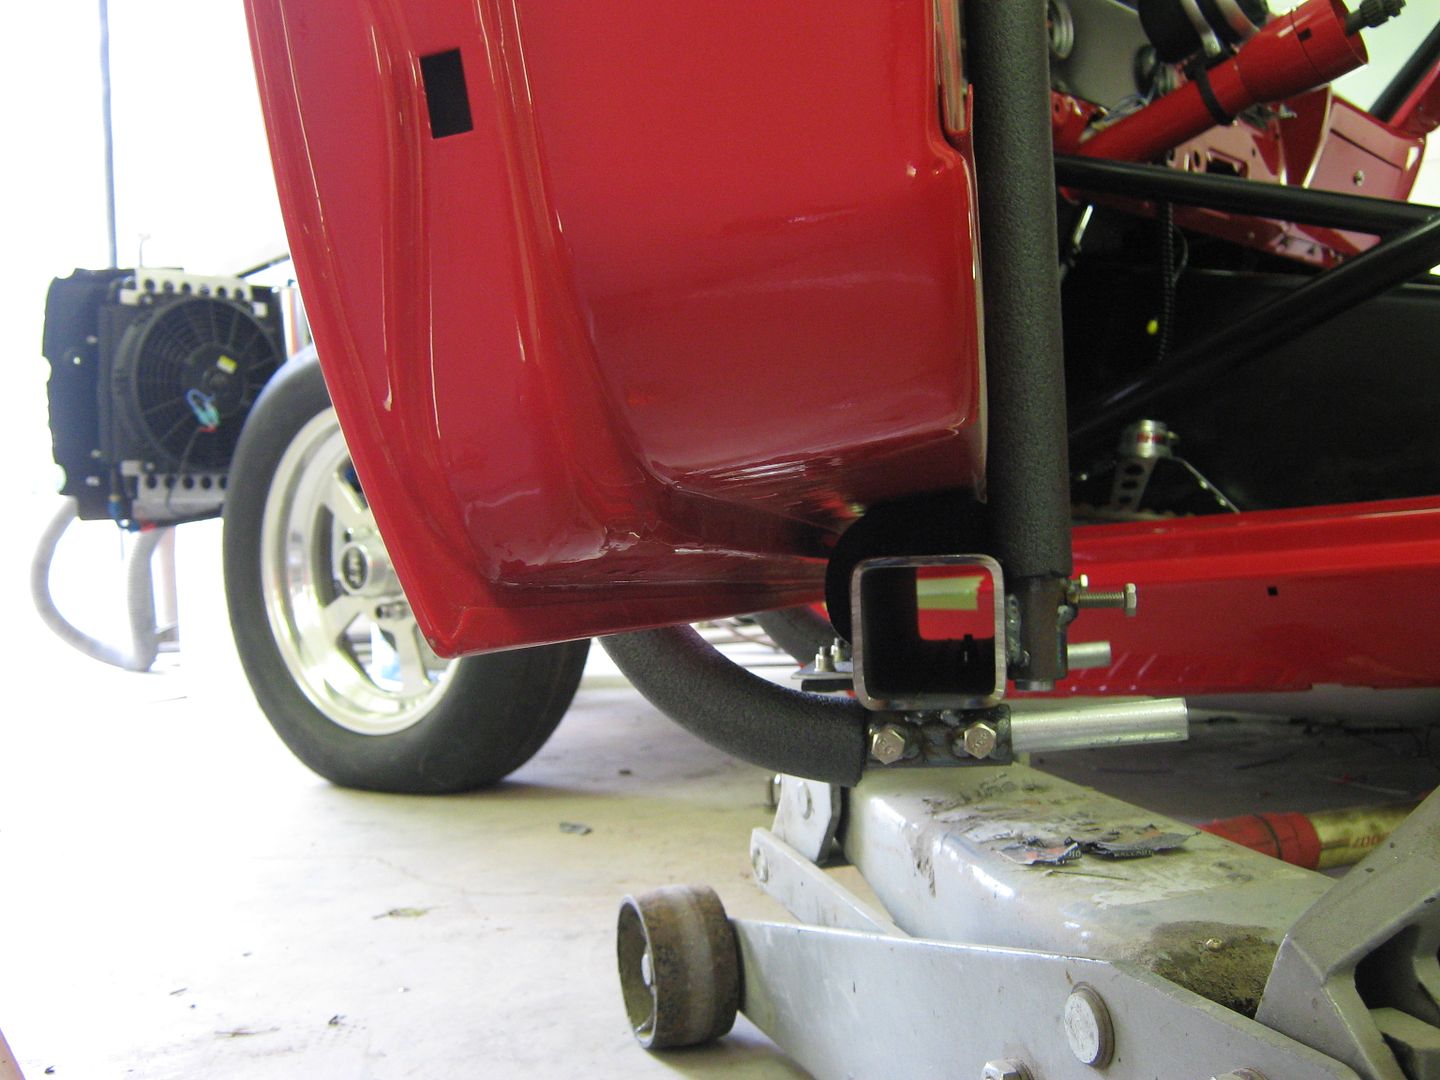 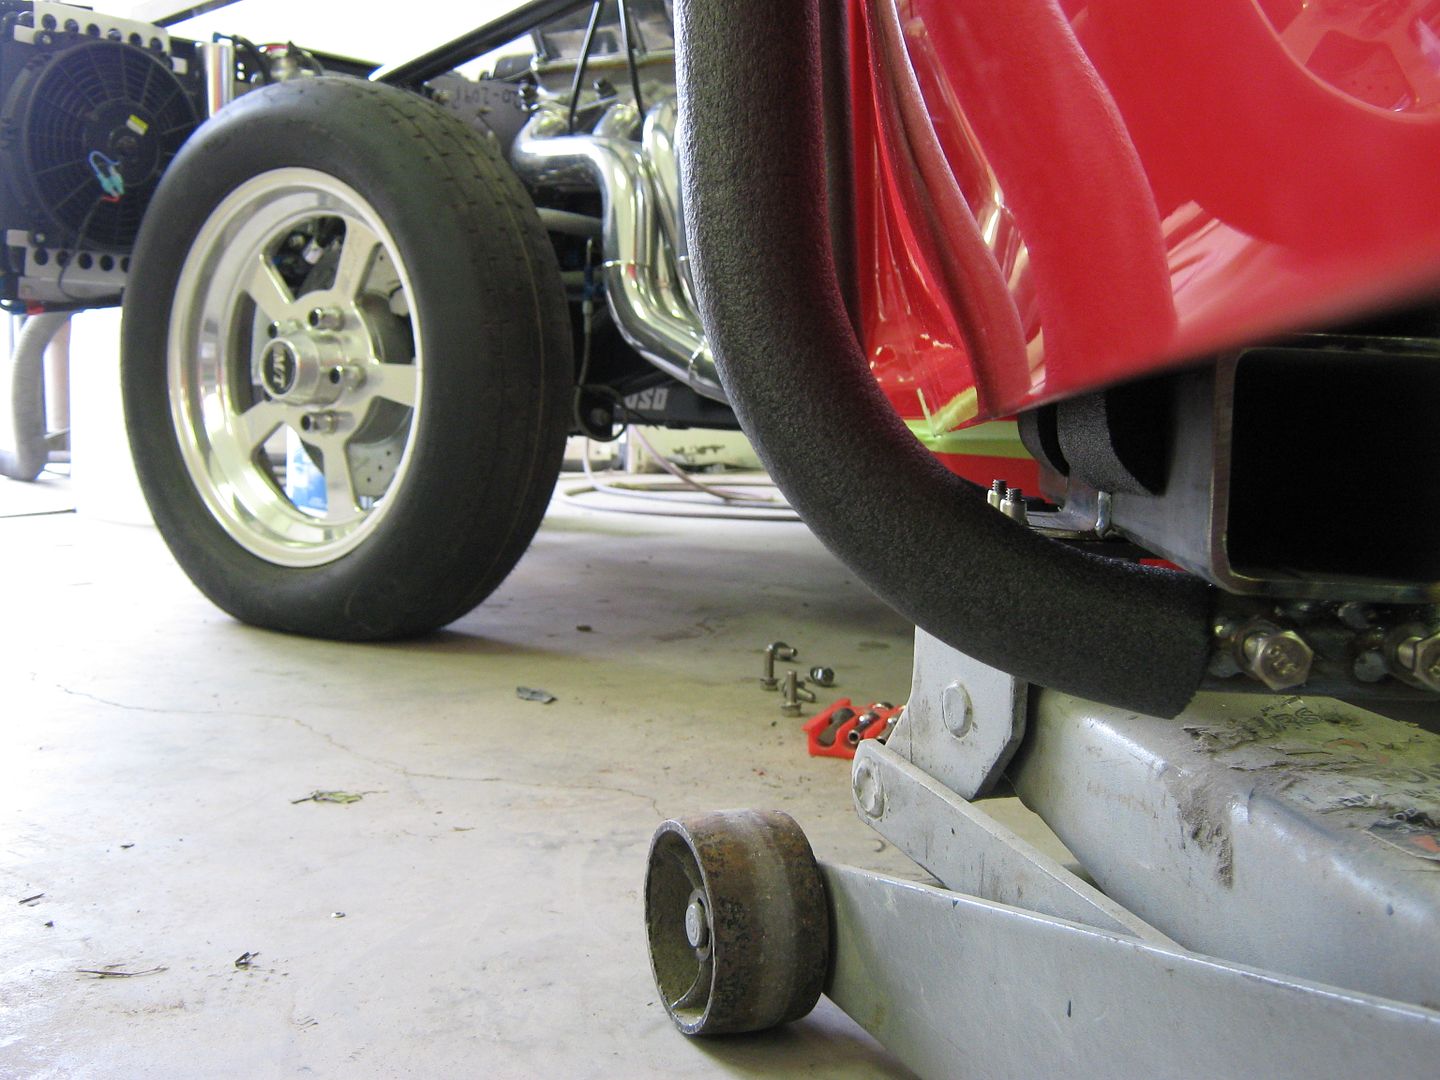 Once hinges are snug, loosen set screws for outer support brace, lower a couple inches, remove outer support brace, and simply pull jack toward rear of car to clear door. 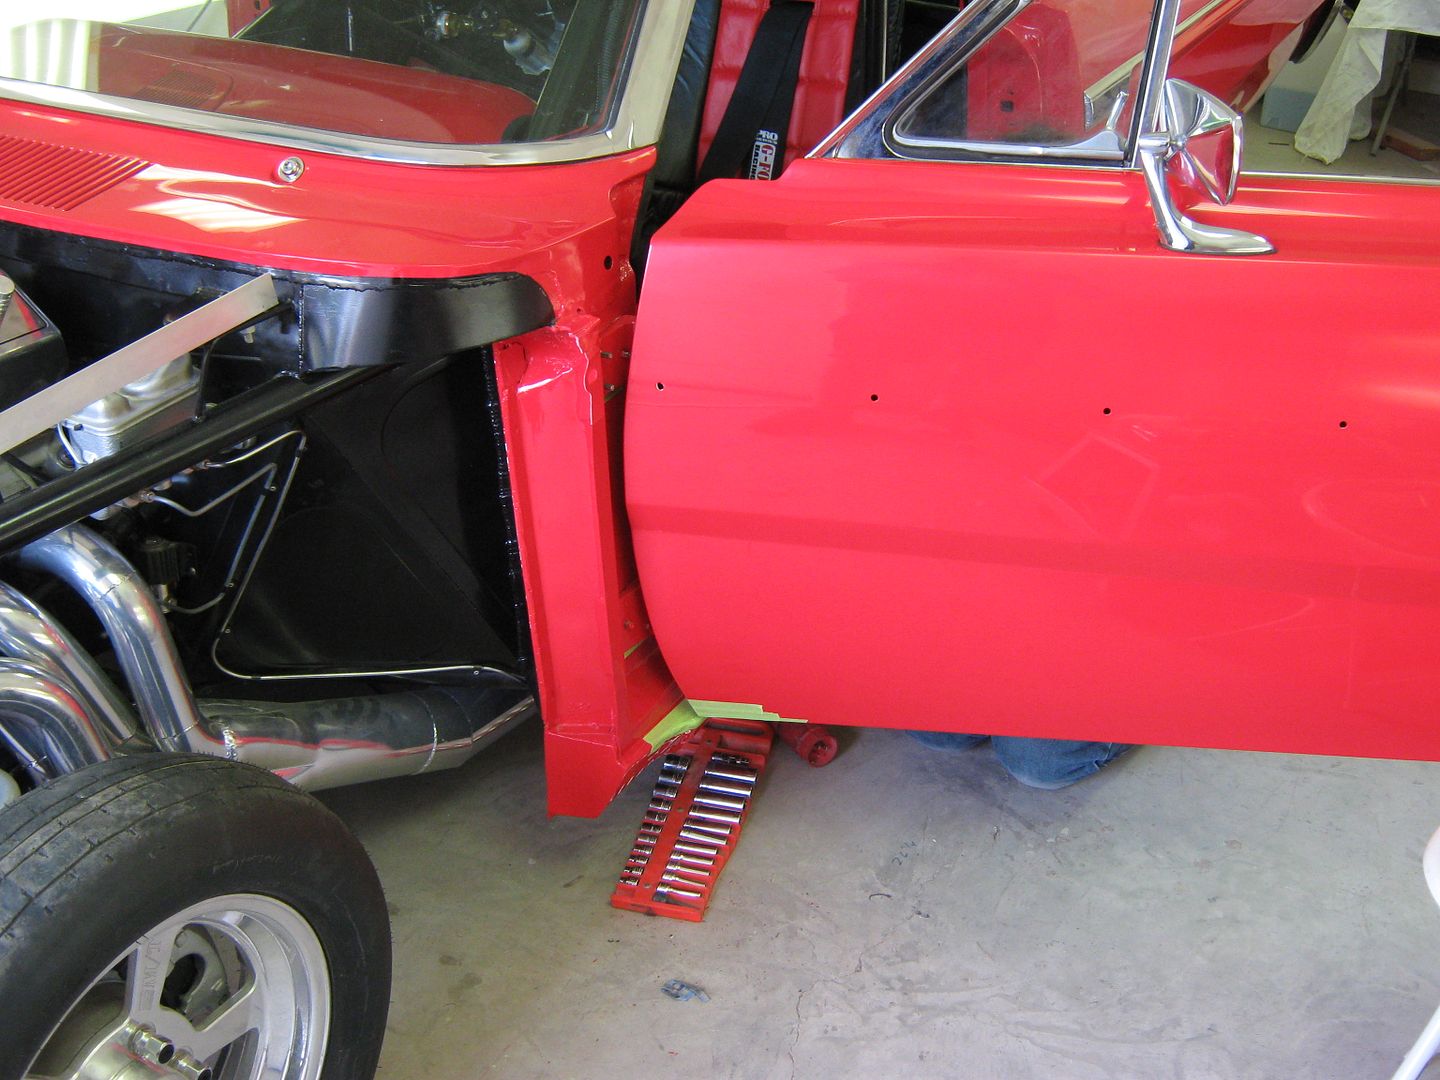 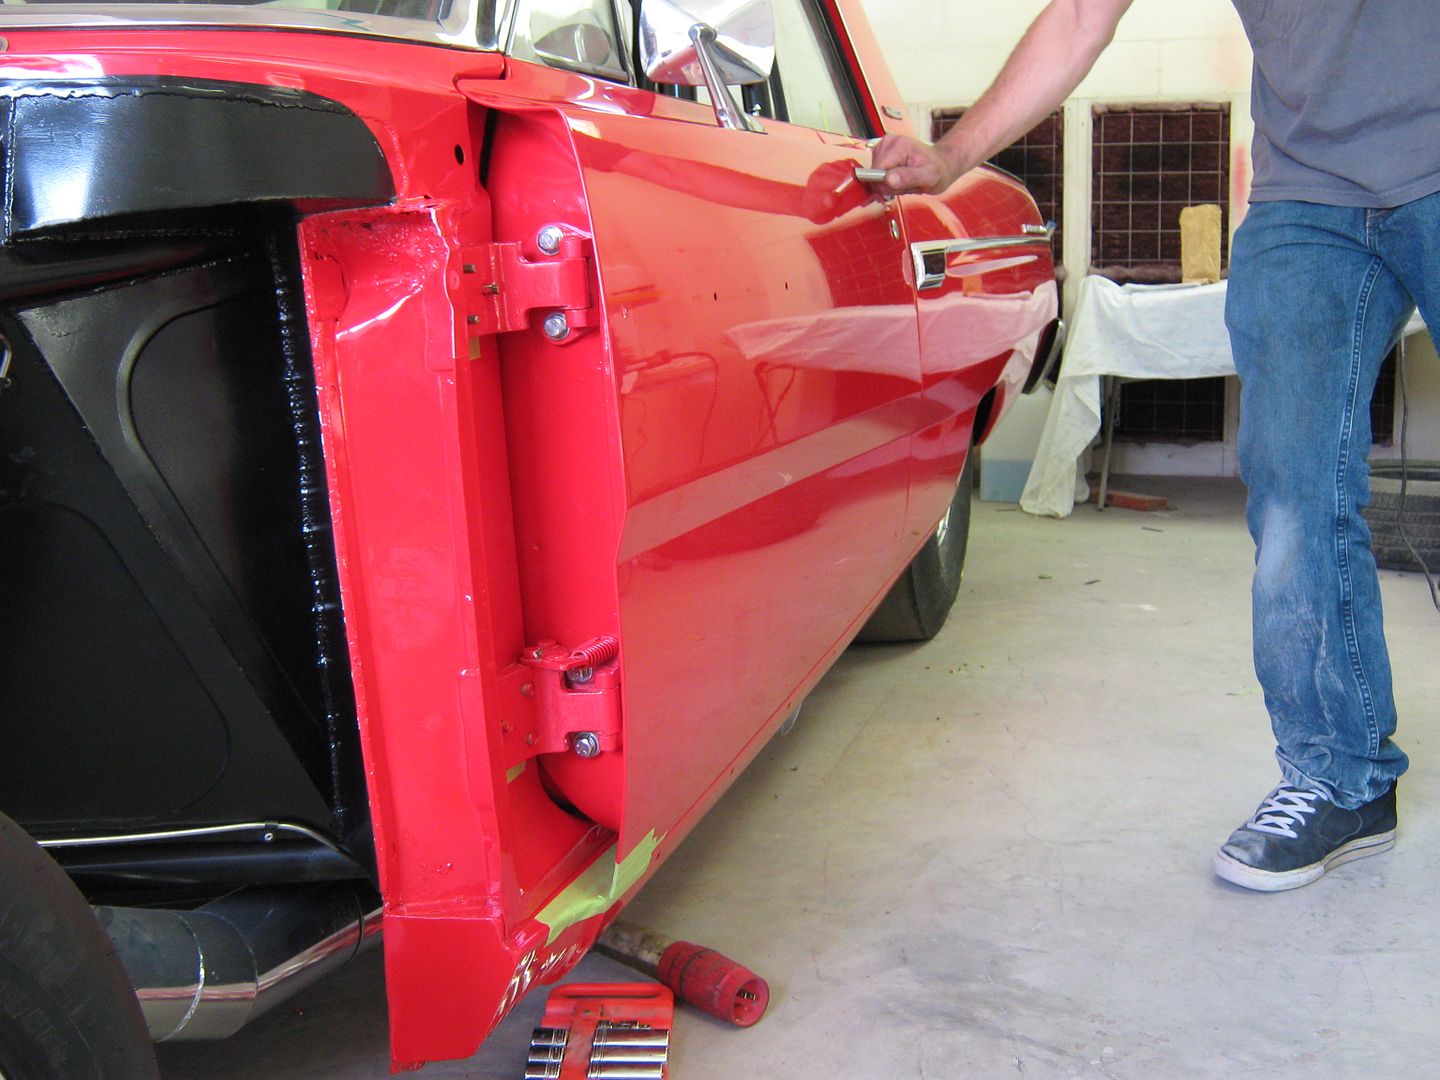 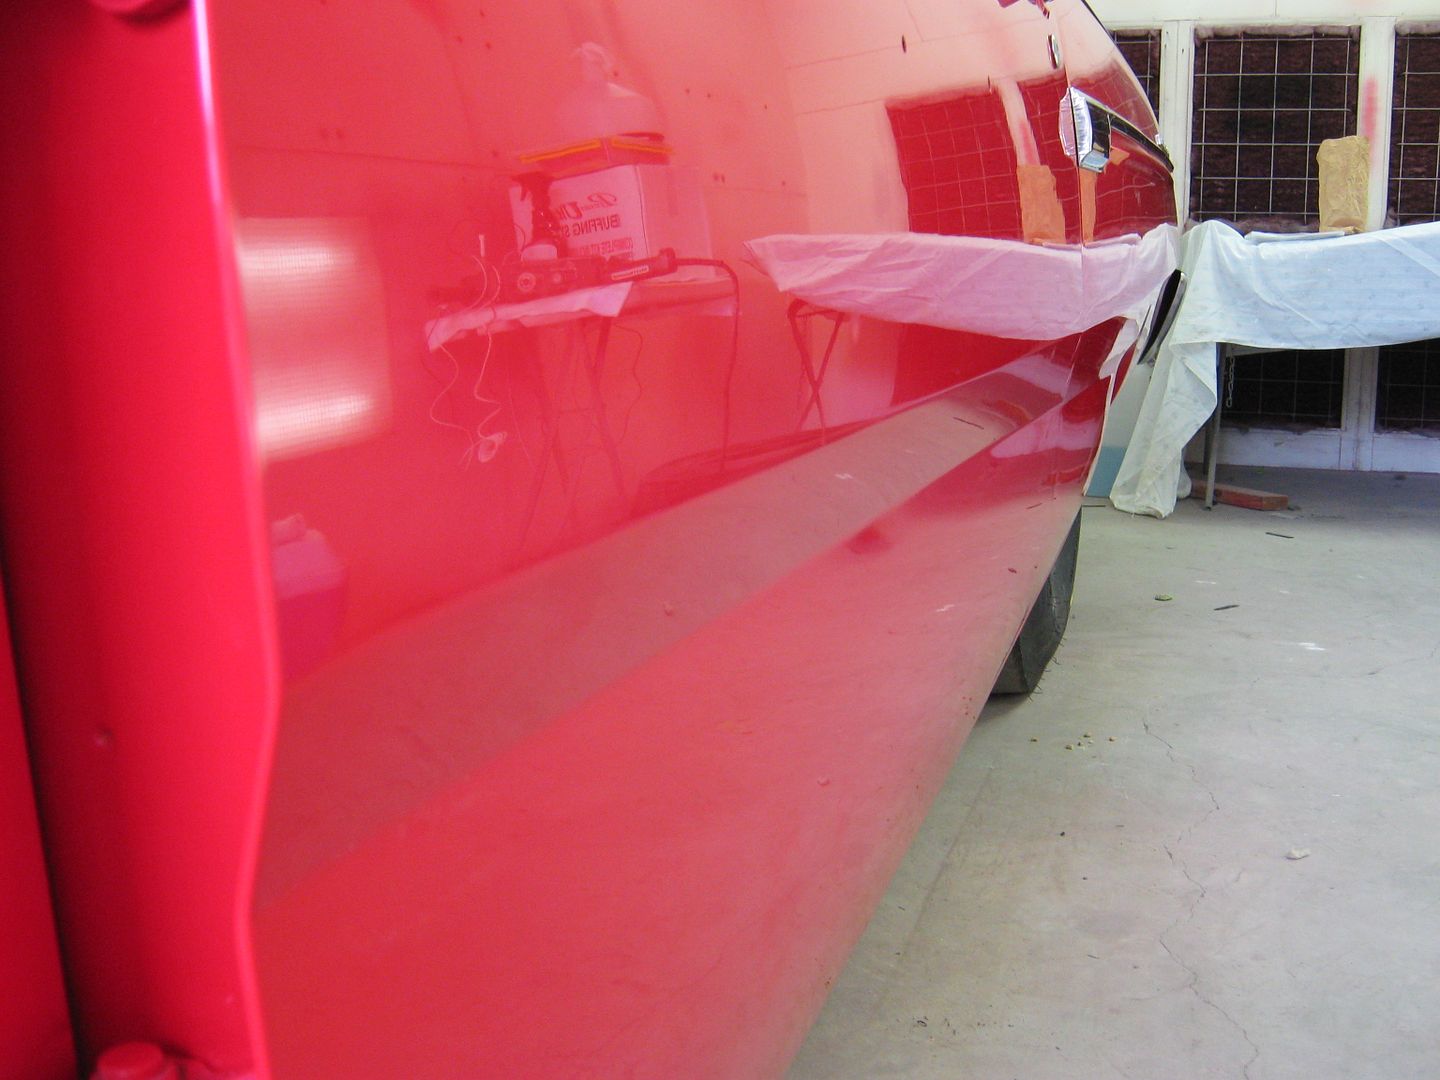
__________________
Robert |
|
|
|
|
01-26-2015, 03:26 PM
|
#331 |
|
Registered Cruiser
Join Date: Mar 2010
Location: Mesa, AZ
Posts: 918
|
Re: 55 Wagon Progress
Pretty slick!
__________________
77' Chevy SB Dropmembered Front and Rear 5.3/4l60e combo |
|
|
|
|
01-26-2015, 06:07 PM
|
#332 |
|
Registered User
Join Date: Jul 2012
Location: Rosenberg, Texas
Posts: 3,506
|
Re: 55 Wagon Progress
Nice! I hope I remember this tool the next time I take a door off a vehicle. This would save a lot of headaches.
I found your thread through another thread suggesting to read your build because you have a lot of great ideas and many of them helped. I can't remember who's thread it was or I'd give him credit. I haven't read everything yet (I'm at work...shhh, don't tell my boss I'm on here.) but from what I've seen so far, he's right. You do some nice work!
__________________
-Duane C/10 Club Texas member 1971 Chevy C10 "Brutus" SWB Fleetside 2016 6.0L (L96) 6L90E (driver/project) 1965 Pontiac GTO "Royal Goat" 400/TH400 w/AC (my baby) |
|
|
|
|
01-26-2015, 09:12 PM
|
#333 |
|
Senior Member
 Join Date: Jul 2012
Location: Oblong, Illinois
Posts: 7,017
|
Re: 55 Wagon Progress
The door cradle is a great idea. You should get that patented if you haven't.
Nice straight red paint too! Great approach to replacing the lead seam. Rather than cutting it out, replacing and having two weld seams to planish you will only have one seam. Cool! I agree with Duane's comment above...lots of great ideas and really nice work shared in this thread. |
|
|
|
|
01-28-2015, 12:10 PM
|
#334 |
|
Registered User
Join Date: Jan 2013
Location: Leonardtown, MD
Posts: 1,633
|
Re: 55 Wagon Progress
In the past I've had guys ask what primer I was using and then why the switch to SPI, here's a home-brewed video (not mine) of a torture test on some panels sprayed with SPI... Pretty tough stuff...
https://www.youtube.com/watch?v=-yA8q4K-_Bo .
__________________
Robert |
|
|
|
|
01-28-2015, 02:37 PM
|
#335 |
|
Registered User
 Join Date: Mar 2007
Location: Scotts, Michigan
Posts: 3,750
|
Re: 55 Wagon Progress
Nice work, I love the detail of your metal work. You make it look so easy. Also nice work creating a special tooling to accomplish a challenge we are all faced with when adjusting doors.
Ok, here is my dumb question. I have never worked with removing lead from seams. I need to do this on two large seems across the back roof of my 53 suburban. Question - I don't have a access to an acetylene torch. Can a person heat the lead up enough using a propane torch? Thanks Marc
__________________
...........__________ .................. ((__|__||___\____ ..;.;;.:;:;.,;..;((_(O))____ (_(O)) 1948 Chevy Truck - Finished SOLD!! 1953 Chevy Suburban "Family Truckster" Completed: Spring of 2021 http://67-72chevytrucks.com/vboard/s...d.php?t=605484 1994 4x4 Blazer - "Field Find" https://67-72chevytrucks.com/vboard/...ferrerid=30857 |
|
|
|
|
01-28-2015, 05:07 PM
|
#336 |
|
Registered User
Join Date: Jan 2013
Location: Leonardtown, MD
Posts: 1,633
|
Re: 55 Wagon Progress
Should be able to, just watch you don't get the heat too far away from the creases where the panel wants to warp. I normally just watch the lead. When it starts to bubble a little, brush..
__________________
Robert |
|
|
|
|
01-29-2015, 12:04 AM
|
#337 |
|
Registered User
Join Date: Jan 2013
Location: Leonardtown, MD
Posts: 1,633
|
Re: 55 Wagon Progress
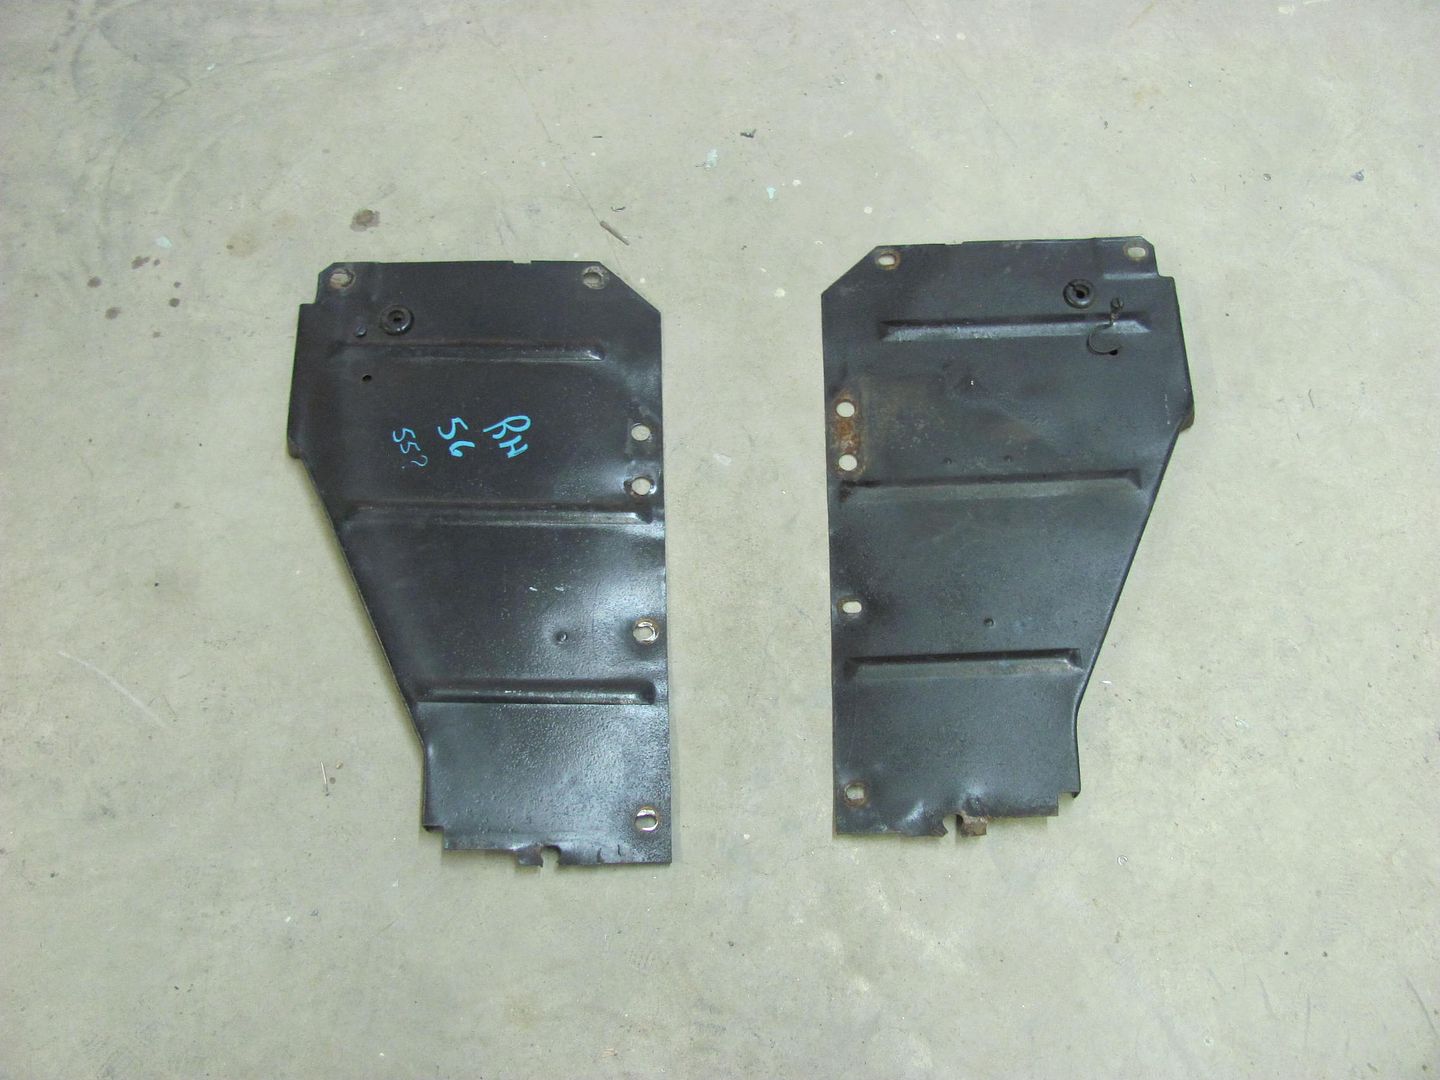
Tonight's update. We took delivery on some nice used core support side panels from Jay Hammond's Chevy Parts. The others were quite mangled, so this will save quite a bit of time in making a set.
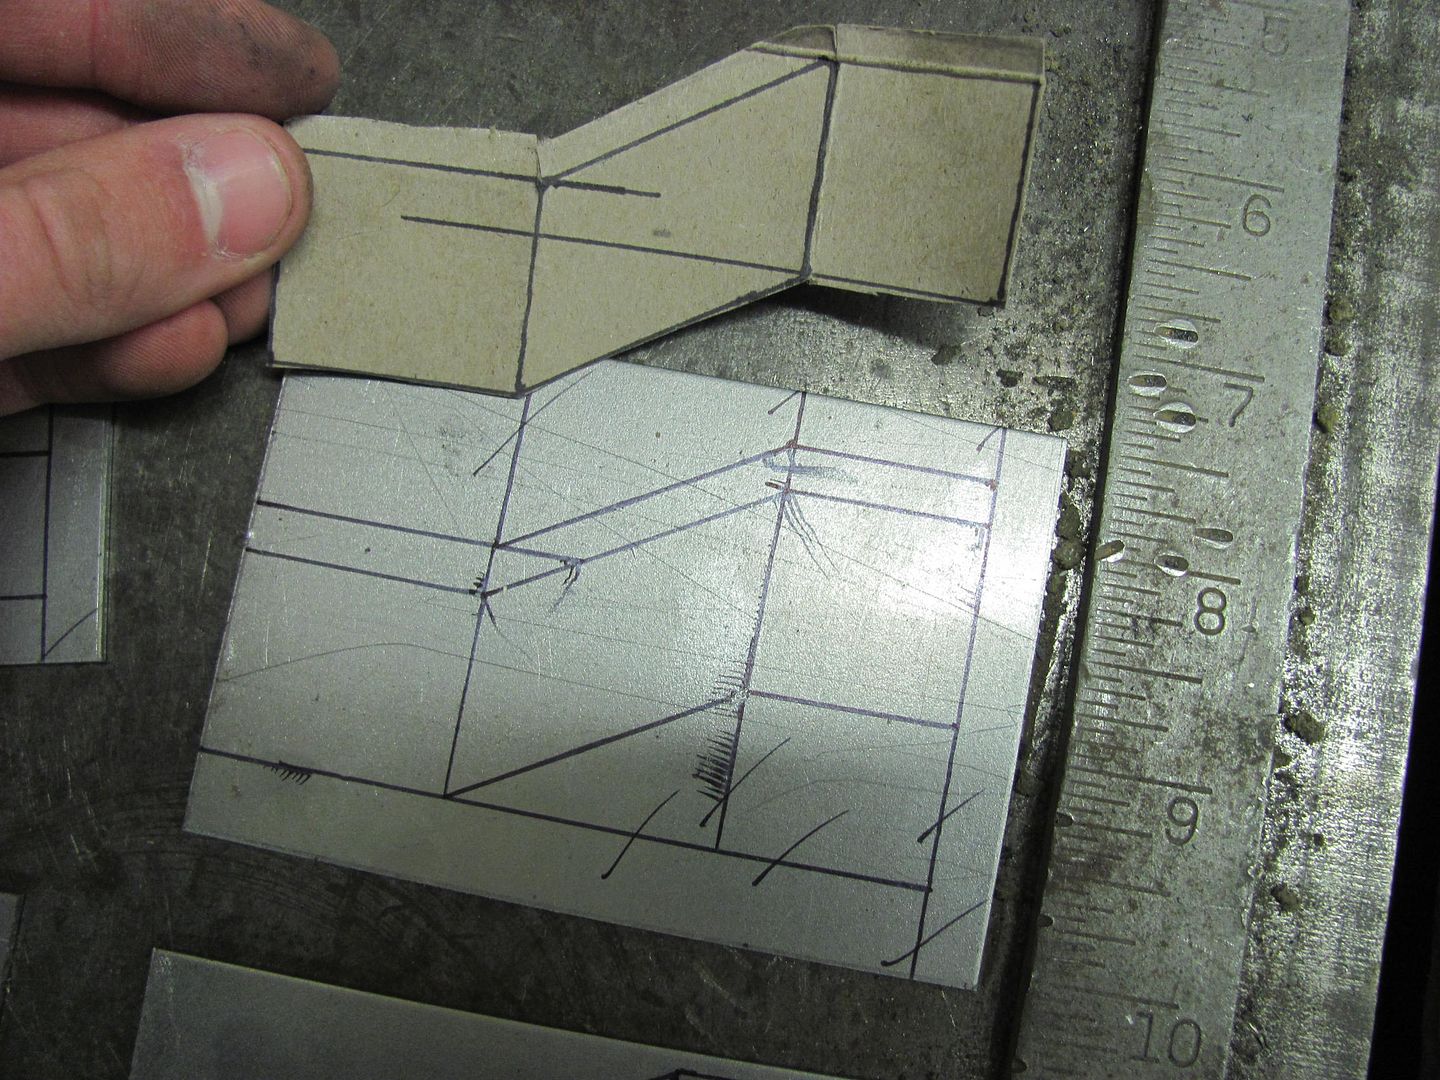
 Kyle finishing up the battery hold down modification... 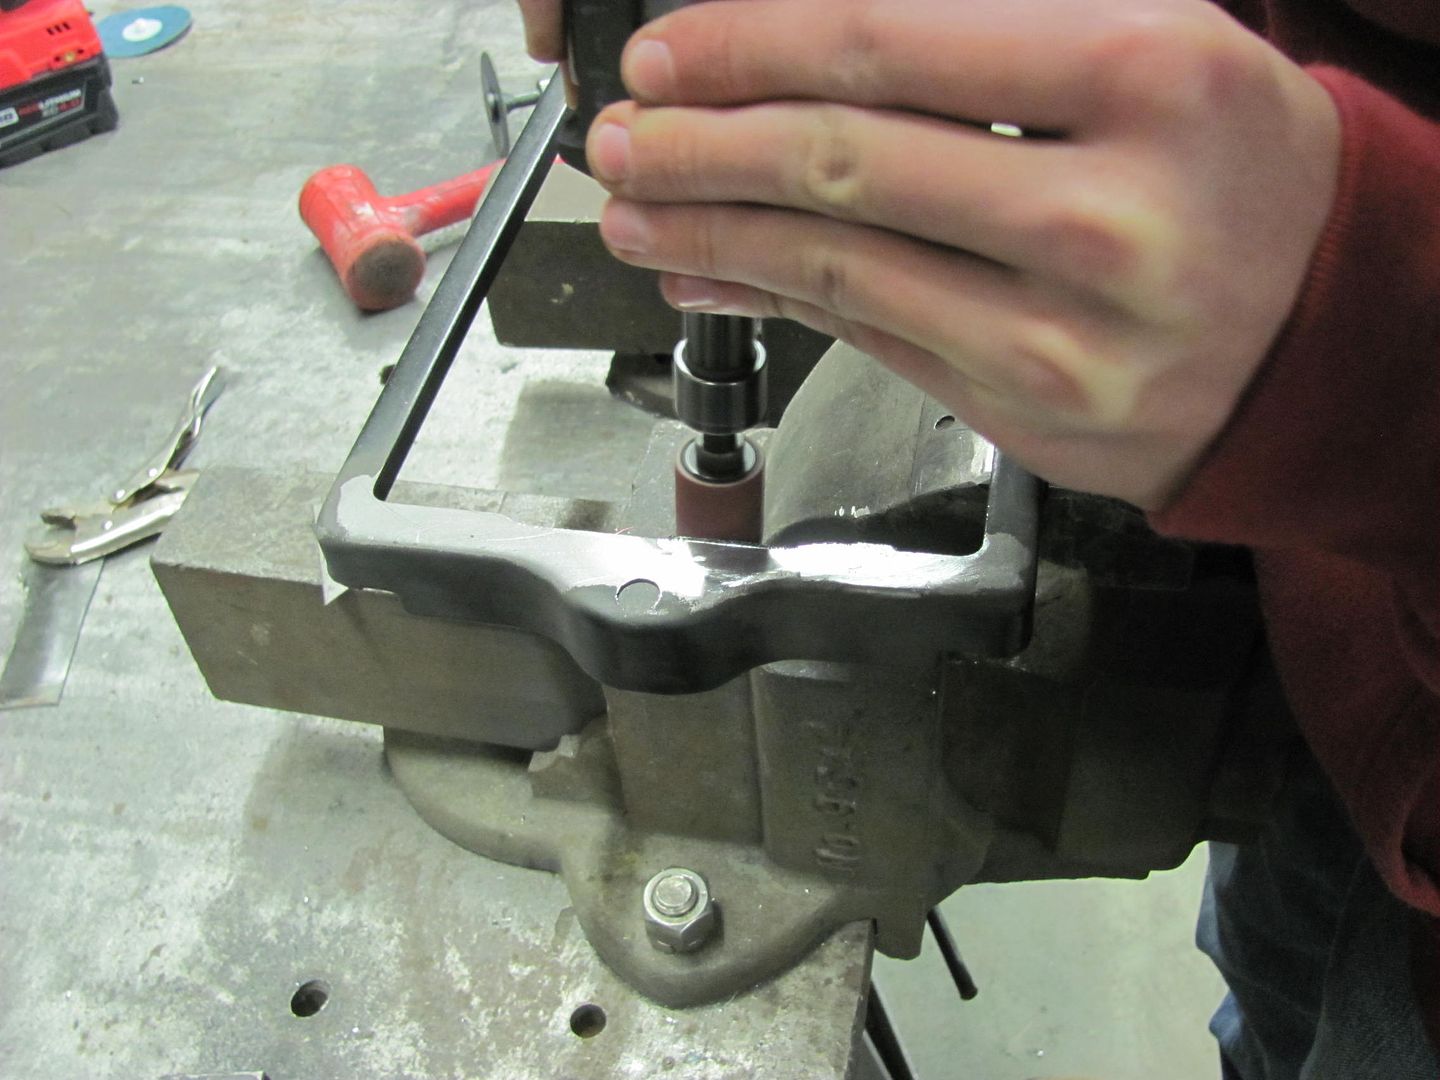 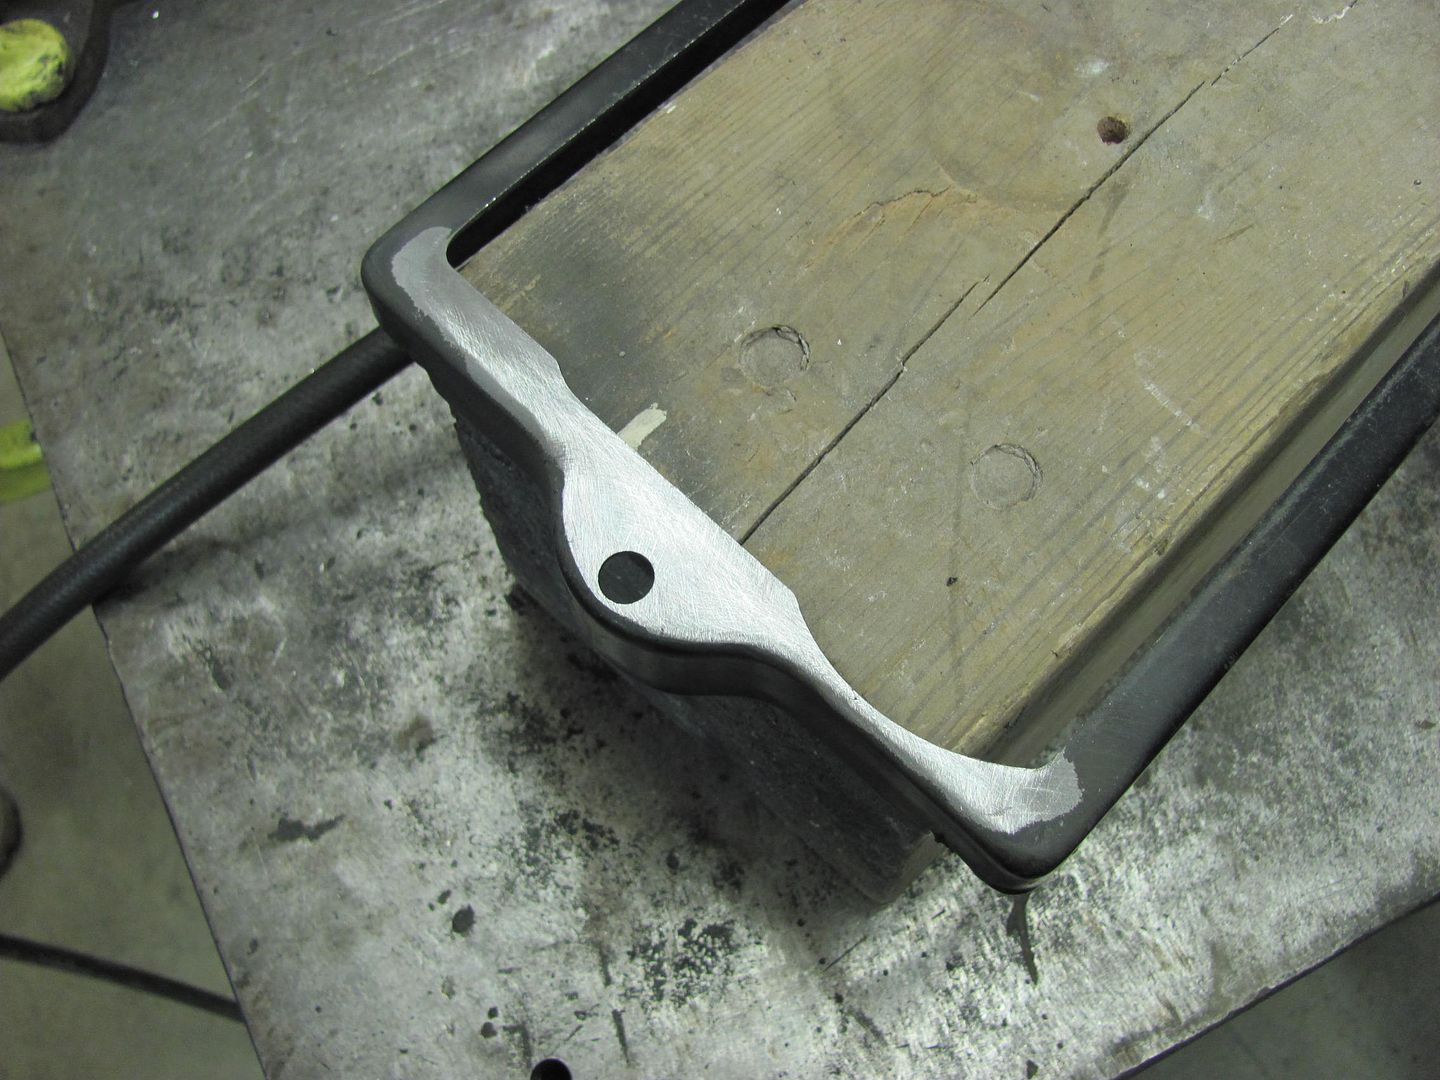 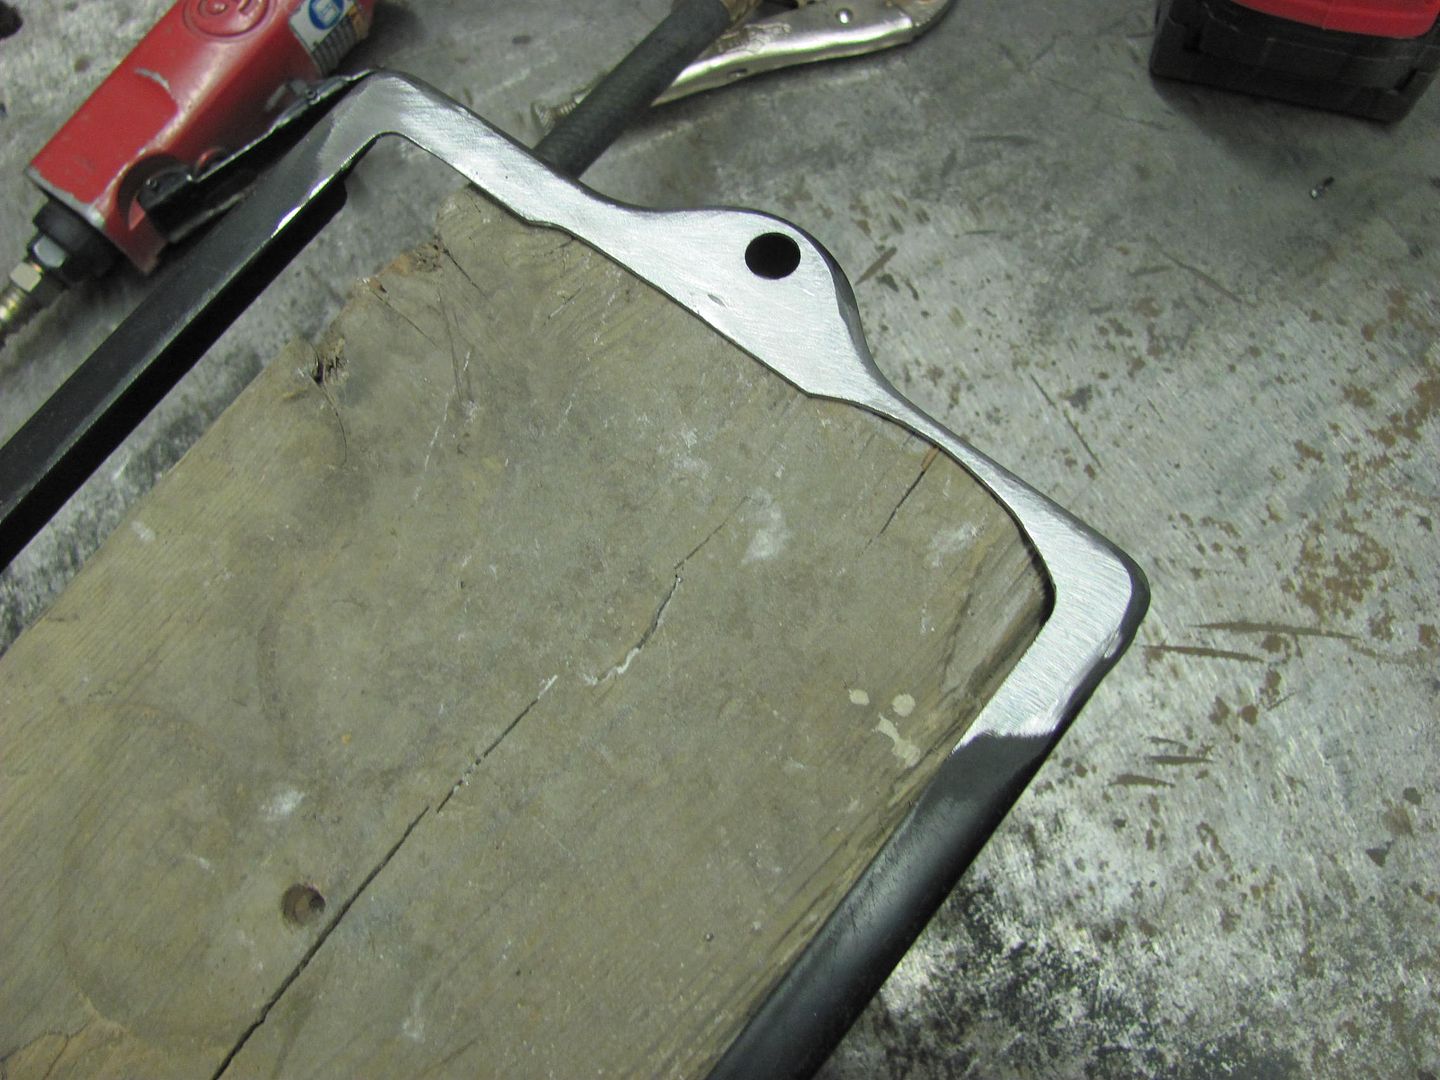 We also mocked up an MT24F battery... 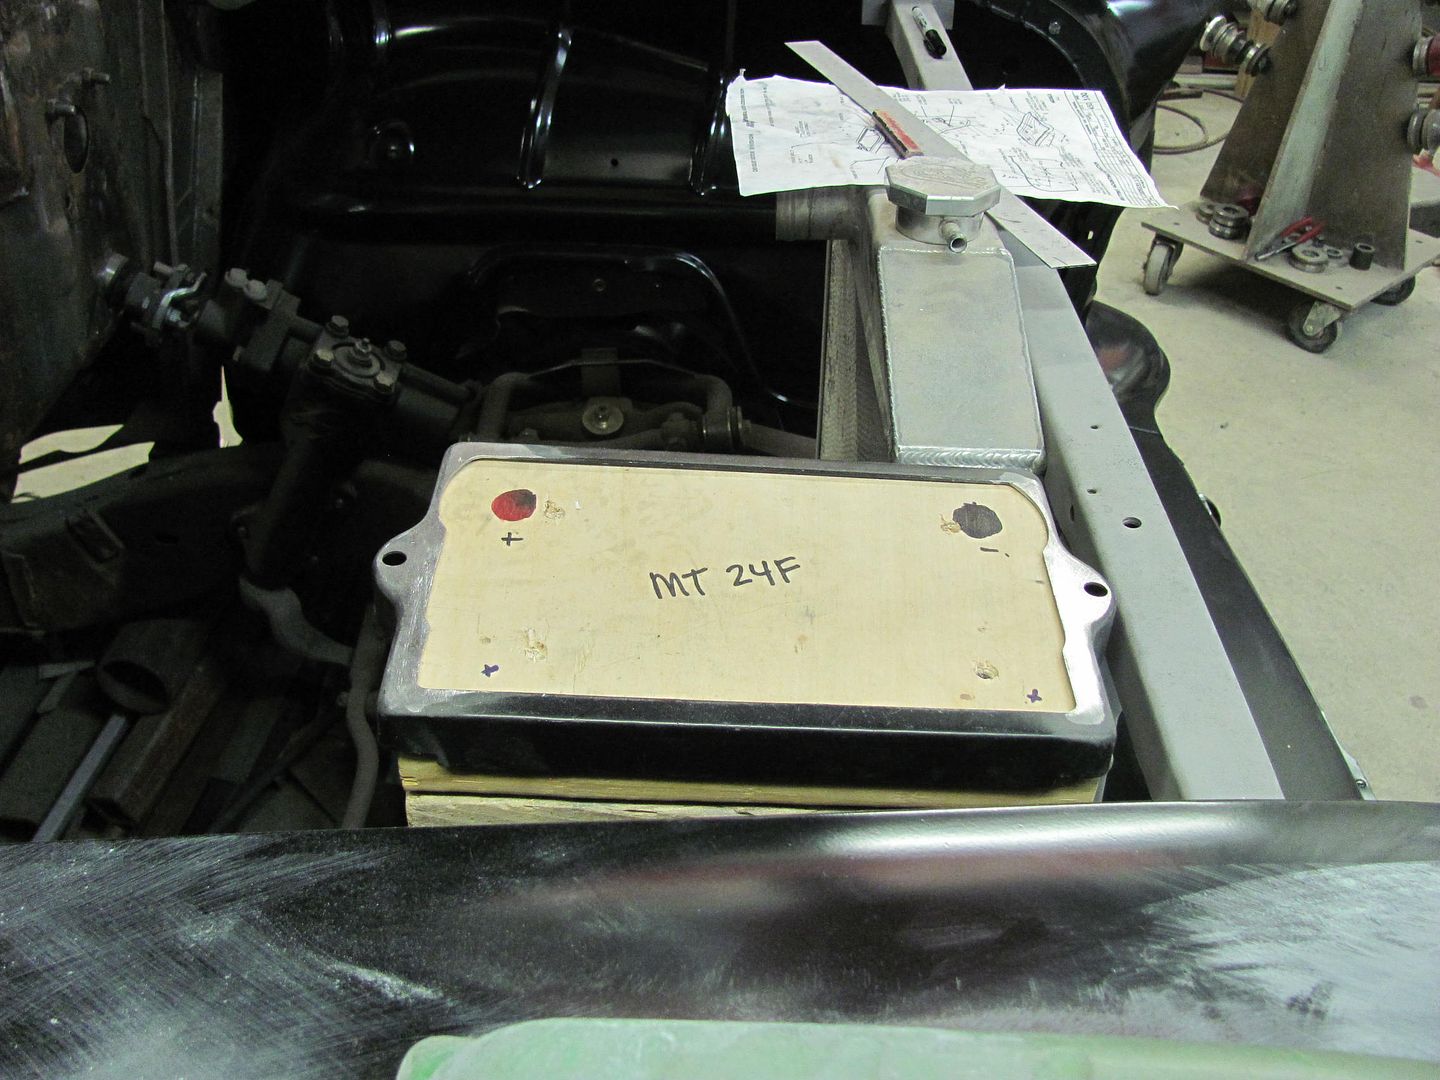 The factory version of this battery location for an air conditioned car also calls for a "zee" bracket to the back side of the core support. 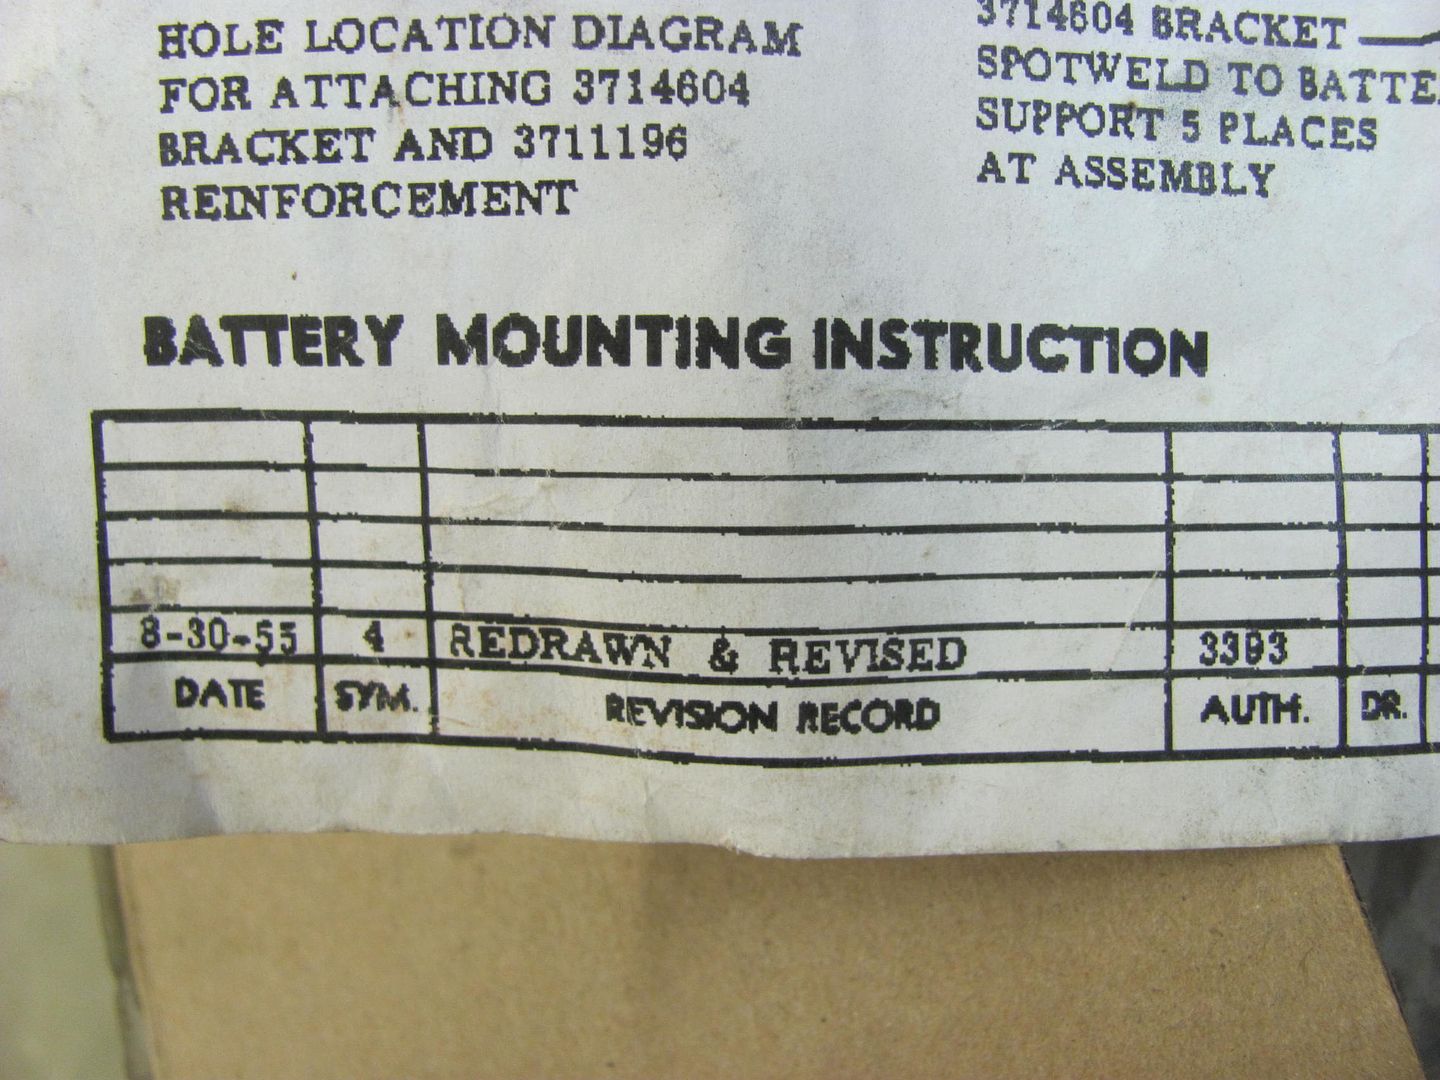 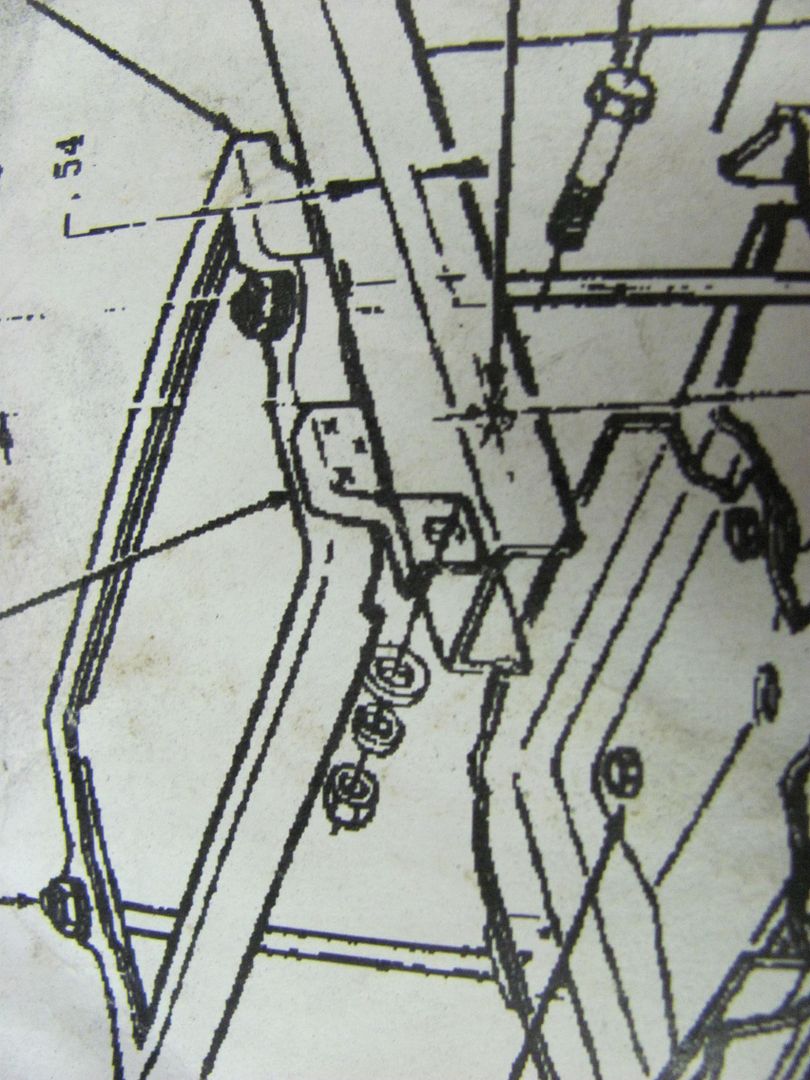 So with dimensions taken, a practice piece was cut out of poster board... 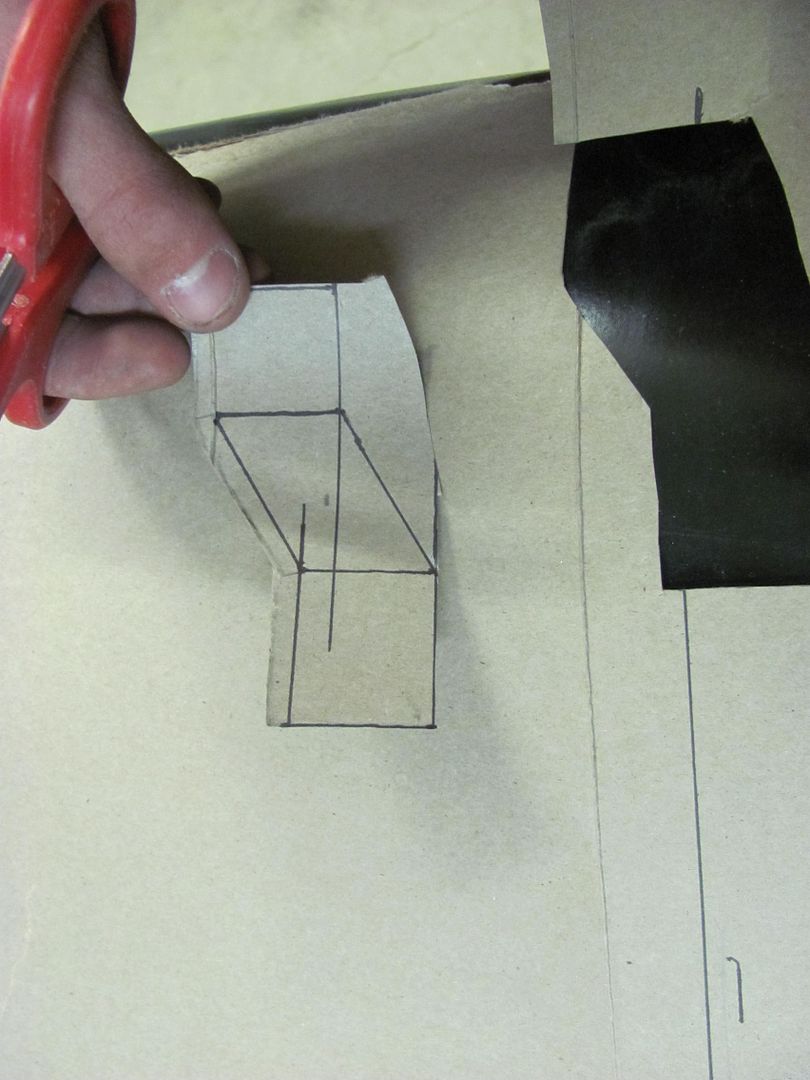 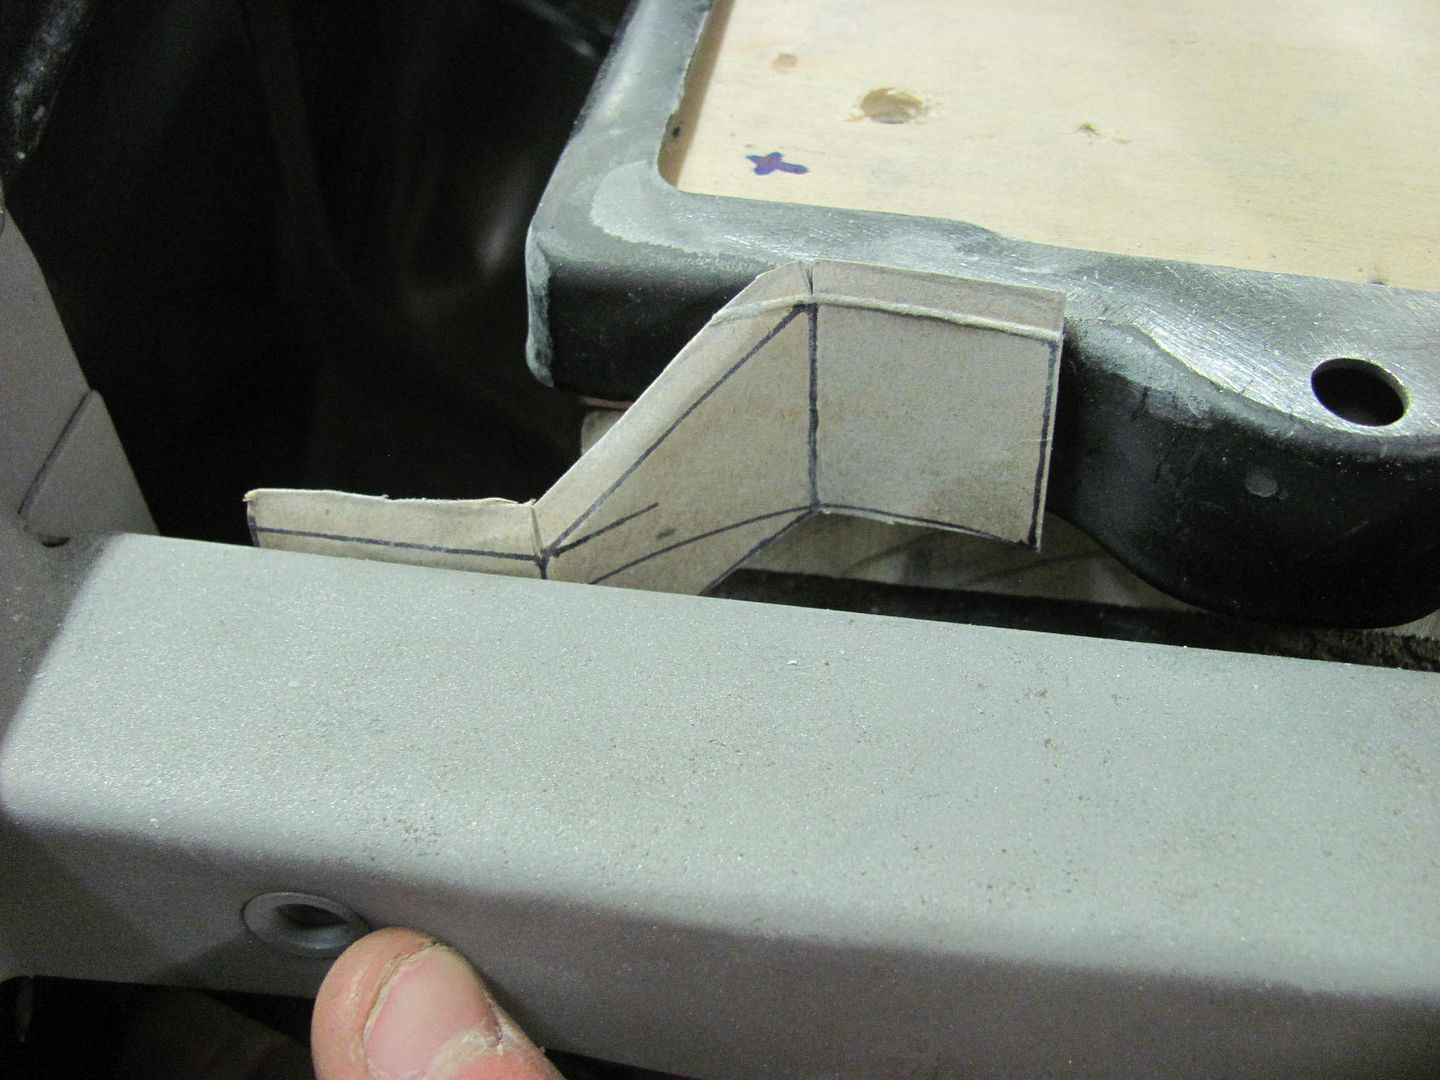 Laid out on some 16 GA CRS... 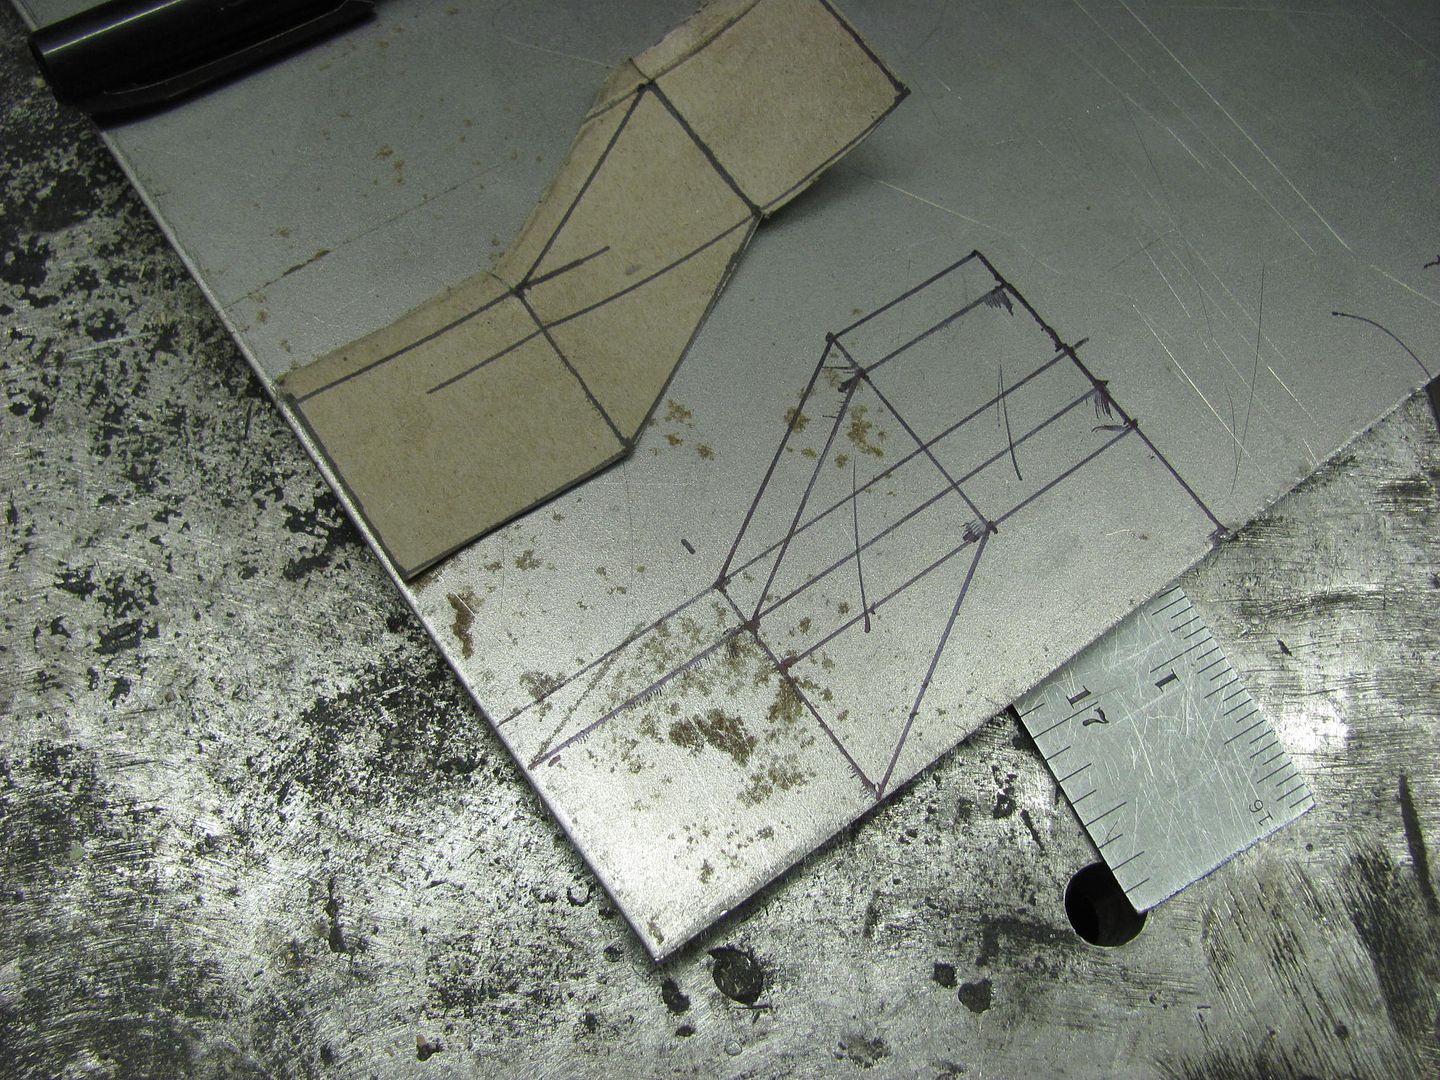 And got a bit more blocking done across the door gaps.. 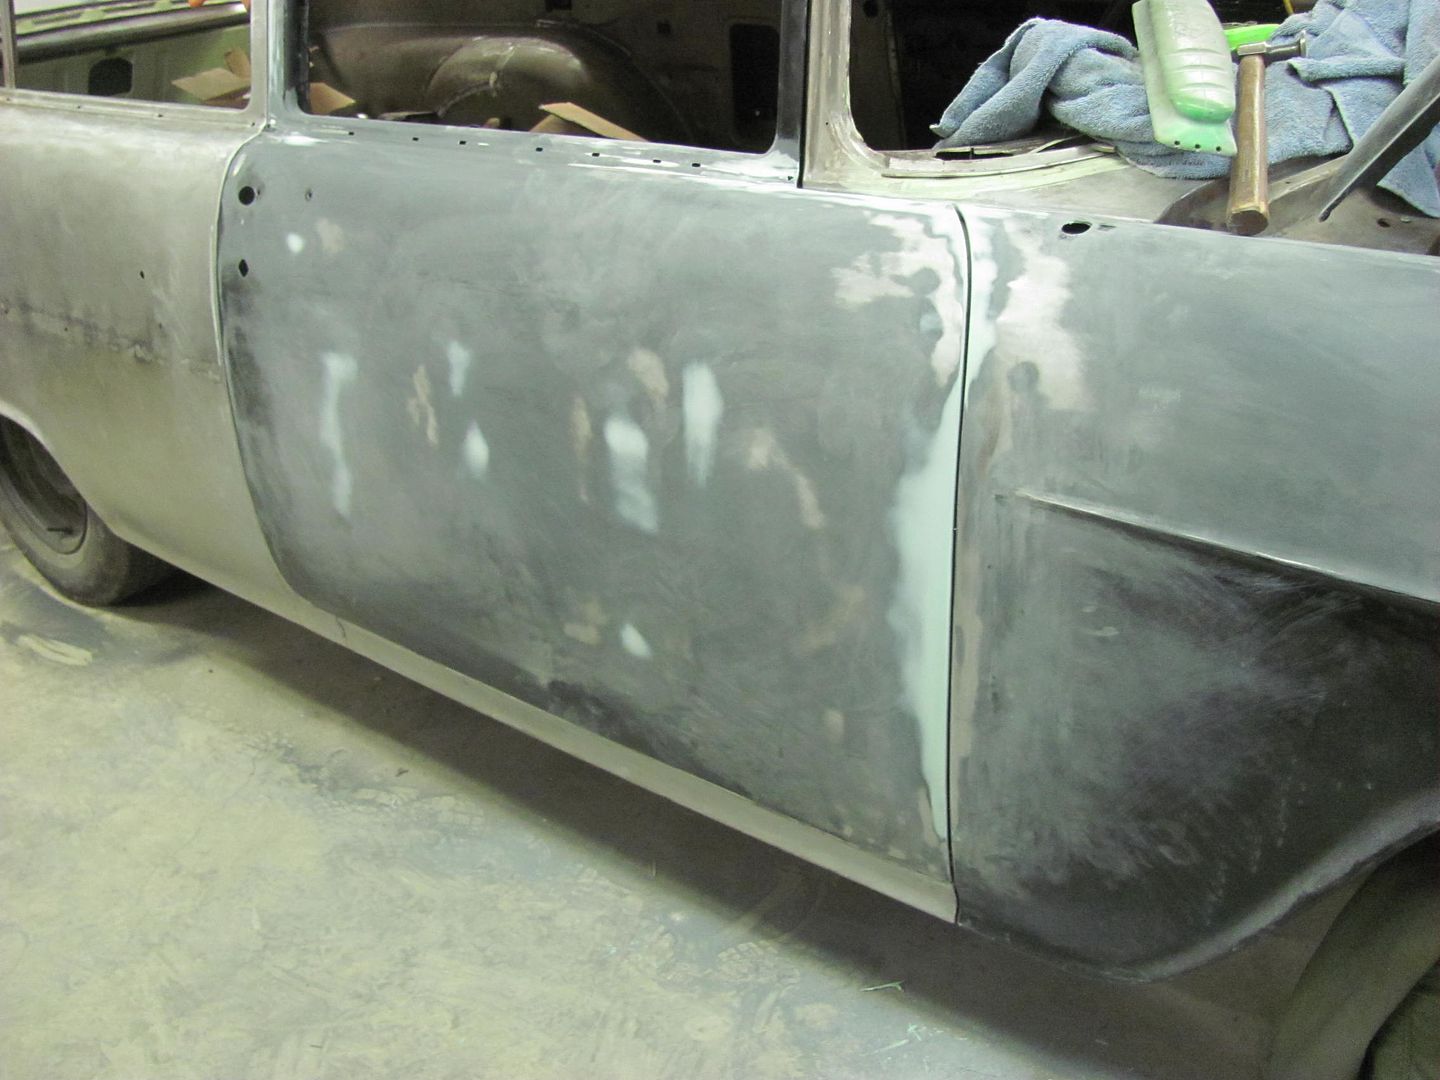 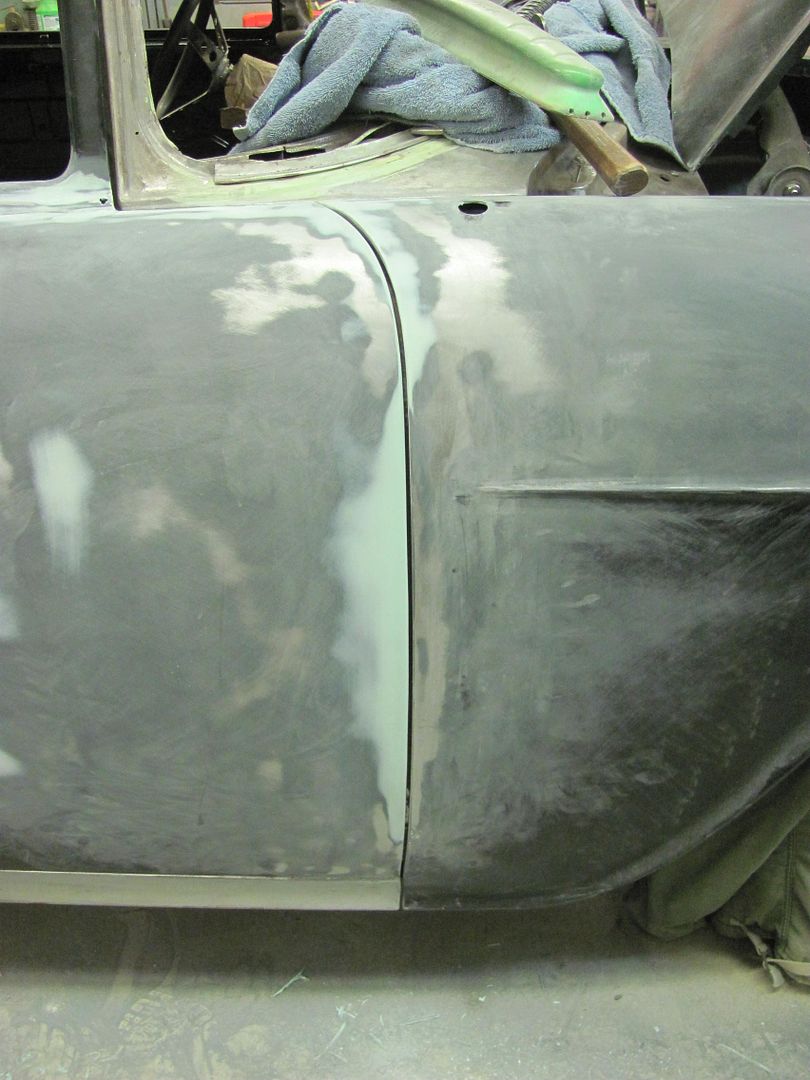
__________________
Robert |
|
|
|
|
01-29-2015, 12:37 AM
|
#338 | |
|
Registered User
Join Date: Mar 2007
Location: Scotts, Michigan
Posts: 3,750
|
Re: 55 Wagon Progress
Quote:
Marc
__________________
...........__________ .................. ((__|__||___\____ ..;.;;.:;:;.,;..;((_(O))____ (_(O)) 1948 Chevy Truck - Finished SOLD!! 1953 Chevy Suburban "Family Truckster" Completed: Spring of 2021 http://67-72chevytrucks.com/vboard/s...d.php?t=605484 1994 4x4 Blazer - "Field Find" https://67-72chevytrucks.com/vboard/...ferrerid=30857 |
|
|
|
|
|
01-29-2015, 01:07 AM
|
#339 |
|
Senior Member
Join Date: Mar 2011
Location: West Plains, Missouri
Posts: 7,553
|
Re: 55 Wagon Progress
Front door gap looks great...Jim
__________________
my build thread: http://67-72chevytrucks.com/vboard/s...d.php?t=459839 Jimbo's long bed step build:http://67-72chevytrucks.com/vboard/s...t=464626<br /> |
|
|
|
|
01-31-2015, 08:53 PM
|
#340 |
|
Registered User
Join Date: Jan 2013
Location: Leonardtown, MD
Posts: 1,633
|
Re: 55 Wagon Progress
Today Kyle cut out the battery tray's zee bracket, and I had told him we should tip the top lip first and then make the vertical bends...
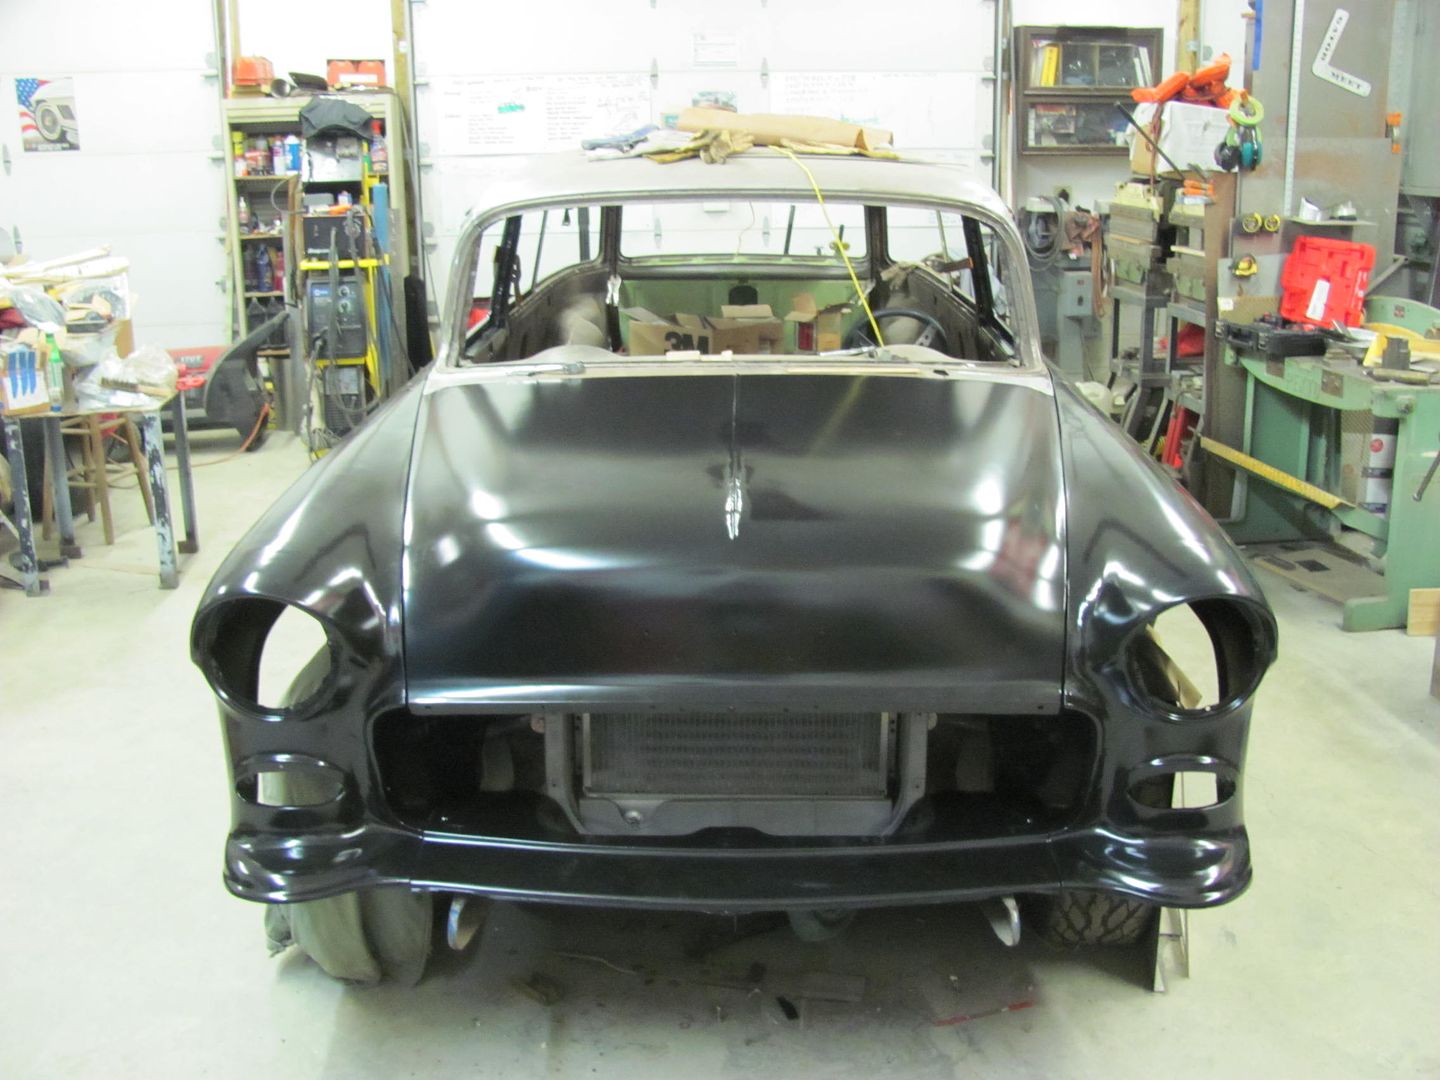
 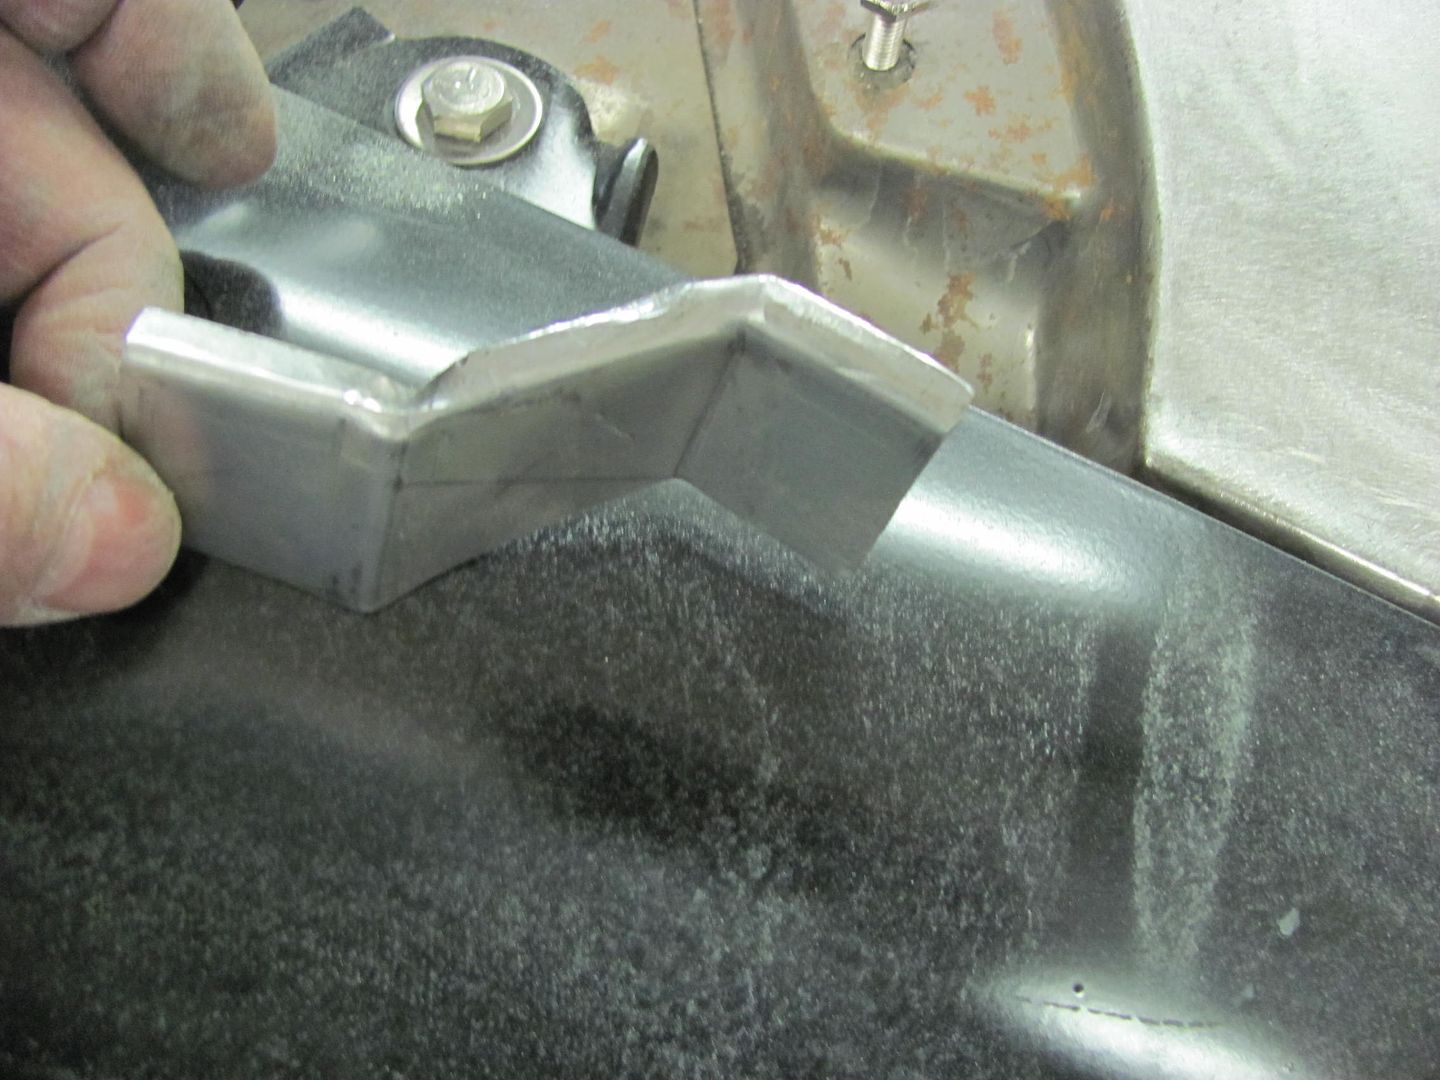 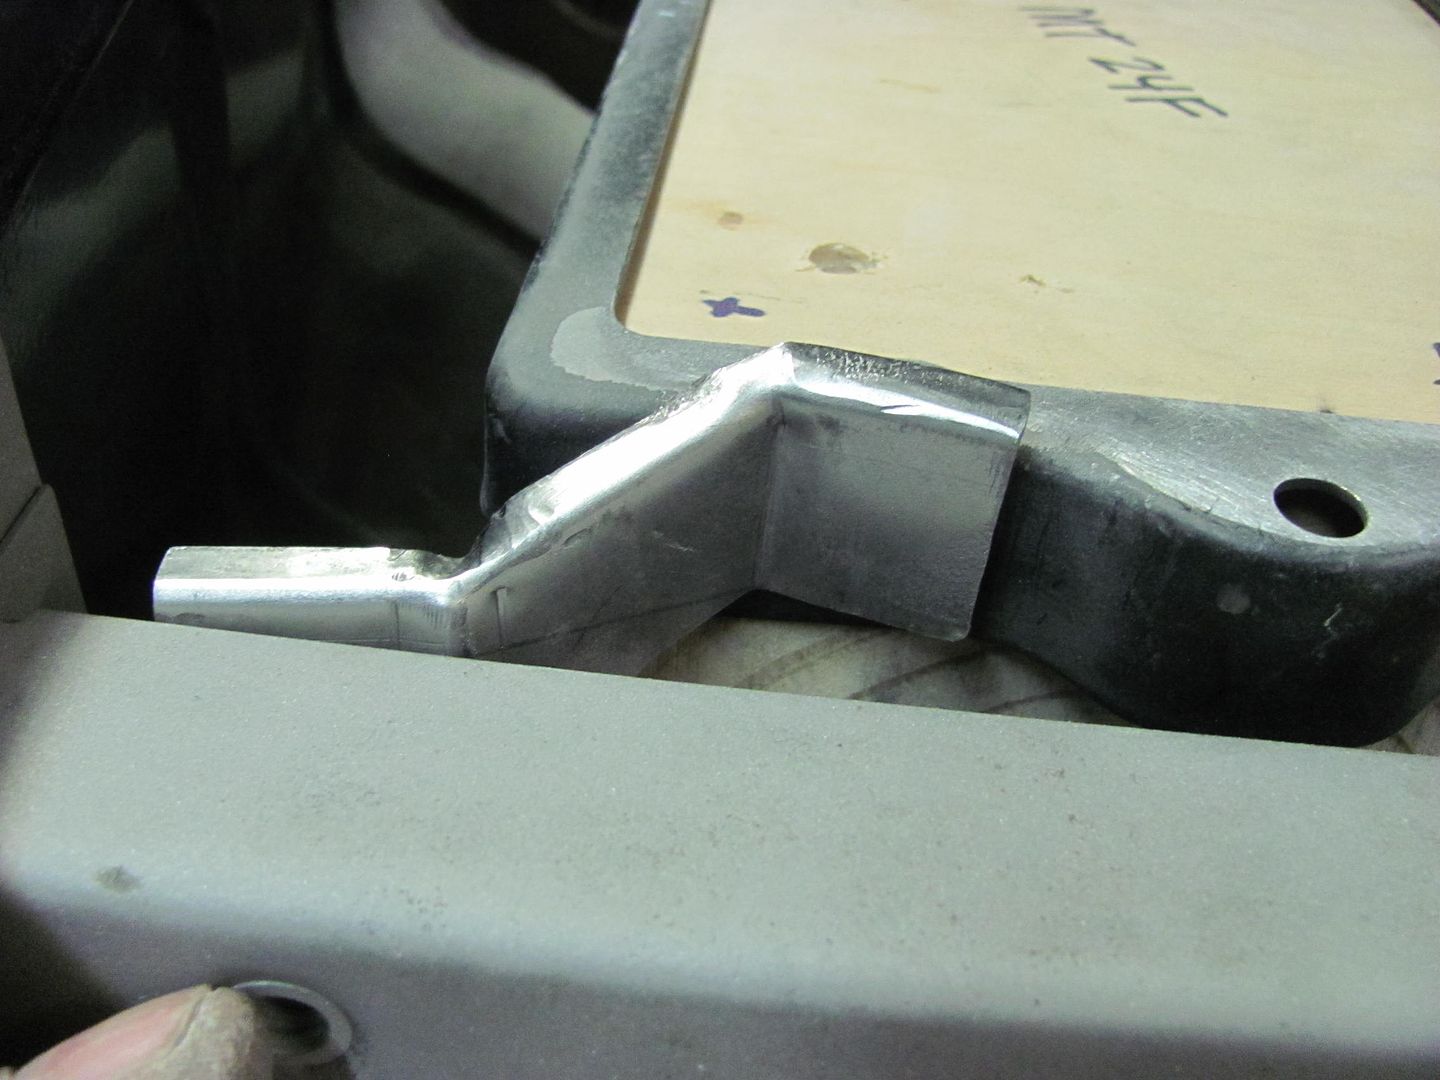 As you can see, it turned out horribly, and sometimes I need a learning curve myself...  We had used a narrow bottom die to tip the top flange, and should have also used something different for the vertical bends. 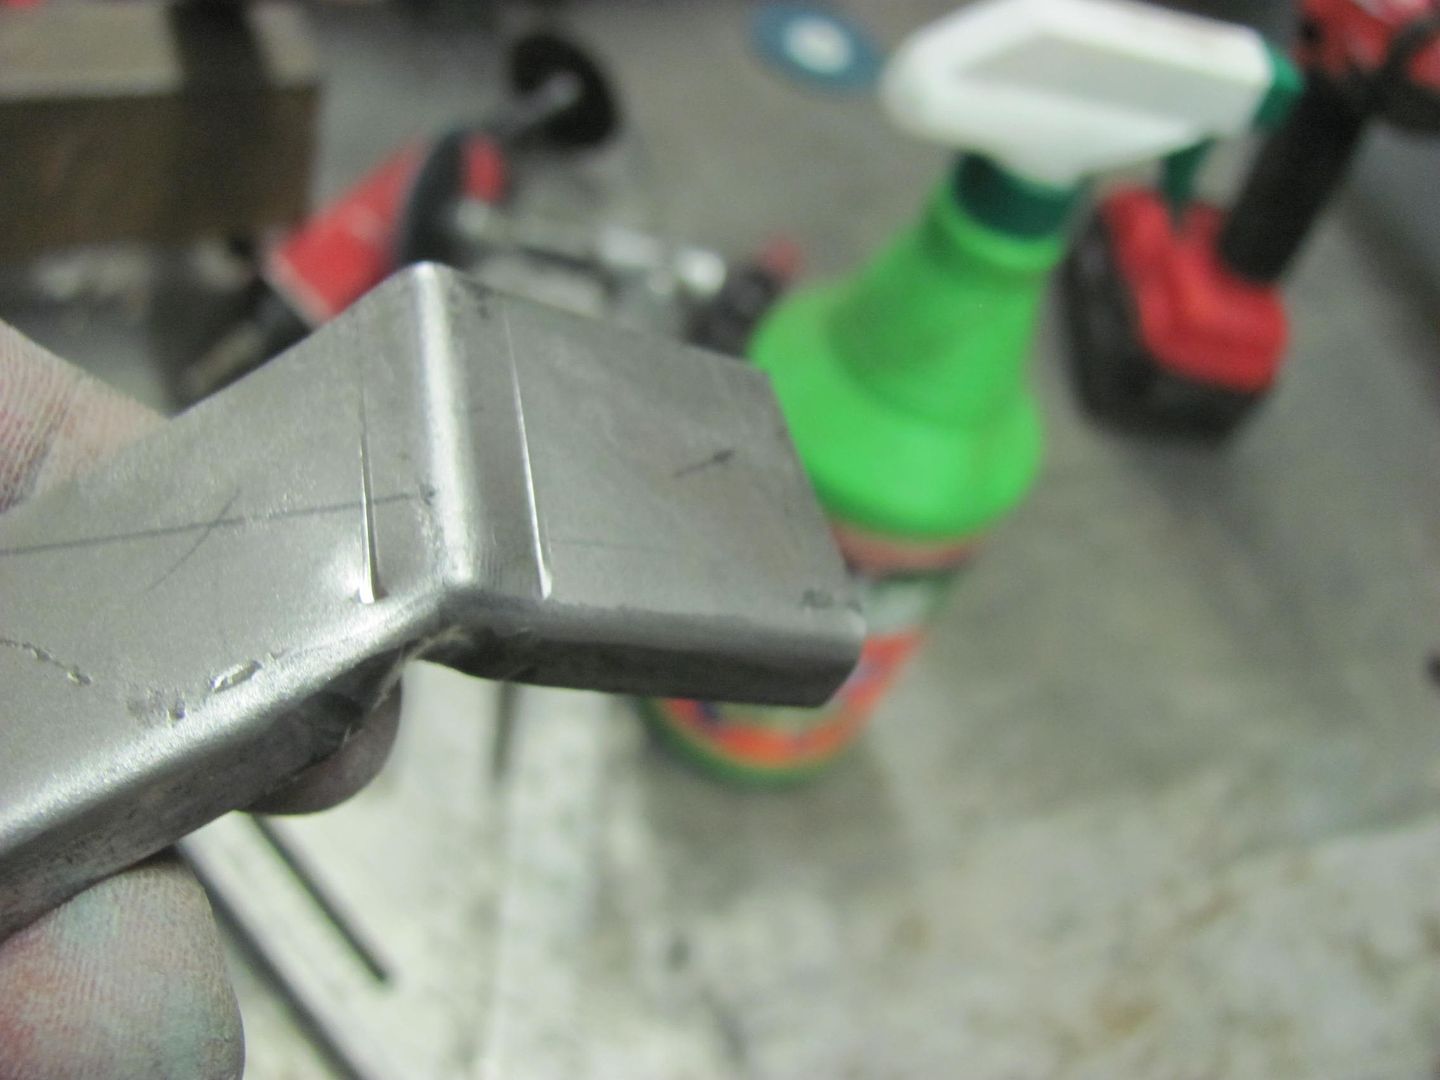 So let's back up and punt, here bending the vertical bends FIRST and using a roll former die to keep any markings to a minimum. We did a partial bend here, then did a partial tip, and jumped back and forth a few times for a much better result: 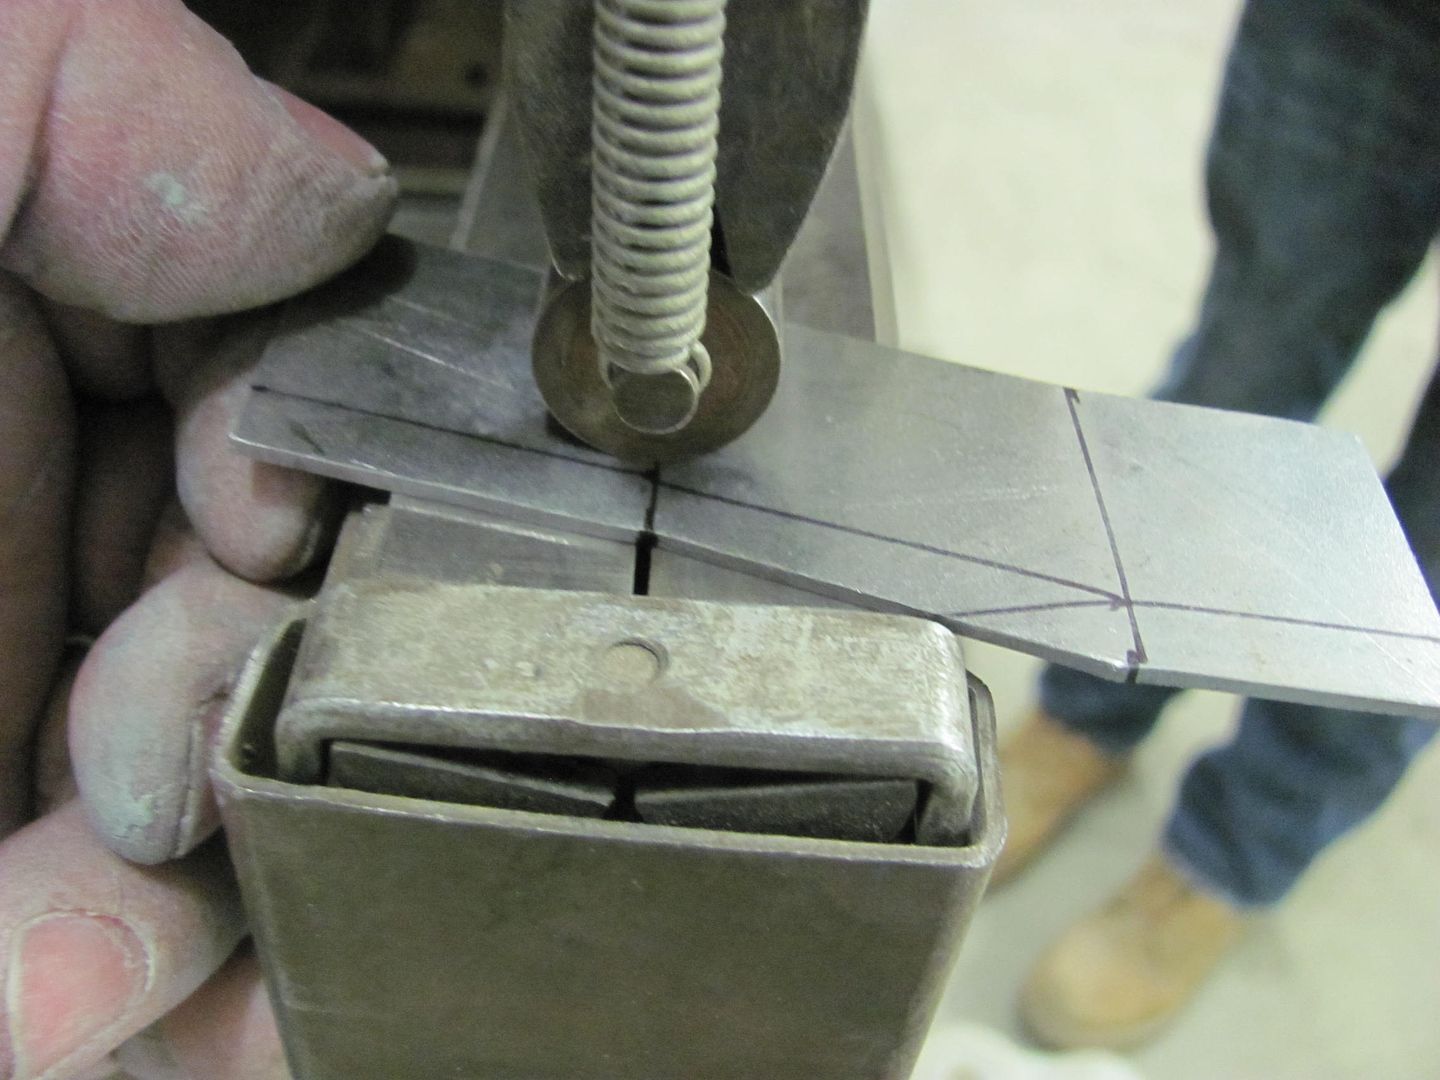 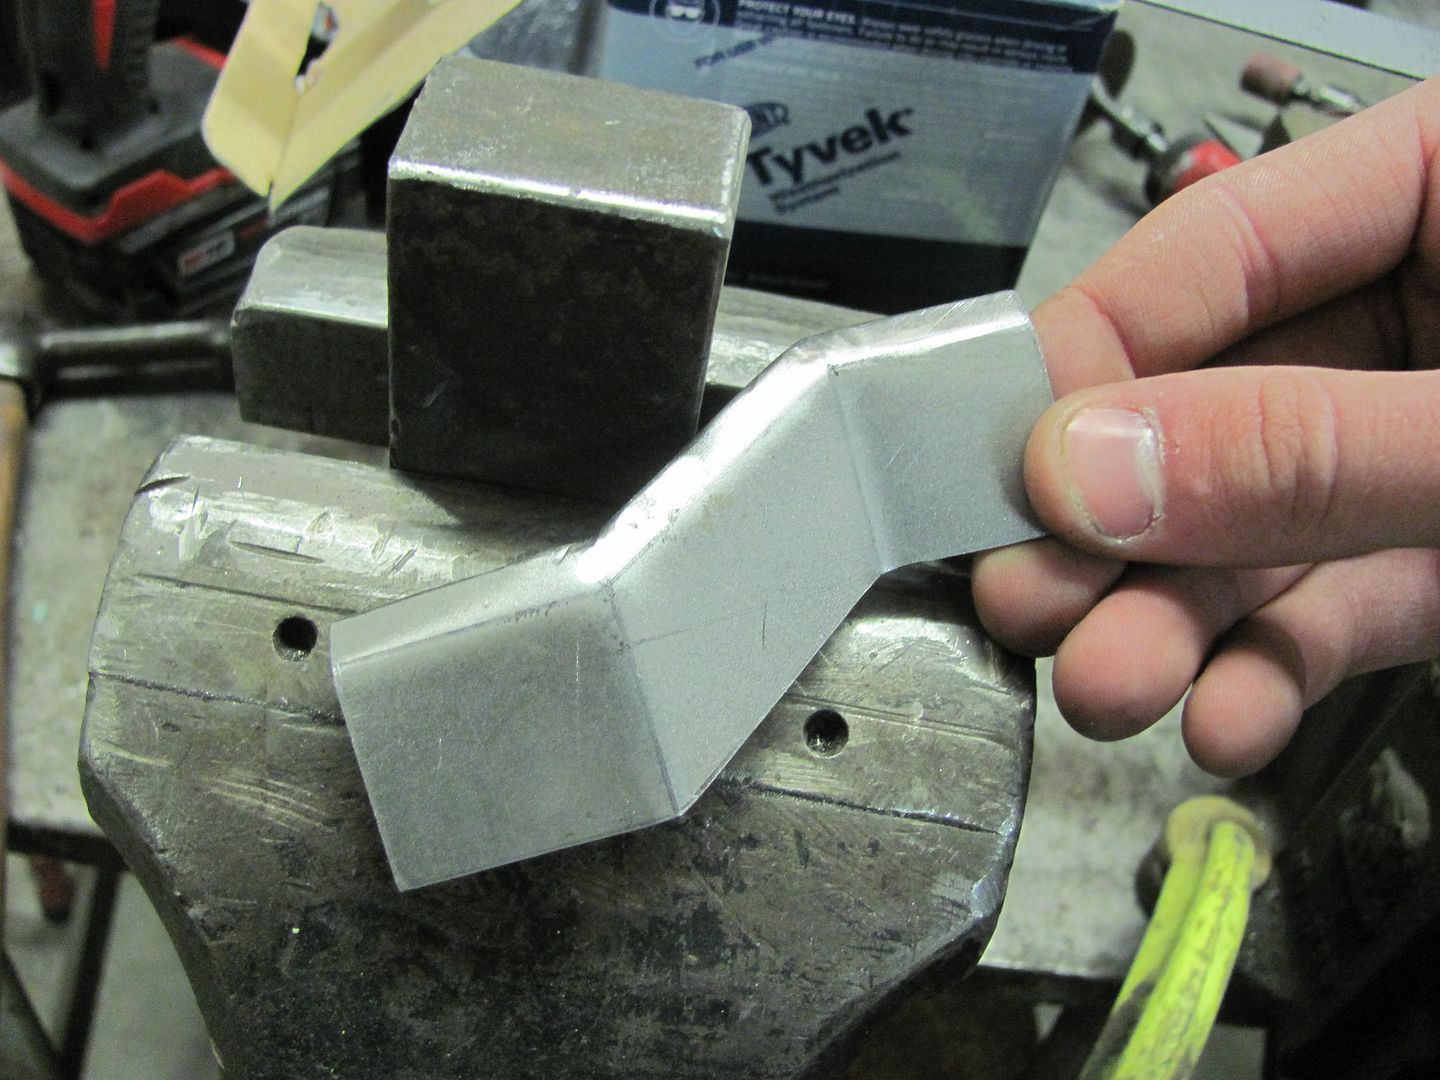 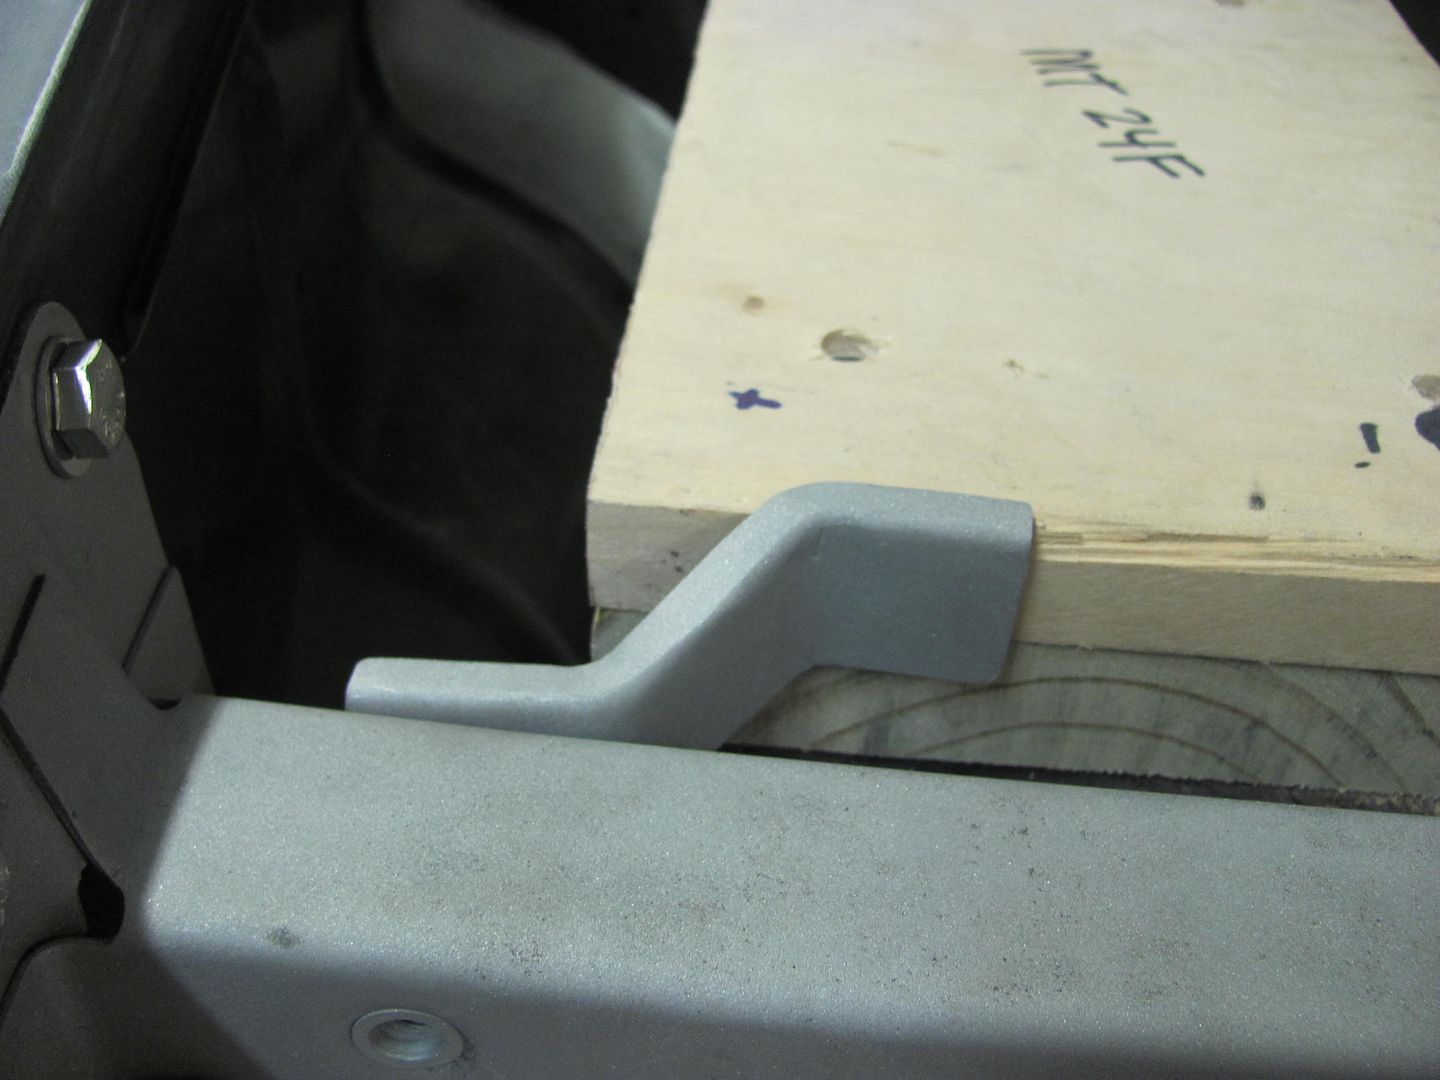 Plug welded through the thinner battery hold down into the 16 ga metal of the zee bracket using a Letter A sized holes and enough heat for weld penetration to show on the back side... 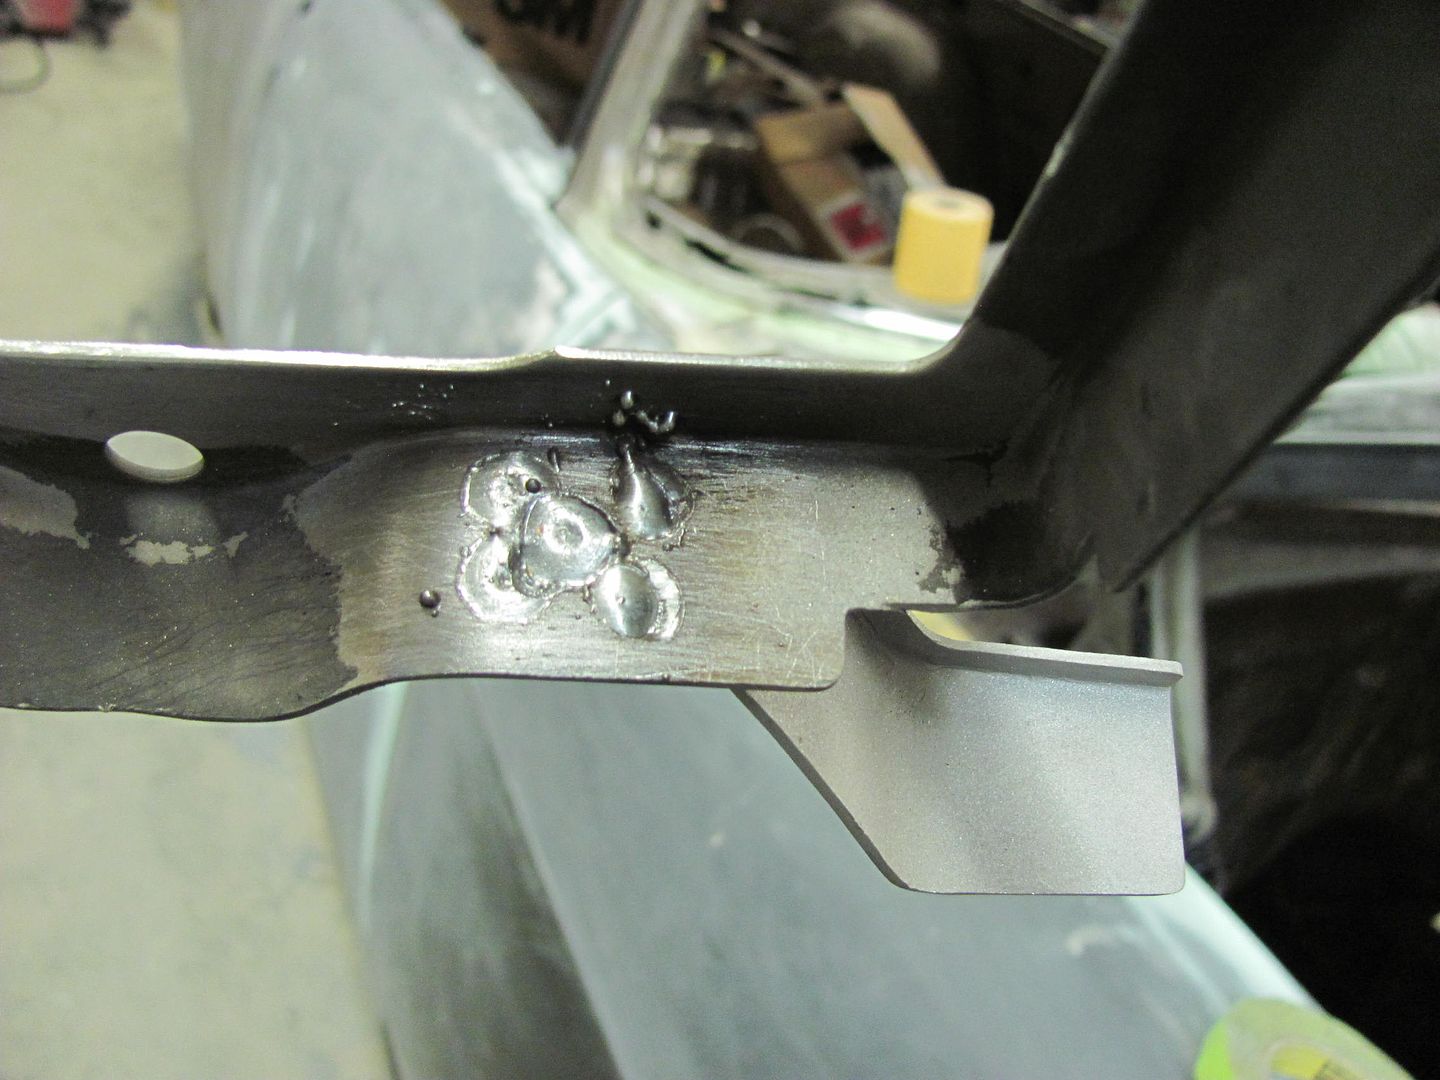  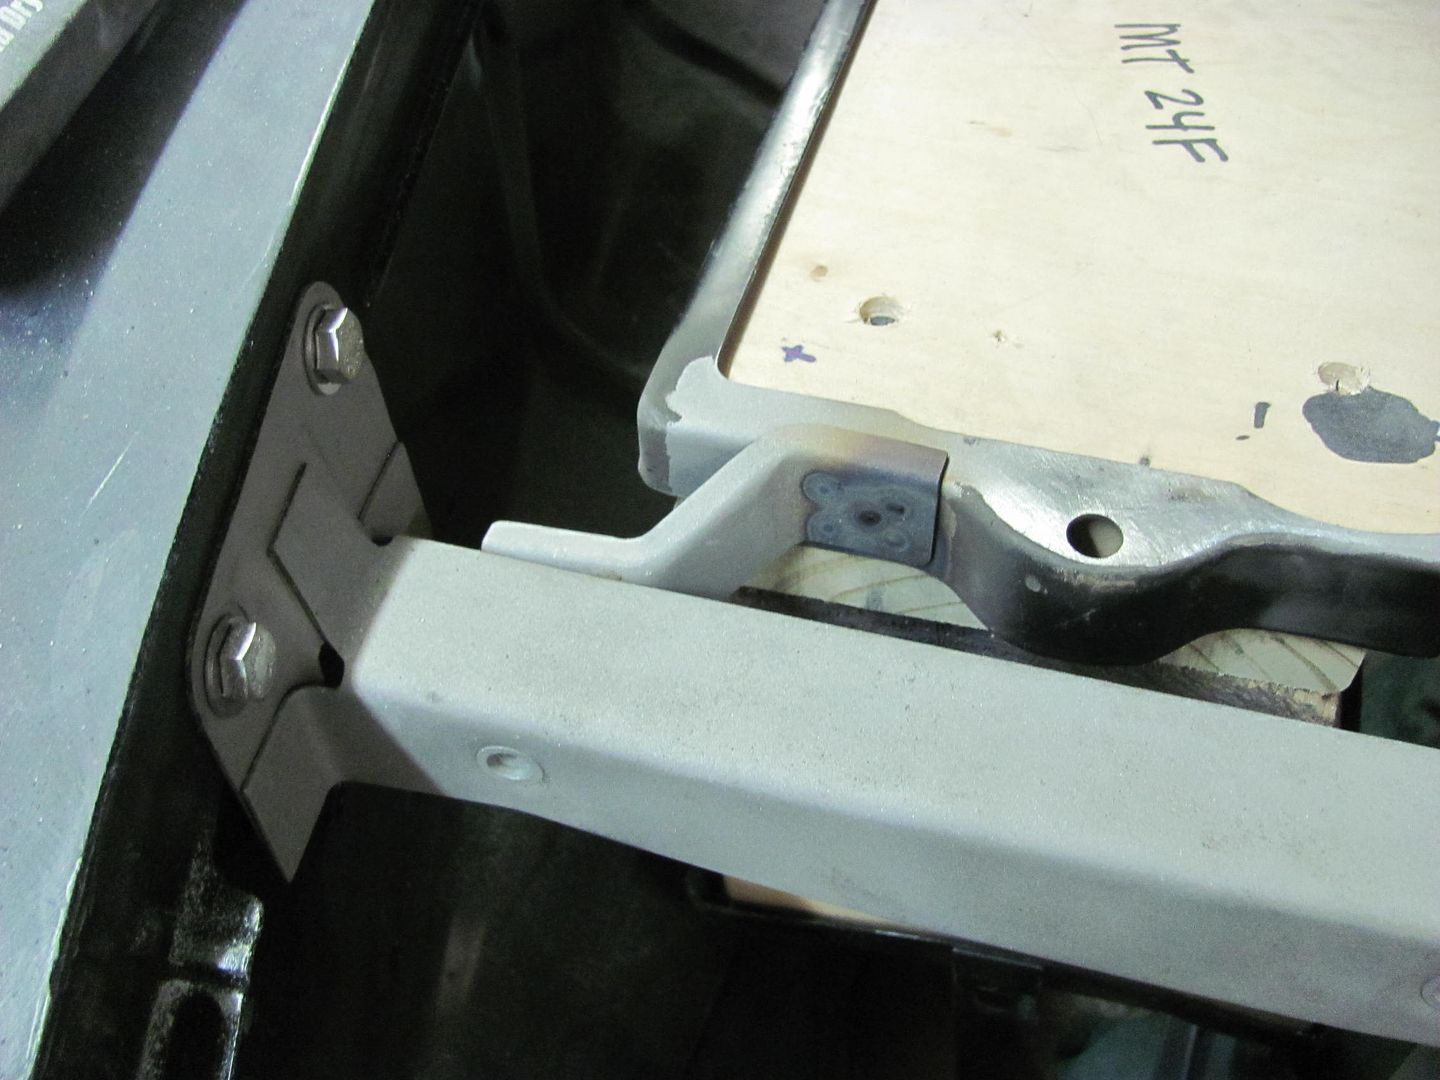 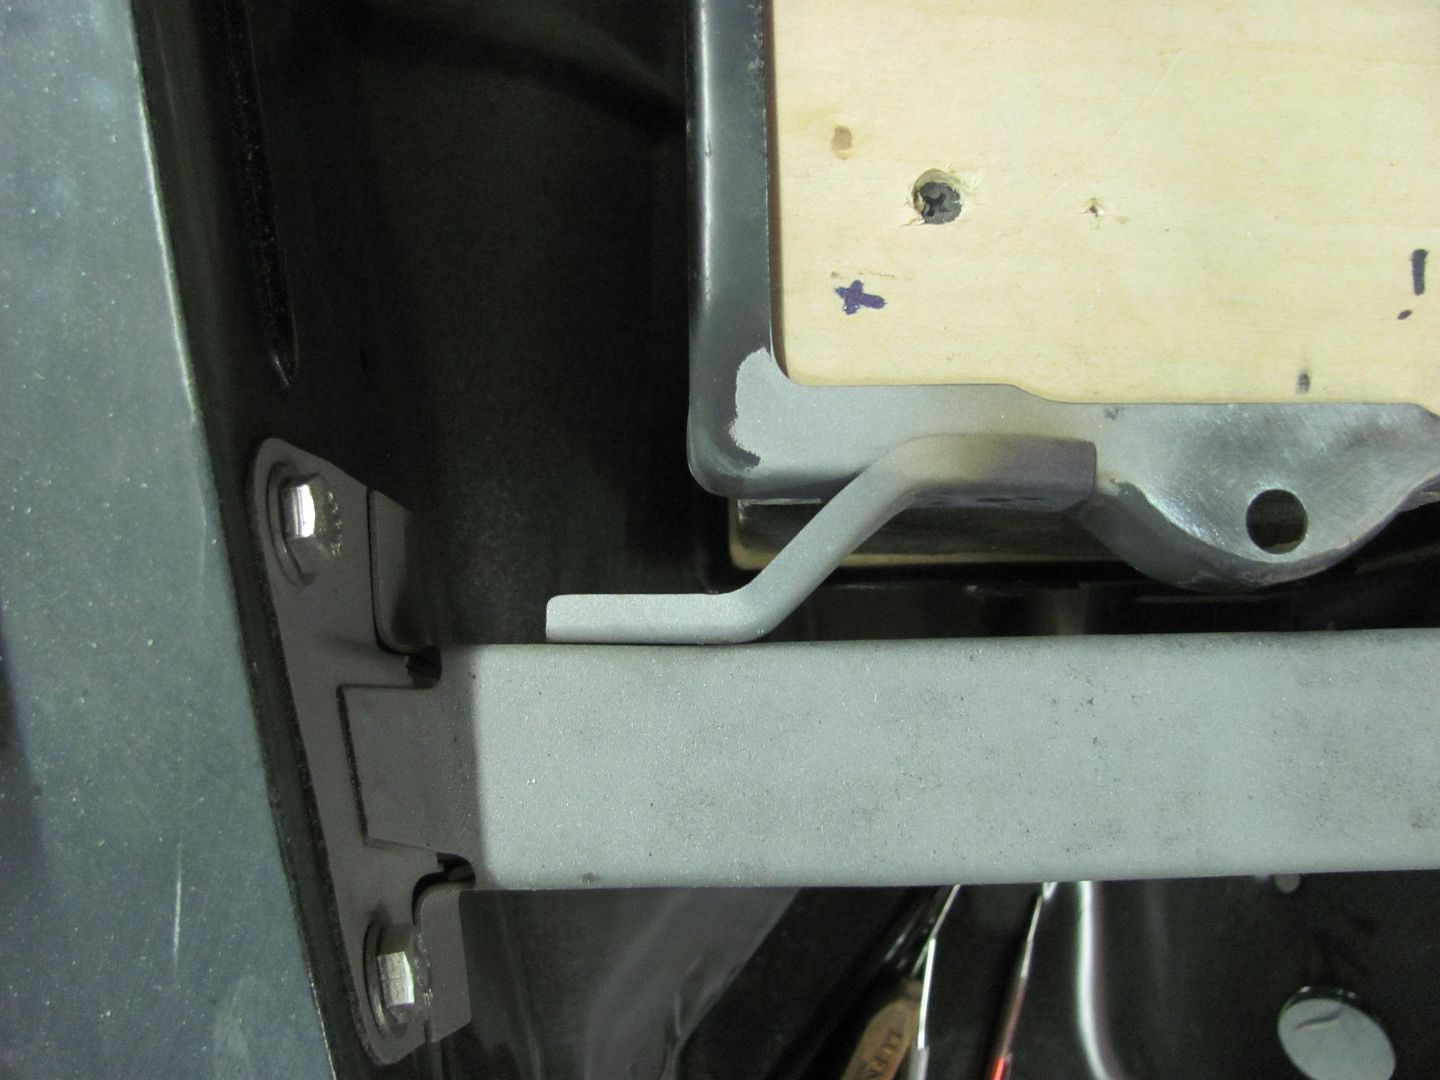 Also did more fine tuning on the front end today.. 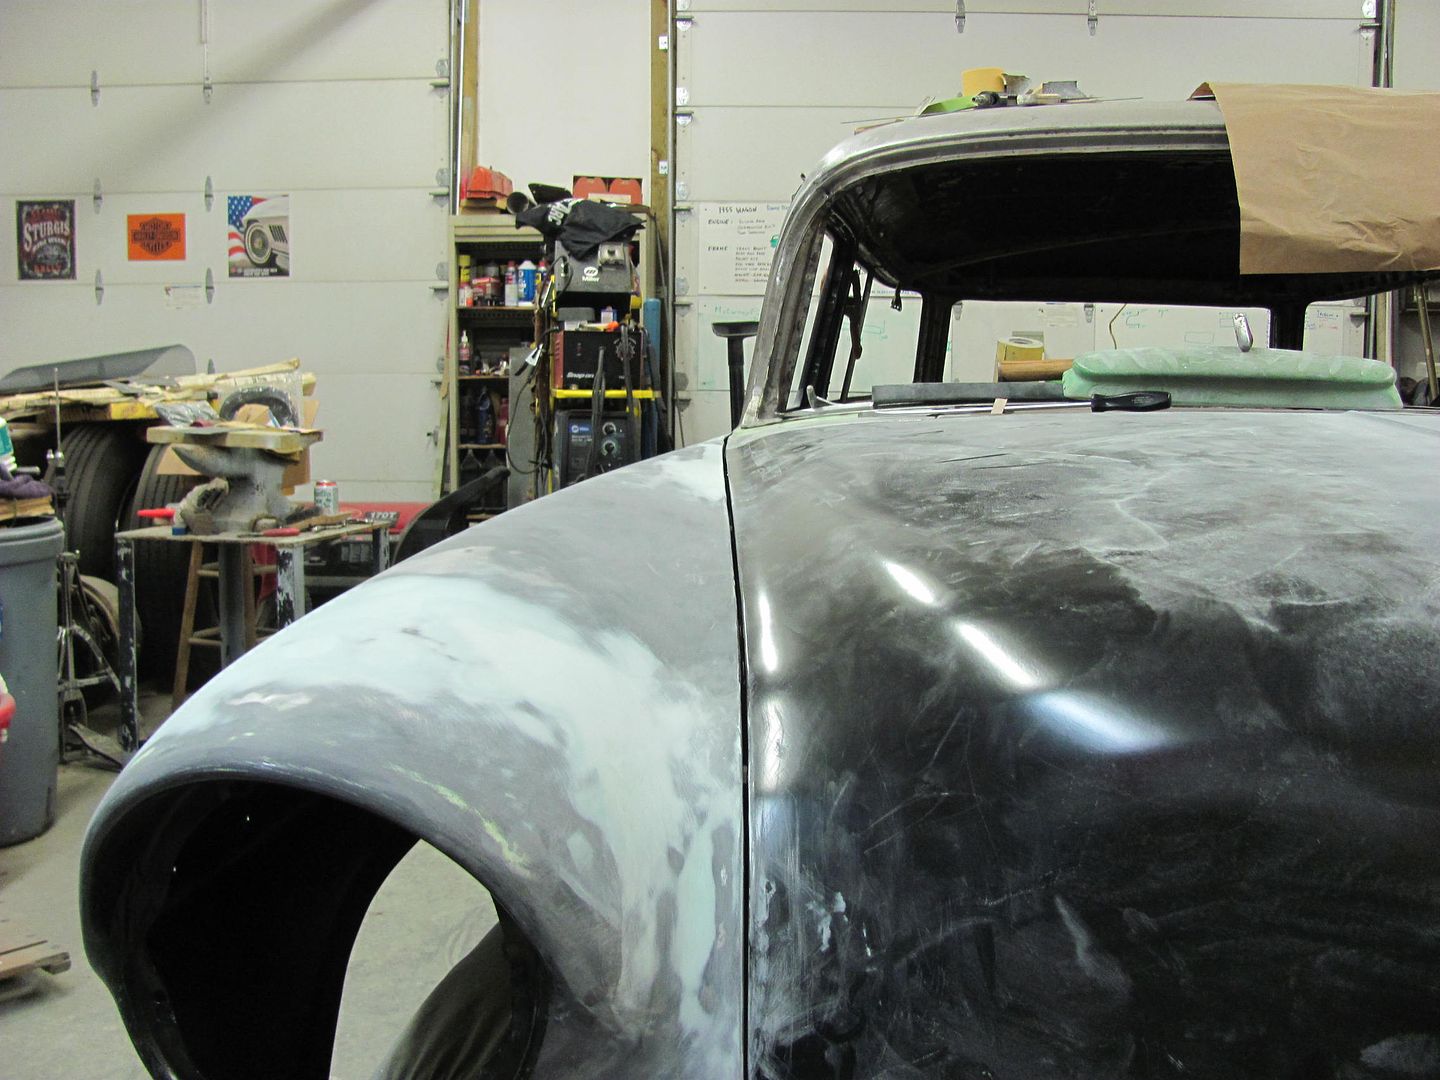 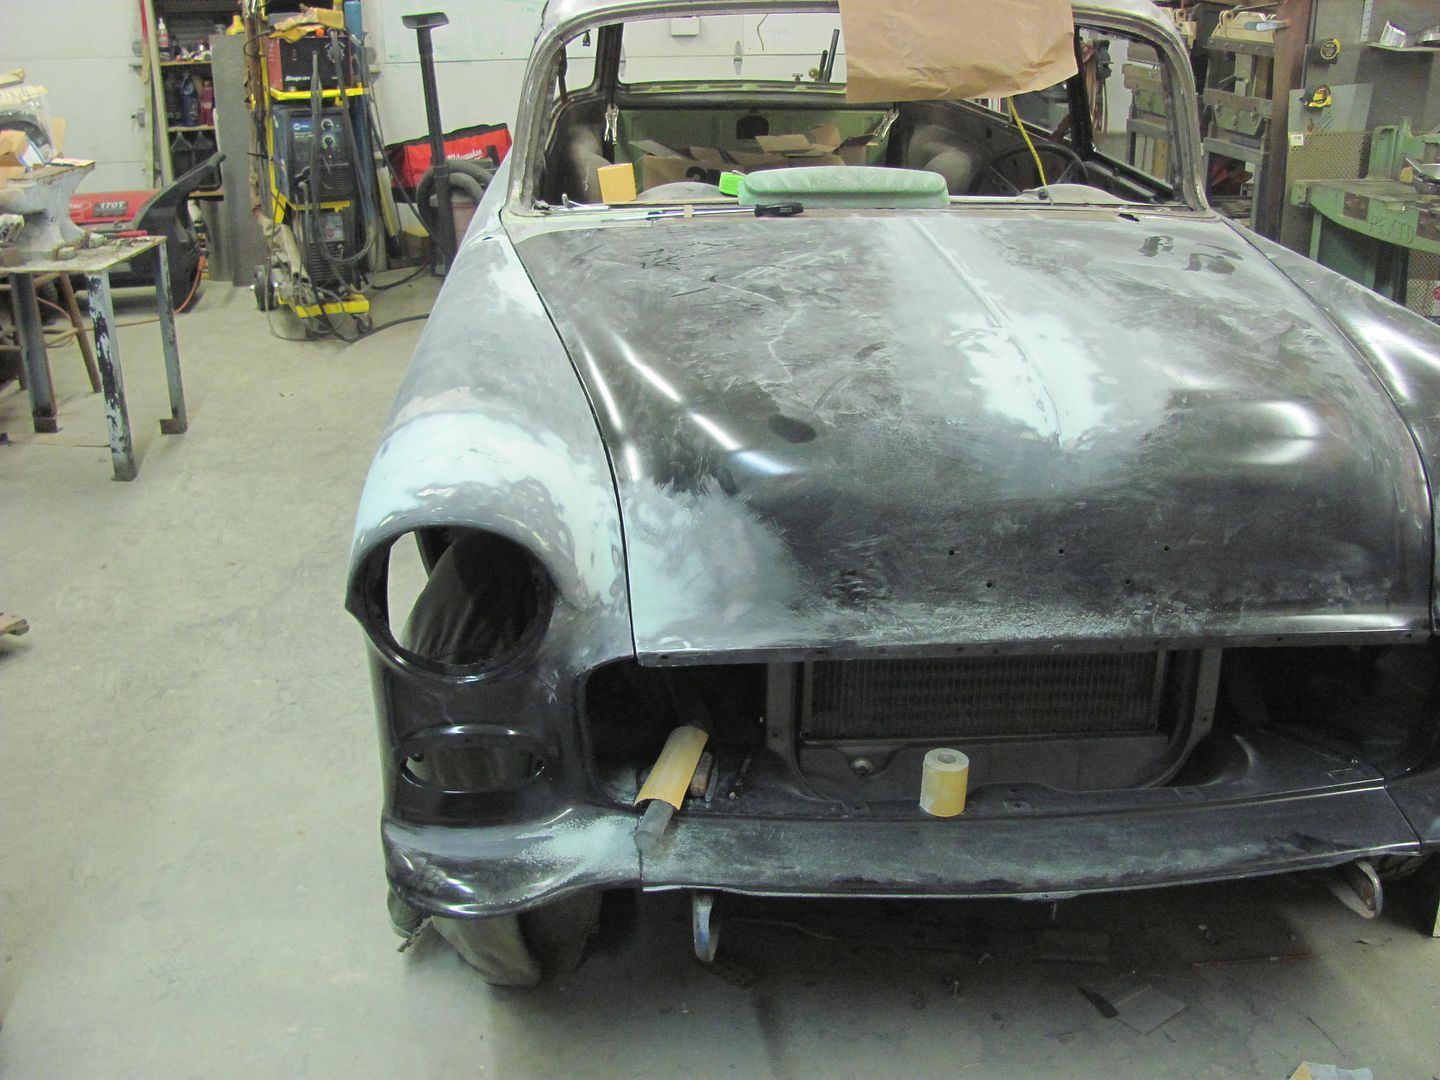 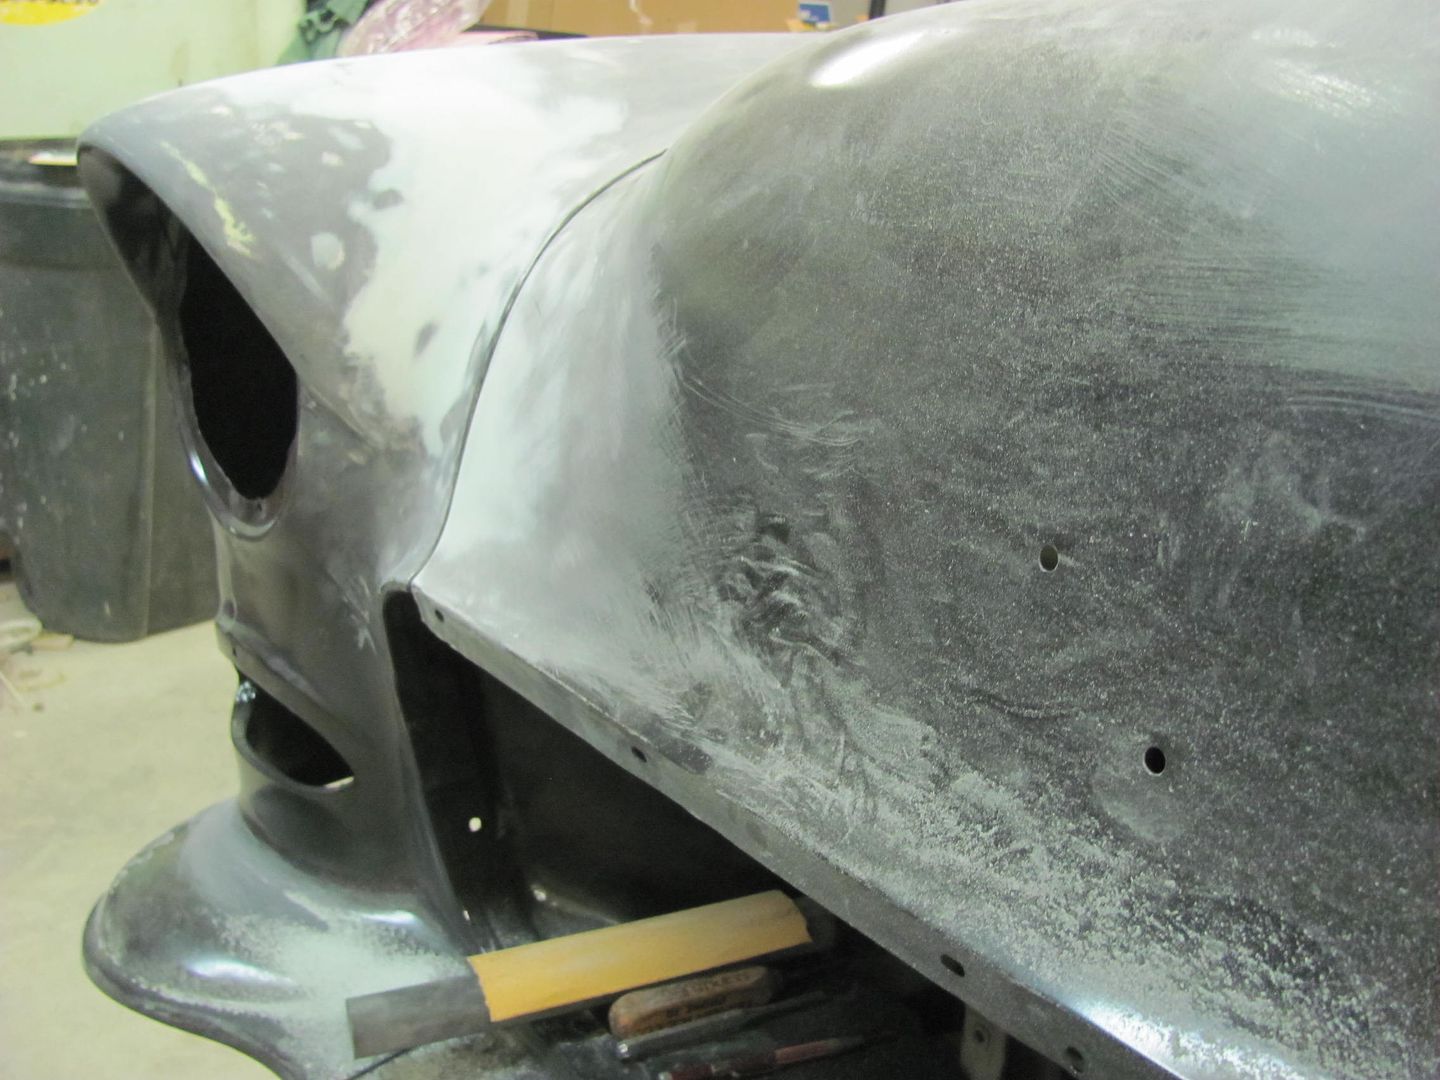 Test fit of the "early" side emblem.. 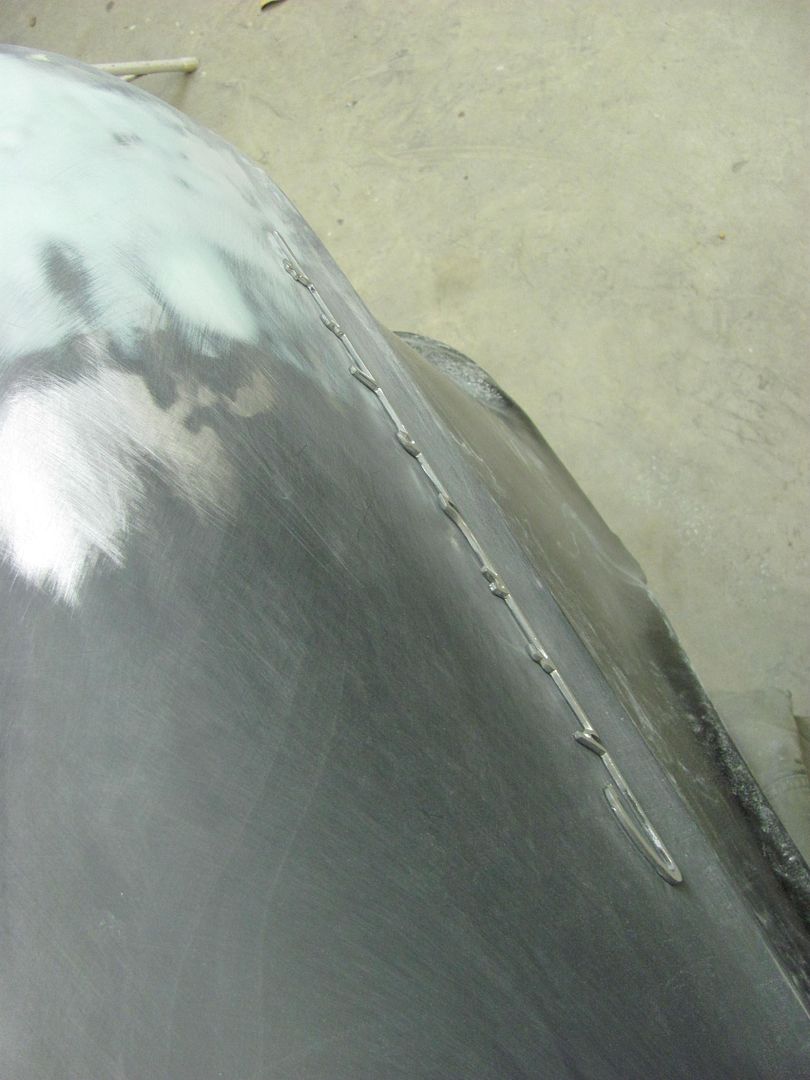 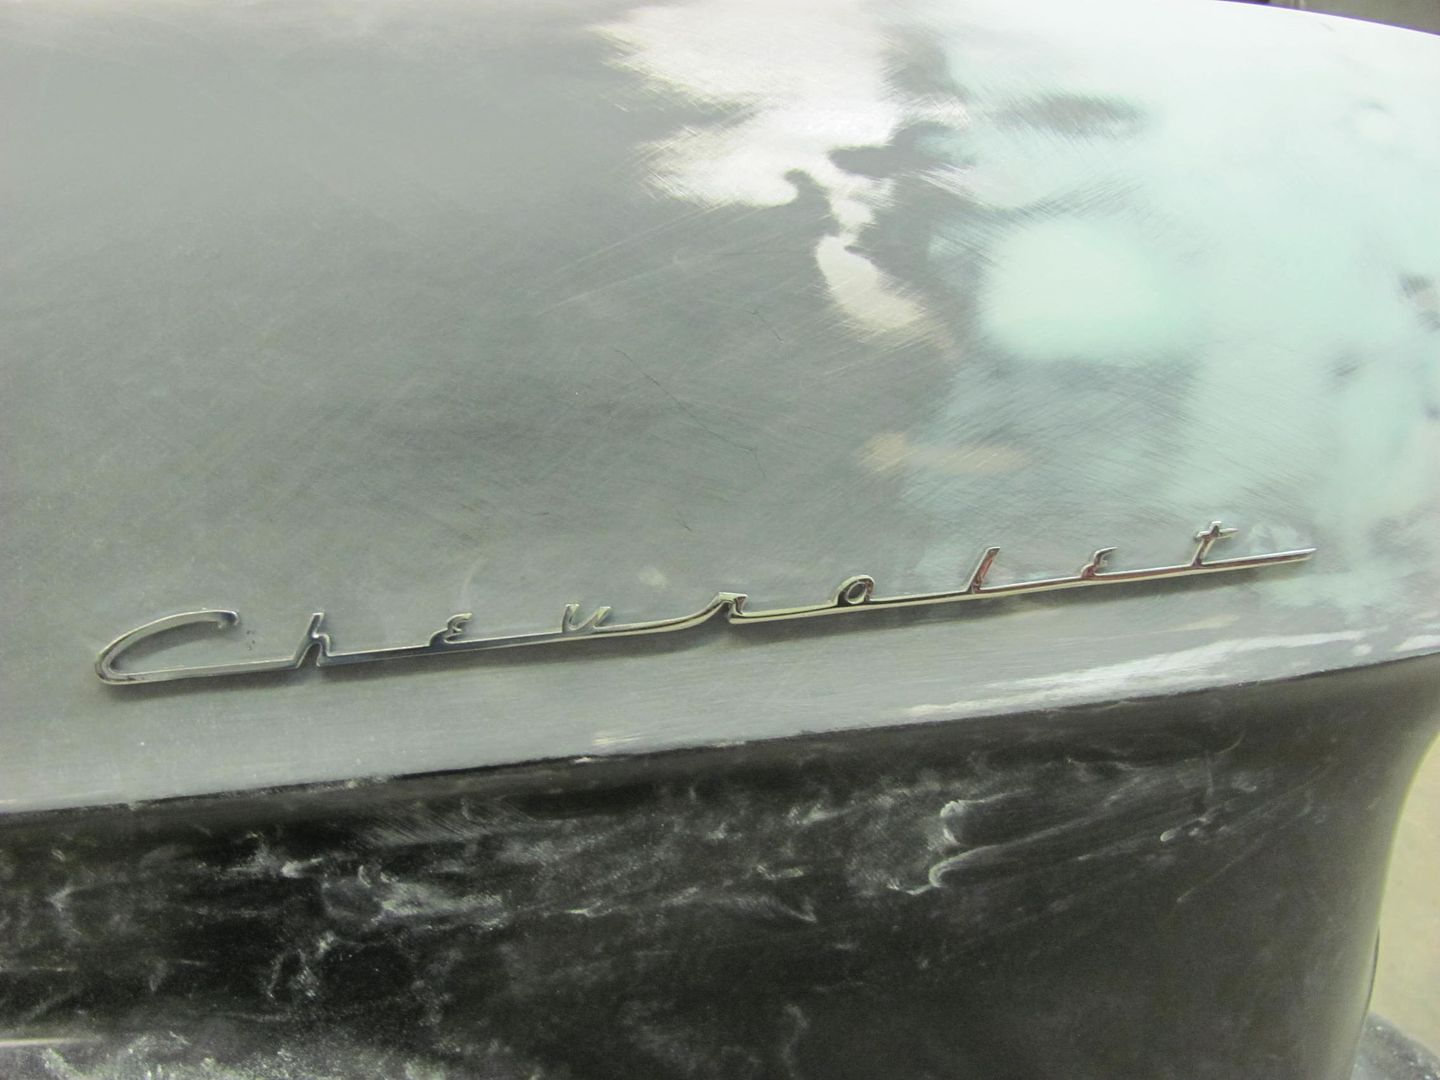
__________________
Robert |
|
|
|
|
01-31-2015, 09:26 PM
|
#341 |
|
Senior Member
Join Date: Jul 2012
Location: Oblong, Illinois
Posts: 7,017
|
Re: 55 Wagon Progress
Nice work on the zee bracket. Was it a regular tipping die / wheel you used? A small diameter one?
The gaps look great! |
|
|
|
|
01-31-2015, 09:51 PM
|
#342 |
|
Registered User
Join Date: Jan 2013
Location: Leonardtown, MD
Posts: 1,633
|
Re: 55 Wagon Progress
It was using a manual tool, the one on the left here.....
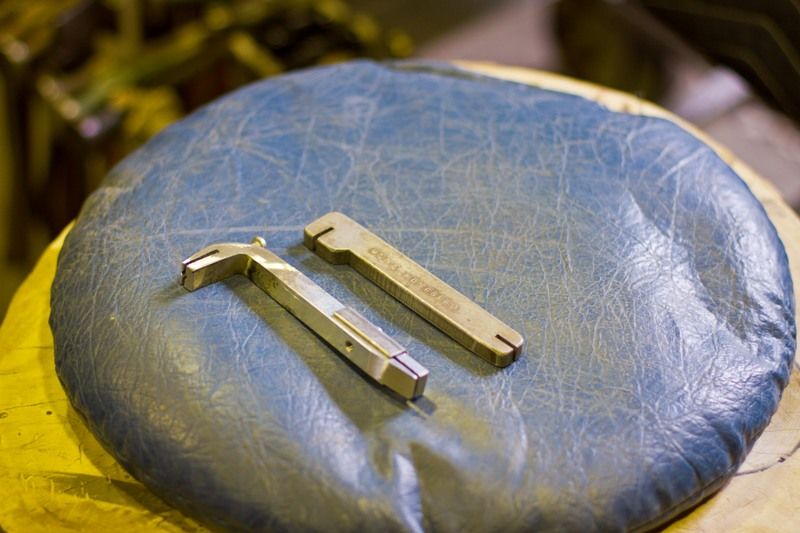 ....that and a hammer and flat anvil clamped in the vise...
__________________
Robert |
|
|
|
|
02-01-2015, 12:14 AM
|
#343 |
|
Senior Member
Join Date: Mar 2011
Location: West Plains, Missouri
Posts: 7,553
|
Re: 55 Wagon Progress
Very nice detail work...Jim
__________________
my build thread: http://67-72chevytrucks.com/vboard/s...d.php?t=459839 Jimbo's long bed step build:http://67-72chevytrucks.com/vboard/s...t=464626<br /> |
|
|
|
|
02-02-2015, 11:58 PM
|
#344 |
|
Registered User
Join Date: Jan 2013
Location: Leonardtown, MD
Posts: 1,633
|
Re: 55 Wagon Progress
Thanks Jim!
We noticed the driver's side hood gap was a bit tight and then noticed a difference in the end plates on the core support. The driver's side appears bent straight, so some hammer action made them more consistent and helped out the gap issue.. 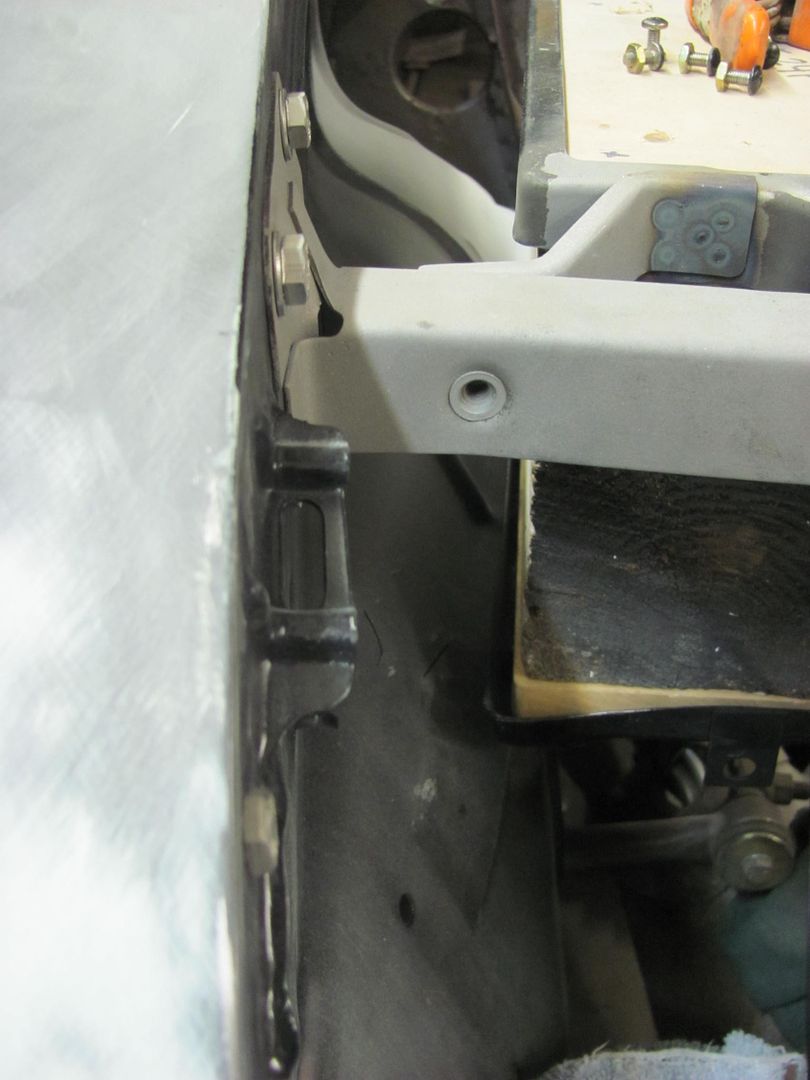 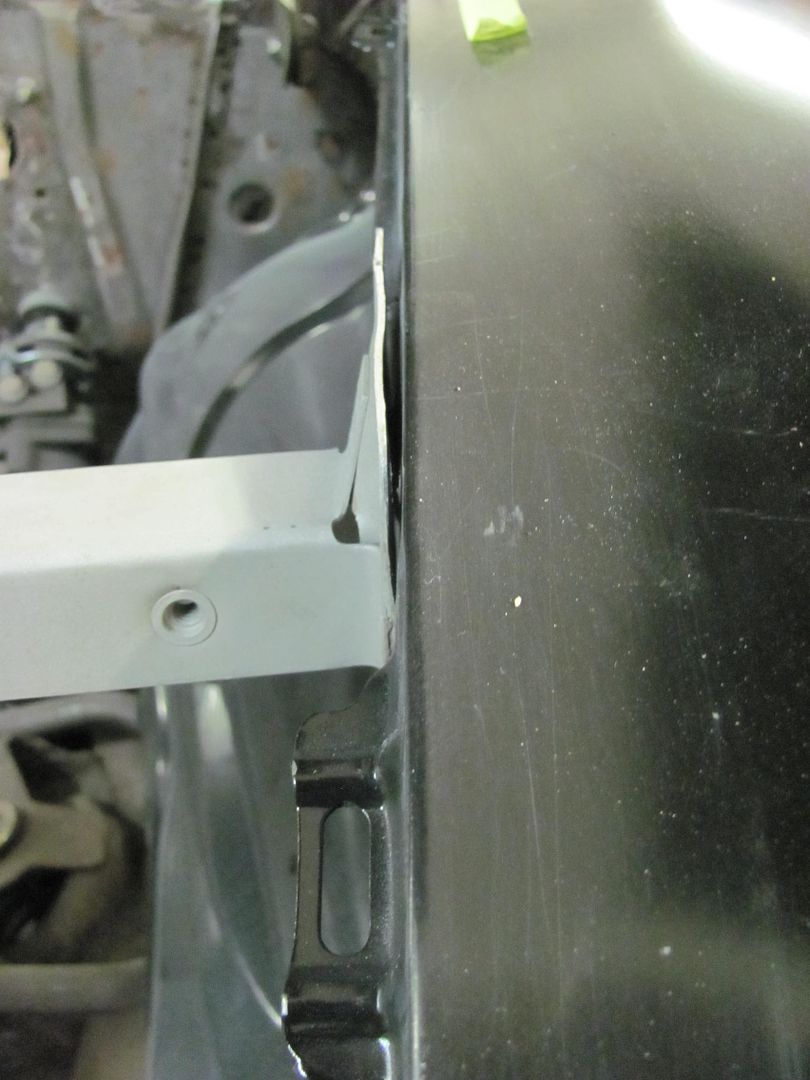 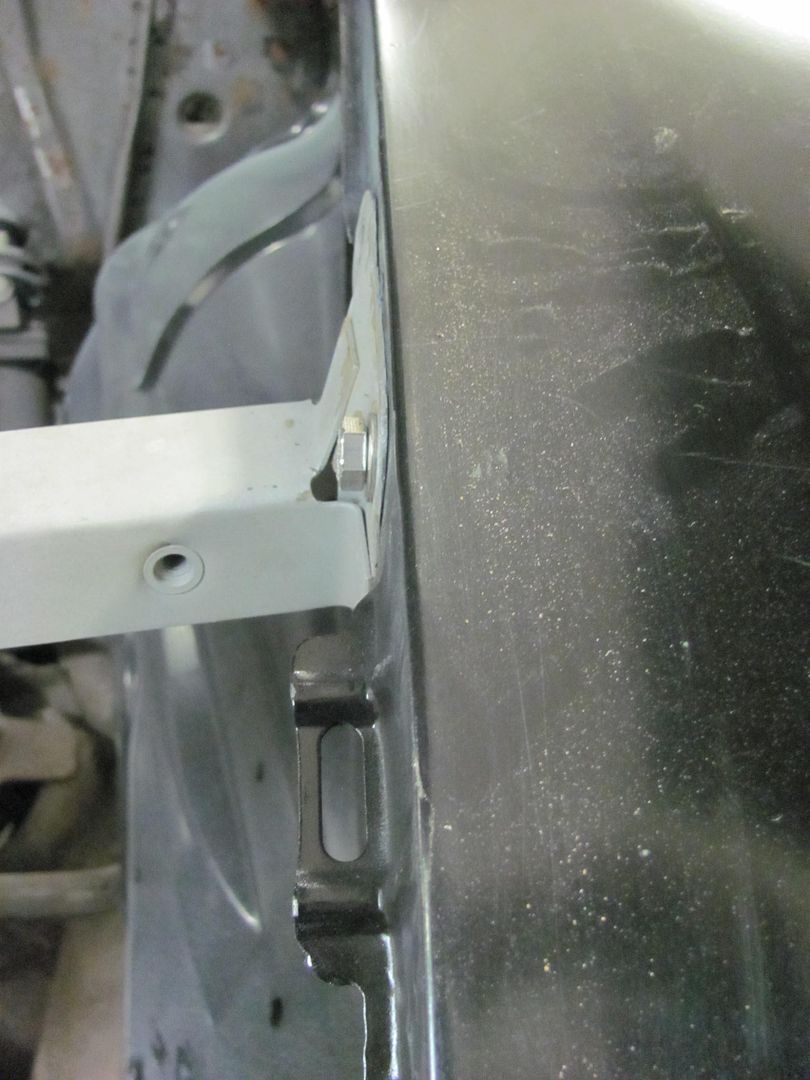 After checking the hood brace to core support for any fitment issues, we noticed some cutouts that will allow the air around the radiator. This opening, although minimal, was re-formed with a couple of fancy chisels.. 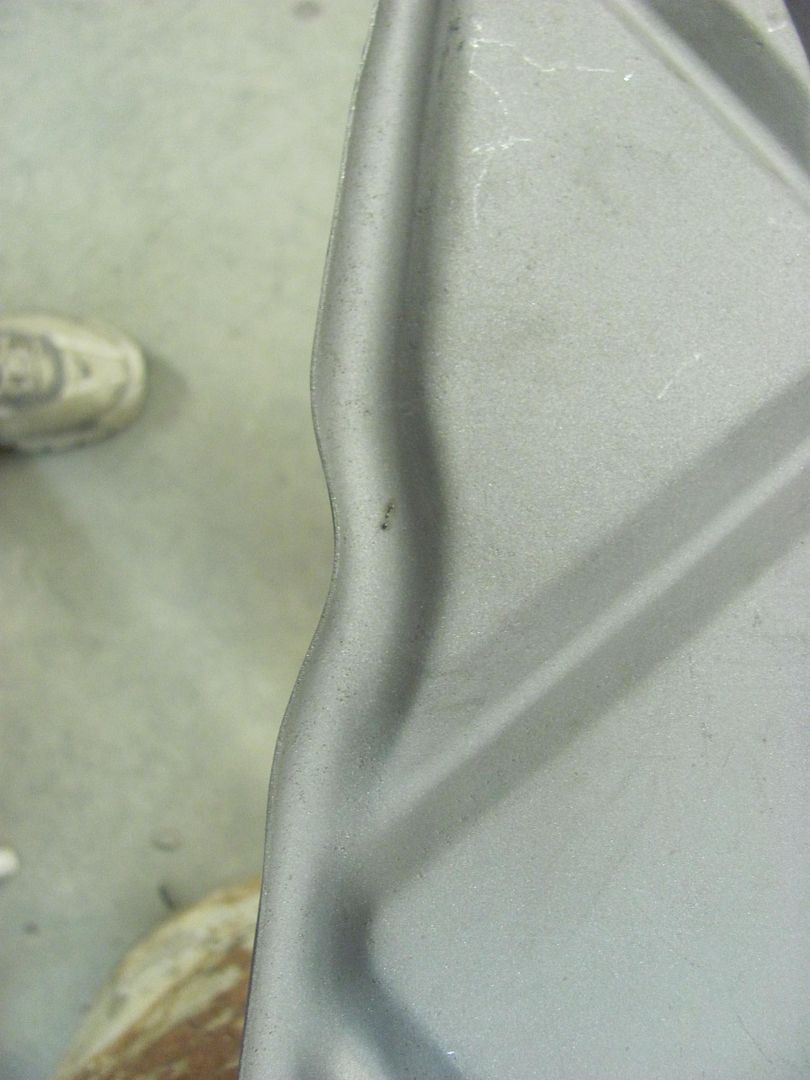 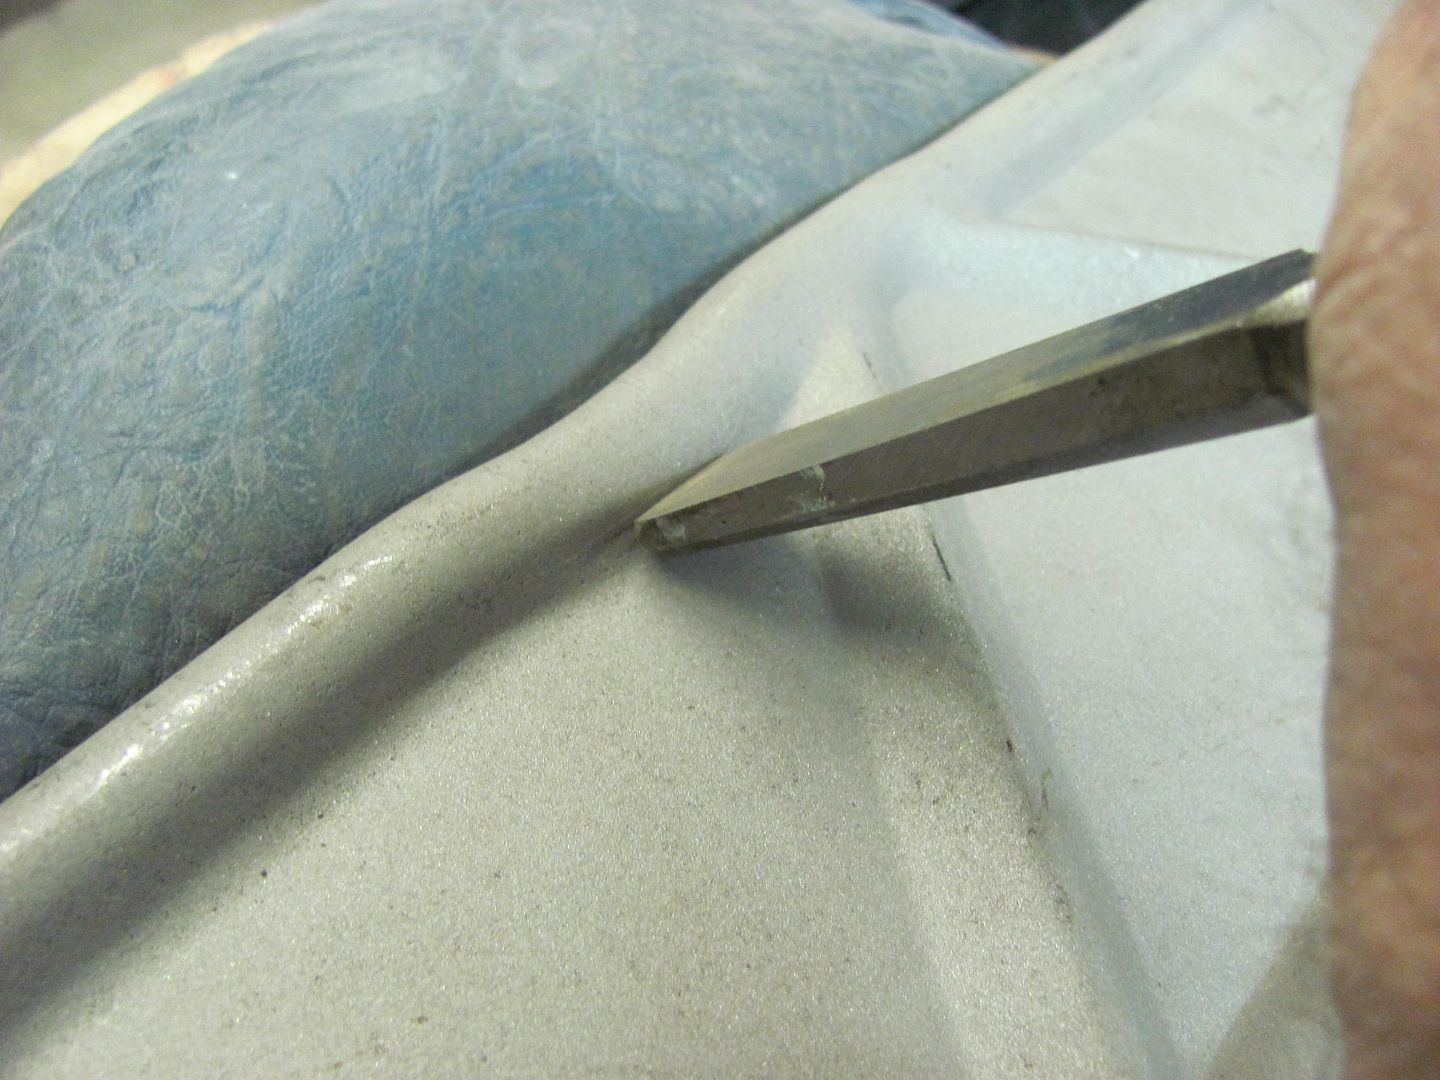 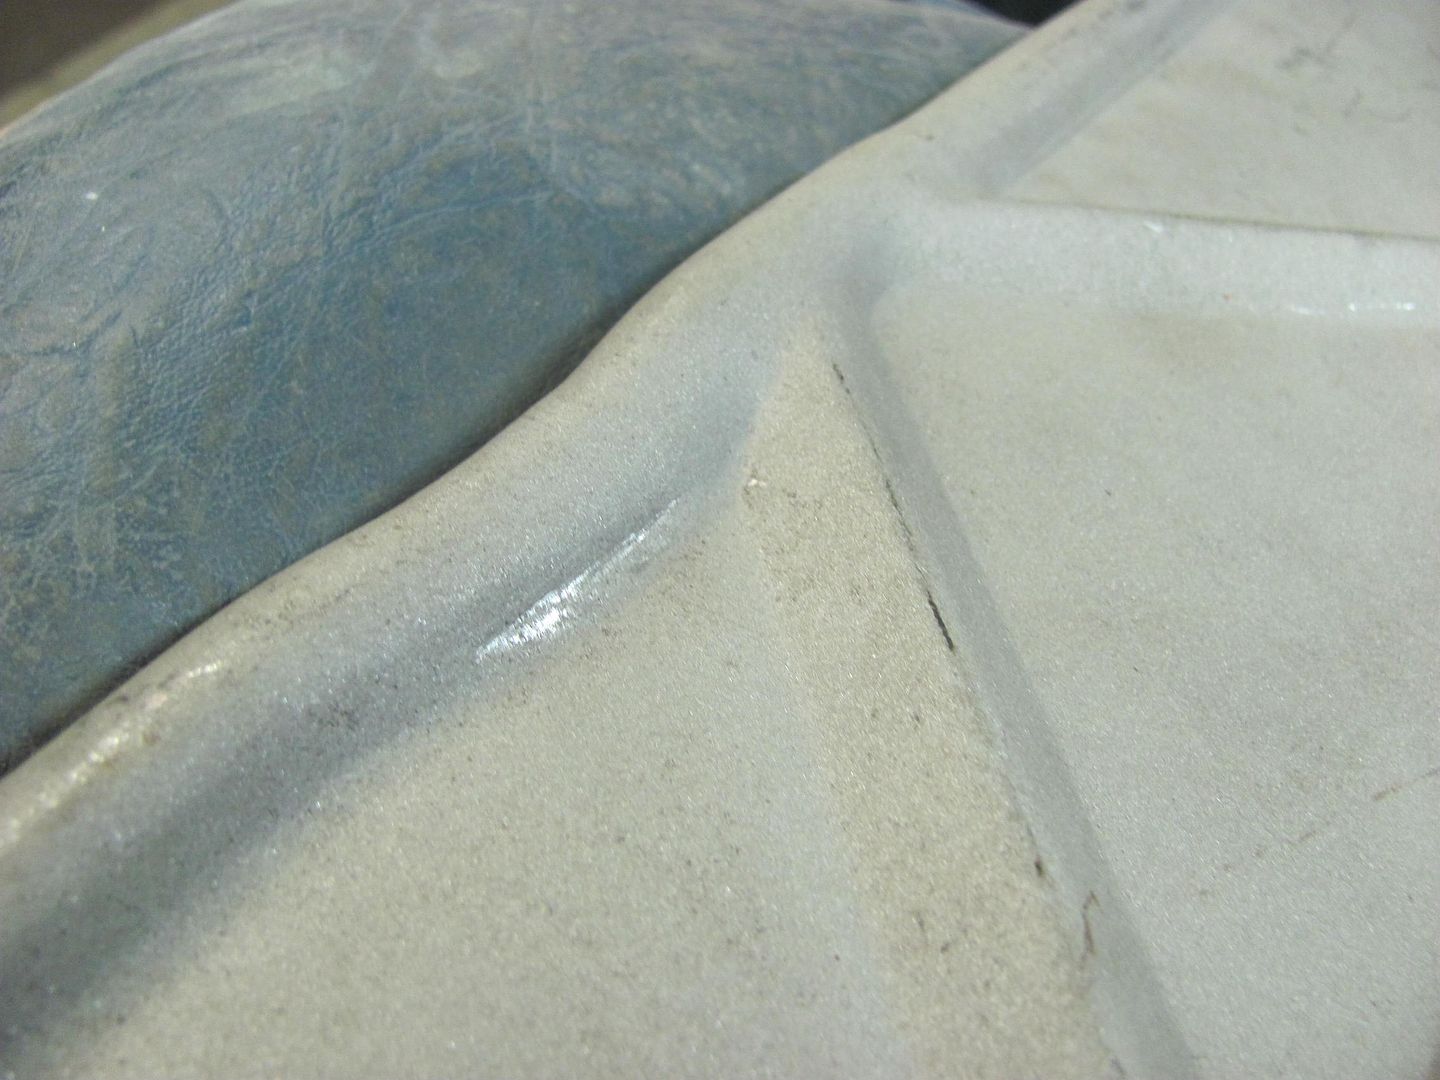 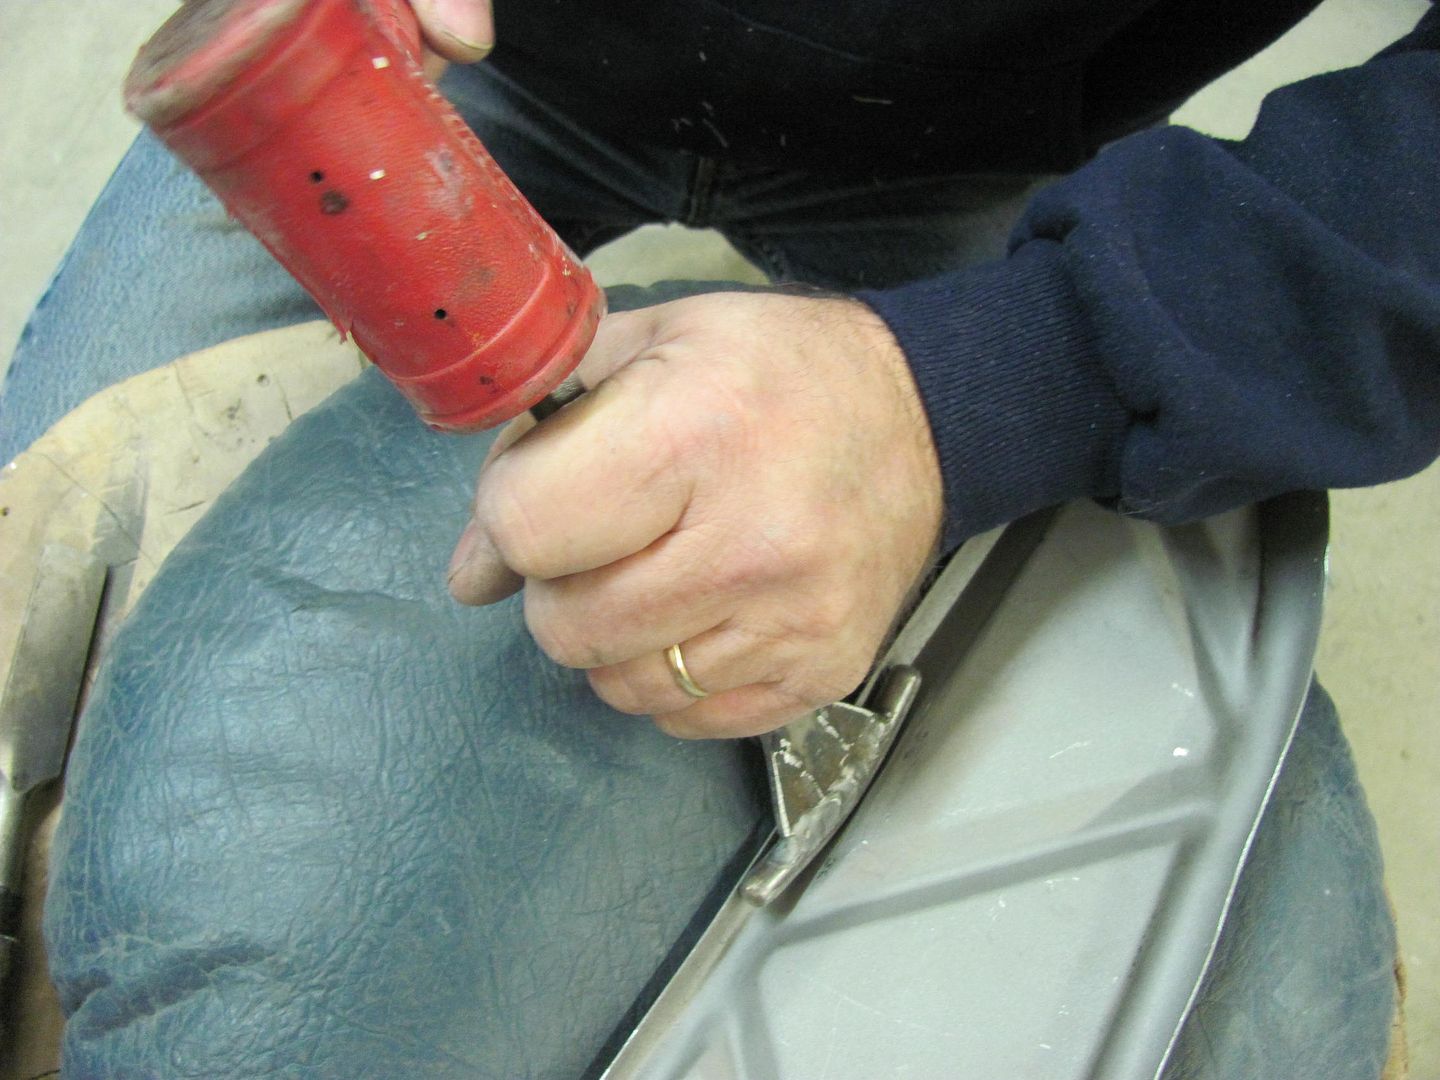 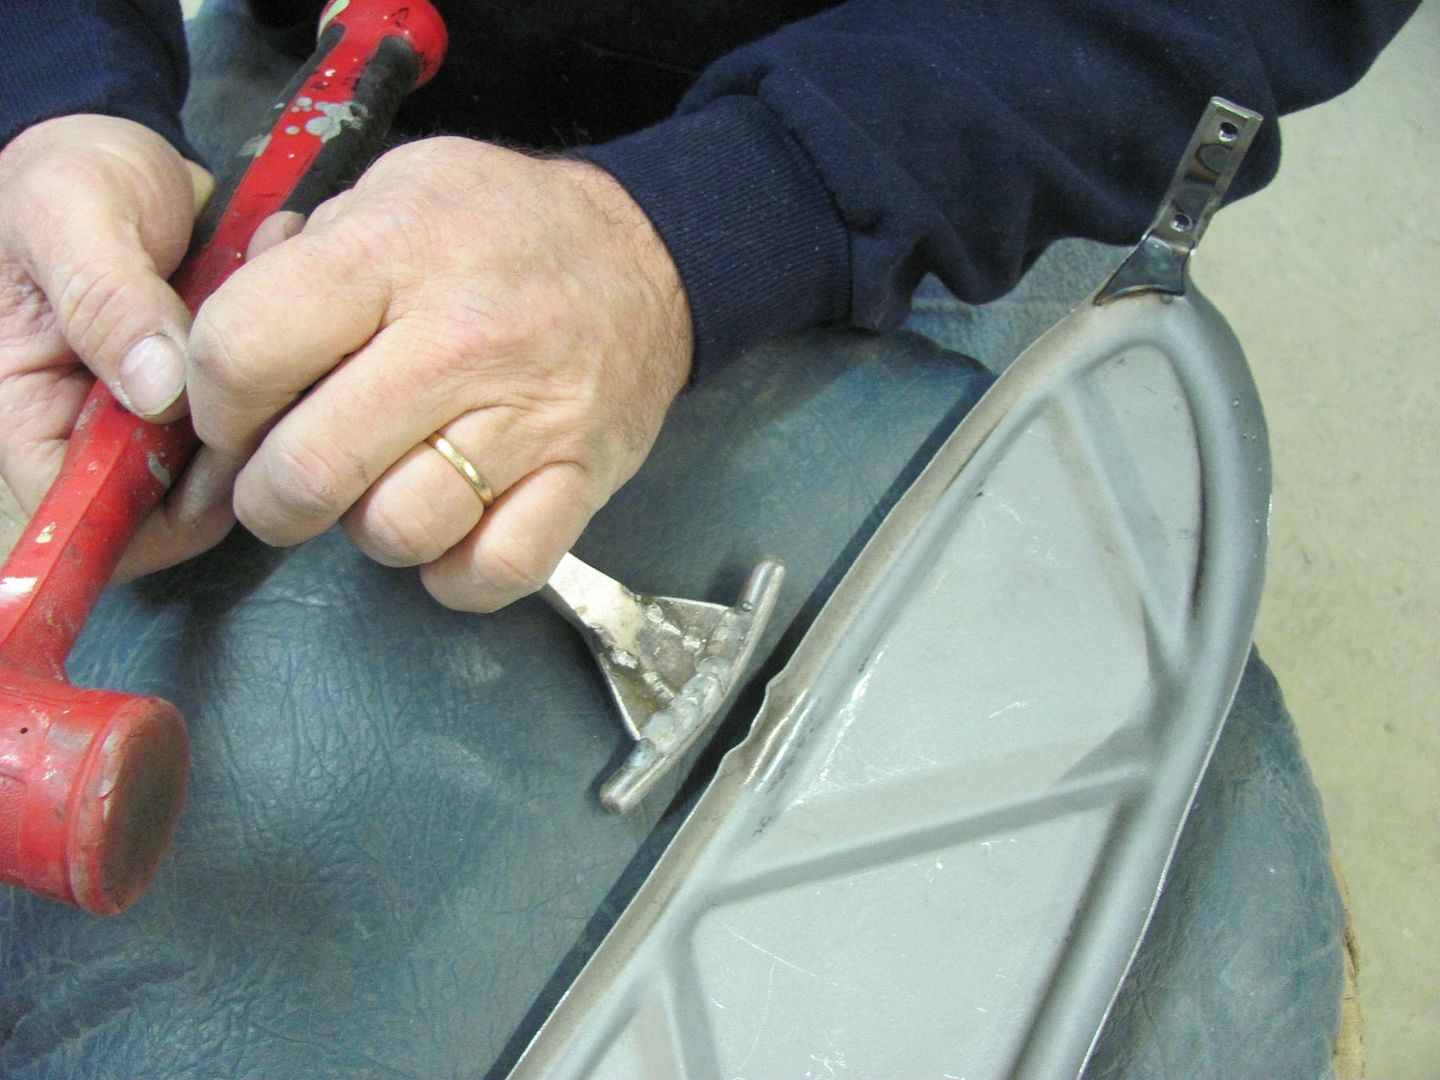 The excess metal ruffles were addressed easily with the kick shrinker... 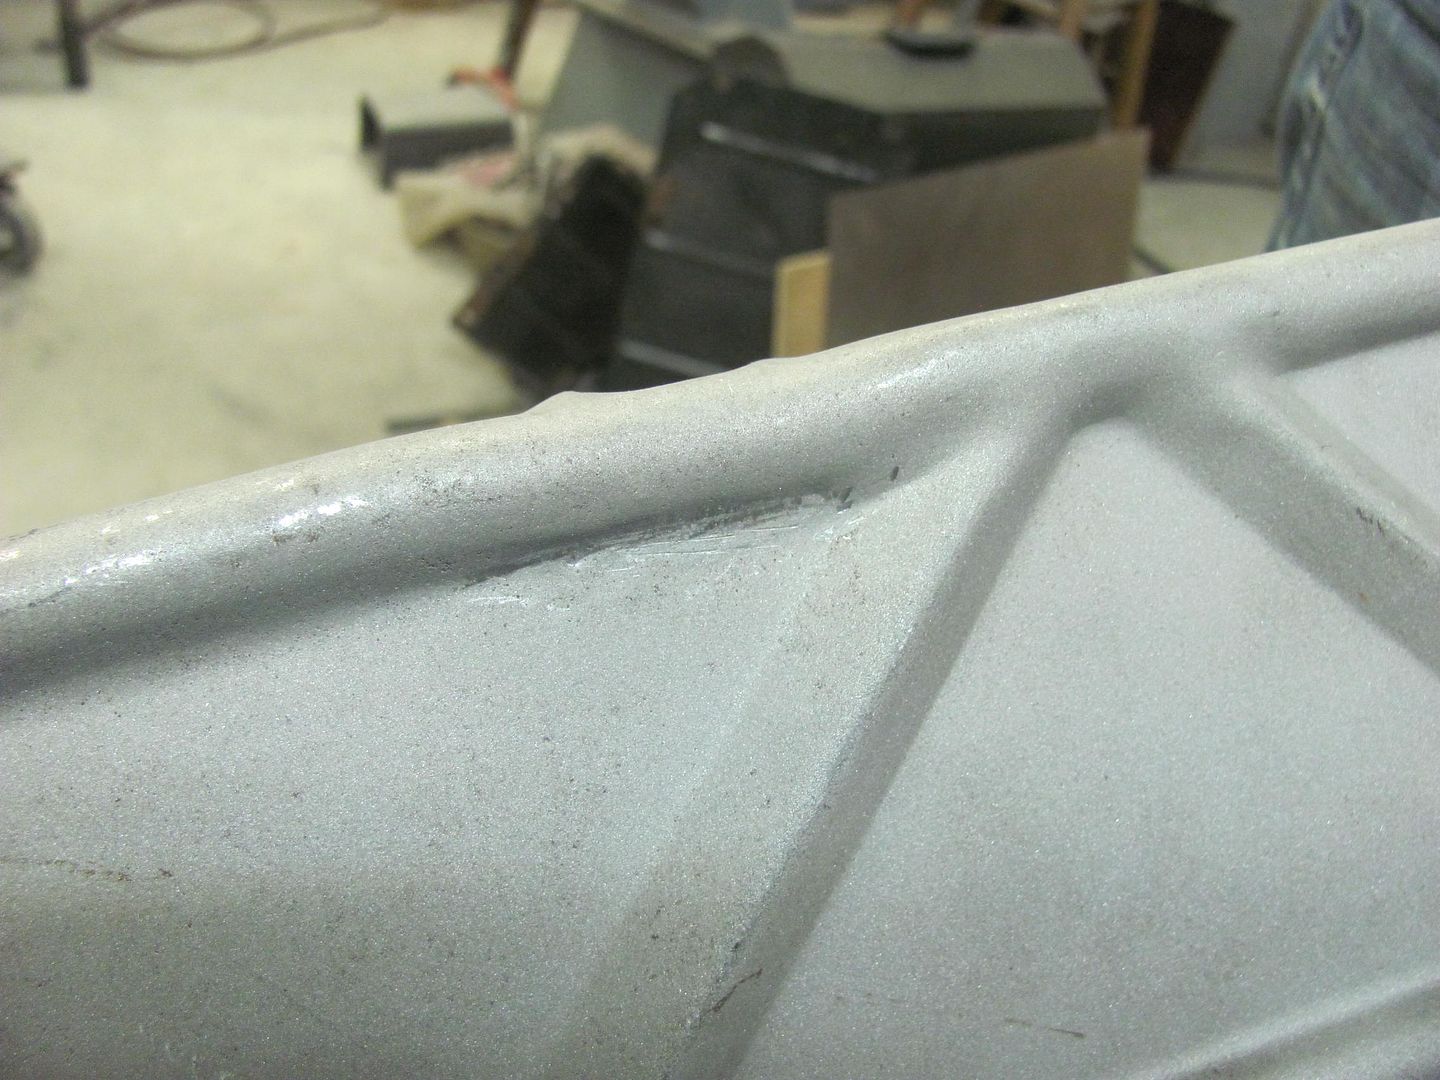 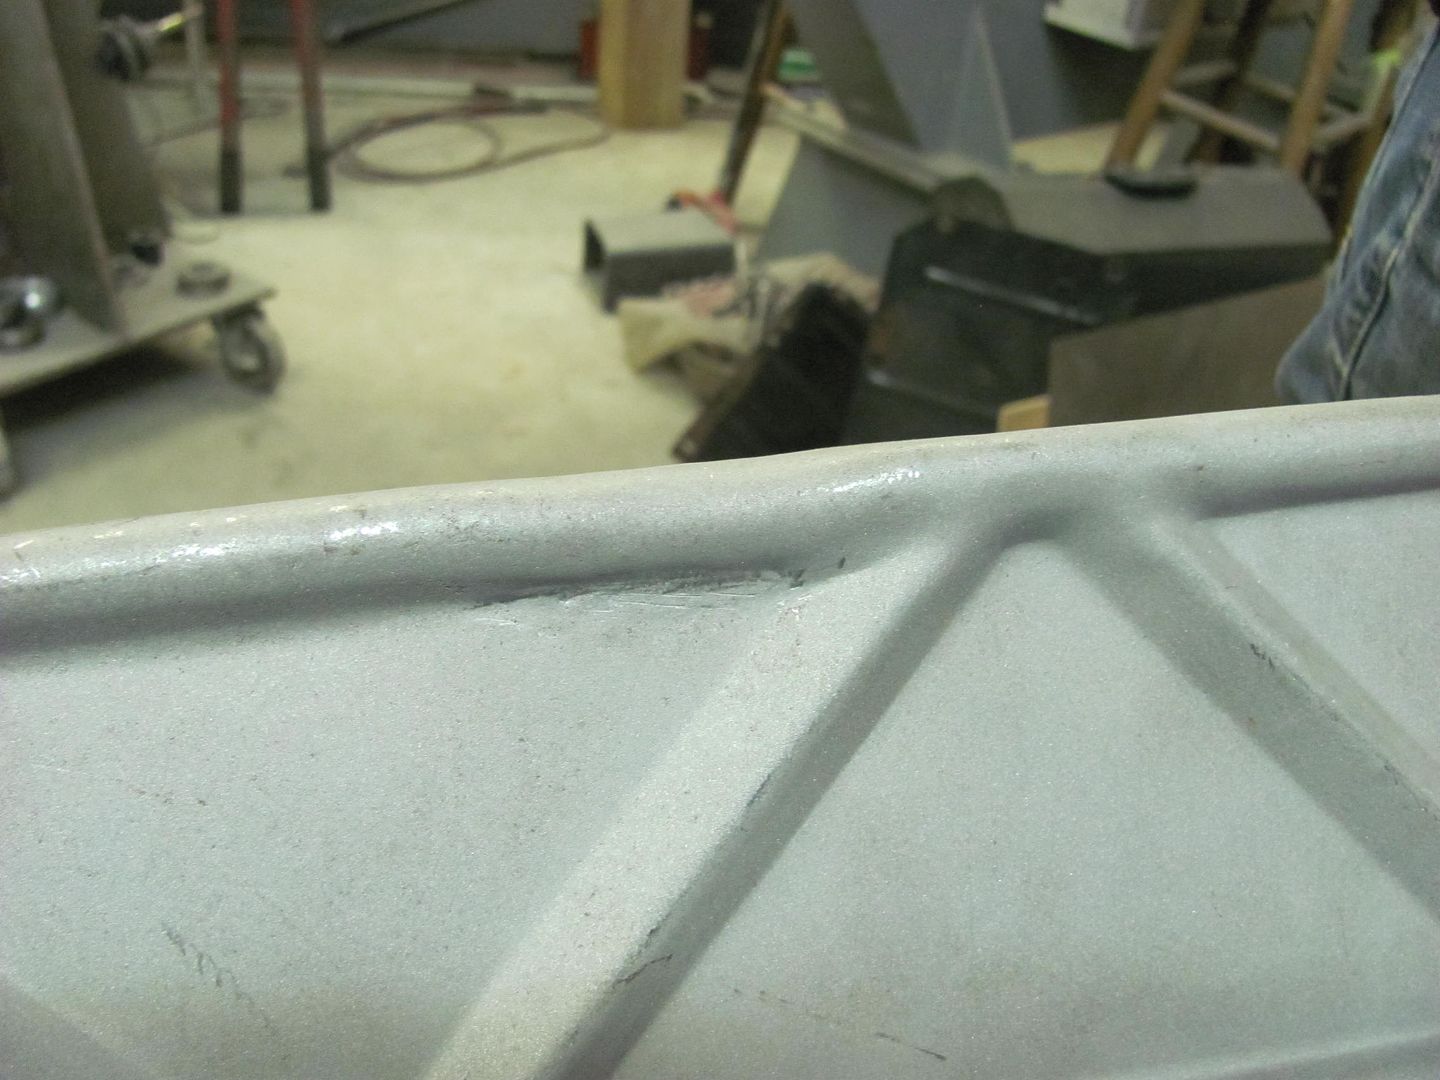 The next opening was a bit more substantial, and would require some replacement metal. Here was our first attempt at a bead along the edge of the panel.. 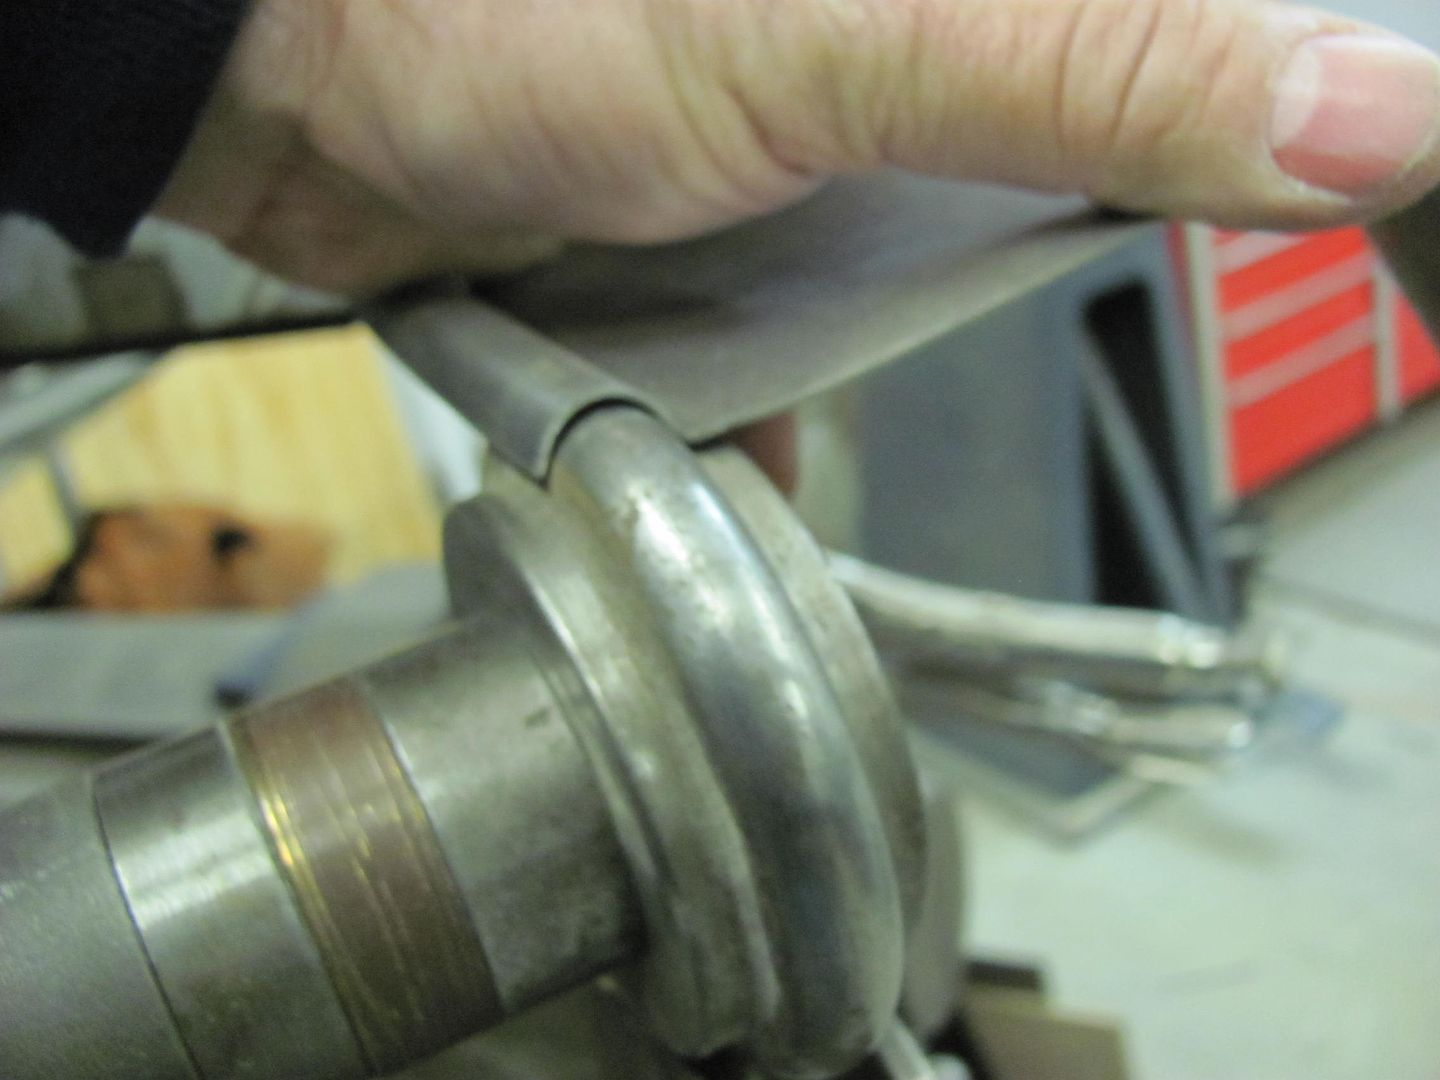 The dies would not permit quite enough length, so we used a vee die off the press brake and a 1/2" steel rod to make a radius die for the mag brake.. 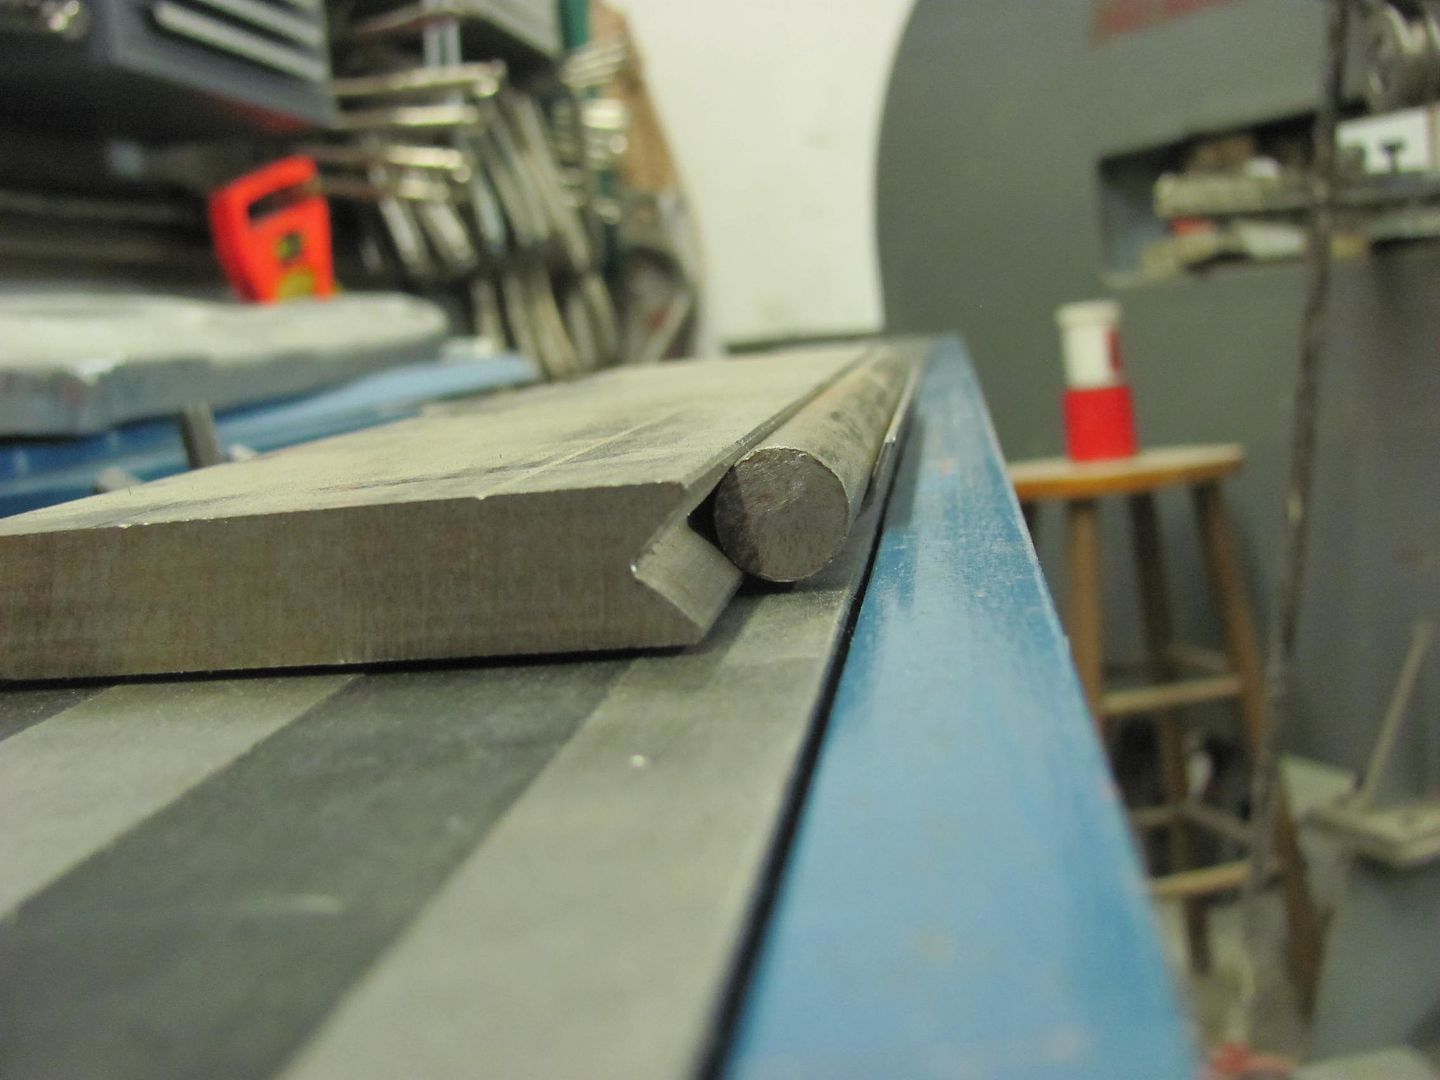 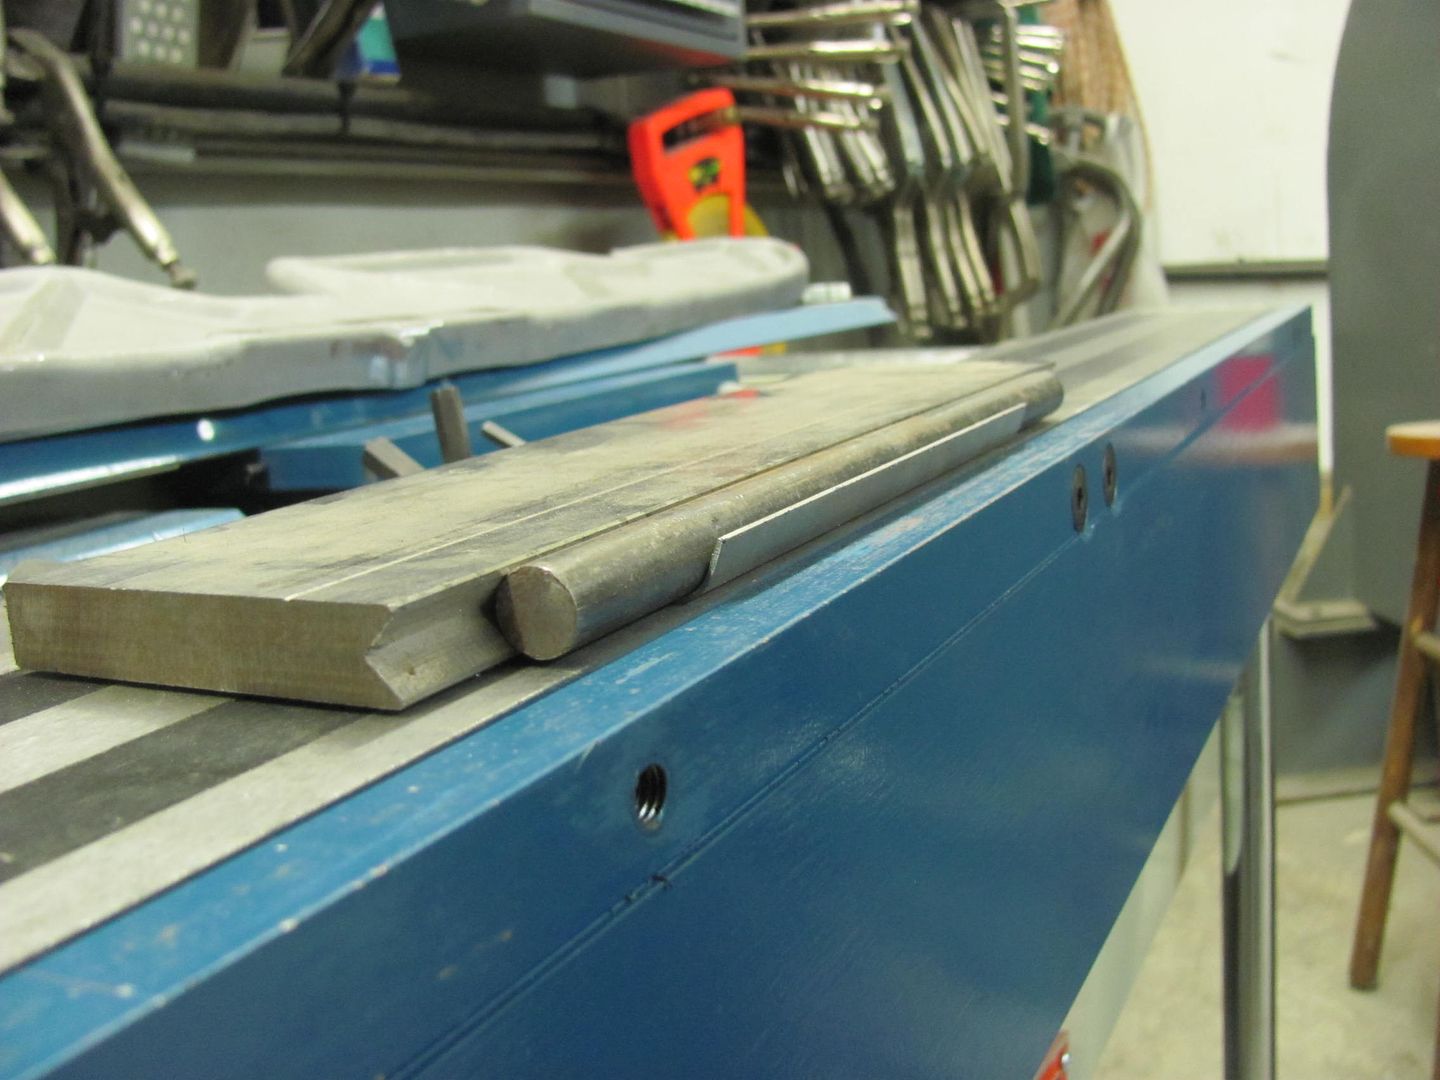 ...and between that and a straight die in the press brake, the edge bead was formed... 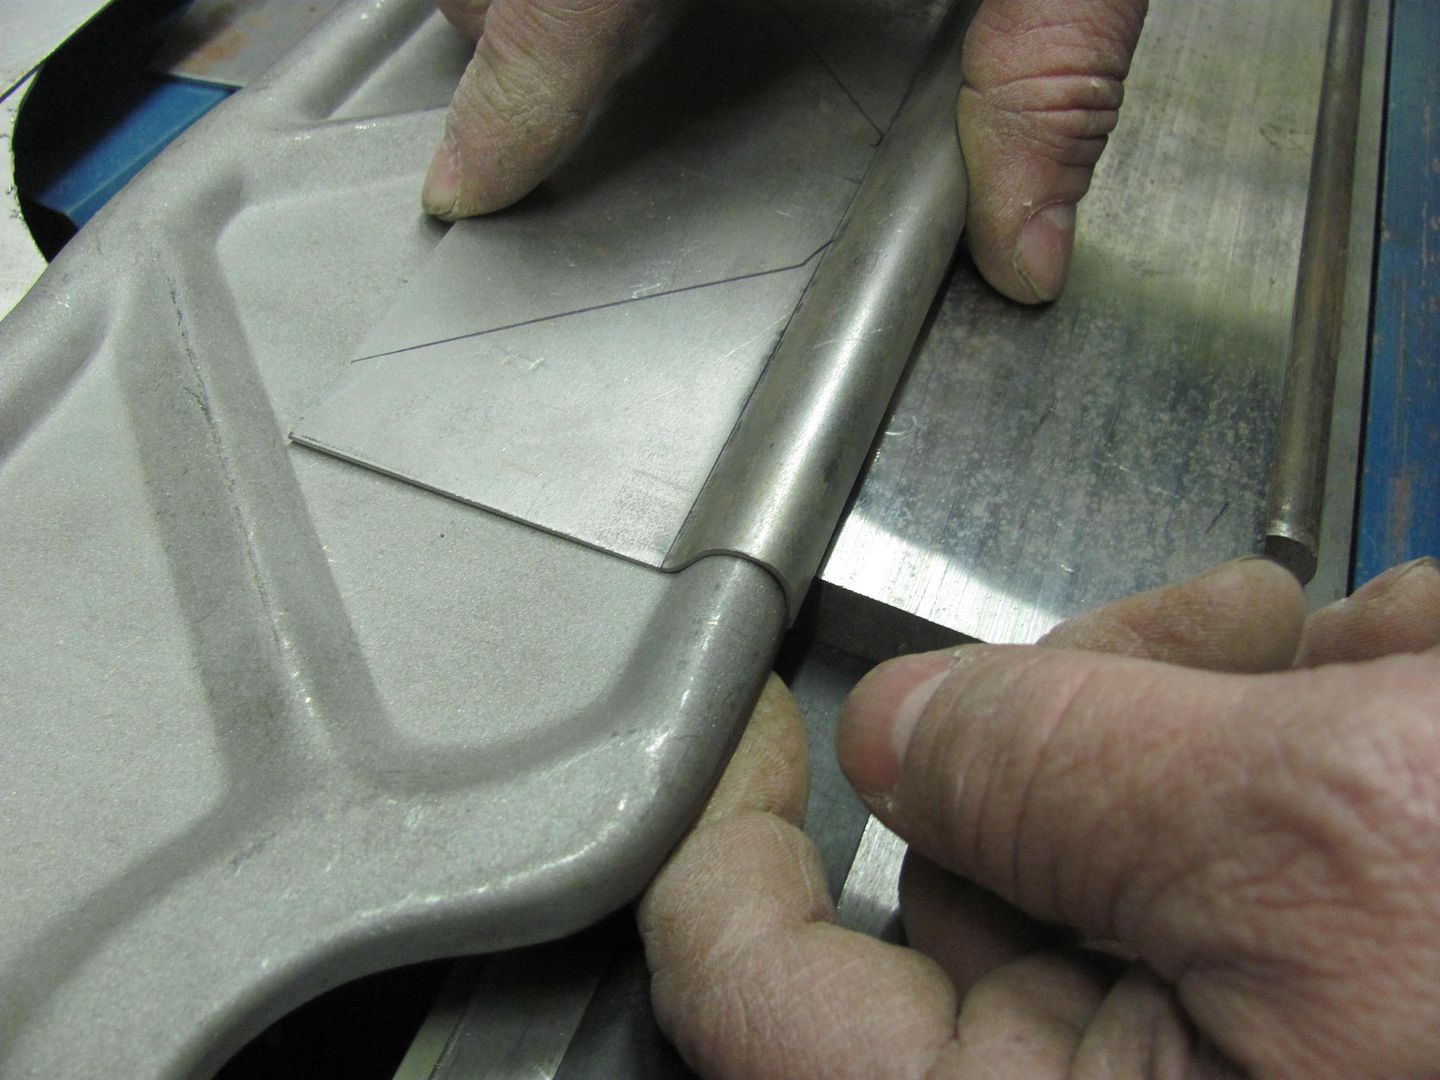 ...here transposing the crease locations... 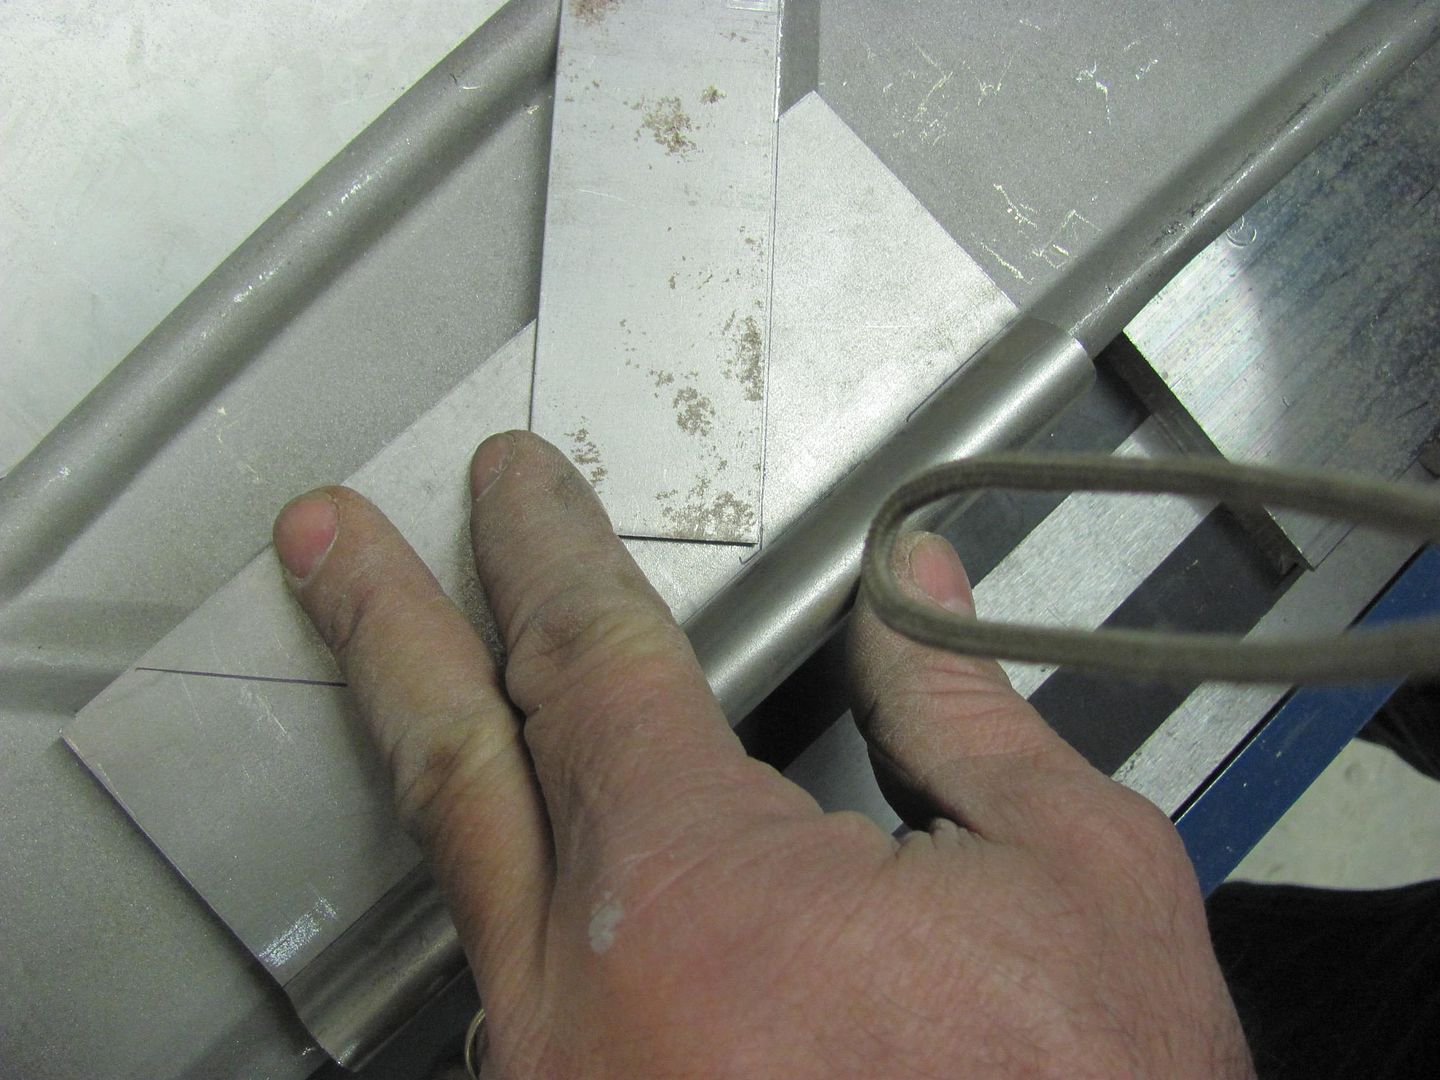 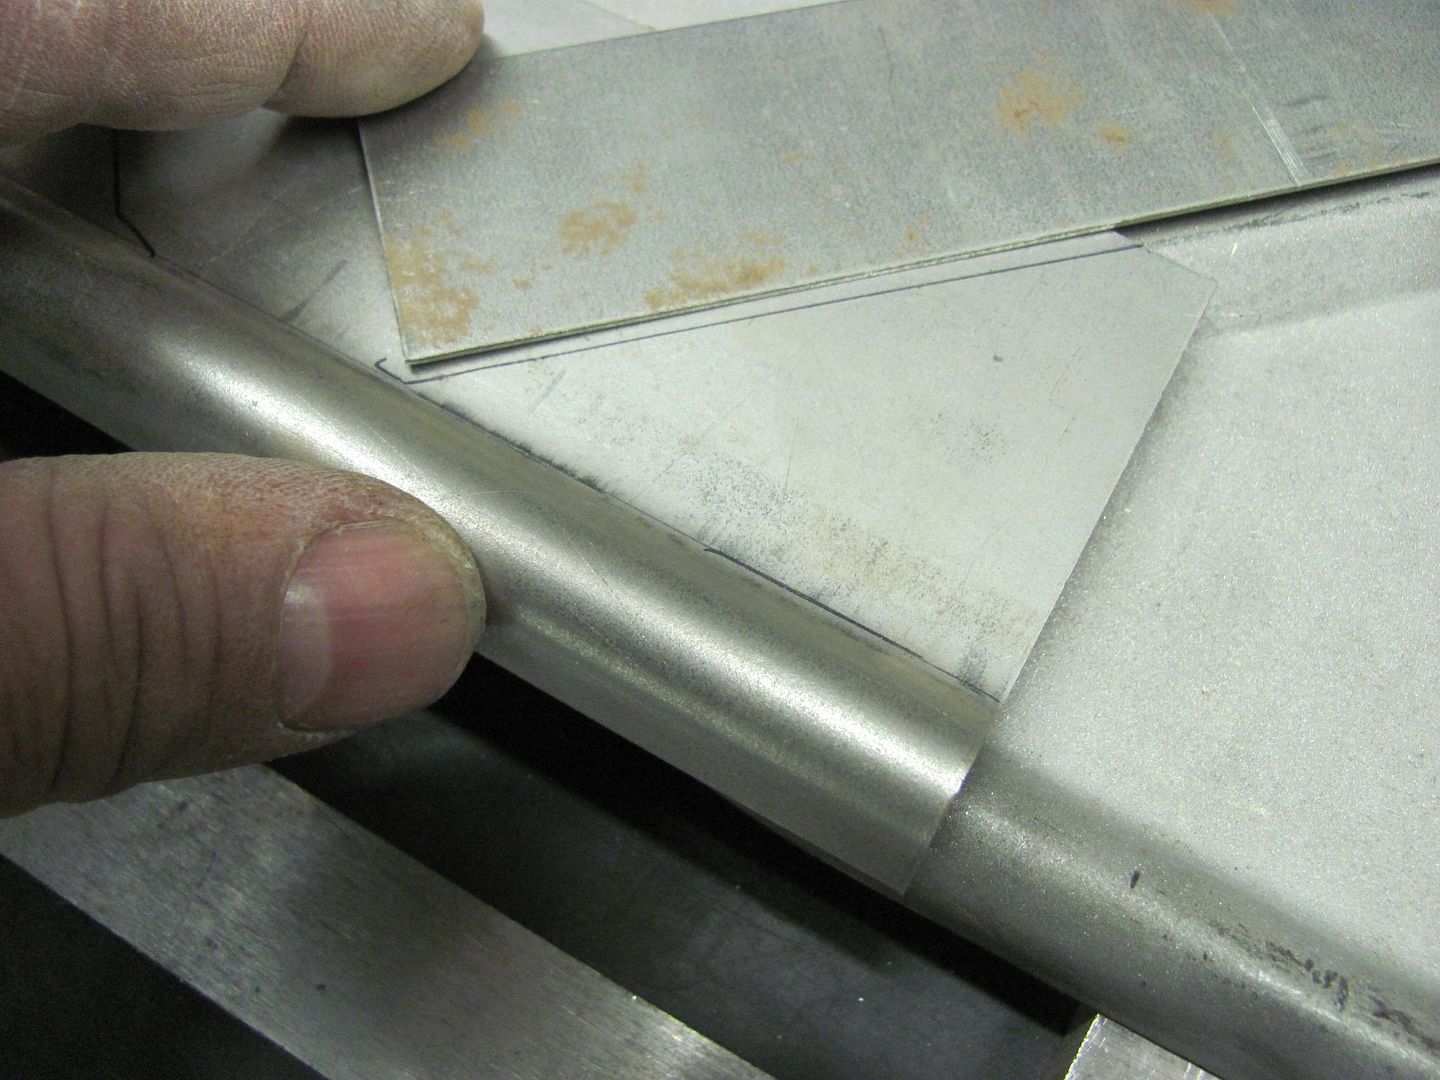 To pre-stretch the areas for the diagonal vee beads, we loaded these in the bead roller.... 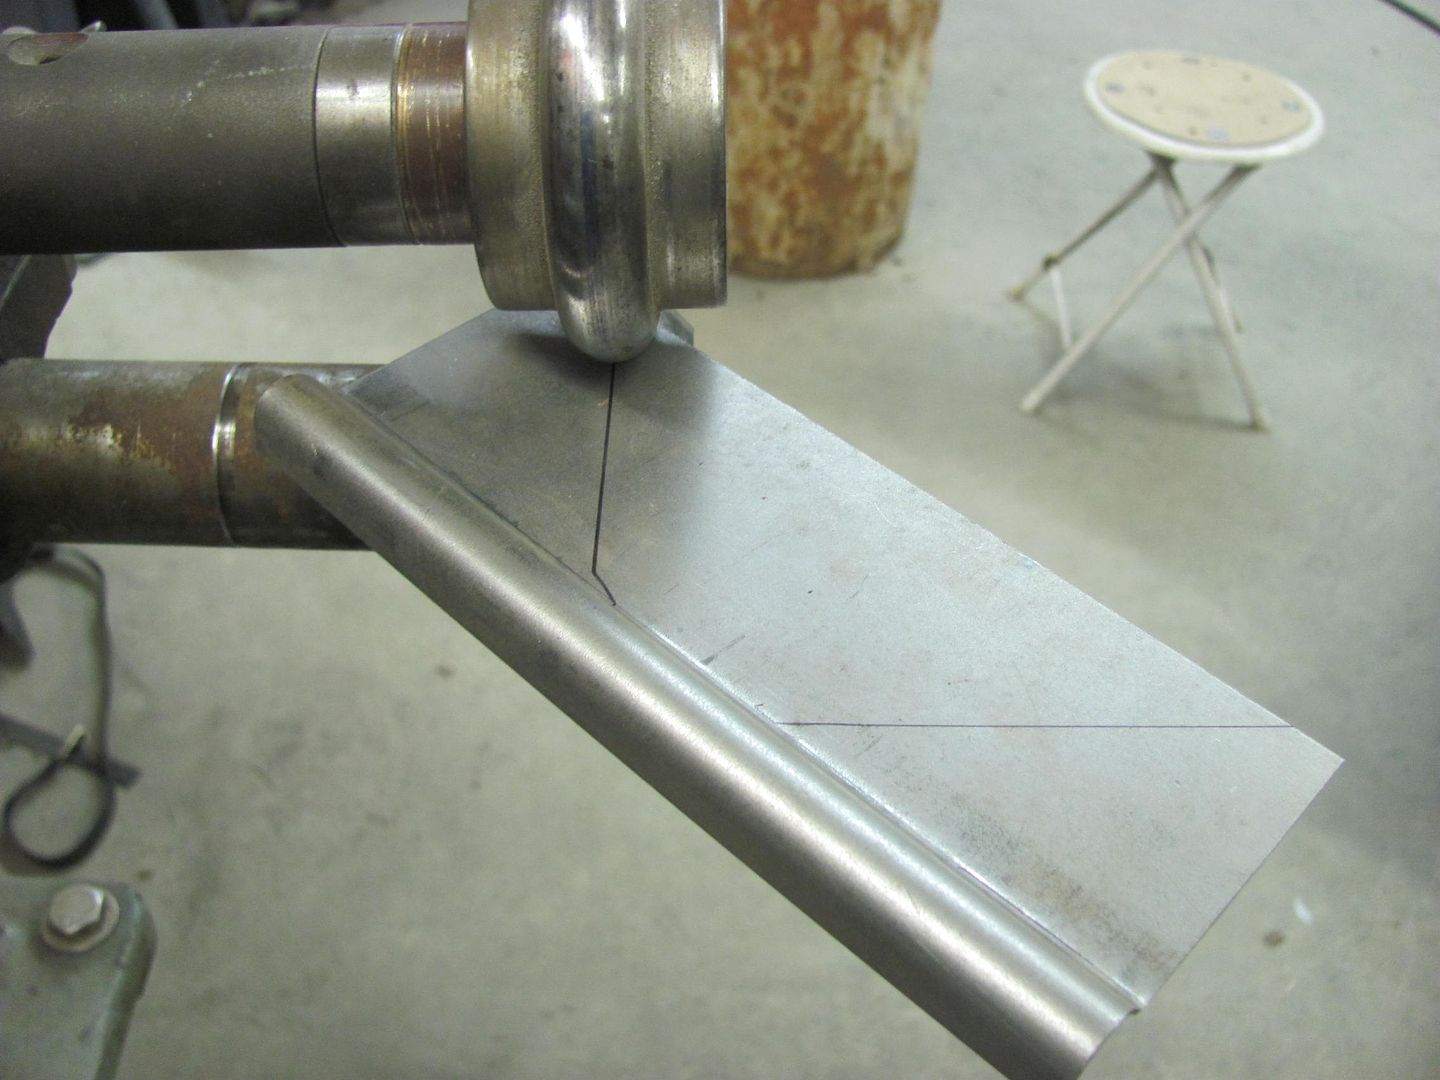 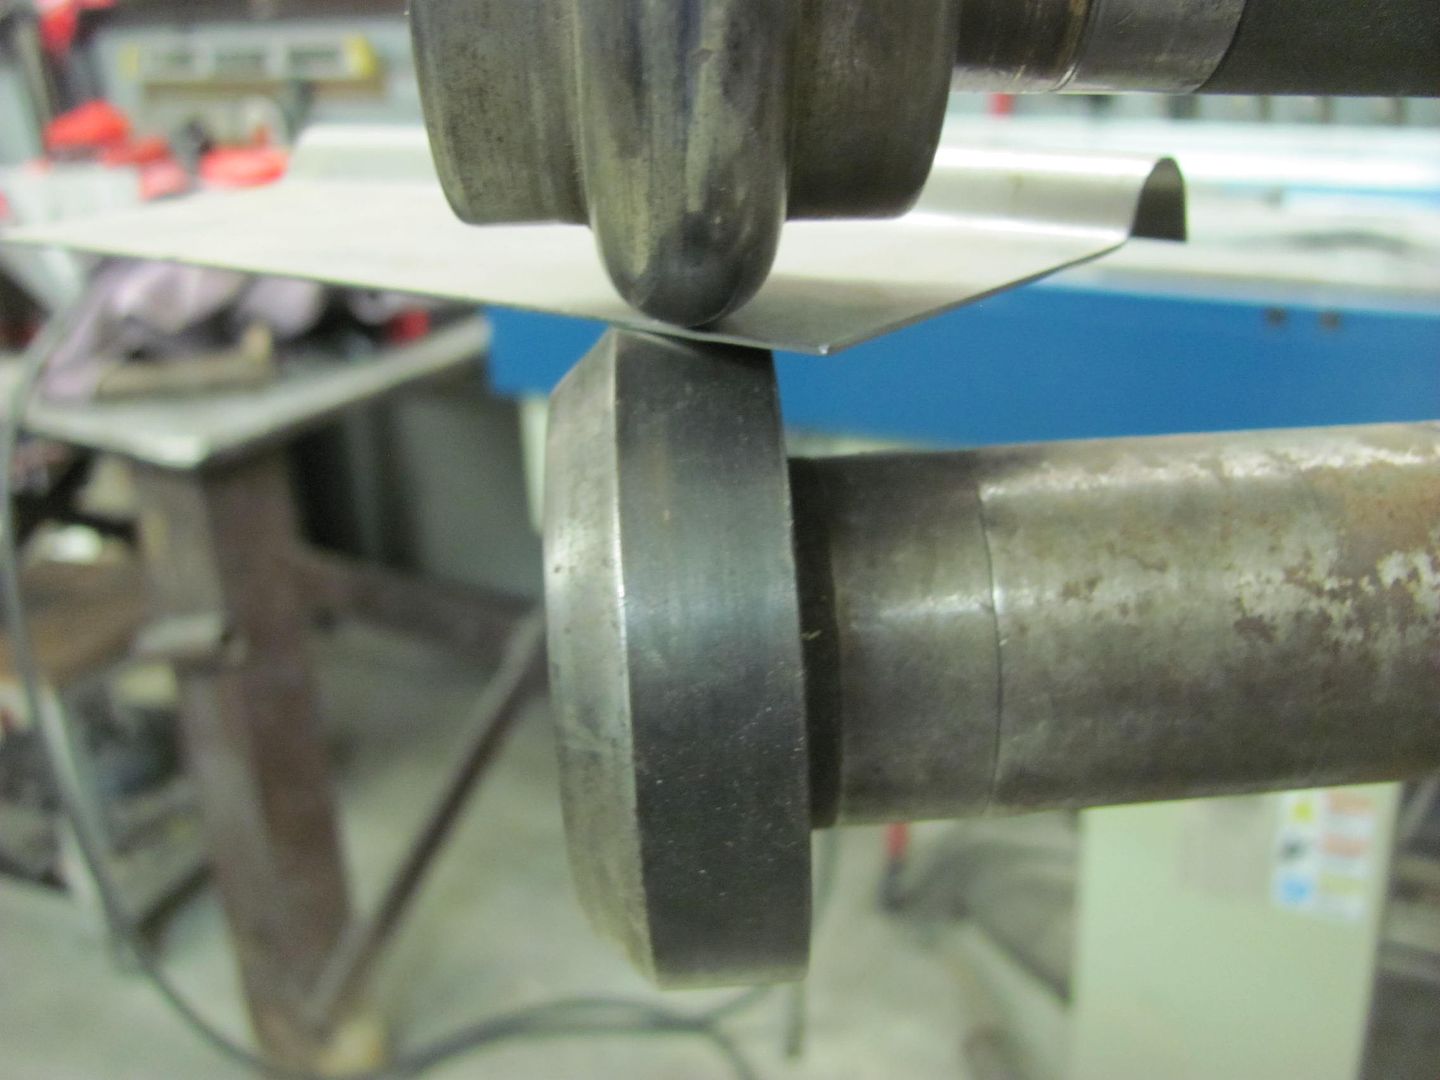 This didn't appear to add enough stretch, so the linear stretch die was used in the Watervliet planishing hammer....  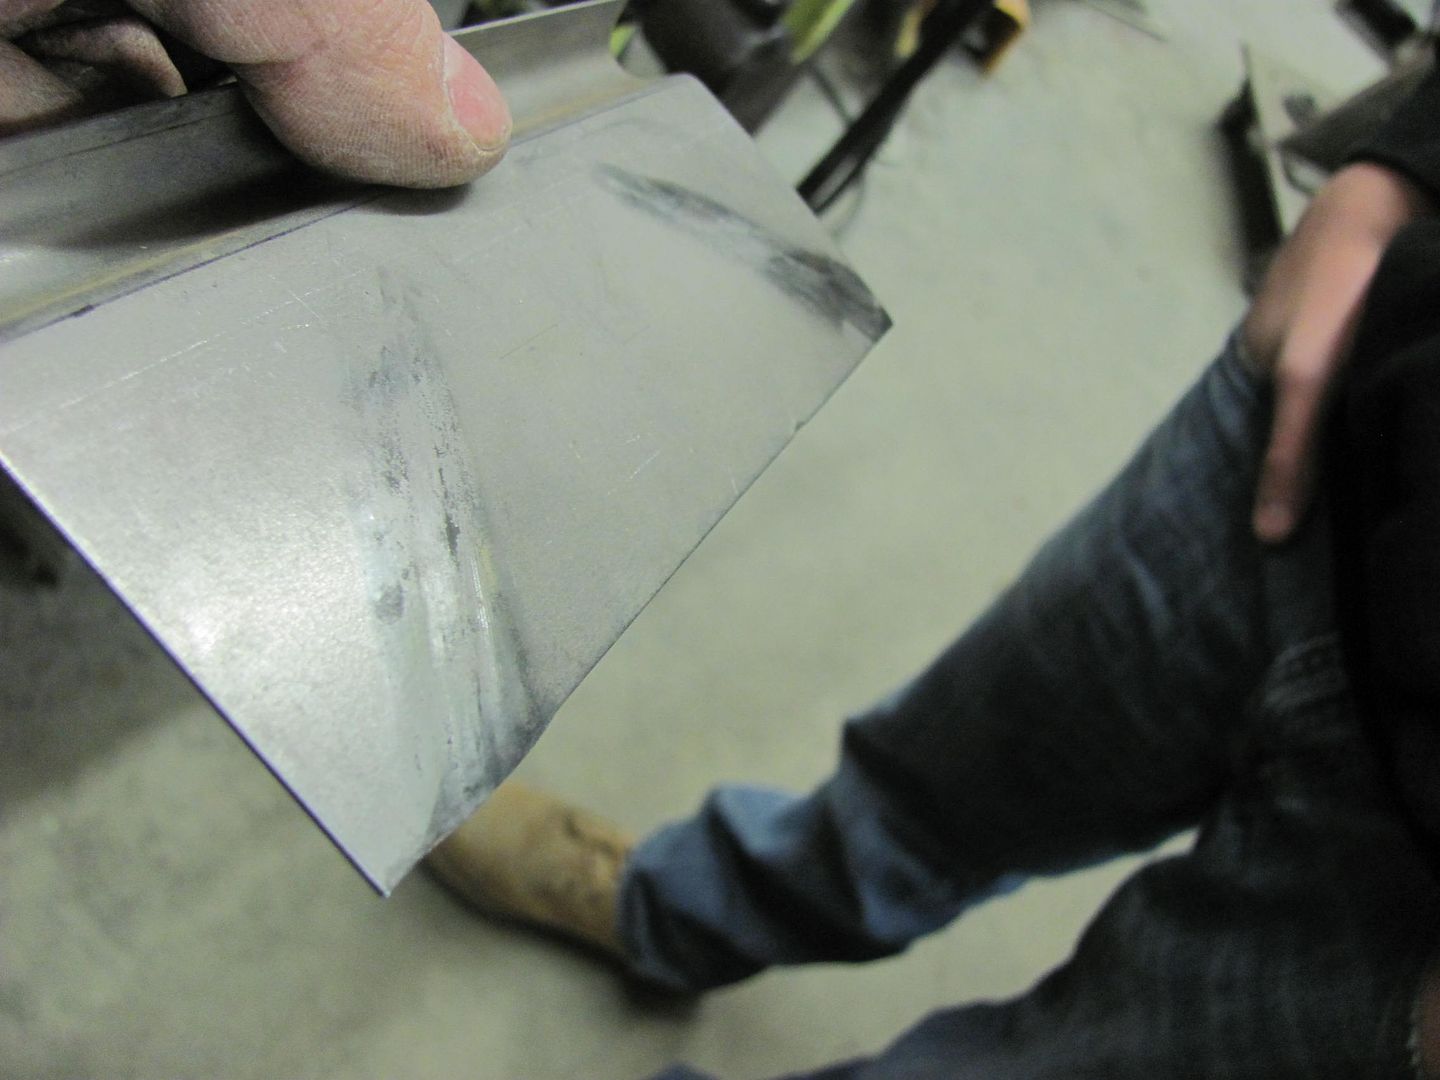 Vee was added using 3/4 wide female bead die and a narrow tipping die.. 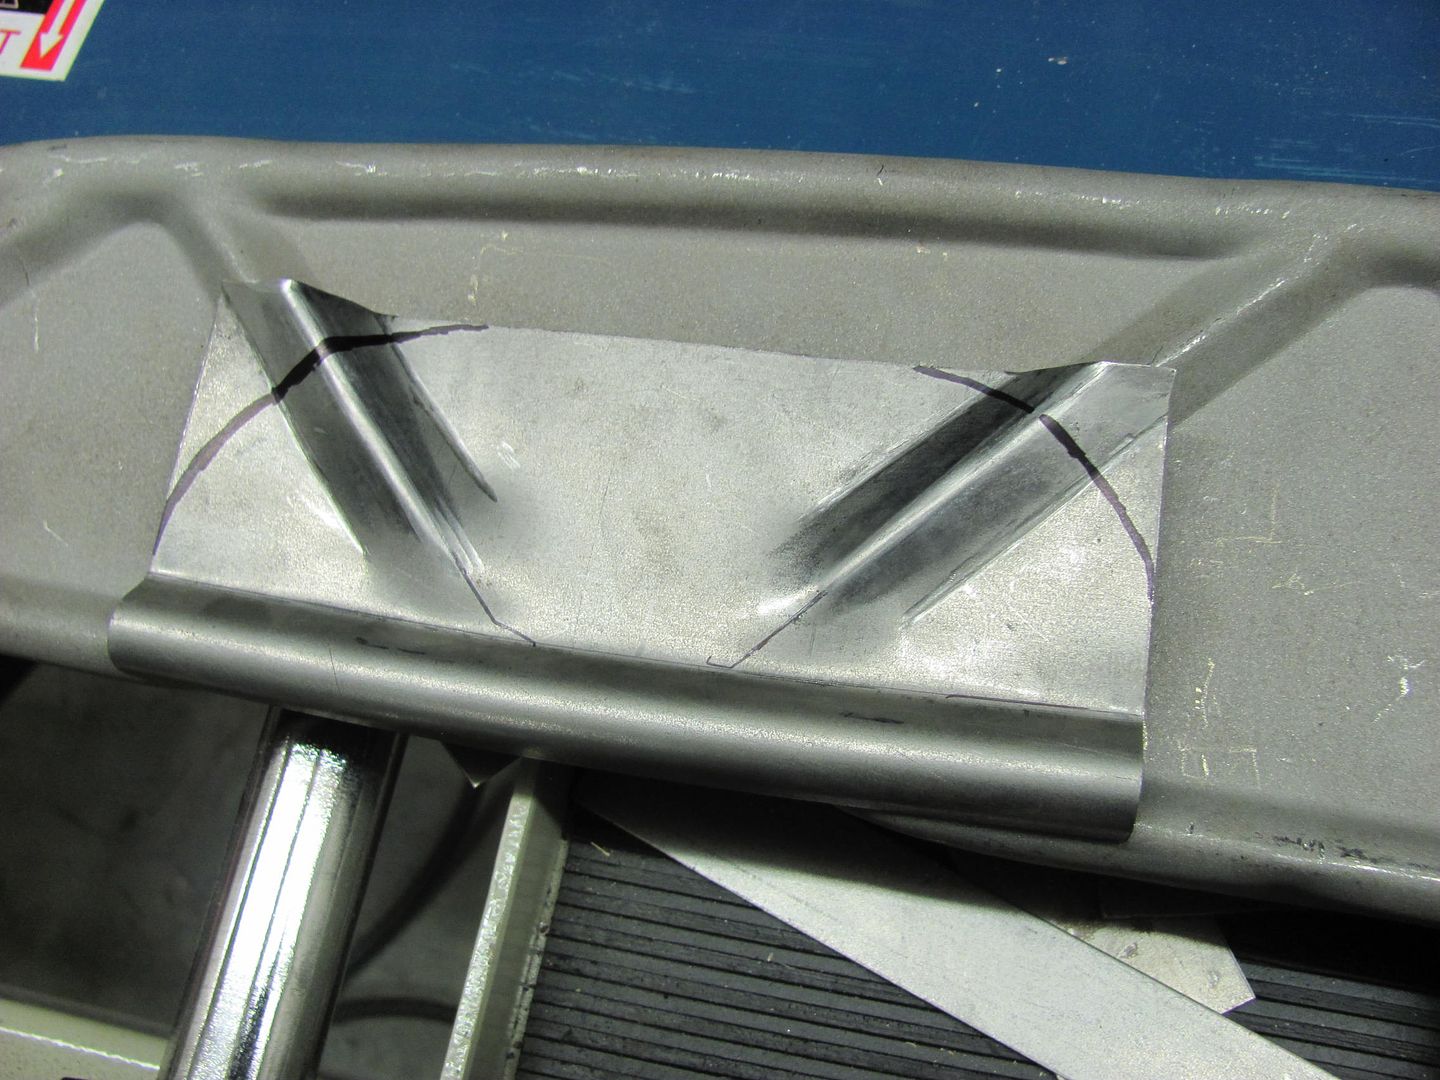 A bit of heat was added to make it a bit easier to transition the round and vee beads together... 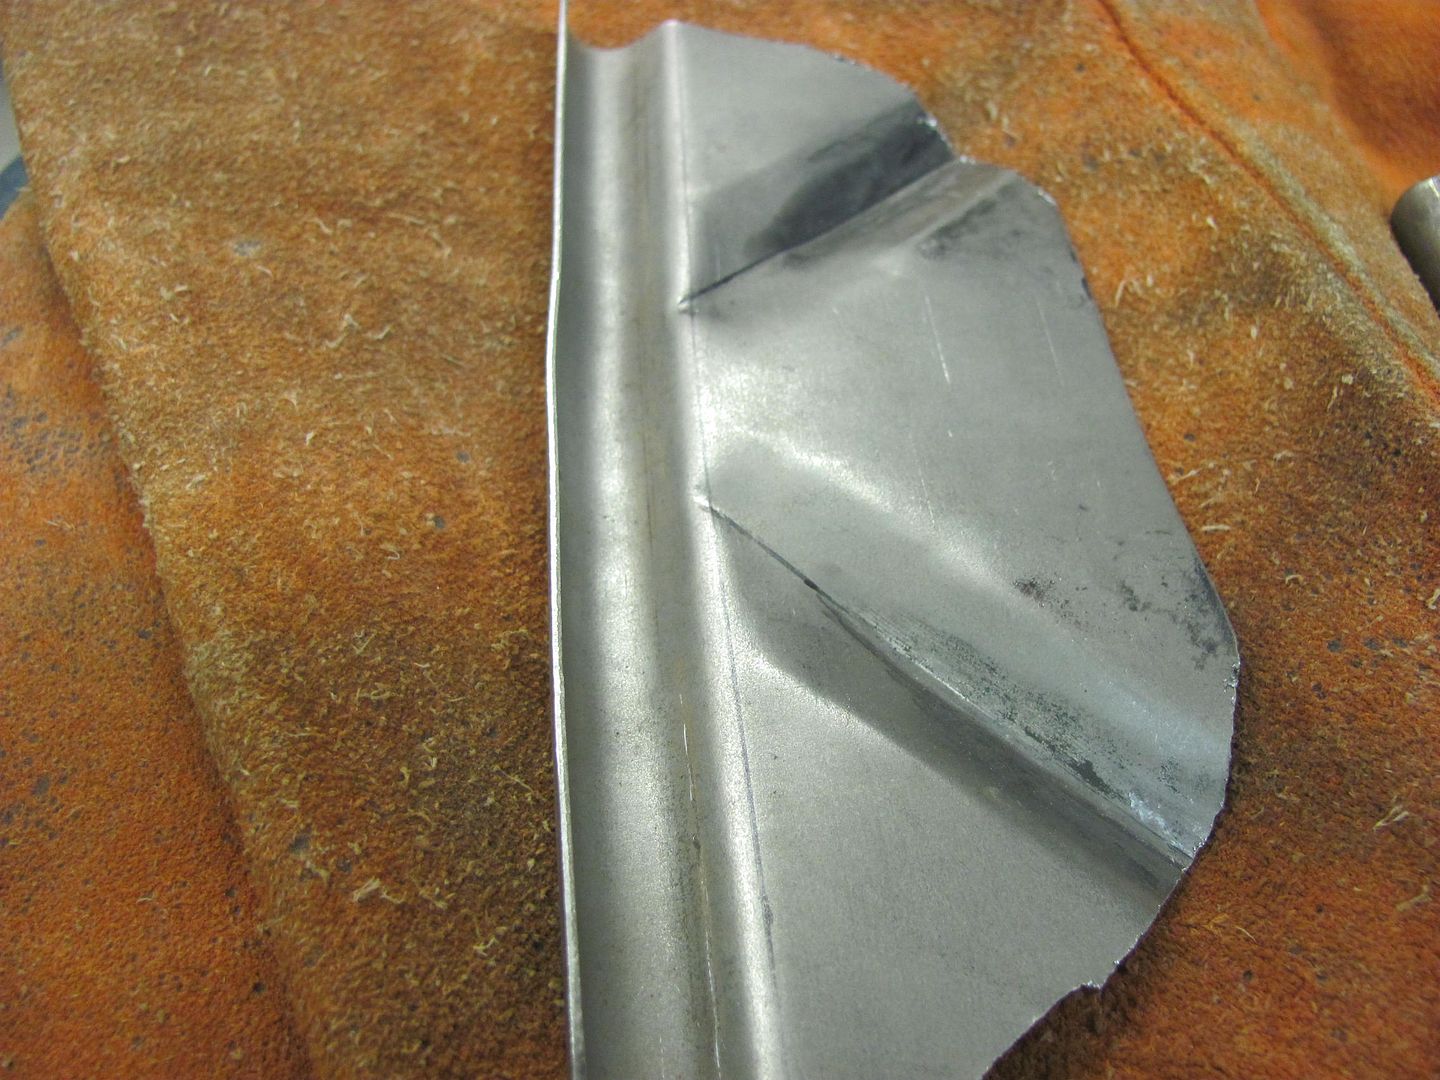 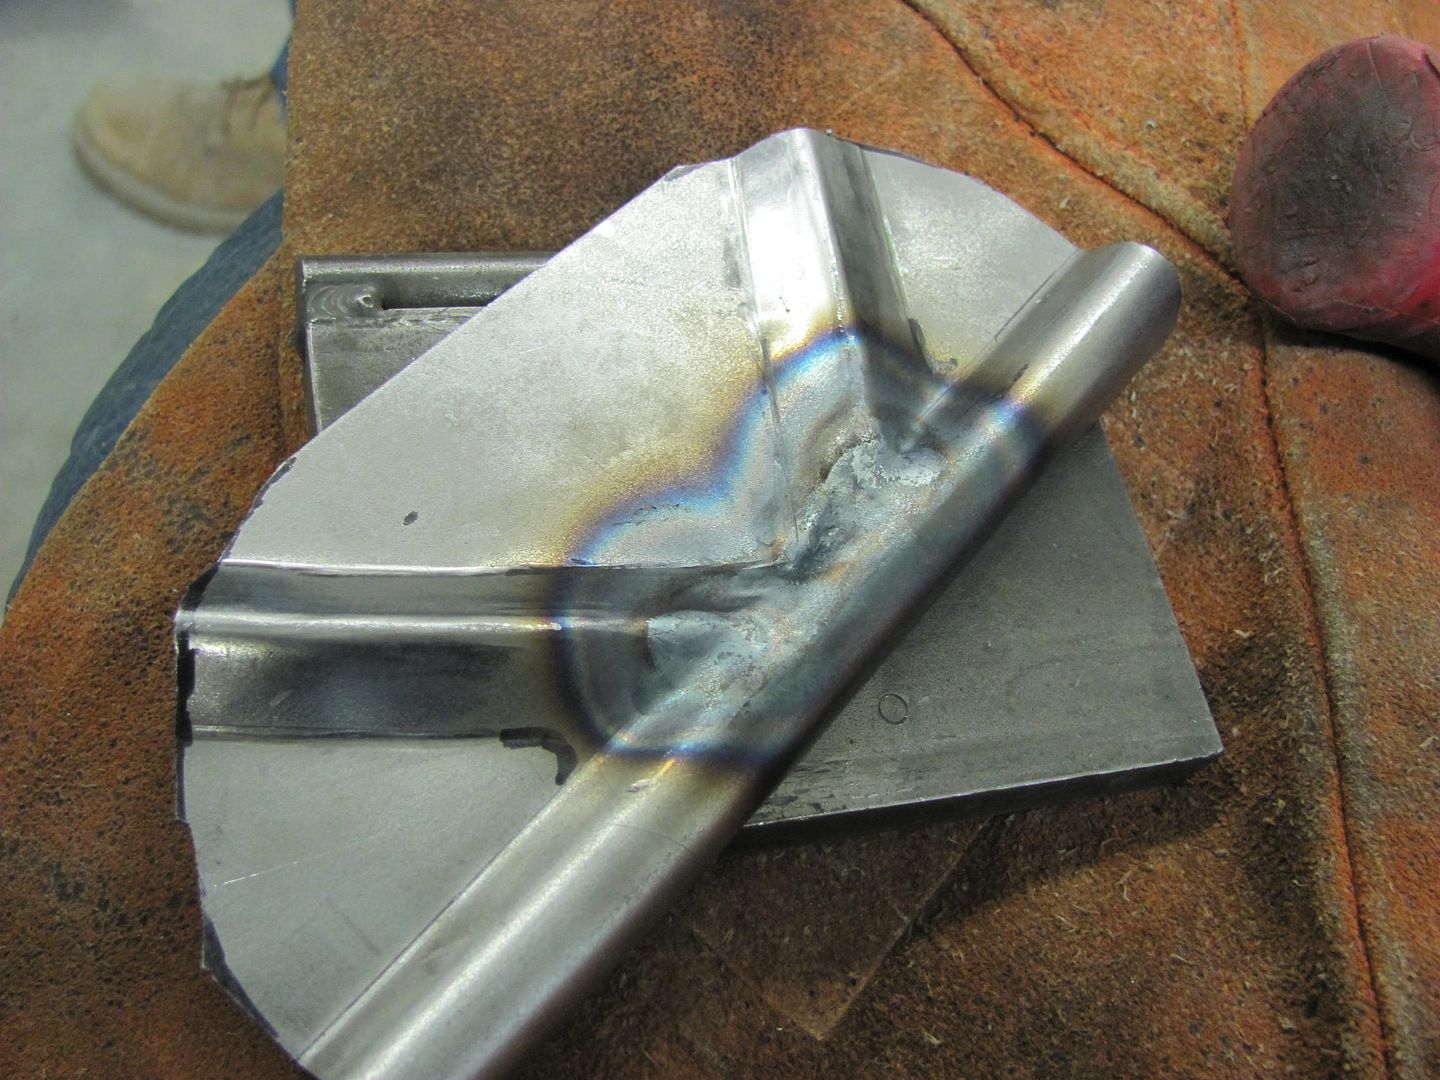 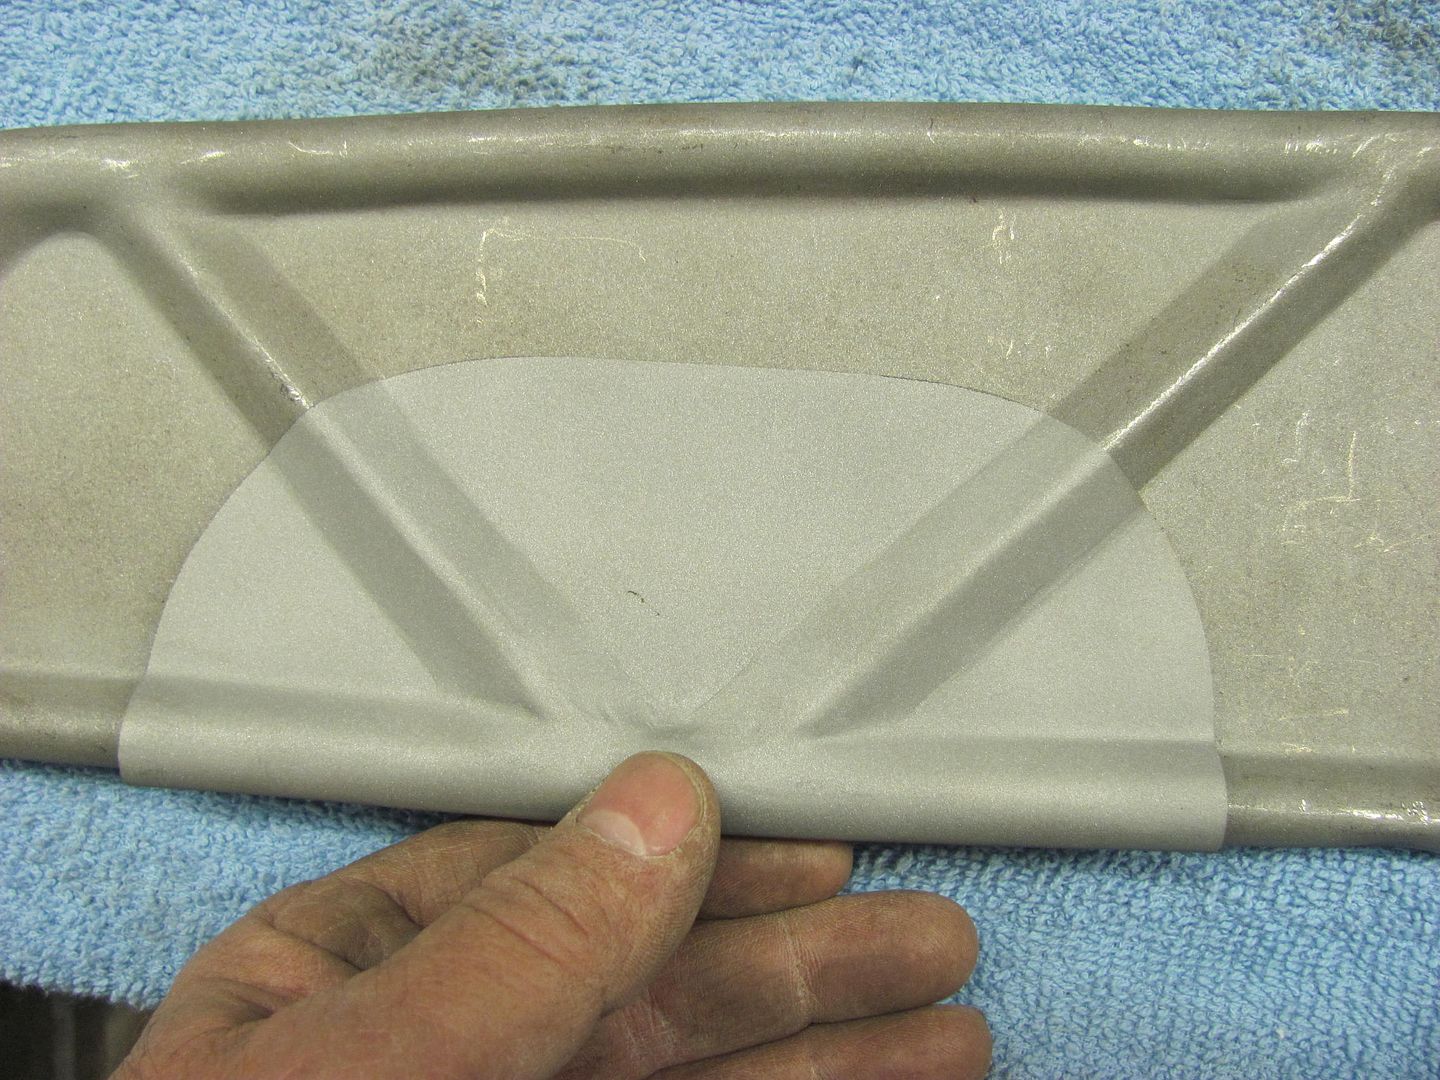 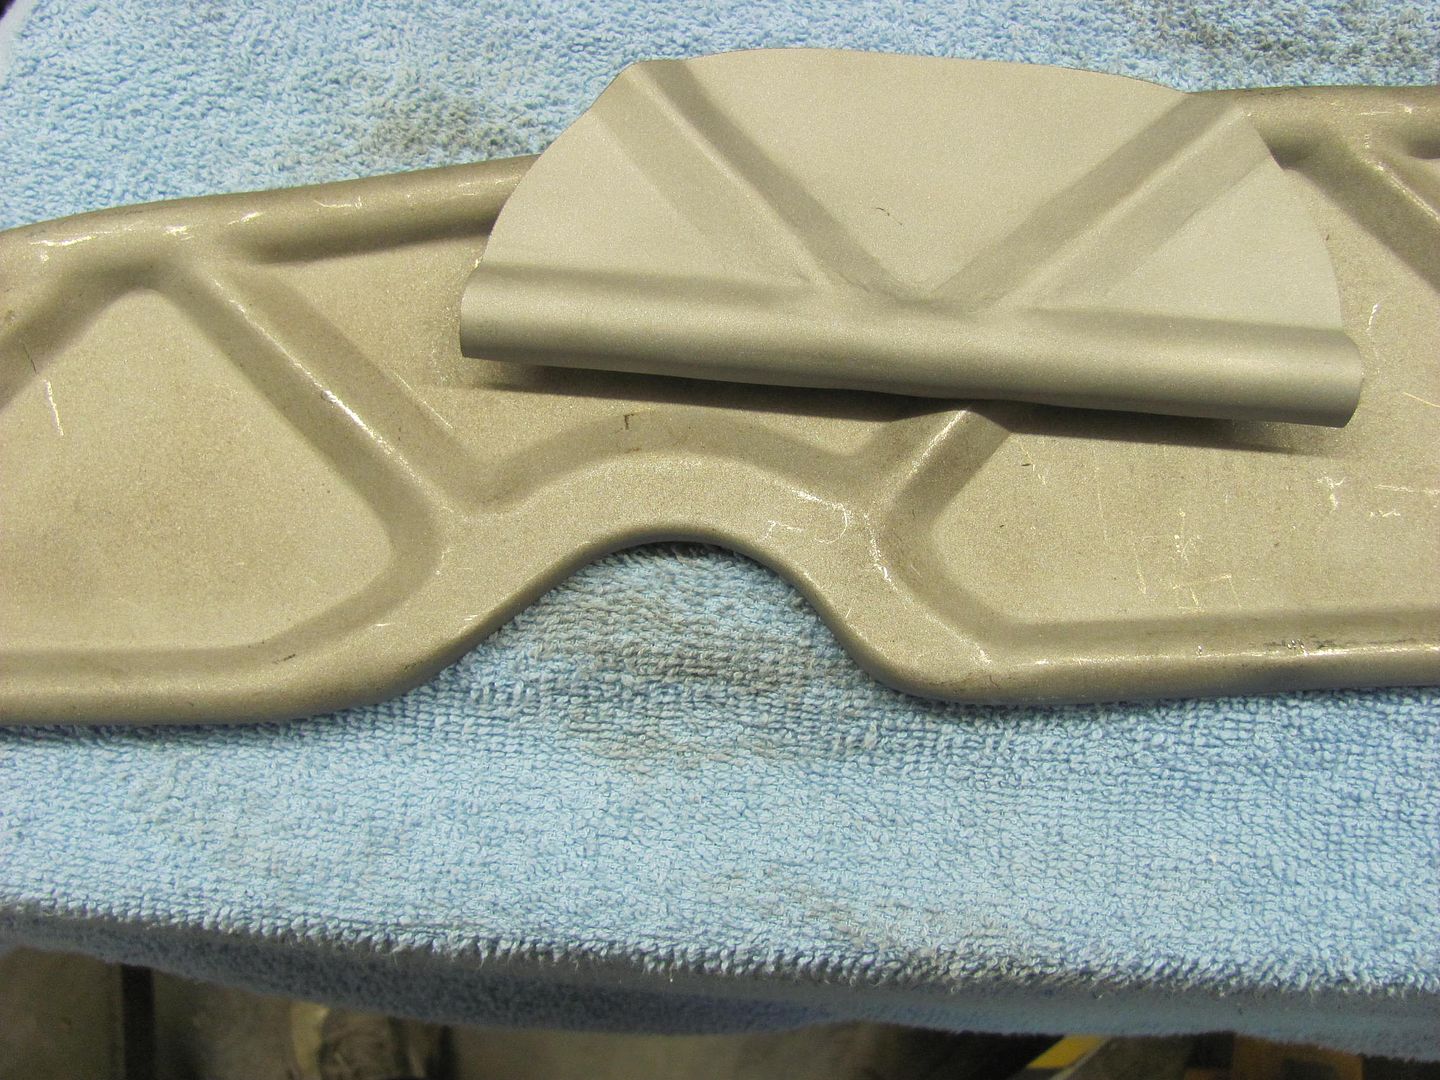 ....and this one we'll get formed up on Wednesday night and get both welded in place... 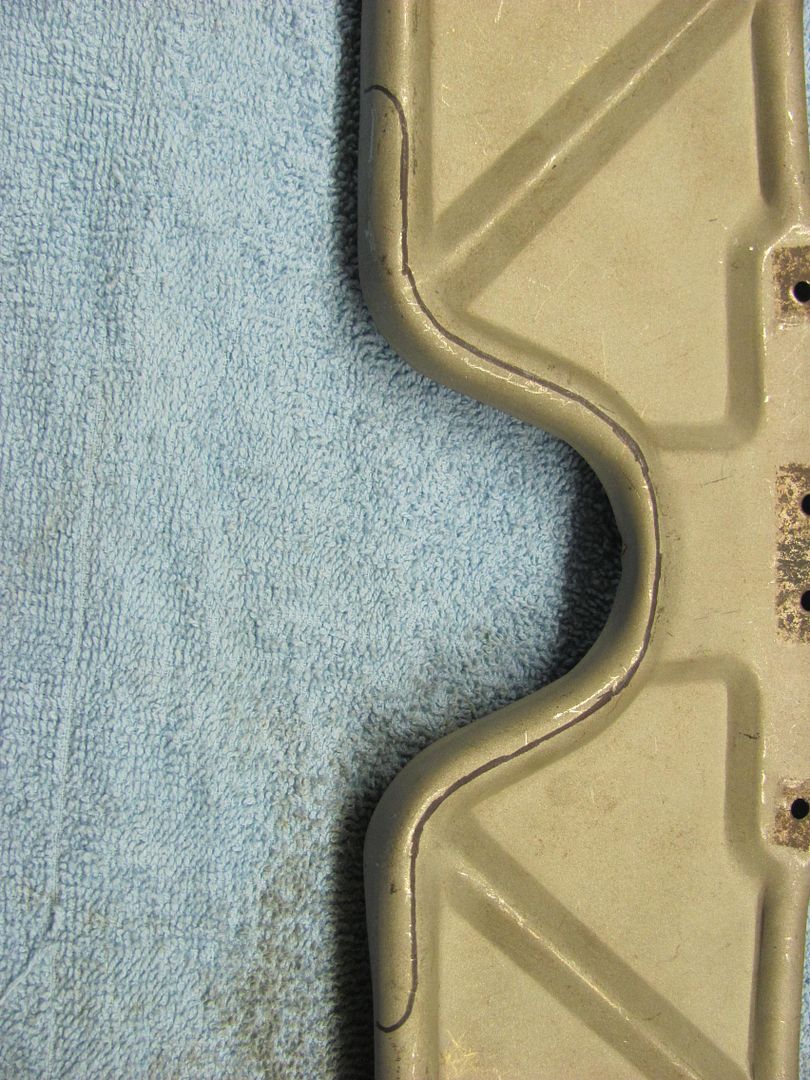
__________________
Robert |
|
|
|
|
02-03-2015, 12:37 AM
|
#345 |
|
Senior Member
Join Date: Mar 2011
Location: West Plains, Missouri
Posts: 7,553
|
Re: 55 Wagon Progress
Nice update, and again some great metal work...Jim
__________________
my build thread: http://67-72chevytrucks.com/vboard/s...d.php?t=459839 Jimbo's long bed step build:http://67-72chevytrucks.com/vboard/s...t=464626<br /> |
|
|
|
|
02-03-2015, 09:31 AM
|
#346 |
|
Senior Member
Join Date: Jul 2012
Location: Oblong, Illinois
Posts: 7,017
|
Re: 55 Wagon Progress
Really nice work! Was the opening to clear the radiator hose or ?
|
|
|
|
|
02-03-2015, 10:00 AM
|
#347 |
|
Registered User
Join Date: Jan 2013
Location: Leonardtown, MD
Posts: 1,633
|
Re: 55 Wagon Progress
For a 6 cylinder car the radiator was in front of the core support, so it was likely clearance for the top hose..
__________________
Robert |
|
|
|
|
02-04-2015, 12:38 AM
|
#348 |
|
Registered User
Join Date: Mar 2007
Location: Scotts, Michigan
Posts: 3,750
|
Re: 55 Wagon Progress
Wow your metal working skills is fantastic. I like the detailed pictures of the process.
Marc
__________________
...........__________ .................. ((__|__||___\____ ..;.;;.:;:;.,;..;((_(O))____ (_(O)) 1948 Chevy Truck - Finished SOLD!! 1953 Chevy Suburban "Family Truckster" Completed: Spring of 2021 http://67-72chevytrucks.com/vboard/s...d.php?t=605484 1994 4x4 Blazer - "Field Find" https://67-72chevytrucks.com/vboard/...ferrerid=30857 |
|
|
|
|
02-05-2015, 12:32 AM
|
#349 |
|
Registered User
Join Date: Jan 2013
Location: Leonardtown, MD
Posts: 1,633
|
Re: 55 Wagon Progress
Thanks Marc!
I had a bit of a short night as I had to pick up the young'n from after school activities, so most of the progress this evening was Kyle's efforts. Making the patch for the center relief, starting with adding the radius to the bottom edge... This uses a bottom vee die from the Diacro and a 1/2" rod to form the radius.. 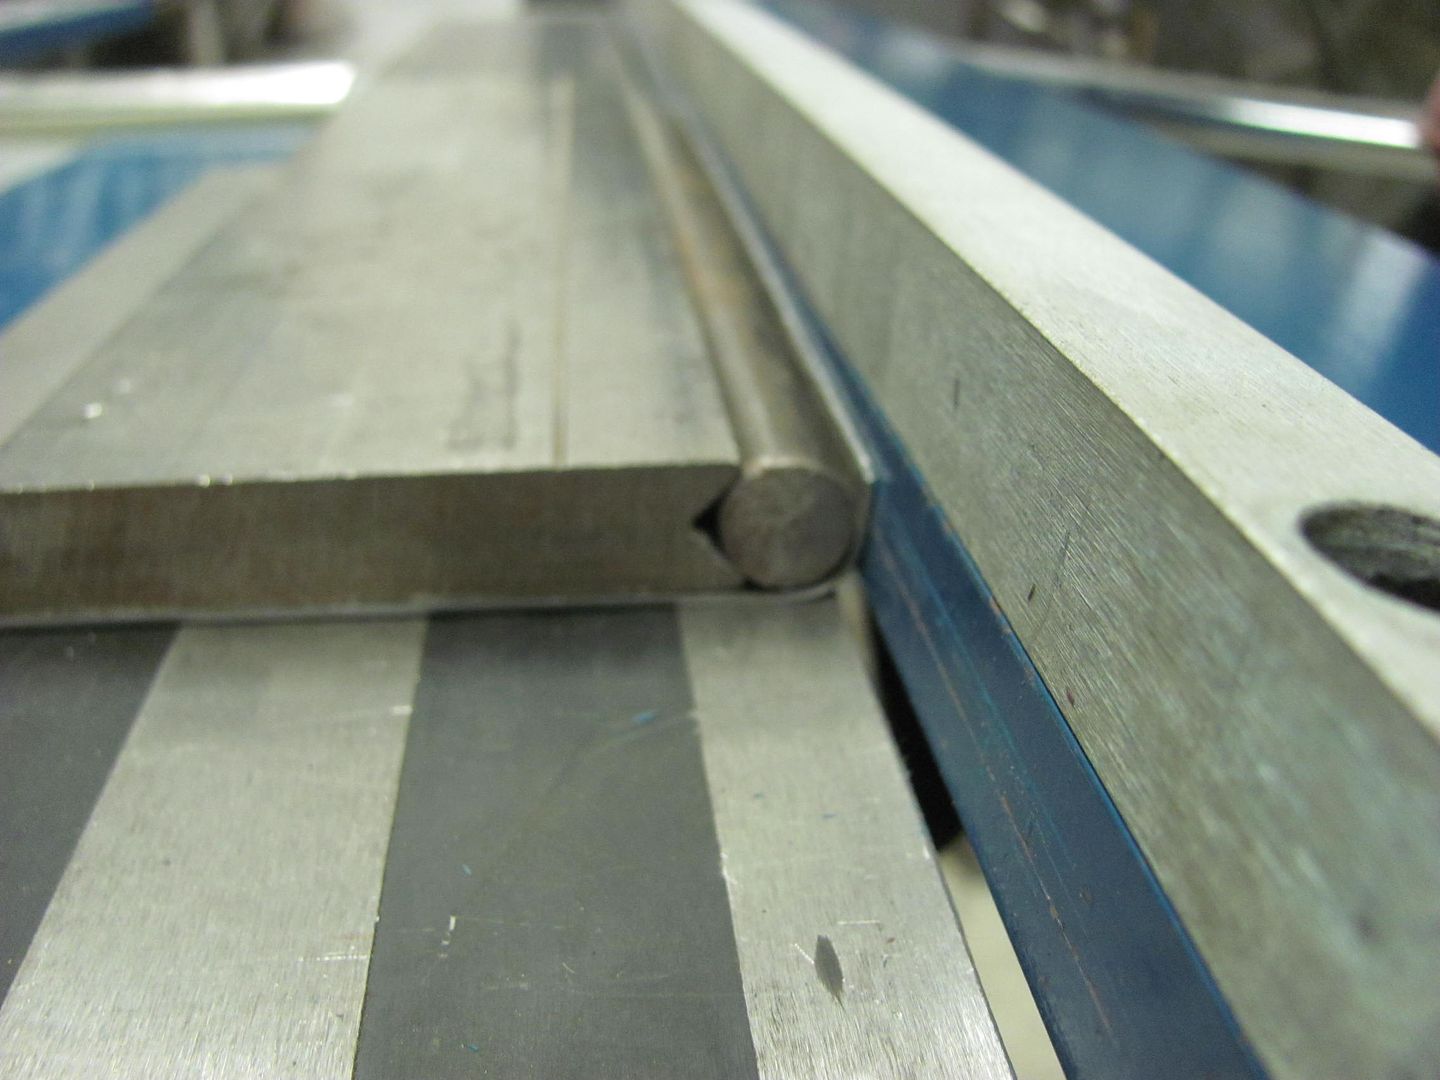 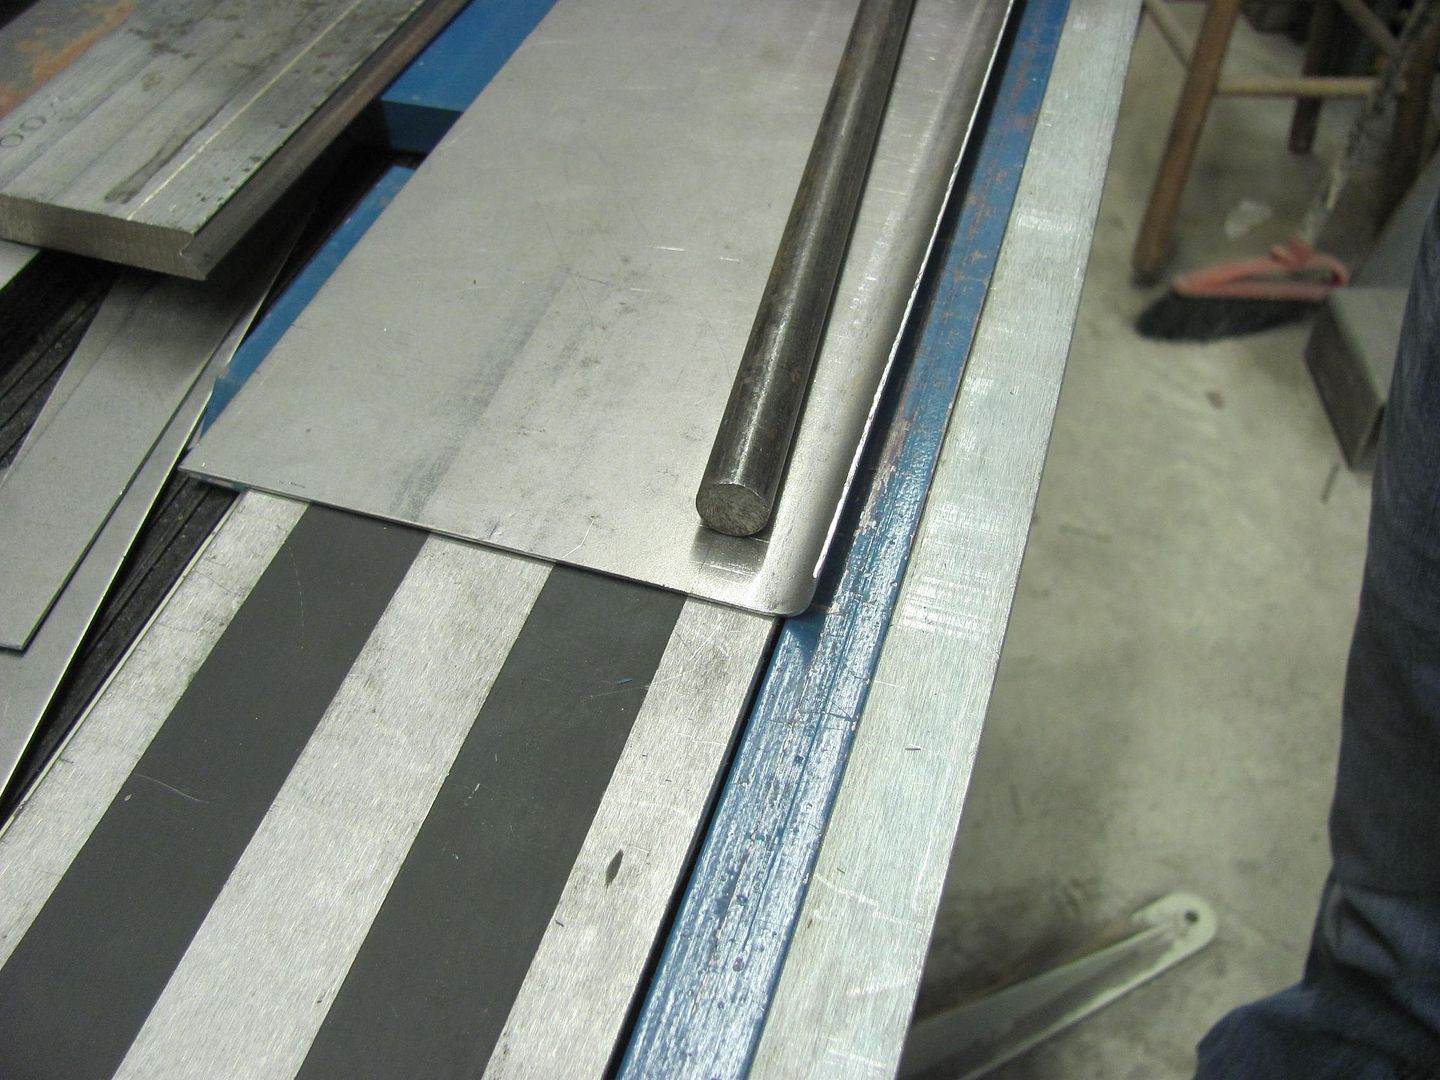 Test fit of the radius... 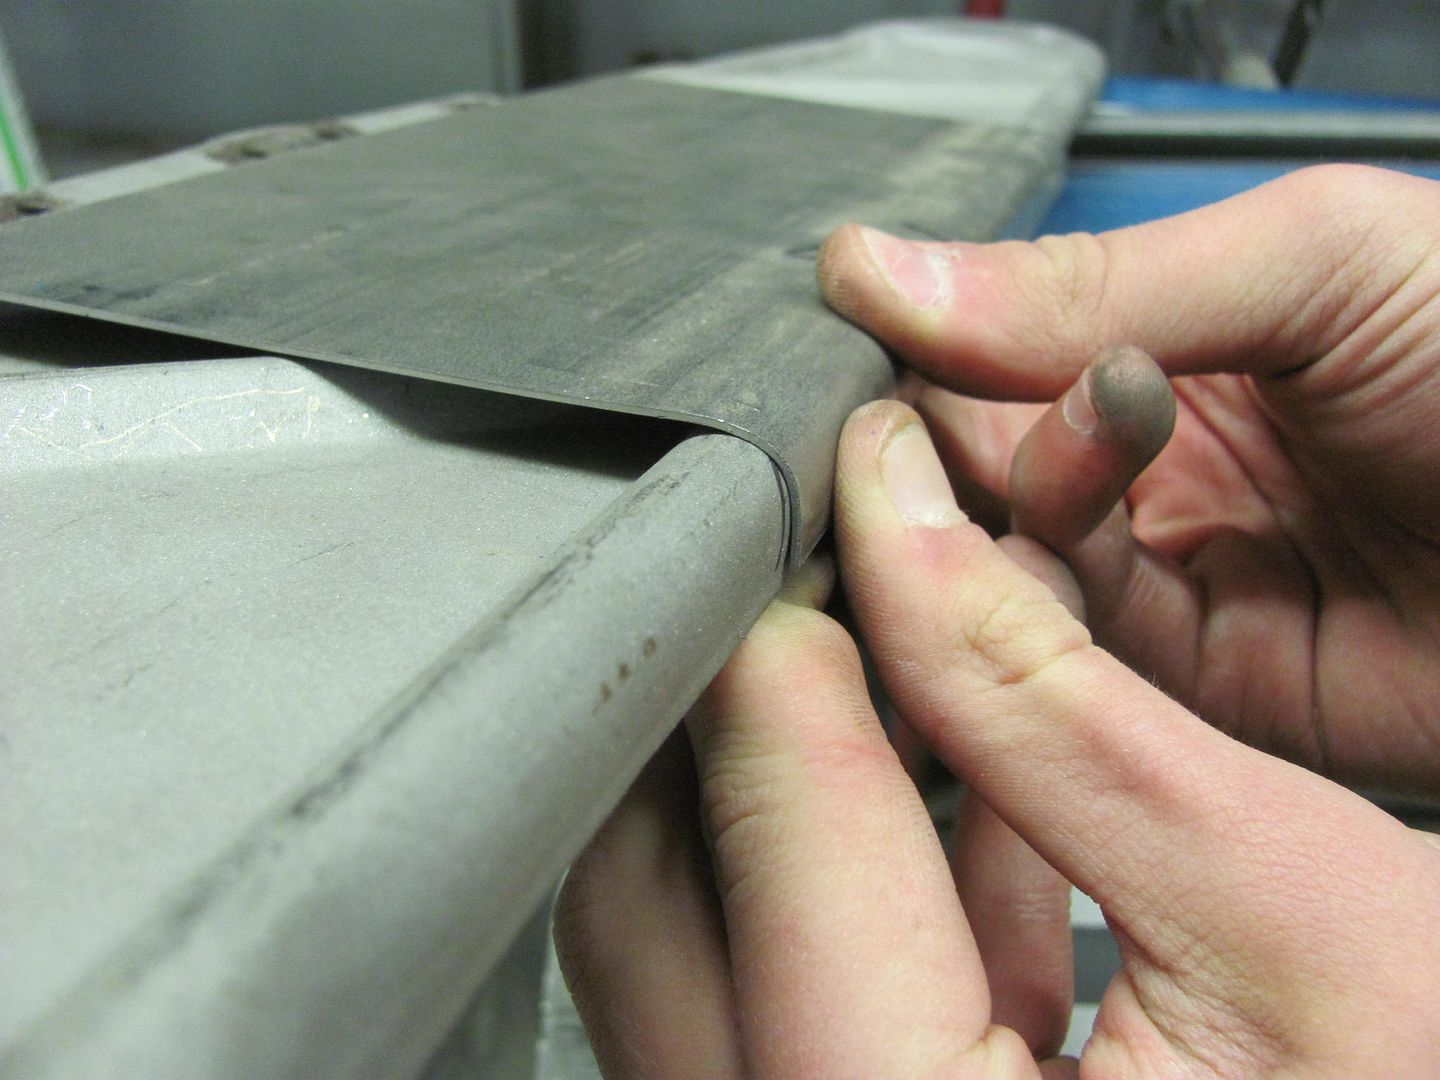 Trimming out the hood brace... 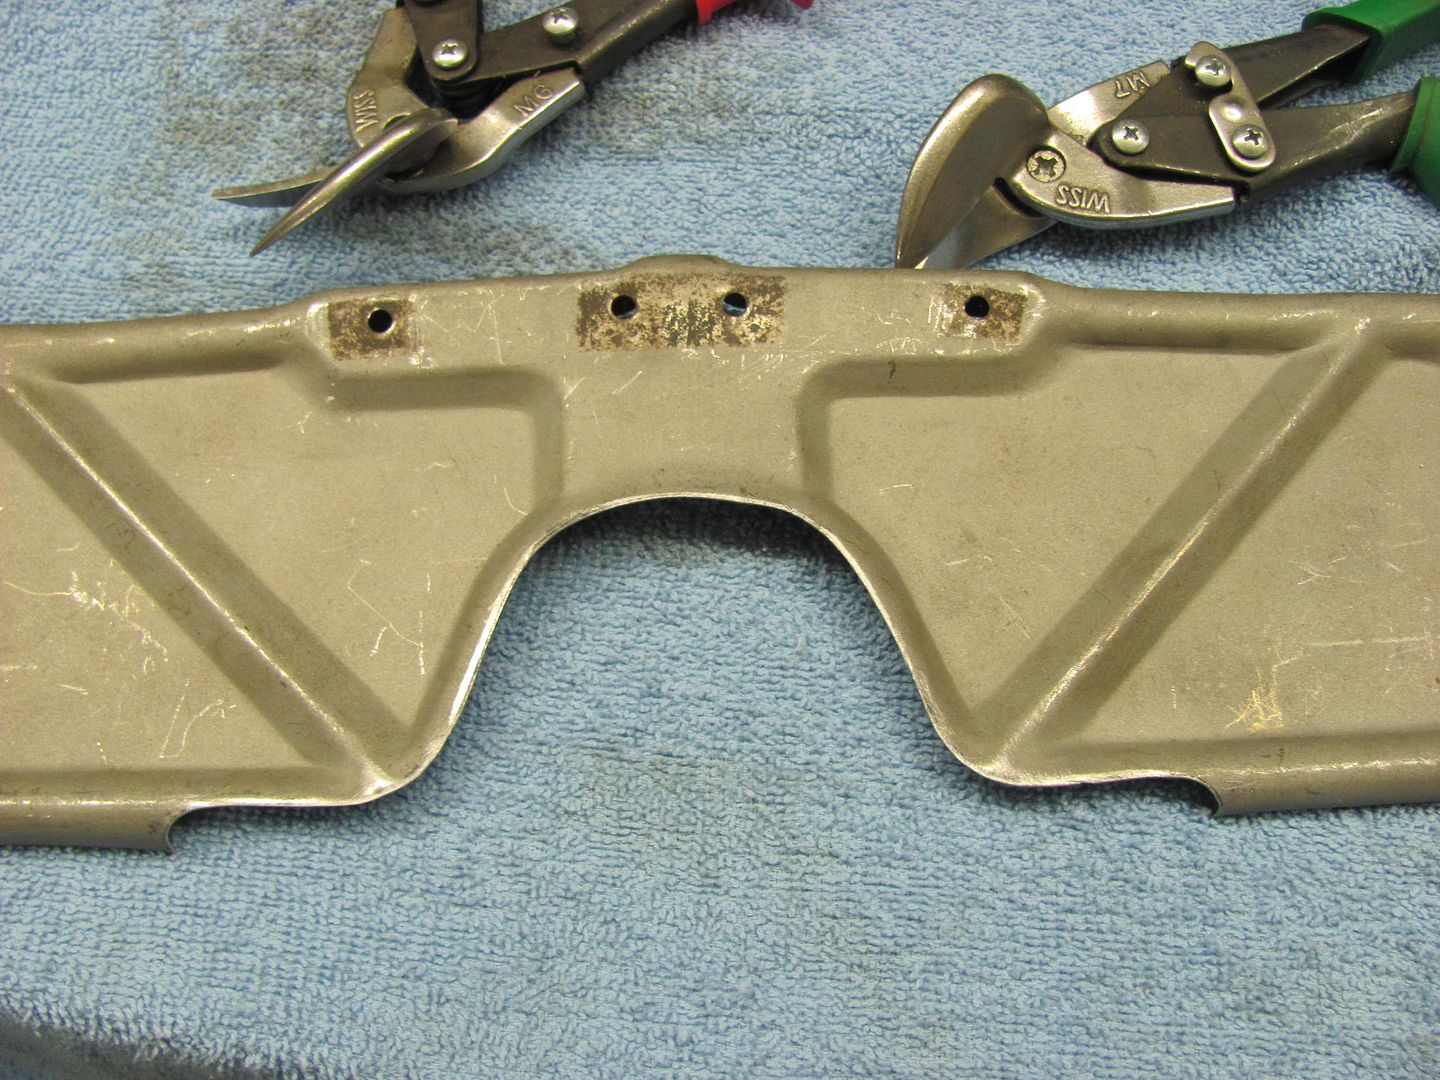 Scribing the patch.... 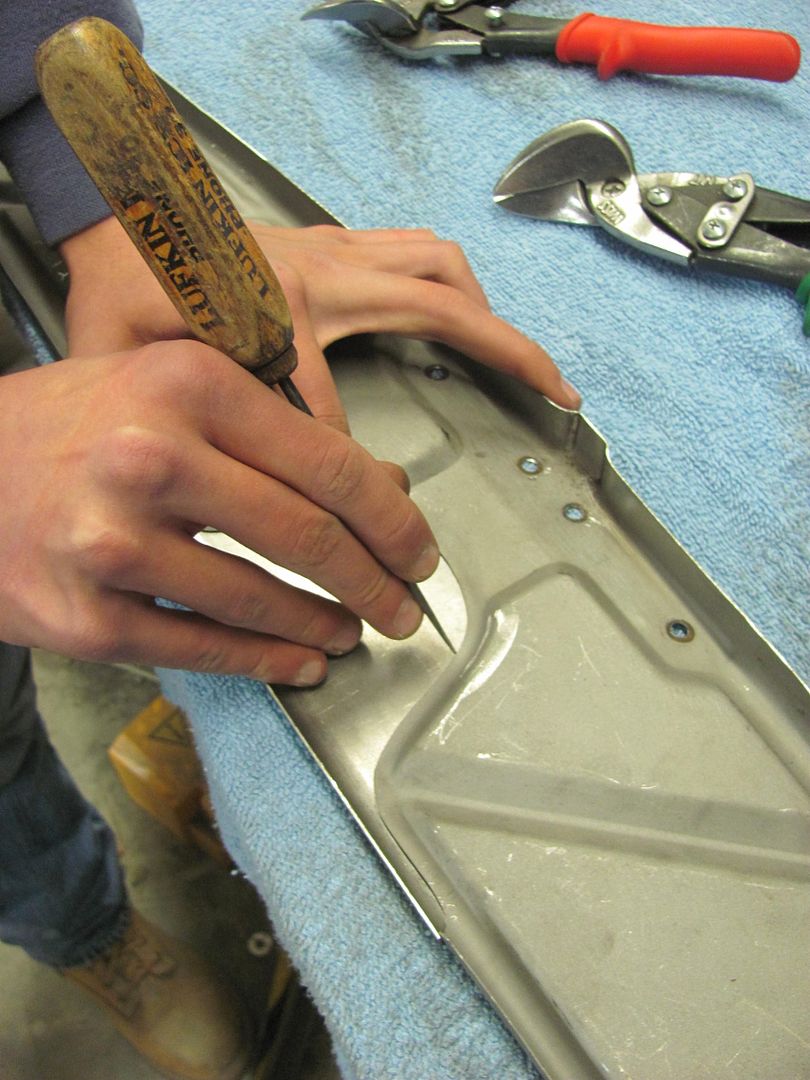 Trimming some of the excess on the bandsaw, and then fine tuning with the snips.... 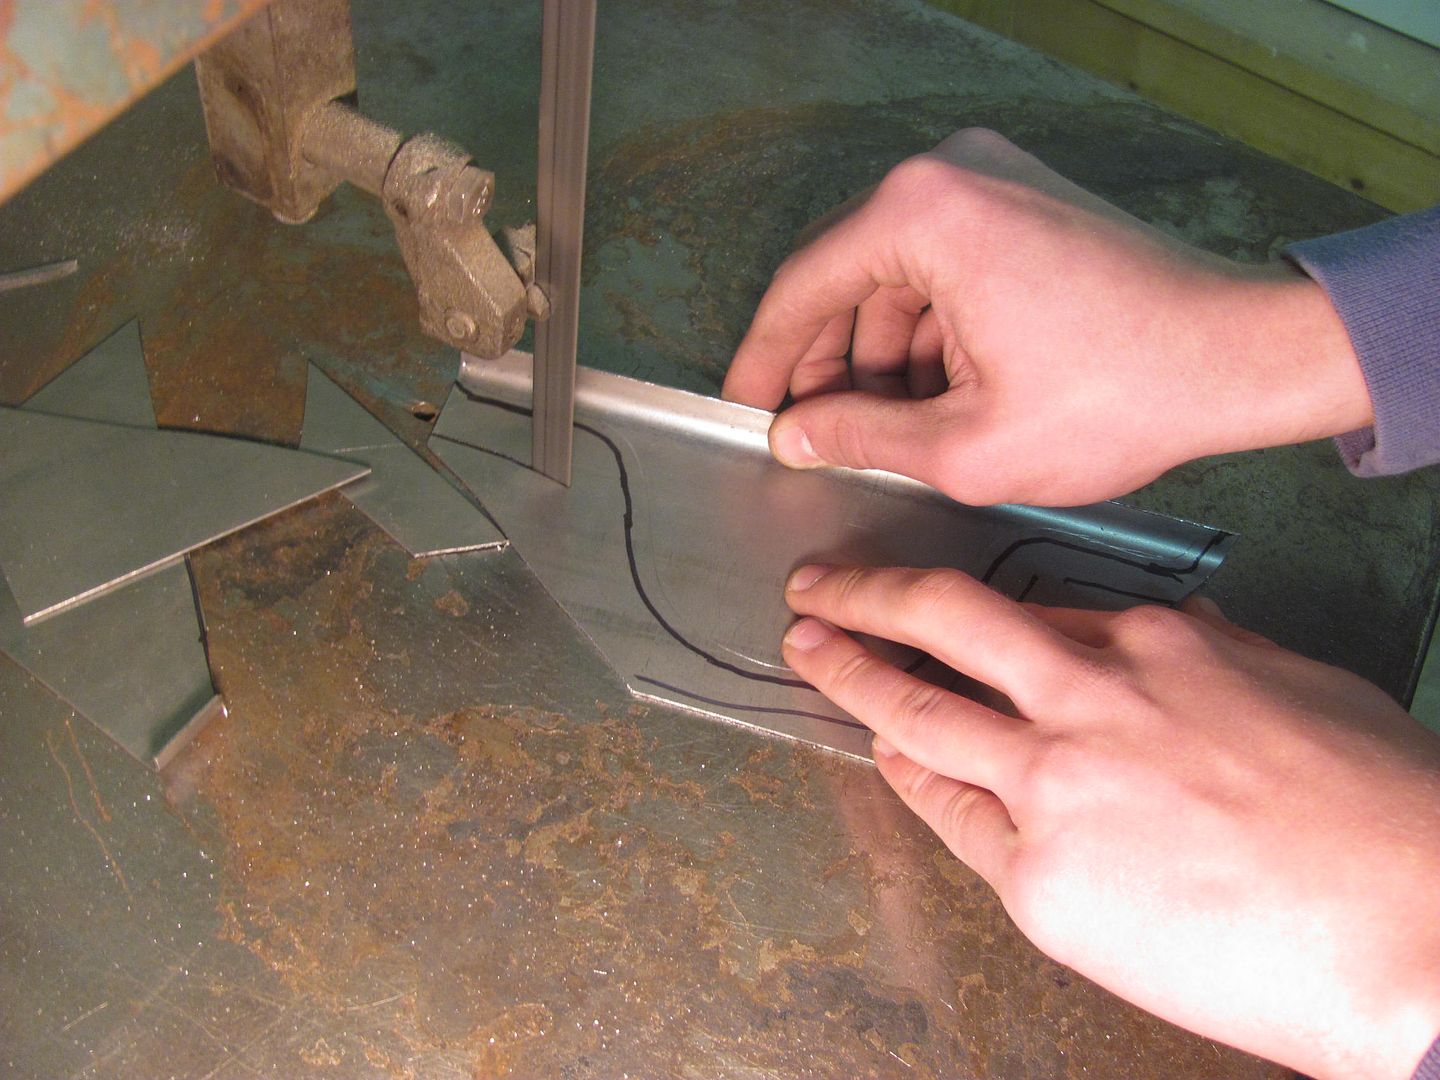 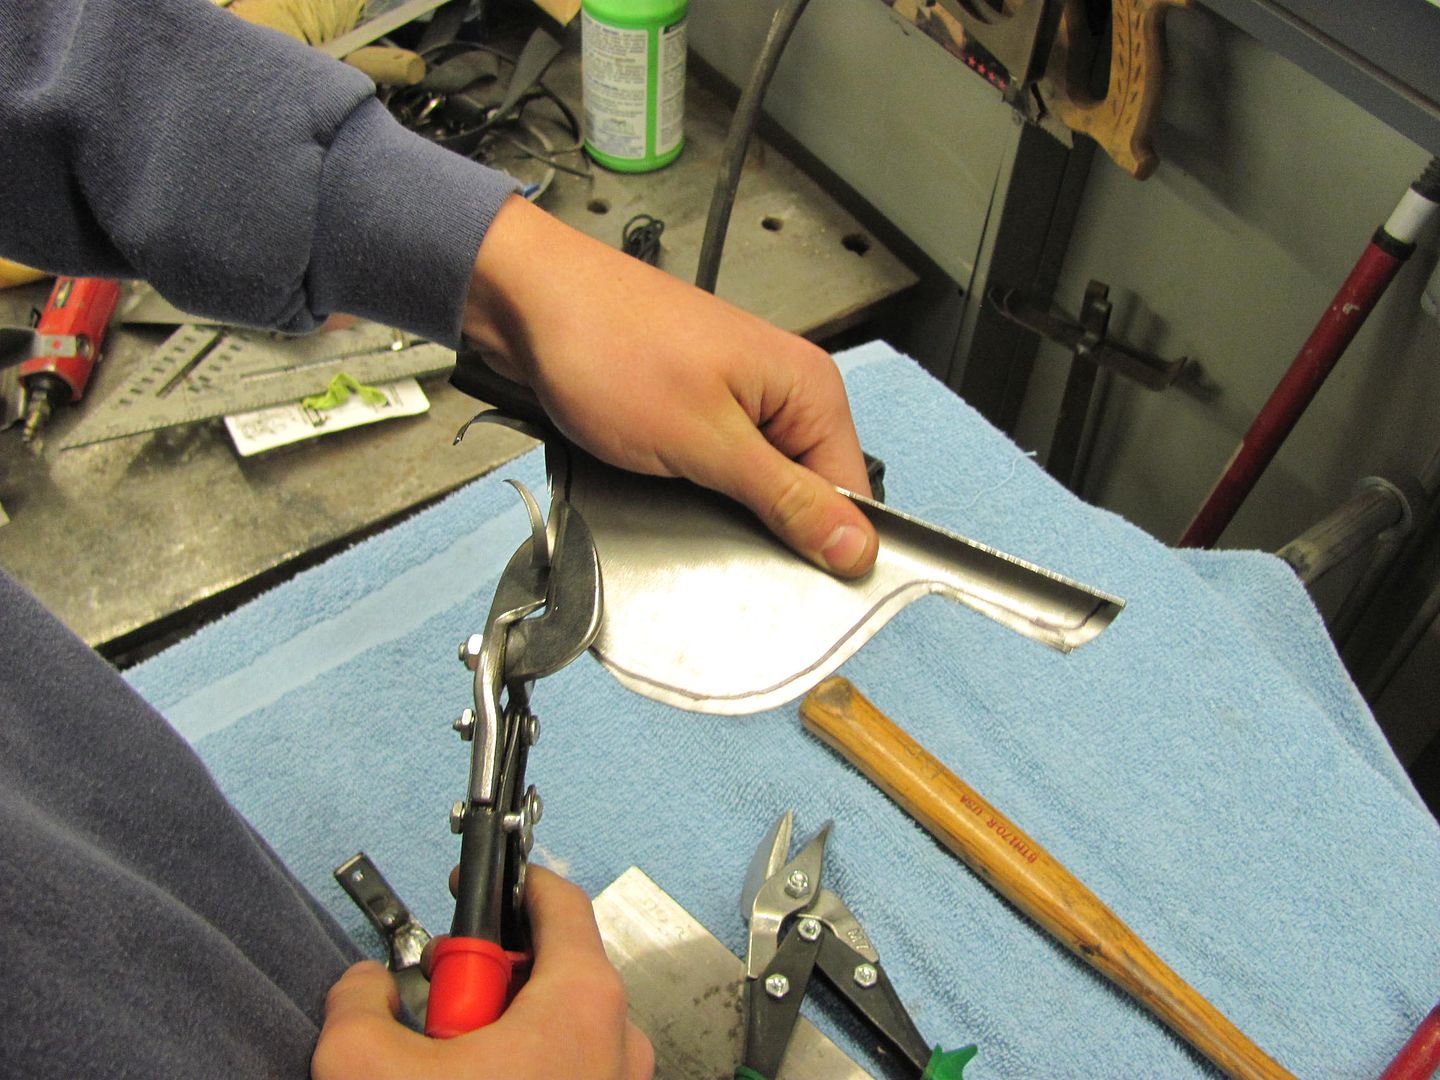 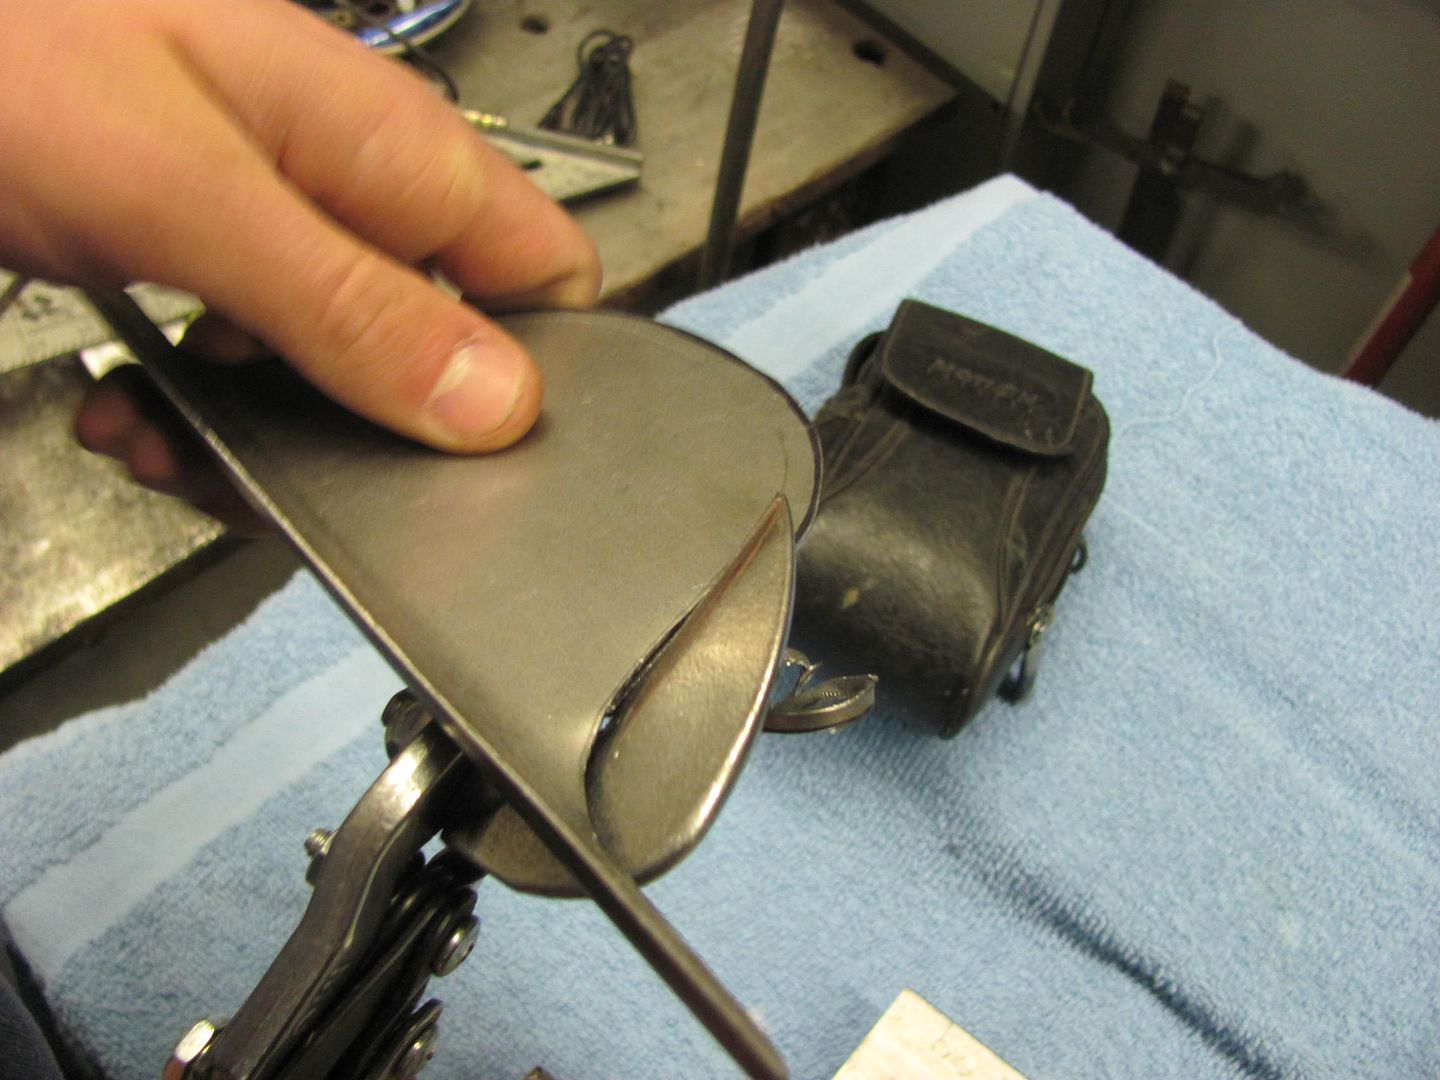 I did work a bit more on hood gaps.. an official gap gauge shown here.... 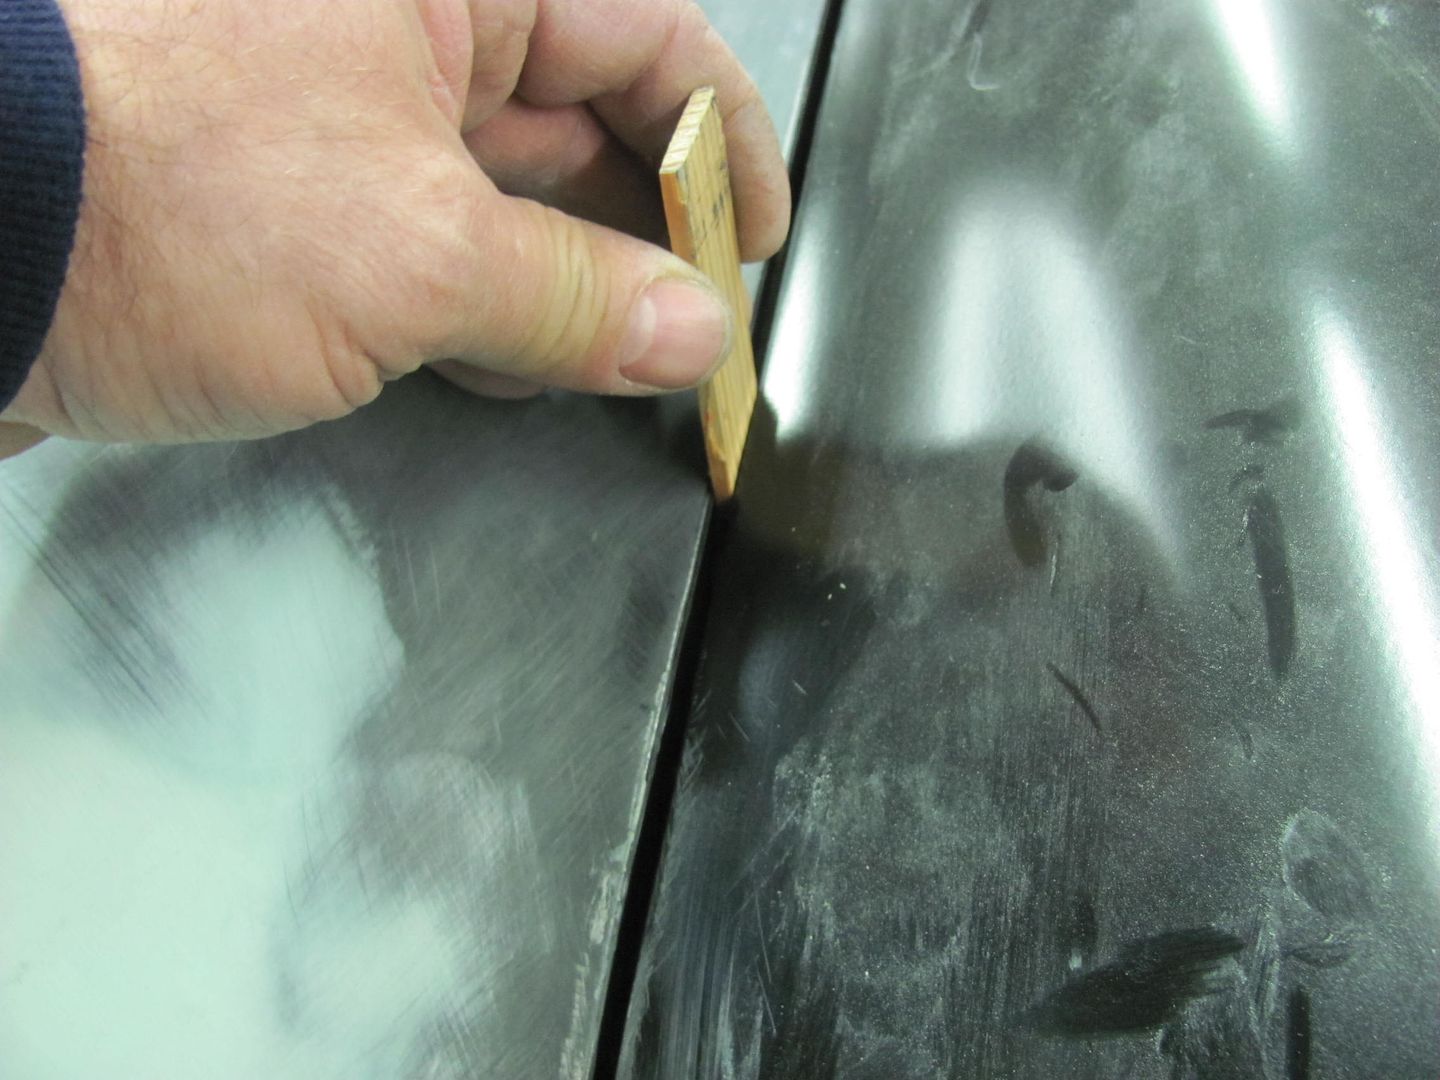 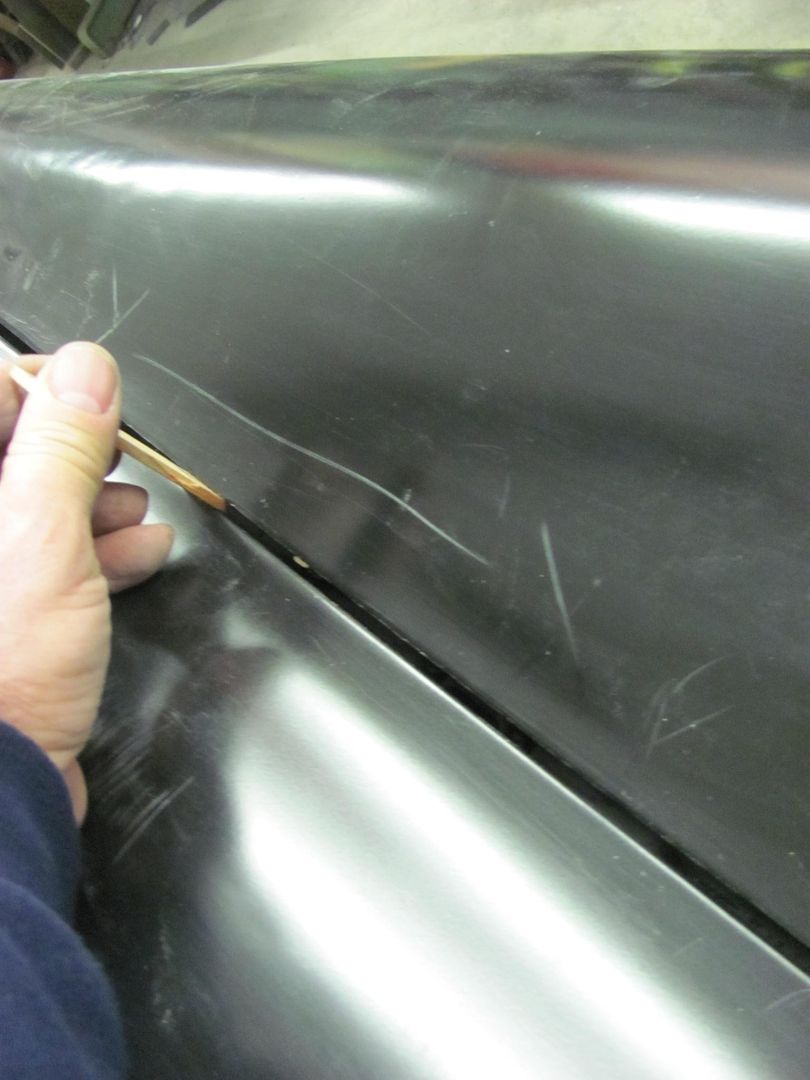 Also took some radiator leak preventative measures.... 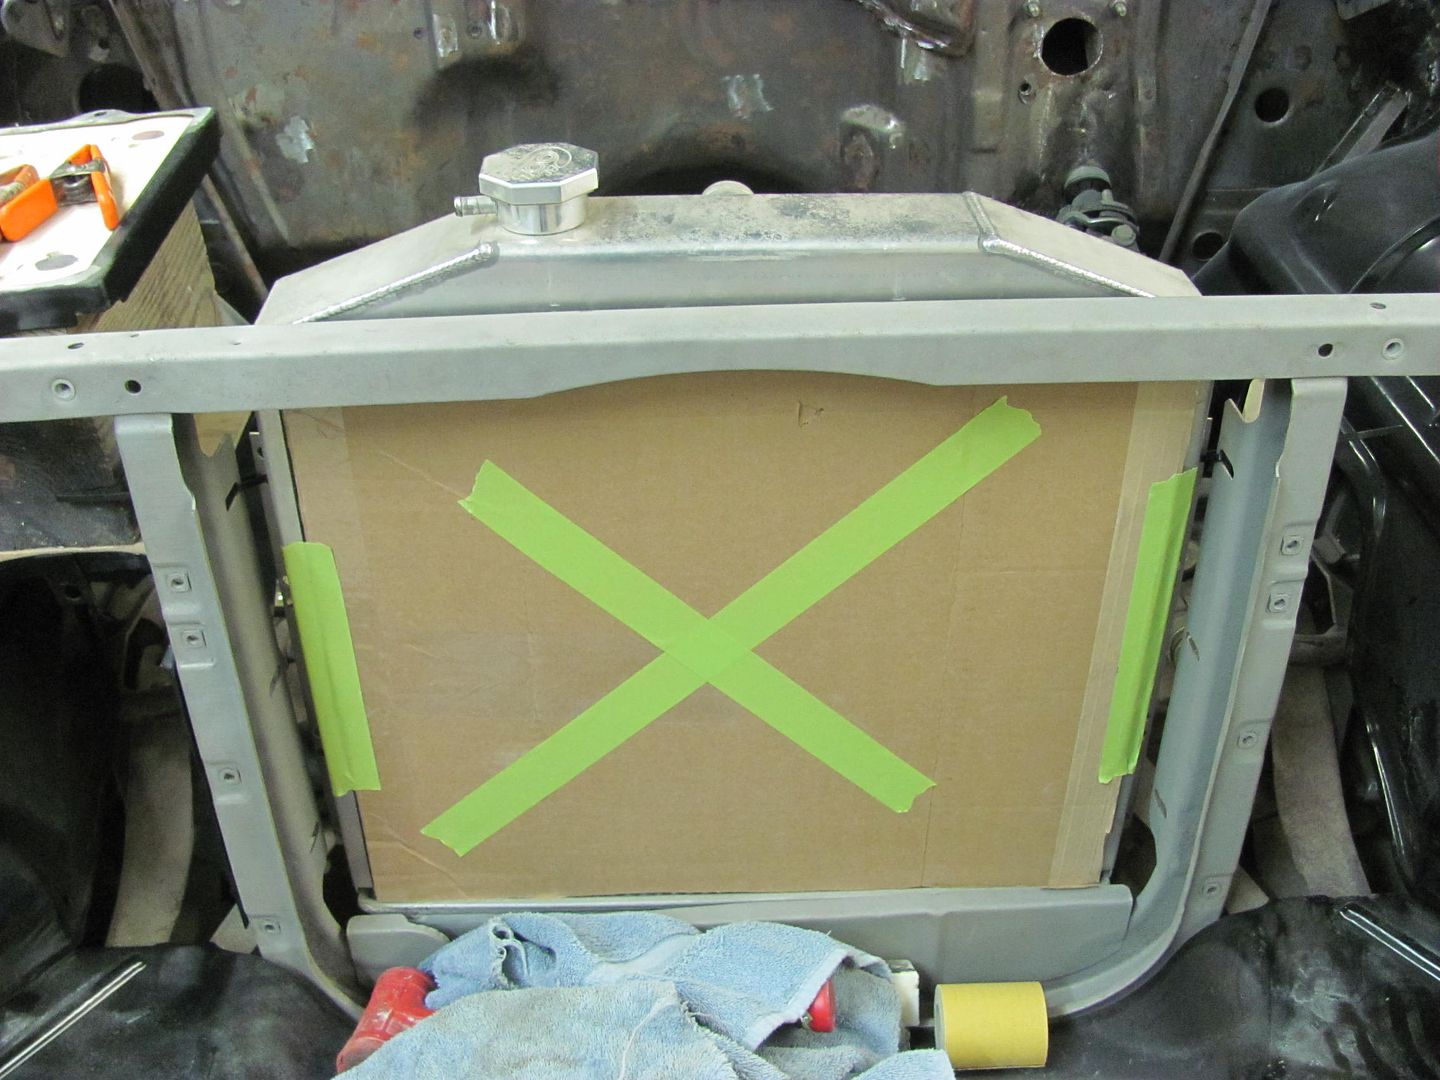 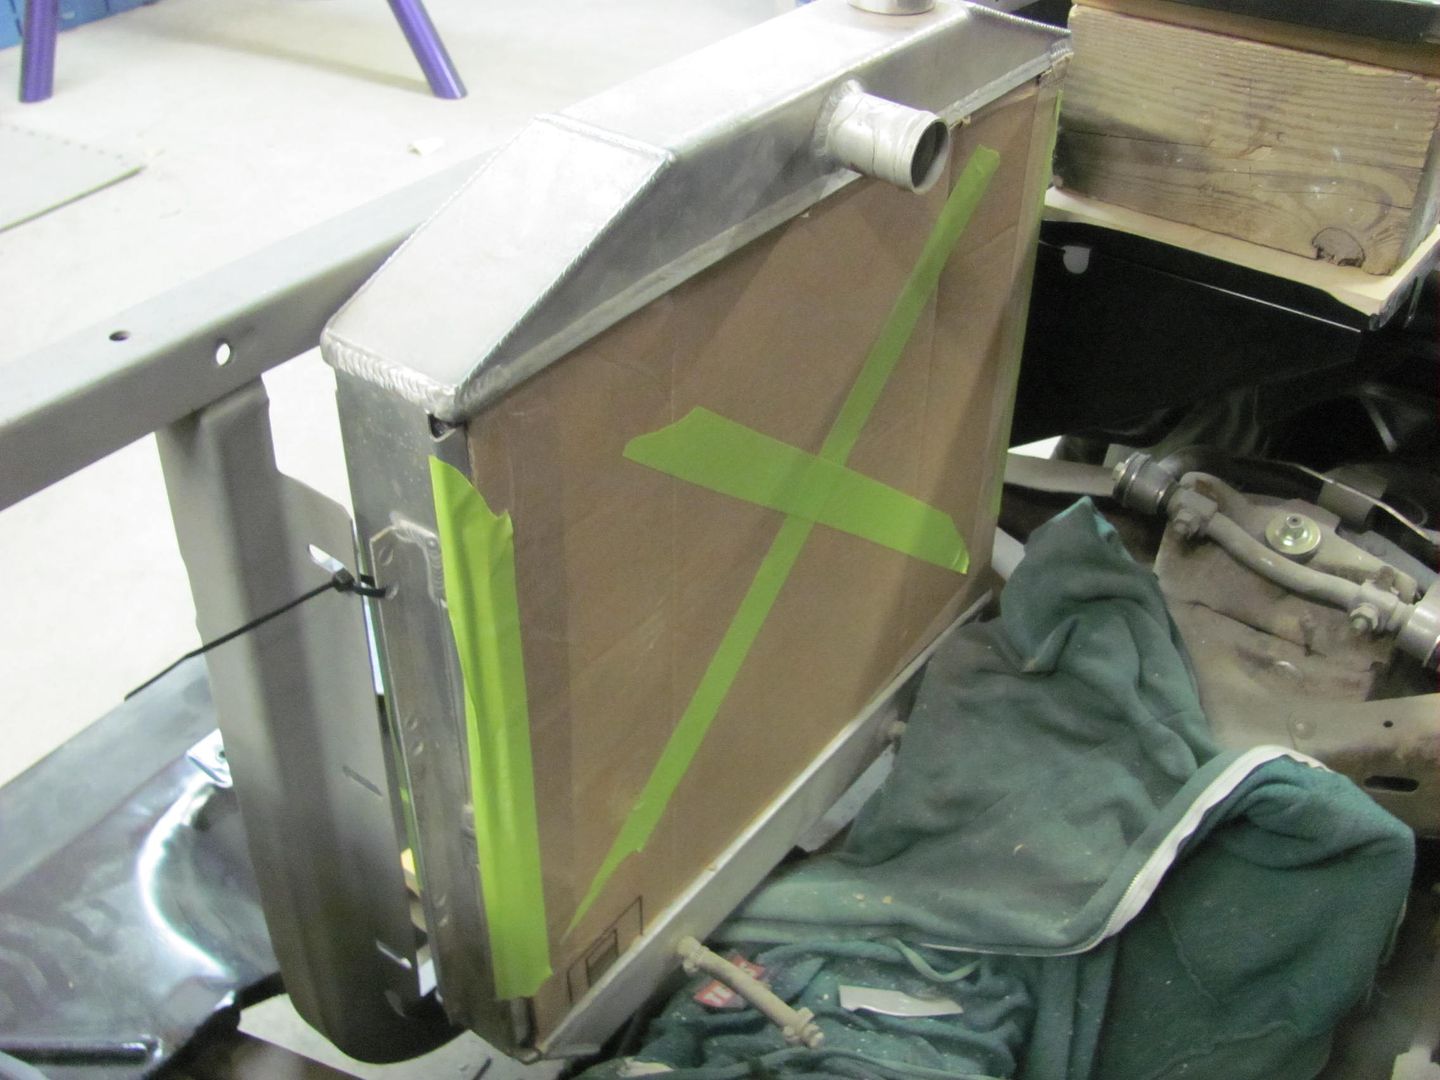 Trimming the other patch for the hood brace.... 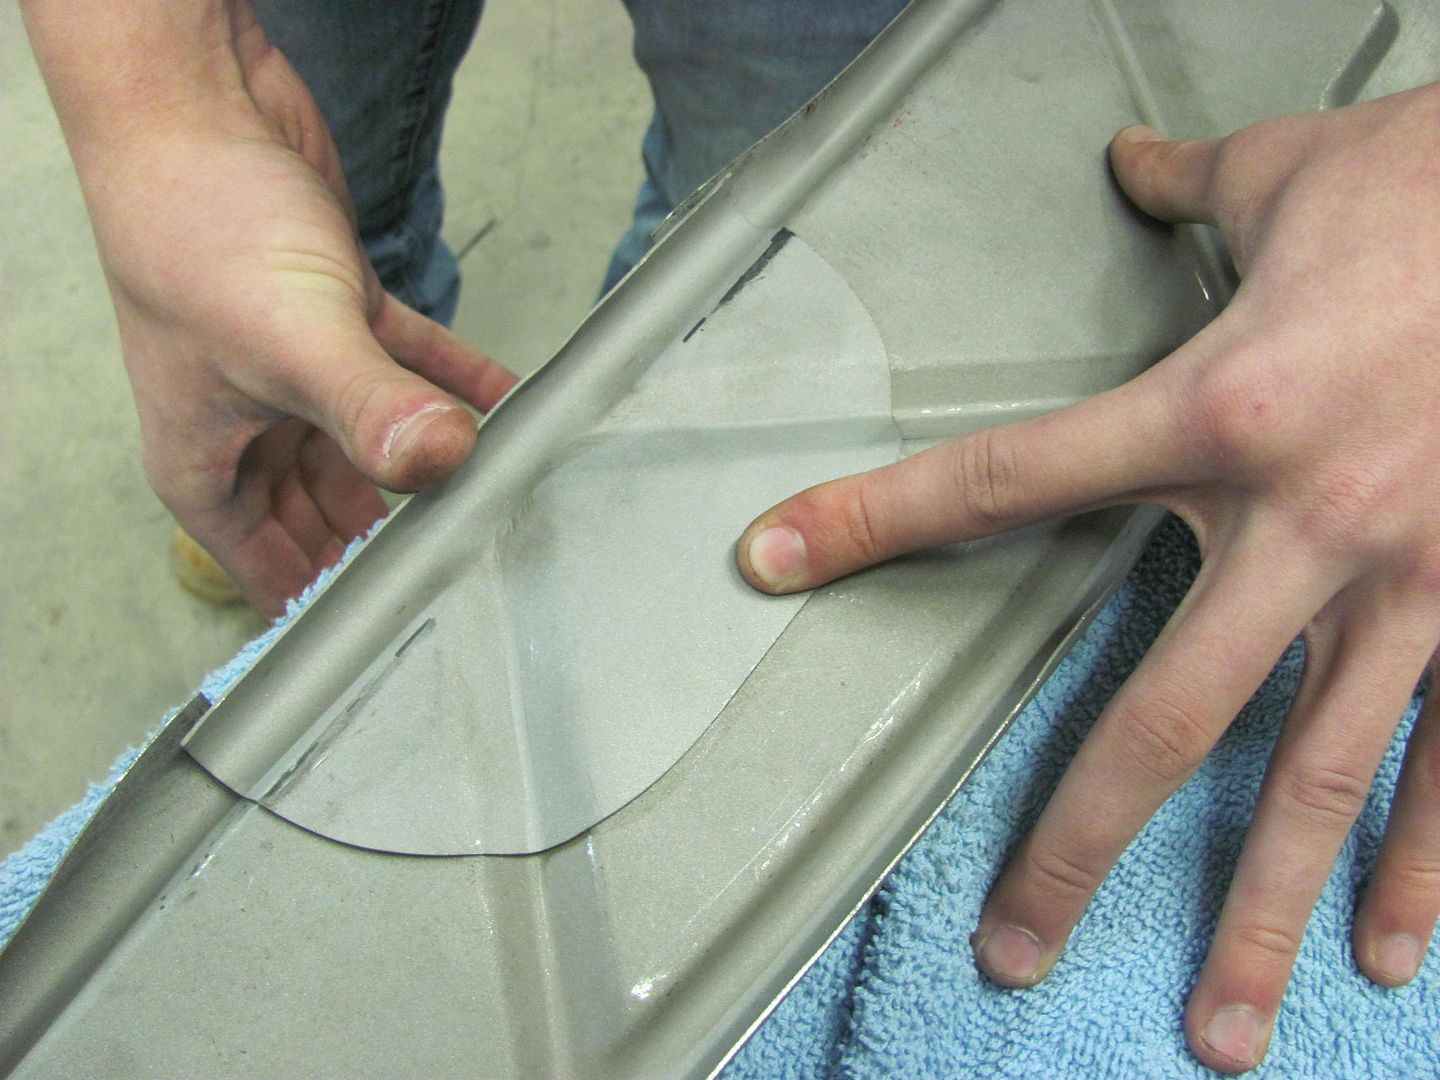 Kyle persuading the patch's crease over a bit. This uses a glancing blow to keep the crease's new location from sliding down on the anvil... 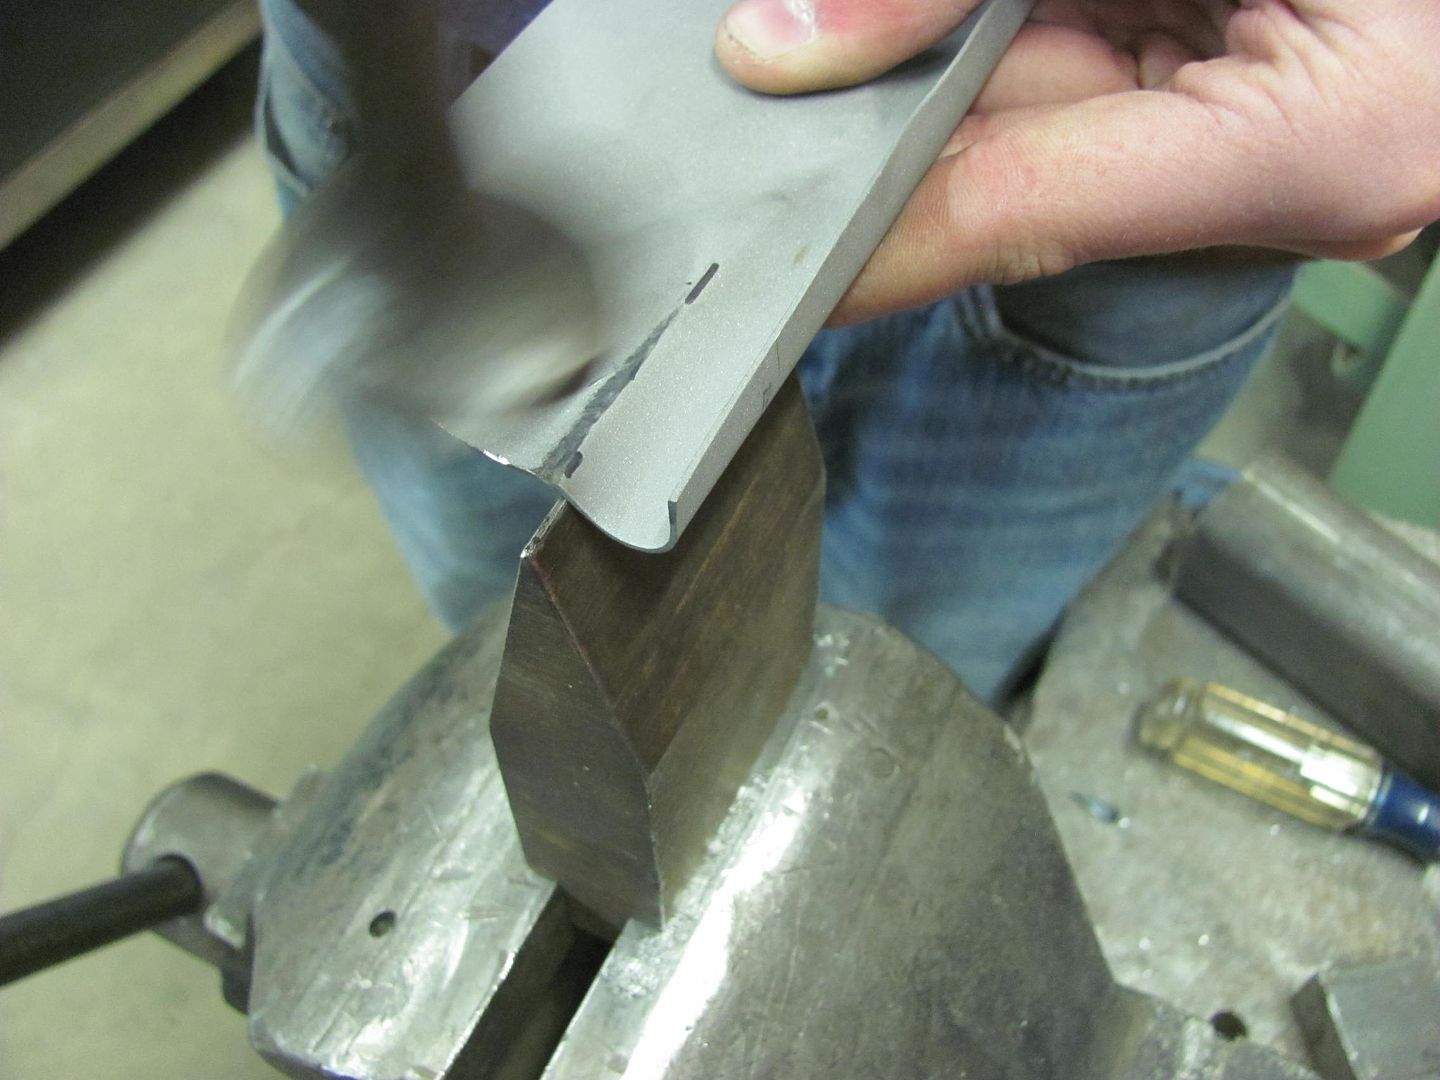 Both pieces clamped in place, we'll get some welding done on Saturday... 
__________________
Robert |
|
|
|
|
02-05-2015, 08:56 AM
|
#350 |
|
Registered User
Join Date: May 2007
Location: Deale Md
Posts: 4,663
|
Re: 55 Wagon Progress
Looks like Kyle is doing pretty good job.
__________________
James 63 GMC V6 4speed carryall 65 chevy swb bbw V8 auto 68 K20 327/4 speed, buddy buckets 2002 GMC CC Dually Duramax 64 GMC lwb 3/4 V6 4speed SOLD 66 GMC swb bbw buddy buckets SOLD IG duallyjams The only thing that stays the same is constant change! |
|
|
|
 |
| Bookmarks |
|
|


 Linear Mode

