
|
Register or Log In To remove these advertisements. |
|
|
|
|||||||
|
|
Thread Tools | Display Modes |
 03-19-2020, 12:29 PM
|
#1 |
|
Registered User
Join Date: Jan 2013
Location: Leonardtown, MD
Posts: 1,633
|
Butt welds for patch panels
I've always said we should be using butt welds, and trimming panels as tightly as we can get them. Some recent shop work helps to show that process, so hopefully this will help out someone with patch panels.
The owner of the Biederman truck we had done all those rust repairs and fabrications on also has a 51 Ford F7 with a Rollback body. He was driving it down the road a few months back when the Delco Remy voltage regulator on the firewall malfunctioned and resulted in an electrical fire. The heat caused some of the filler on the outside of the hood above the fire to delaminate, showing up as circles in the paint. As we sanded these defects out it was noticed that an abundance of filler (+1/4") had been used. The more we looked, the more filler we found all over the hood. In an effort to yield some weight savings, the entire outside of the hood was stripped.. 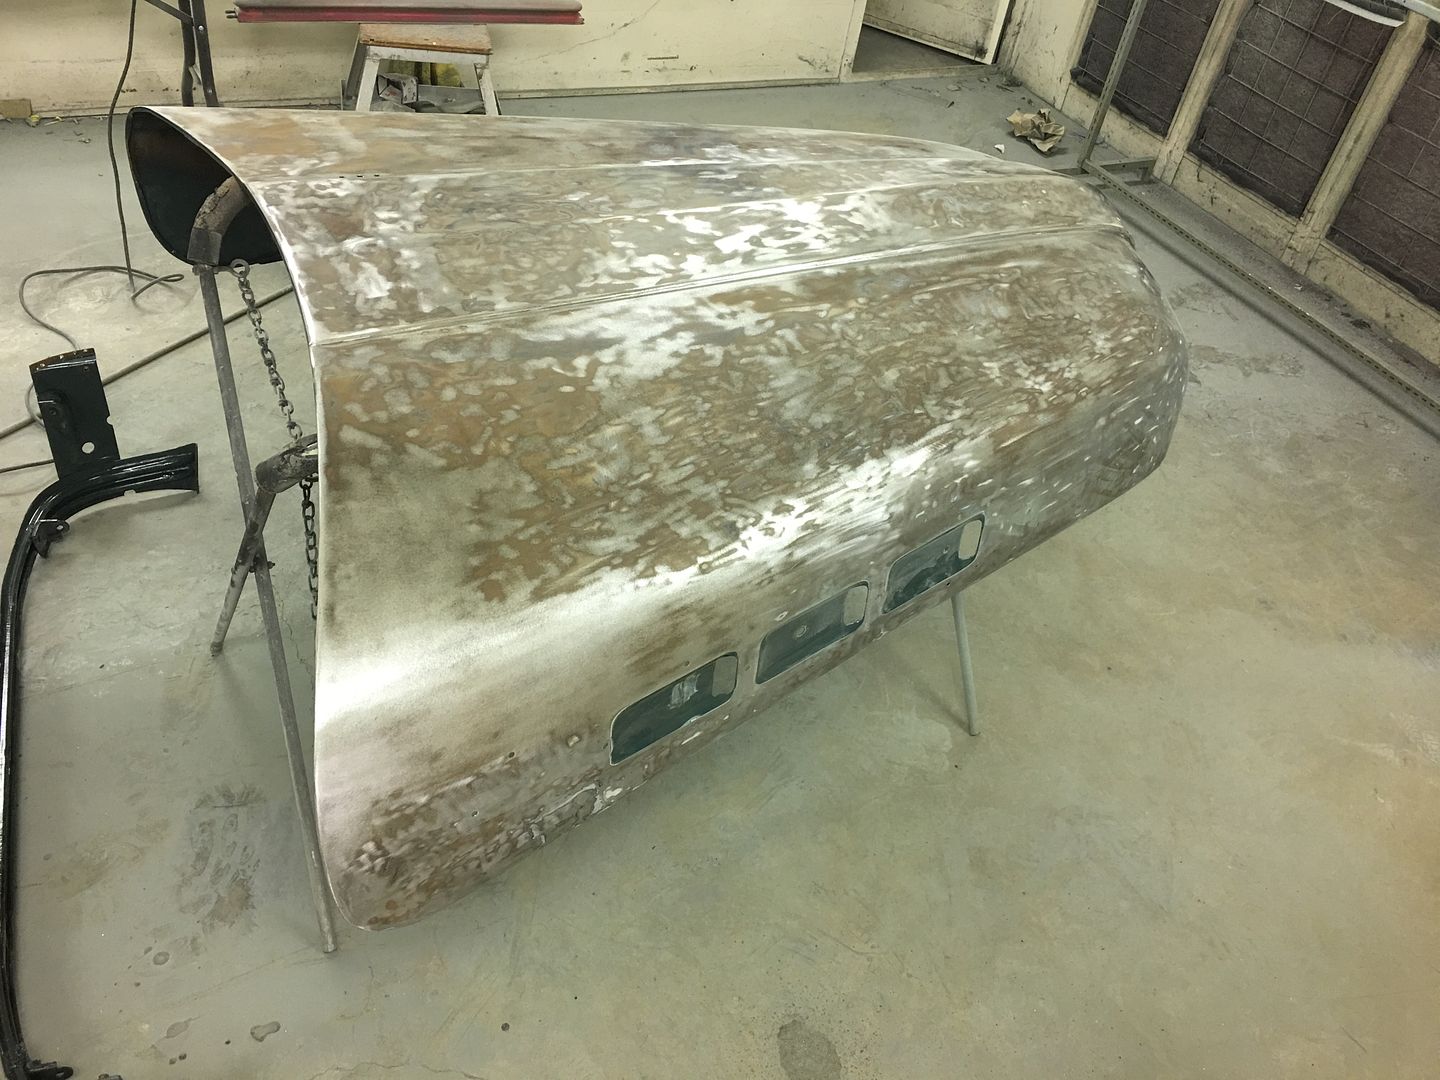 In order to have free access for planishing out the Atlantic Ocean defects, the hood brace was removed from the inside... 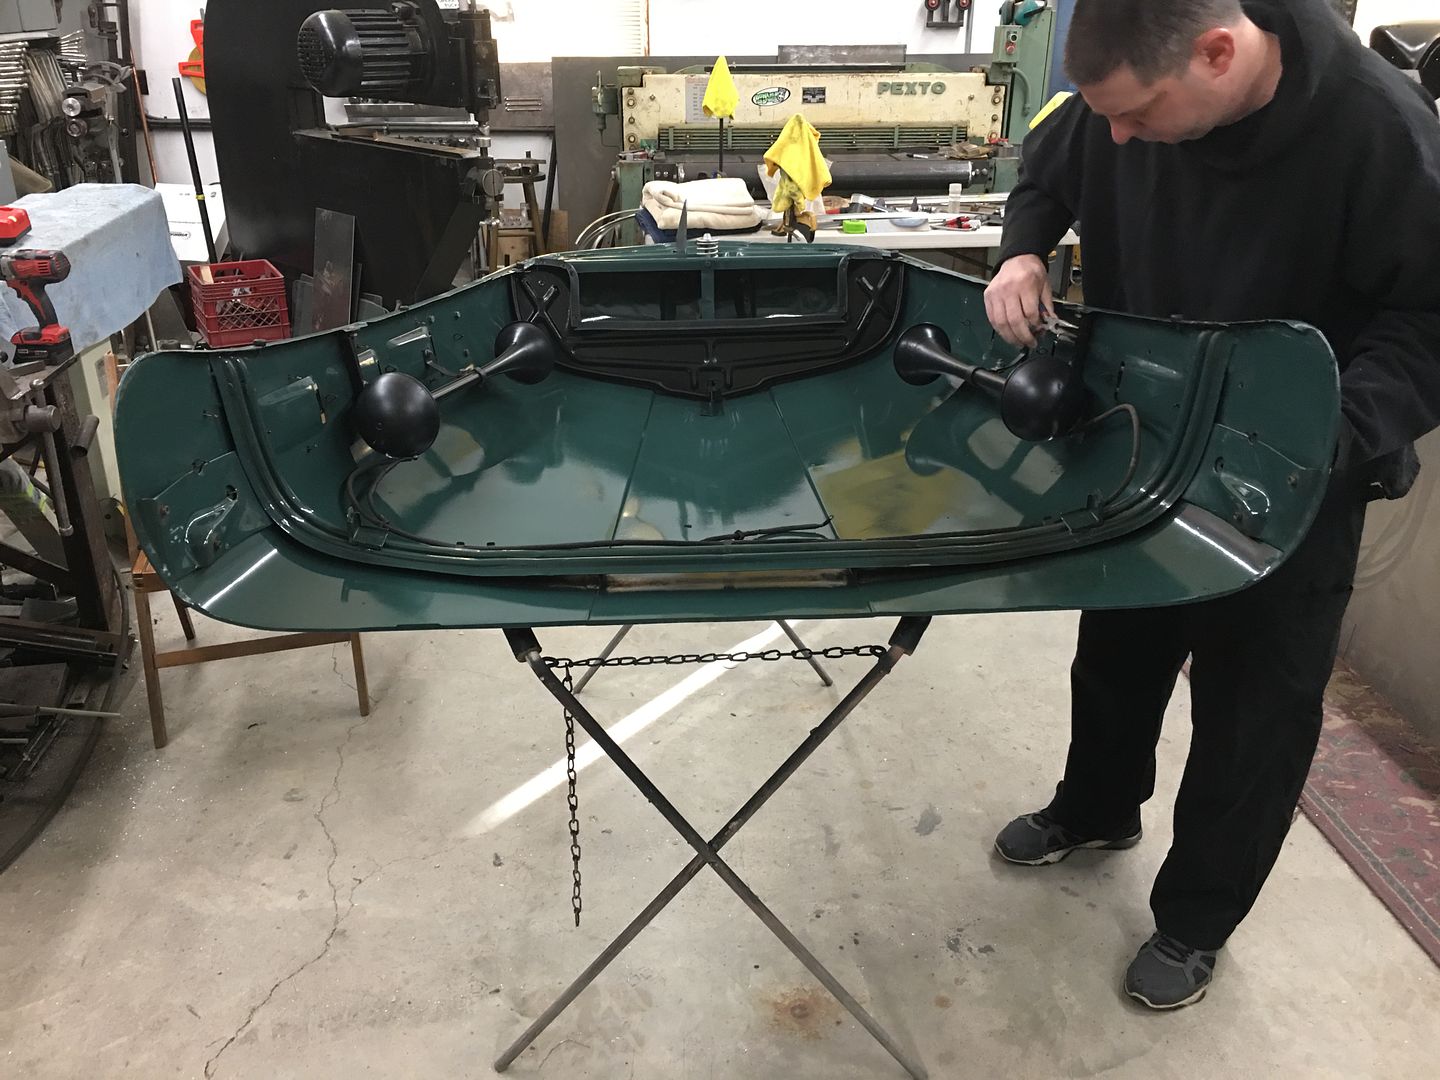 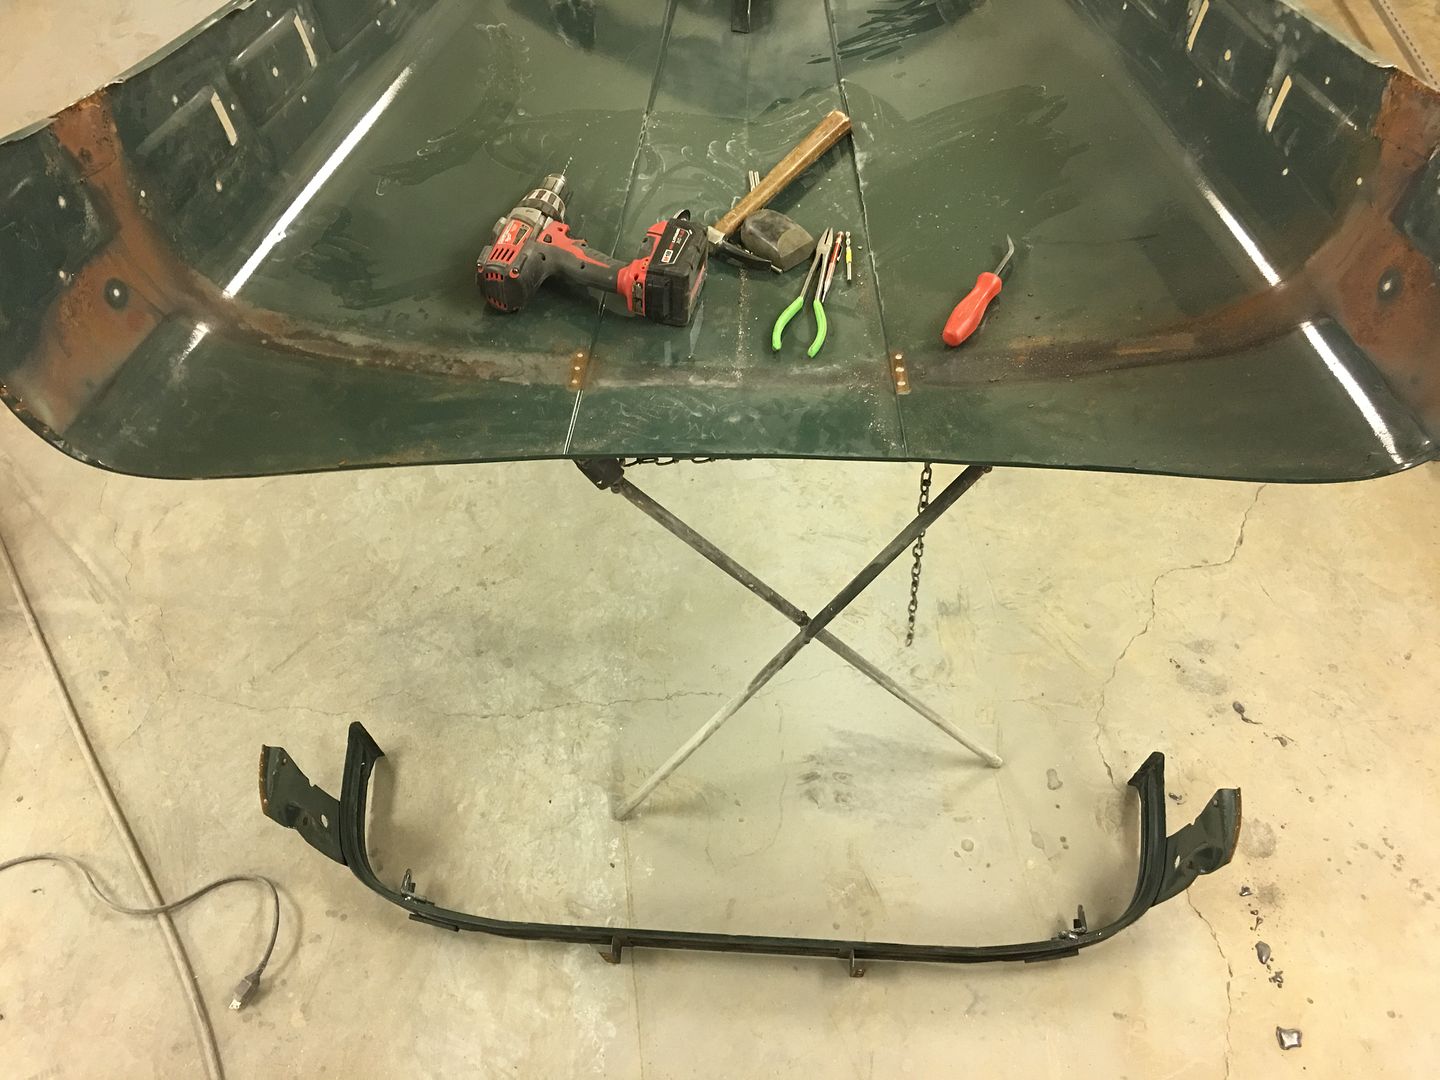 This revealed more defects that the last shop saw as fixes, but they won't leave my shop like that.... Rather than butt weld in the proper thickness metal, a piece of about 16 gauge is slipped behind the rust hole area (from dirt accumulating between brace and hood skin) and MIG welded around the perimeter. I think we can improve on that.. 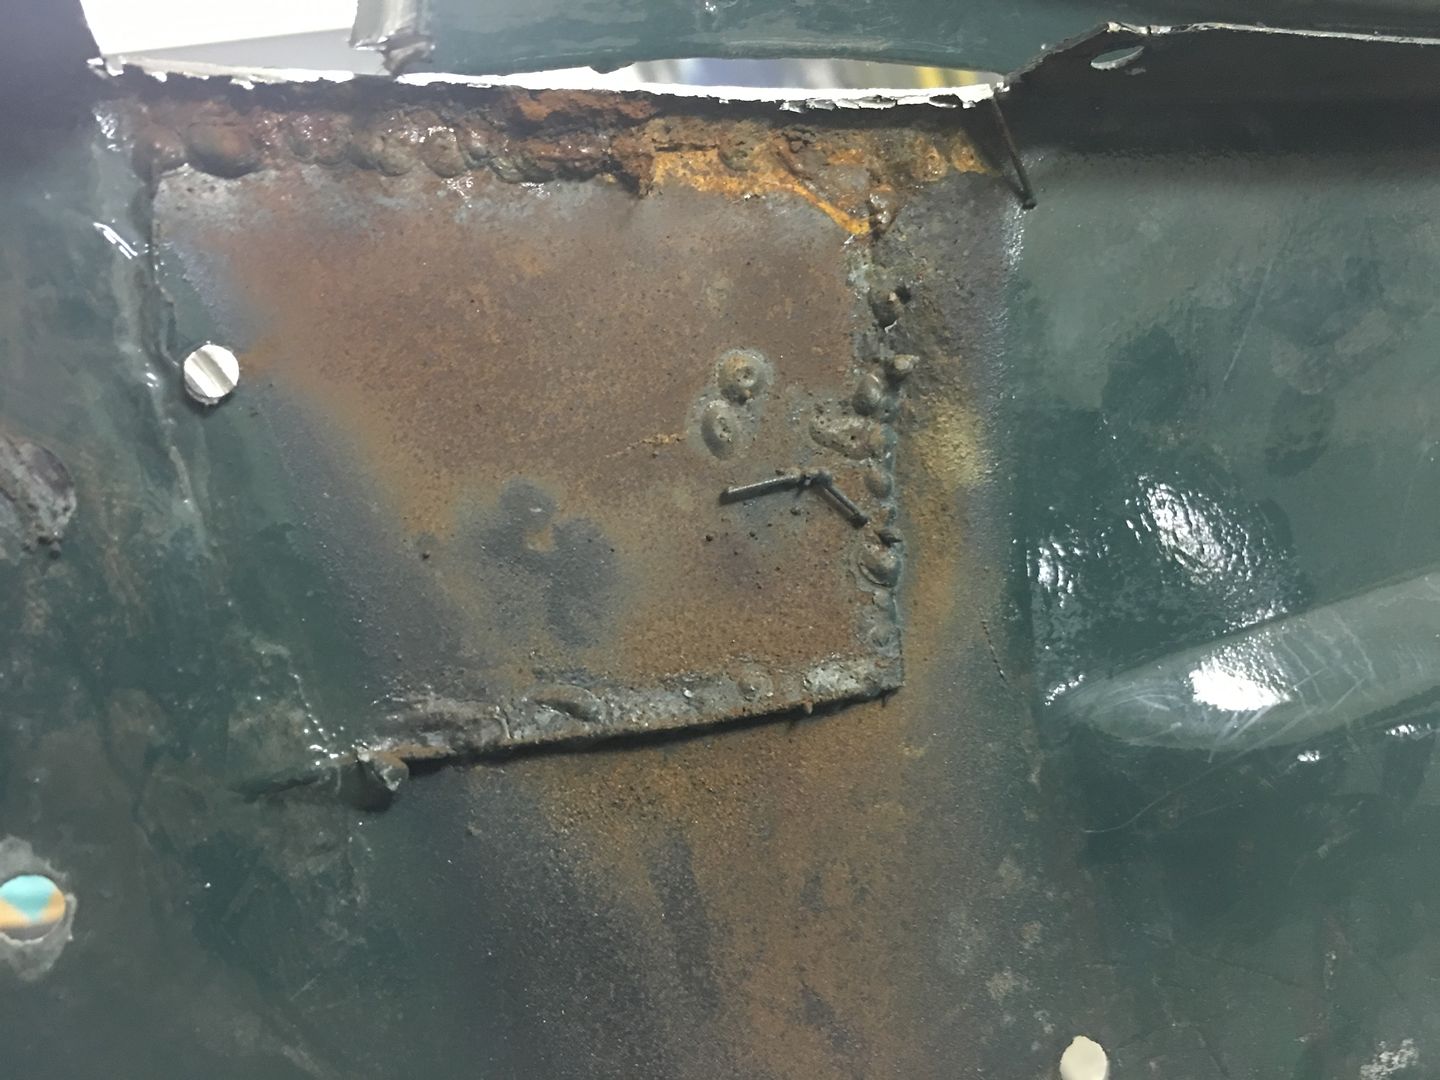 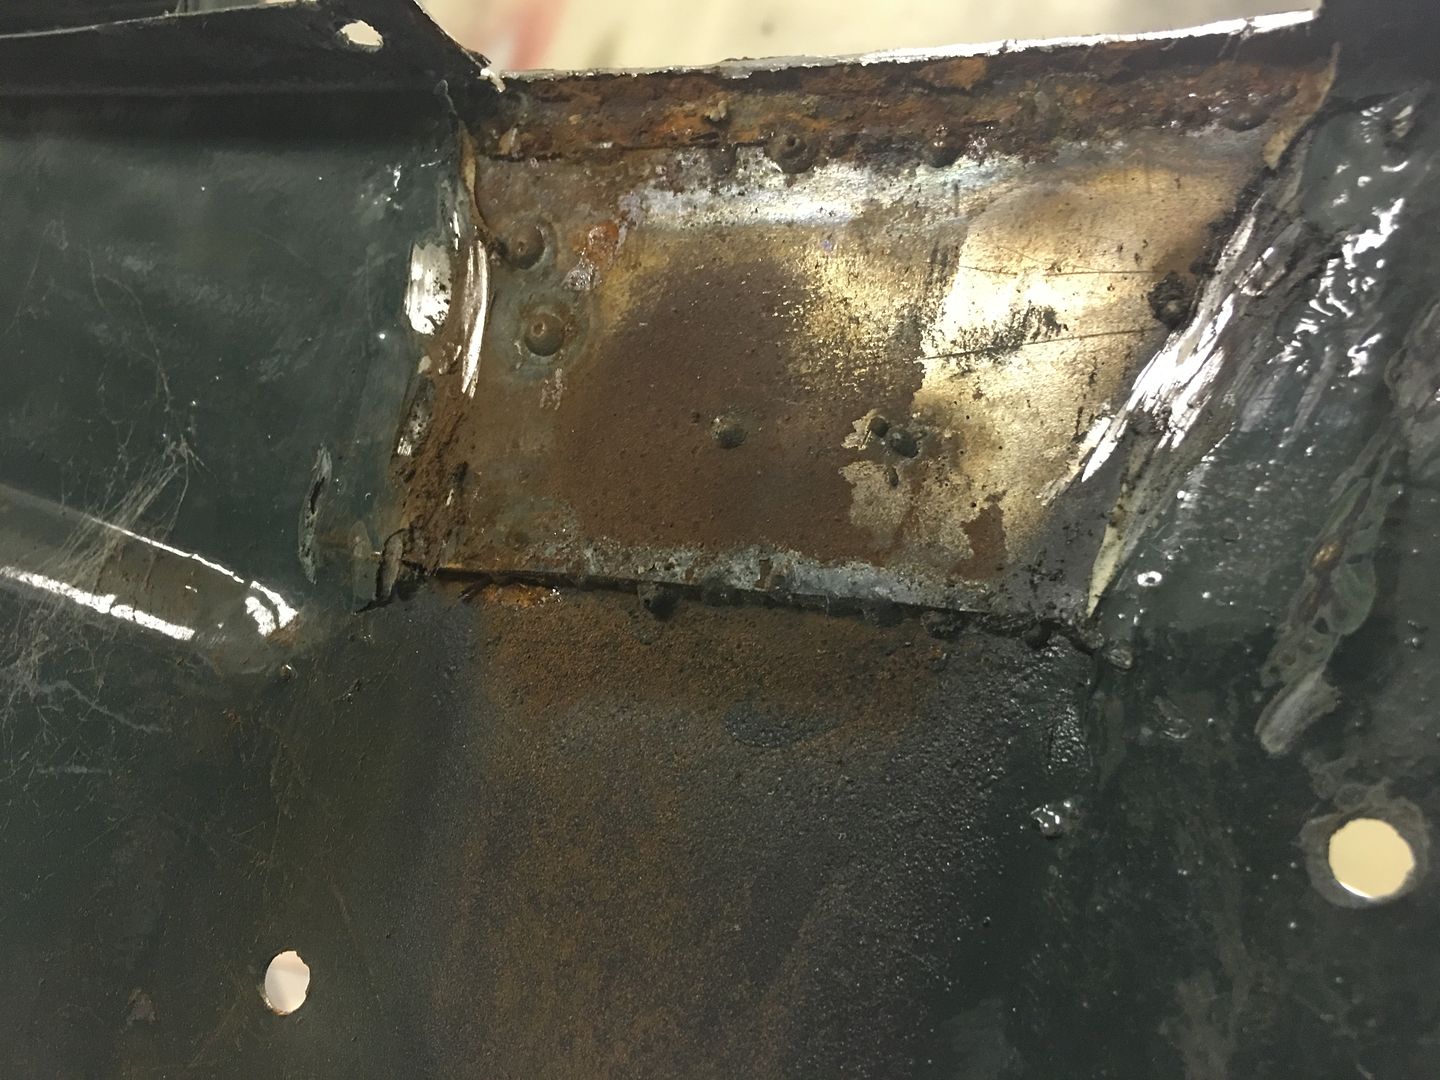 In addition to that, the brace had lost it's structural integrity, so we will remake the ends.. 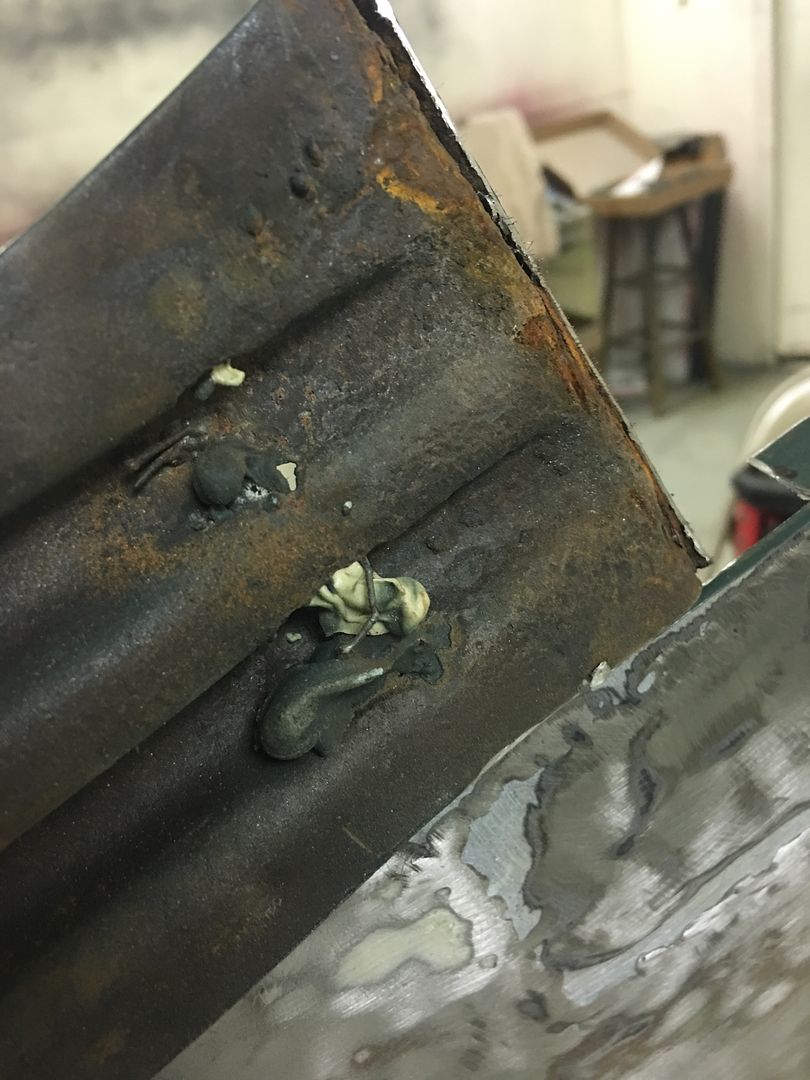 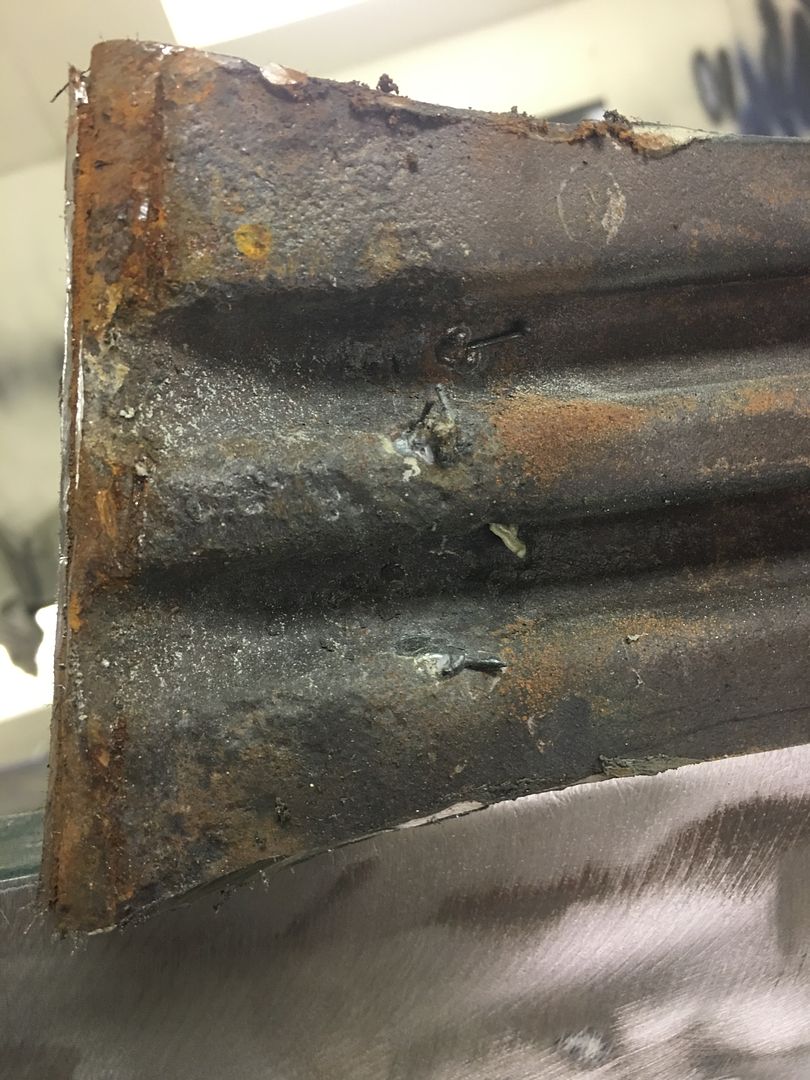 To start our repairs, a body sweep is used to capture the lower flange profile. Note that a profile cut out of construction paper/cardboard works as well.  Verifying the panel thickness. Despite this being an early 50's truck, despite this being a BIG truck, yes, the outer sheet metal here is STILL only 19 gauge. 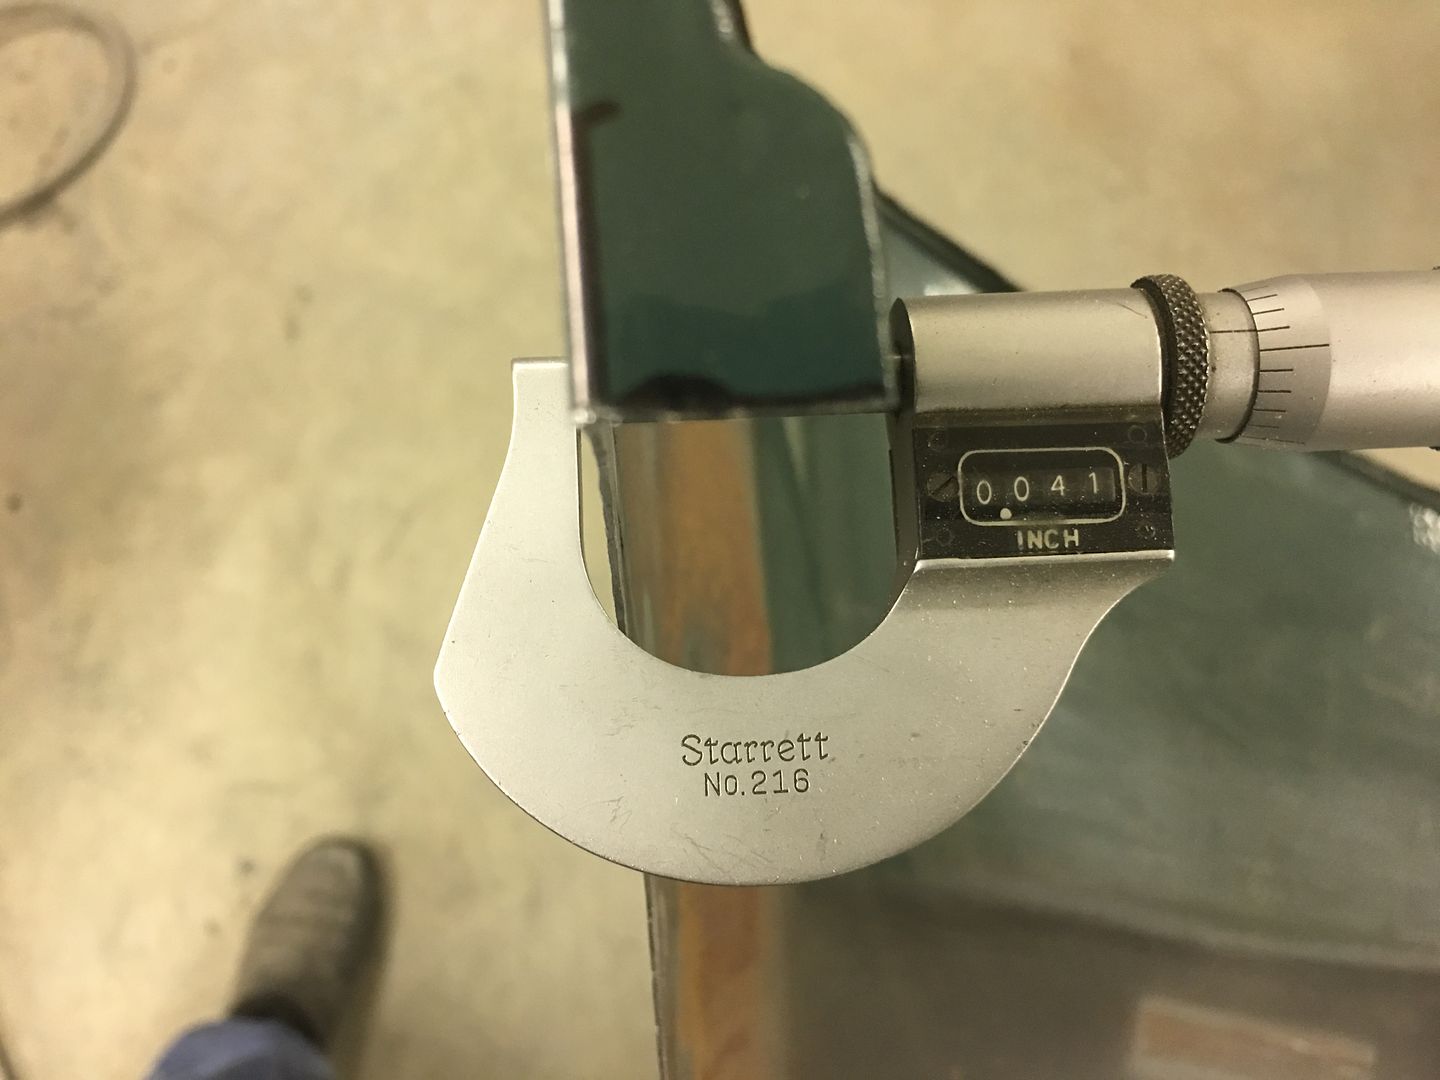 The affected area was cut out using an air body saw, use what you have available. Note we have no corners in the cut to help improve consistency in weld shrinkage on either side. 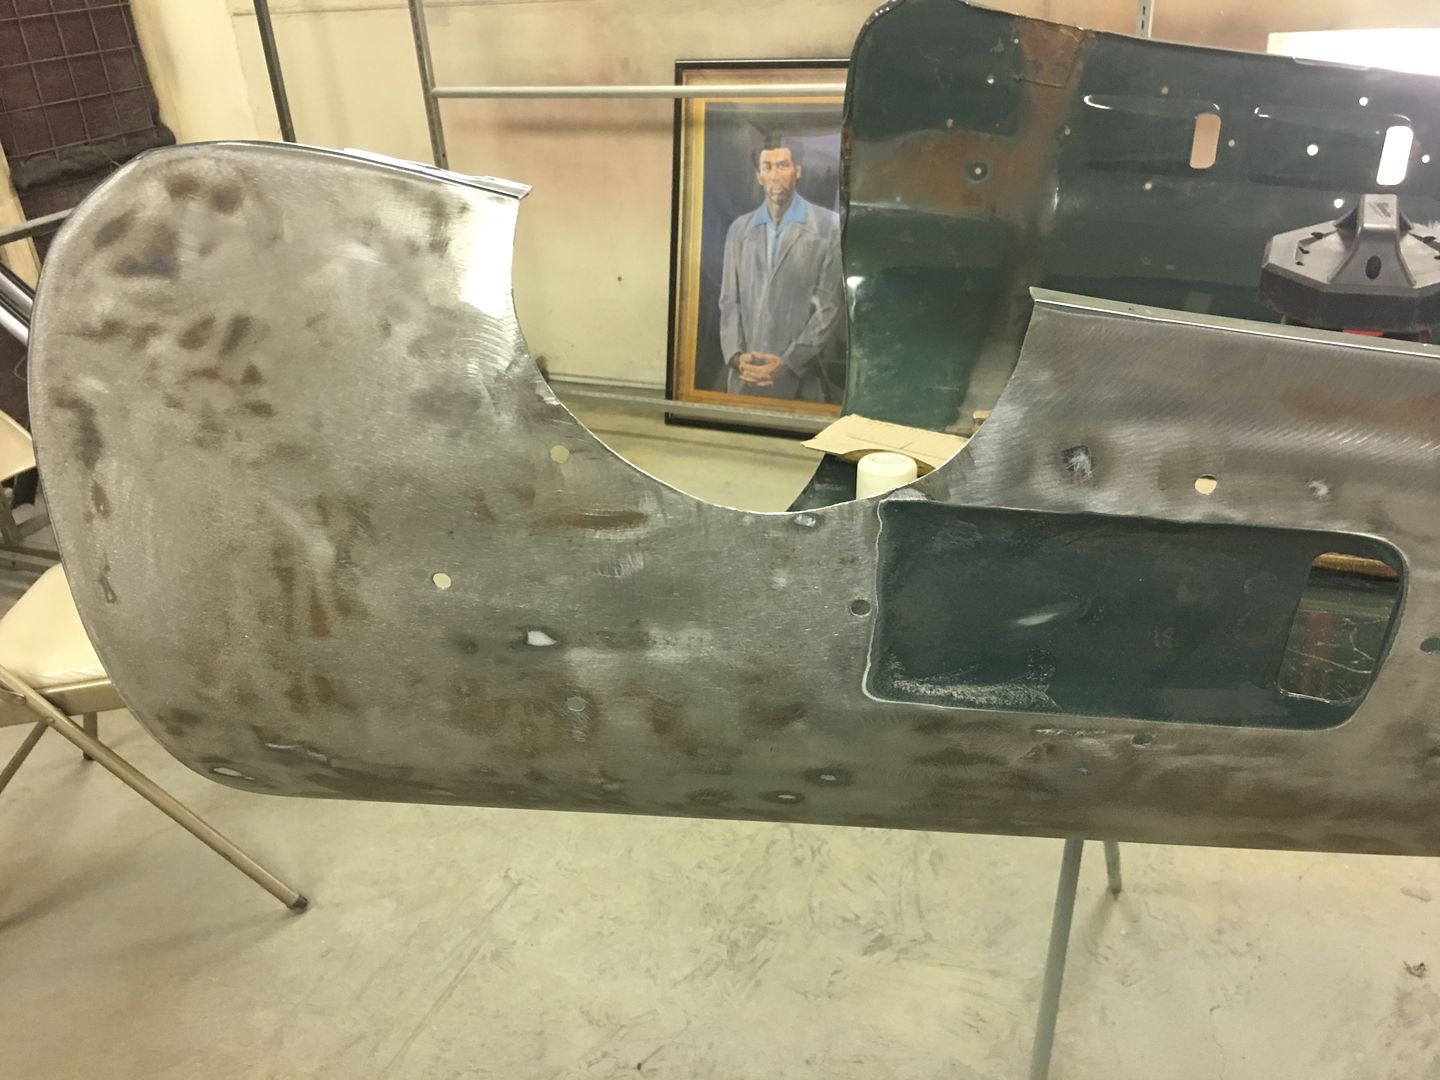 The flange bend line is traced from our profile template/body sweep, and bent using tipping wheel on the bead roller (since it's not a straight bend). Here test fitted to the hood.. 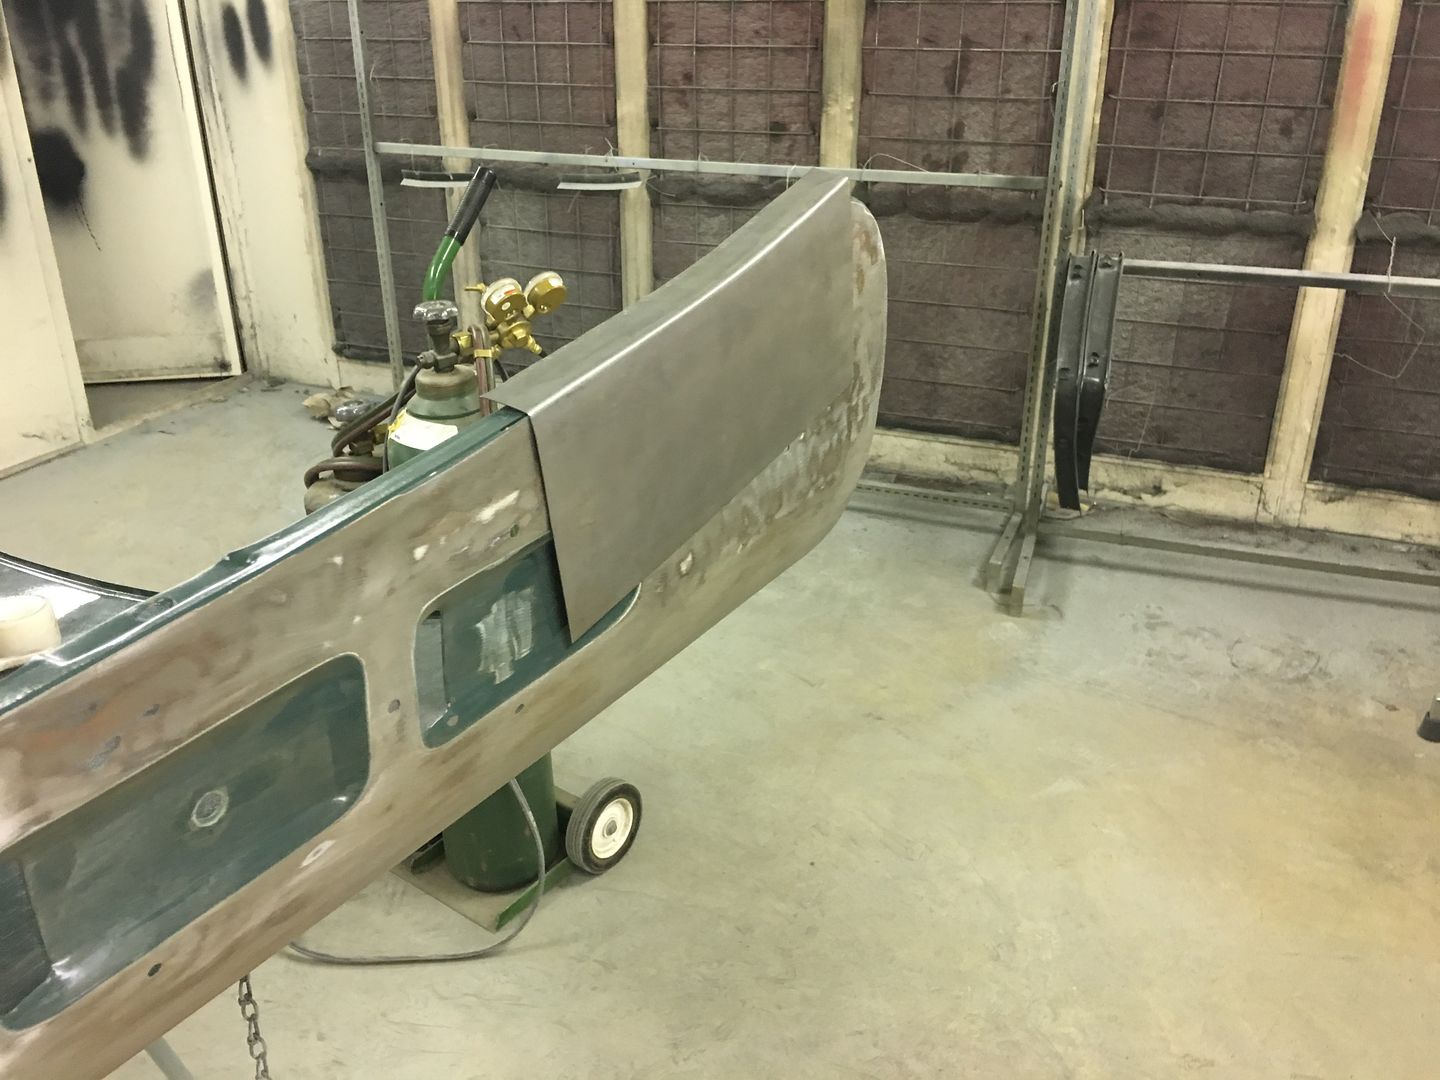 An Ice Pick (something everyone should have if doing this type of work) is used to mark the area of the cut and more importantly, the cuts for the flanges. 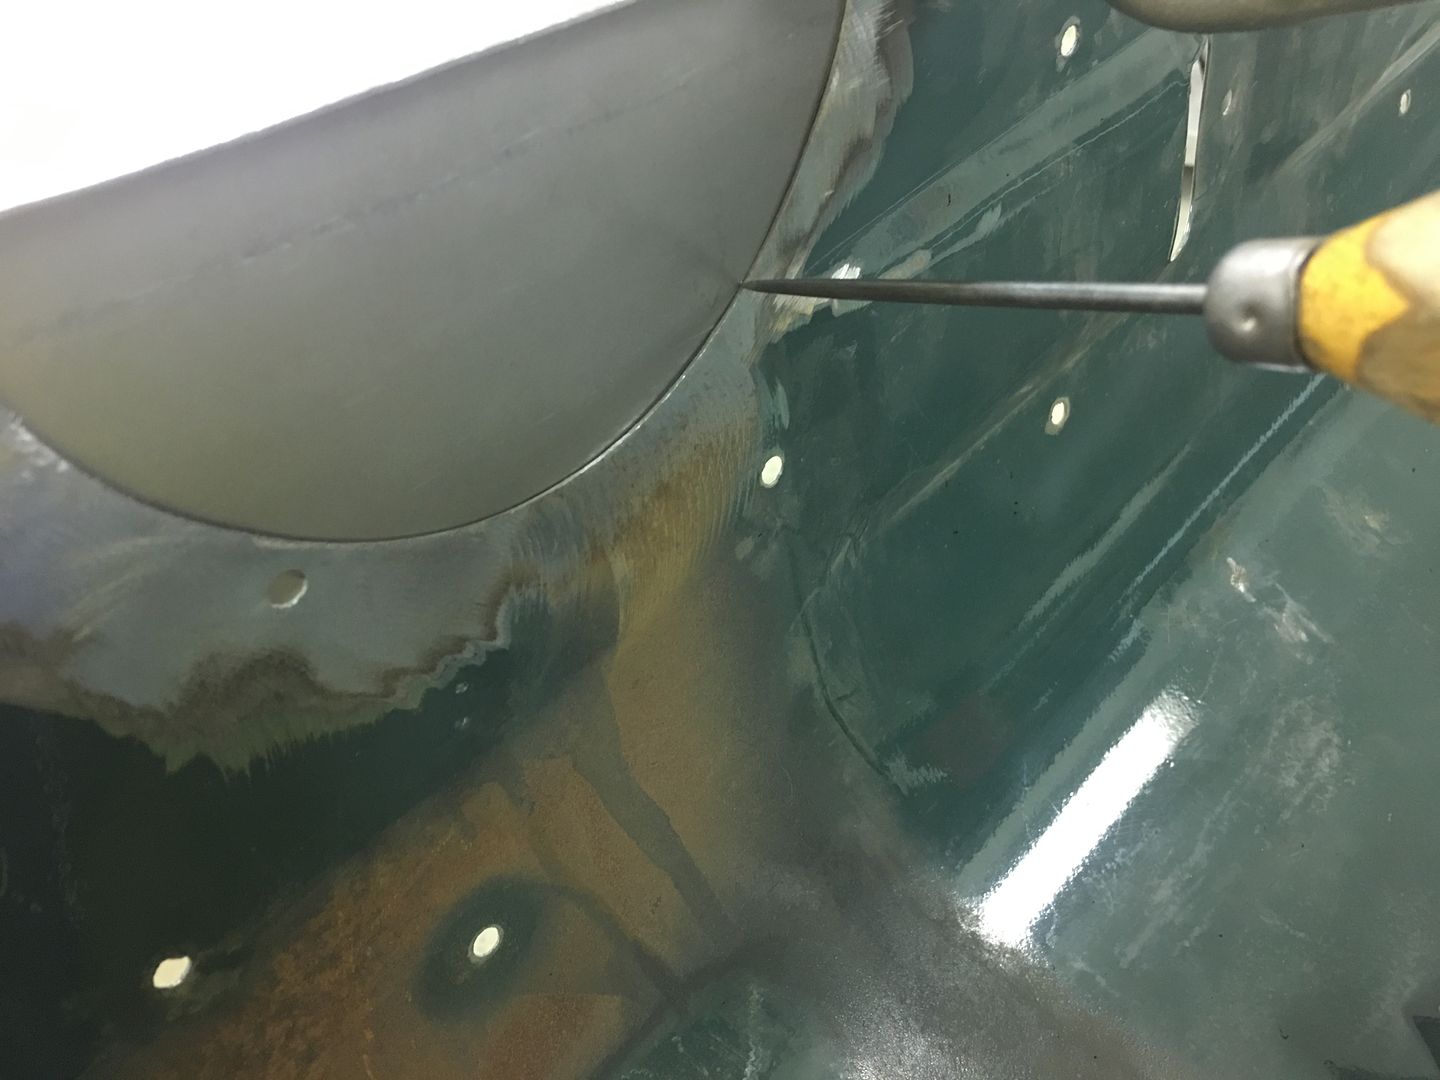 Next we trim the panel on the band saw leaving 1/4" extra around our marks. Next, we use offset snips and trim the flanges to the lines scribed. And ONLY the flanges.. Then the panel is re-fitted with the flanges flush with the original, and RE-scribe the round line, this time with more force to see the mark better. Note the scribe line has moved closer toward the flange as we located the panel correctly with flanges flush.. 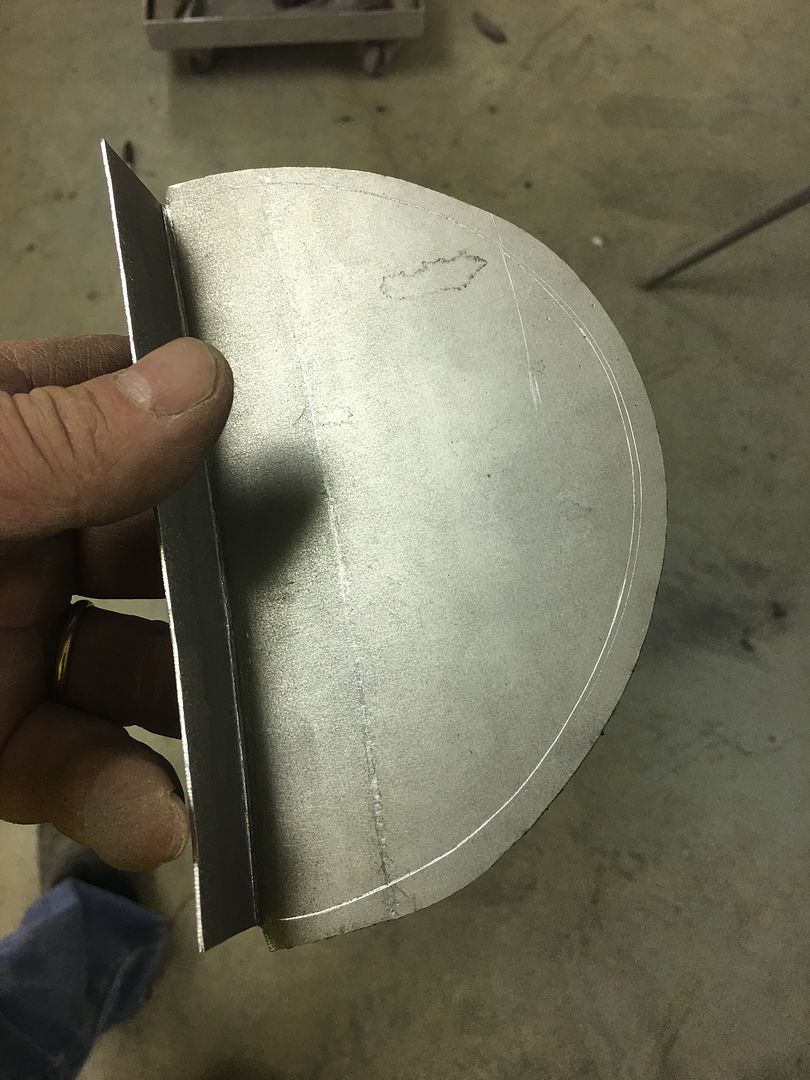 Fitted... panel should be as tight as you can get it to minimize any shrinking/pulling. 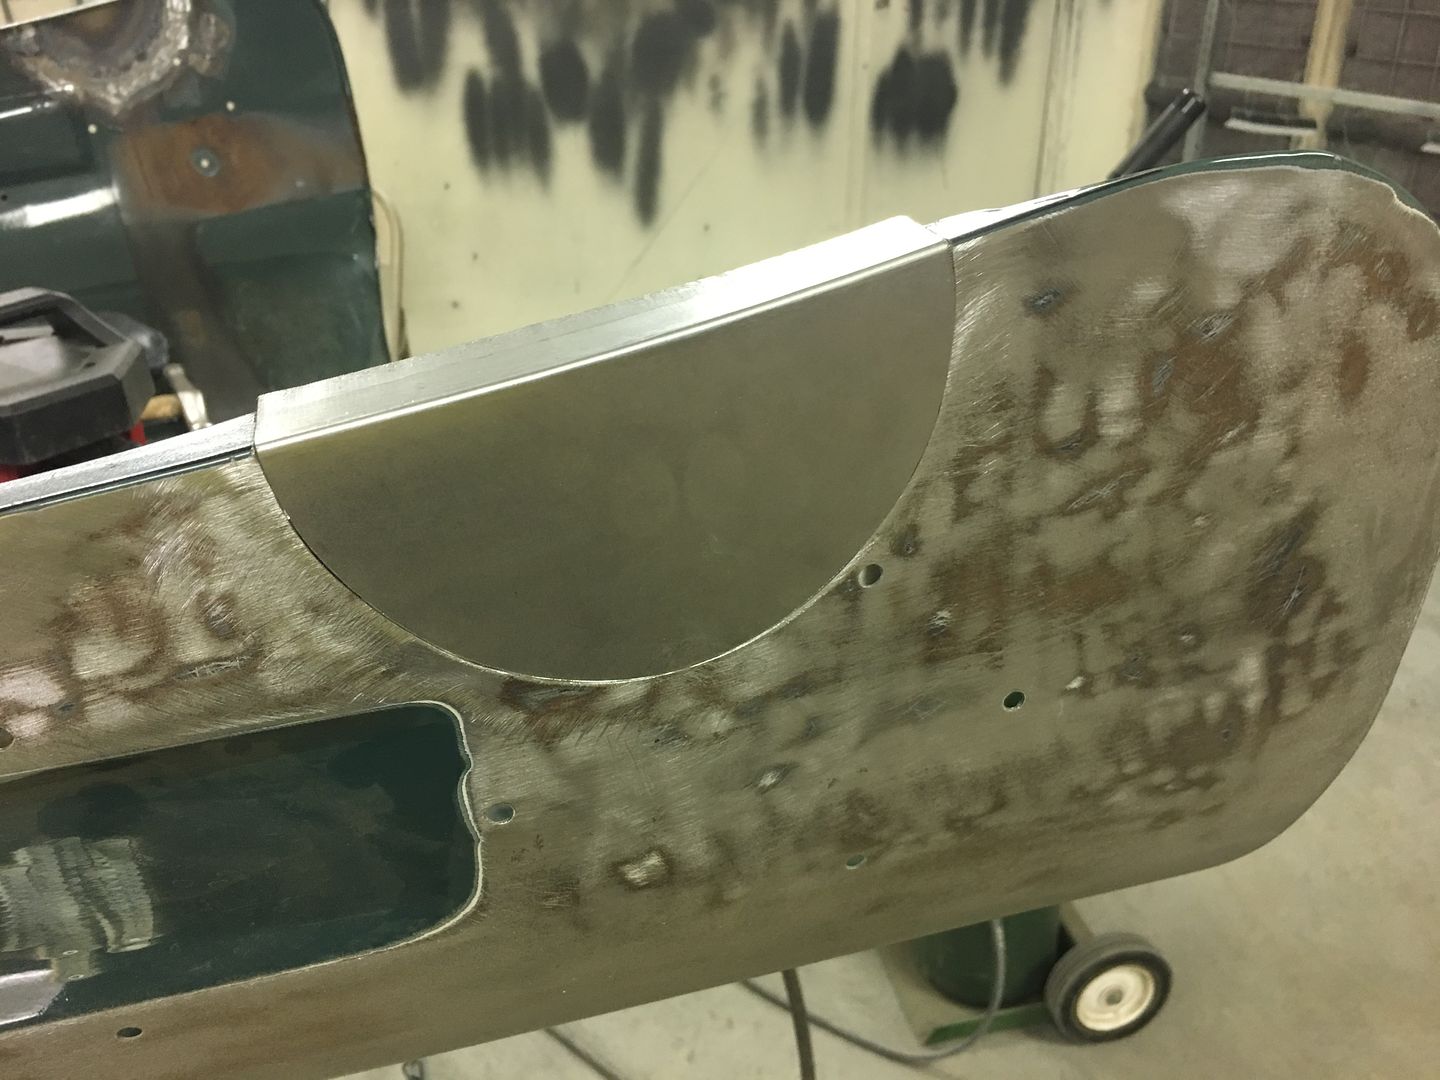 Flanges and outer surface are both aligned to the original first and I use TIG to tack on the exact corner on both ends to maintain this alignment.. Side note.... tacking only one end and working around to the other may shrink as you go, pulling other end down where it no longer aligns. So in this case, align both ends, tack both ends, and then progressively work your tacks side to side toward the bottom of the circle. 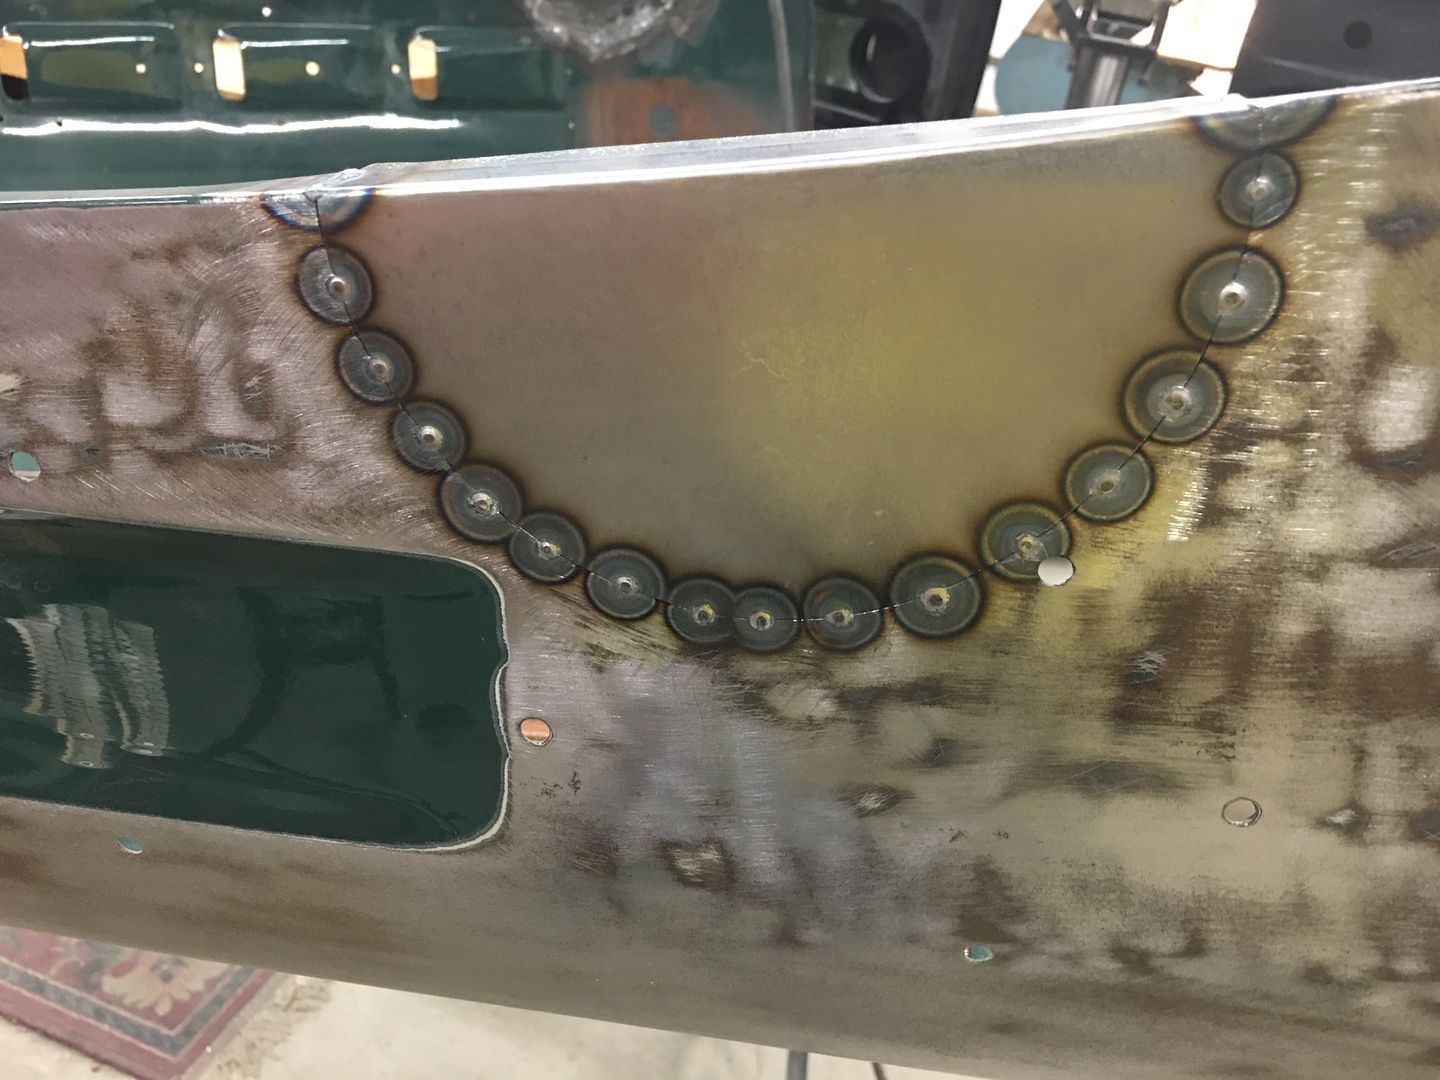 Note here the flange was left long on our replacement. Trying to weld it in place already trimmed to fit will invariably cause the edge to burn back, making it more difficult to weld this seam all the way to the edge. Leaving the flange on our patch long makes the outer part serve as a heat sink where this burn back effect is less of an issue. Once the welds are dressed, trim the excess using offset snips.. 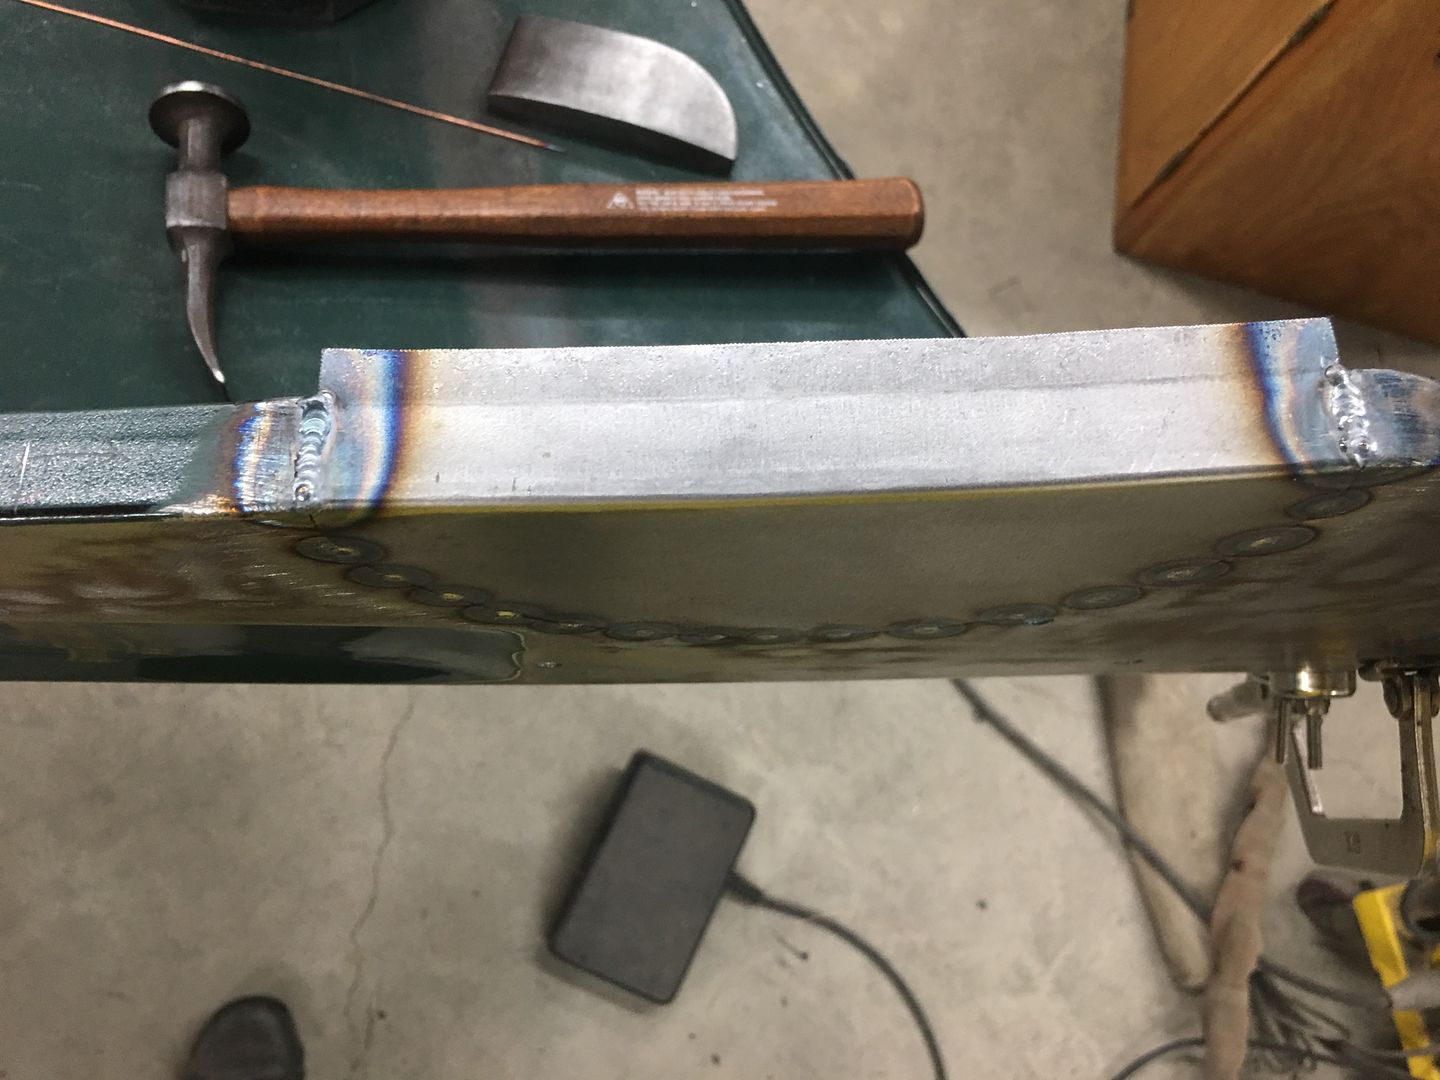
__________________
Robert Last edited by MP&C; 03-19-2020 at 12:43 PM. |

|

|
| Bookmarks |
|
|


 Threaded Mode