
|
 04-22-2016, 07:12 PM
|
#26 |
|
Registered User
Join Date: Oct 2006
Location: Orland Park Il
Posts: 2,041
|
Re: Project 1972
How do the tabco panels compare thickness wise to the original sheet metal?
__________________
68 GMC C3500 Longhorn DRW 67 Chevy C10 LWB 90 Mustang Gt 90 Mustang Notchback |

|

|
|
04-22-2016, 07:49 PM
|
#27 | |
|
Registered User
Join Date: Apr 2009
Location: Lowell AR
Posts: 360
|
Re: Project 1972
Quote:
|
|
|
|
|
|
04-22-2016, 08:17 PM
|
#28 |
|
Registered User
Join Date: Oct 2006
Location: Orland Park Il
Posts: 2,041
|
Re: Project 1972
That's good to hear! I bought there stuff in the past, glad they haven't changed. Thank you.
__________________
68 GMC C3500 Longhorn DRW 67 Chevy C10 LWB 90 Mustang Gt 90 Mustang Notchback |
|
|
|
|
05-11-2016, 09:33 PM
|
#29 |
|
Registered User
Join Date: Apr 2009
Location: Lowell AR
Posts: 360
|
Re: Project 1972
I finished sanding the top and fixing and welding where the rust was around the windshield. I sprayed some black epoxy primer. Tomorrow I am going to reseal the drip rails and get it ready for some 2k gray primer.
 
|
|
|
|
|
05-12-2016, 12:10 AM
|
#30 | |
|
Registered User
Join Date: Oct 2007
Location: Spanaway
Posts: 8,451
|
Re: Project 1972
Quote:
__________________
Mike. Swamp Rat build thread : http://67-72chevytrucks.com/vboard/s...d.php?t=595019 72 3/4T 4X4 4" BDS Lift 33" BFG's |
|
|
|
|
|
05-12-2016, 10:34 AM
|
#31 | |
|
Registered User
Join Date: Apr 2009
Location: Lowell AR
Posts: 360
|
Re: Project 1972
Quote:
|
|
|
|
|
|
05-12-2016, 11:20 PM
|
#32 |
|
Registered User
Join Date: Apr 2009
Location: Lowell AR
Posts: 360
|
Re: Project 1972
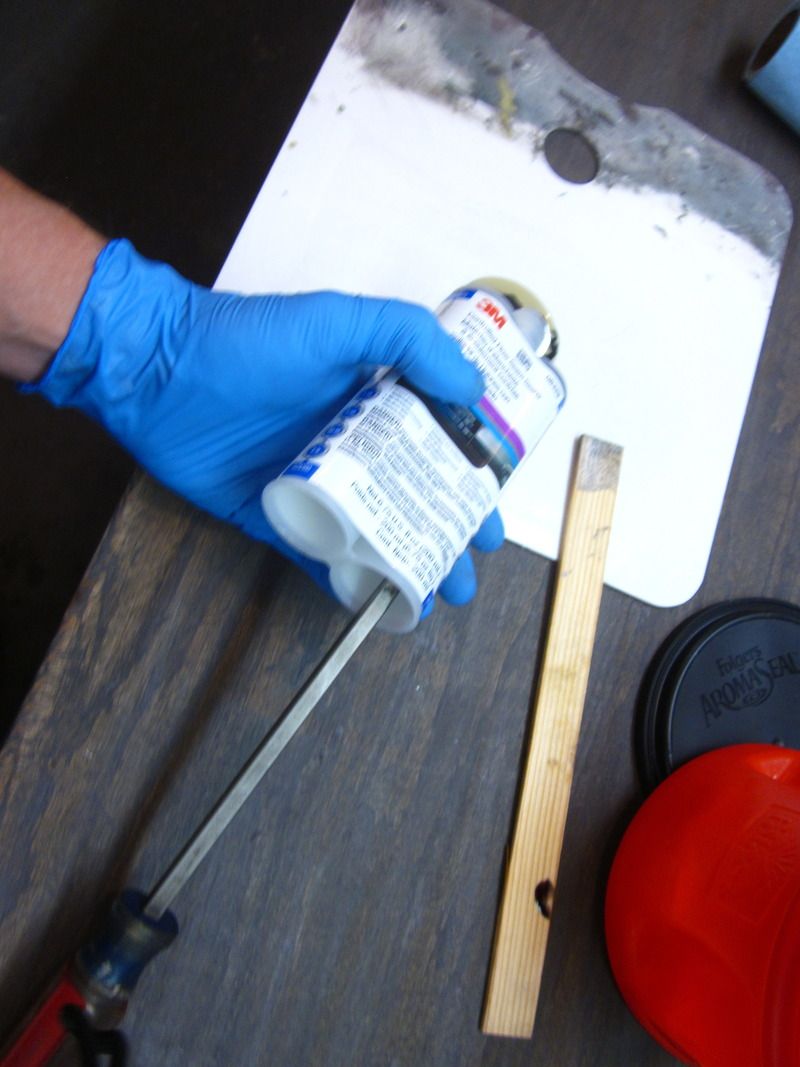
Today I sealed the drip rails. I did not have the duel caulk gun so I just push out equal amounts with a screwdriver and mixed it on a mixing board. I used a paint stick to put it in place then used my finger with a glove on to smooth it out. This stuff flowed out real nice.
|
|
|
|
|
05-13-2016, 02:25 AM
|
#33 |
|
Registered User
Join Date: Dec 2009
Location: El Dorado Ca
Posts: 3,374
|
Re: Project 1972
You are very talented , great job you are doing!!!!
|
|
|
|
|
05-13-2016, 02:50 PM
|
#34 | |
|
Registered User
Join Date: Apr 2009
Location: Lowell AR
Posts: 360
|
Re: Project 1972
Quote:
|
|
|
|
|
|
05-13-2016, 02:54 PM
|
#35 |
|
Registered User
Join Date: Apr 2009
Location: Lowell AR
Posts: 360
|
Re: Project 1972
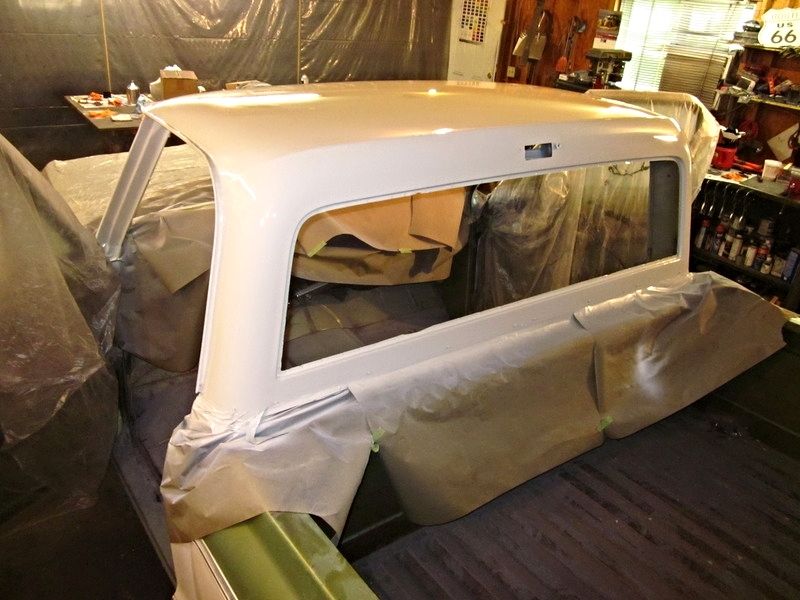
Today I got the top painted! It turned out real good.
|
|
|
|
|
05-16-2016, 07:52 PM
|
#36 |
|
Registered User
Join Date: Apr 2009
Location: Lowell AR
Posts: 360
|
Re: Project 1972
Today I painted the inside of the cab!
 
|
|
|
|
|
05-16-2016, 09:21 PM
|
#37 |
|
Registered User
Join Date: Oct 2009
Location: canton ga
Posts: 12,729
|
Re: Project 1972
Looking great ,waiting for more .I cant play with my toys right now so Im enjoying all the builds on here .
|
|
|
|
|
05-16-2016, 11:48 PM
|
#38 |
|
Registered User
Join Date: Jan 2009
Location: San Antonio, Texas
Posts: 1,374
|
Re: Project 1972
Nothing more exciting than fresh paint! It looks great!
__________________
1972 C10 LWB, 350/350 Deconstruction began 5/2009, mostly completed restoration, 5/2017 |
|
|
|
|
05-17-2016, 03:46 PM
|
#39 |
|
Registered User
Join Date: Jul 2015
Location: Warner Robins, Ga
Posts: 32
|
Re: Project 1972
Transformation looks great. Love fresh paint.
|
|
|
|
|
05-18-2016, 11:41 PM
|
#40 |
|
Registered User
Join Date: Apr 2009
Location: Lowell AR
Posts: 360
|
Re: Project 1972
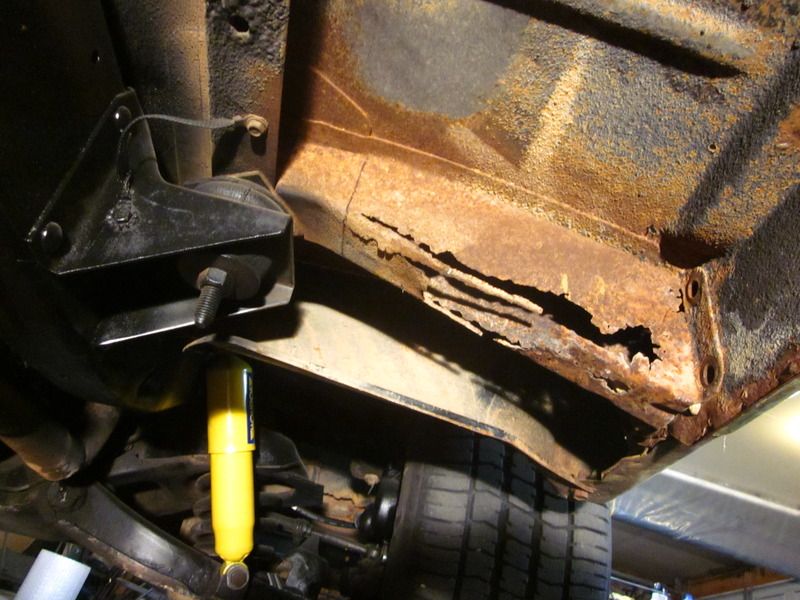
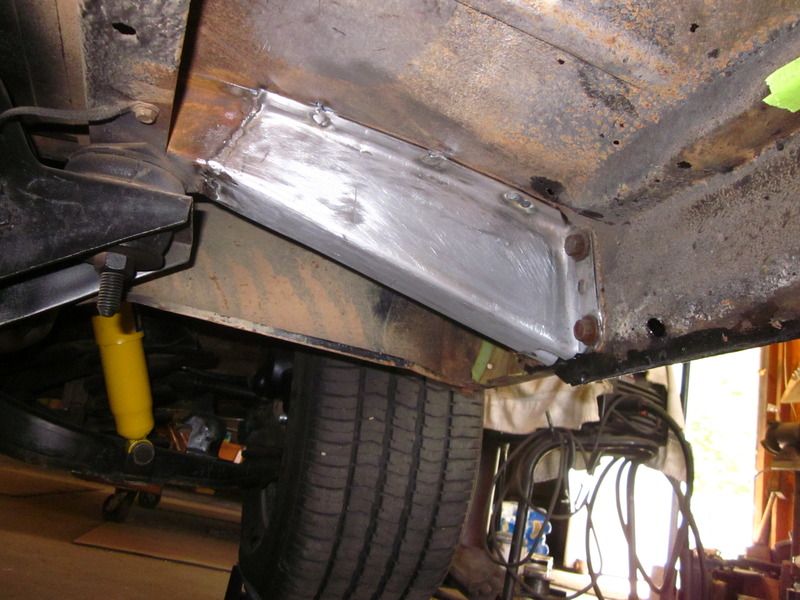
Today I cut out the rusted support and installed one of my tabco cab suppports.
|
|
|
|
|
05-25-2016, 12:00 AM
|
#41 |
|
Registered User
Join Date: Apr 2009
Location: Lowell AR
Posts: 360
|
Re: Project 1972
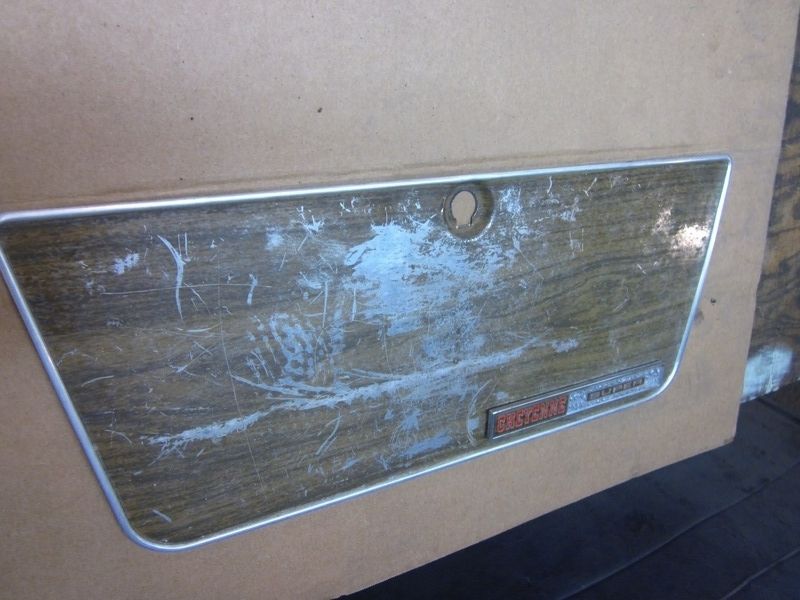
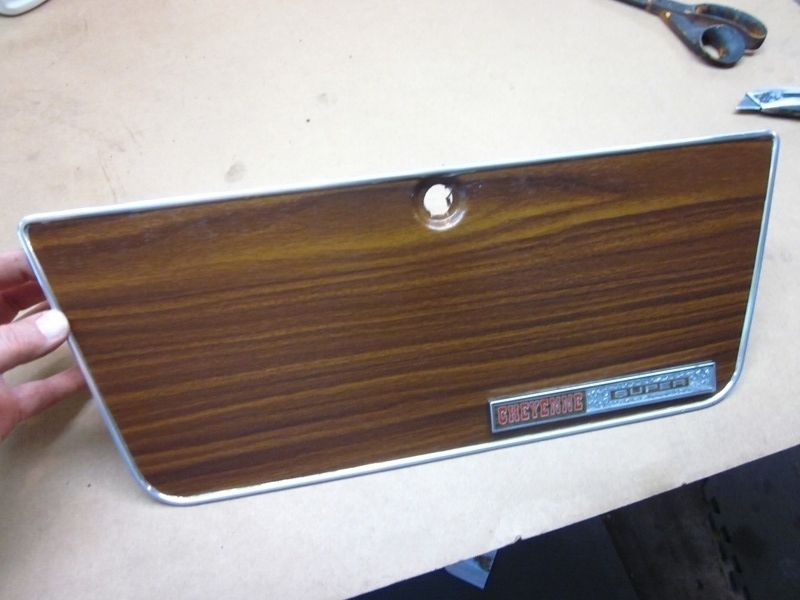
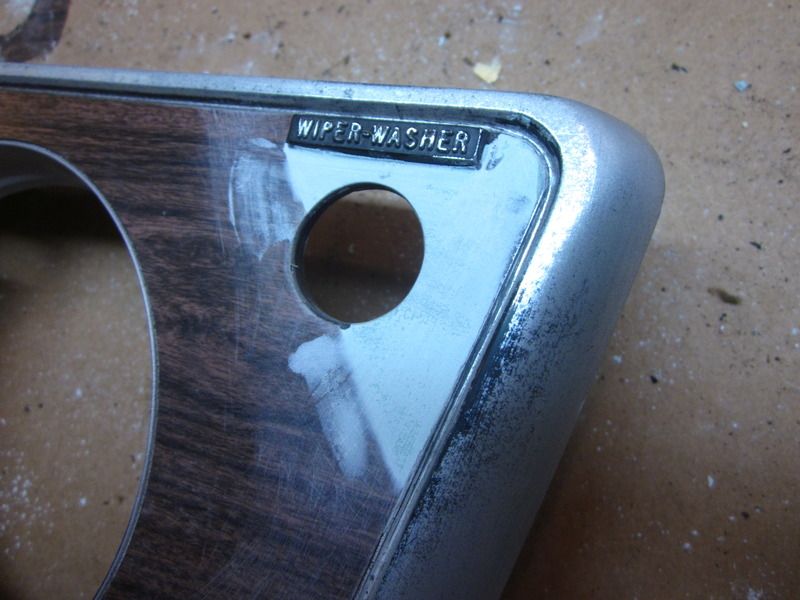
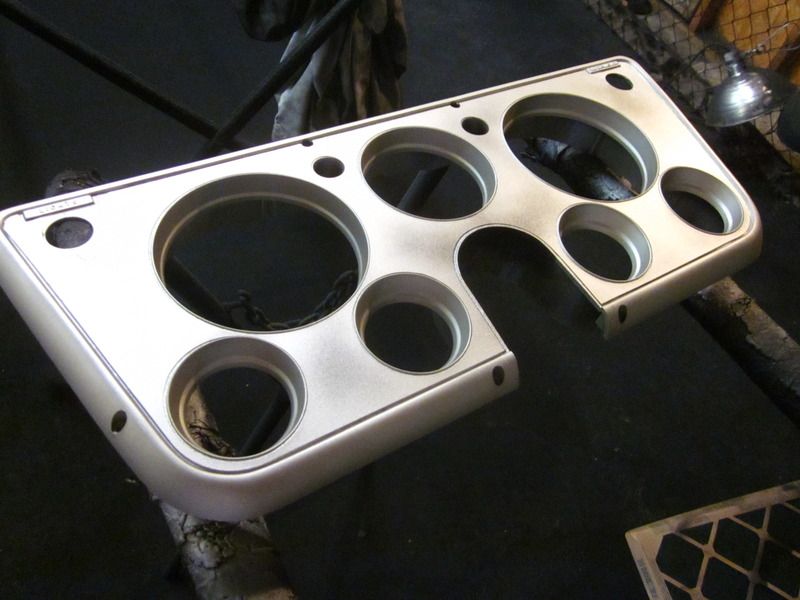
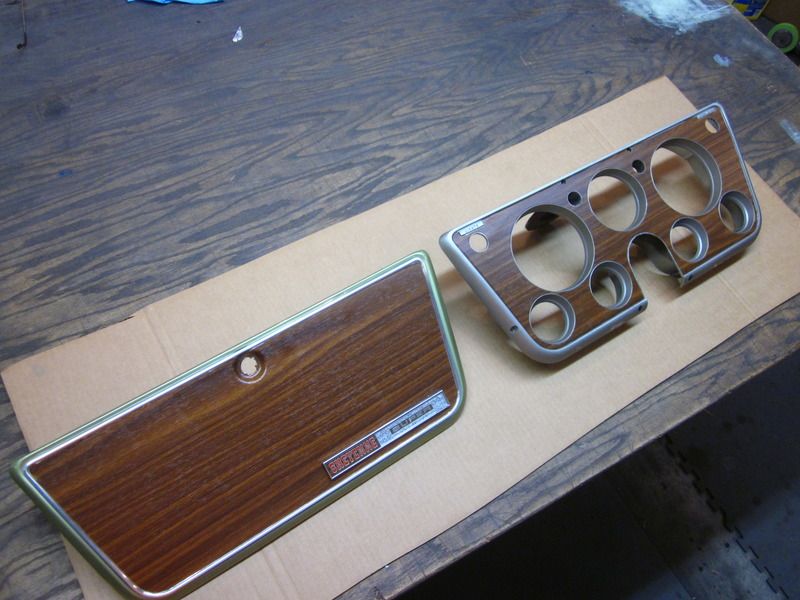
I worked on my glove box cover. I cleaned it with an sos pad and all of the finish came off except where the emblem was. I installed some oak vinyl wrap to it. I am working on the instrument cluster now. I had to cut off some of the peeling corners and smooth it with body filler. I painted the edges and tomorrow I am going to try my hand again with the vinyl wrap.
|
|
|
|
|
05-25-2016, 01:48 PM
|
#42 |
|
Registered User
Join Date: Apr 2009
Location: Lowell AR
Posts: 360
|
Re: Project 1972
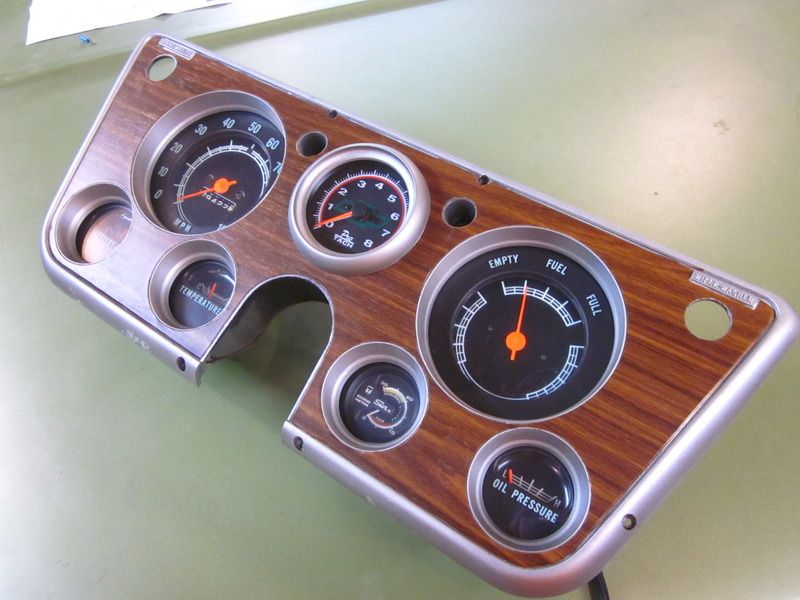
I did it! It wasn't as hard as I thought it would be. The vinyl I am using is from R/vinyl it is a premium vehicle wrap.
|
|
|
|
|
05-25-2016, 02:31 PM
|
#43 |
|
Registered User
Join Date: Jul 2012
Location: Jonestown, TX
Posts: 469
|
Re: Project 1972
Dude.... Nice work, love the green!
|
|
|
|
|
06-03-2016, 07:12 PM
|
#44 | ||
|
Registered User
Join Date: Oct 2014
Location: Location:
Posts: 8,157
|
Re: Project 1972
Quote:
. X2 - looks great w/ the gauges installed: Quote:
__________________
... Click here to see thousands of 'Abandoned & Neglected' Chevy trucks rotting away... ... |
||
|
|
|
|
06-10-2016, 07:13 PM
|
#45 |
|
Registered User
Join Date: Apr 2009
Location: Lowell AR
Posts: 360
|
Re: Project 1972
Installed the new windshield. Precision gasket and a $100.00 windshield from a local glass place. I used 3m strip caulk. Me and my wife installed it today.
 
__________________
http://67-72chevytrucks.com/vboard/s...d.php?t=698292 |
|
|
|
|
06-11-2016, 11:53 AM
|
#46 |
|
Registered User
Join Date: Sep 2005
Location: S. Georgia
Posts: 254
|
Re: Project 1972
Really enjoying the work your doing. Seems you waited and found the perfect truck.
|
|
|
|
|
06-11-2016, 02:05 PM
|
#47 | |
|
Registered User
Join Date: Apr 2009
Location: Lowell AR
Posts: 360
|
Re: Project 1972
Quote:
__________________
http://67-72chevytrucks.com/vboard/s...d.php?t=698292 |
|
|
|
|
|
06-11-2016, 02:15 PM
|
#48 | |
|
Registered User
Join Date: Sep 2005
Location: S. Georgia
Posts: 254
|
Re: Project 1972
Quote:
|
|
|
|
|
|
06-13-2016, 08:13 PM
|
#49 |
|
Registered User
Join Date: Apr 2009
Location: Lowell AR
Posts: 360
|
Re: Project 1972
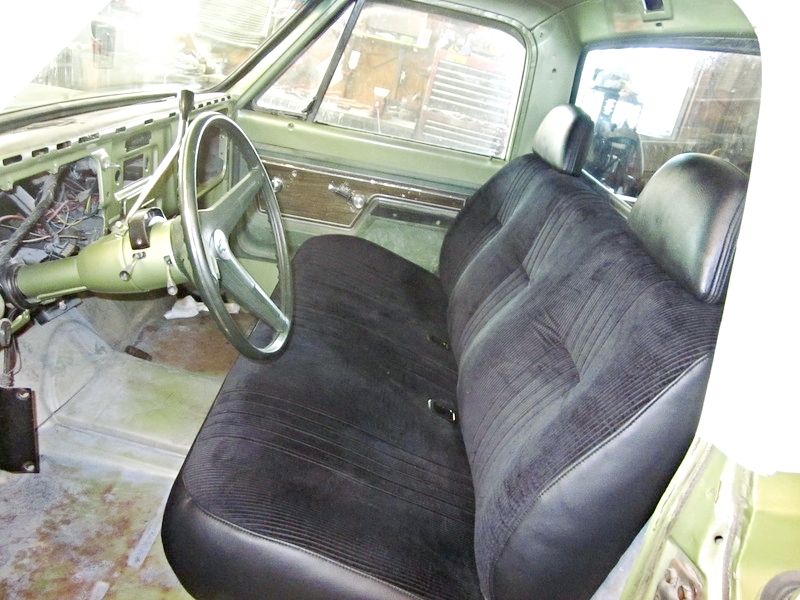
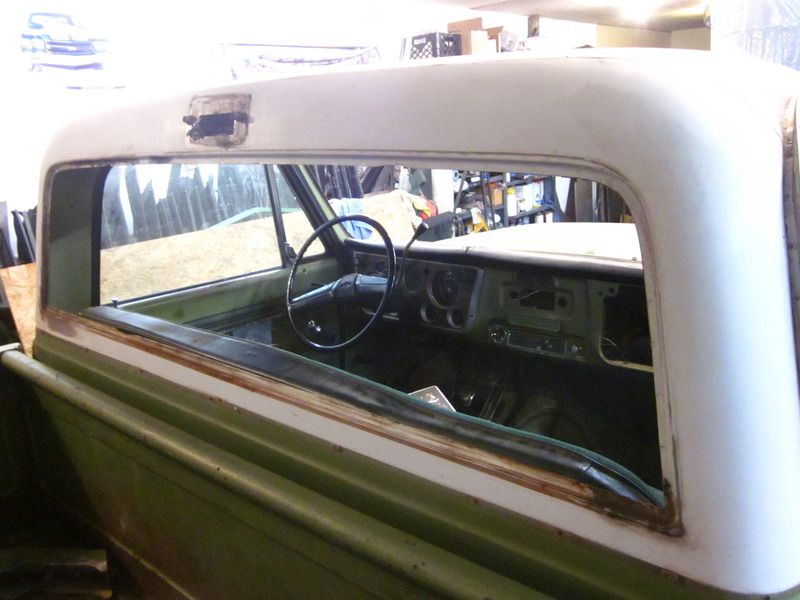
I got my seat back from the upholstery shop today. Installed the back glass today.
__________________
http://67-72chevytrucks.com/vboard/s...d.php?t=698292 |
|
|
|
|
06-13-2016, 11:59 PM
|
#50 | |
|
Registered User
Join Date: May 2016
Location: Ohio
Posts: 274
|
Quote:
That seat looks right at home in there. Posted via Mobile Device |
|
|
|
|
 |
| Bookmarks |
|
|


 Linear Mode

