 |
Register or Log In To remove these advertisements. |
|
|
|
|||||||
 |
|
|
Thread Tools | Display Modes |
|
|
|
|
#1 |
|
SAVING ONE TRUCK AT A TIME
 Join Date: Feb 2010
Location: sherwood oregon
Posts: 1,141
|
Re: 46 pickemup in NJ "the Rebuild"
lookin good paintman. also worked all summer on my property.but did have a chance to enjoy some car shows and family time.lookin forward to more pics.chizzler
__________________
53-suburban (99% done) 40-pick up (99.9% done) 12-cc lb dually D-max (dd) 61-crew cab D-max "PAY LESS FOR WHAT YOU NEED PAY MORE FOR WHAT YOU WANT" 53 BURBAN BARN FIND:http://67-72chevytrucks.com/vboard/s...d.php?t=404091 1940 PROJECT MOON SHINE:http://67-72chevytrucks.com/vboard/s...d.php?t=551088 1961 CREW MAX: http://67-72chevytrucks.com/vboard/s....php?p=6957999 |
|
|

|
|
|
#2 |
|
Registered User
Join Date: Dec 2010
Location: washington NJ
Posts: 766
|
Re: 46 pickemup in NJ "the Rebuild"
|
|
|

|
|
|
#3 |
|
Registered User
Join Date: Dec 2010
Location: washington NJ
Posts: 766
|
Re: 46 pickemup in NJ "the Rebuild"
On some of the smaller holes, instead of trying to make small plugs, I just shoved a sheet rock screw into the hole as a backer and burner her shut.
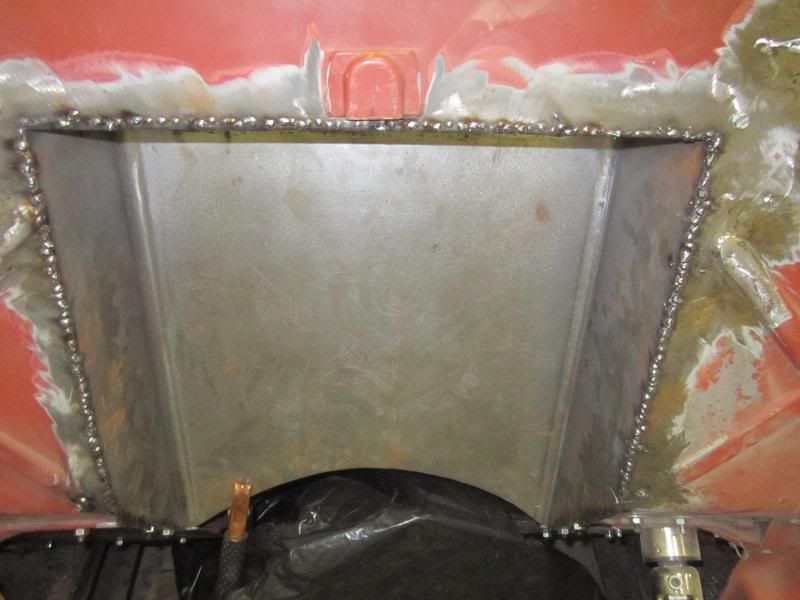
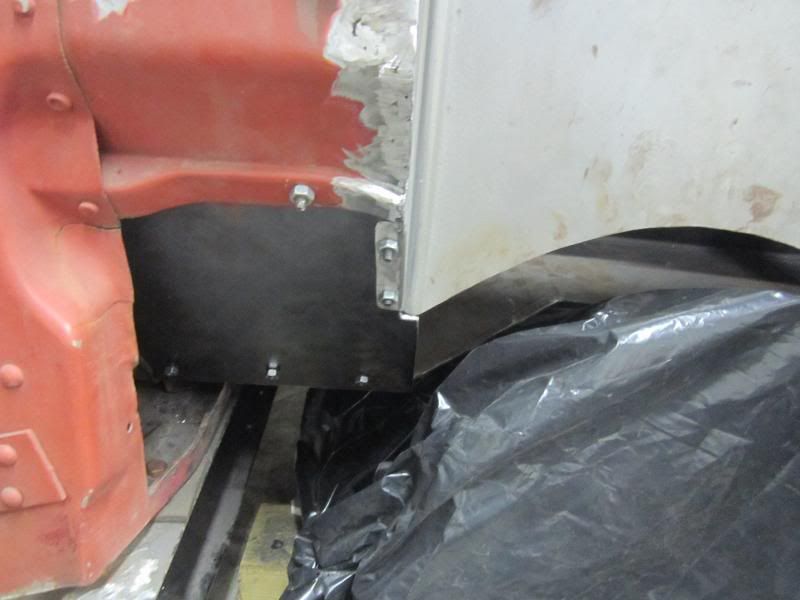
 Once I got my holes filled in, I fit and stitched the recess box in. I originally had planned on cutting the opening for the box to fit flush into the firewall and then weld the flange all the way around. But upon further review i realized to do it that way would have meant cutting into the ribs that were stamped into the firewall at the factory for re-reinforcement. That just seemed like it would cause more trouble then it was worth so I mounted the flange to the back side of the firewall. I now have it stitched and ground down on the front side, and plan on stitching on the backside as well. Hope that made sense. Maybe the pics will help.  I was able fold over some the extra material on the recess box and create a flange to add more support for the floor boards.  So at the end of a few long days this what the firewall looks like. I still have alot of clean up to do yet but i'm gettin there. Did I do it right????????? I don't have a clue. But I know a painter that's good working with spackle  
|
|
|

|
 |
| Bookmarks |
|
|