
|
 05-14-2014, 06:55 AM
|
#26 |
|
Watch out for your cornhole !
 Join Date: Jun 2003
Location: Azle, Texas
Posts: 14,162
|
Re: My Luxurious late model truck (not so much)
First priority was to get the engine squared away so I could judge how much of my old truck building budget was gonna get used up.
I began with the research. GM used two different 350 engines in pickups during these years. I looked closely at the options and found that there were the 350s used in the half ton and light duty 3/4 ton, and there was a second one that was used in heavy 3/4 ton and 1 ton applications. My buddy at the dealership told me the only difference between the two was 2 bolt vs 4 bolt mains. As I got to looking deeper, I found two more differences. First, the heavy duty engines are listed as lower compression ratio. Further investigation revealed that the heavy engines had a deeper dish piston to do that. Second, the heavy engines have different exhaust valves. The stems are larger, and they are stellite valves. If you want to geek out, here is further reading. http://www.aera.org/engine-professio...ve-technology/ Let me reiterate, the valve stems are larger. You cannot put stellite valves from a heavy engine into light duty engine heads as an upgrade. You'd have to machine the valve guides larger. The purpose of the larger exhaust valve stems was to more thoroughly transfer the heat from the valve through to the head. My main goals for the engine were to keep cost down and to use a roller cam. These TBI engines of this era were machined for roller cam usage even though they were equipped with flat tappet cams. So, I wanted to take advantage of this. with the modern oils we have, a flat tappet cam is always in jeopardy of failing whereas a roller isn't. First step was to knock all cam bearings, freeze plugs and oil galley plugs out of the block. Then much cleaning of the entire block inside and out, all oil passages etc. After that, I used my hone and drill to clean up the bores. Tech tip: A rifle cleaning kit from the sporting goods section of Walmart works killer for cleaning all of those long oil galleys. 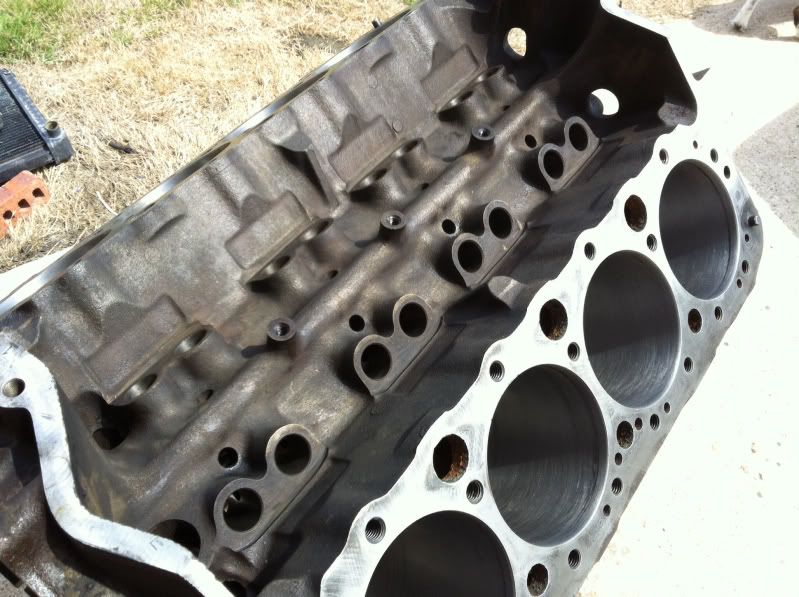 In an effort to further my abilities, I bought cam bearing installation tools from Summit. They were like 30 bucks or something. Basically about what a machine shop would charge to install them for me, but I'm left with a new tool for my arsenal. 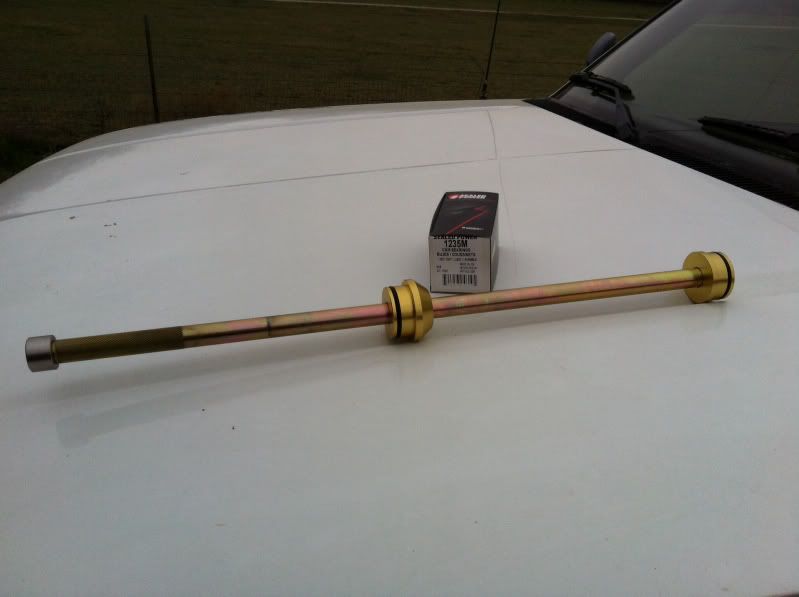 Cam bearings are stupid easy once you've got the tool. Maybe five minutes to install all of them. New cam bearings, block plug kit and cam thrust plate (for the new roller cam setup). 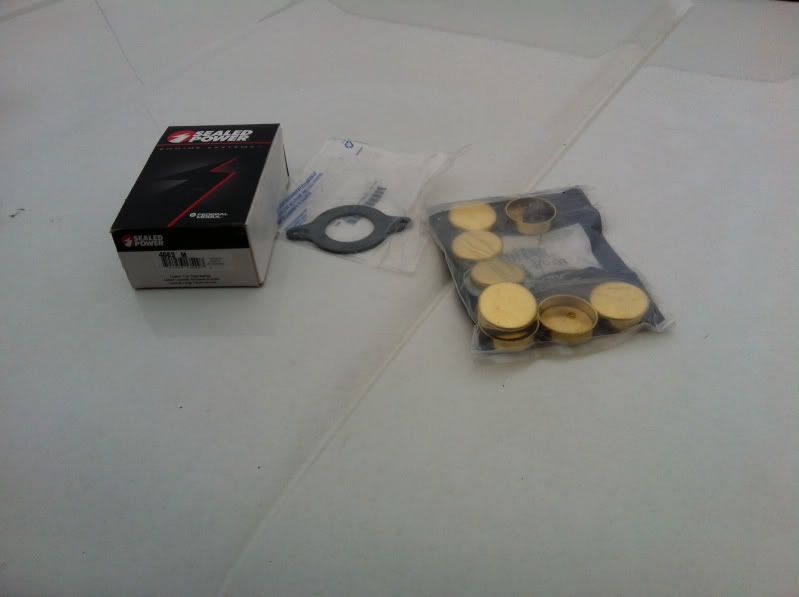 Now, I needed a roller cam and lifters. Some folks don't realize, but the great thing about roller cams is that the cam and lifters are infinitely reusable. I had an old Vortec 350 under my workbench that my stepson had destroyed via overheating (see my Lemonade truck build for that story). So I plucked the roller cam and lifters out of it for this build. 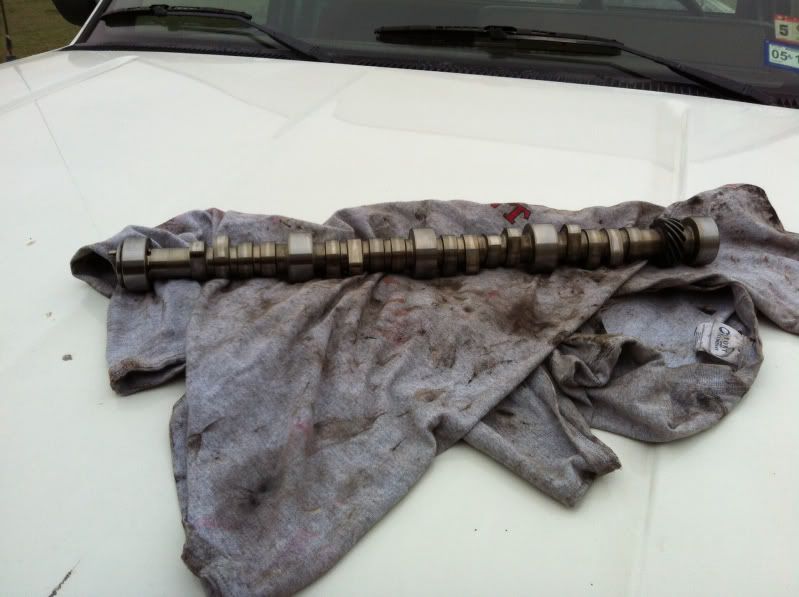  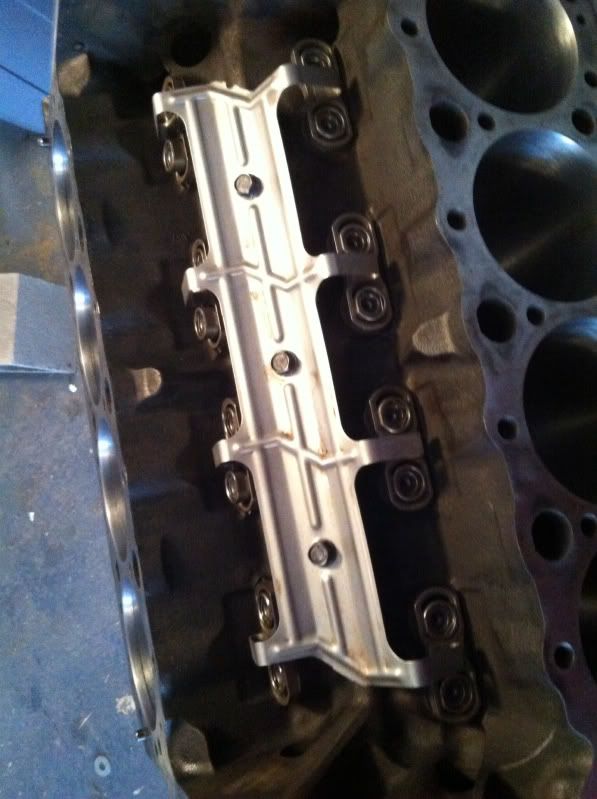 The crankshaft in the Vortec engine was a bit smoother and nicer than the old TBI engine so I used it too. Notice the lovely 4 bolt mains. 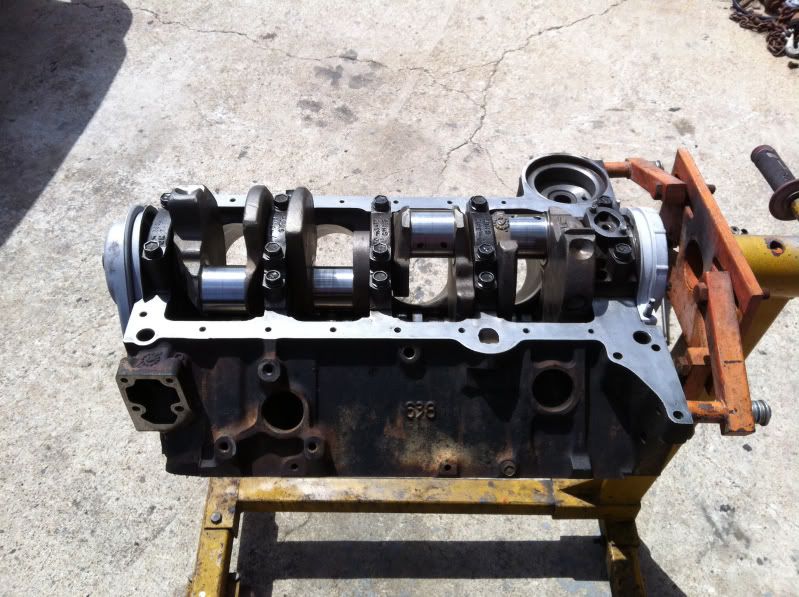 Disassembled and cleaned the oil pump so I could reuse it. The original engine had great oil pressure so I knew the pump was a good one. 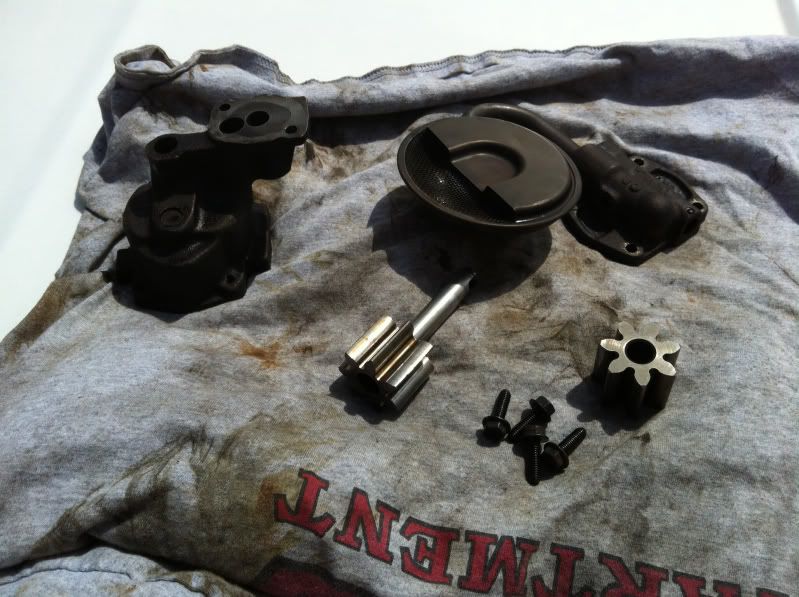 A picture of installing the rear main seal. This is obviously a 1 piece rear main seal engine. The press and a scrap of steel plate make the job easy and drama free. I don't want to be using a hammer on a 20 dollar seal. 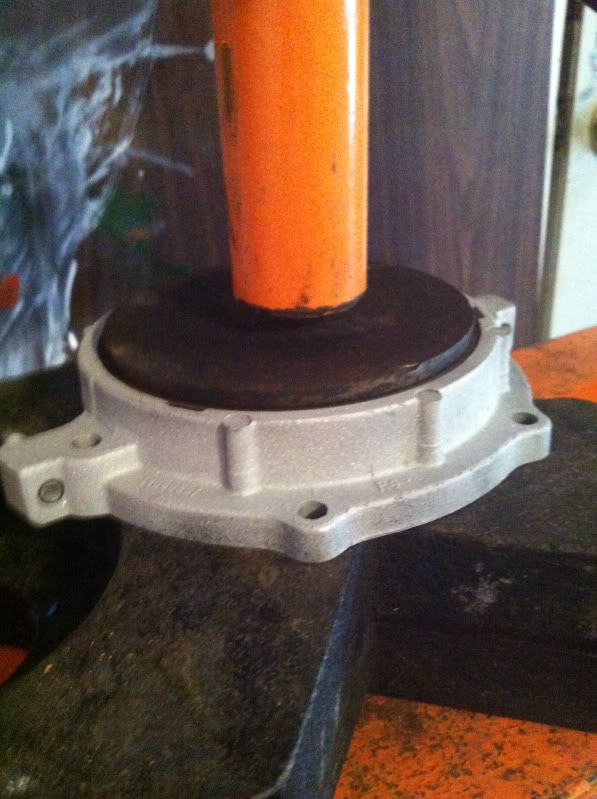 Vortec engine are reputed to have high quality rods. To my eyes, they do look nicer than most so I decided to use the Vortec pistons and rods. First step was to soak them in diesel for 24 hours to loosen the carbon. 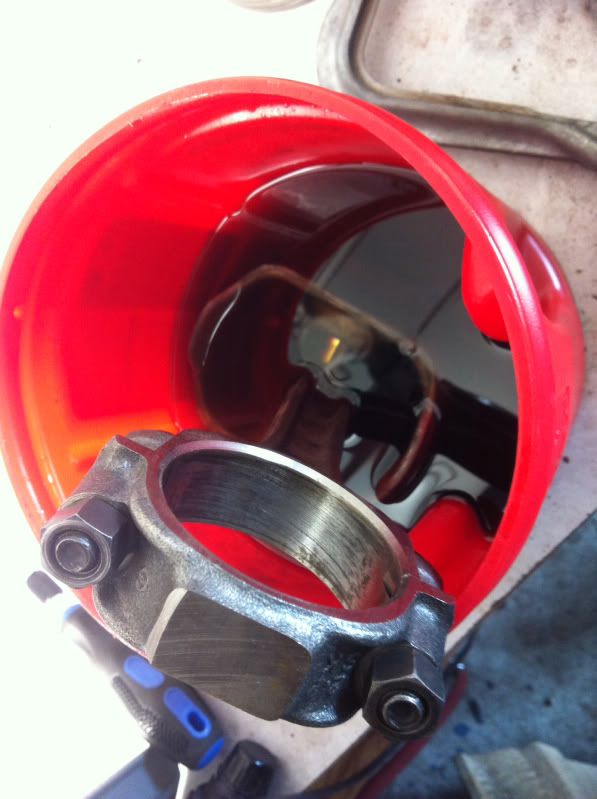 Comparison shot of the Vortec piston and rod (left) versus the TBI parts (right)  Again, Vortec left and TBI right. You can see the Vortec pistons offer less dish volume for a bit higher compression ratio.  Vortec left, TBI right. Notice the Vortecs have shorter skirts for less resistance and significantly thinner rings. Look closely, the rings are little narrow things. This bit me on the parts cost because the skinny ring sets are about 20 dollars more expensive than the normal thick ones that so many engines used. 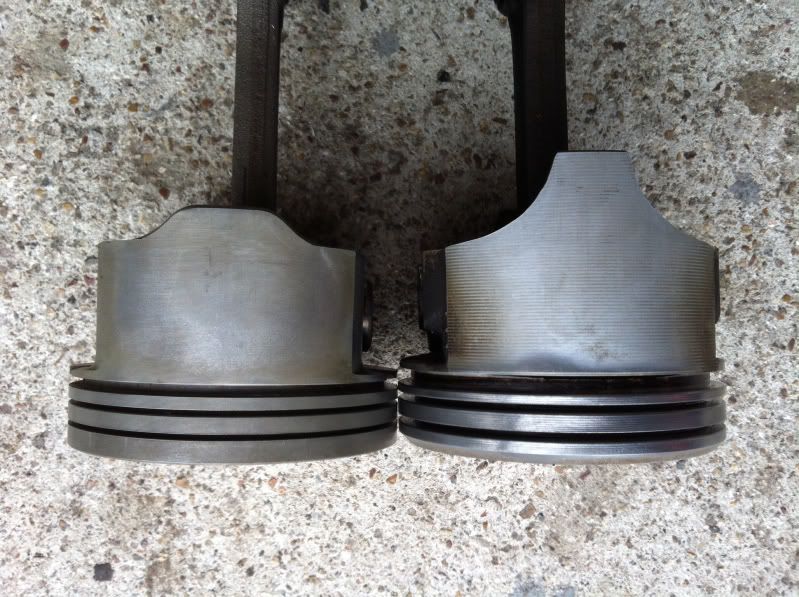 In the next post, I'll do the top end.
__________________
I'm on the Instagram- @Gearhead_Kevin Last edited by Tx Firefighter; 05-17-2014 at 12:03 PM. |

|

|
|
05-14-2014, 07:09 AM
|
#27 |
|
Watch out for your cornhole !
Join Date: Jun 2003
Location: Azle, Texas
Posts: 14,162
|
Re: My Luxurious late model truck (not so much)
My cylinder heads were wasted. Total scrap metal. The exhaust valve seats were cracked. Since I'm doing this on a budget, paying a machine shop to change valve seats wasn't an option.
In a huge stroke of good luck, another member on here from up in Oklahoma reached out to me and offered to sell me a set of heavy duty TBI heads (with the Stellite valves like I need) for a good deal. I talked Valerie into a road trip adventure so we got in my Honda and headed north across the Red River to Oklahoma for my new (used) cylinder heads. The guides were fairly tight so I knew they would fill my need. 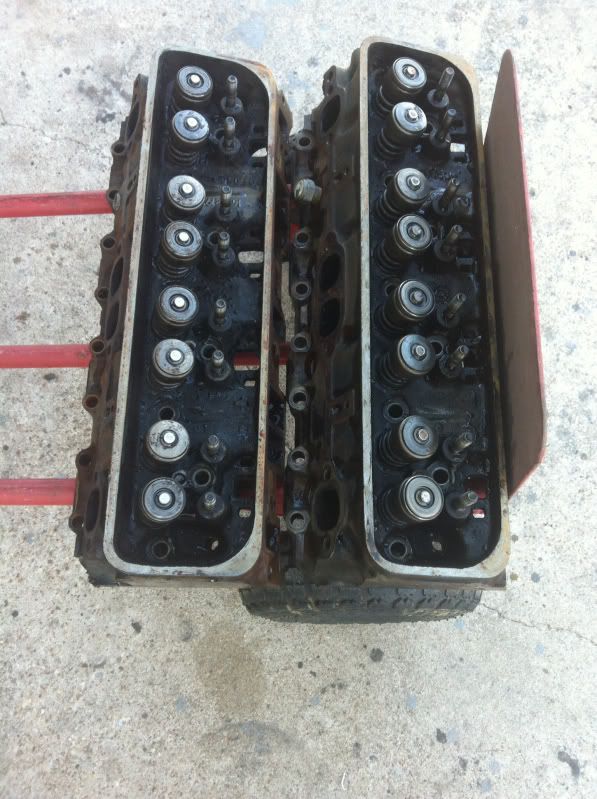 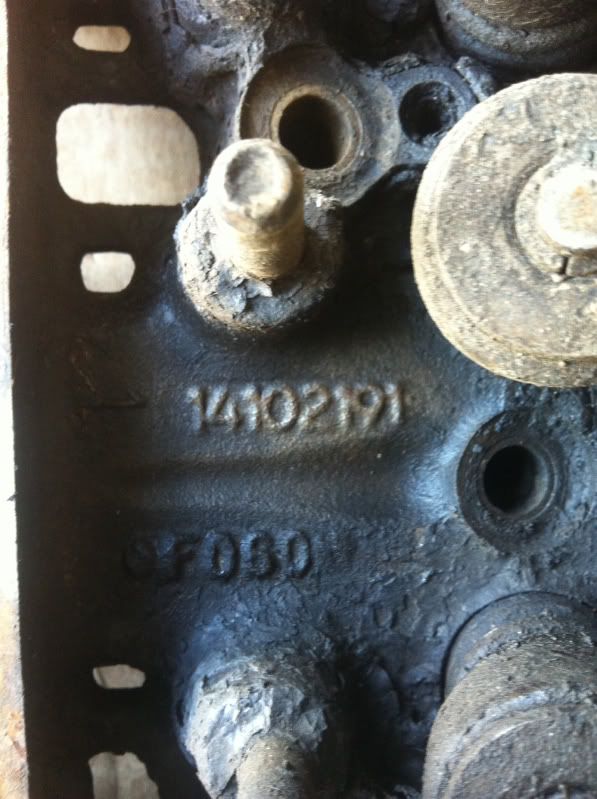 First step was to soak them in a 5 gallon bucket of diesel to loosen the crud. Then, degreaser and soda blast them clean. I also got out my high tech cylinder head machine tools. My mill.  Valve guide cleaner. 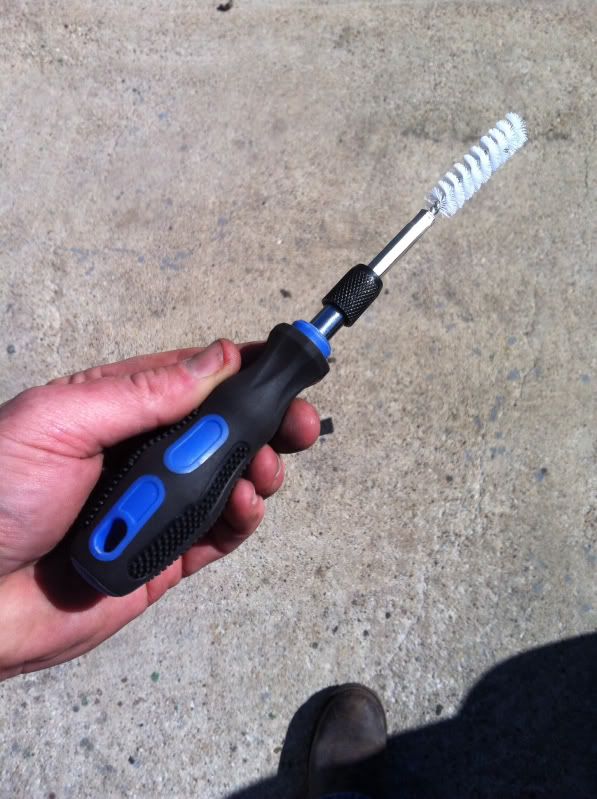 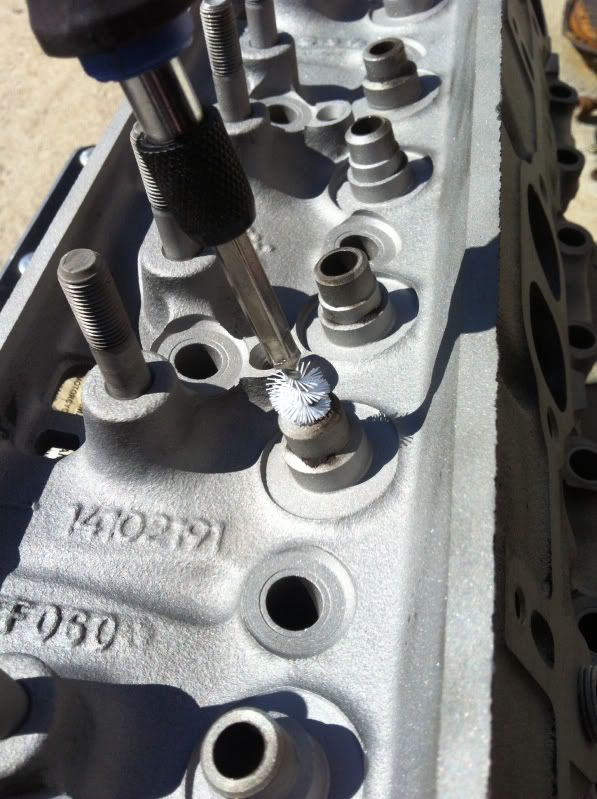 Valve spring compressor. 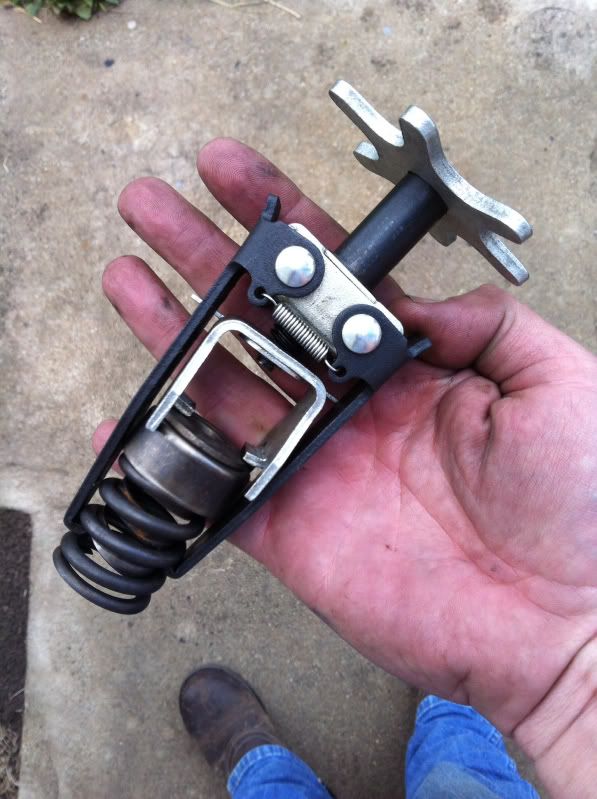 After surfacing the heads with a long sanding block. 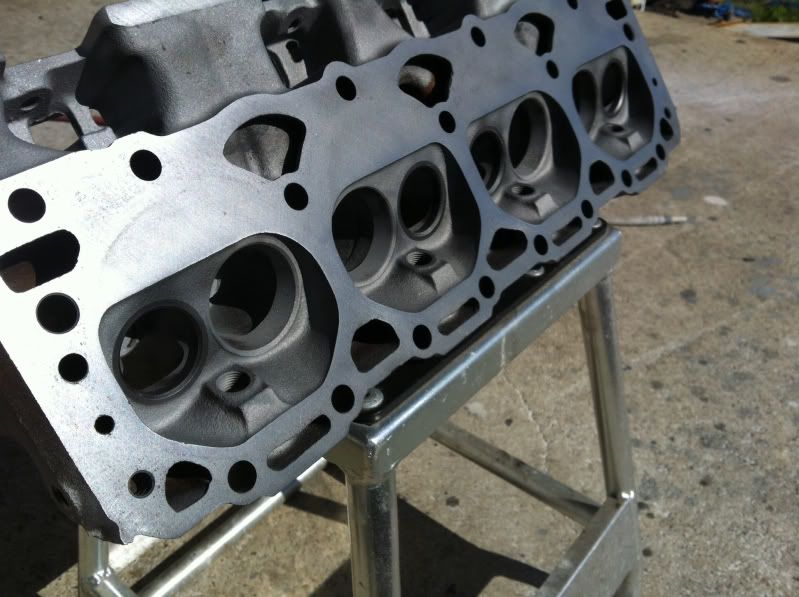 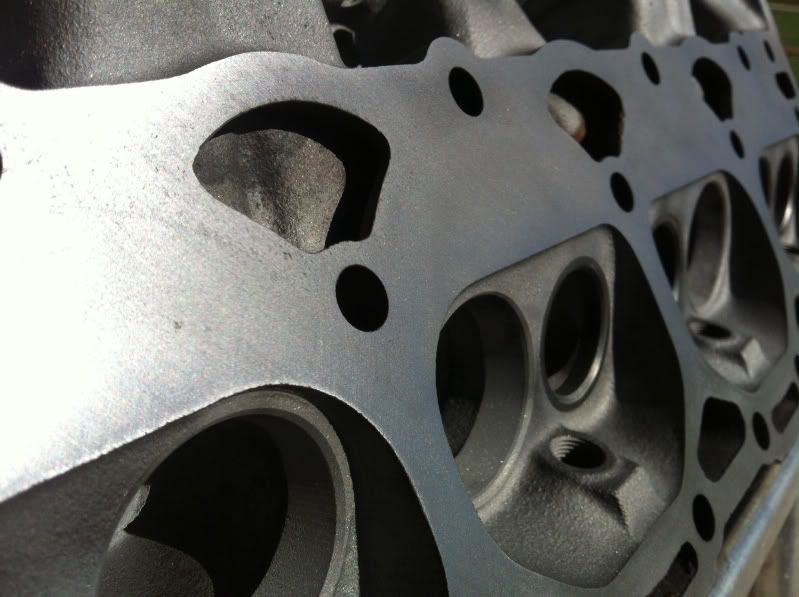 I re-lapped the valves to clean up the sealing surfaces. Exhaust valve before... 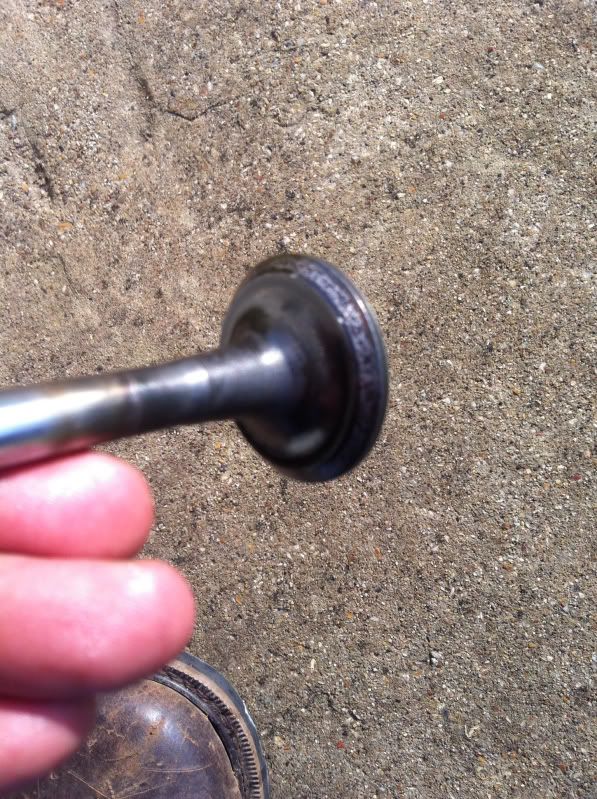 After... 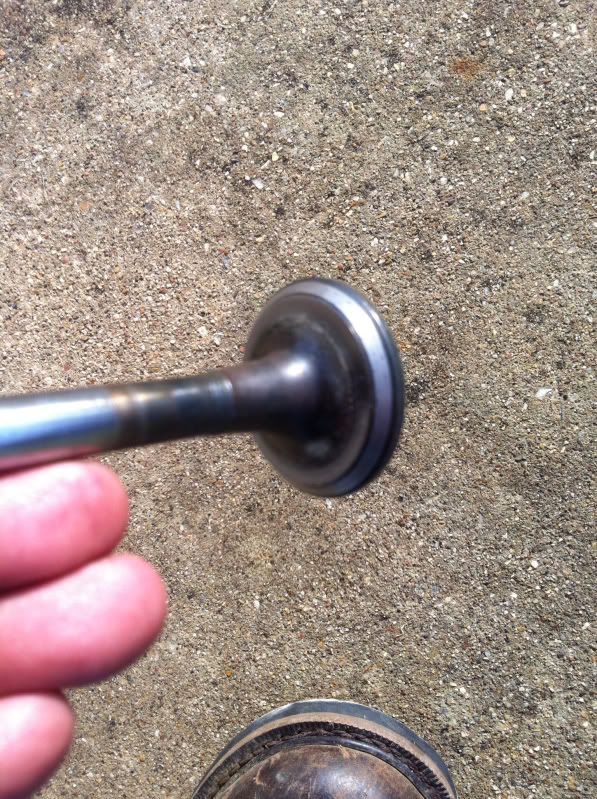 New valve stem seals. I had to special order the exhaust valve seals (not shown) since they use the unusual larger stems. My gasket kit just included the exhaust valve stem seals for light duty applications. 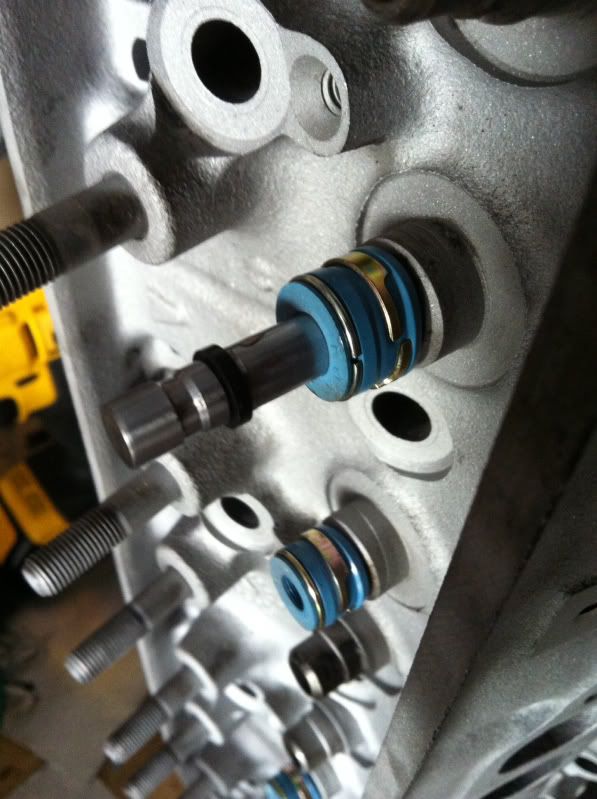 Bottom end all together.... 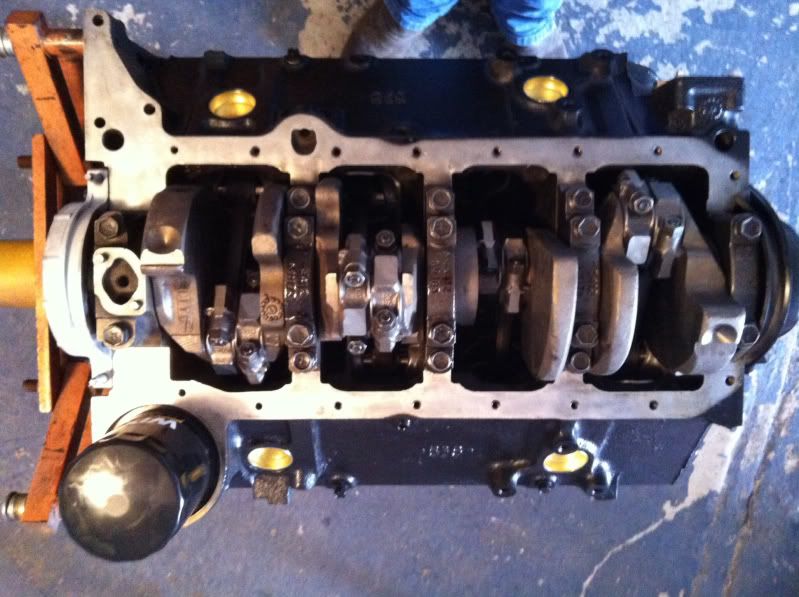 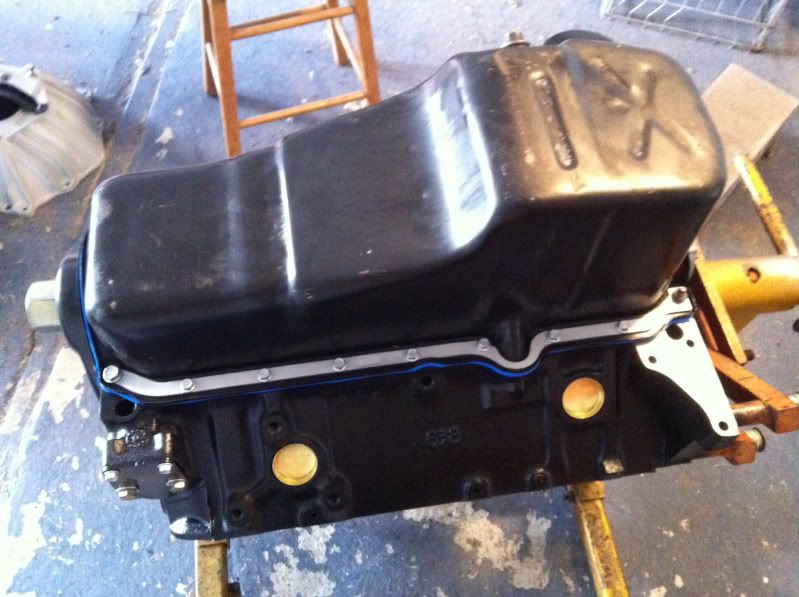
__________________
I'm on the Instagram- @Gearhead_Kevin Last edited by Tx Firefighter; 05-14-2014 at 10:40 AM. |
|
|
|
|
05-14-2014, 07:14 AM
|
#28 |
|
Watch out for your cornhole !
Join Date: Jun 2003
Location: Azle, Texas
Posts: 14,162
|
Re: My Luxurious late model truck (not so much)
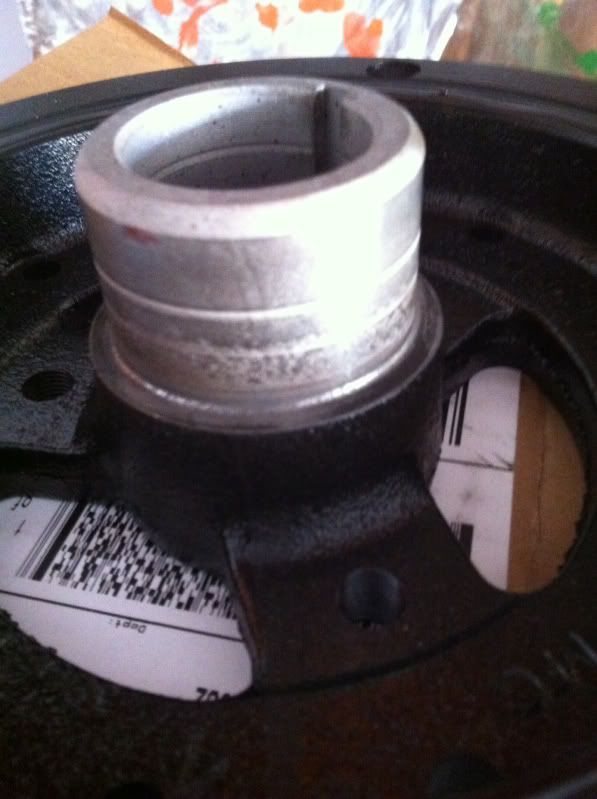
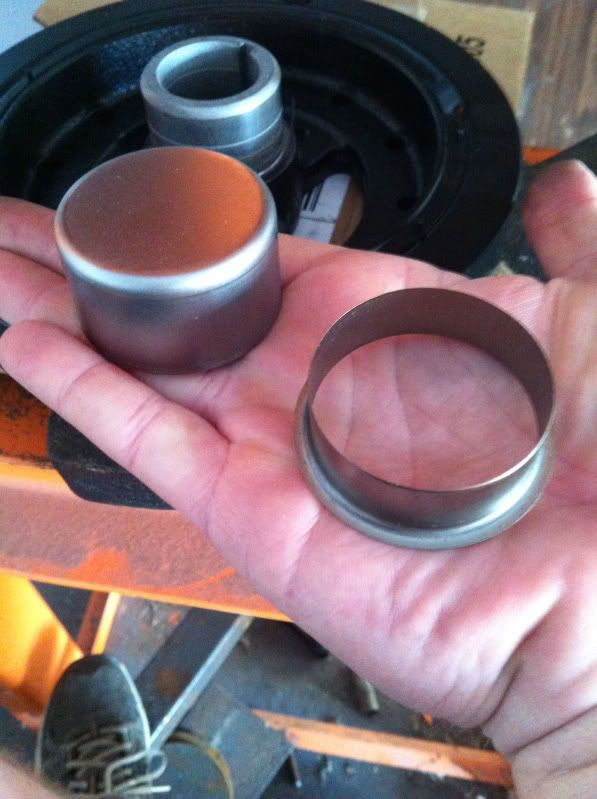
My harmonic balancer was good other than a significant groove where the seals rides. So I bead blasted it and installed a speedi-sleeve.
  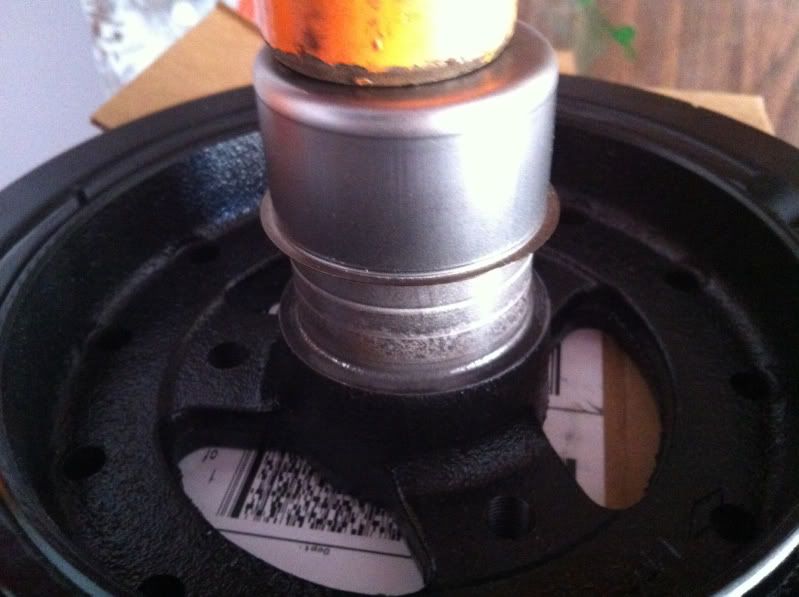 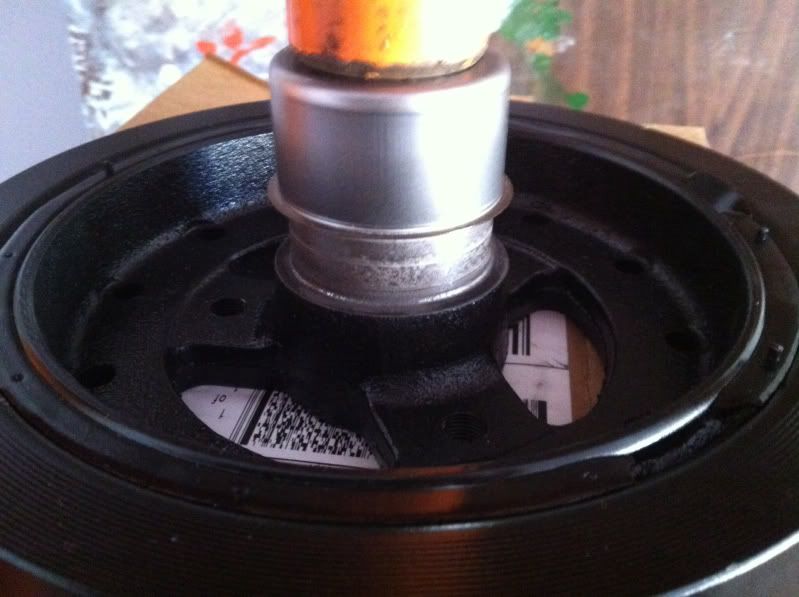 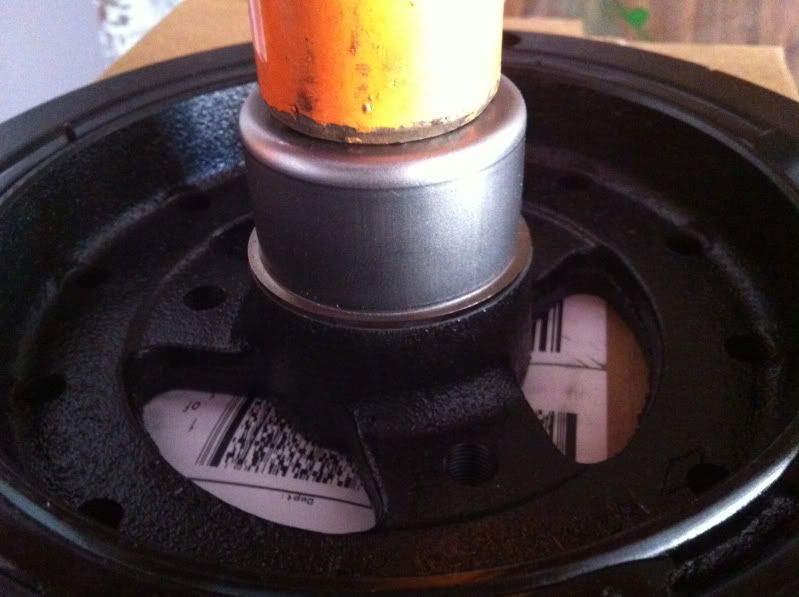 Then, install it properly. I try to buy one specialty tool per job. Last engine I built, I bought a harmonic balancer installer. Something like 30 bucks from Summit. 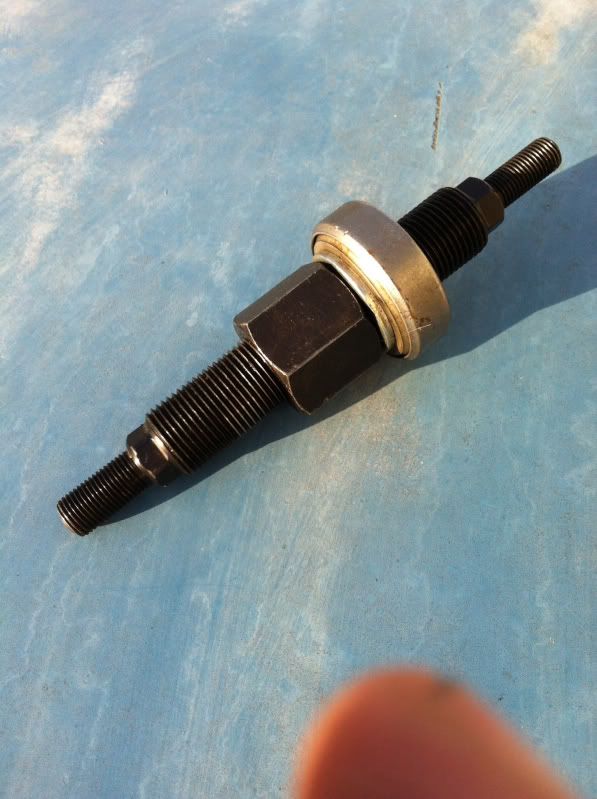 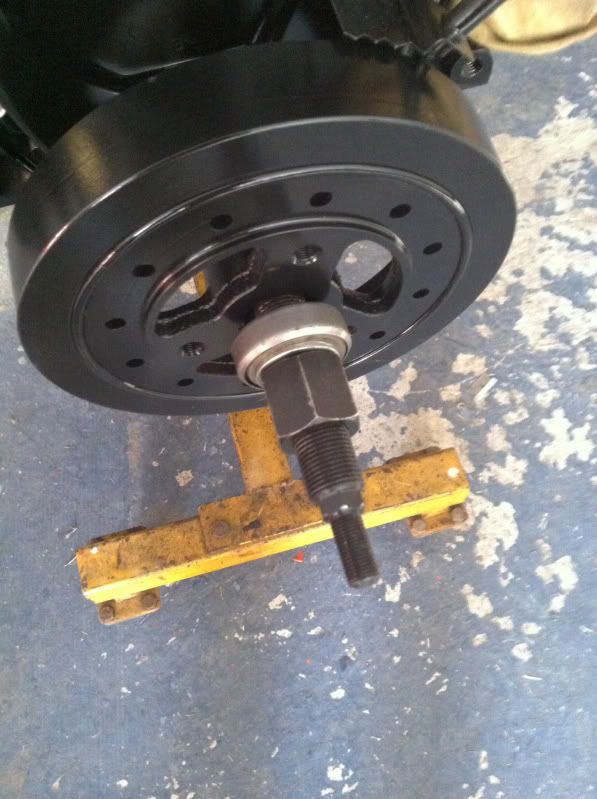 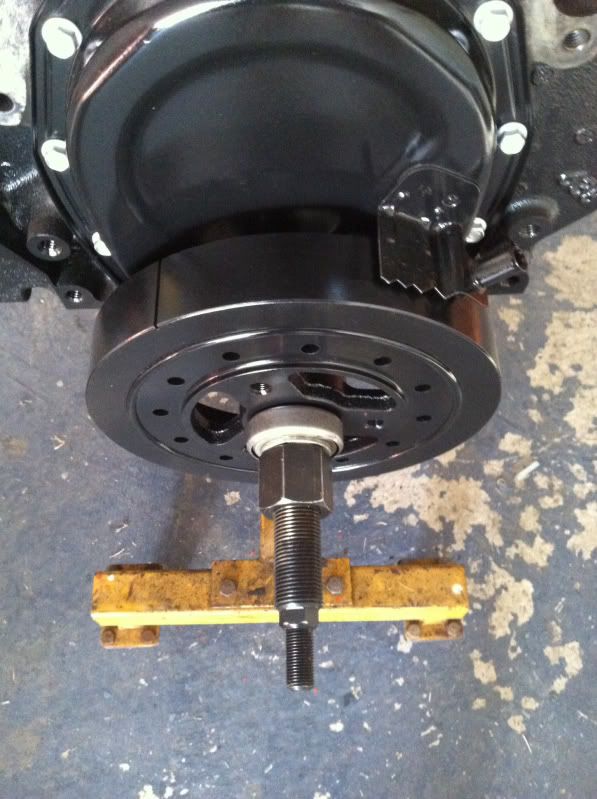 My little shop helper was there every step of the way. Border Collies are some kind of smart. She helped me remember torque specs and tolerances throughout the whole build (when she wasn't busy doing my taxes or programming my VCR). 
__________________
I'm on the Instagram- @Gearhead_Kevin |
|
|
|
|
05-14-2014, 10:00 AM
|
#29 |
|
I'm just glad to be here!
Join Date: Jan 2008
Location: Longview, TX
Posts: 4,788
|
Re: My Luxurious late model truck (not so much)
I need to find me a rebuildable Vortec core engine...I think I would do the same thing here that you did. Just do a basic re-ring/bearing job with attension to the small details and cleaning...
We has a border collie mix for about 14 years. She was a great dog and smart like you say. One of our current dogs is a Red Healer/Korgy mix. Super Smart and Super Loyal! We swear if she could talk, we could have great conversations!
__________________
Karl  1965 Chevy Stepside(Grandpa's Old Blue) and (July 2015 Shop Build!)(2020, the Saga Continues) http://67-72chevytrucks.com/vboard/s...d.php?t=372424 The LST Challenge: http://67-72chevytrucks.com/vboard/s...=1#post7812257 Korbin's 1st Square: "Sunburn" http://67-72chevytrucks.com/vboard/s...d.php?t=418618 1985 GMC Sierra: "White Trash", Korbin's 2nd now... http://67-72chevytrucks.com/vboard/s...d.php?t=632305 Henry - 1984 Chevrolet, Owen's 1st Square |
|
|
|
|
05-14-2014, 10:22 AM
|
#30 |
|
Watch out for your cornhole !
Join Date: Jun 2003
Location: Azle, Texas
Posts: 14,162
|
Re: My Luxurious late model truck (not so much)
My goal on this engine was to pick and choose with what used parts I had on hand and end up with a good runner that didn't need any TBI programming trickery due to being overbuilt. I was afraid if I got too fancy I'd wind up with drivability issues on the stock ECM tune. I did hours of research on the internet machine and the consensus was about 50/50 whether the TBI would tolerate a Vortec cam. In my case, it worked fantastic.
The roller cam is said to add 20 horsepower over an identical flat tappet engine just with the reduced friction, not the cam grind itself. Plus the added security of no break in worries or flattening a lobe issues and never needing zinc additive added to the oil for the rest of it's life. All told, I'm somewhere between 350-400 dollars into the engine build, including the 50 I gave for the used heads up in Oklahoma. I don't expect it to last as long as a properly bored, fresh piston, machined crank rebuild, but it will last plenty long enough. Years ago I built a 350 for a little 72 SWB I had. My neighbor is a GM parts guy and he was there with me every step of the way on that engine build. He called it a "swept the floor motor" because I just used whatever was hidden under the workbench or in old worn out engines I had laying around. I sold that truck to him a short while later and he still drives it today, which is 20 years later. He said it's begun to burn some oil now, but it went for many years without issue, and that bore was loose when I put it together. That was an engine built entirely out of used parts with a 175 dollar Summit rebuild kit and a cheapie Erson camshaft. I probably had less than 250 dollars in the entire deal. Here's the truck. This was all done back in the day before the internet, when I didn't have 1000 folks sitting at computers telling me I was doing it wrong. I'm sure the engine in this project will similarly cause criticism from a few people. That's the single reason I have delayed posting this build thread for so long, because I didn't care to listen to naysayers. There's so many times in life that folks do things that work just fine, but technically, they didn't do it according to the book or standard practices. 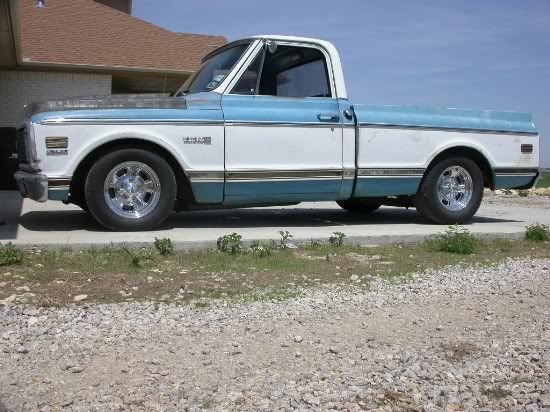 What's that old joke ? Scientists say it's impossible for a bumble bee to fly because it weighs too much for it's little wings. Yet, fly they do. Just don't tell the bumble bee he can't fly and he will be happy doing his thing.
__________________
I'm on the Instagram- @Gearhead_Kevin Last edited by Tx Firefighter; 05-14-2014 at 10:37 AM. |
|
|
|
|
05-14-2014, 08:11 PM
|
#31 |
|
Registered User
Join Date: Sep 2012
Location: Midway, NC
Posts: 3,275
|
Re: My Luxurious late model truck (not so much)
You know I helped my buddy put together a engine together for our enduro car some twelve years ago. It was just a 350 iron headed small block. Nothing super fancy and nothing trick. It was put in that old car and ran for 100s of laps in stop and go racing action. The motor is solid. It wasn't bored or any machine work done to it. Just a simple rebuild. The motor still runs to this day with no smoke. It's hard to beat a basic run of the mill engine that does it's job and does it well. Killer write up Kevin. Thanks for posting up the info.
__________________
http://67-72chevytrucks.com/vboard/s...d.php?t=581873 The low buck build threads. Check'em out! http://67-72chevytrucks.com/vboard/s...d.php?t=666022 My build thread Crossmembers CC |
|
|
|
|
05-14-2014, 08:26 PM
|
#32 |
|
Watch out for your cornhole !
Join Date: Jun 2003
Location: Azle, Texas
Posts: 14,162
|
Re: My Luxurious late model truck (not so much)
This build will take off somewhat as time goes on. I've been fortunate to find some nice parts for good deals by dogging Craigslist religiously. I haven't had any real compass to guide me, just scoring good deals on parts when they show up. It seems like when you're building something and you get set on finding a particular piece that you usually wind up overpaying and not getting the best example too. Only when you relax and back off do you find good deals and great parts.
Tomorrow I go to see my dealership buddy and pick up some parts I've ordered last week. I got some big stuff at home to put on the truck but I needed a bunch of little detail stuff to do it.
__________________
I'm on the Instagram- @Gearhead_Kevin |
|
|
|
|
05-15-2014, 12:44 AM
|
#33 |
|
Registered User
Join Date: Dec 2011
Location: Creighton Sask. Canada
Posts: 4,121
|
Re: My Luxurious late model truck (not so much)
Doing a great job, coming together nicely. Will be nice to hear it run, cool price too.
__________________
1987 Green n Green machine. 5.0 4spd std. 7" lift w 35's. |
|
|
|
|
05-15-2014, 03:23 AM
|
#34 |
|
Registered User
Join Date: May 2011
Location: Fort Worth, Tx
Posts: 63
|
Re: My Luxurious late model truck (not so much)
I have a HD bumper I pulled off my 90 that is in pretty good shape. We could probably work something out on it and I'm right down the road.
|
|
|
|
|
05-15-2014, 10:27 AM
|
#35 | |
|
Registered User
Join Date: Sep 2009
Location: Beaverton, OR from WA State
Posts: 1,515
|
Re: My Luxurious late model truck (not so much)
Quote:
  Woo-hoo! My experience is lacking in a few ways, one of which is engine building/assembling. I really appreciate the pictures and explanation behind your engine build. As always, I look forward to your thread updates. I always learn something, be it a process, a tip/trick, or just good advice. Woo-hoo! My experience is lacking in a few ways, one of which is engine building/assembling. I really appreciate the pictures and explanation behind your engine build. As always, I look forward to your thread updates. I always learn something, be it a process, a tip/trick, or just good advice.Craigslist is indeed funny that way. Wasn't even thinking about them the other day and I stumbled across a set of Firestone Ride-Rite bags for the flatbed, whole kit off a '94 just a couple years old. Cha-ching, mine!
__________________
Devin 1983 GMC High Sierra 2500, 4x4, RC/LB, 400 S.B., SM-465, NP-208, Corporate 10 bolt & 9.5" 14 bolt 1996 GMC Sierra SLE 3500 DRW, 4x4, EC/LB, Vortec 454, NV-4500, BW-4401, AAM 925 & AAM 1050 1997 GMC Sierra SLT 1500 4x4, Z71/F44, EC/SB, Vortec 350 My Introduction with my '83s History New Daily, the '96 |
|
|
|
|
|
05-17-2014, 06:58 AM
|
#36 |
|
Watch out for your cornhole !
Join Date: Jun 2003
Location: Azle, Texas
Posts: 14,162
|
Re: My Luxurious late model truck (not so much)
Now that I had the engine assembled it was time to tend to the engine compartment and engine accesories before installation.
First thing I noticed about the truck, even before I bought it, was that the fan clutch was seized up. I haven't ever seen one completely seized like this one. With the engine off you could grab the fan with your hand and turn the engine over. So, I cleaned up and powdercoated the fan. 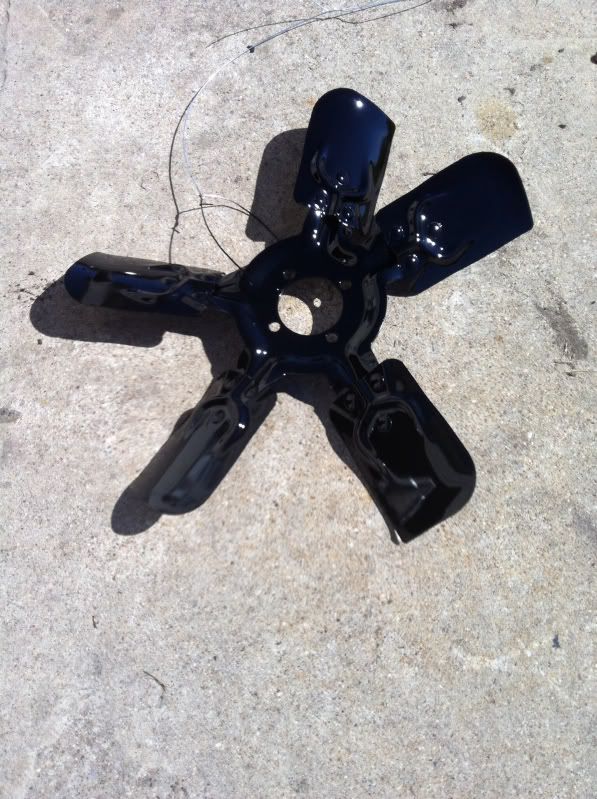 New Heavy Duty Hayden fan clutch. 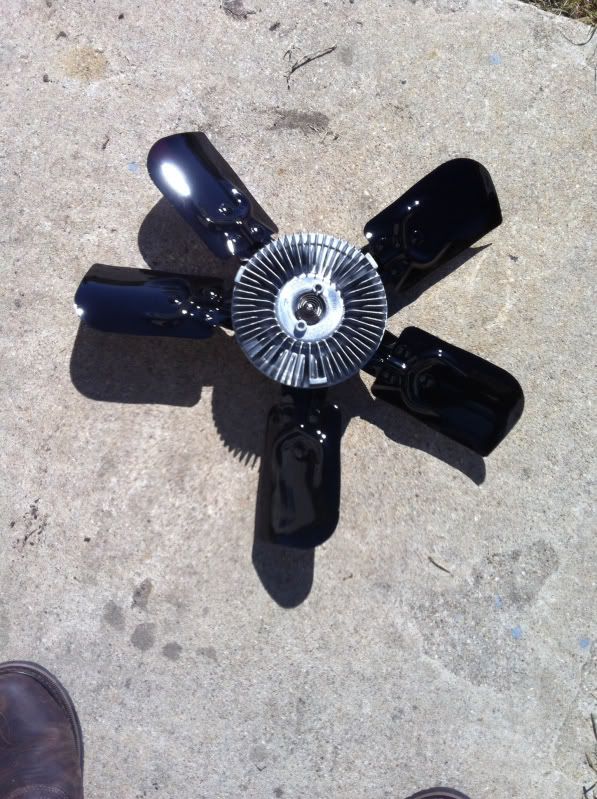 The knock sensor was broken for some reason so I had to get a new one. Rockauto takes a lot of the pain out of buying Delco quality parts. 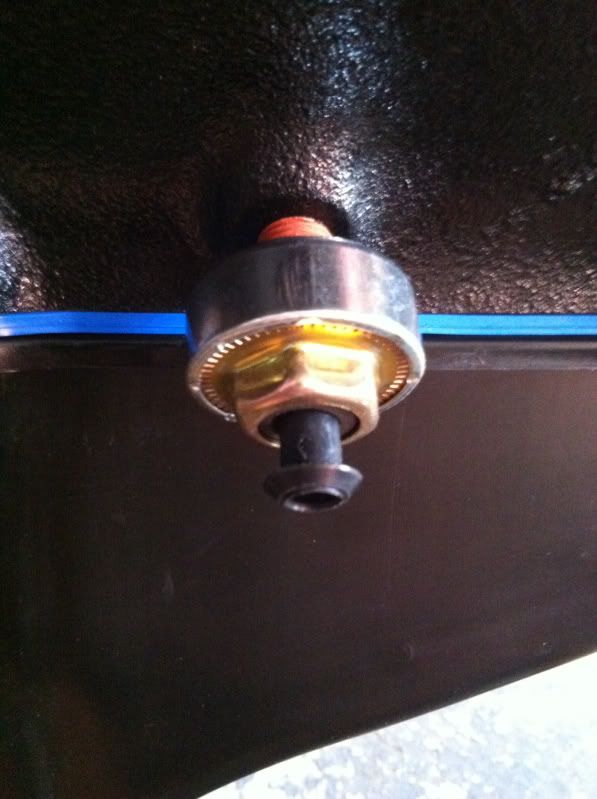 I cleaned and powdercoated the stock intake manifold. Good thing I spent some time on it, the EGR passages were completely clogged with carbon. Various bits cleaned up and installed... 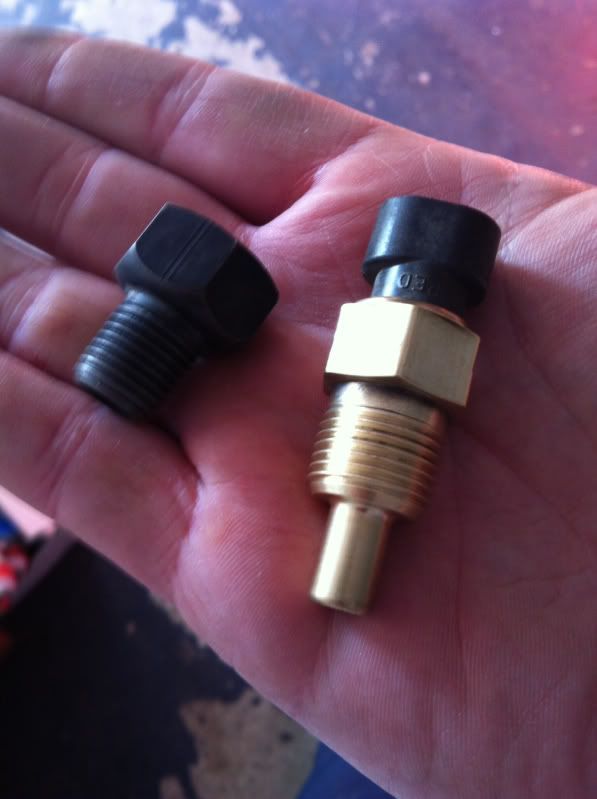 I like to use teflon paste rather than teflon tape. 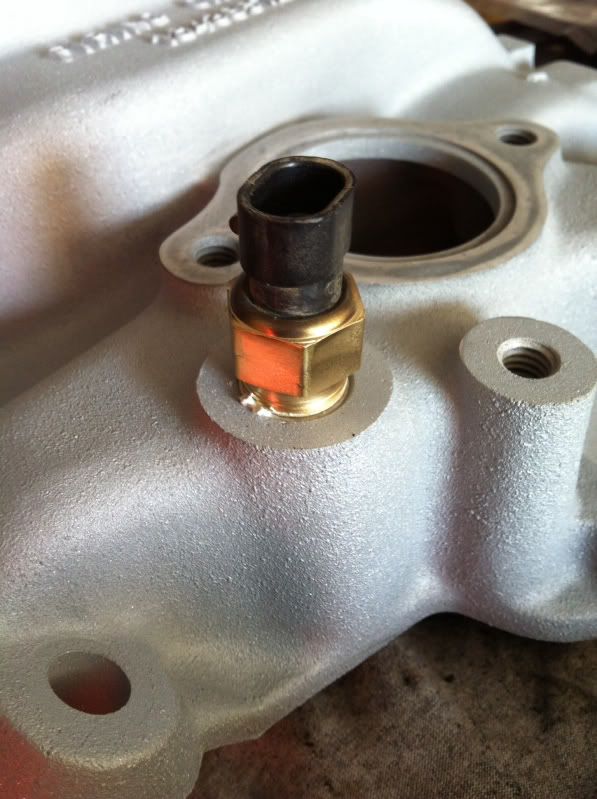 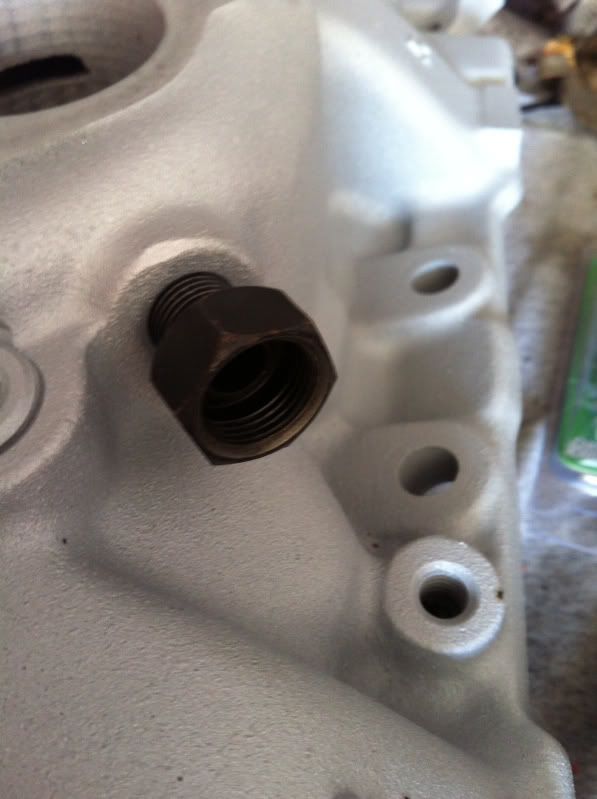 These trucks have a very brittle quick connect for the heater hose on the back of the manifold which seem the break regularly and cause heartache so I changed over to the better aftermarket replacement. No better time than right now rather the beside the road sometime. 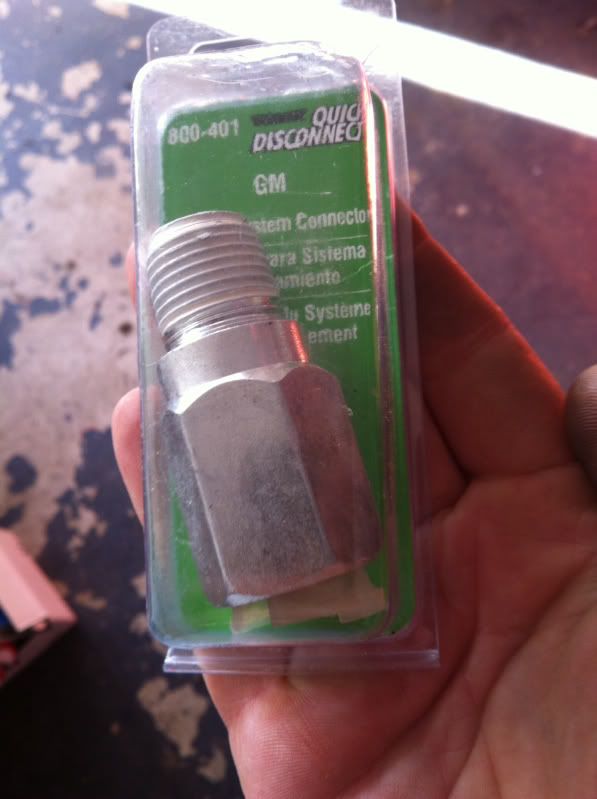 These are the only thermostat gaskets to buy. They're multi layer and reuseable many times. No sealer, no silicone, no mess, no leaks. Since I started using these some years ago I have never had an issue with leaky thermostat housings. 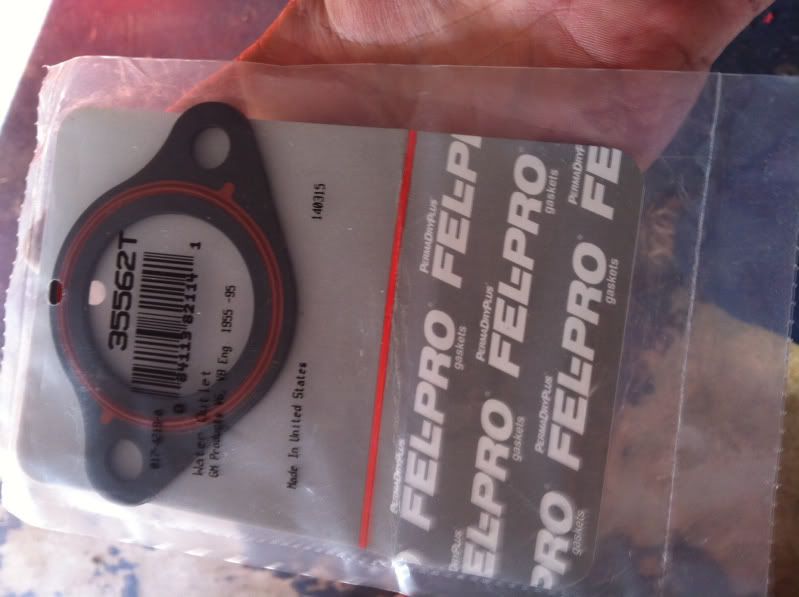 New thermostat. 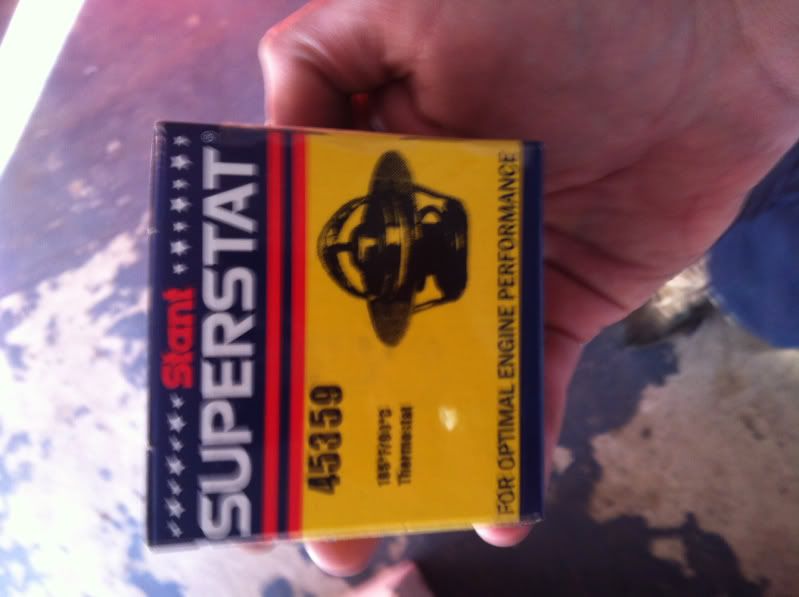 I always drill little bleed holes in my thermostats. It alleviates getting air locks when filling with coolant. 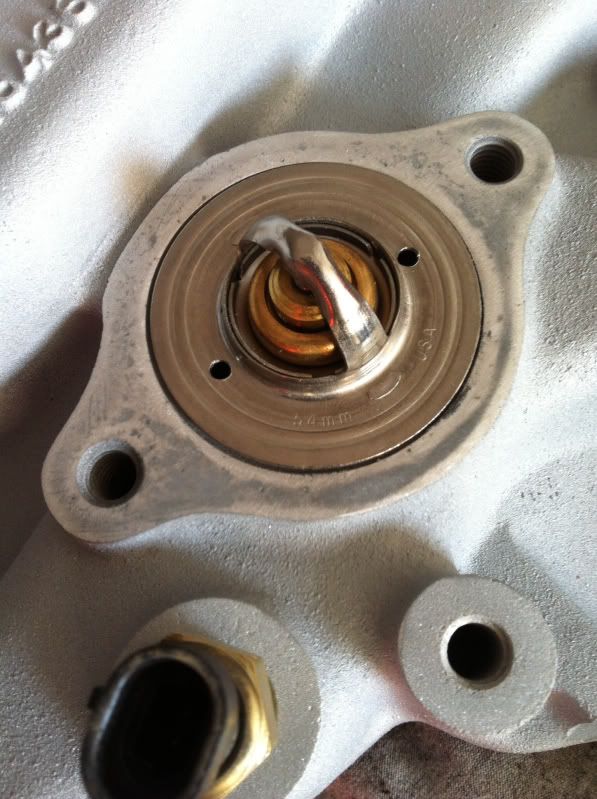 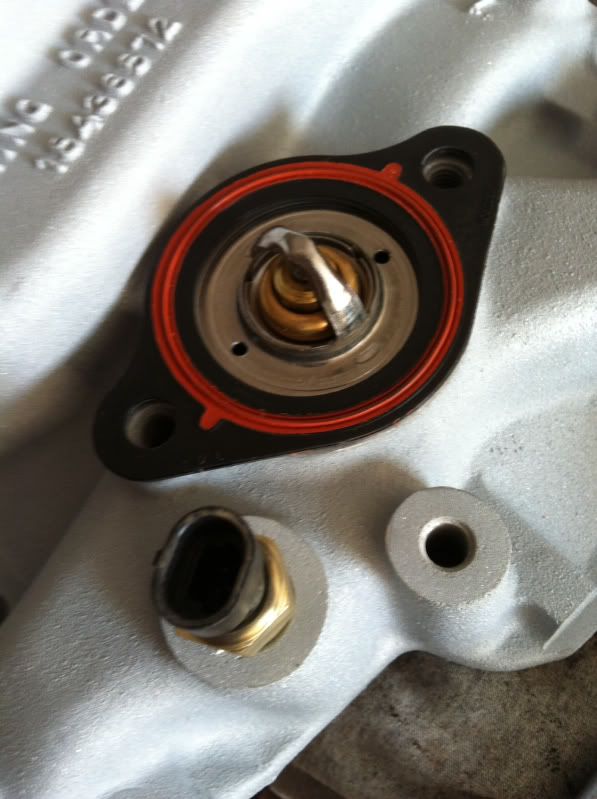 Always use anti-seize on your thermostat bolts. It avoids future heartaches. How many threads have we seen on here from guys with broken off thermostat housing bolts ? A ton, that's how many. 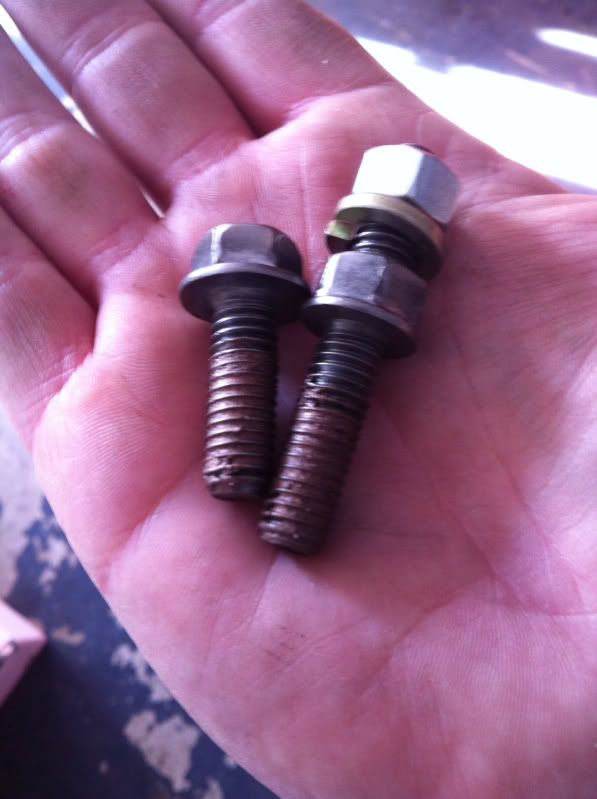 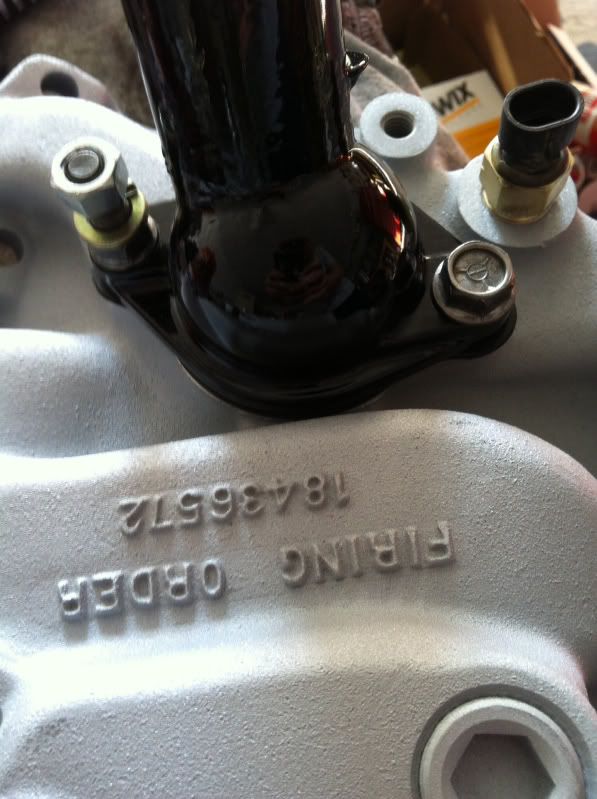 EGR valve hardware. 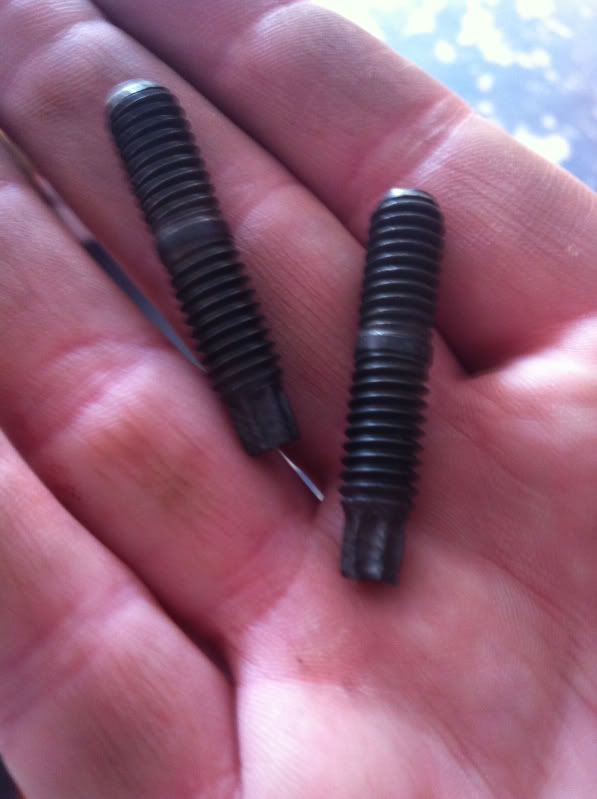  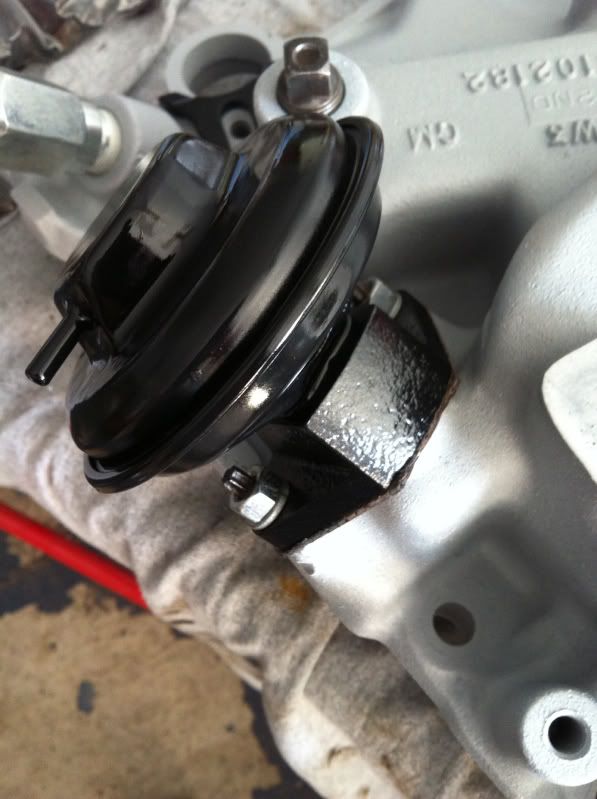 A note here. My thermostat housing was somewhat heavily pitted on the bottom flange and I didn't want to pony up the cash for a new one so I powdercoated it heavily, then filed it flat, using the powdercoat as filler for the pits. Then one final finish coat of powdercoat. 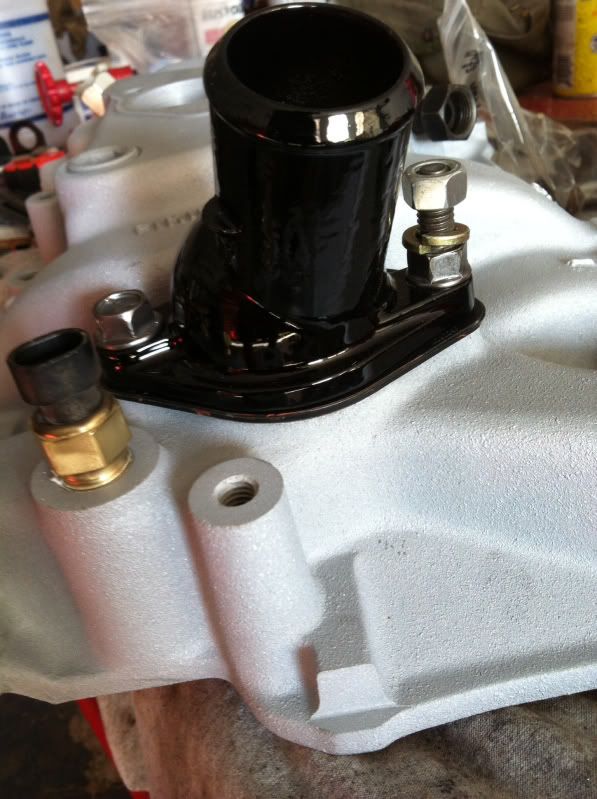 That heater hose fitting I was talking about earlier. It comes with sealant on the threads, just open it up and screw it in place. 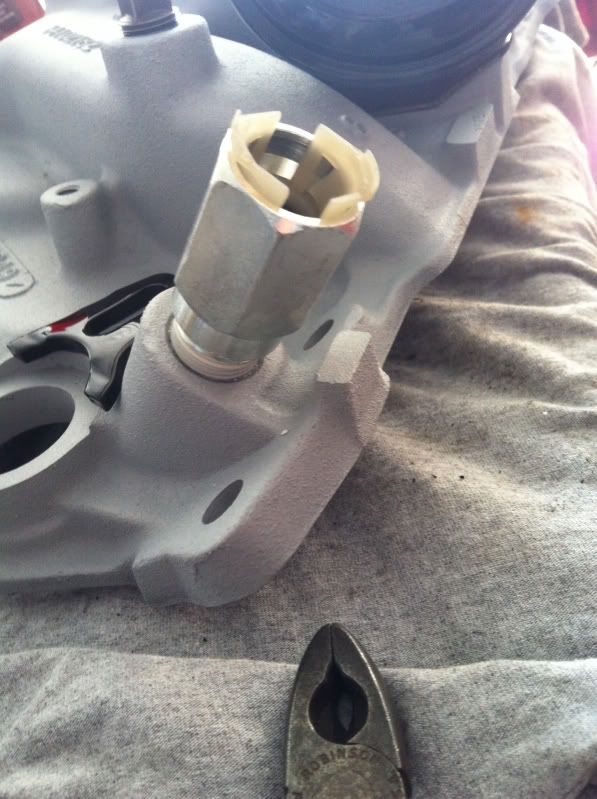
__________________
I'm on the Instagram- @Gearhead_Kevin Last edited by Tx Firefighter; 05-17-2014 at 12:09 PM. |
|
|
|
|
05-17-2014, 07:14 AM
|
#37 |
|
Watch out for your cornhole !
Join Date: Jun 2003
Location: Azle, Texas
Posts: 14,162
|
Re: My Luxurious late model truck (not so much)
Next sub project was the heater hose. I like stuff all routed like original so I wanted to spend some time here and get it right rather than using plain hose or something.
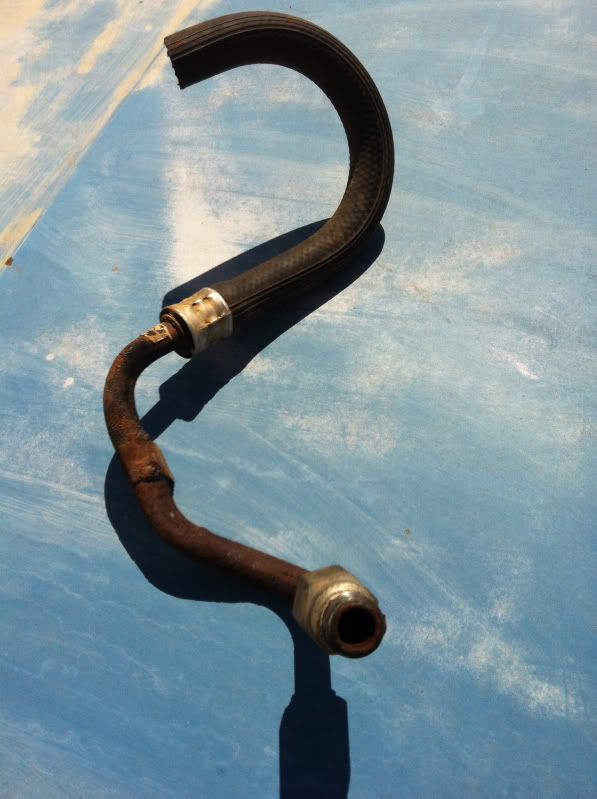 The old quick connect. 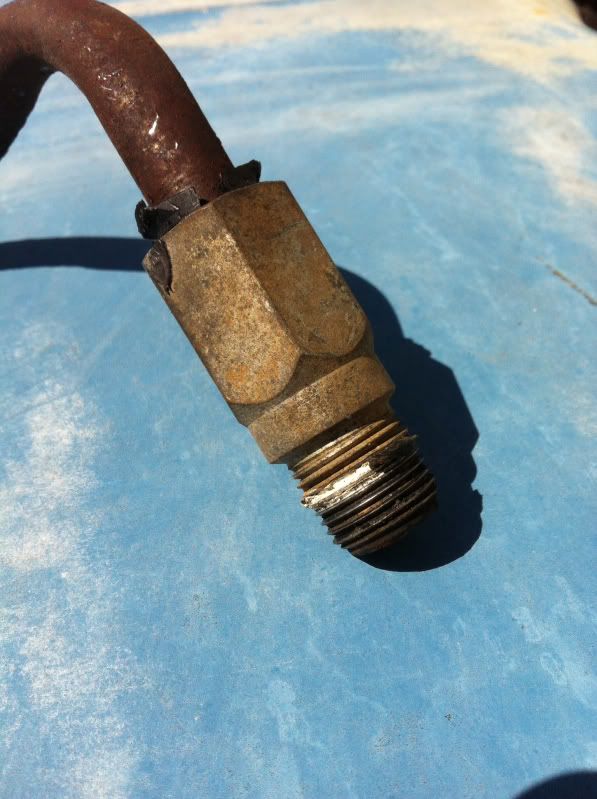 Slit the factory crimp band with a grinder. 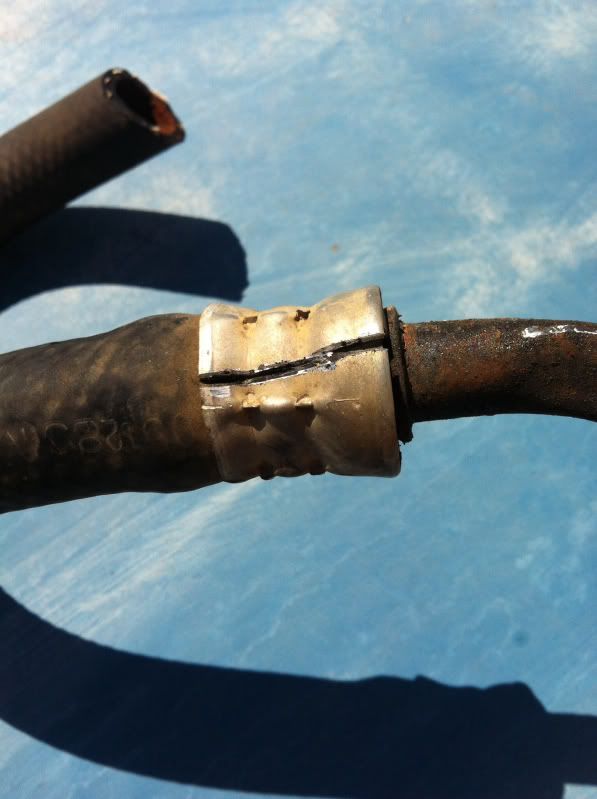 Take all this junk off and throw it away. 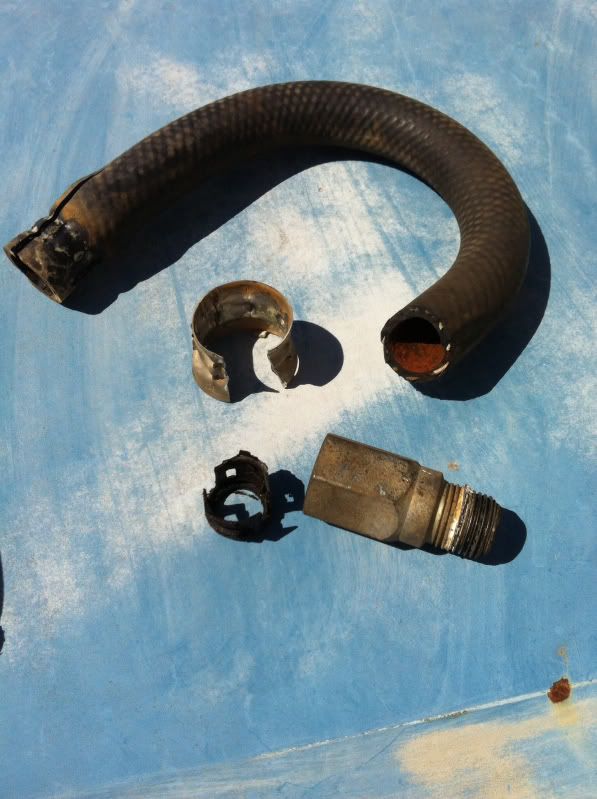 You're left with the pipe itself. Corroded and gunky. 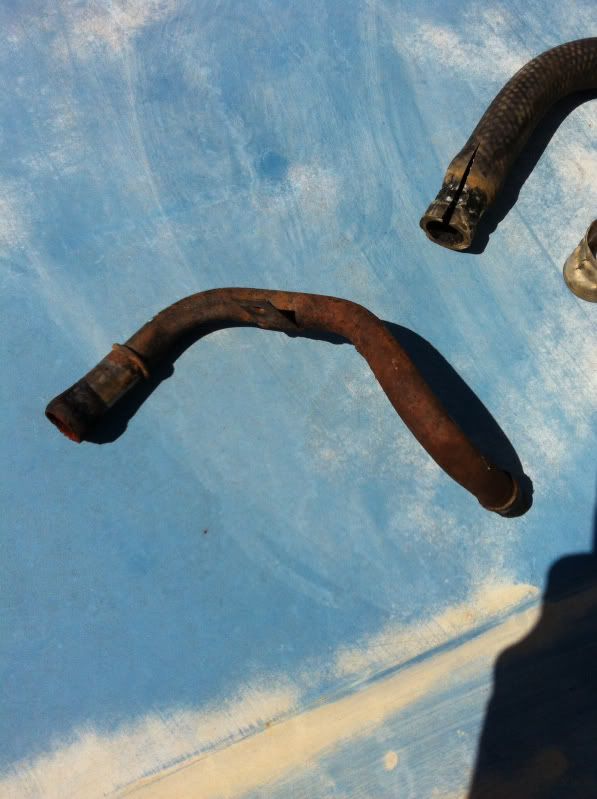 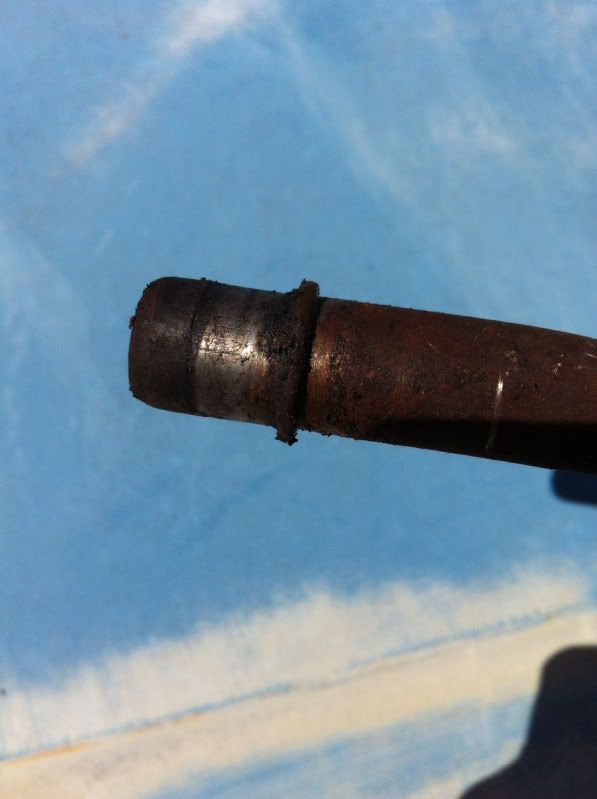 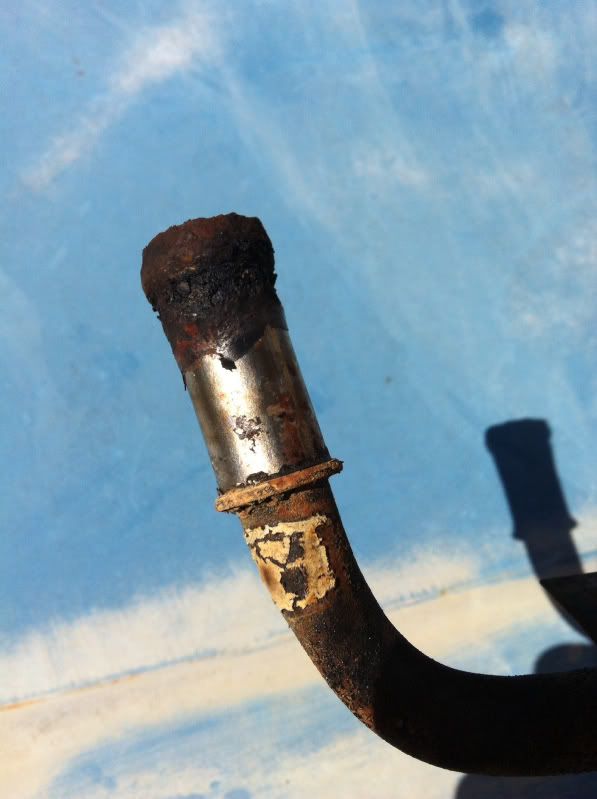 Now, clean that mess up and paint it. 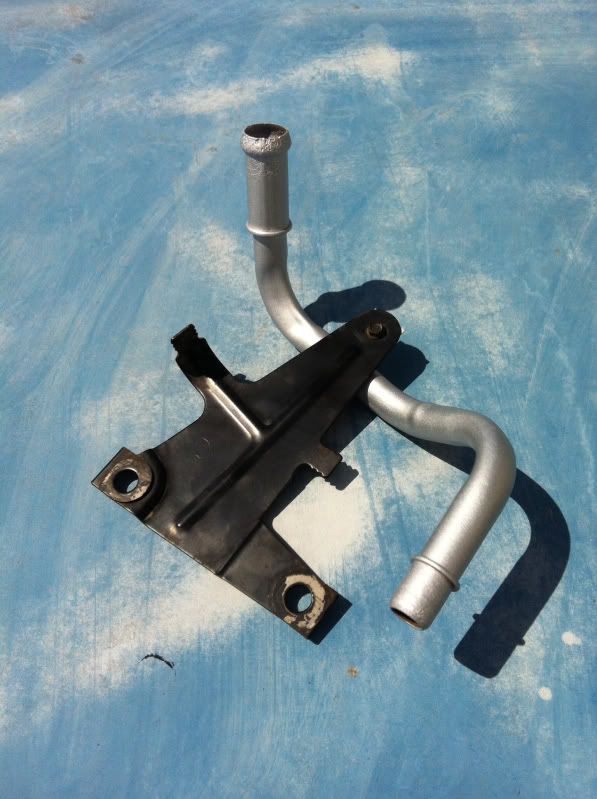 Various other little bits cleaned up, detailed, and powdercoated. 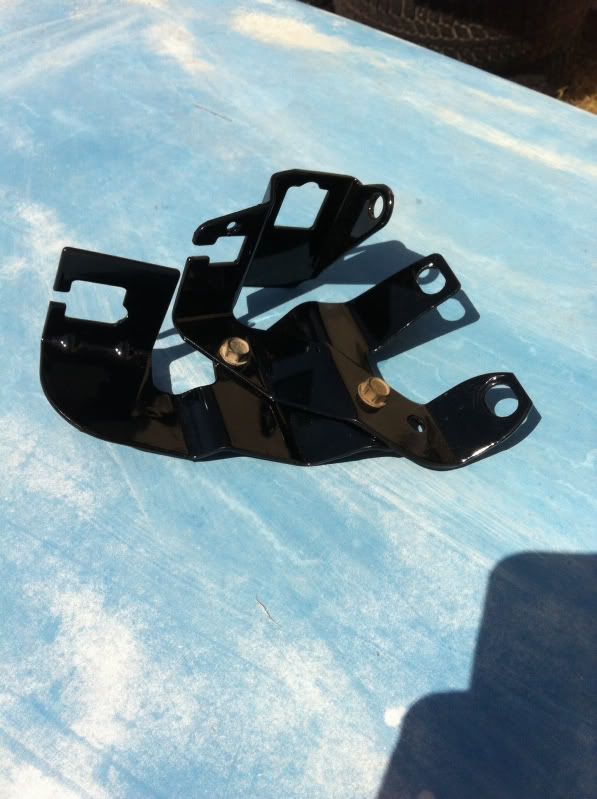 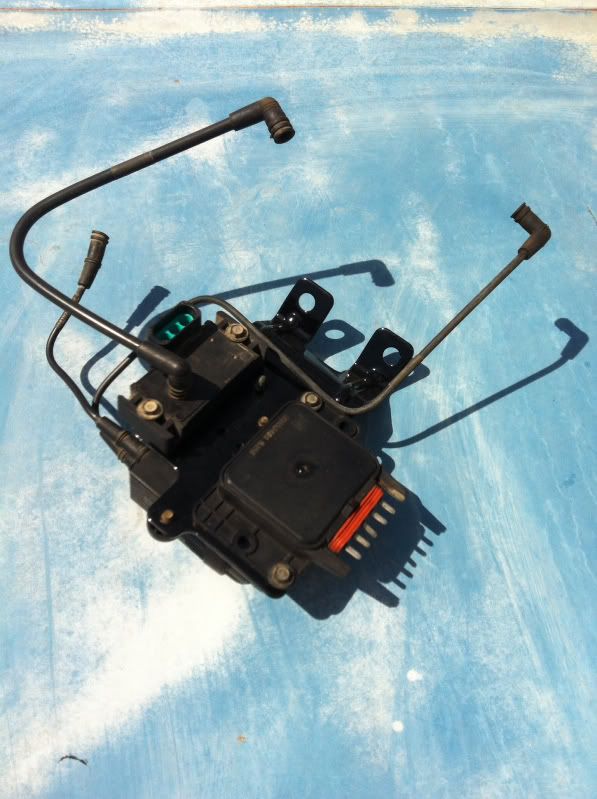 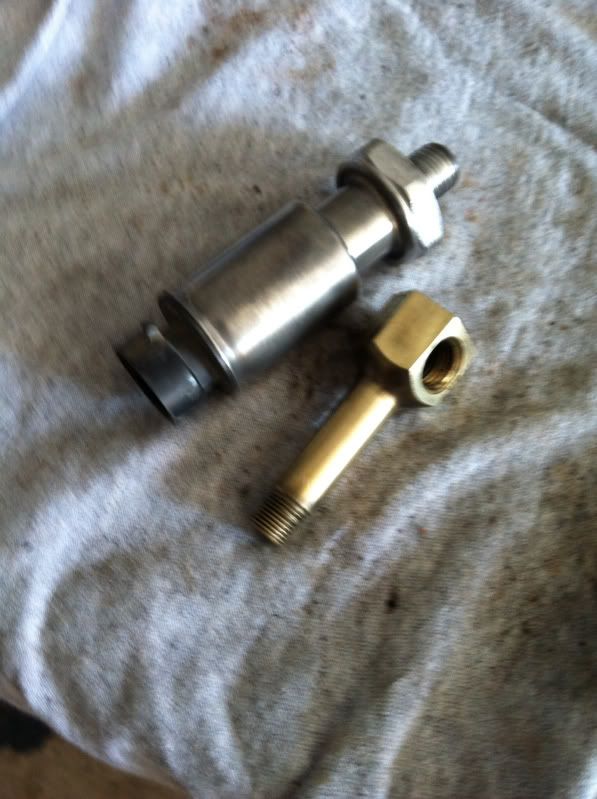 Begin the laborious process of degreasing and pressure washing the engine compartment. 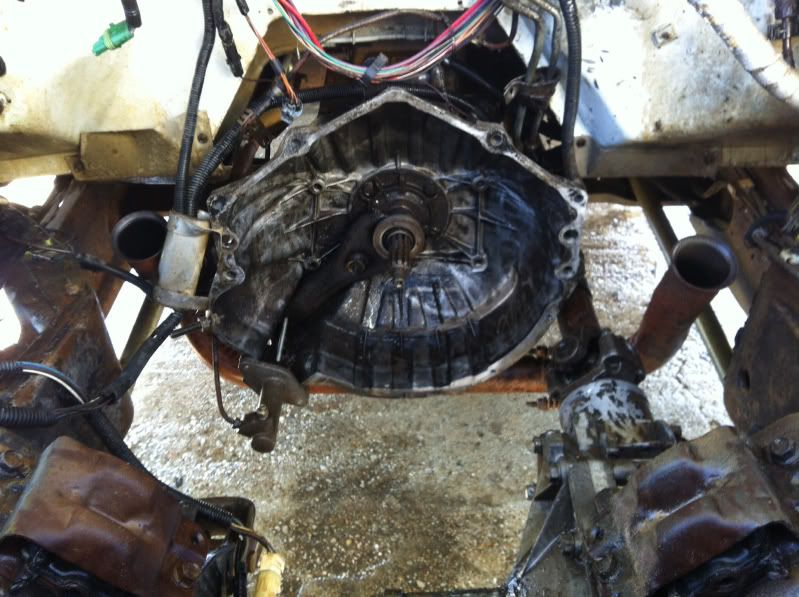 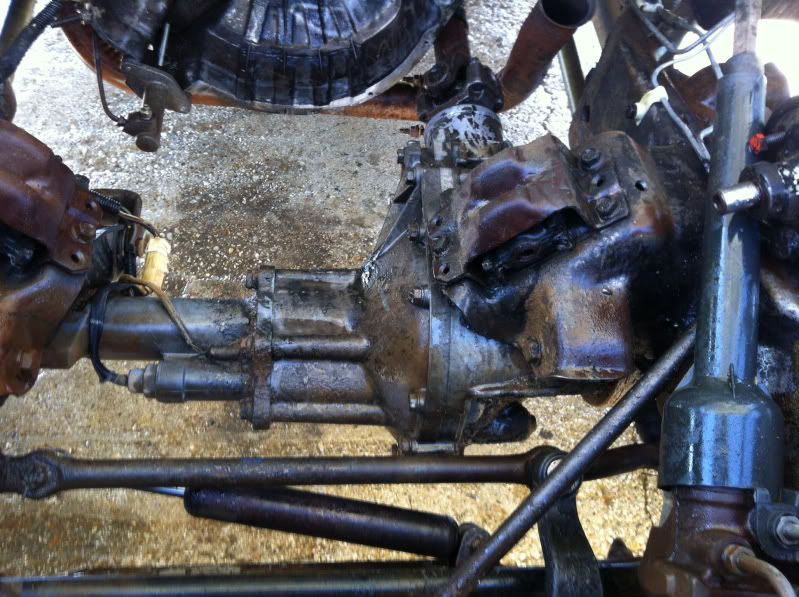 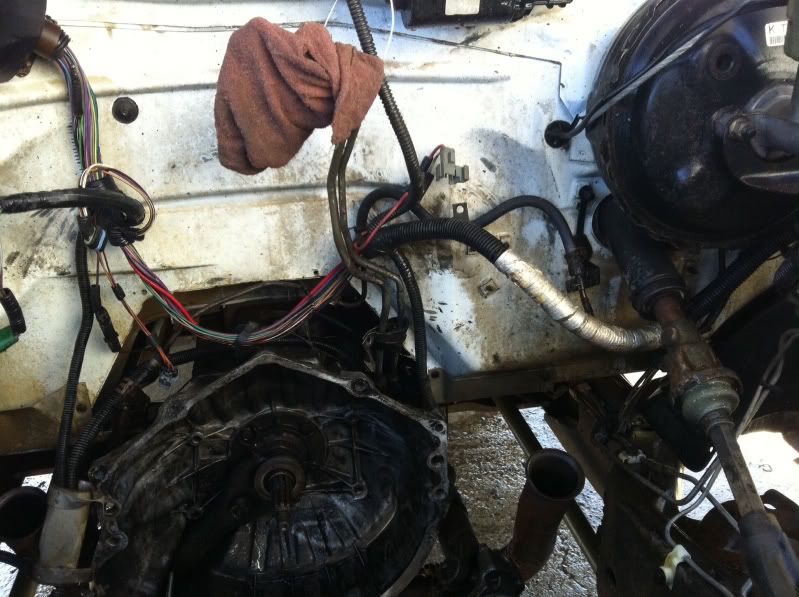 Personally, I always change engine mounts on the trucks I build. These had 200k miles on them and new ones were less than 15 dollars for the pair. Changing them was not fun. I had to wind up dropping the entire front differential housing down from the truck to get access to the nuts on the bottom.  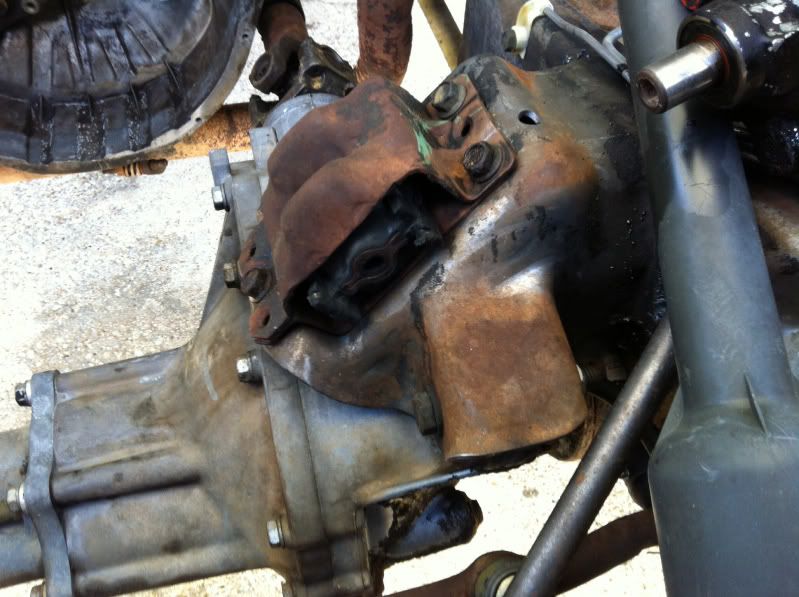 Some grease was hidden behind the old mounts. I can't sleep at night with that. 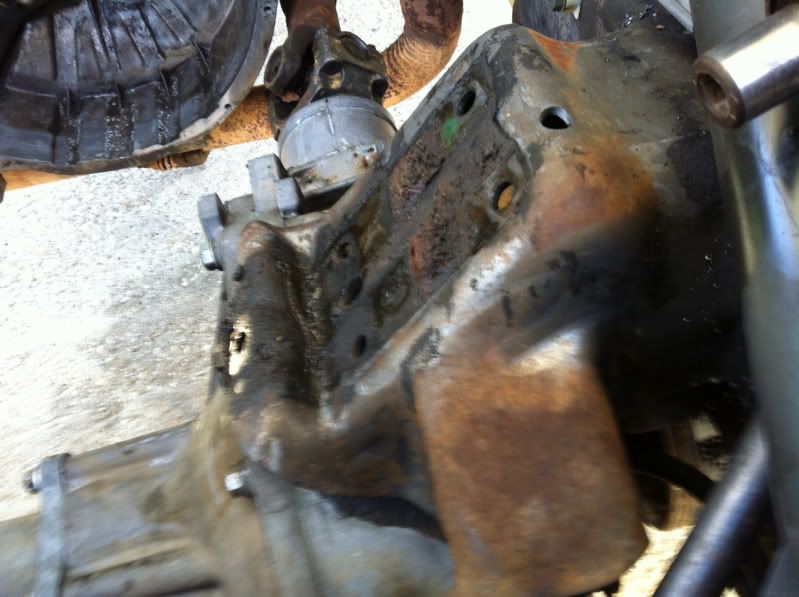  New versus old.  Cleaned and shot with a quick coat of paint .  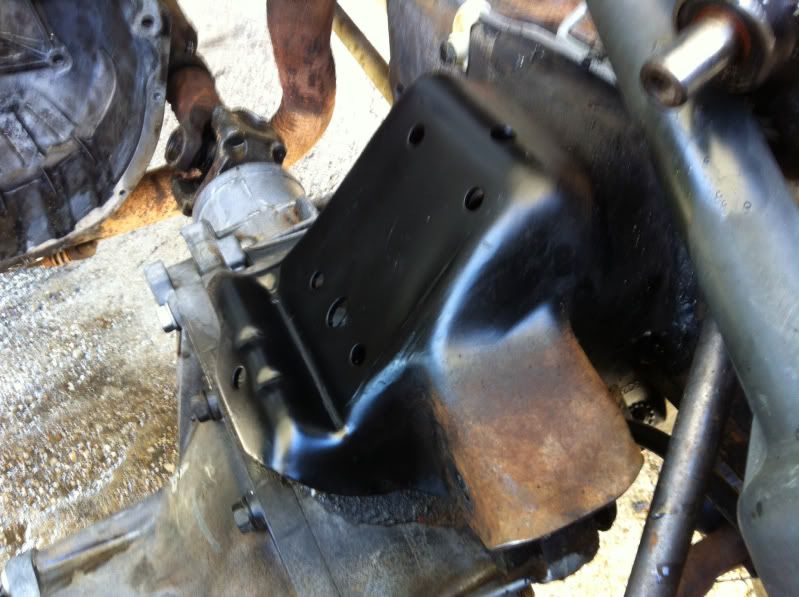 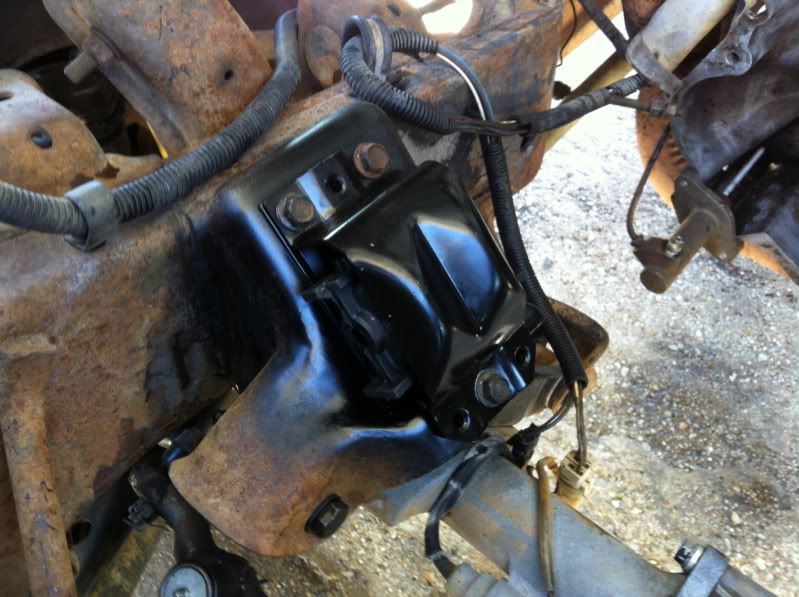 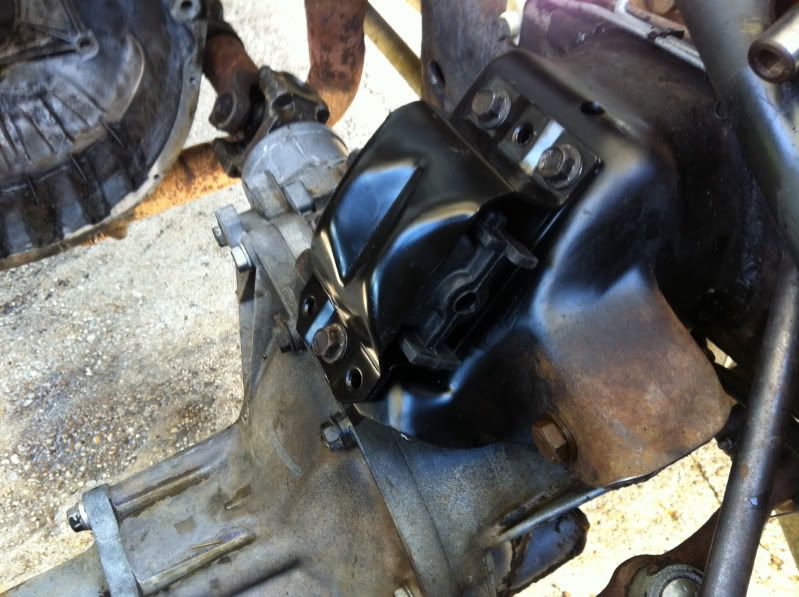 The flywheel looked pretty ugly so I had my local place machine it for me. 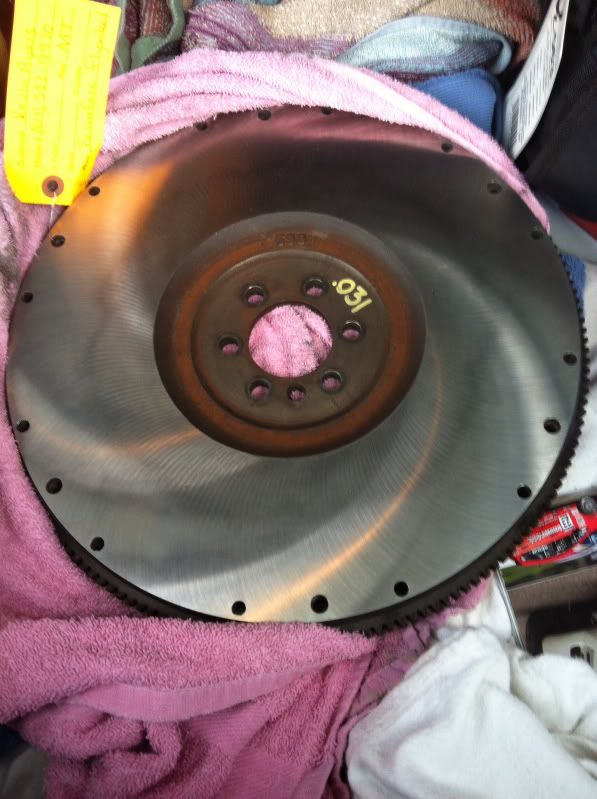 It's important to use a shim between the flywheel and crankshaft to compensate for the thickness that was removed off of the flywheel. 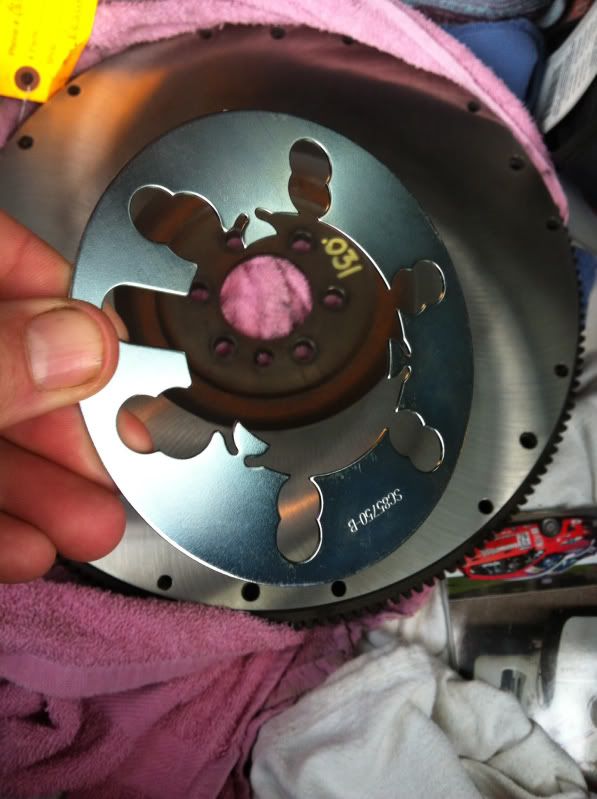 These guys work cheap. That's the out the door total for machining and the shim both. 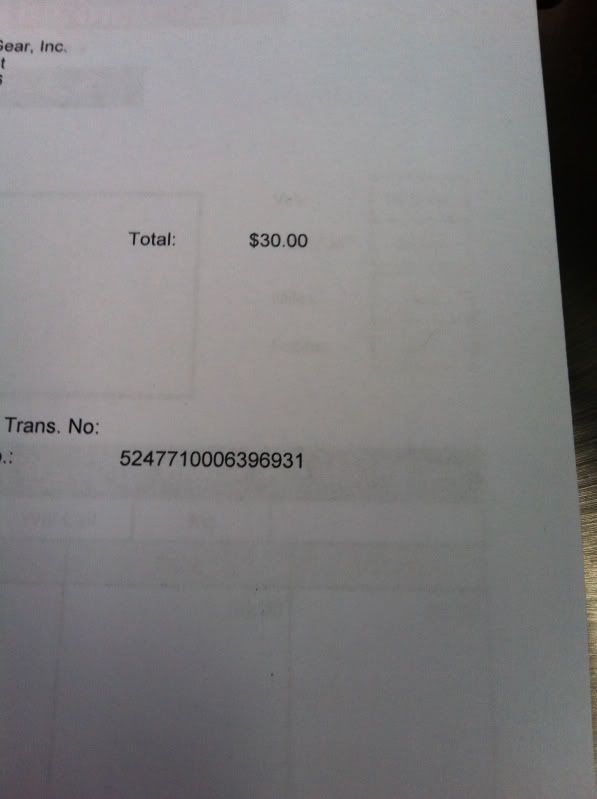 Various other bits cleaned and powdercoated. 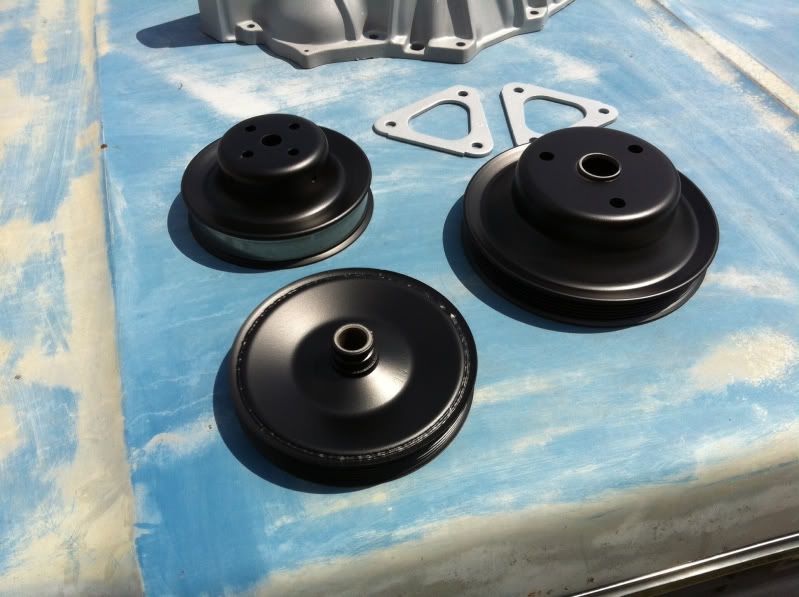 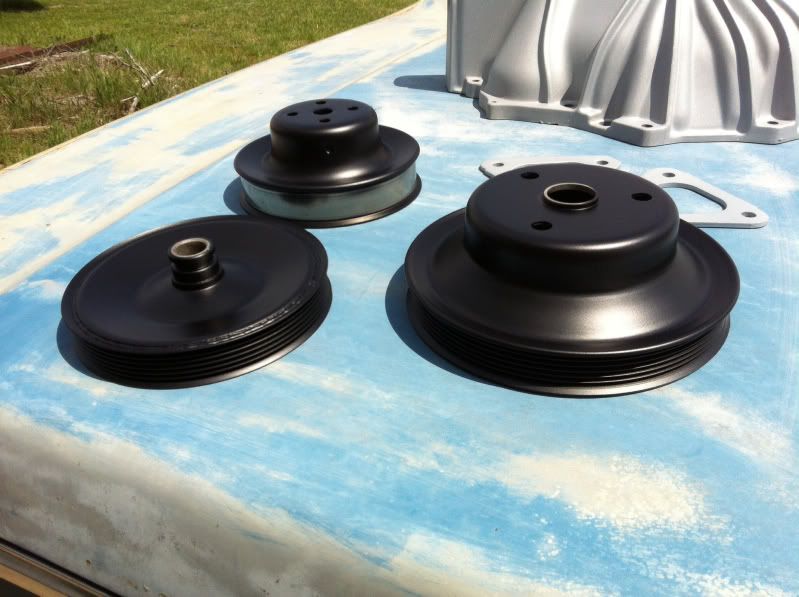 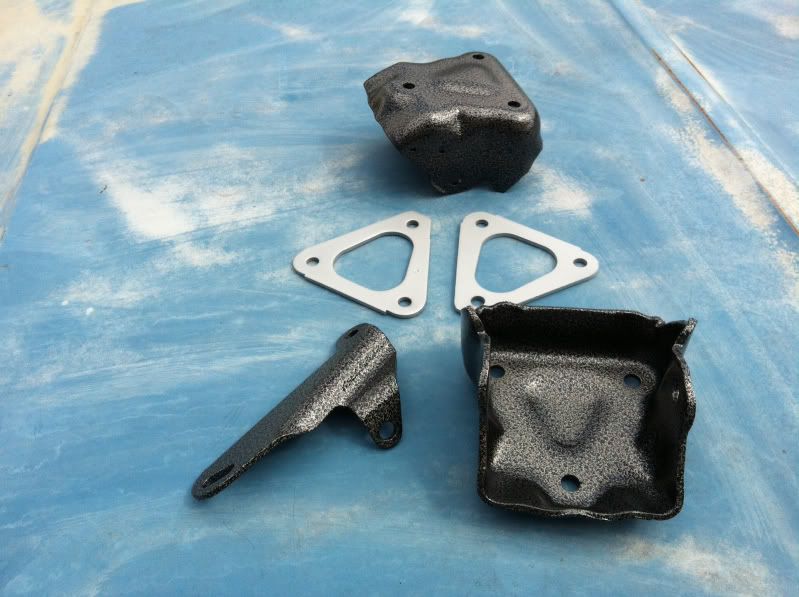 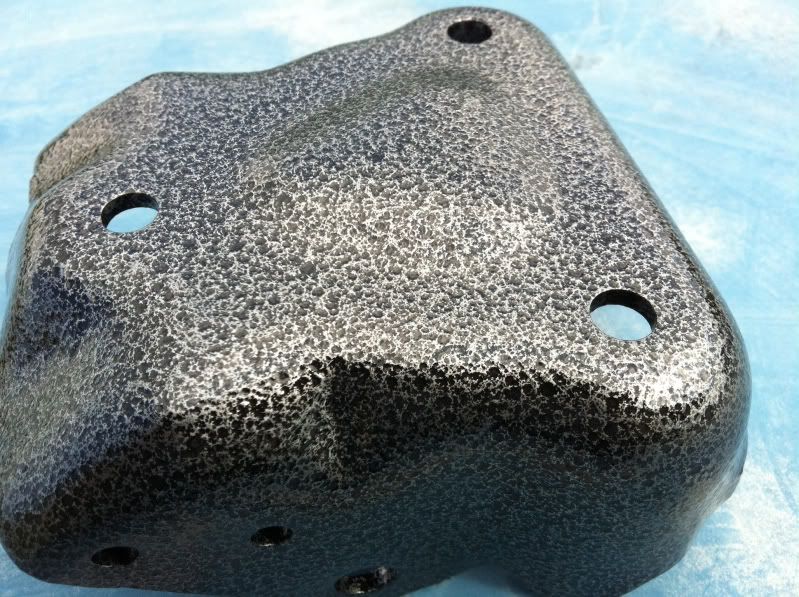
__________________
I'm on the Instagram- @Gearhead_Kevin |
|
|
|
|
05-17-2014, 07:18 AM
|
#38 |
|
Registered User
Join Date: May 2011
Location: Fort Worth, Tx
Posts: 63
|
Re: My Luxurious late model truck (not so much)
Once again man I love how detail oriented you are on your builds.
|
|
|
|
|
05-17-2014, 08:21 AM
|
#39 |
|
Registered User
Join Date: Oct 2009
Location: canton ga
Posts: 12,729
|
Re: My Luxurious late model truck (not so much)
Very nicely done as always .
|
|
|
|
|
05-17-2014, 11:35 AM
|
#40 |
|
Registered User
Join Date: Sep 2009
Location: Beaverton, OR from WA State
Posts: 1,515
|
Re: My Luxurious late model truck (not so much)
Those freshly coated parts look so goooood. How easy are they to keep clean? Thinking of any dust, fluid vapors or splashes incurred in driving or maintaining.
I have one of those (rarer) GMT-400 SM-465 bellhousings stashed and it looks like crapola compared to the one I see behind your motor mounts. What do you do for aluminum, sand/soda & clear? I might need to scope out the motor mounts on my '96, it has almost 260k with a 454 riding on them. Good to know they're affordable.
__________________
Devin 1983 GMC High Sierra 2500, 4x4, RC/LB, 400 S.B., SM-465, NP-208, Corporate 10 bolt & 9.5" 14 bolt 1996 GMC Sierra SLE 3500 DRW, 4x4, EC/LB, Vortec 454, NV-4500, BW-4401, AAM 925 & AAM 1050 1997 GMC Sierra SLT 1500 4x4, Z71/F44, EC/SB, Vortec 350 My Introduction with my '83s History New Daily, the '96 |
|
|
|
|
05-17-2014, 11:54 AM
|
#41 |
|
Watch out for your cornhole !
Join Date: Jun 2003
Location: Azle, Texas
Posts: 14,162
|
Re: My Luxurious late model truck (not so much)
Devin, I use a powder called "blasted aluminum". Basically, I degrease the parts, then cook in my oven for an hour to dry up any remaining greasy mess. After that, bead blast and powdercoat.
Now is probably a good time to talk about the bellhousing phase of the project. Basically, mine was a mess. I got the engine all assembled with new clutch and ready to drop in, but when I reached down to change the throwout bearing I ran into issues. I should have looked closer, earlier in the project. Remember back in post two when I mentioned the previous owner sold the truck due to throwout bearing issues. First, I have read enough bad about pilot bearings that I wasn't comfortable using the one that came in my Luk clutch kit. I'm very familiar and comfortable with pilot bushings though so I got one locally. There is plenty of material to geek out on pilot bushings if you care. Basically, most nowadays are Hecho in China out of some mystery metal. Good old fashioned oilite bushings are hard to find. The part number is there on the box. This is a good one. Something like 7 bucks at O Reilly. They'll likely have to order it. 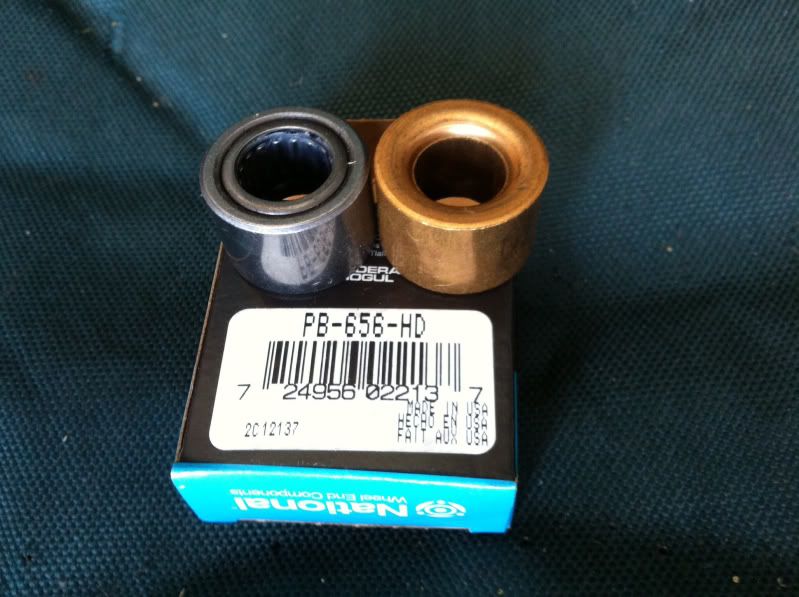 My hillbilly pilot bushing installer tool. 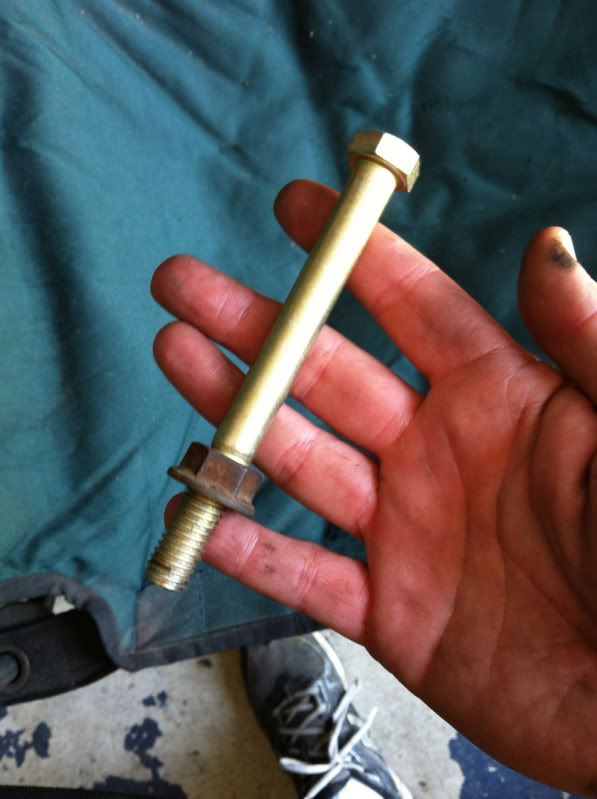 All ready to drop in. 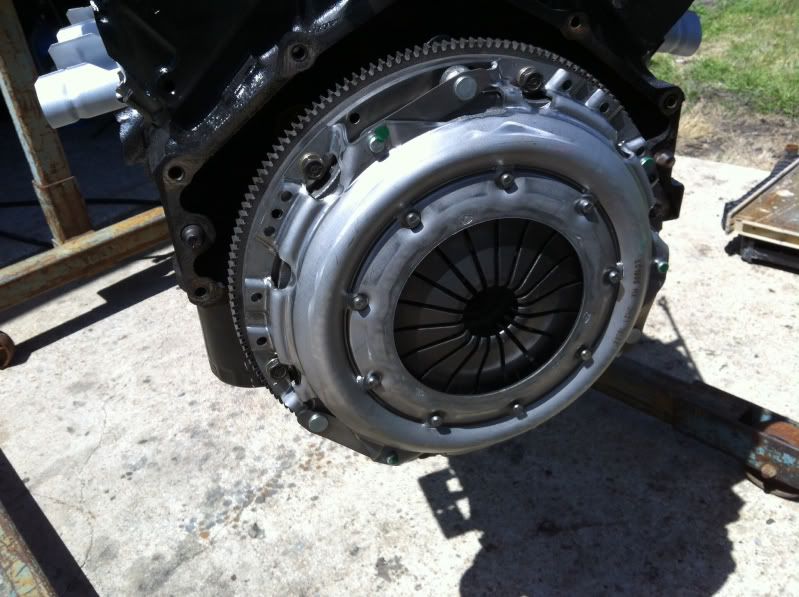 Now, here is where the problems came in. I climbed up in the engine compartment with my new throwout bearing to install it. When I got down close and looked, here is what I found. 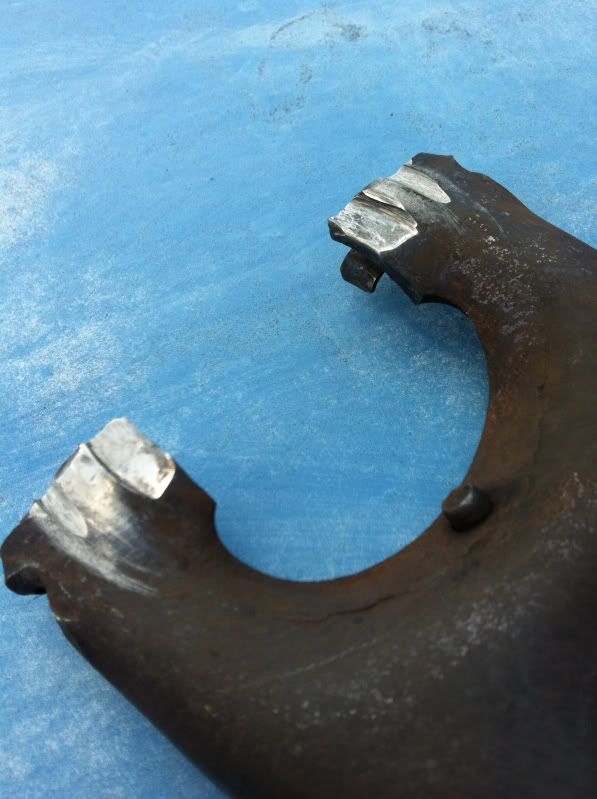 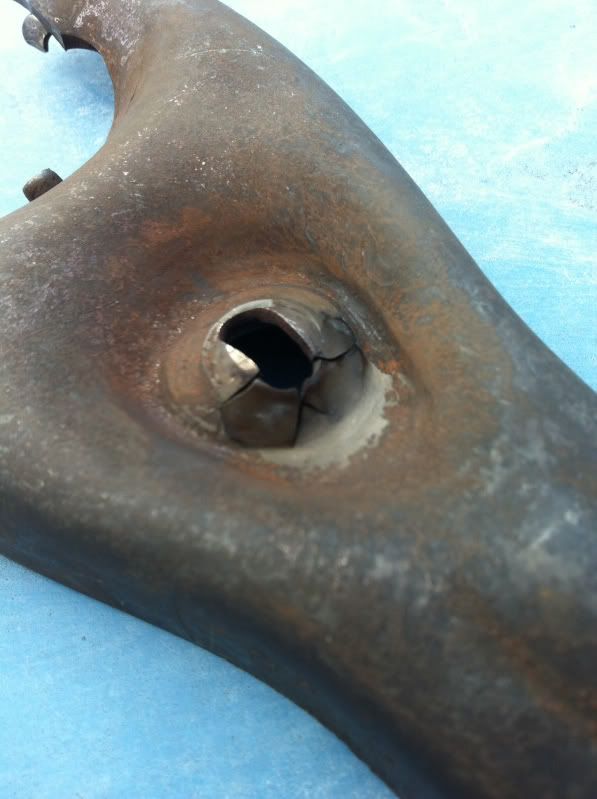 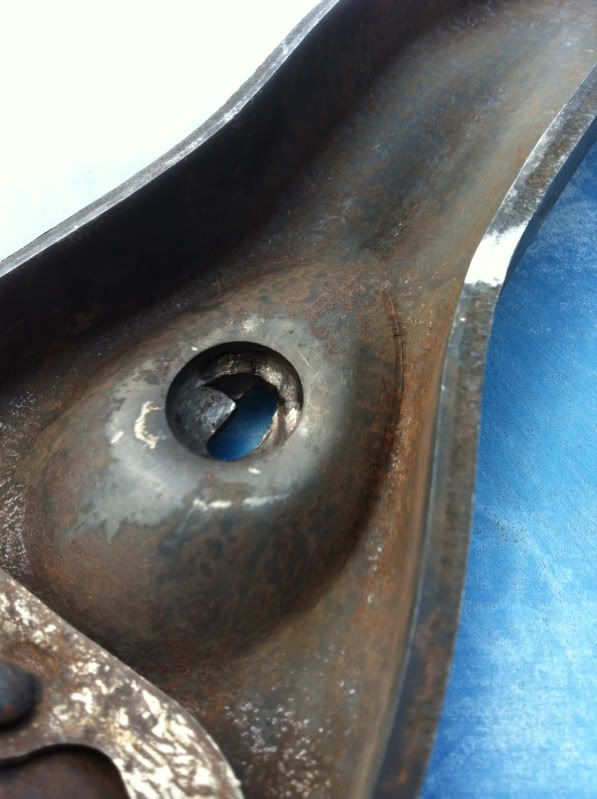 The pivot ball. 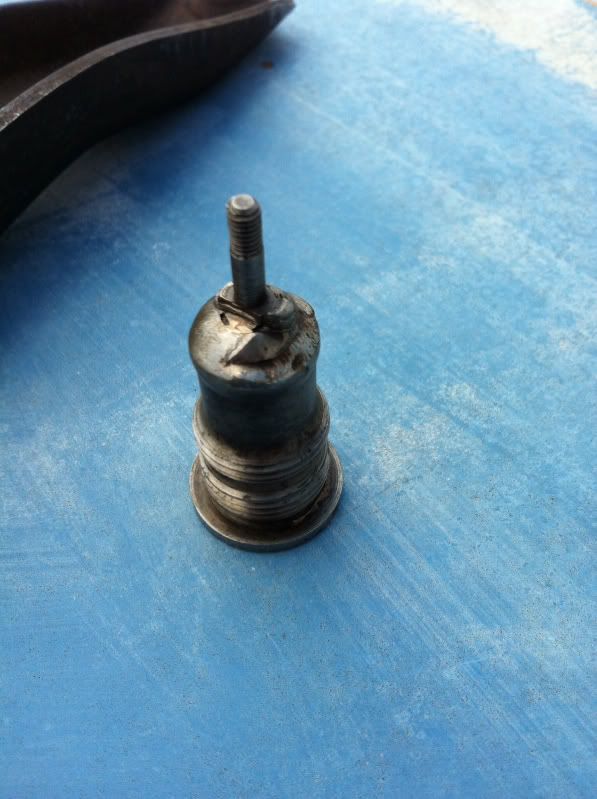 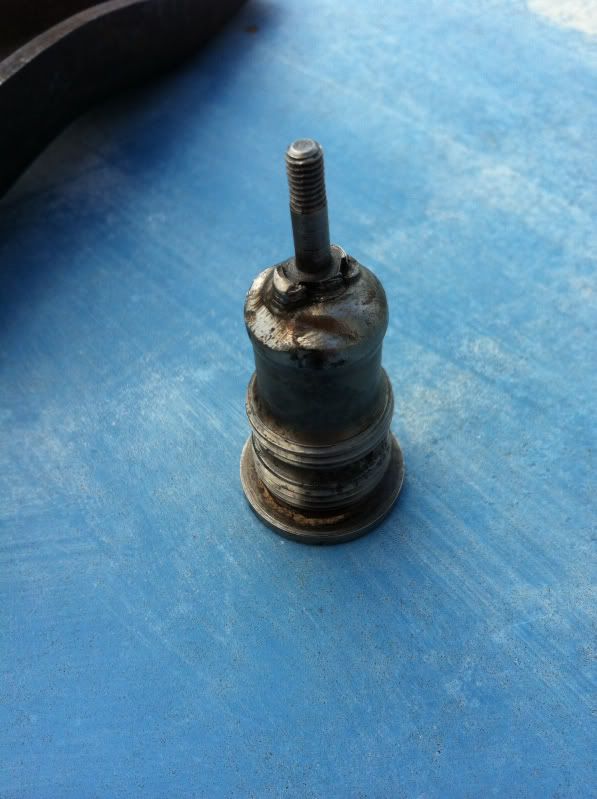 So, off to Rockauto for yet another order. Fortunately a new Delco clutch fork is only like 23 dollars. The pivot ball another 10 or so. Push the button to get them ordered and wait for the brown truck. While I was waiting for my new Rockauto stuff I went ahead and pulled the bellhousing off of the transmsiion and restored it. Many folks may not know, but the clutch pivot ball is greasable on these trucks. It's usually buried under the muck, but it's there. 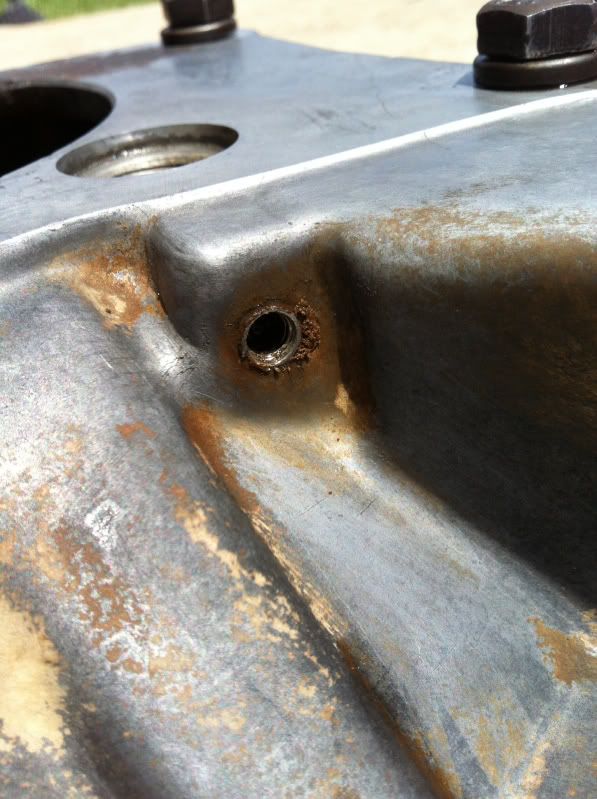 Then to clean the passage under the zerk. 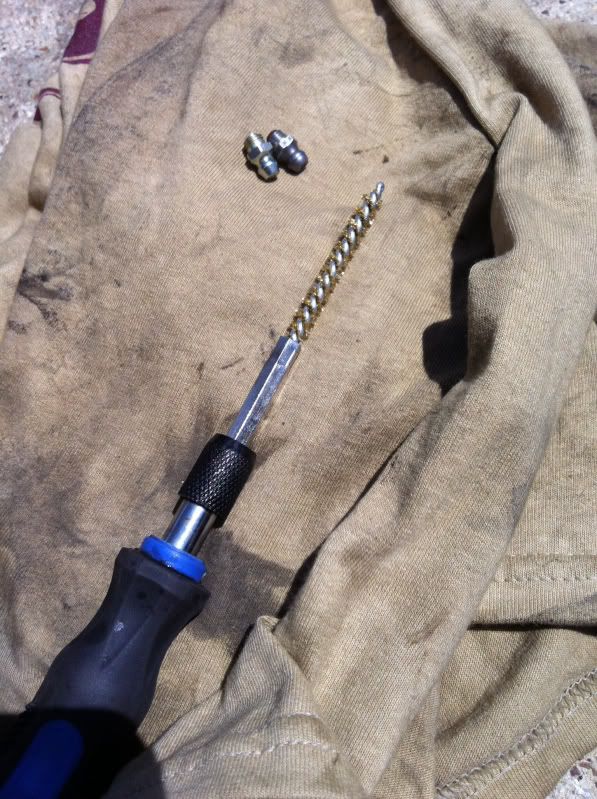 New zerks are cheap from Tractor Supply. I keep a few dozen on hand at all times. 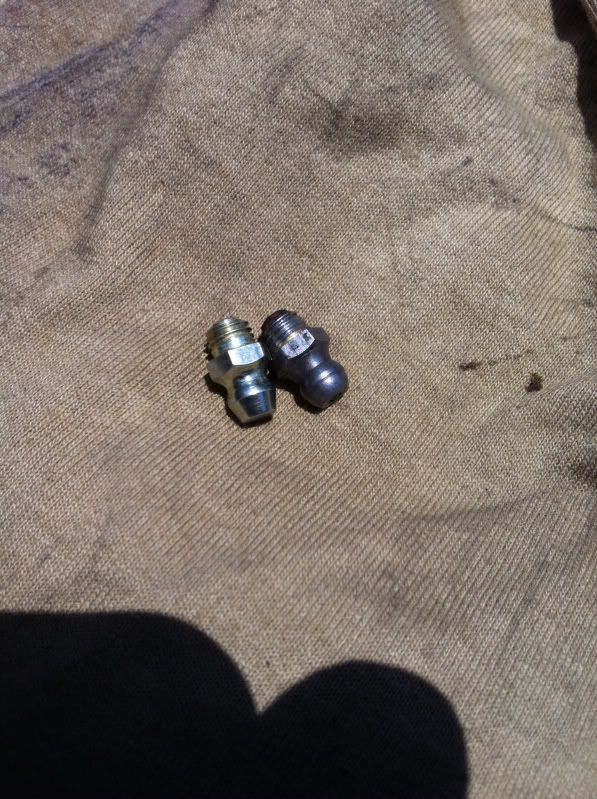 Clean, blast and powdercoat the bellhousing (blasted aluminum is the name of the powder) 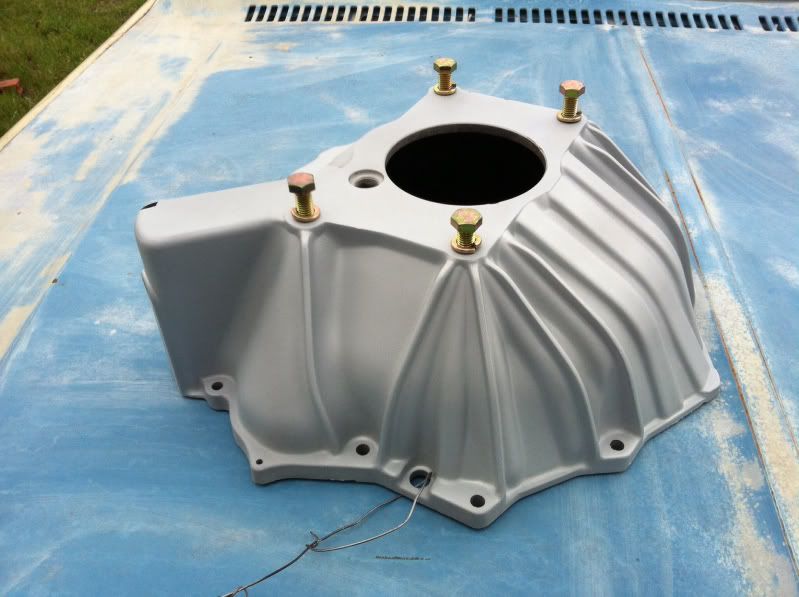 You can see the grease zerk if you look close. 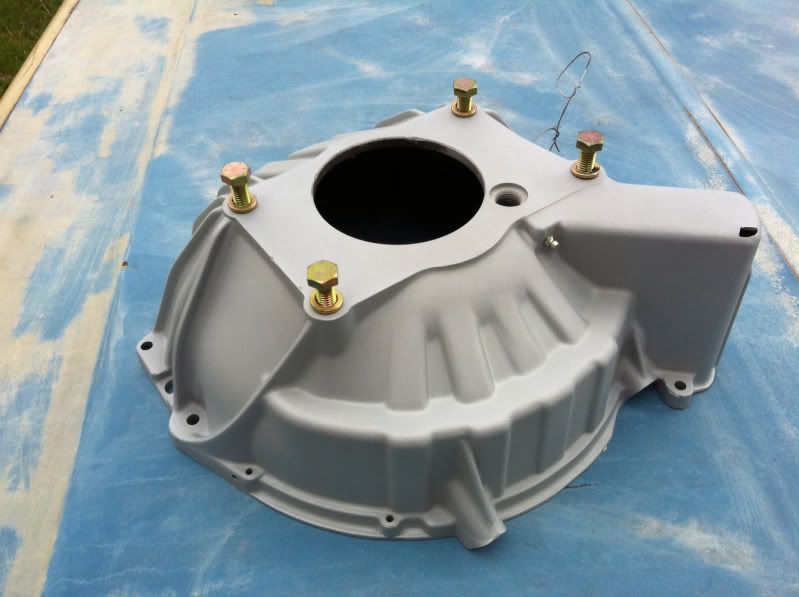 Finally Santa Claus in the brown truck came and I could proceed with the project. 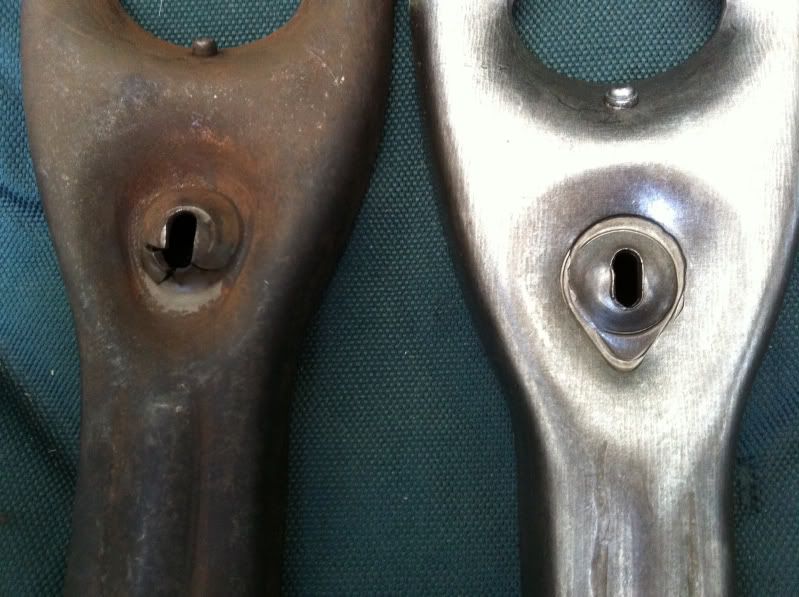 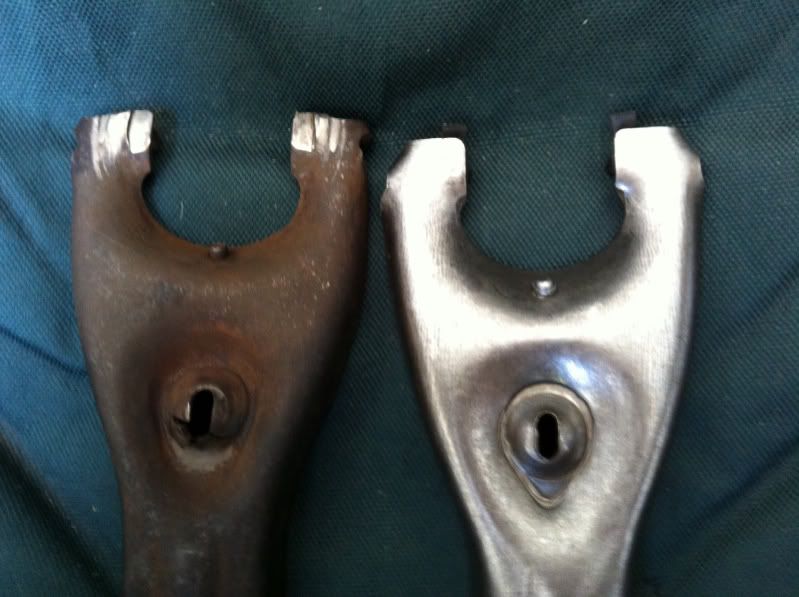 That's a ton of wear on the pivot ball. 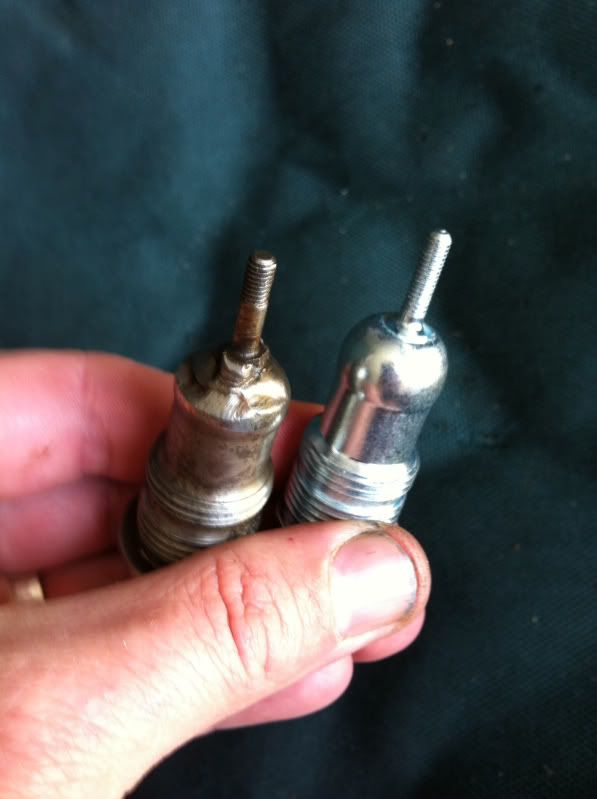 Last thing before installing the engine was to tune up the janky wiring harness. The wiring was intact and sound but the insulation was crumbly and mostly gone. So, like 100 feet of loom later, it's back into proper shape. Tech Tip: To clean old greasy, dirty wiring, use Goop hand cleaner. It's about 2 bucks per tub from Walmart. Just get yourself a dollop of it in your hand and run the wiring back and forth. Now, wipe it clean with a towel. The Goop leaves the wiring very clean, grease free, and supple. It's also not oily or so aggressive that it damages your insulation. 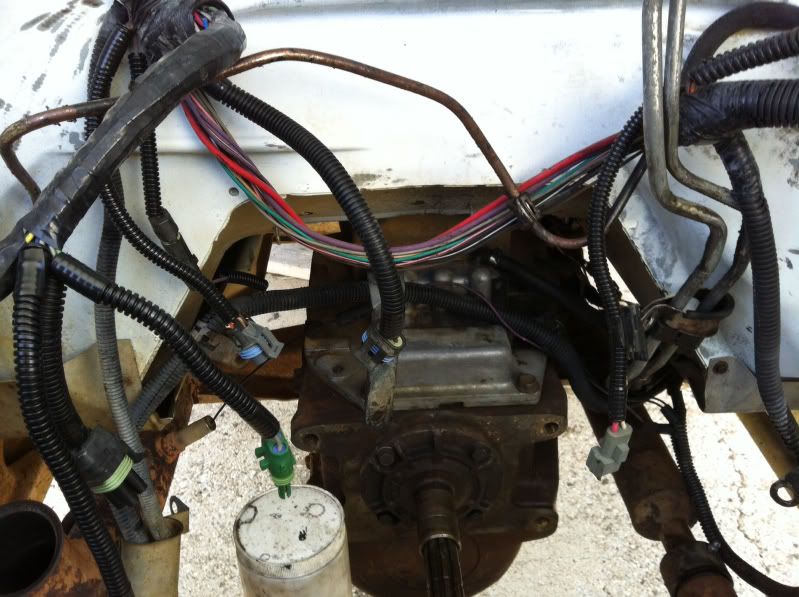 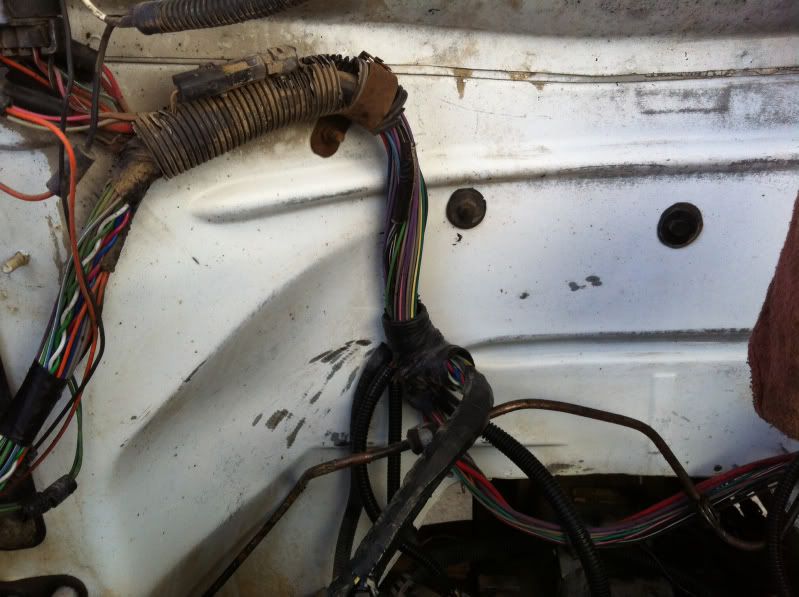 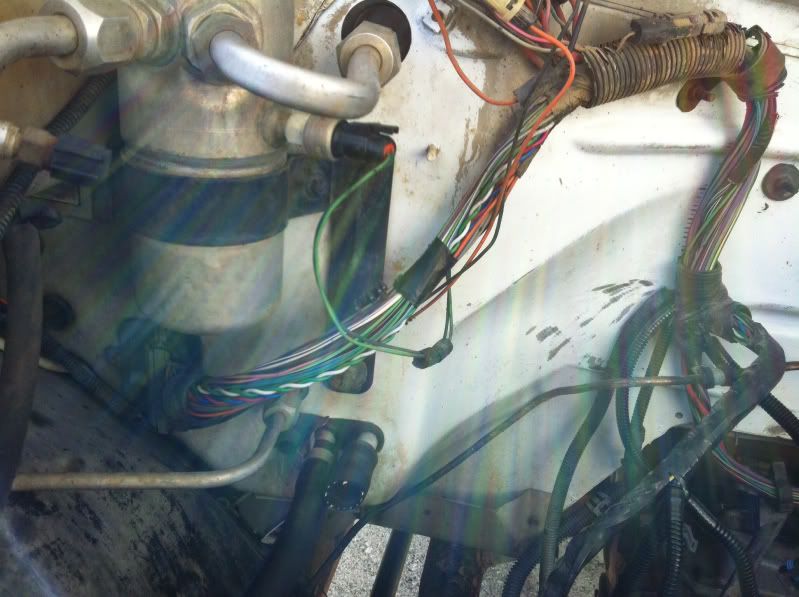 After... 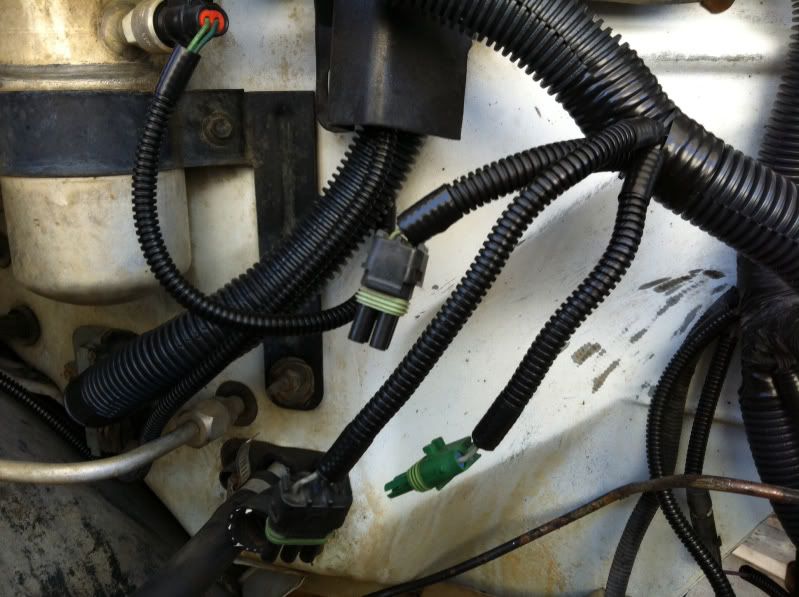 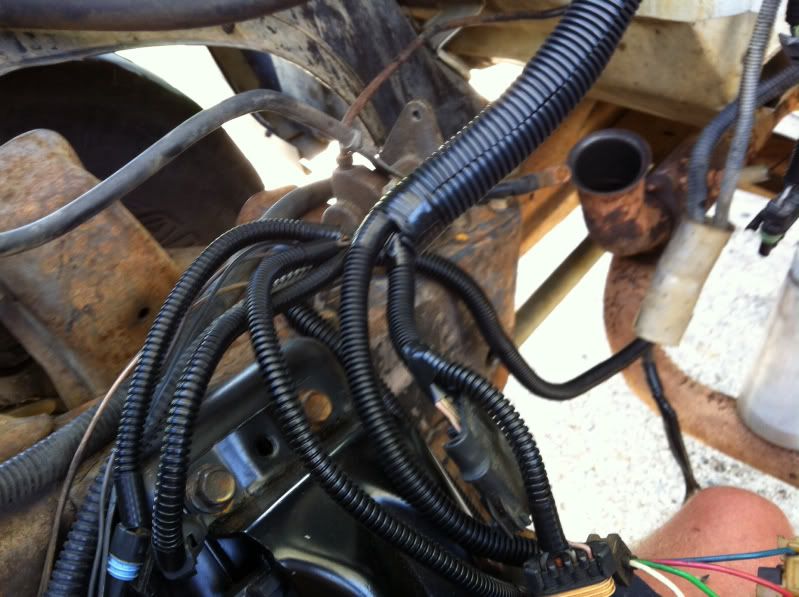 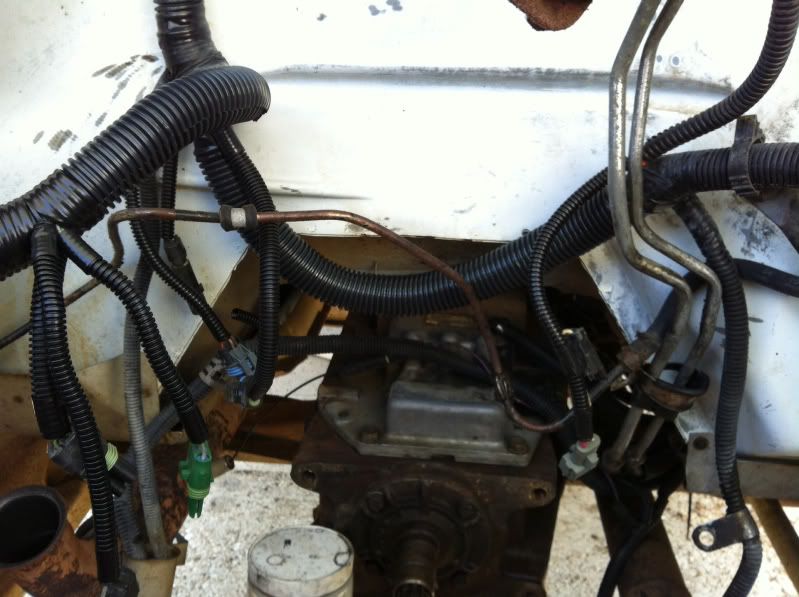 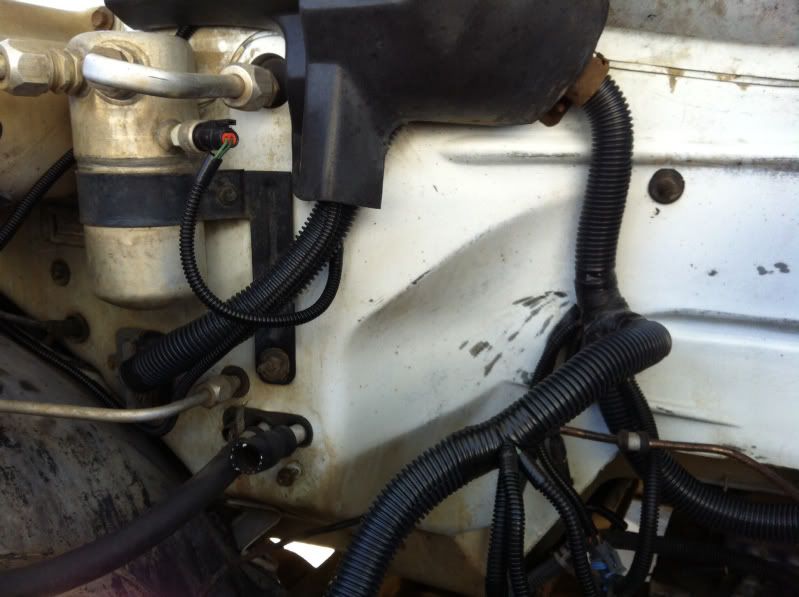 Now, finally, it was time to drop the engine. And you guys wondered why it took me so long to get the engine built and running.
__________________
I'm on the Instagram- @Gearhead_Kevin Last edited by Tx Firefighter; 05-17-2014 at 12:17 PM. |
|
|
|
|
05-17-2014, 12:16 PM
|
#42 |
|
Registered User
Join Date: Sep 2009
Location: Beaverton, OR from WA State
Posts: 1,515
|
Re: My Luxurious late model truck (not so much)
That harness looks 100x better. Split loom can be frustrating to work around but it sure cleans up wiring nicely.
Was the intake manifold "powdered aluminum" as well? What is that tool called that you used to clean the zerk passage? It looks far more robust than the normal plastic cylindrical brush. When you have a flywheel surfaced and should install one of those shims, how do you gauge the thickness required? I am sure there is a measurement from flywheel face to crank face, but to what tolerance is it measured?
__________________
Devin 1983 GMC High Sierra 2500, 4x4, RC/LB, 400 S.B., SM-465, NP-208, Corporate 10 bolt & 9.5" 14 bolt 1996 GMC Sierra SLE 3500 DRW, 4x4, EC/LB, Vortec 454, NV-4500, BW-4401, AAM 925 & AAM 1050 1997 GMC Sierra SLT 1500 4x4, Z71/F44, EC/SB, Vortec 350 My Introduction with my '83s History New Daily, the '96 |
|
|
|
|
05-17-2014, 12:26 PM
|
#43 | |
|
Watch out for your cornhole !
Join Date: Jun 2003
Location: Azle, Texas
Posts: 14,162
|
Re: My Luxurious late model truck (not so much)
Quote:
To clean the grease passage..... http://www.harborfreight.com/engine-...-pc-69020.html Take a 20% off coupon from any car magazine to drive the price down even further. Between that kit and the Walmart rifle cleaning kit, there is no passage you can't clean. The flywheel, I left in the hands of professionals. Notice when he machined it he used a paint marker to write his final number on it. Then, the guy behind the counter sees the number and reaches up onto the wall and plucks off the proper shim for you. 30 bucks cash out the door. The shim is critical to keeping the clutch pedal "in the normal spot" as far as feel. Thinner flywheel makes the clutch release higher if I remember correctly. The shim fixes that. This place has done all my standard transmission and clutch work since 1990. Even when I'm building a transmission myself, I use them for my parts and they give me good solid advice without looking down their noses at a do-it-yourselfer. http://www.standardtransmission.com/ I'm truly blessed to have the nations best standard and automatic transmission shops within driving range of me. Automatic transmission place. http://www.phoenixtrans.com/ They build trannys for the biggies like Boyd and Treypaneir. As well as the lesser famous Tx Firefighter.
__________________
I'm on the Instagram- @Gearhead_Kevin |
|
|
|
|
|
05-17-2014, 12:55 PM
|
#44 |
|
Registered User
Join Date: Dec 2011
Location: Creighton Sask. Canada
Posts: 4,121
|
Re: My Luxurious late model truck (not so much)
Doing some very nice work TX, truck is coming along quickly.

__________________
1987 Green n Green machine. 5.0 4spd std. 7" lift w 35's. |
|
|
|
|
05-17-2014, 07:01 PM
|
#45 |
|
State of Confusion!
 Join Date: Jul 2002
Location: Gulfport, MS USA
Posts: 46,613
|
Re: My Luxurious late model truck (not so much)
You been BUSY! Looking real good on what you have done so far. Thanks for the wiring/goop tip. That will be handy for me in the near future.
__________________
Bill 1970 Chevy Custom/10 LWB Fleetside 2010 Toyota Tacoma PreRunner SR5 Double Cab - DD Member of Louisiana Classic Truck Club (LCTC) Bill's Gallery Life isn't tied with a bow, but it's still a gift. Live simply. Love generously. Care deeply. Speak kindly. Leave the rest to God! Last edited by Palf70Step; 05-19-2014 at 08:58 PM. |
|
|
|
|
05-19-2014, 06:38 PM
|
#46 |
|
Registered User
Join Date: Sep 2012
Location: Midway, NC
Posts: 3,275
|
Re: My Luxurious late model truck (not so much)
Thanks for the updates and the quality work. I learned a lot from your builds and plan to apply them to my own build one day. Thanks.
__________________
http://67-72chevytrucks.com/vboard/s...d.php?t=581873 The low buck build threads. Check'em out! http://67-72chevytrucks.com/vboard/s...d.php?t=666022 My build thread Crossmembers CC |
|
|
|
|
05-20-2014, 06:40 AM
|
#47 |
|
Watch out for your cornhole !
Join Date: Jun 2003
Location: Azle, Texas
Posts: 14,162
|
Re: My Luxurious late model truck (not so much)
When I last left off, the engine was ready to install.
I did run into a few little issues at that point. First was exhaust manifolds. Upon sandblasting them, I found hairline cracks from past overheating. 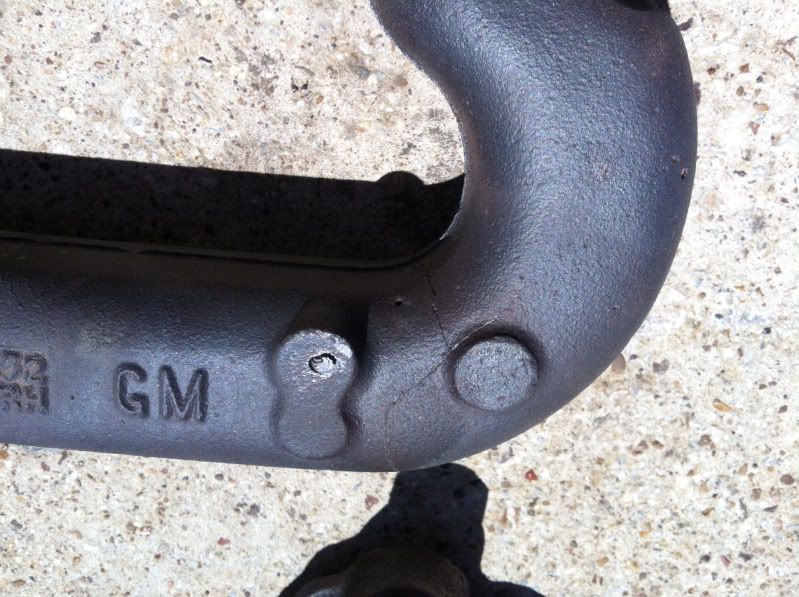 So, another two weeks of saving my money and yet another order from Rockauto.... 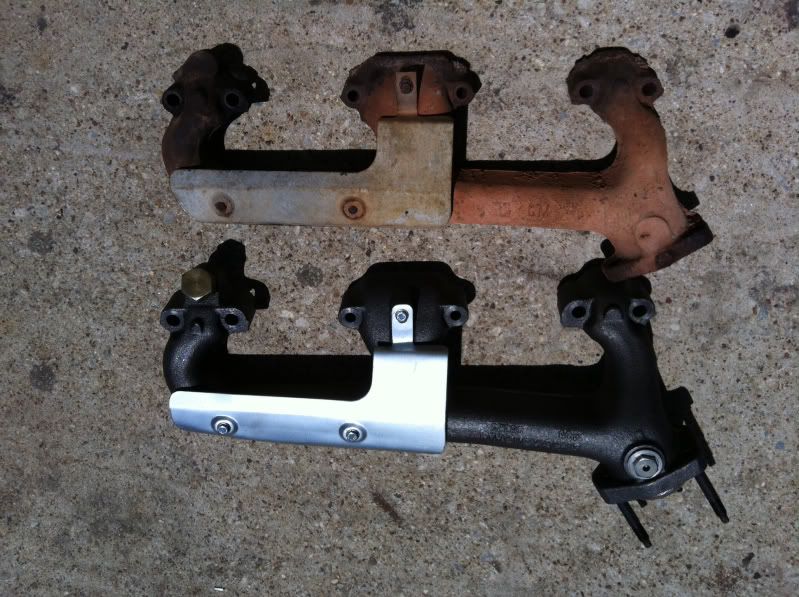 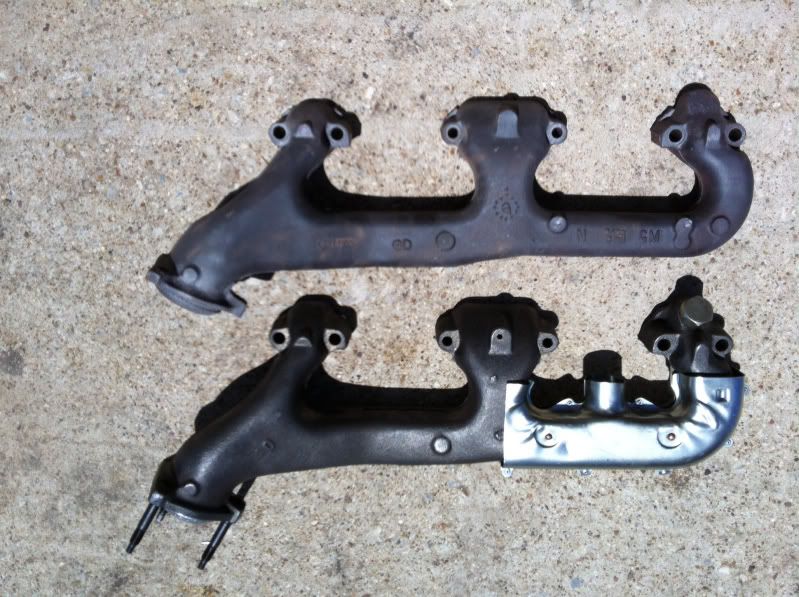 Something I'm kind of particular about is exhaust hardware. I like new stuff to go with new manifolds. Problem is, the stock bolts are 3/8X2.25 inches. That's not a bolt you can easily source locally since only 2" and 2.5" are common in stores. So McMaster Carr to the rescue. Nice new flange head bolts in the proper 2.25 inch length. 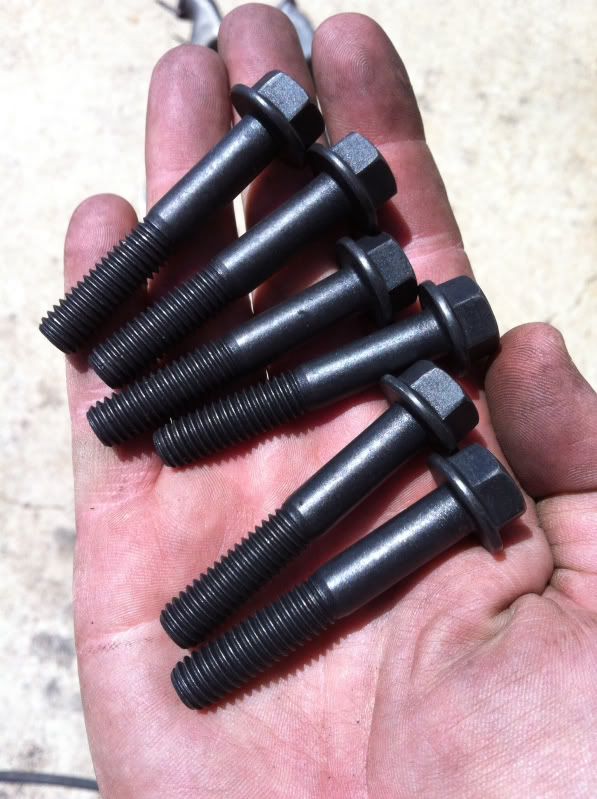 The old accelerator cable was stiff and shedding it's outer layer so I got one of those from Rockauto too. They are real cheap at under 15 bucks and go a long way towards making the truck feel nicer to drive. 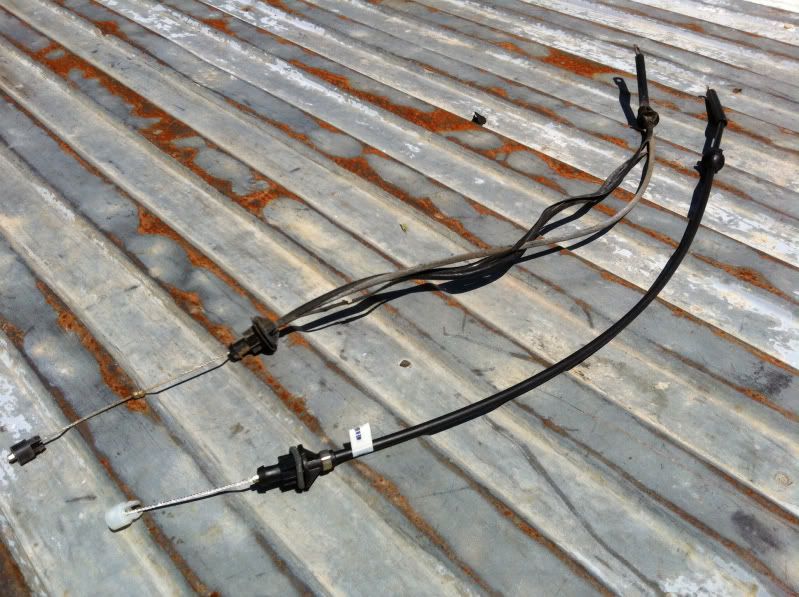 Not having the budget for high end fluids, I chose to use generic stuff. Two gallons of antifreeze, two gallons of 90W gear oil and a quart of brake fluid. That's 60 dollars worth sitting there in the basket. Another paycheck of truck money spent on fluids. The gear oil is for the front differential, the transmission and the rear differential. No pictures of it, but I did a full drain and fill on those components. The brake fluid is for flushing the clutch hydraulics and brake hydraulics. The antifreeze because it tastes so good. That's a joke of course, but antifreeze is very sweet, like Koolaid, if you ever taste it. Not recommended though for health reasons. 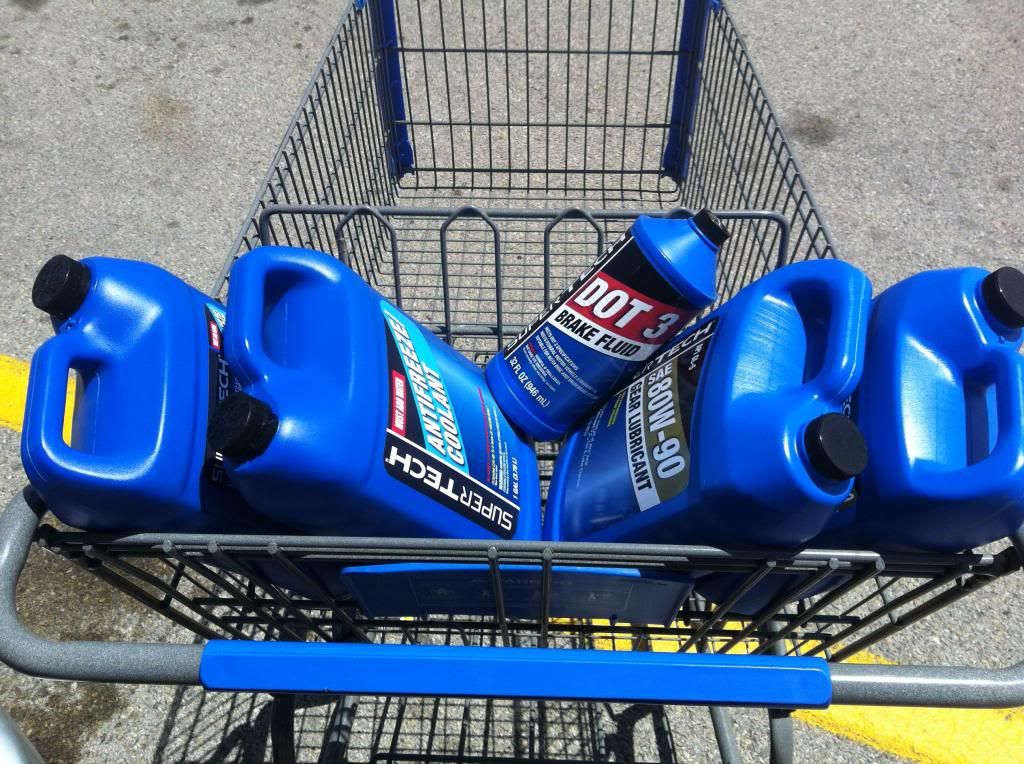 This truck had the steel horseshoe type of front serpentine brackets. They had been cracked and welded and bent in the past and several small parts were missing. I remember when these trucks were coming through the dealership under warranty for failures of these brackets way back in the day. They were just a weak design. GM redesigned them in 1990 and replaced the entire setup with cast aluminum stuff which is fantastic compared to the steel ones. So, off to Craigslist to see what I could turn up. 40 bucks later.... 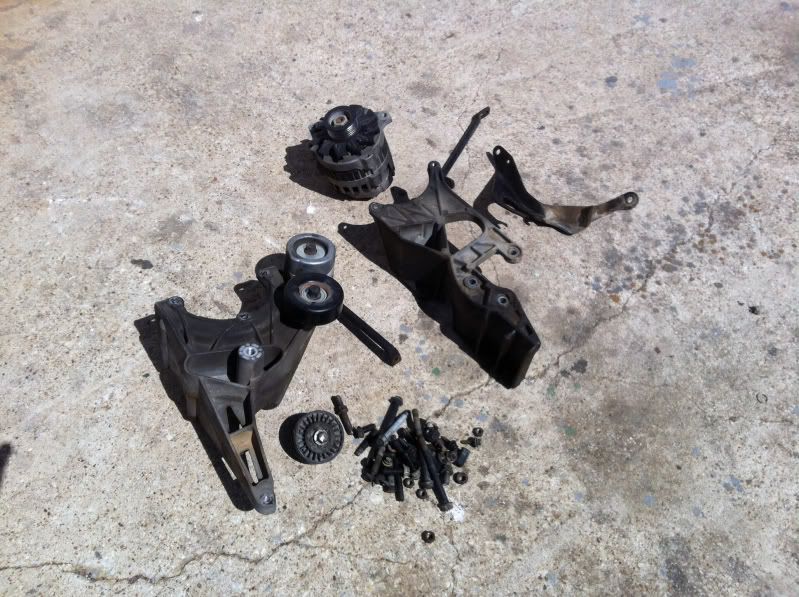 Kind of fortuitous, when I was at the guy's house pulling the serp brackets off of his parts truck I noticed it had a brand new radiator in it. A further 40 bucks scored it. I said fortuitous because my original radiator was leaking and I was planning to get a new one for 100 bucks. So, 60 bucks saved by buying a used radiator. Original top, used Craigslist bottom. 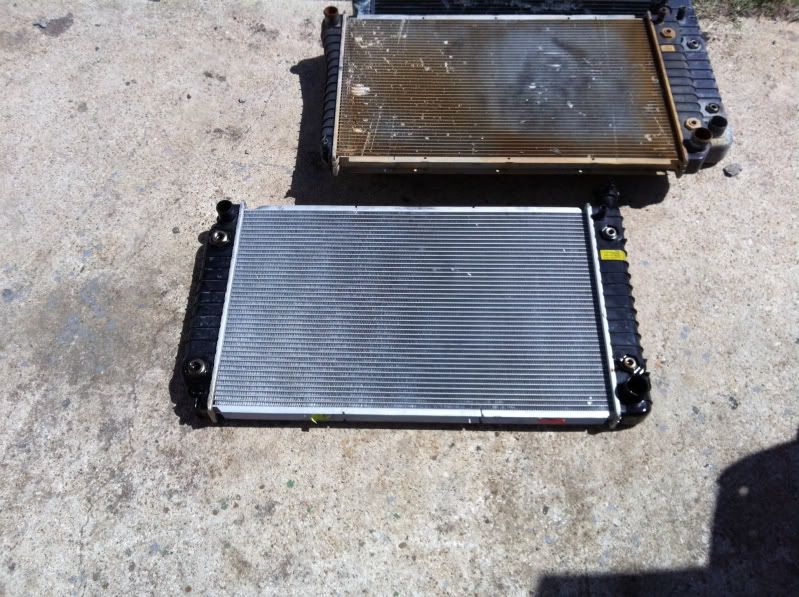 Let me back up a second and mention something. The power steering pump, alternator, AC compressor, and all pulleys completely interchange between the two styles of serpentine brackets. Therefore I reused my original stuff and saved some money. One snag I did run into was that my power steering pump needing replacing. I took it apart to attempt a rebuild, but the inside was scored up very badly. So, rather than buy a rebuilt pump, I dug in my core pile and found a V-belt type of pump off of an 87 squarebody truck. After swapping the reservoir, it was a bolt on. The serpentine type of pulley presses right on the V belt type of pump. No mods needed and all hardware even interchanged. Win-win deal. 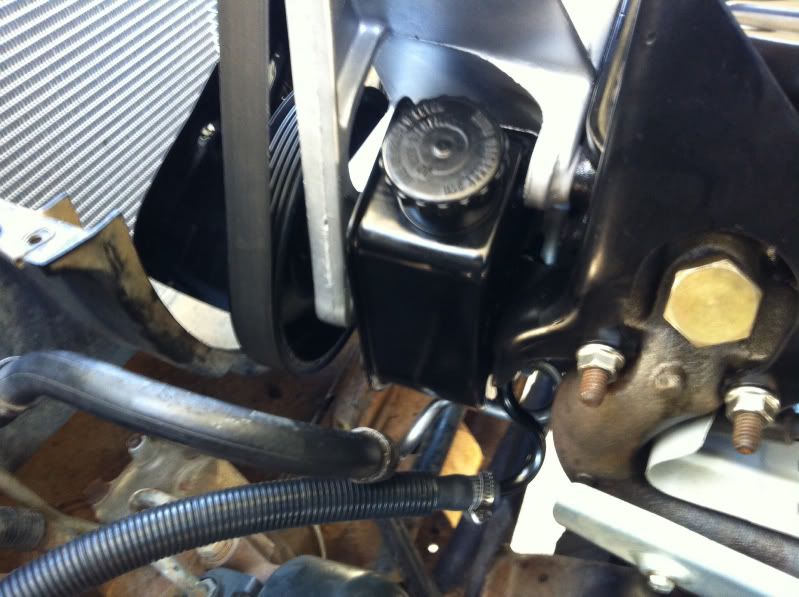 The only interchange difference I found between the V-belt and serpentine type of power steering pumps was that the V-belt pump has a slightly shorter shaft. The original V-belt pulley wasn't pressed completely flush with the end of the shaft to start with, whereas the serpentine setup it was. When installing the pulley I simply pressed it on near flush like the other pulley had been and everything lined up. 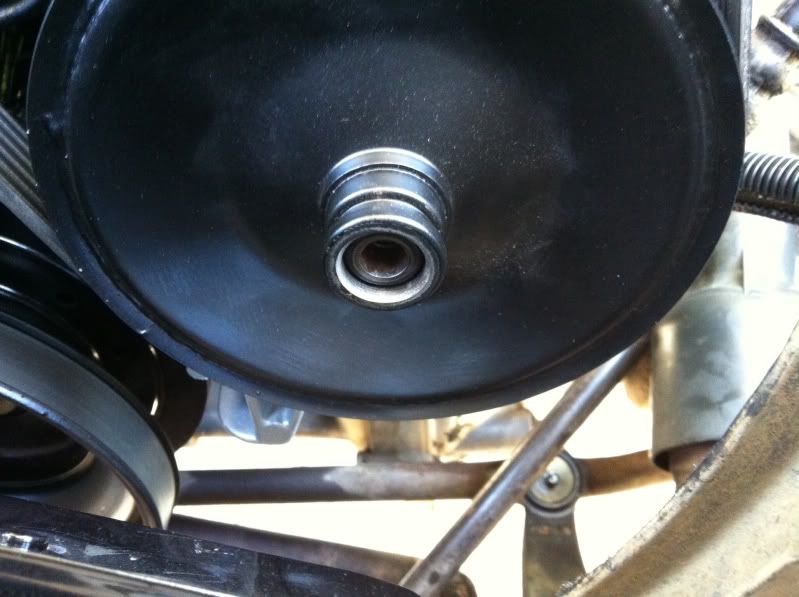 The engine final installed. It runs very, very well. Even my wife, who has zero gearhead background commented several times about how good it sounds. I'm probably going to yank the air cleaner housing back off and powdercoat it all pretty. 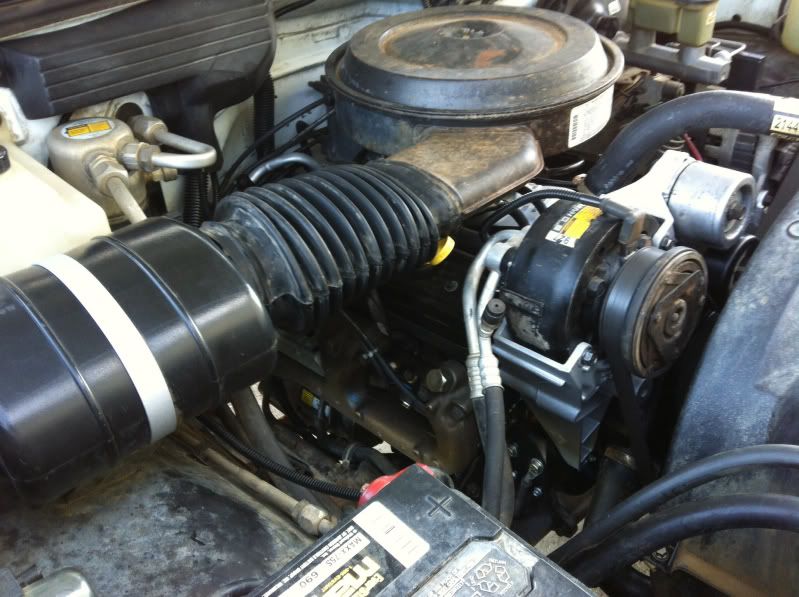 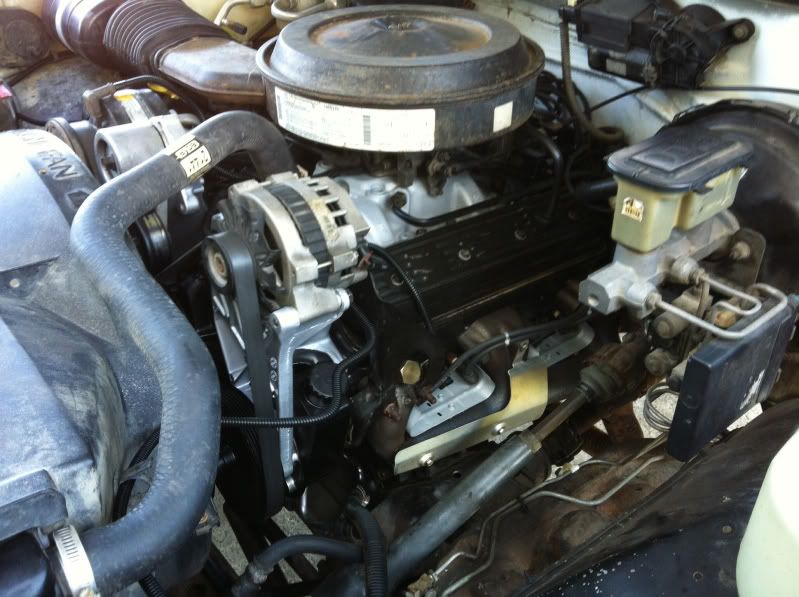 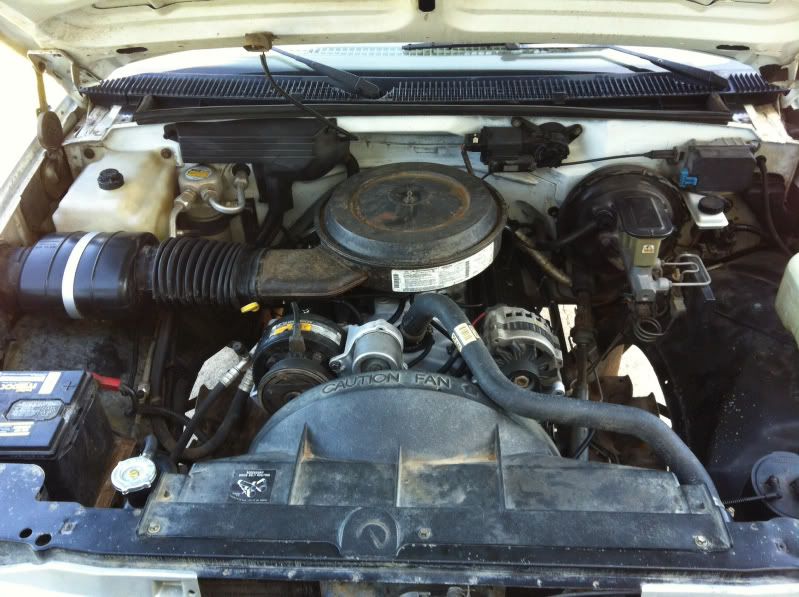
__________________
I'm on the Instagram- @Gearhead_Kevin |
|
|
|
|
05-20-2014, 09:21 AM
|
#48 |
|
I'm just glad to be here!
Join Date: Jan 2008
Location: Longview, TX
Posts: 4,788
|
Re: My Luxurious late model truck (not so much)
Great job and great no non-sense approach to part replacement/repurposing.
I agree, PC that air cleaner...LOL
__________________
Karl 1965 Chevy Stepside(Grandpa's Old Blue) and (July 2015 Shop Build!)(2020, the Saga Continues) http://67-72chevytrucks.com/vboard/s...d.php?t=372424 The LST Challenge: http://67-72chevytrucks.com/vboard/s...=1#post7812257 Korbin's 1st Square: "Sunburn" http://67-72chevytrucks.com/vboard/s...d.php?t=418618 1985 GMC Sierra: "White Trash", Korbin's 2nd now... http://67-72chevytrucks.com/vboard/s...d.php?t=632305 Henry - 1984 Chevrolet, Owen's 1st Square |
|
|
|
|
05-21-2014, 07:39 PM
|
#49 |
|
Registered User
Join Date: Sep 2012
Location: Midway, NC
Posts: 3,275
|
Re: My Luxurious late model truck (not so much)
Nice work as always.
__________________
http://67-72chevytrucks.com/vboard/s...d.php?t=581873 The low buck build threads. Check'em out! http://67-72chevytrucks.com/vboard/s...d.php?t=666022 My build thread Crossmembers CC |
|
|
|
|
05-21-2014, 10:43 PM
|
#50 |
|
Farm Truck
Join Date: Aug 2006
Location: Jersey Village, Texas
Posts: 547
|
Re: My Luxurious late model truck (not so much)
Awesome rebuild, you always come up with some cool tools to get the job done right.
__________________
1969 CST/10 1984 K5 Blazer 4x4 2016 Dodge Ram 2500 4x4 Mike Jersey Village, Tx |
|
|
|
 |
| Bookmarks |
|
|


 Linear Mode

