
|
Register or Log In To remove these advertisements. |
|
|
|
|||||||
 |
|
|
Thread Tools | Display Modes |
 04-16-2020, 07:39 PM
|
#26 |
|
Registered User
Join Date: Jun 2018
Location: Washington, DC
Posts: 638
|
Re: Butt welds for patch panels
That's good to know that there is someone in my area that is doing the kind of work that you do.
|

|

|
|
04-16-2020, 07:40 PM
|
#27 |
|
Registered User
Join Date: Jun 2018
Location: Washington, DC
Posts: 638
|
Re: Butt welds for patch panels
What is the best site to follow your work that you do?
|
|
|
|
|
04-16-2020, 08:59 PM
|
#28 | |
|
Registered User
Join Date: Nov 2019
Location: LA - Lower Alabama
Posts: 57
|
Re: Butt welds for patch panels
Quote:
 WDE! |
|
|
|
|
|
04-16-2020, 09:33 PM
|
#29 | |
|
Registered User
Join Date: Nov 2019
Location: LA - Lower Alabama
Posts: 57
|
Re: Butt welds for patch panels
Quote:
|
|
|
|
|
|
04-21-2020, 11:00 PM
|
#30 |
|
Registered User
Join Date: Jan 2013
Location: Leonardtown, MD
Posts: 1,633
|
Re: Butt welds for patch panels
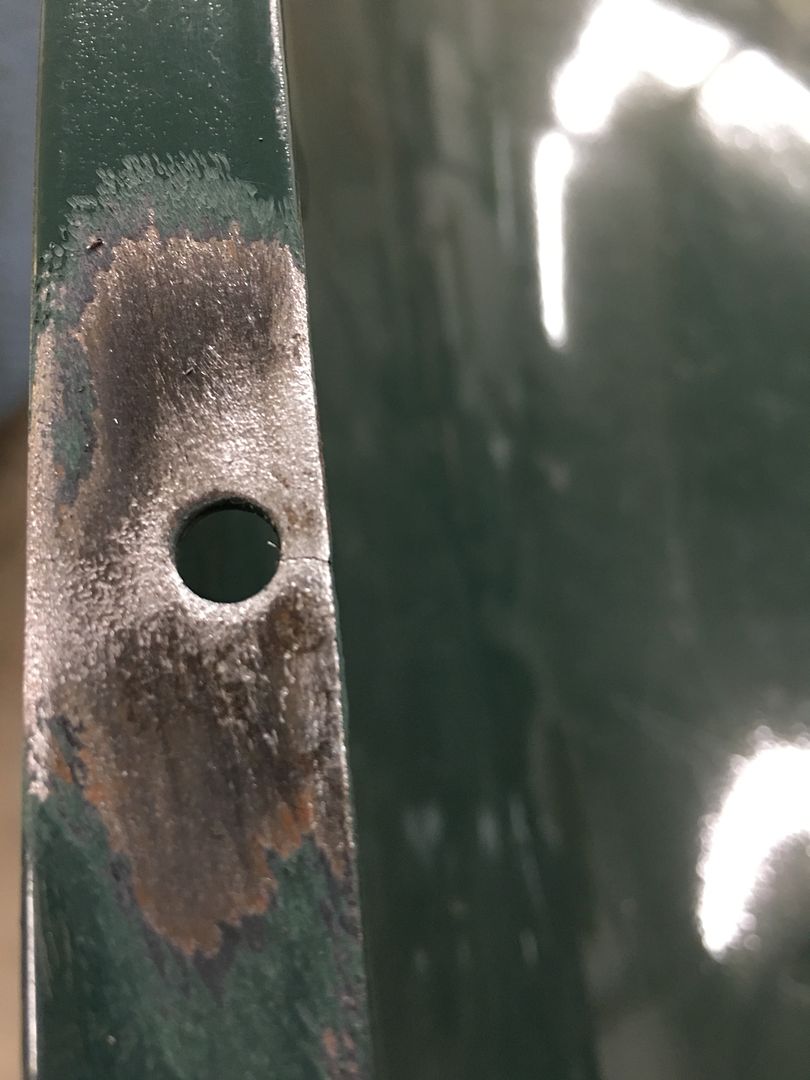
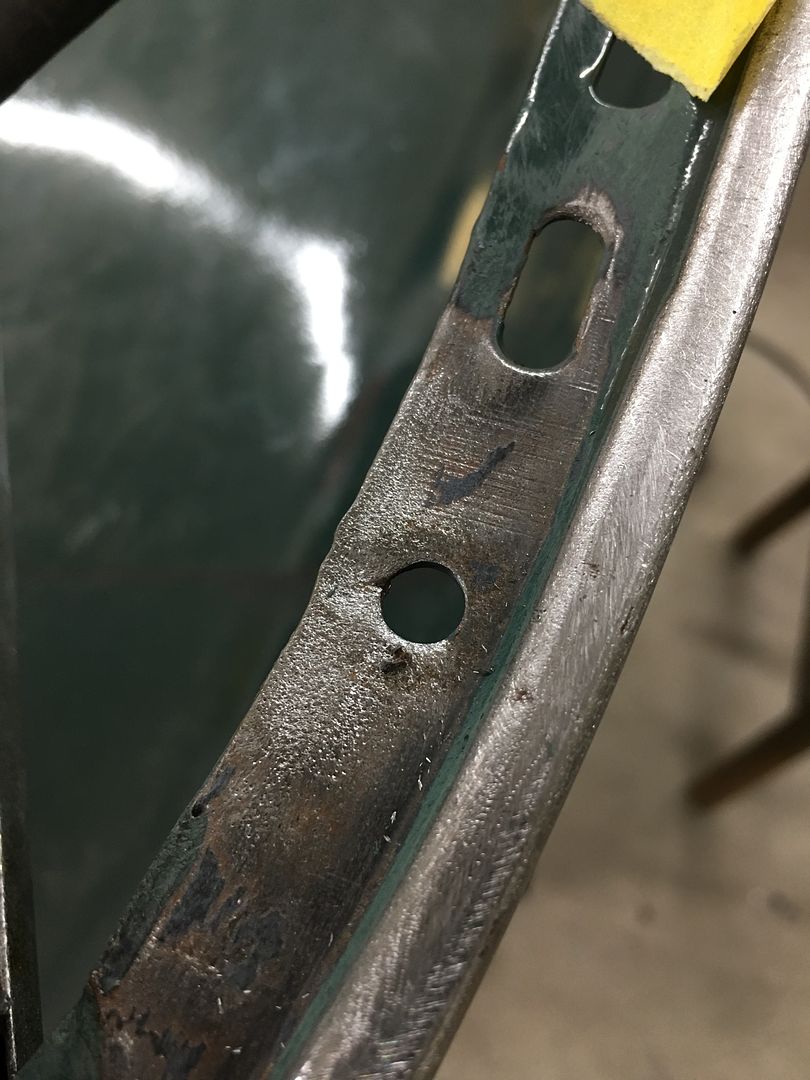
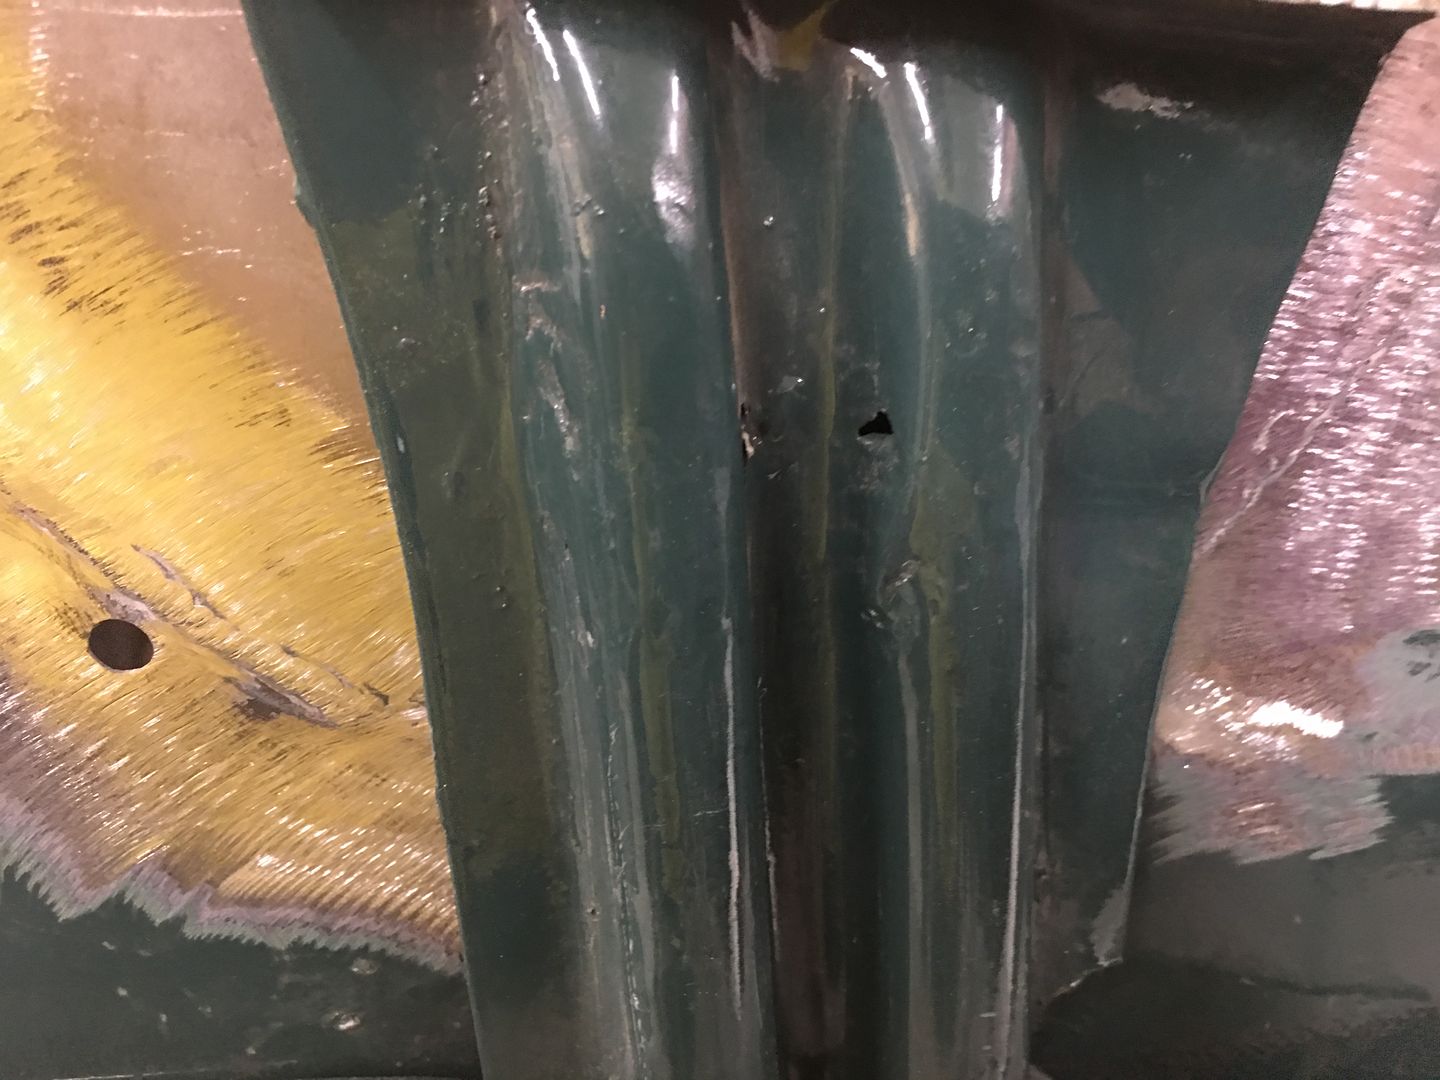
We have a few more spots to fix from cracking and fatigue, namely the holes on the underside for the rubber hood bumpers. We've already repaired three, and from the looks of it, need to take care of the remaining three..
   18 Gauge x 1/4" plugs were TIG welded in to fill the existing holes, and a copper backer gives us a bit of a heat sink so the cracks/fatigued areas don't blow a big hole on us.. 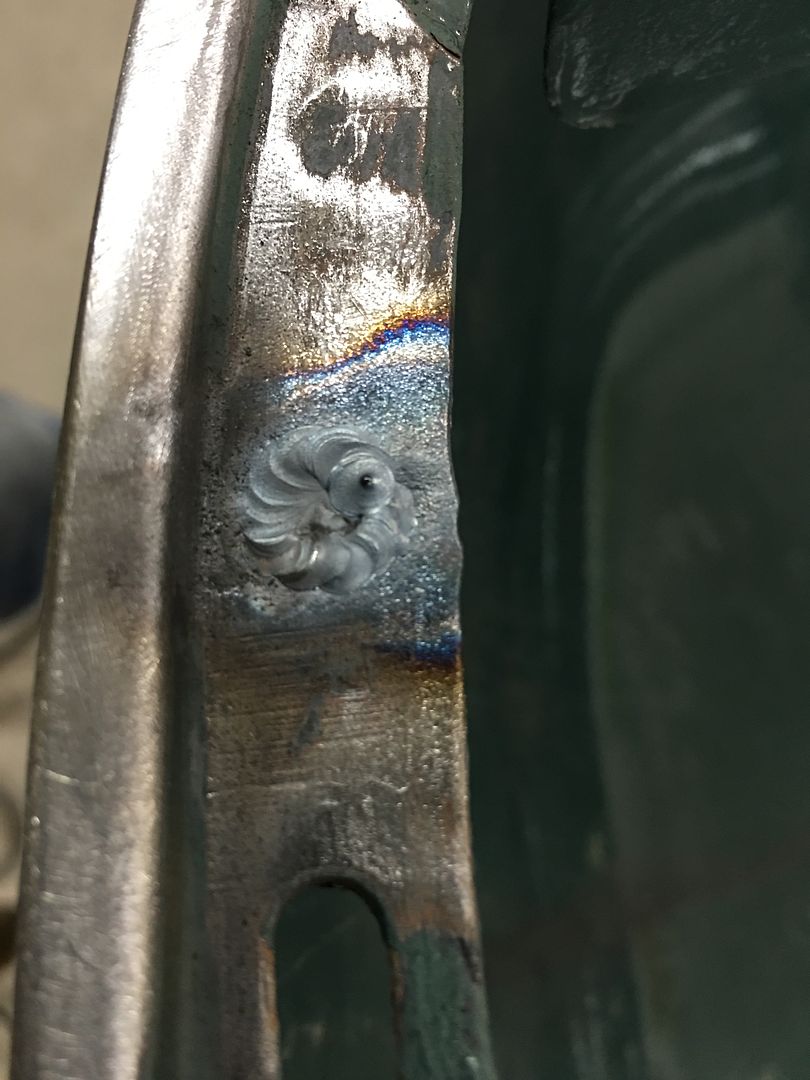 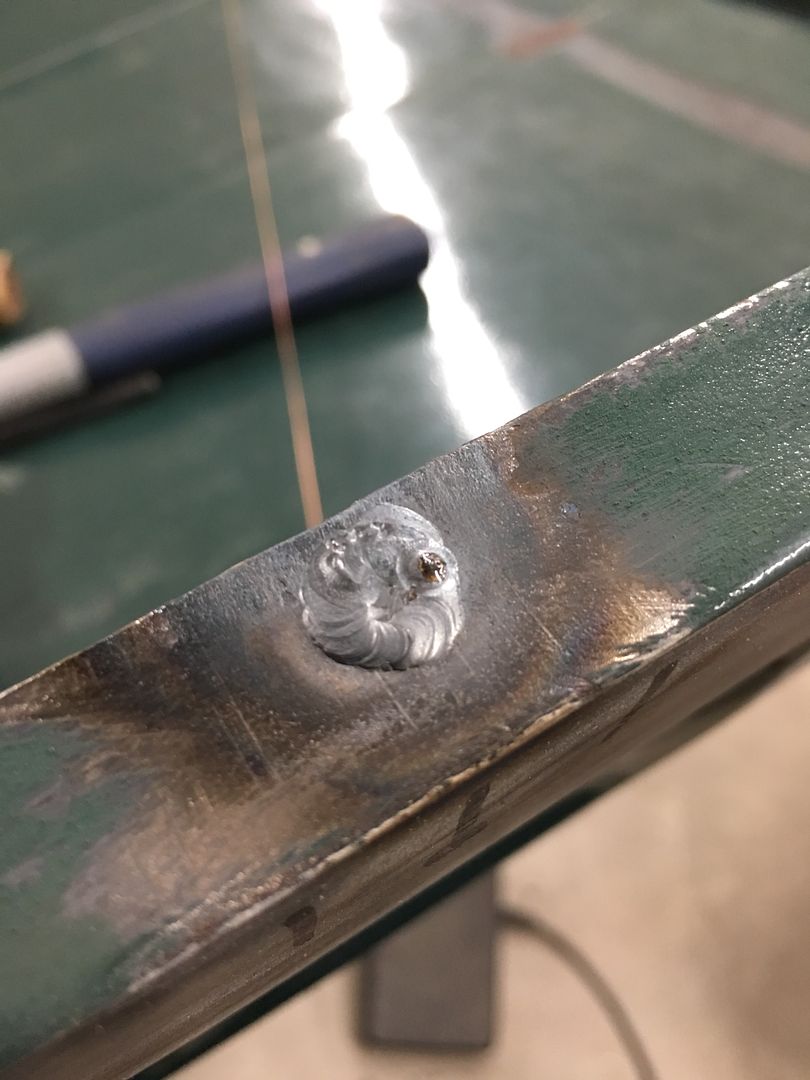  Welds were dressed on both sides of the sheet metal, and new holes drilled slightly in farther from the edge to help slow down the reappearance of cracks. 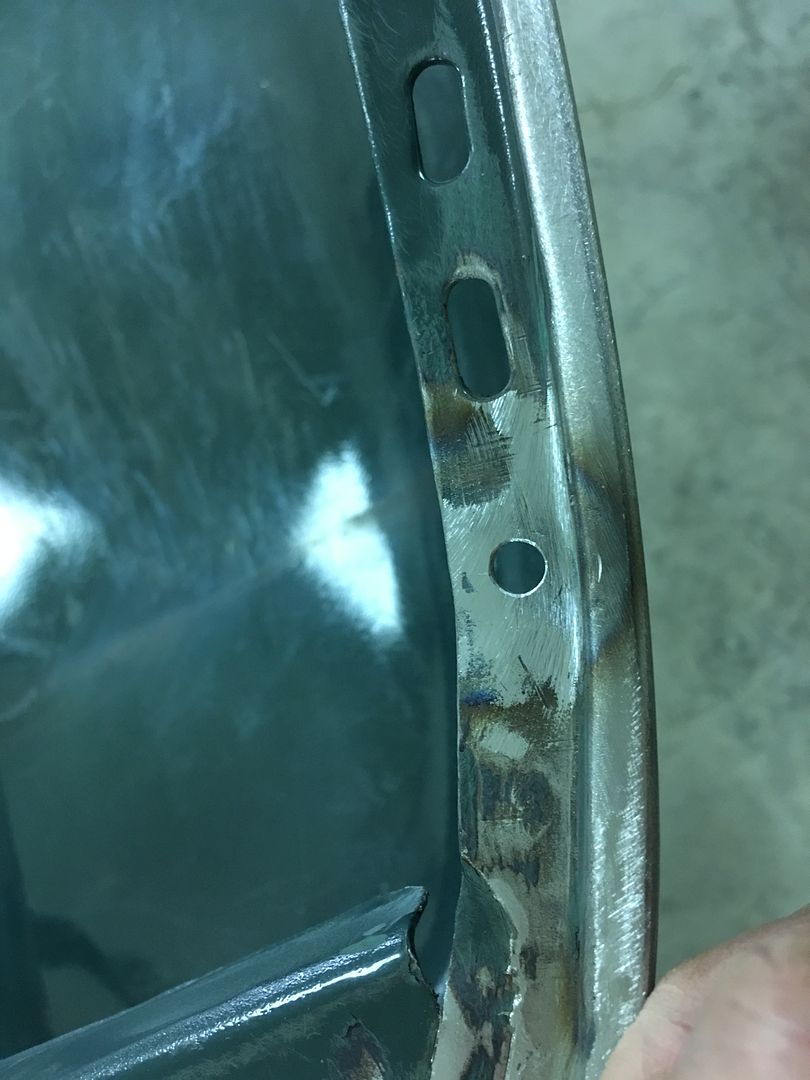 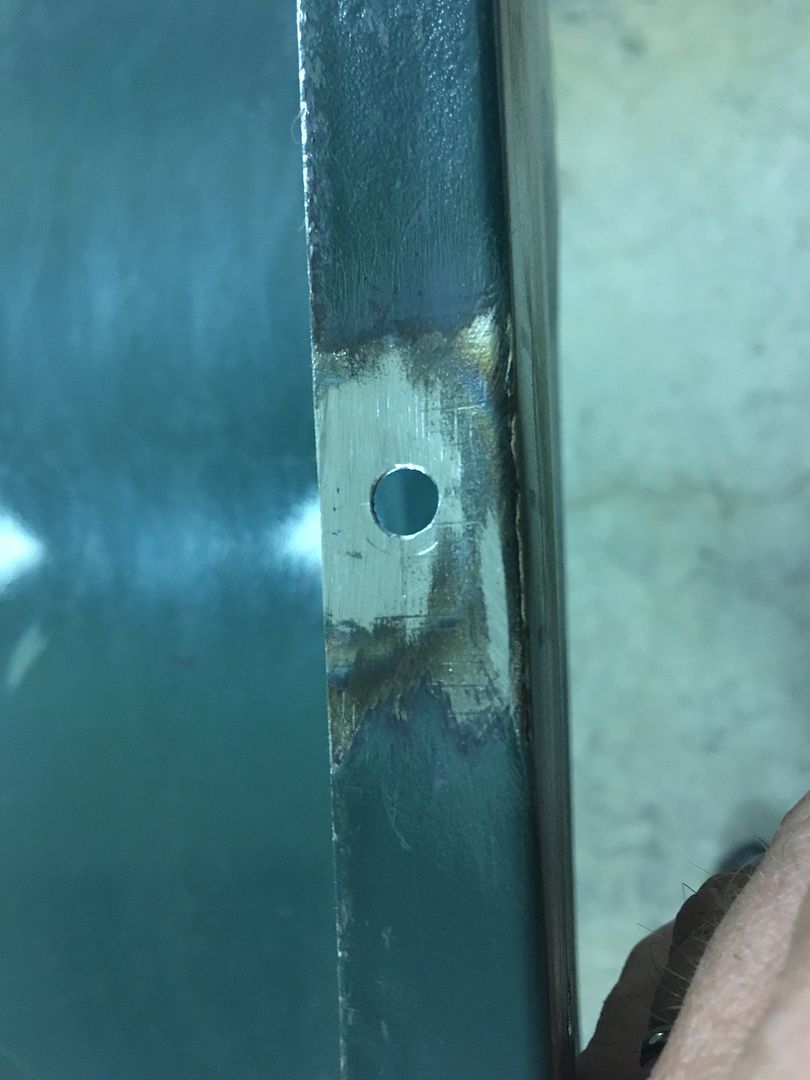 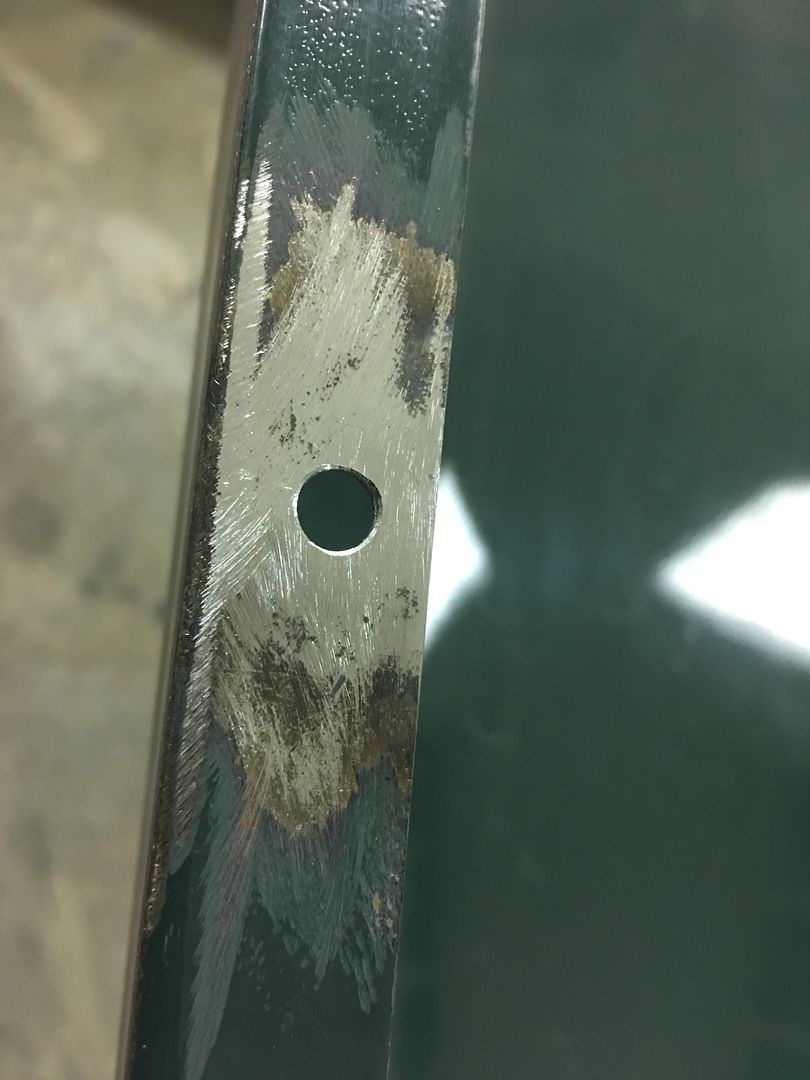 Next, I'm sure everyone has seen how these hoods can oil can, show low spots, and try to flop around while driving down the road. Part of that is abuse over the years, fatigue, etc. Any low spots invariably result in a loss of support of the hood and will show oil cans or loose areas. 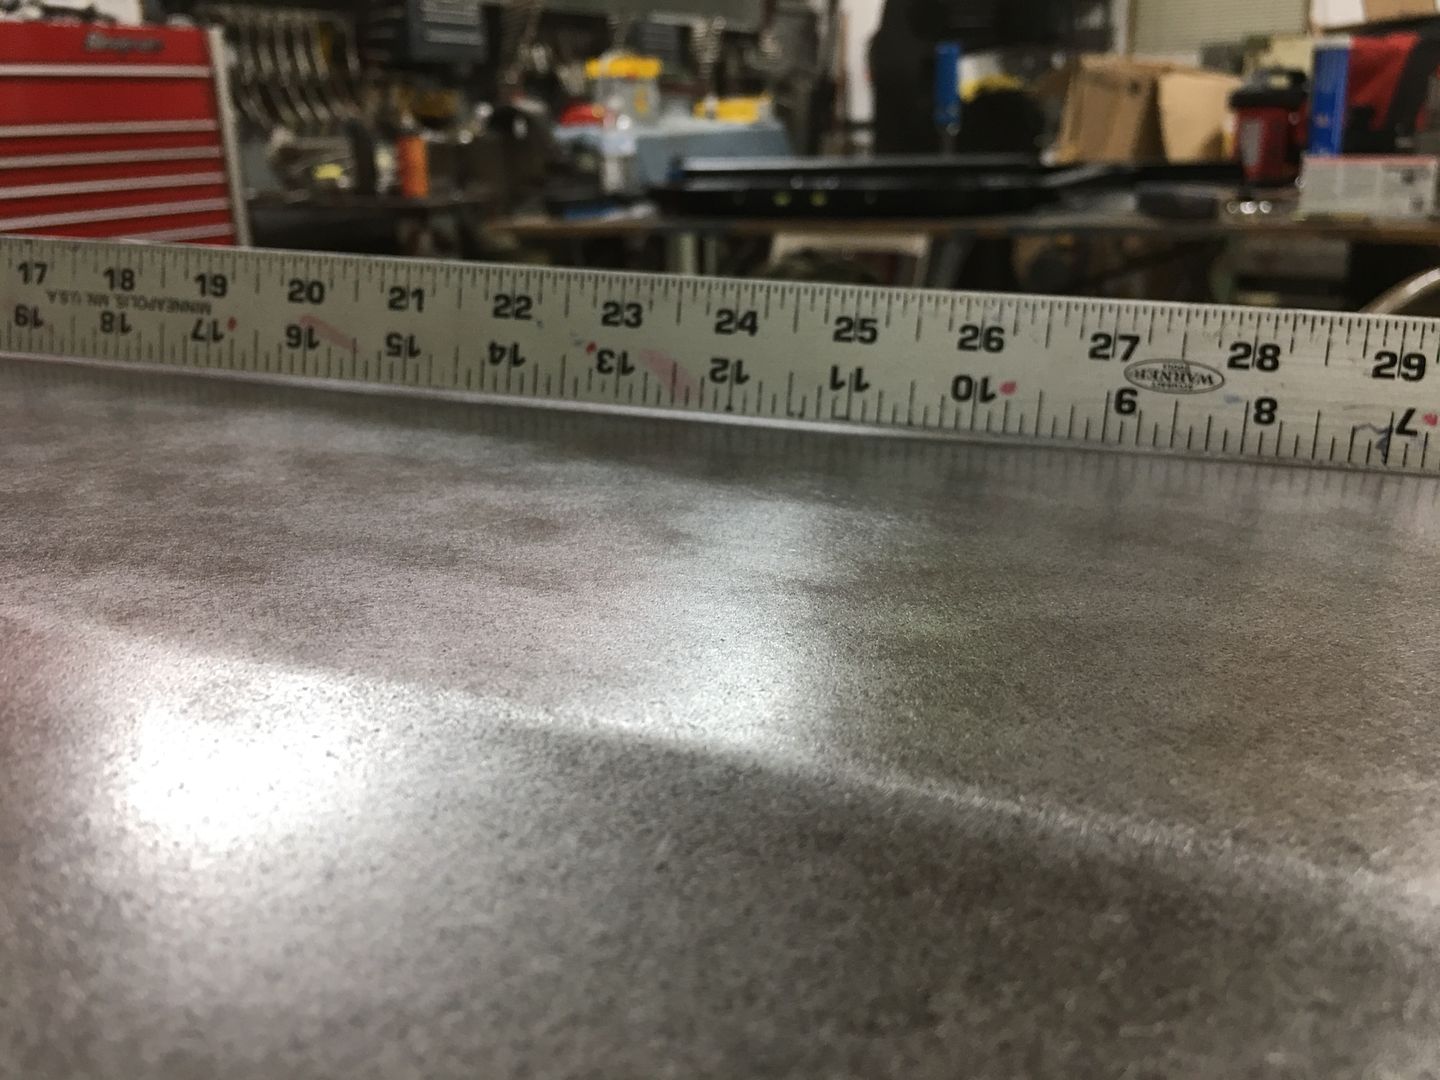 A good tool to check the crown of the hood is a long straight edge in the form of a 36" rule. If you don't have one, most hardware stores sell aluminum flat bar for a few dollars that will make a good profile template. For this style hood, lows are bad, straight is better, and a slight crown in the center crease along the entire length of the "flat" area of the hood is optimal.. This gives the support to help eliminate those oil cans and floppy hoods. When we started there was an obvious area about 12" forward of the rear edge, dead center, that appears low, and was easily pushed downward. In order to better define the center crease and provide the support needed, we will use a sand bag (a rather large one) and lightly hammer from the bottom side into said bag with a purpose built "punch". 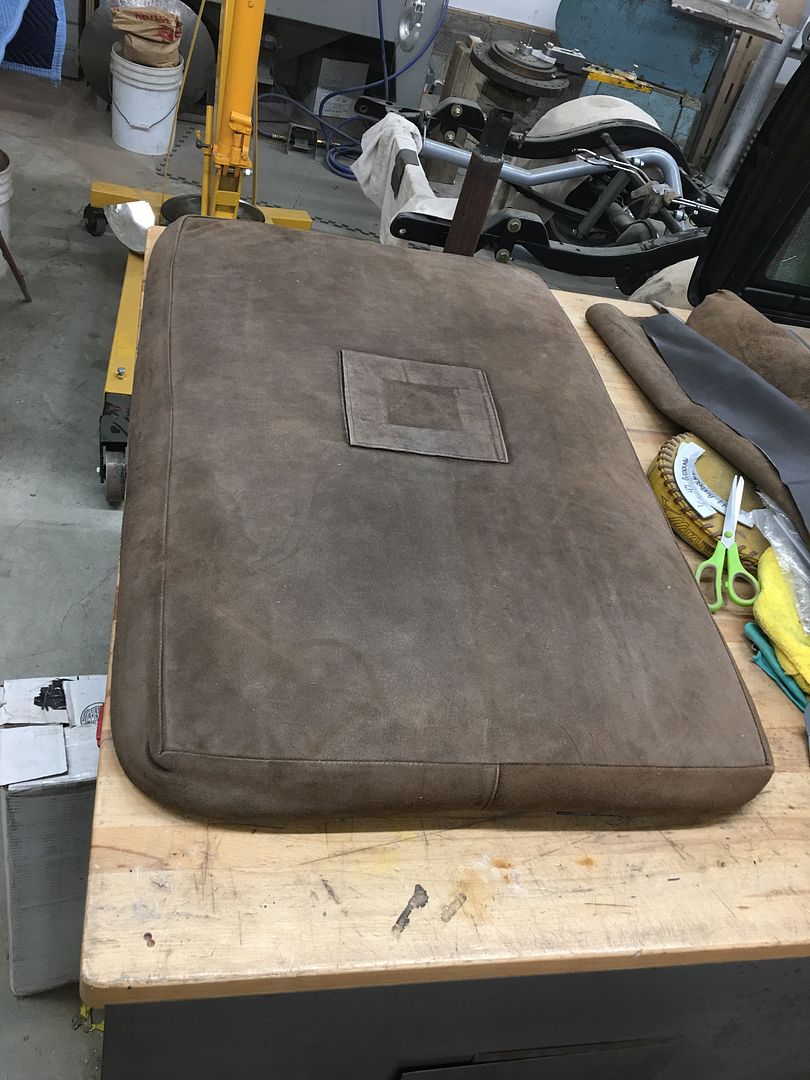 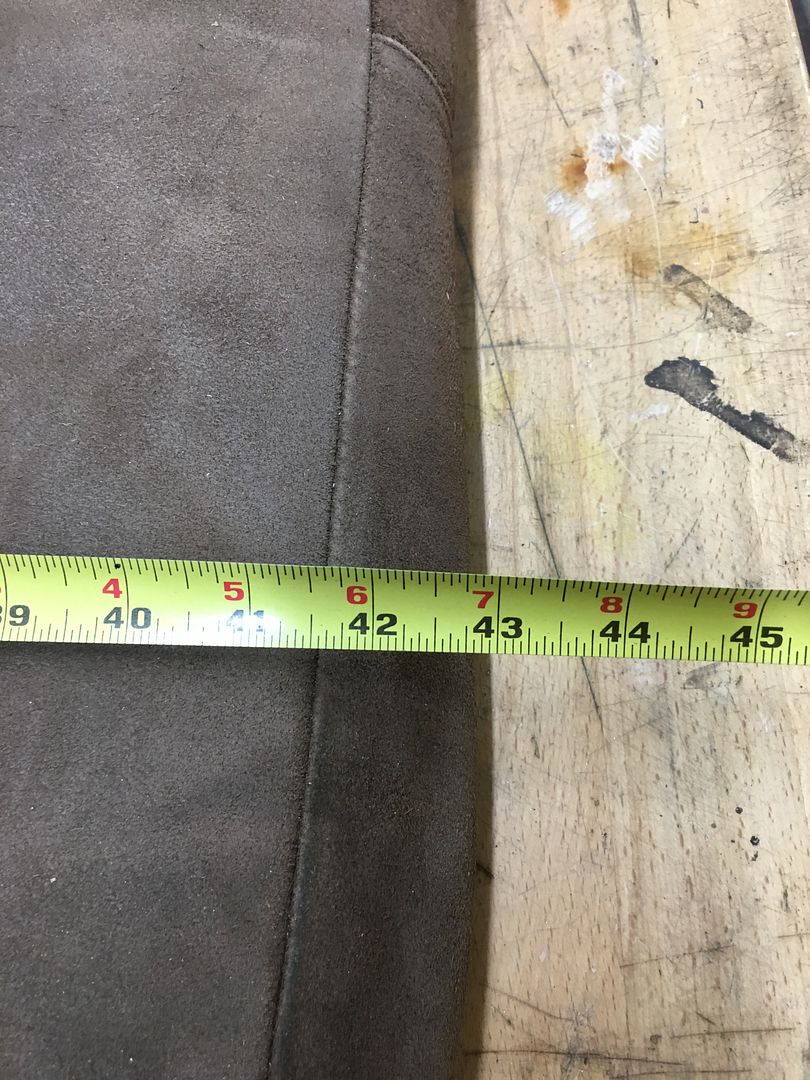 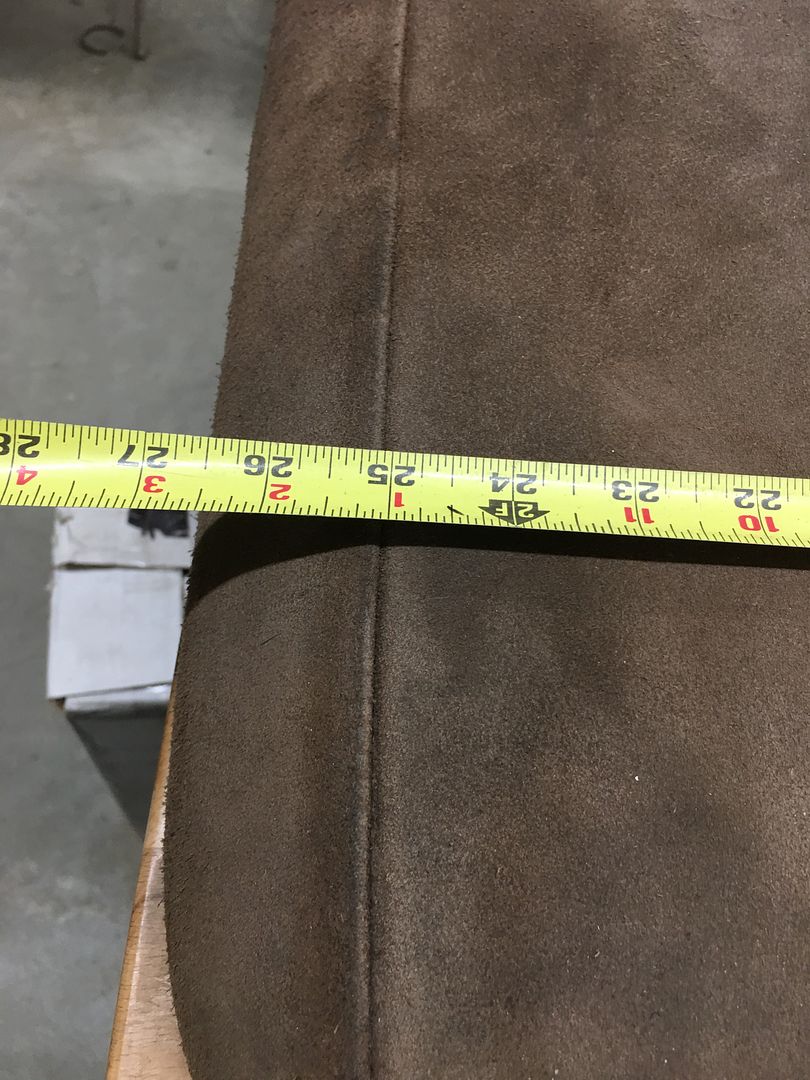 In order to keep the back portion of the hood down against the bag for support, we used our latest "metalshaping" tool to hold the front of the hood up, an engine hoist.. 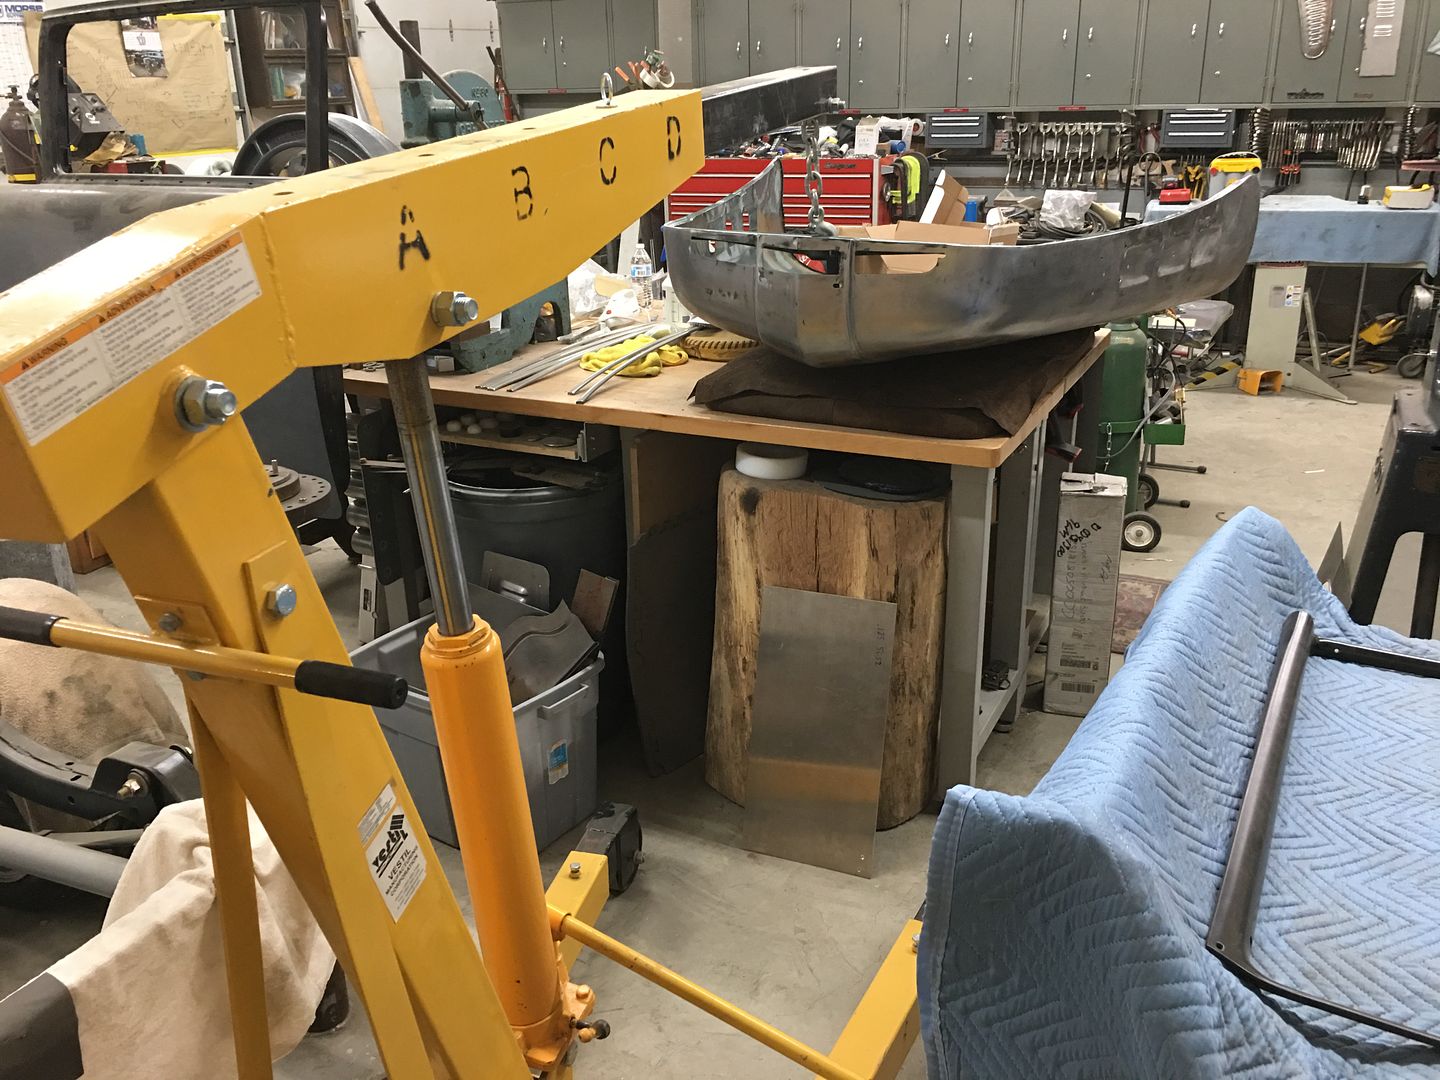 A reference mark is used on the inside, measured and centered... 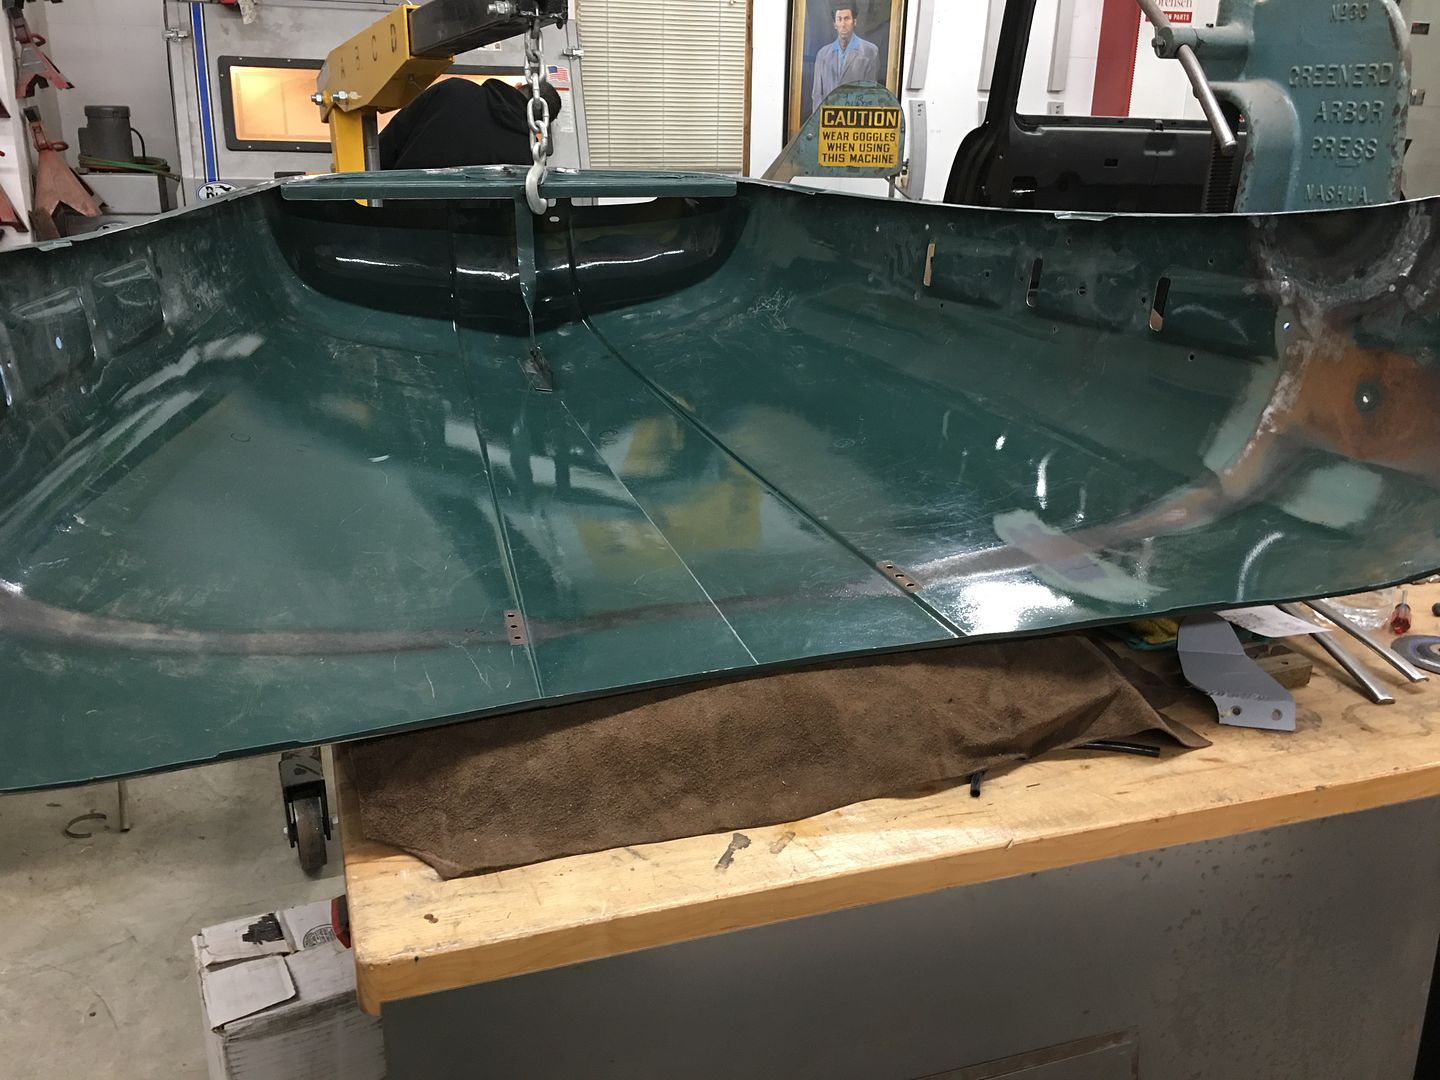 The crease was checked for low spots prior, and the bottom marked. The "punch" is dragged along the centerline and tapped as you go. Flip the hood over, check crown, remark as needed, repeat. We got to a good straight/slight crown and the oil can disappeared. Pushing along the entire center crease was a nice tight support now.. 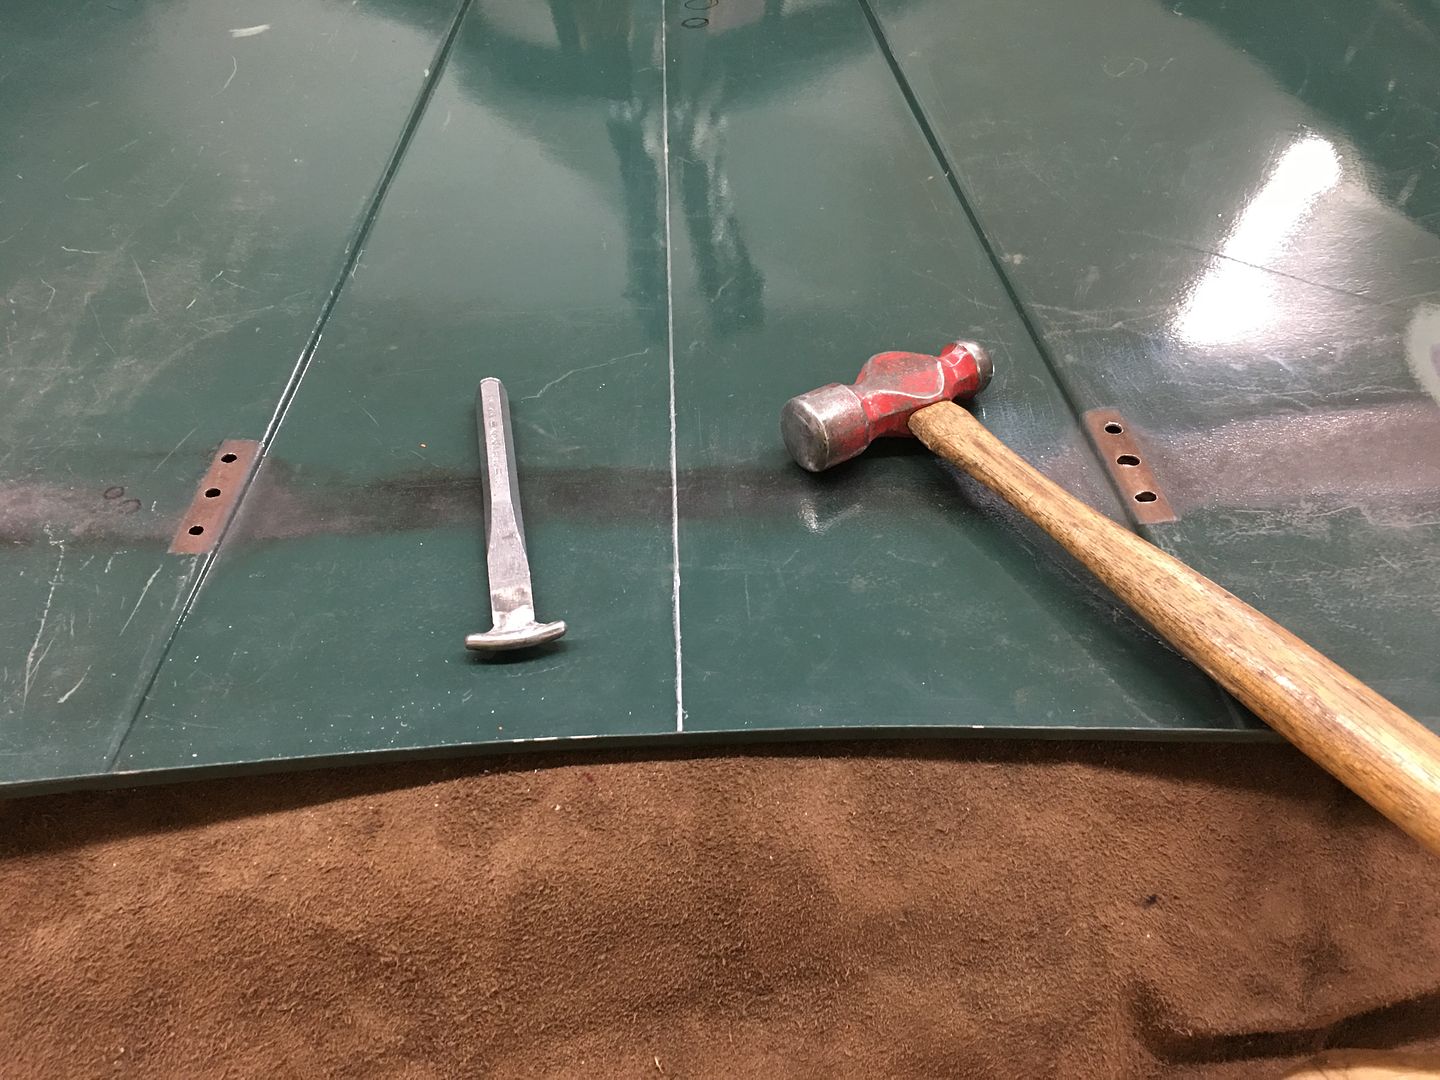 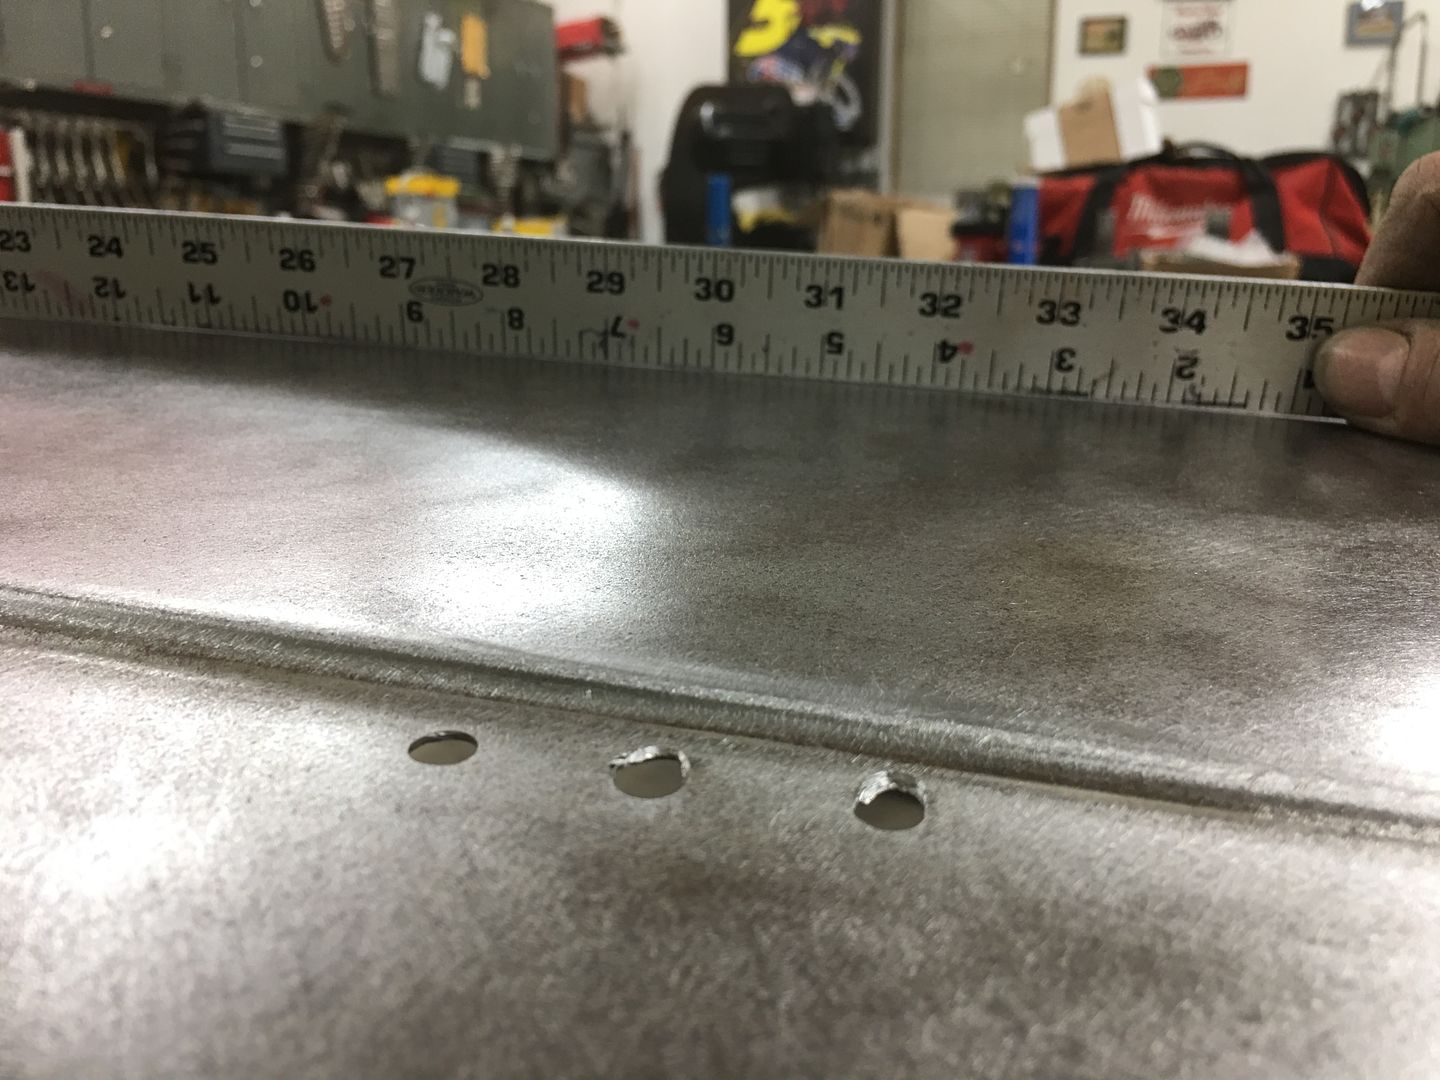 So if you are having issue with your hood, I would suggest first checking your center crease.
__________________
Robert |
|
|
|
|
06-03-2020, 07:34 AM
|
#31 |
|
Registered User
Join Date: Jan 2013
Location: Leonardtown, MD
Posts: 1,633
|
Re: Butt welds for patch panels
More progress on the F7 hood, got some SPI epoxy on the hood brace...
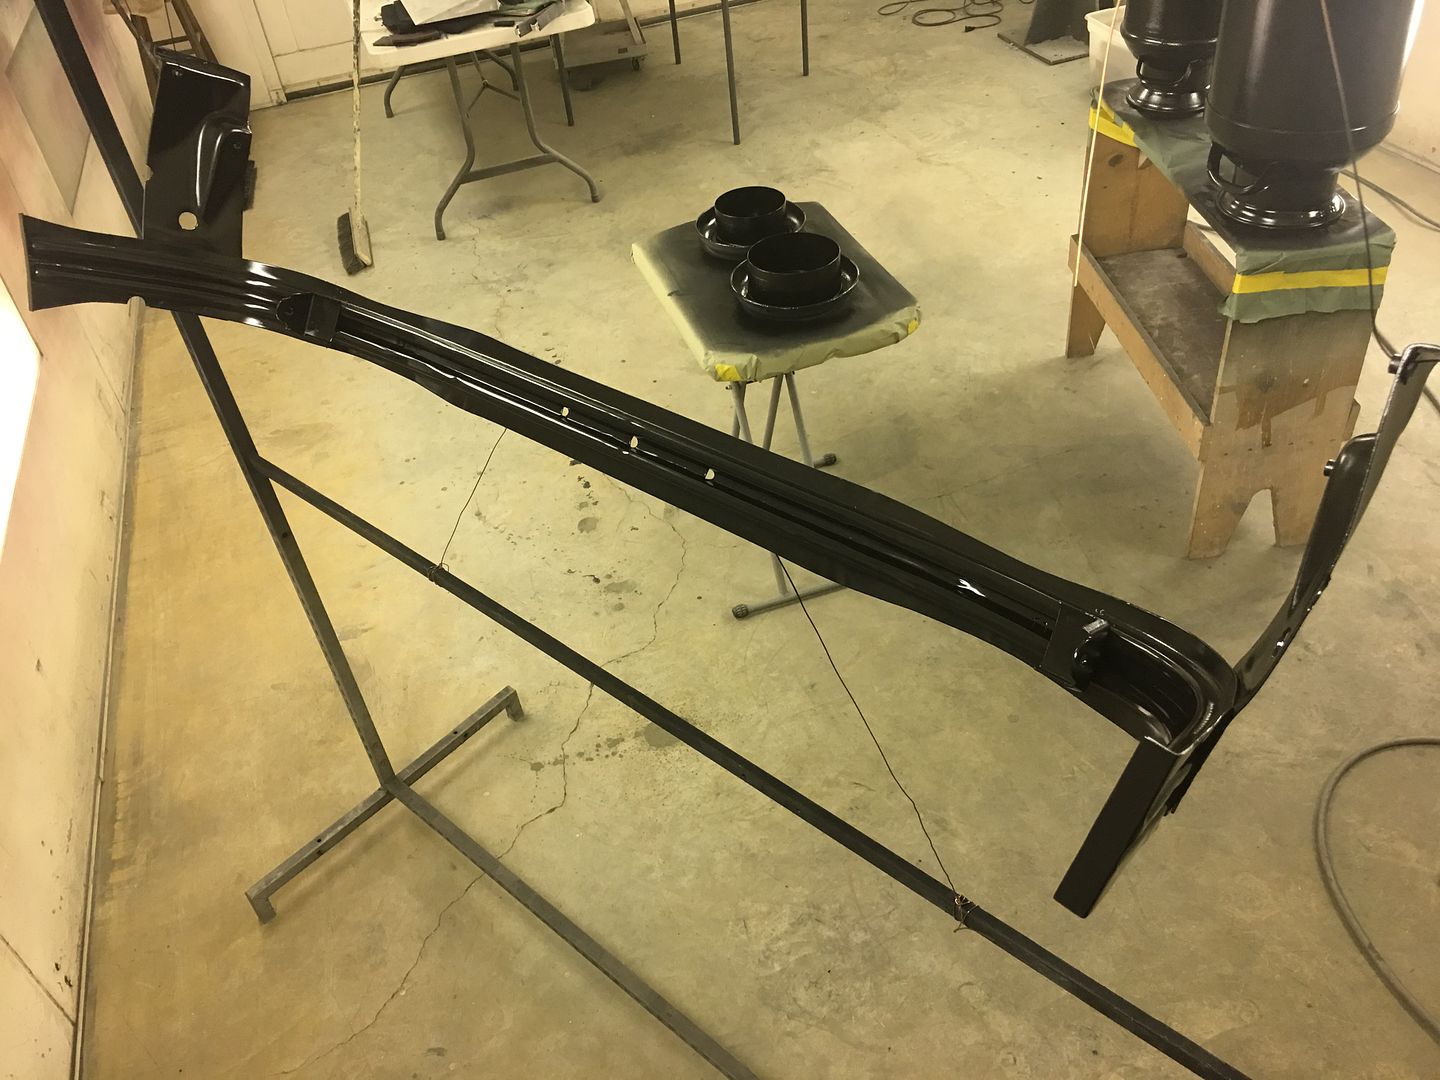 Ends are quite a bit better than before.. 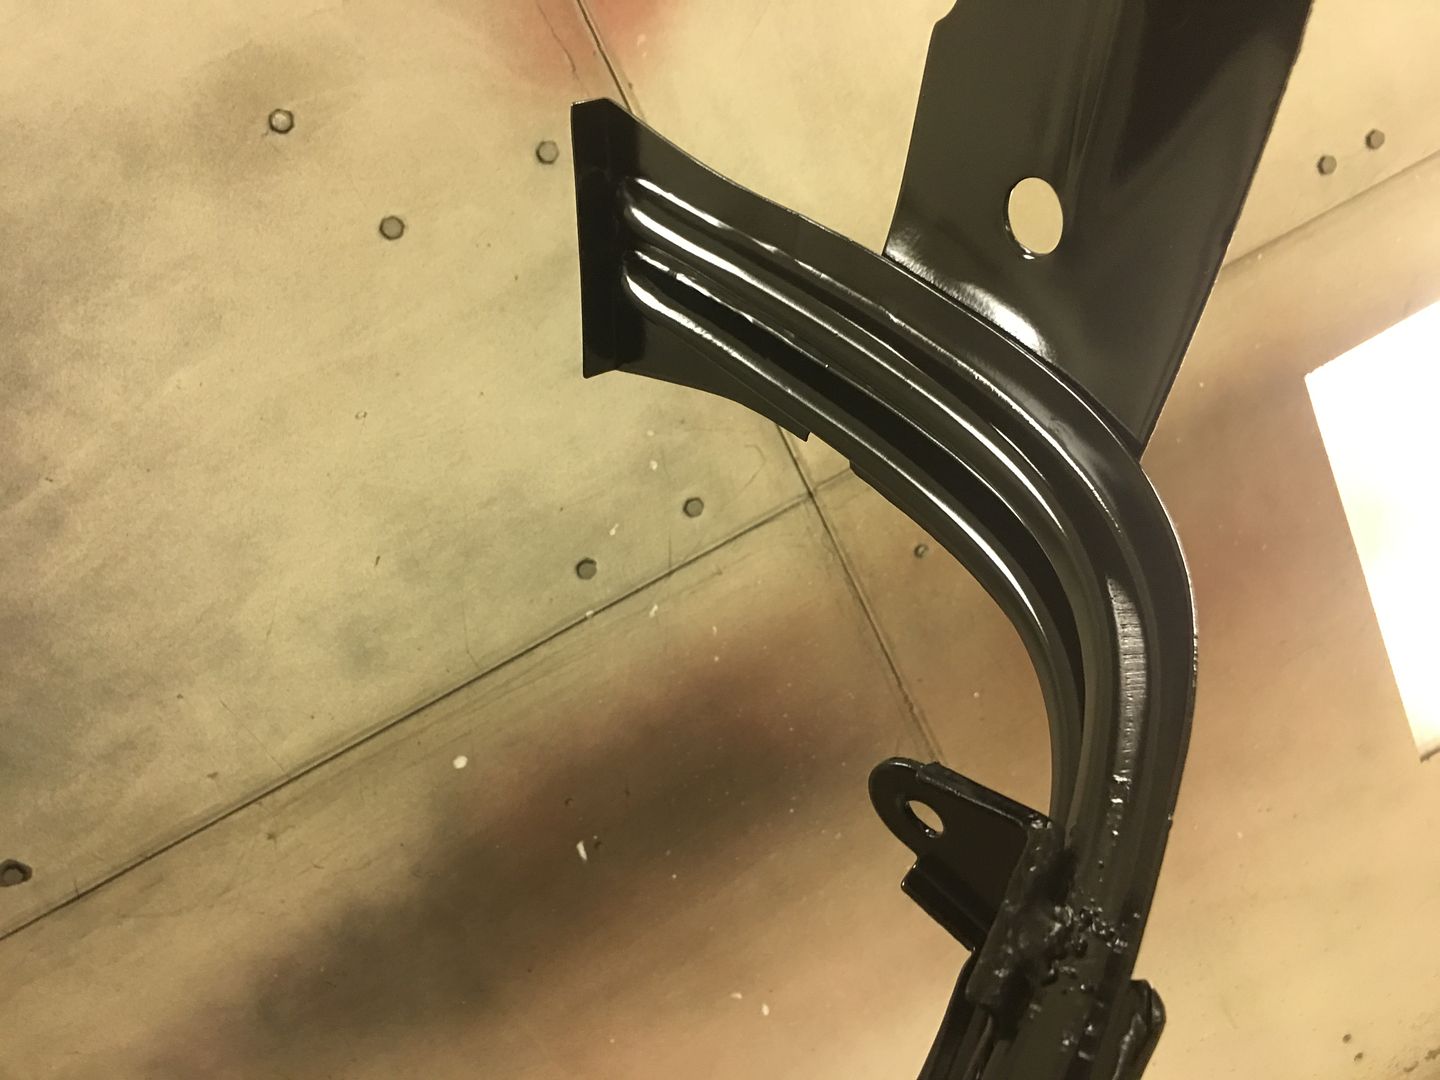 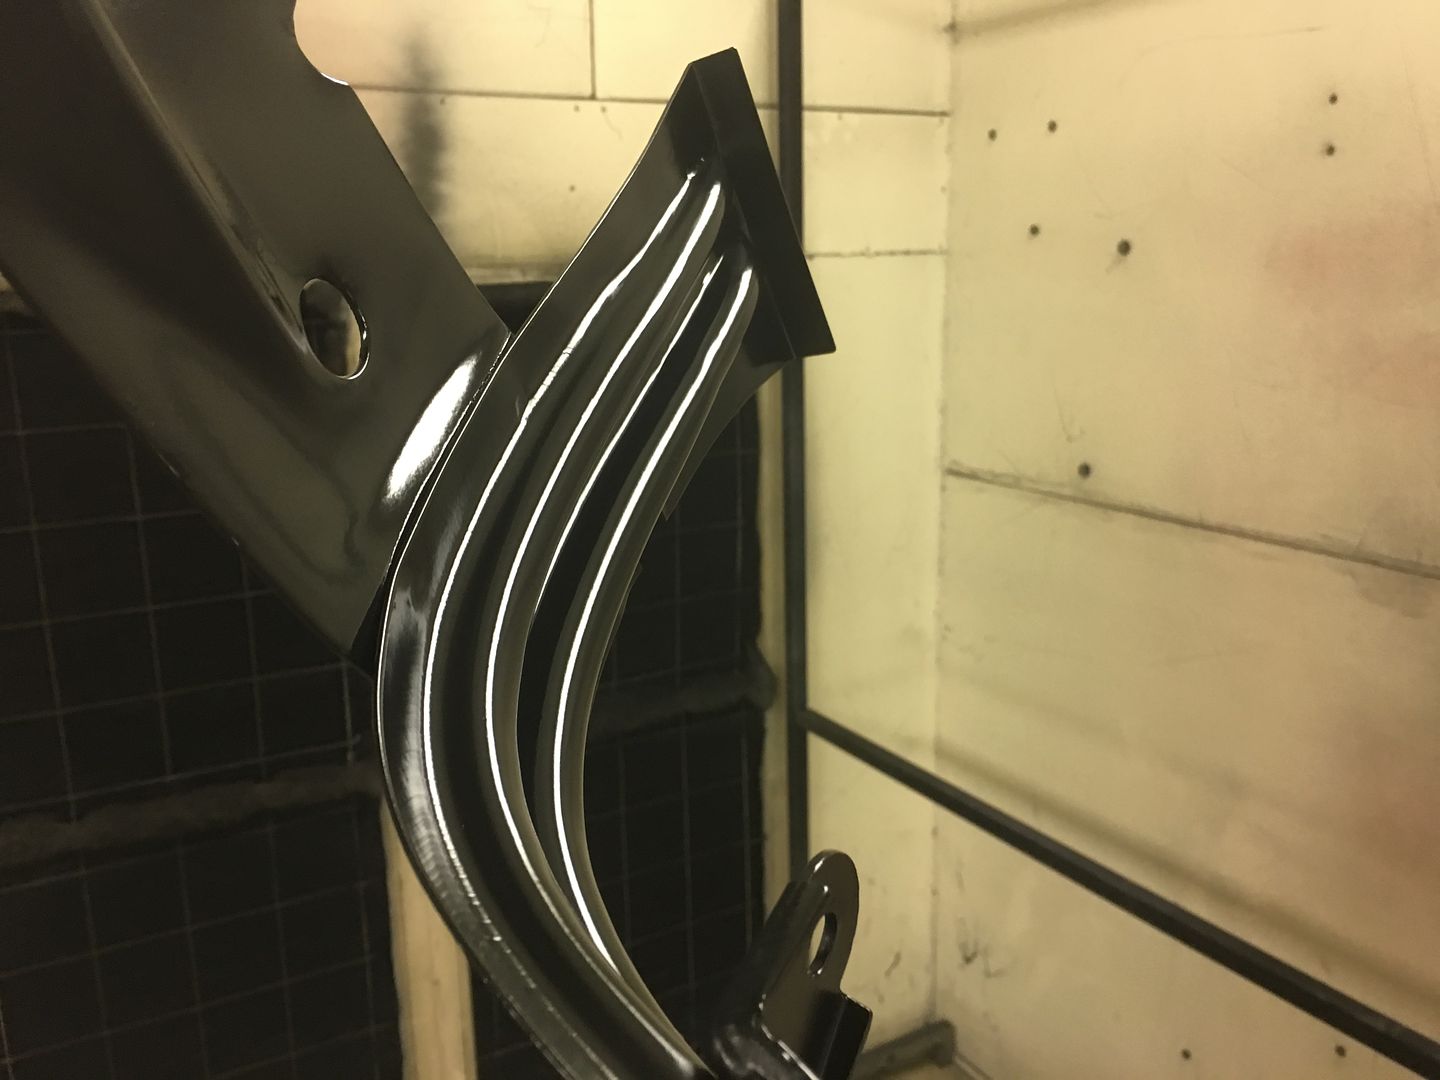 Vince has the hood just about ready for epoxy... 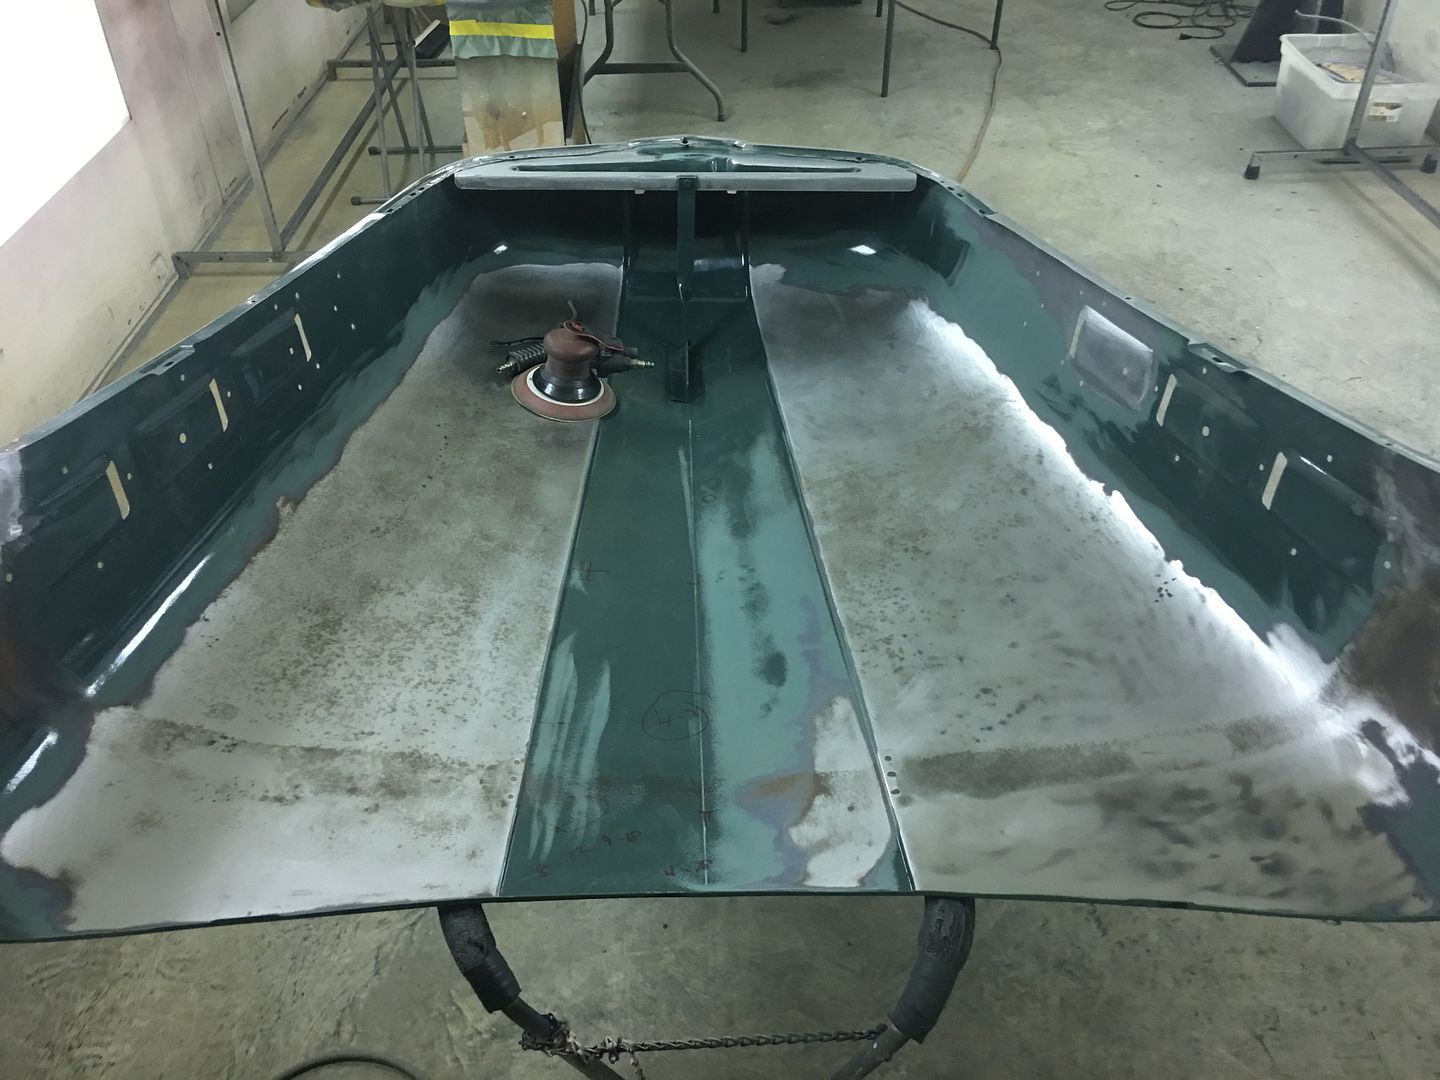 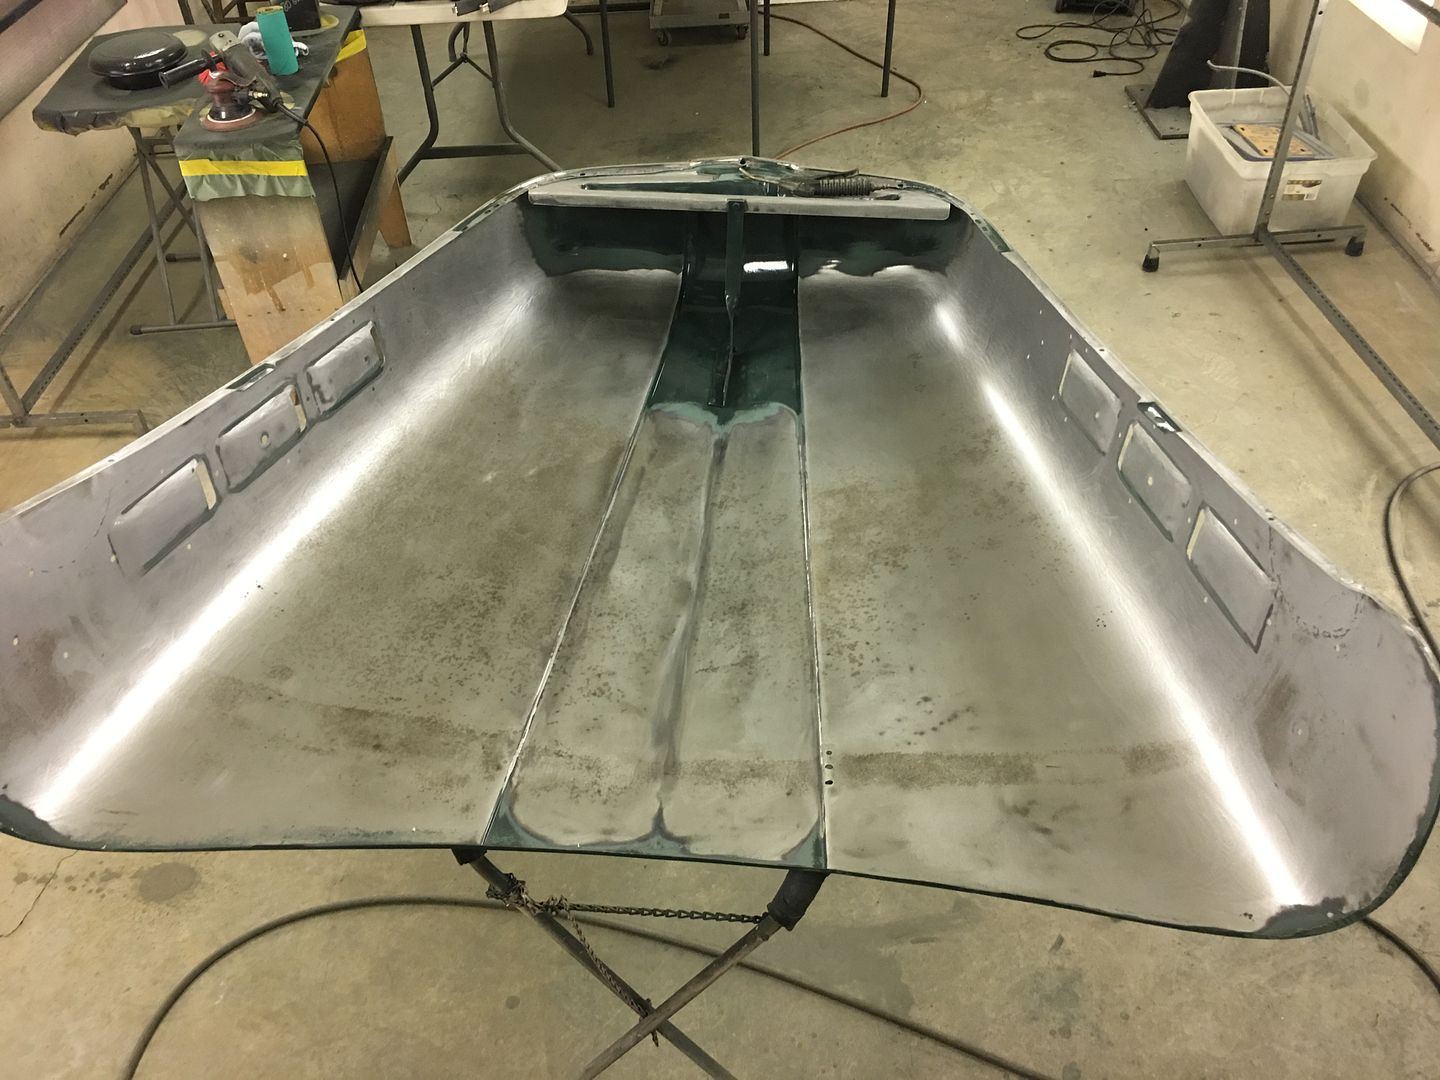
__________________
Robert |
|
|
|
|
06-09-2020, 10:24 AM
|
#32 |
|
Registered User
Join Date: Feb 2013
Location: Northwest NJ
Posts: 684
|
Re: Butt welds for patch panels
Your work is amazing Robert !....thanks so much for sharing with us all...great pics and welding tips also. As a retired Machinist, I can say you are a true craftsman .....Keep up the great work !
|
|
|
|
|
08-31-2020, 11:42 AM
|
#33 |
|
Registered User
Join Date: Jan 2013
Location: Leonardtown, MD
Posts: 1,633
|
Re: Butt welds for patch panels
Thanks!!
The 51 F7 hood is closer to reuniting with the brace with the newly repaired ends.. Epoxy primer will be under the brace this time around to help prevent the new side patches from rusting again.. 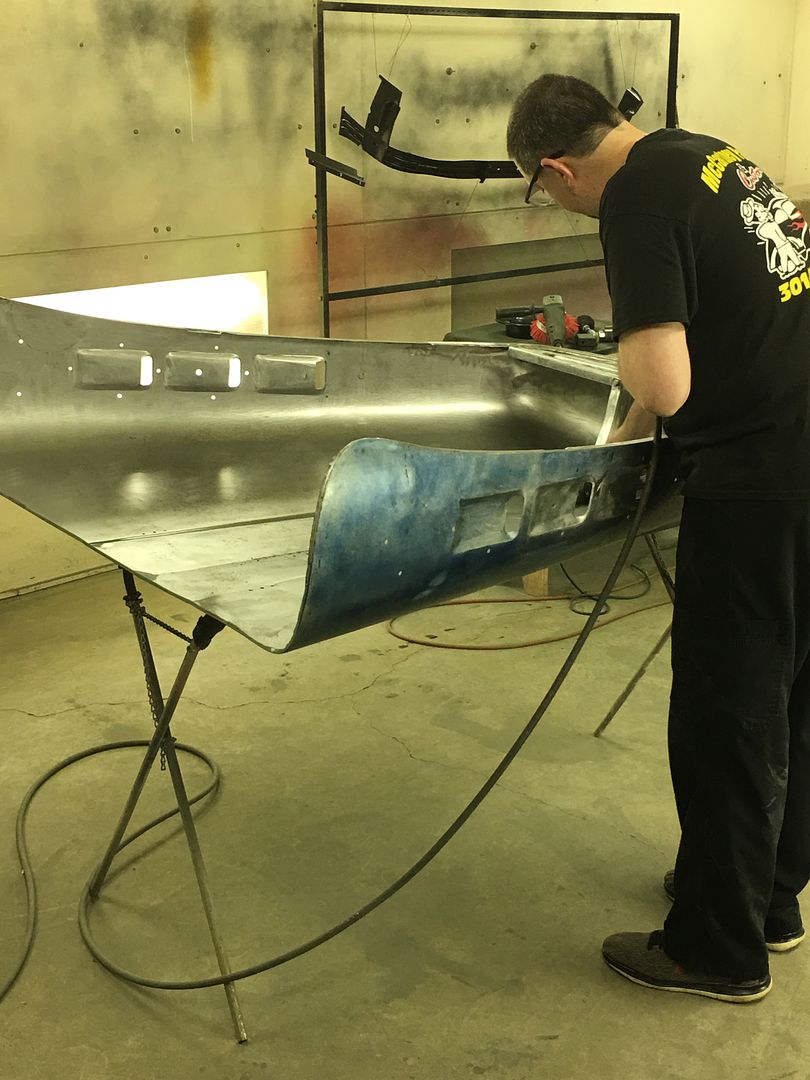 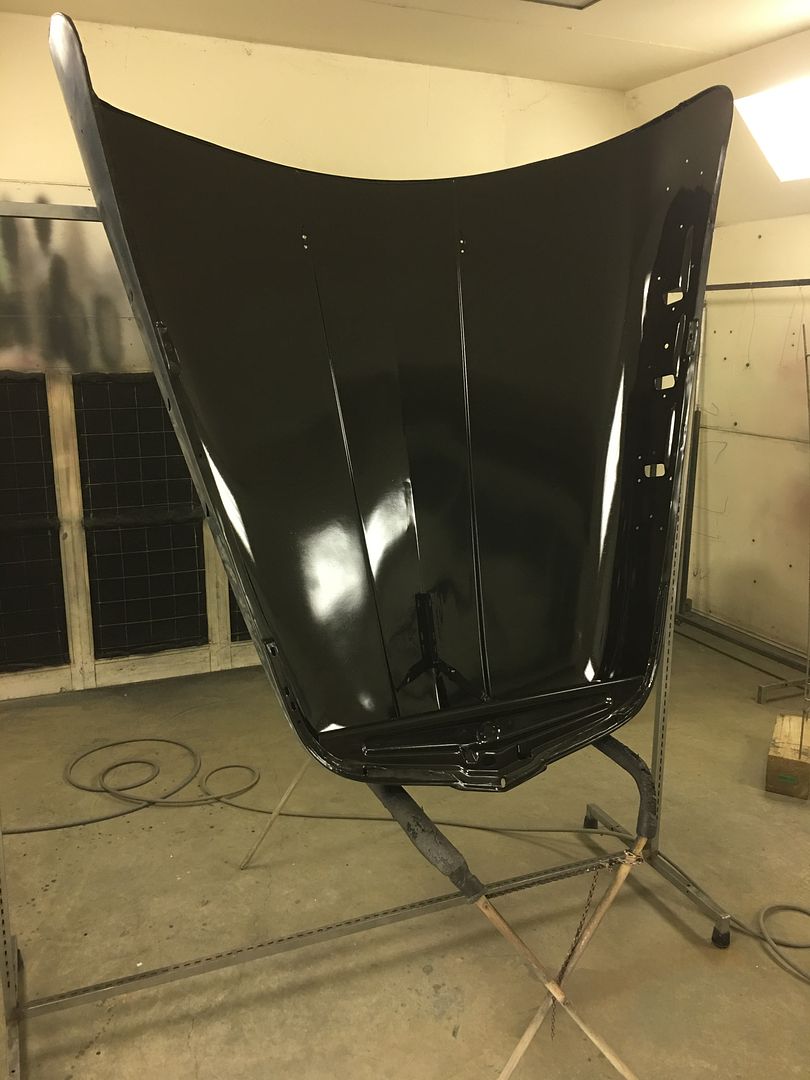 .JPG) .JPG) .JPG) Some blocking tips on the F7 hood. We have a nice crease on the inside of the hood from front to back. These scratches show that we would be taking material off the adjacent side if no other steps were taken to stop our sanding block at the center of the crease... 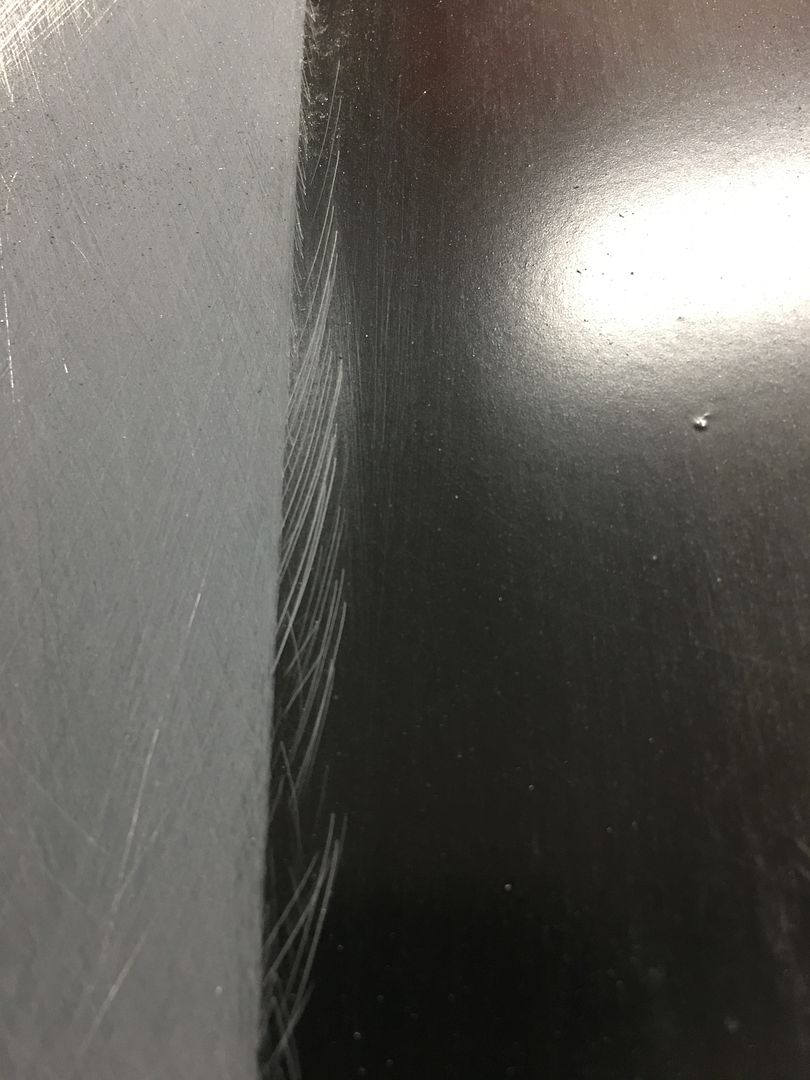 By adding a strip of tape along the center, it gives us a positive stop for the sanding block.. 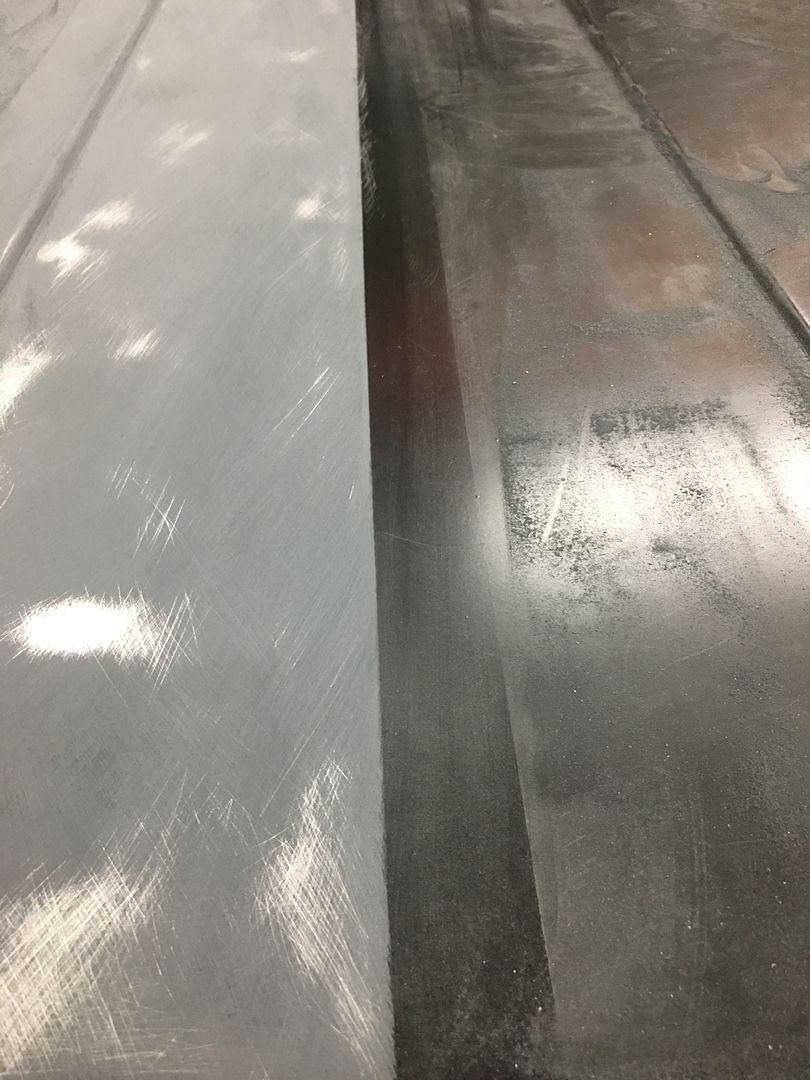 Then switching for the other side.... 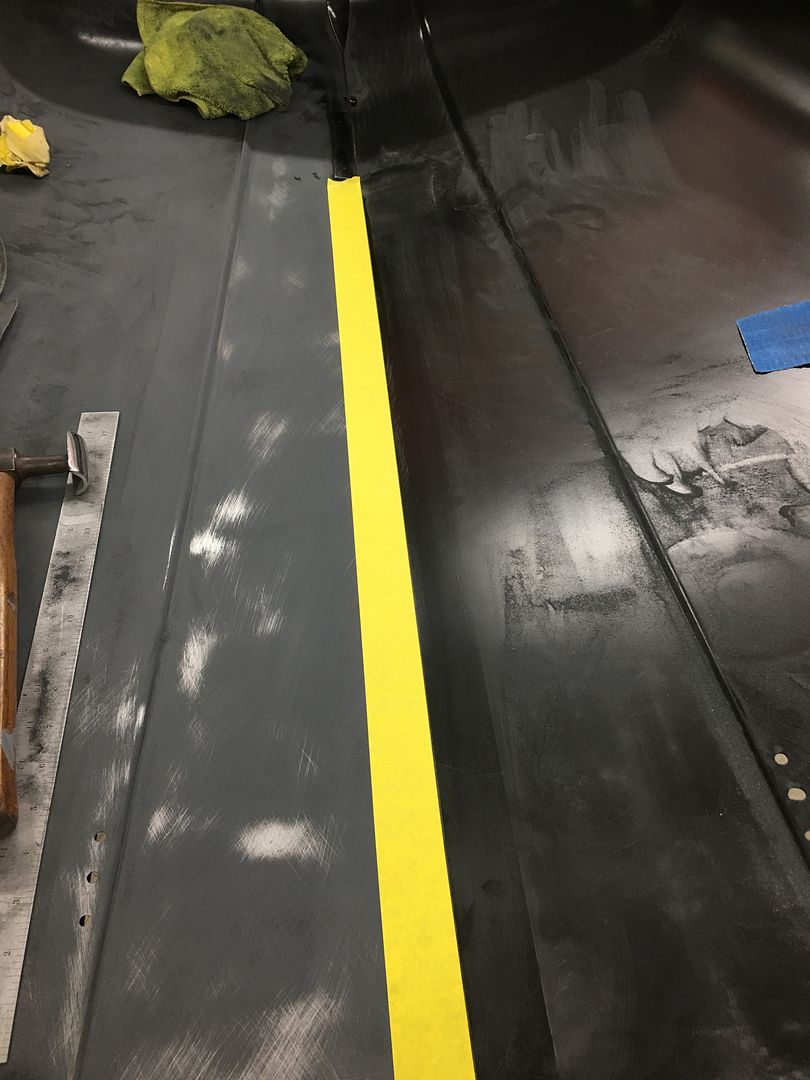 Which leaves us a nice crease in the middle, and panels nice and flat to either side... 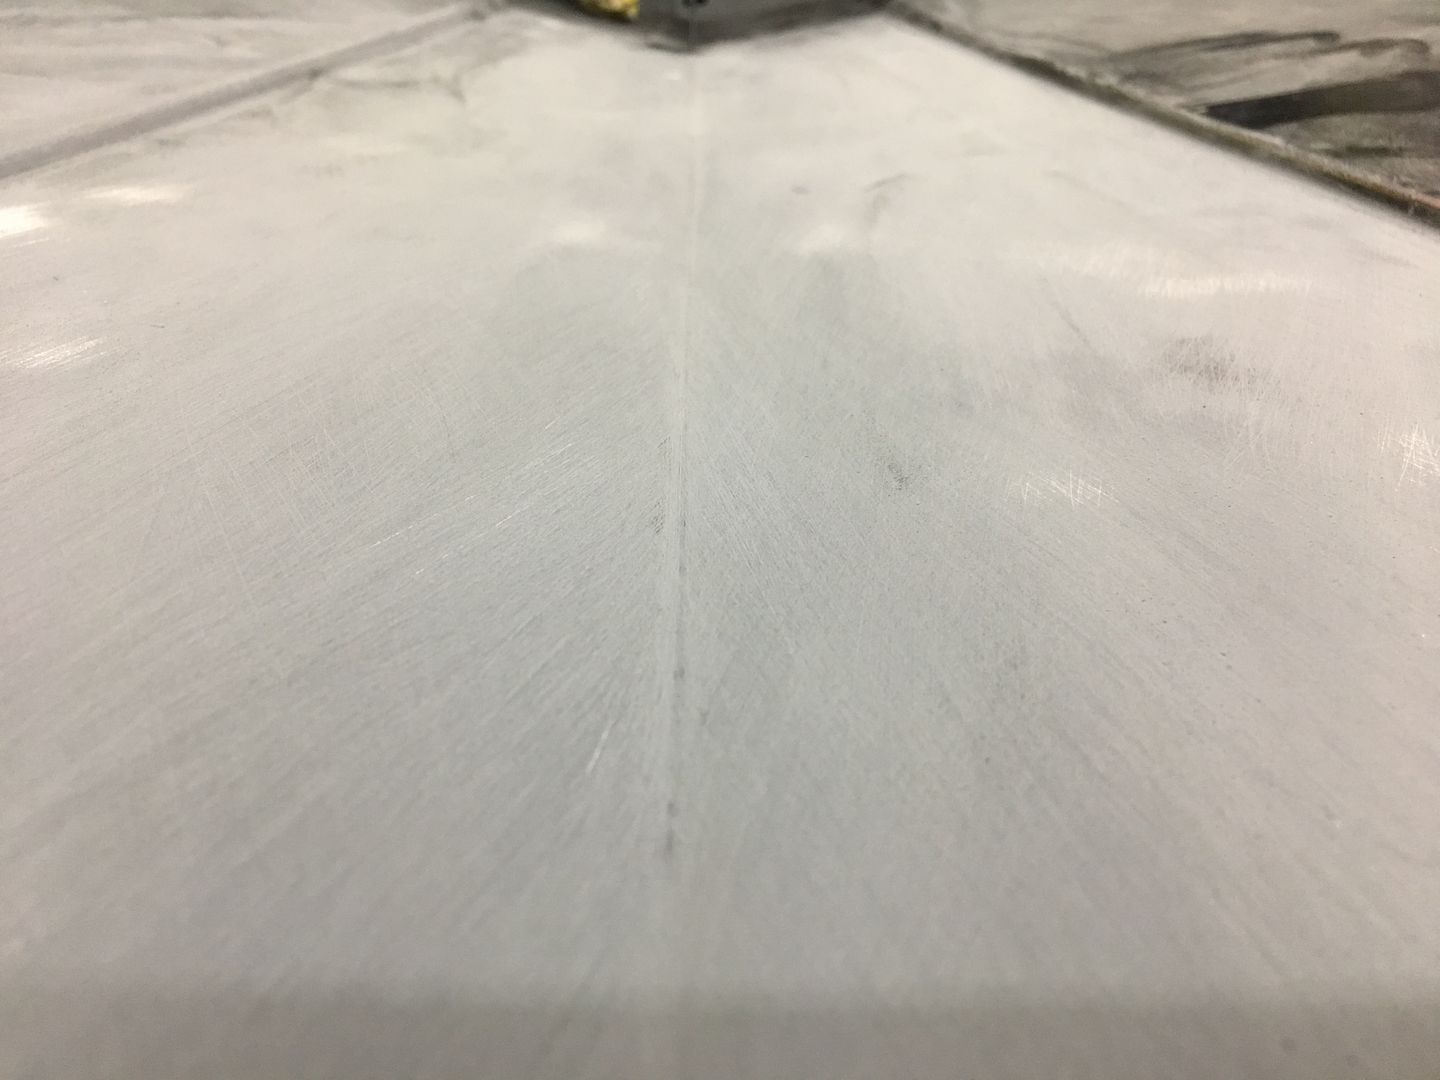 Final blocking on the inside using tape to keep the center line sharp, then brace welded in place and some epoxy touch ups done.. 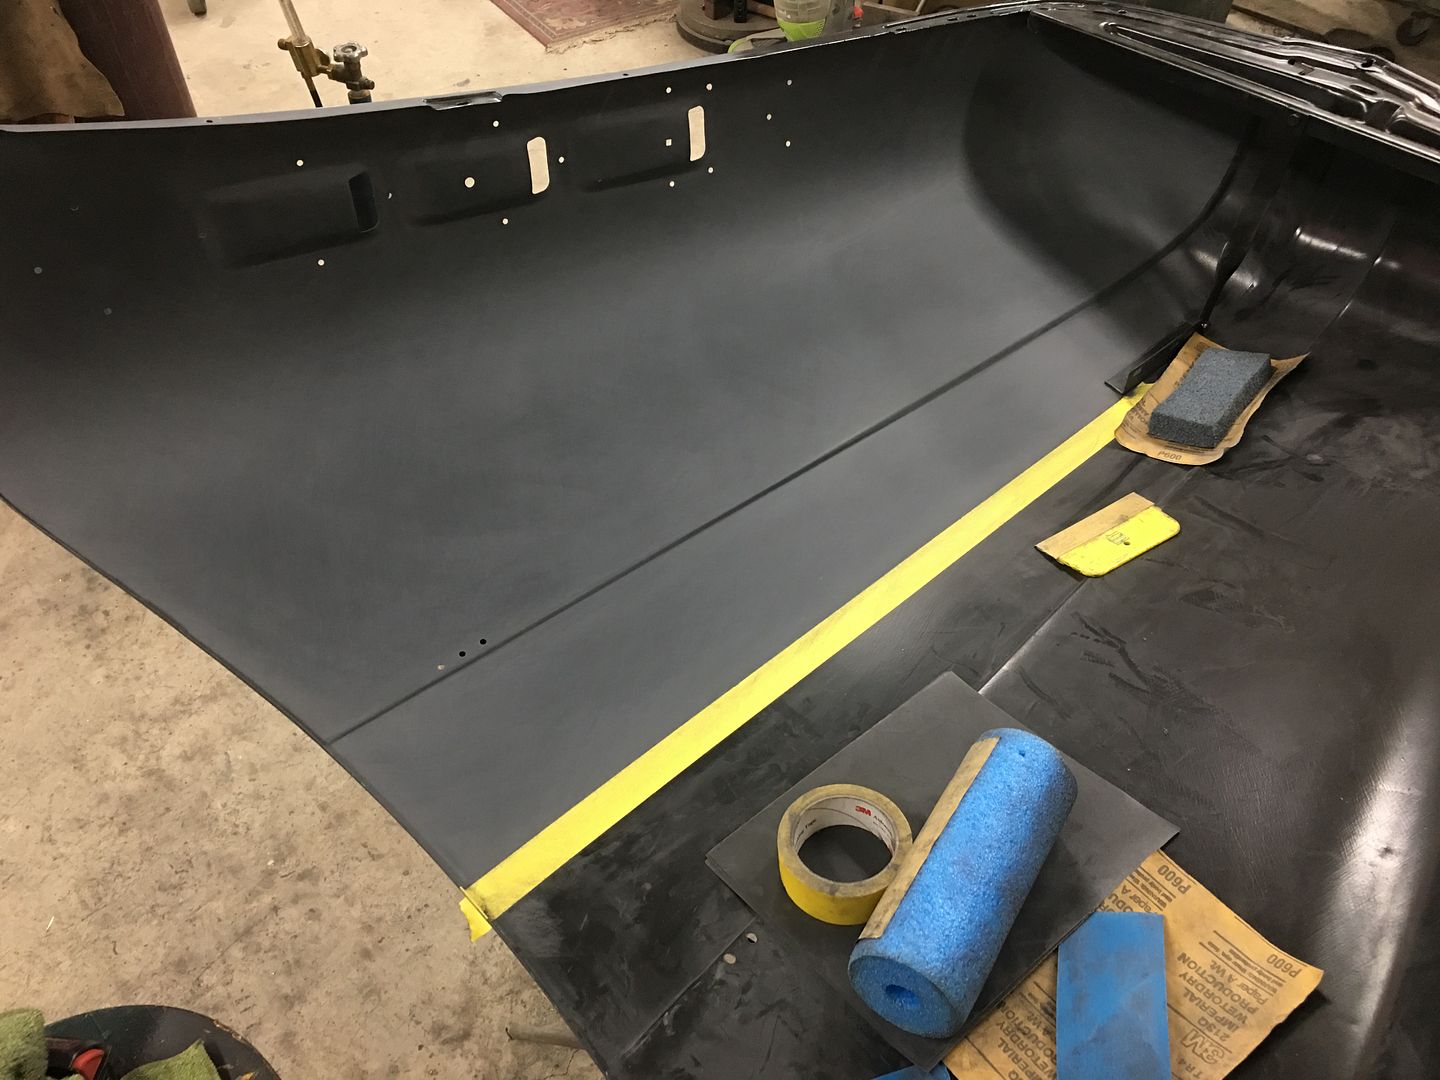 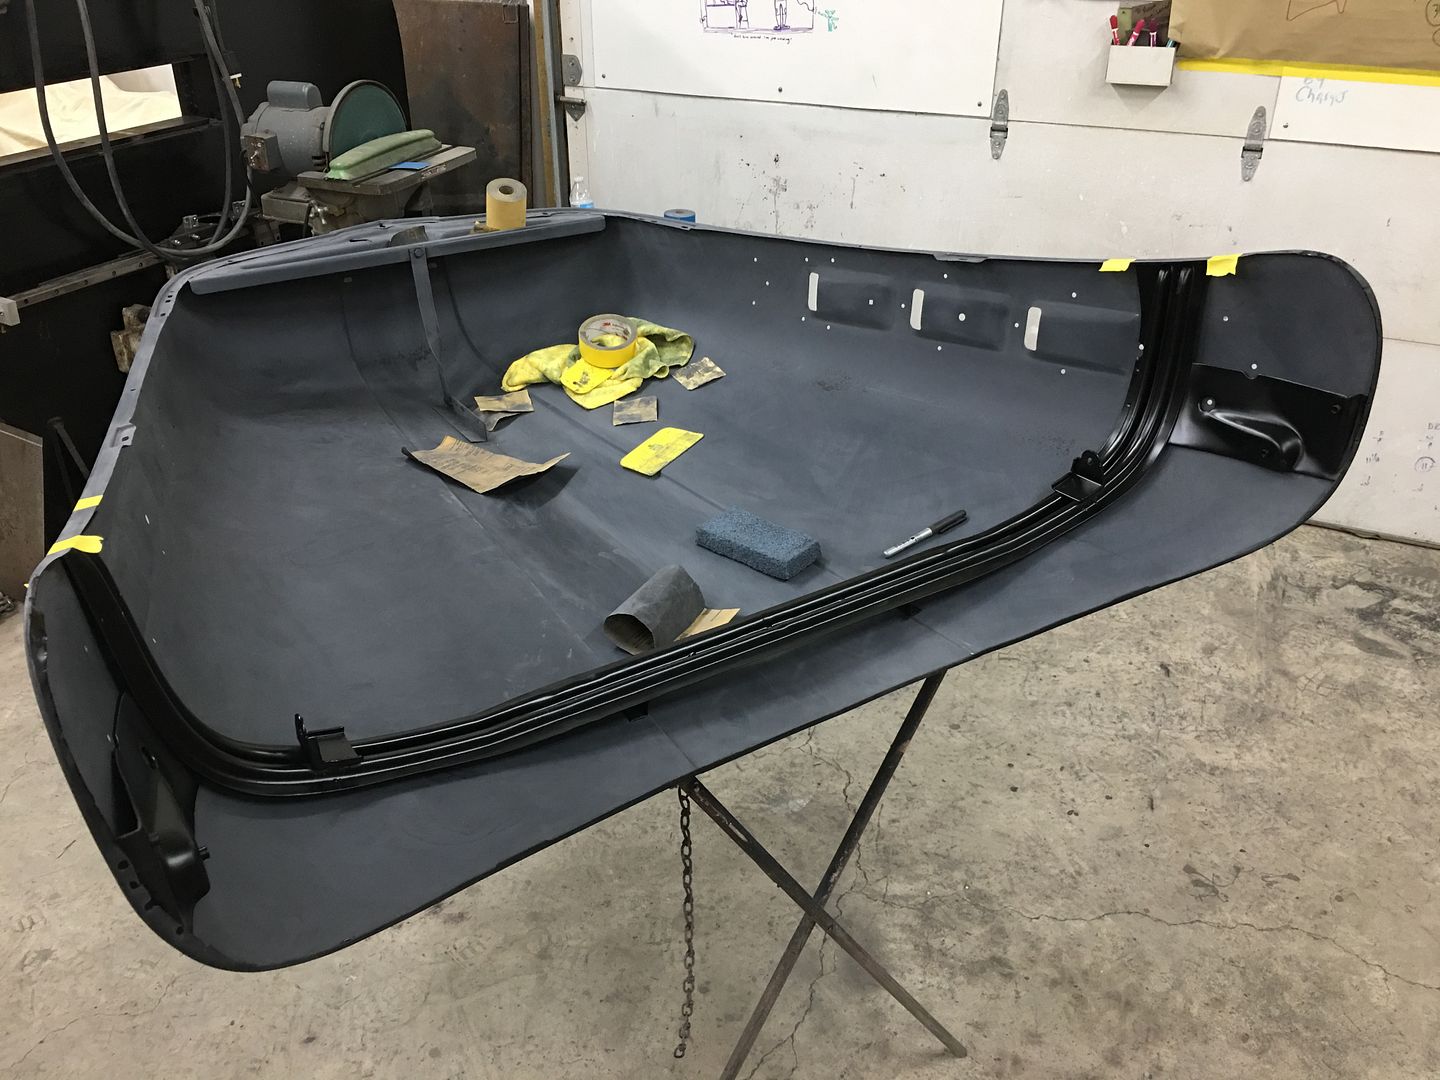 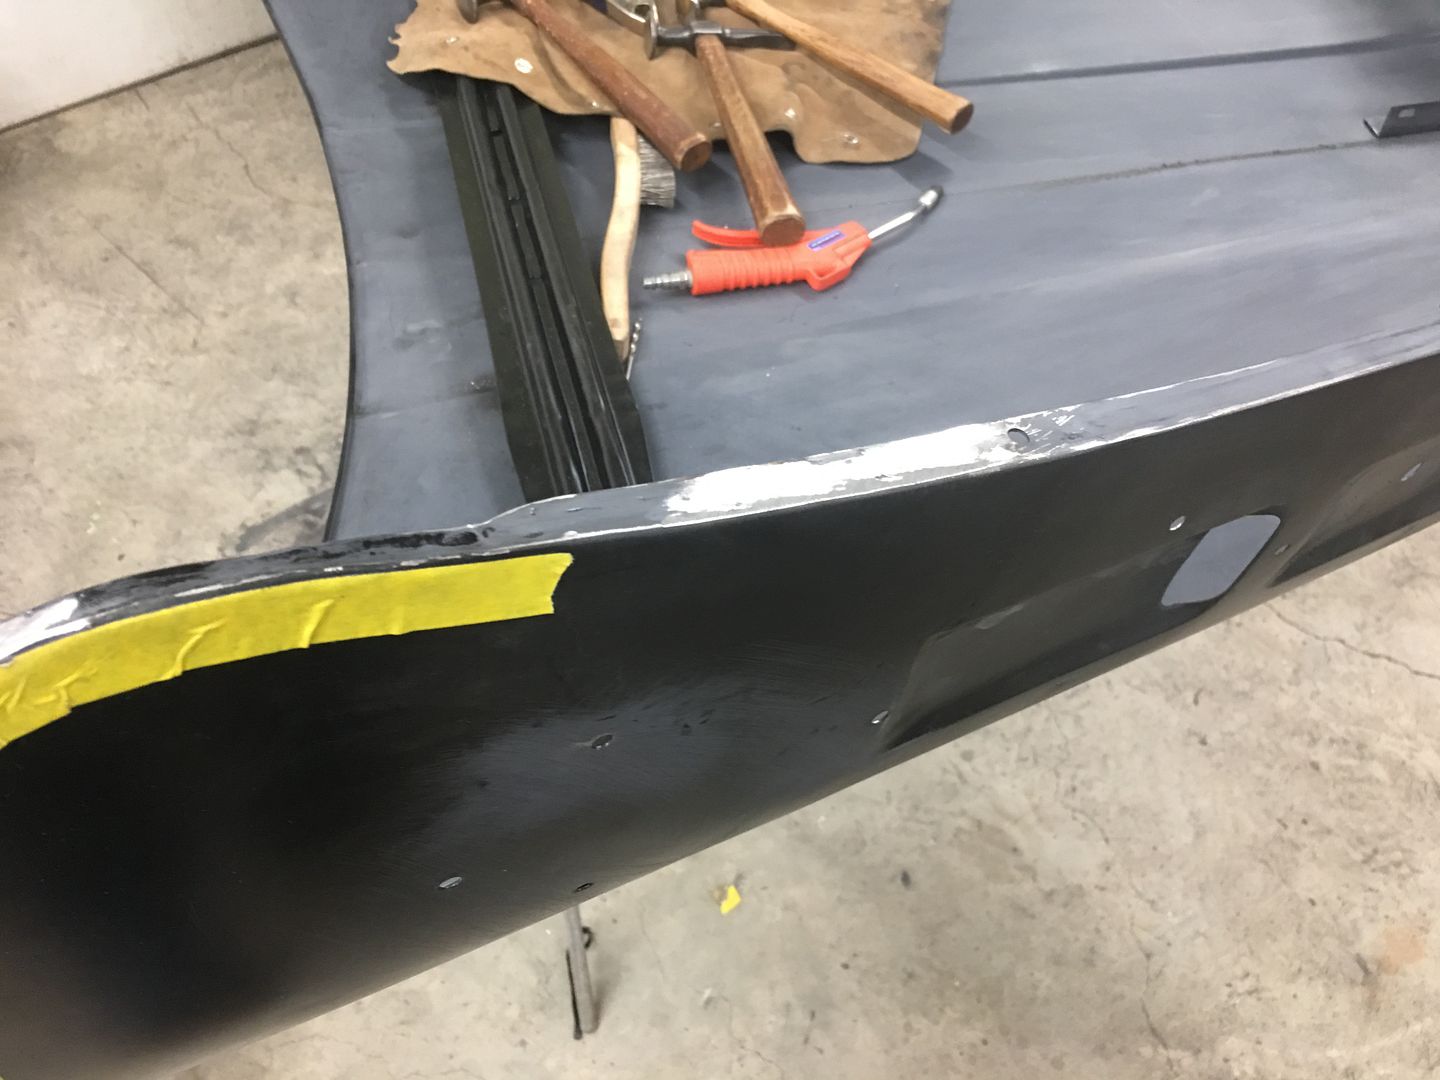 With the touch ups blocked, we're ready for some Epoxy/sealer, some PPG ESSS base, and my first time spraying SPI Universal... WooHoo! love this clear!! 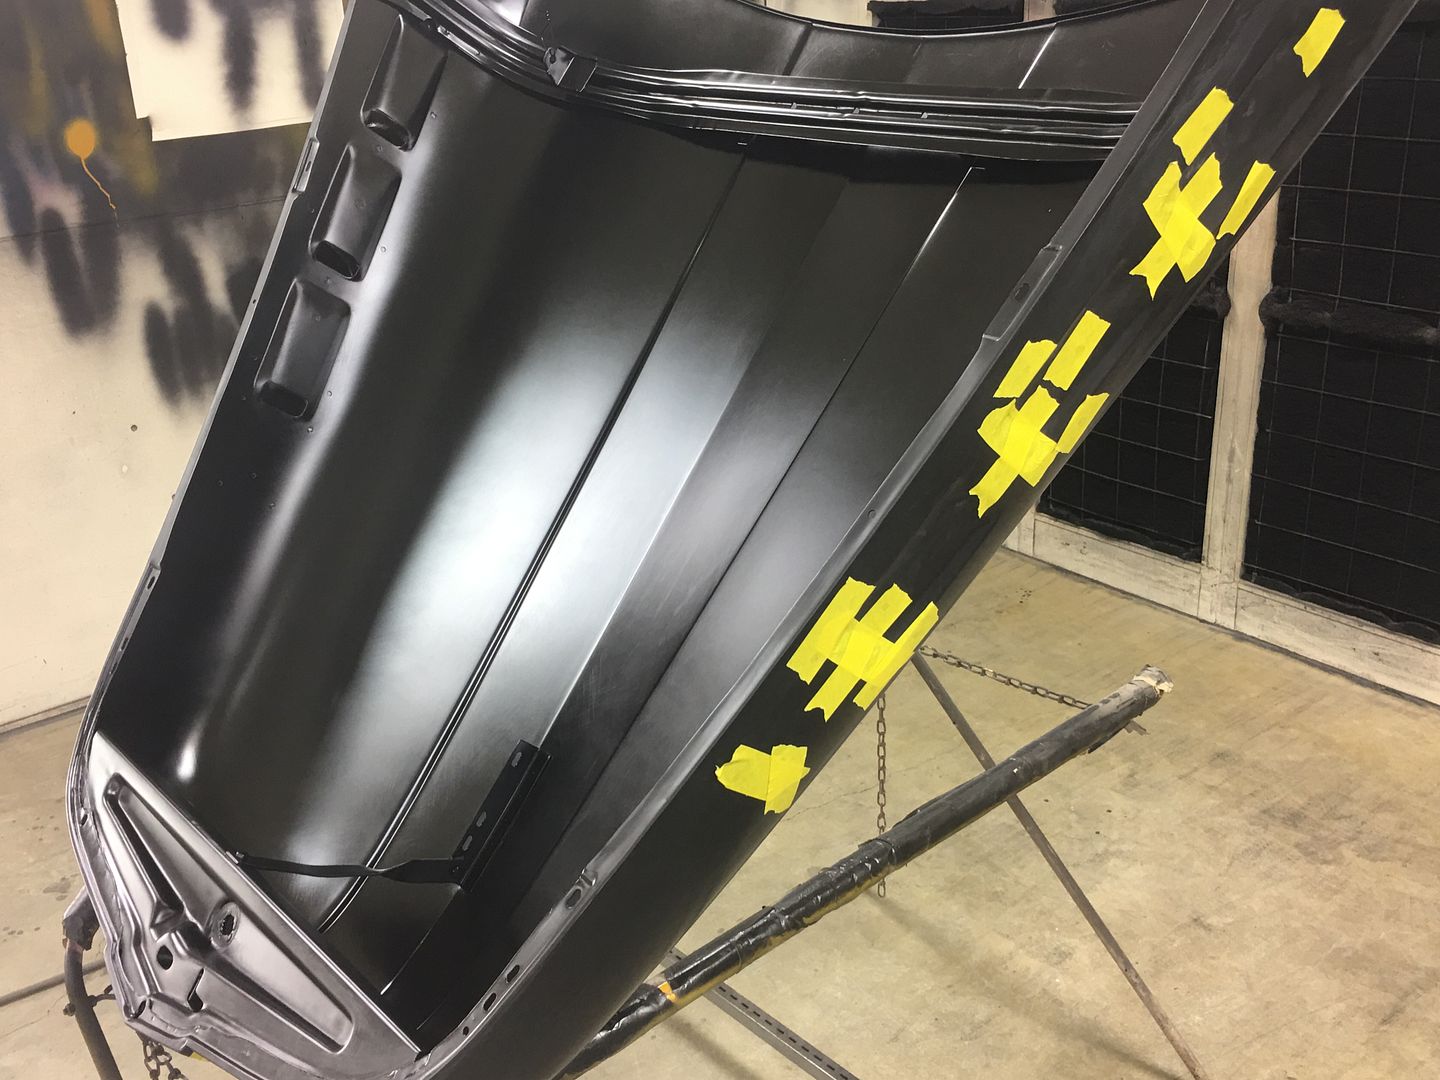 These Ford truck hoods can be a pain to get good paint coverage inside the nose.. So a couple pieces of TIG wire from our rack to the hood brackets hold it up in the air so we can get into the nose with the spray gun.. 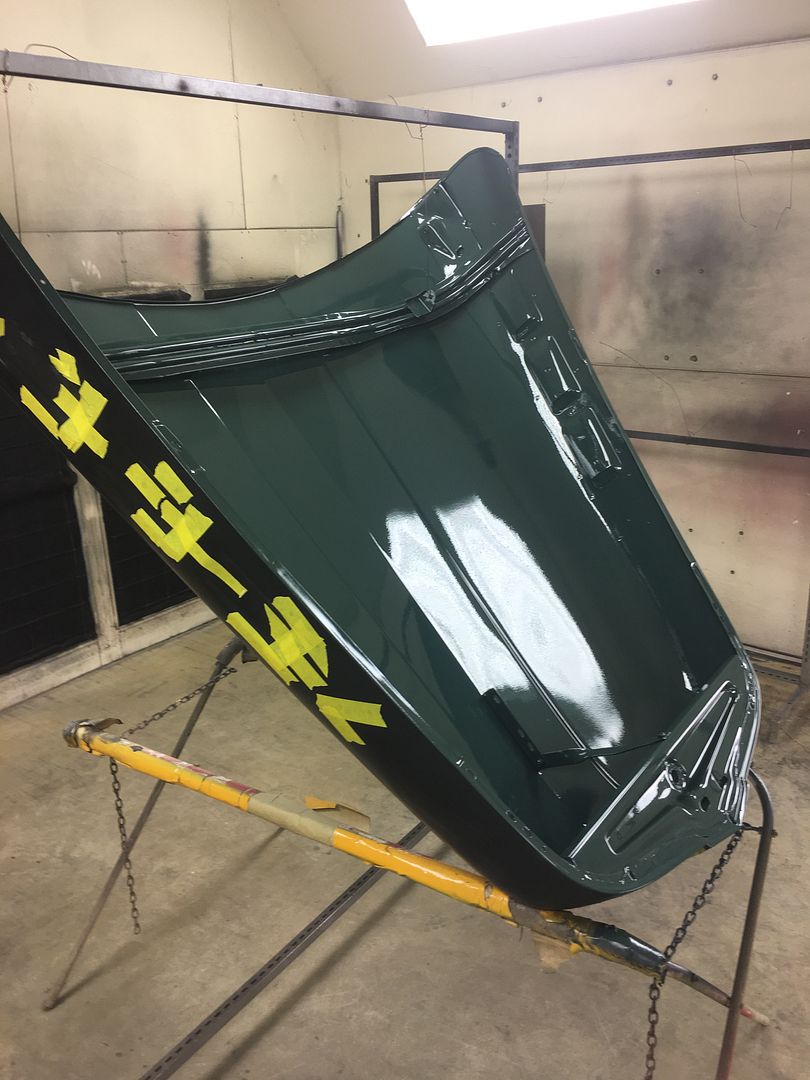 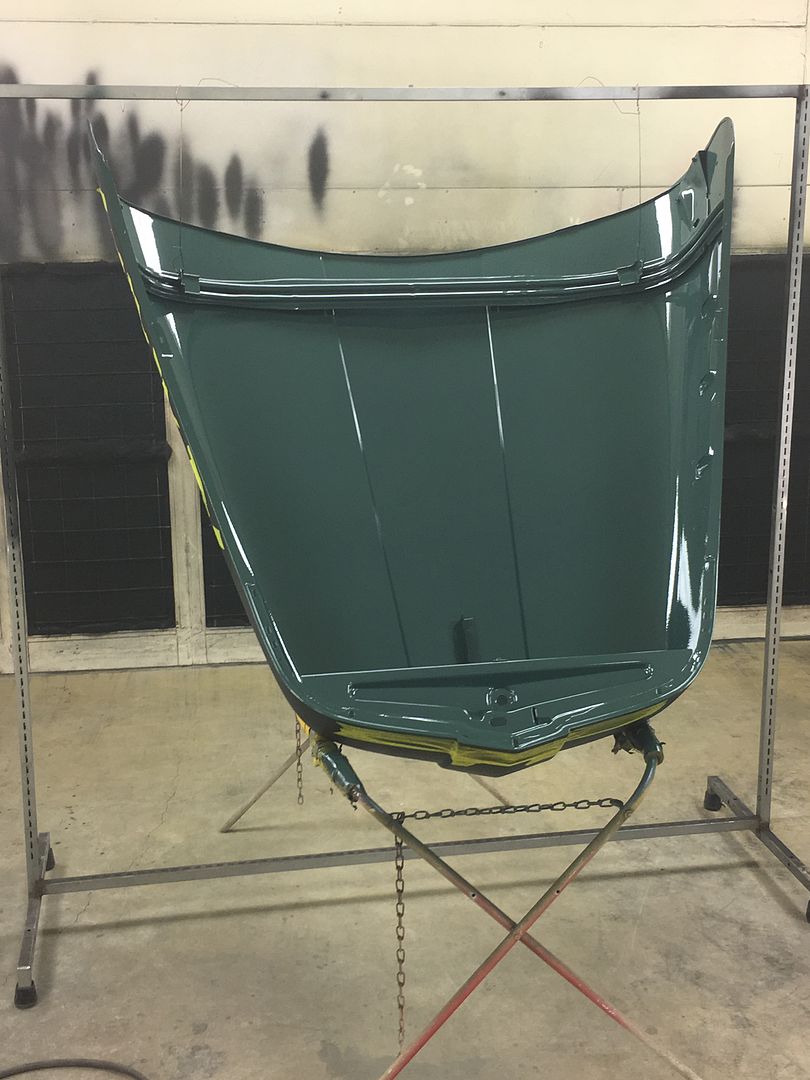
__________________
Robert |
|
|
|
|
09-02-2020, 12:15 AM
|
#34 |
|
Registered User
Join Date: Jan 2013
Location: Leonardtown, MD
Posts: 1,633
|
Re: Butt welds for patch panels
Thought I'd do a progression of pictures to show the carnage we started with on the hood brace to where it was painted this past weekend....
 https://www.youtube.com/watch?v=NDZyTTuUGVE 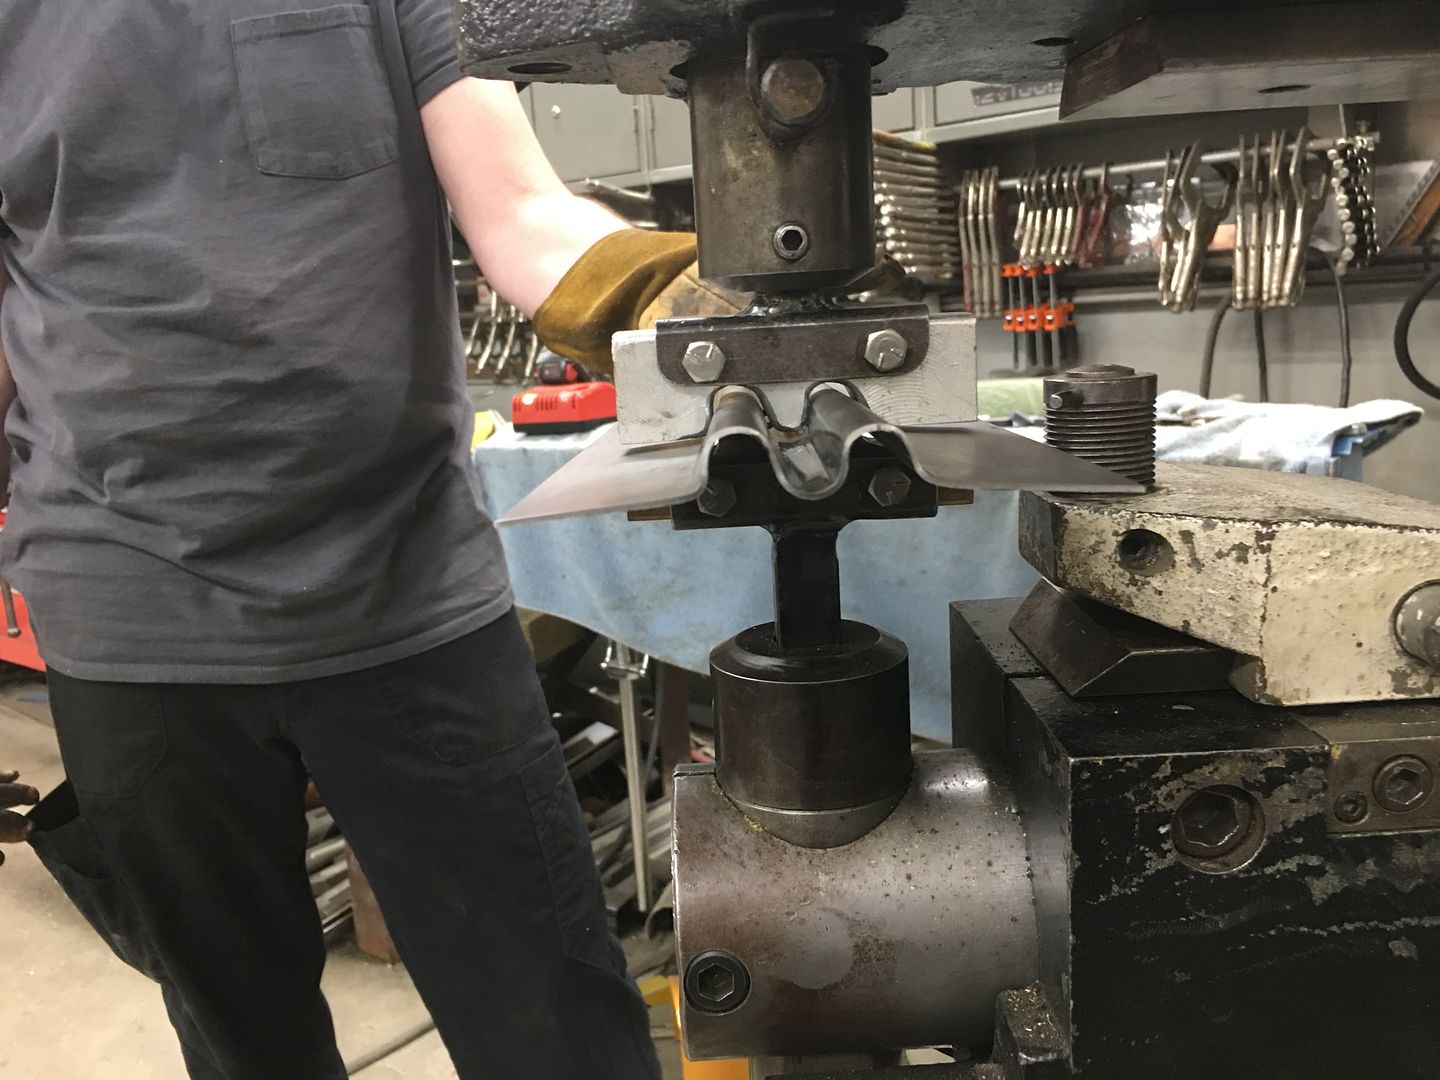 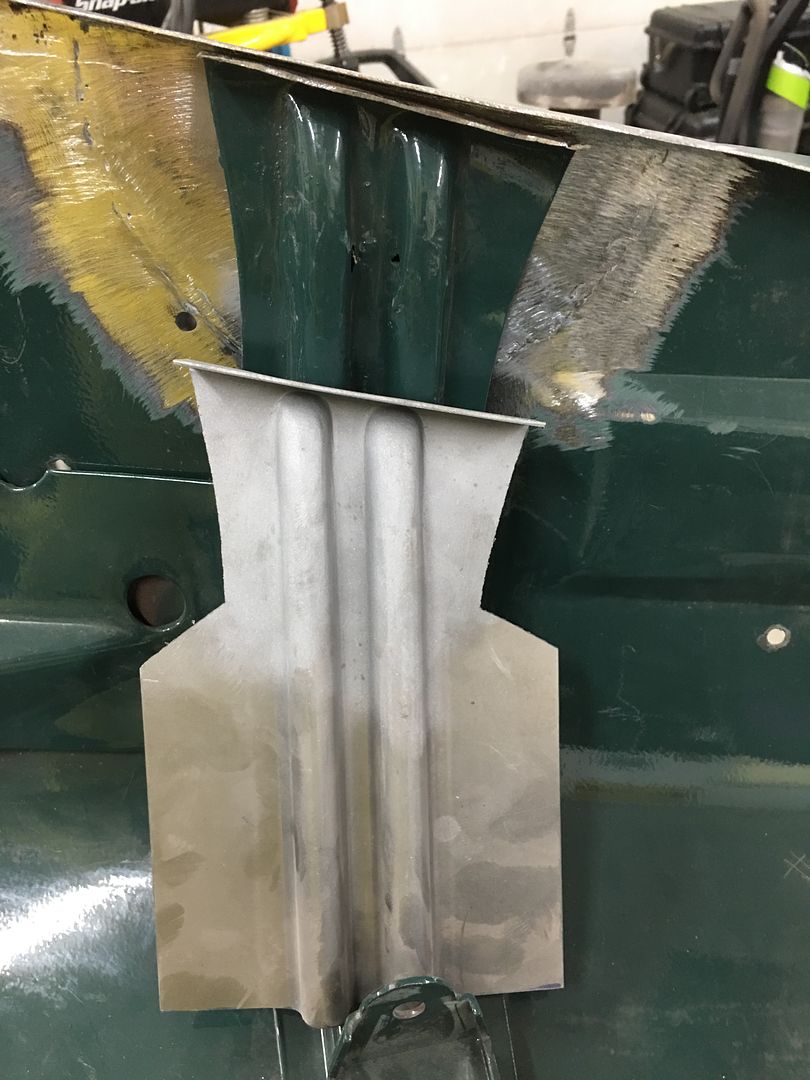 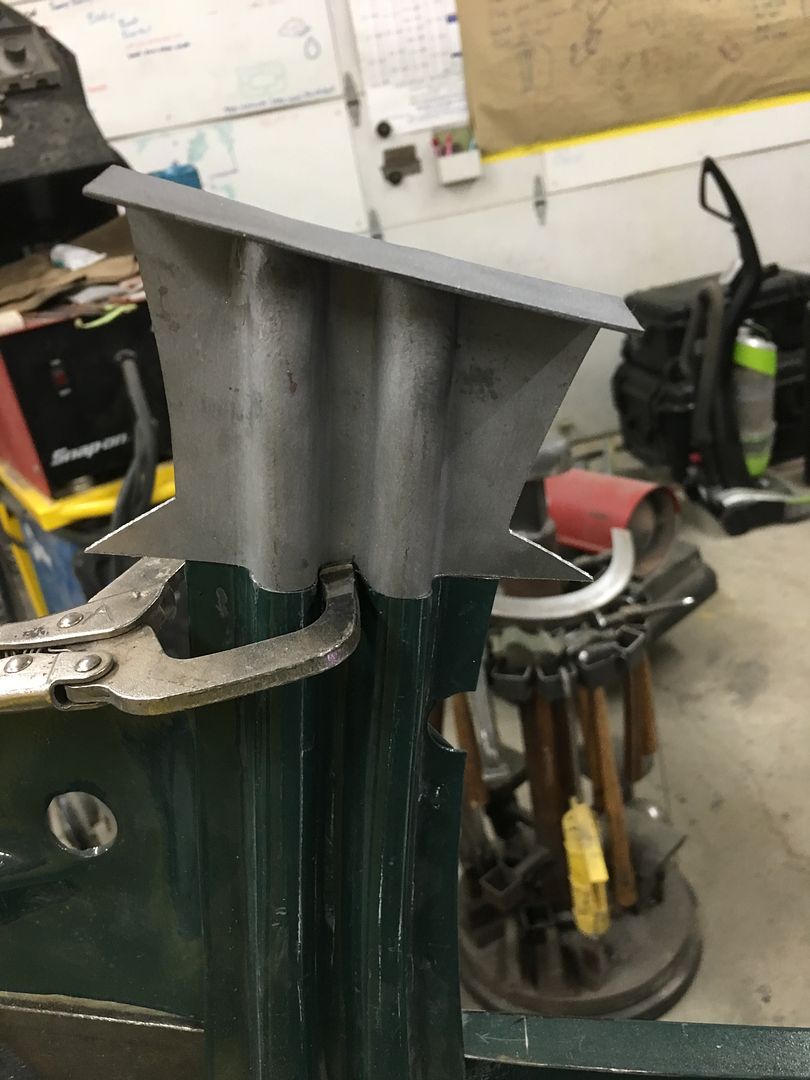 Note the wings left adjacent to the weld to act as heat sinks and prevent the edge from burning back... 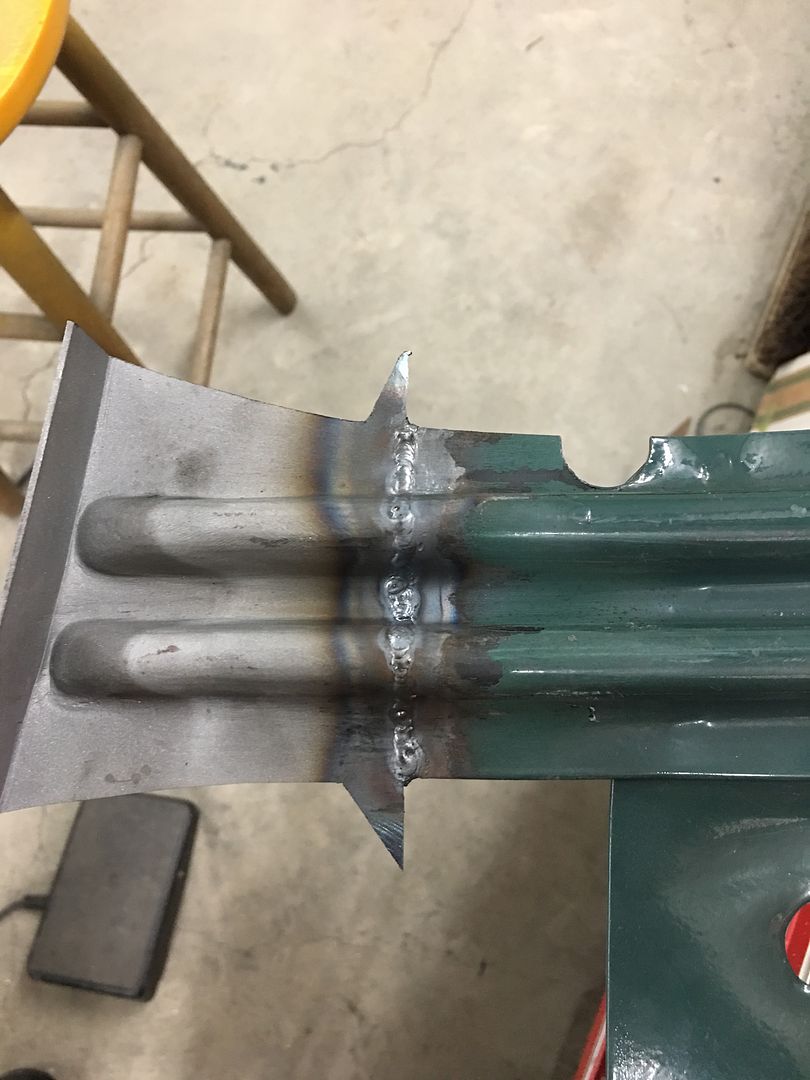 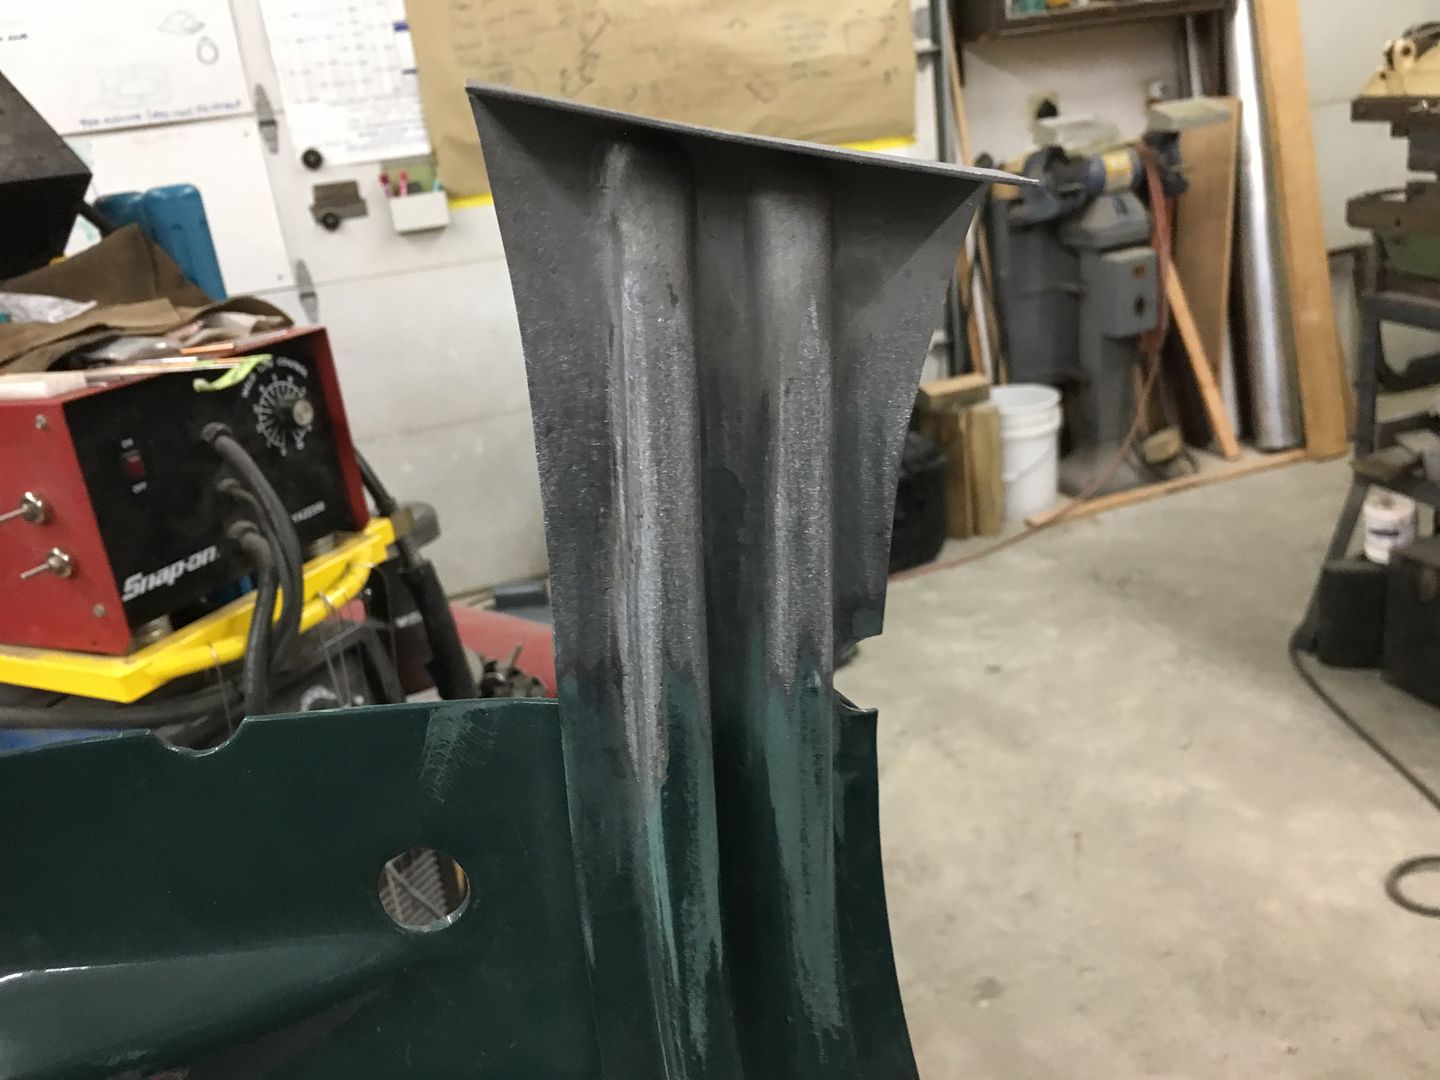 No Body filler, just epoxy primer, basecoat, and clearcoat. Looks almost factory!! 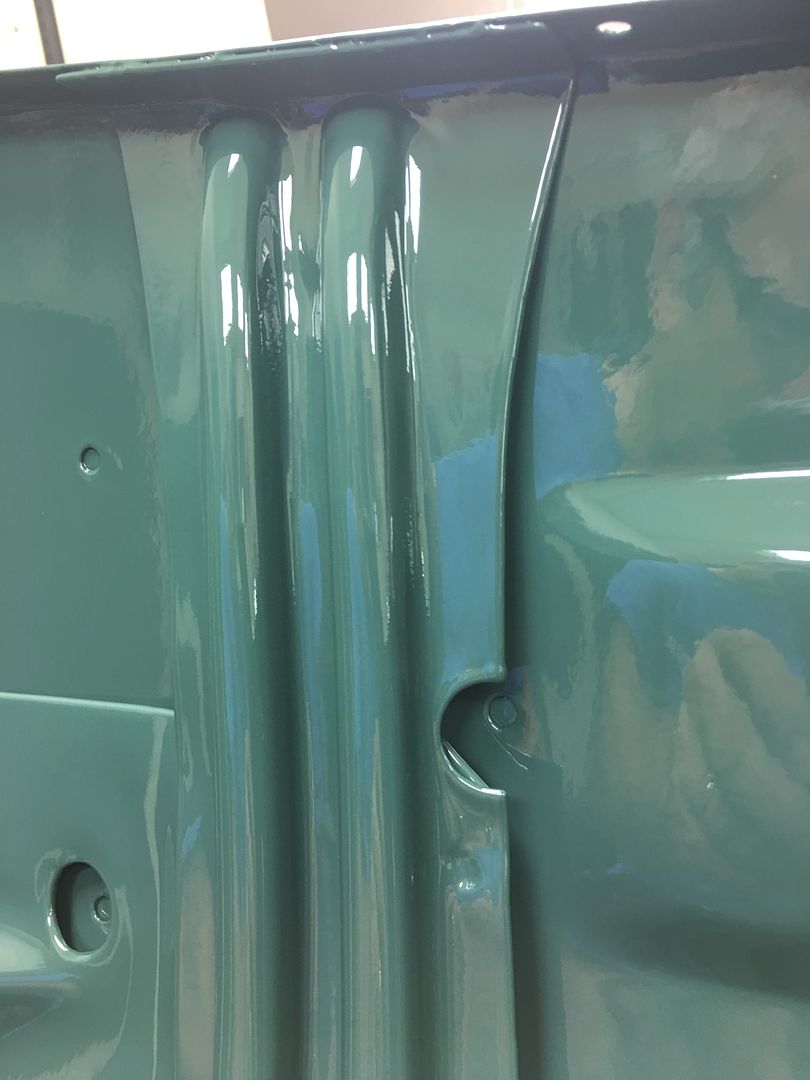
__________________
Robert |
|
|
|
|
09-02-2020, 07:41 AM
|
#35 |
|
Registered User
Join Date: Sep 2009
Location: Monroe,Iowa
Posts: 4,370
|
Re: Butt welds for patch panels
one word WOW!
|
|
|
|
|
09-17-2020, 07:37 AM
|
#36 |
|
Registered User
Join Date: Jan 2013
Location: Leonardtown, MD
Posts: 1,633
|
Re: Butt welds for patch panels
Thanks for checking out the work!!
So every time we place the hood on my folding stand, the hood skin deflects upward at those pressure points (corners). Which means that won't work for blocking out the hood. So lets' use the same supports that the hood uses and make a blocking "stand". Large 5/8" bolt through the hood latch hole for supporting the nose... 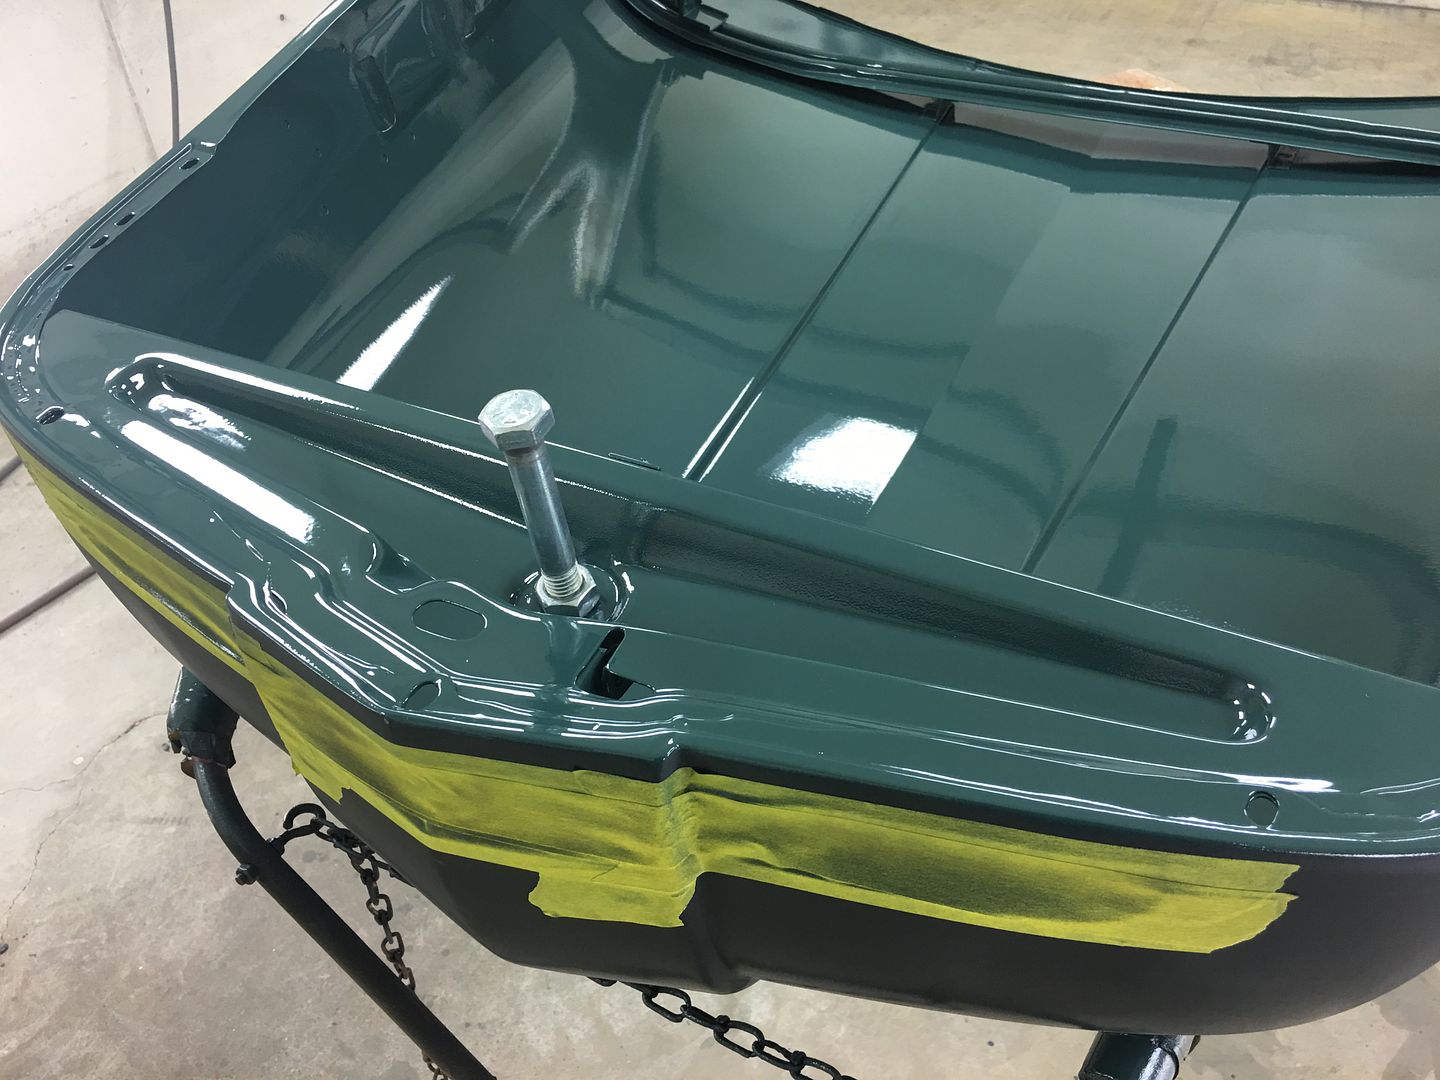 And going through our scrap inventory, here's some tubing we used for the back end, bolted into the hinge support. The extra "feet" help to stabilize it so the sanding effort won't try and flop it over... 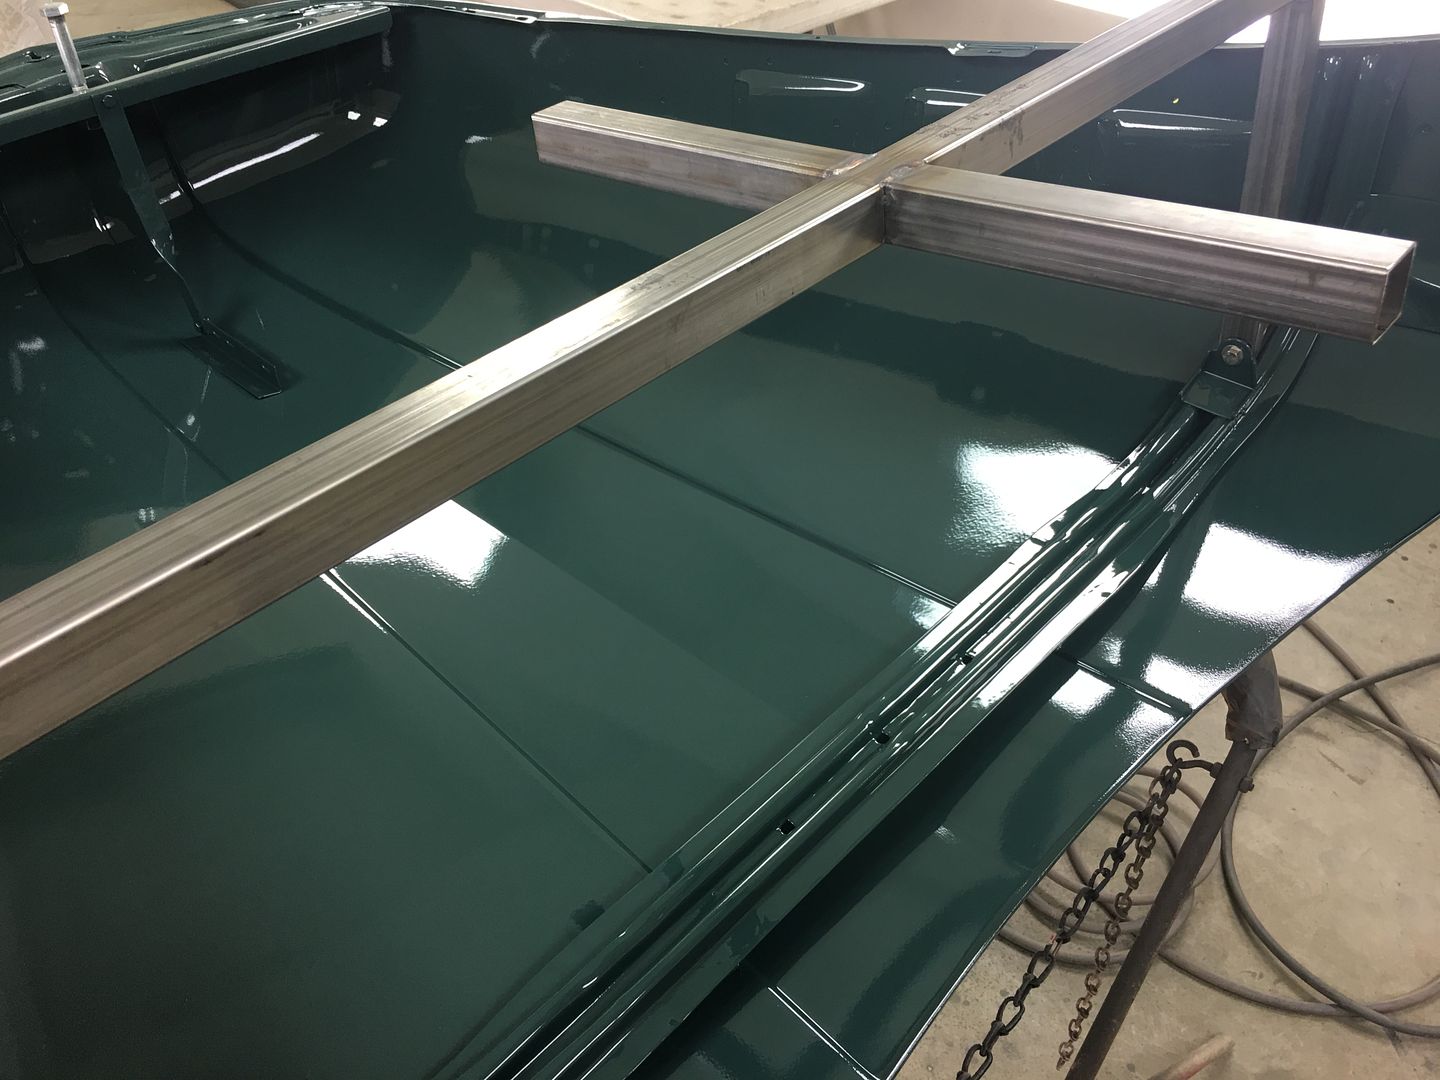 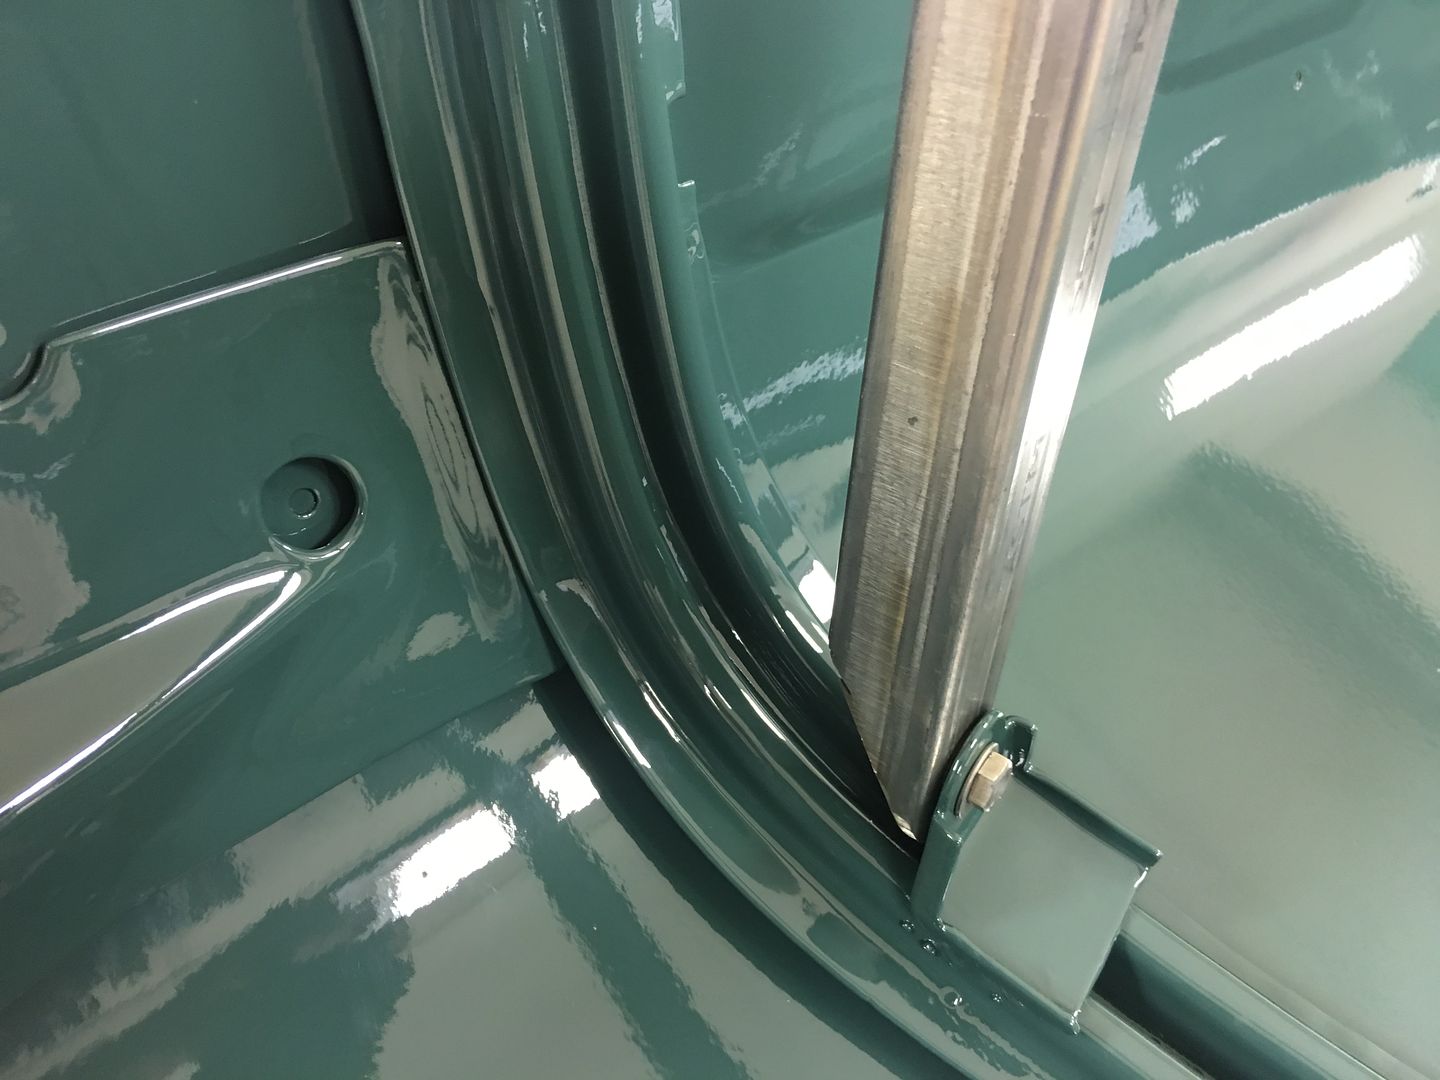 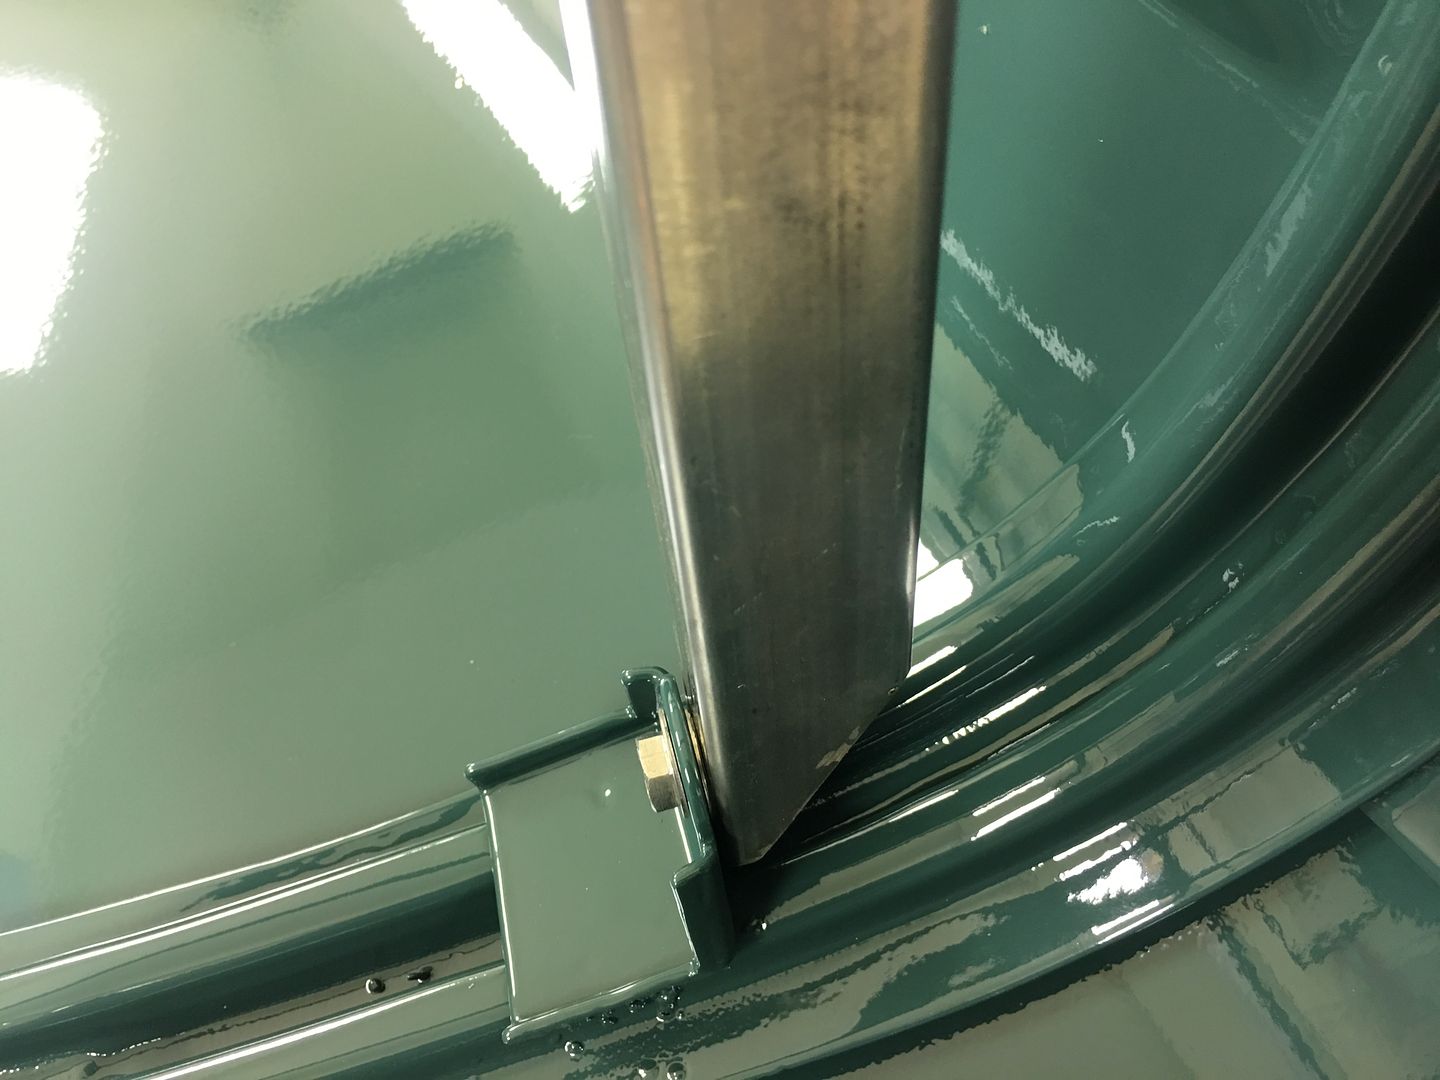 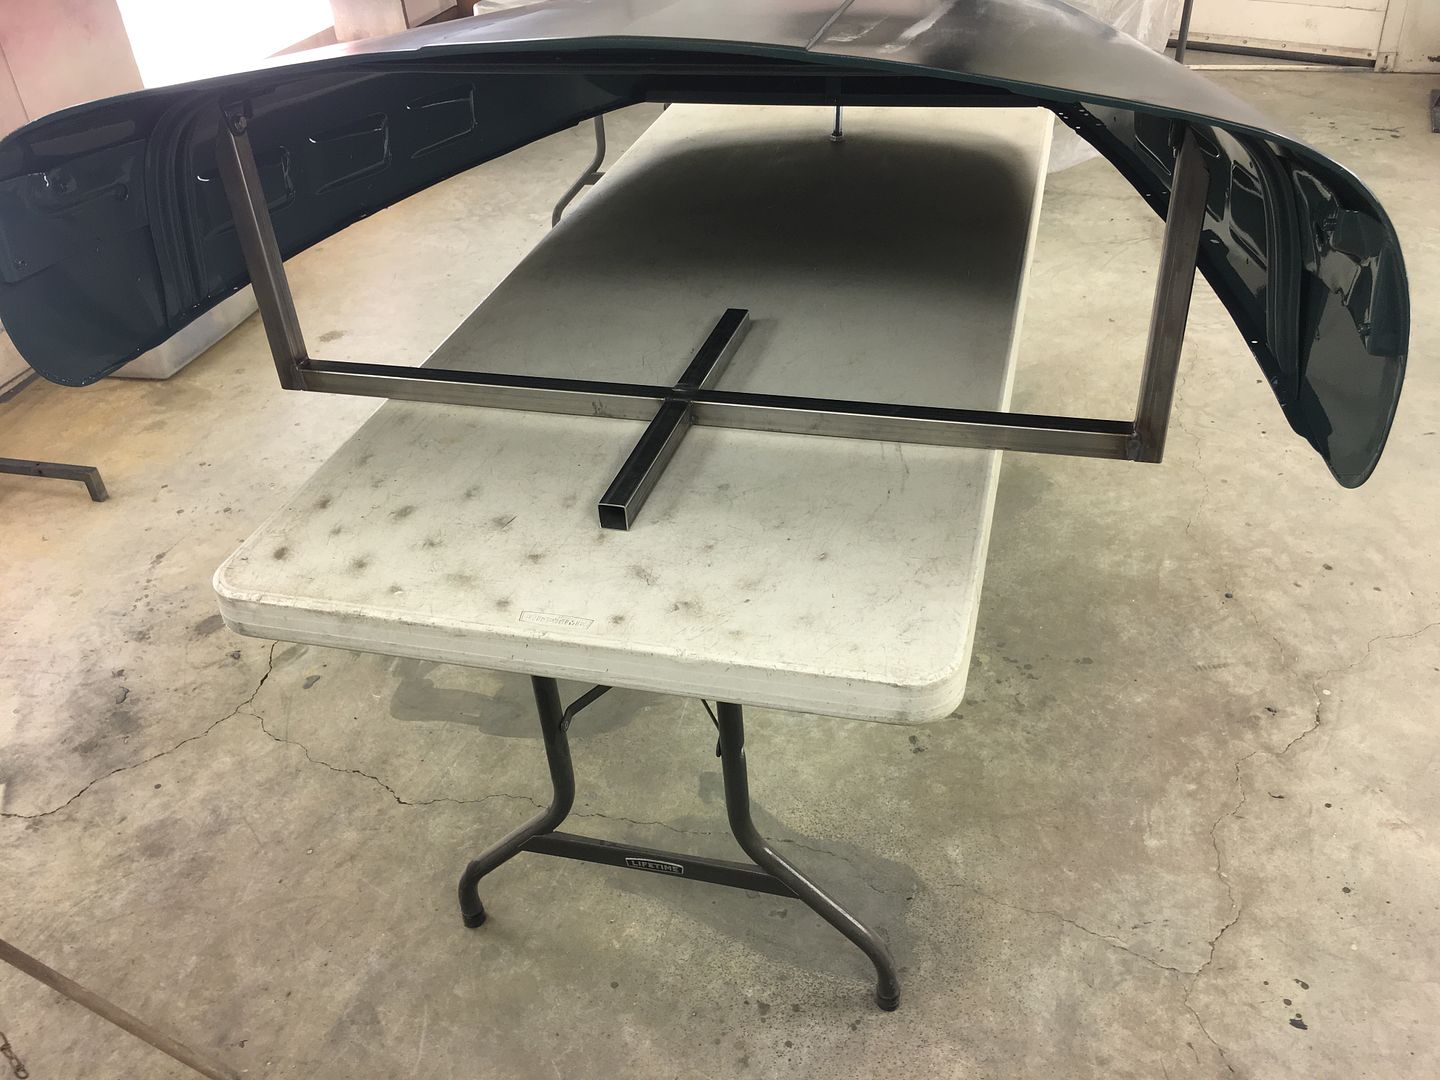 With that done, all our open holes are taped over and the entire bottom side masked off to protect the inside finish.. 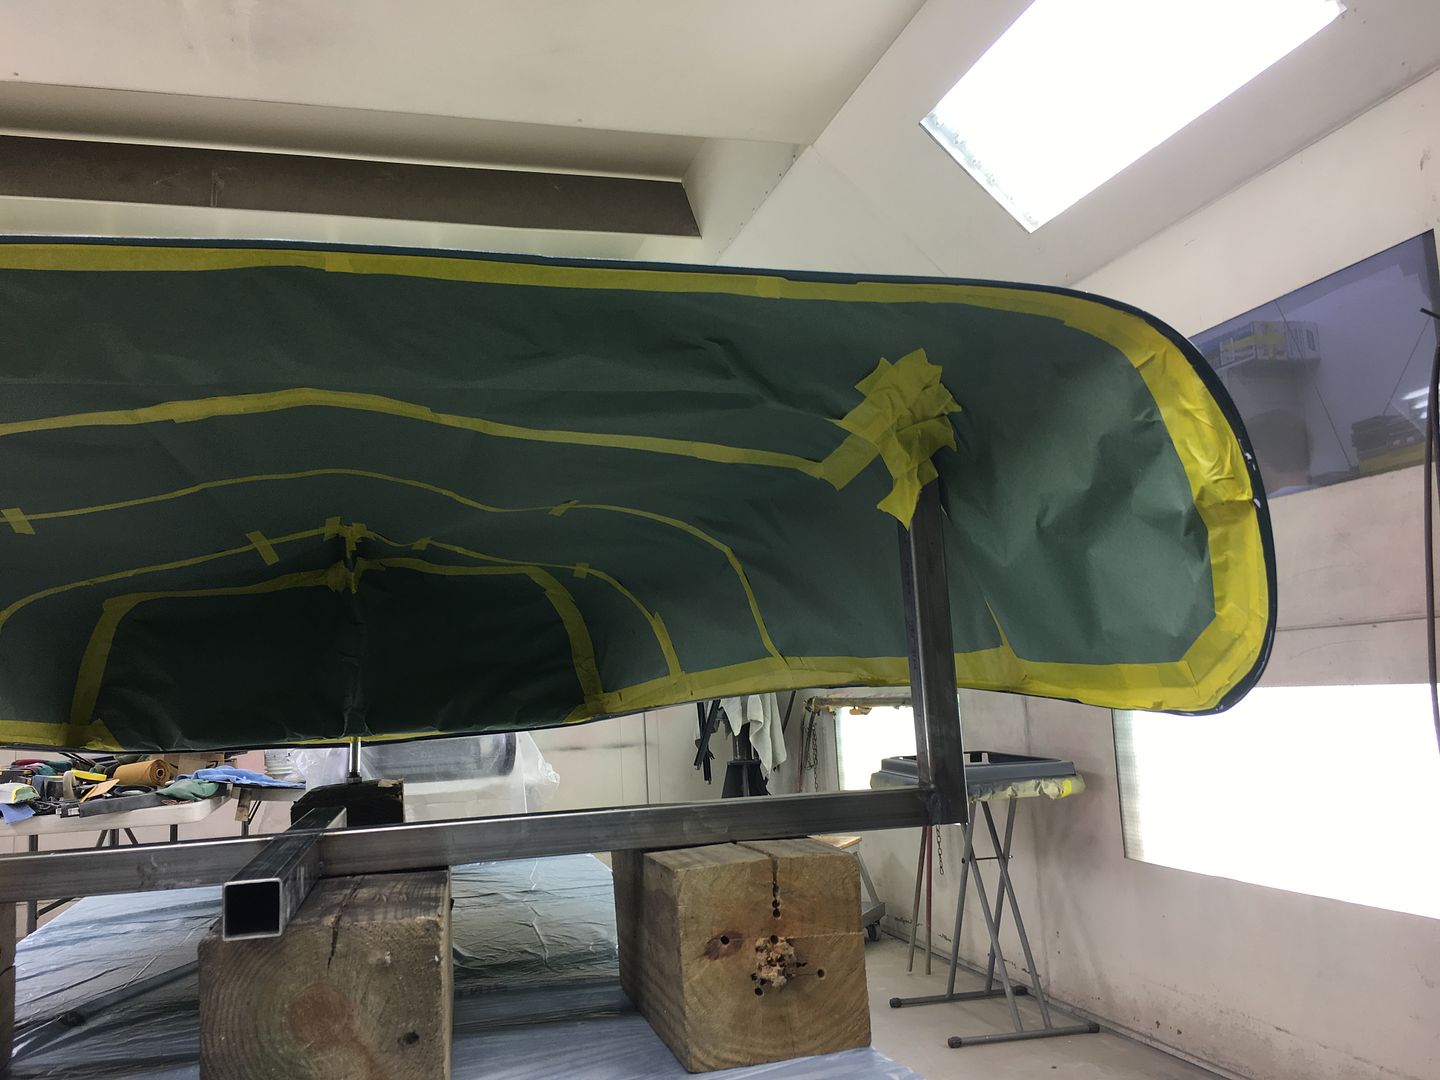 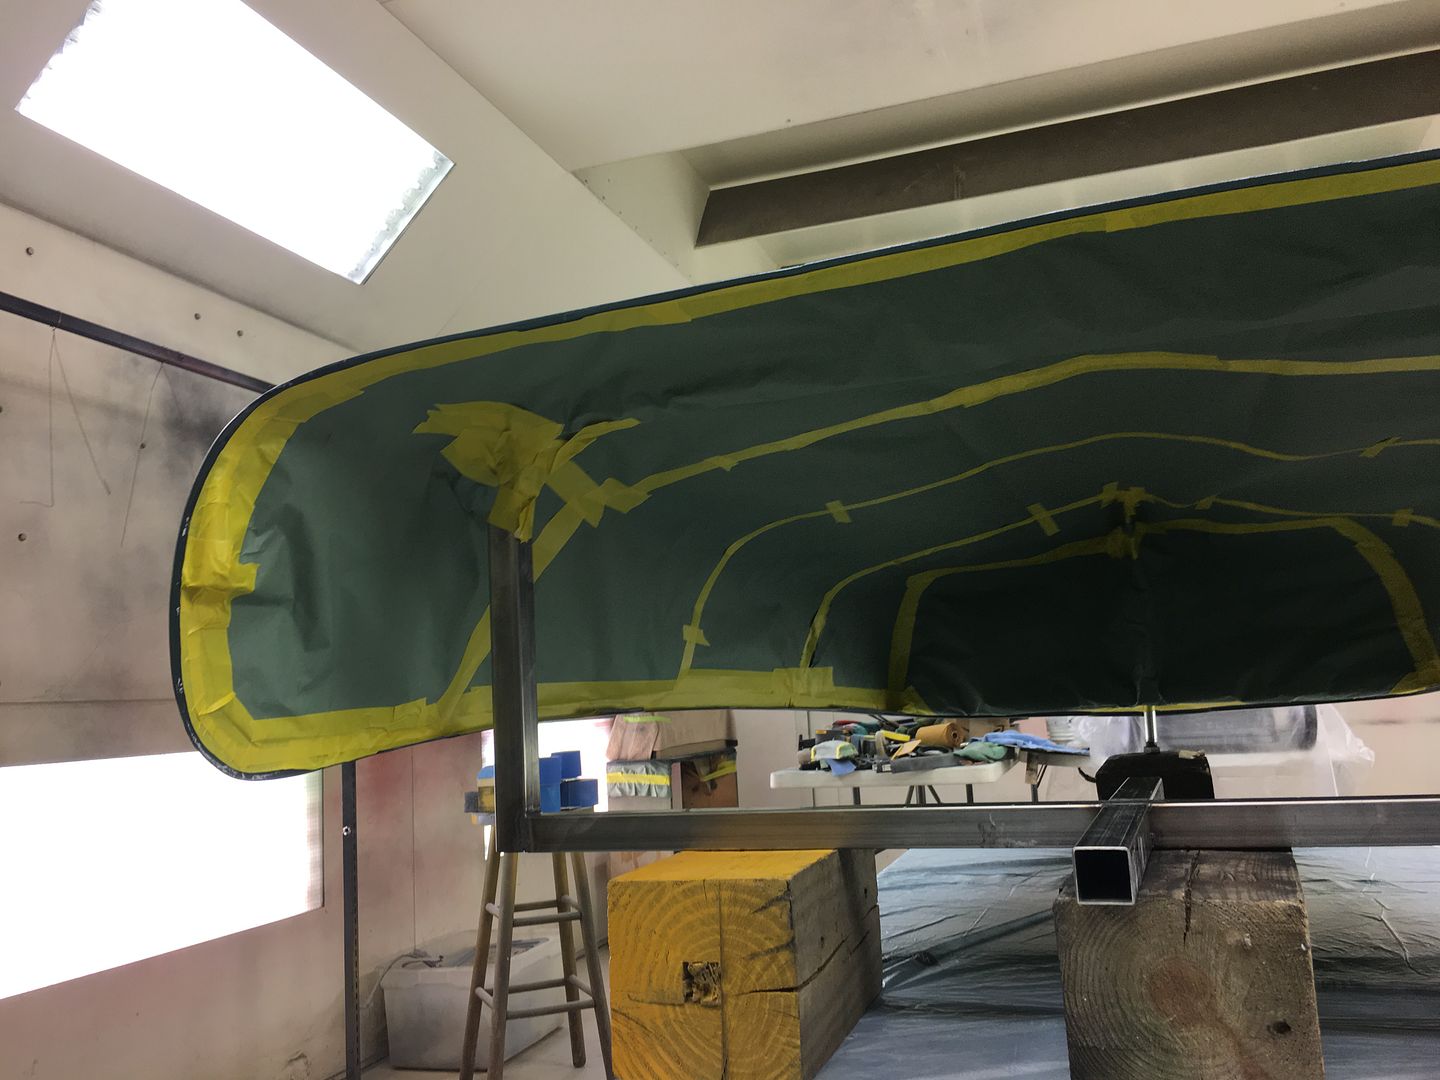 A bit of Evercoat 416 to address some lows, and 3 coats of SPI epoxy for the next round of blocking on the outside. 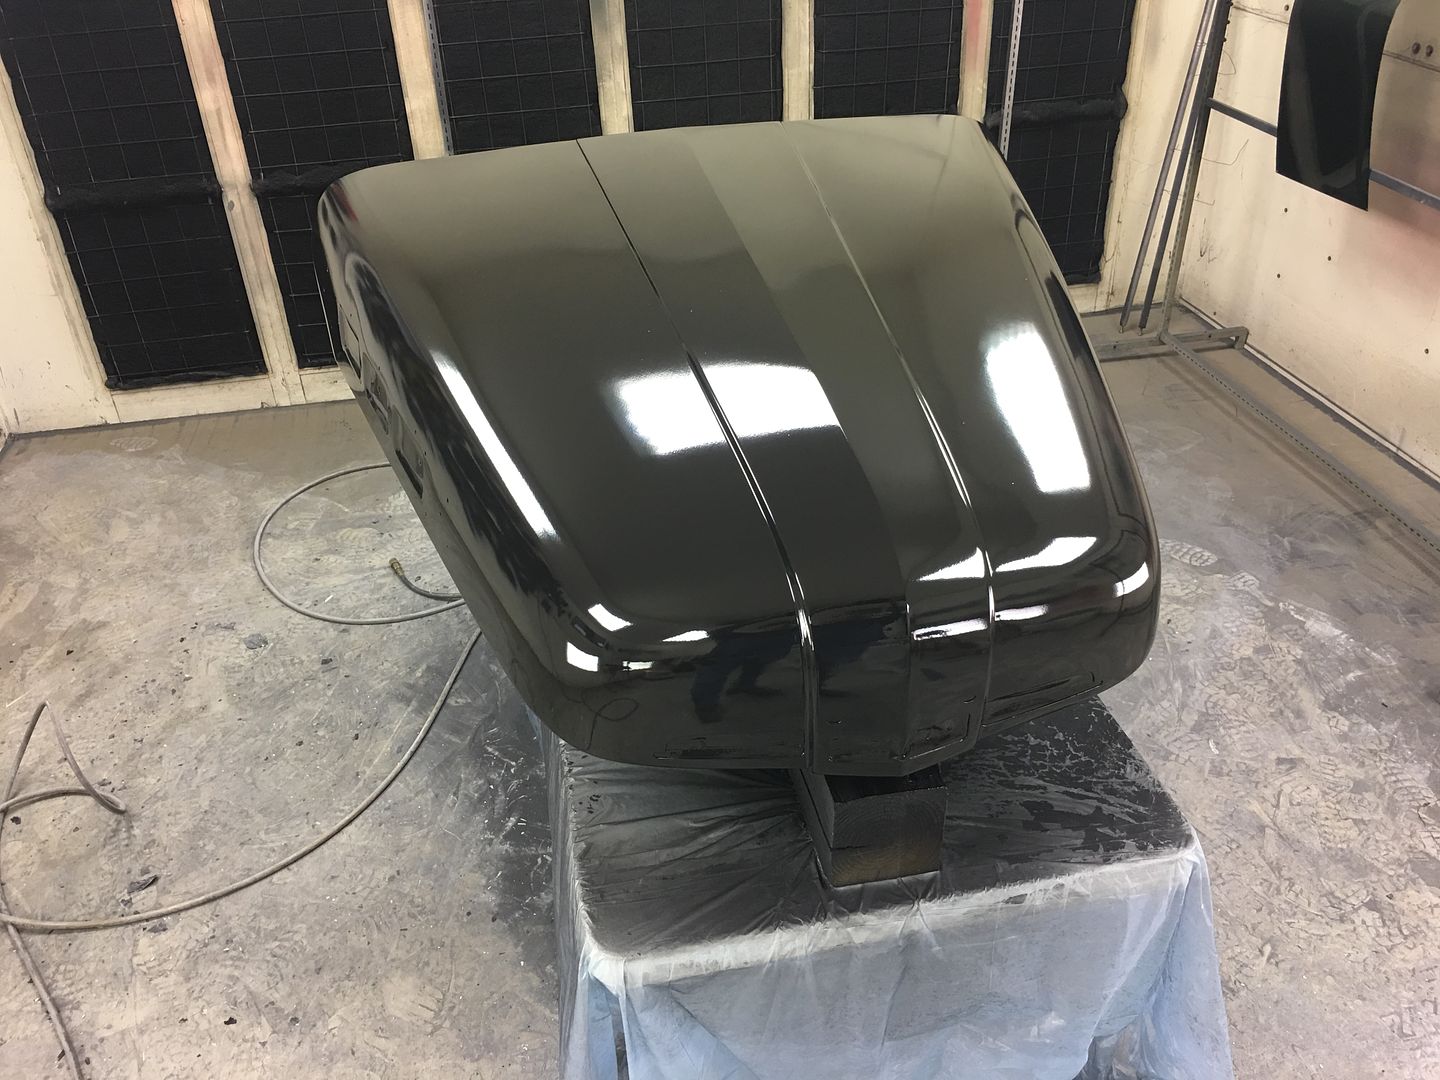 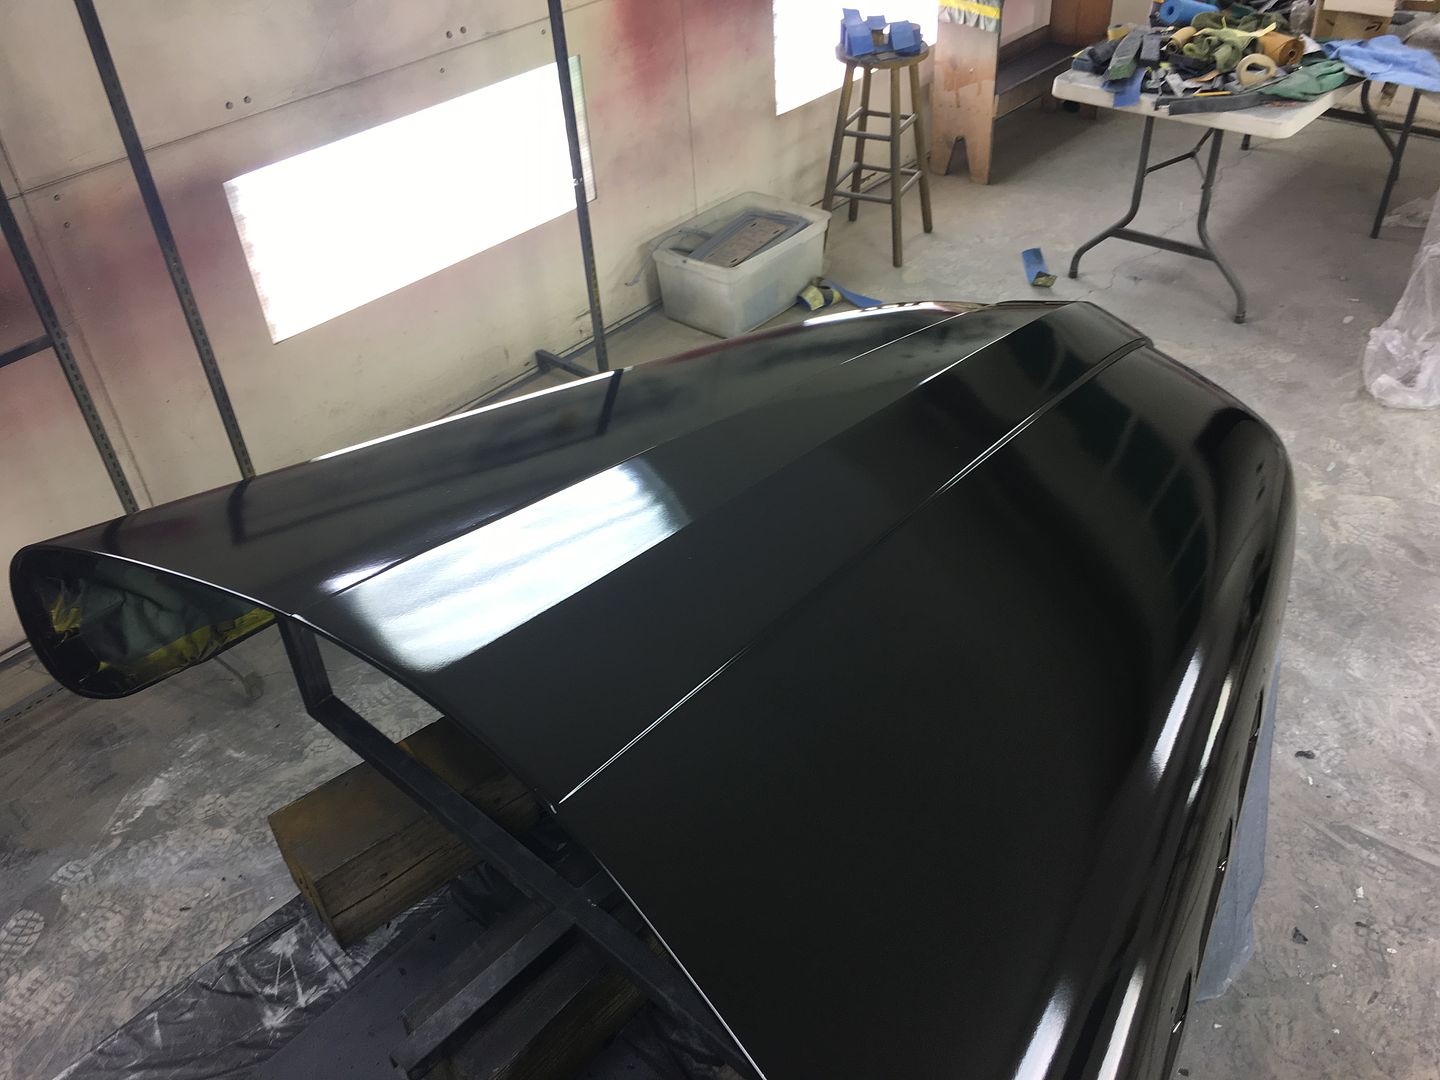 Blocking... 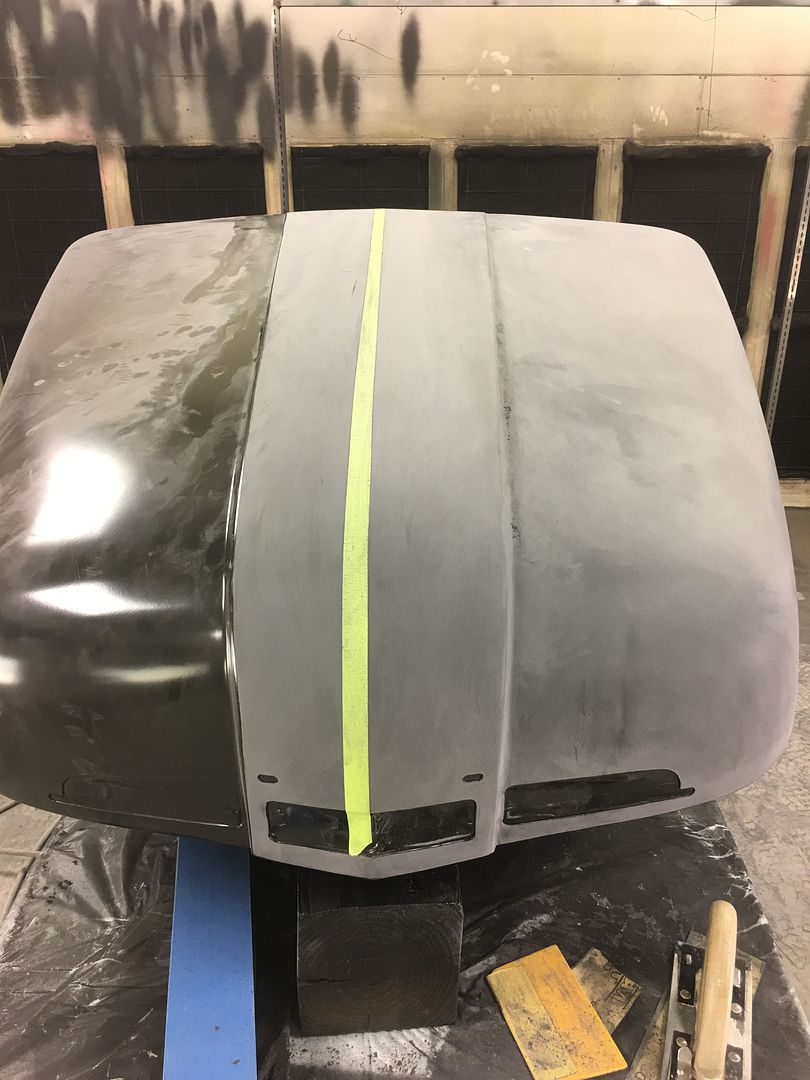 Some booth clean up and fresh masking on the table, hood pre-cleaned and tacked..... 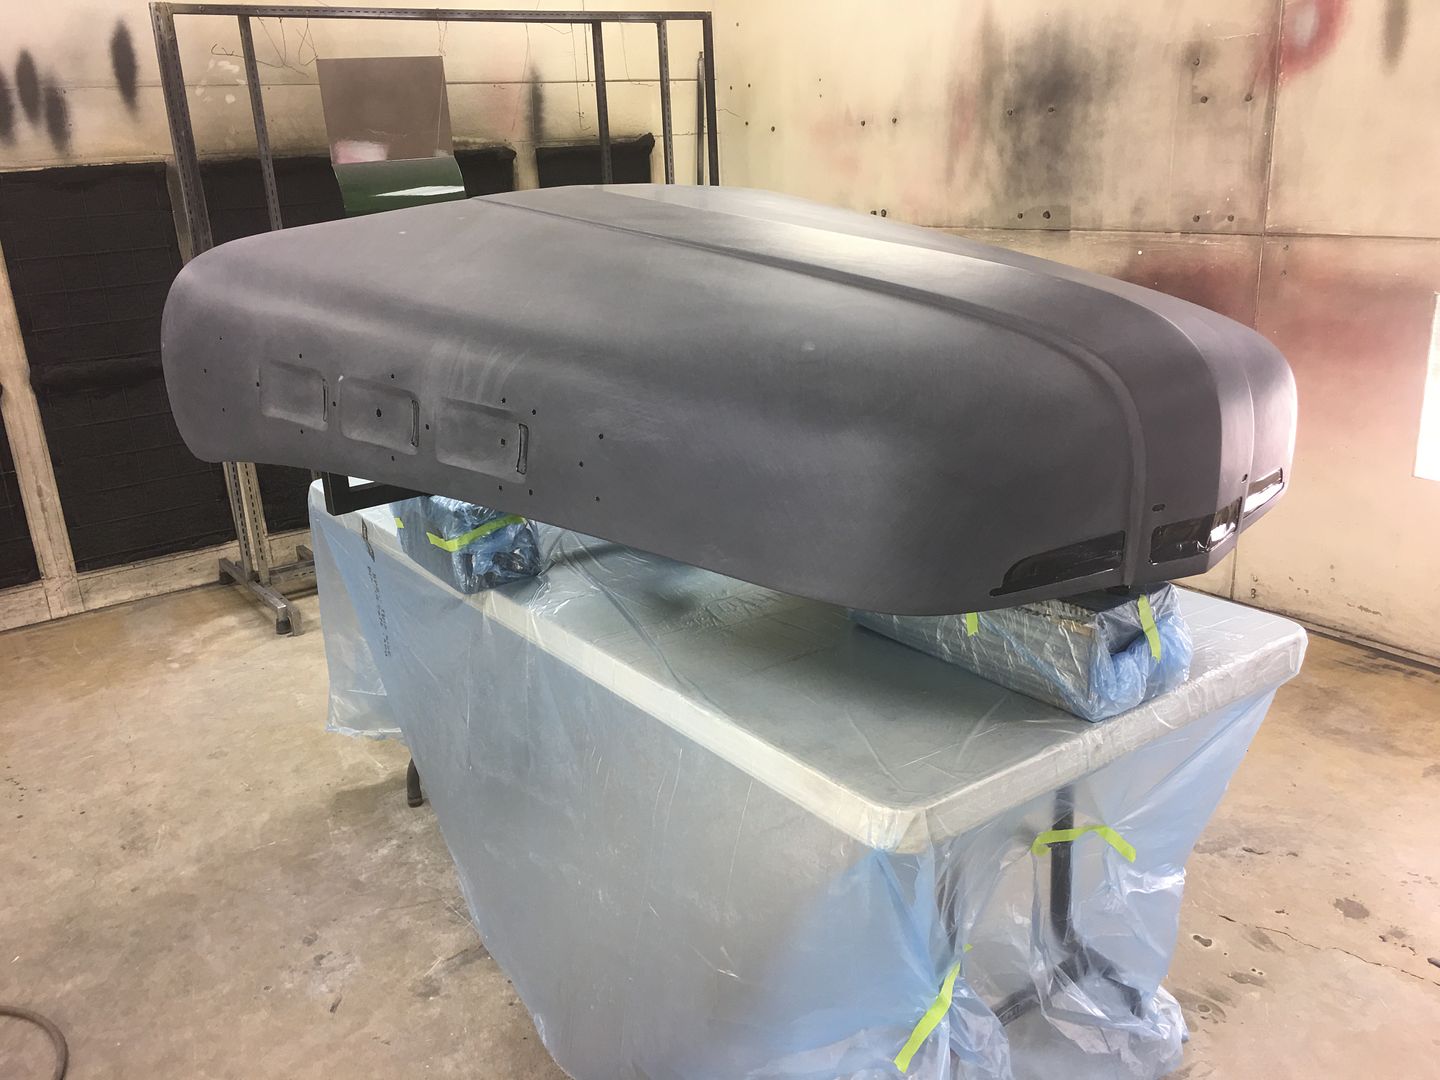 Sealed with SPI Epoxy thinned about 10% 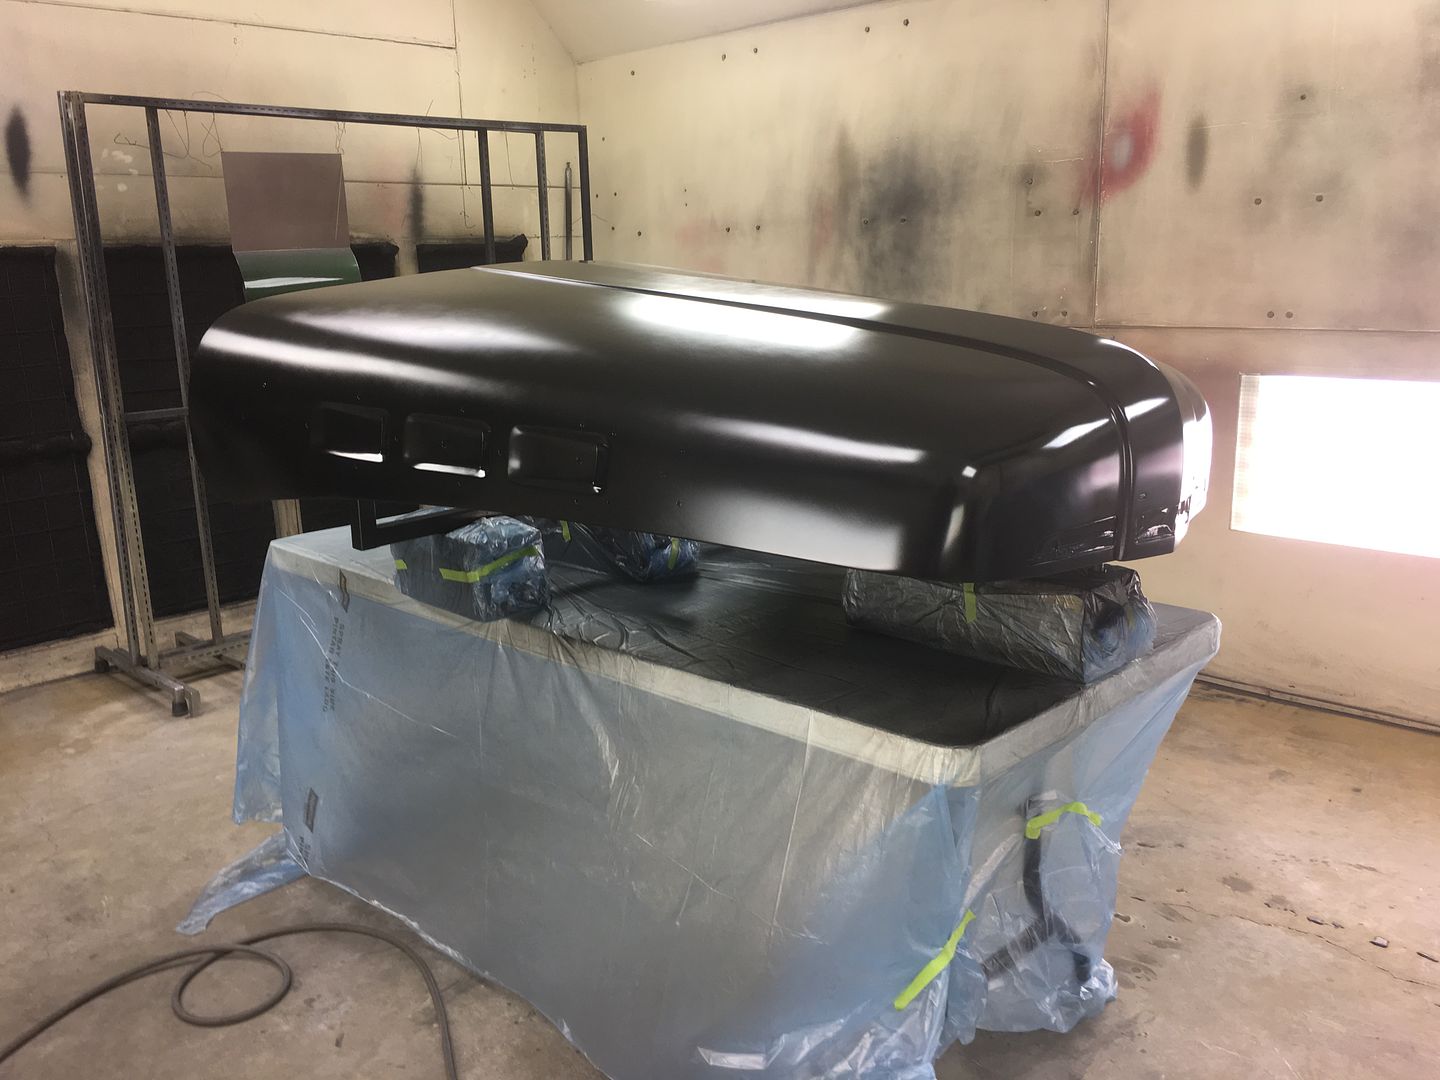 Fleet paint that was used originally on the truck, supplied by owner. Orange peel in a can.. 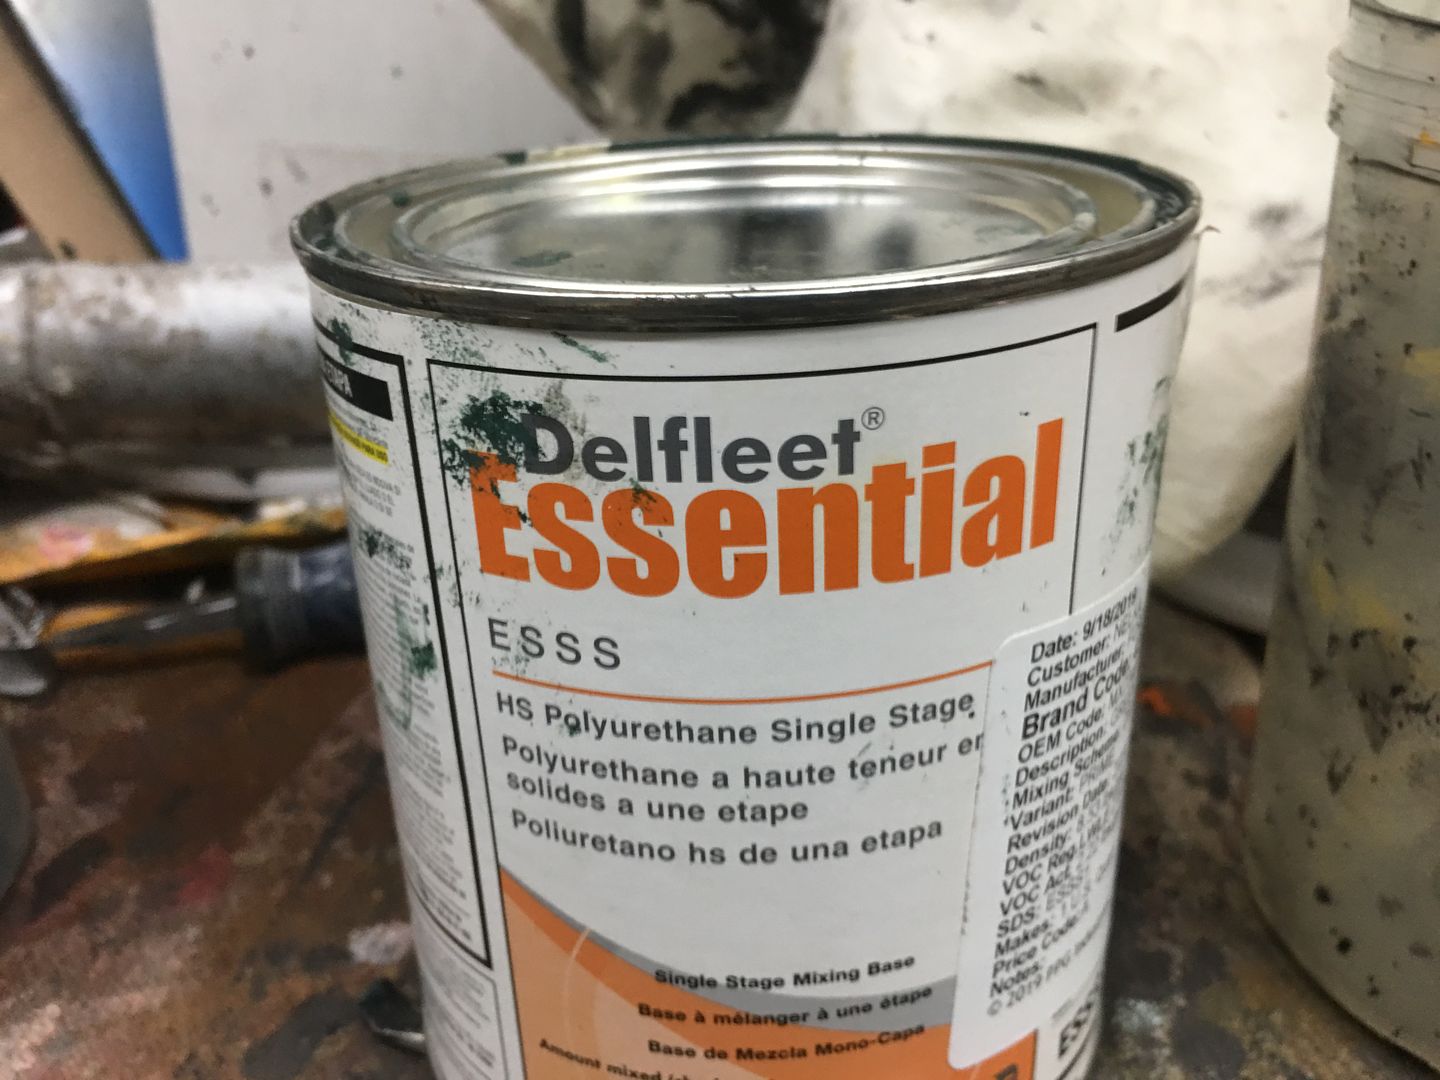 2 coats of color, 2 coats of SPI Universal Clear... 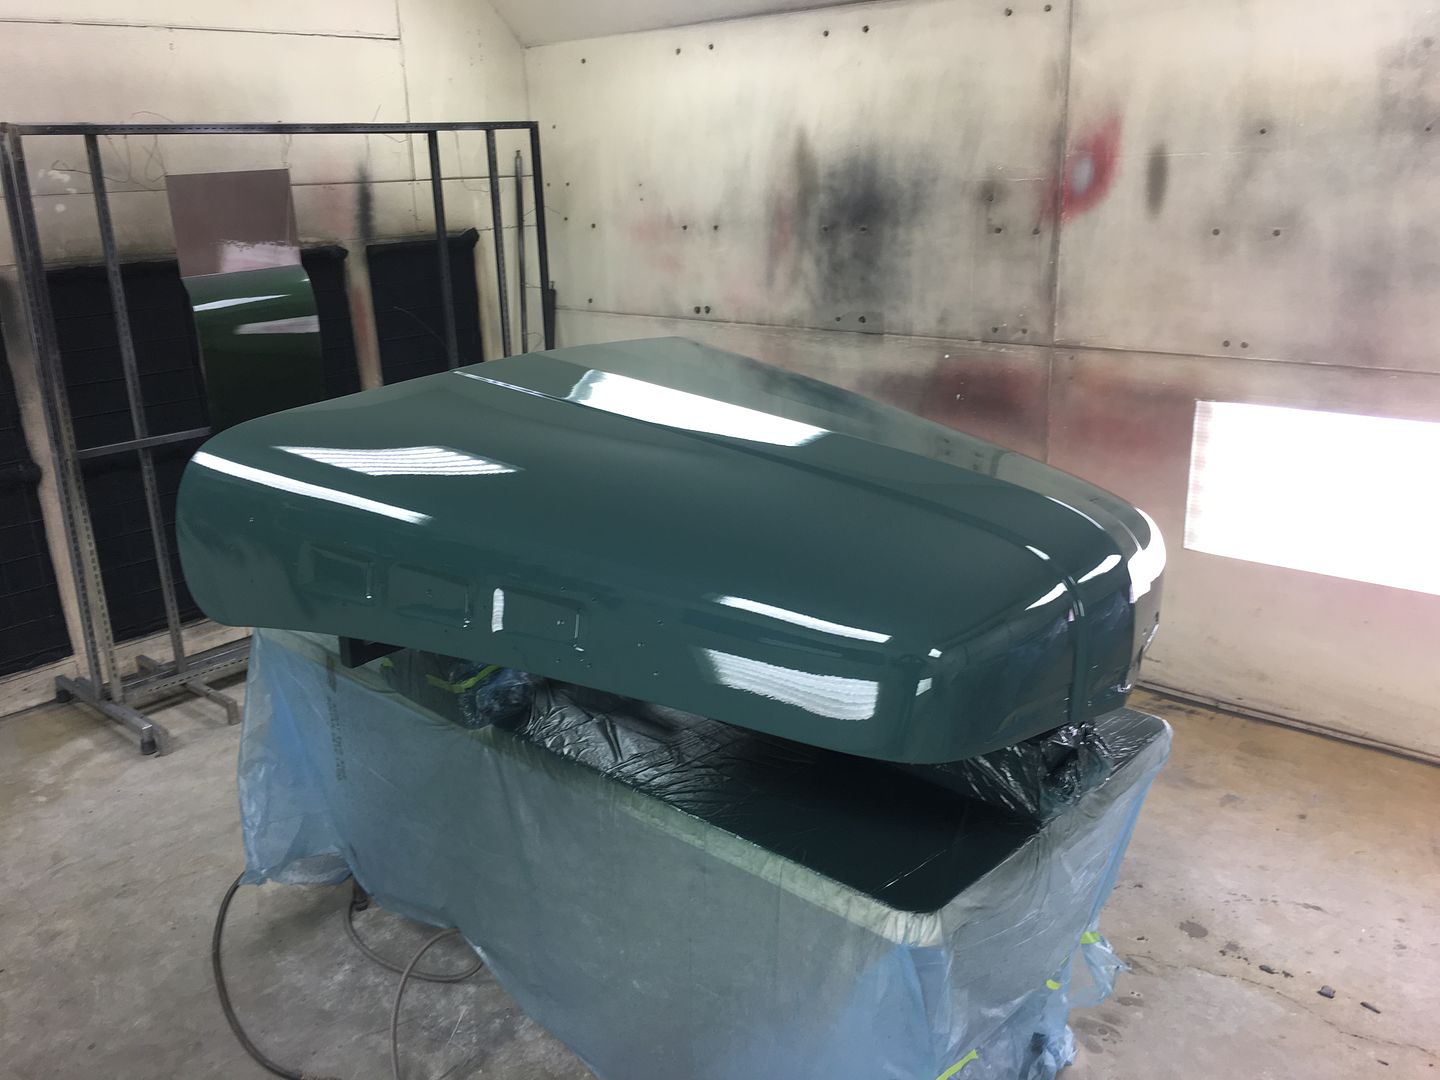 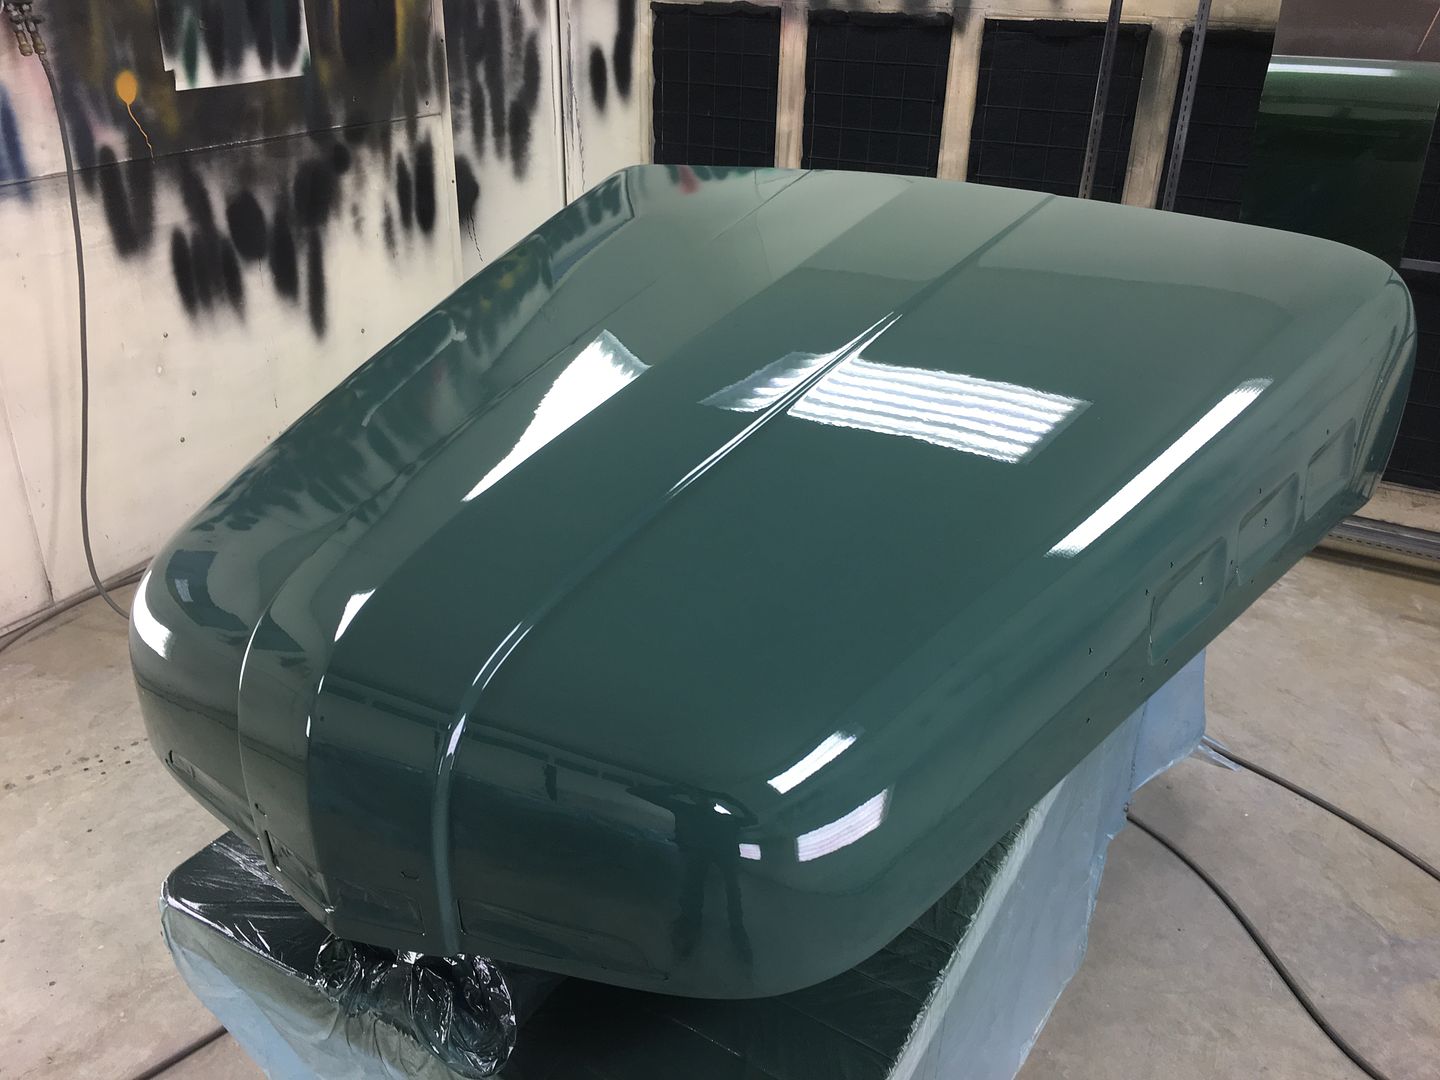
__________________
Robert |
|
|
|
|
09-17-2020, 01:34 PM
|
#37 |
|
Registered User
Join Date: Oct 2003
Location: Chesapeake, VA
Posts: 724
|
Re: Butt welds for patch panels
That is not auto body work. That is ART! :-)
__________________
Semper Paratus |
|
|
|
|
09-21-2020, 06:39 AM
|
#38 |
|
Registered User
Join Date: Jan 2013
Location: Leonardtown, MD
Posts: 1,633
|
Re: Butt welds for patch panels
Thanks!!
This past Friday night we cut and buffed the F7 hood to get rid of some dust nibs, and Saturday morning Jared and I started to reassemble the hood. The horn wiring had some dry and cracking insulation sleeving, so it was replaced as well.  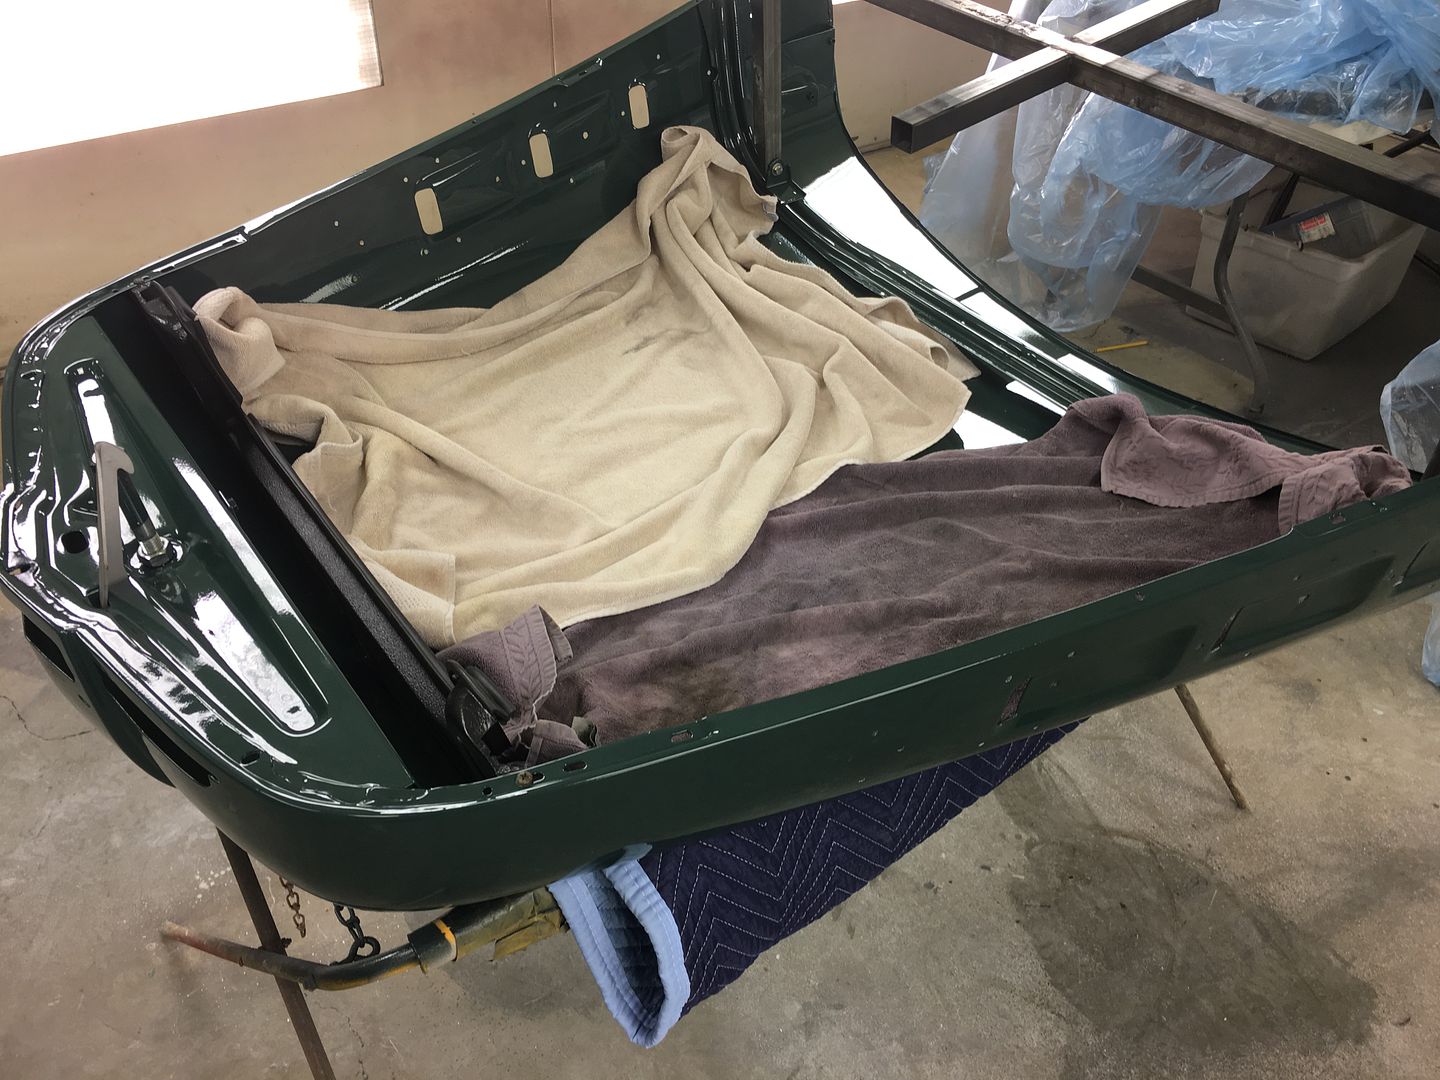 John stopped by mid morning and we got all the parts put back together and adjusted. Looks much better with the hood back on, John has been driving without one for a couple months.  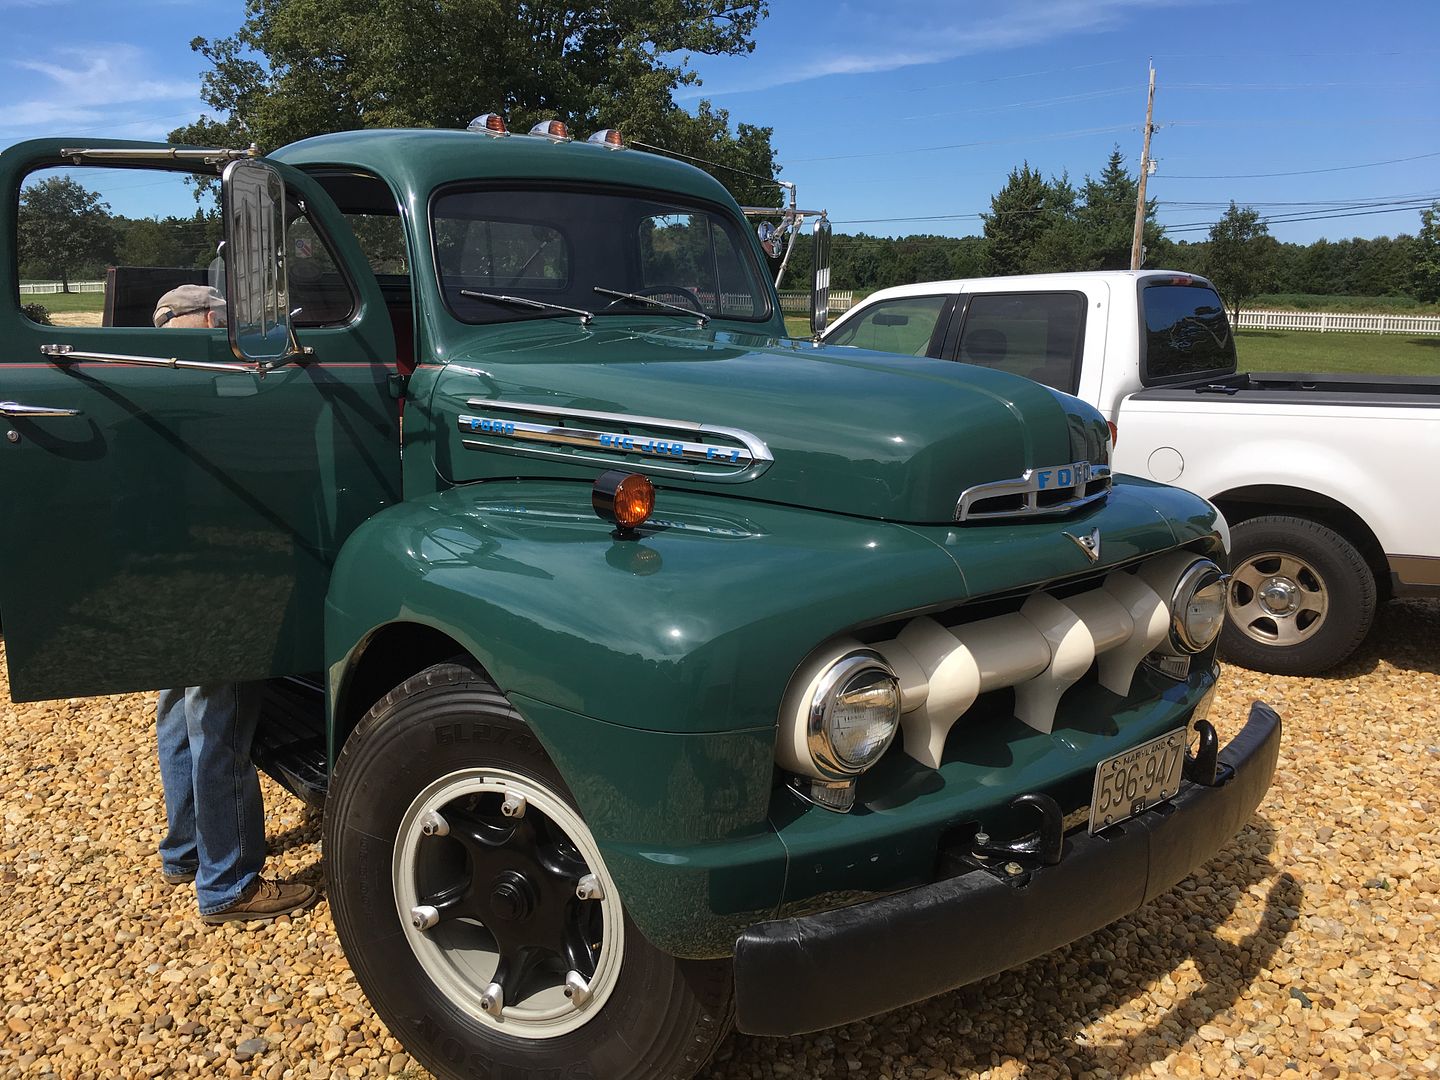 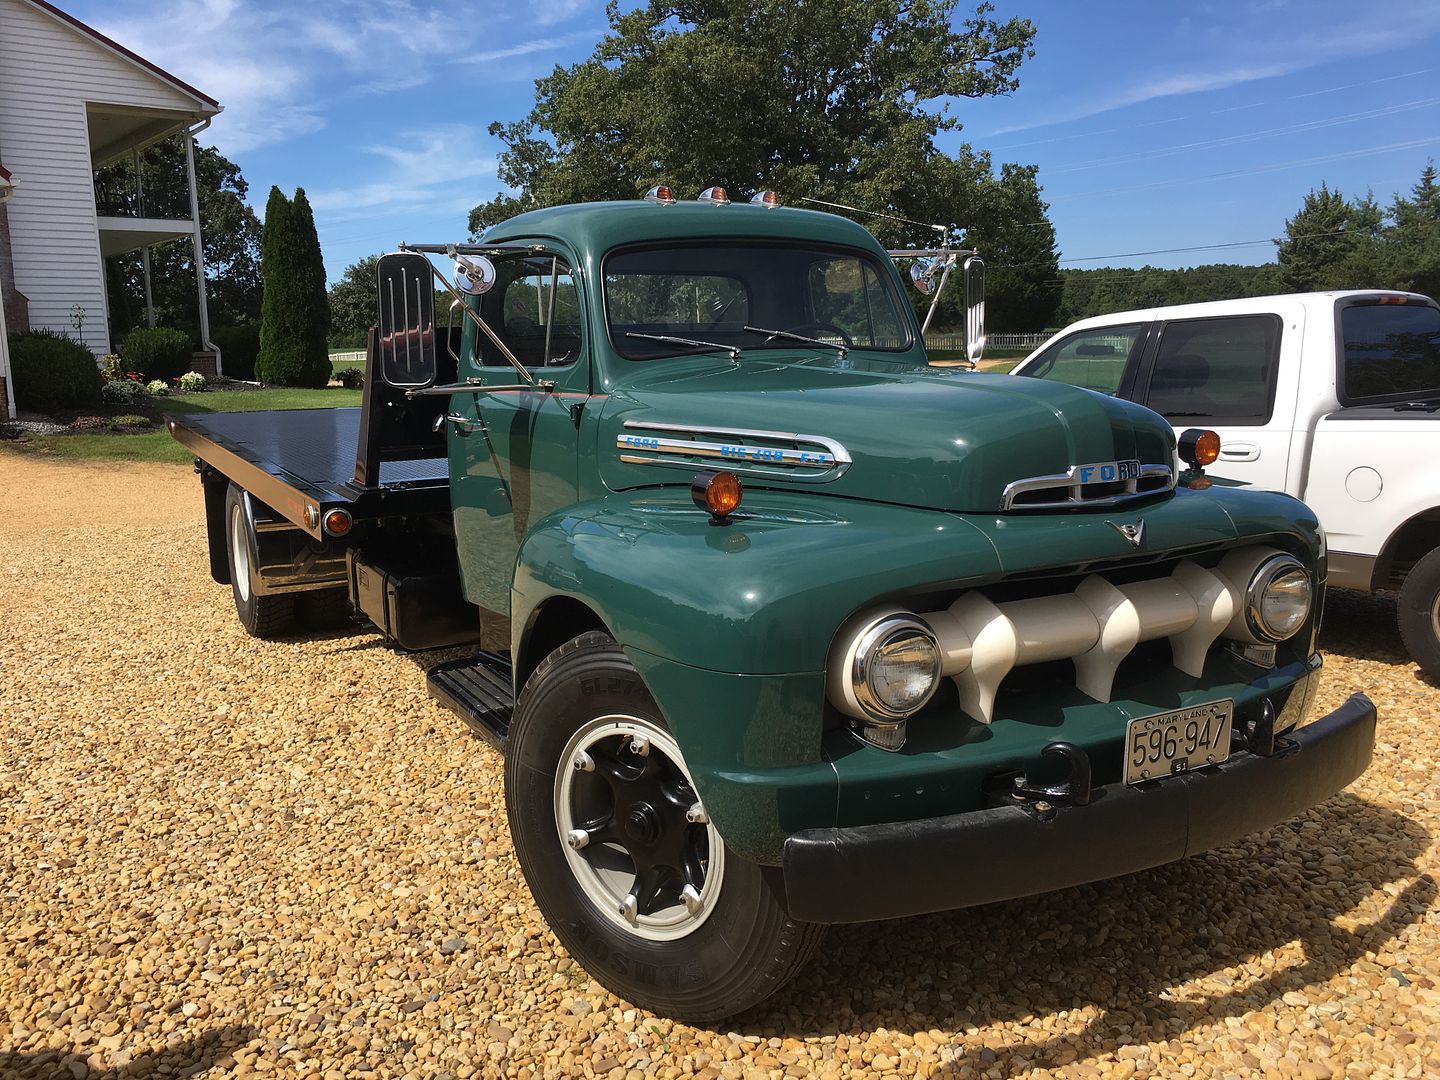 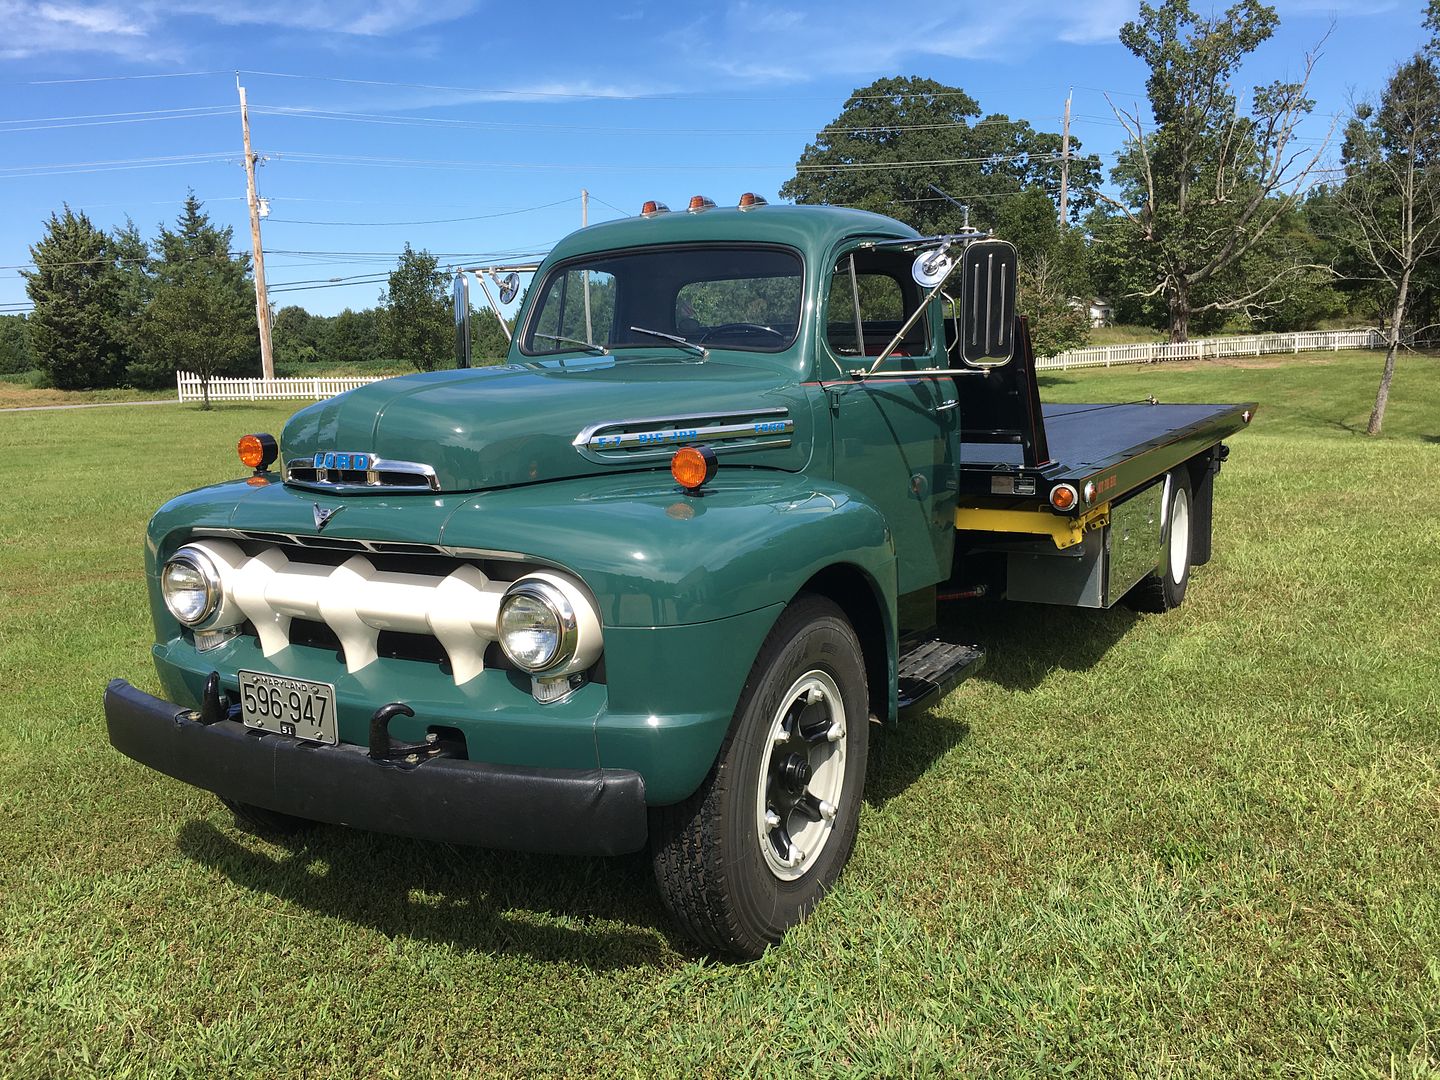 All ready for the Tri-state Antique Truck Show this week in Clear Brook VA..
__________________
Robert |
|
|
|
|
09-21-2020, 08:53 AM
|
#39 |
|
Post Whore
  Join Date: May 2015
Location: Alabama
Posts: 14,585
|
Re: Butt welds for patch panels
Just like it never happened....turned out great Robert......
__________________
Mongo...aka Greg RIP Dad RIP Jesse 1981 C30 LQ9 NV4500..http://67-72chevytrucks.com/vboard/s...d.php?t=753598 Mongos AD- LS3 TR6060...http://67-72chevytrucks.com/vboard/s...34#post8522334 Columbus..the 1957 IH 4x4...http://67-72chevytrucks.com/vboard/s...63#post8082563 2023 Chevy Z71..daily driver |
|
|
|
|
09-21-2020, 05:54 PM
|
#40 |
|
Registered User
Join Date: Sep 2020
Location: Tempe AZ
Posts: 37
|
Re: Butt welds for patch panels
Just out of curiosity, what are your mig welder settings for that thickness of metal?
|
|
|
|
|
09-22-2020, 01:23 AM
|
#41 | |
|
Registered User
Join Date: Jan 2013
Location: Leonardtown, MD
Posts: 1,633
|
Re: Butt welds for patch panels
Thanks Greg...
Quote:
I normally set the MIG higher than the recommended setting, for this 19 GA it would have been set at about the 16 gauge setting, and use a shorter trigger pull. Although these repairs were TIG welded.....
__________________
Robert |
|
|
|
|
|
09-22-2020, 10:30 PM
|
#42 | |
|
Registered User
Join Date: Sep 2020
Location: Tempe AZ
Posts: 37
|
Re: Butt welds for patch panels
Quote:
|
|
|
|
|
|
| Bookmarks |
|
|


 Linear Mode

