
|
 07-17-2023, 09:54 AM
|
#251 |
|
Registered User
Join Date: Nov 2010
Location: calgary alberta
Posts: 7,844
|
Re: Long Time Coming......
nice work, and thanks for posting up lots of pics. it helps the rest of us think about what we will do and where. sometimes just getting us thinking about the next little job is good. better than piling more stuff in front of the project. you seem to have done a lot of work in a short time. congrats.
will the patch panel on the cowl be big enough to cover the damages you found there? |

|

|
|
07-17-2023, 03:28 PM
|
#252 | ||||
|
Registered User
Join Date: Jan 2022
Location: Conn.
Posts: 184
|
Re: Long Time Coming......
Quote:
Quote:
Quote:
Quote:
And yes I am getting a lot done right now. Remember I'm a school teacher with my summer off. So I get up every morning and am in the shop by 8am and work until about 2-3pm. Then I clean up and spend some time with my wife. The top of the cowl is also a mess, but I wasn't about to spend all the coin for the entire cowl replacement panel. I have already made a template of that and will just cur out the ugly and patch in what I need.
__________________
Glenn 1951 3100, Area51 1955 BelAir, 4EVER17 1987 R10, Ethel Copper Hill Rod & Custom http://67-72chevytrucks.com/vboard/s...d.php?t=829856 Last edited by gsinon; 07-17-2023 at 03:45 PM. |
||||
|
|
|
|
07-17-2023, 03:42 PM
|
#253 |
|
Registered User
Join Date: Jan 2022
Location: Conn.
Posts: 184
|
Re: Long Time Coming......
Today's adventures in the garage....
I got out to the shop early this morning with a plan to finish the rough fab on the bed. To do what I wanted I needed to reinstall the cab first. Kind of nice seeing it like this for the first time in more then a year. 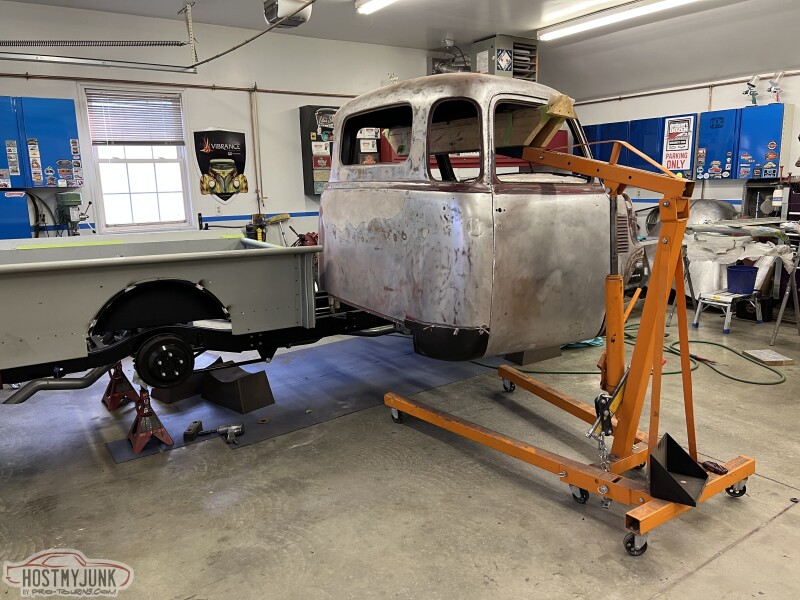 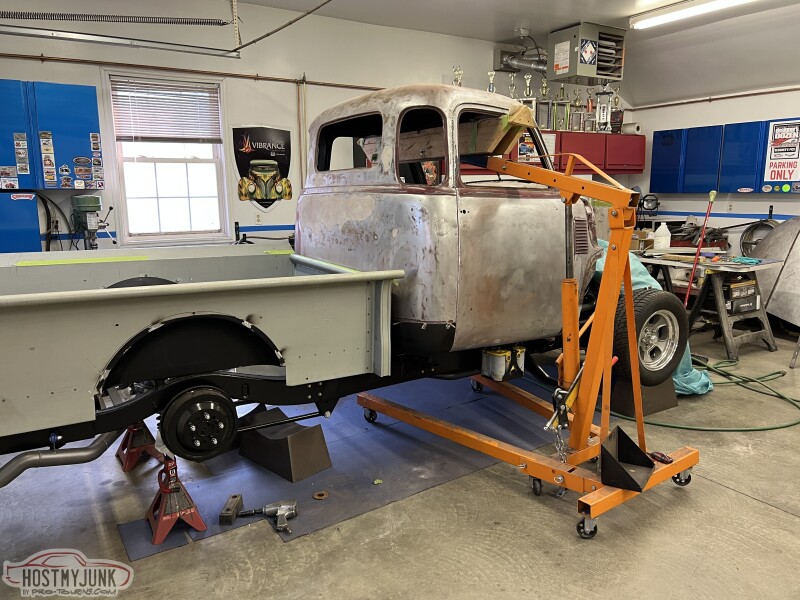 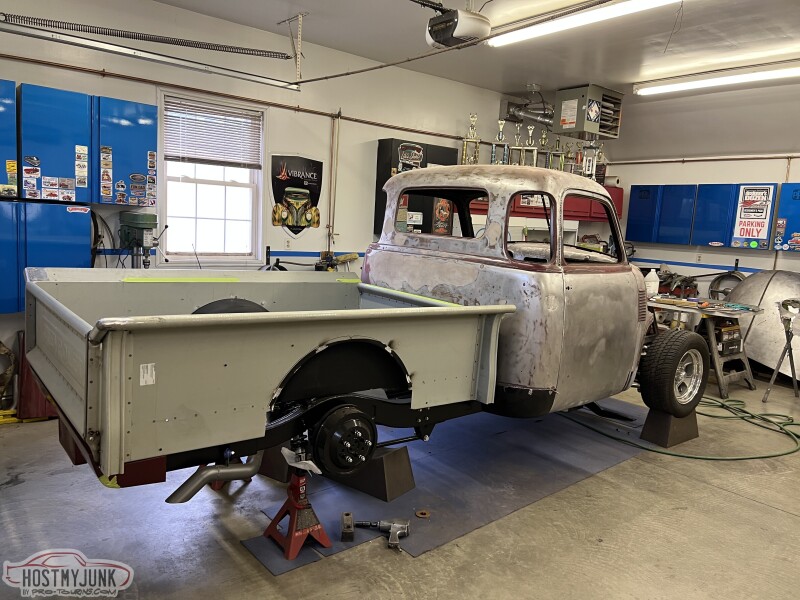 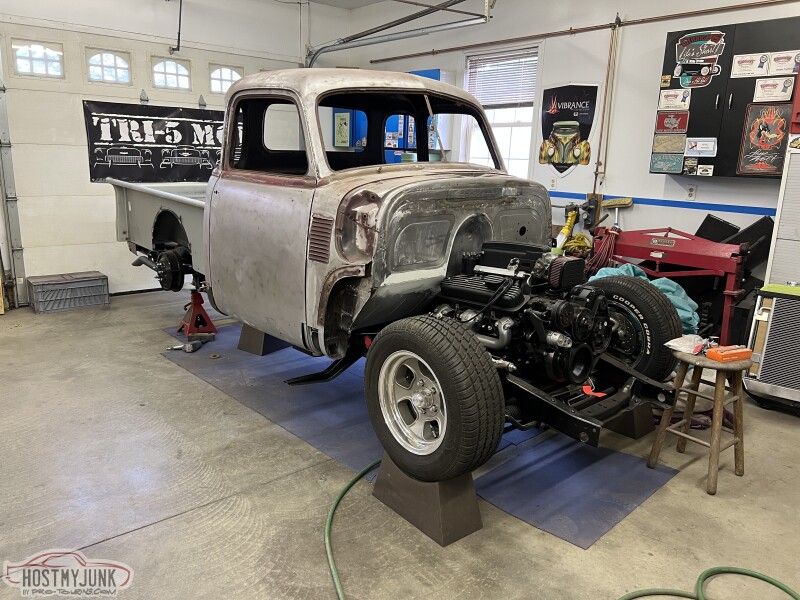 With the cab on and both it and the bed squared to eachother it was time to address one of my biggest pet peeves with these trucks. The rounded back of the cab and the flat front of the bed. Ugh. I've seen some metal masters go all in and make a new front bed panel that is curved. And while I would love to attempt that it is beyond my skill level, or at least it is with the very basic of metal tools I have on hand. 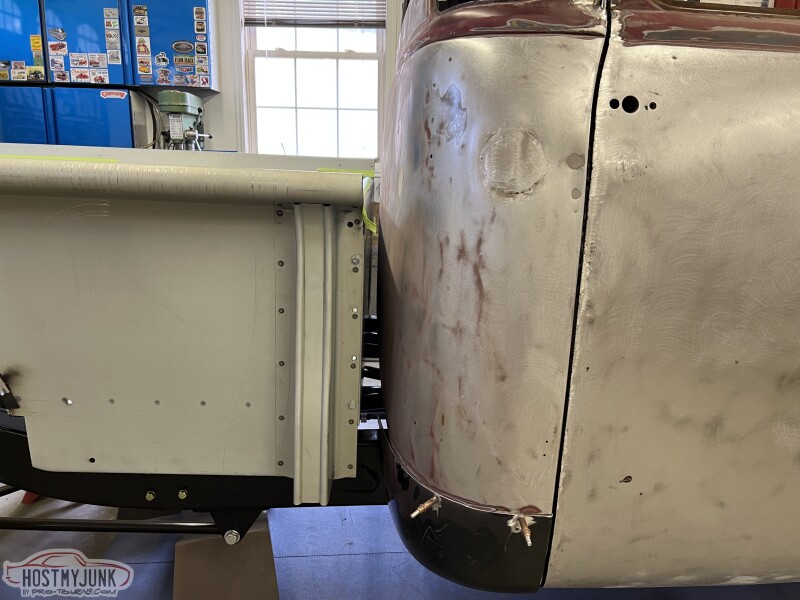 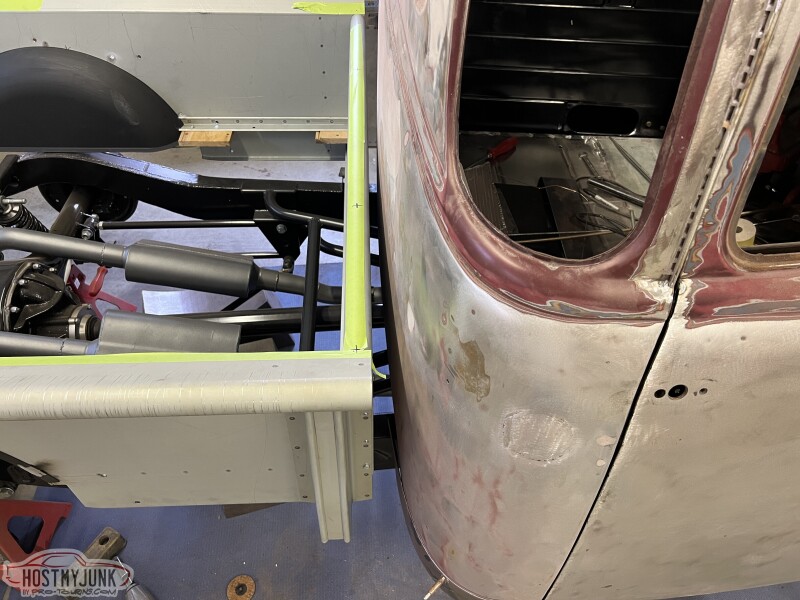 So instead of doing all of that, I am just going to make a filler piece that will go between the top rail of the bed and the cab so it matches the arc of the cab. I started by taping some foam I had oaying around, then I used some poster board to make some templates. 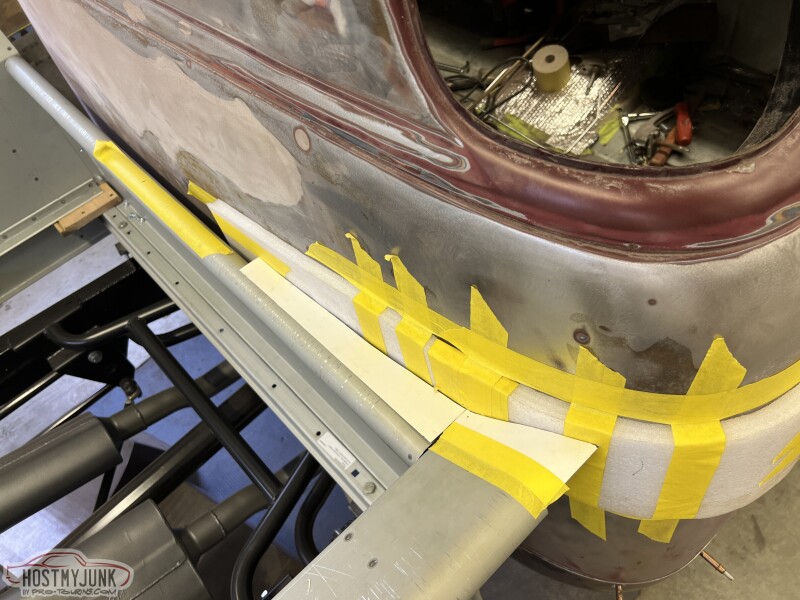 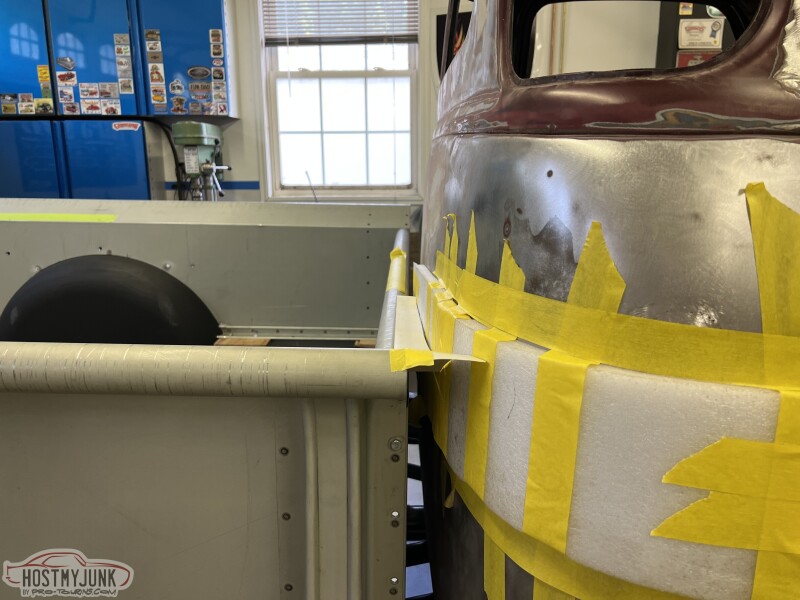 With that figured out, I ran to the parts store for a couple pieces of 1.75" round exhaust pipe to use for the bed rail extensions. I got them trimmed and tacked in place. 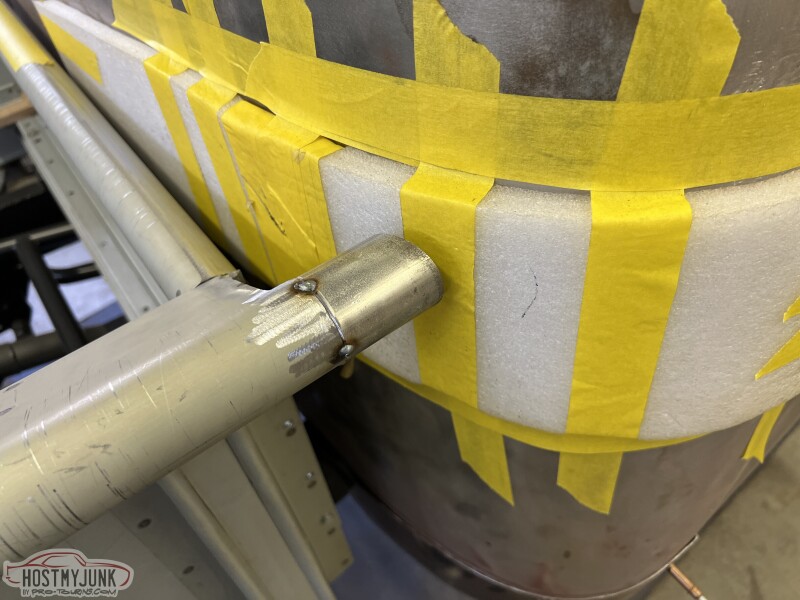 I then trimmed back the bed side to make room for the filler panel I would need. 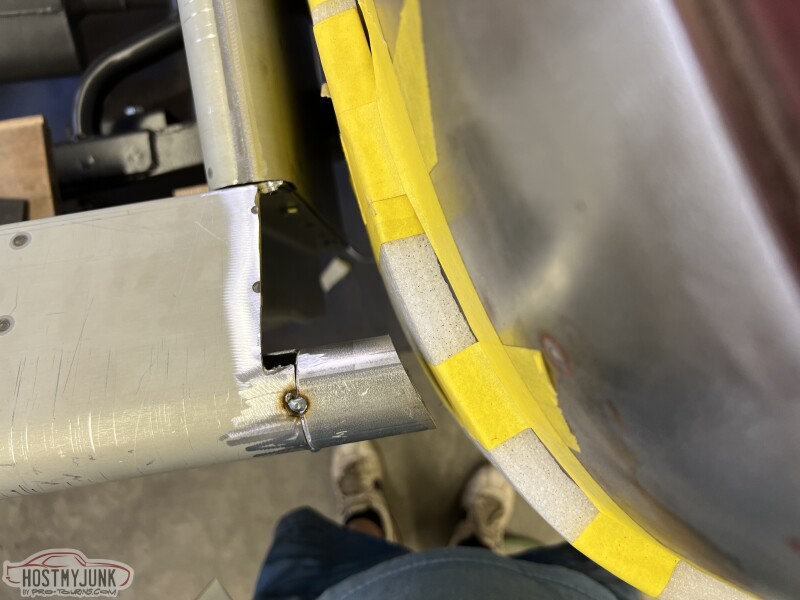  Using my trusty poster board, I transferred the template to some 16g sheet metal I had. I also tacked on some round 3/16 bar to the edge to give it a finished look instead of just having the metal just end. 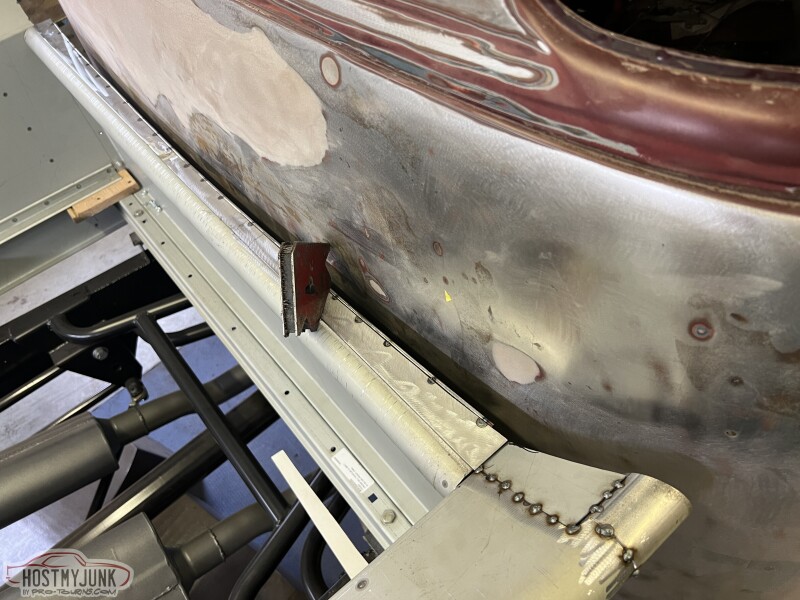 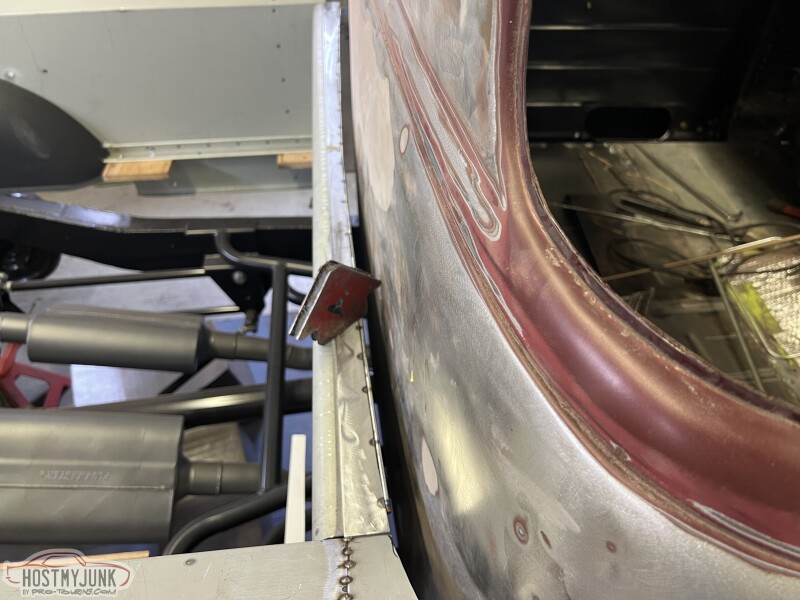 This is the finished look. Still a lot more welding to do. Then at some point body work it all in. But you get the idea I'm after. Much better in my opinion then the first two pics. 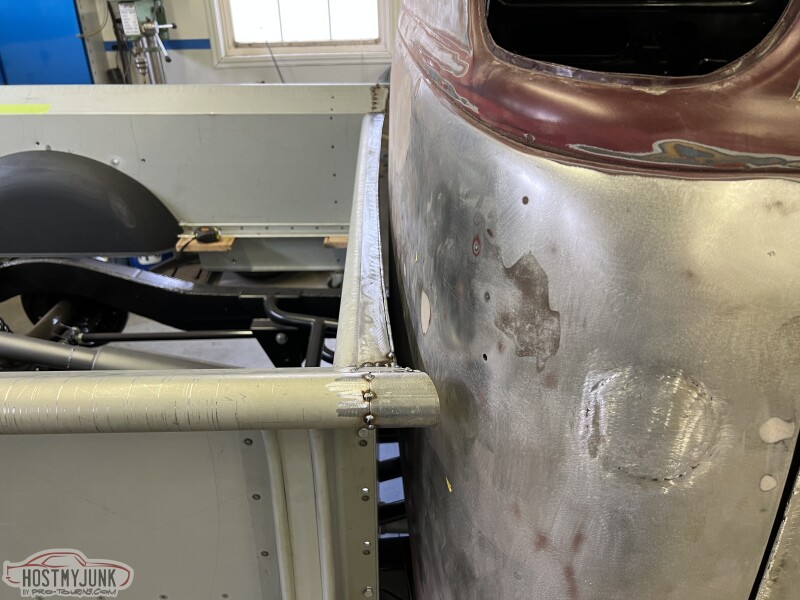 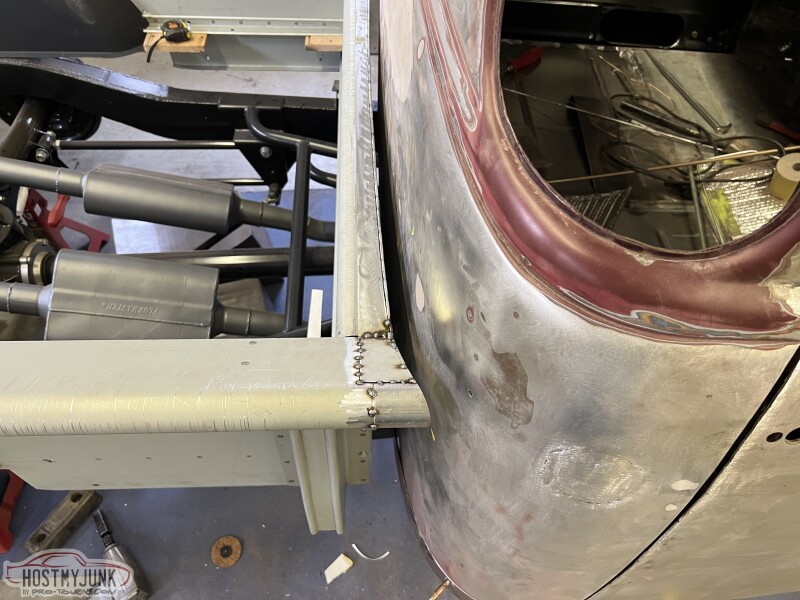
__________________
Glenn 1951 3100, Area51 1955 BelAir, 4EVER17 1987 R10, Ethel Copper Hill Rod & Custom http://67-72chevytrucks.com/vboard/s...d.php?t=829856 |
|
|
|
|
07-17-2023, 03:45 PM
|
#254 | ||||
|
Registered User
Join Date: Jan 2022
Location: Conn.
Posts: 184
|
Re: Long Time Coming......
Quote:
Quote:
Quote:
Quote:
In the end I share what I do in hopes it inspires in one form or another.
__________________
Glenn 1951 3100, Area51 1955 BelAir, 4EVER17 1987 R10, Ethel Copper Hill Rod & Custom http://67-72chevytrucks.com/vboard/s...d.php?t=829856 |
||||
|
|
|
|
07-18-2023, 05:32 PM
|
#255 |
|
Registered User
Join Date: Jan 2022
Location: Conn.
Posts: 184
|
Re: Long Time Coming......
Today's episode of What did Glenn do in the Garage Today...
In an effort to get all the rough fab work done on the bed I decided to tackle the rolled pan and taillights. I am using 1939 Chevy passenger car bullt style taillights. I wanted to get them to mount to the bottom of the rolled pan. But I don;t want them to hang off, but rather be cut up into the pan roughly 50%. With the pan on a stand I measured and started vutting to get the buckets to fit.  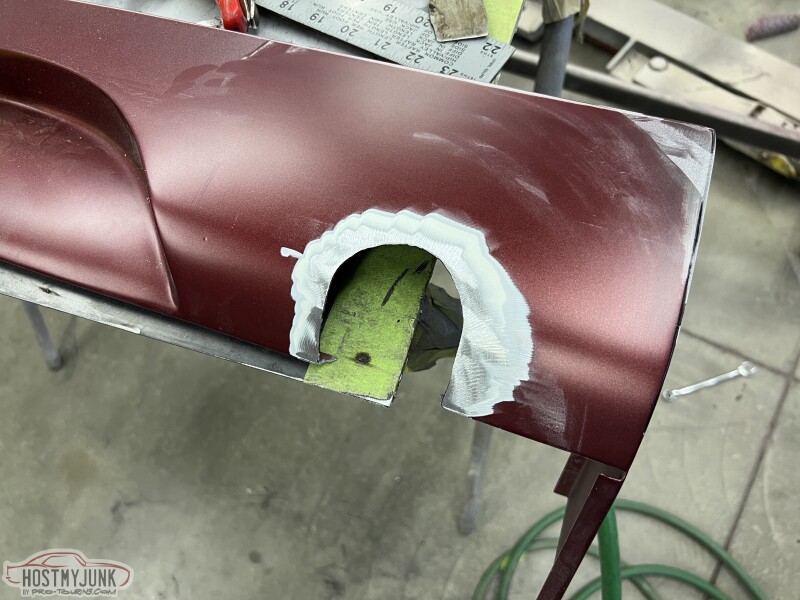 Once trimmeed to fit the bucket nicely I used some rectangular steel stock I have and a long level to make sure the buckets are on the same angle as the license plate panel. 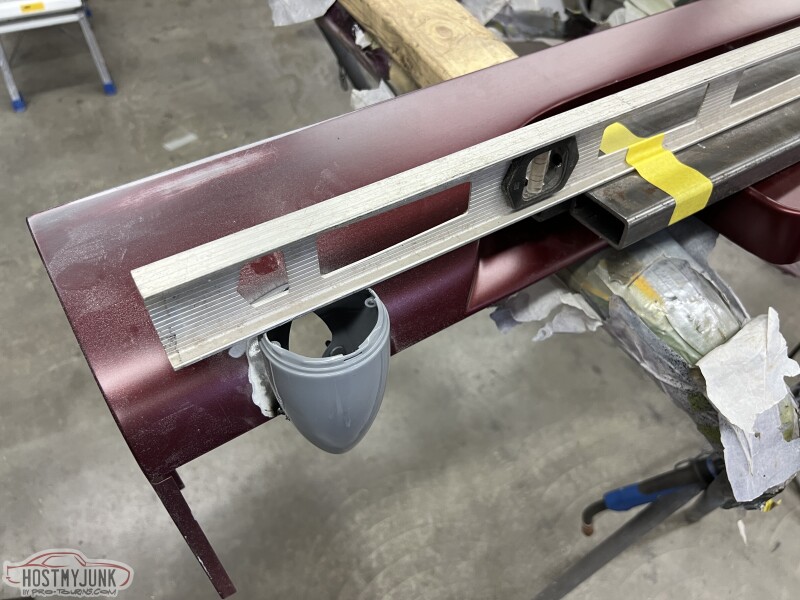 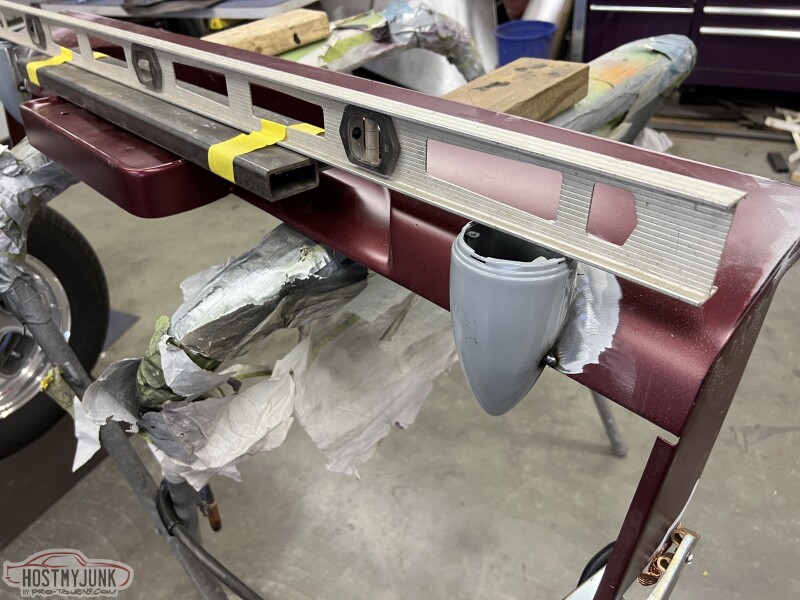 Once I liked the position I welded them in place. I welded them from the back side so I don't have to worry about foing a ton of grinding. 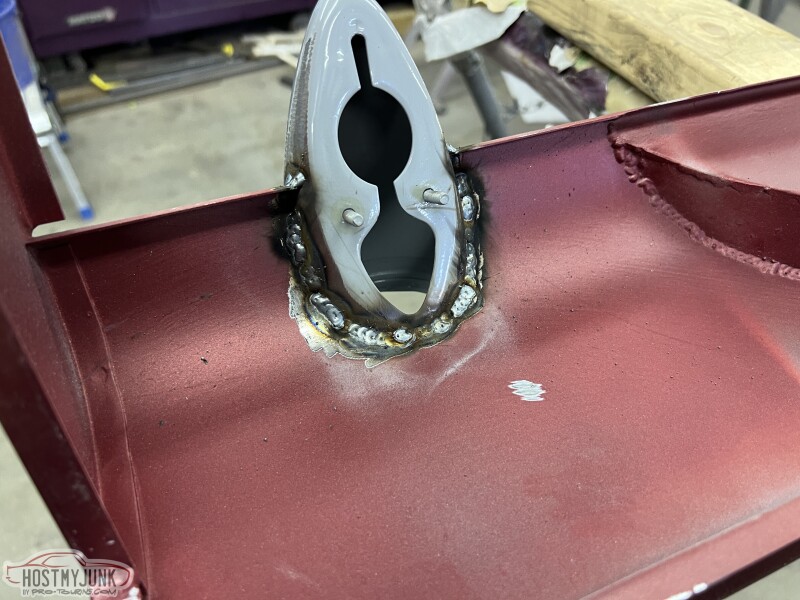 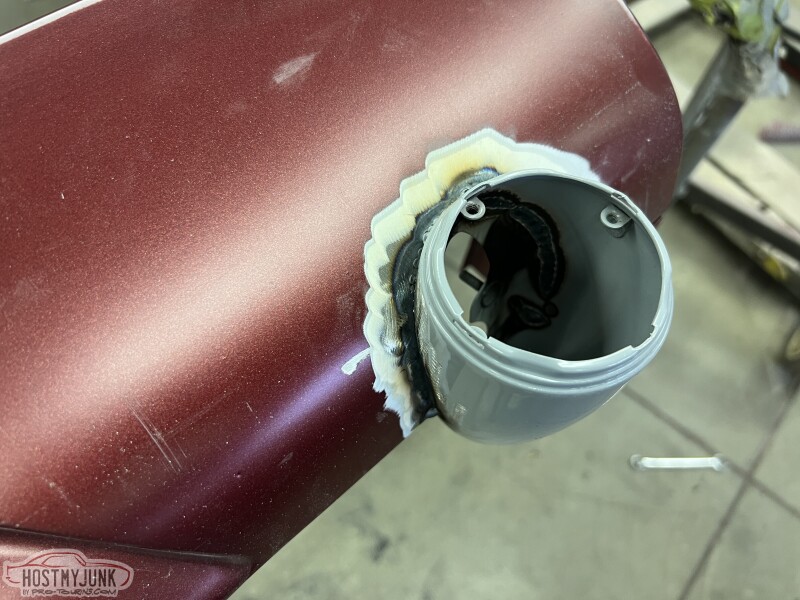 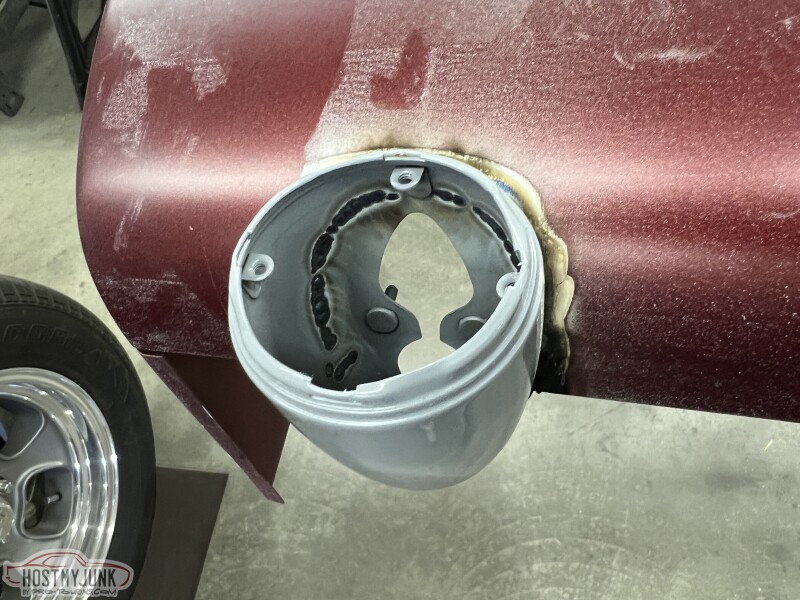 Then it was time for a fit up and be able to step back and see how it looked. 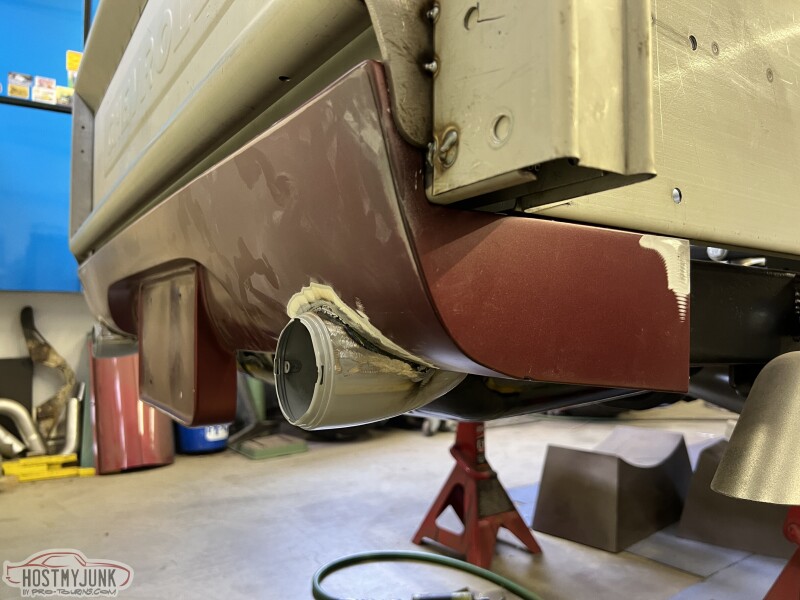 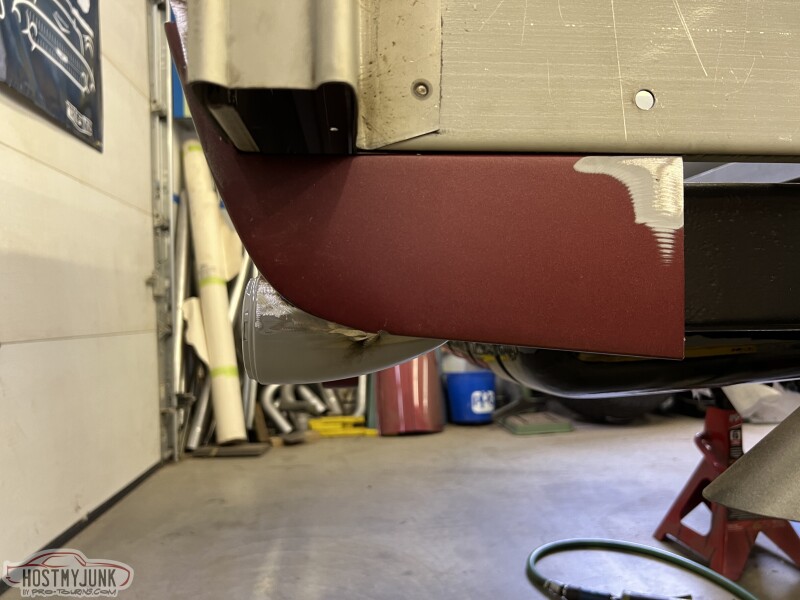 I put the lens and trim rings on to show what it will look like when done. 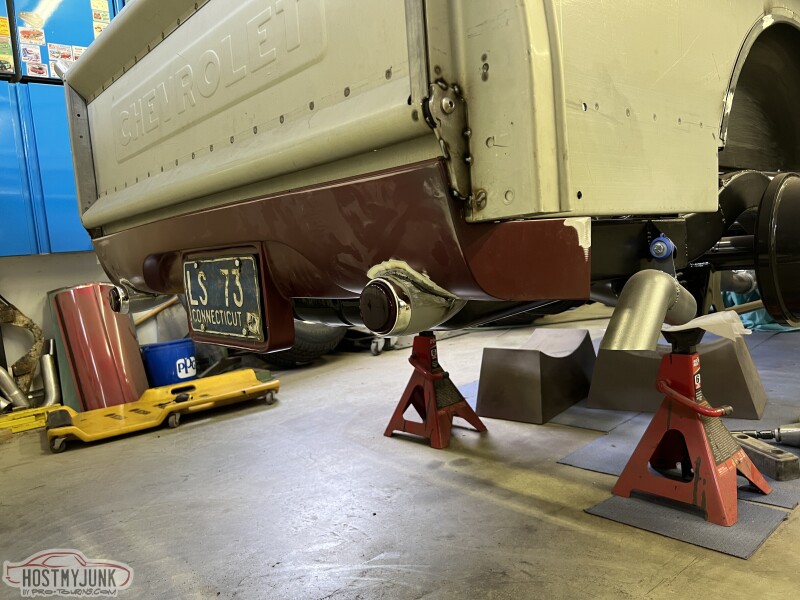 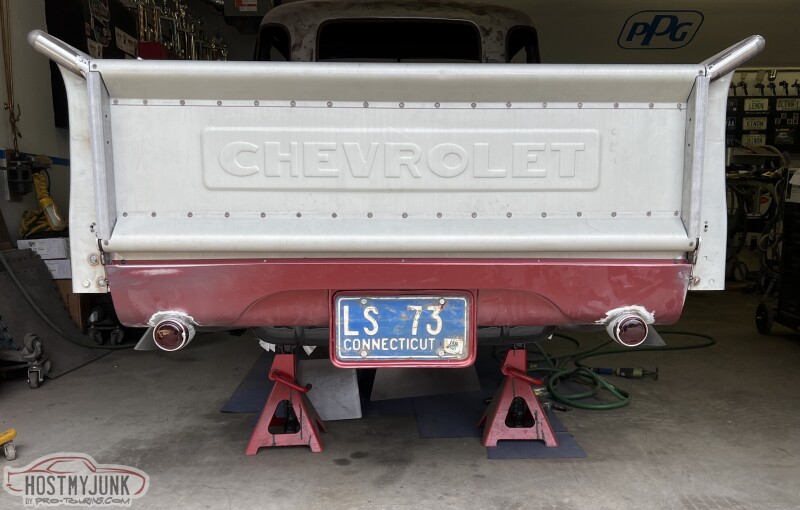 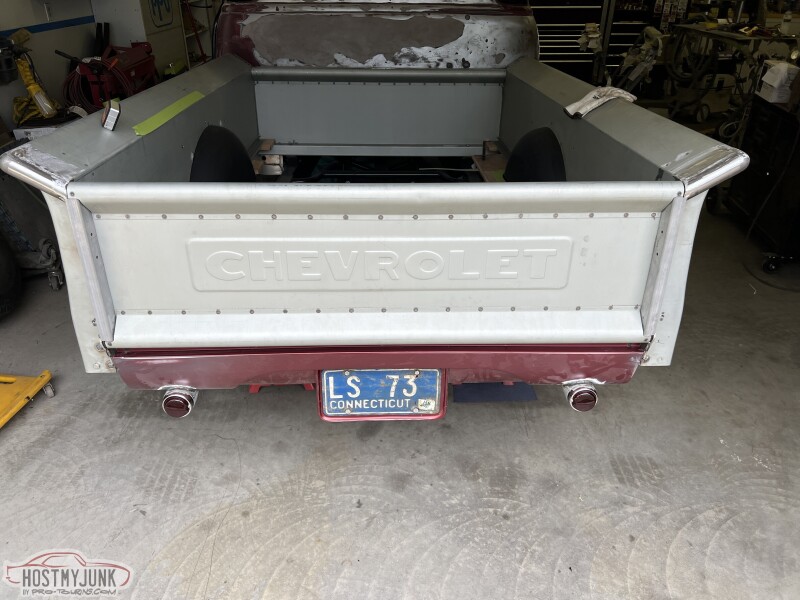
__________________
Glenn 1951 3100, Area51 1955 BelAir, 4EVER17 1987 R10, Ethel Copper Hill Rod & Custom http://67-72chevytrucks.com/vboard/s...d.php?t=829856 |
|
|
|
|
07-18-2023, 07:24 PM
|
#256 |
|
Registered User
Join Date: Nov 2010
Location: calgary alberta
Posts: 7,844
|
Re: Long Time Coming......
Nice work.
They will be hard for other drivers to see down low like that so go fast ALL THE TIME! Haha |
|
|
|
|
07-18-2023, 09:35 PM
|
#257 |
|
Registered User
Join Date: Mar 2017
Location: Western Colorado
Posts: 30
|
Re: Long Time Coming......
On here I get so few comments I sometimes wonder if people are paying attention, or even care.
I am absolutely paying attention to your talented work. It inspires me to get off my butt and keep my project motivated. If I respond to each of your posts, I would feel like a troll. Im sure that I am not the only one who hides in the dark! Please keep posting your progress - I do keep up on it. |
|
|
|
|
07-18-2023, 10:17 PM
|
#258 |
|
Registered User
Join Date: Dec 2011
Location: Moxee WA
Posts: 1,425
|
Re: Long Time Coming......
I'm another one who has gotten some great ideas from you. all I can say is keep it up so others may follow.
I was thinking of using the same style tail light but mounted on the side of the stake pocket about where the stock lights mount. Now you have me rethinking that idea. If I go that route, I think I would mount the lights so the bottom of the lights are flush with the bottom of the pan and move the license plate up to match.
__________________
49 chevy 3100 3 window. 327 / m21 4 spd, 12 bolt w/ 3:55's Bought in 1973 for $235.00. Had it longer than my wife & Kids!! |
|
|
|
|
07-19-2023, 06:24 AM
|
#259 | |||
|
Registered User
Join Date: Jan 2022
Location: Conn.
Posts: 184
|
Re: Long Time Coming......
Quote:
Quote:
Quote:
 I would like to have raised them up a little higher in the rolled pan, however the end of the frame is right there. I even had to notch the ends of the frame rails to get the buckets as high as they are now. But thats just due to them being centered in the space on each side of the curved area in the pan. If someone had a "normal" rolled pan and the lights were centered the frame wouldn't be an issue. One thing always affects the other. Thanks again to everyone that is following along.
__________________
Glenn 1951 3100, Area51 1955 BelAir, 4EVER17 1987 R10, Ethel Copper Hill Rod & Custom http://67-72chevytrucks.com/vboard/s...d.php?t=829856 |
|||
|
|
|
|
07-19-2023, 11:43 AM
|
#260 |
|
Registered User
Join Date: Nov 2010
Location: calgary alberta
Posts: 7,844
|
Re: Long Time Coming......
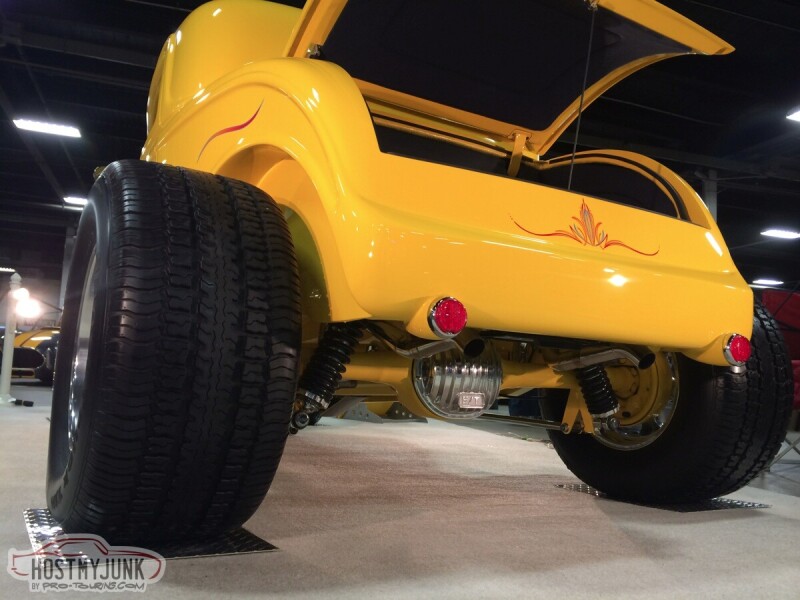
your old ford looks awesome too.
on your box gap, will you also close in the vertical gap to match? I like the idea of a third brake light, where would you put it though? I installed one in the roof of my 57. that look isn't for everybody though. I also looked at the top edge of the tailgate but that area can get beat up too easily. then I thought about the tailgaye latch area (not a stock gate so it has a handle in the middle), same deal. |
|
|
|
|
07-19-2023, 02:57 PM
|
#261 | |
|
Registered User
Join Date: Jan 2022
Location: Conn.
Posts: 184
|
Re: Long Time Coming......
Quote:
__________________
Glenn 1951 3100, Area51 1955 BelAir, 4EVER17 1987 R10, Ethel Copper Hill Rod & Custom http://67-72chevytrucks.com/vboard/s...d.php?t=829856 |
|
|
|
|
|
07-19-2023, 04:41 PM
|
#262 |
|
Registered User
Join Date: Nov 2010
Location: calgary alberta
Posts: 7,844
|
Re: Long Time Coming......
I have seen some placed below the back window above the box. Also seen some I side the truck at the top or bottom of the window. Maybe a trip to the wrecker would come up with a donor that would look ok.
|
|
|
|
|
07-28-2023, 02:48 PM
|
#263 |
|
Registered User
Join Date: Jan 2022
Location: Conn.
Posts: 184
|
Re: Long Time Coming......
This has been one of those weeks where I spent many hours in the garage, and yet it doesn't appear that much happened. All this takes so much time.
I ended up getting off the bed for now. I can't do too much to fill the gap between the bed and the cab on the sides until I had installed the running boards and they weren't in yet. First I had to install the support arms for the running boards, then bolt the filler panel to the running boards. They then bolted on nicely. I'm still waiting for the rear fenders though. So I decided now was a good time to start fitting the nose and see how it all falls in place. I got the rad support in along with the latch support panel and lower pan. Those both needed some trimming to fit around the new radiator. Then it was time for the hood and fender wells. 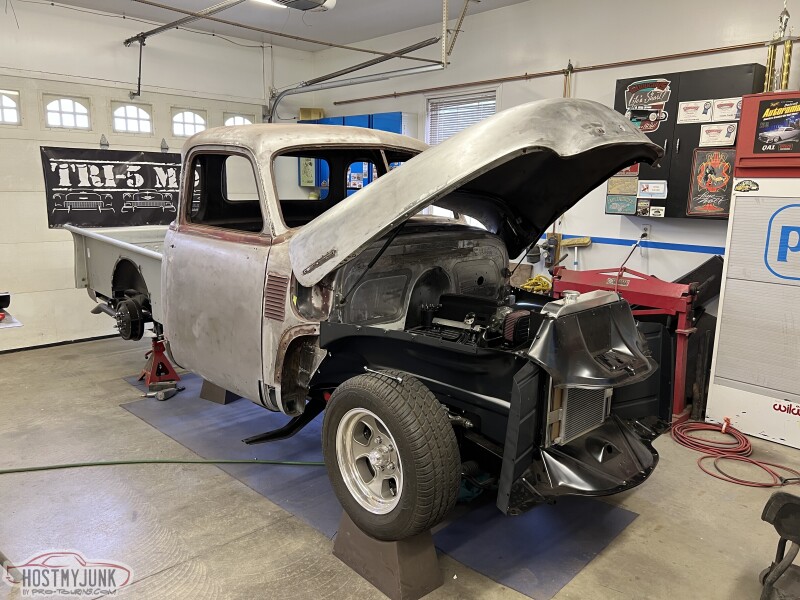 With the front fenders in place it was time for the running boards and bed filler panels. These are still loose waiting for the instalation of the rear fenders. They should be here by the middle of next week.  Once everything is fitted I will definitely be fixing all of this. I hate the gap between the bed and cab. I will also be extending the stake pocket down to the filler panel as well as extending the leading edge of the filler panel to follow the cab corner better. 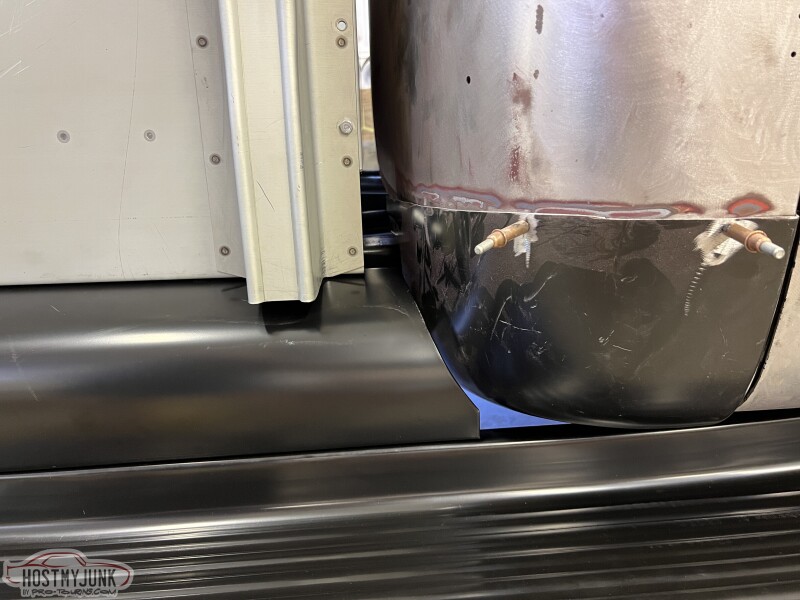 With everything loosely bolted together...I was also able to get a giid view of how bad the hood and fender gaps are. I've got some work ahead of me here. 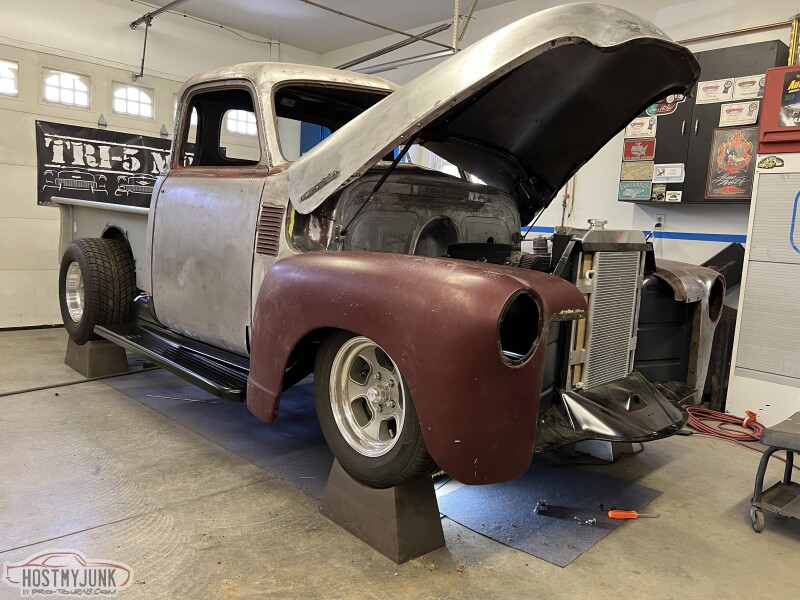 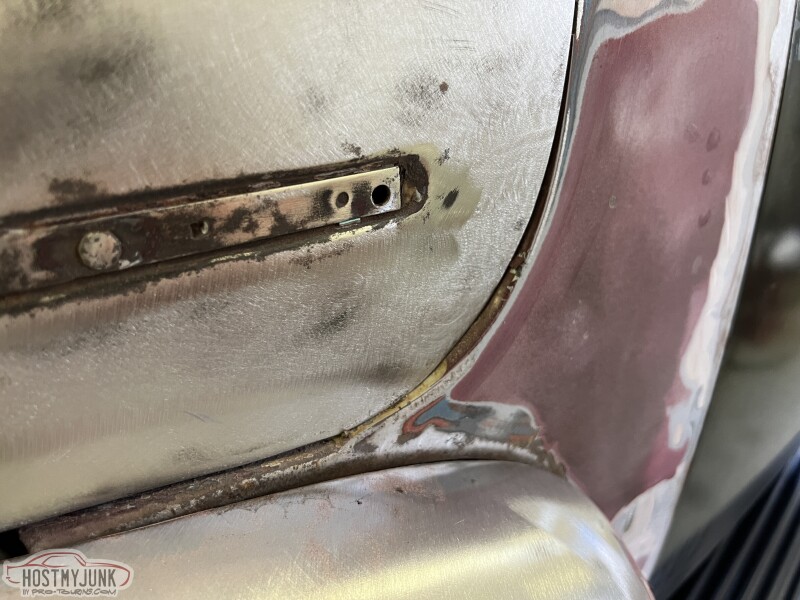 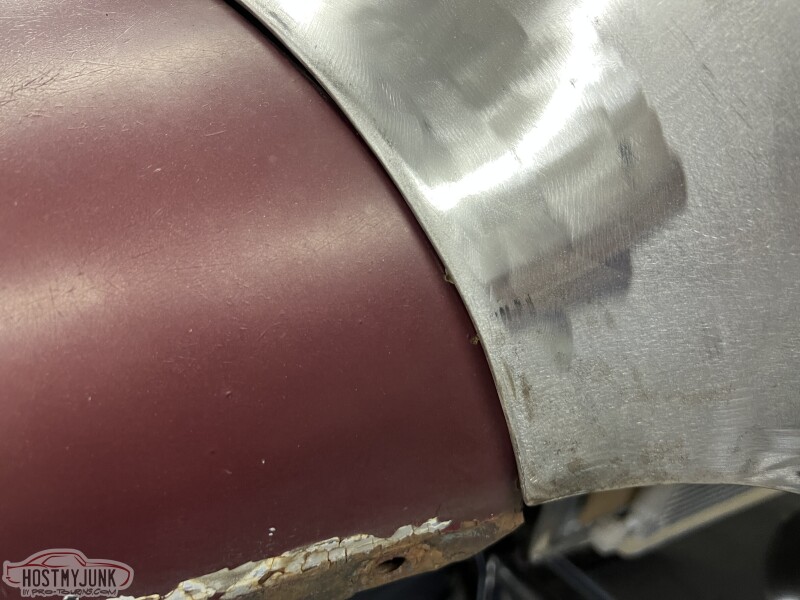 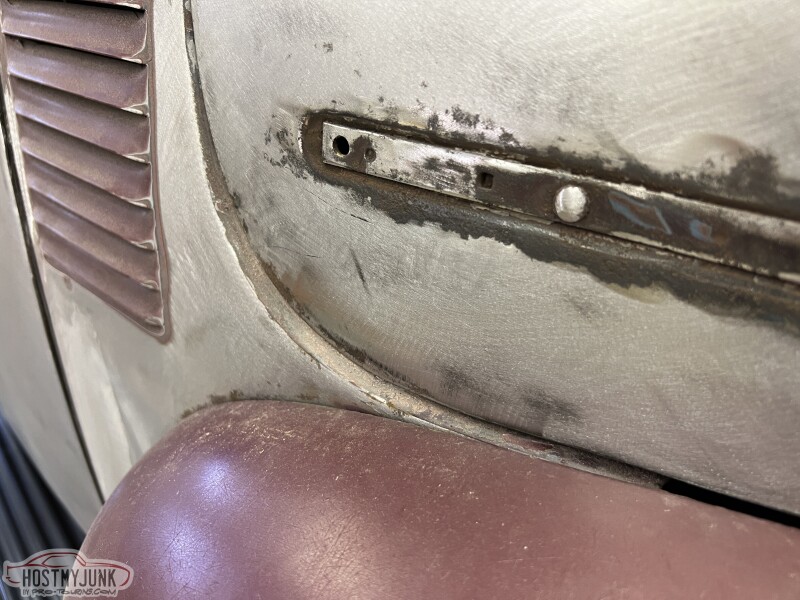 And lastly the chance to stand back and take it all in..... 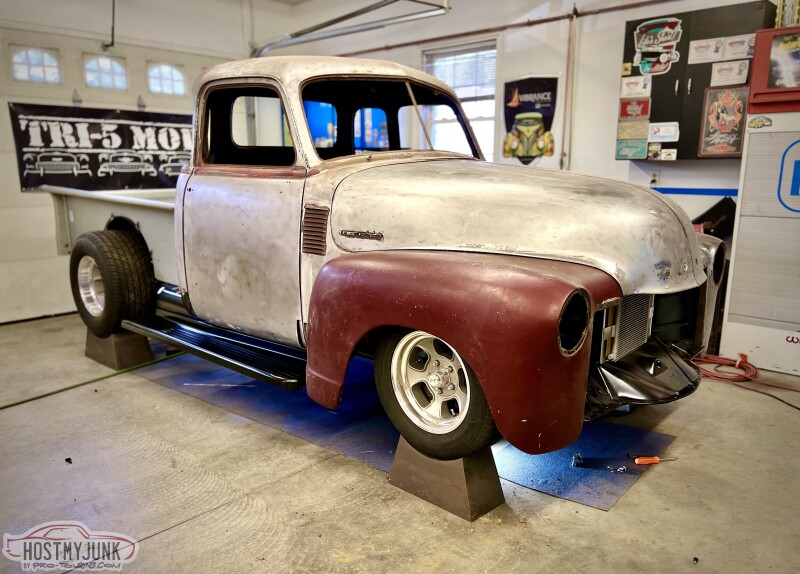 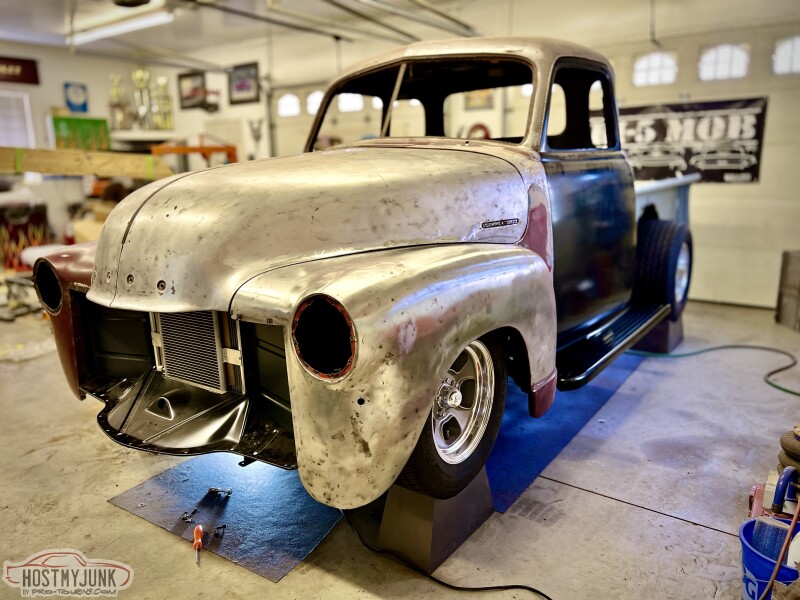 One last thing. Since I track my hours I have decided to start posting up the hours involved and a complete running tally. Might be fun to watch and see what it all adds up to. Any guesses? This all took 14 hours. Subtotal is now 484.75 hours!
__________________
Glenn 1951 3100, Area51 1955 BelAir, 4EVER17 1987 R10, Ethel Copper Hill Rod & Custom http://67-72chevytrucks.com/vboard/s...d.php?t=829856 |
|
|
|
|
07-28-2023, 03:21 PM
|
#264 |
|
Registered User
Join Date: Dec 2011
Location: Moxee WA
Posts: 1,425
|
Re: Long Time Coming......
I don't think my calculator goes that high !! LOL
__________________
49 chevy 3100 3 window. 327 / m21 4 spd, 12 bolt w/ 3:55's Bought in 1973 for $235.00. Had it longer than my wife & Kids!! |
|
|
|
|
07-28-2023, 04:33 PM
|
#265 |
|
Registered User
Join Date: Jul 2019
Location: East Tennessee
Posts: 260
|
Re: Long Time Coming......
I tracked my hours on a Falcon project I did years ago. Full strip to bare metal, nothing untouched. I stopped taking it around 800 hours!
Your front bed detail is outstanding, by the way. Eager to see how you work the running board gaps. Keep it up- Dan
__________________
Just playing in my shop, trying to maintain my sanity and maybe finish a project here and there. . . . My 53 3100 "rebuild" - Soon to be Scott's suspension, LS, low and mean. https://www.67-72chevytrucks.com/vbo...d.php?t=791886 My 65 Ford project . . https://www.67-72chevytrucks.com/vbo...d.php?t=792428 |
|
|
|
|
07-29-2023, 06:28 AM
|
#266 | ||
|
Registered User
Join Date: Jan 2022
Location: Conn.
Posts: 184
|
Re: Long Time Coming......
Quote:
Quote:
I'm also looking forward to how the bed details shape up. Once the rear fenders are on I will tackle that project.
__________________
Glenn 1951 3100, Area51 1955 BelAir, 4EVER17 1987 R10, Ethel Copper Hill Rod & Custom http://67-72chevytrucks.com/vboard/s...d.php?t=829856 Last edited by gsinon; 07-29-2023 at 08:00 AM. |
||
|
|
|
|
07-29-2023, 10:58 AM
|
#267 |
|
Registered User
Join Date: Nov 2010
Location: calgary alberta
Posts: 7,844
|
Re: Long Time Coming......
on your box vertical gaps, my 2015 silverado has "gap fillers" for that space. they have 2 sided tape holding them on. I realize the box is formed to go around the cab in my case but I wonder if something like that may stop the light from coming through the gap so the eye isn't drawn to that spot. just a thought once you get the gap nearly filled with steel the rest of the gap, possibly further back a bit from the steel filler, could be filled with something like that to stop the light coming through and appear completely filled in. if slightly further back from the steel part, and attached to the cab, it wouldn't need to touch the box so no paint scuffing by the rubber.
just a thought |
|
|
|
|
07-30-2023, 07:51 AM
|
#268 | |
|
Registered User
Join Date: Jan 2022
Location: Conn.
Posts: 184
|
Re: Long Time Coming......
Quote:
__________________
Glenn 1951 3100, Area51 1955 BelAir, 4EVER17 1987 R10, Ethel Copper Hill Rod & Custom http://67-72chevytrucks.com/vboard/s...d.php?t=829856 |
|
|
|
|
|
08-01-2023, 03:51 PM
|
#269 |
|
Registered User
Join Date: Jan 2022
Location: Conn.
Posts: 184
|
Re: Long Time Coming......
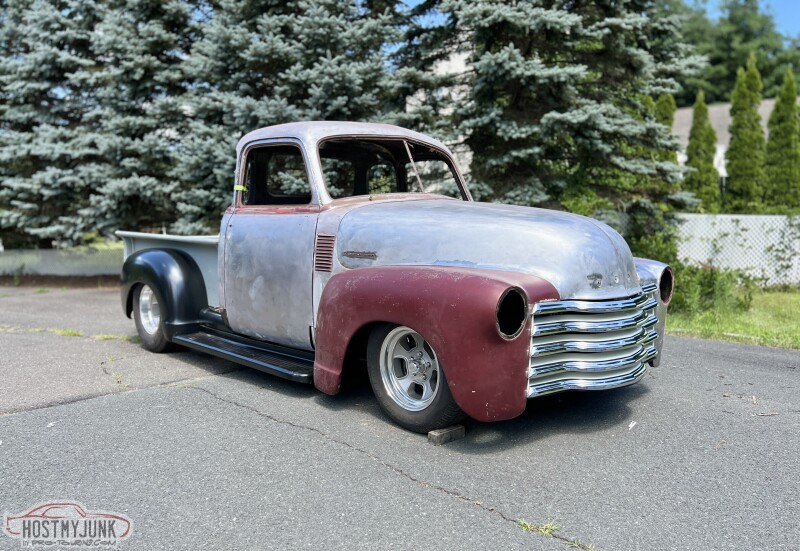
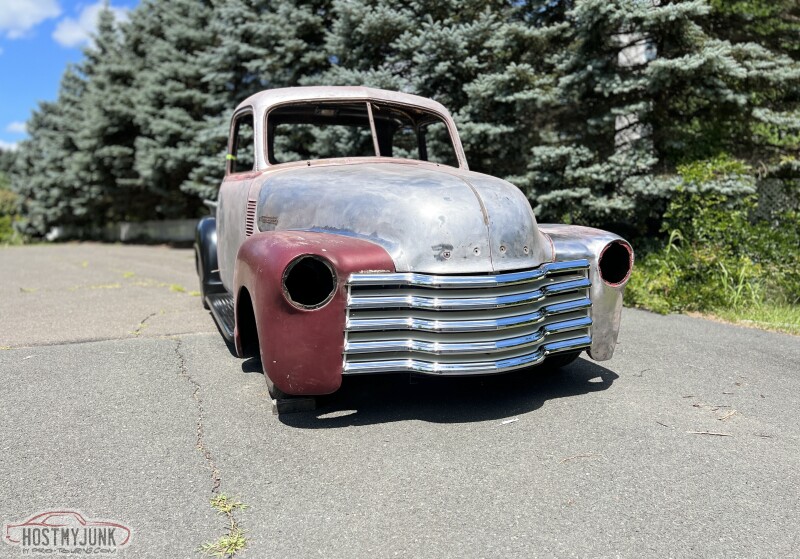
In my last update I showed a picture of how the hood overlapped the hood a bit. I started thinking about that and what I was going to do. It occured to me that when I bolted the inner fender panels and outer I bolted them right up against the radiator support. This didn;t allow any real outward adjustments. So I loosened the boltd and was able to pull each side out about a 1/4" which made all the difference in the world. Having done that I was able to slide the new grill in place as well.
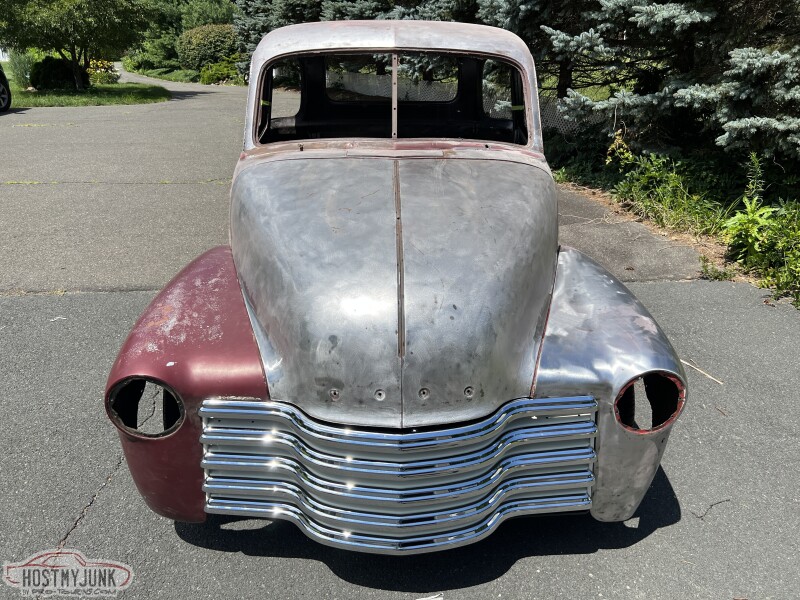
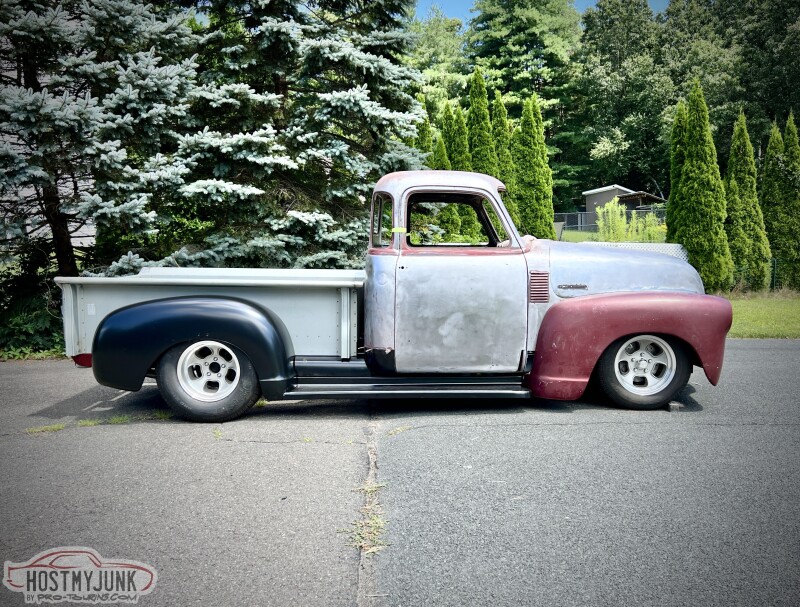
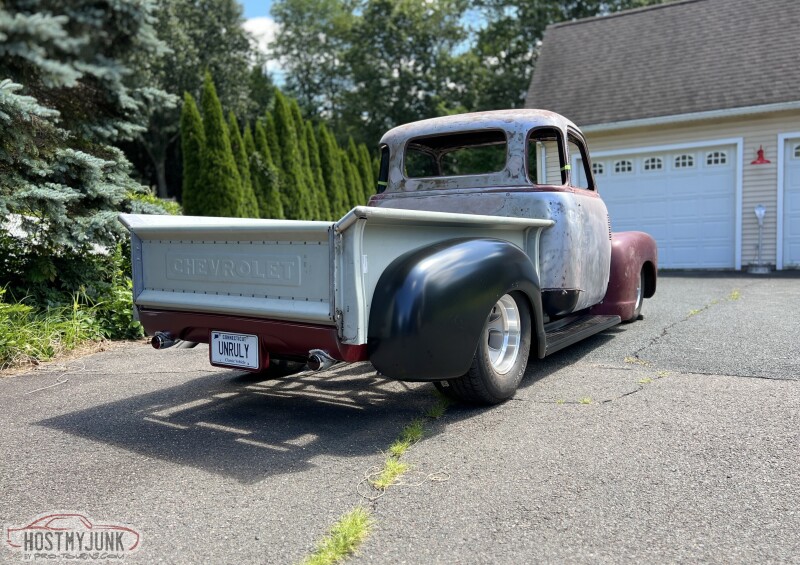
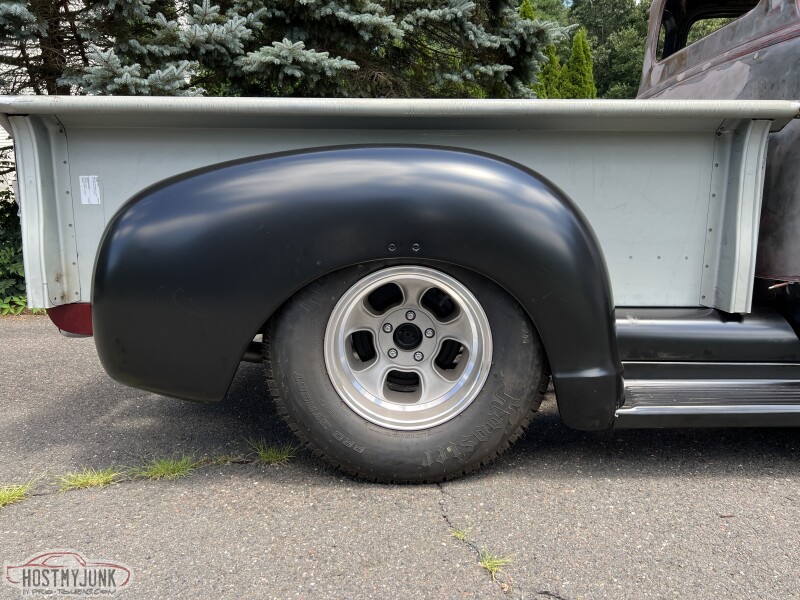
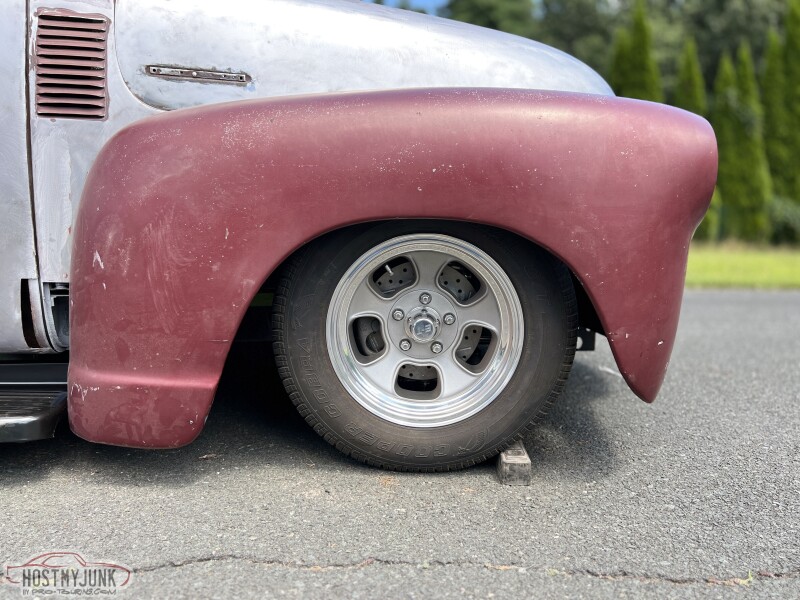
This leads me to a question. How have you all assembled the front end after paint? Piece by piece on the truck? Or as an assembly on the floor and then slide the entire thing in place? Getting all the holes to line up and move thngs around can lead to scratches that when painted I'm not going to want to deal with. Curious what others have done. 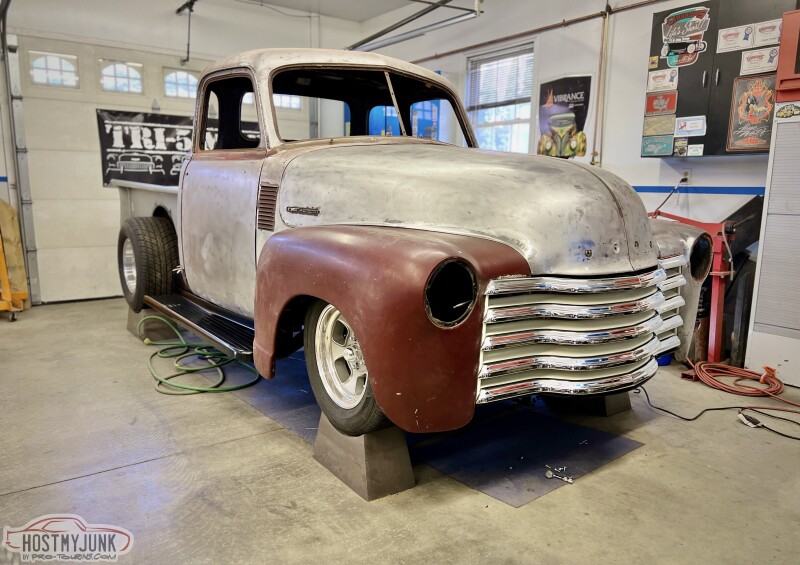 The rear fenders showed up yesterday, so I unboxed the passenger side and bolted it on. I had to loosen the running boards and take off the filler panel that goes from the bed to the running board. After some tweaking I was able to get all three parts lined up. 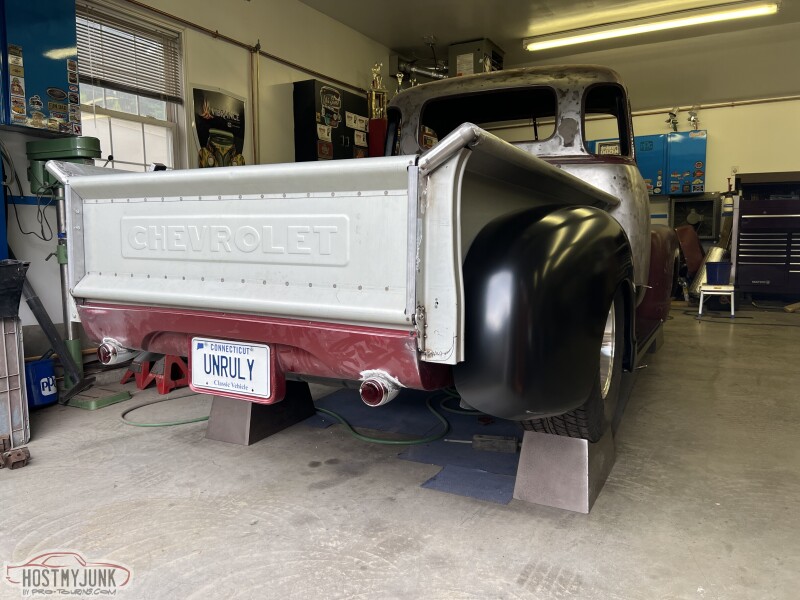 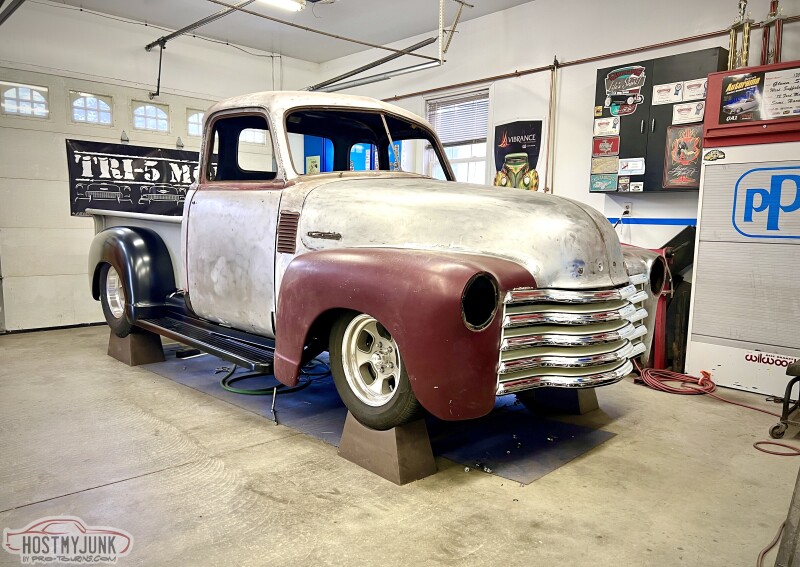 With that done I decided it was time to put it on the ground and look at the entire truck as a whole for the first time since November 2020 when I dismantled the whole truck to start the project. 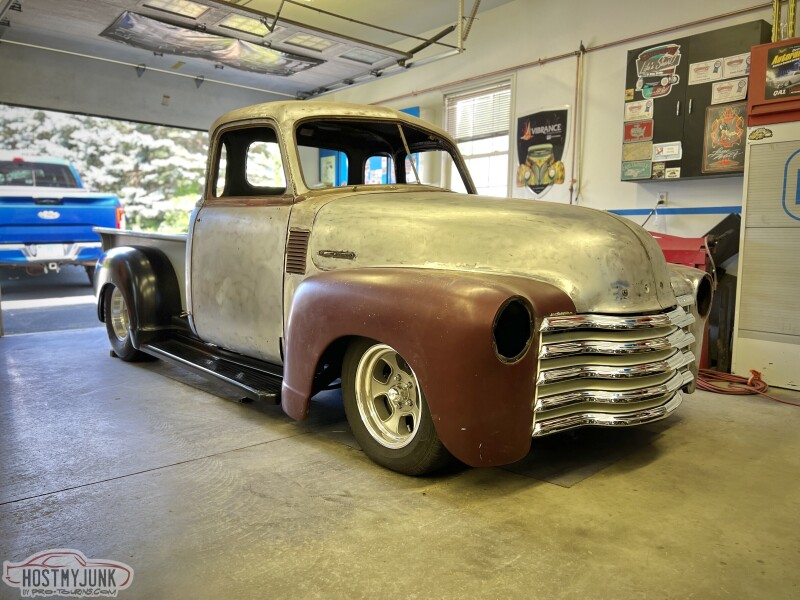 While things fit ok, ok isn't enough for me. Some of these things are just the way GM made them, but I'm going to fix all the things I think they should have done. To start is how the running board ends before the front fender unlike the rear where it bolts directly to the fender. 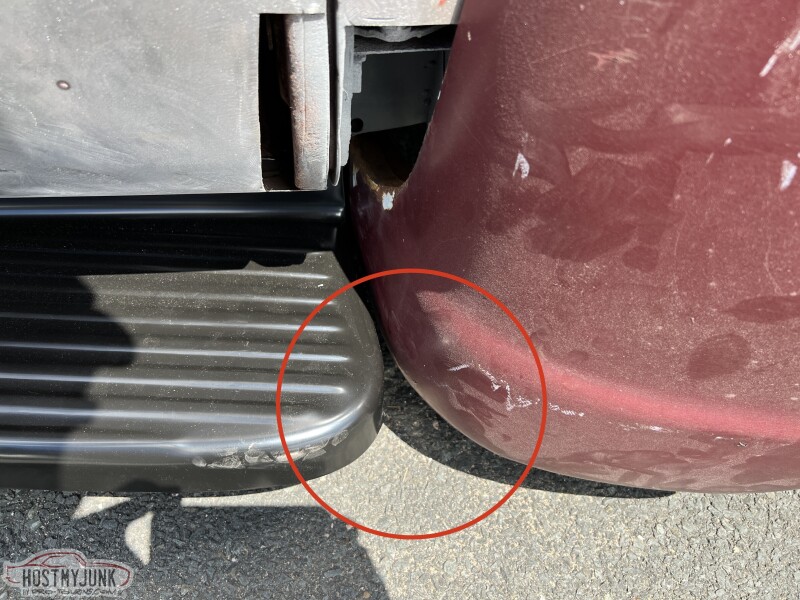 I'm also not a fan the way the filler panel just ends rather than continuing the slope down under the cab. 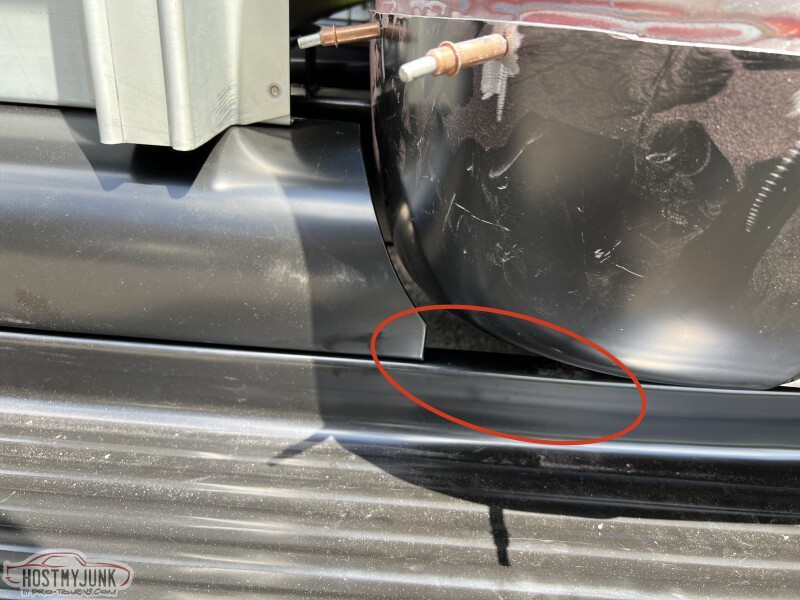 I'm going to extend the stake pocket and roll it in to meet the filler panel. 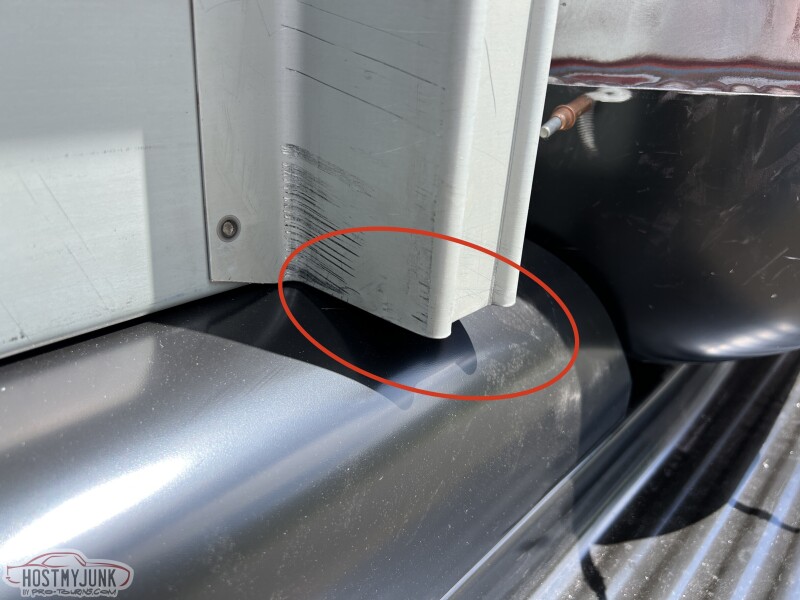 These two are to show the fitment between the filler panel and rear fender as well as the running board and the rear fender. These will both be fixed. 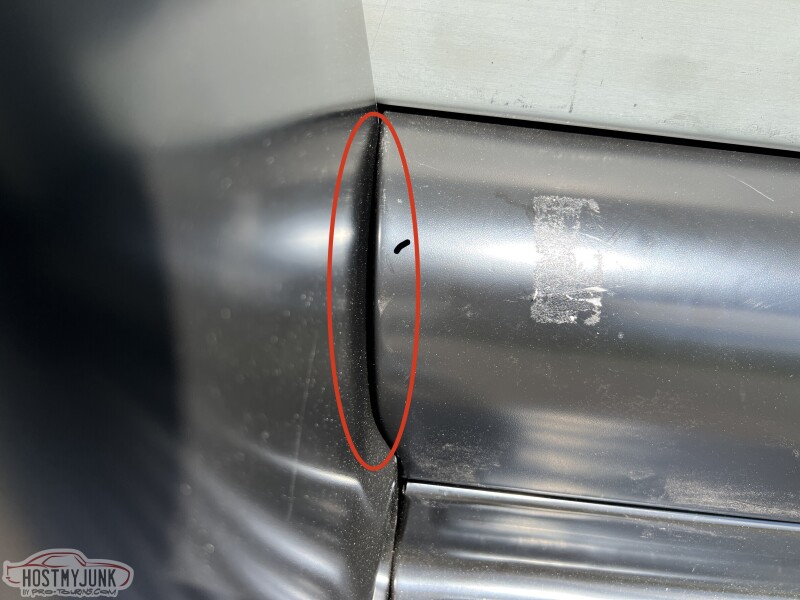 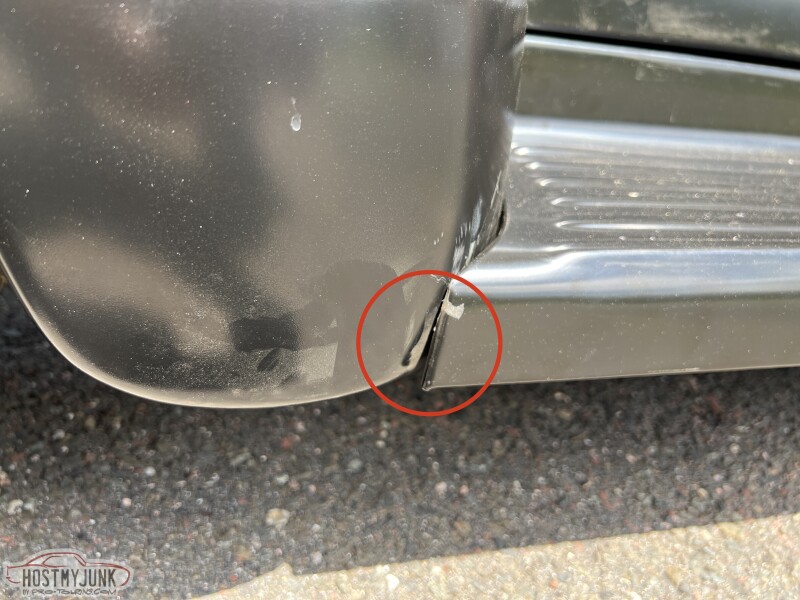 Time tally: 7 hours 491.6 total .
__________________
Glenn 1951 3100, Area51 1955 BelAir, 4EVER17 1987 R10, Ethel Copper Hill Rod & Custom http://67-72chevytrucks.com/vboard/s...d.php?t=829856 |
|
|
|
|
08-01-2023, 03:57 PM
|
#270 |
|
Registered User
Join Date: Jan 2022
Location: Conn.
Posts: 184
|
Re: Long Time Coming......
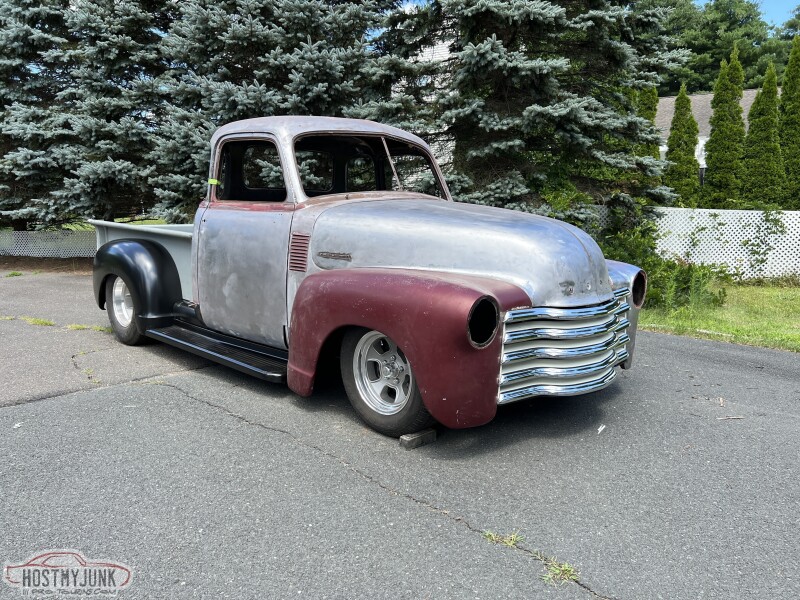
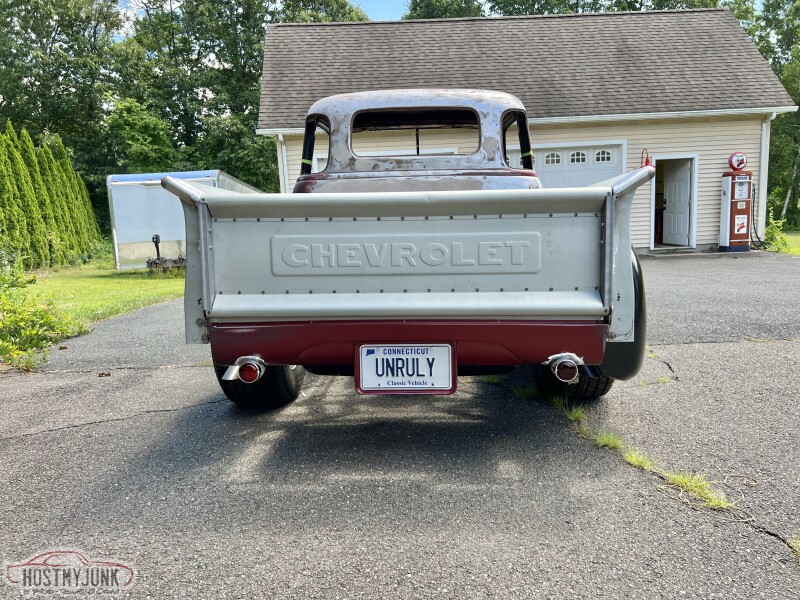
Being excited and having it on the ground led to the decision to roll it outside so I could stand away from it and get a good view of the overall look and stance.
__________________
Glenn 1951 3100, Area51 1955 BelAir, 4EVER17 1987 R10, Ethel Copper Hill Rod & Custom http://67-72chevytrucks.com/vboard/s...d.php?t=829856 |
|
|
|
|
08-02-2023, 09:17 AM
|
#271 |
|
Registered User
 Join Date: Mar 2007
Location: Scotts, Michigan
Posts: 3,756
|
Re: Long Time Coming......
That stance is spot on. It looks really good. On my last painted 48 truck build I assembled the front end piece by piece. I didn't think it was realistic (for me) to assemble it on the floor then wrestle that heavy mass into place without scratching something.
It is looking great. Marc
__________________
...........__________ .................. ((__|__||___\____ ..;.;;.:;:;.,;..;((_(O))____ (_(O)) 1948 Chevy Truck - Finished SOLD!! 1953 Chevy Suburban "Family Truckster" Completed: Spring of 2021 http://67-72chevytrucks.com/vboard/s...d.php?t=605484 1994 4x4 Blazer - "Field Find" https://67-72chevytrucks.com/vboard/...ferrerid=30857 |
|
|
|
|
08-02-2023, 11:22 AM
|
#272 |
|
Registered User
Join Date: Feb 2021
Location: WestCentral MN,
Posts: 35
|
Re: Long Time Coming......
From a body-man's point of view, I prefer to get everything fit perfect then when I have it disassembled I only paint the jambs. Then reassemble, fix any scratches in what was the final primer sand, "soft-mask" the jambs and paint the cab/front clip all at once. Especially if a high-metallic color is used. I can pick out vehicles that were painted apart vs painted as a whole at car shows(high metallic colors). Paint out of the same gallon can can be many different colors depending on conditions and how it is applied. Silvers and very light golds are the worst. The metallic particles can lay flat, on end or any variation in-between. Giving a different look at different angles.
Just my humble opinion... It's more work and requires more painting skill but, a good painter can do it and it will look better. |
|
|
|
|
08-02-2023, 12:08 PM
|
#273 |
|
Registered User
Join Date: Nov 2010
Location: calgary alberta
Posts: 7,844
|
Re: Long Time Coming......
My opinion also. Some painters try to do really long stretches at once, like the whole length of the car. Having step side fenders or fenders like the AD trucks have would complicate that. Spraying at the same time but not attached to vehicle would possibly help.
|
|
|
|
|
08-02-2023, 02:40 PM
|
#274 | |||
|
Registered User
Join Date: Jan 2022
Location: Conn.
Posts: 184
|
Re: Long Time Coming......
Quote:
Quote:
Quote:
I am a stickler for consistant air pressure settings, reduction and I paint everything in the oriantation they will be on the vehicle, meaning door standing upright and not laying down. If by chance it isn't right when assembled, then I can sand it down and blow one even coat on the cab/nose and then reclear. I hope that reply didn't come off as me being arrogant, I'm the least arrogant person you will ever meet. .
__________________
Glenn 1951 3100, Area51 1955 BelAir, 4EVER17 1987 R10, Ethel Copper Hill Rod & Custom http://67-72chevytrucks.com/vboard/s...d.php?t=829856 |
|||
|
|
|
|
08-02-2023, 03:53 PM
|
#275 |
|
Registered User
Join Date: Feb 2021
Location: WestCentral MN,
Posts: 35
|
Re: Long Time Coming......
No worries. It's almost impossible to insult me. I too HATE tape lines. Soft-Masking is different and I have had plenty of vehicles in the World of Wheels shows over the years. I promise you my soft edges rub right out, invisible.
It sounds like you know what you are doing when painting parts how they hang. Your method is a lot less work, as long as you don't scratch anything. |
|
|
|
 |
| Bookmarks |
|
|


 Linear Mode

