
|
 09-07-2011, 10:26 AM
|
#126 |
|
Registered User
Join Date: Mar 2008
Location: Monroe, WA
Posts: 181
|
Re: My project 55 begins
No caliper clearance issues, I don't think a 14" wheel would fit but the 15" has plenty of room.
-Joel |

|

|
|
09-21-2011, 12:16 AM
|
#127 |
|
Registered User
Join Date: Mar 2008
Location: Monroe, WA
Posts: 181
|
Re: My project 55 begins
taking apart the right front cab corner
  little bit of repair needed on the floor as well  -Joel |
|
|
|
|
09-21-2011, 11:10 AM
|
#128 | |
|
PITbut
Join Date: Sep 2007
Location: monroe washington
Posts: 3,041
|
Re: My project 55 begins
Quote:
Good to see progress on it.. Offer still stands btw.
__________________
New project. 1971 Twin Turbo blazer http://67-72chevytrucks.com/vboard/s...d.php?t=676047 My new YOUTUBE channel.. Videos of my truck and a current walk around. Lyrikz74 Youtube channel DONE! SOLD!  My 1971 stepside build thread My Build Thread UPDATED 6/11. DONE and sold. |
|
|
|
|
|
09-21-2011, 11:22 PM
|
#129 |
|
Registered User
Join Date: Mar 2008
Location: Monroe, WA
Posts: 181
|
Re: My project 55 begins
i actually have the pieces ready, it's like a puzzle. you'll have to see it in person.
|
|
|
|
|
09-22-2011, 01:01 AM
|
#130 |
|
Senior Member
  Join Date: Nov 2008
Location: Glendora, CA
Posts: 6,336
|
Re: My project 55 begins
You're doing great work...but I agree with lyrikz that you seem to be making it harder than it has to be and creating a greater possibility of warpage. Just cut out a simple square or rectangle and weld in s l o w l y.
|
|
|
|
|
09-22-2011, 01:23 PM
|
#131 |
|
Registered User
Join Date: Jun 2006
Location: Idaho
Posts: 8,800
|
Re: My project 55 begins
I think the minimal approach is OK. Thats the way I went. It takes patience but preserving as much of the original metal as possible helps keeps the original alignment. Taking out gross area increases the chance for things to start moving.
__________________
1959 Chevy Short Fleetside w/ 74 4WD drive train (current project) OrrieG Build Thread 1964 Chevelle Malibu w/ 355-350TH (daily driver) Helpful AD and TF Manual Site Old Car Manual Project |
|
|
|
|
09-22-2011, 10:06 PM
|
#132 | |
|
Registered User
Join Date: Mar 2008
Location: Monroe, WA
Posts: 181
|
Re: My project 55 begins
Quote:
|
|
|
|
|
|
09-22-2011, 10:09 PM
|
#133 | |
|
Registered User
Join Date: Mar 2008
Location: Monroe, WA
Posts: 181
|
Re: My project 55 begins
Quote:
|
|
|
|
|
|
10-08-2011, 03:45 AM
|
#134 |
|
Registered User
Join Date: Mar 2008
Location: Monroe, WA
Posts: 181
|
Re: My project 55 begins
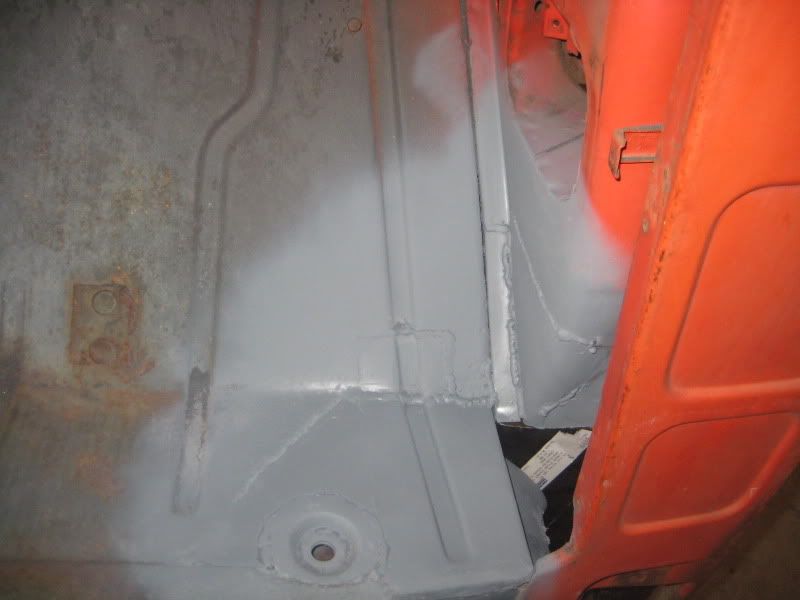
I have been making some progress, I started off with the floor since I needed the flange that the inner cab corner welds to and I have always thought it makes the most sense to put things back together in the exact opposite as I take them apart. I saved some good floor chunks from my old cab and since the corner of the floor has a groove in it I needed to make the first patch with a piece of that and some flat sheet I had laying around.
  I also made a small patch out of the same chunk of old cab to fill the bottom of the firewall and continue the stock body groove. I used a piece of flat sheet hand bent to fit in the inner portion of the cab below the air vent. 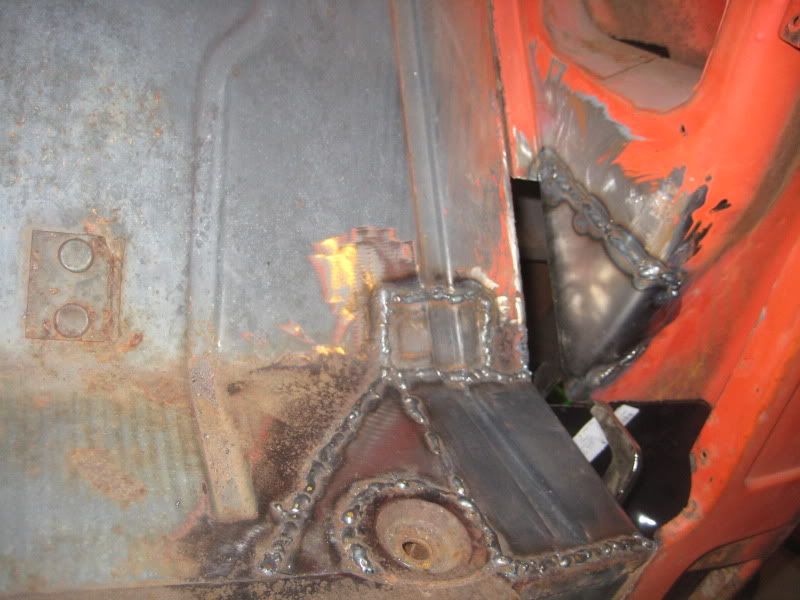 These patches went in without much hassle. -Joel |
|
|
|
|
10-08-2011, 03:53 AM
|
#135 |
|
Registered User
Join Date: Mar 2008
Location: Monroe, WA
Posts: 181
|
Re: My project 55 begins
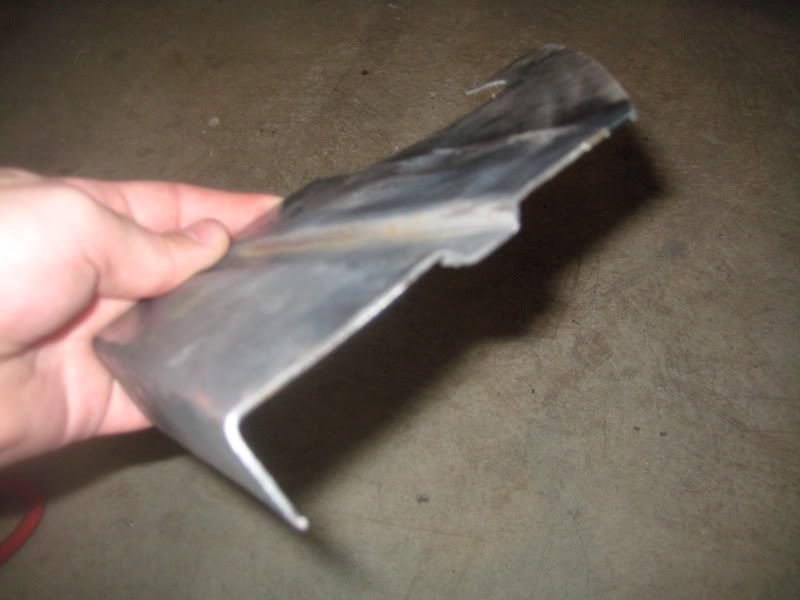
Next up was the flange where the firewall mates up to the cab corner. I measured the total of all three dimensions of the flange and bent up some scrap to fit.
 once I test fit it to make sure it would work I marked off the angles and trimed it to fit. I also drilled some holes in it to mimic the stock spot welds.   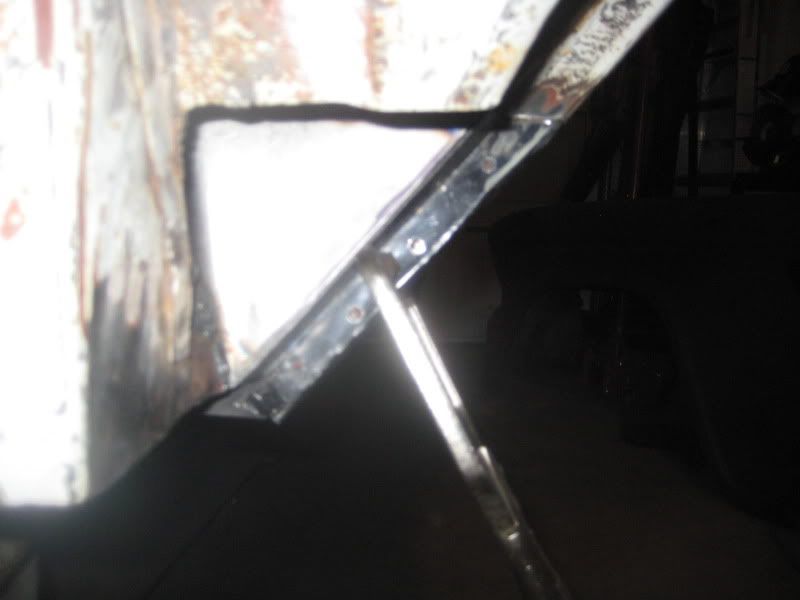 perfect fit, well perfect enough for me anyway. -Joel |
|
|
|
|
10-08-2011, 04:11 AM
|
#136 |
|
Registered User
Join Date: Mar 2008
Location: Monroe, WA
Posts: 181
|
Re: My project 55 begins
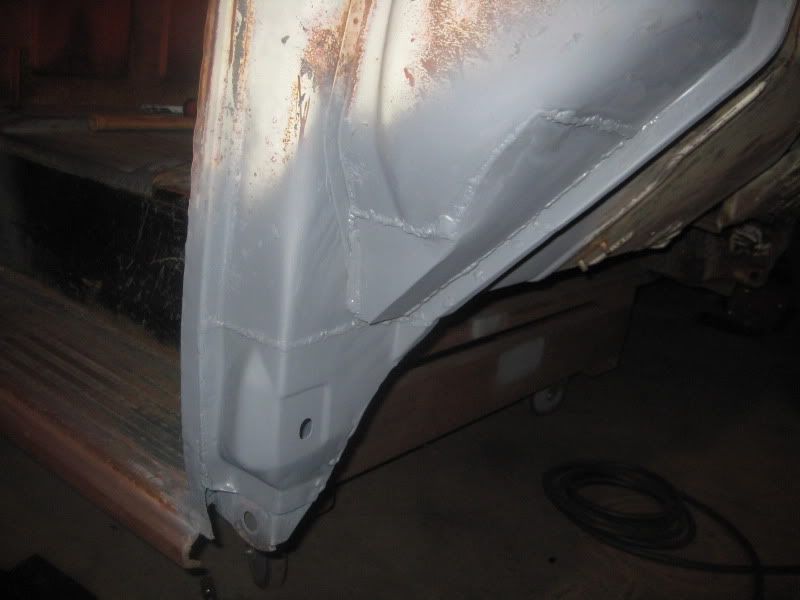
At this point I grabbed the grinder and knocked down some of the welds, honestly this is the step I don't enjoy. cutting and making patches and welding is fun, grinding not so much. So after I thought about it I decided not to go all out since it is the floor it will be covered in sound deadening and carpet nobody is gonna see it once the truck is done so I shot some primer on it and called it done.
 Next up is the inner lower cab corner and outer lower cab corner. Now I bought both of these patch panels a while ago and while the outer patch fit fine without much "adjusting" the inner lower patch was a piece of crap. I could have made my own that looked and fit better. I spend more time monkeying around with that panel than anything else to this point. The outer lower patch only needed some minor tweeking to fit, must be a better stamping process... 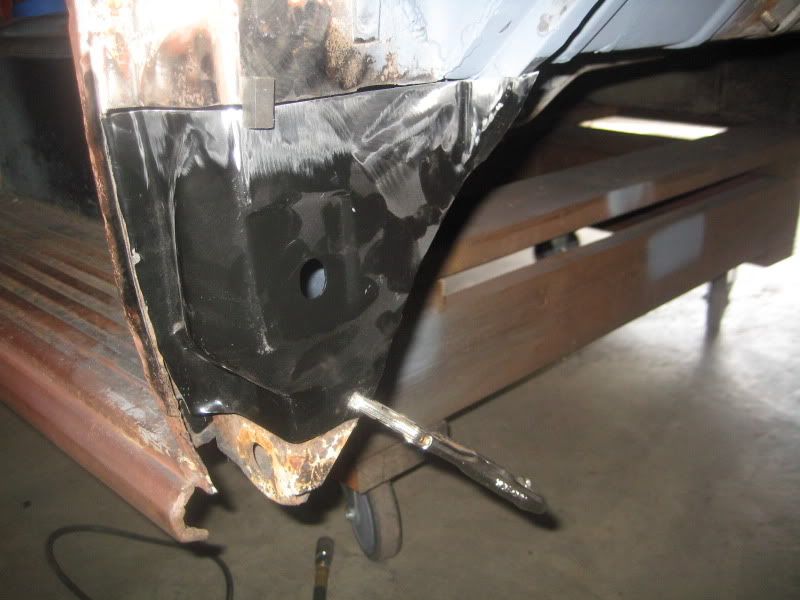 I welded in the outer patch and now I was feeling like I was really making some progress. All that was left was the awkward hole that I made taking out the rusty section midway up the corner.  -Joel |
|
|
|
|
10-08-2011, 04:22 AM
|
#137 |
|
Registered User
Join Date: Mar 2008
Location: Monroe, WA
Posts: 181
|
Re: My project 55 begins
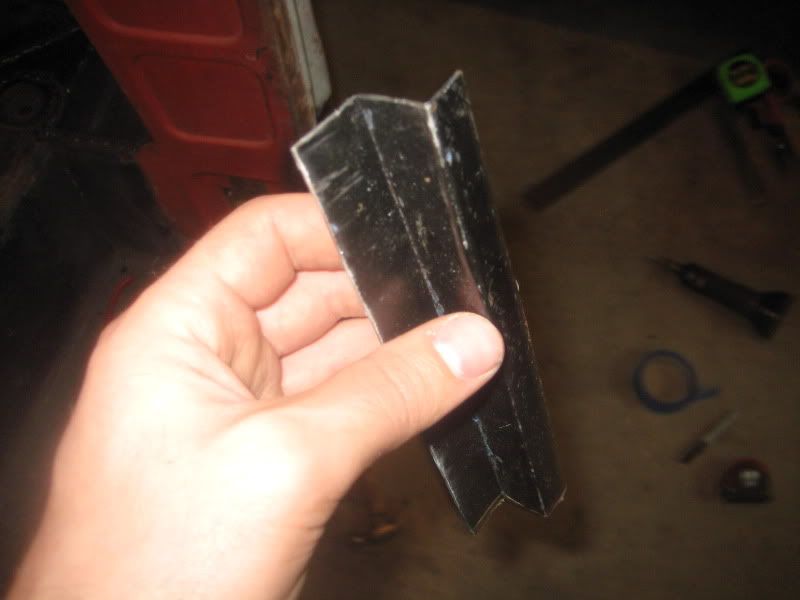
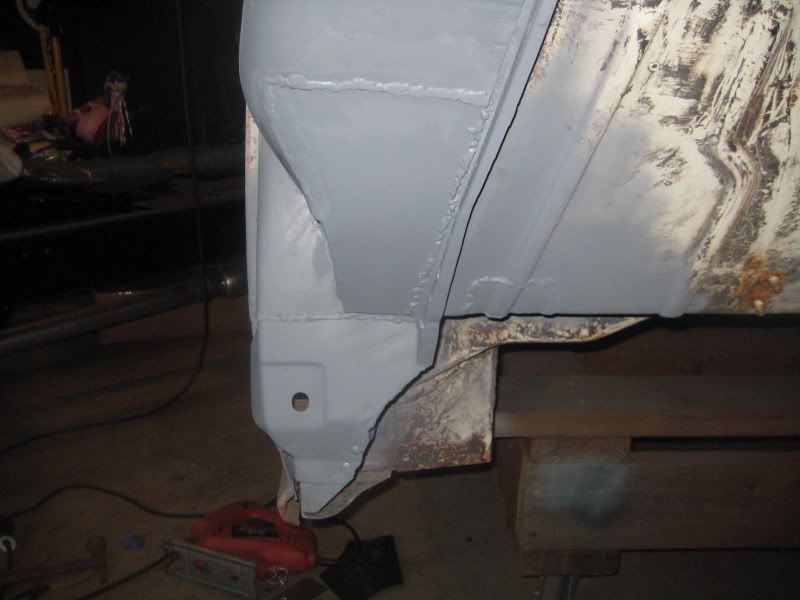
Initially I figured I would have to make the patch out of two pieces of steel and weld them in one at a time to make it look right. Then I figured why not take carboard and make the two pieces and then tape them together, lay it flat, tranfer the shape to some flat sheet metal, and then try and bend it into the shape I needed. If it turned out like crap I could always cut it and make the pieces individually. I was wasn't sure how it would go due to the 90 degree bend and two curves, but I was able to pull it off and I am pretty happy with the way it turned out.
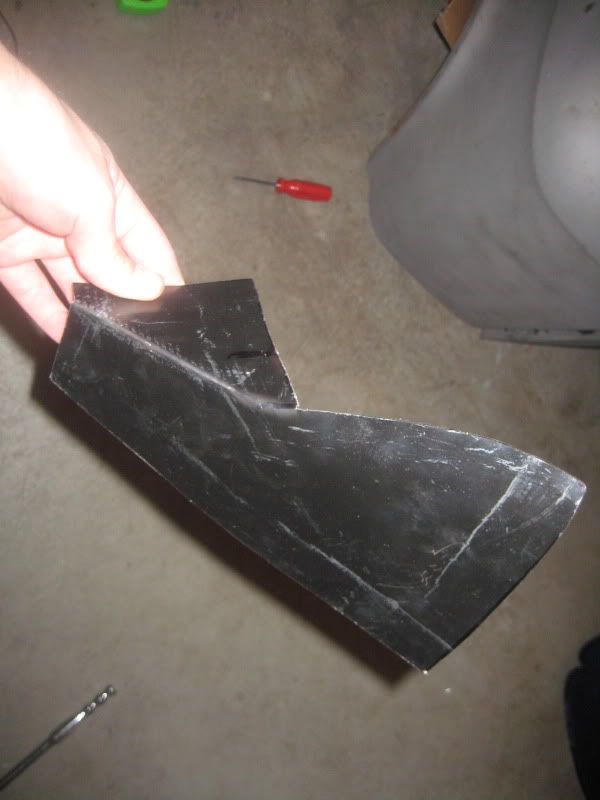 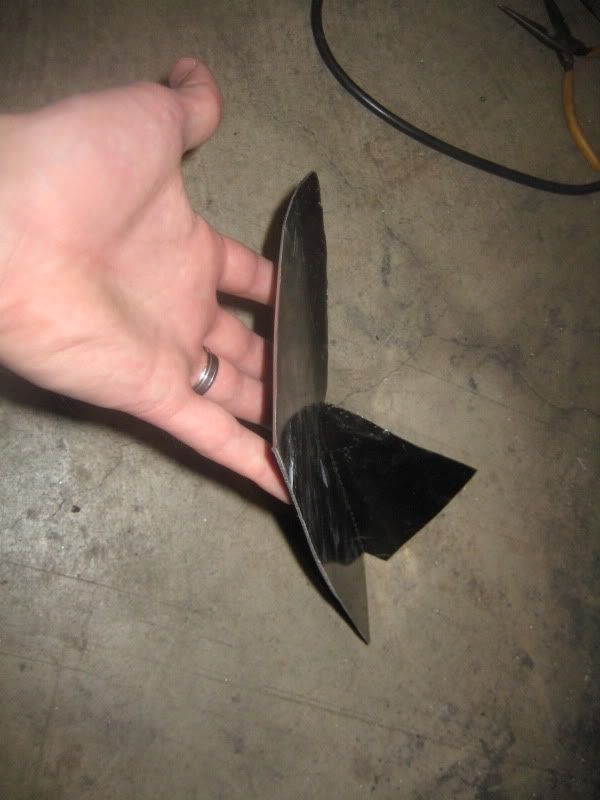 After some fitment grinding it fits like a glove. 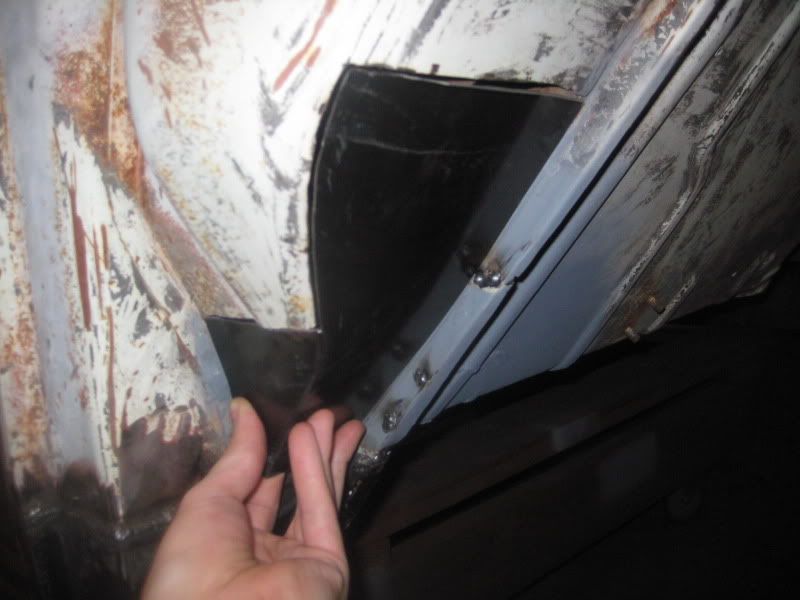 -Joel |
|
|
|
|
10-08-2011, 04:34 AM
|
#138 |
|
Registered User
Join Date: Mar 2008
Location: Monroe, WA
Posts: 181
|
Re: My project 55 begins
I can finally cross off a major "to-do" on the project. Finishing up the cab corner is good because now I am feeling more motivated to keep plugging away and get this truck done.
   As with the floor I am not going to spend a bunch of time grinding all of the welds down smooth this is going to be covered up with the fender and more importantly its going to be a driver, not a show queen. It is solid and that is all that matters to me. 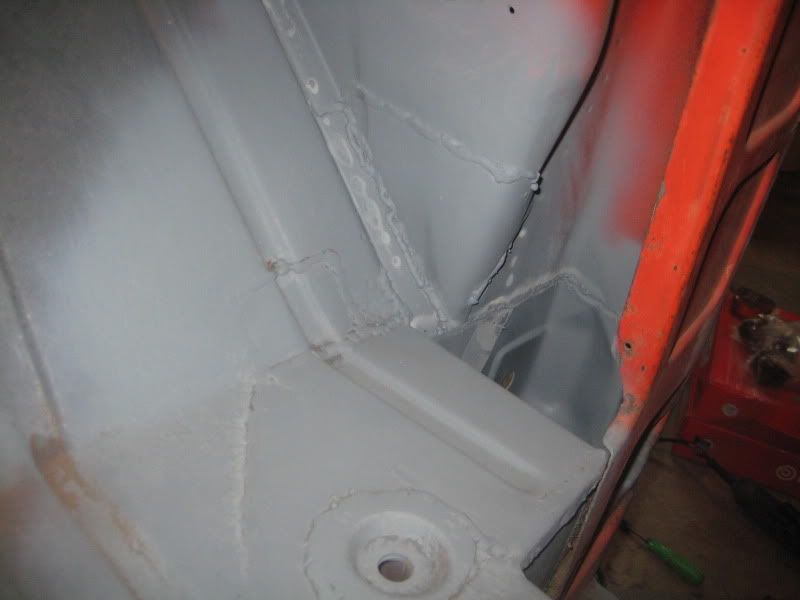 Now that the right corner is done the left corner is up. Lucky for me the left side isn't as rusty so it should go easier. -Joel |
|
|
|
|
10-08-2011, 01:26 PM
|
#139 |
|
Registered User
Join Date: Aug 2007
Location: Corona, California
Posts: 7,998
|
Re: My project 55 begins
Looking real good Joel.
Kim |
|
|
|
|
09-29-2012, 12:50 PM
|
#140 |
|
Registered User
Join Date: Mar 2008
Location: Monroe, WA
Posts: 181
|
Re: My project 55 begins
I am taking a very different direction with my truck at this point.... pictures to follow.

|
|
|
|
|
10-30-2013, 05:01 PM
|
#141 |
|
Registered User
Join Date: Nov 2010
Location: SoCal
Posts: 914
|
Re: My project 55 begins
How's the truck going? Hope to see some photos soon. Very nice work btw.
__________________
I'm not tail-gating, I'm drafting.  http://67-72chevytrucks.com/vboard/s...d.php?t=432758 |
|
|
|
|
11-18-2013, 11:30 PM
|
#142 | |
|
Registered User
Join Date: Mar 2008
Location: Monroe, WA
Posts: 181
|
Re: My project 55 begins
Quote:
-Joel |
|
|
|
|
 |
| Bookmarks |
|
|


 Linear Mode

