
|
Register or Log In To remove these advertisements. |
|
|
|
|||||||
 |
|
|
Thread Tools | Display Modes |
 04-11-2018, 03:51 PM
|
#26 |
|
Registered User
Join Date: Apr 2015
Location: Finland
Posts: 133
|
Re: C30 dually project goes patina
Thank you, Orange67, that's very kind of you.
Getter-Done: Yes, using the old distributor makes it look period. I huge HEI would look out of place behind that little carb. Now that the engine is in, it's time to turn to the attention to the wheel brakes. All tubes and hoses had been done, and I took a deep breath and dived into the task of making the breaks work. When I removed the first drum, an awesome surprise waited. The breaks are all brand new! Some previous owner had been working on the truck, buying and mounting all new brake parts! 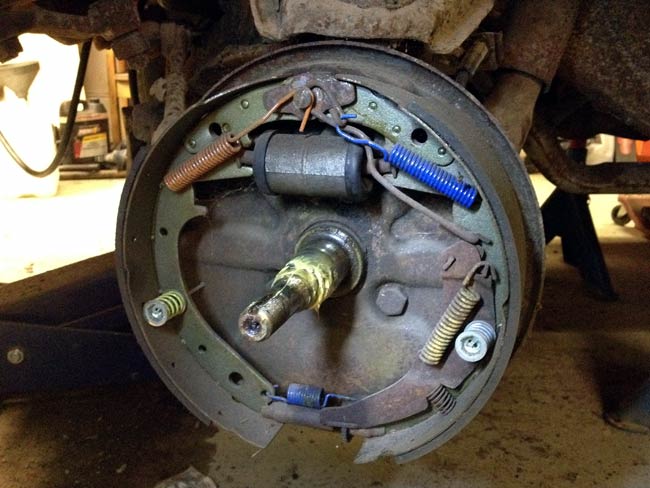 This is not the way drum brakes look inside on a fifty year old truck. All brand new, the brake shoes had never touched the surface of the brand new drums. Gotta hit gold sometimes, huh? Taking my geographical situation into account, I easily saved two weeks and a nice bunch of greenbacks. I beleive that the PO had given up at some point. Maybe when he had poured brake fluid into the master reservoir, and it had just leaked in on the floor of the cab. Who knows... So I just connected the new hoses, and bled the brakes. Of course a T-junction leaked, so I had to get a new one, but other than that the brakes were pretty straight forward from here. I bench bled the master cylinder. I once tried to do without bemch bleeding a new maser cylinder, but it was definitely a no go. 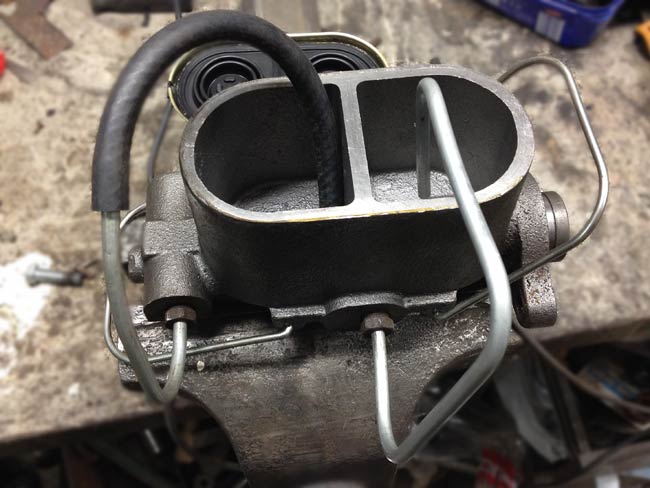 I had used up all my 1/4" brake tube, so I used a piece of rubber hose to extend my last piece of tube.  The new version of the offending T-joint. I had never realized these could wear out. Apparently they do, because it was no way it was going to hold any break fluid. I made three new tubes, and failed miserably to get any of them tight, and had to give in and buy a new T. It's not like it was expensive, but it was yet another trip to the almost-local speed shop. |

|

|
|
04-12-2018, 03:19 PM
|
#27 |
|
Registered User
Join Date: Apr 2015
Location: Finland
Posts: 133
|
Re: C30 dually project goes patina
New mirrors were mounted to the doors. These cheapo mirrors were ordered from Amazon to a cost of $19 each. Now the right hand side door latch works as it should too (it didn't open at all before), it only needed a little tweak and some lubrication.
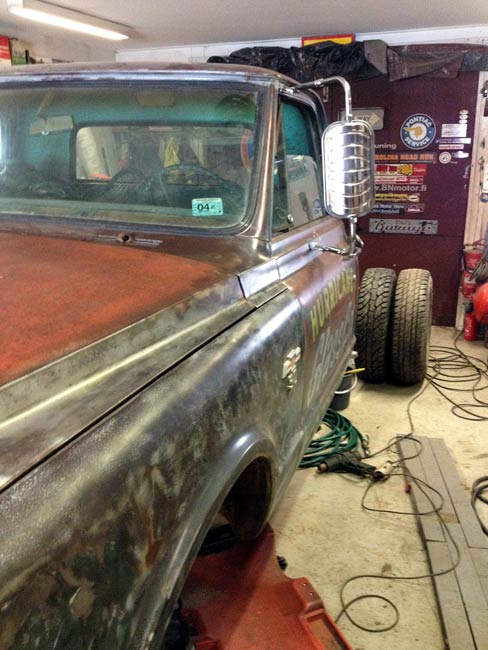 And no, the rear axle isn't that wide. The outer wheel is a front wheel just standing there, and what looks like the inner wheel is actually the outer dual. |
|
|
|
|
04-19-2018, 03:45 AM
|
#28 |
|
Registered User
Join Date: Apr 2015
Location: Finland
Posts: 133
|
Re: C30 dually project goes patina
The frame was in good condition. It looked real bad, but it was just a thin layer of surface rust, so it cleaned up real nice when it was sand blasted.
The rear crossmember had been pulled hard out of shape, so it was next on the agenda. Someone had probably tried to pull out a tree stump, or maybe the truck had got stuck in some deep mud or a ditch, and yanked out. 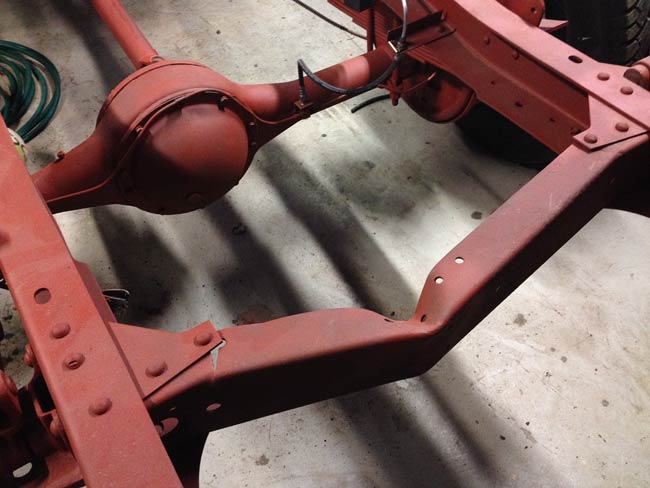 Even when the crossmember was cut every which way, it wouldn't budge with the sledge hammer, so it was pulled with a wire winch, and then hammered. Slowly it was back to something resembling the original shape, and welded back together.  The result is not perfect, but nobody will see it under the bed later anyway |
|
|
|
|
04-19-2018, 09:00 AM
|
#29 |
|
Registered User
Join Date: Apr 2018
Location: Poughkeepsie ny
Posts: 53
|
Re: C30 dually project goes patina
Work trucks back then took some abuse that's for sure, it's just a good thing the crossmember metal tore at the side instead bending the frame sides rails also. The repair looks fine adds to the patina.
|
|
|
|
|
04-25-2018, 02:20 PM
|
#30 |
|
Registered User
Join Date: Apr 2015
Location: Finland
Posts: 133
|
Re: C30 dually project goes patina
Martino patina: Thanks for the encouragement. Yes, I assume worktrucks from the period, as well as now too, get their fair share of abuse. To me it seems like these fairly light duty trucks were made to do way heavier duty work than they were designed for
 Now for some fun small work, as the engine and frame are almost done. When the truck came it lacked rear lights of any kind. I got the bright idea of making a rear light bumper or whatever you might want to call it. The idea came from my finding two destination sign boxes from the windshield of a bus. These ones were backlit, and you could crank up multiple destinations, which rolled by, on a piece of canvas over two rolls. In any case they look like this on the backside with '50 Pontiac aftermarket rear lights added. 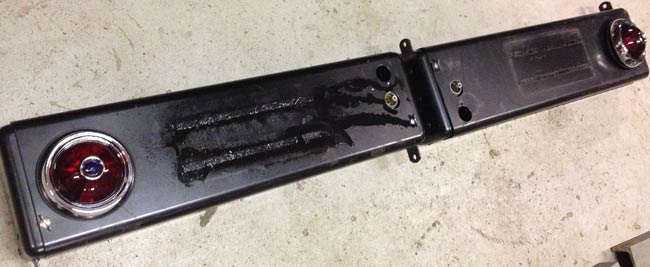 The frame was cut about 8" shorter in the back. I had to do this to make it fit with the bed in the garage. 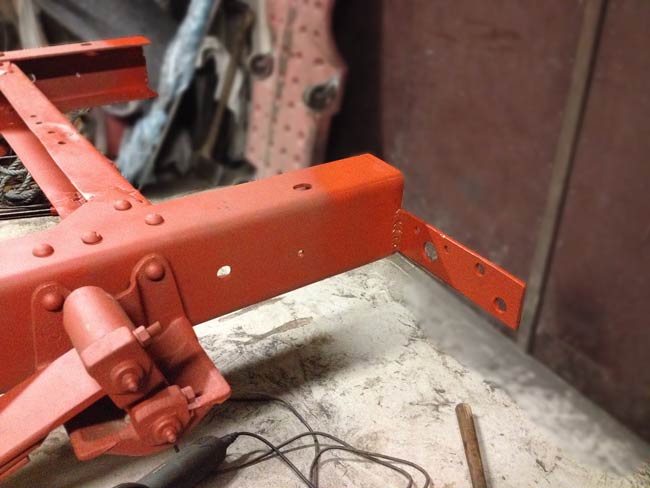 Pieces of the offcuts were bent out and welded for good measure, to be used as mounts for the rear lights. The light bumper, or bar, was then bolted to the frame, and got a nice piece of sheetmetal with rolled edges to connect the boxes to eachoter.  Finally the electrics were connected, and 1/4" bolts were added to work as mounting points for the licence plate (This is not the real licence number for this truck). While we were at it, the front lights, and turn signal lenses were substituted for new ones. Funny thing these are handed. I made fruitless attempts at getting the first one to fit on the wrong side. They do look completely symmetric... 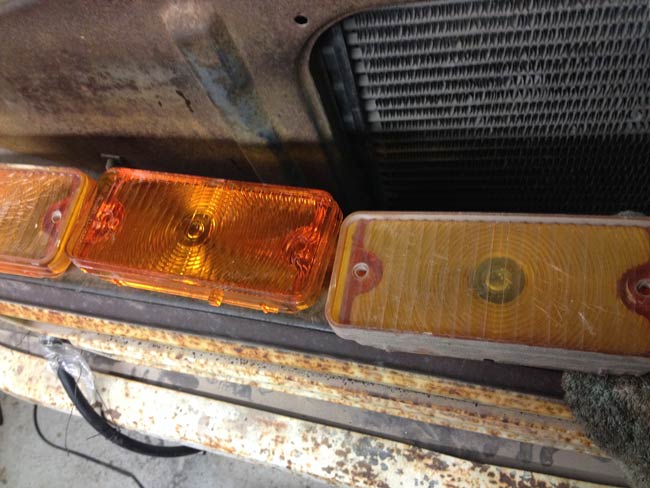
|
|
|
|
|
04-27-2018, 05:25 PM
|
#31 |
|
Registered User
Join Date: Apr 2015
Location: Finland
Posts: 133
|
Re: C30 dually project goes patina
Provided you have lots of time on your hands, fabricating an exhaust system is good fun. Also exciting, as one never knows how it will sound when it's done.
First, a pair of RedHots mufflers were slipped onto the old cut off pipes. 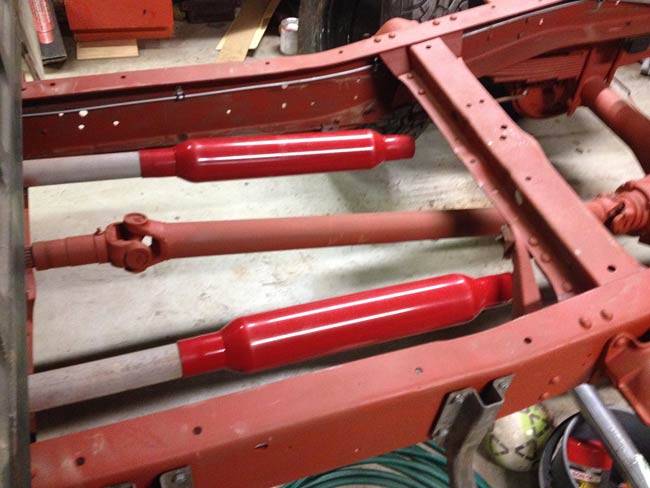 A bit of planning later, the pieces could be cut and welded. 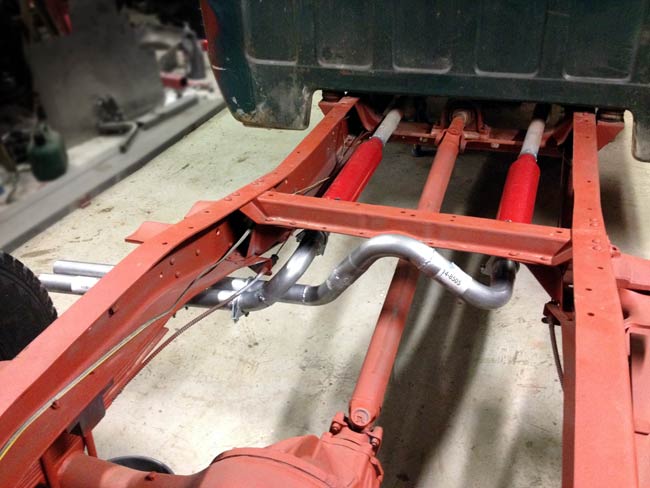 This time the sound of the exhaust came out very nice. The pipes were made out of 2" tubing, the small diameter helping to achieve an old style sound. |
|
|
|
|
04-27-2018, 09:19 PM
|
#32 |
|
Registered User
 Join Date: Mar 2013
Location: Syracuse, Utah
Posts: 499
|
Re: C30 dually project goes patina
You are doing a great job on your truck, and giving me ideas for mine too! Keep it up.
__________________
Justin '67 C20 CST Custom Camper '04.5 LLY Duramax CCSB...sold |
|
|
|
|
04-28-2018, 12:35 PM
|
#33 |
|
Registered User
Join Date: Sep 2006
Location: Ely, Minnesota
Posts: 536
|
Re: C30 dually project goes patina
Awesome build! Look forward to watching this one! Love the glass packs… Sisu!
|
|
|
|
|
04-28-2018, 05:12 PM
|
#34 |
|
Registered User
Join Date: Apr 2015
Location: Finland
Posts: 133
|
Re: C30 dually project goes patina
Thank you Orange67, for the nice words. Good to hear that someone likes my way of tackling this project. It's also fun to see that someone is actually taking a look at this thread
Good to see that you know the Finnish sisu, fishnixon! I hope I have some of it in me. Today I was going to get help to tackle the task of straightening the front bumper on the truck. I looked pretty hopeless. Some sturdy material it is made from too, and it looked beat up. It had taken a hit on the right hand side, and somenone had probably backed out of a tight place, almost leaving the drivers side end of the bumper behind at some point. 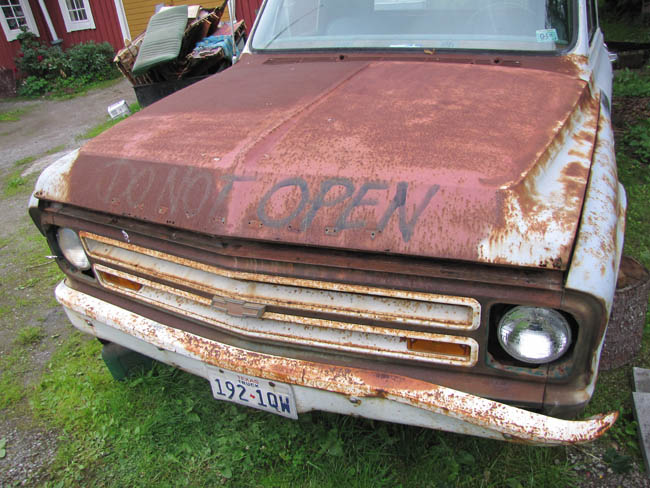 I took the bumper to Kim's body shop, he had promised to try and take a look at it, and man, did he persuade it into submission! Using first a sledge hammer, then two smaller, but still big hammers to fine tune it, and a shrinker to help with getting it straightened out. It got dark before I had a chance to take a pic of the truck with the bumper back on, but I'll post a pic as soon as I can. Like a teaser, huh? |
|
|
|
|
04-29-2018, 02:37 PM
|
#35 |
|
Registered User
Join Date: Apr 2015
Location: Finland
Posts: 133
|
Re: C30 dually project goes patina
The sun got up, and I was able to take a pic of the front of the truck.
It looks much better now. Not perfect, but it fits the rough look nicely 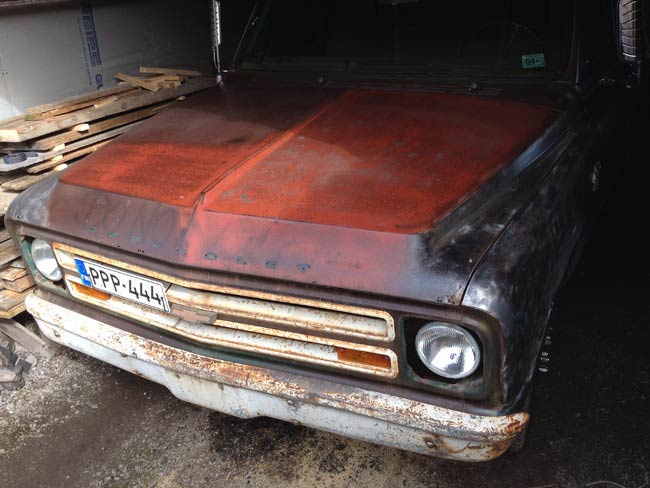 This pic was shot today, the previous one when the truck arived, that's why the gray paint is still there. |
|
|
|
|
04-29-2018, 02:51 PM
|
#36 |
|
Registered User
Join Date: Apr 2018
Location: Poughkeepsie ny
Posts: 53
|
Re: C30 dually project goes patina
I love the look of your truck comming along nicely, I'm doing a gmc 3500 patina truck. I personally think patina with a few very nice elements on the truck makes it more interesting to veiw and gets peoples attention at car shows. In my opinion your truck would look great with some nice new or very nice old lettering on the hood.
|
|
|
|
|
04-30-2018, 04:34 PM
|
#37 |
|
Registered User
Join Date: Apr 2015
Location: Finland
Posts: 133
|
Re: C30 dually project goes patina
Thank you, Martino patina, for that.
Regarding the letters on the hood: If you read my thread from the beginning, you might have noticed that the text on this truck was hidden under a layer of paint. Only thing I added was some repair work on a one of the doors, where I had been sanding away the text almost completely by mistake. After sanding off the gray paint, I just squirted on some flat clear. So depending how you see it, it's not fake patina, I just had to get the paint covering the patina off. The hood is very rusty, so any lettering that would have been there wouldn't show anymore. To put any text there, I would have to media blast it, epoxy, sand, seal, paint, sand, text, sand angain and whatnot, to get it to look like it belongs.... Nah, too big a risk that it wouldn't look right. I might have followed your suggestion if it all were a new faux patina paint job, because the idea isn't bad at all
|
|
|
|
|
04-30-2018, 04:38 PM
|
#38 |
|
Registered User
Join Date: Apr 2015
Location: Finland
Posts: 133
|
Re: C30 dually project goes patina
Due to problems with the automatic choke on the new carburetor, a decision was made to go on and rebuild the old one. It also has the advantage of being completely compatible with the original throttle linkage and choke wire.
The electrical system is all but ready to run too. The ignition lock has been changed to a new one, as there were no keys for the original lock. Also all wiring is done. Youtube was a real good helper here, as a couple of things aren't easy to get done if you don't know how. 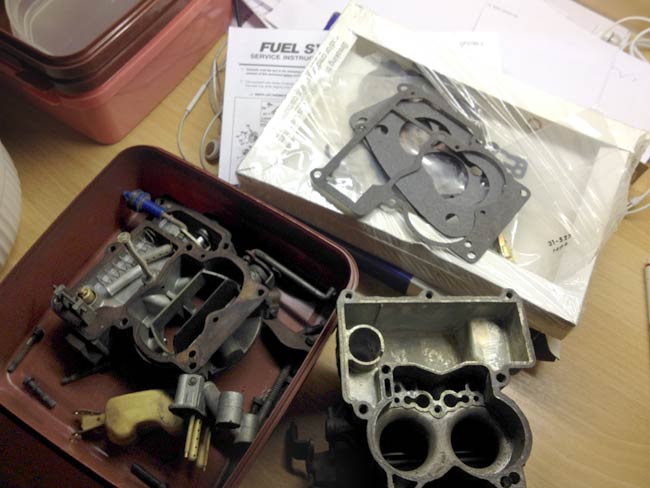
|
|
|
|
|
04-30-2018, 11:23 PM
|
#39 |
|
Registered User
Join Date: Apr 2018
Location: Poughkeepsie ny
Posts: 53
|
Re: C30 dually project goes patina
Sorry for the missunderstanding, I was referring to the Chevrolet lettering on the hood I always loved how the crome letters look across the hood it's the only thing I don't like about my truck that I can't put them on my hood
|
|
|
|
|
05-01-2018, 01:04 PM
|
#40 |
|
Registered User
Join Date: Apr 2015
Location: Finland
Posts: 133
|
Re: C30 dually project goes patina
No need to apologize. You're right, and I really should try to get the letters for the hood, they'd really boost the look of the truck a notch.
I should get the head light bezels too, but I have bought three pairs off ebay, and they've all been wrong. In no small part caused by my own ignorance. First pair were for a GMC. I chose not to customize the front to use these. Second pair were for a 1967 Chevy car, ordered without thinking, and the third pair were for 1967-1972 trucks, and of course they happened to be for the 1969 on model... At least now I know what to look for. Parts needed: -CHEVROLET letters for truck hood. -1967-1968 truck head light bezels. -1967-1972 truck glove box hinge. If someone wants to sell me these parts, please contact me eg via pm The glove box door was missing on my truck, and I found a good one on ebay, not realizing that I shold have ordered the hinge on the same shipment. |
|
|
|
|
05-05-2018, 04:59 PM
|
#41 |
|
Registered User
Join Date: Apr 2015
Location: Finland
Posts: 133
|
Re: C30 dually project goes patina
I was shopping for some angle iron to make the basis of the bed from, when I happened to look into a scrap metal recycling container. There was some pretty heavy U-beam material in it, and the same evening I went there with my little trailer, and hauled home the two 3'x3'x3-1/2' frameworks I found earlier in the day.
Cut up, and welded into three 76" long beams, they looked like this: 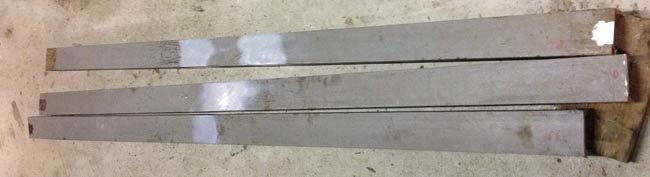 I also found some suitable square tubing to build the uprights from, and cut them to lengt, making a foundation for the bed floor. 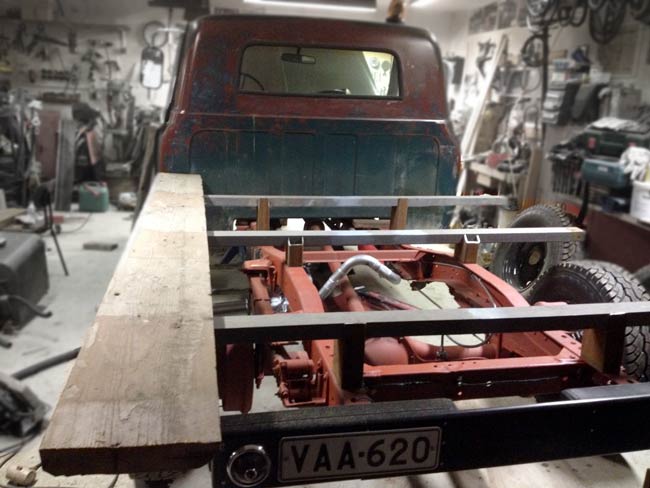 The planks that will be used for the bed are the old living room floor boards from our house that were thrown out during our big renovation in the early nineties. Our house is built in 1917, so the boards are over a hundred years old, and hopefully will look awesome on this truck. |
|
|
|
|
05-05-2018, 05:55 PM
|
#42 |
|
Registered User
Join Date: Apr 2015
Location: Finland
Posts: 133
|
Re: C30 dually project goes patina
Some testing, trial and error style, was done to determine the best looking height of the bed. It now sits a bit lower than first planned, and there is room for about 10 cm (4") of suspension travel at the rear wheels, which probably is the lowest I want go. Higher, and the side view will be bony and silly.
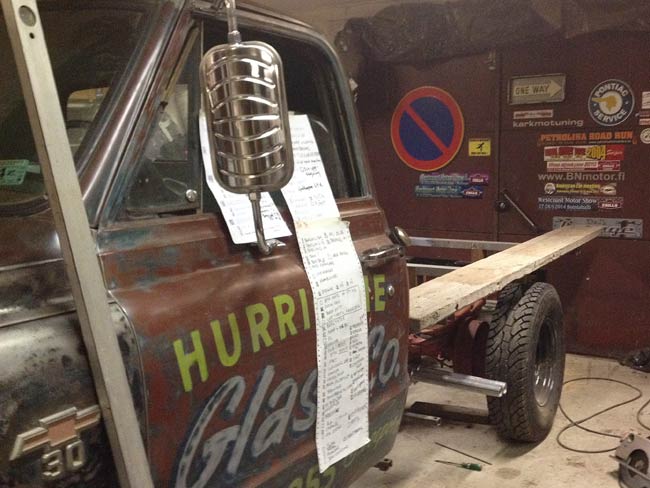 The plank in the pic is a bit over length, plans call for a bit shorter bed planks, they'll over hang the rear lamps a bit, some 8-12". Gotta make the truck fit in the garage. Also in this pic you can see my trade mark check lists. I think they really help keep me focused, and they do show what's been done too. Without these lists, one tends to forget how much has been done, and the work might soon feel overwhelming. |
|
|
|
|
05-14-2018, 09:30 AM
|
#43 |
|
Registered User
Join Date: Apr 2015
Location: Finland
Posts: 133
|
Re: C30 dually project goes patina
The carburetor was finally assembled after all passages had been checked and cleaned.
As the engine ran quite happily with this carb earlier, it'll probably be completely ok now that the critical parts are changed and it's all cleaned out. The new accellerator piston will likely make the most noticeable improvement.  For some reason the fuel line was totally blocked. Nice thing that I happened to try and blow air from the fuel pump end of the line towards the tank. Otherwise I'd probably have wondered why there's no fuel coming to the carb, and lost a few hours of work. The fuel pickup tube and tank gauge was pulled out of the tank, and the mesh sock was totally full with old muck, and the tube was so clogged with debris, that I actually had to drill it out! A new sock was made from one for a newer car. it was cut off, and mounted to the tube with a hoseclamp and a piece of fuel resistant rubber hose. The hole in it was sealed off with a round piece cut out of sheet metal. The tank was checked and is in excalent condition and only needed a good rinse. it says:"1972 Chevrolet/GMC pick up" on the tank in black marker, so it's got to be off a wrecked truck. 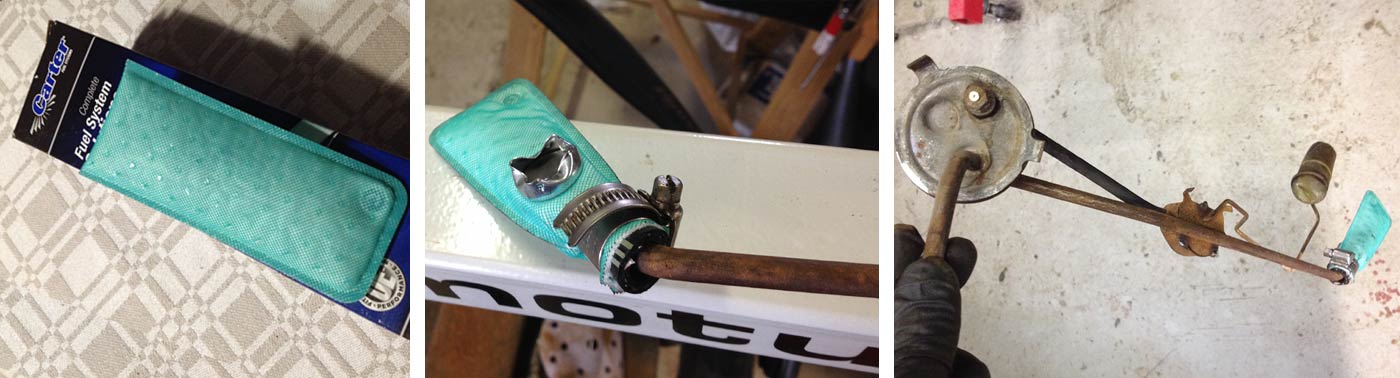 Parts needed: -CHEVROLET letters for truck hood. -1967-1968 truck head light bezels. -1967-1972 truck glove box hinge. |
|
|
|
|
05-26-2018, 11:09 AM
|
#44 |
|
Registered User
Join Date: Apr 2015
Location: Finland
Posts: 133
|
Re: C30 dually project goes patina
There's been some time since my last update, but here comes.
After the overhaul, the old carb is back where it belongs. It felt nice to be able to mount the choke wire too, so now it works from the original knob on the dash. 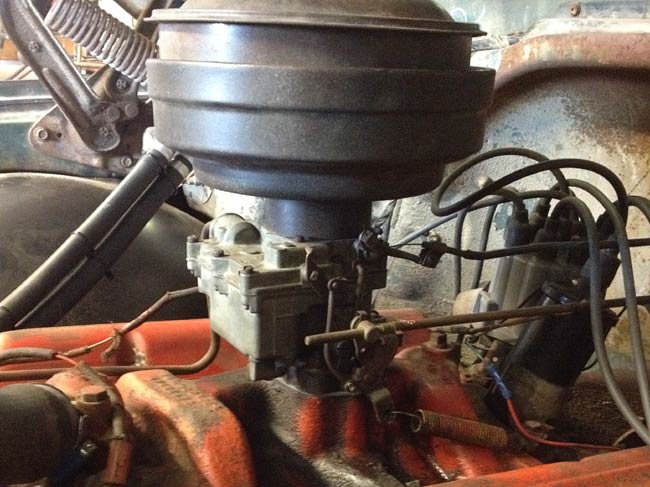 I happened to find some materials in suitable sizes on a junk yard. Beams and uprights for the bed foundation were measured and cut to size, then cleaned up and welded. Then the new parts were sprayed with the same red primer as the frame and rear axle had been earlier. 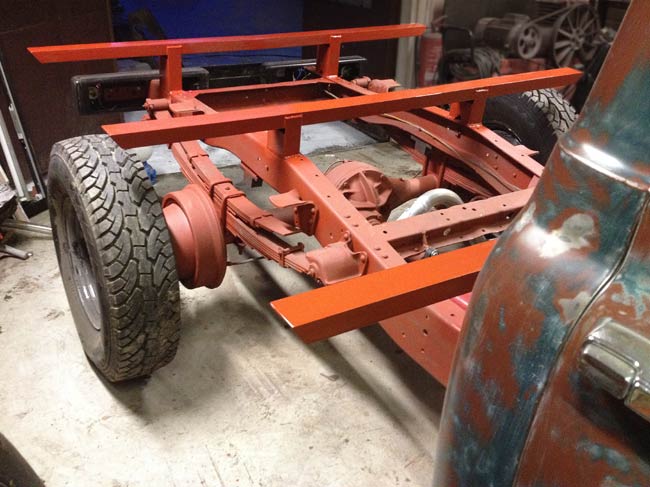 The chassis was then painted gloss black. Flat or satin is often used on frames, but this 2 part gloss paint was dirt cheap, and will be semi flat and dirty soon enough. 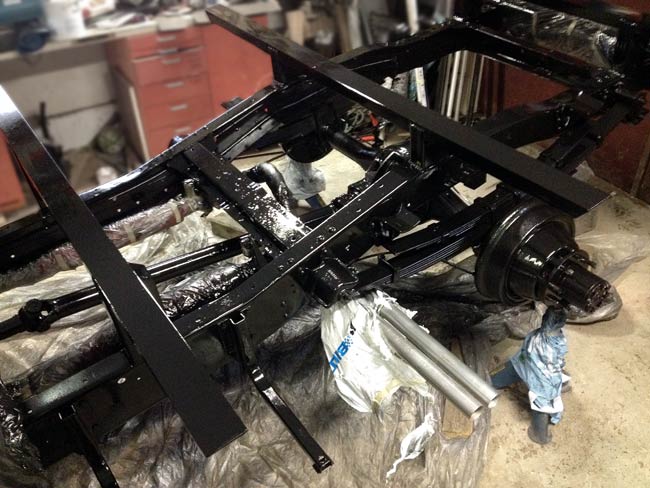
|
|
|
|
|
05-28-2018, 04:27 PM
|
#45 |
|
Registered User
Join Date: Apr 2015
Location: Finland
Posts: 133
|
Re: C30 dually project goes patina
The wife came with the idea to use the old floor boards from when we renovated our old farmhouse in the nineties for the bedfloor. The house was built in 1917, så the planks are over a hundred years old.
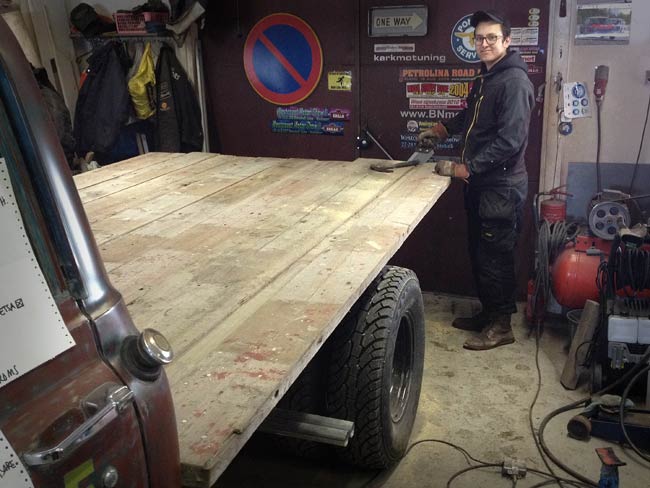 Young friend William here helping with the planks. The planks were measured and cut off square at one end. Then they were pushed forward towards the cab against a board, and cut again at the rear. The Pythagorean theorem was useful in this job (3x4x5 makes a 90 degree angle triangle). The boards were of slightly different thicknesses, so some had to be cut thinner at the cross beams, to make the bed floor flat. 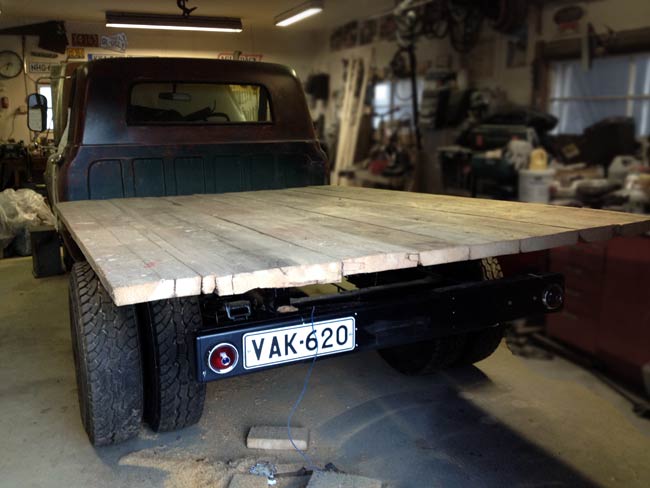
|
|
|
|
|
05-28-2018, 05:20 PM
|
#46 |
|
Senior Member
Join Date: Dec 2009
Location: TN.
Posts: 7,700
|
Re: C30 dually project goes patina
Looking Good.
I really like that old wood flat bed Idea. What is your plans for Tie down points on that Nice looking wood bed? Will you have side boards? |
|
|
|
|
06-02-2018, 06:05 PM
|
#47 |
|
Registered User
Join Date: Apr 2015
Location: Finland
Posts: 133
|
Re: C30 dually project goes patina
The floor boards were bolted to two by four cross beams, just aside the U-prifile cross beams. This way I saved myself the trouble of drilling almost fifty holes for the 5/16" bolts through the thick metal, and drilled them through the wooden cross beams instead.
Rear fenders were made from 500 millimeter wide (about 20 inches) cable shelving stock. I'd have liked round ones, but couldn't find any the weren't plastic, 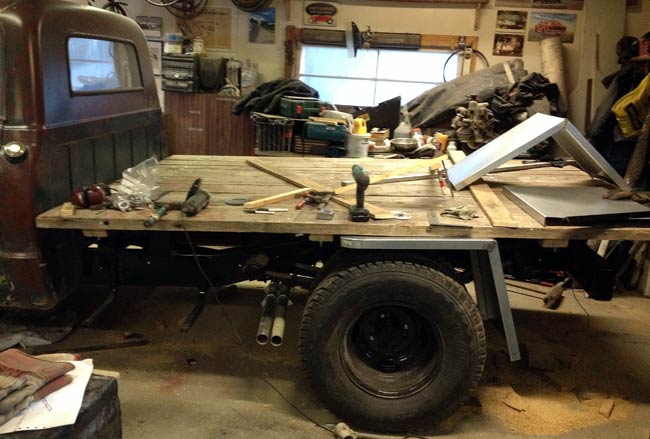 Thank you Getter-Done, here's your answer: Close to the edge of the bed, in each end of the U-profiles, holes were drilled, and upended bolts were cinched down with "Ring nuts", that double as tie down points. No, plans do not call for any side boards at this point. Rear fenders, or mudguards, if you will, ready here, painted rattle can flat black. 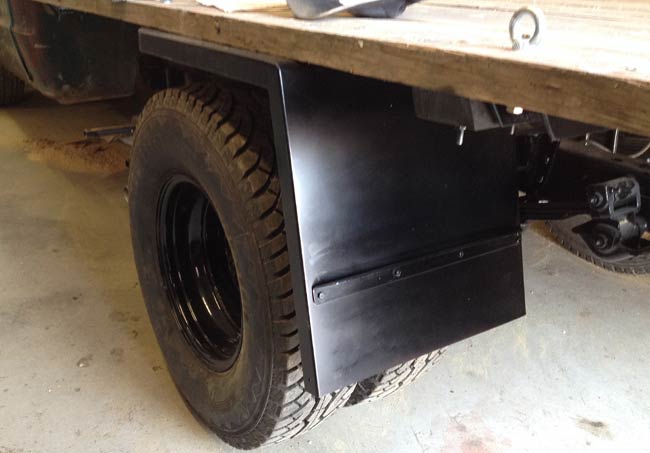 A friend came with the totally sick idea of mounting the licence plate light on a wooden wedge, and I wasn't hard to persuade. It wouldn't ground right off the wood, so I had to wire in a ground lead too  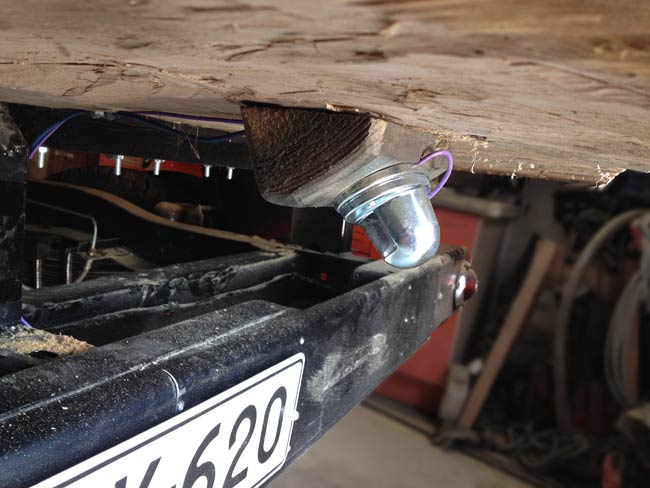
|
|
|
|
|
06-02-2018, 06:09 PM
|
#48 |
|
Senior Member
Join Date: Dec 2009
Location: TN.
Posts: 7,700
|
Re: C30 dually project goes patina
Cool ��
|
|
|
|
|
06-02-2018, 09:47 PM
|
#49 |
|
Registered User
Join Date: Apr 2014
Location: Azle,Texas
Posts: 2,249
|
Re: C30 dually project goes patina
Lovin this cool build! How is the interior in your truck?
|
|
|
|
|
06-02-2018, 10:50 PM
|
#50 |
|
Senior Member
Join Date: Dec 2009
Location: TN.
Posts: 7,700
|
Re: C30 dually project goes patina
I know you are Probably Planning on
an Awesome head-ache rack For the front of the bed. Those Steel mud -flaps you made are Over the Top.  The Light is cool also. |
|
|
|
|
| Bookmarks |
|
|


 Linear Mode

