
|
 08-16-2014, 01:36 AM
|
#276 |
|
Registered User
Join Date: Aug 2007
Location: Corona, California
Posts: 7,998
|
Re: Project: Over My Head
Sounds like your almost there, congrats.
Kim |

|

|
|
08-16-2014, 02:26 AM
|
#277 |
|
Registered User
Join Date: Feb 2010
Location: Lebanon, Ohio
Posts: 1,359
|
Re: Project: Over My Head
Way to go!
__________________
Bob "It won't take long and it won't cost much." '55 3100 (383/700R4)--'55 Belair Sedan (350/4-speed)--'64 'Vette Conv. (327/4-speed)--'68 GTO Conv. (462/4-speed)--'69 Cutlass Conv. (350/TH350)--'06 'Vette Conv. (LS2/6-speed) Bob's Retirement Build - My 55 TF Bob's 700R4 Build (how-to) |
|
|
|
|
08-17-2014, 10:27 PM
|
#278 |
|
Registered User
Join Date: Sep 2011
Location: Nevada City, CA
Posts: 908
|
Re: Project: Over My Head
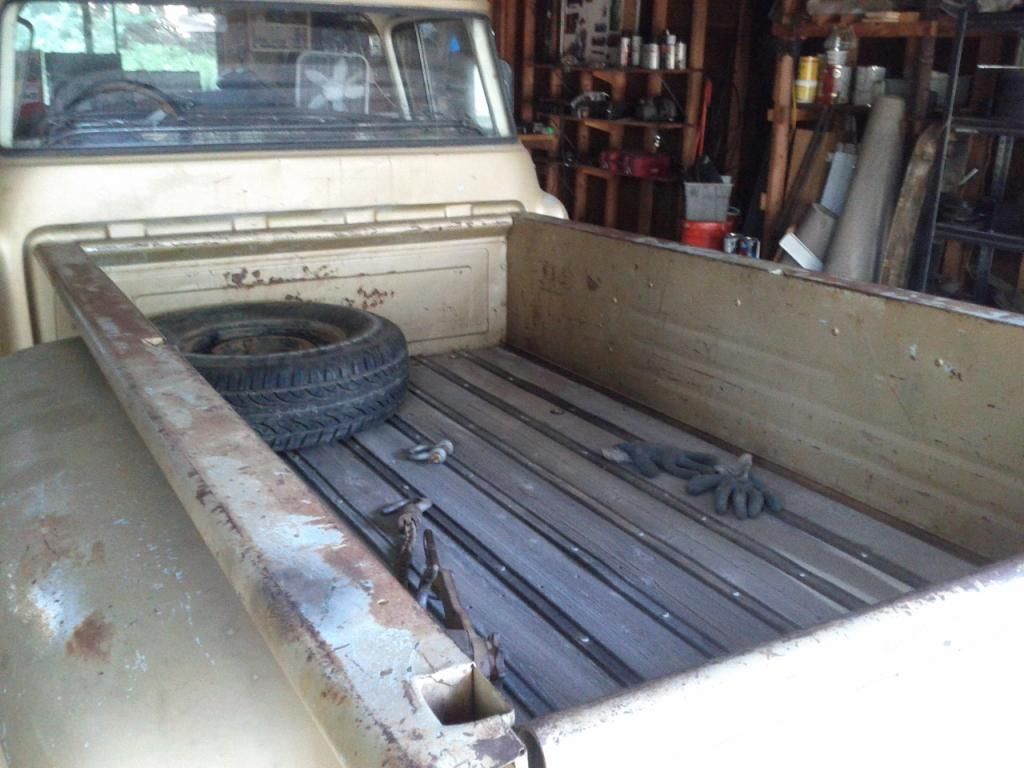
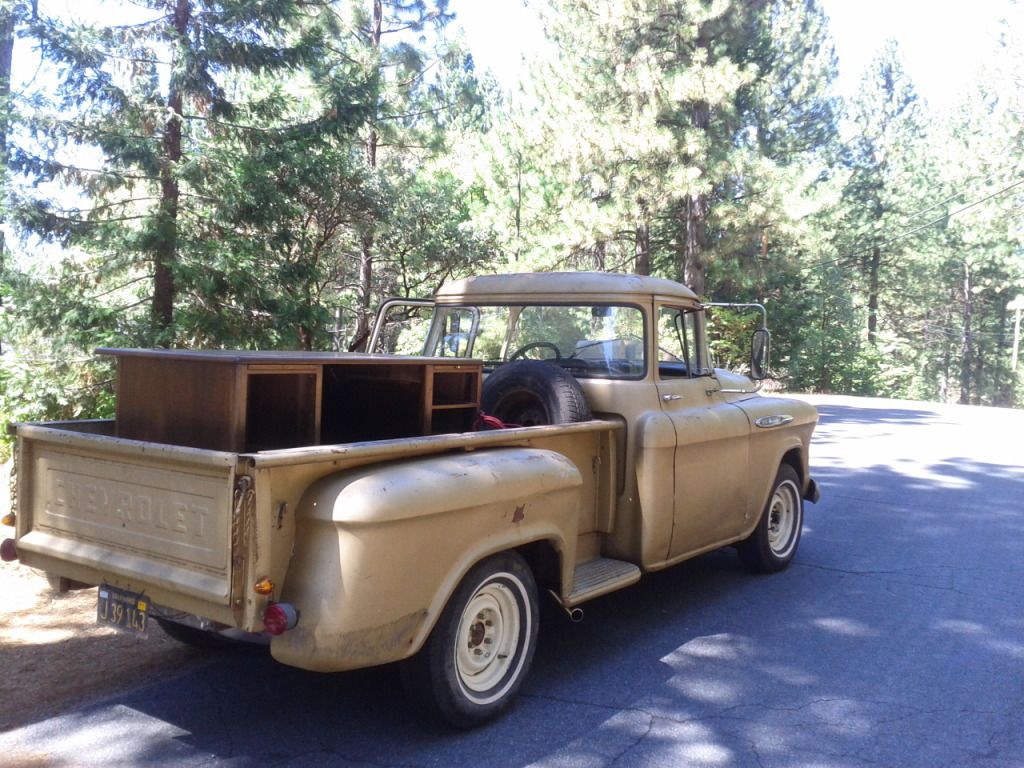 Here we are, back to work. The 8 ft bed swallowed a school teacher's desk, swivel chair, the spare tire & my jumper cables with room to spare. After the first ~5 miles of shakedown I put the truck up on stands to have a look around. I found... One jam nut on my drag link was loose I'd never put any grease or anti-seize on the tie rod (so, come spring, it was going to be solid) the water temp sender for the gauges was seeping a little coolant A wire conduit was too close to the exhaust manifold and the kicker, the driver's front spring bushing was totally shot. Dunno how I missed that. So I fixed the first three, I'm making a mental note on the 4th and I've got parts on the way for the leaf spring bushing. I was sorely tempted to order leaf spring liner & shackle kits, too. I may regret not doing so but I'm at the point where shaking down the truck I already built & fixing the little things to make it reliable is even more appealing than spending more money on it.
__________________
"Over my head" 1957 Chevy 3200, big rear window & 6 lug. Front disc, power steering, Vortec 4.8 / 4L60E swap, hydro boost brakes & patina. |
|
|
|
|
08-18-2014, 12:14 AM
|
#279 |
|
Registered User
Join Date: Jan 2011
Location: Redmond, OR
Posts: 754
|
Re: Project: Over My Head
Congrats on hitting the legal driving milestone. You have successfully moved from garage clutter catcher to a grocery getter ( and a fun one at that).
Enjoy, and best of luck on the new baby.
__________________
68 Chev C20- son has it now 83 K20 - bought from son 70 C20 - in progress |
|
|
|
|
08-19-2014, 12:54 AM
|
#280 |
|
Registered User
Join Date: Sep 2011
Location: Nevada City, CA
Posts: 908
|
Re: Project: Over My Head
Well, I got a bit tired of the choice between warping plywood & rotting planks. I also had some wire routing, framing, etc to do in the back of the truck.
So, some 3/8" bolts + 2X4 + metal brackets, a $35 piece of history in the form of a Yale & Townes chain hoist and here we are 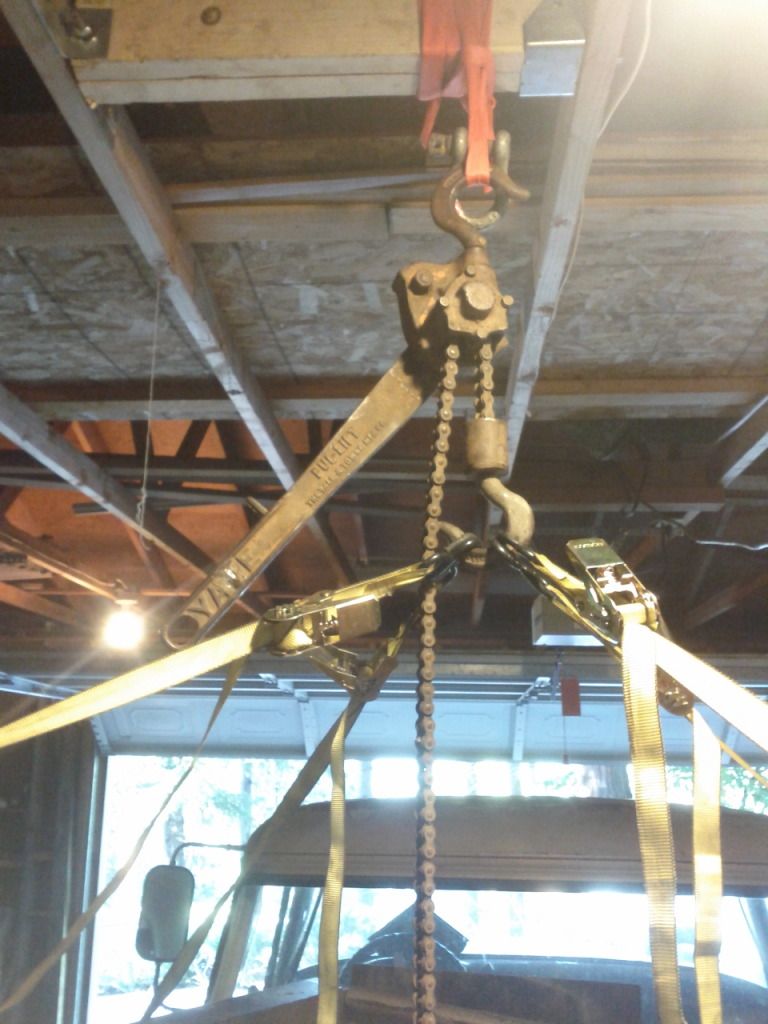 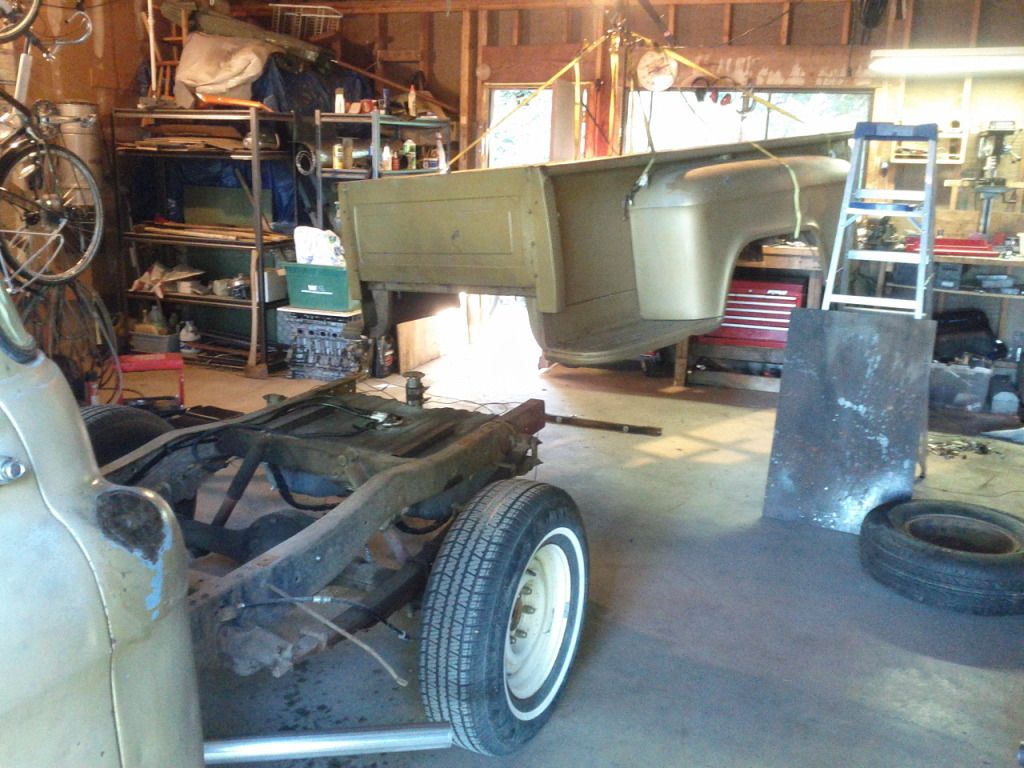 I managed to get the bed set onto sawhorses & roll the truck outside before having to pack & get my wife back down to Oakland for a business trip. So no more updates for a few days, but the plan is to get all my metal work & plumbing done back there & put Trex plastic wood down in the bed. I proposed a flatbed, or running with no bed, to the wife and she just shook her head and chuckled.
__________________
"Over my head" 1957 Chevy 3200, big rear window & 6 lug. Front disc, power steering, Vortec 4.8 / 4L60E swap, hydro boost brakes & patina. |
|
|
|
|
08-20-2014, 04:48 PM
|
#281 |
|
Registered User
Join Date: Sep 2012
Location: Oregon
Posts: 3,303
|
Re: Project: Over My Head
Awesome! just read your thread and thanks for posting the little things. I'm getting ready for my 1st LS swap and I grabbed a couple things from your journey

__________________
GOD BLESS AMERICA! |
|
|
|
|
08-23-2014, 10:22 PM
|
#282 |
|
Registered User
Join Date: Sep 2011
Location: Nevada City, CA
Posts: 908
|
Re: Project: Over My Head
Thanks for the kind words, folks. It's a lot of give & take on this board: I learn a lot from you all & appreciate the encouragement.
I got home Thursday evening and sat down for a half hour before getting started. Since then, I've torn down the bed & come up with a plan for rebuilding. 1/2" plywood, house exterior paint, cedar fencing boards from a buddy, new carriage bolts, etc. Lemme say, a sawzall is your friend when you run up against rusty carriage bolts. I'll try and let the pictures do some more of the talking; saves me some typing and you all some reading. 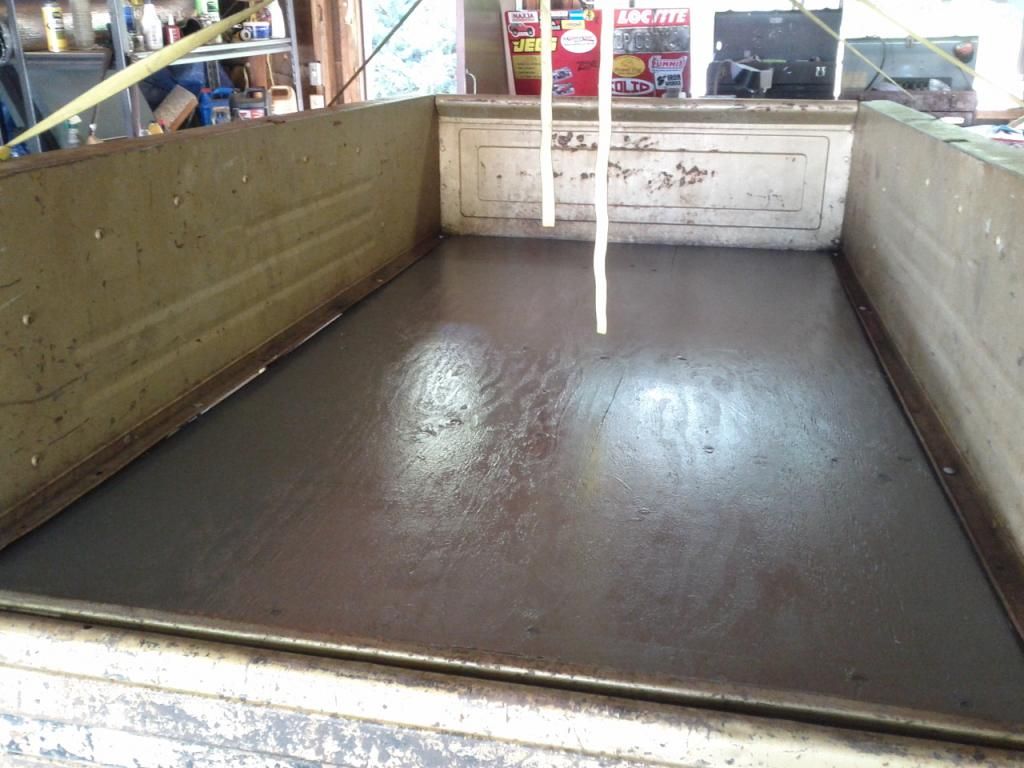 Painted 4x8 (chopped to 88 3/4 inches length) laid in the bed. Note that you can't get the plywood in there with bolts in the angle strip. The bed will, I think, take a 3/4" piece of plywood but things will suck in enough to use 1/2" like I did. In a perfect world, 3/4" marine grade would be used. 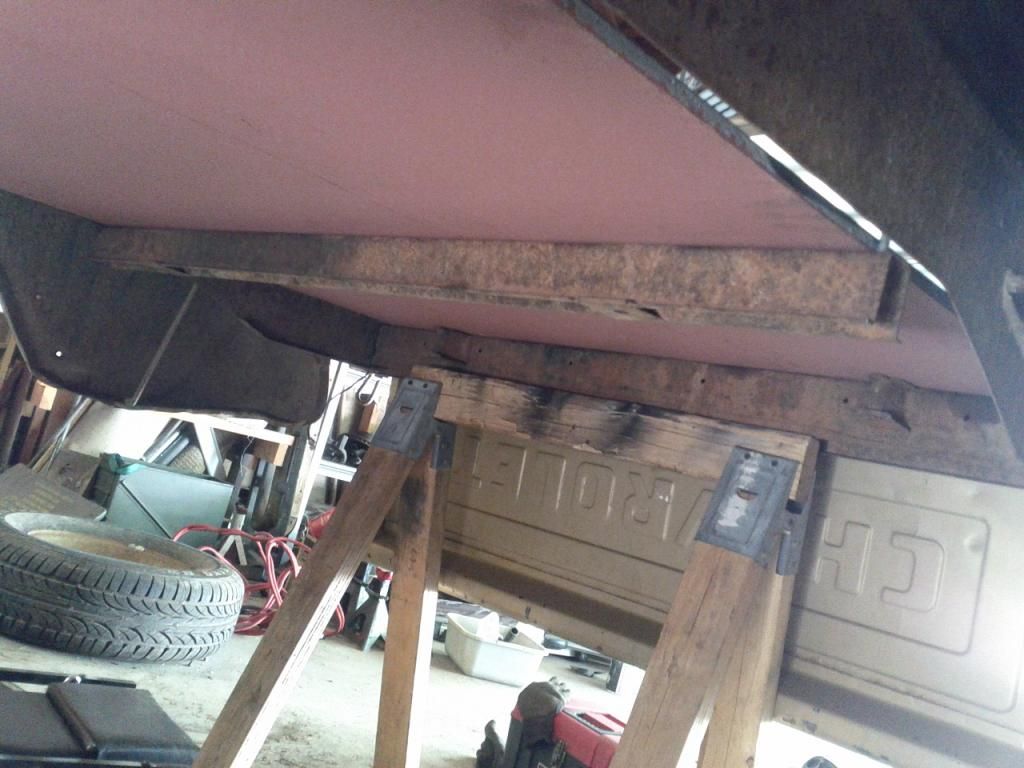 Here we are, starting to hang the cross braces underneath the plywood. Minor PITA. Would be easier to use hex head bolts & put a box end wrench on the top side. Carriage bolts like to come out of their squares when you try to start the nut. 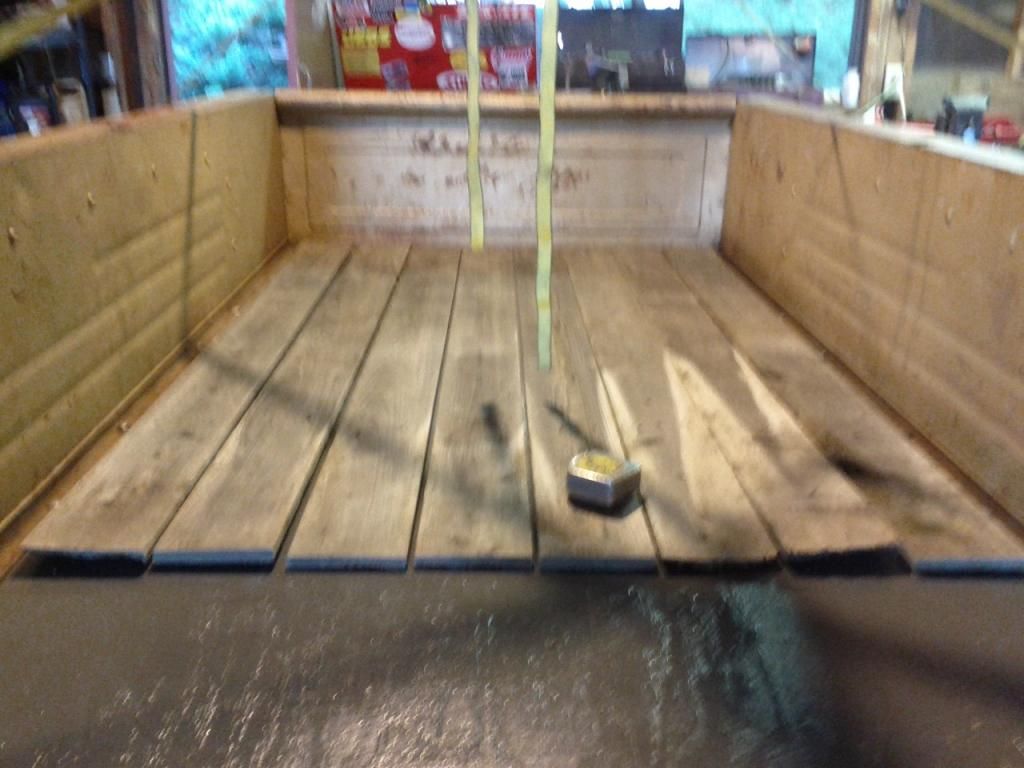 Here's the fencing boards. I think they are cedar, not real sure. They don't appear to have been painted and haven't rotted plus cedar is common around here. Anyway, I really like the gray that the boards took as they aged. 6' boards are a bit short for the 89" bed, but I can work with / around that. 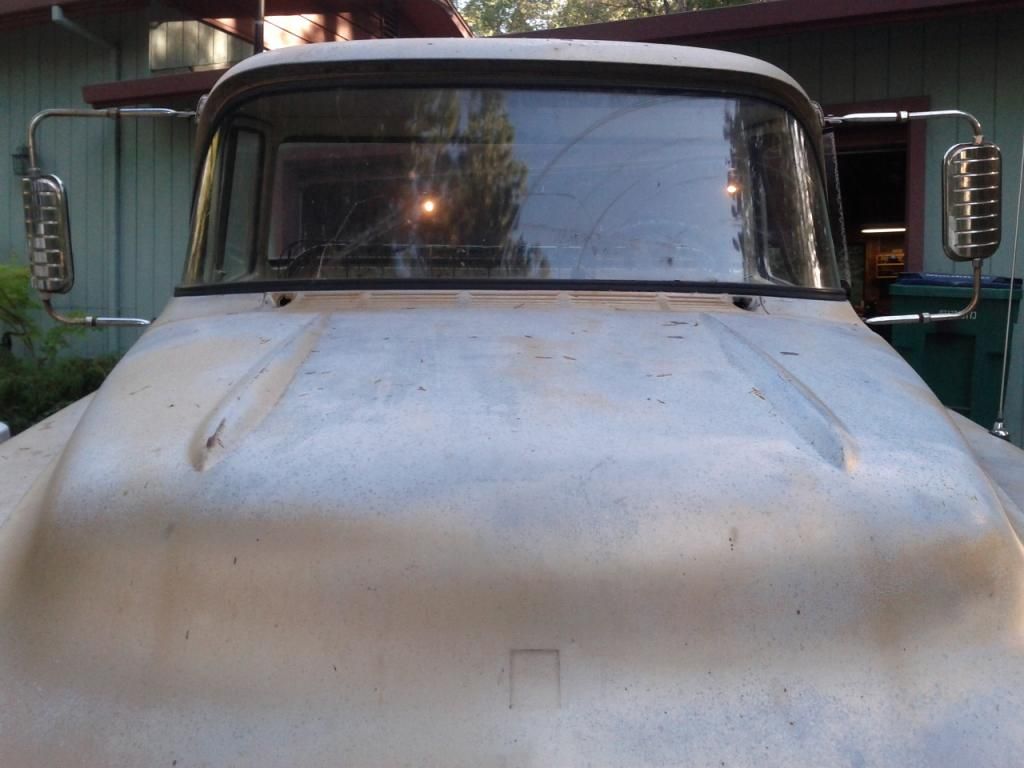 See? If I was going with fresh pine or oak & a glossy finish, it wouldn't match the hood. It doesn't come through in the pictures but the wood matches the hood darned nicely. 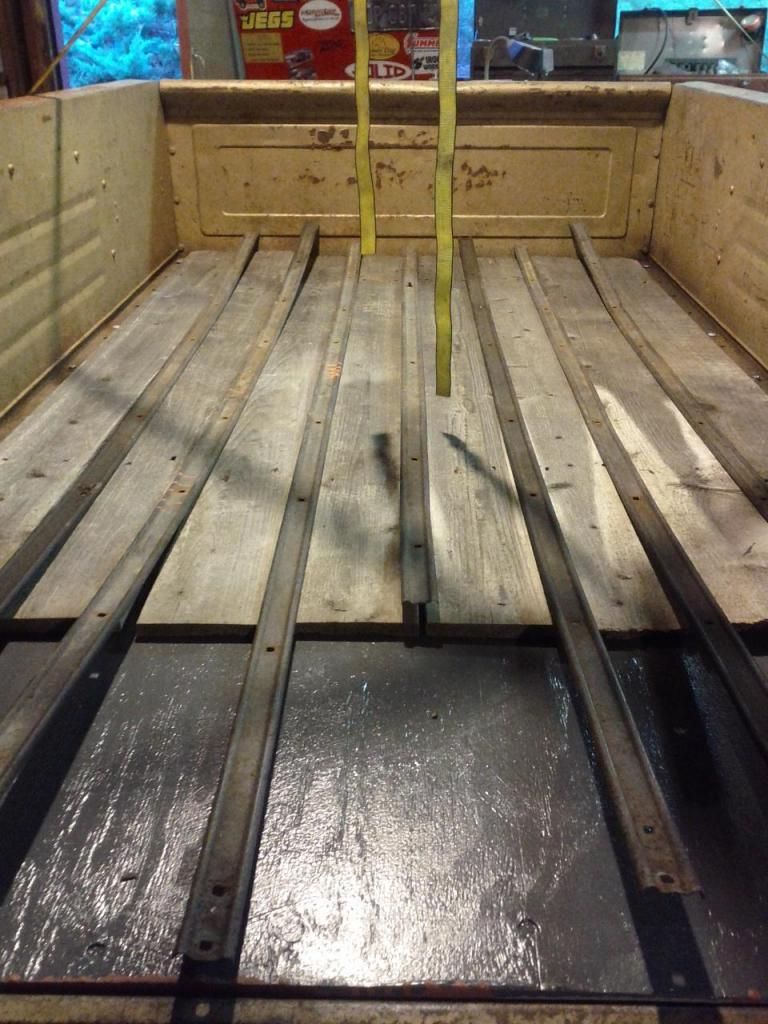 I'd thought I was just going to screw the boards down to the plywood and call it a day. The wife informed me that I was going to re-use the metal bed strips. So I guess I'm going to give my Dewalt even more of a workout than I'd realized. I'm not 100% on the best approach. Having said that, I think what I'll do tomorrow is get the boards lined up where I want them & screw them down to the plywood. I'll have to cut some 16" sections off the extra fence boards & color-match them so the seam between the long & short pieces isn't so noticeable. Then, I'll put the metal strips in place & clamp them flat somehow. Zip some 5/16" holes through the fence + plywood, add carriage bolt, move on. I may / may not even worry about attaching the strips to the cross-bed members. I haven't measured the fence boards but I think they are 3/4". This puts the bed at 1.25" thick, bonded by (I think I'll use) 8 screws per fence board & ~50 1/4" bolts. Should be good for the full 1/2 ton rating of the truck, I'd think.
__________________
"Over my head" 1957 Chevy 3200, big rear window & 6 lug. Front disc, power steering, Vortec 4.8 / 4L60E swap, hydro boost brakes & patina. Last edited by yossarian19; 08-23-2014 at 10:28 PM. |
|
|
|
|
08-24-2014, 10:46 AM
|
#283 |
|
Registered User
Join Date: Aug 2007
Location: Corona, California
Posts: 7,998
|
Re: Project: Over My Head
That should look pretty good.
I would stagger the joints in the wood. They won't be as noticeable that way. Kim |
|
|
|
|
08-24-2014, 10:21 PM
|
#284 |
|
Registered User
Join Date: Sep 2011
Location: Nevada City, CA
Posts: 908
|
Re: Project: Over My Head
That's a darned good idea, Kim. If I had read that "before" cutting all my boards, I would have done it your way.
I'll save the picture for the "done" shot but I drilled about 54 holes today, tightened a lot of nuts & sunk many a screw. Lots of measuring, getting up & down off the creeper, etc. It feels solid & looks good. I'm happy but gassed - the heat takes it out of me pretty quick.
__________________
"Over my head" 1957 Chevy 3200, big rear window & 6 lug. Front disc, power steering, Vortec 4.8 / 4L60E swap, hydro boost brakes & patina. |
|
|
|
|
08-27-2014, 09:23 PM
|
#285 |
|
Registered User
Join Date: Sep 2011
Location: Nevada City, CA
Posts: 908
|
Re: Project: Over My Head
Well, 3 weeks till the baby is due & I just this afternoon got the bed reattached. I'm pleased as could be that everything lined up with no more than a taper pin. Even the gas tank filler landed correctly. Measure about a million times, eat lunch, measure 2 more times & *then* cut.
 I think the bed came out nicely. It looks "correct" for the rest of the truck, even a bit nicer, but doesn't make the sheet metal look too awful either. The Cedar cleaned up nicely with a scrub brush to remove the dirt. I still have some wires to wrap up & a list of "maybes" as long as my leg but we're officially on the road.
__________________
"Over my head" 1957 Chevy 3200, big rear window & 6 lug. Front disc, power steering, Vortec 4.8 / 4L60E swap, hydro boost brakes & patina. |
|
|
|
|
08-27-2014, 09:26 PM
|
#286 |
|
Registered User
 Join Date: Aug 2012
Location: West Side of the valley, CA
Posts: 878
|
Re: Project: Over My Head
looking good
|
|
|
|
|
08-27-2014, 11:17 PM
|
#287 |
|
Registered User
Join Date: Aug 2007
Location: Corona, California
Posts: 7,998
|
Re: Project: Over My Head
Nice job.
Kim |
|
|
|
|
08-28-2014, 09:29 AM
|
#288 |
|
Senior Member
Join Date: Mar 2011
Location: West Plains, Missouri
Posts: 7,553
|
Re: Project: Over My Head
Looks good, as if it's been there for awhile...Jim
__________________
my build thread: http://67-72chevytrucks.com/vboard/s...d.php?t=459839 Jimbo's long bed step build:http://67-72chevytrucks.com/vboard/s...t=464626<br /> |
|
|
|
|
08-28-2014, 09:34 AM
|
#289 |
|
Registered User
Join Date: Feb 2010
Location: Lebanon, Ohio
Posts: 1,359
|
Re: Project: Over My Head
Nice weathered look. Can't even see the seams!
__________________
Bob "It won't take long and it won't cost much." '55 3100 (383/700R4)--'55 Belair Sedan (350/4-speed)--'64 'Vette Conv. (327/4-speed)--'68 GTO Conv. (462/4-speed)--'69 Cutlass Conv. (350/TH350)--'06 'Vette Conv. (LS2/6-speed) Bob's Retirement Build - My 55 TF Bob's 700R4 Build (how-to) |
|
|
|
|
09-14-2014, 08:58 PM
|
#290 |
|
Registered User
Join Date: Sep 2011
Location: Nevada City, CA
Posts: 908
|
Re: Project: Over My Head
I've got 50 miles on it now and I'm generally pleased. It's got good acceleration in every gear. Not like my old man's Corvette but a damned site faster than my Jeep or the wife's Corrolla. I'd have been pretty upset if that last bit wasn't true...
Anyway. Today I took a chunk of afternoon and built stake sides for it. Same material I made the bed from. 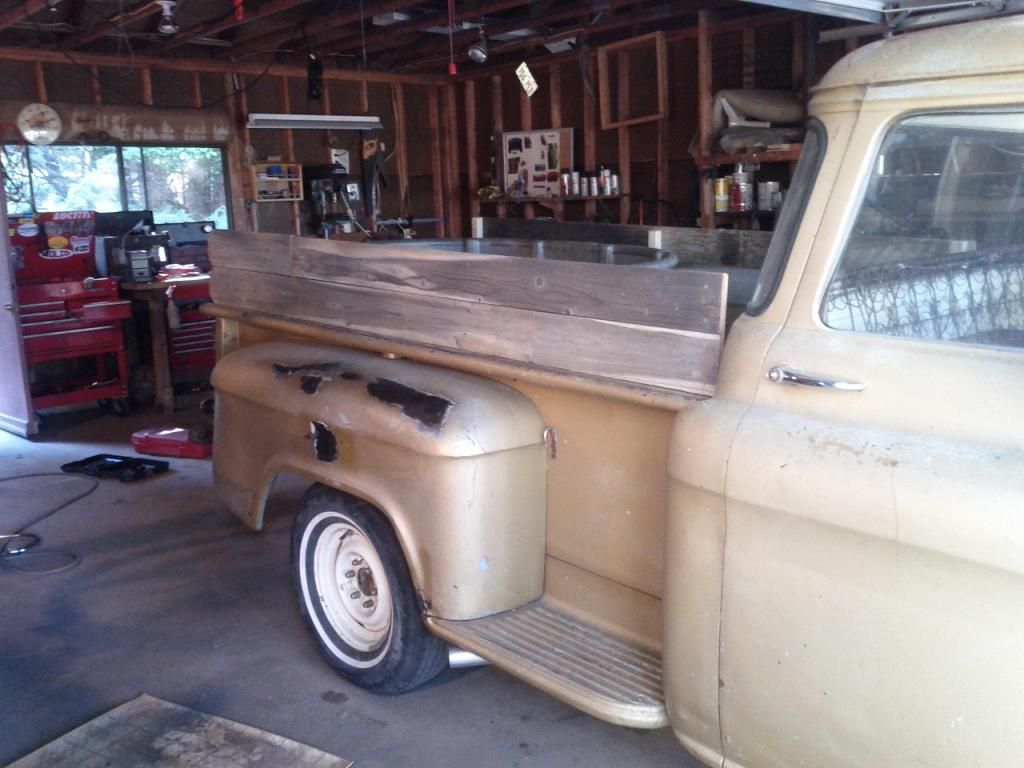 The edge right up against the cab doesn't look right to me but I don't know what to do with it, either. It'll be easy to make changes when I decide though. I also put a braided wire cup wheel on the grinder and took one layer of rust, two layers of paint, one layer of bondo & some OE primer off the bed fender. Wipe up the dust, shoot clear coat onto it, done. I kind of like how the clear-over-steel looks, in patches the way it is. This is helpful since it is cheap to cup-wheel the rust off & shoot it.
__________________
"Over my head" 1957 Chevy 3200, big rear window & 6 lug. Front disc, power steering, Vortec 4.8 / 4L60E swap, hydro boost brakes & patina. |
|
|
|
|
09-20-2014, 03:04 PM
|
#291 |
|
Registered User
Join Date: Sep 2011
Location: Nevada City, CA
Posts: 908
|
Re: Project: Over My Head
Got around to replacing the pivot side bushings on the front springs. Here's what came out...
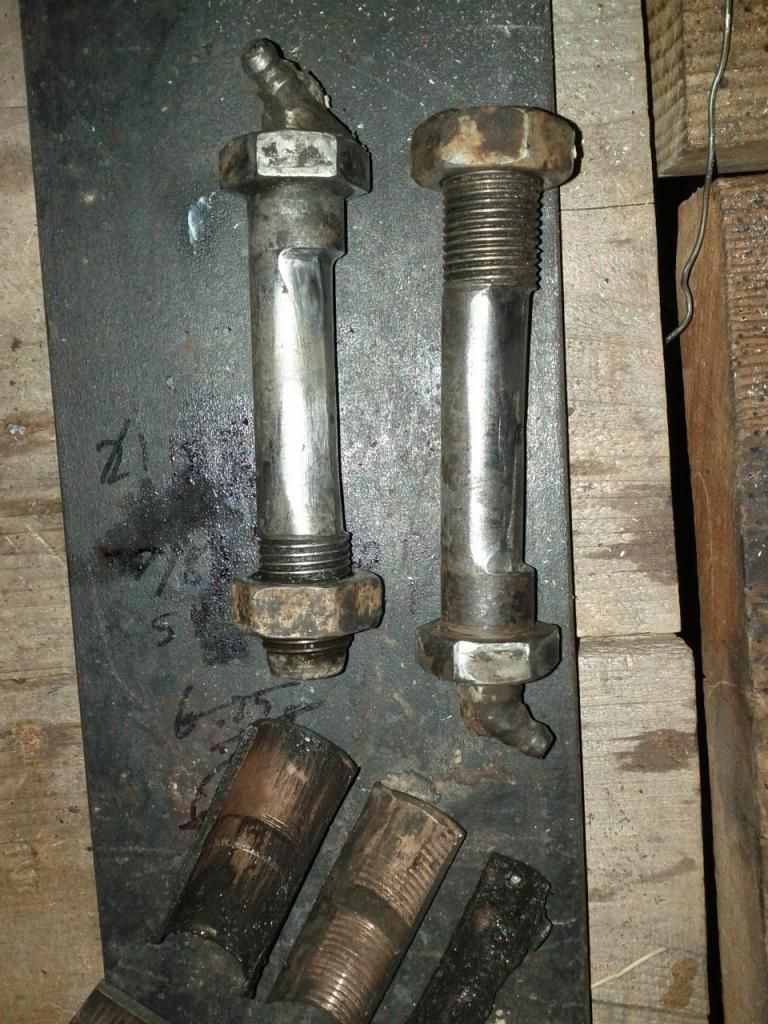 Handling improved a bit. 60 MPH still feels fast for the chassis but not as bad as it was. I think new shocks would help quite a lot and I may need new shackles as well. If I still need more stability, I could add a sway bar - but I'd like to run through the normal maintenance items first. I've been wire-wheeling the rust that's coming through the paint in places and shooting clear on top of it. I've found that the body has a lot more filler and a lot more holes than I knew. Not sure if / how it changes plans, but here's the worst of what I've found so far. 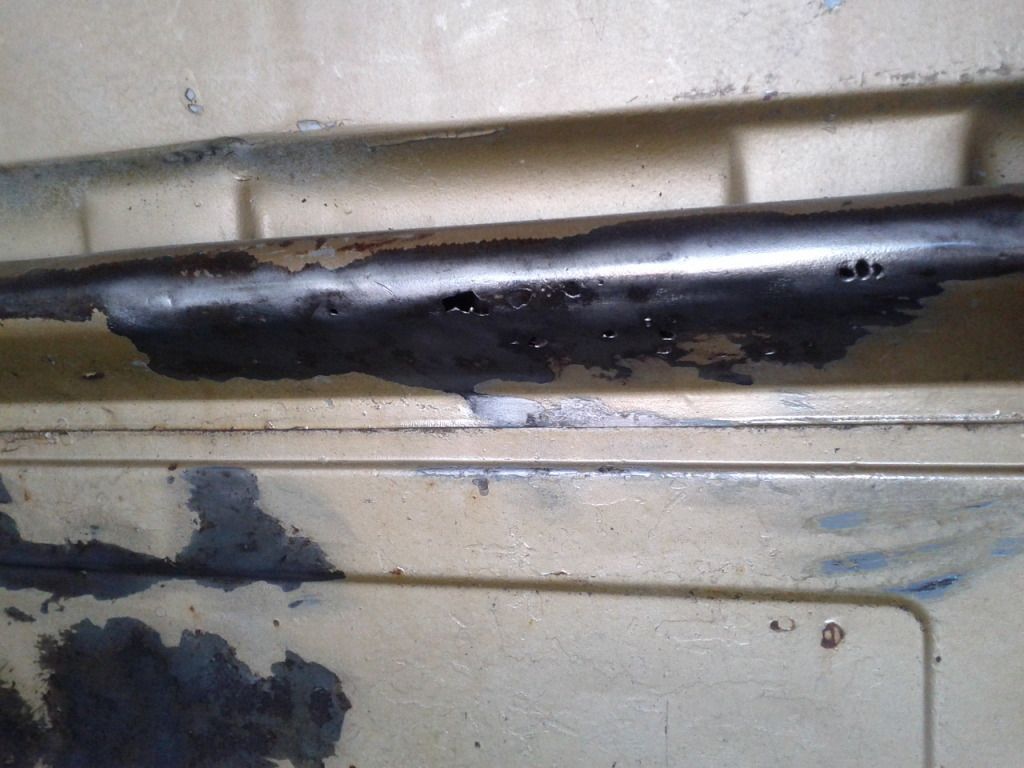 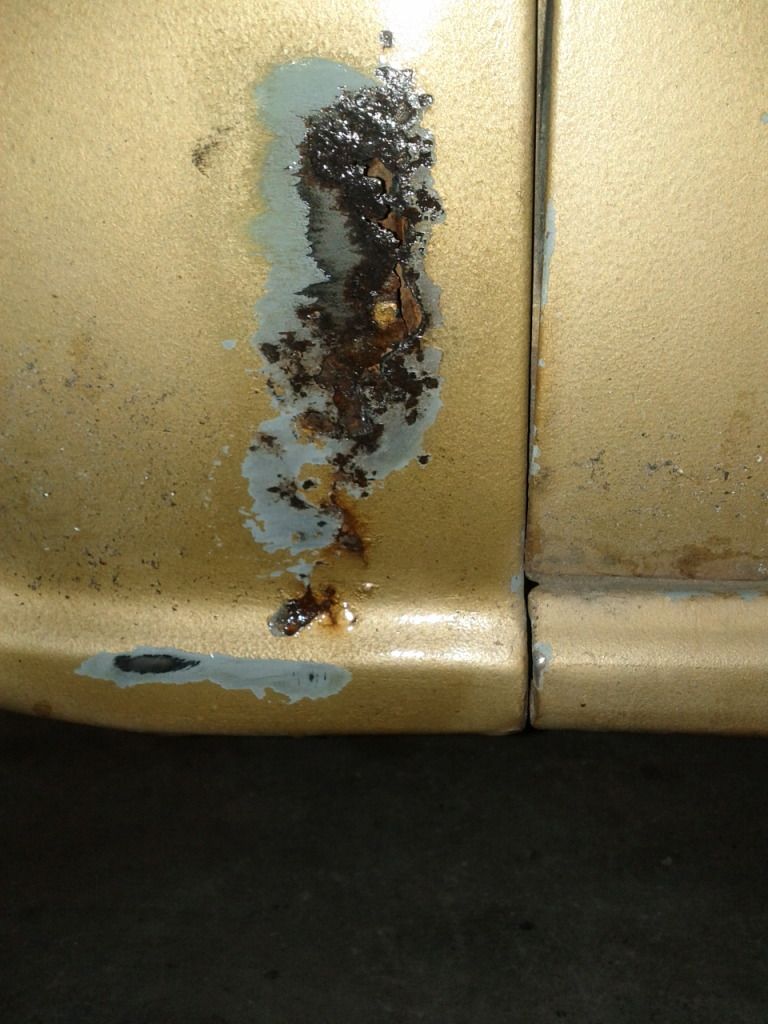 I think I'm going to go ahead and wire wheel everything that looks at all suspect & clean up the back of the panels as best I can before committing to a course of action. I'd thought there was just the one rust spot in the car but if it's all this bad, I don't know that I want to pay a body guy to fix it all. That means... something.
__________________
"Over my head" 1957 Chevy 3200, big rear window & 6 lug. Front disc, power steering, Vortec 4.8 / 4L60E swap, hydro boost brakes & patina. |
|
|
|
|
09-20-2014, 07:33 PM
|
#292 |
|
Registered User
Join Date: Aug 2007
Location: Corona, California
Posts: 7,998
|
Re: Project: Over My Head
It's almost 60 years old so you're going to find some bad spots.
Try not to get to overwhelmed with it and break it up into small projects. That's what I did with mine so I could feel I accomplished something as I finished them. Good luck. Kim |
|
|
|
|
09-27-2014, 06:03 PM
|
#293 |
|
Registered User
Join Date: Sep 2011
Location: Nevada City, CA
Posts: 908
|
Re: Project: Over My Head
I was working in the garage, removing a rusted / cross threaded bolt from the grill (in the end, drilled & tapped for a 3/8" bolt instead) and thinking about how to get the grill to fit with the radiator fan when my wife went into labor.
Little Man is 9 lbs 11 oz, born about 24 hours ago. I think the truck will be 2nd fiddle for a while, though I may write a few checks and have other people do some of the work. Priorities. They done changed a bit.
__________________
"Over my head" 1957 Chevy 3200, big rear window & 6 lug. Front disc, power steering, Vortec 4.8 / 4L60E swap, hydro boost brakes & patina. |
|
|
|
|
09-27-2014, 07:14 PM
|
#294 |
|
Senior Member
Join Date: Mar 2011
Location: West Plains, Missouri
Posts: 7,553
|
Re: Project: Over My Head
Congrats on the new son, take some time and enjoy your new wonder...Jim
__________________
my build thread: http://67-72chevytrucks.com/vboard/s...d.php?t=459839 Jimbo's long bed step build:http://67-72chevytrucks.com/vboard/s...t=464626<br /> |
|
|
|
|
09-27-2014, 08:49 PM
|
#295 |
|
Registered User
Join Date: Aug 2012
Location: West Side of the valley, CA
Posts: 878
|
Re: Project: Over My Head
Ooohweee that's a big boy. Contratz!!!
|
|
|
|
|
09-27-2014, 08:56 PM
|
#296 |
|
Registered User
Join Date: Feb 2013
Location: Lakeside Ariz
Posts: 445
|
Re: Project: Over My Head
Congrats on the new little one. Rich
|
|
|
|
|
09-28-2014, 12:21 AM
|
#297 |
|
Registered User
Join Date: Jan 2011
Location: Redmond, OR
Posts: 754
|
Re: Project: Over My Head
Enjoy every day. They grow up quick.
__________________
68 Chev C20- son has it now 83 K20 - bought from son 70 C20 - in progress |
|
|
|
|
09-28-2014, 10:25 AM
|
#298 |
|
Registered User
Join Date: Aug 2007
Location: Corona, California
Posts: 7,998
|
Re: Project: Over My Head
Congrats.
Enjoy your new son. Get him in the garage with you early and you'll both have fun together. Kim |
|
|
|
|
10-11-2014, 08:14 PM
|
#299 |
|
Registered User
Join Date: Sep 2011
Location: Nevada City, CA
Posts: 908
|
Re: Project: Over My Head
2 weeks in on fatherhood. Tired / occasionally cranky. In spare moments, though, I've been in the garage. An hour here when baby sleeps, an hour there when mom's on duty.
I've been on rust prevention / slow down detail. Here is the before & after of lots of surface rust, then scrubbed clean with CLR & a scotch brute. I sealed it all up with Rustoleum satin clear in a spray can. 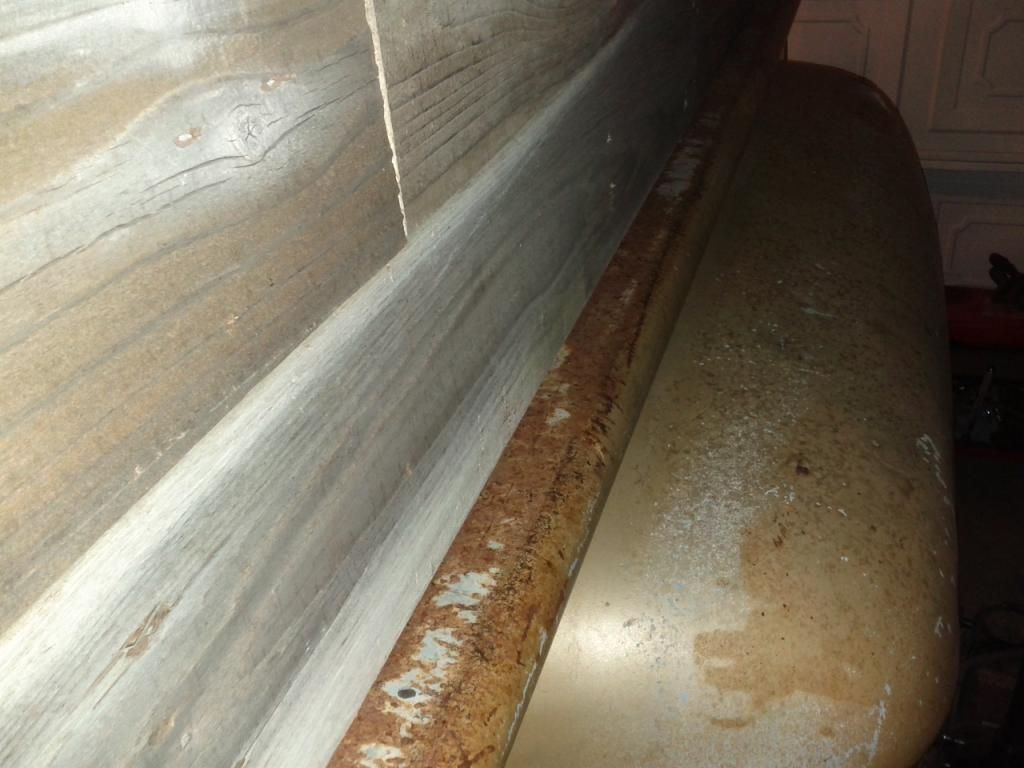 And after 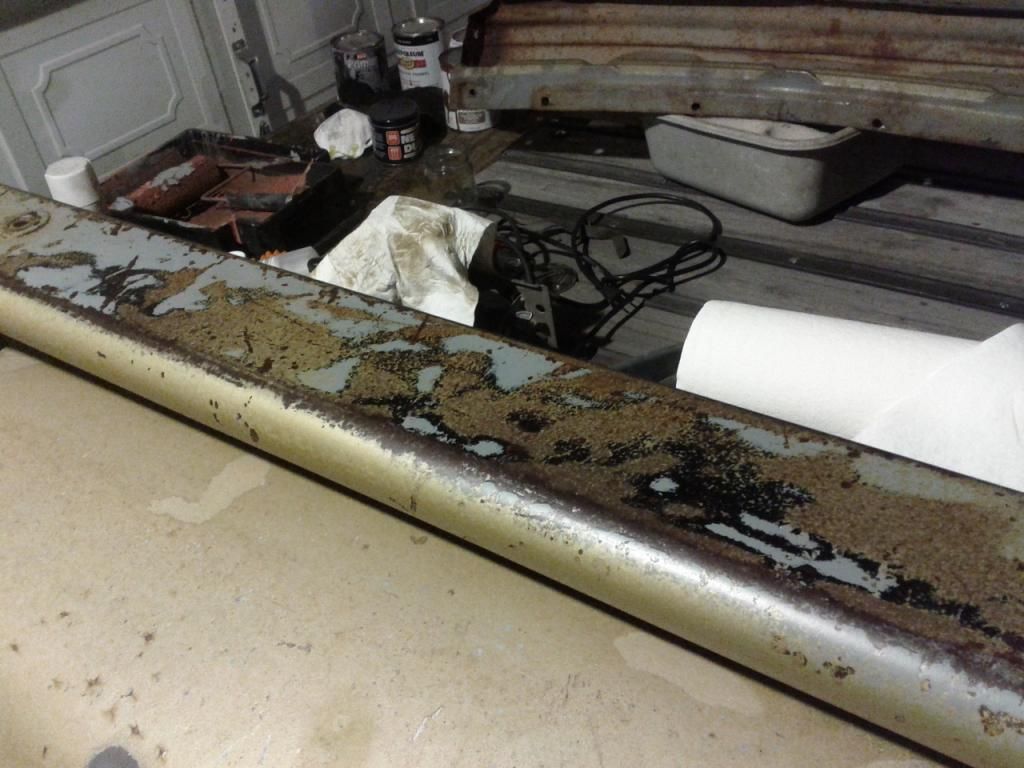 The hood and roof got much the same treatment and appear about the same: rust and at least two paint jobs. 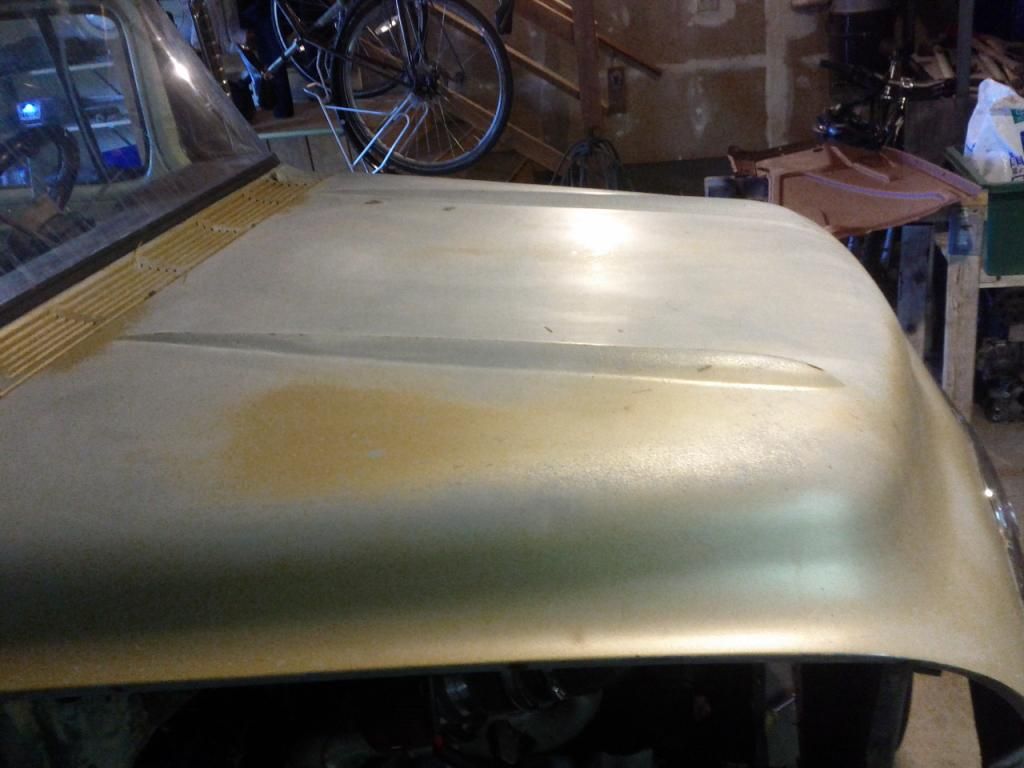 For anyone that didn't already know it, there is no such thing as light surface rust coming up through the paint. What happens is that rust on the back side of the panel gets bad enough to make the metal porous, at which point it can come up through the top coat. I've been scraping the loose stuff off the rusty side of each panel, using a heavy coat of Rustoleum Rusty Metal primer on that side, then sealing the "pretty" side with clear coat (after scrubbing) and the "ugly" side with under-coat. I've still got a ways to go before I'm reassembling the body work but I'm not really in a rush. It's going to be a couple weeks, I think, before I can take Clay (my son) to the weekly cruise anyway.
__________________
"Over my head" 1957 Chevy 3200, big rear window & 6 lug. Front disc, power steering, Vortec 4.8 / 4L60E swap, hydro boost brakes & patina. |
|
|
|
|
10-12-2014, 01:47 AM
|
#300 |
|
Registered User
Join Date: Aug 2007
Location: Corona, California
Posts: 7,998
|
Re: Project: Over My Head
Looking good.
A little here a little there and it all adds up. Kim |
|
|
|
 |
| Bookmarks |
|
|


 Linear Mode

