
|
|
|
 01-08-2012, 01:57 PM
|
#1 |
|
Still Learning
Join Date: Jul 2009
Location: Central Oklahoma
Posts: 10,108
|
Re: Crash's 72 K10
Wow! Mark, what a day. You got way more done than me. I know who is build my 4L60e if it takes a puke. Nice documentation and pictures. I hope to have one of these 4x4 trucks some day. This thread will be a how to step by step.
Looks like you got throught the coupler shortening without any trouble. Keep the updates coming. |

|

|
|
01-08-2012, 10:32 PM
|
#2 | |
|
Registered User
Join Date: Nov 2011
Location: Edmond, OK.
Posts: 1,362
|
Re: Crash's 72 K10
Quote:
Cutting the coupler was strange.. you could tell when you got to the hard parts of the coupler.... but I finally got it....
__________________
Mark ----------------------- Crash's 69 4x4 SWB Crash's Roof over Lake Home Crash's 1988 Land Cruiser Build Last edited by Crash_OK; 01-08-2012 at 10:42 PM. |
|
|
|
|
|
01-08-2012, 10:37 PM
|
#3 |
|
Registered User
Join Date: Nov 2011
Location: Edmond, OK.
Posts: 1,362
|
Re: Crash's 72 K10
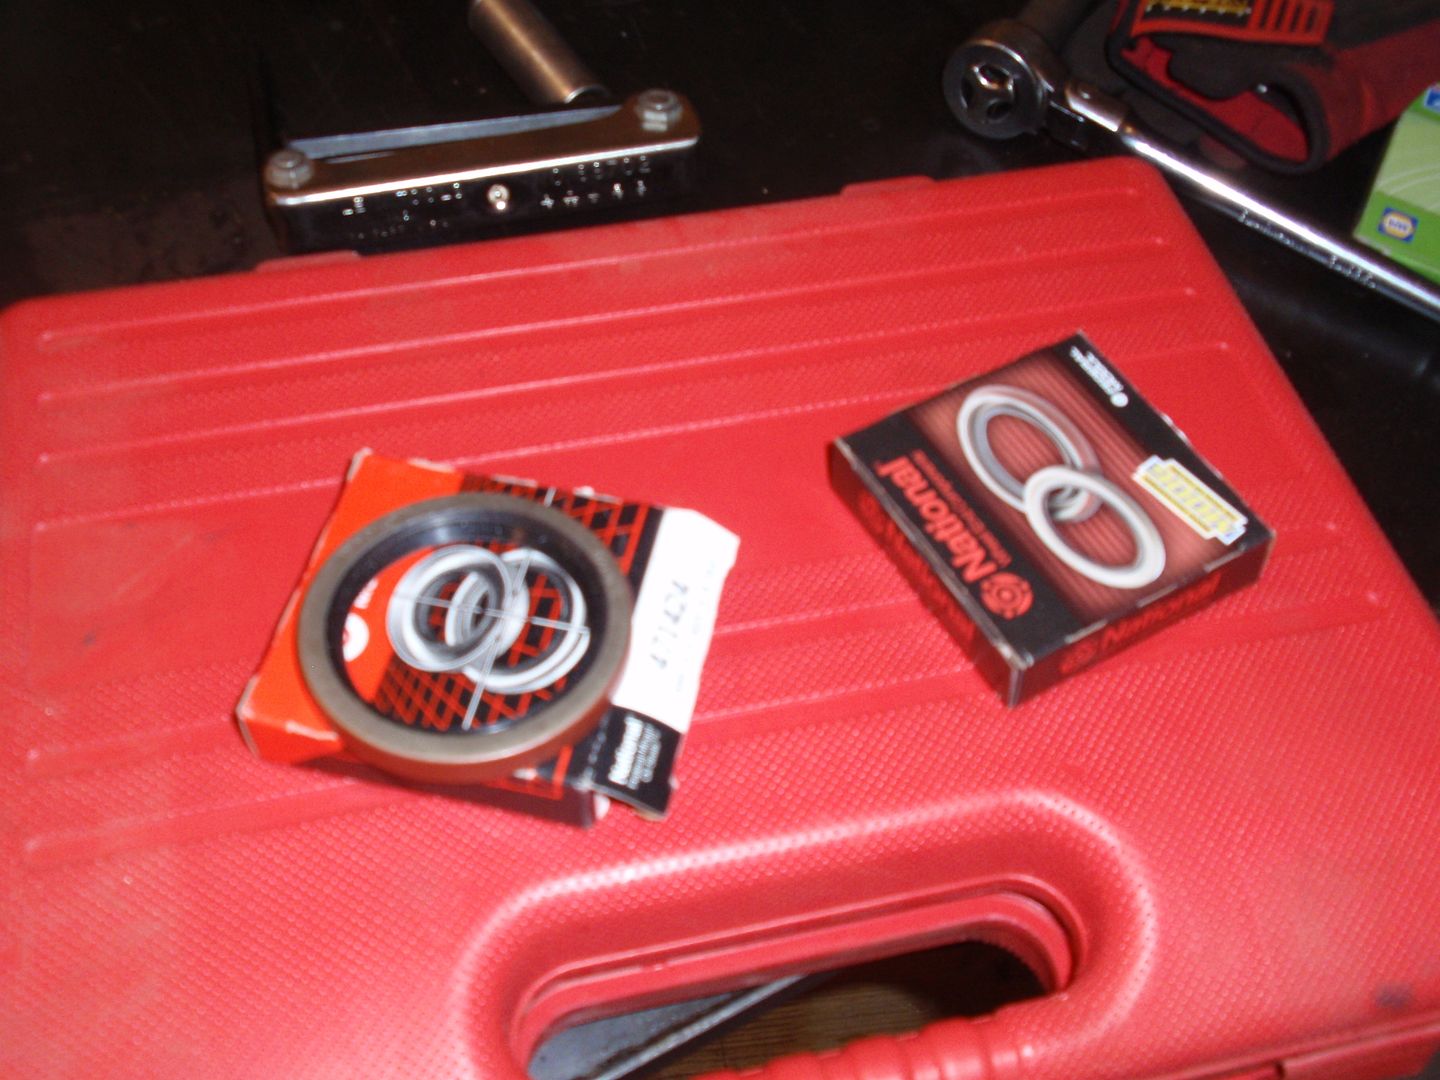
Well, I went to Eufaula this morning in search of the elusive transmission to transfer case seals. After working with Michael at Oreillys we discovered that the seals are called Transmission output seals. Of course they didnt have them.. but there were 2 in McAlester.. So off the McAlester I went..
 Thought I would try the new heater this morning.. It really worked well 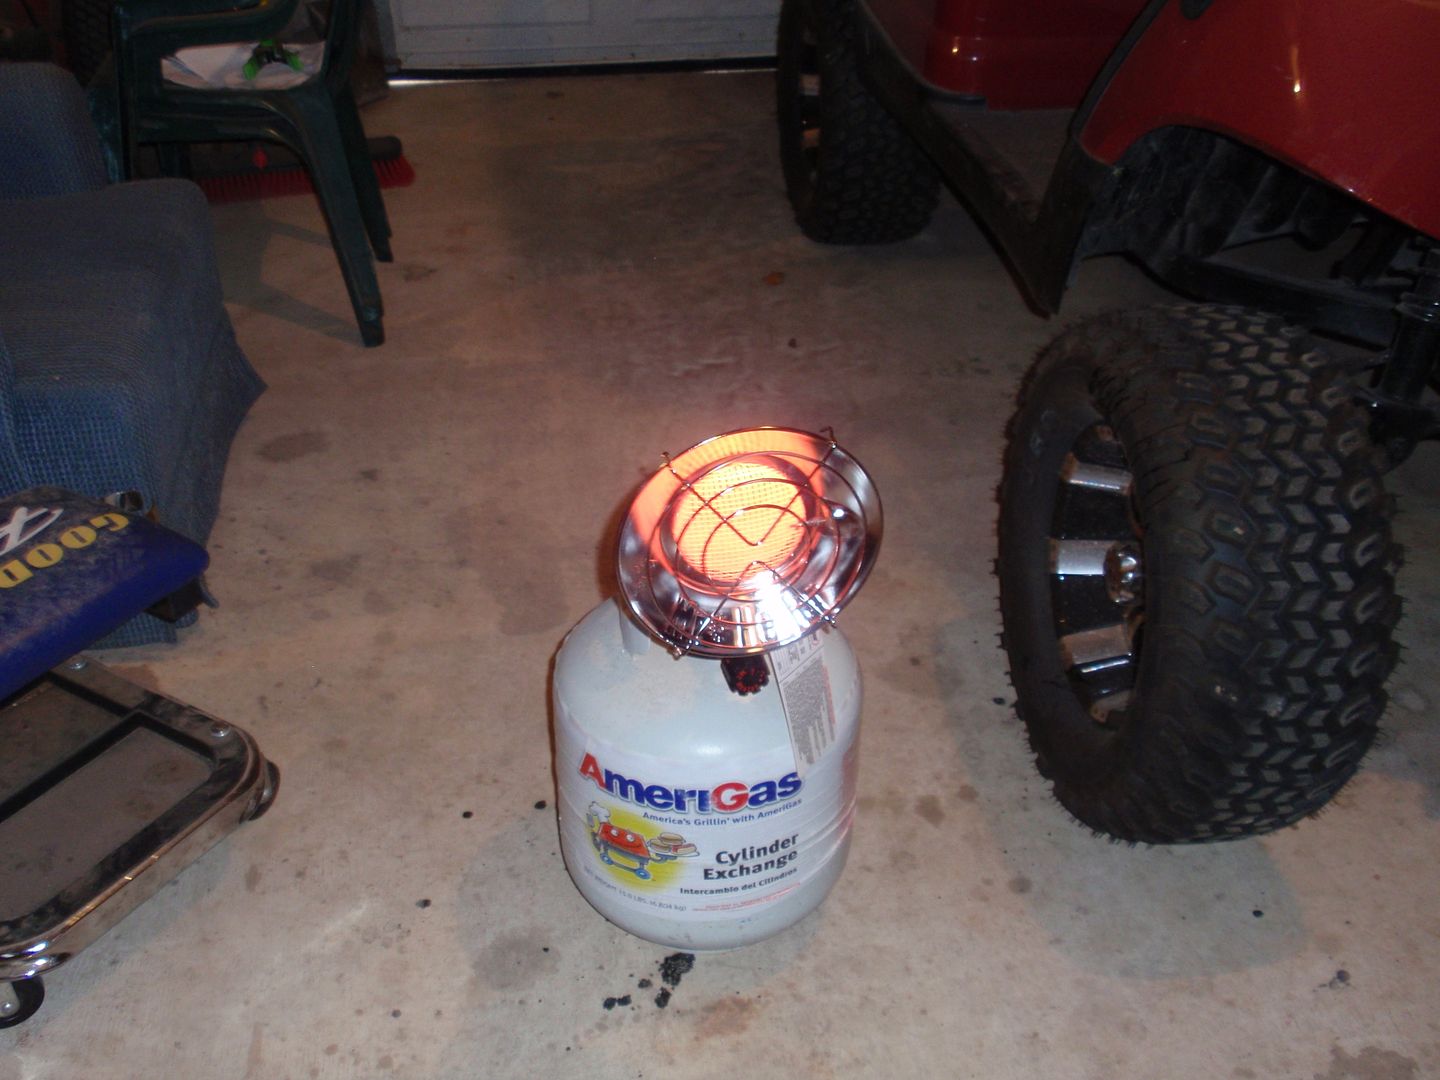 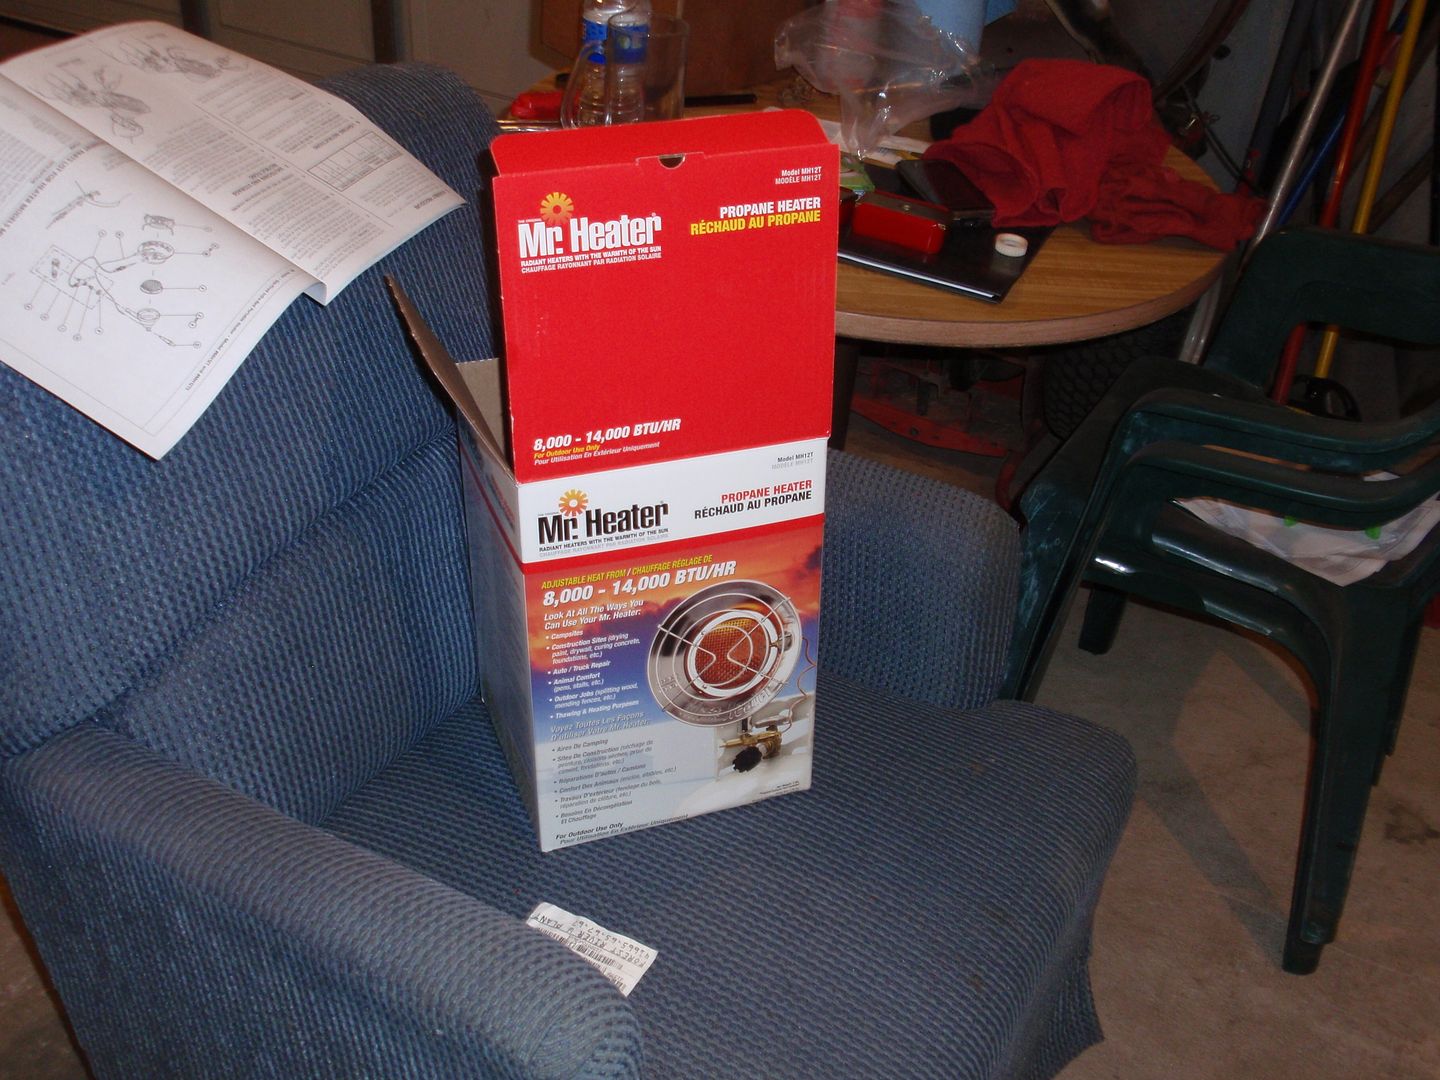 There is an order you should follow to install the seals. The seals should be installed with the seal lip on each towards the Transmission and Transfer case. First step is to install the seal on the transfer case side of the adapter.. install the seal with the seal lip pointed up towards the transfer case. 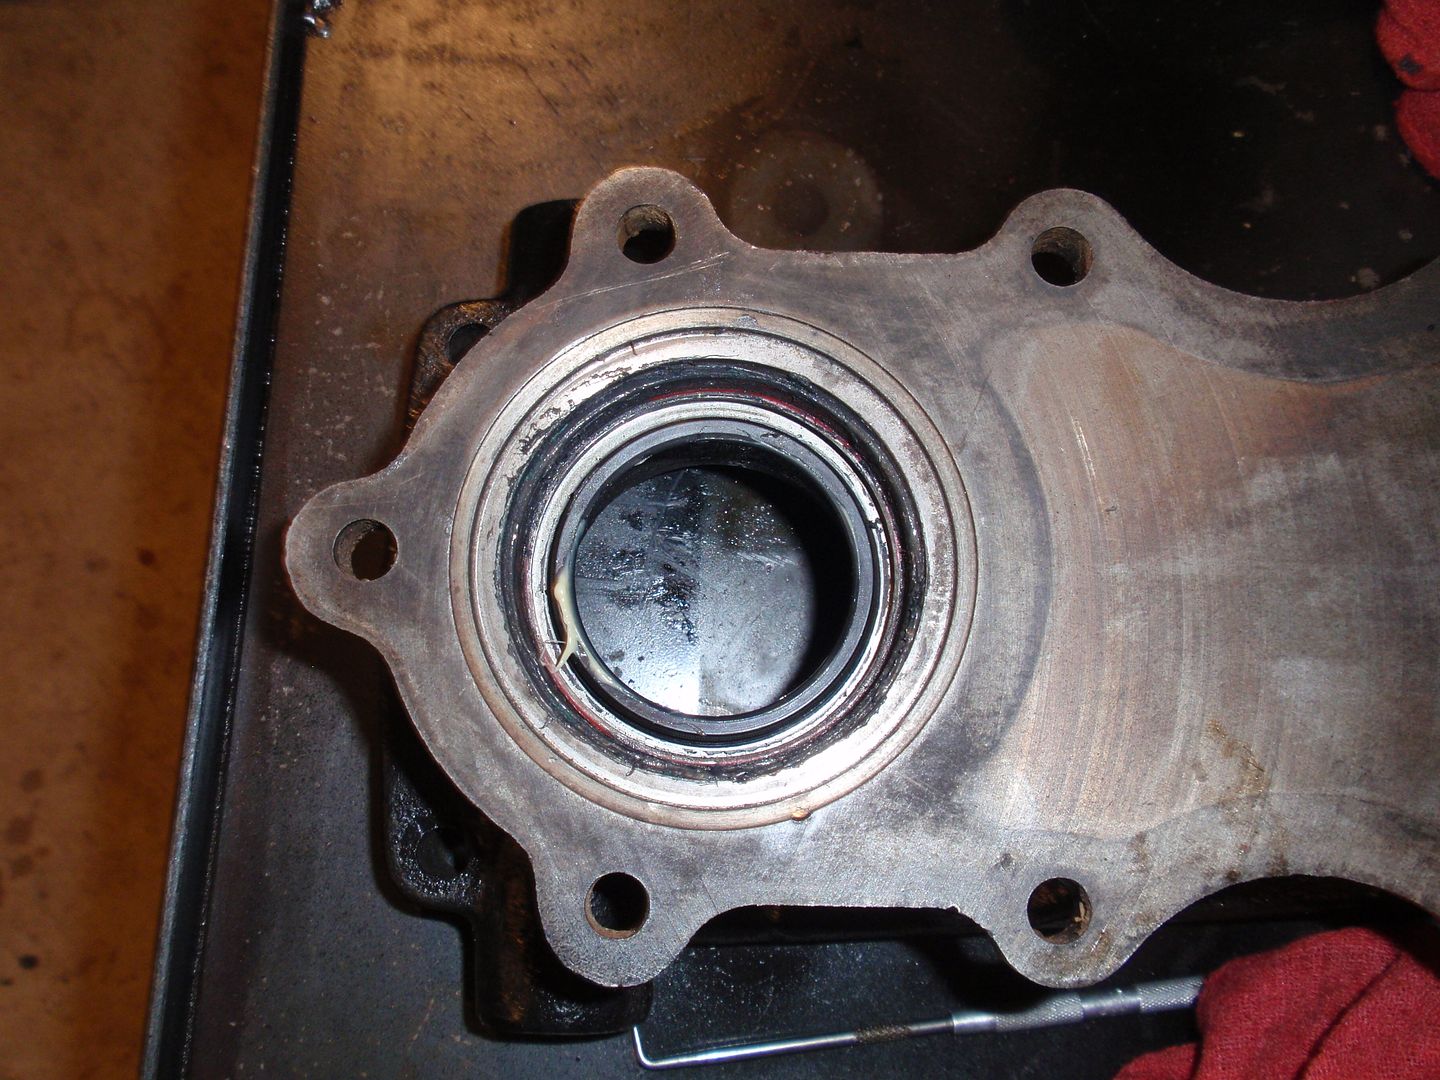 Next step is to lube the seal lip and transfer case input shaft O-ring with some white lithium grease and mount the adapter to the transfer case. 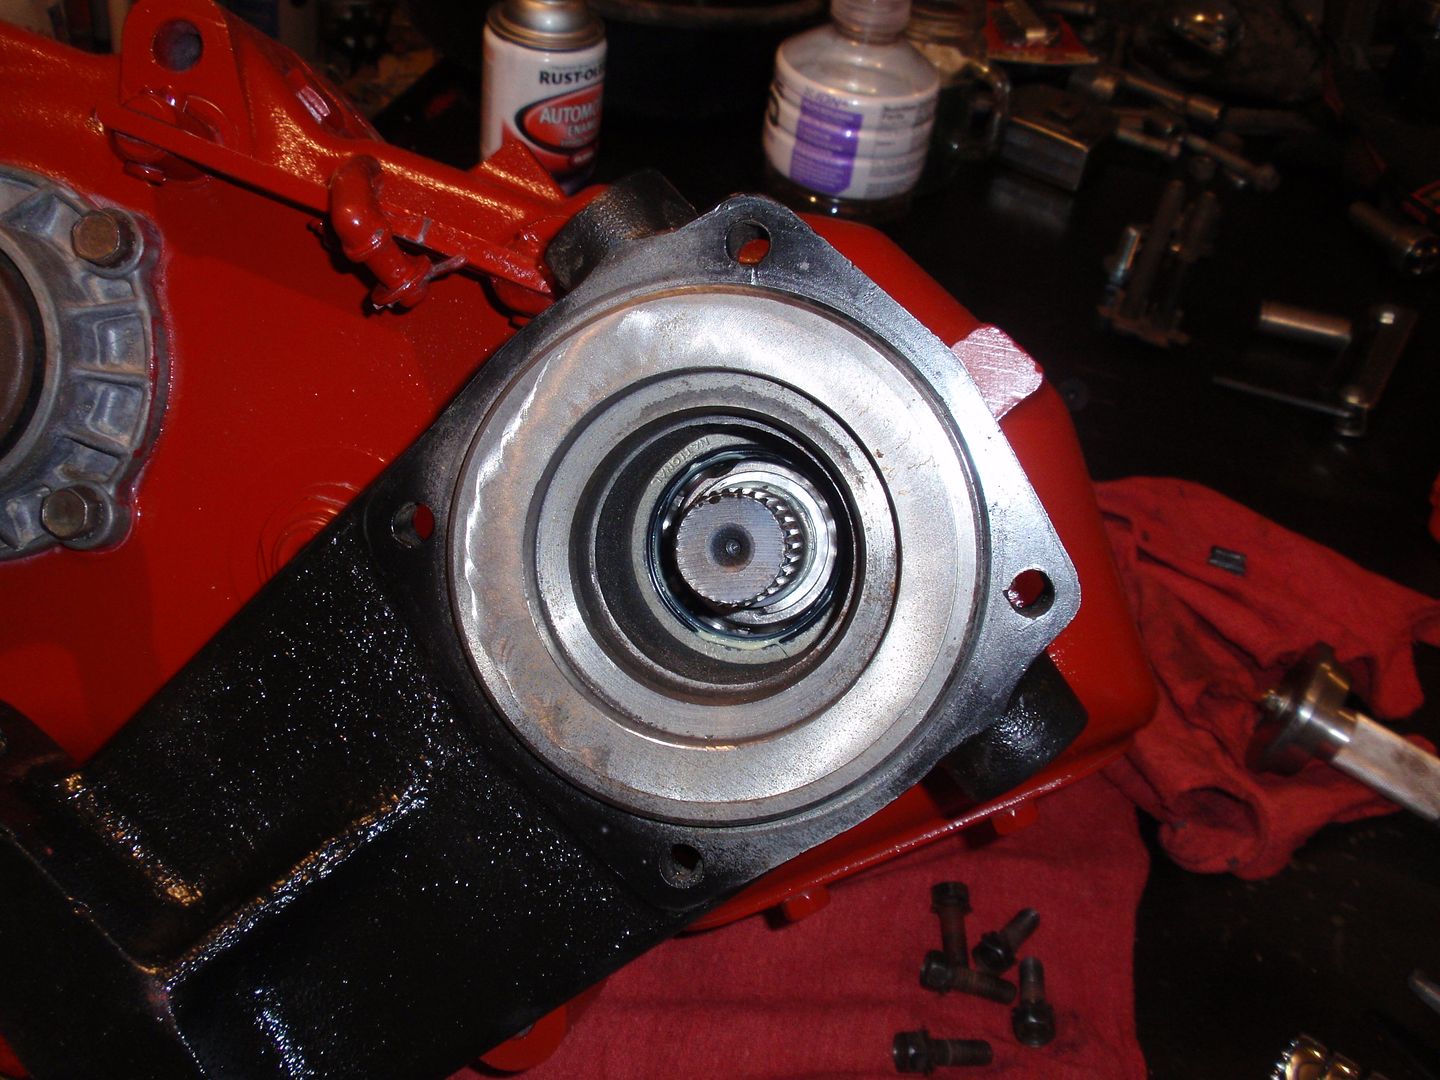 This was a good time to try out the shorty wrenches I got from lowes.. they worked great .. 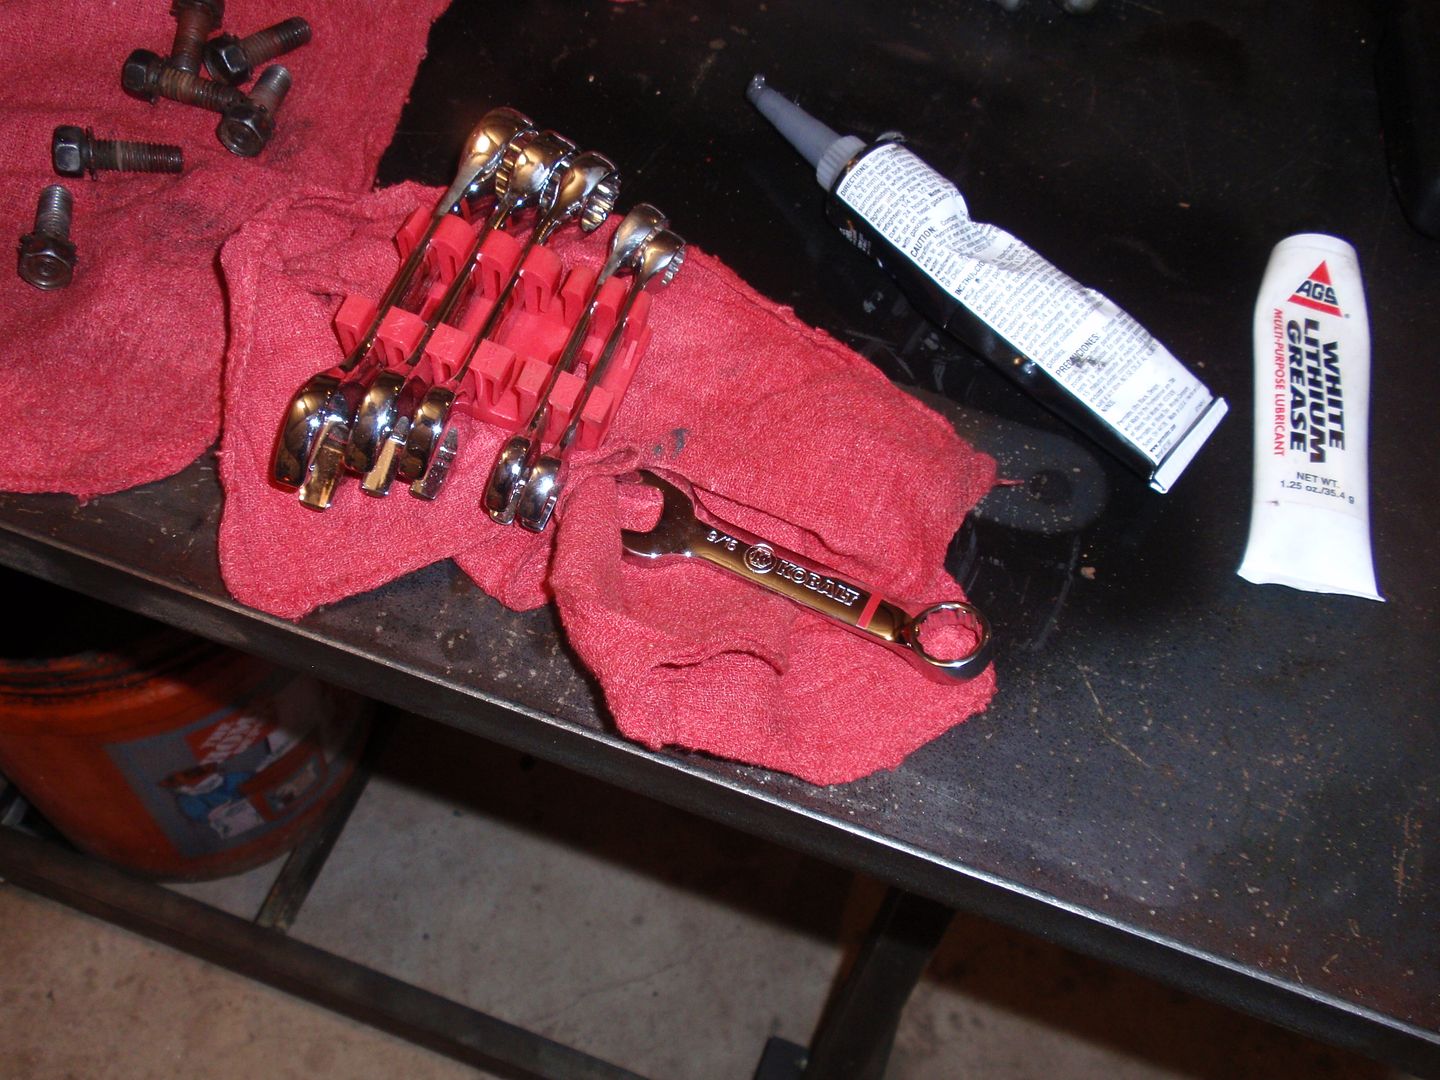 Next install power coupler onto the transfer case input shaft. 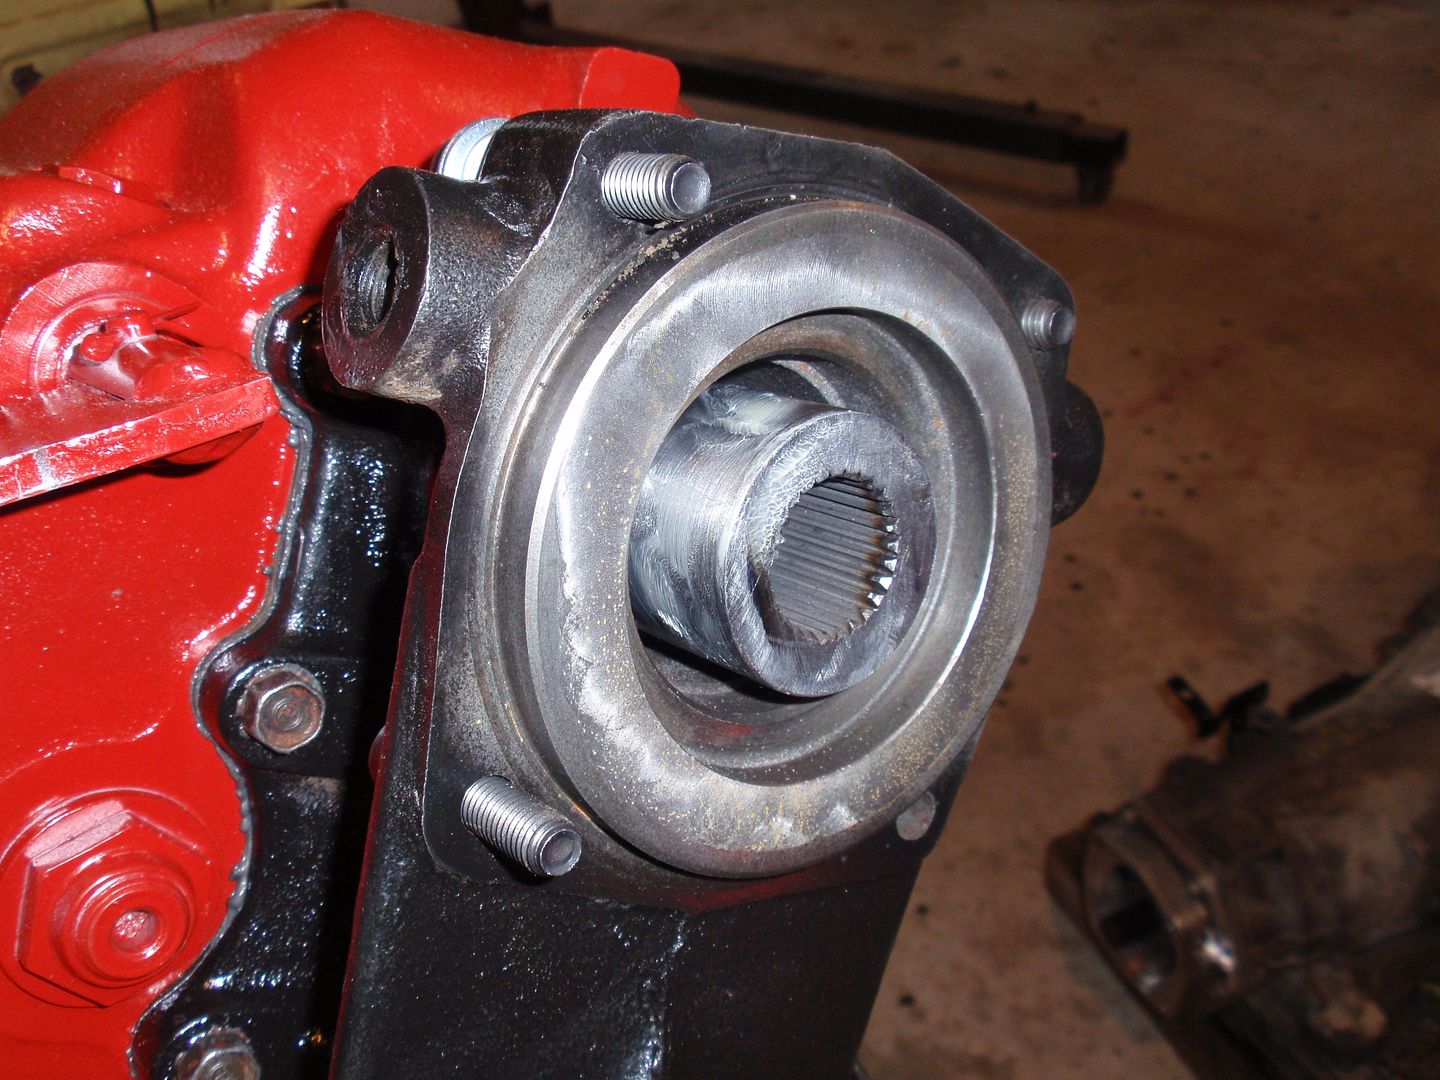 After that install the seal on the transmission side of the adapter with seal lip pointed toward the transmission. 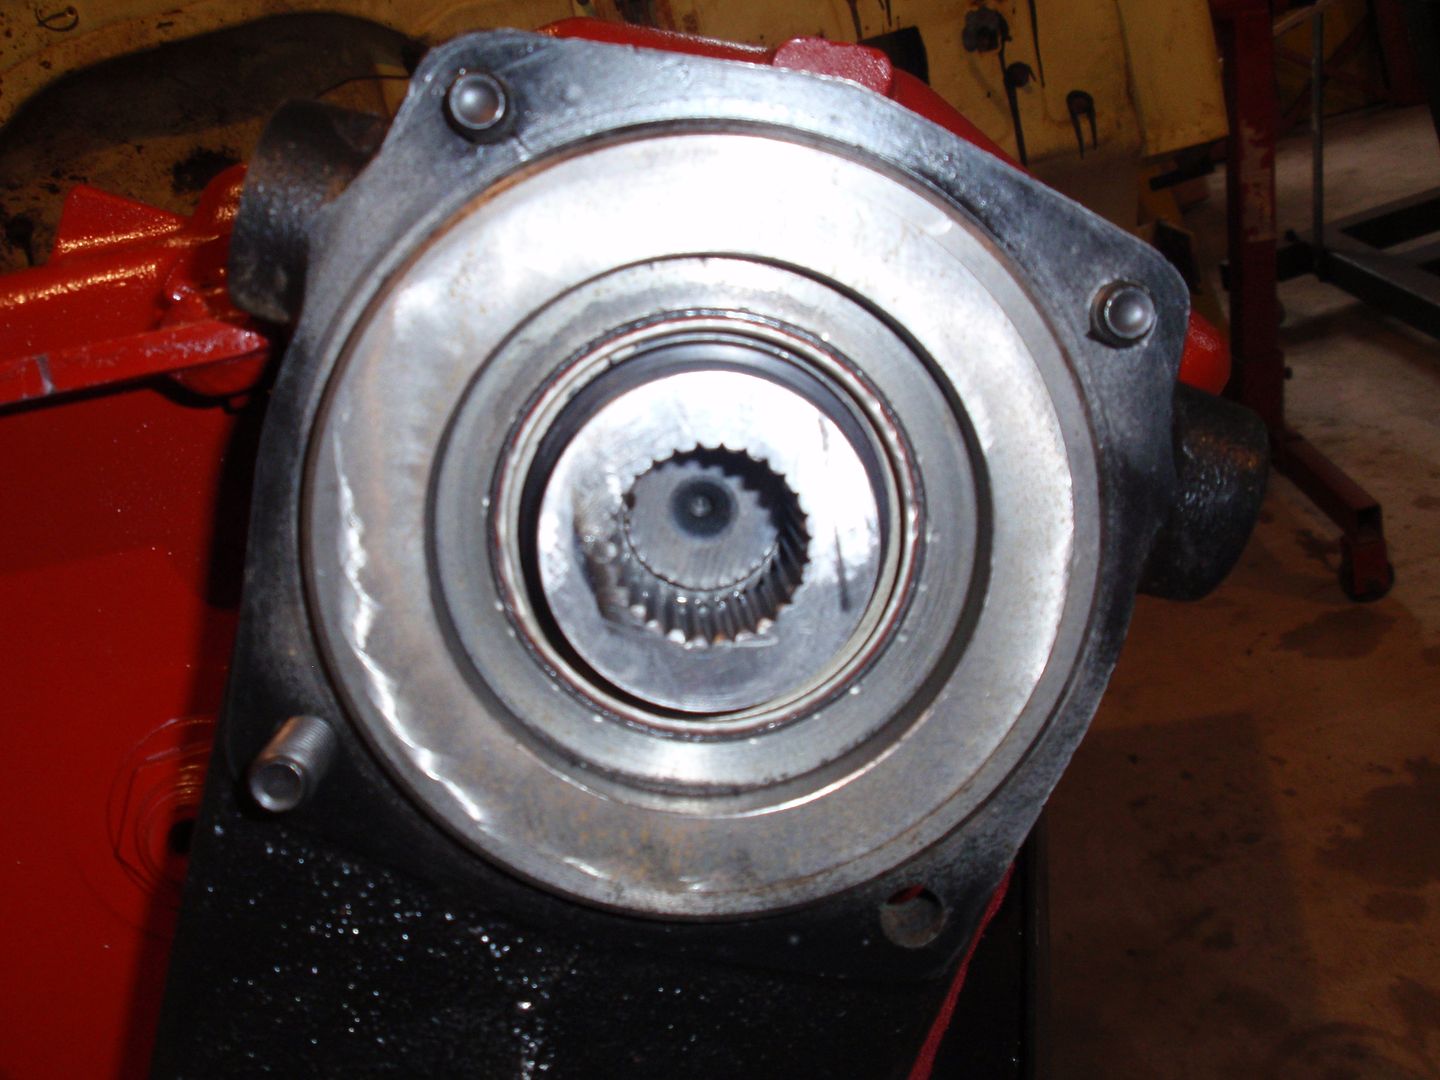 Time to mount the Transfer case to the frame. 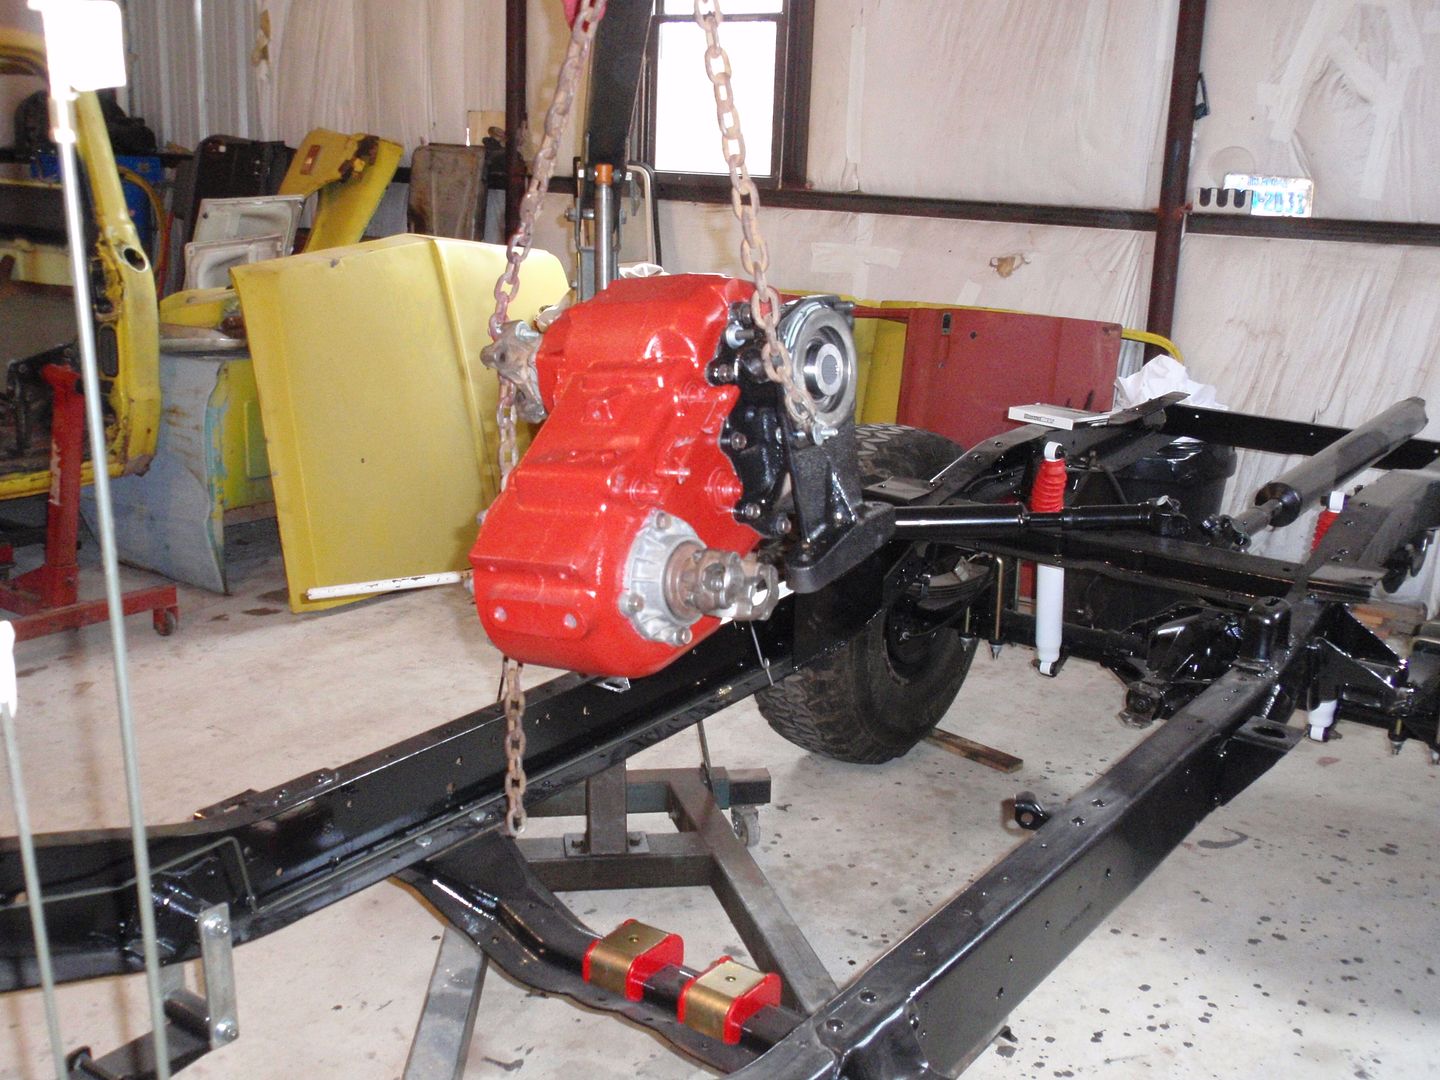 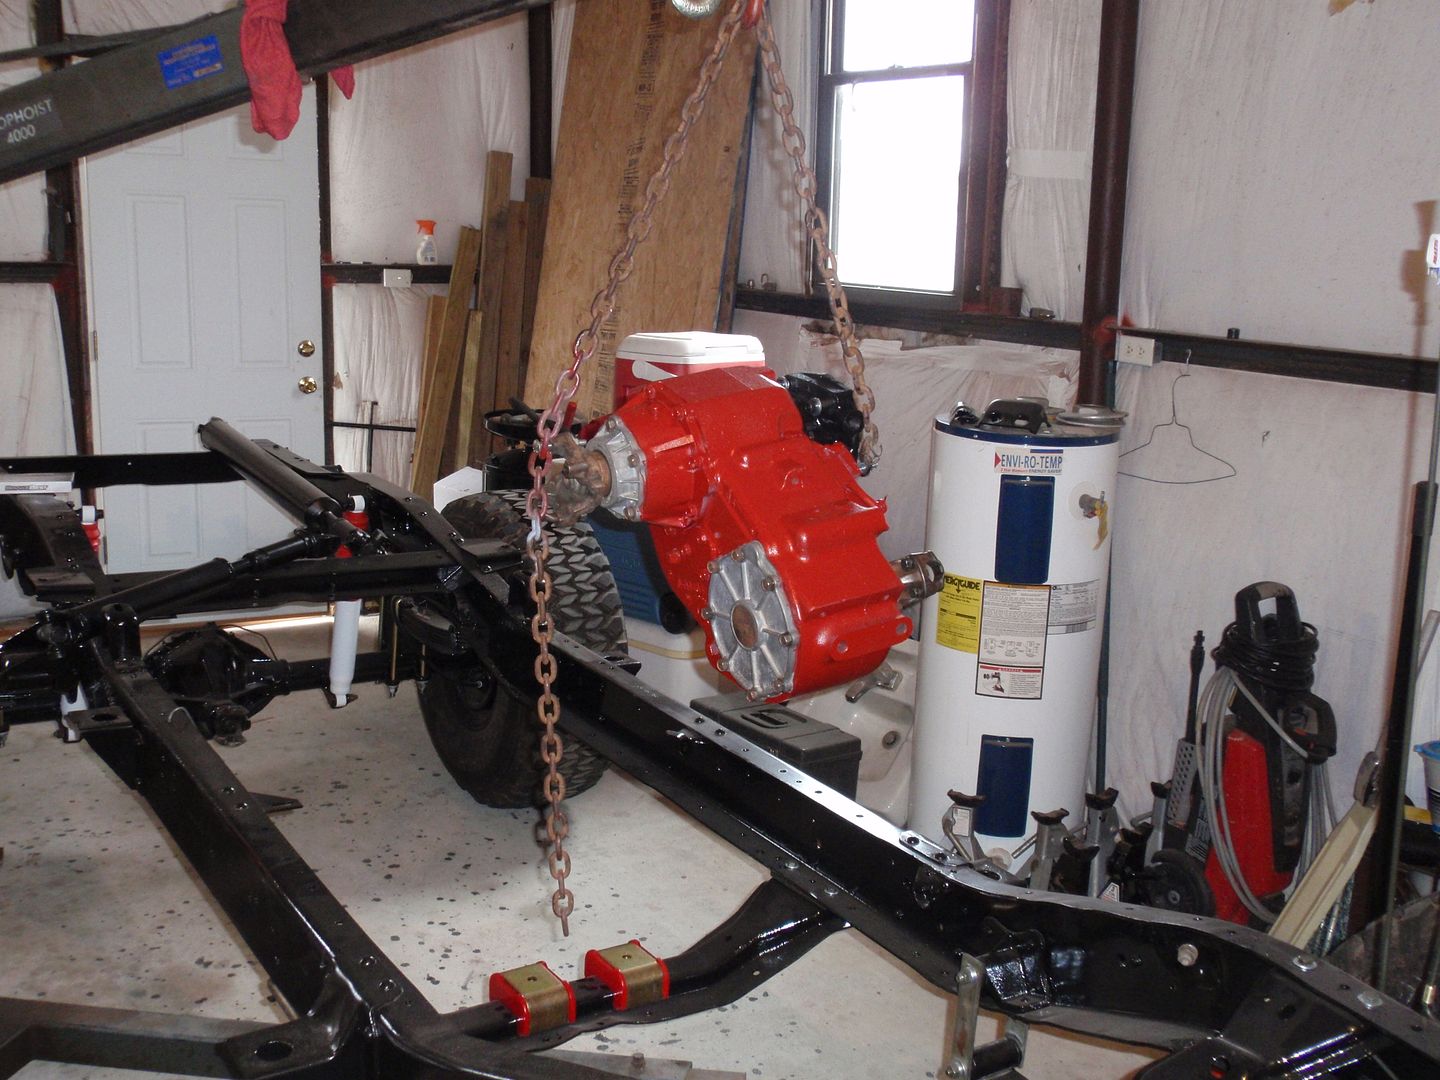 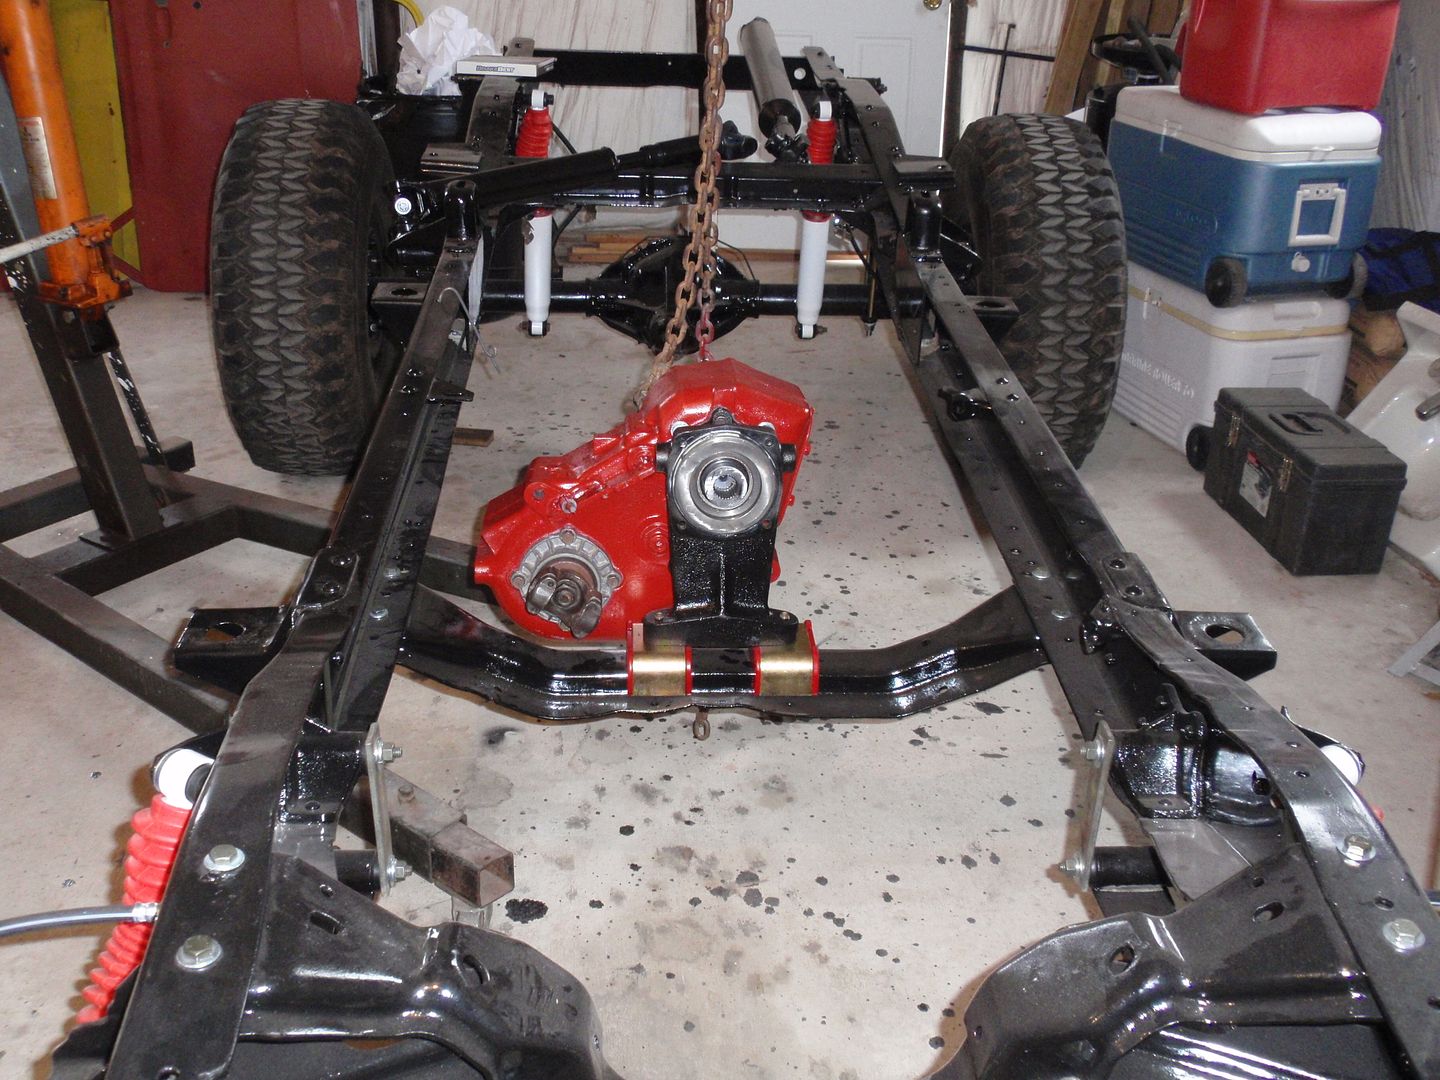 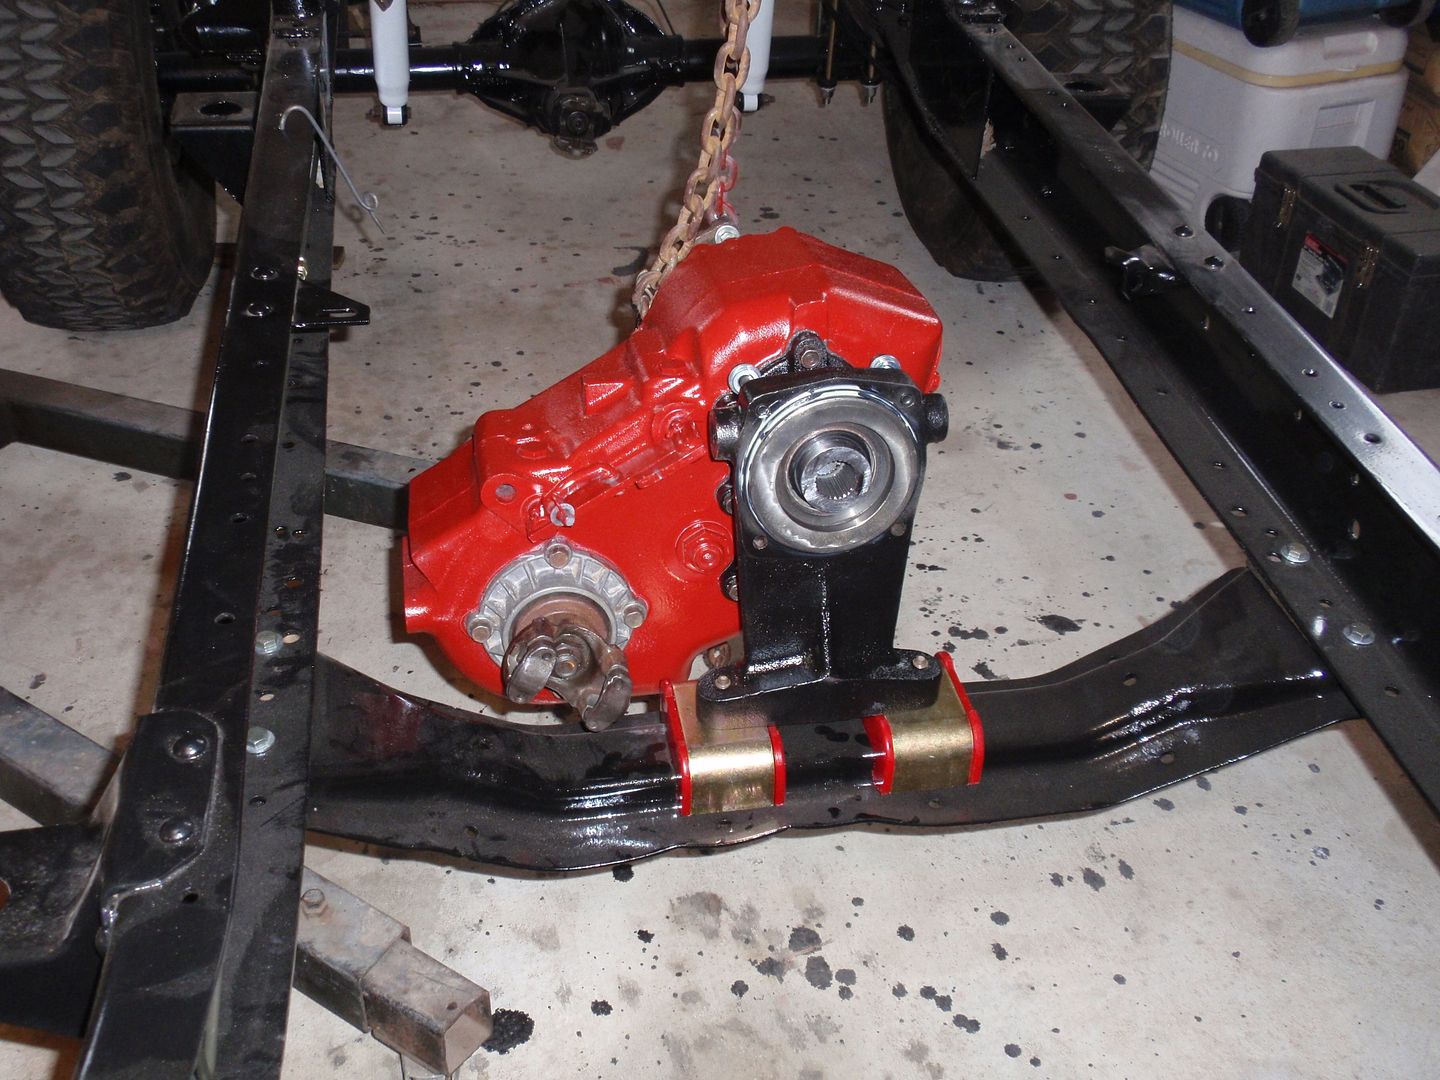 After that swing the engine and transmission into the frame and bolt it up to the transfer case. 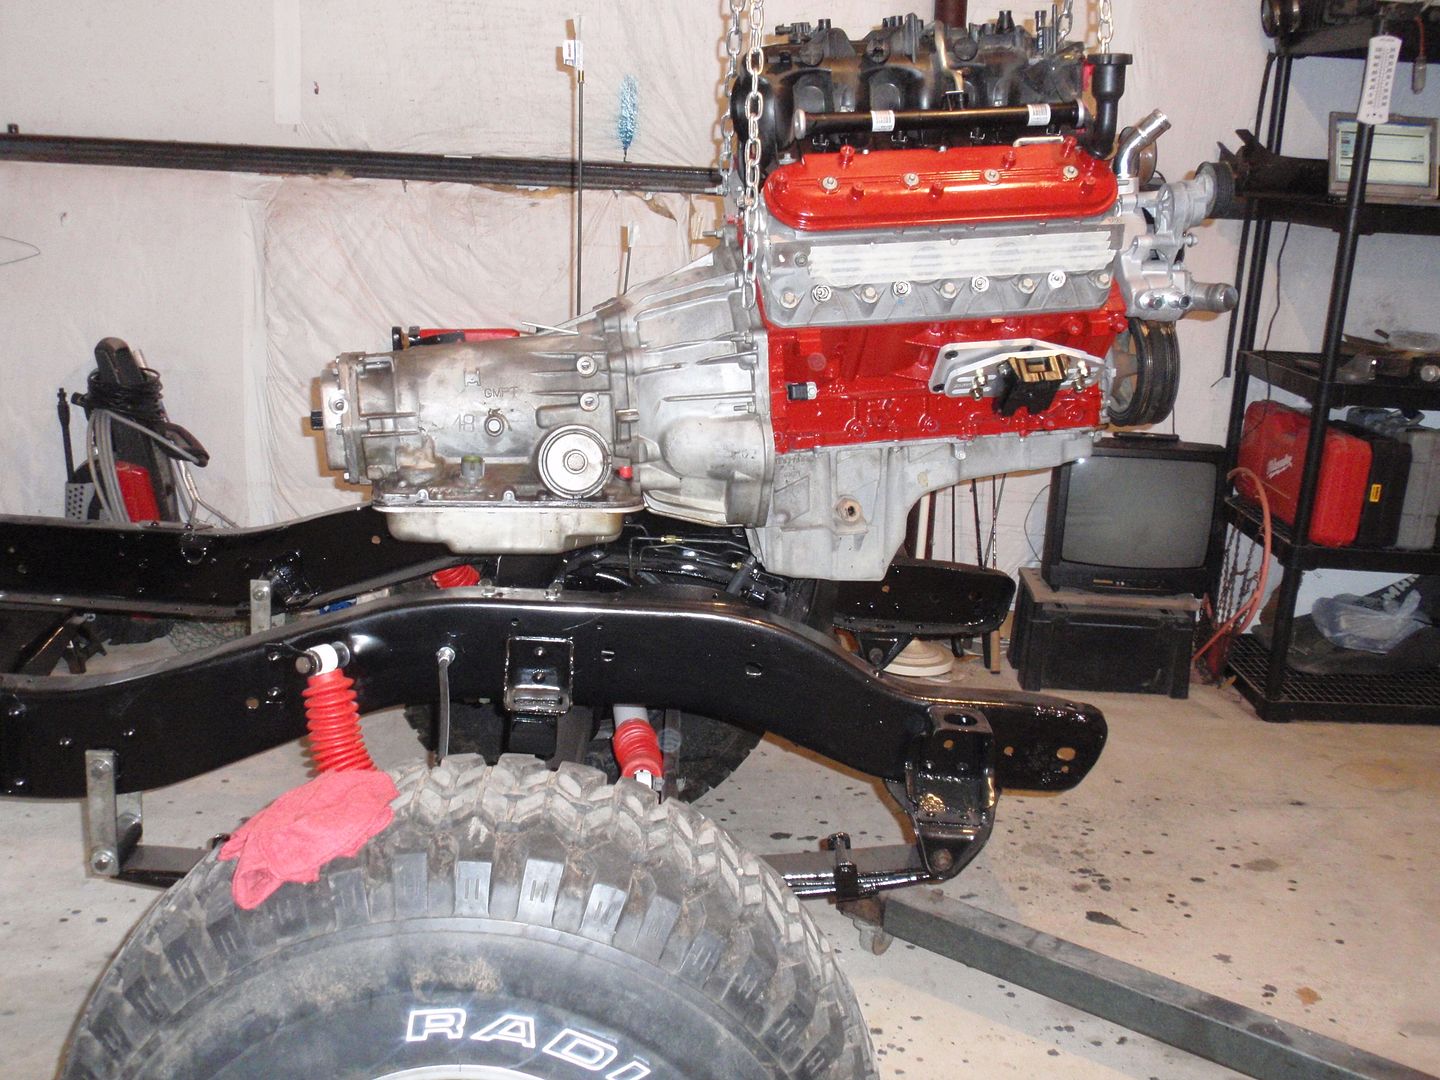 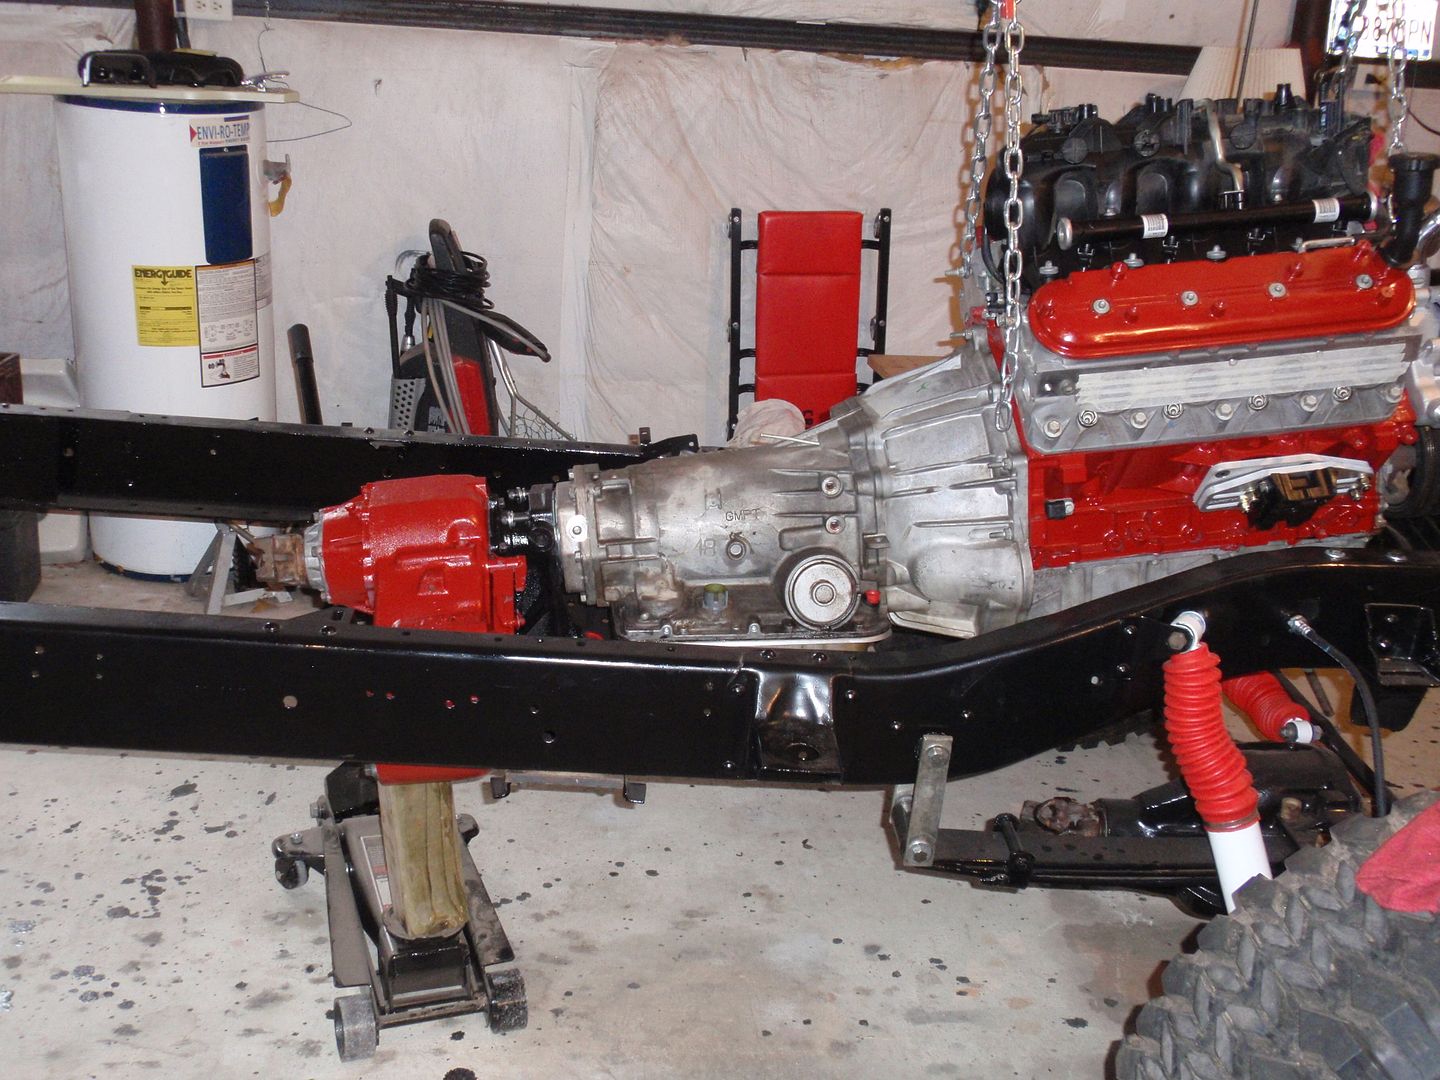  Then the progress all came to an end.. again 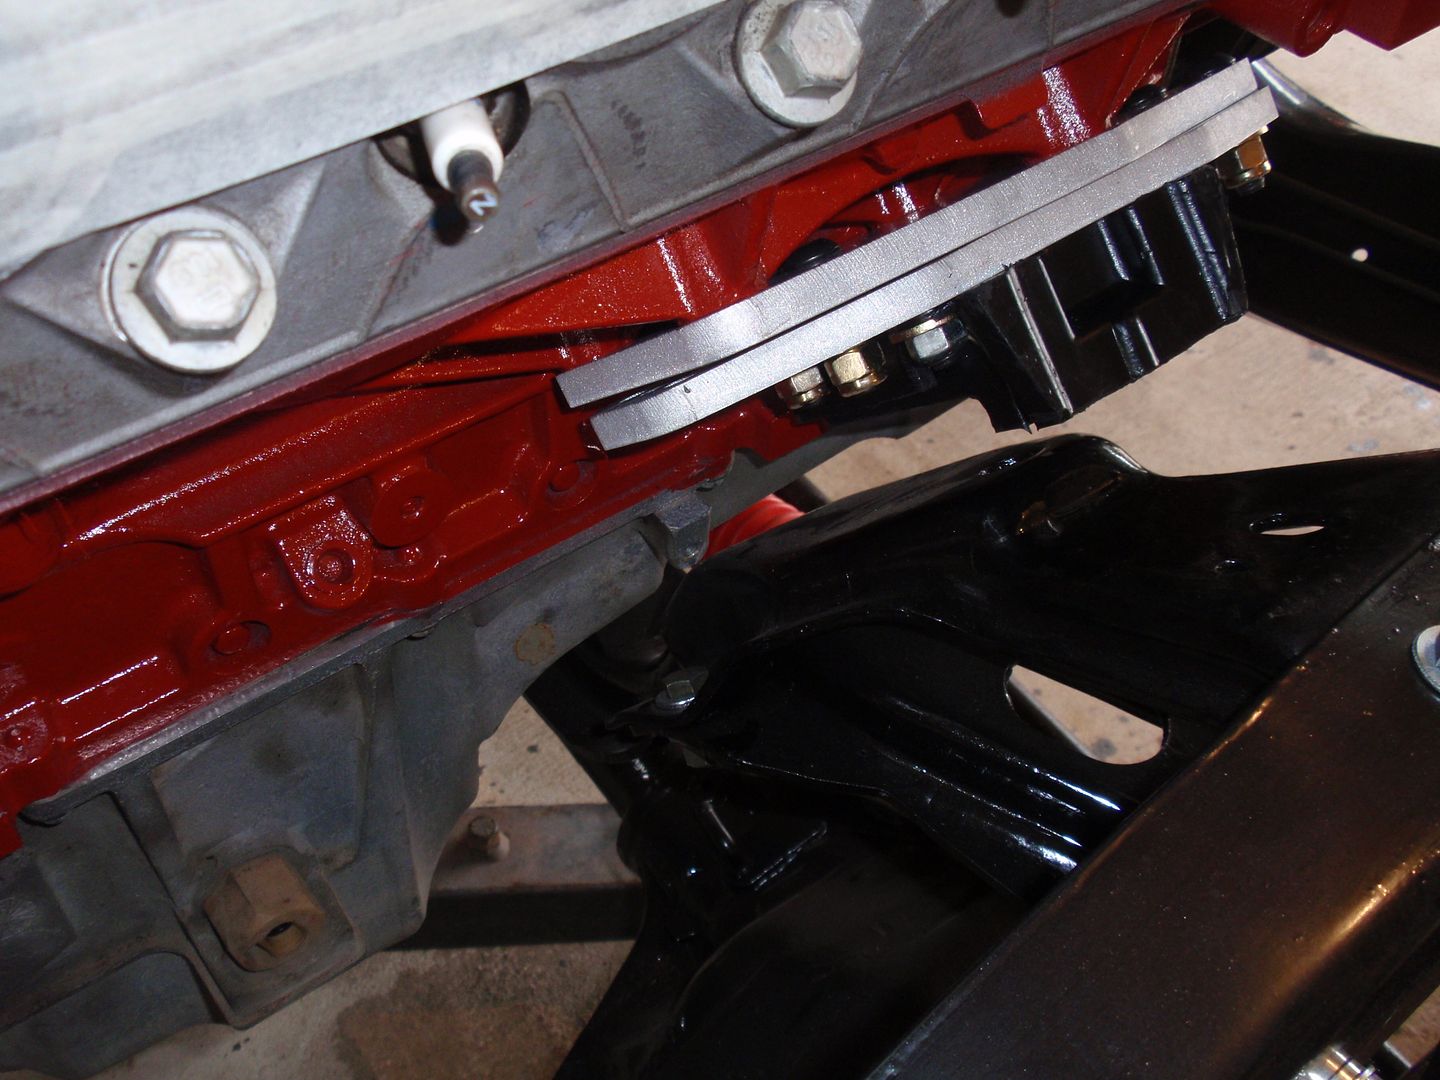 The engine has clearance problems with the cross member Dirty Dingo said this plates would solve all those problems.. Sorry.. they is not a plate made that can solve this.. This will require some fabrication. I thought I would try to move the entire drive train back a inch or so.. so I unbolted the transmission cross member and moved it.. no luck . We are hitting a different area now.. 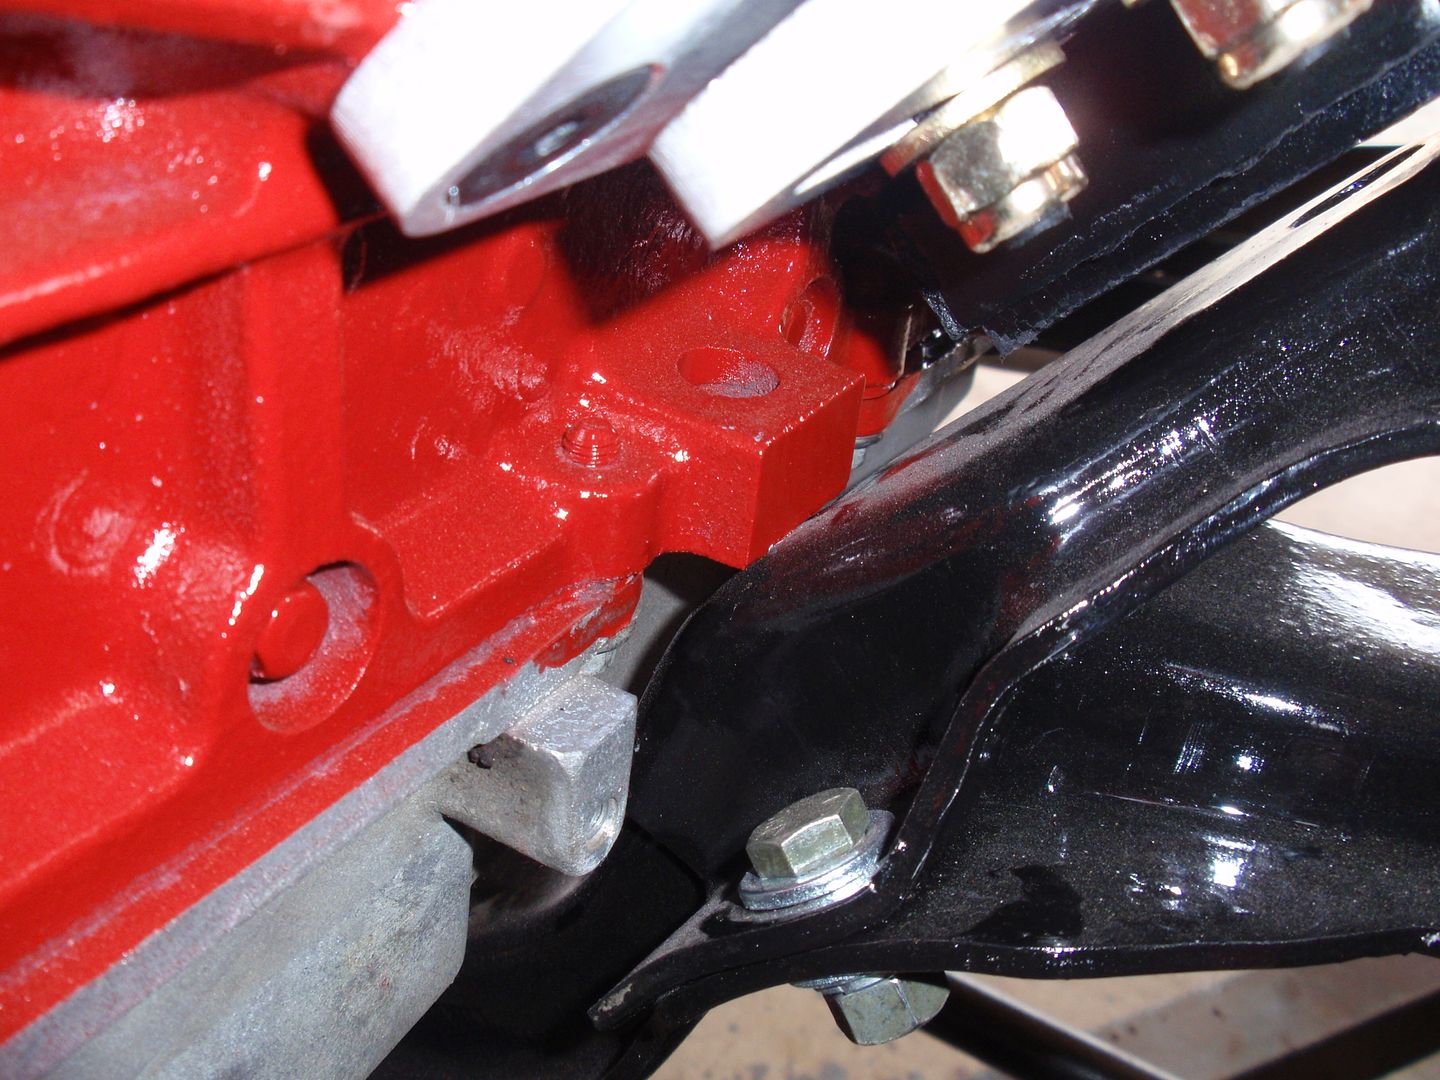 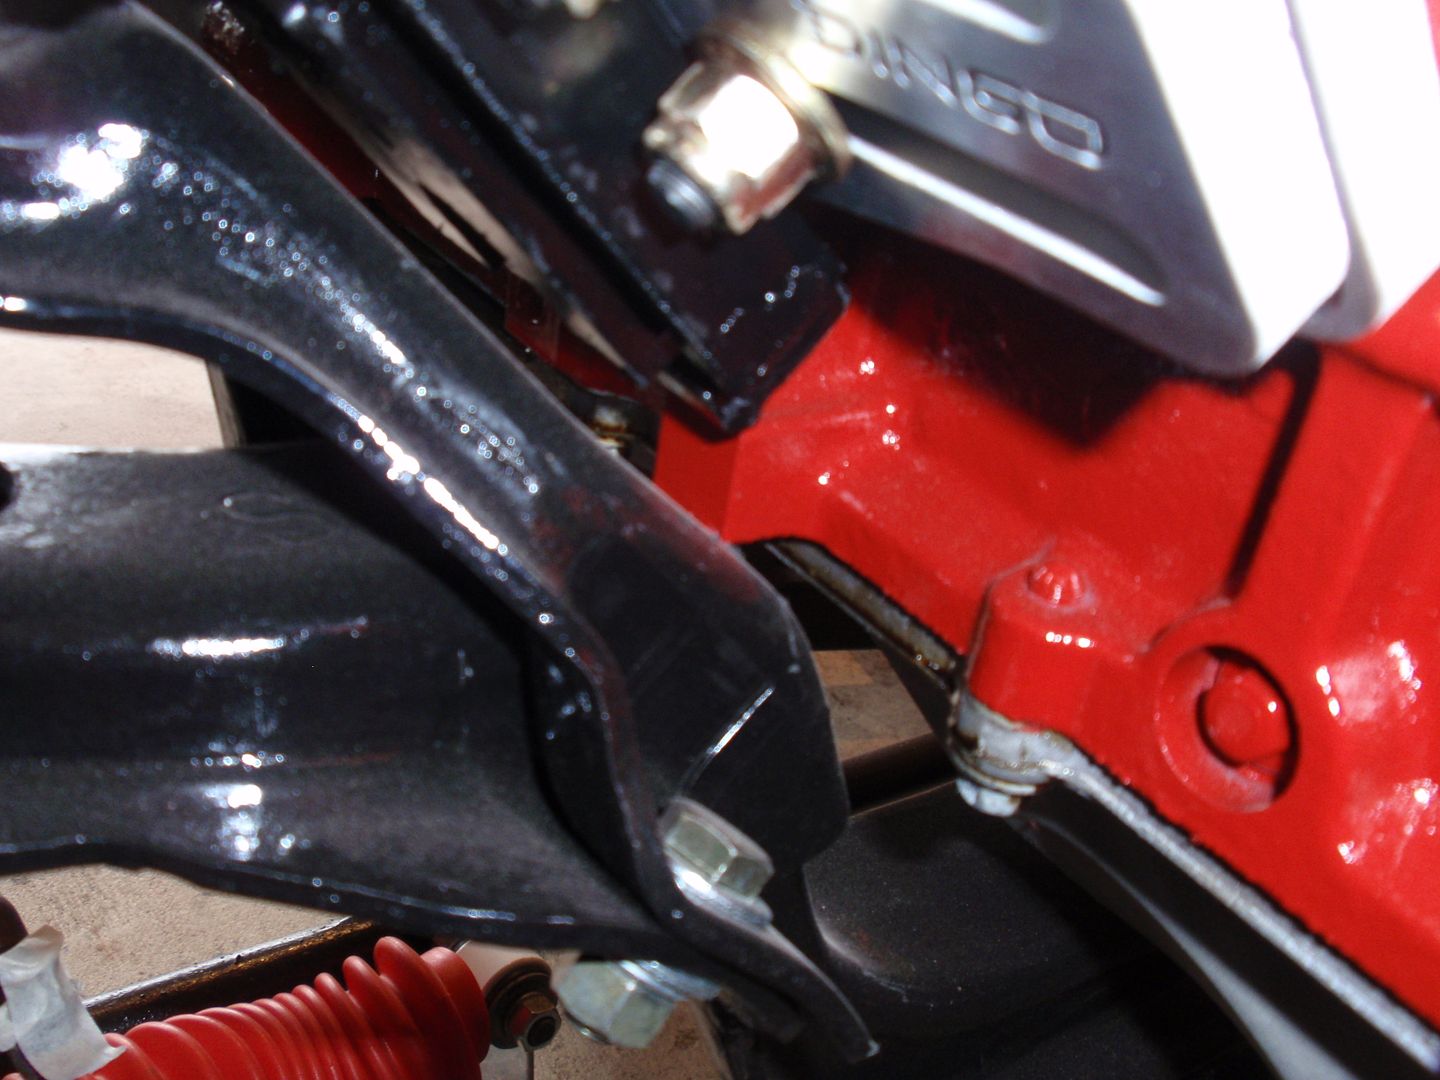 Also, both driveshafts will have to be modified with the cross member in this location.. So back to the original location.. more pics of the problem.. 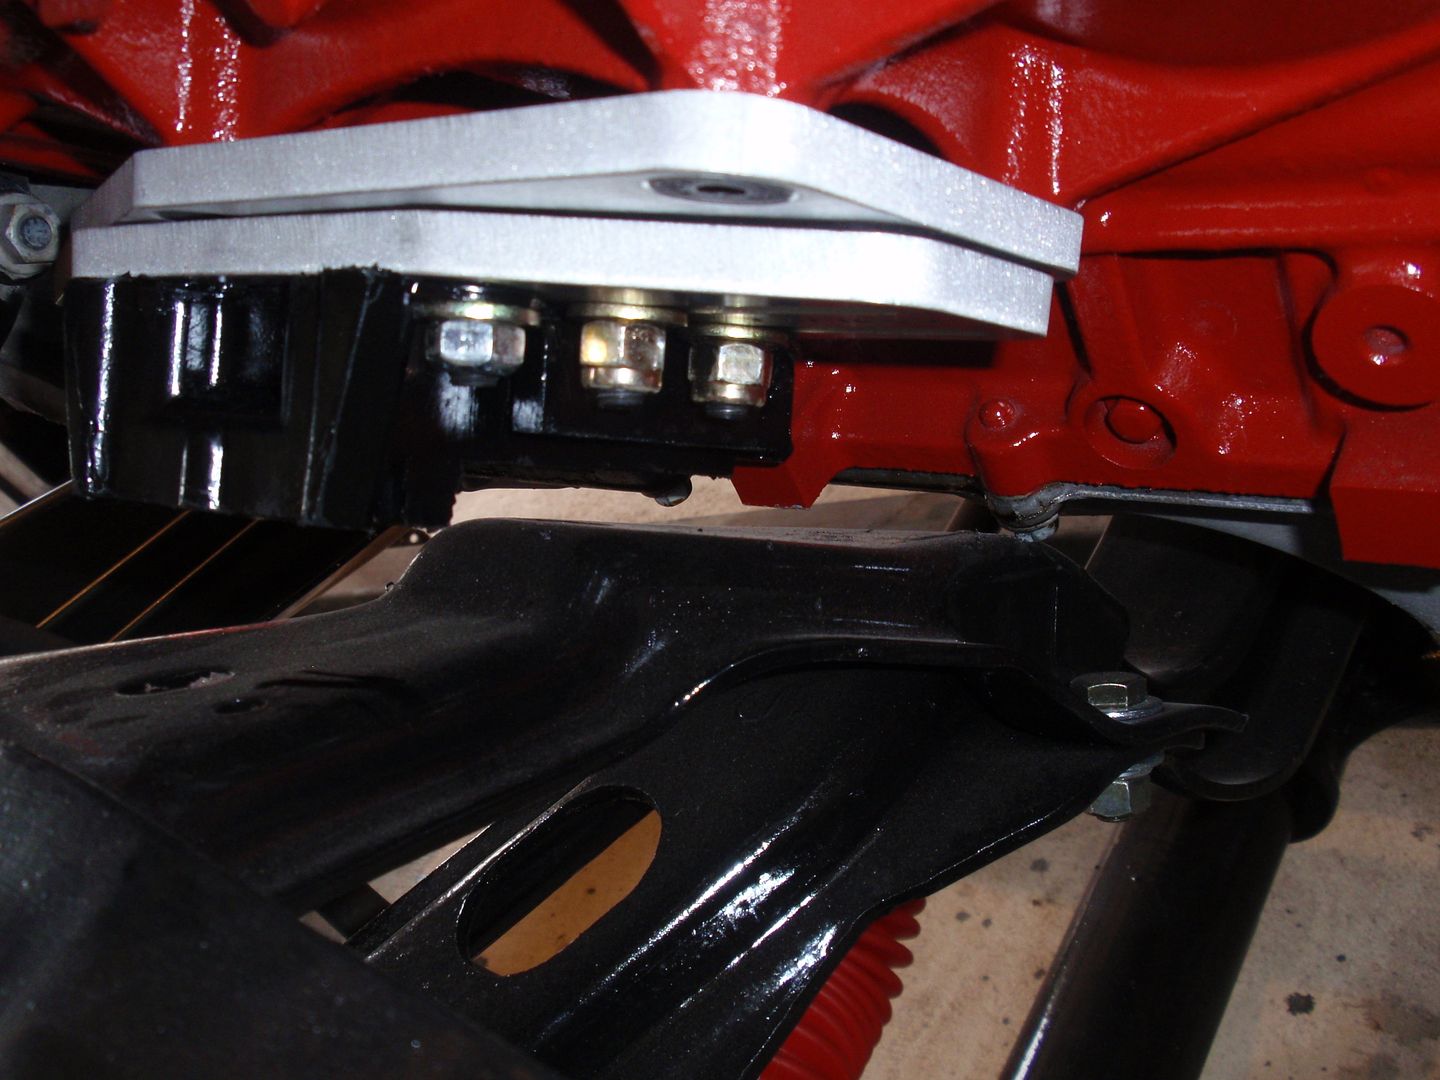 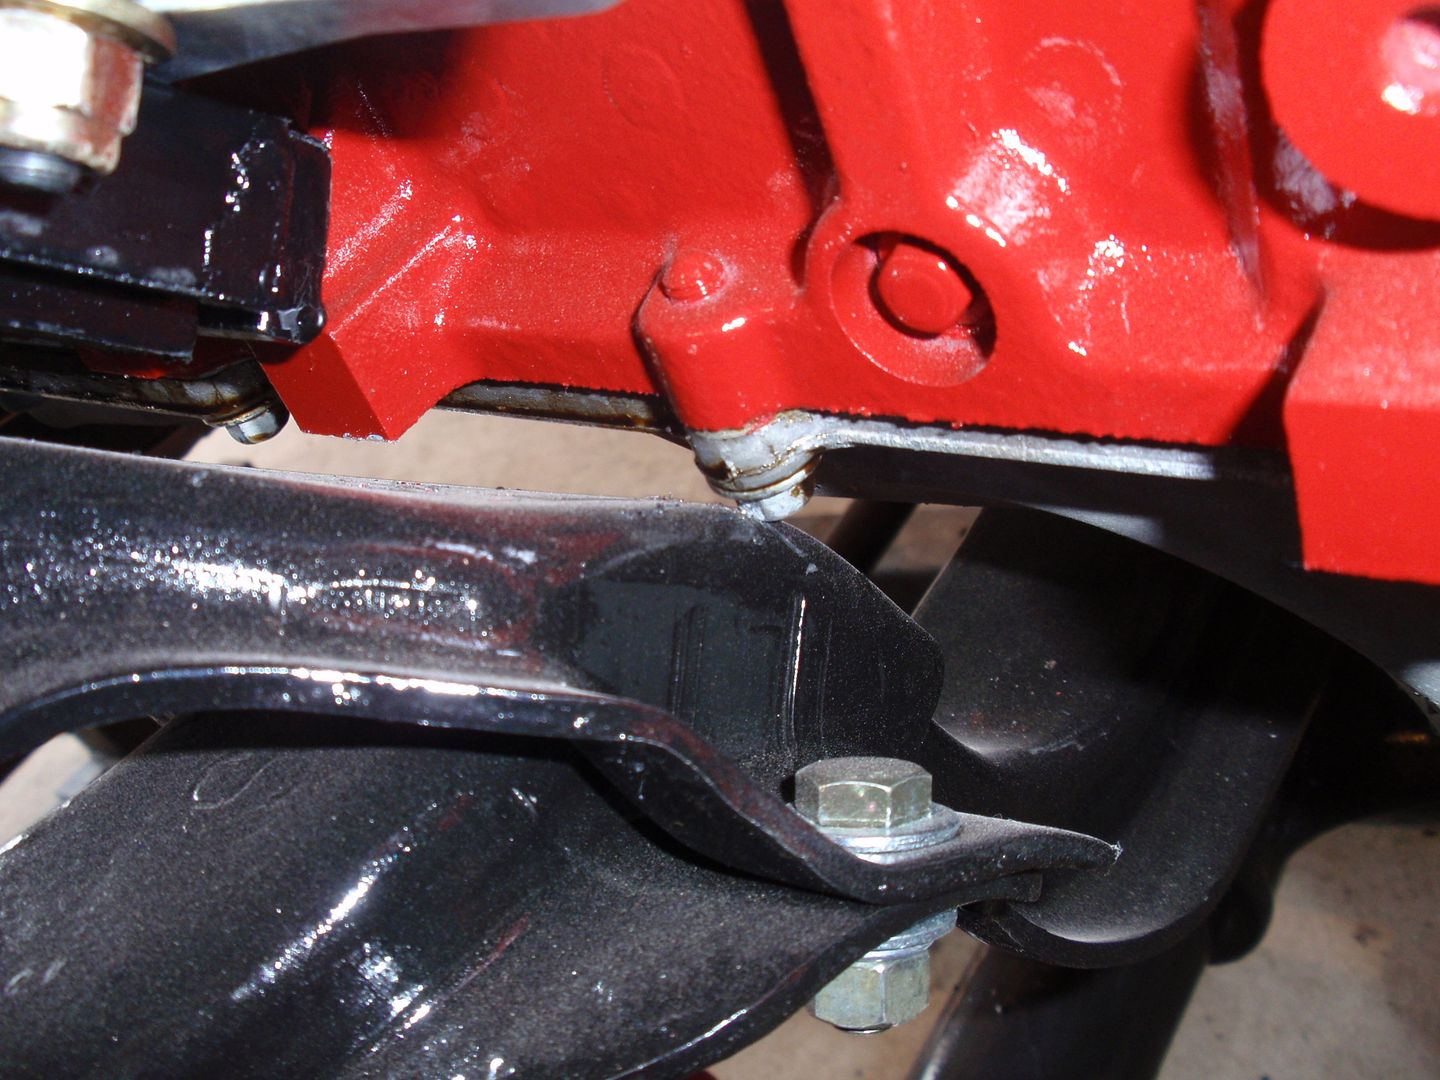 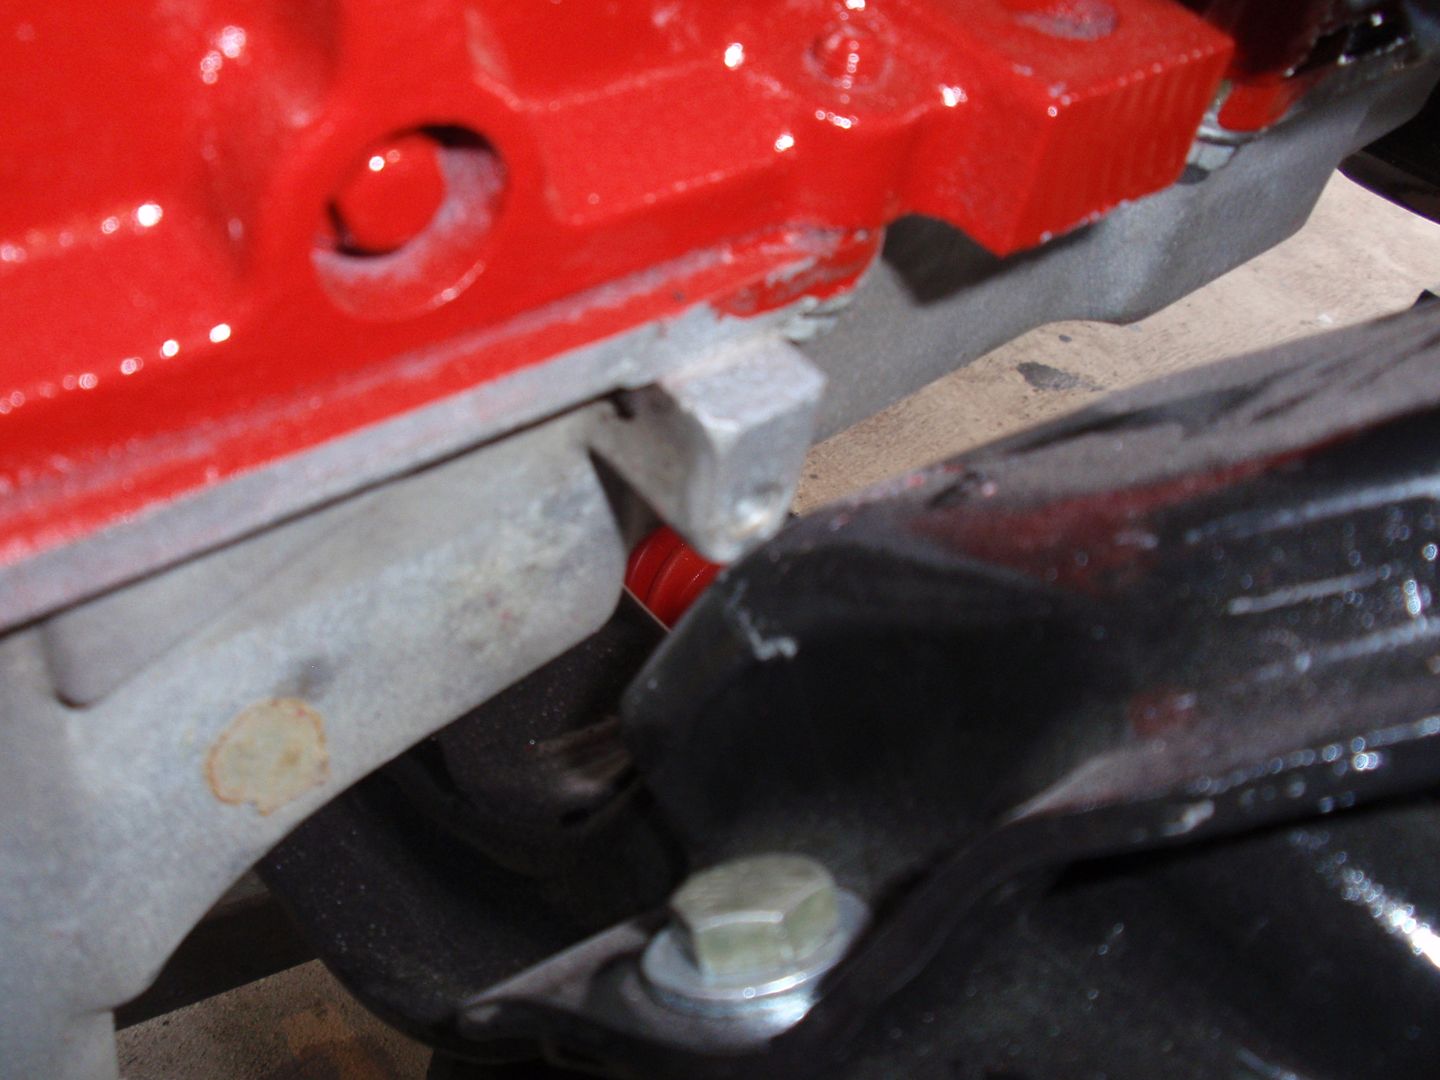 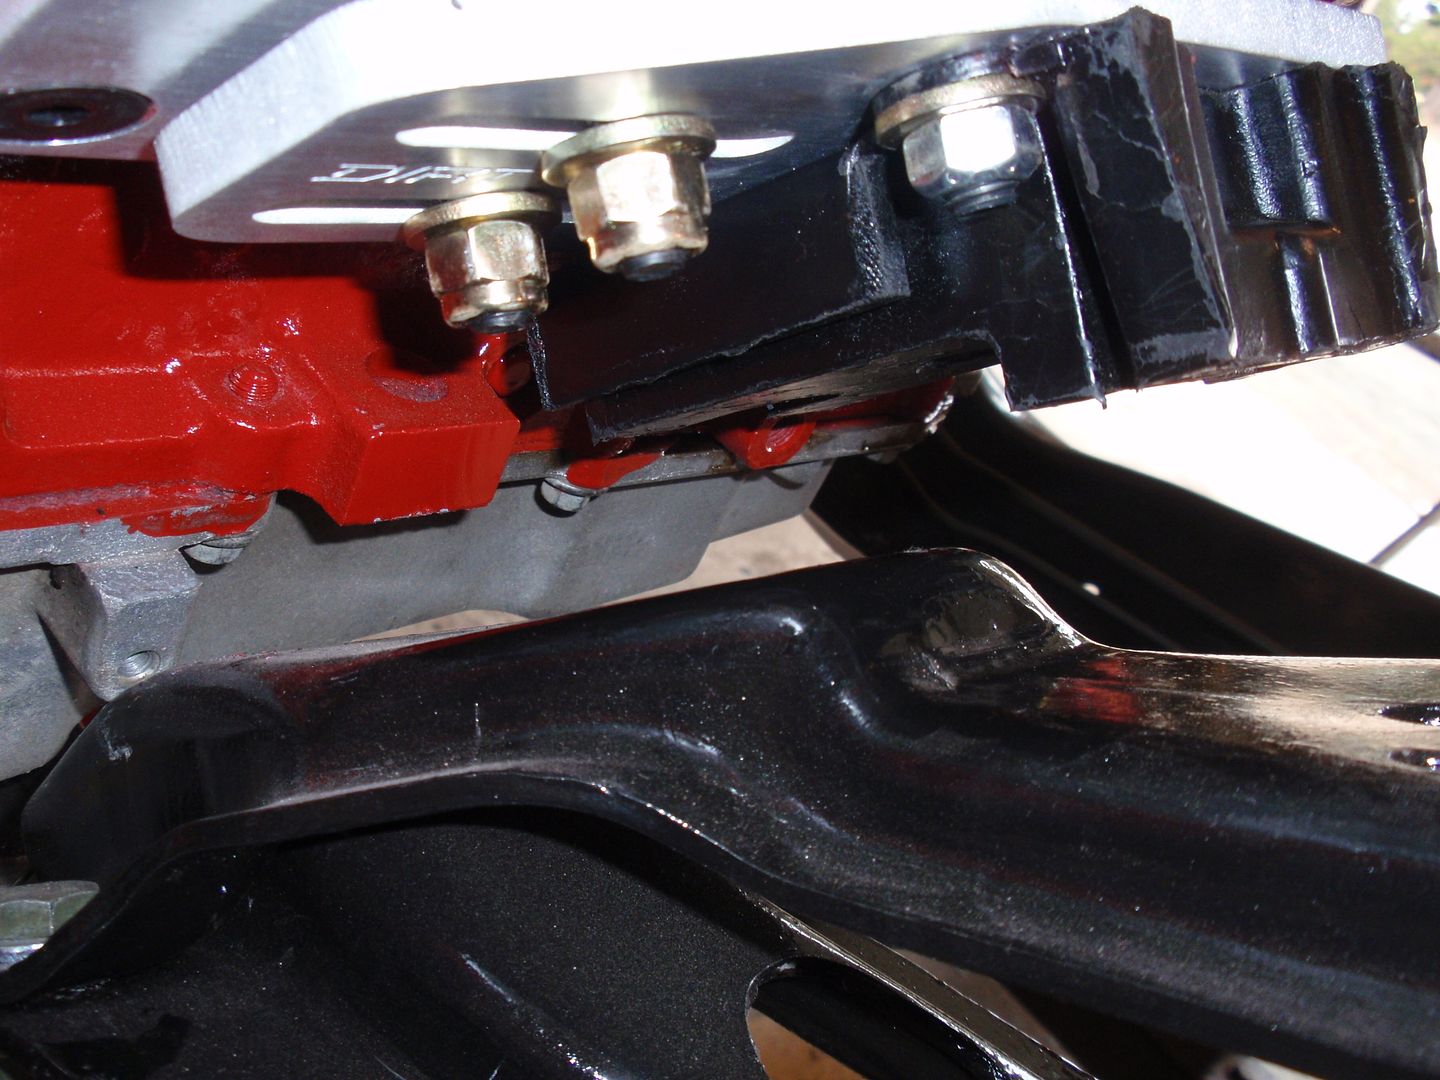 It does look good sitting there to bad it aint right.. 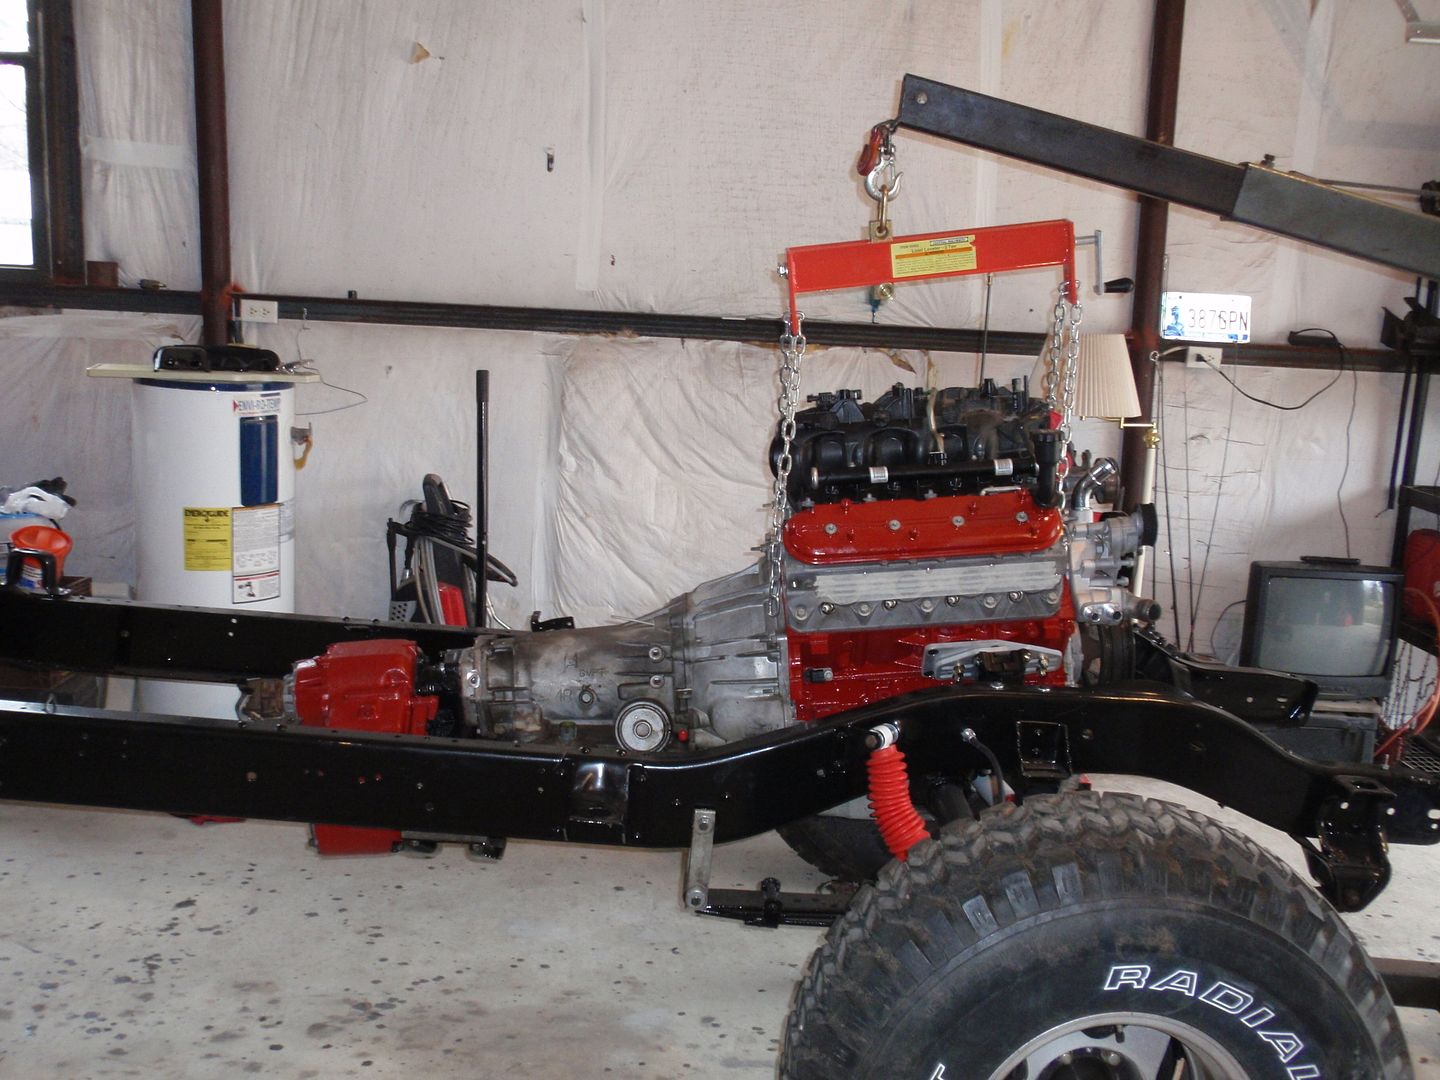 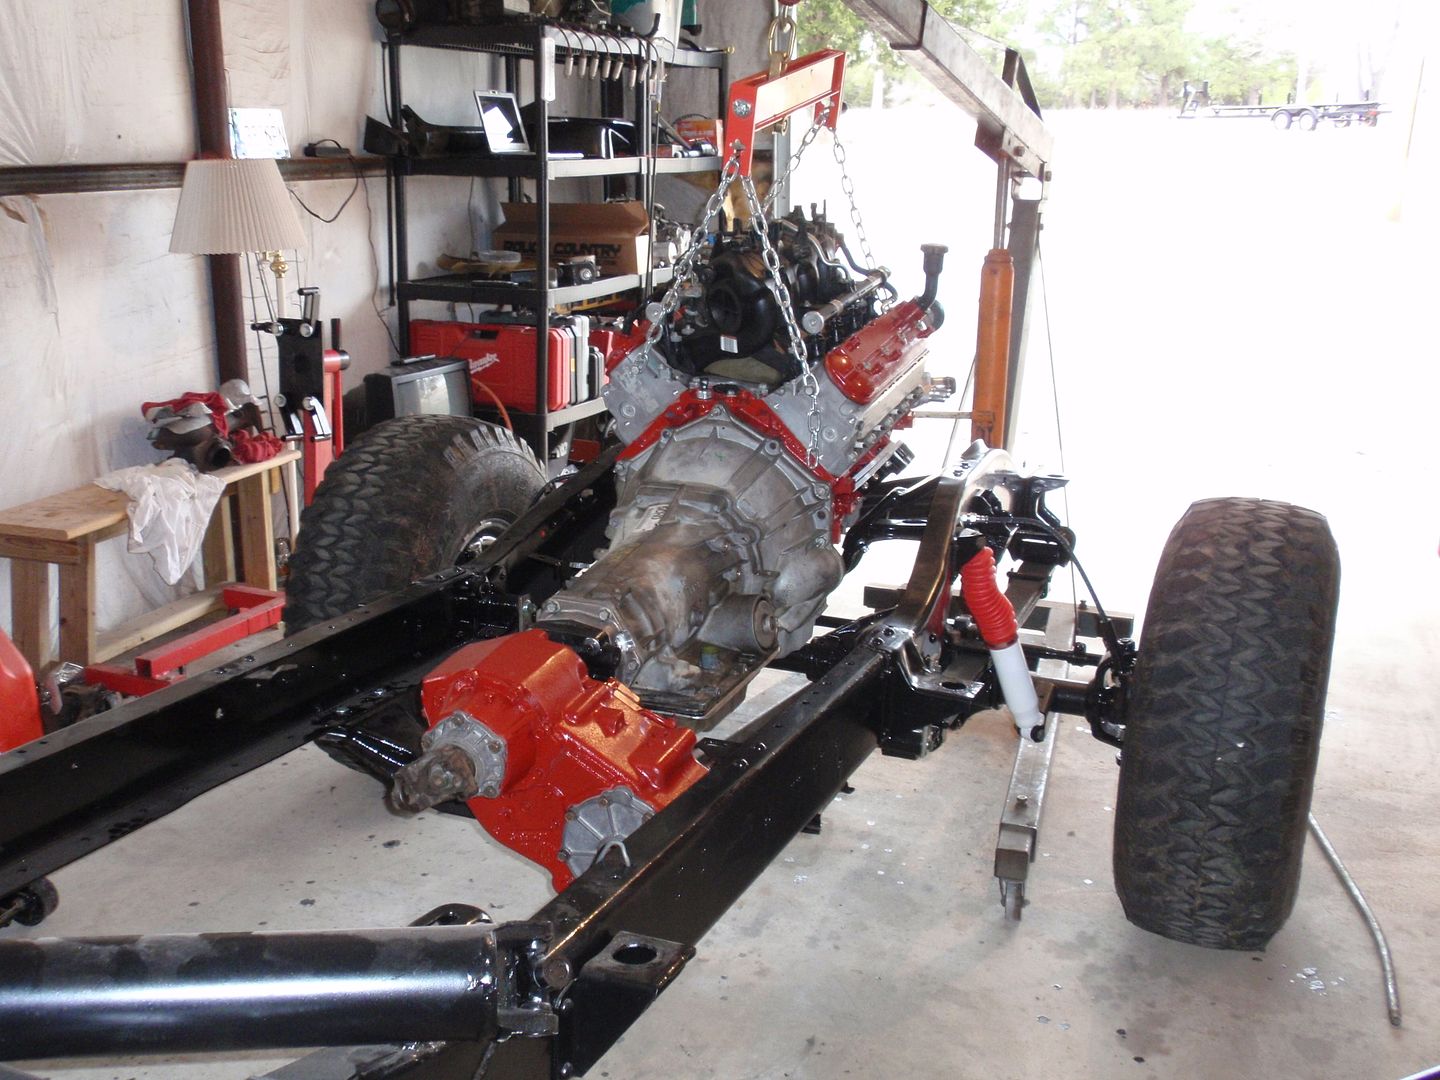 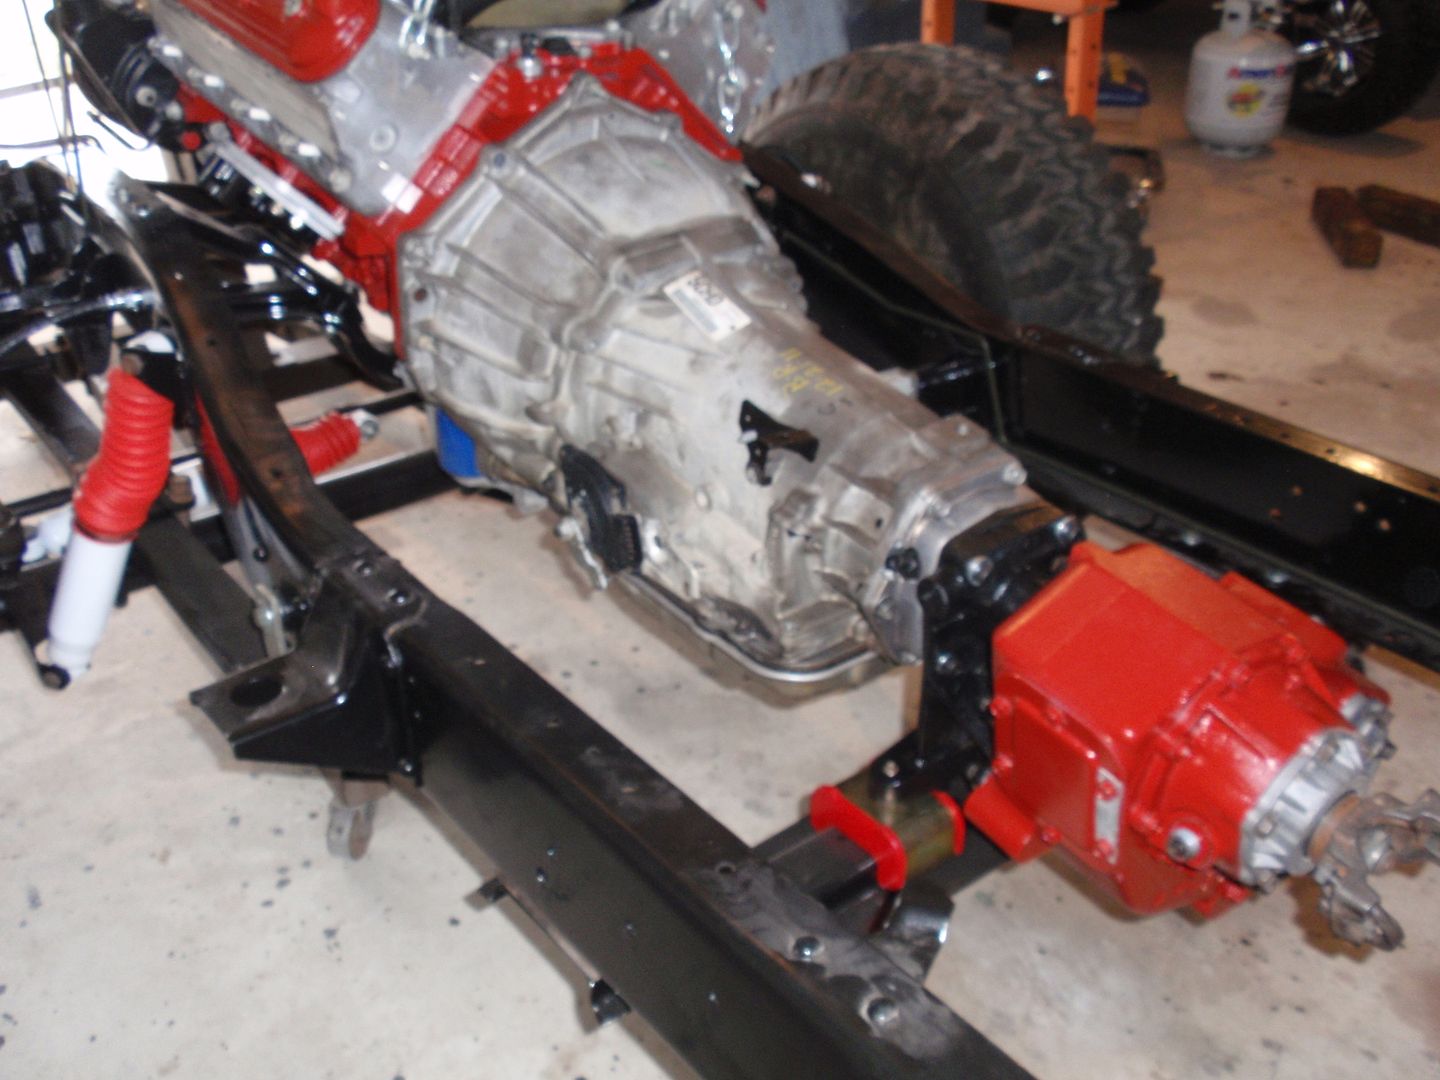 More pictures of the problem with the Dirty Dingo Sliders removed.. 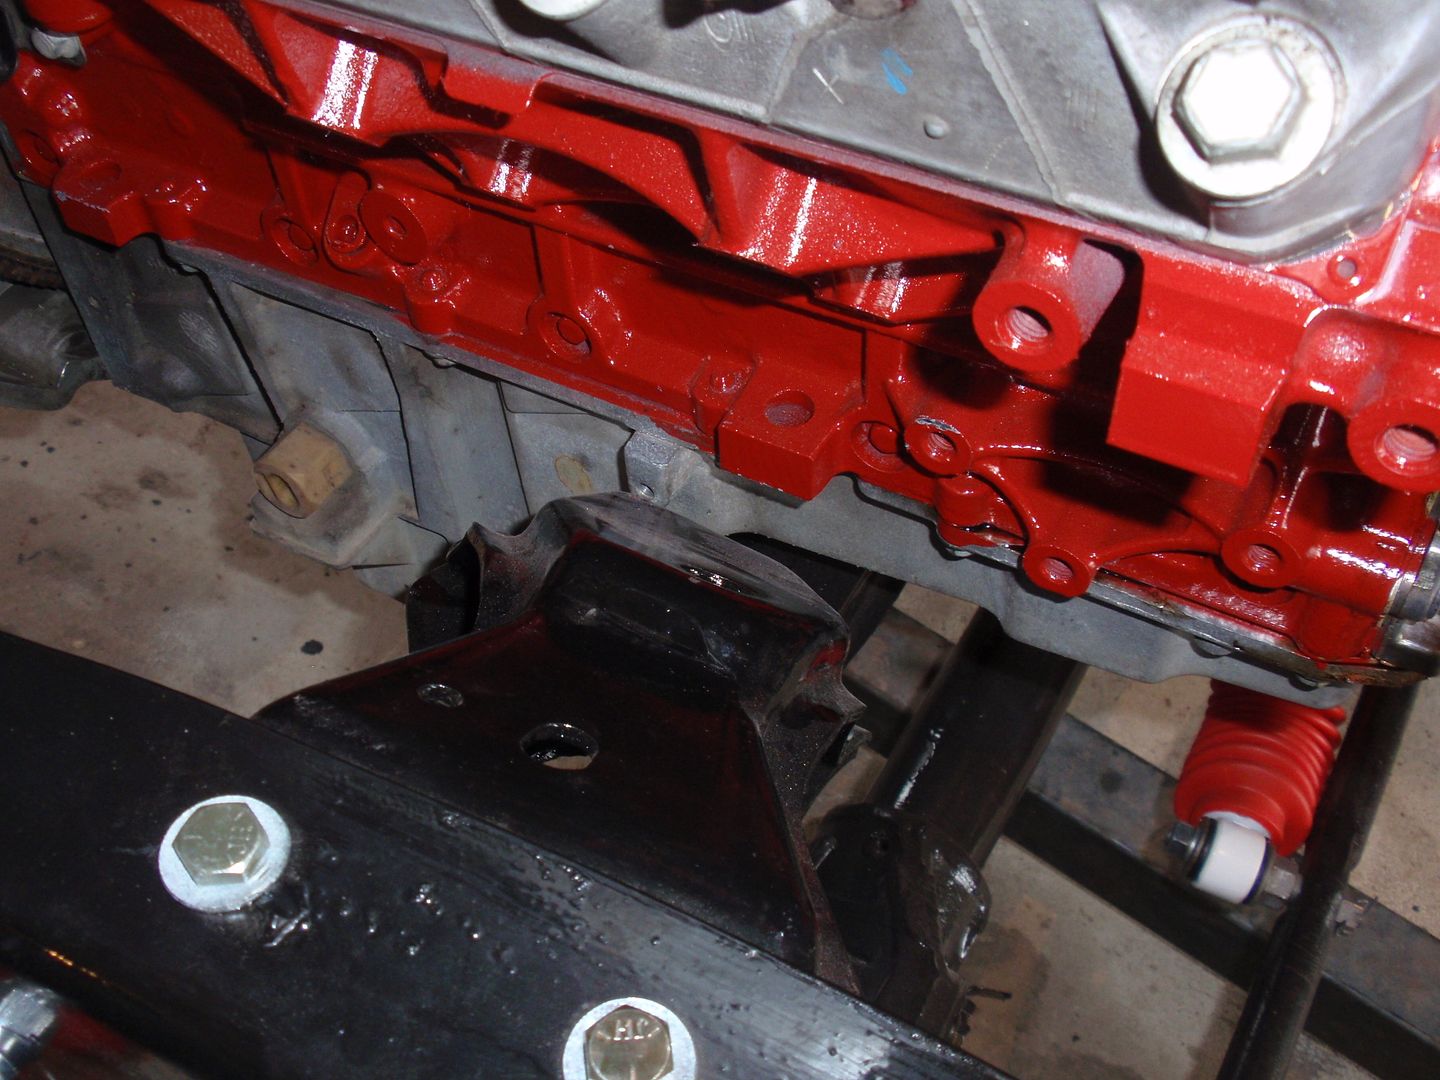 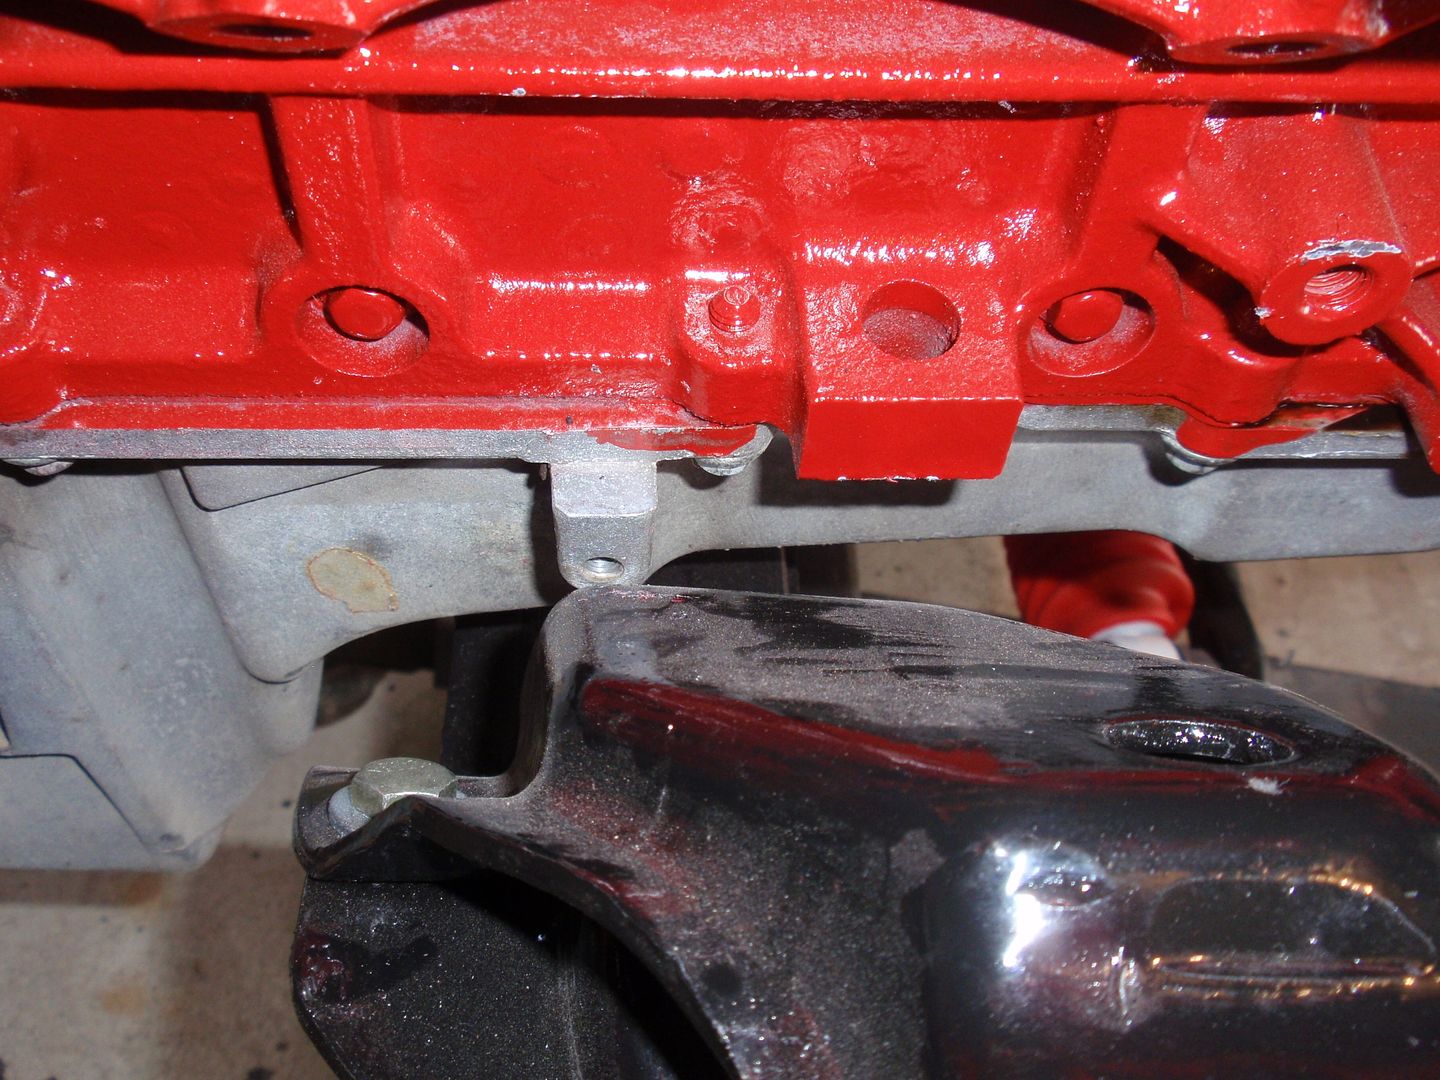 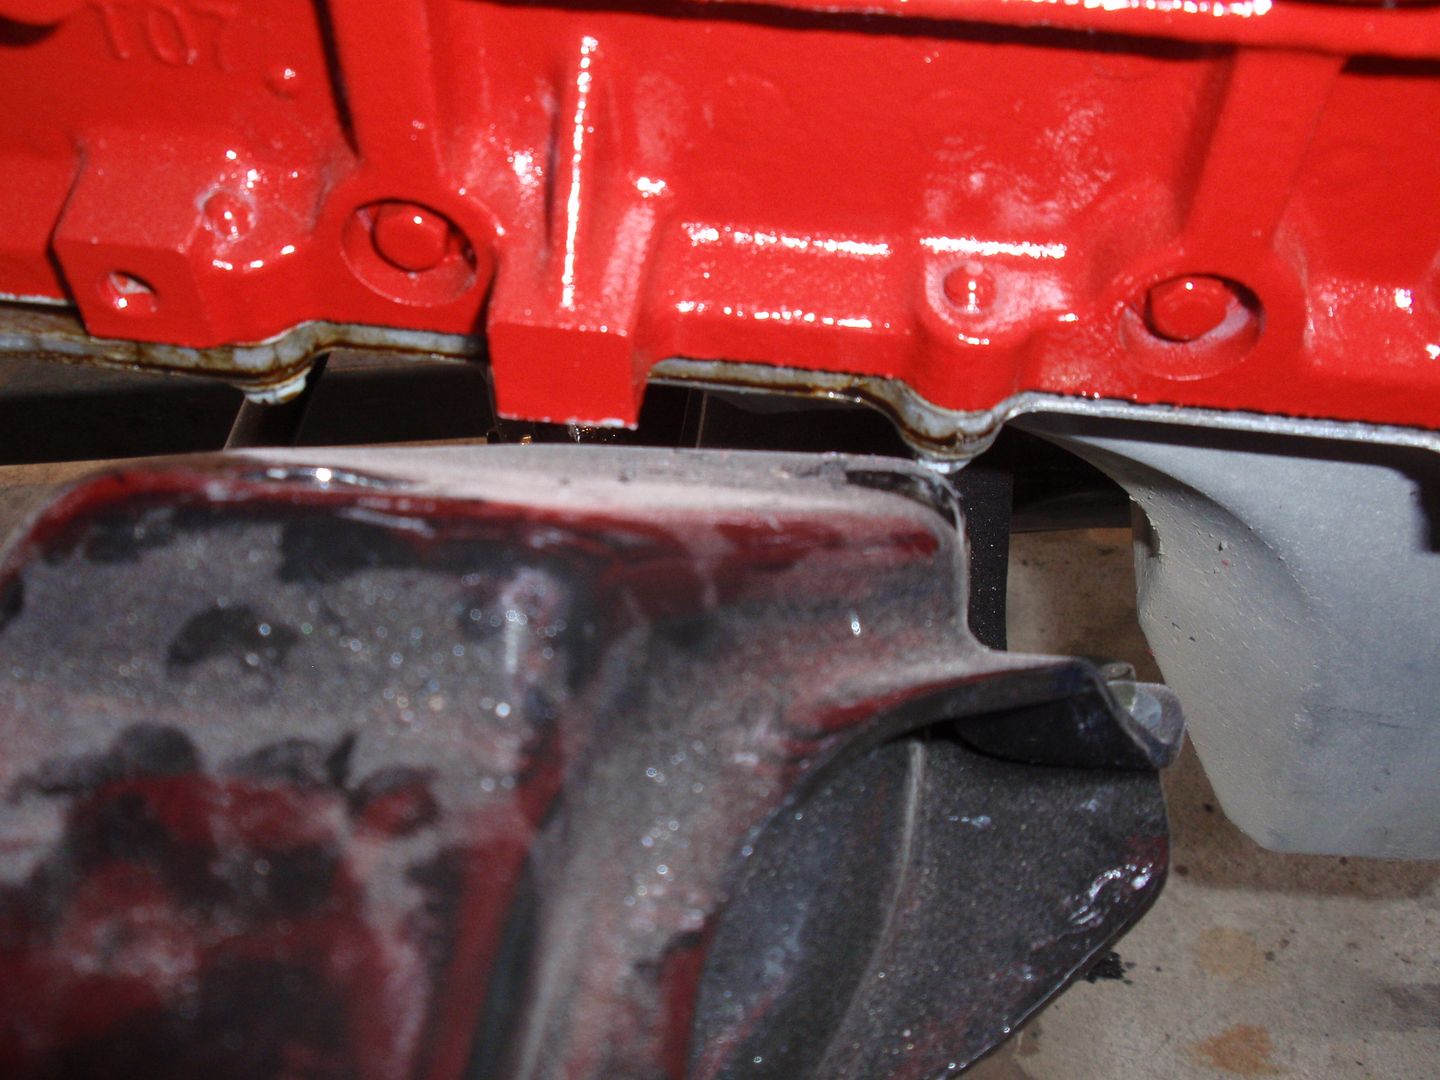 Removed the upper part of the engine cross member and still have problems.. 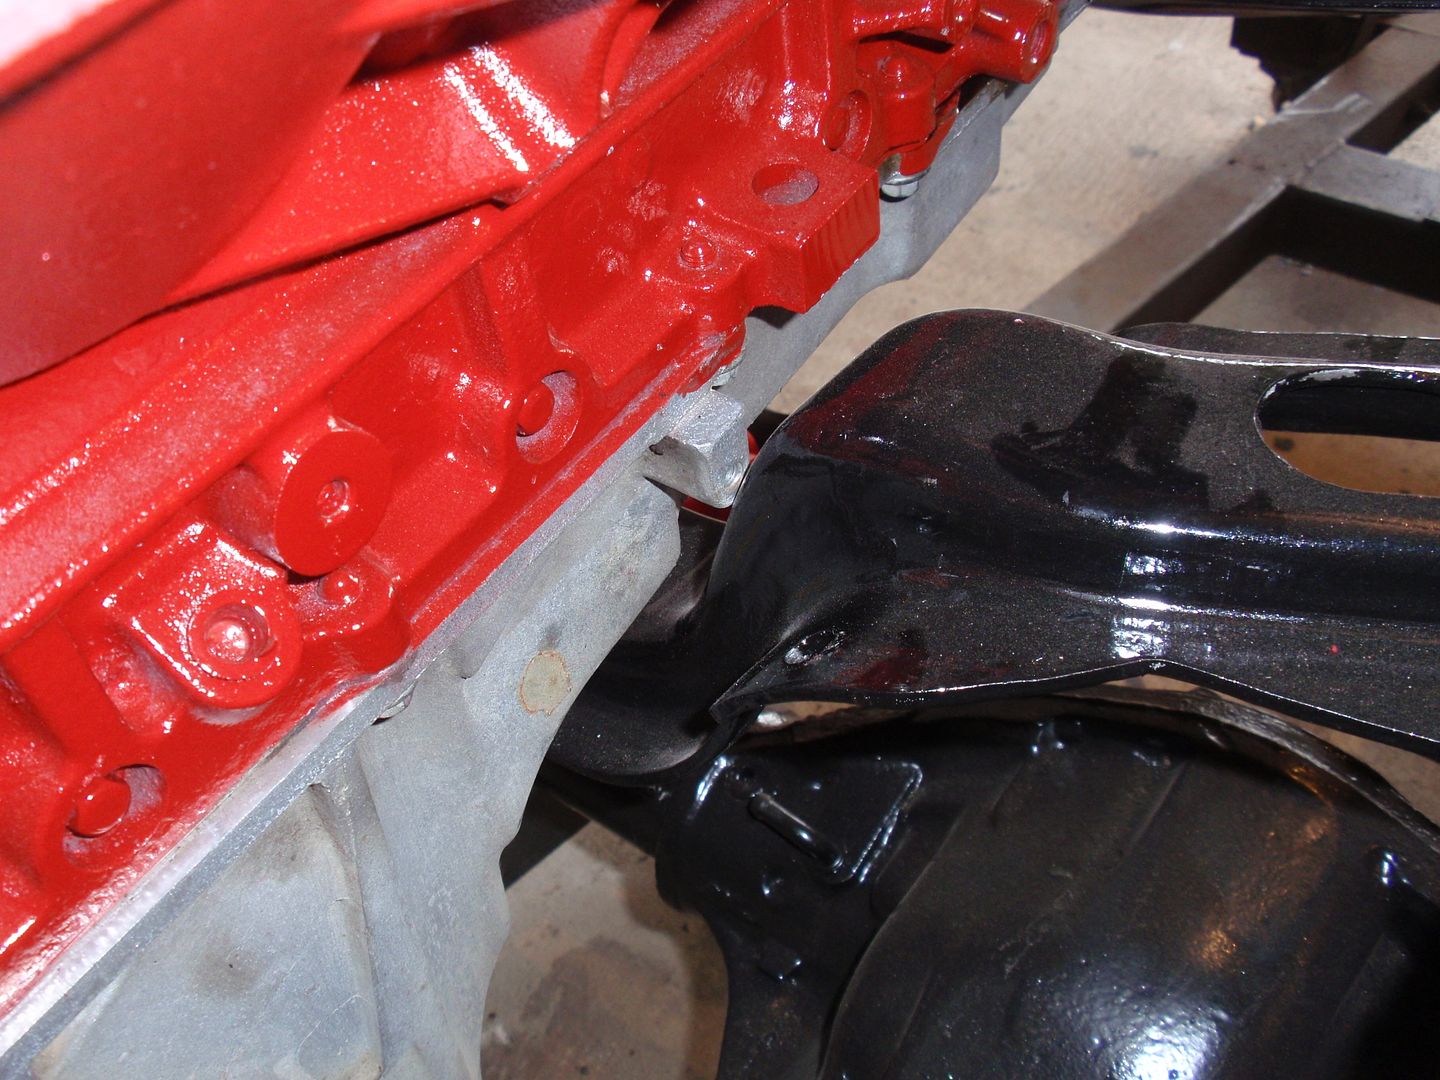 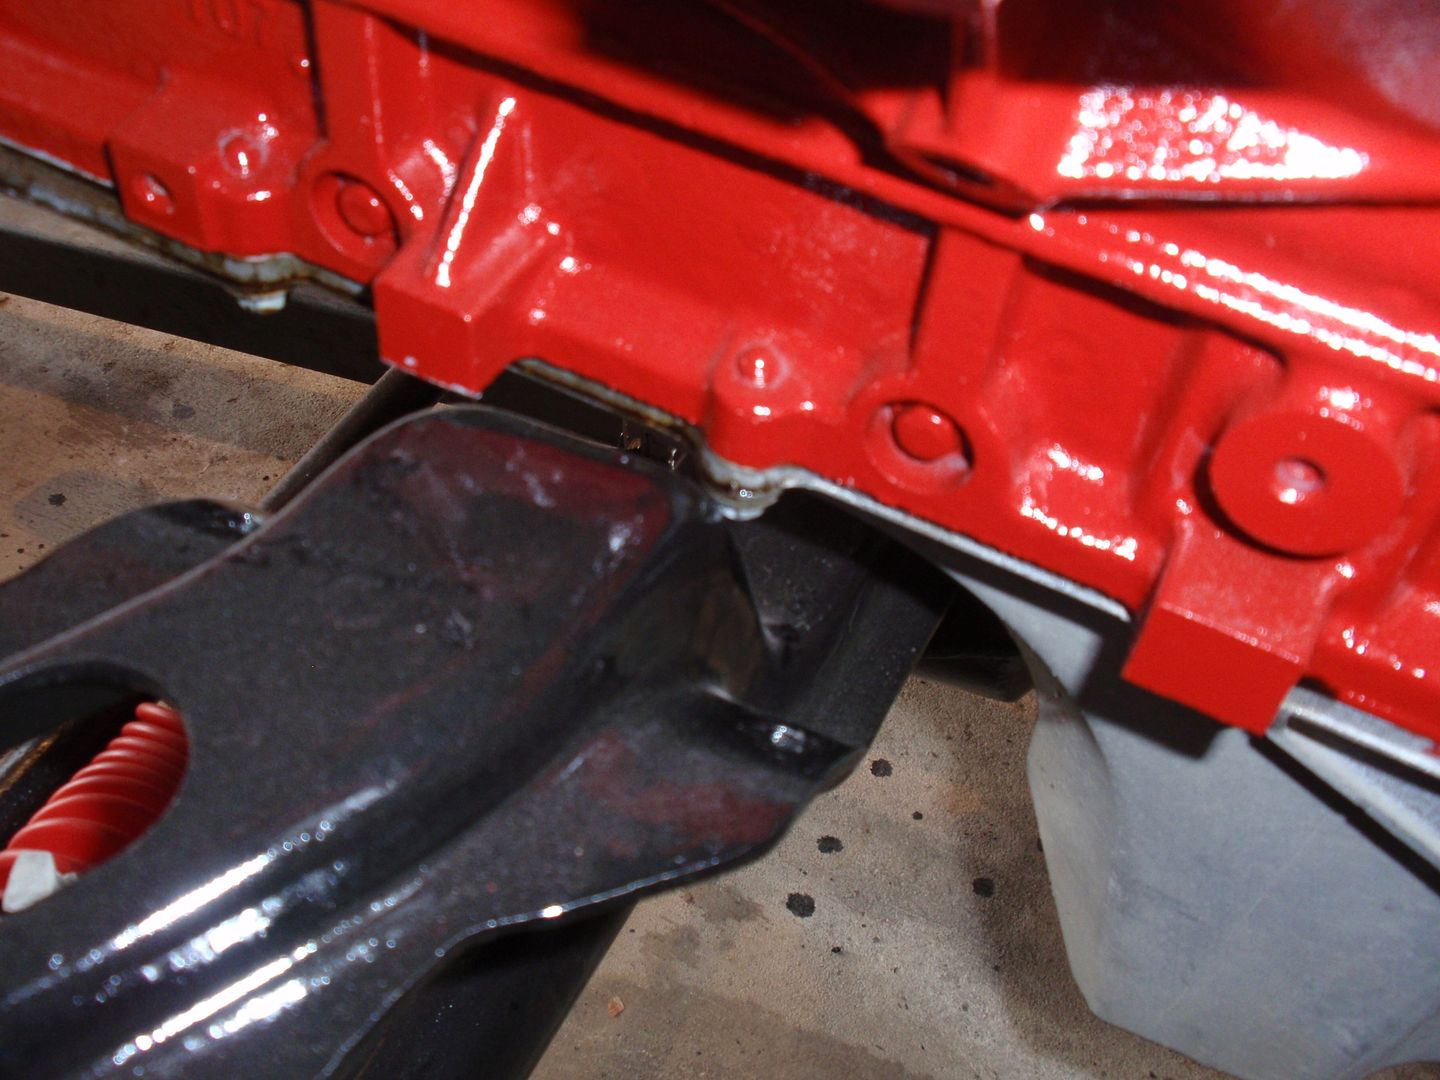 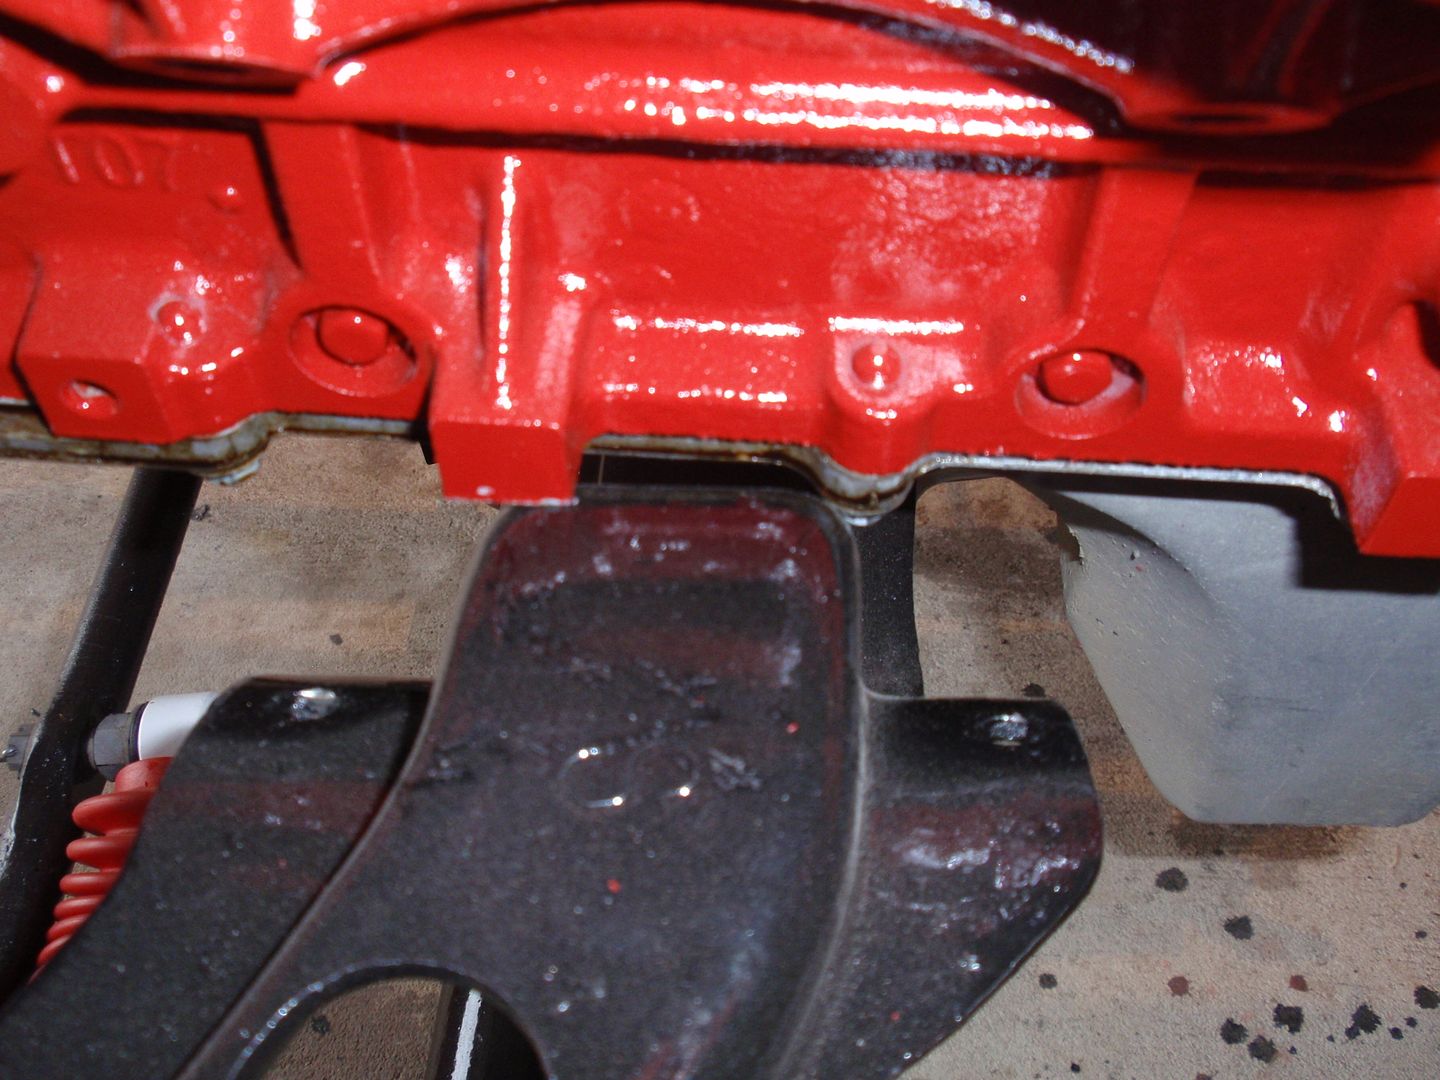 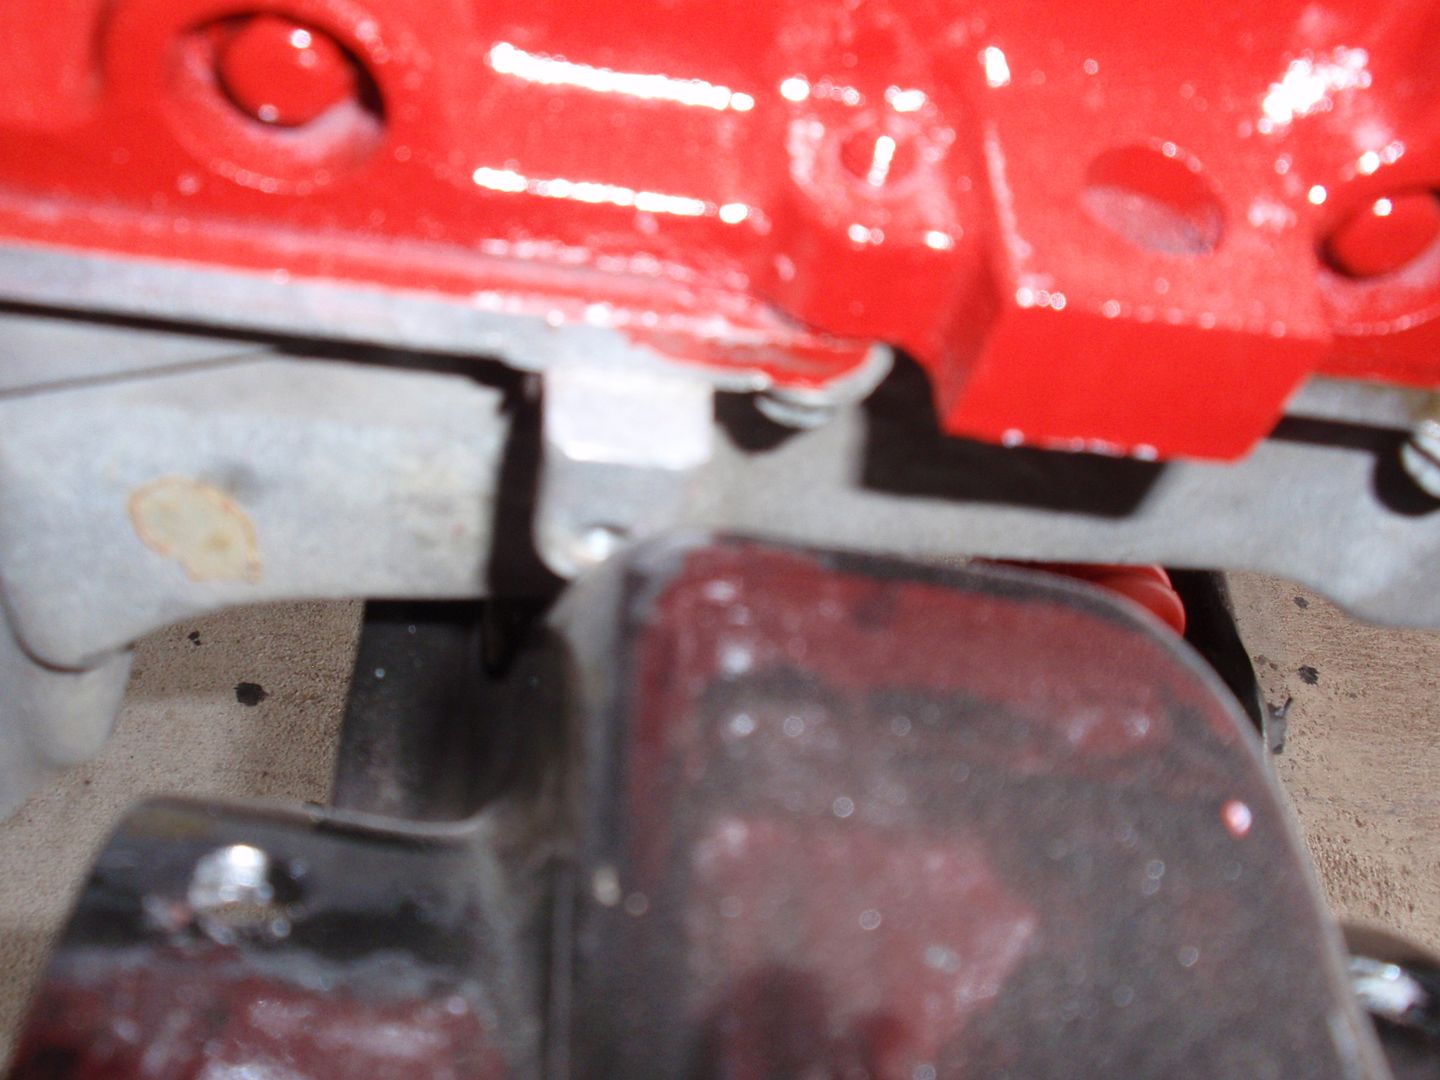 Decided to install the transfer case support bushings, new rear brake hose, and new front spring u-bolts.. While I considered my options on the engine mounts. 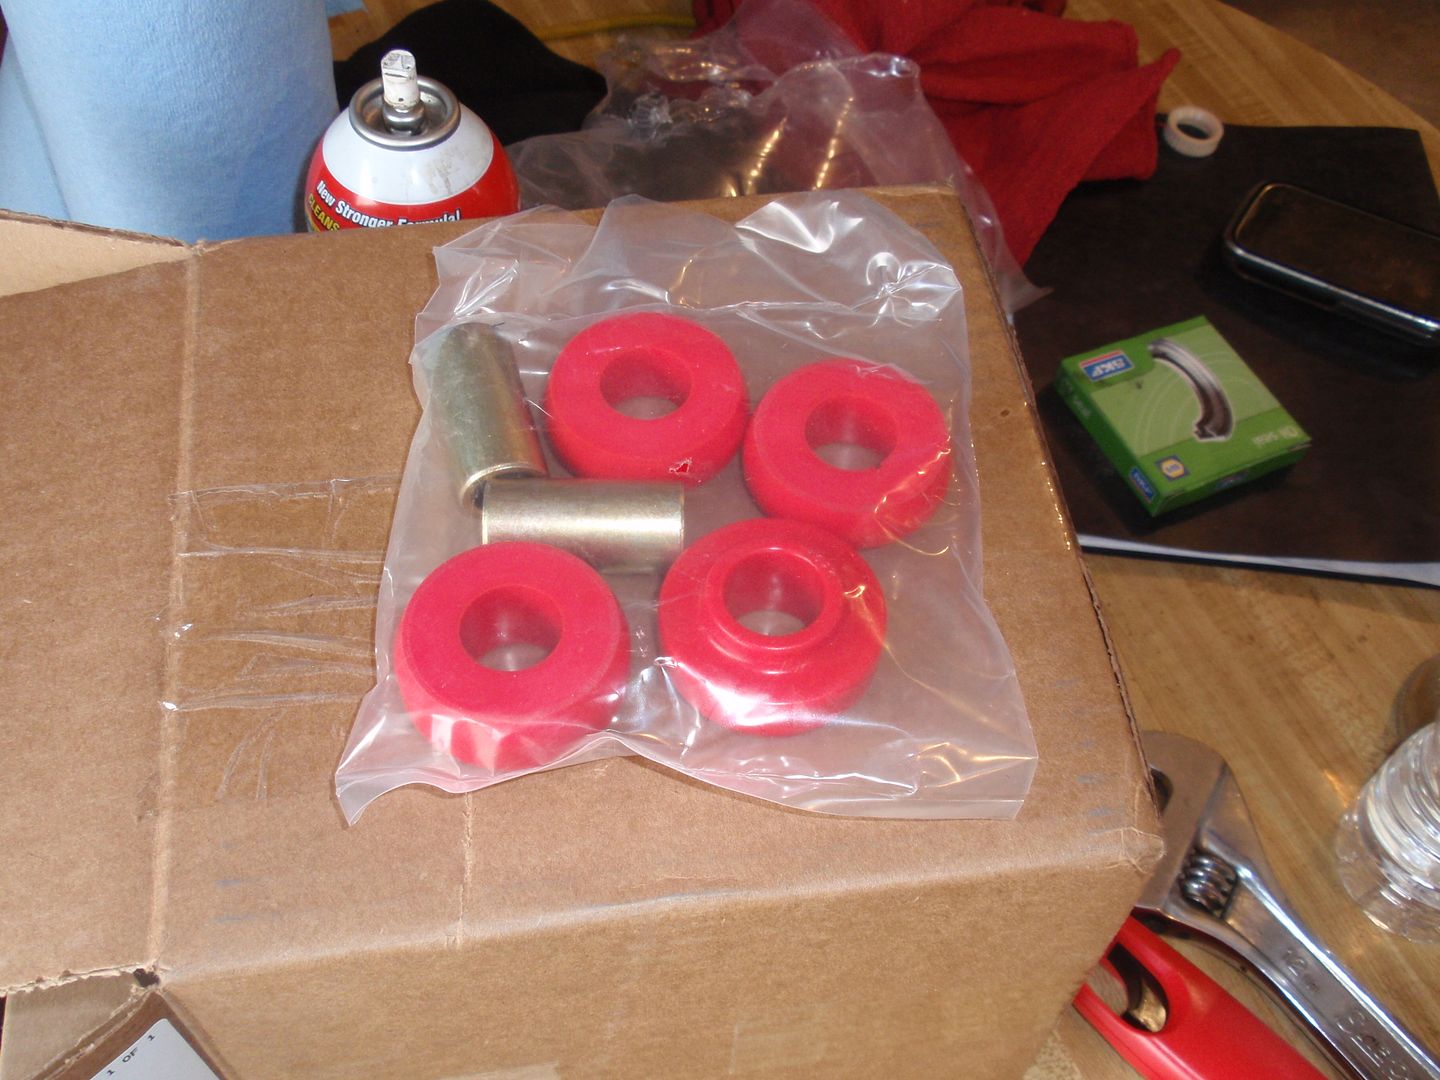 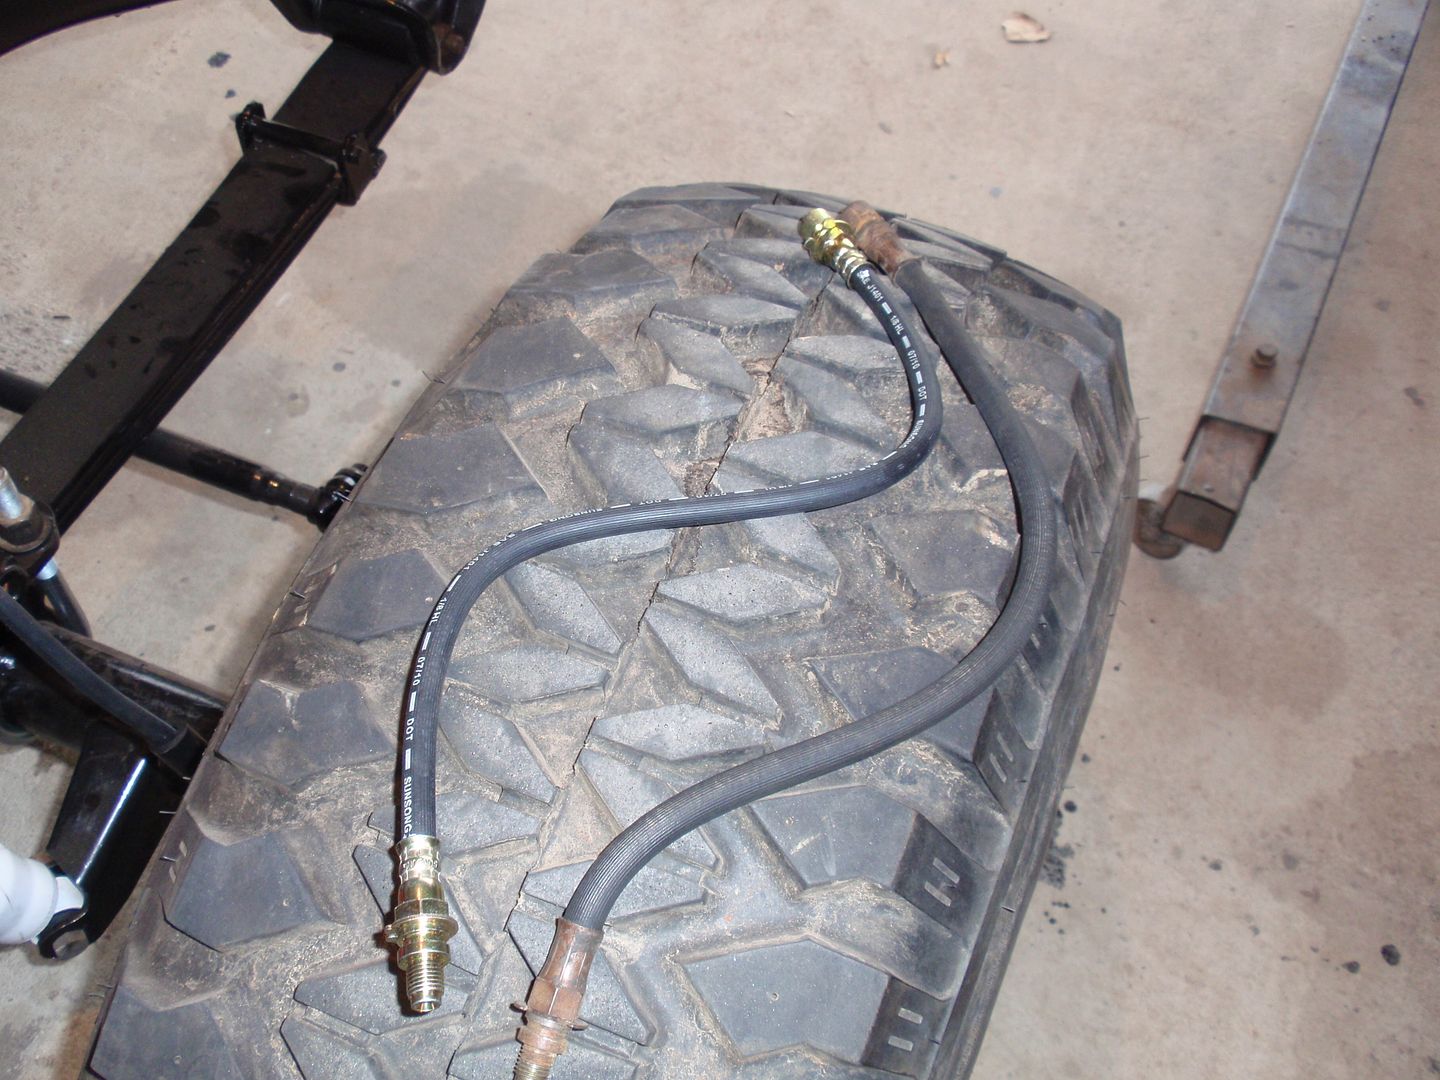 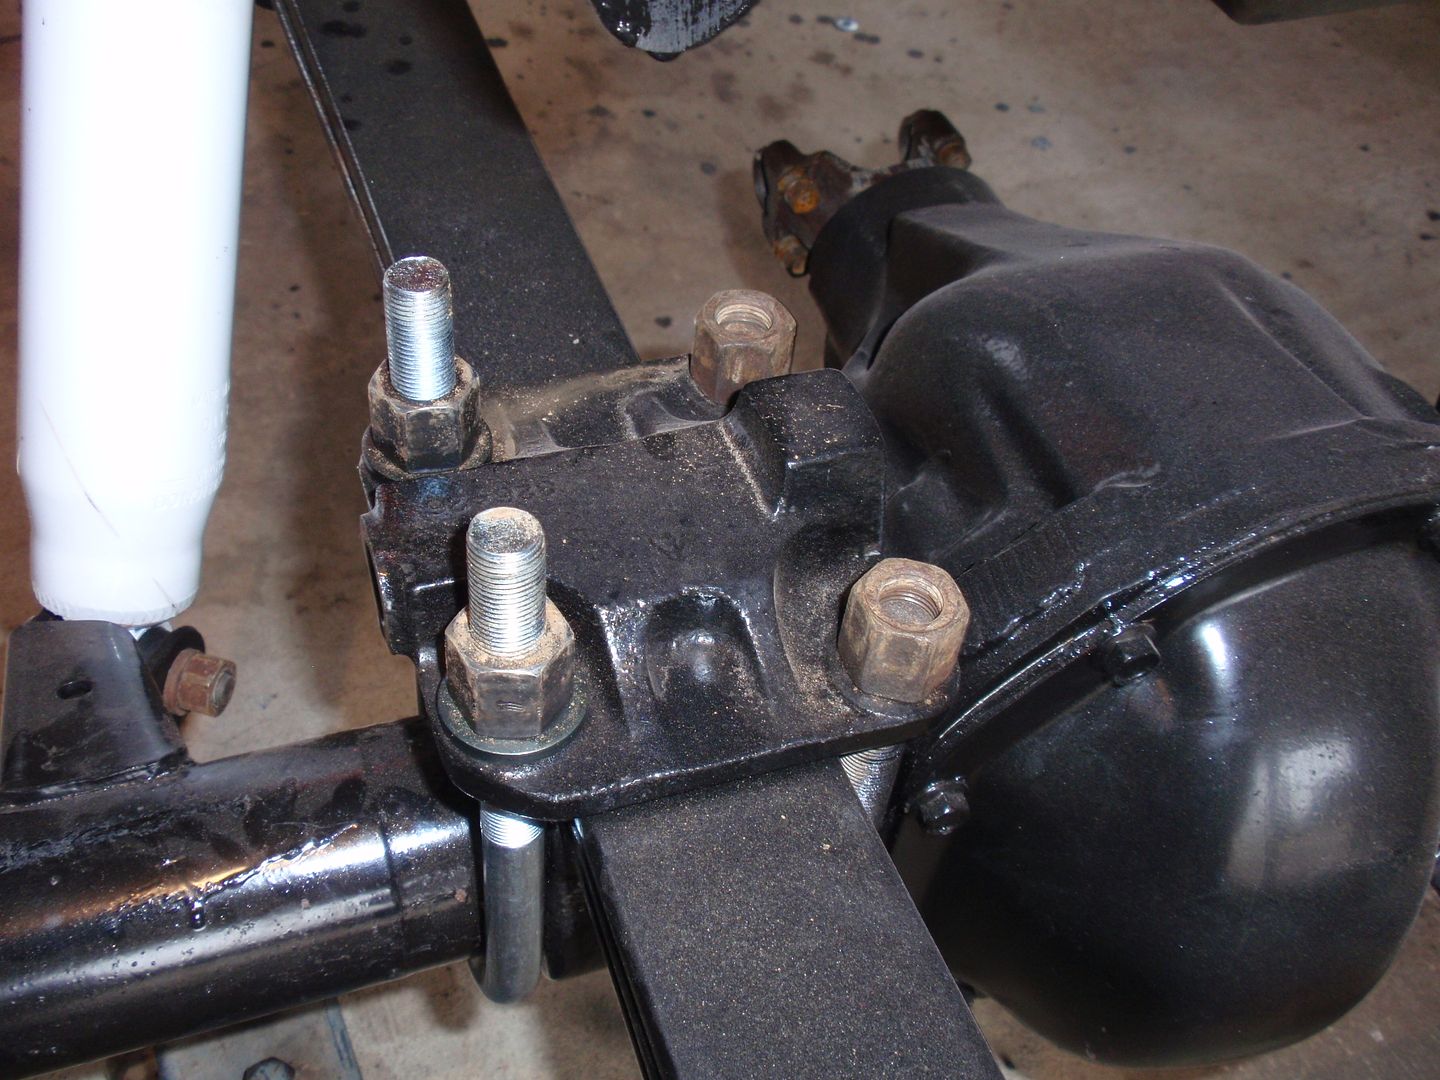 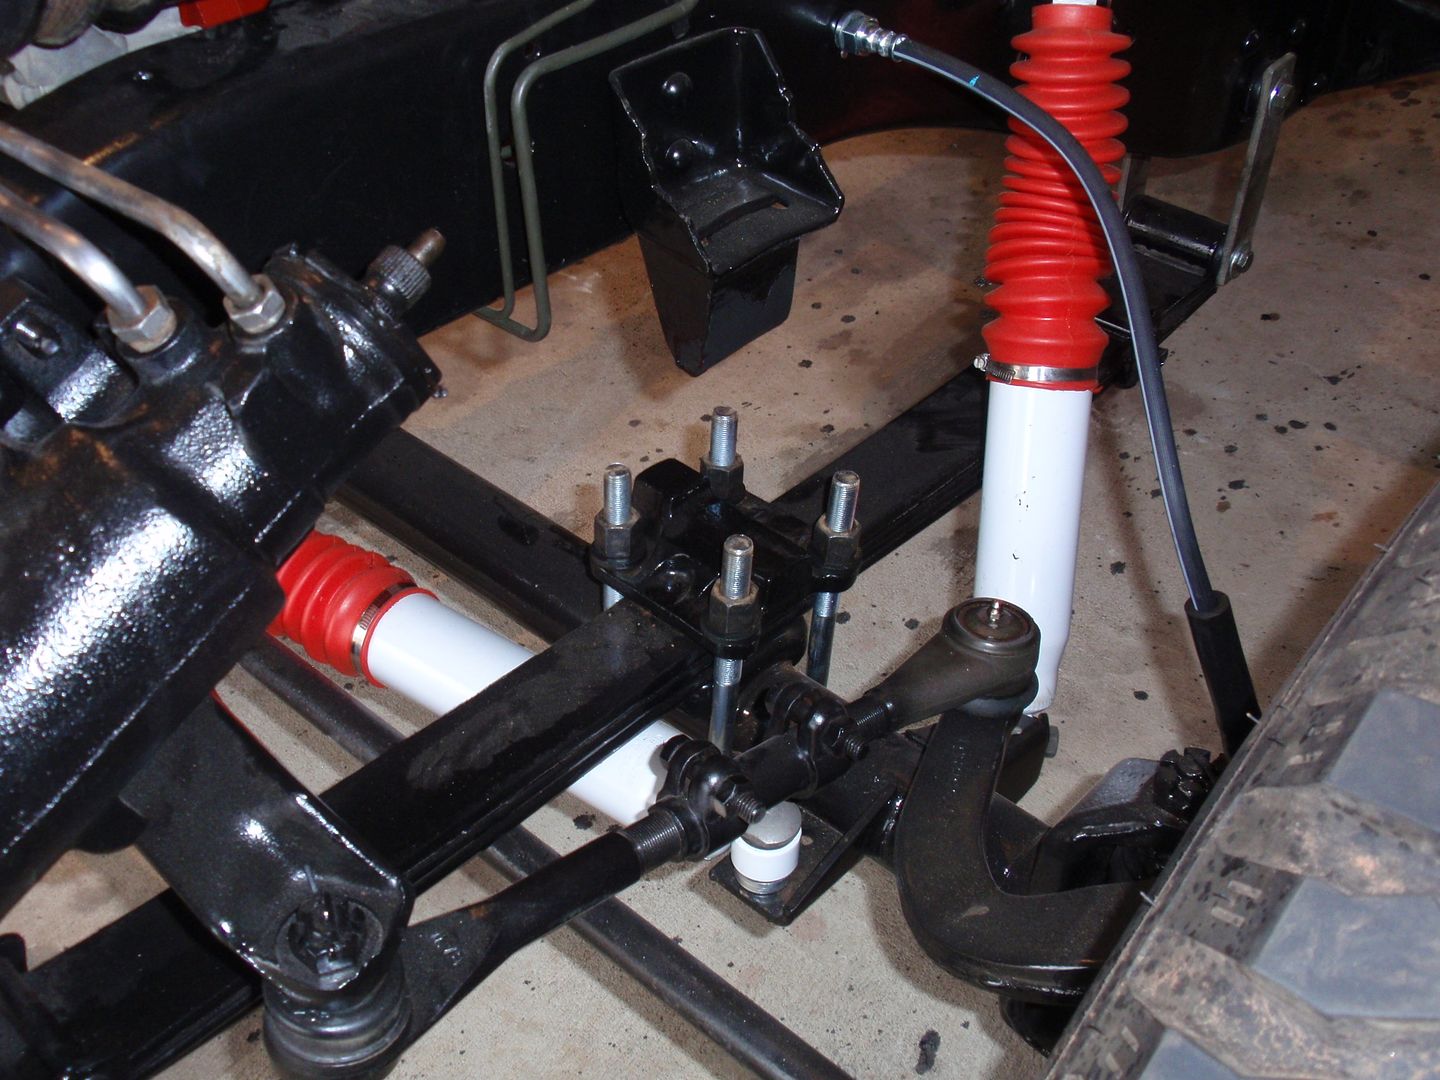 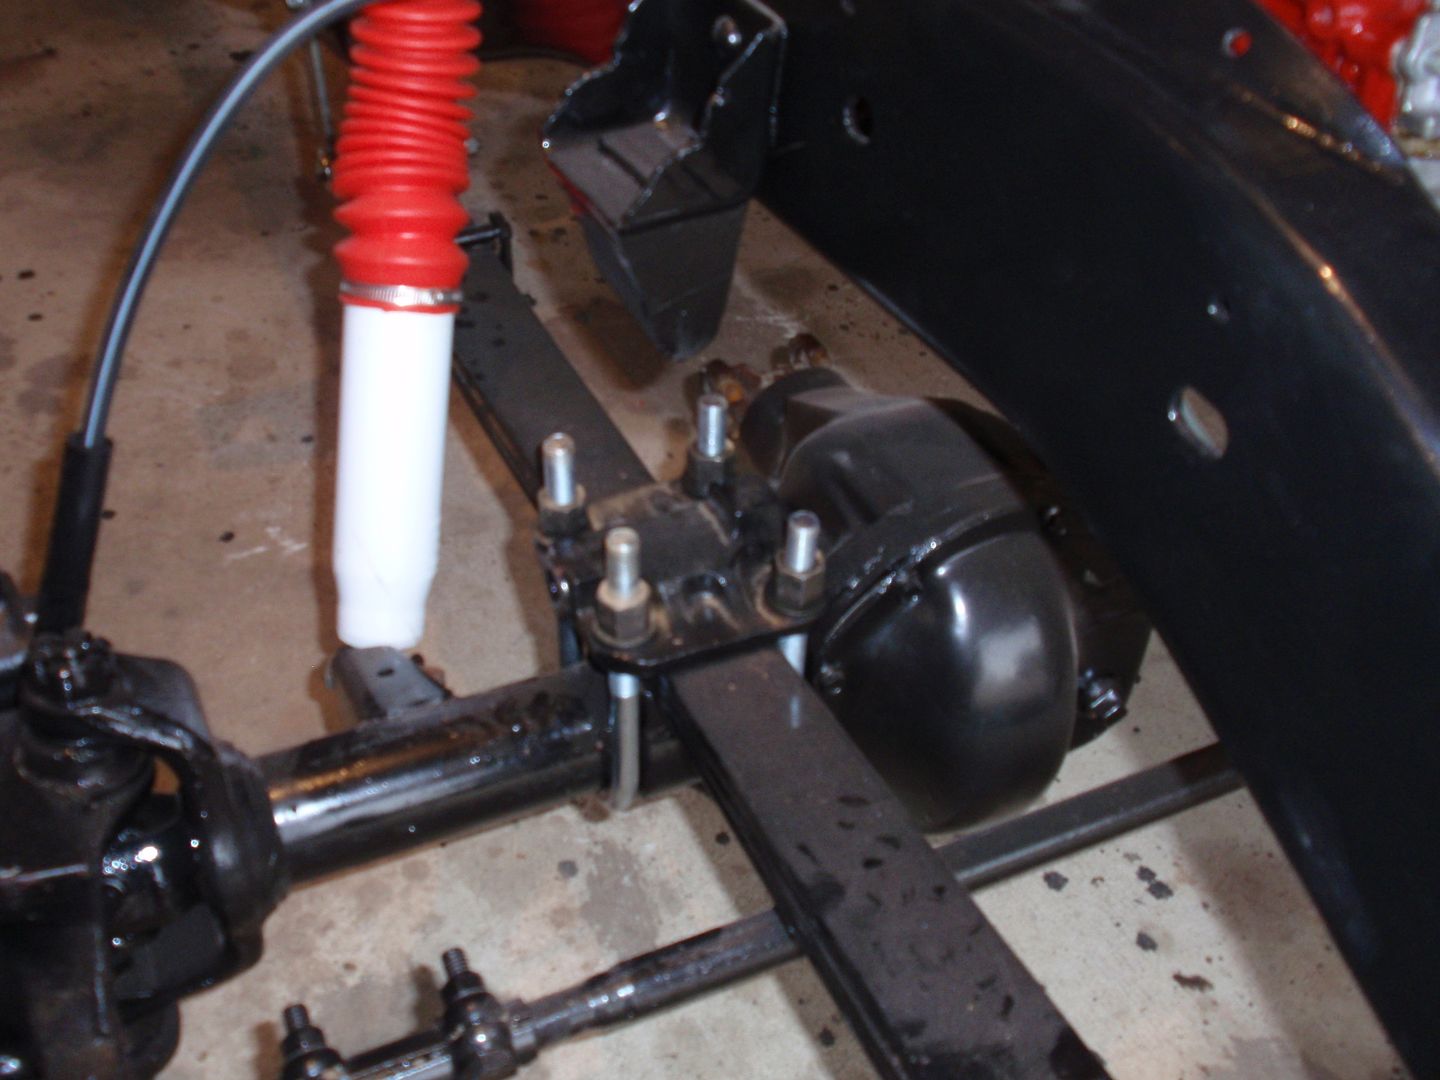 This week while I am working on the solution to the engine mounting problem I will start on the wiring harness.. 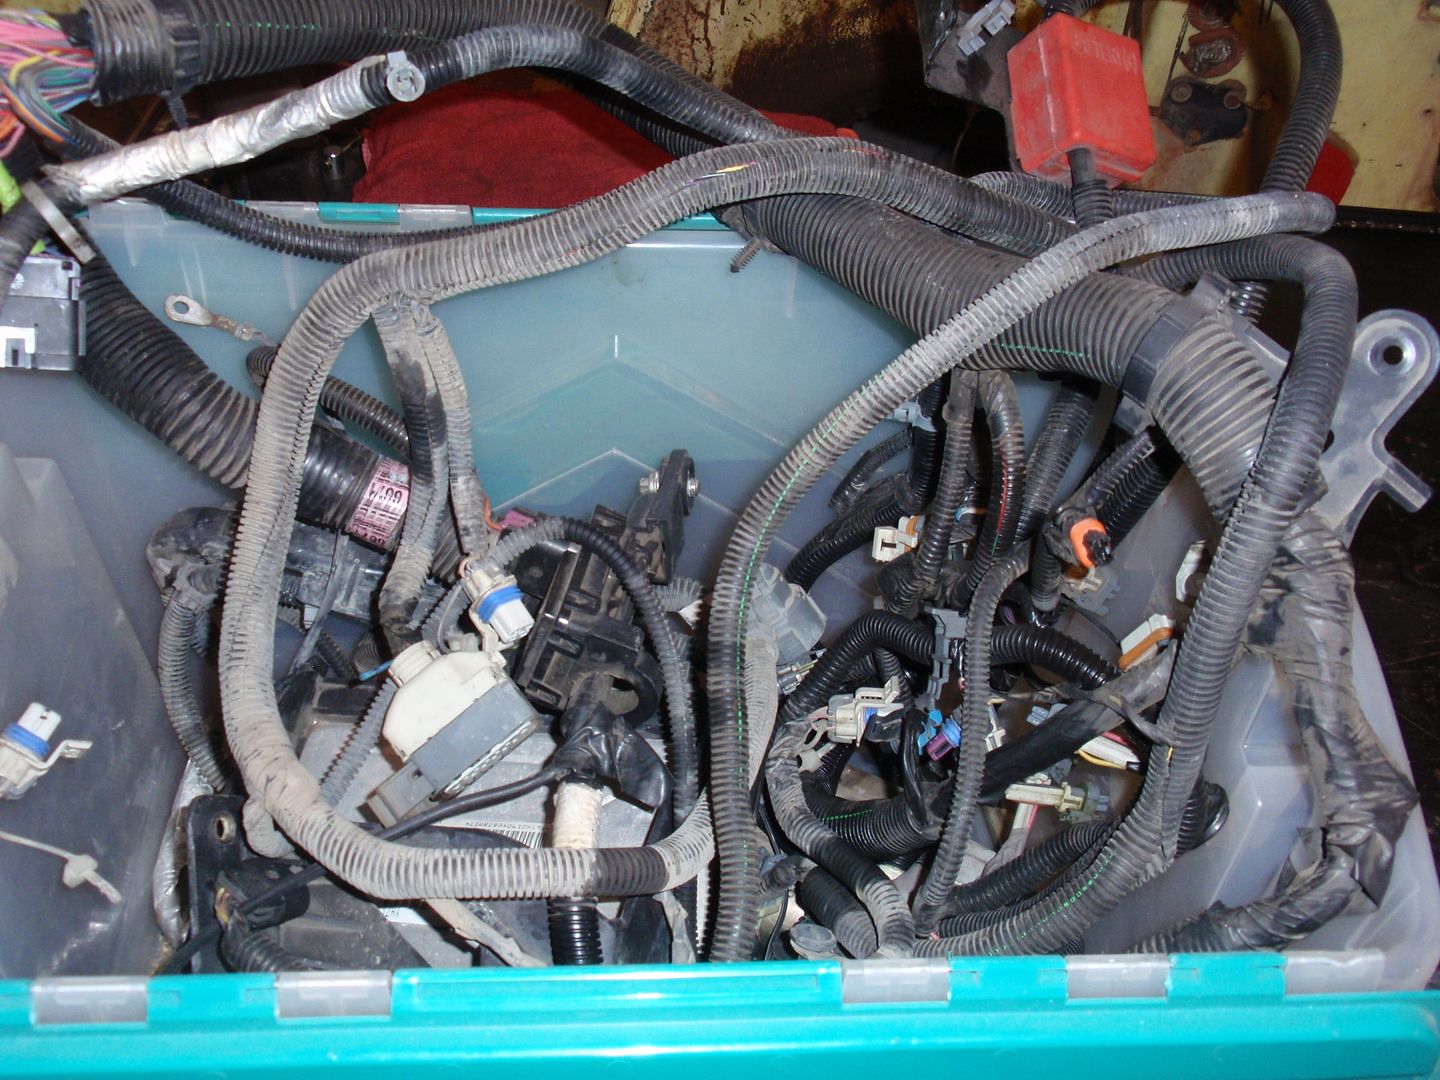 Looks good.. wish it was mounted up.. 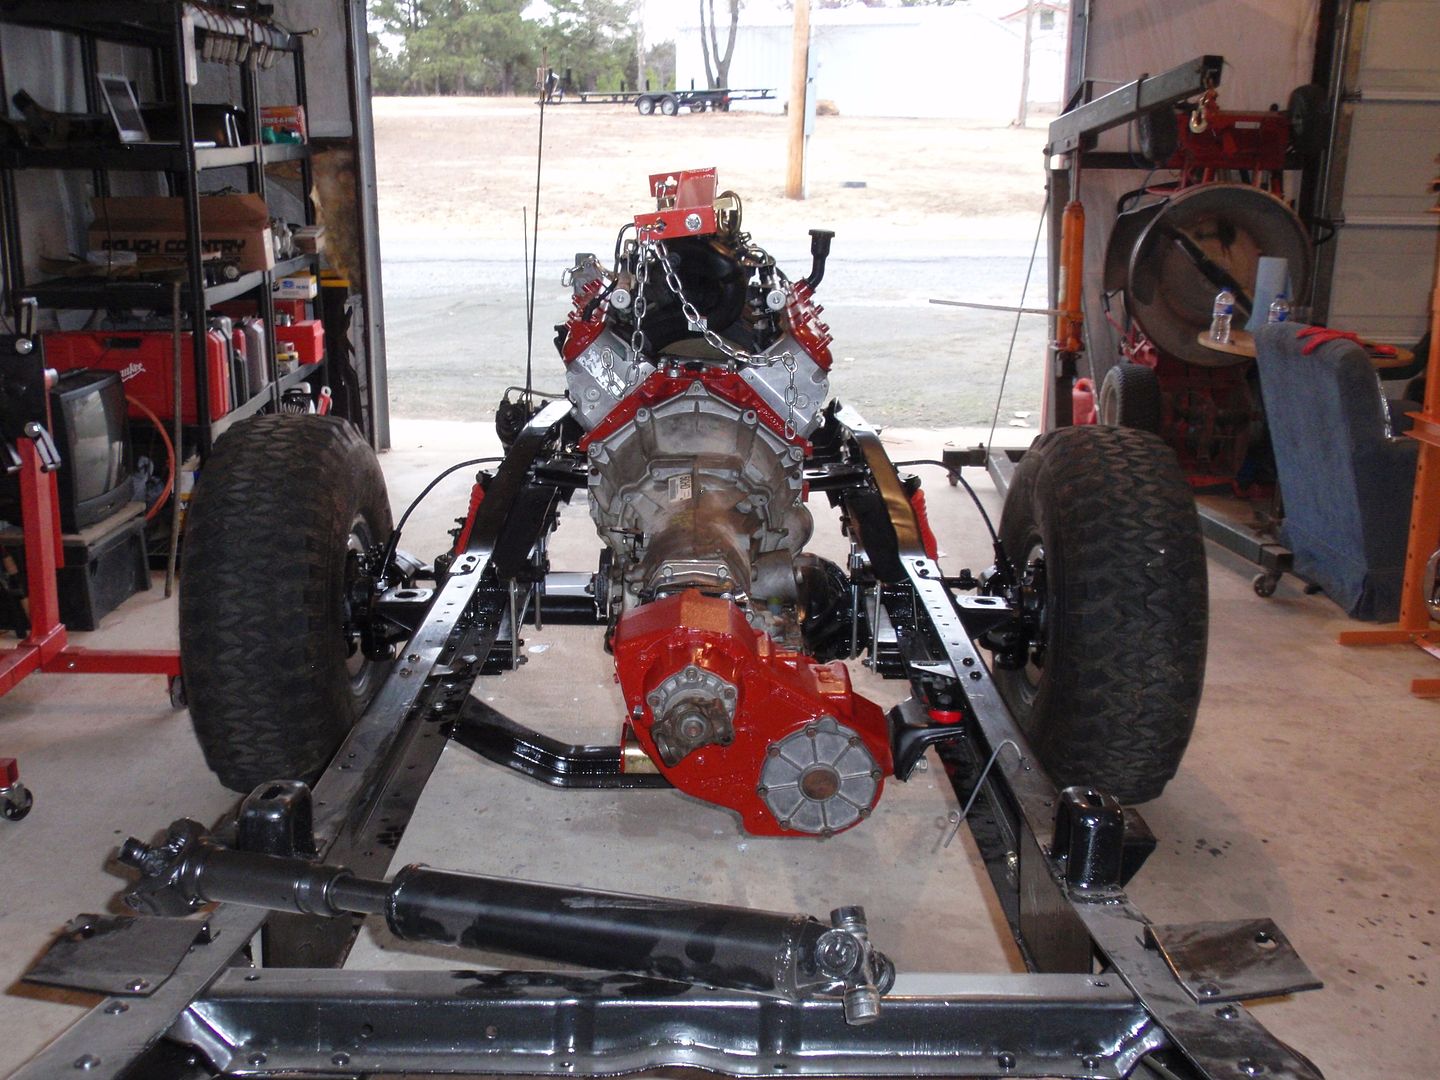 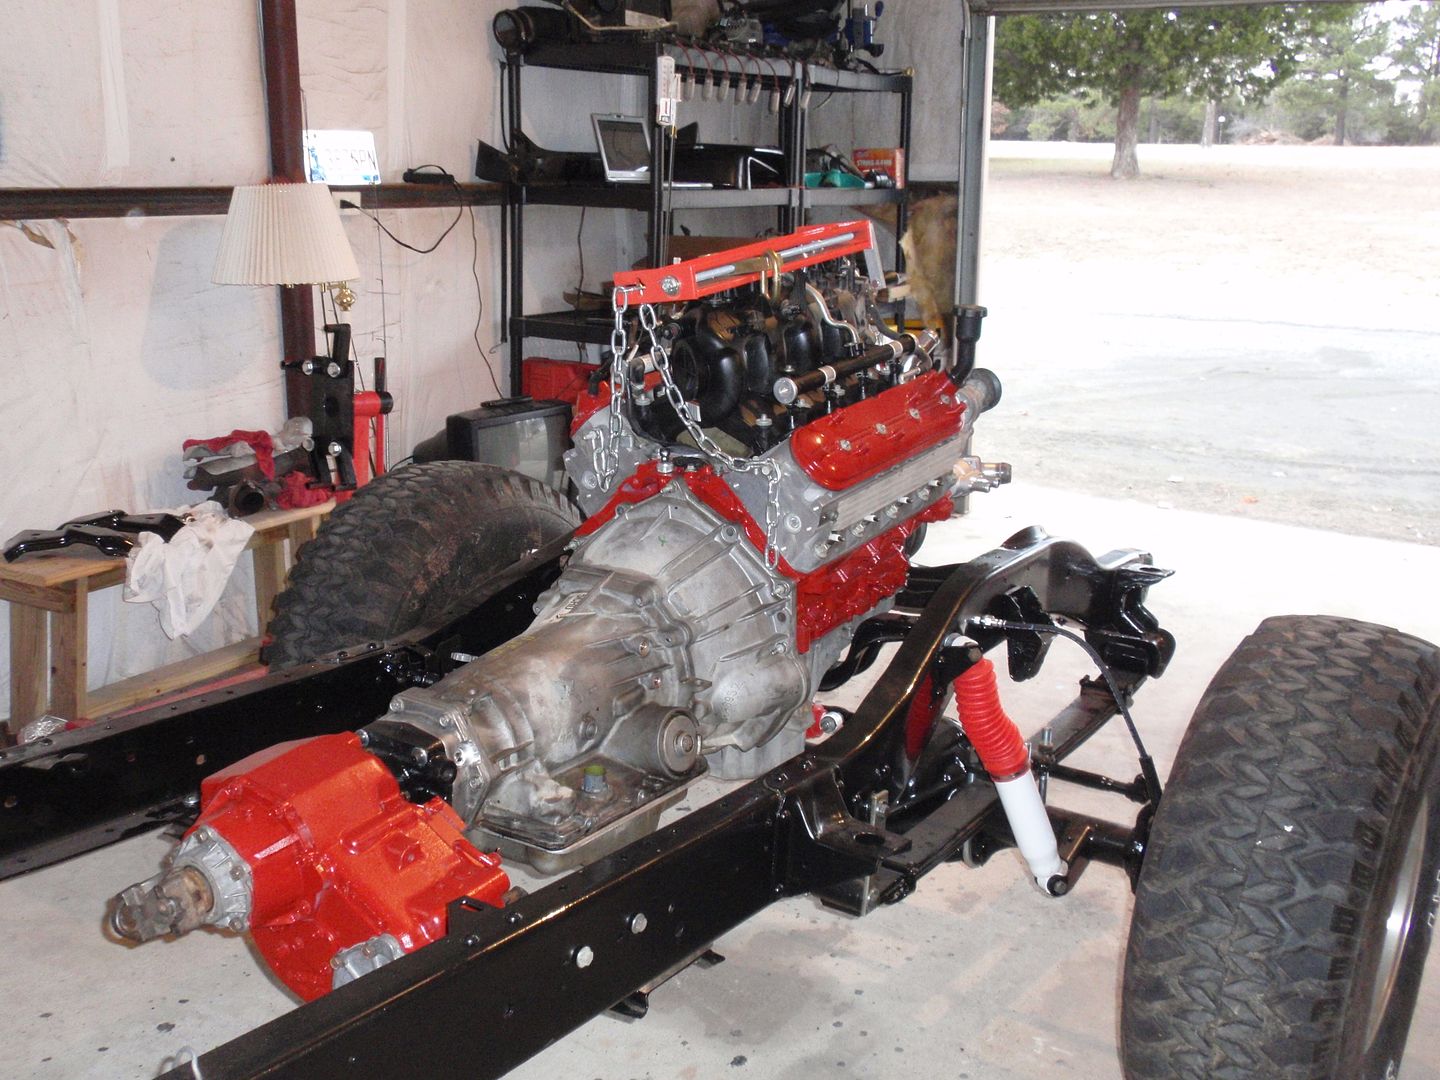 I guess I have a few options.. fab something up myself , hire someone to fab something up.. or look online for another solution .
__________________
Mark ----------------------- Crash's 69 4x4 SWB Crash's Roof over Lake Home Crash's 1988 Land Cruiser Build |
|
|
|
|
01-08-2012, 11:13 PM
|
#4 | |
|
Still Learning
Join Date: Jul 2009
Location: Central Oklahoma
Posts: 10,108
|
Re: Crash's 72 K10
Quote:
I'm wondering what mount thealien used on his build? |
|
|
|
|
|
01-08-2012, 11:19 PM
|
#5 | |
|
Registered User
Join Date: Nov 2011
Location: Edmond, OK.
Posts: 1,362
|
Re: Crash's 72 K10
Quote:
I thought about that.. I am sure something could be fabed up.. I think thealien is using this,    Not for sure.. I will PM him..
__________________
Mark ----------------------- Crash's 69 4x4 SWB Crash's Roof over Lake Home Crash's 1988 Land Cruiser Build |
|
|
|
|
|
01-08-2012, 11:36 PM
|
#6 | |
|
Registered User
Join Date: Apr 2008
Location: Md
Posts: 2,452
|
Re: Crash's 72 K10
Quote:
|
|
|
|
|
|
01-08-2012, 11:40 PM
|
#7 | |
|
Registered User
Join Date: Nov 2011
Location: Edmond, OK.
Posts: 1,362
|
Re: Crash's 72 K10
Quote:
Thanks Ed.. I will check it out.. I bought a cab yesterday from a friend.. He done me right.... It will still need some work.. but nothing like the one I have now.
__________________
Mark ----------------------- Crash's 69 4x4 SWB Crash's Roof over Lake Home Crash's 1988 Land Cruiser Build |
|
|
|
|
 |
| Bookmarks |
|
|


 Hybrid Mode
