
|
 03-09-2014, 01:49 AM
|
#1326 |
|
Registered User
Join Date: Apr 2012
Location: Searcy, AR
Posts: 4,203
|
Re: Markeb01 Build Thread
and the bar is once again RAISED!
 Well Done Sir, Well Done! 
__________________
DON Proverbs 27:17  US Air Force Retarded errr Retired My '65 Stepper Build:http://67-72chevytrucks.com/vboard/s...d.php?t=533920 My '60 Rusty Patina Build:http://67-72chevytrucks.com/vboard/s...66#post7402266 My '72 http://67-72chevytrucks.com/vboard/s...59#post7204359 SOLD |

|

|
|
03-09-2014, 10:28 AM
|
#1327 |
|
Registered User
Join Date: Jan 2012
Location: Killeen, Tx
Posts: 1,348
|
Re: Markeb01 Build Thread
Looking good! I never would have thought to add those lights to the truck.
__________________
John Z 1962 Chevy C10 Stepside 62 Barnfind My build tread: http://67-72chevytrucks.com/vboard/s...d.php?t=507513 |
|
|
|
|
03-09-2014, 11:24 AM
|
#1328 |
|
Registered User
Join Date: Jun 2012
Location: Selkirk Ontario Canada
Posts: 1,141
|
Re: Markeb01 Build Thread
that is outstanding
__________________
My 63 GMC Panel Slow Build http://67-72chevytrucks.com/vboard/s...=1#post5457281 63 
|
|
|
|
|
03-10-2014, 01:31 AM
|
#1329 |
|
Senior Enthusiast
Join Date: Feb 2007
Location: Spokane Valley, WA
Posts: 8,356
|
Re: Markeb01 Build Thread
I started out in to the garage this morning somewhat earlier than usual today. Having great confidence in how much easier it was going to be replicating all the stuff I learned on the passenger side, I cut all the external holes at the same time:
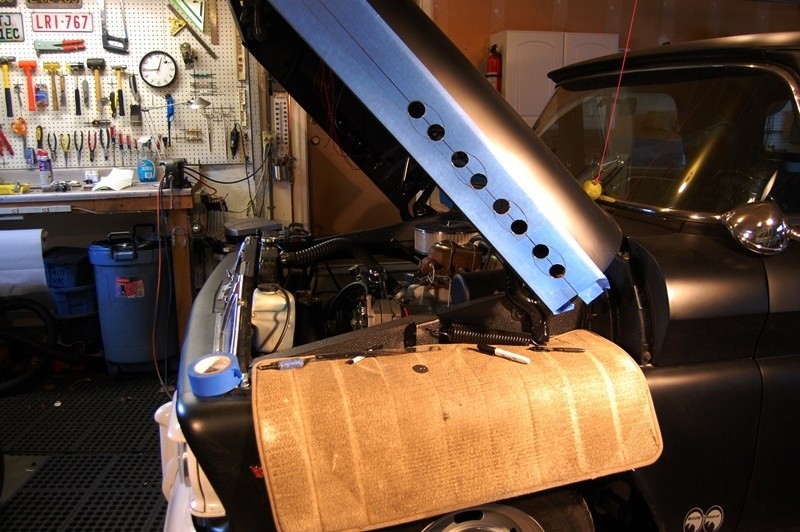 I then sliced all the upper curves with a sabre saw: 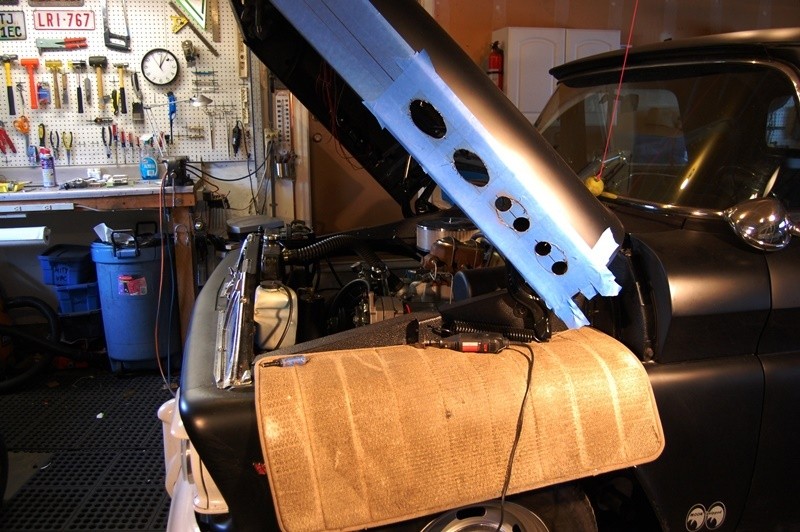 This not only went much faster than the Dremel cut off wheels, it kept the heat down much lower preventing blistering of the edge paint. The bottom curve of the rear two holes still required the Dremel wheels, as there was insufficient space for the sabre saw blades. In anticipation of todays workload, I got online yesterday and searched for some type of sanding drum more effective than the little Dremel drums Ive been burning through. I found the following on Lowes website. We ran out last night just before closing and picked up a couple: 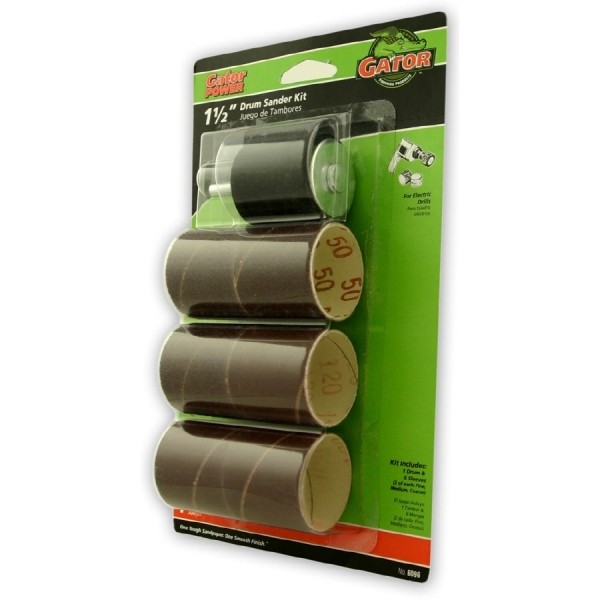 What a difference. After cutting all four holes open, the grinding needed for final fitting took less than an hour. Using the Dremel drums to accomplish the same task took most of a day. 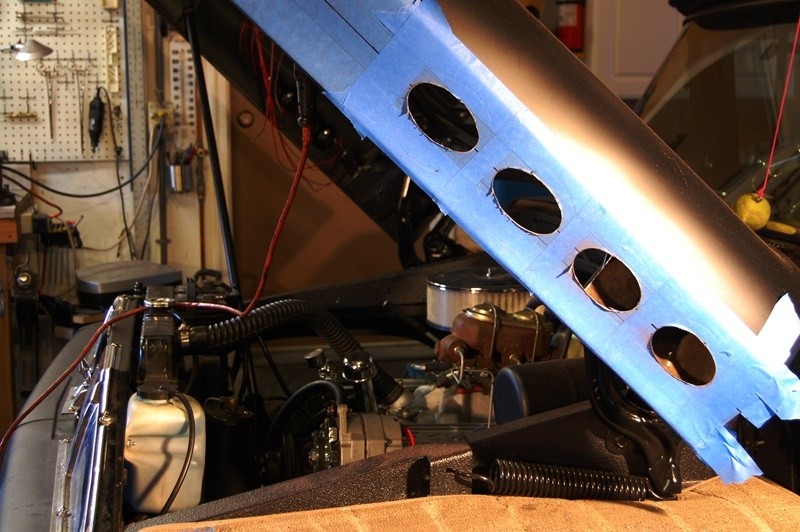 The next several hours were spent connecting the light wires and sequencers. It was straight forward and easy, but tedious and time consuming. Both parking light and blinker systems were double checked and operating perfectly. The last effort was running the new harness through the hood support and feeding it next to the existing hood harness. Heres the only finished photo taken tonight: 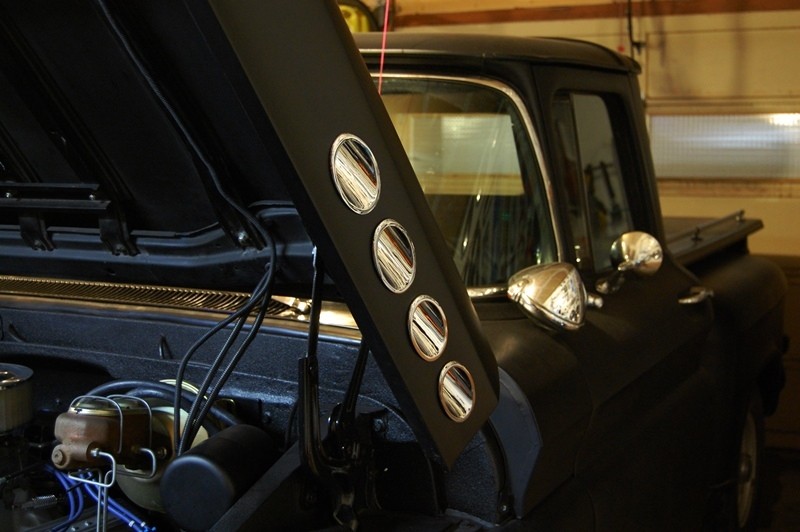 Theres less than an hour of work left to attach the connectors and run the new hood ground, but my right ankle and knee starting screaming an hour earlier and finally gave up and stopped working. Im really looking forward to having this done tomorrow as there is no more dirty work. Ive had enough cutting and grinding to last for a while. Its late enough in the season that as soon as the wiring is finished, Im going to wash the truck, detail the mags, pull the snow tires and reinstall the street rod tires/wheels. Then it will be ready for some finished photos and a video showing how cool the lights look in operation.
__________________
My Build Thread: http://67-72chevytrucks.com/vboard/s...d.php?t=444502 |
|
|
|
|
03-10-2014, 08:51 AM
|
#1330 |
|
Registered User
Join Date: Sep 2011
Location: Tacoma, WA
Posts: 2,425
|
Re: Markeb01 Build Thread
I always liked the Buick portholes as a kid, they really made the cars stand out.
You have taken it totally up a few notches, and nicely done !! Thanks for sharing the little drum sanders, now I have to go find some, Ohhhhhh the stages of projects I could have used those on  Looking super good there brother, cannot wait for the video
__________________
Michael McMurphy My 66 Stepside My 64 Tow Truck My 66 Tempest Table Of Contents Added to Page1 |
|
|
|
|
03-10-2014, 09:28 AM
|
#1331 |
|
Registered User
Join Date: Jun 2012
Location: Selkirk Ontario Canada
Posts: 1,141
|
Re: Markeb01 Build Thread
i can'rt wait to see the final finish ..looks awesome
__________________
My 63 GMC Panel Slow Build http://67-72chevytrucks.com/vboard/s...=1#post5457281 63
|
|
|
|
|
03-10-2014, 09:38 AM
|
#1332 |
|
Registered User
Join Date: Nov 2011
Location: fayetteville nc
Posts: 10,338
|
Re: Markeb01 Build Thread
Looking great...can't wait to see them lit up!!
__________________
1963 Short bed step side SBW 427 big block and borg warner T-16 HD 3 speed manual http://67-72chevytrucks.com/vboard/s...d.php?t=519869 1963 Short bed fleetside BBW 348 1st gen big block w/Powerglide http://67-72chevytrucks.com/vboard/s...d.php?t=619024 1964 Short bed trailer |
|
|
|
|
03-10-2014, 09:46 AM
|
#1333 | |
|
Registered User
Join Date: Apr 2012
Location: Searcy, AR
Posts: 4,203
|
Re: Markeb01 Build Thread
Quote:

__________________
DON Proverbs 27:17 US Air Force Retarded errr Retired My '65 Stepper Build:http://67-72chevytrucks.com/vboard/s...d.php?t=533920 My '60 Rusty Patina Build:http://67-72chevytrucks.com/vboard/s...66#post7402266 My '72 http://67-72chevytrucks.com/vboard/s...59#post7204359 SOLD |
|
|
|
|
|
03-10-2014, 11:19 PM
|
#1334 |
|
Registered User
Join Date: Sep 2011
Location: Tacoma, WA
Posts: 2,425
|
Re: Markeb01 Build Thread
I got the box today, and gushed all about it on my thread.
Thank you !!
__________________
Michael McMurphy My 66 Stepside My 64 Tow Truck My 66 Tempest Table Of Contents Added to Page1 |
|
|
|
|
03-10-2014, 11:55 PM
|
#1335 |
|
Senior Enthusiast
Join Date: Feb 2007
Location: Spokane Valley, WA
Posts: 8,356
|
Re: Markeb01 Build Thread
Thats great Mike, Ill be sure to check out your thread. I forgot to include the jam nut they provided. It came with a note that says not to bottom out the knob on the stick or you can crack the knob. The nut seems huge and inappropriate to me. Ill take a picture of it and scan the note, probably tomorrow and if it interests you Ill drop it in the mail.
* I finally completed the Buick porthole project this morning. It took about an hour to hook up all the wires to the front parking/turn signal harness and button it all up. After that the mags were reinstalled and the truck was given a bath for the first time in months. Not only was it dirty from winter driving, but it was also covered in cutting and grinding powder. Heres a quick poor quality video taken on one of our cheap import dash cams. This is the best I can do until that new GoPro shows up (maybe for my birthday): http://www.youtube.com/watch?v=l83Fv...ature=youtu.be Apologies for the misstatements in the narration, I was exhausted by the time we got to filming. The video shows the sequencing of the lights, but in real life they look very little like the video. Rather than being blurry, they are razor sharp and almost look like fire coming out of the ports from certain angles. I couldnt be happier with how nice the project turned out. Im still on the fence about the Moon decals. Ive always liked them, but to me they now seem out of place, and somewhat detract from the stainless and chrome parts. Opinions for or against are welcome. Thanks for looking!
__________________
My Build Thread: http://67-72chevytrucks.com/vboard/s...d.php?t=444502 |
|
|
|
|
03-11-2014, 10:40 AM
|
#1336 |
|
Registered User
Join Date: Jun 2012
Location: Selkirk Ontario Canada
Posts: 1,141
|
Re: Markeb01 Build Thread
wow they turned out awesome nice job on them
__________________
My 63 GMC Panel Slow Build http://67-72chevytrucks.com/vboard/s...=1#post5457281 63
|
|
|
|
|
03-11-2014, 12:26 PM
|
#1337 |
|
Registered User
Join Date: Jun 2012
Location: Portland
Posts: 1,330
|
Re: Markeb01 Build Thread
Looks awesome, and definitely very unique!
|
|
|
|
|
03-11-2014, 09:14 PM
|
#1338 |
|
Registered User
Join Date: Apr 2012
Location: Searcy, AR
Posts: 4,203
|
Re: Markeb01 Build Thread
Awesome Video
Those Portholes are...
 Moon Decals I vote to Keep em but in the long run, you have to be happy with them!!!
__________________
DON Proverbs 27:17 US Air Force Retarded errr Retired My '65 Stepper Build:http://67-72chevytrucks.com/vboard/s...d.php?t=533920 My '60 Rusty Patina Build:http://67-72chevytrucks.com/vboard/s...66#post7402266 My '72 http://67-72chevytrucks.com/vboard/s...59#post7204359 SOLD |
|
|
|
|
03-11-2014, 10:28 PM
|
#1339 |
|
Rollin' Old Skool
Join Date: Jun 2007
Location: Hattiesburg, MS
Posts: 5,371
|
Re: Markeb01 Build Thread
Awesome job Mark! Could you not magnetize a set of Moon decals & just install or remove them as you please? I bought some magnetic sheets & planned to do that with my S-10 in which I had already installed Mooneyes. I sold the truck though before trying the magnetized idea.
Also, if you plan to do another photoshoot, maybe we can decipher what looks best then. Maybe we can get a better glimpse of how they look with your new portholes.
__________________
_____________________________________________ Phillip My Build threads: 1966 Chevy C-10 "Black Betty" shortbed, fleetside, BBW, 327 V8/ Powerglide (under construction) http://67-72chevytrucks.com/vboard/s...ighlight=betty 1997 Chevy Tahoe, 2dr/2wd, mild custom (Daily driver) http://67-72chevytrucks.com/vboard/s...d.php?t=601142 Pics: '66 C-10 https://flic.kr/s/aHsjHWD4h9 '97 Tahoe https://flic.kr/s/aHsjGZ7wKP '93 C-1500 https://flic.kr/s/aHskxdpdnQ '88 S-10 Blazer https://flic.kr/s/aHsjYGx4Md Previous Rides: 1993 Chevy S-10 ext. cab, 4.3L, 4/5 drop (Sold) 1993 Chevy C-1500 short/step Retro-Rod (Sold) 1988 S-10 Blazer 2dr/2wd mild custom (Sold) |
|
|
|
|
03-11-2014, 10:31 PM
|
#1340 |
|
Senior Enthusiast
Join Date: Feb 2007
Location: Spokane Valley, WA
Posts: 8,356
|
Re: Markeb01 Build Thread
That's an easy enough idea to try out. I have sheets of magnet material, spare decals, and even a set of stickers. I'll give that a try!
__________________
My Build Thread: http://67-72chevytrucks.com/vboard/s...d.php?t=444502 |
|
|
|
|
03-11-2014, 11:14 PM
|
#1341 |
|
Registered User
Join Date: Apr 2011
Location: .
Posts: 3,104
|
Re: Markeb01 Build Thread
That is Trick.
|
|
|
|
|
03-12-2014, 08:29 PM
|
#1342 |
|
Senior Enthusiast
Join Date: Feb 2007
Location: Spokane Valley, WA
Posts: 8,356
|
Re: Markeb01 Build Thread
As a wrap up on the porthole project, I wanted to share what parts I used and where I got them. Not that anyone will want to duplicate this project on a 60-66, but in case someone wants to add lights to a Buick, and old custom, or anything else, the parts I used were:
1954 Buick Porthole reproductions came from: OldBuickParts.com: 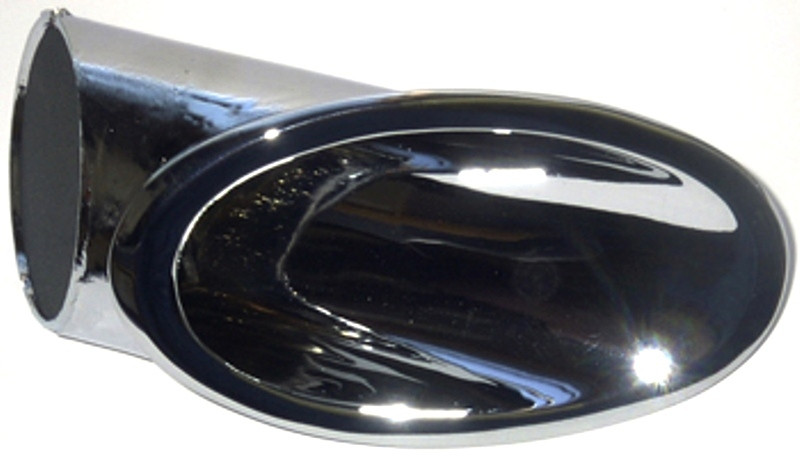 http://www.oldbuickparts.com/catalog...952a43&x=0&y=0 * I added two LED bolts to each porthole. 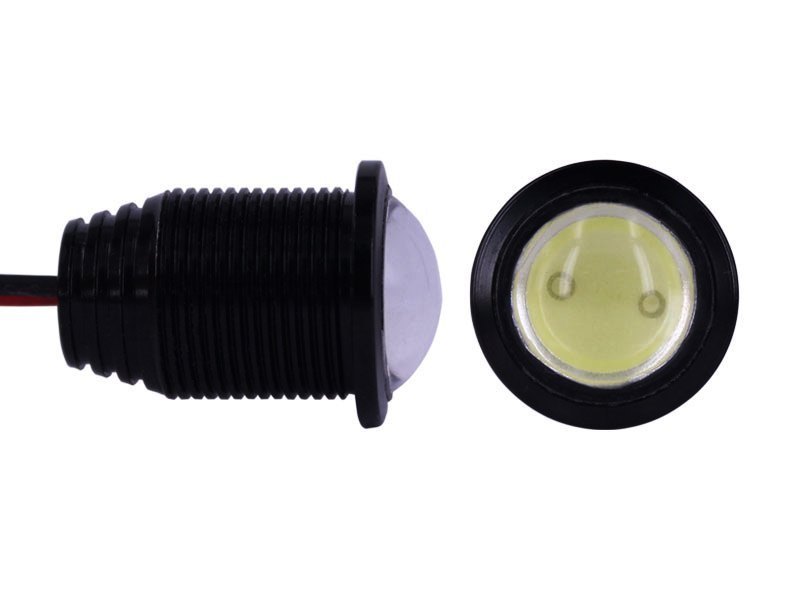 One amber 6mm for the parking light circuit, and one amber 16mm (with lens) for the sequential turn signals. They were sourced from Oznium http://www.oznium.com/led-bolt * WebElectric Products provided the sequencer kit (Part number STS-4) - This is a shot of a two circuit module. The 4 circuit looks the same but has more wires sticking out: 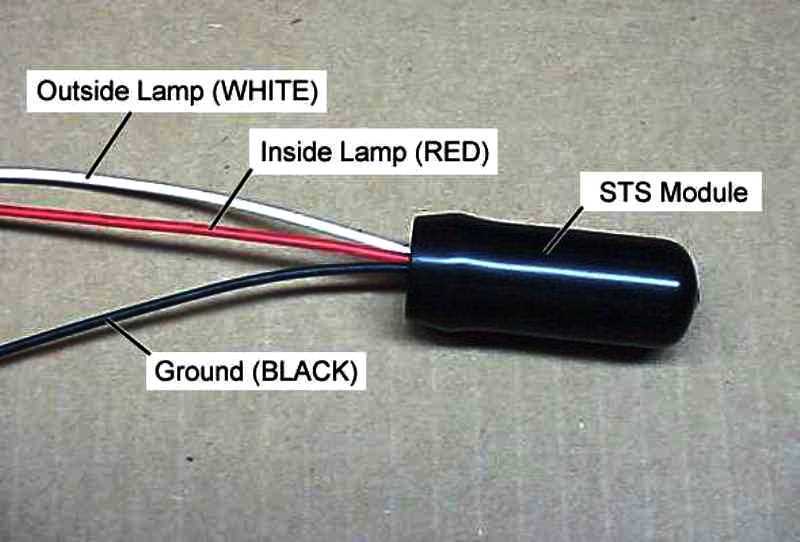 http://www.webelectricproducts.com/products.htm WebElectric was the only outfit I could find that offered sequencing for 4 lamps instead of only 3. Once I figured out the circuitry it was very simple to hook up. Being solid state it should be very dependable. And here are my greatly simplified wiring instructions, for turn signals only - when brake lights will not be involved in the installation: 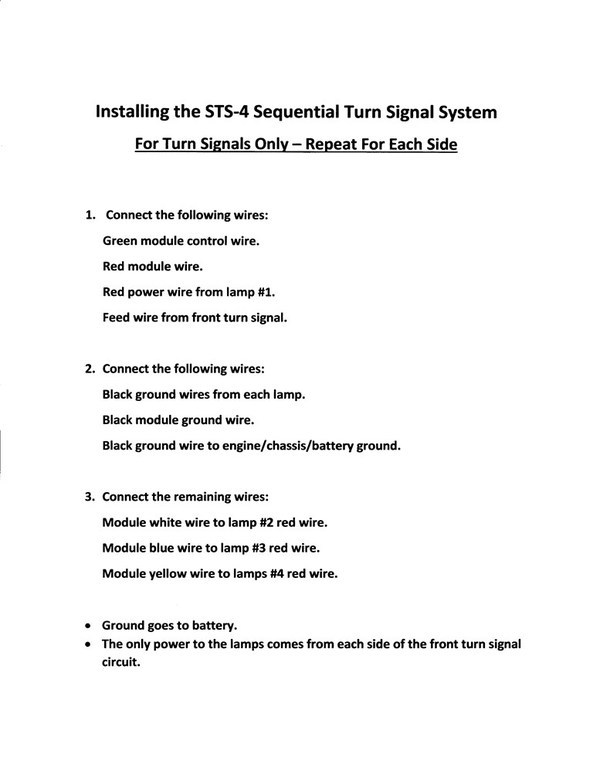 That's about it for now until some other idea pops in my head!
__________________
My Build Thread: http://67-72chevytrucks.com/vboard/s...d.php?t=444502 |
|
|
|
|
03-14-2014, 11:54 AM
|
#1343 |
|
Senior Enthusiast
Join Date: Feb 2007
Location: Spokane Valley, WA
Posts: 8,356
|
Re: Markeb01 Build Thread
Today was a day of discovery on a couple of topics. Ever since I installed the stainless steel windshield trim back in 2012, Ive been plagued by an intermittent chirping squeak somewhere in or near the dashboard. At first I thought it was the windshield trim, and numerous adjustments and hours of modifications presumably eliminated the irritation. Weeks or months later it reappeared. Eventually I found an errant nut wedged between the dash and the under dash panel. Removing the nut also eliminated the noise. As it came back again many more times. I would make corrections that apparently fixed the problem, only to have it come back repeatedly.
After a long winter nap, the truck was finally taken out for a nice long ride today. The chirping squeak was back, louder than ever. We touched, pushed, pulled, and pounded on just about every surface in sight, and it just got worse. It became so loud I could hardly stand to be in the truck, but it became so persistent it eventually became apparent the squeak went away when the driveline was disconnected. Running through the mental checklist I eliminated the u-joints and throw out bearing, which led me to the clutch linkage, which is hydraulic. Taking logic a step further, the hydraulic portion doesnt start until the firewall. The culprit turned out the spherical joint that connects the push rod to the original pedal arm: 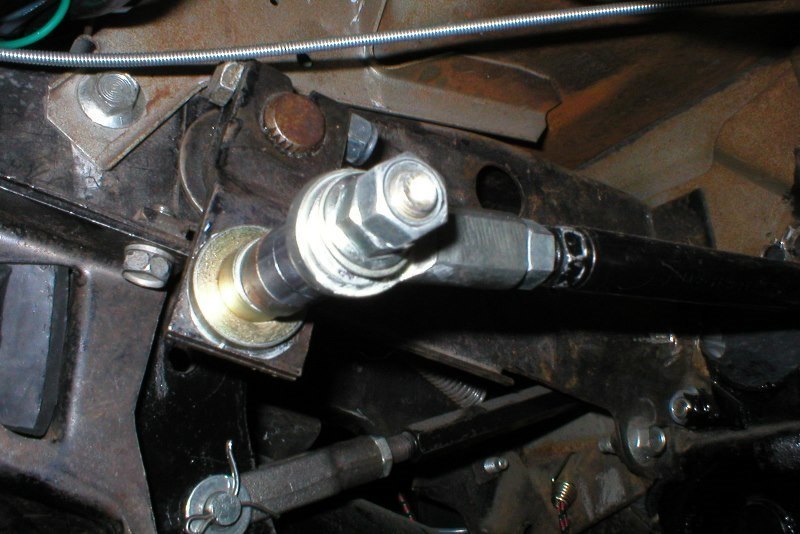 When first assembled, it received a dose of WD40 or something similar. Nine years later the joint was so dry it wouldnt even wobble when disconnected. After a good cleaning it returned to free movement, and was liberally coated with white lithium grease. Once back together the squeak was gone! Im hopeful its really permanent this time, as this is one of the few functional pieces that has been neglected for a long time. Another interesting thought jumped off the page when I looked at the new snapshot. Compared to the next shot taken around 10 years ago, the area certainly has been cleaned up by installation of the new fuse panel, elimination of the wig wag lights and removal of the cruise control. It isnt pretty, but its much cleaner: 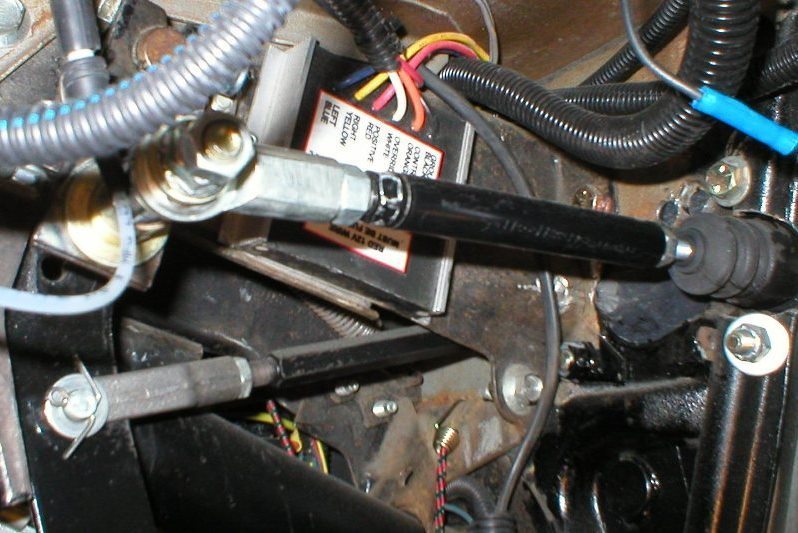 We also discovered another interesting phenomenon riding around. Cars, minivans, trucks, and big rigs that would intend to zoom by us on either side, apparent smitten with the lighted portholes, stopped their forward progress roughly even with the front of our truck and dropped back to sit on my rear quarters studying the portholes/lights. When they decided to move on several drivers stuck out their arms with a thumbs up as they accelerated away. I also encountered a pair of cyclists as we approached an intersection simultaneously. They wanted to go straight (in the bike lane) and I wanted to turn right. I remained in the main traffic lane and flipped on the signal. They rode alongside the door for a few seconds watching the sequential blinkers and finally pulled out in front of the truck. Both turned around and offered another thumbs up as they went across the intersection. Some individuals may not find favor with the portholes or the lights, but they generated more waves, smiles, and thumbs up in one day than in all the years weve owned the truck. Theyve added a whole new level of fun to the driving experience.
__________________
My Build Thread: http://67-72chevytrucks.com/vboard/s...d.php?t=444502 |
|
|
|
|
03-14-2014, 12:21 PM
|
#1344 |
|
Registered User
Join Date: Apr 2012
Location: Searcy, AR
Posts: 4,203
|
Re: Markeb01 Build Thread
Great write-up and detective work!!!
Always better to get waves and thumbs up...
__________________
DON Proverbs 27:17 US Air Force Retarded errr Retired My '65 Stepper Build:http://67-72chevytrucks.com/vboard/s...d.php?t=533920 My '60 Rusty Patina Build:http://67-72chevytrucks.com/vboard/s...66#post7402266 My '72 http://67-72chevytrucks.com/vboard/s...59#post7204359 SOLD |
|
|
|
|
03-14-2014, 01:34 PM
|
#1345 |
|
Registered User
Join Date: Nov 2011
Location: fayetteville nc
Posts: 10,338
|
Re: Markeb01 Build Thread
So when are we going to see some pics of them lit up!!!!
__________________
1963 Short bed step side SBW 427 big block and borg warner T-16 HD 3 speed manual http://67-72chevytrucks.com/vboard/s...d.php?t=519869 1963 Short bed fleetside BBW 348 1st gen big block w/Powerglide http://67-72chevytrucks.com/vboard/s...d.php?t=619024 1964 Short bed trailer |
|
|
|
|
03-14-2014, 02:28 PM
|
#1346 |
|
Senior Enthusiast
Join Date: Feb 2007
Location: Spokane Valley, WA
Posts: 8,356
|
Re: Markeb01 Build Thread
I posted this video a couple of days ago, as I thought it would show them off better than photos. I do intend on taking some nice outdoor pictures soon, but the rainy weather and winter brown colors aren't very attractive at the moment:
http://www.youtube.com/watch?v=l83Fv...ature=youtu.be
__________________
My Build Thread: http://67-72chevytrucks.com/vboard/s...d.php?t=444502 |
|
|
|
|
03-15-2014, 01:50 AM
|
#1347 |
|
Senior Member
 Join Date: Mar 2011
Location: Tucson, Arizona
Posts: 2,059
|
Re: Markeb01 Build Thread
Hey Mark, check out what I saw at the Portland Roadster Show today.
Sorry about the crappy pictures. I was trying to use the camera in my phone.
__________________
Sanity'66 http://67-72chevytrucks.com/vboard/s...d.php?t=515110 Long bed, Fleetside, Small back window I've Done So Much, With So Little, For So Long, That Now I Can Do Anything With Nothing.
|
|
|
|
|
03-15-2014, 03:05 AM
|
#1348 |
|
Senior Enthusiast
Join Date: Feb 2007
Location: Spokane Valley, WA
Posts: 8,356
|
Re: Markeb01 Build Thread
That's really interesting! Thanks for sharing.
__________________
My Build Thread: http://67-72chevytrucks.com/vboard/s...d.php?t=444502 |
|
|
|
|
03-15-2014, 03:10 AM
|
#1349 |
|
Registered User
Join Date: Dec 2012
Location: Rochester, KENT
Posts: 10,480
|
Re: Markeb01 Build Thread
Good morning Mark
Just watched your video again while having my breakfast. 07.00 here in the UK. I really like the sequential mature of the portholes. And seeing your Caddy rears in action makes me want a car with some on too. Just off to the garage to start welding. Have a good night.
__________________
MY BUILD LINK: http://67-72chevytrucks.com/vboard/s...585901]Redneck Express - 1966 C10 Short Fleetside MY USA ROADTRIPS http://forum.retro-rides.org/thread/...2018-humdinger IF YOU CAN'T FIX IT WITH A HAMMER, YOU'VE GOT AN ELECTRICAL PROBLEM MATE. |
|
|
|
|
03-16-2014, 02:30 AM
|
#1350 |
|
Senior Enthusiast
Join Date: Feb 2007
Location: Spokane Valley, WA
Posts: 8,356
|
Re: Markeb01 Build Thread
Heres another short video clip my daughter took when I was heading out for something completely different. I just fired up the truck, and had the pipes open for 17 seconds. At 54 seconds I opened the cutouts again and shut off the fast idle:
It caused me to realize the video (and audio) taken on our phones is way better than the dash cam, so Ill be trying this again with the camera turned the right way!
__________________
My Build Thread: http://67-72chevytrucks.com/vboard/s...d.php?t=444502 |
|
|
|
 |
| Bookmarks |
|
|


 Linear Mode

