
|
Register or Log In To remove these advertisements. |
|
|
|
|||||||
 |
|
|
Thread Tools | Display Modes |
 07-12-2020, 01:32 PM
|
#1 |
|
Registered User
Join Date: Mar 2020
Location: Limburg, Netherlands
Posts: 298
|
1972 C20 -Airride conversion-
Hello,
I'm Sander, 24 Years old, from The Netherlands In May 2019 I bought myself a 1972 C20 that was just imported from California. I've been driving the truck allmost every day until March this year. Just did some minor changes in the meantime. In March I started to do a 5 lug swap and put it on airride suspention. I see you guys thinking why make a thread about it, it has been done thousands off times, dont bother us with it  But I want to show you the progress, and I think i'm doing a couple of things a little different. (thinks that i've never seen before) And i'd like to hear what you guys think about it. I already did a lot of the work, but i'm not going to make one post with everything from march until now. I will post it at a faster pace though. Enough talking, lets see some pictures.  The truck when i just bought it:  My brother is a woodworker, we decided to put some wood on the bed:  Staining the wood: 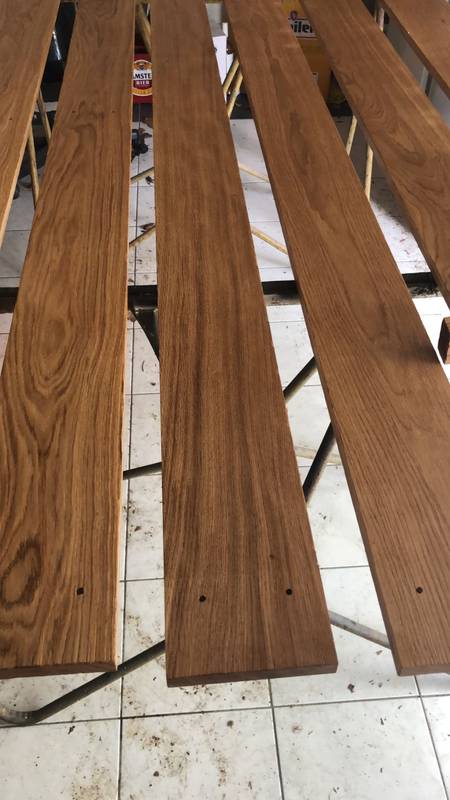 After staining: 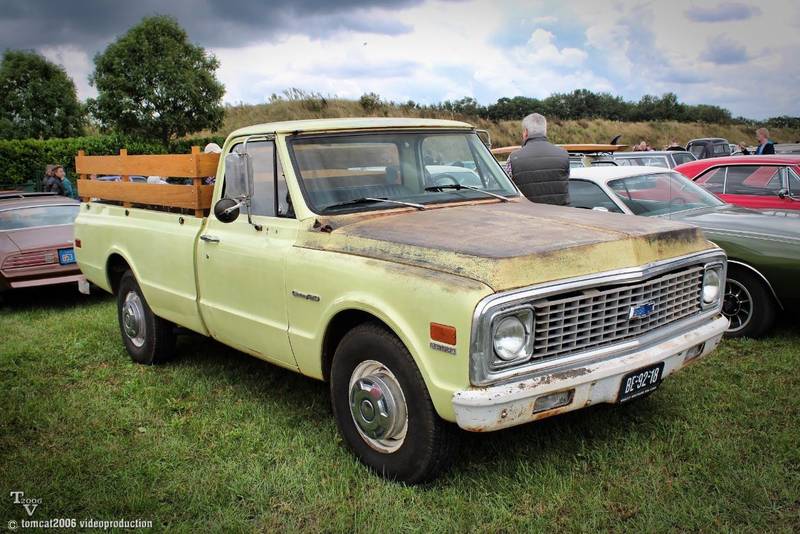 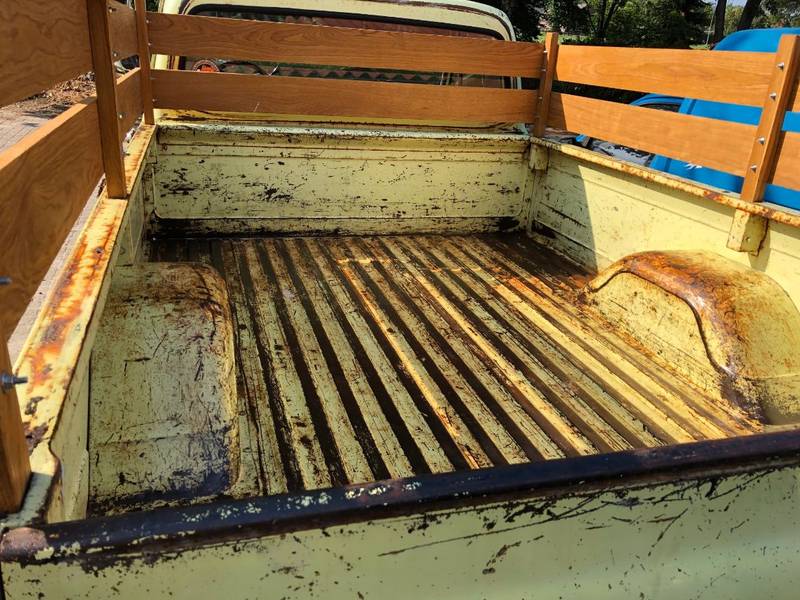 Truck is all original with a 350 engine. little rust, nothing major. |

|

|
|
07-12-2020, 02:01 PM
|
#2 | |
|
BlahBlahBlah
 Join Date: Feb 2002
Location: Monroe, Wa.
Posts: 19,768
|
Re: 1972 C20 -Airride conversion-
Quote:
More pics, more pics, more pics 
__________________
... Monroe Swap meet May 18-19. Mike has the same spots for the NW guys he's had forever. Lunch time BBQ at the spaces. If you have stuff to sell bring it along. If you have a question PM stllookn (Mike) here via the board. https://67-72chevytrucks.com/vboard/...d.php?t=851291 |
|
|
|
|
|
07-12-2020, 04:09 PM
|
#3 |
|
Registered User
Join Date: Mar 2020
Location: Limburg, Netherlands
Posts: 298
|
Re: 1972 C20 -Airride conversion-
yes getting parts is a pain in the *** sometimes.
most times they are either way too expensive to get here or it'll take 6 weeks to arrive. stay tuned, more pics to come!
__________________
Sander All Ideas, advice, critisism is welcome. Nothing better to learn from. ______________ '72 C/20 http://67-72chevytrucks.com/vboard/s...d.php?t=809053 |
|
|
|
|
07-13-2020, 08:34 AM
|
#4 |
|
Registered User
Join Date: Mar 2020
Location: Limburg, Netherlands
Posts: 298
|
1972 C/20 -Airride conversion- exhaust
In August 2019 I decided to rebuilt the exhaust.
The truck had the stock exhaust wich wasn't in good condition. I also wanted a bit more growl from the exhaust instead of the whispering stock exhaust. so a couple of flexies, v-band clamps, mufflers and a lot of hours later we ended up with this: painted the stock manifolds:  h-pipe:  mockup under the truck:  welded up on the floor:  This is the first complete exhaust i made, a good learning project. Because it hangs to low after bagging it, I can do it all over again  I also found a deal on a set of 5 lug axles from a 1973 C10. 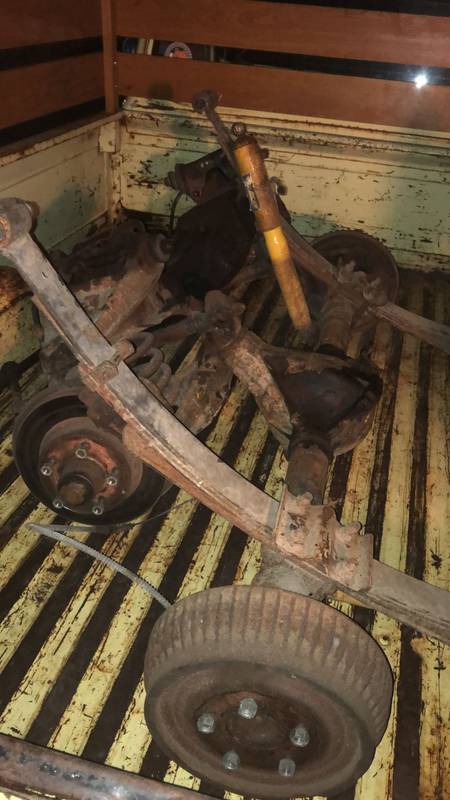
__________________
Sander All Ideas, advice, critisism is welcome. Nothing better to learn from. ______________ '72 C/20 http://67-72chevytrucks.com/vboard/s...d.php?t=809053 |
|
|
|
|
07-14-2020, 05:55 PM
|
#5 |
|
Registered User
Join Date: Mar 2018
Location: Looking for braaaains in Salt Lake City, UT
Posts: 49
|
Re: 1972 C20 -Airride conversion-
Awesome job so far, looking forward to seeing more progress!
__________________
1969 K10 LWB - 383/SM465/T221/4.56 - 8" of lift and 40" tires - the broski's truck aka JackdTruck 1974 C30 Crew Cab Dually - No Eng/No Trans/Bagged sometime in the 1990s and will be worked on sometime in the 2020s ... And a whole gaggle of other projects. Check out what I'm up to on Instagram: @zohmbii |
|
|
|
|
07-14-2020, 07:09 PM
|
#6 |
|
Registered User
Join Date: Mar 2020
Location: Limburg, Netherlands
Posts: 298
|
Re: 1972 C20 -Airride conversion-
Thanks ZohmBii.
Next up, found a nice dry spot in the shed, and started dismanteling the Pickup. Took the bed and wheels off:  Took the axle out: 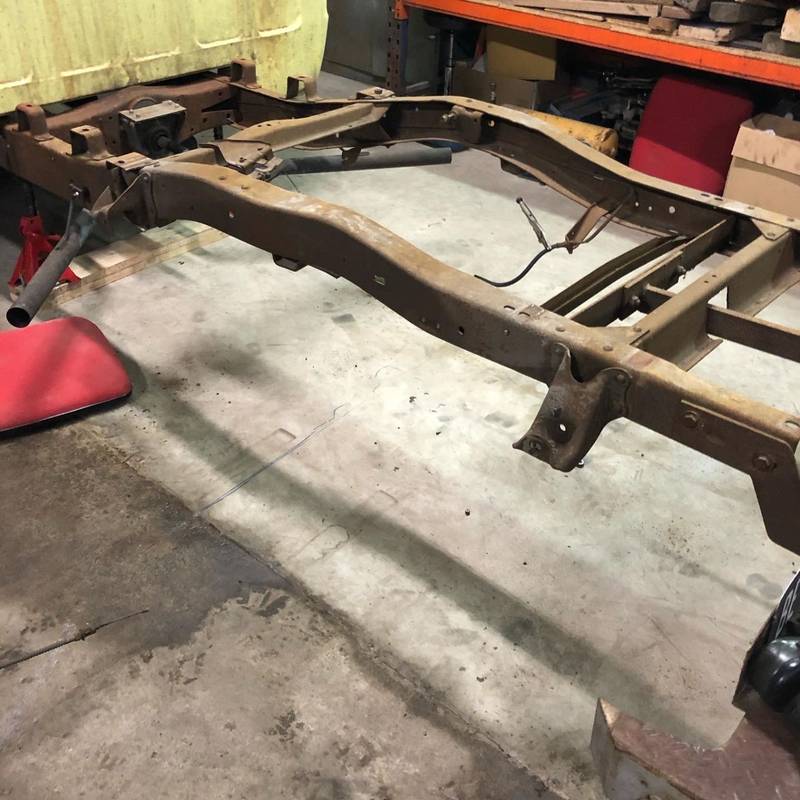 Front suspension disassembled: 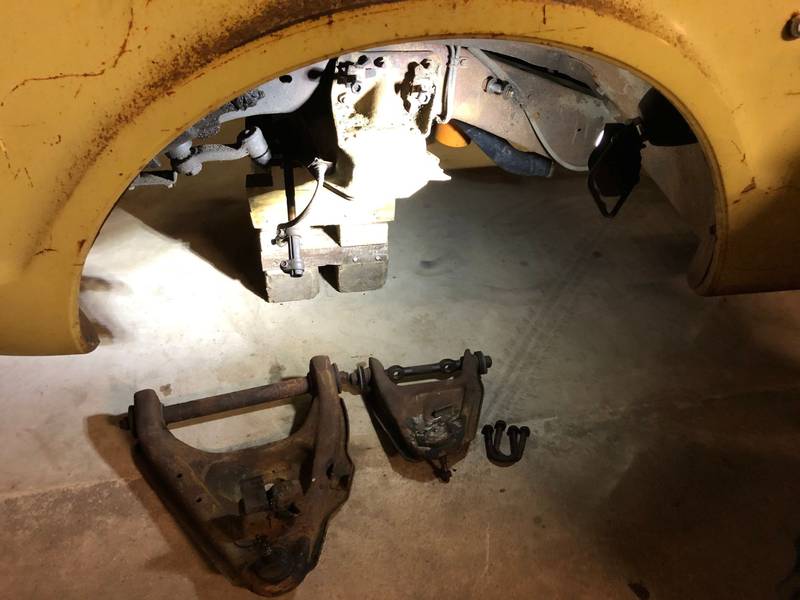 everything against the wall: 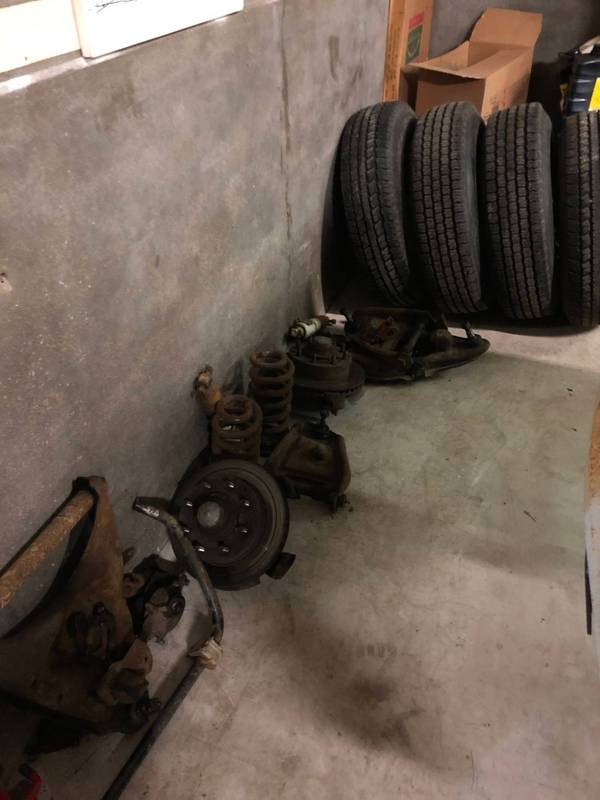 Cleaned off the new 5-lug rear axle:   cleaned off the frame a bit, put some wheels on the axle and held it in place to have a look at it:  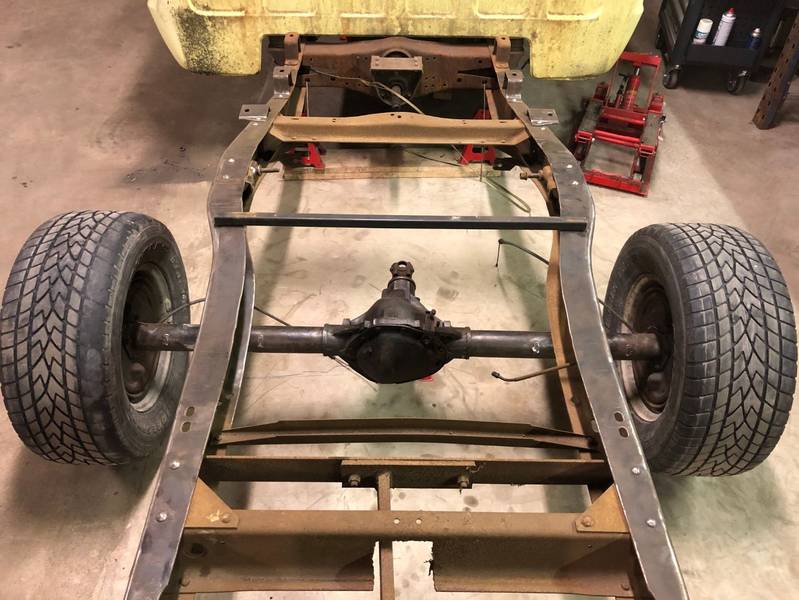 seems like it could work Trying to not die while disassembling the front suspension from the 5-lug front axle  I found out that the spring from a 1973 c/10 are a little longer and have more pre tension than the sprins from a 1792 c/20. So without any weight on the axle it was a little sketchy to get it all apart. But, didn't die, got it apart. Win for me  Thats it again for now, fun stuff starts tomorrow!
__________________
Sander All Ideas, advice, critisism is welcome. Nothing better to learn from. ______________ '72 C/20 http://67-72chevytrucks.com/vboard/s...d.php?t=809053 |
|
|
|
|
07-15-2020, 12:44 PM
|
#7 |
|
Registered User
Join Date: Mar 2020
Location: Limburg, Netherlands
Posts: 298
|
Re: 1972 C20 -Airride conversion-
Soo... Fun stuff.
Parallel 4-Link rear suspension. Why not?! I've searched the webs for a good bolt on / weld on 4 link kit. Found a lot of options... In the US. The only 4-link kit I could buy in the Netherlands was the ridetech kit, the simplest one they offer. But it would cost me 1000,- (+- $1150) I tought that was a little expensive for basically 5 tubes, 4 brackets and some screw in joints. So I decided to make my own 4 link system. I drew all the brackets i wanted on paper and got them lasercut in 1/4 inch steel 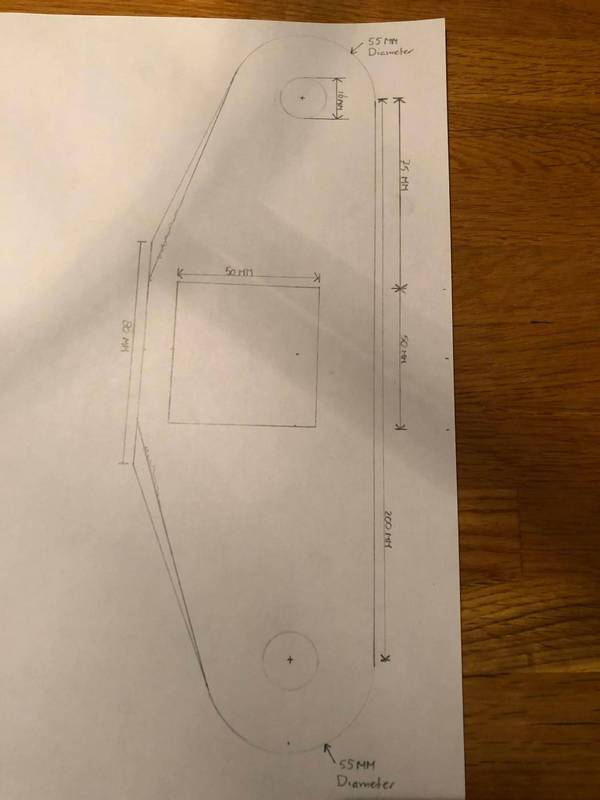   measurements are in Millimeters for the ones wondering.   I also welded a thick piece of steel against the frame just to strengthen it all up.   Then tacked everything together. 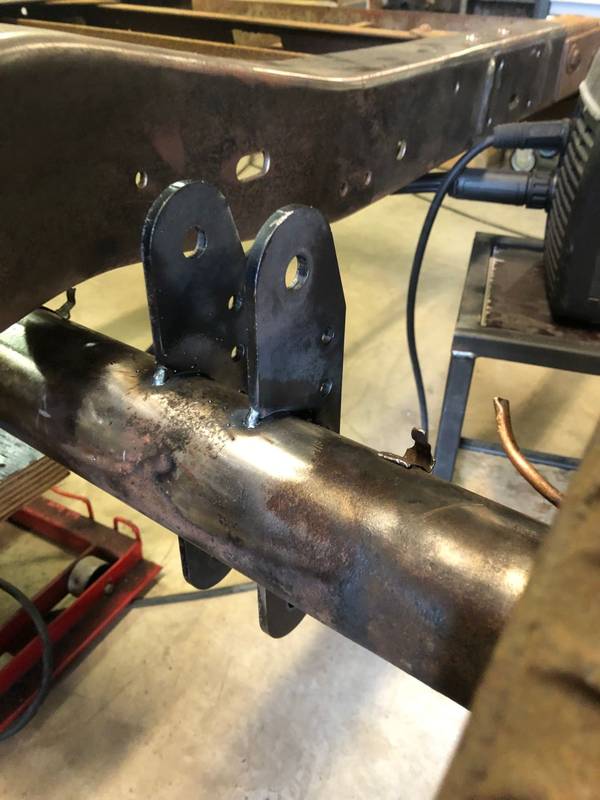  Got some bushings from a Land Rover shipped from england. these are a good size and reasonably priced. Then I made the inner and outer tubes on the lathe. 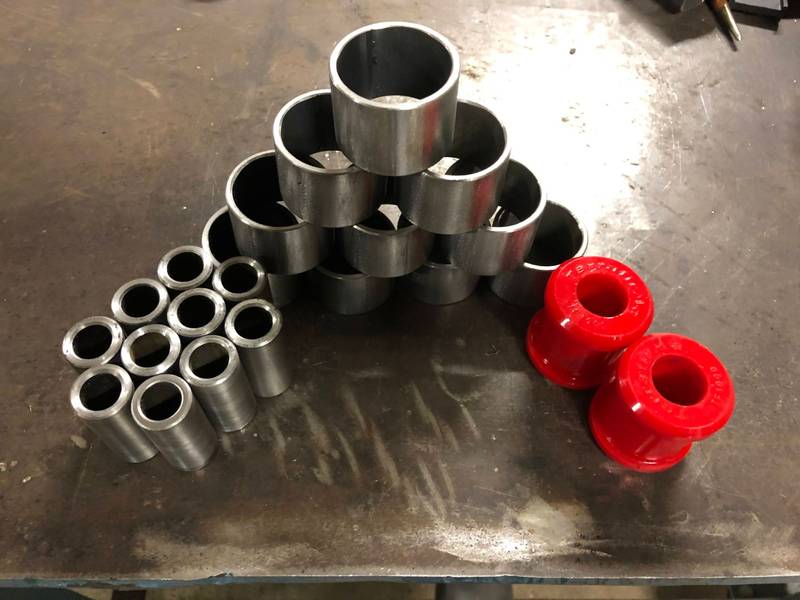 made a little jig on the table to weld the outer tubes to the links. 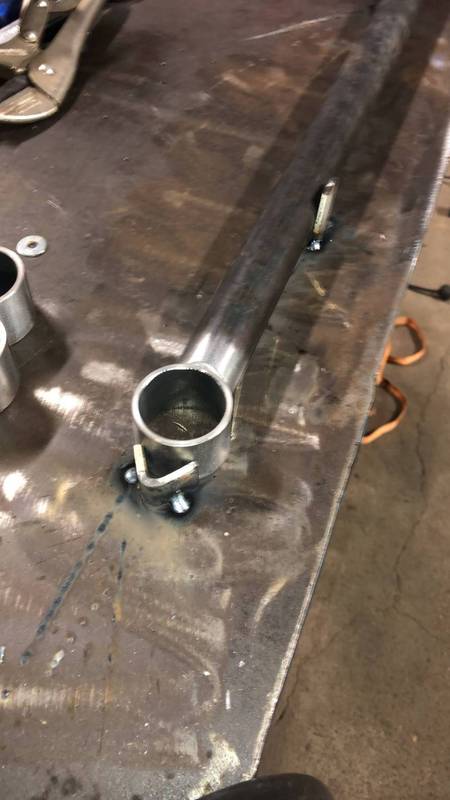 and with a bushing installed 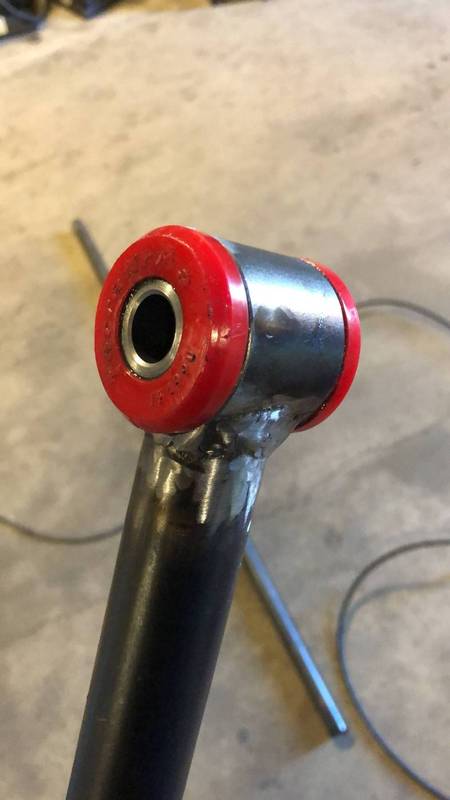 In the other end of the link i welded a wheel nut from a tractor wich i turned down to fit in the tube. 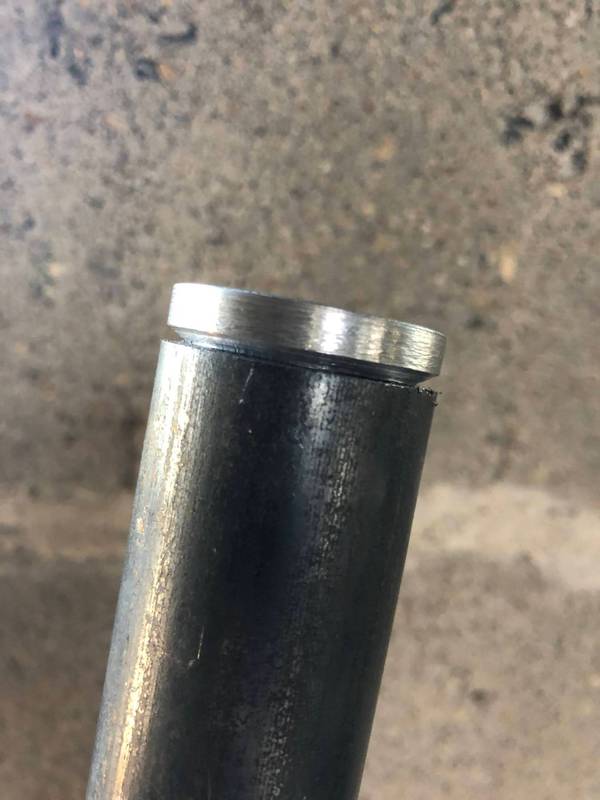 And welded a wheel stud to the other bushing tube  I will add a locking nut holding it all tight together at final assembly. After tacking everything together it was time for a test fit.   That is it for today. Tomorrow there wil be more.
__________________
Sander All Ideas, advice, critisism is welcome. Nothing better to learn from. ______________ '72 C/20 http://67-72chevytrucks.com/vboard/s...d.php?t=809053 |
|
|
|
|
07-16-2020, 03:14 PM
|
#8 | |
|
Registered User
Join Date: Mar 2018
Location: Looking for braaaains in Salt Lake City, UT
Posts: 49
|
Re: 1972 C20 -Airride conversion-
Quote:
Beautiful work on the 4-link so far as well! 
__________________
1969 K10 LWB - 383/SM465/T221/4.56 - 8" of lift and 40" tires - the broski's truck aka JackdTruck 1974 C30 Crew Cab Dually - No Eng/No Trans/Bagged sometime in the 1990s and will be worked on sometime in the 2020s ... And a whole gaggle of other projects. Check out what I'm up to on Instagram: @zohmbii |
|
|
|
|
|
07-16-2020, 05:26 PM
|
#9 | |
|
Registered User
Join Date: Mar 2020
Location: Limburg, Netherlands
Posts: 298
|
Re: 1972 C20 -Airride conversion-
Quote:
I Had spring compressors in the toolbox right next to me, but decided i could do it without them since the c20 springs didnt have tension at all. Then things escalated quickly
__________________
Sander All Ideas, advice, critisism is welcome. Nothing better to learn from. ______________ '72 C/20 http://67-72chevytrucks.com/vboard/s...d.php?t=809053 |
|
|
|
|
|
07-16-2020, 06:23 PM
|
#10 |
|
Registered User
Join Date: Mar 2020
Location: Limburg, Netherlands
Posts: 298
|
Re: 1972 C20 -Airride conversion-
- Update -
This post is going to be a little messy, a lot of things happend in a short period of time, so i didn't get enough pictures made to make things clear. So bear with me on this one First of all some goodies I bought before I even begun the project: 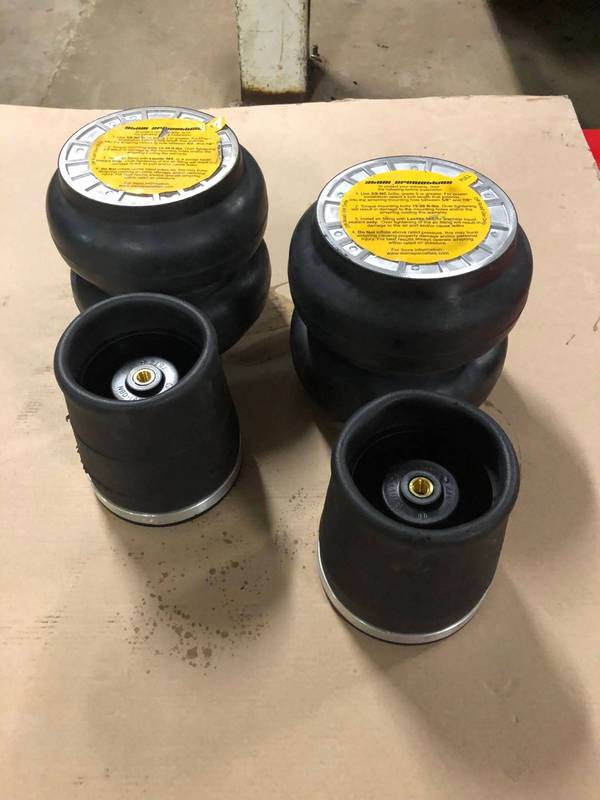 Firestone F9000 rear bags Slam Specialties RE-7 front bags  AccuAir VU4 Manifold AccuAir E-Level with touchpad AccuAir I-level Wifi receiver I got a great deal on this set, unfortunately a month after i bought it AccuAir closed there business. But I have to stick with it. Made a bracket in the frame for a panhart bar. 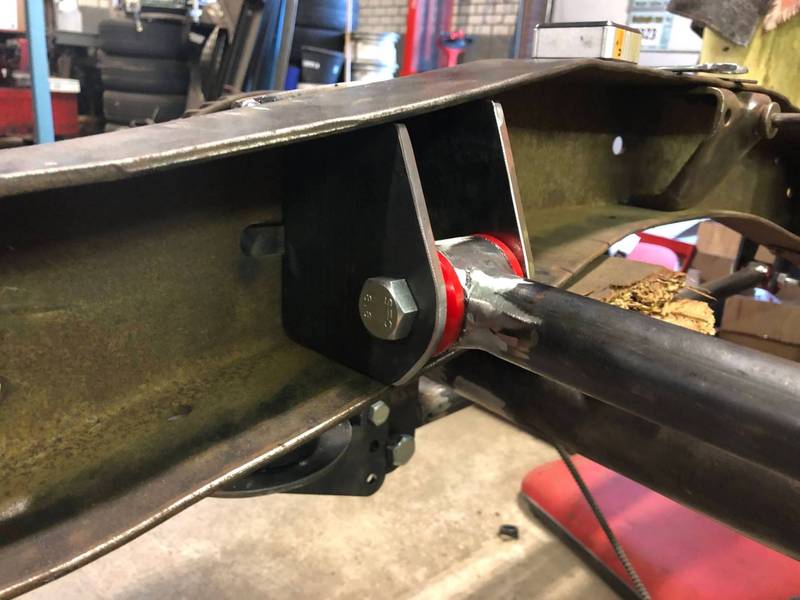 The other end on the axle side was a little more difficult. started out with a 3"x3" square tube. and with a bit of hacking and welding we get this:  And after a little more fiddling around we end up with this:  Tacked on the axle: 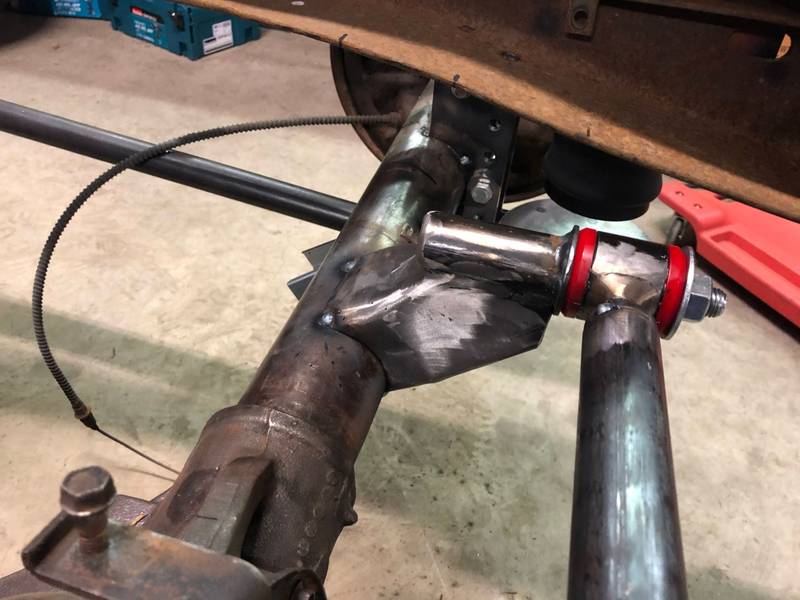 I wanted to strengthen the frame because I also wanted a notch. I've seen all the bolt in notches which get used a lot. But somehow I think it looks a bit too weak for me. So height in the frame makes it strong, so i want to have as much height as possible. measured the distance between the frame and the underside of the bed and drew it on som cardbord.  I ended up boxing part of the frame and welding a ridge on the outside of the frame. 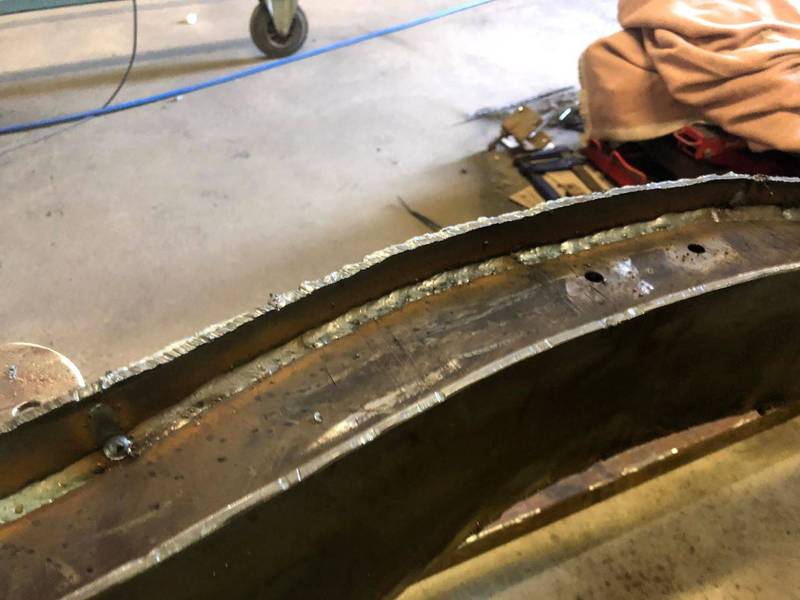 then added plates on top to make it a steel box again 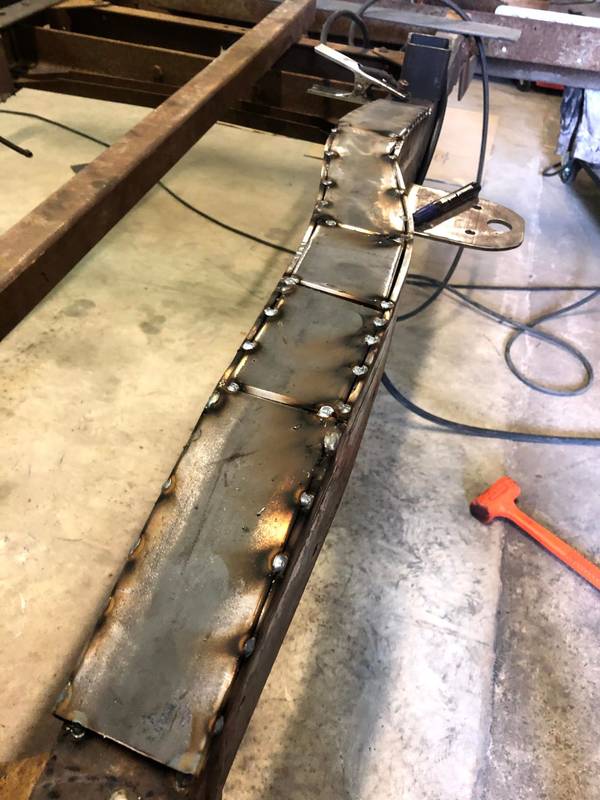 all done with 6mm steel plate (roughly 1/4") Drawing where to cut for the notch: 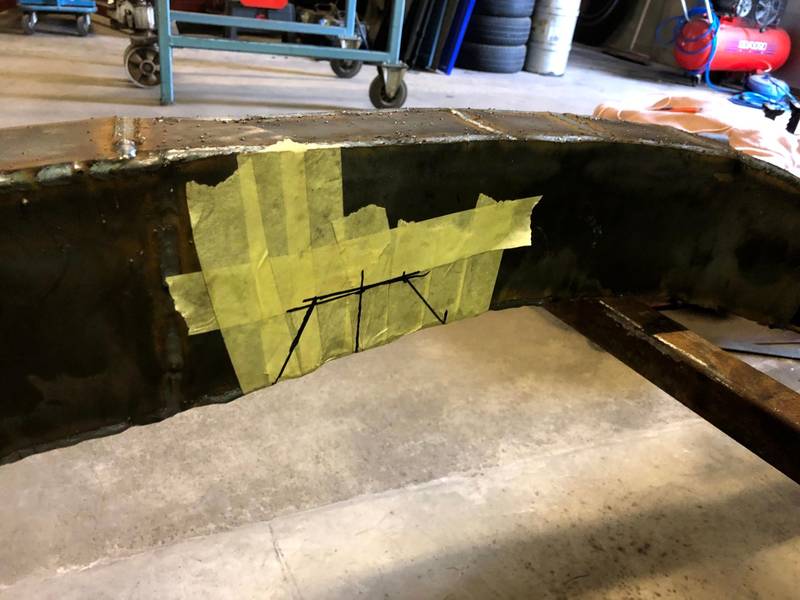 After cutting:  Boxed this in after: 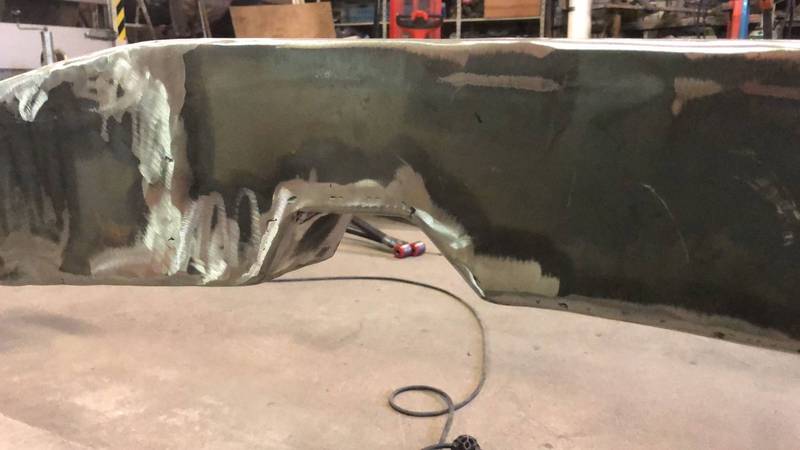 after cleaning up the welds and making new brackets for the panhart bar:  I'm confident that it's stronger than it was before based on flex in the frame when jacking up on the hitch an just side to side flex. Made the frame brackets for the air bags Started off with a piece of construction I beam with one side cut off  ended up with this (yes needs cleanup)  I Didn't like the placement of the panhart bar behind the axle, mostly because it gets really short, which causes more side to side travel from the axle when going up and down. So I decided to change it to the front of the axle, where it could be 4 inches longer which resulted in 1/2" less side to side travel overall. At this point I mounted everything and tested the system with the shop compressor.  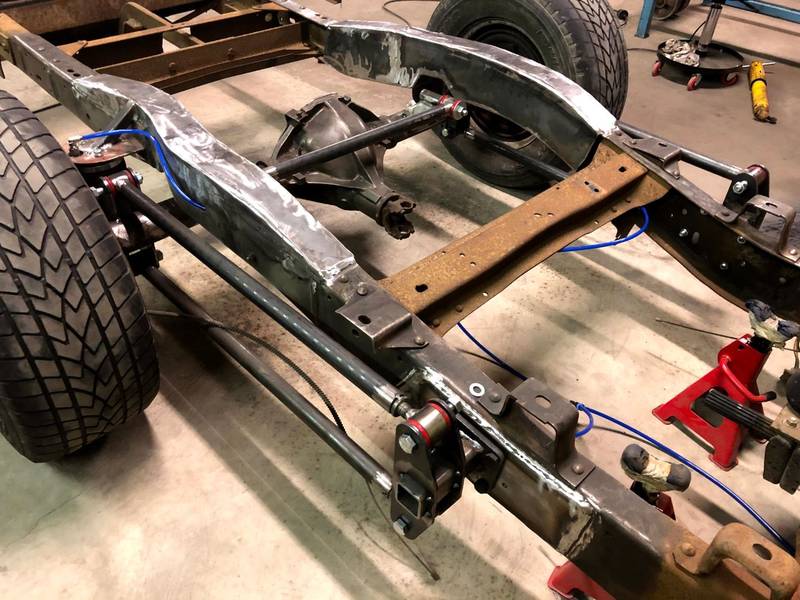 Right now the only thing going above the frame line at full airout is the brakeline bracket on the diff and the very top lip on the diffcover   So I'll be leaving it at that for now. Hope you guys like the progress so far, would love to hear back from y'all since i cant see if anyone is viewing this tread at all
__________________
Sander All Ideas, advice, critisism is welcome. Nothing better to learn from. ______________ '72 C/20 http://67-72chevytrucks.com/vboard/s...d.php?t=809053 |
|
|
|
|
07-16-2020, 06:30 PM
|
#11 |
|
67-72 parts collector,
Join Date: Nov 2002
Location: Mid-MO
Posts: 22,682
|
Re: 1972 C20 -Airride conversion-
Looks great.
What did you end up with for your pinion angle? Might just be the pictures, but it looks like the pinion is pointed down a little.
__________________
Keith Convert to disc brakes. http://67-72chevytrucks.com/vboard/s...d.php?t=444823 |
|
|
|
|
07-16-2020, 06:41 PM
|
#12 | |
|
Registered User
Join Date: Mar 2020
Location: Limburg, Netherlands
Posts: 298
|
Re: 1972 C20 -Airride conversion-
Quote:
__________________
Sander All Ideas, advice, critisism is welcome. Nothing better to learn from. ______________ '72 C/20 http://67-72chevytrucks.com/vboard/s...d.php?t=809053 |
|
|
|
|
|
07-16-2020, 09:23 PM
|
#13 | |
|
67-72 parts collector,
Join Date: Nov 2002
Location: Mid-MO
Posts: 22,682
|
Re: 1972 C20 -Airride conversion-
Quote:
As in the transmission down 3 degrees and the pinion up 3 degrees. 4-link and panhard bar looks nice!
__________________
Keith Convert to disc brakes. http://67-72chevytrucks.com/vboard/s...d.php?t=444823 |
|
|
|
|
|
07-17-2020, 10:10 AM
|
#14 |
|
Registered User
 Join Date: Mar 2007
Location: Scotts, Michigan
Posts: 3,746
|
Re: 1972 C20 -Airride conversion-
Nice project and progress. Be careful with the R9 AccuAir ECU. If you ever have a need to jump start your truck unplug the ECU completely. These earlier ECU's are said to fry easily from a jump start surge. I only mention it because I'm running the same set up from AccuAir.
Marc
__________________
...........__________ .................. ((__|__||___\____ ..;.;;.:;:;.,;..;((_(O))____ (_(O)) 1948 Chevy Truck - Finished SOLD!! 1953 Chevy Suburban "Family Truckster" Completed: Spring of 2021 http://67-72chevytrucks.com/vboard/s...d.php?t=605484 1994 4x4 Blazer - "Field Find" https://67-72chevytrucks.com/vboard/...ferrerid=30857 |
|
|
|
|
07-17-2020, 12:05 PM
|
#15 | ||
|
Registered User
Join Date: Mar 2020
Location: Limburg, Netherlands
Posts: 298
|
Re: 1972 C20 -Airride conversion-
Quote:
Thanks for the info. Quote:
How do you like the setup?
__________________
Sander All Ideas, advice, critisism is welcome. Nothing better to learn from. ______________ '72 C/20 http://67-72chevytrucks.com/vboard/s...d.php?t=809053 |
||
|
|
|
|
07-18-2020, 02:35 PM
|
#16 |
|
Registered User
Join Date: Mar 2020
Location: Limburg, Netherlands
Posts: 298
|
Re: 1972 C20 -Airride conversion-
I checked the pinionangle yesterday, and it's defenetely off...
 Thanks to lolife99 for mentioning it. It would be a pain to redo when I welded it all the way. For now its all just tacked together, so it's not too bad to fix. But for now an update... Front suspention. I cut out the rough shape for the top bagmount plates.  Cut out some circles: 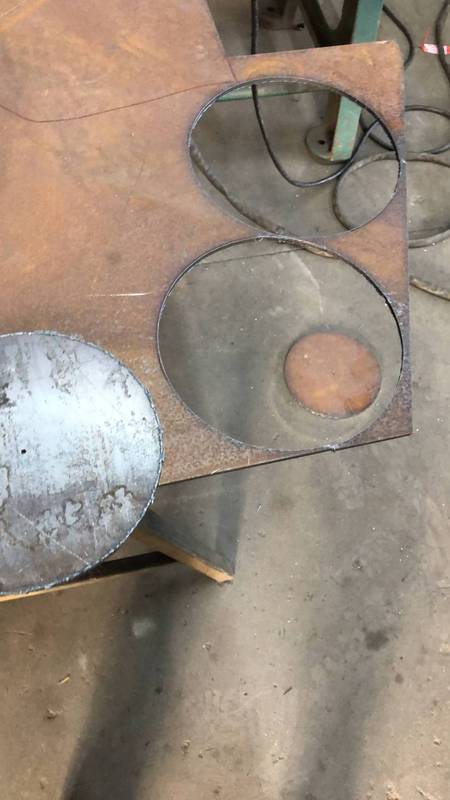 After rolling some 40mm flat steel and tacking it together we end up with this  Cut some big holes in the lower control arms:  and tacked the cups in 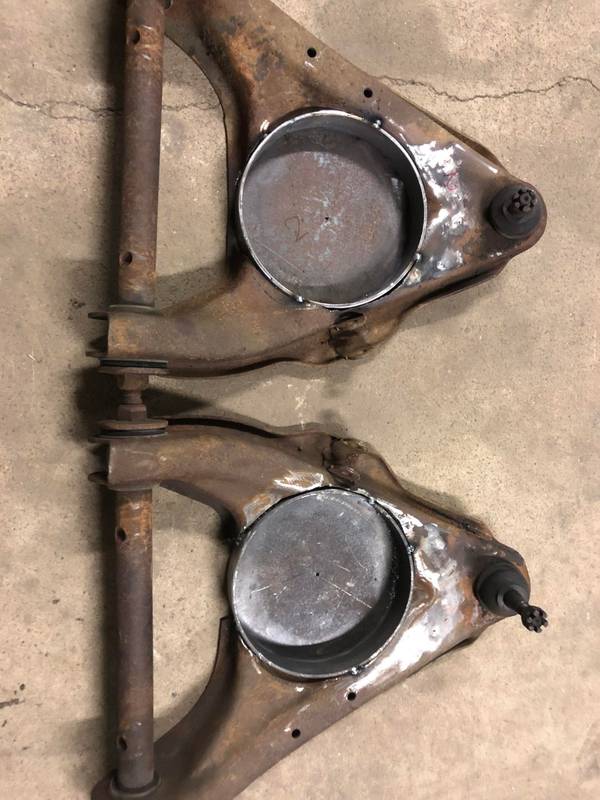 Time for a test fit  Test fit with the bag 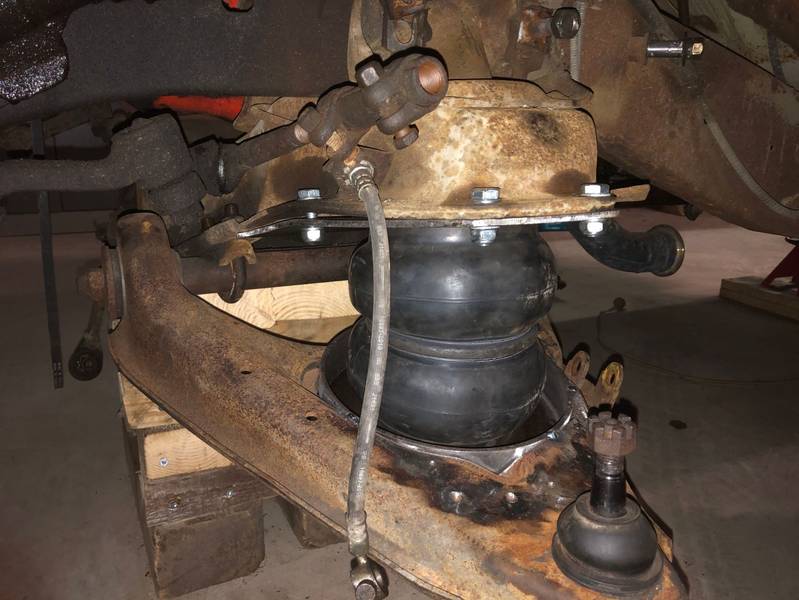 Looks good, welded it solid. Mounted the spindel and drilled a hole for the airline to the bag. wheels on and take a look at roughly ride hight  That is it for now again. Next update tomorrow 'ish'
__________________
Sander All Ideas, advice, critisism is welcome. Nothing better to learn from. ______________ '72 C/20 http://67-72chevytrucks.com/vboard/s...d.php?t=809053 |
|
|
|
|
07-20-2020, 10:50 AM
|
#17 | |
|
Registered User
Join Date: Mar 2007
Location: Scotts, Michigan
Posts: 3,746
|
Re: 1972 C20 -Airride conversion-
Quote:
Marc
__________________
...........__________ .................. ((__|__||___\____ ..;.;;.:;:;.,;..;((_(O))____ (_(O)) 1948 Chevy Truck - Finished SOLD!! 1953 Chevy Suburban "Family Truckster" Completed: Spring of 2021 http://67-72chevytrucks.com/vboard/s...d.php?t=605484 1994 4x4 Blazer - "Field Find" https://67-72chevytrucks.com/vboard/...ferrerid=30857 |
|
|
|
|
|
07-21-2020, 02:11 PM
|
#18 |
|
Registered User
Join Date: Mar 2020
Location: Limburg, Netherlands
Posts: 298
|
Re: 1972 C20 -Airride conversion-
Allright.
I'm working on something I've never seen done before on a car. And I now know why I'm going to feed the air system from a engine driven compressor just like semi trucks and tractors have. I have seen cars with converted a/c compressors to get on board air, but they all have problems with compressor lubrication or oil in the air and in the entire system. So I want to go with a proven air system concept, and make it fit on the pickup. Starting with a compressor: 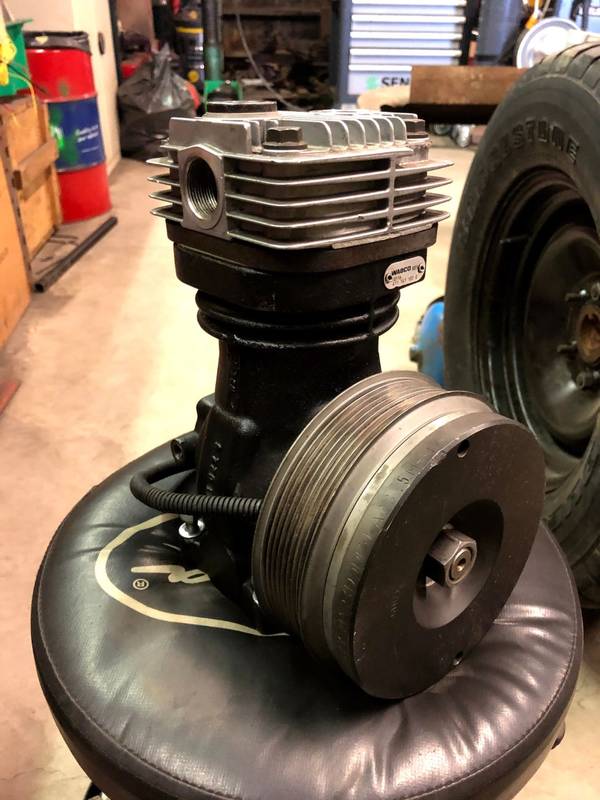 delivering from 2,83 cfm at 600 rpm engine speed up to 12 cfm at 2500 rpm compared to electic compressors. Dual Viair 480C poduce about 3,53 cfm. The only downside is viair will go up to 200 psi, the engine driven compressor will only go to 145 psi. But I will only need a max of 80-90 psi to get the truck completely up. The compressor gets lubricated by engine oil, much like a turbo would. So Oil goes in through the back, and out from the bottom true this big hole. 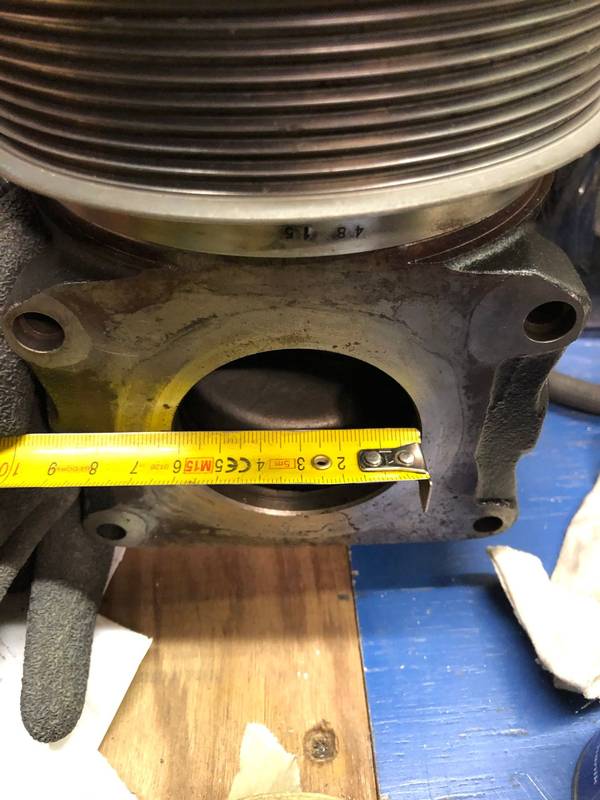 (yes these are centimeters  ) )I made a bracket for the compressor to sit on: 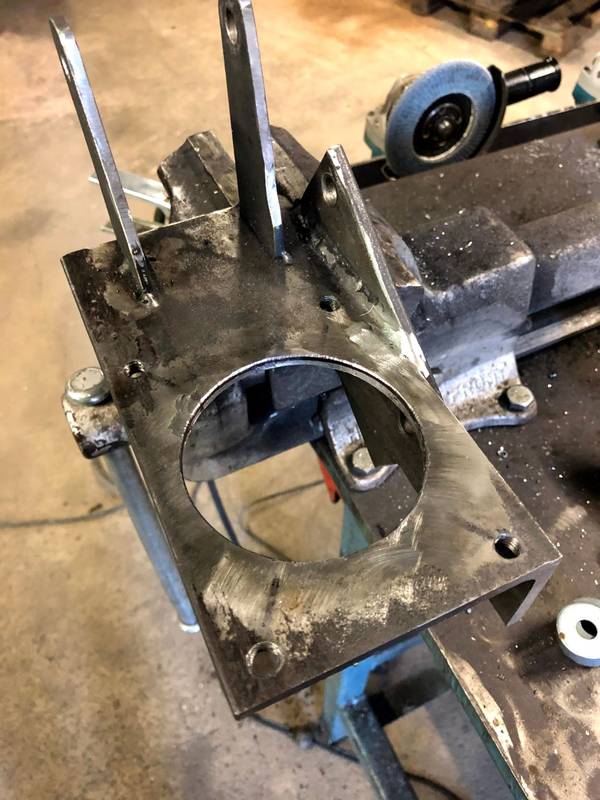 Will get more attention in the future, It will look a lot better. It will sit like this in the engine bay.  With a new mount for the dynamo.  mocked up a new crank pulley just for measuring and fitment.  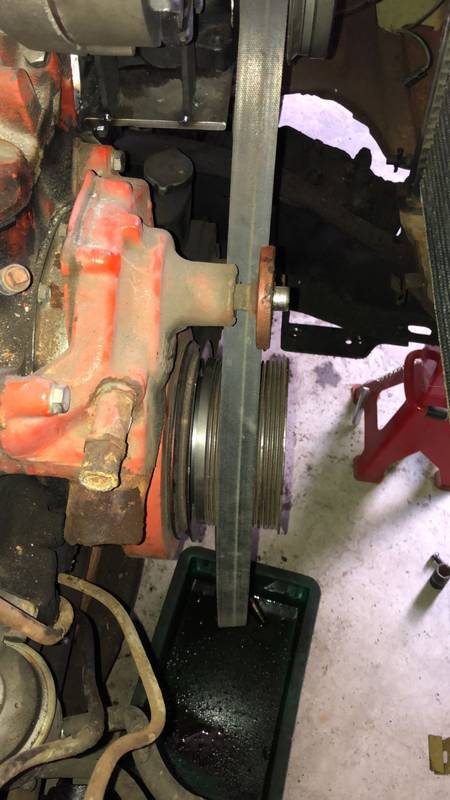 I measured it all and a pulley is being made at the moment. I need to get the oil from the bottom of the compressor back into the oil sump, so I made a small drain sump for the compressor. 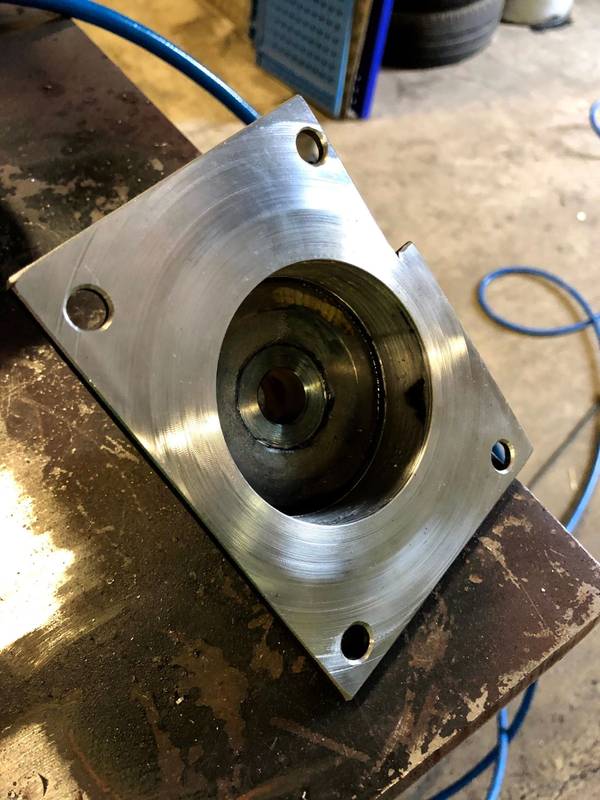  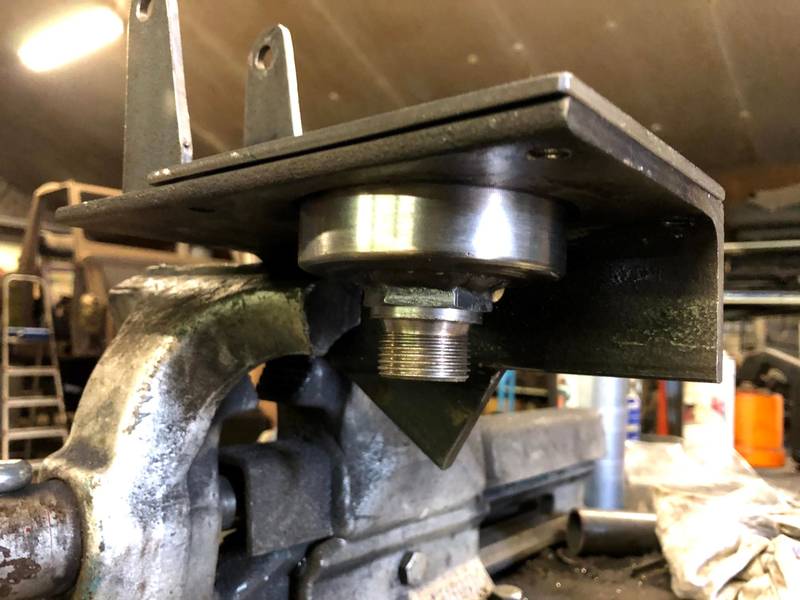 It gets sandwiched in bitween the compressor and the stand. It could not be one piece, I would not be able to bolt the bracket to the engine. I'm just waiting on the pulley at the moment, than I can make a belt tentioner and bolt it all up and see how it works. (I've no idea) The compressor has a electric clutch inside the pulley, so i can shut the compressor off so only the pulley will spin. There will be a couple of other things I want to do with this, mostly for safety reasons, to keep the compressor reliable. I will go deeper into this when I make it all. For now this is it. I'd like to hear what you think of this idea. Good and bad things. Yes there are a thousand reasons why I shouldn't do this. Mostly because of the hassle to get it working, but it's one of those things I just want. And I like to take on the challenge to get it working.
__________________
Sander All Ideas, advice, critisism is welcome. Nothing better to learn from. ______________ '72 C/20 http://67-72chevytrucks.com/vboard/s...d.php?t=809053 |
|
|
|
|
07-22-2020, 10:03 AM
|
#19 |
|
Registered User
Join Date: Apr 2001
Location: DALLAS,TX
Posts: 21,907
|
Re: 1972 C20 -Airride conversion-
Just looked through this build. I'm liking the DIY fab approach. I would appear you definitely have metal fabricating experience (rolling the steel for the round cups/rear link bar adjustable ends) & things look like you put thought into it. I get the engine driven compressor but I'm not a fan strictly based on it's size. But, that's just me.
Subbing in for your future updates.
__________________
67SWB-B.B.RetroRod 64SWB-Recycle 89CCDually-Driver/Tow Truck 99CCSWB Driver All Fleetsides @rattlecankustoms in IG Building a small, high rpm engine with the perfect bore, stroke and rod ratio is very impressive. It's like a highly skilled Morrocan sword fighter with a Damascus Steel Scimitar..... Cubic inches is like Indiana Jones with a cheap pistol. |
|
|
|
|
07-25-2020, 08:15 AM
|
#20 |
|
Registered User
Join Date: Mar 2020
Location: Limburg, Netherlands
Posts: 298
|
Re: 1972 C20 -Airride conversion-
Thanks Scoti!
I agree with you on the size of the compressor. But it will never be a under the hood showtruck, so I went with function over beauty. I try to do everything myself, and I'm taking my time with it. A lot of this time is thinking of all the possibilities on what to make and on why to make it a particular way. For axample the next thing. Making the rear shock mount's I start off with everything I want and need. I want: - as much travel as possible - it to look good - it to work good - no crazy expensive shocks - not stick out too much under the axle I need: - as small as possible angle of the shocks - as far out on the axle as possible - Not go above frame level and hit the bed floor So after roughly 6 hours of just holding the shocks all the possible ways on all possible places, I decide to make it this way. First I make A lower axle mount. similar to the one i ended up with, but it was to short and the angle wasn't good. Threw it in the bin. (3 hours past) Then made new ones: 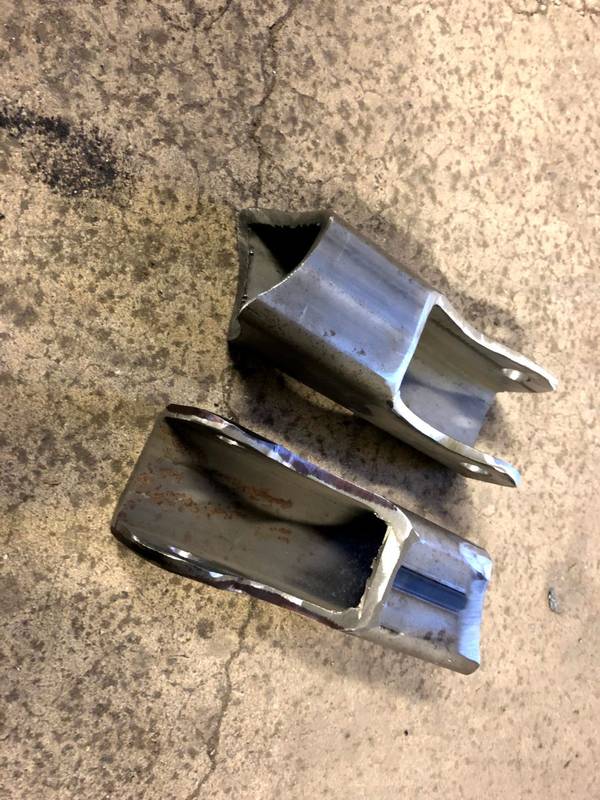 cut the angle with a hole saw, it definitely didn't like it.  after some cleanup and some lightning holes  tacked one to the axle and clamped some scrap steel to the frame to find the angle I wanted.  Then welded a tube in bitween the framerails. Than welded the original shock frame mount pins on the tube, ad reinforced them with another chopped up tube. And after cleanup ended up with this 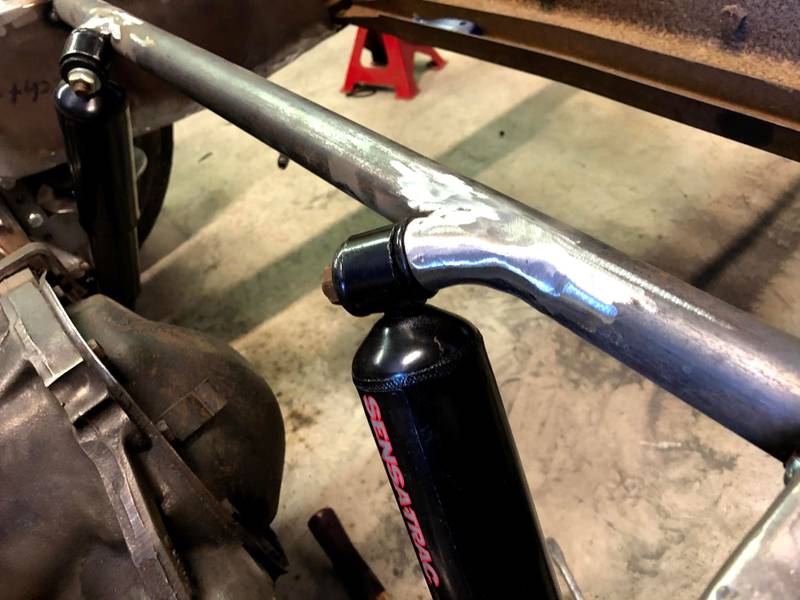  Just these mounts took me something in the lines of 18 hours of thinking and fabricating time. Oh and just before I made all this I found a place to mount my airtanks to 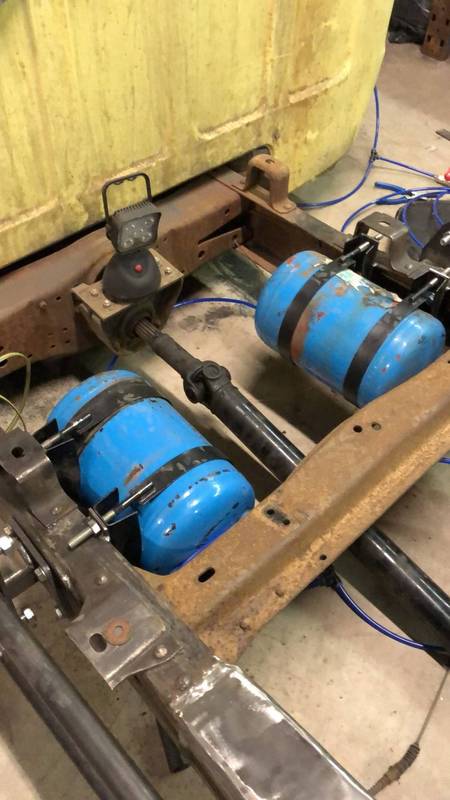 Those are 2 10 liter tanks, so thats just over 5 gallons total.
__________________
Sander All Ideas, advice, critisism is welcome. Nothing better to learn from. ______________ '72 C/20 http://67-72chevytrucks.com/vboard/s...d.php?t=809053 |
|
|
|
|
07-25-2020, 11:57 AM
|
#21 |
|
Registered User
Join Date: Apr 2001
Location: DALLAS,TX
Posts: 21,907
|
Re: 1972 C20 -Airride conversion-
I understand the effort & time it takes to create & build your own brackets or parts (especially w/basic tools). I did a similar shock relocation for my dually. I set mine up with the ability to pivot side to side w/o bind since a Panard Bar allows side to side fluctuations as the suspension extends/compresses. My set-up was easier to do as I wanted to minimize the effort for what it was/does ��
You're doing a great job, especially for your age.
__________________
67SWB-B.B.RetroRod 64SWB-Recycle 89CCDually-Driver/Tow Truck 99CCSWB Driver All Fleetsides @rattlecankustoms in IG Building a small, high rpm engine with the perfect bore, stroke and rod ratio is very impressive. It's like a highly skilled Morrocan sword fighter with a Damascus Steel Scimitar..... Cubic inches is like Indiana Jones with a cheap pistol. |
|
|
|
|
08-16-2020, 09:22 AM
|
#22 |
|
Registered User
Join Date: Mar 2020
Location: Limburg, Netherlands
Posts: 298
|
Re: 1972 C20 -Airride conversion-
- Update -
The pulley I designed is done, and looks awesome 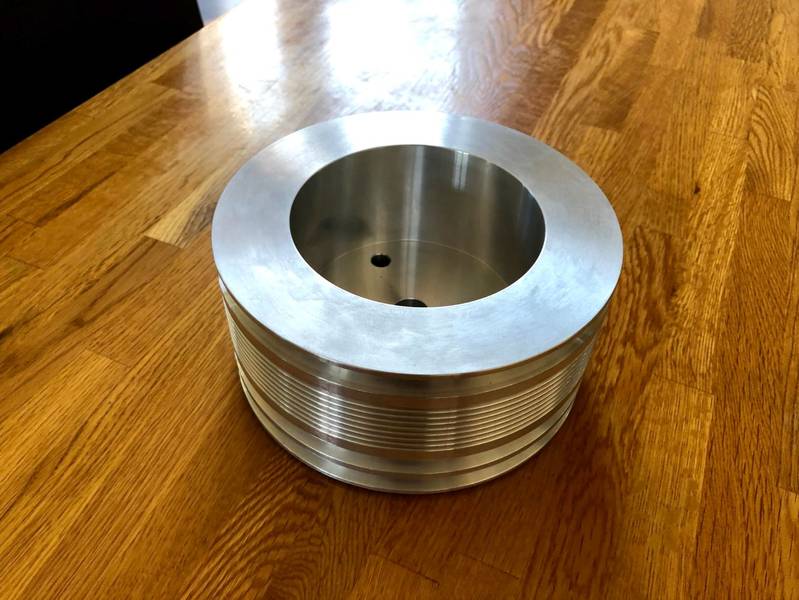 But i messed up on the measuring side of things.  So I needed to make a spacer for it. 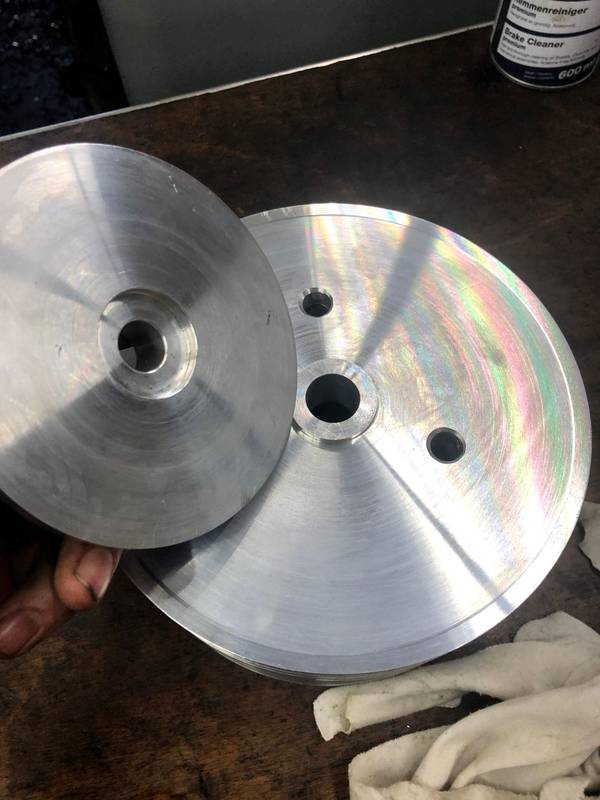 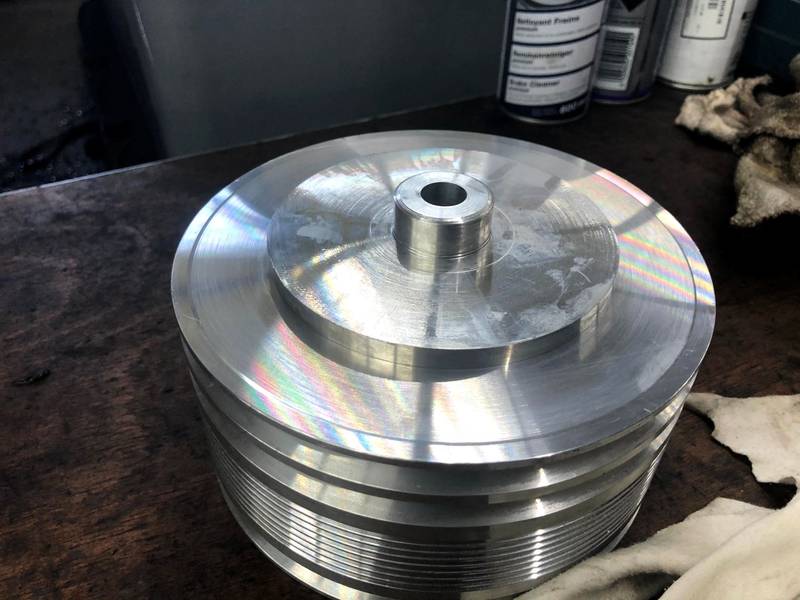 Made this from aluminium with the necessary centering rings  After this I also needed to make a spacer for the waterpump pulley. 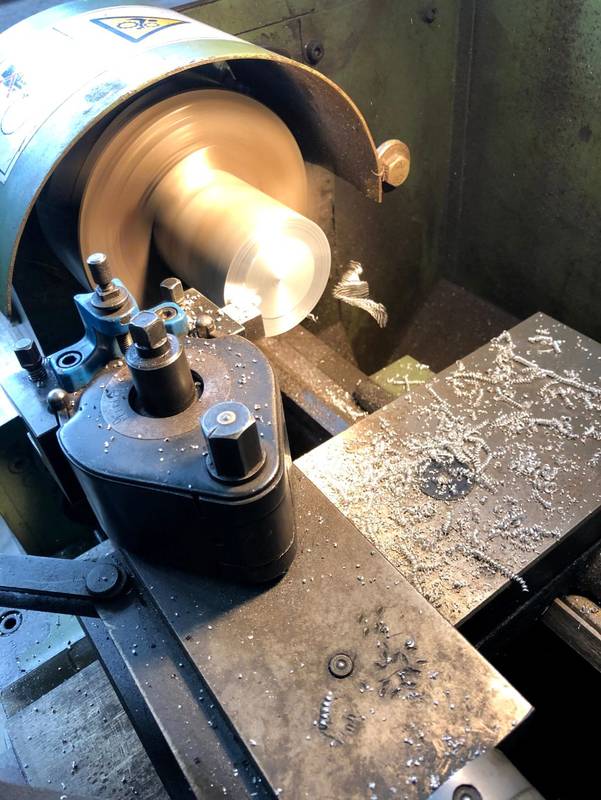  Next up the oil feed for the compressor. Screwed a 1/8 Npt to 1/4 Bsp Nippel into the oil hole in the front of the engine. 1/8 NPT is not a common size over here. 1/4 BSP can be bougth at every hydraulic shop in the area.  Then I made a oil line from this nipple to a banjo bolt on the compressor. 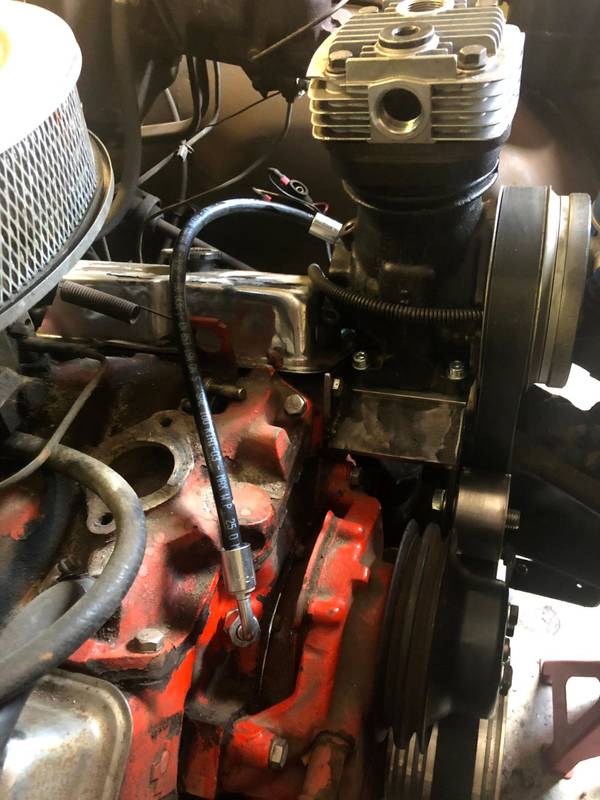 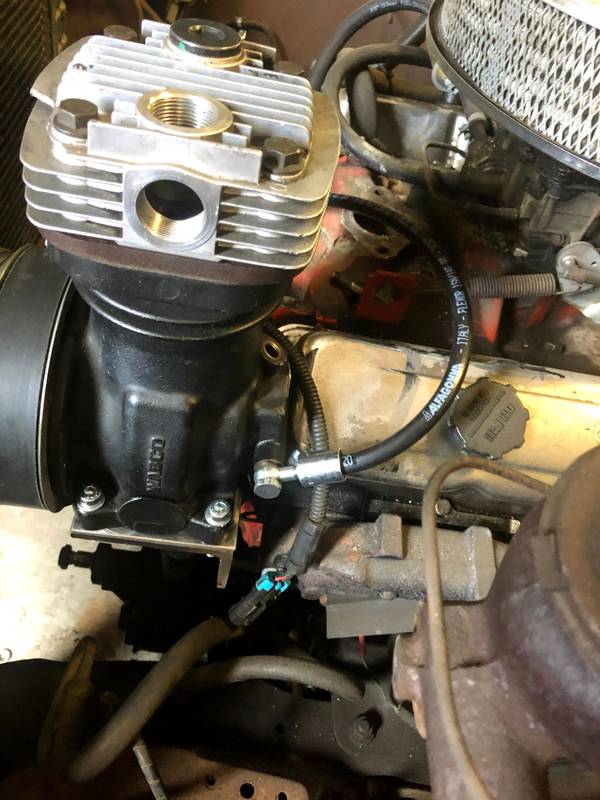 I still need to press the sleeves on the ends of the oil line. Got a belt that fits on the compressor looks good to me  Getting closer to be able to do a testrun
__________________
Sander All Ideas, advice, critisism is welcome. Nothing better to learn from. ______________ '72 C/20 http://67-72chevytrucks.com/vboard/s...d.php?t=809053 |
|
|
|
|
08-16-2020, 01:23 PM
|
#23 |
|
Registered User
Join Date: Apr 2001
Location: DALLAS,TX
Posts: 21,907
|
Re: 1972 C20 -Airride conversion-
Impressive work on the pulleys.
__________________
67SWB-B.B.RetroRod 64SWB-Recycle 89CCDually-Driver/Tow Truck 99CCSWB Driver All Fleetsides @rattlecankustoms in IG Building a small, high rpm engine with the perfect bore, stroke and rod ratio is very impressive. It's like a highly skilled Morrocan sword fighter with a Damascus Steel Scimitar..... Cubic inches is like Indiana Jones with a cheap pistol. |
|
|
|
|
09-06-2020, 12:59 PM
|
#24 |
|
Registered User
Join Date: Mar 2020
Location: Limburg, Netherlands
Posts: 298
|
Re: 1972 C20 -Airride conversion-
-Update-
Took the oilpan off and welded a bung to it. Put it back together with new seals and made a hose form my compressor oil pan to the engine oil pan. So with oil going into the compressor and oil going back to the engine we're ready for a testrun. https://youtu.be/Mj82cHnSsuo It runs really smooth. I'm really happy with this. offcourse when its making 8 bar (100+ psi) it will pull a lot more on the belt. But for what I see now I'm not conserned with it failing. With the compressor working I can work on getting the air in the tanks. The air will be going from the compressor into a 3 meter (10 foot) tube in front of the radiator. This will cool the air down a bit. 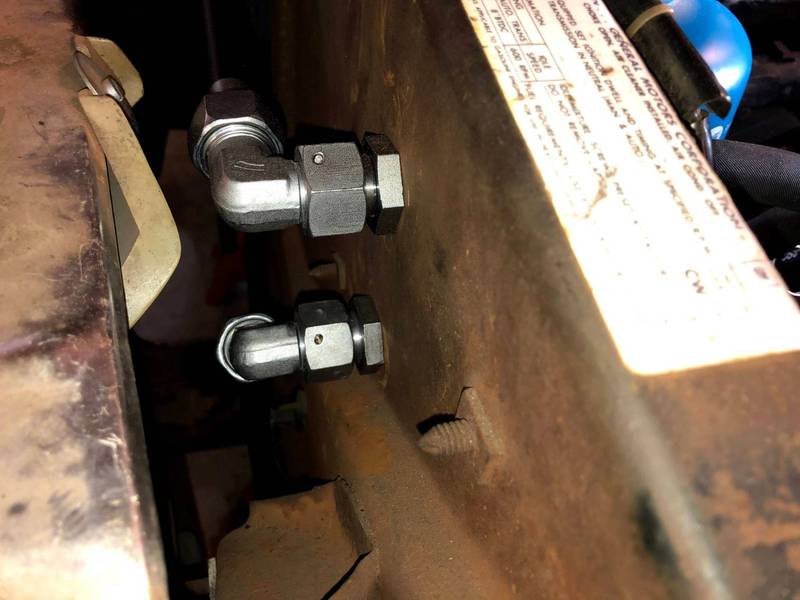 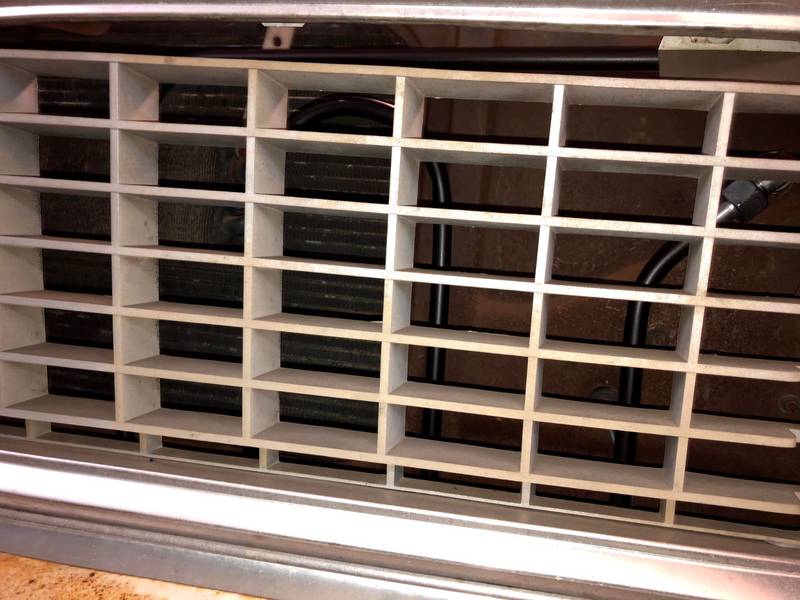 After that the air wil go though a big oil and moisture separator with built in safety valve (blow off at 210 psi), filter regenerationvalve and external filtered filling. From there it wil feed a regeneration air reservoir and the main air tanks under the bed.   So I'll try to explain what it does and how it works. The compressor clutch will turn on when the main tanks (under the bed) are running low on air. Than it will fill the main tanks simultaneously with the regenaration tank. When the main tanks are filled to a set pressure the valve will switch and the regenaration tank will empty though the filter to atmosphere. So it will blow the moisture out of the filter. When that happens the regeneration air tank wil drop below a set pressure, and the clutch on the compressor will turn off. You may ask, is this nessesary to have? - No, not really That's it for now. More stuff in the works.
__________________
Sander All Ideas, advice, critisism is welcome. Nothing better to learn from. ______________ '72 C/20 http://67-72chevytrucks.com/vboard/s...d.php?t=809053 |
|
|
|
|
09-06-2020, 06:27 PM
|
#25 | |
|
Registered User
Join Date: Apr 2001
Location: DALLAS,TX
Posts: 21,907
|
Re: 1972 C20 -Airride conversion-
Quote:
__________________
67SWB-B.B.RetroRod 64SWB-Recycle 89CCDually-Driver/Tow Truck 99CCSWB Driver All Fleetsides @rattlecankustoms in IG Building a small, high rpm engine with the perfect bore, stroke and rod ratio is very impressive. It's like a highly skilled Morrocan sword fighter with a Damascus Steel Scimitar..... Cubic inches is like Indiana Jones with a cheap pistol. |
|
|
|
|
|
| Bookmarks |
| Thread Tools | |
| Display Modes | |
|
|


 Linear Mode

