
|
 04-22-2015, 01:58 PM
|
#426 |
|
Registered User
Join Date: Oct 2007
Location: Spanaway
Posts: 8,451
|
Re: 55 Wagon Progress
I watched the video on the Watervliet planishing hammer, thats a pretty cool tool!
__________________
Mike. Swamp Rat build thread : http://67-72chevytrucks.com/vboard/s...d.php?t=595019 72 3/4T 4X4 4" BDS Lift 33" BFG's |

|

|
|
04-26-2015, 12:45 AM
|
#427 |
|
Registered User
Join Date: Jan 2013
Location: Leonardtown, MD
Posts: 1,636
|
Re: 55 Wagon Progress
Quite noisy too!
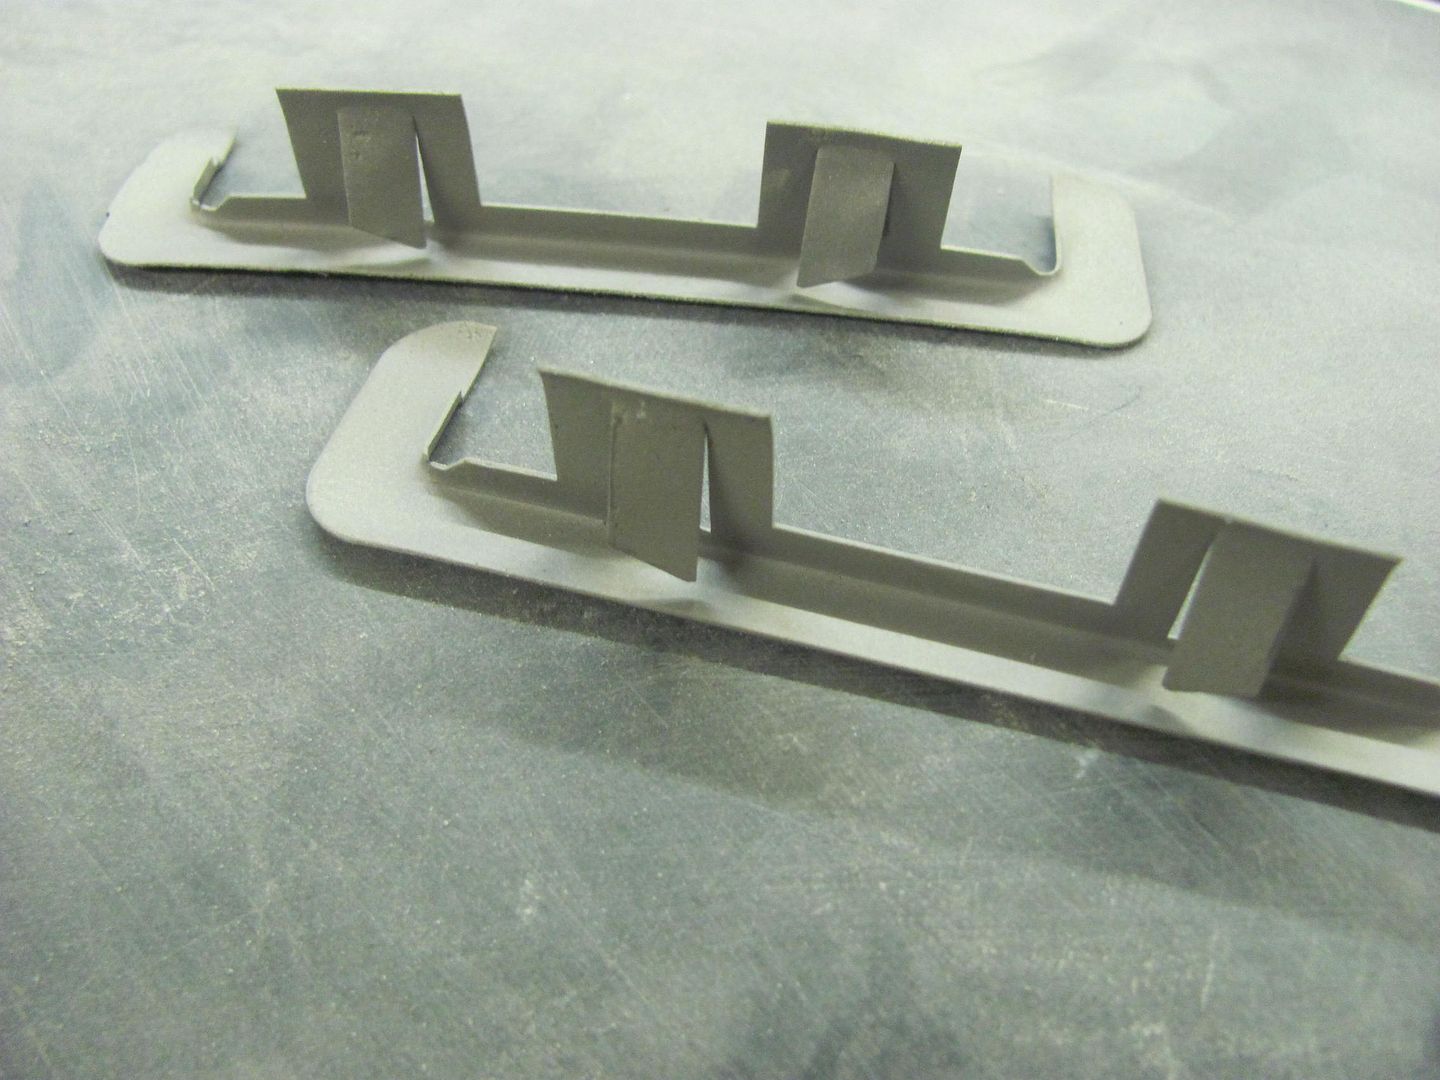
Finishing up on the radio holes... 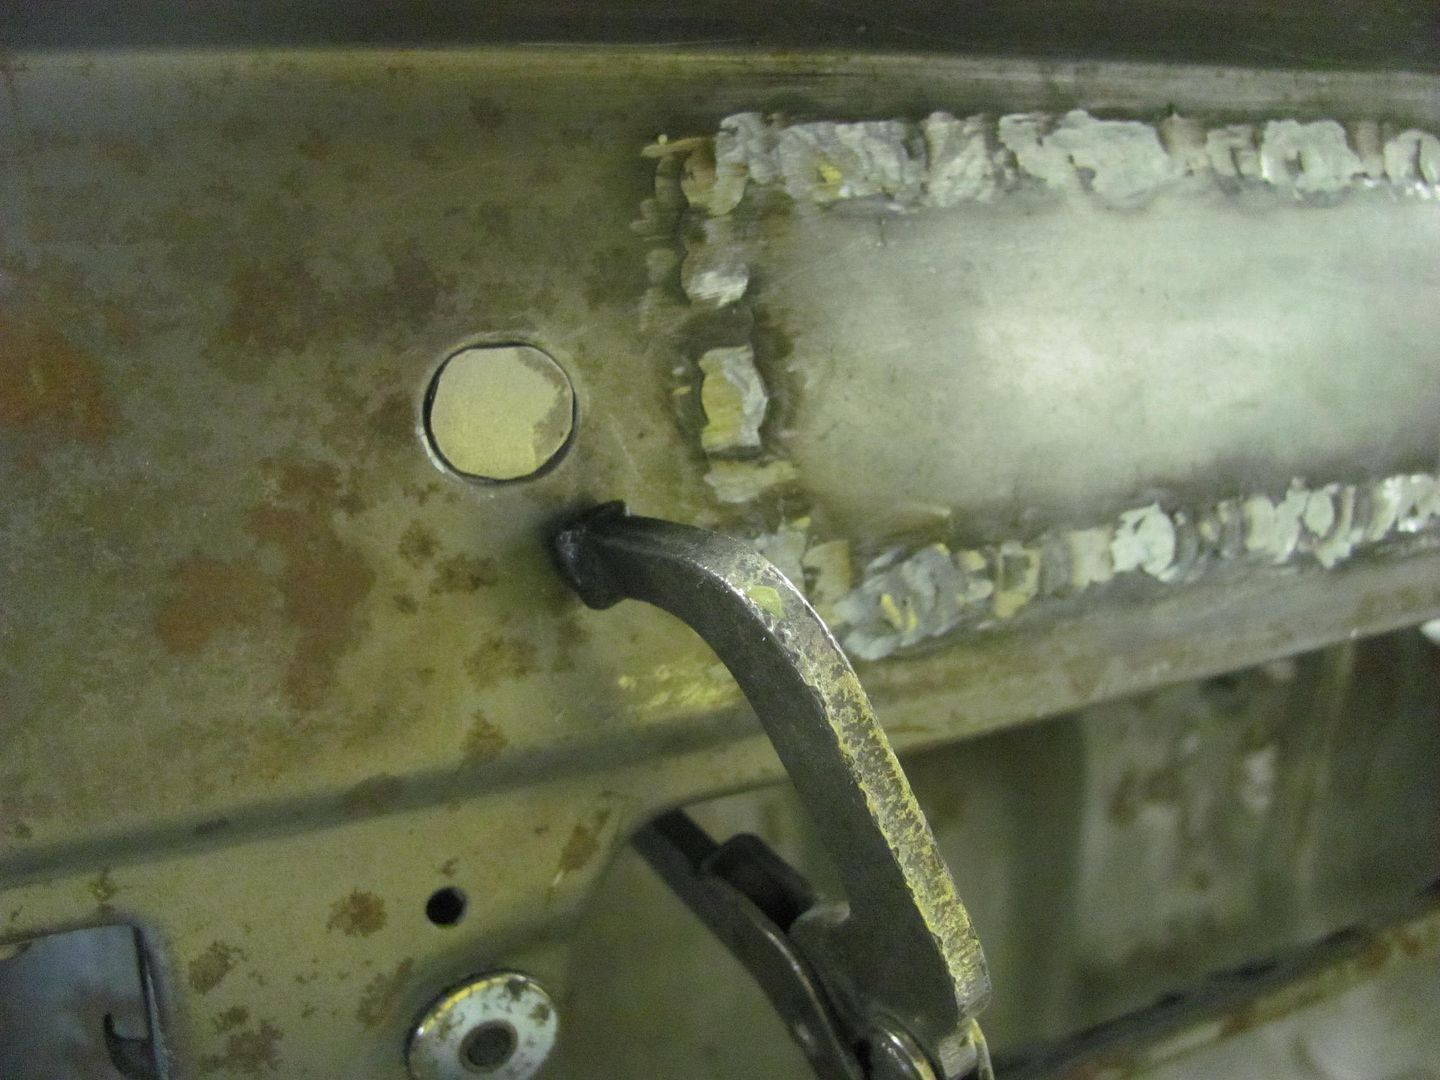   Shaving the other seam, here bumping the panels to get a consistent height across the front... 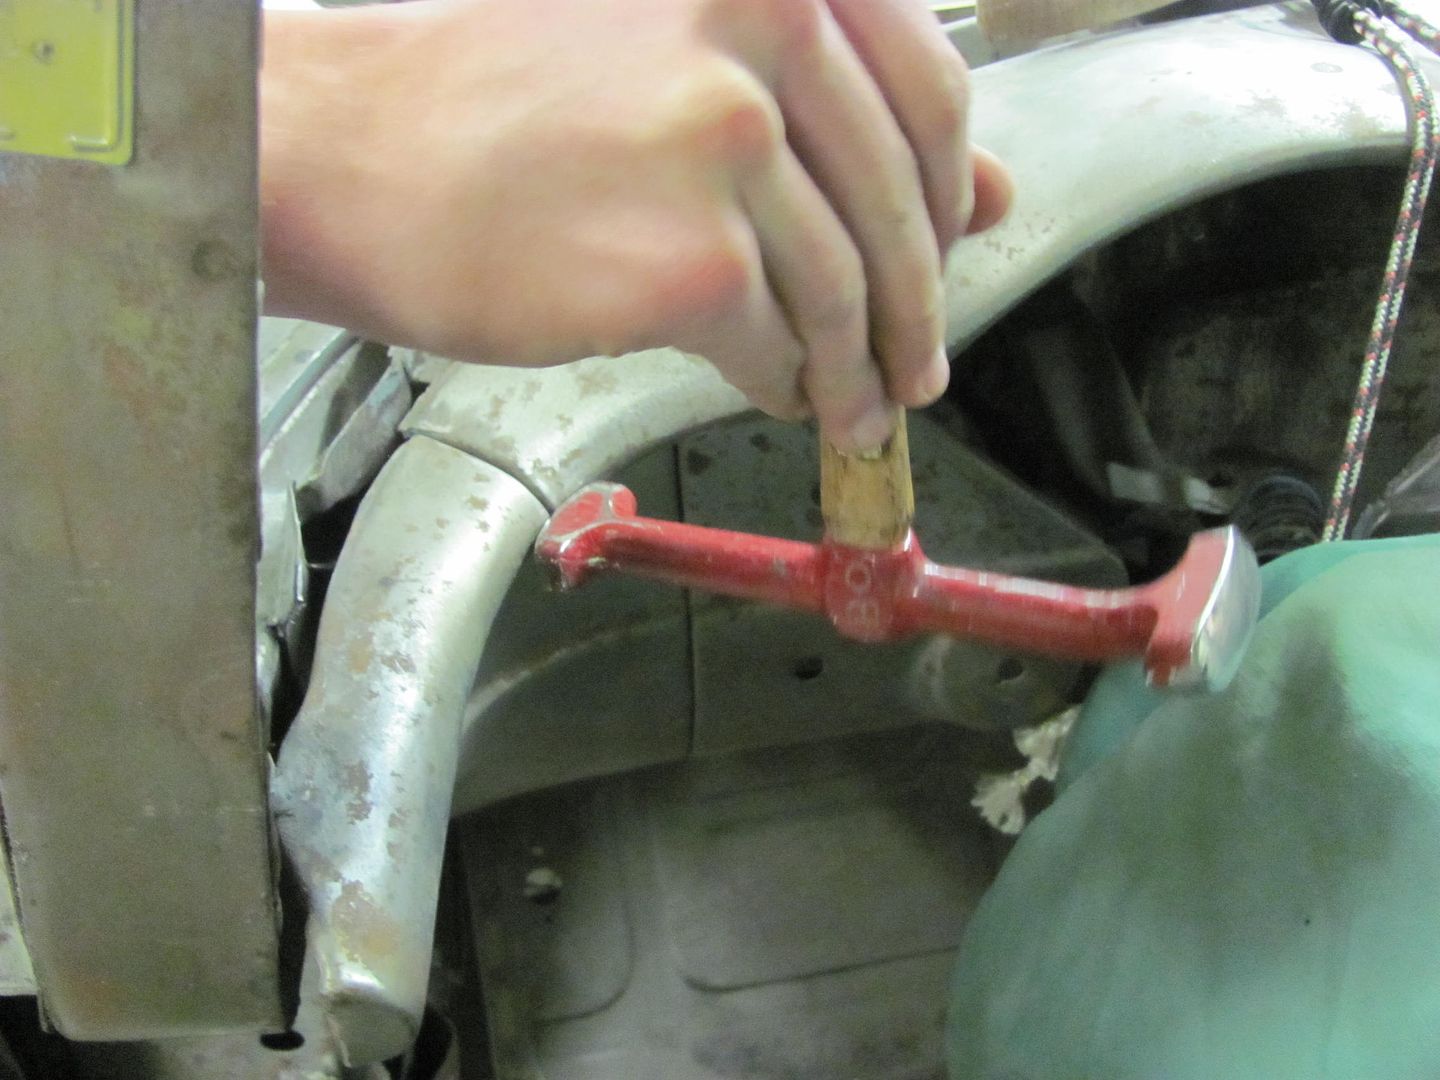 The upper section would prove to need a bit more persuasion... 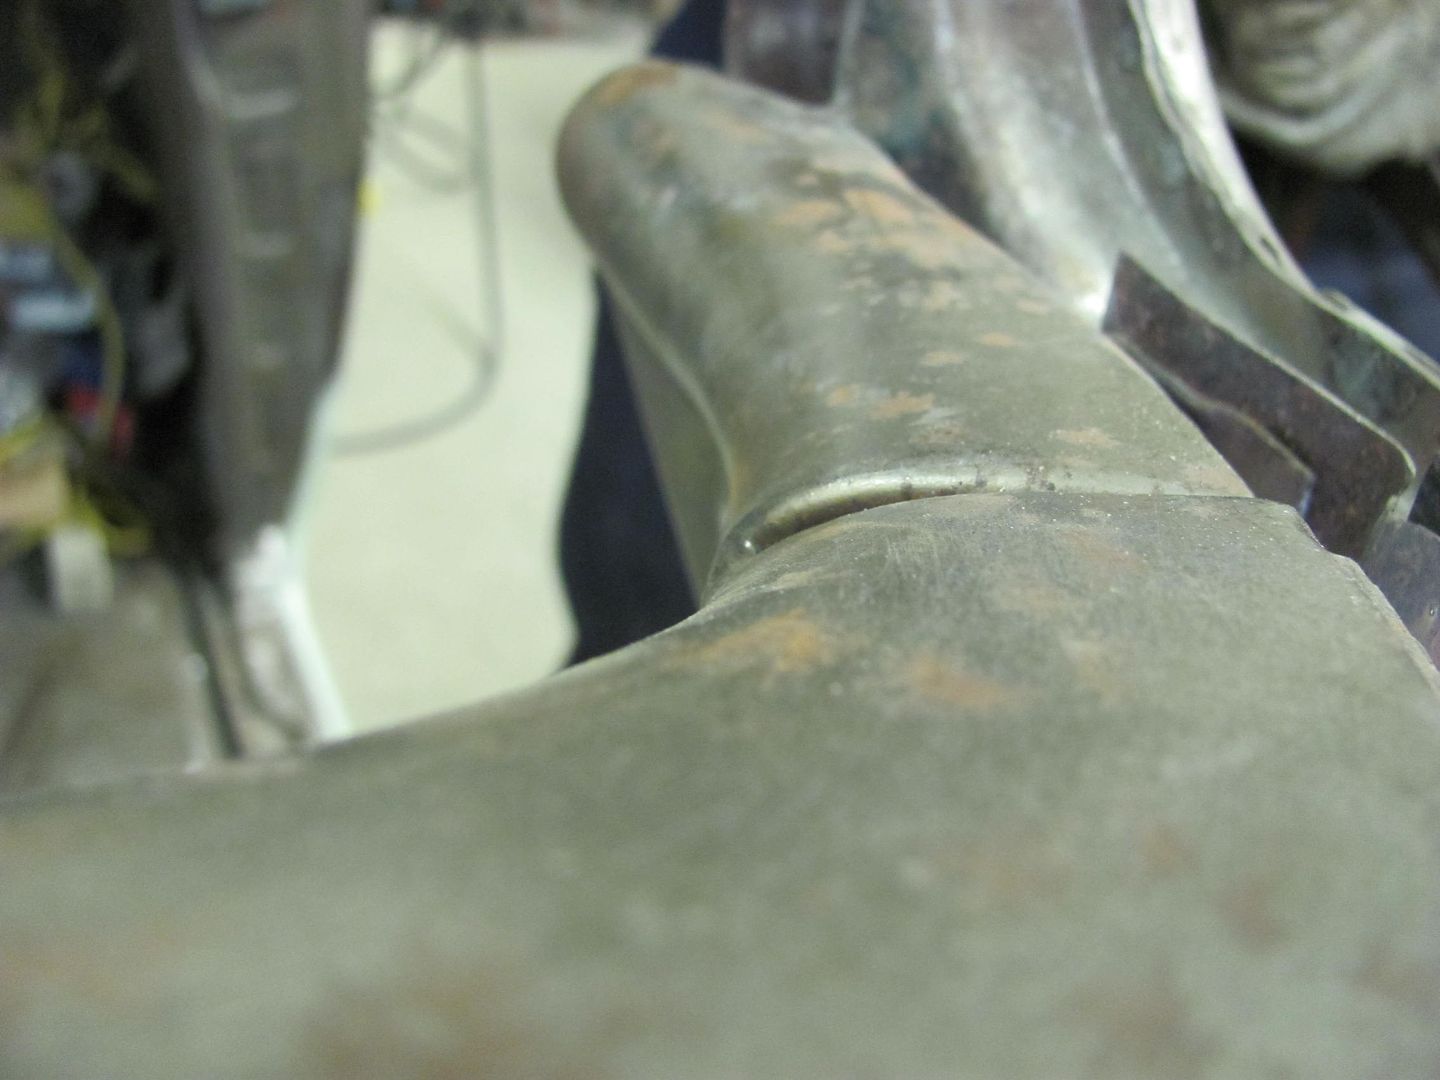 Tool modification... 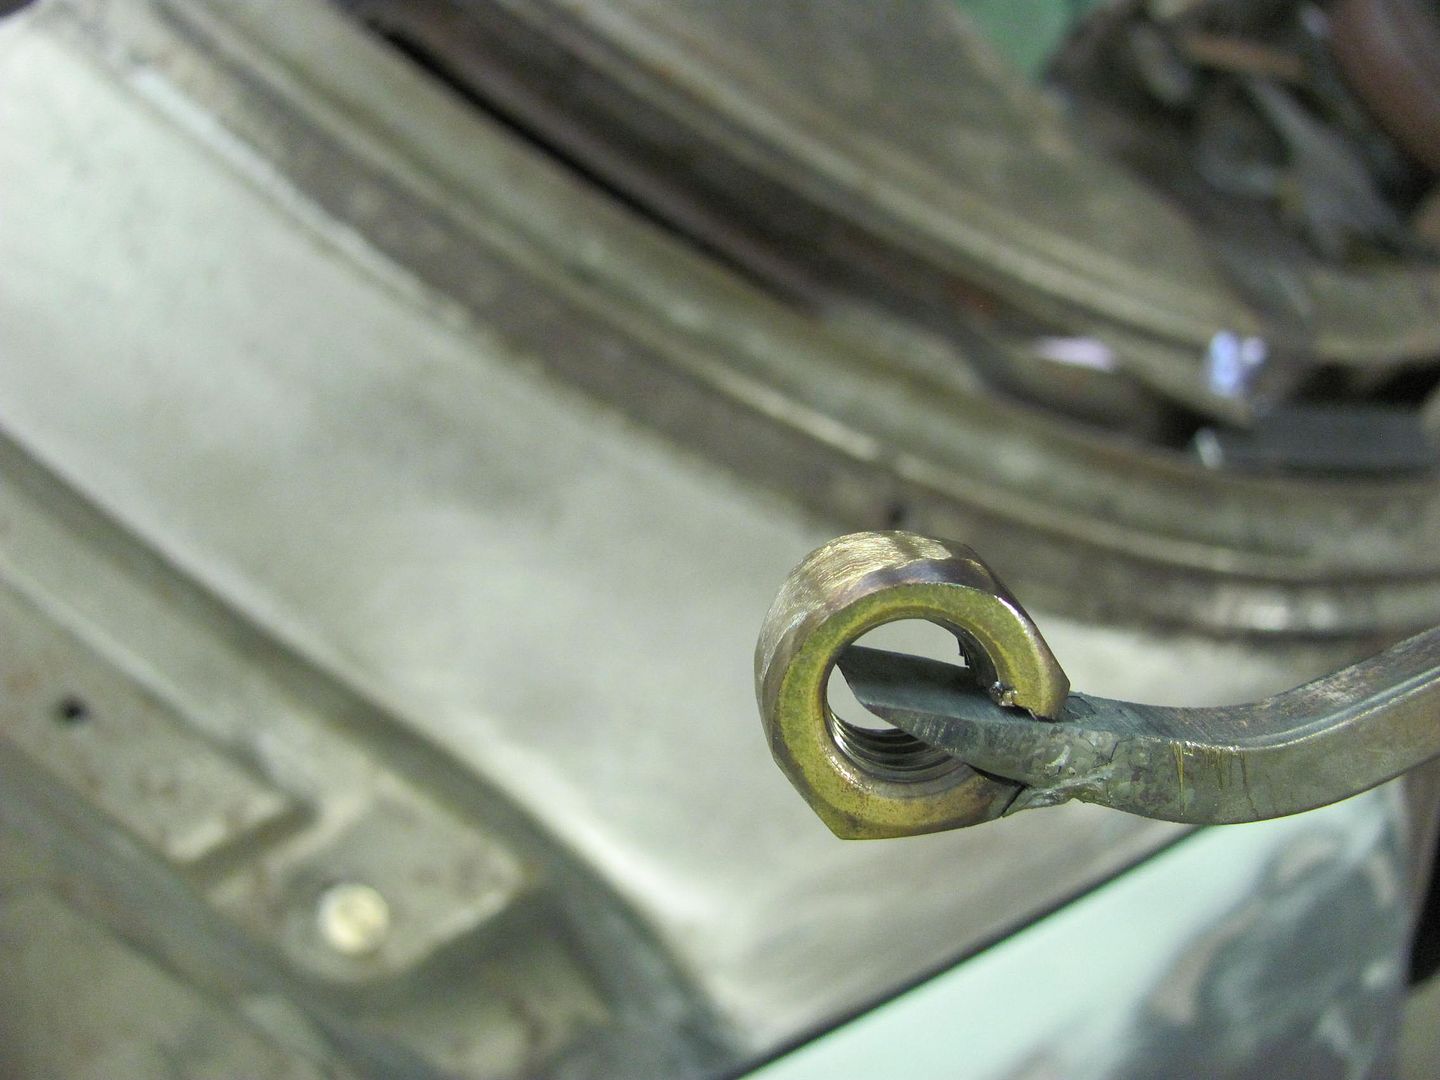 A chunk of 3/4 square stock laid in dash void to use as fulcrum...  Heat applied... 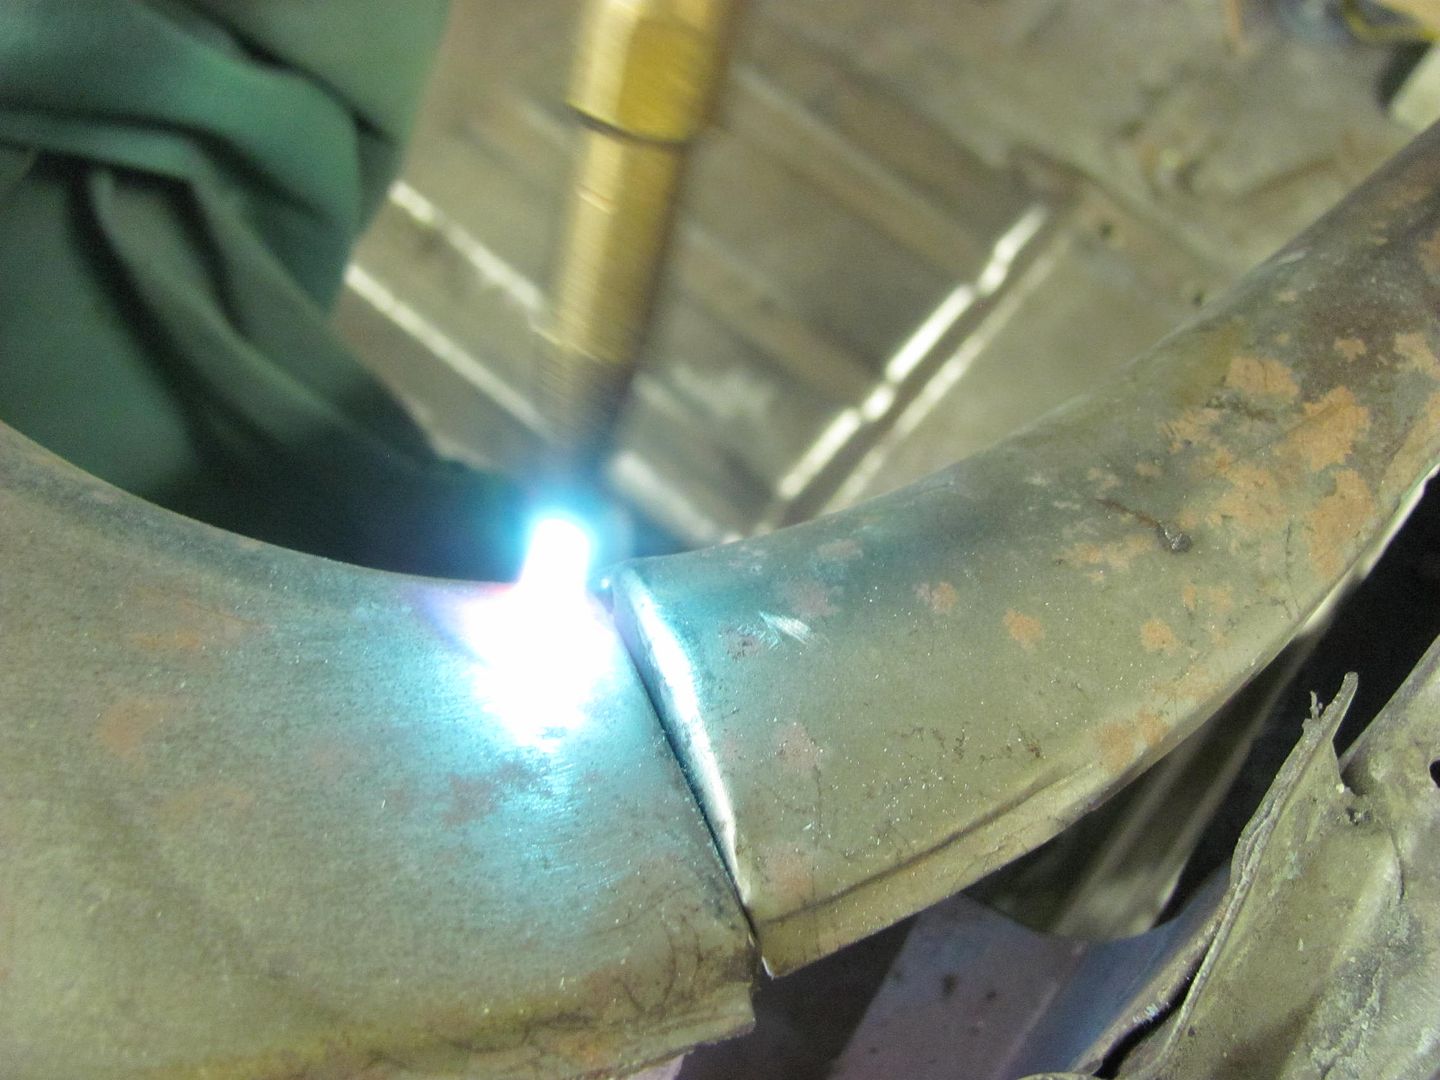 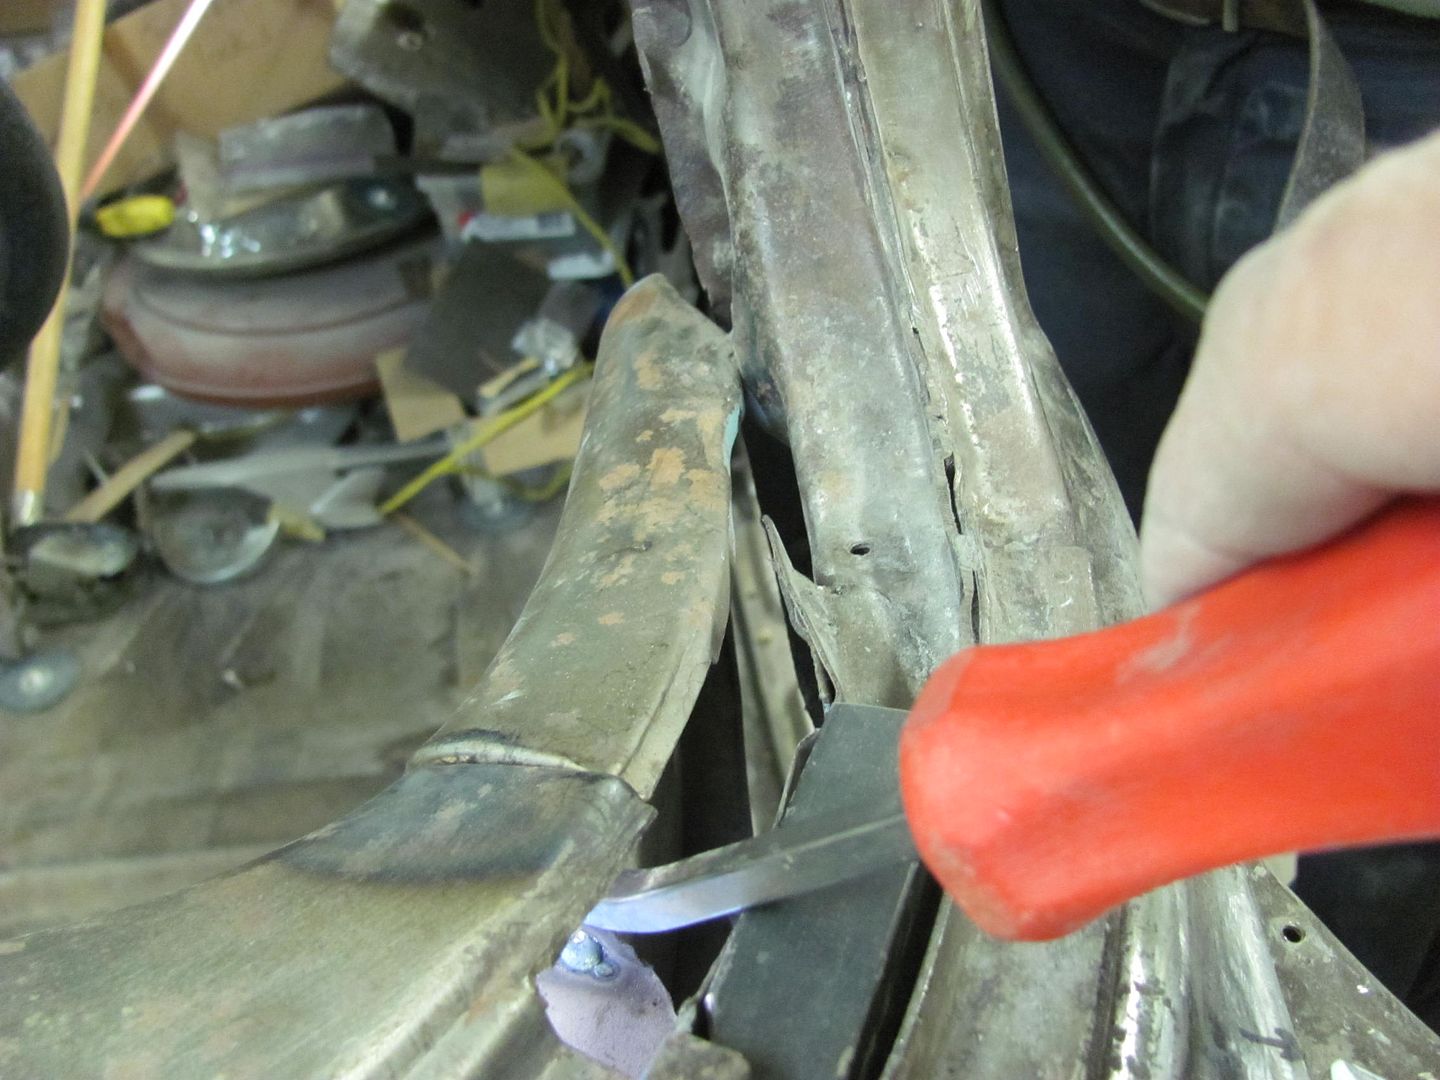 Results... before.. After... 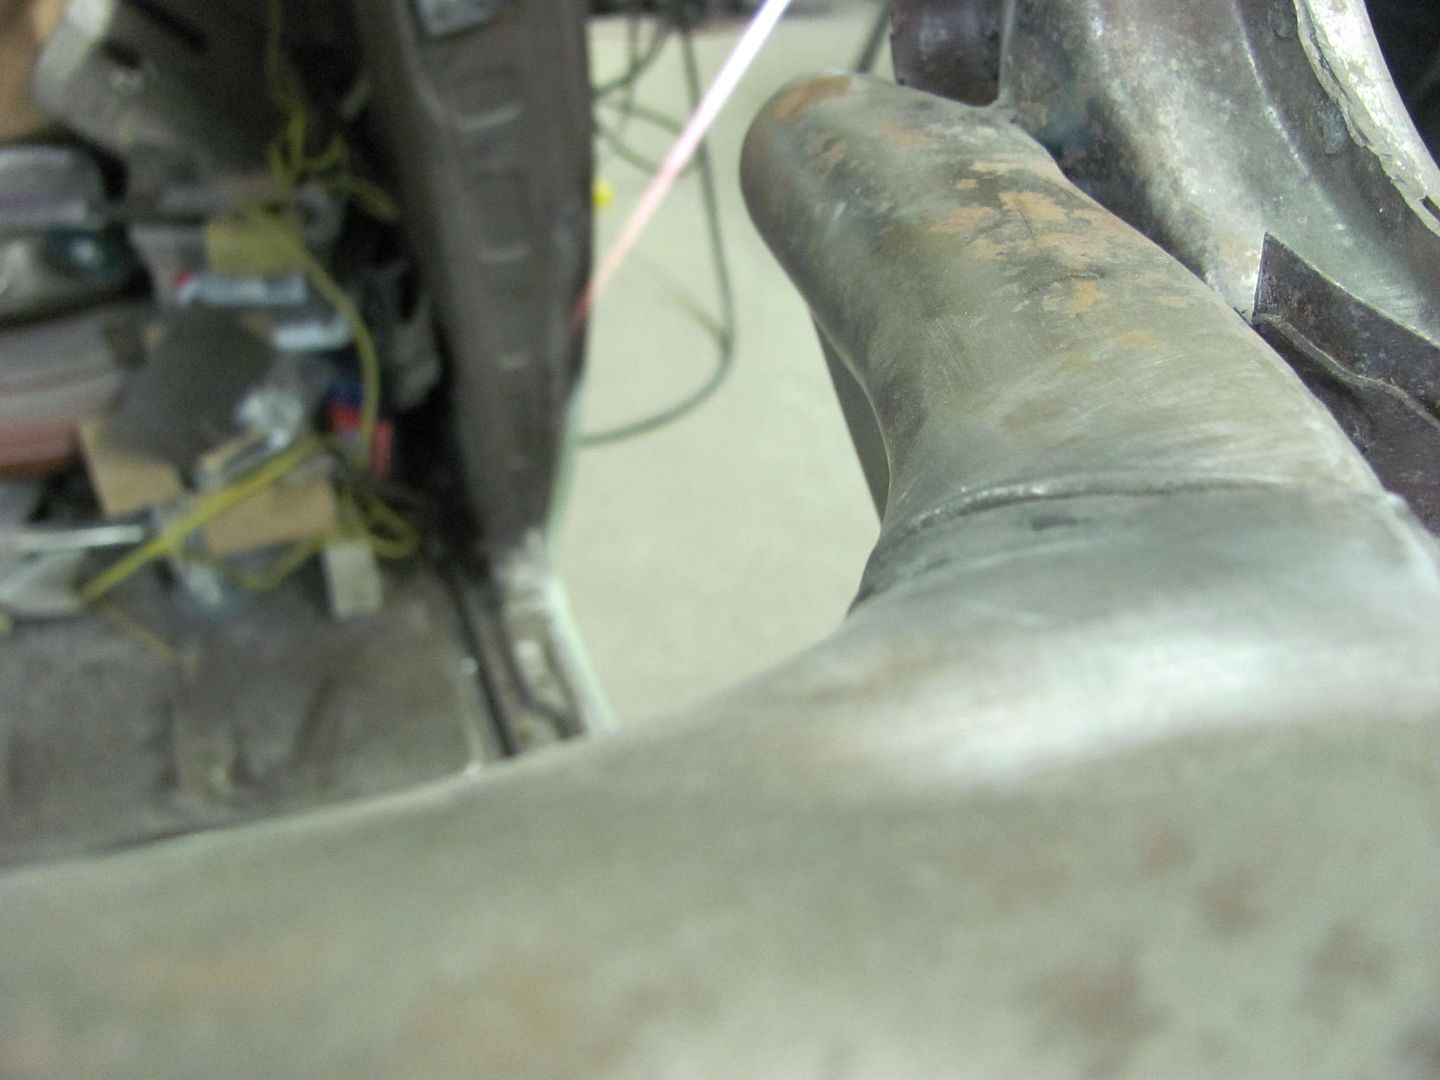   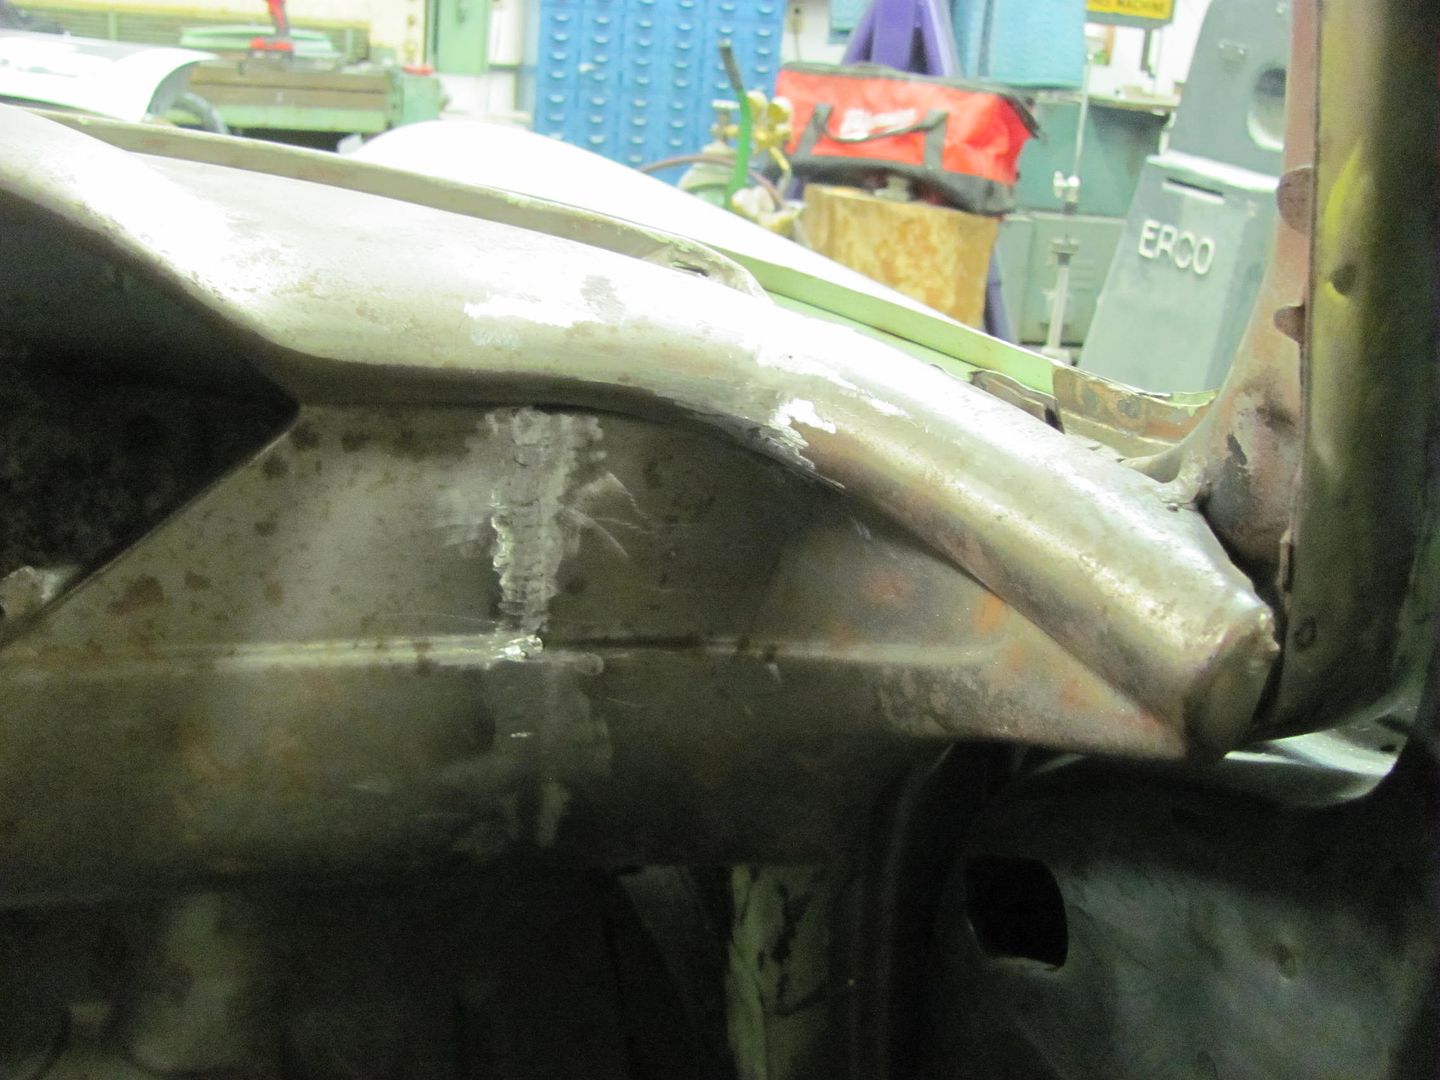 This view from the back side of weld dot penetration shows Kyle has pretty good consistency in weld dot sizing. 
__________________
Robert |
|
|
|
|
04-26-2015, 09:09 AM
|
#428 |
|
Senior Member
 Join Date: Jul 2012
Location: Oblong, Illinois
Posts: 7,017
|
Re: 55 Wagon Progress
Nice detail repair. 99% would never have noticed that. Really like your creative solutions.
|
|
|
|
|
04-26-2015, 10:28 AM
|
#429 | |
|
Senior Member
Join Date: Mar 2011
Location: West Plains, Missouri
Posts: 7,555
|
Re: 55 Wagon Progress
Quote:
__________________
my build thread: http://67-72chevytrucks.com/vboard/s...d.php?t=459839 Jimbo's long bed step build:http://67-72chevytrucks.com/vboard/s...t=464626<br /> |
|
|
|
|
|
04-26-2015, 11:53 PM
|
#430 |
|
Registered User
Join Date: Jan 2013
Location: Leonardtown, MD
Posts: 1,636
|
Re: 55 Wagon Progress
Thanks guys!
Today was the Spring Fling car show in Leonardtown so we took the opportunity to do some "window shopping" for vents to fit in the dashboard. With all this nice real estate now: .....our plans are for some rectangular AC vents in the radio's original place. I always thought the "up in your face" vents do a better job of keeping you cool than the under dash ones that freeze the knees. So in no particular order, here are some sample vents.. 1940 Ford "ashtray replacements" by VA... Although small, thought these may work toward the outside in the same "band" area of the dash... 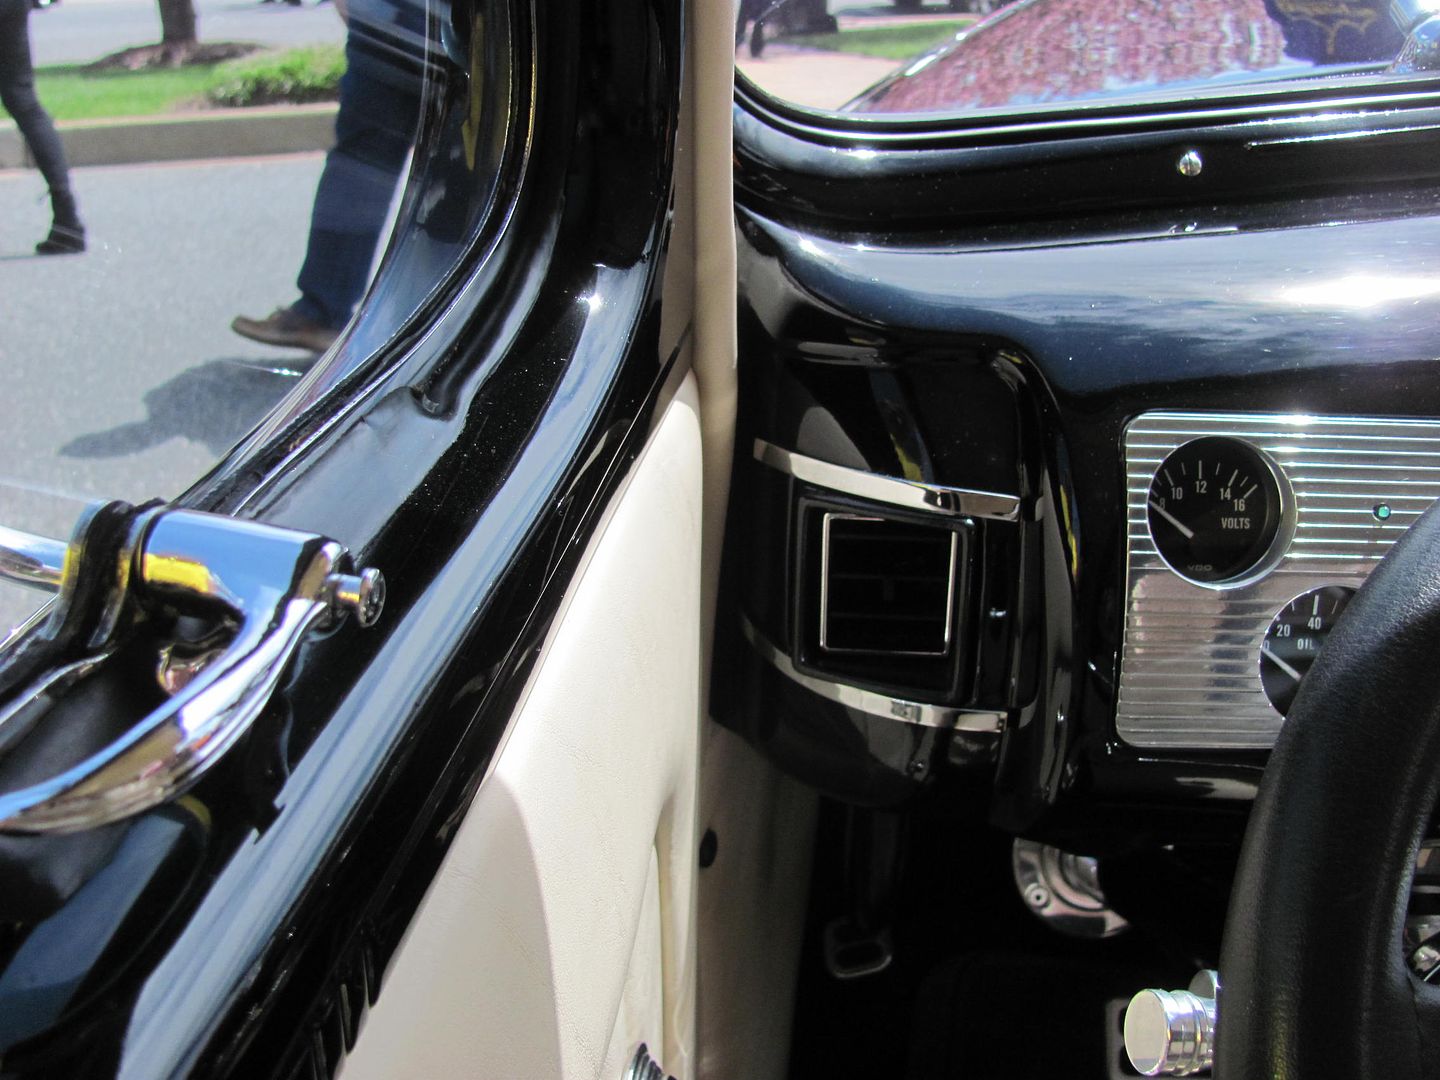 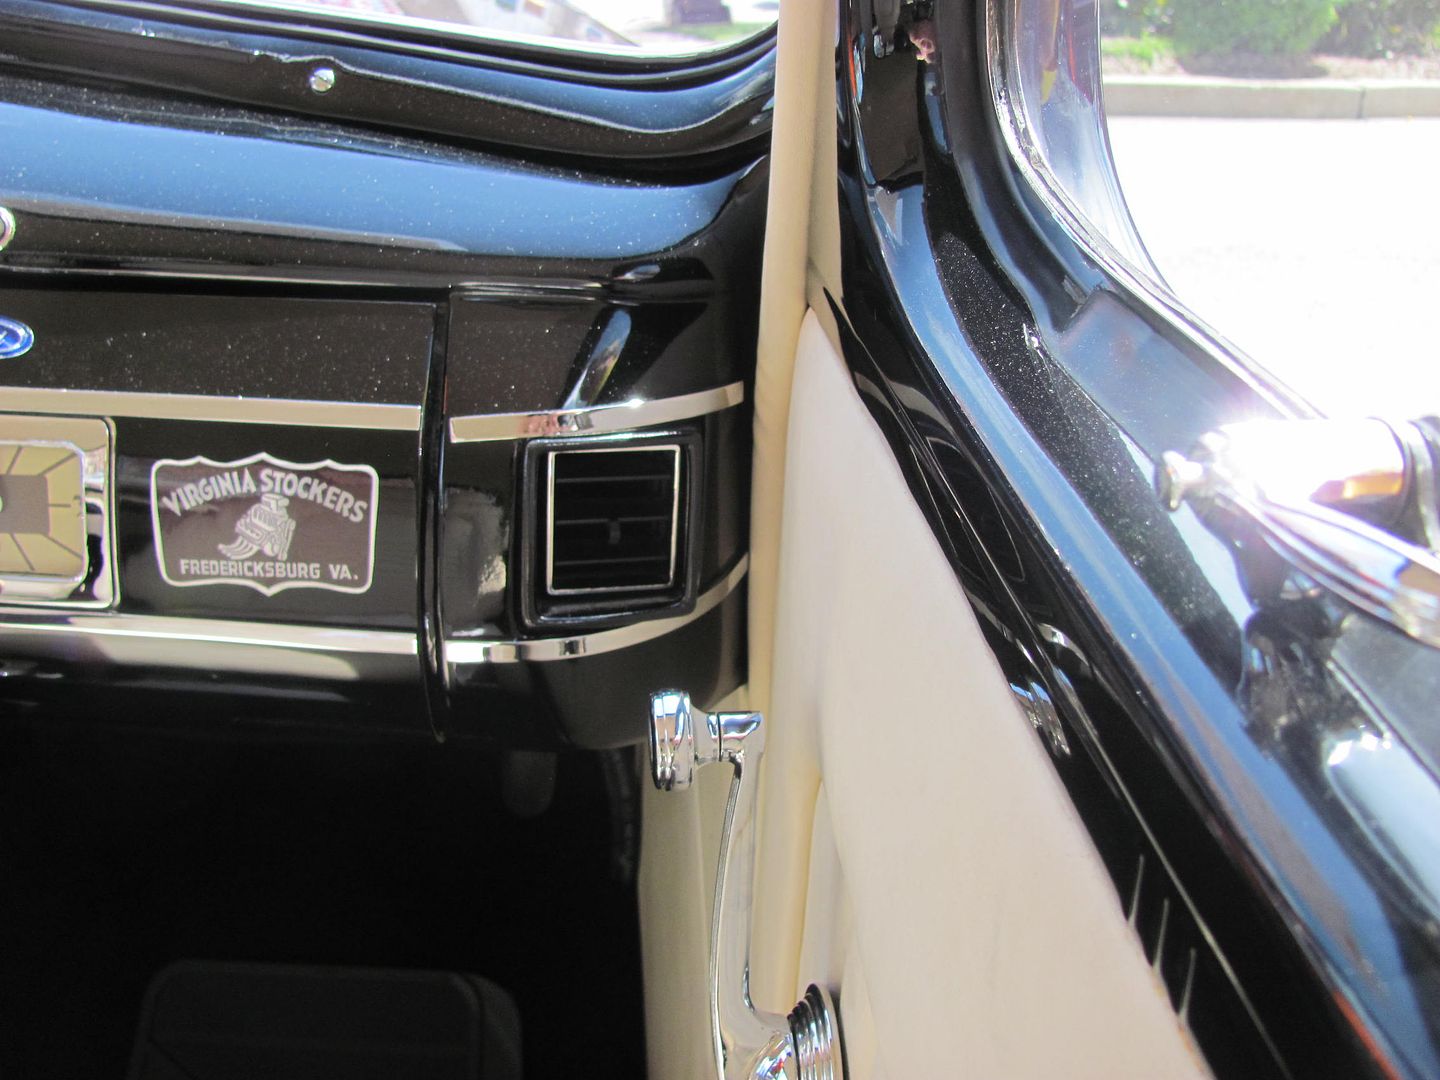  Grand National...   Lower dash vents for a 65 Impala... 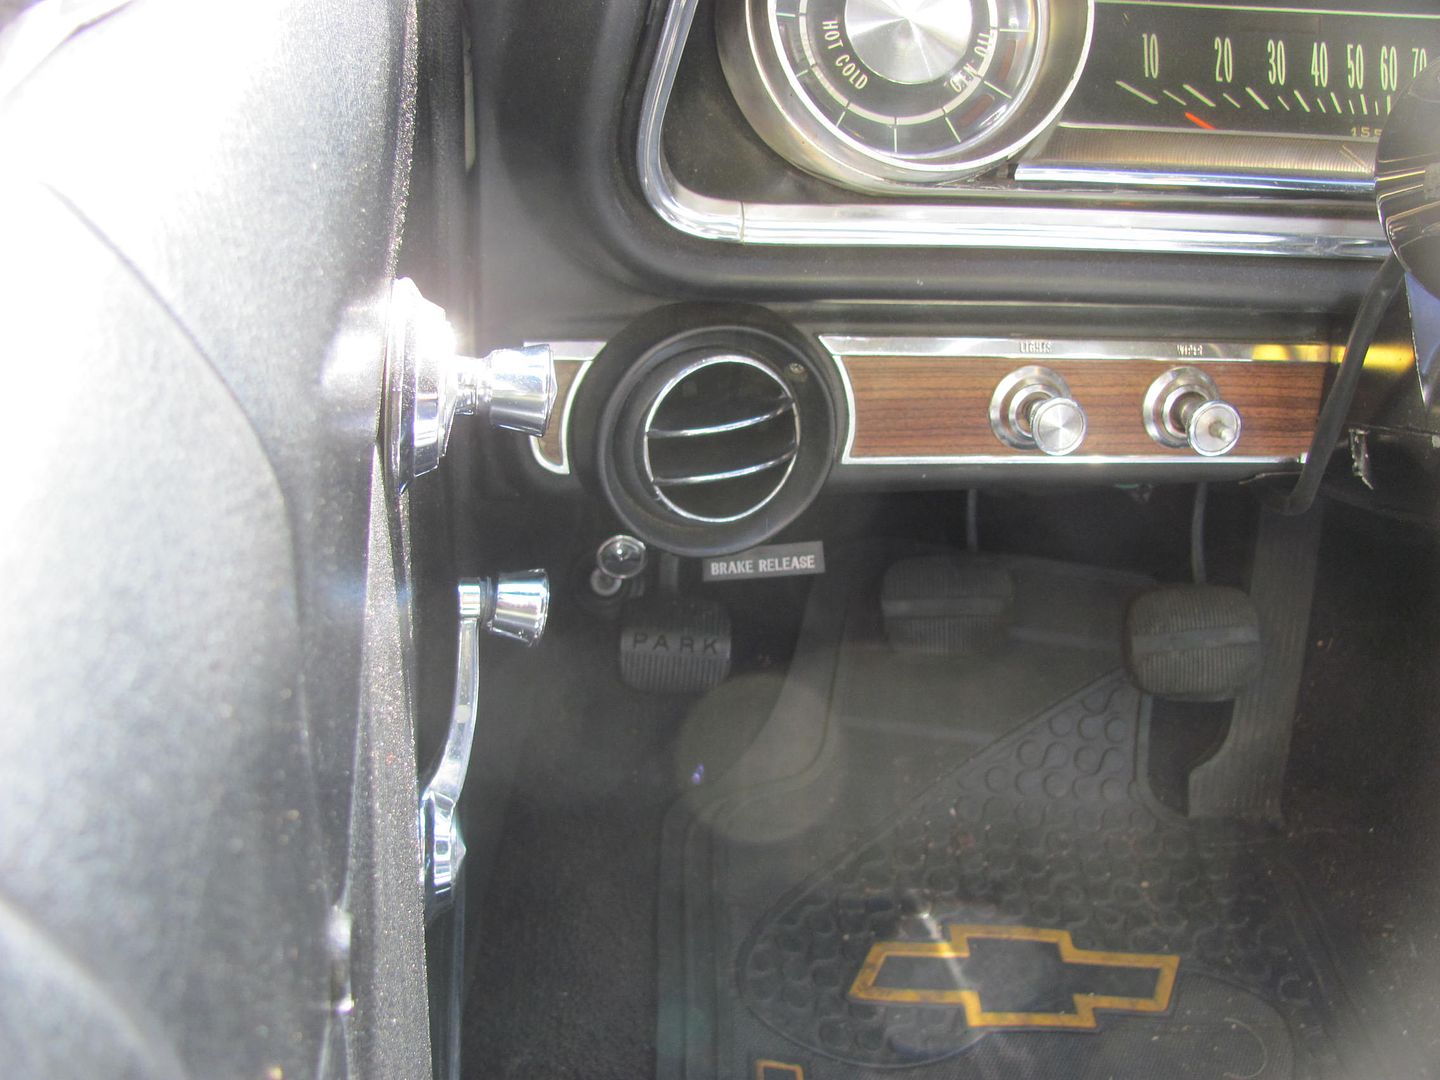 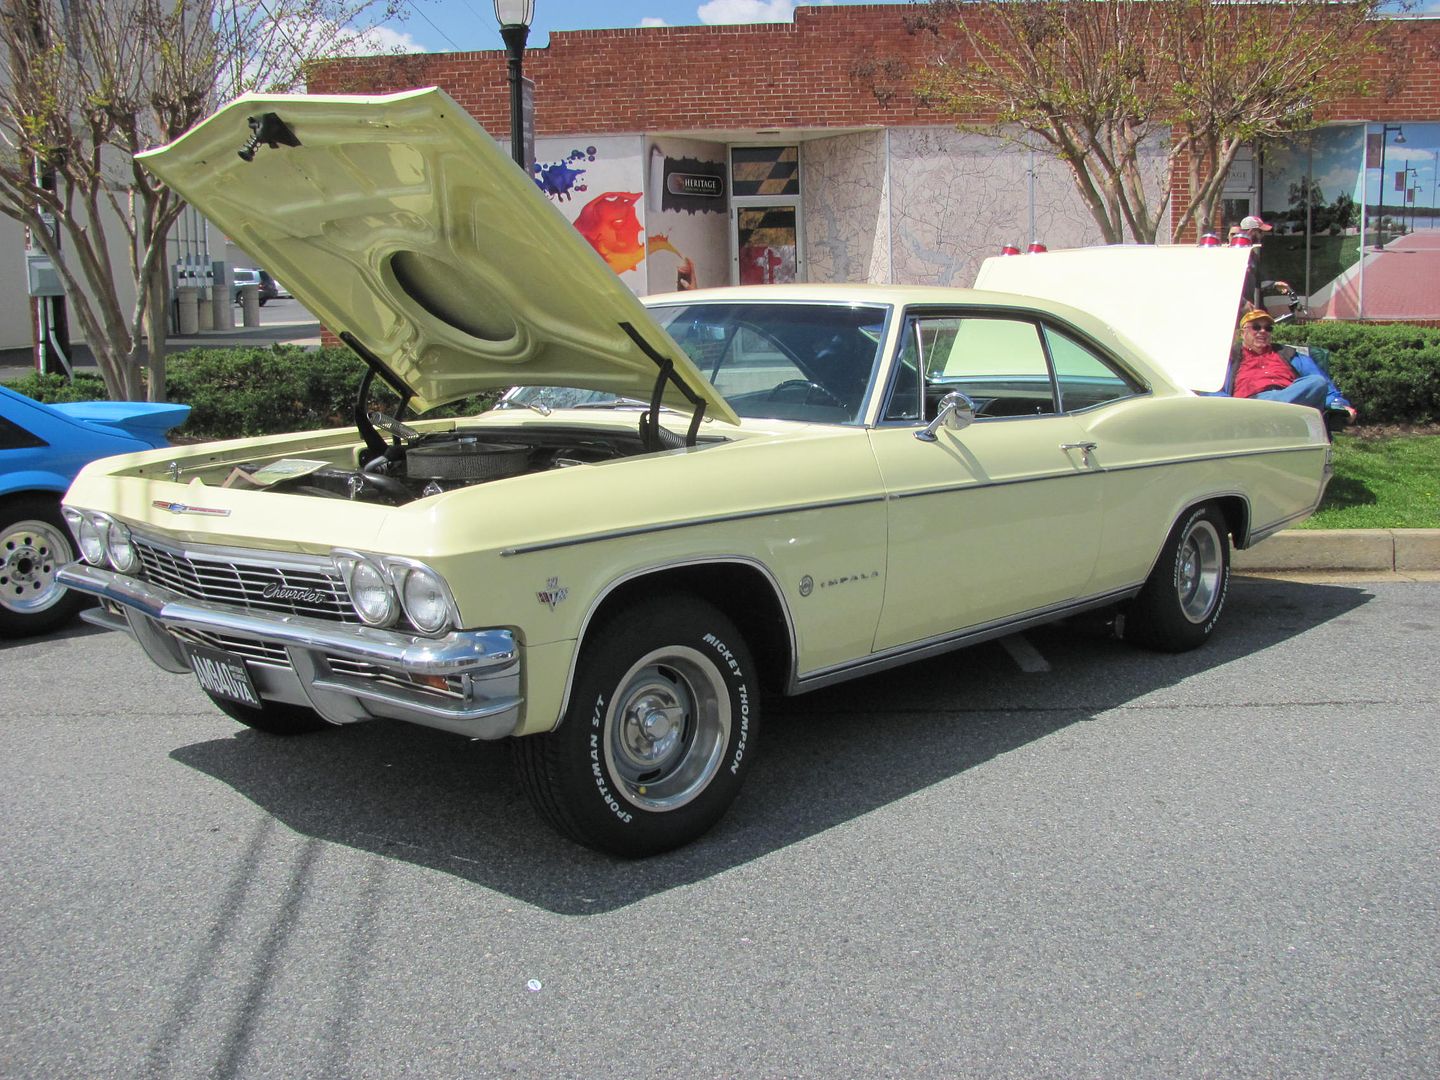 I like these and the dual parallel deflector vanes over the 55 factory, which is a ball vent with a wide open hole. These next ones are the ones I'm leaning toward for the dash center as they are an easier install than most of the GM ones of the era. The GM vents have a solid pivot shaft at either end that would require making a saddle and clamp deal to hold it in place. The Fomoco style shown here has the pivot pin on a tab that springs inward for installation/removal, so it requires two simple holes. A much easier fabrication of needed ducting.. if we need to fabricate.. 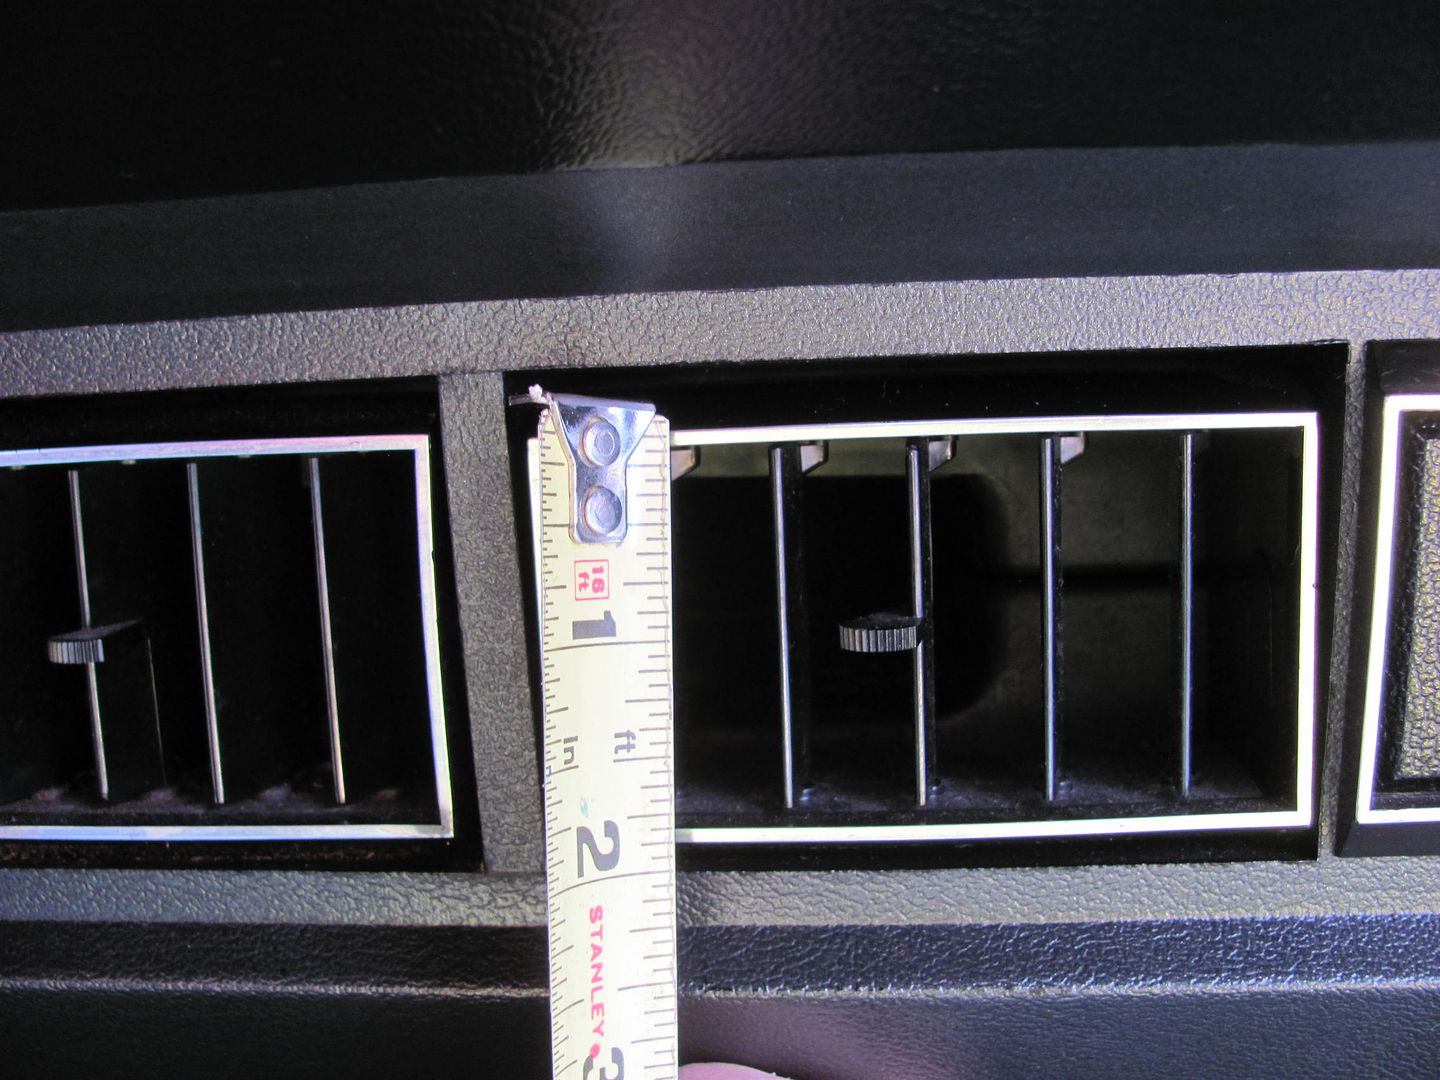 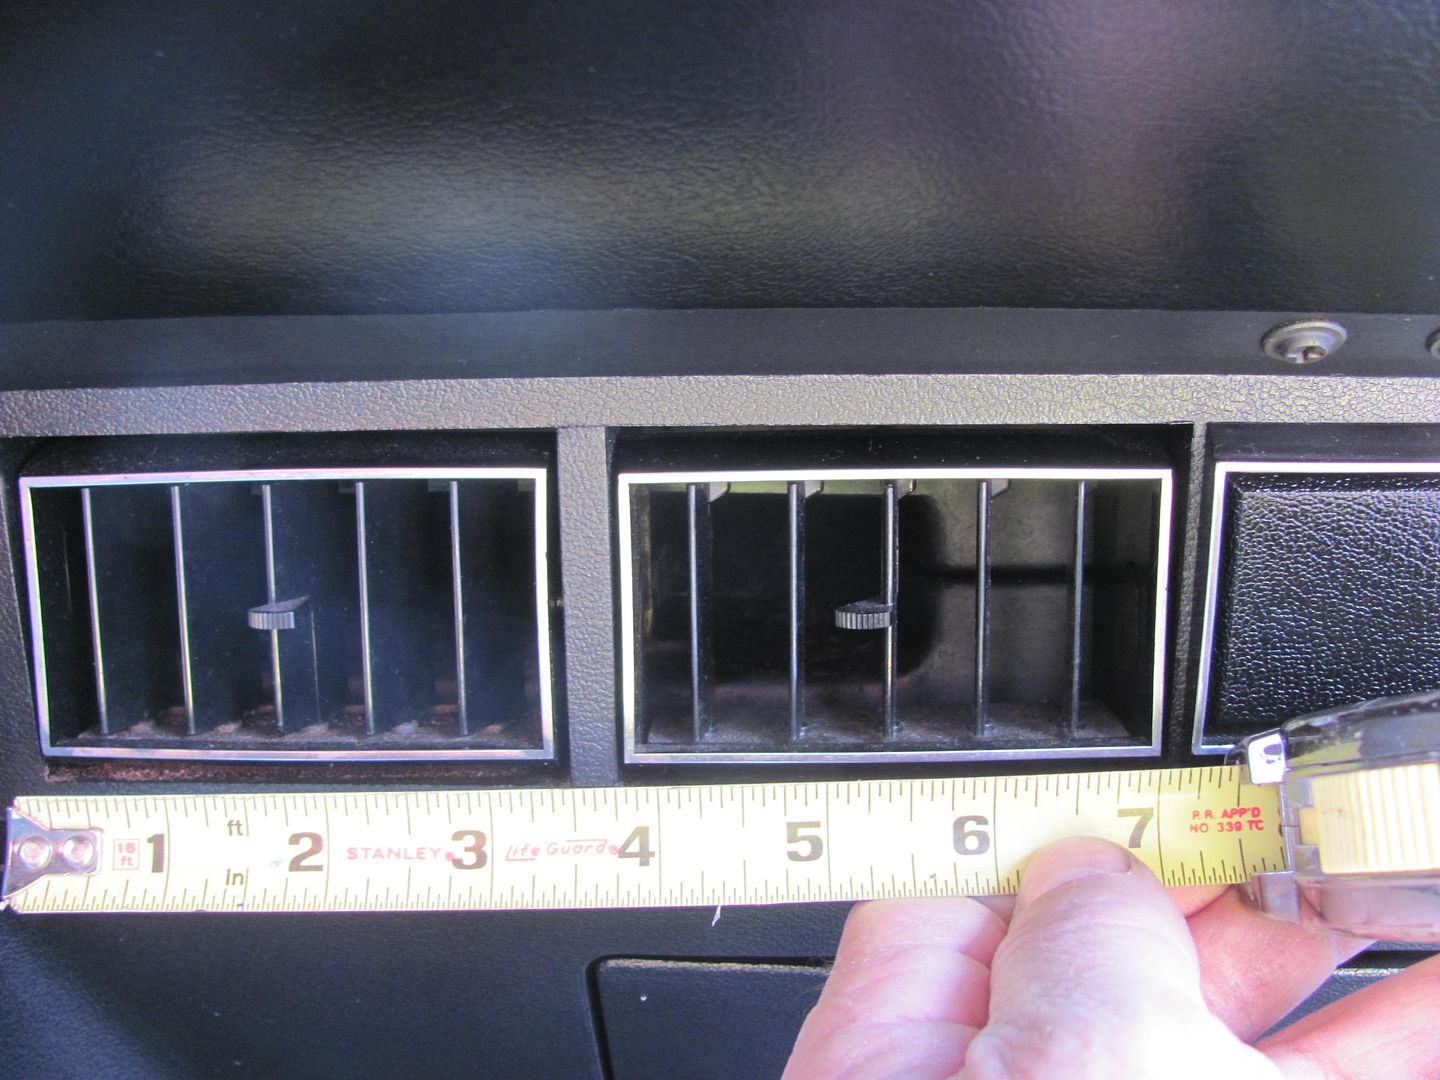 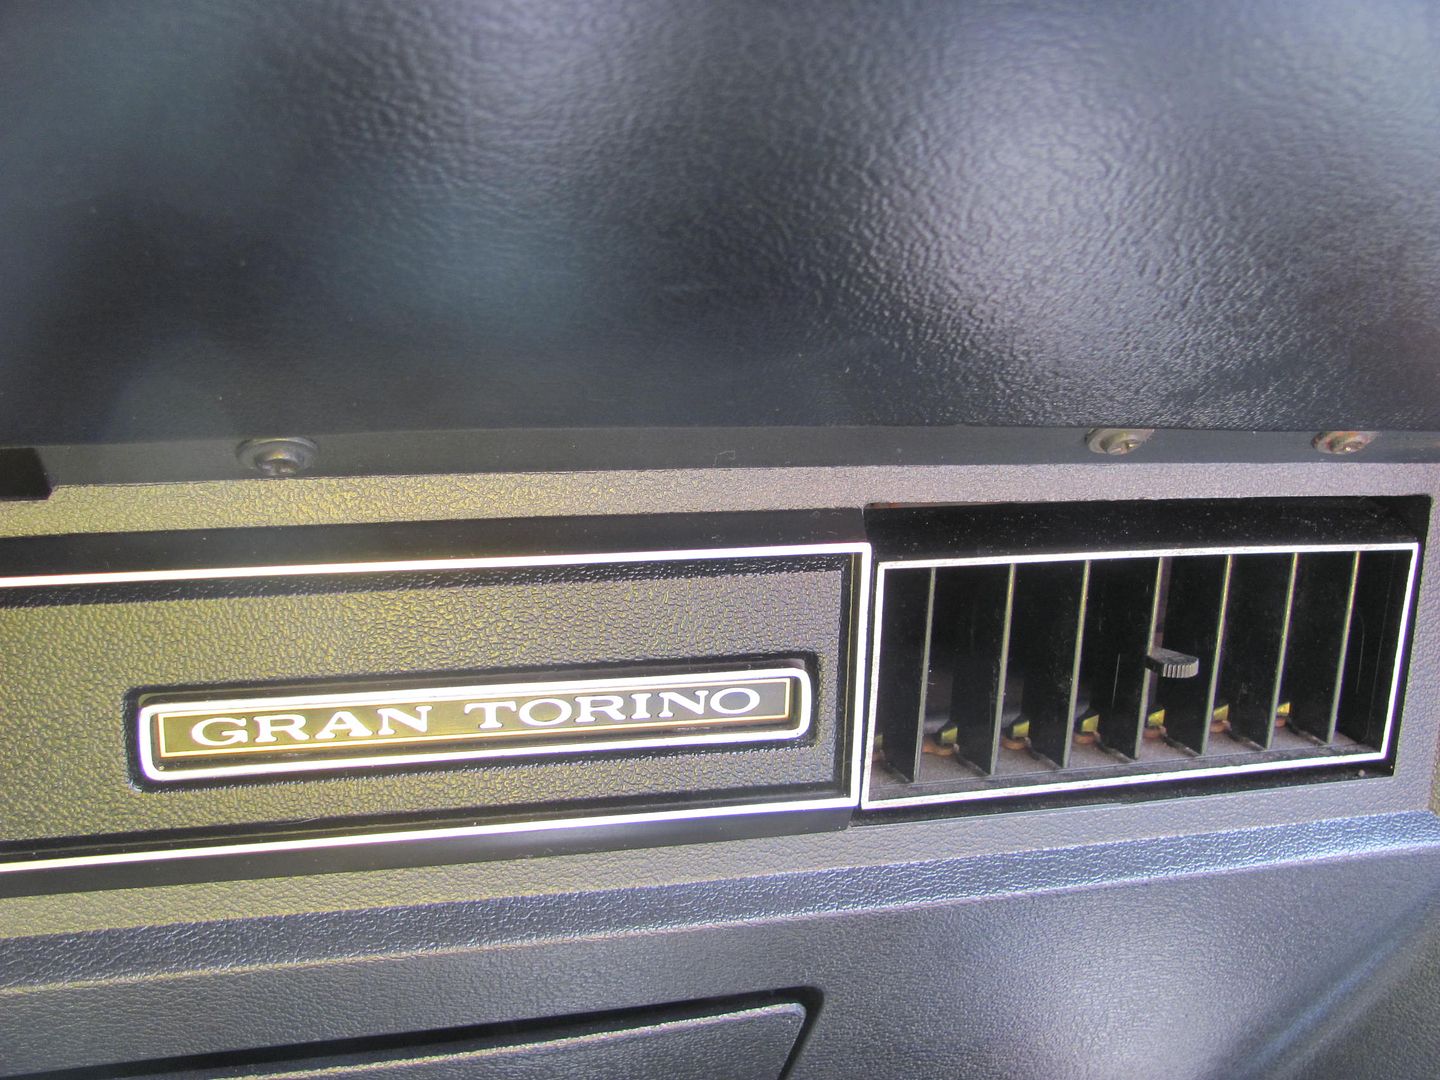 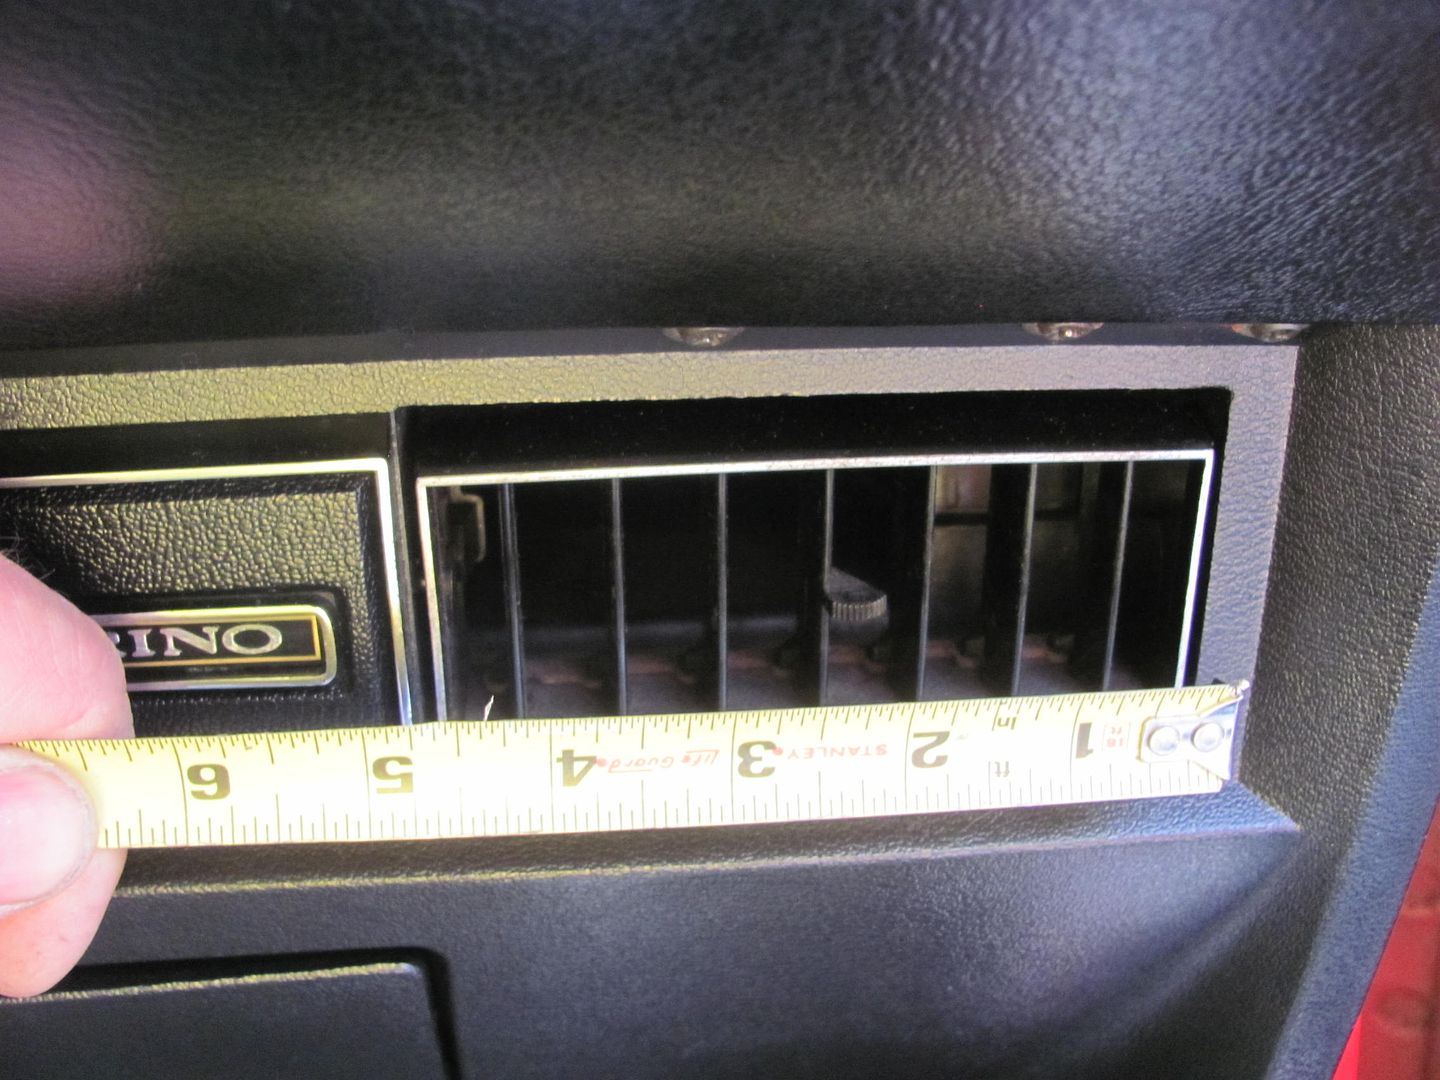 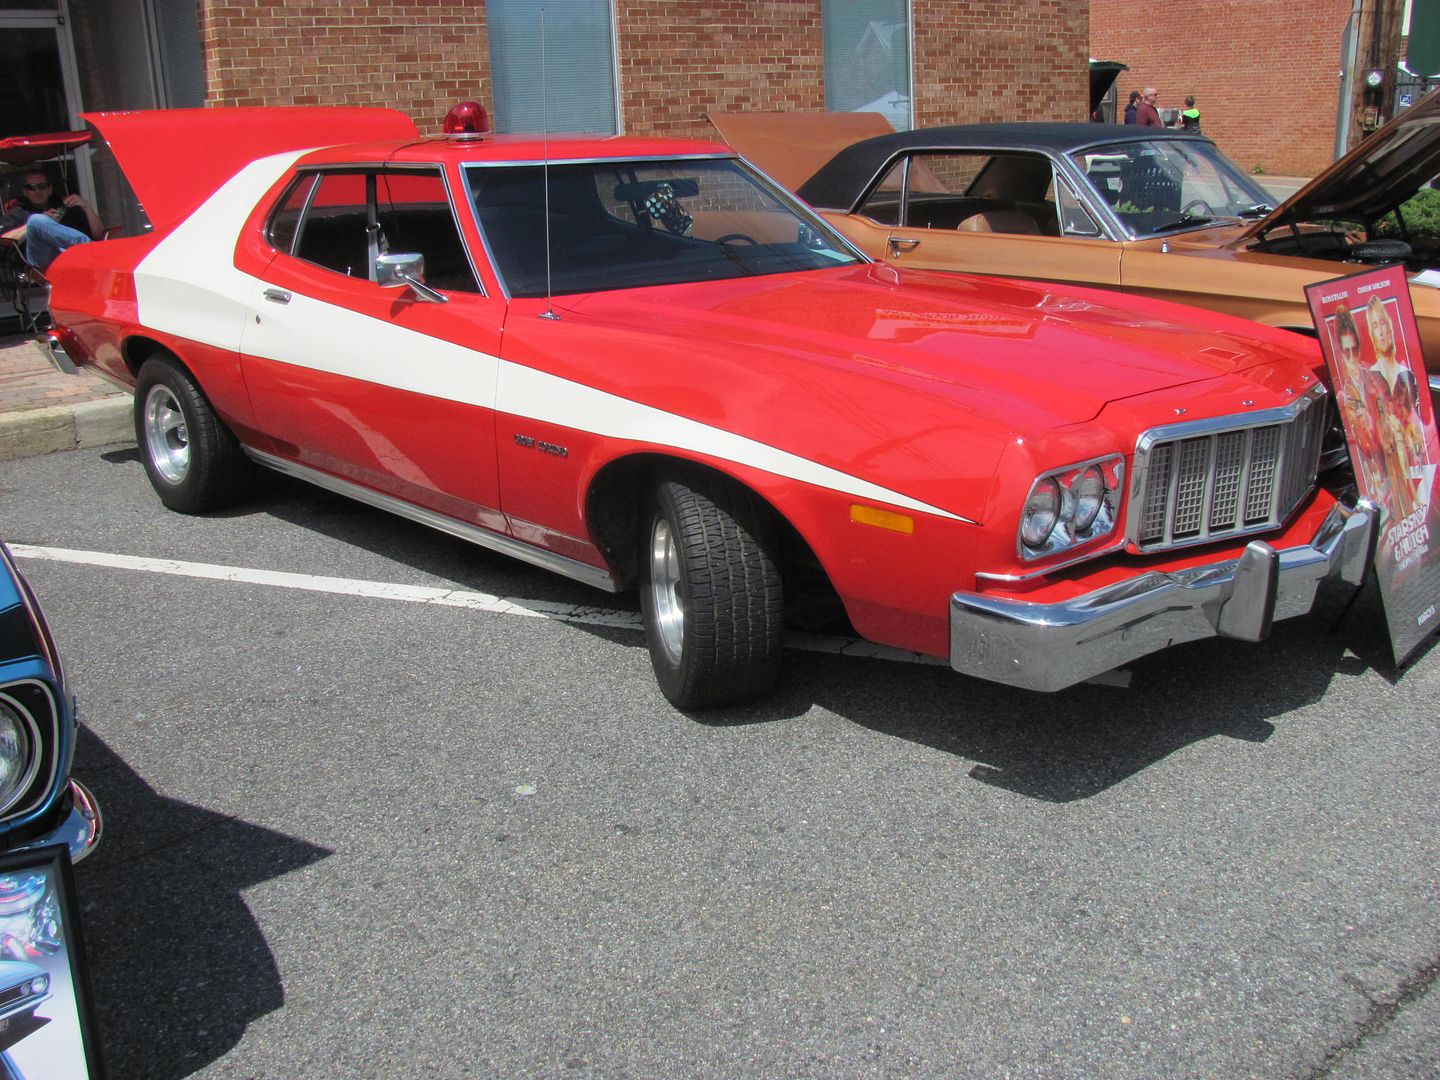 This had no AC vents, but was a super clean ride, and still sported the Straight 8 under the hood, so consider this complimentary eye candy! 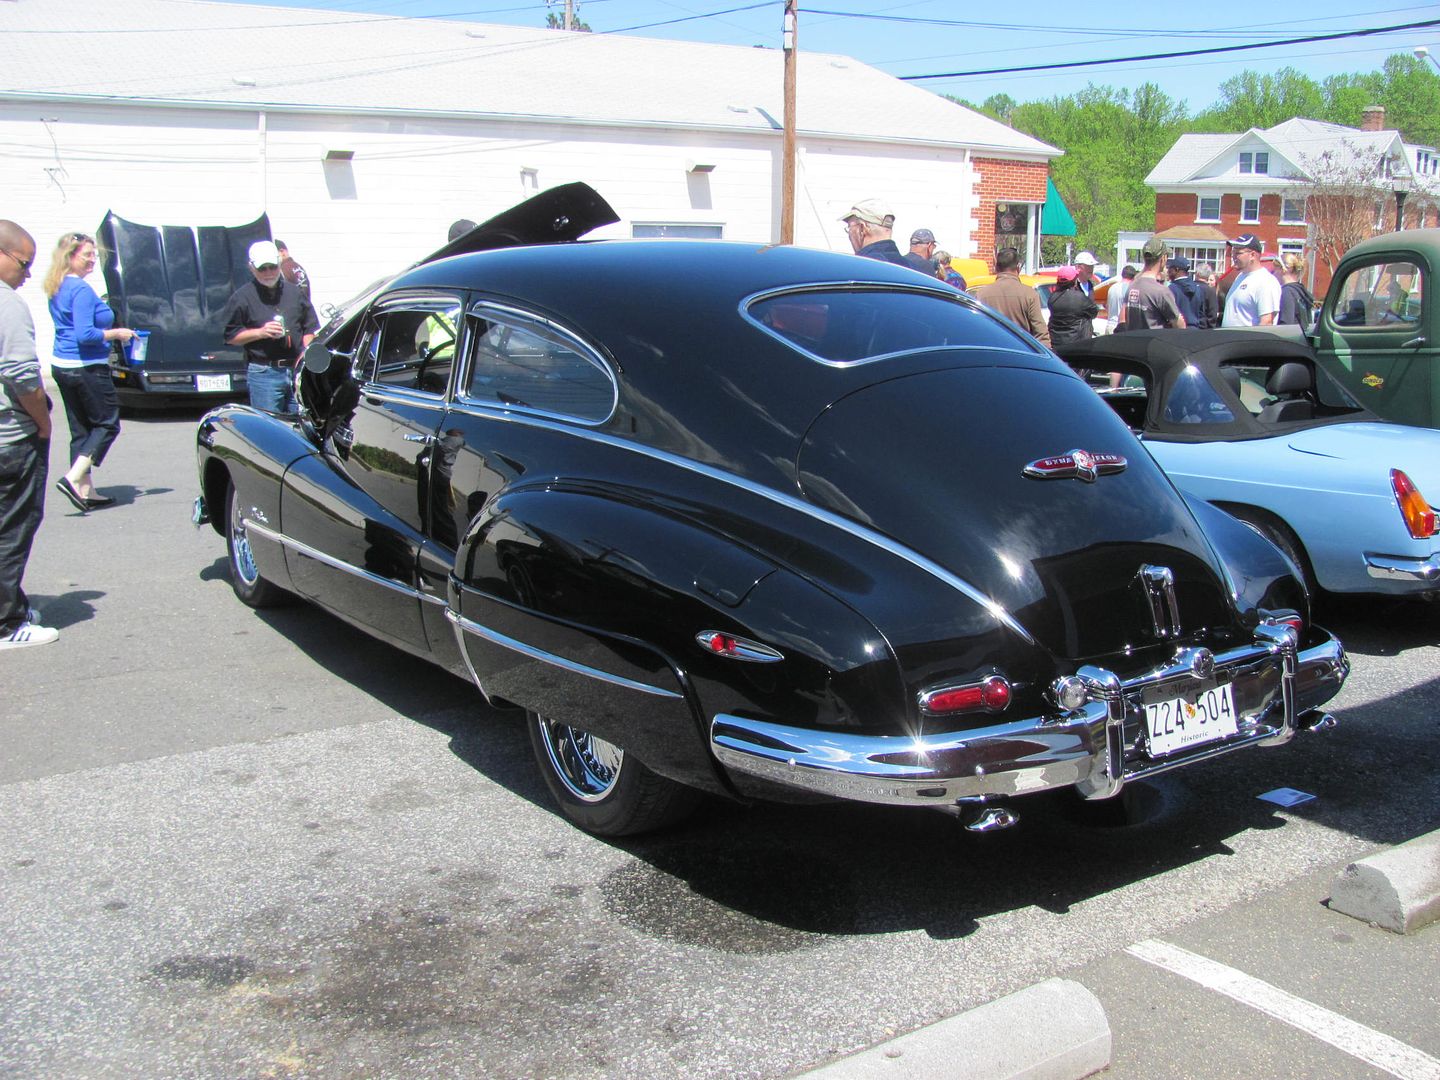 More VA pieces, these are nice and compact 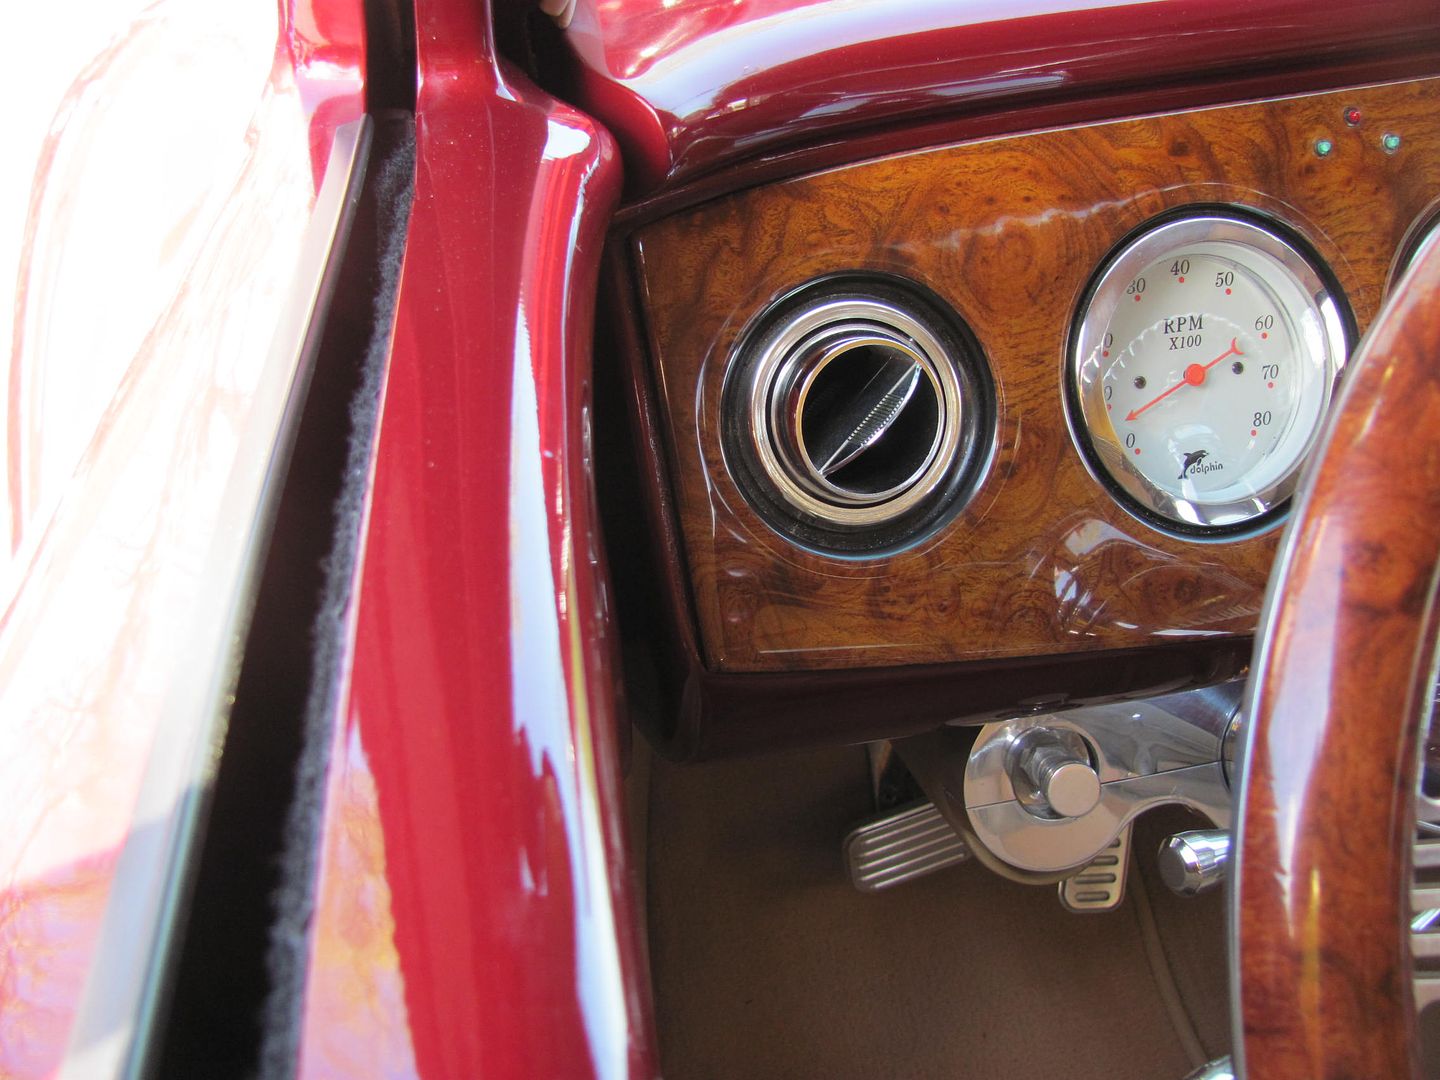 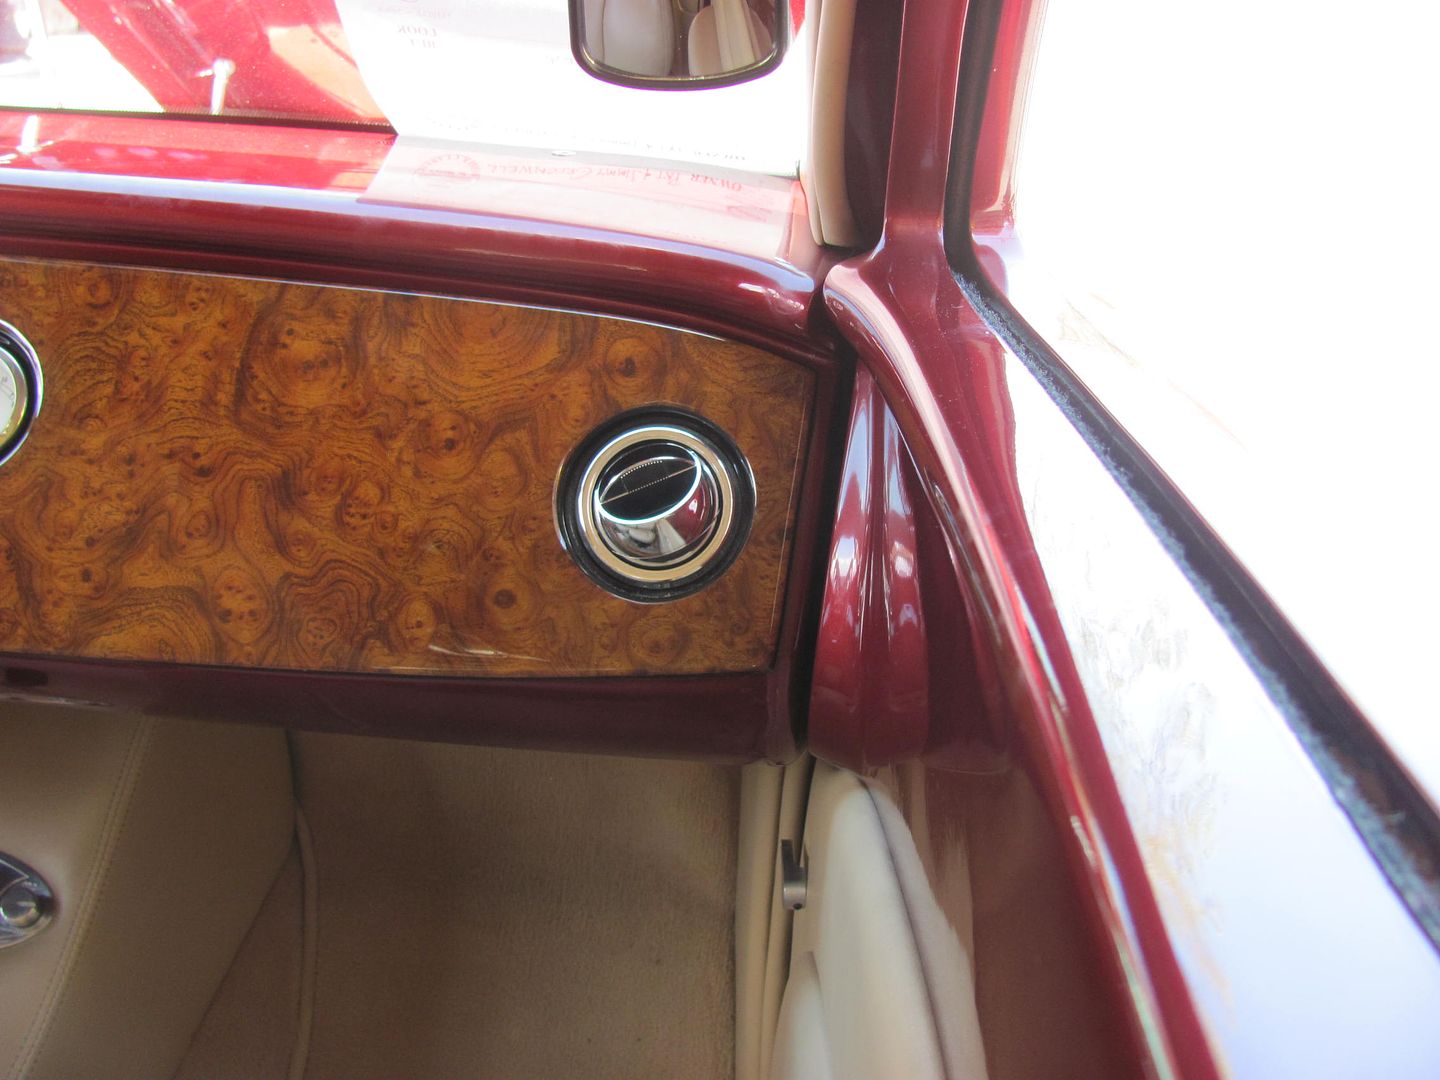 I like the rectangular for the center of the dash but worry these round style vents may "clash" with rectangular ones. So the 40's small rectangular may be a good option for the side vents. Thoughts, personal choices, ones we haven't shown (with pictures) are welcome. This build really isn't a billet type, so black and chrome are a preferred option. Thanks in advance for any advice/pointers..
__________________
Robert |
|
|
|
|
04-29-2015, 07:12 AM
|
#431 |
|
Registered User
Join Date: Jan 2013
Location: Leonardtown, MD
Posts: 1,636
|
Re: 55 Wagon Progress
First, I'll have to agree that these shoebox cars lend themselves more to curves, but given the long, flat, rectangular mounting surface in the center of the dash, it seemed that two round vents would not begin to fill the void. Thus we were leaning toward the rectangular vents to fill the space. Dana wanted to keep the outside vents round, and mount below in the factory location. So these are the ones decided on, Vintage Air pieces...
for the corner locations..... 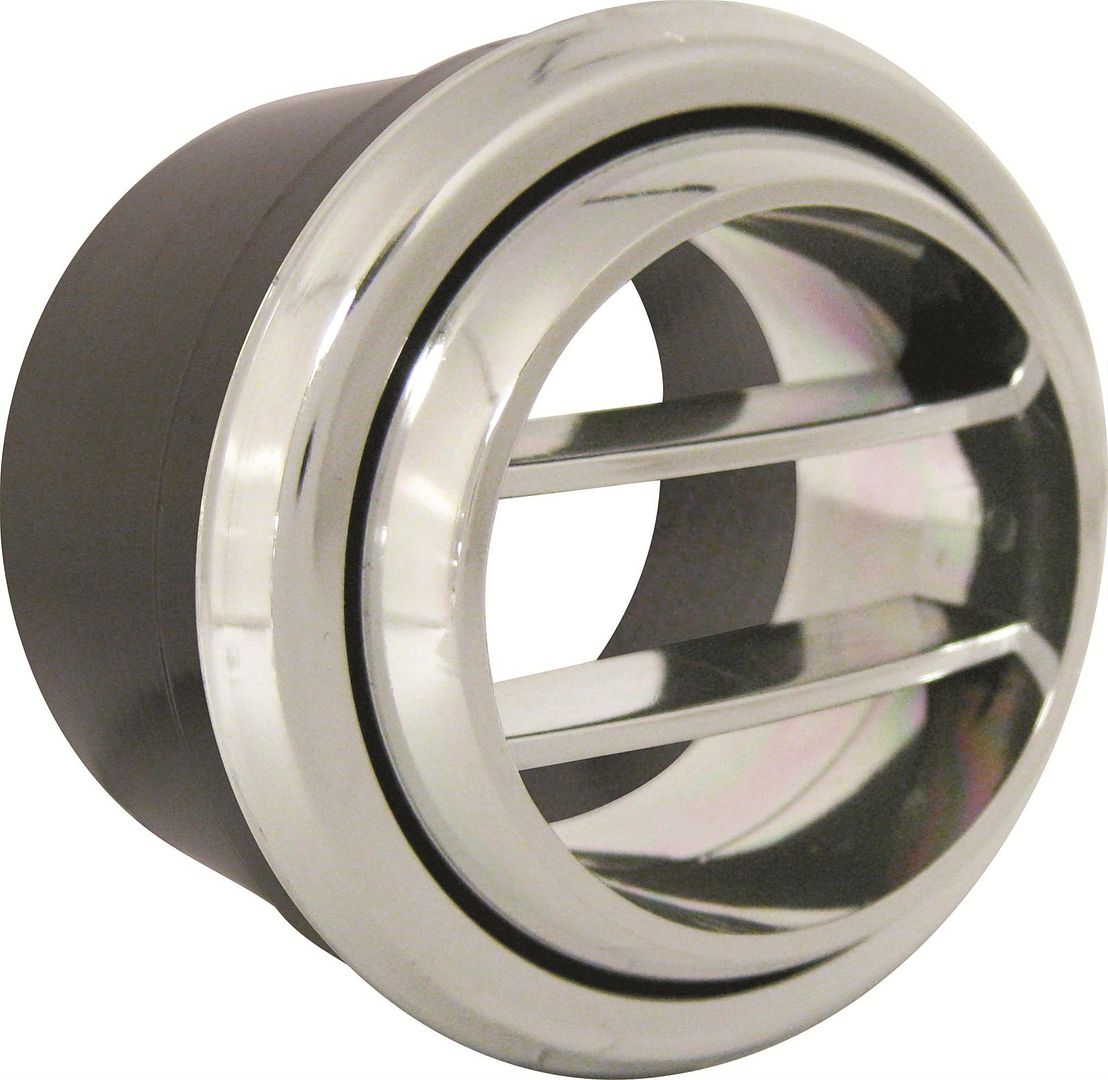 for the center of the dash....... 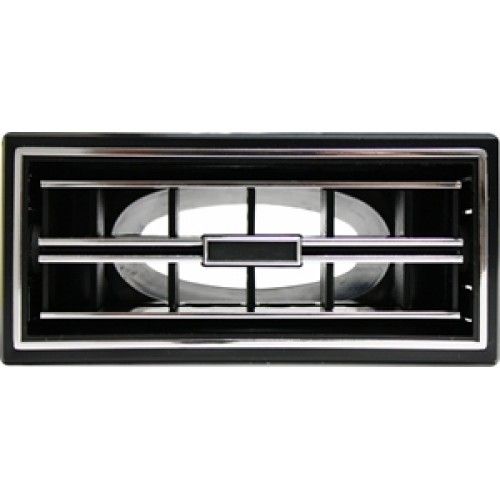 Of course, something told me to keep looking, and as someone had suggested to do the Google image search on "dash vents", I skipped the catalogs this time and looked at installed vents. Then it hit me, how could I have not seen this before..... 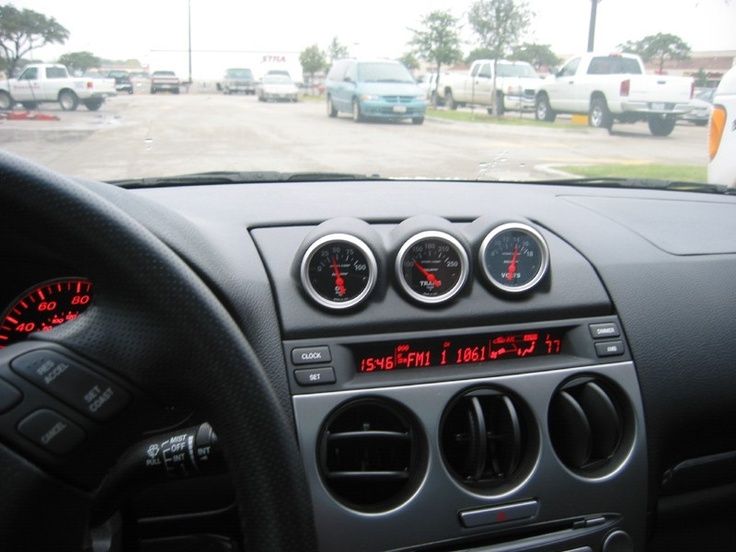 Three wide in the round vents vs. only two did a better job of filling out the dash and would give us matching vents all around. So, with only two round on order (and two rectangular that will likely go back), we plan to see how "tight" these 2-5/8 round bezels look on a 2-3/4 high flat area, and make the final decision from there.. The saga continues.. Now with the dash seams all welded and waiting for gauges to be delivered, the moment I've been dreading. Installing the Rocky Hinge fuel "door". First thing noticed was that some of the holes on the weld-in mounting plate were off by half a hole.. 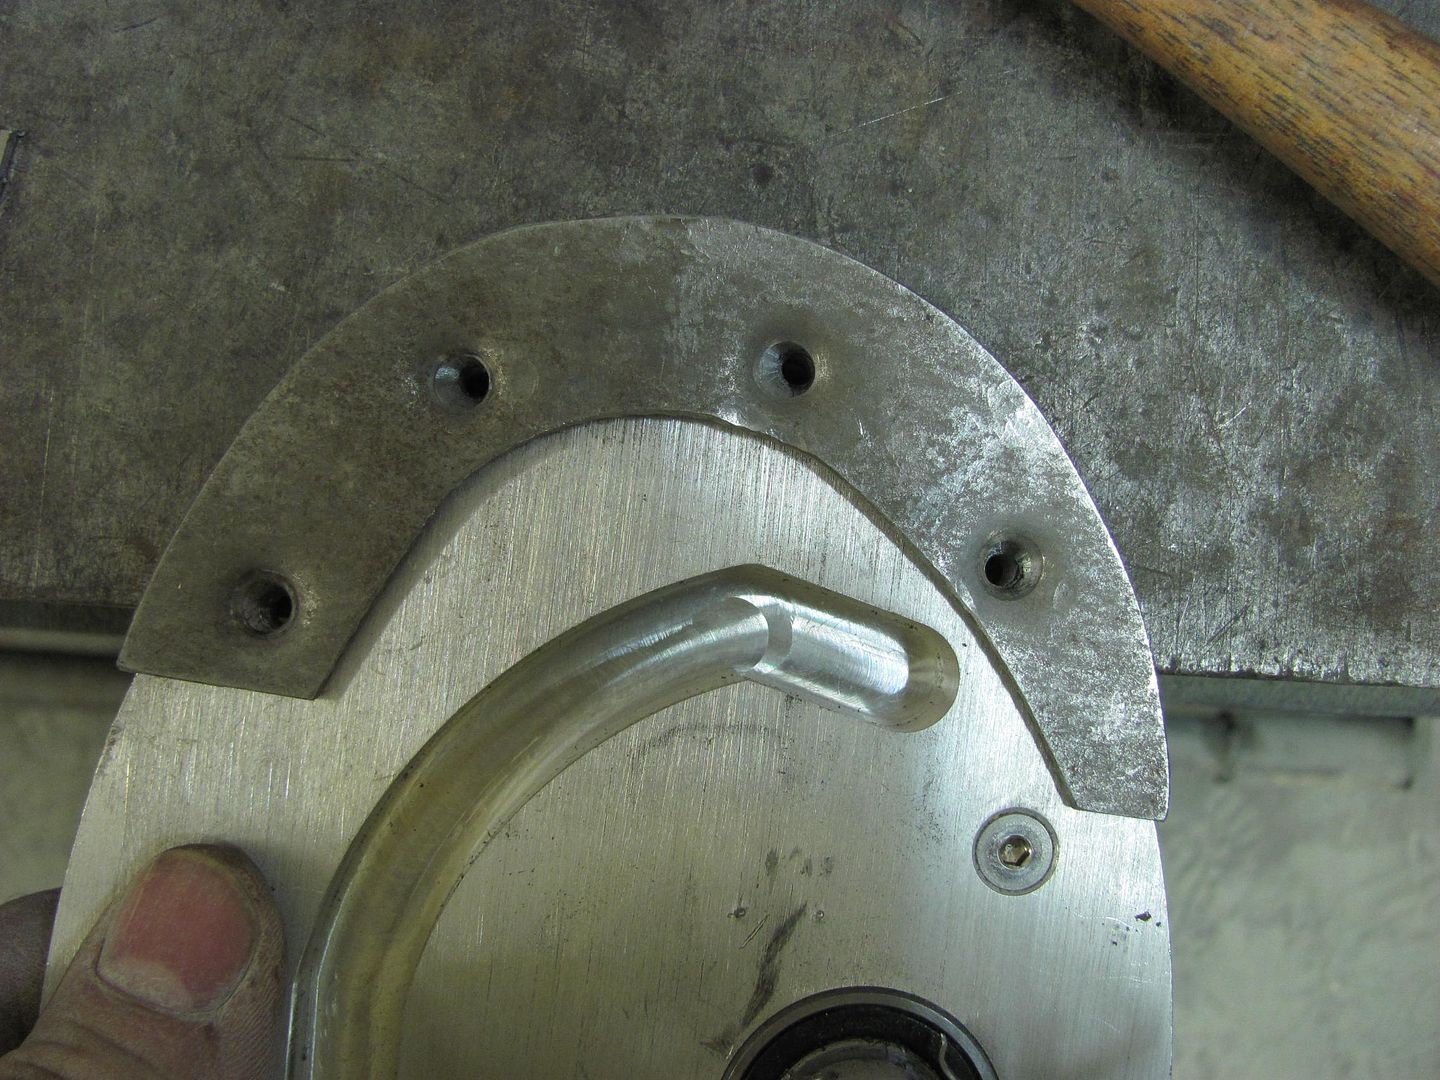 So Kyle cut out a fresh piece of 14 ga crs to make a new one, a bit oversized to trim later. Used some transfer punches to get the bolt holes lined up a bit better on our version of the weld-in plate.. 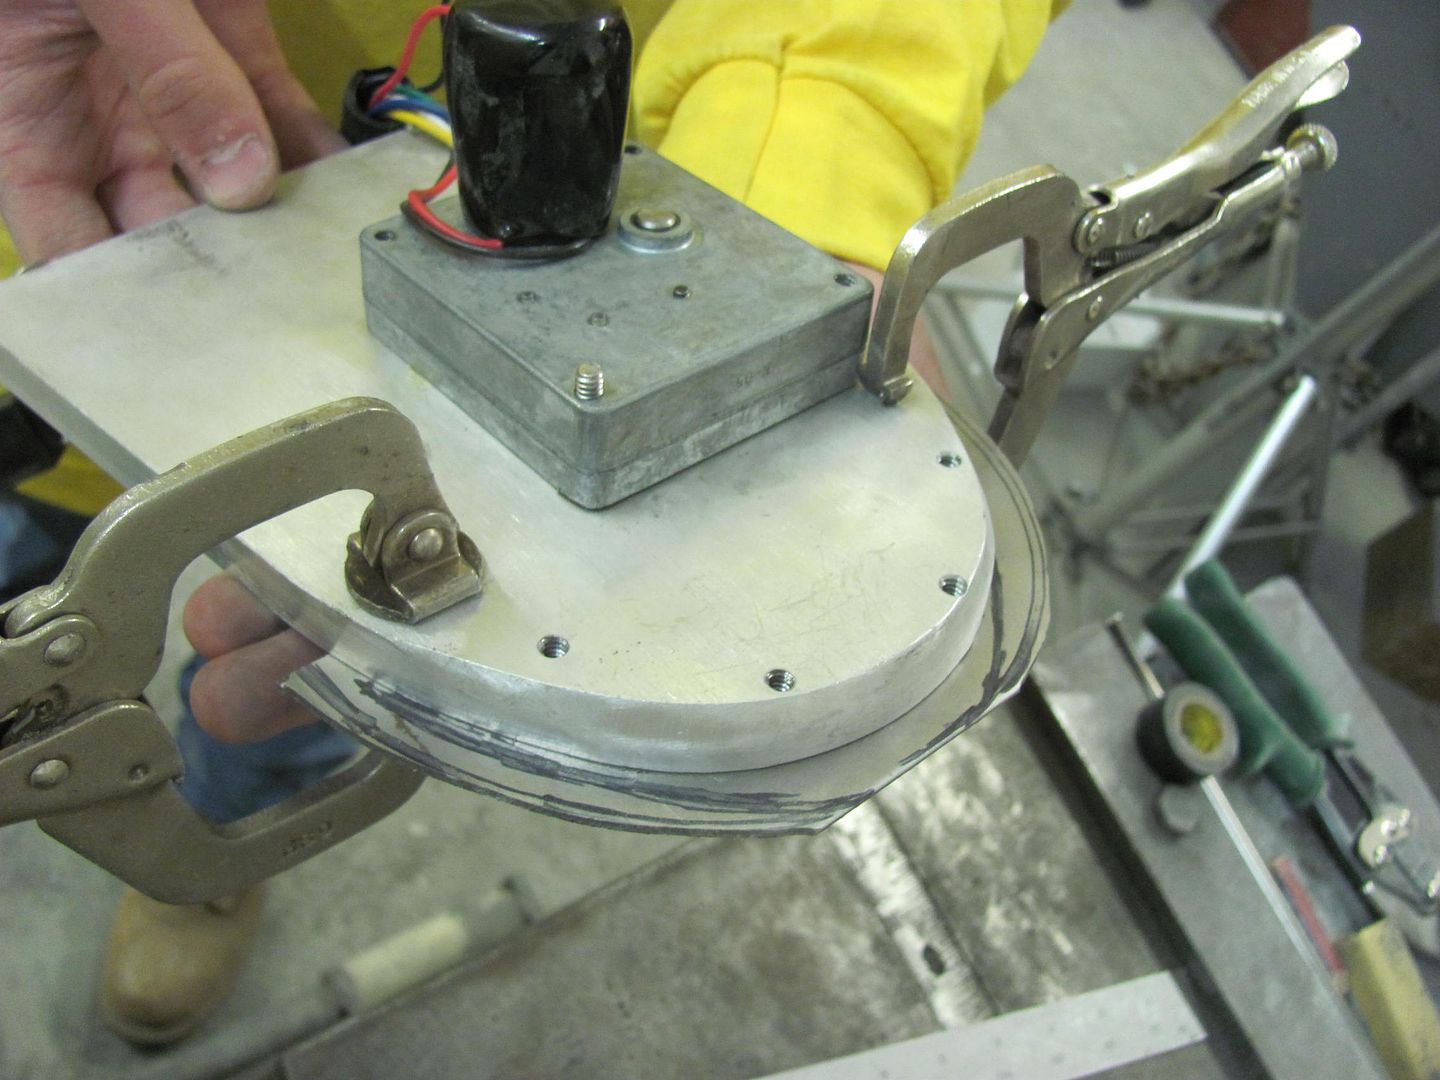 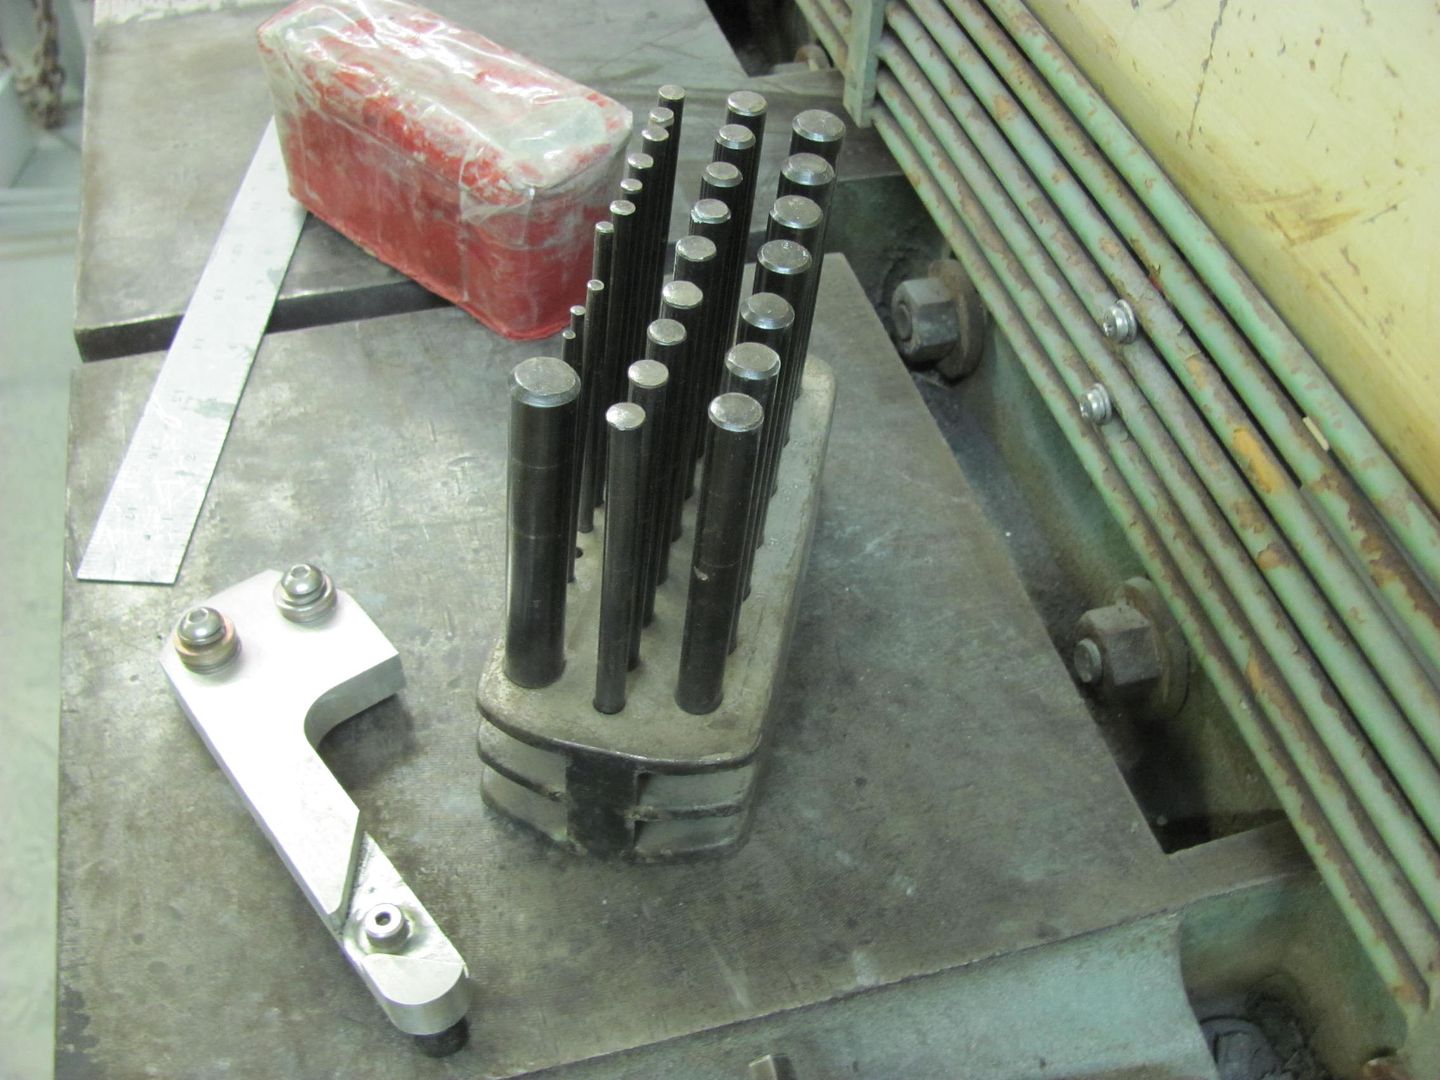 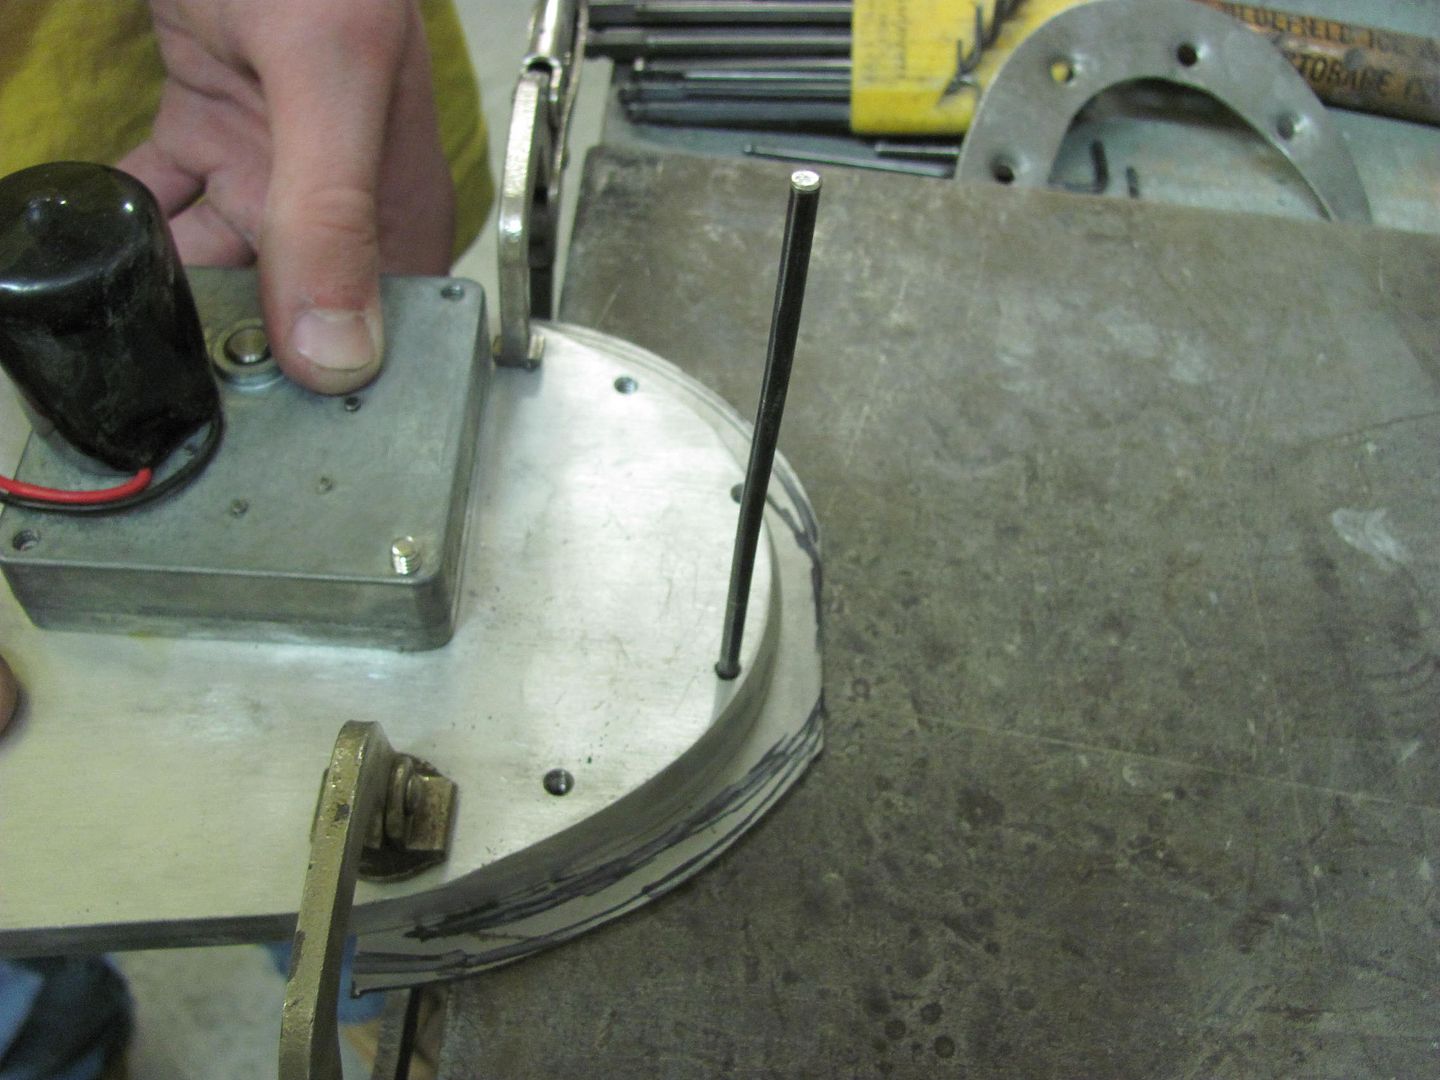 Attachment screws fitting better already.... 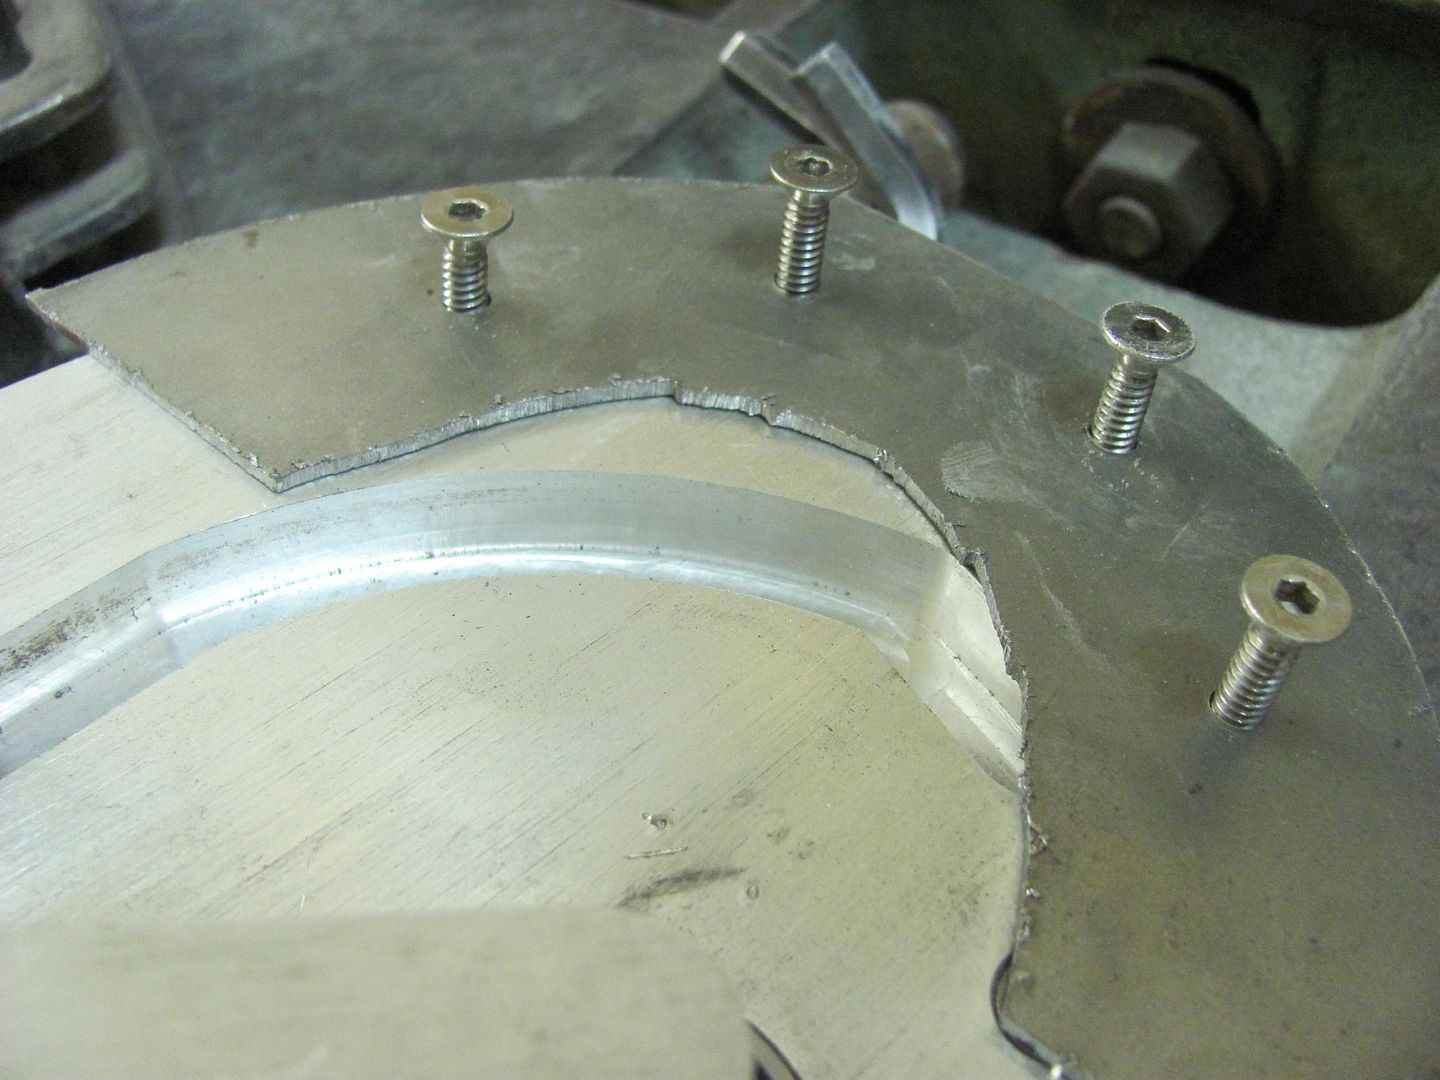 To provide the proper "pressed" countersink, we broke out the tubing flare kit... 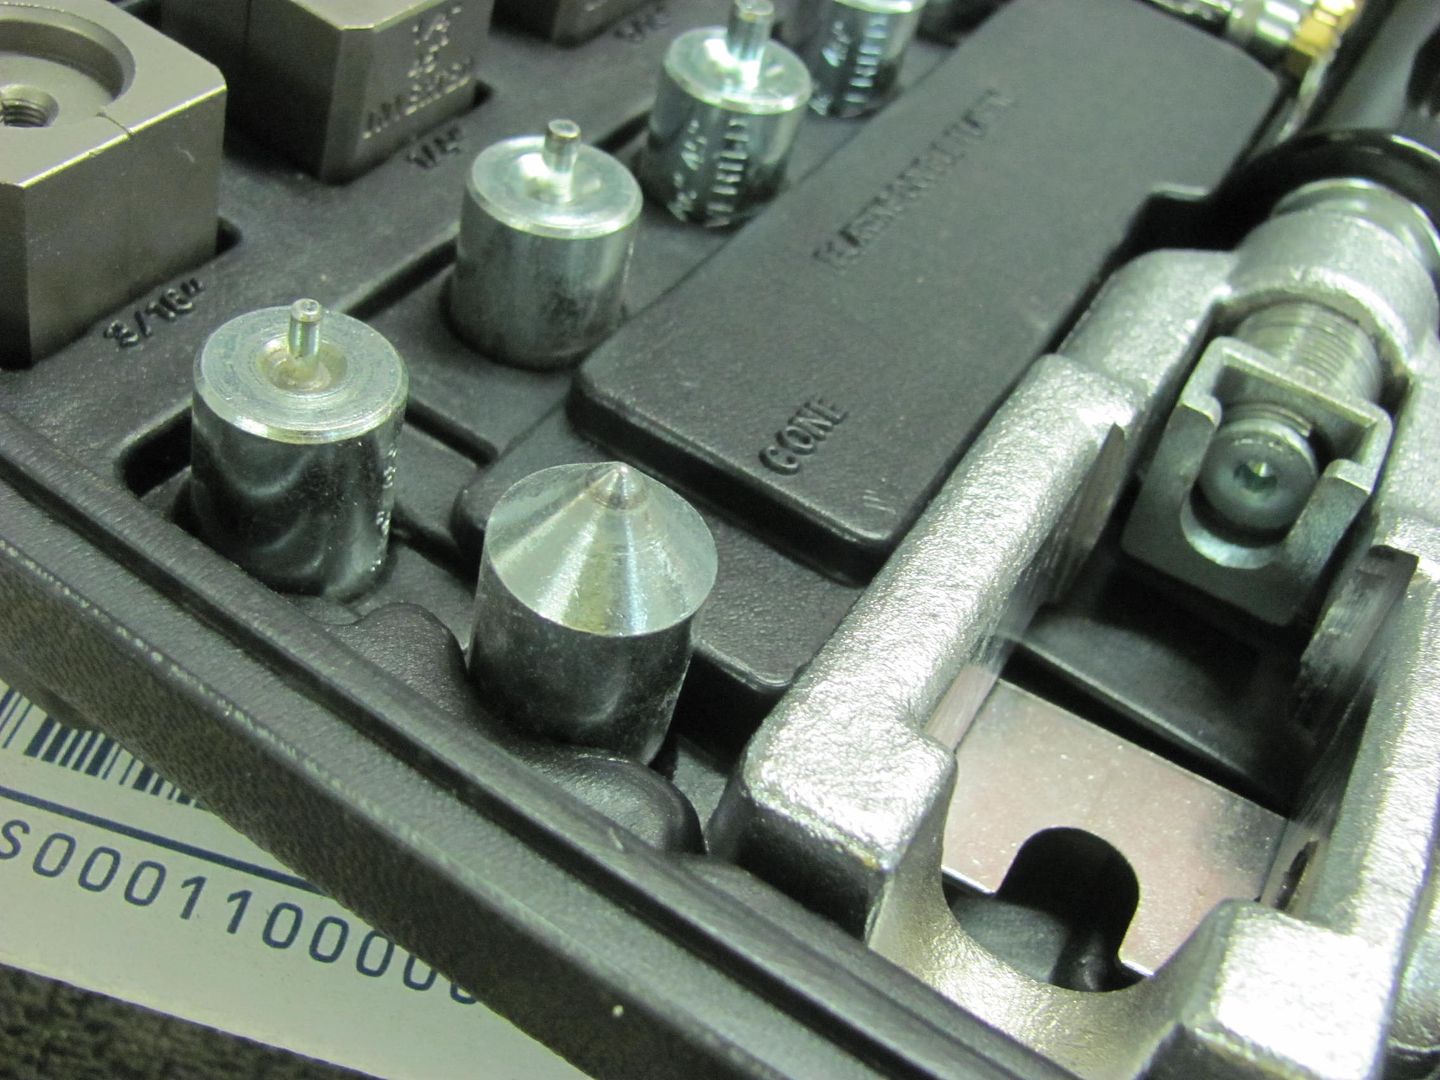 Redneck press... 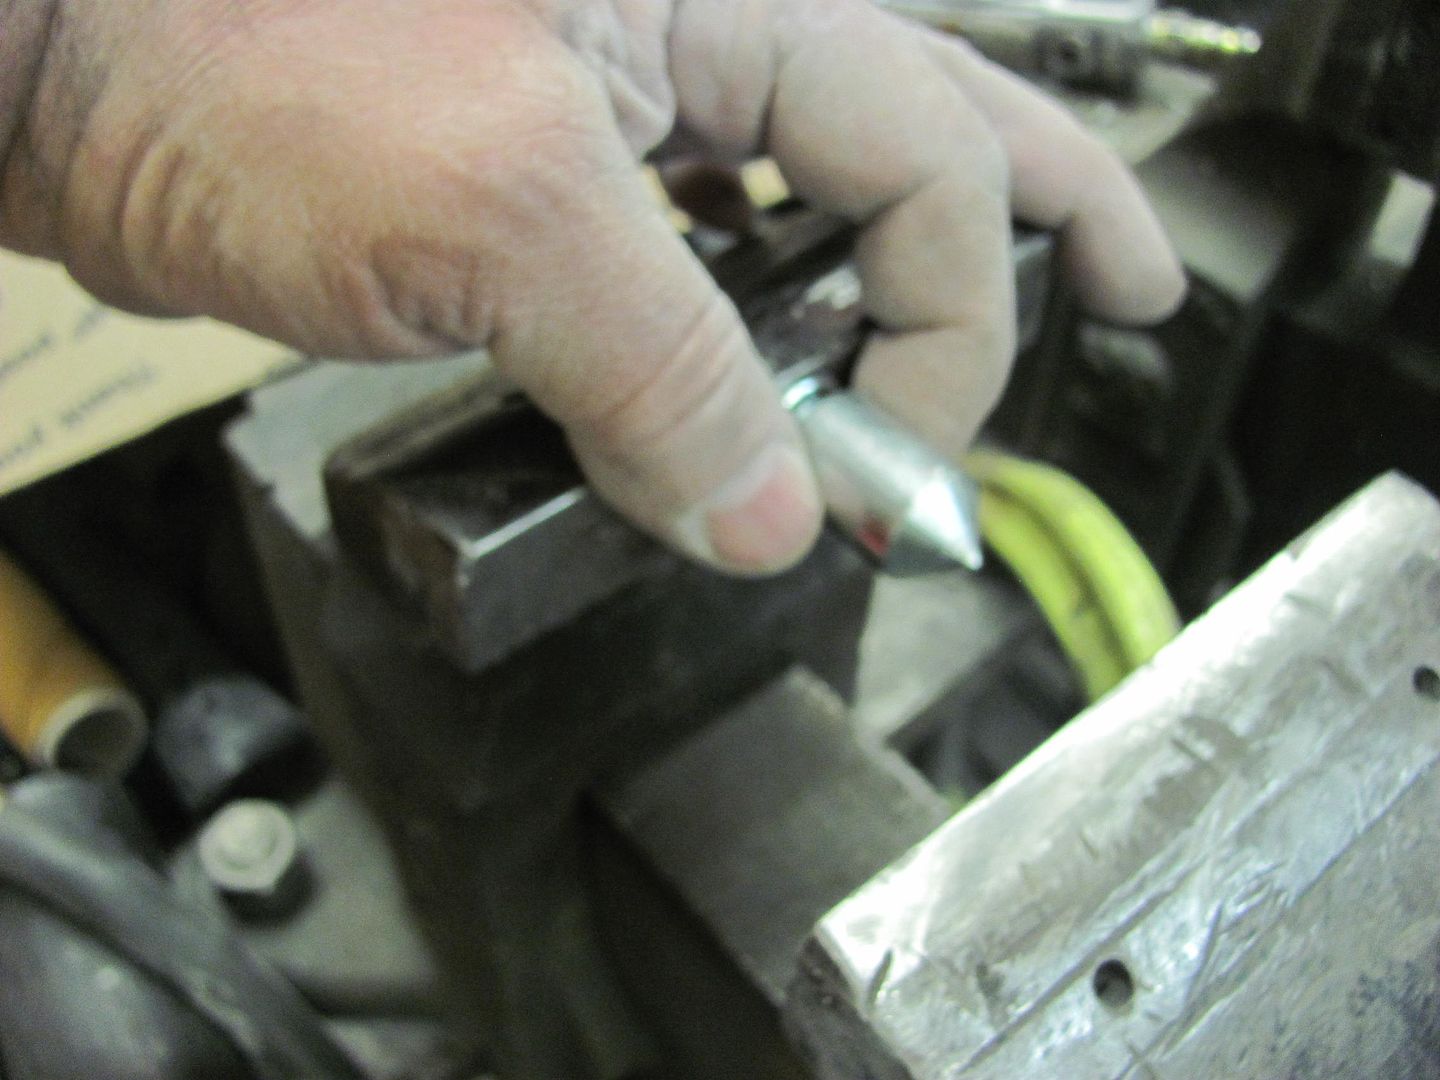 Our lower "die" was a 1/2-13 nut, centered over the hole, perimeter marked, and then taped in place before locating this into the press. Hey, it wasn't pretty, but it worked! 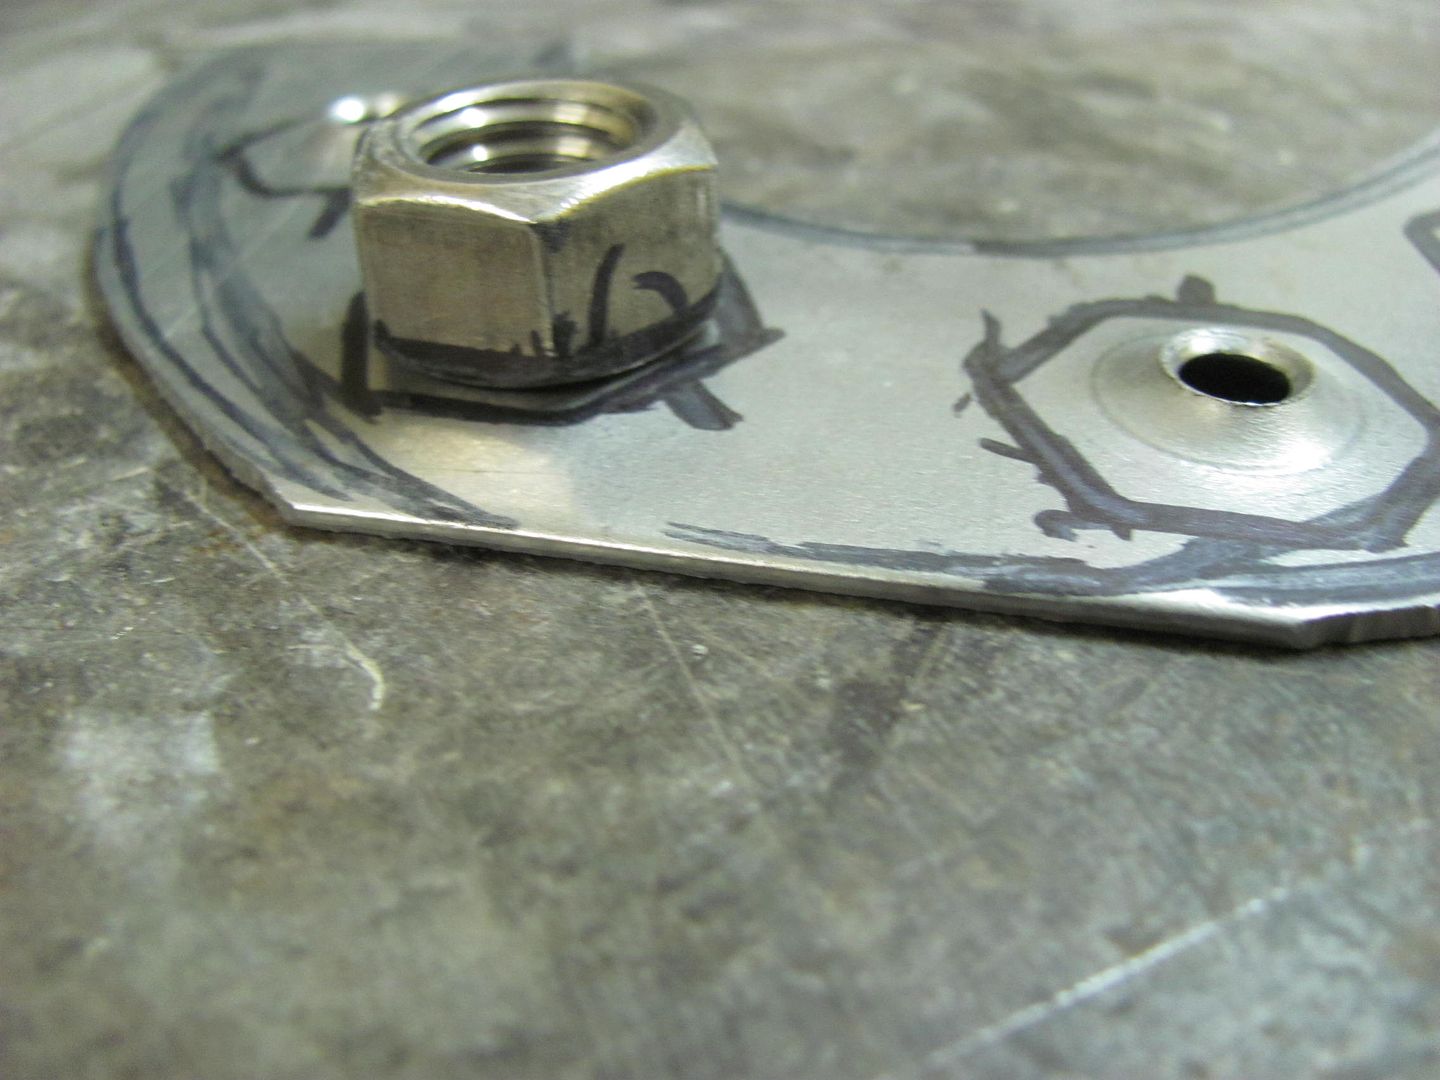 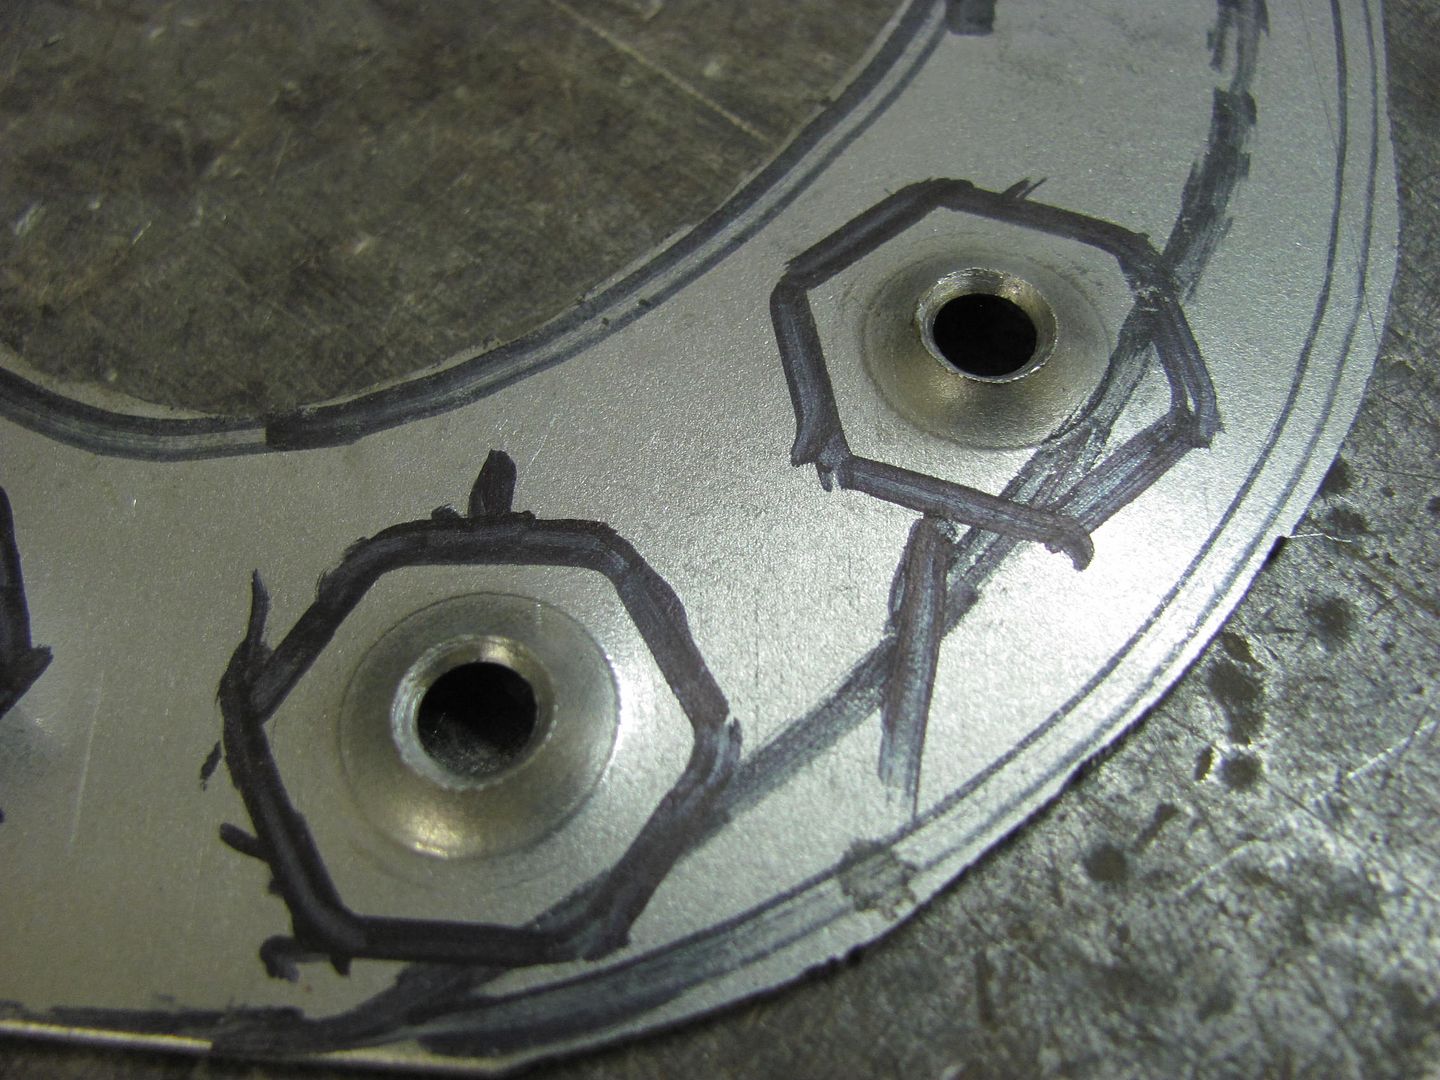 Some trimming of the hole to provide room for the weld-in mounting plate.... 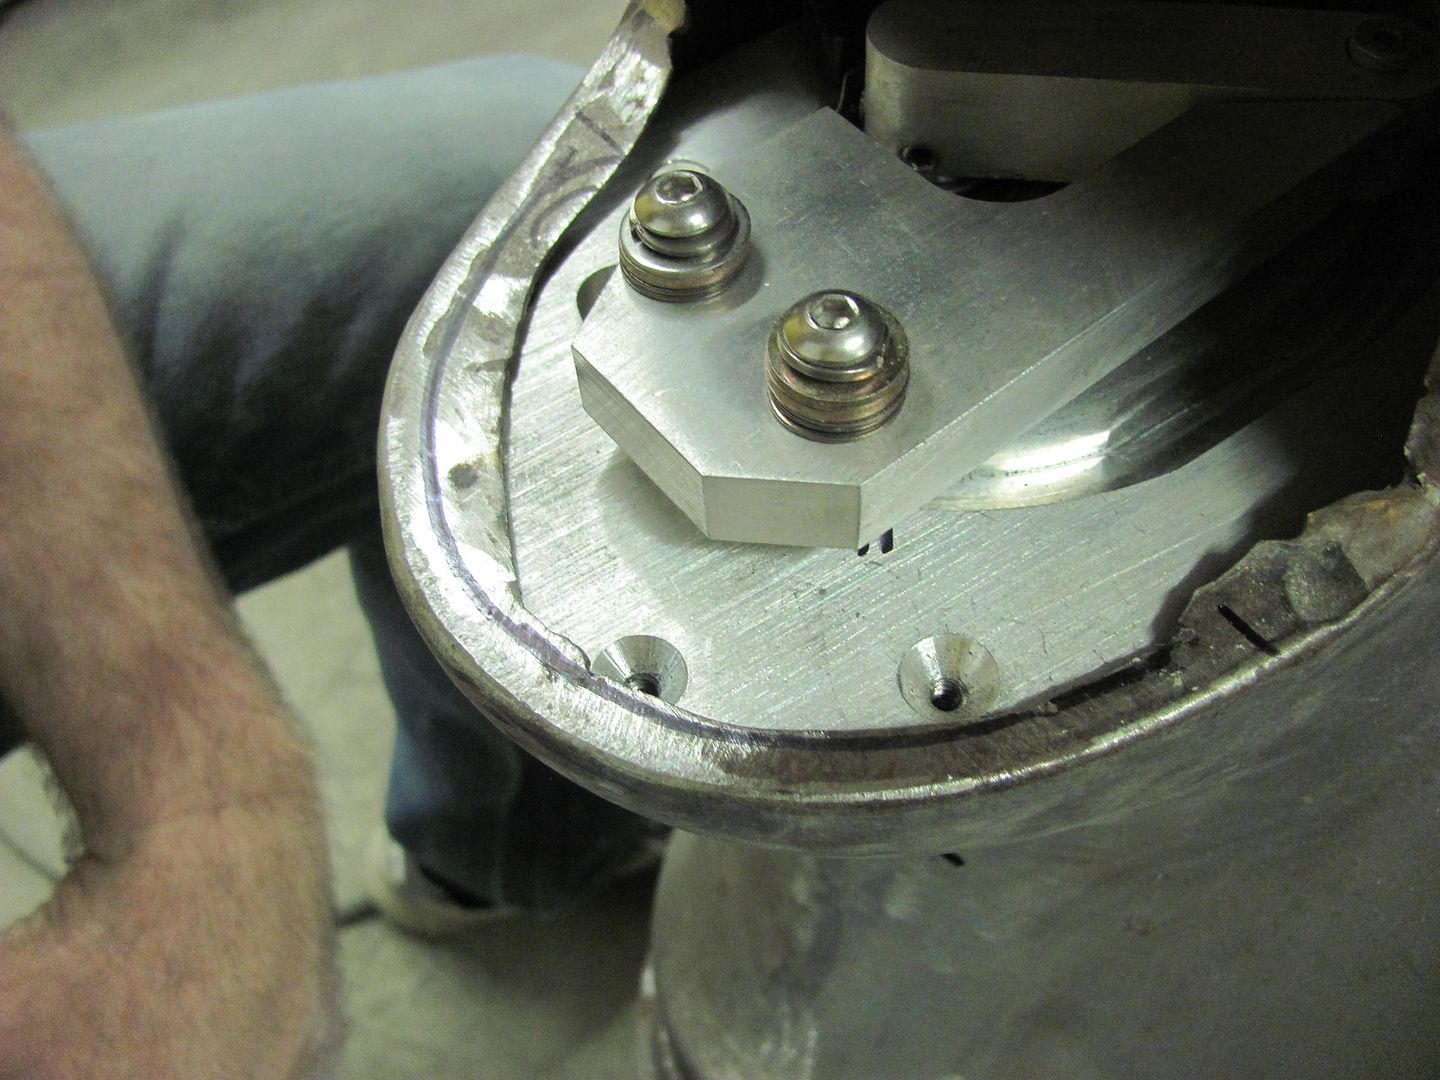 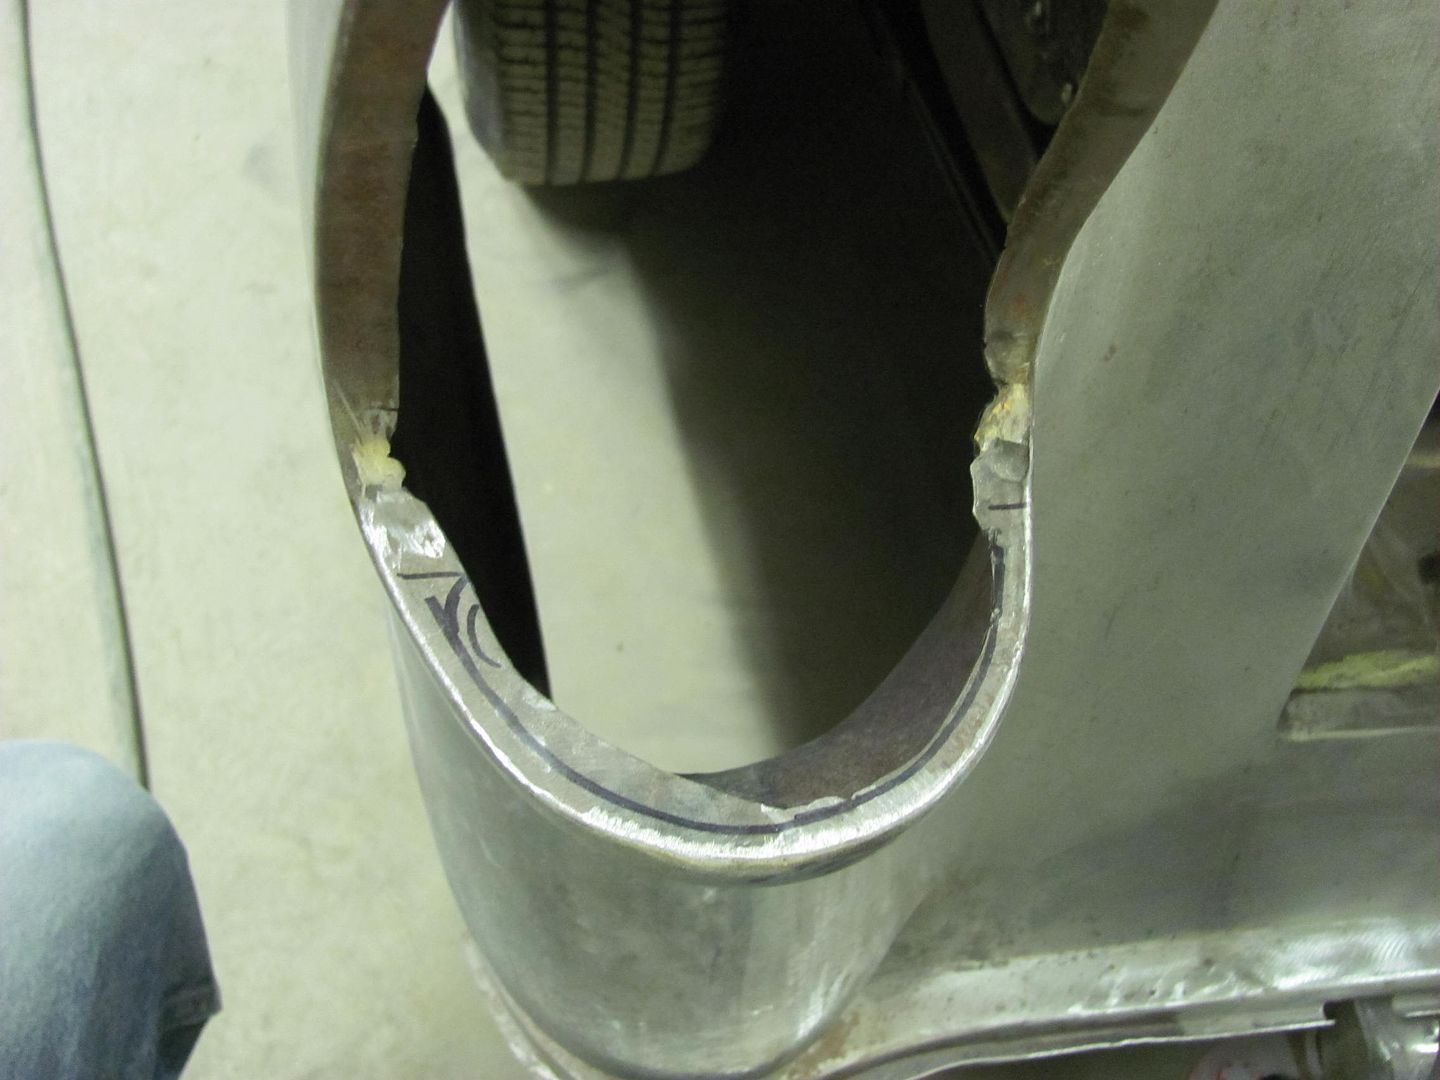 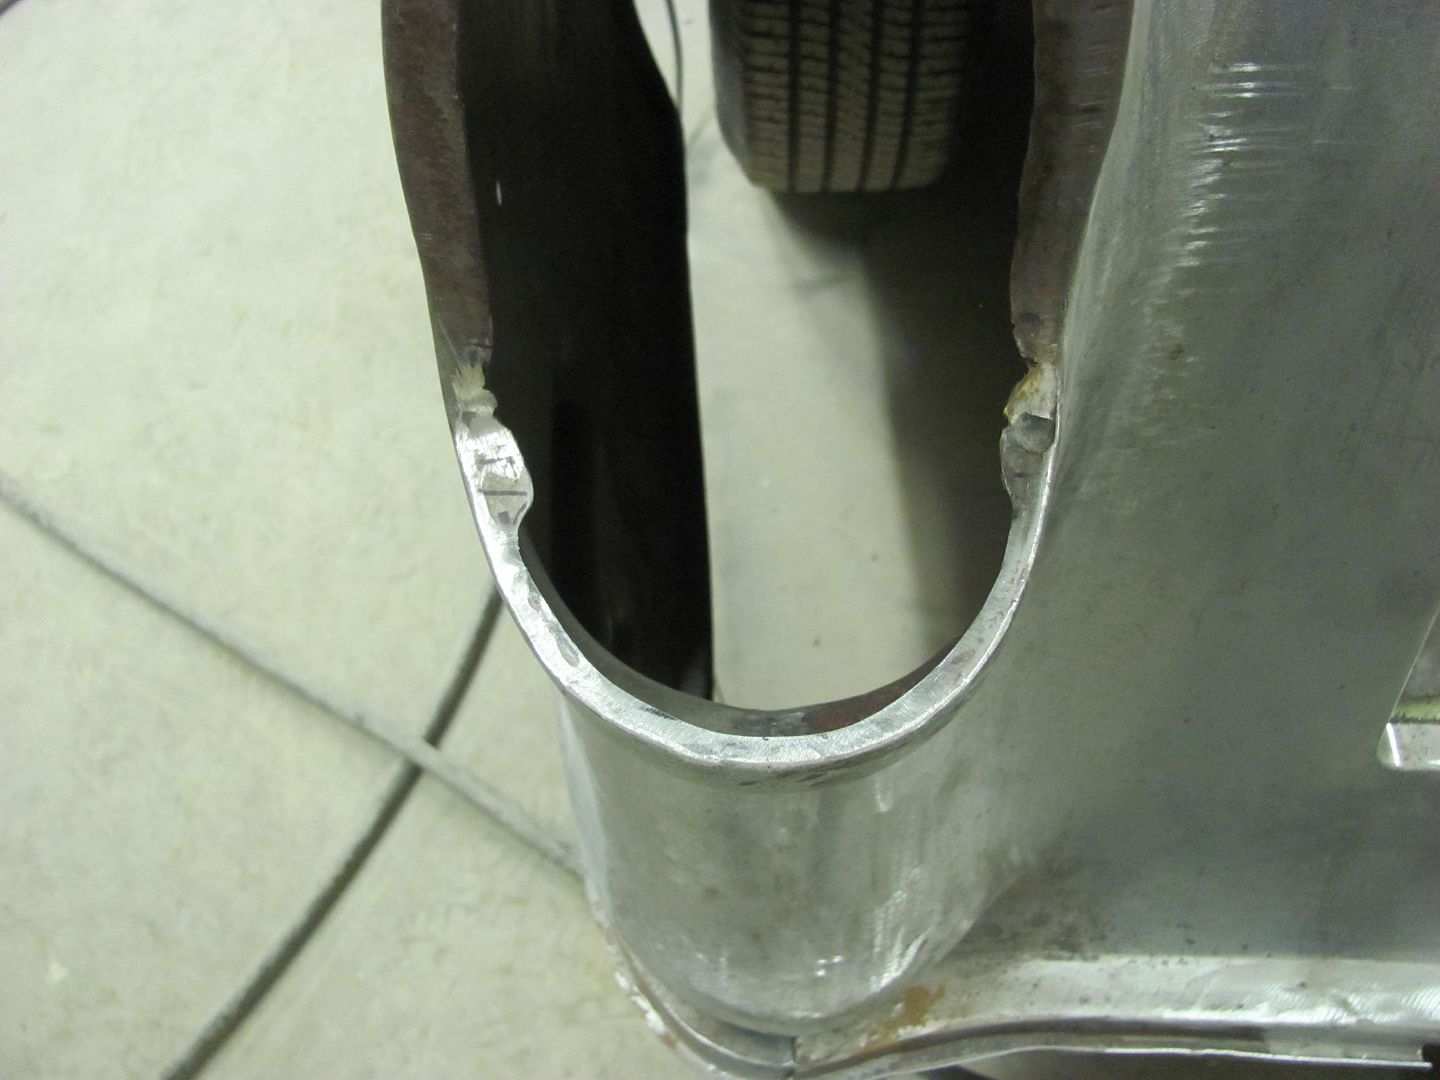 Test fit of the tail light housing showed the opening was a bit wide, especially to the inside towards the tailgate. So some glancing blows with too large a hammer provided a bit of stretch in this inner valley to persuade the panel over to the left, tightening up the opening.... 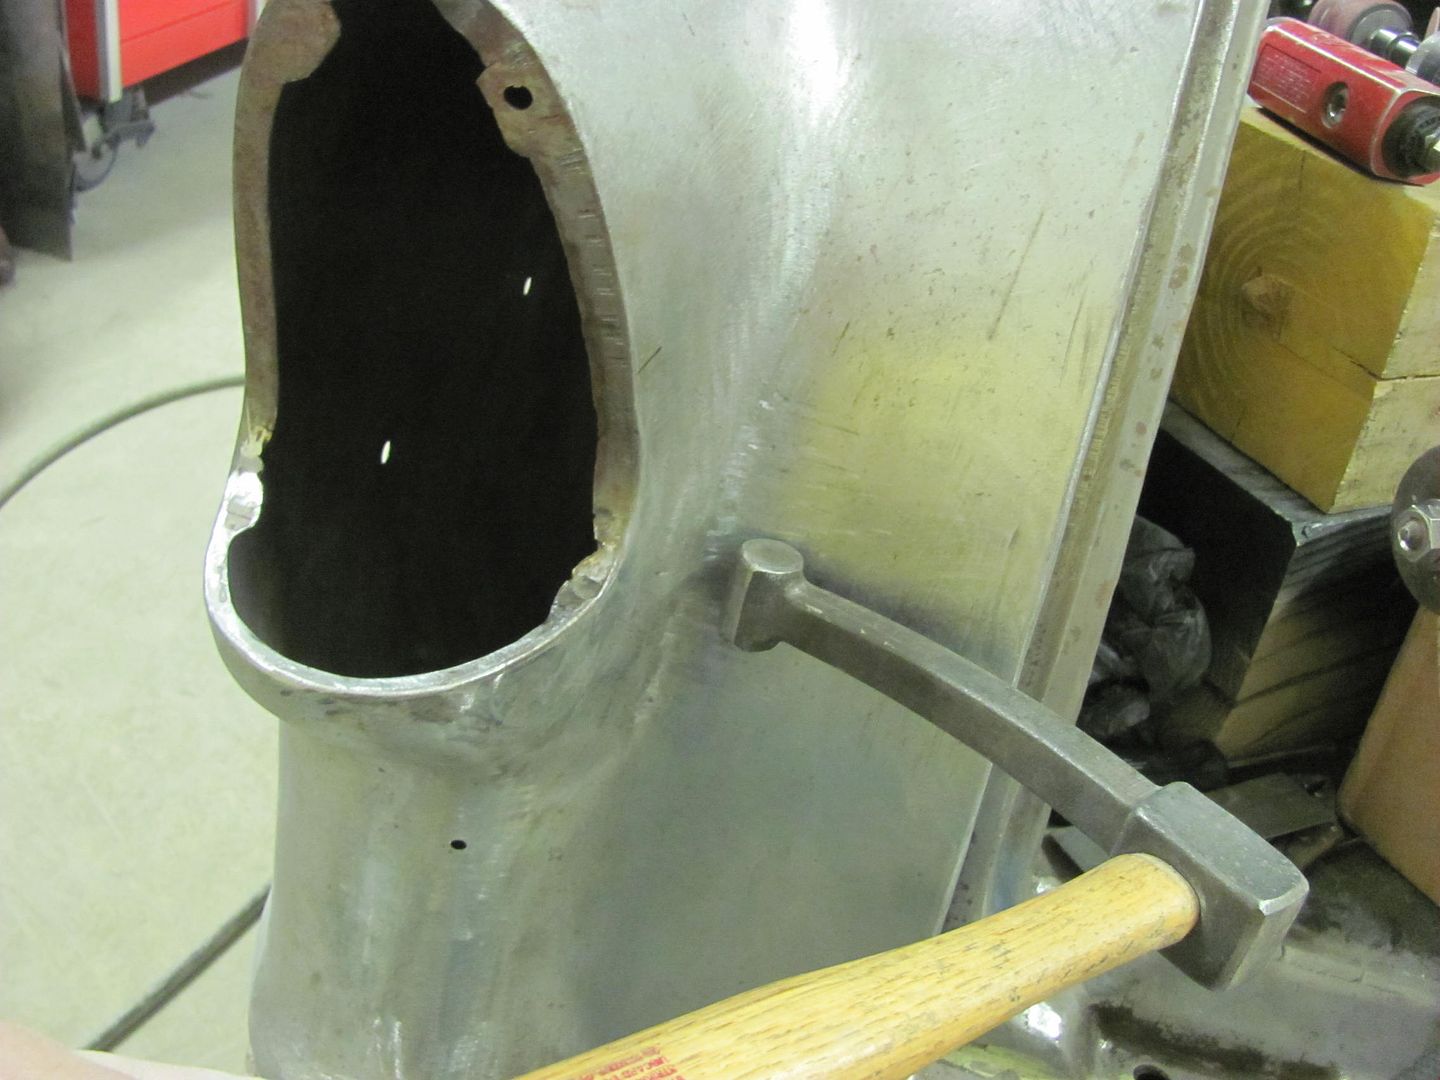 A bit better here, but more tweaking will be needed on the outside before the mounting plate gets welded in place.. 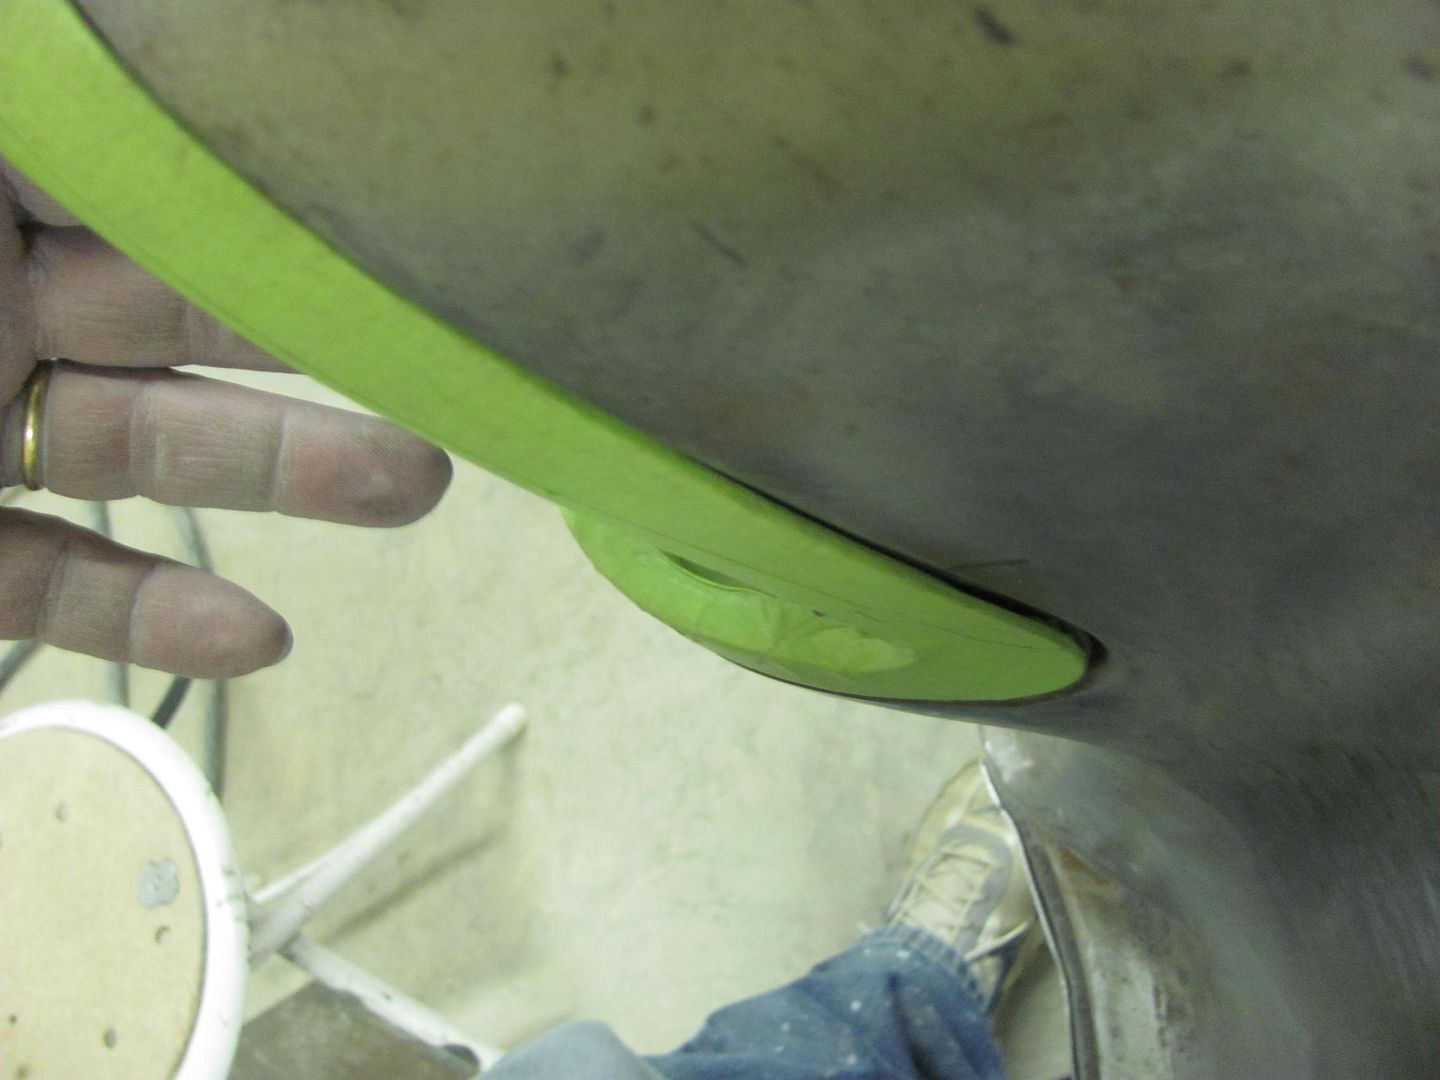
__________________
Robert |
|
|
|
|
04-29-2015, 08:10 AM
|
#432 |
|
Senior Member
Join Date: Jul 2012
Location: Oblong, Illinois
Posts: 7,017
|
Re: 55 Wagon Progress
I like the choice of the round vents too. Better match for the lines of the car. Really like the eye candy shot of the Buick ...have a thing for them.
Continued exceptional work guys. Following along here is teaching me to have a more critical eye on my projects. |
|
|
|
|
04-29-2015, 08:43 AM
|
#433 |
|
Senior Member
Join Date: Mar 2011
Location: West Plains, Missouri
Posts: 7,555
|
Re: 55 Wagon Progress
Detail with you is amazing, love the work...Jim
__________________
my build thread: http://67-72chevytrucks.com/vboard/s...d.php?t=459839 Jimbo's long bed step build:http://67-72chevytrucks.com/vboard/s...t=464626<br /> |
|
|
|
|
04-29-2015, 12:27 PM
|
#434 |
|
Registered User
Join Date: May 2011
Location: Anderson SC
Posts: 3,870
|
Re: 55 Wagon Progress
Always love checking in on the progress. Makes me want to do better work, especially the welding/planishing steps.
__________________
Project Goldilocks '66 C10 Short Fleet BBW Build '65 C10 Highly Detailed Stock Restoration Thread '78 Camaro Targa Roof Build '55 International Metal/Body/Paint Work '66 F100 Full Rotisserie Restoration '40 Packard 120 Convertible Coupe Restoration How To Restore and Detail an Original Gauge Cluster How To Detail Sand Body Panels, Edges, Corners, Etc |
|
|
|
|
04-29-2015, 05:00 PM
|
#435 |
|
Registered User
Join Date: Jul 2012
Location: Rosenberg, Texas
Posts: 3,506
|
Re: 55 Wagon Progress
What about a couple of oval vents instead of rectangular or 3 round? That way you get more coverage with 2 vents and still have some curve to it instead of the not so flattering rectangular vents? like this ProLine Oval Louver from VA:
 Or check out places like Trique Manufacturing http://www.triquemfg.com/air-conditioning-vents/ They have a triangular vent that looks pretty unique, and other oval vents.
__________________
-Duane C/10 Club Texas member 1971 Chevy C10 "Brutus" SWB Fleetside 2016 6.0L (L96) 6L90E (driver/project) 1965 Pontiac GTO "Royal Goat" 400/TH400 w/AC (my baby) |
|
|
|
|
04-30-2015, 06:16 AM
|
#436 |
|
Registered User
Join Date: Jan 2013
Location: Leonardtown, MD
Posts: 1,636
|
Re: 55 Wagon Progress
Thanks for the comments guys, and John, you set the bar quite high yourself..
Duane, we looked at quite a few of those, and it seems when you get into those higher priced vents more attention is spent on the looks over function. Neither of the oval/triangular vents have a full directional adjustment for putting the air flow exactly where you want it. The ovals do have a left to right adjustment but nothing for up and down. The ones linked don't appear to have any adjustment at all.
__________________
Robert |
|
|
|
|
04-30-2015, 10:46 PM
|
#437 |
|
Registered User
Join Date: Jan 2013
Location: Leonardtown, MD
Posts: 1,636
|
Re: 55 Wagon Progress
Received a couple of care packages today, first was some of the tailgate hinge trim rings, shown here after Kyle media blasted them. So to all the guys that were watching the ebay auction for these, sorry..
  Next, we got our AC vent samples in.. Here is the test fit with tape... Only have two of the round ones to show, but if we go with these there will be three in a row here in the center of the dash. 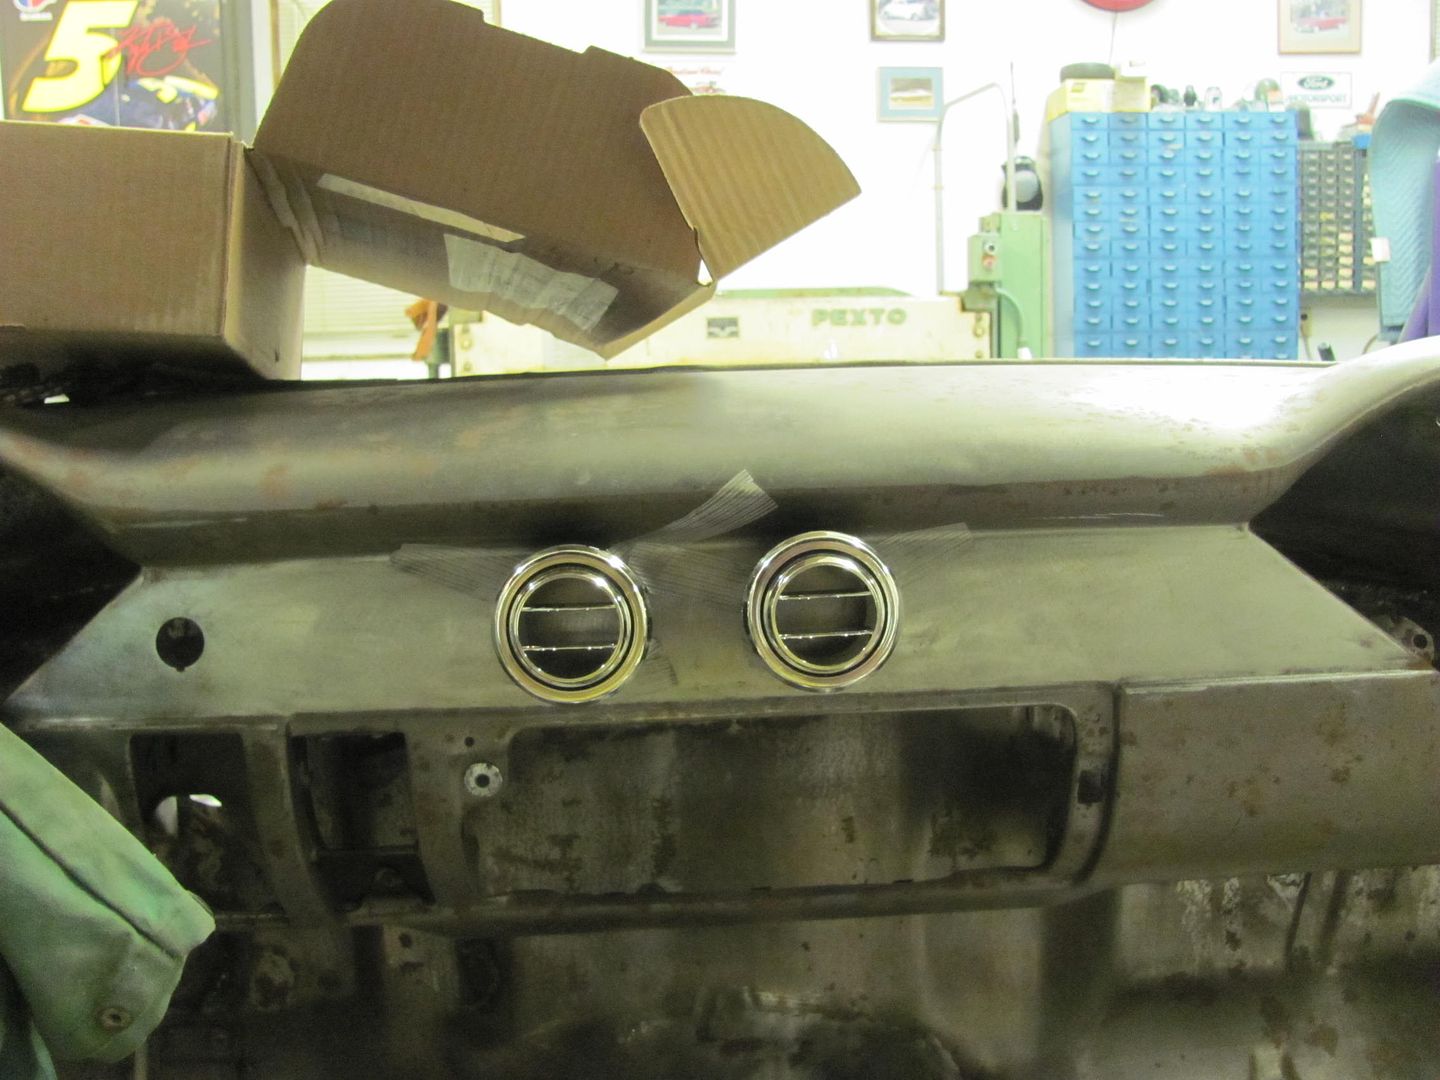 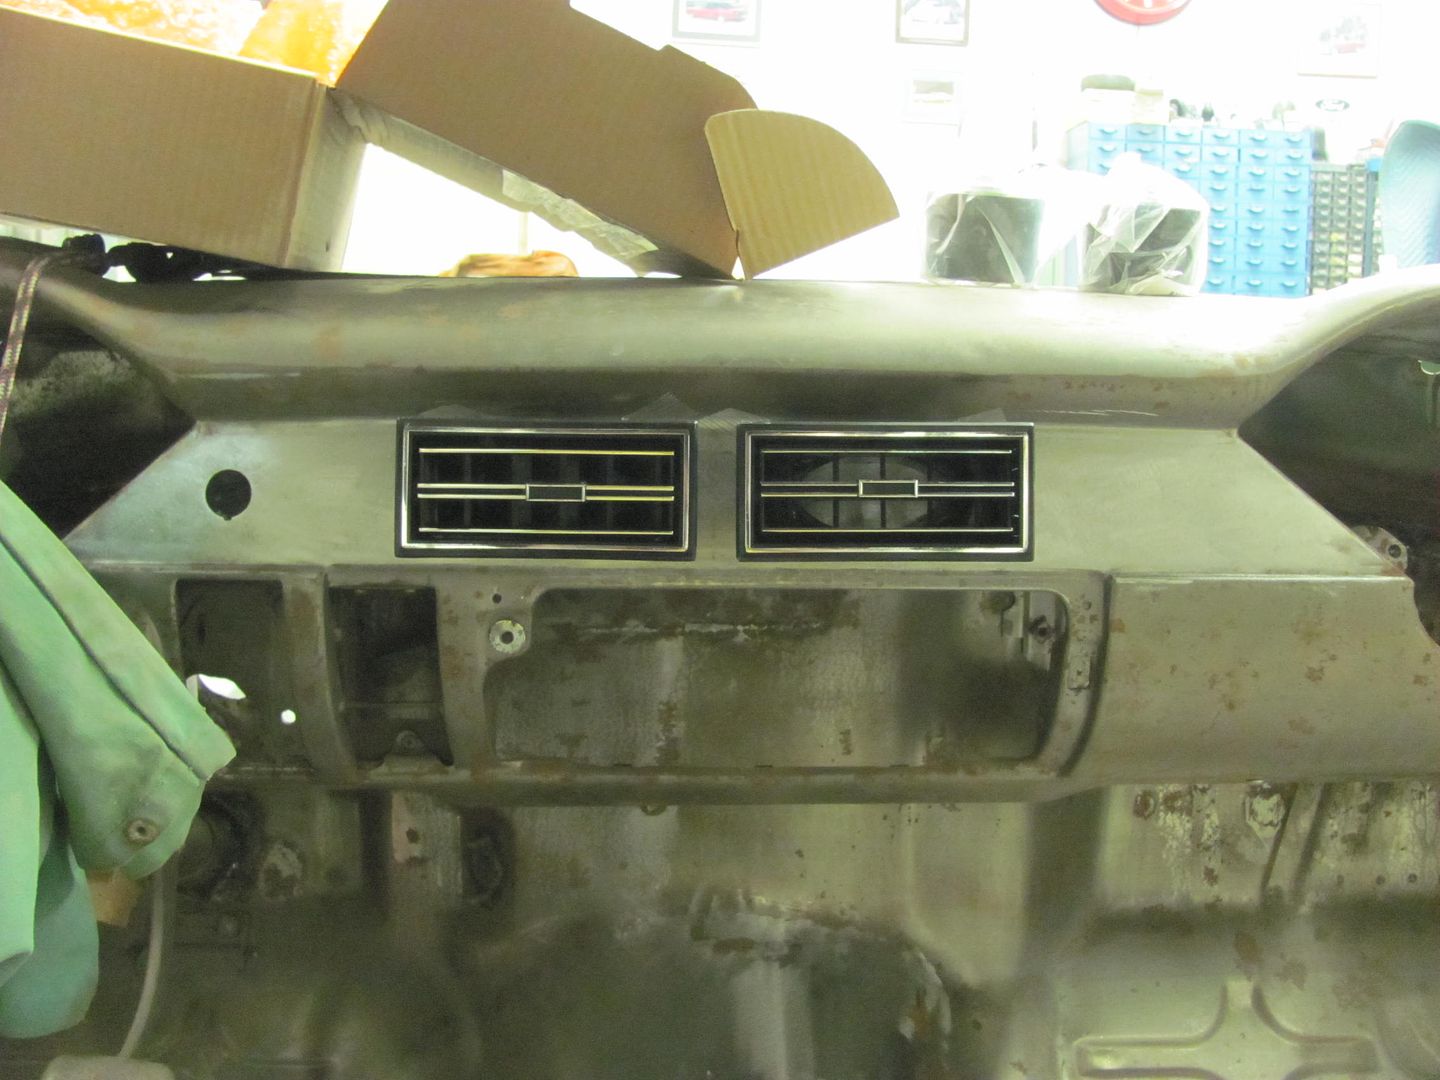 Any thoughts on the vents now with them mocked up? Then Kyle tried his hand at block sanding epoxy on the inside of the hood.. 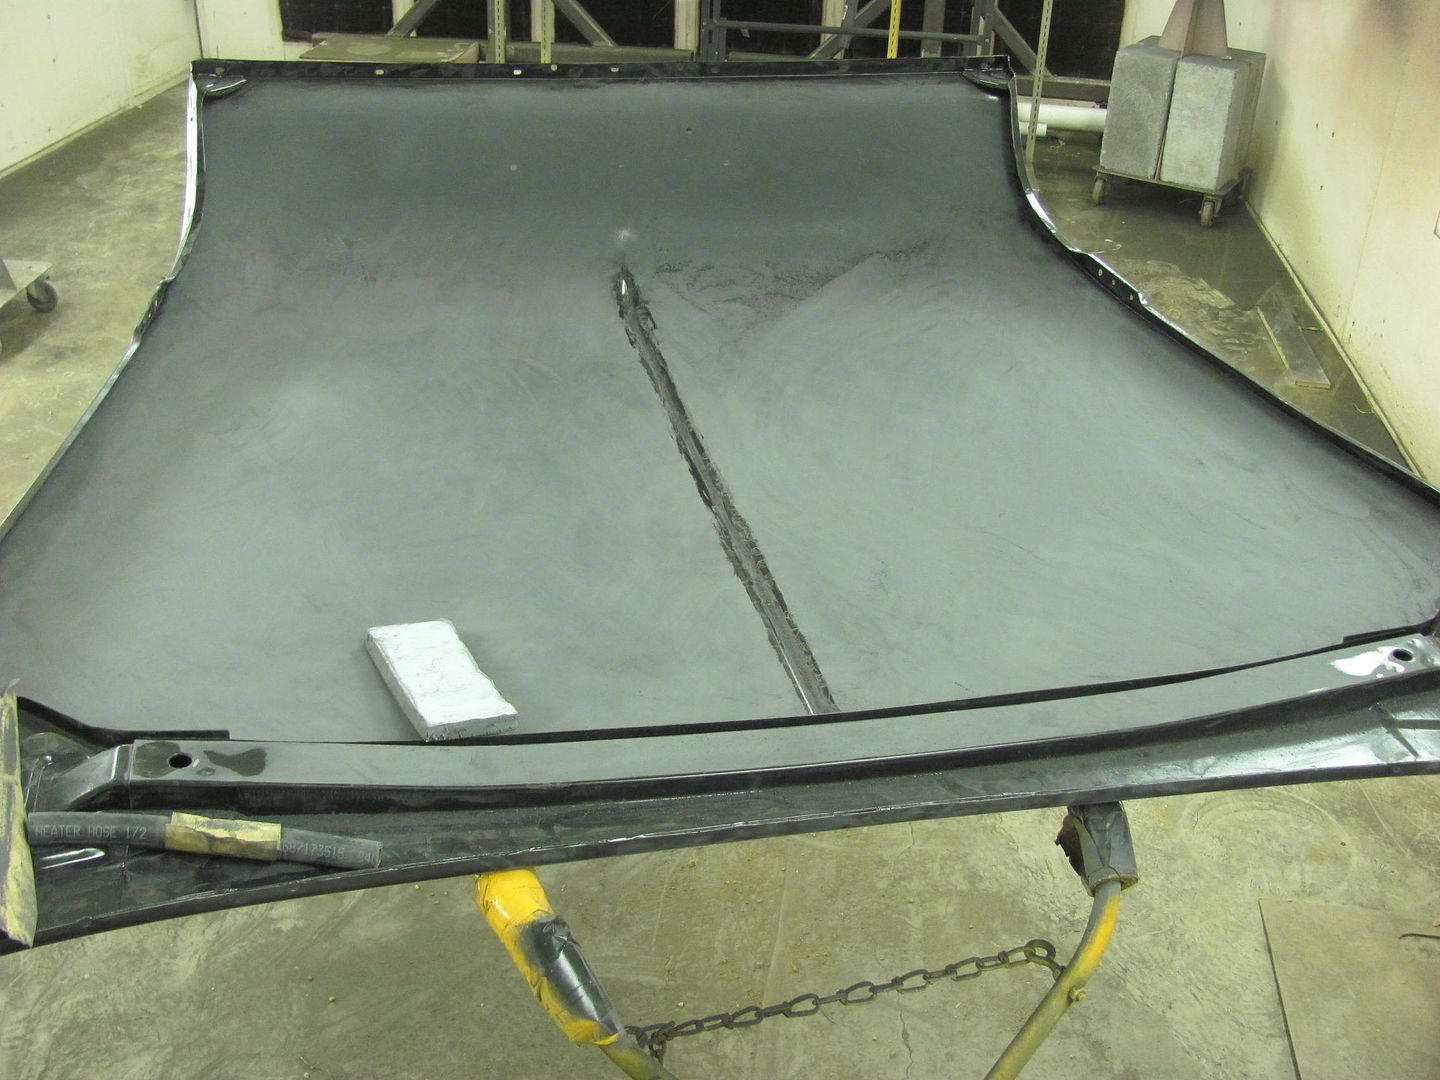
__________________
Robert |
|
|
|
|
04-30-2015, 11:05 PM
|
#438 |
|
Senior Member
Join Date: Jul 2012
Location: Oblong, Illinois
Posts: 7,017
|
Re: 55 Wagon Progress
Any chance there are oval ones that have the functionality you are looking for? If they exist, how would two look installed in the dash vertically?
Buddy building a 52 Buick is using round vents from a Chevy Sonic. Suprisingly they look right in that car. |
|
|
|
|
05-01-2015, 08:41 PM
|
#439 |
|
Registered User
Join Date: May 2007
Location: Deale Md
Posts: 4,663
|
Re: 55 Wagon Progress
round
__________________
James 63 GMC V6 4speed carryall 65 chevy swb bbw V8 auto 68 K20 327/4 speed, buddy buckets 2002 GMC CC Dually Duramax 64 GMC lwb 3/4 V6 4speed SOLD 66 GMC swb bbw buddy buckets SOLD IG duallyjams The only thing that stays the same is constant change! |
|
|
|
|
05-01-2015, 11:08 PM
|
#440 |
|
Registered User
Join Date: Oct 2007
Location: Spanaway
Posts: 8,451
|
Re: 55 Wagon Progress
I think round looks more in tune for the year of the ride.
__________________
Mike. Swamp Rat build thread : http://67-72chevytrucks.com/vboard/s...d.php?t=595019 72 3/4T 4X4 4" BDS Lift 33" BFG's |
|
|
|
|
05-04-2015, 03:55 PM
|
#441 |
|
Registered User
Join Date: Jul 2012
Location: Rosenberg, Texas
Posts: 3,506
|
Re: 55 Wagon Progress
I'd definitely go round over rectangular. There really aren't any crisp lines on a tri-five. I mean in an overall sense.
__________________
-Duane C/10 Club Texas member 1971 Chevy C10 "Brutus" SWB Fleetside 2016 6.0L (L96) 6L90E (driver/project) 1965 Pontiac GTO "Royal Goat" 400/TH400 w/AC (my baby) |
|
|
|
|
05-05-2015, 06:47 AM
|
#442 |
|
Registered User
Join Date: Jan 2013
Location: Leonardtown, MD
Posts: 1,636
|
Re: 55 Wagon Progress
Went to a metal shaping workshop this past weekend, and just in case we needed a project to tackle, I took along one of the round vents so I could make some "buckets" in case we were going to mount them in the lower outside corners of the dash. To prevent scratching, I covered the chrome with painters tape. As it turned out, we had plenty of other projects going on, and I never got to the vents. Removing the tape when we got home resulted in this:
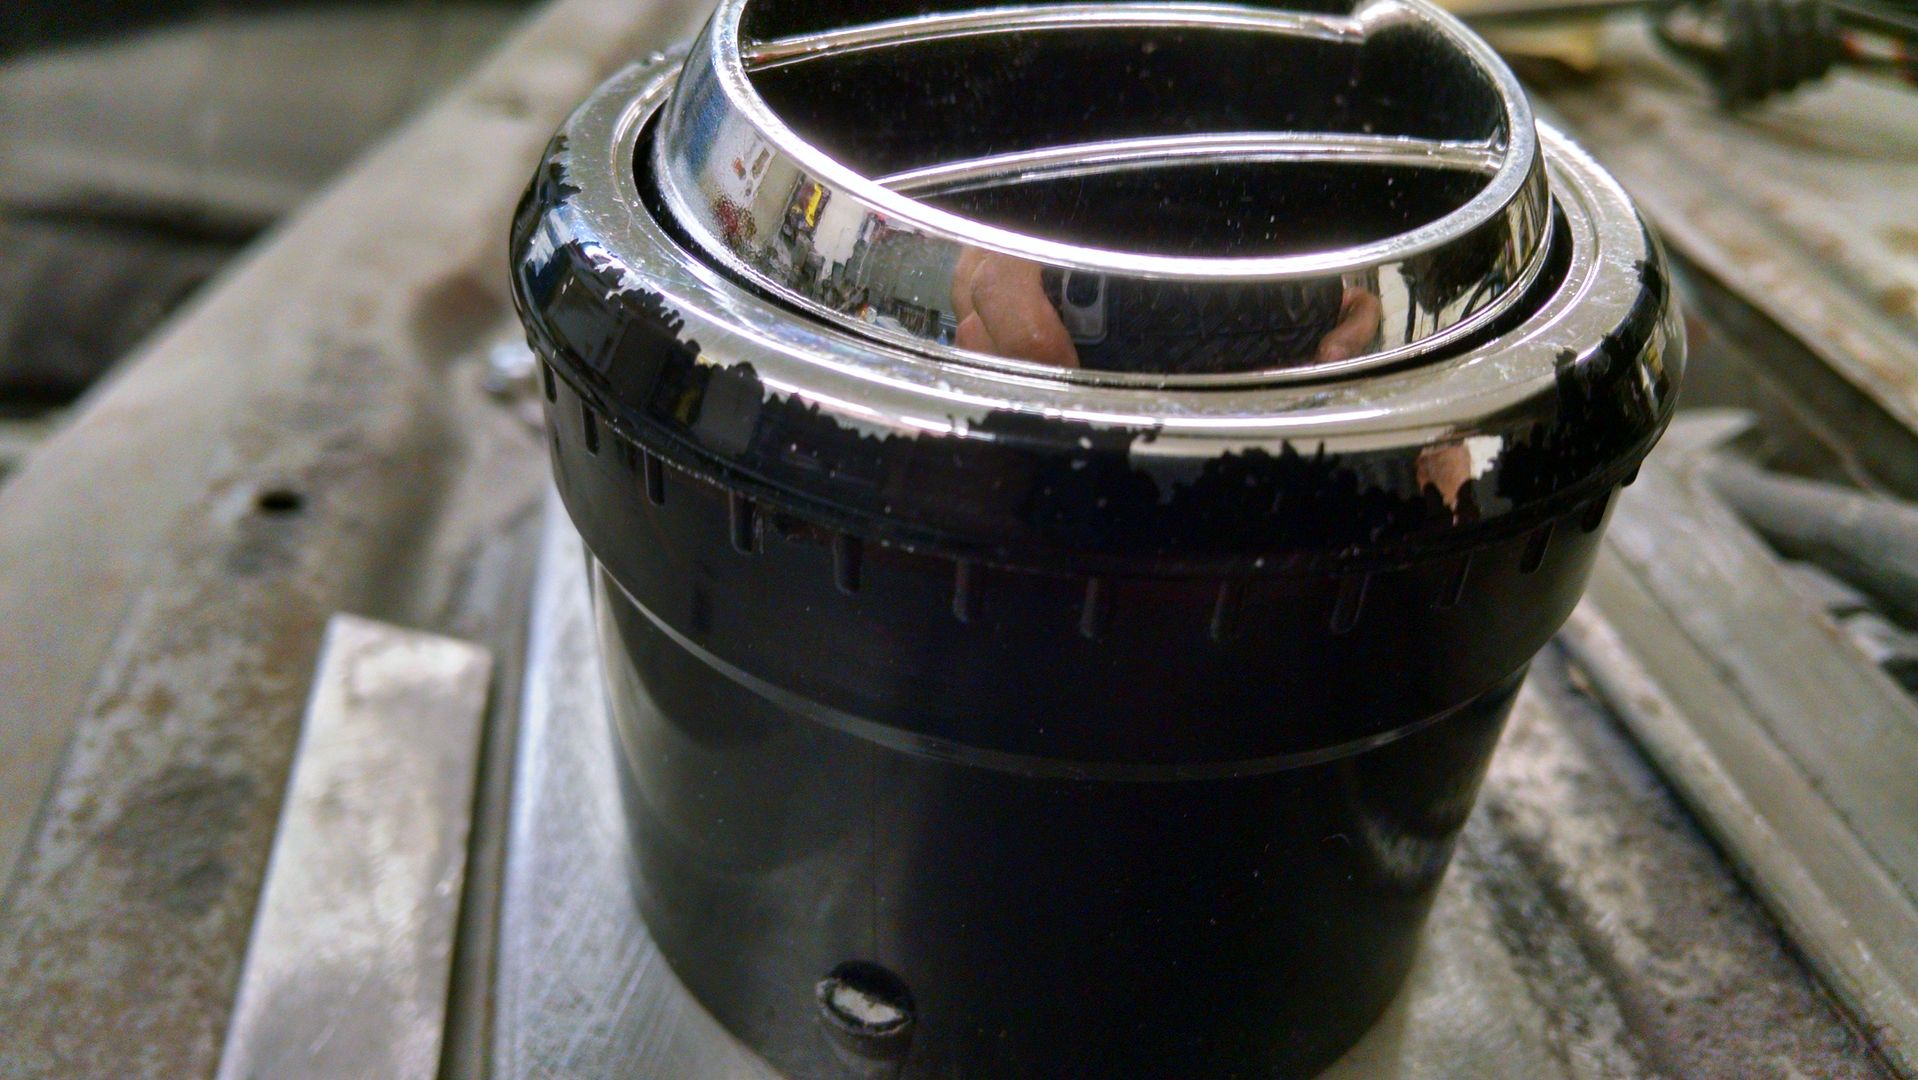 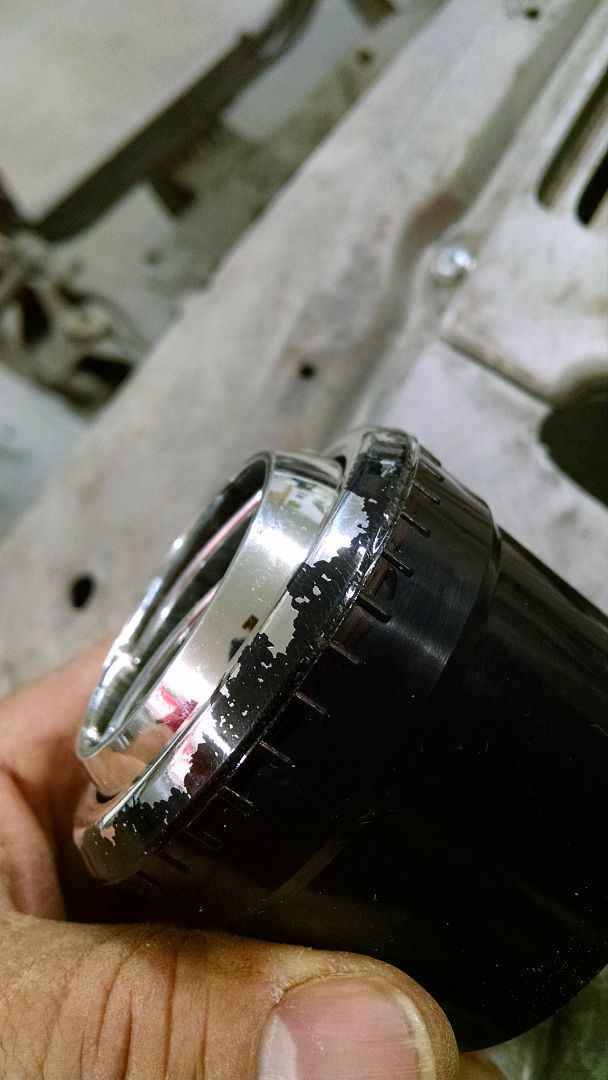 So be forewarned, don't use tape to protect the chrome on the plastic vents from Vintage Air. Also made a Xerox copy of the vents to be able to lay them out and test a pattern before cutting any holes. Thanks to all for the input on vent selection. Here is the 5 round pattern that the owner has decided on... 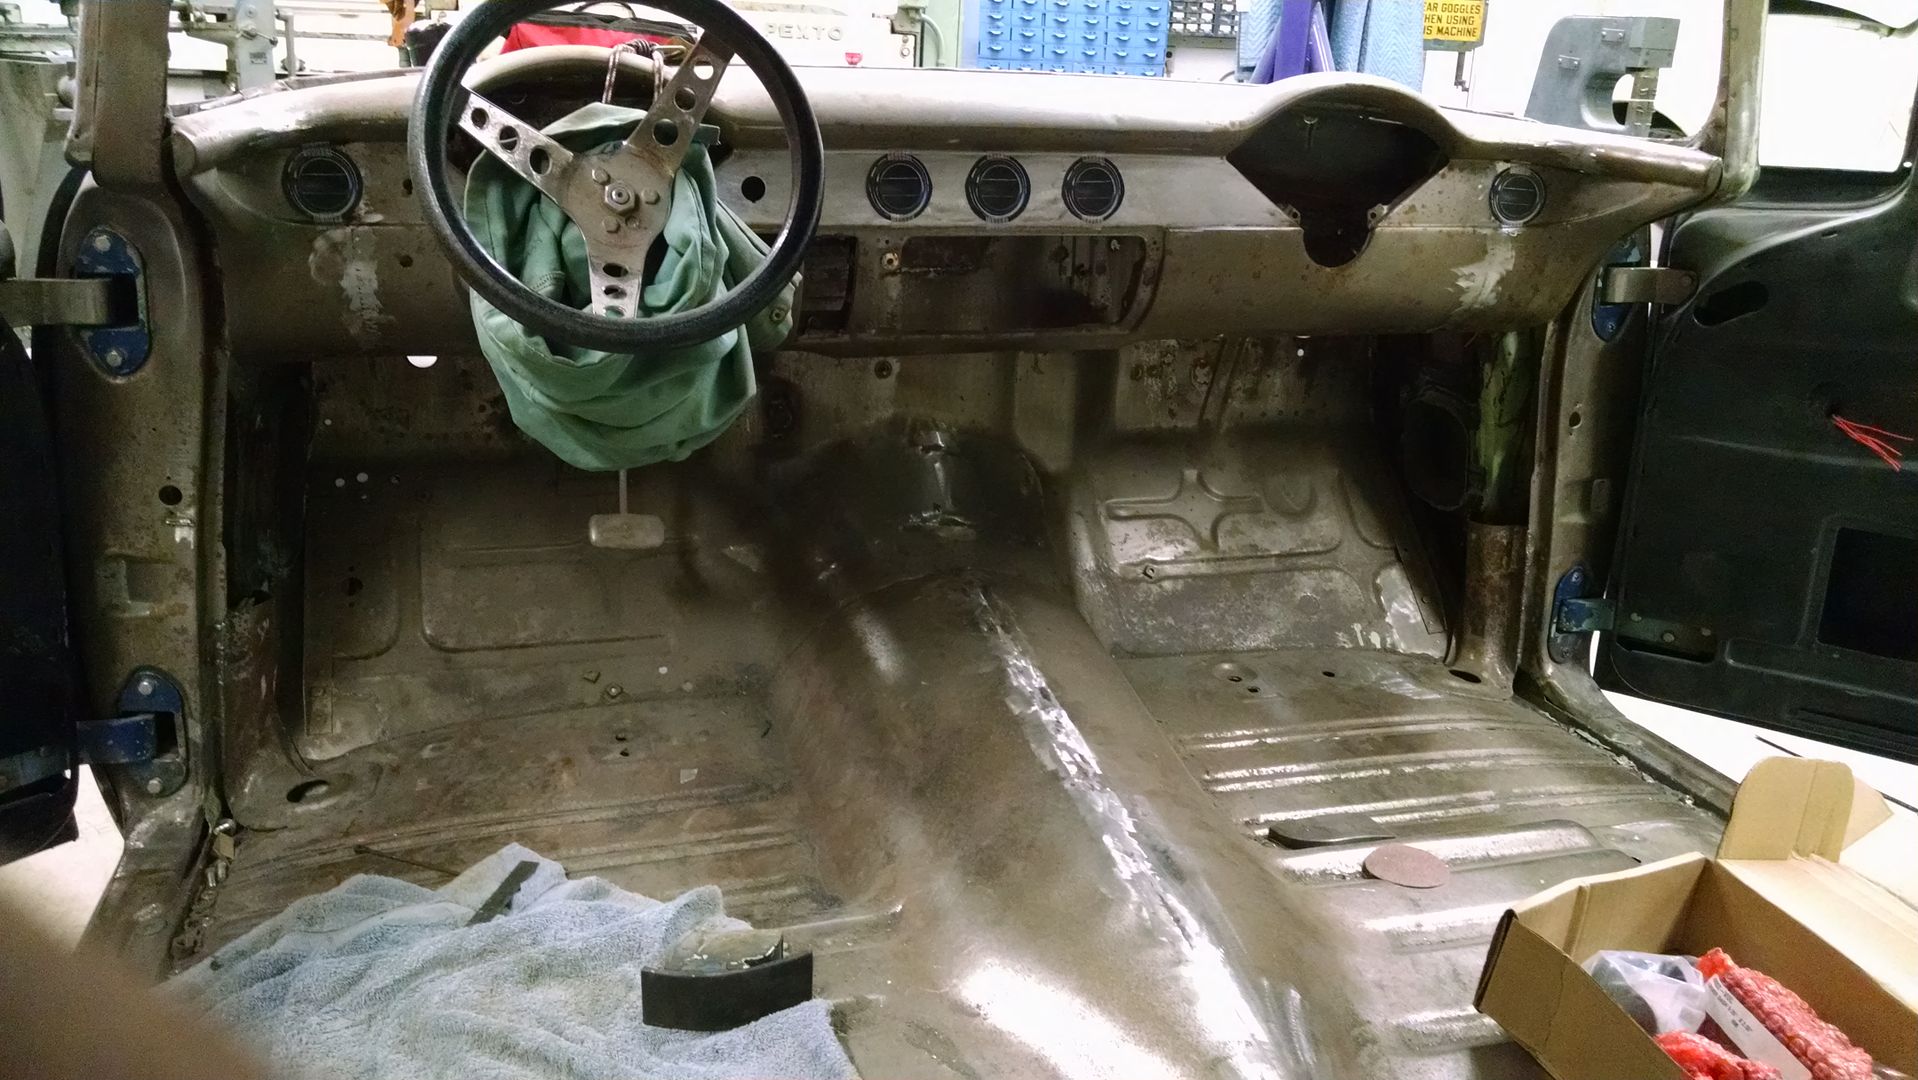
__________________
Robert |
|
|
|
|
05-05-2015, 07:54 AM
|
#443 |
|
Senior Member
Join Date: Jul 2012
Location: Oblong, Illinois
Posts: 7,017
|
Re: 55 Wagon Progress
Well that chrome didn't hold up very well! Vent pattern looks good.
|
|
|
|
|
05-05-2015, 10:02 AM
|
#444 |
|
Senior Member
Join Date: Mar 2011
Location: West Plains, Missouri
Posts: 7,555
|
Re: 55 Wagon Progress
Can't believe chrome came off that easy...Jim
__________________
my build thread: http://67-72chevytrucks.com/vboard/s...d.php?t=459839 Jimbo's long bed step build:http://67-72chevytrucks.com/vboard/s...t=464626<br /> |
|
|
|
|
05-08-2015, 08:49 AM
|
#445 |
|
Registered User
Join Date: Jan 2013
Location: Leonardtown, MD
Posts: 1,636
|
Re: 55 Wagon Progress
At about $10 ea, I think that's one of those got your money's worth things..
Well, the past couple of shop nights we've had some detours and some back up and punts. Where to start.. Started with a test fit of the power antenna the owner had bought, installed somewhat easily and even clears the door hinge when closed by 1/4". But this trim ring on top is just......obnoxious. Anyone use a power antenna that is a bit easier to hide? 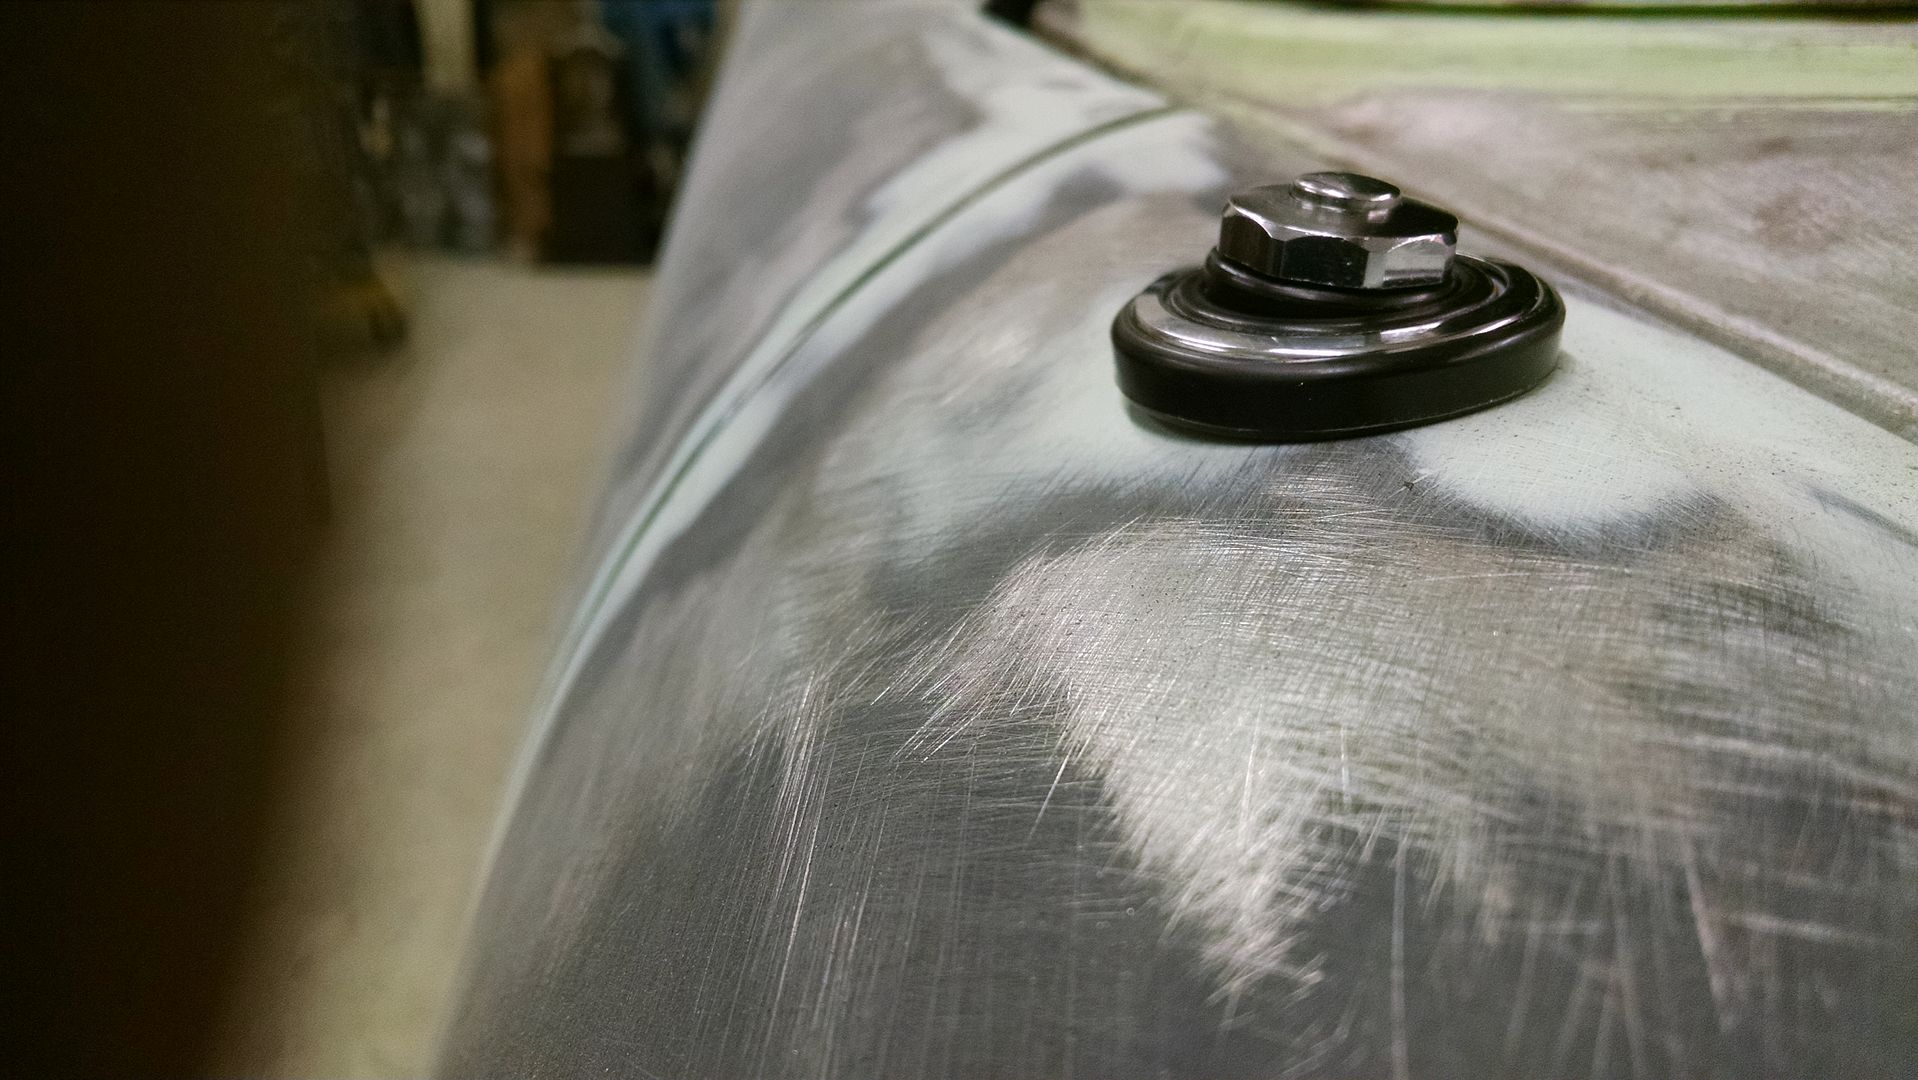 Next, lets get the VA unit under the dash to see how much room we have to work with on a radio.. 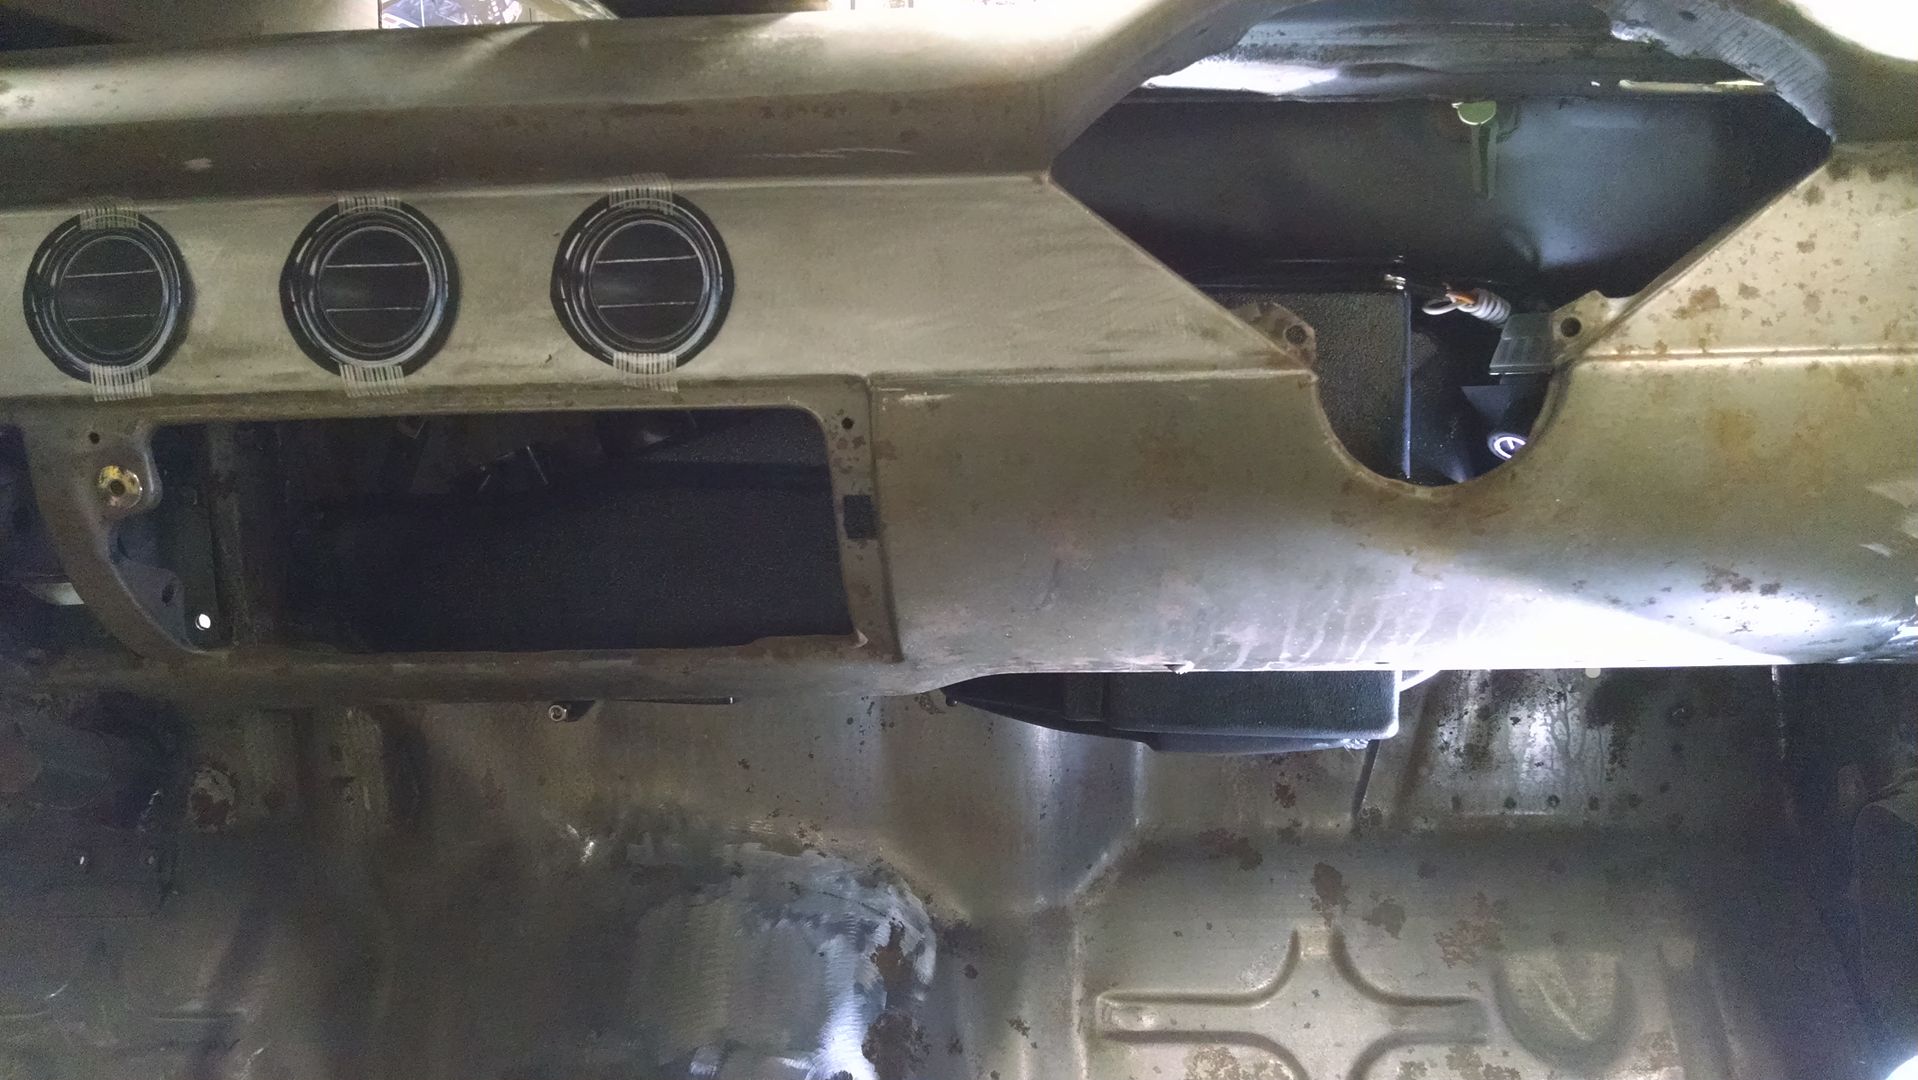 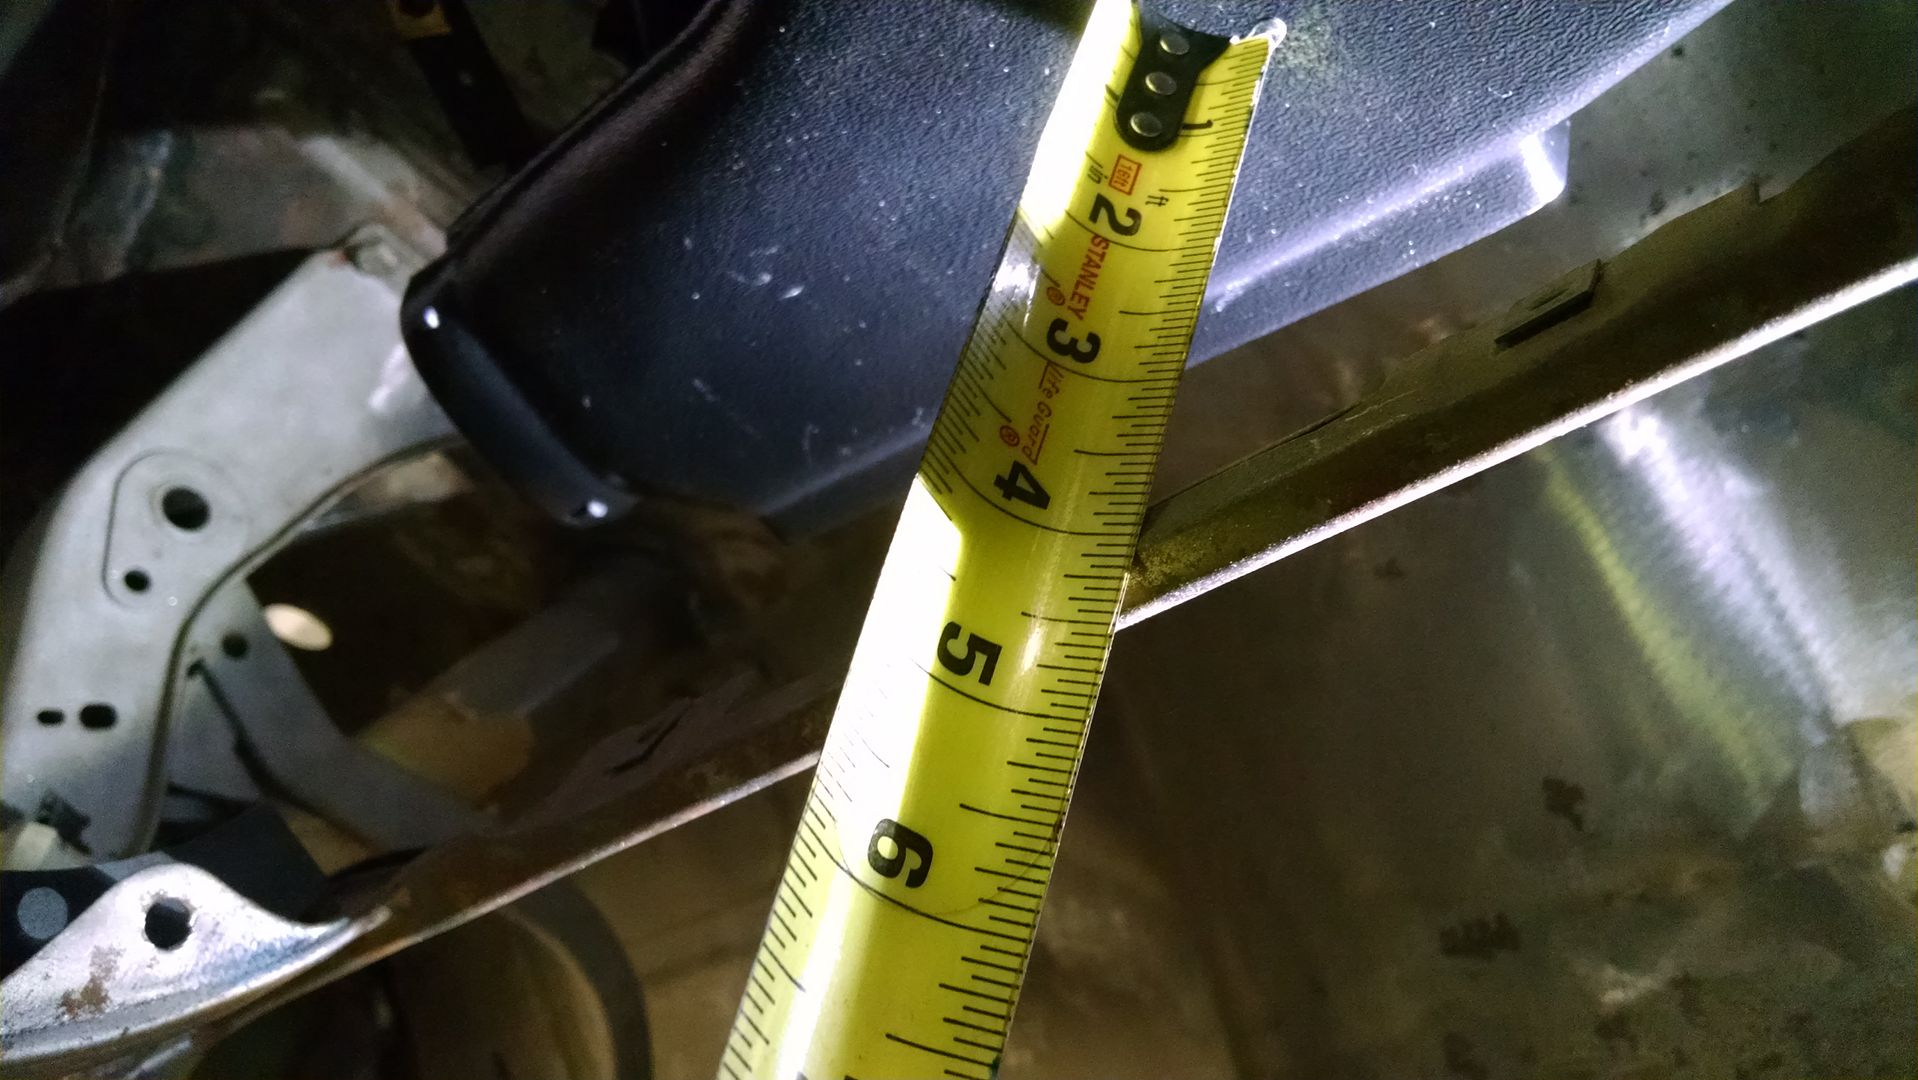 Doh! We had planned on a single DIN chassis, so it appears the radio will need to be 4" deep, or go back into the dash, or go in a console. She did buy a console with the bucket seats, they all came out of a late model Monte Carlo. Let's give that a go. 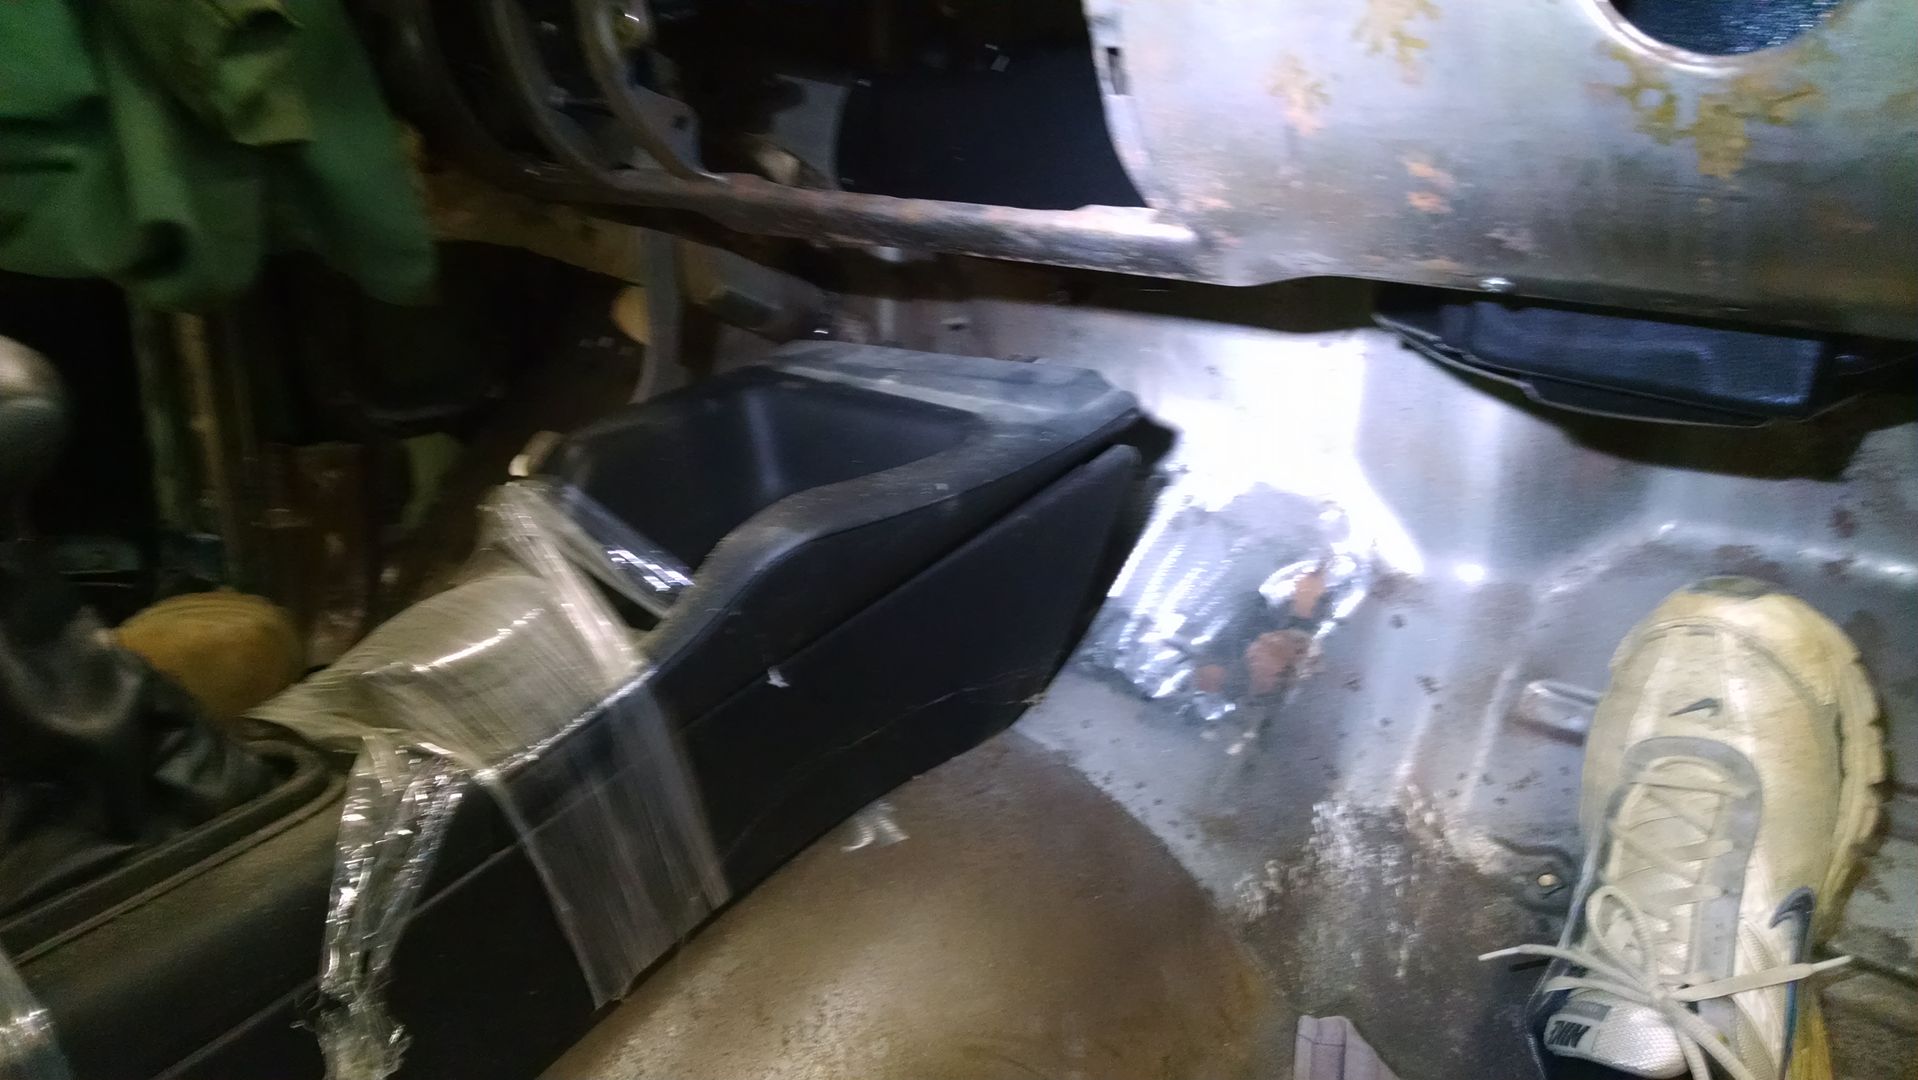 Not much room for installing a single DIN chassis, but even worse the console tapers in at the bottom where the trans tunnel is spreading outward. So it looks like its teeter tottering. Doesn't match the car at all. So this looks like something else to add to the list, perhaps a custom made console is in order.. Since we're not doing too well inside the car, let's shift gears and move to the outside. We had a couple more parts to add to the pile awaiting powder coat. The side baffles of the core support had some hole alignment issues, must be off a 57 or something.... so we'll fill those in and get them re-drilled correctly. Next, we need mounting brackets for the radiator. These were made from some 16 gauge cold rolled steel.. 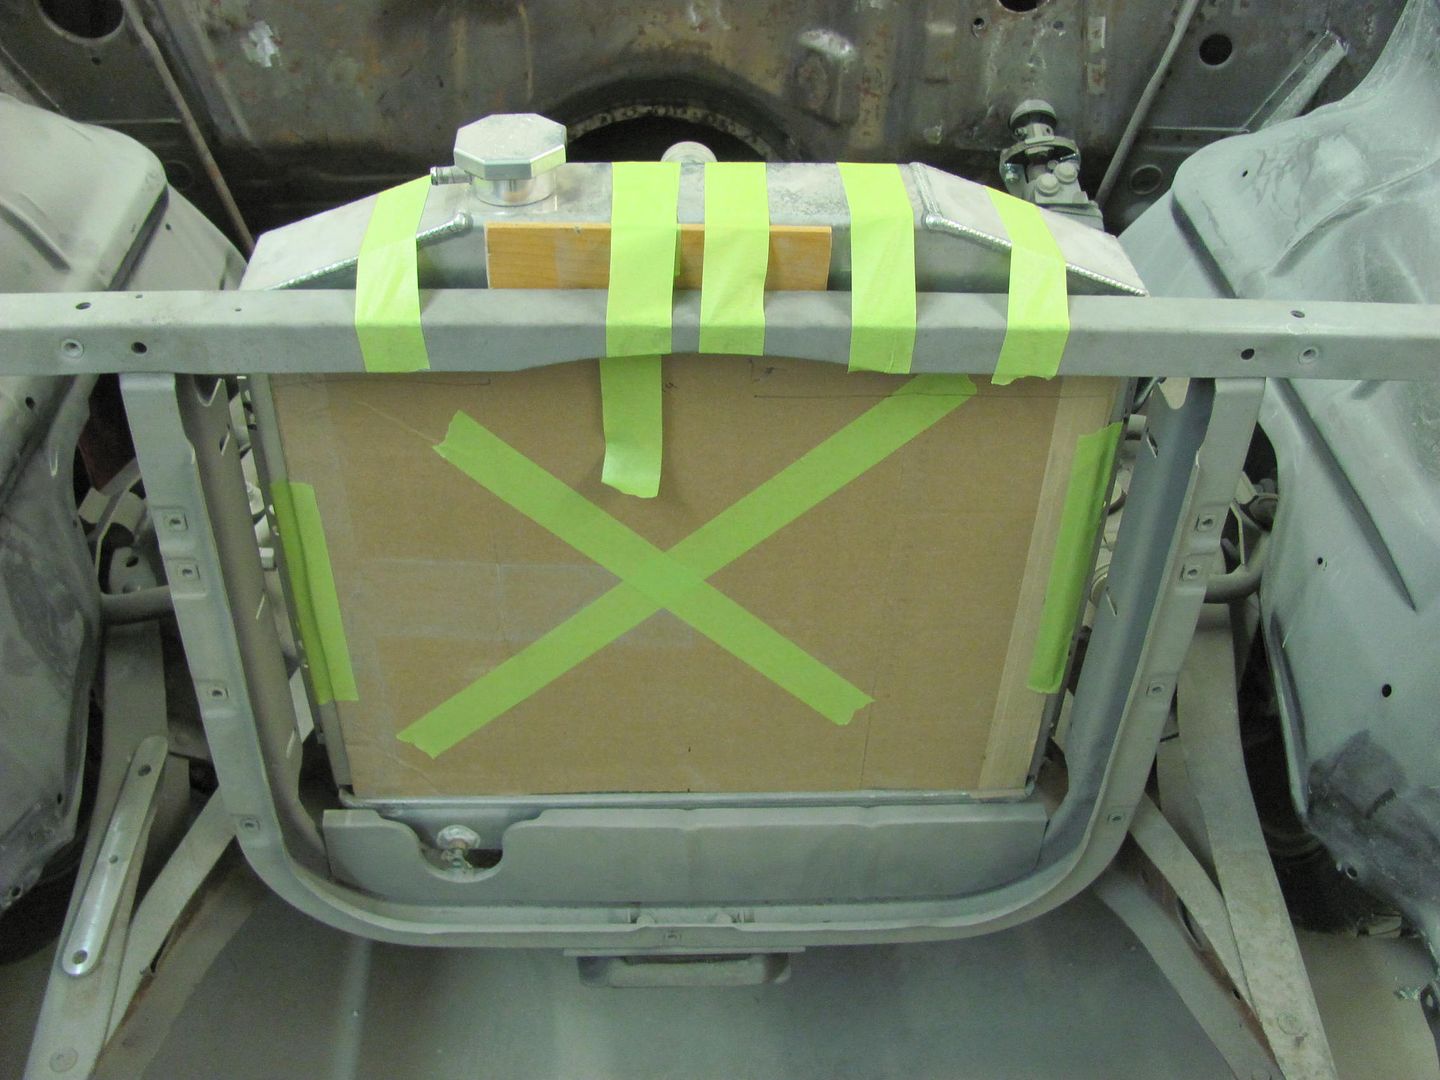 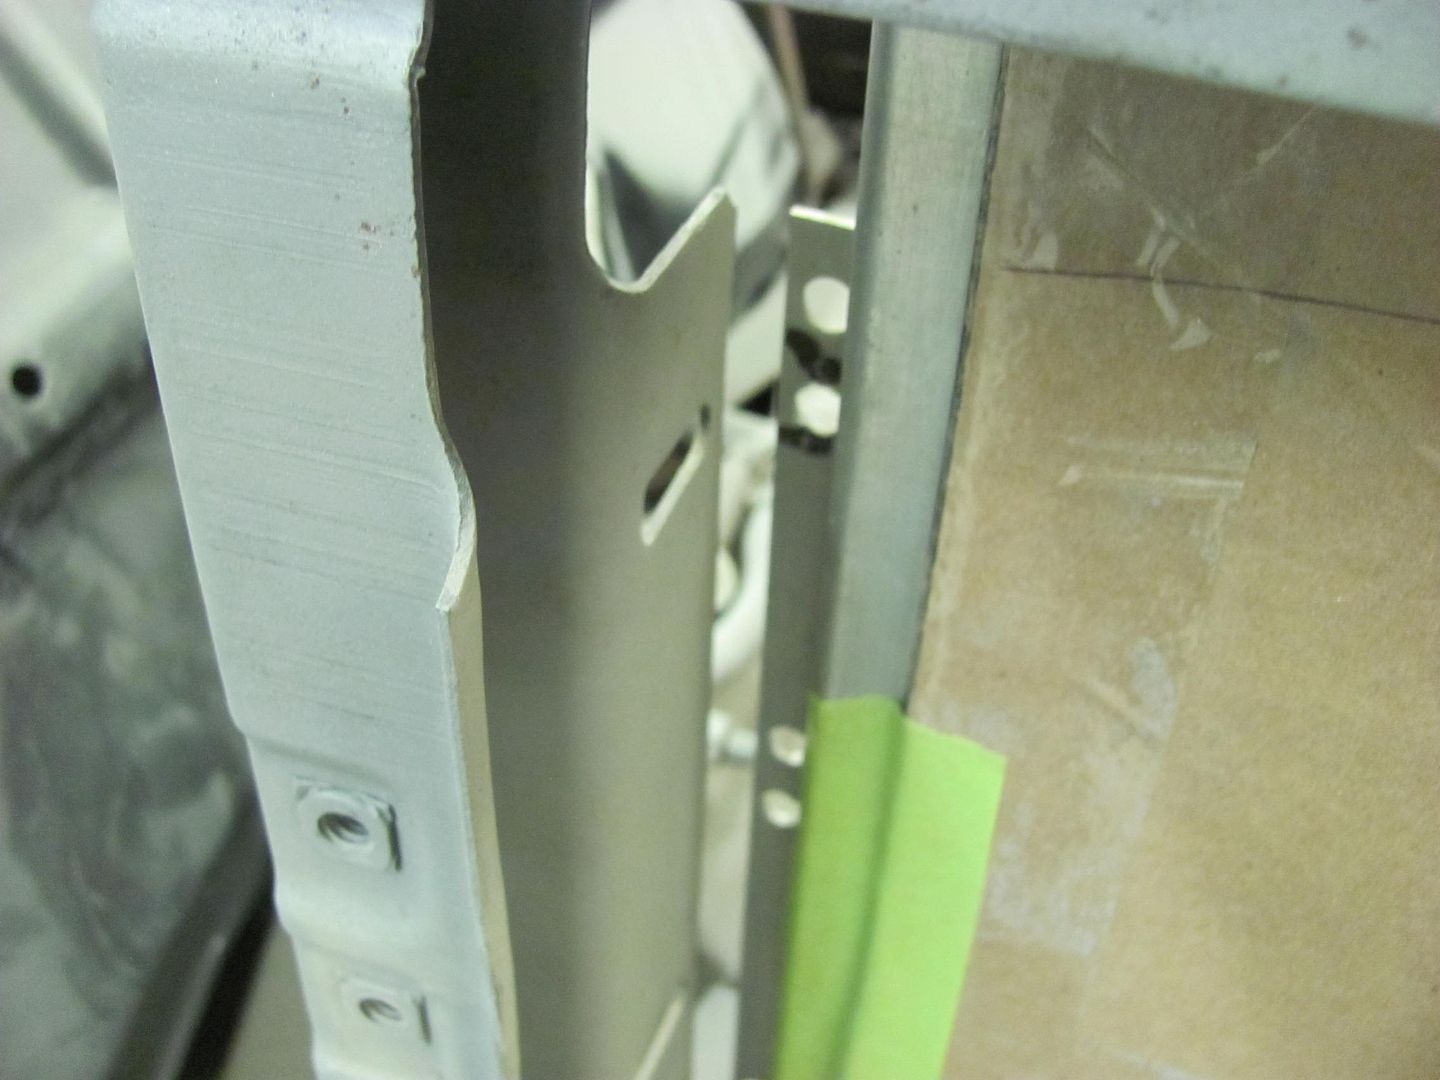 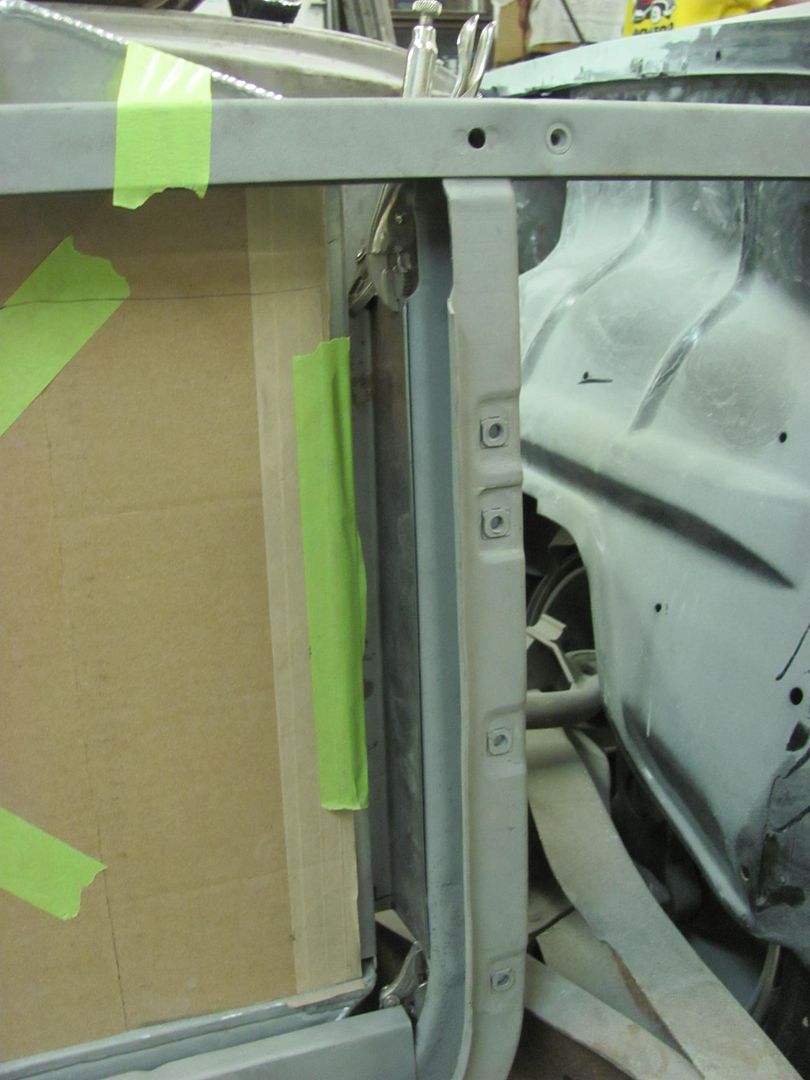 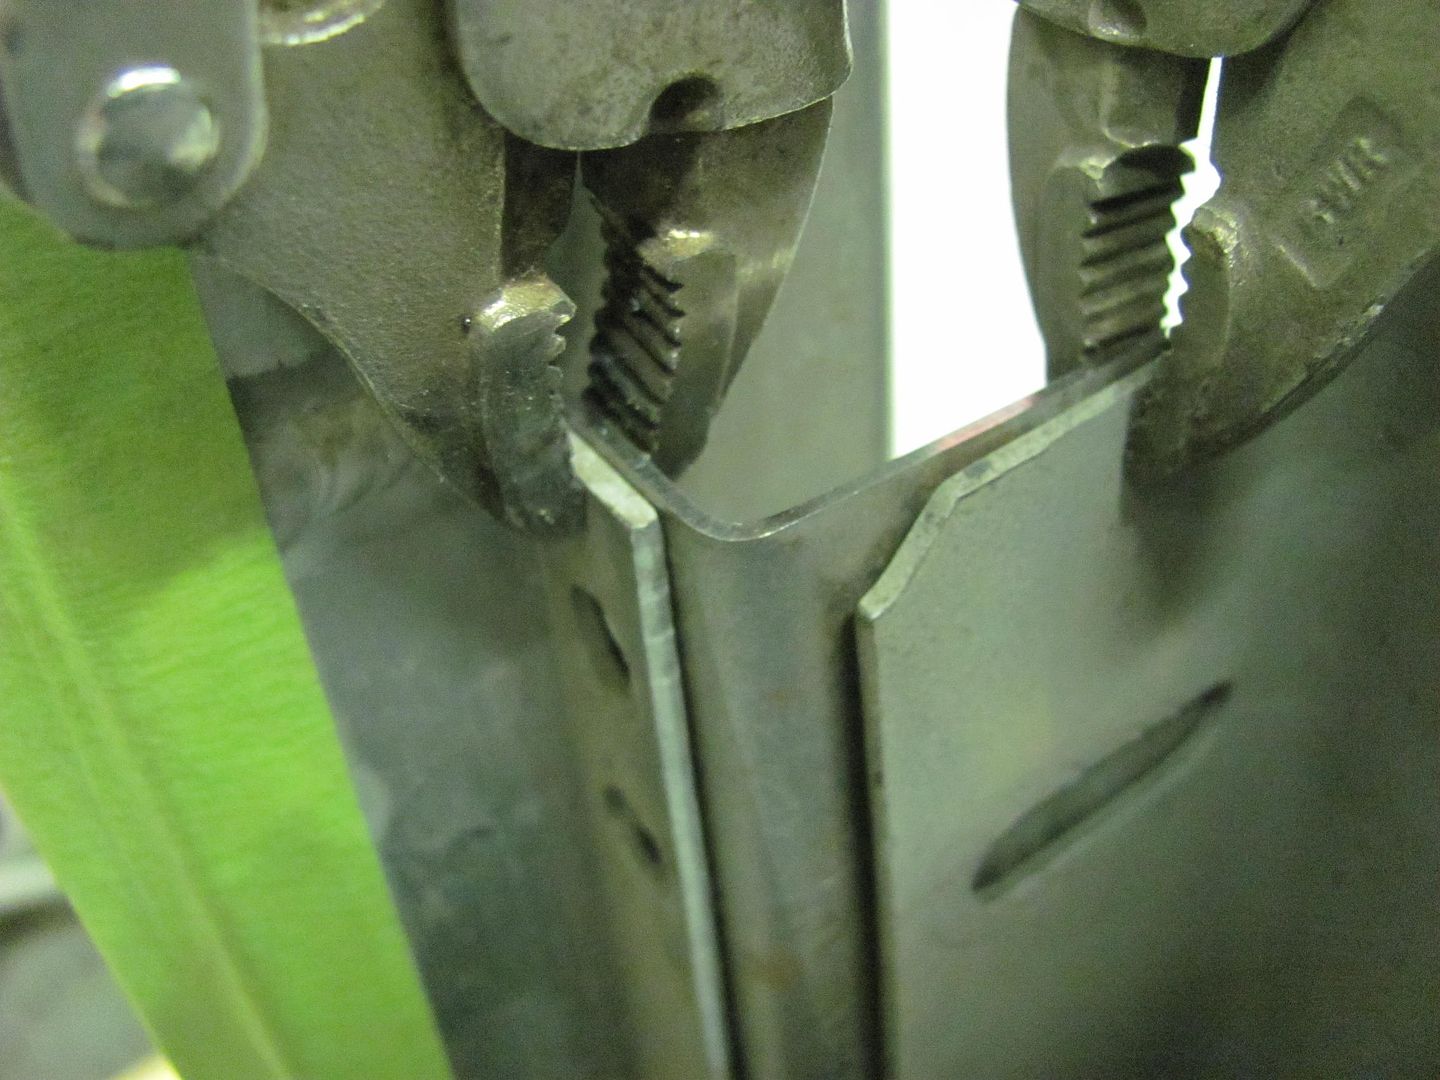 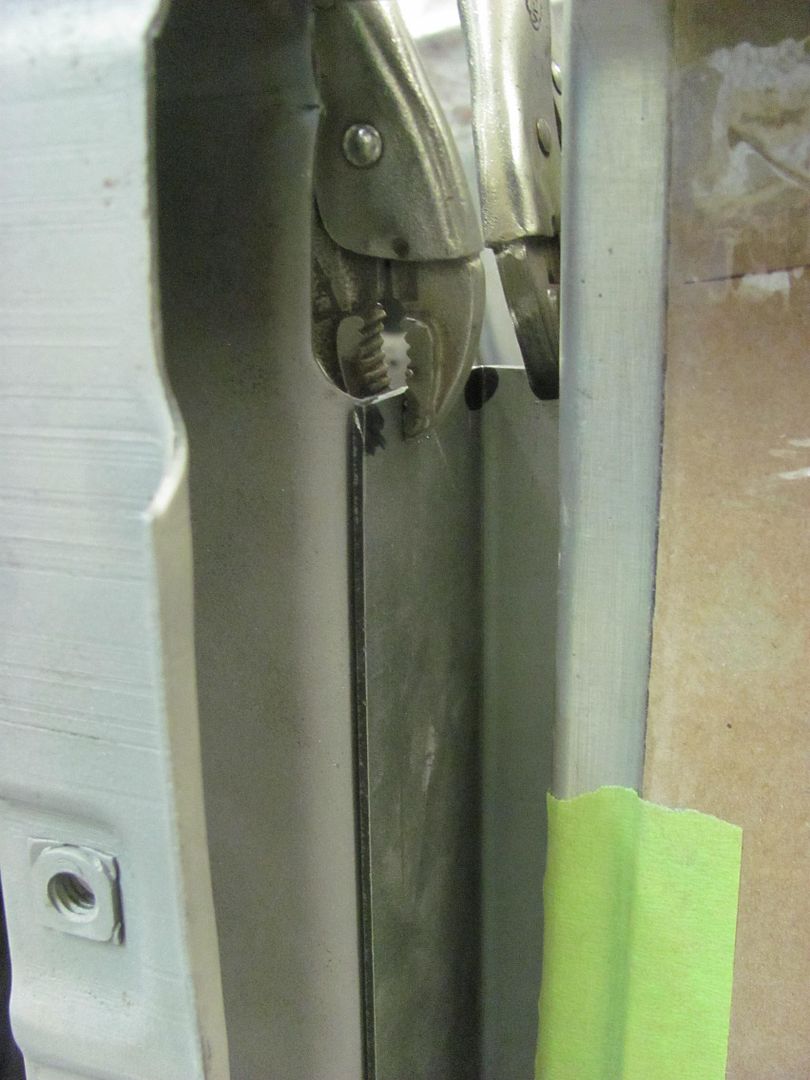 We do now have much better clearance around the radiator petcock with the new improved version of the lower baffle.. 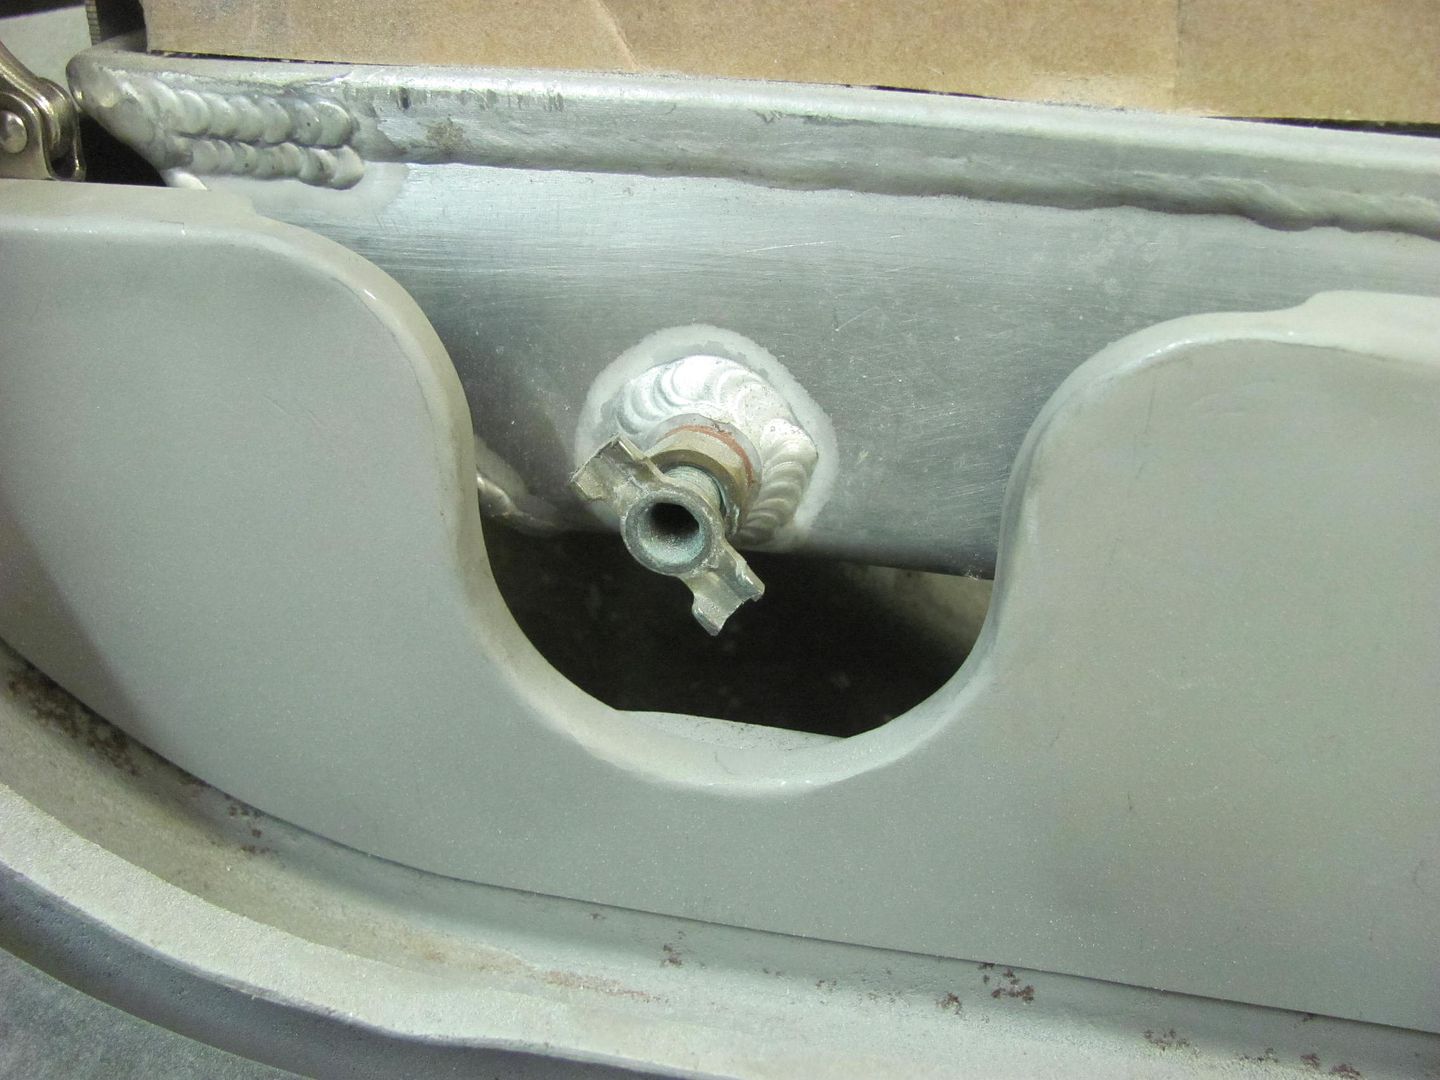 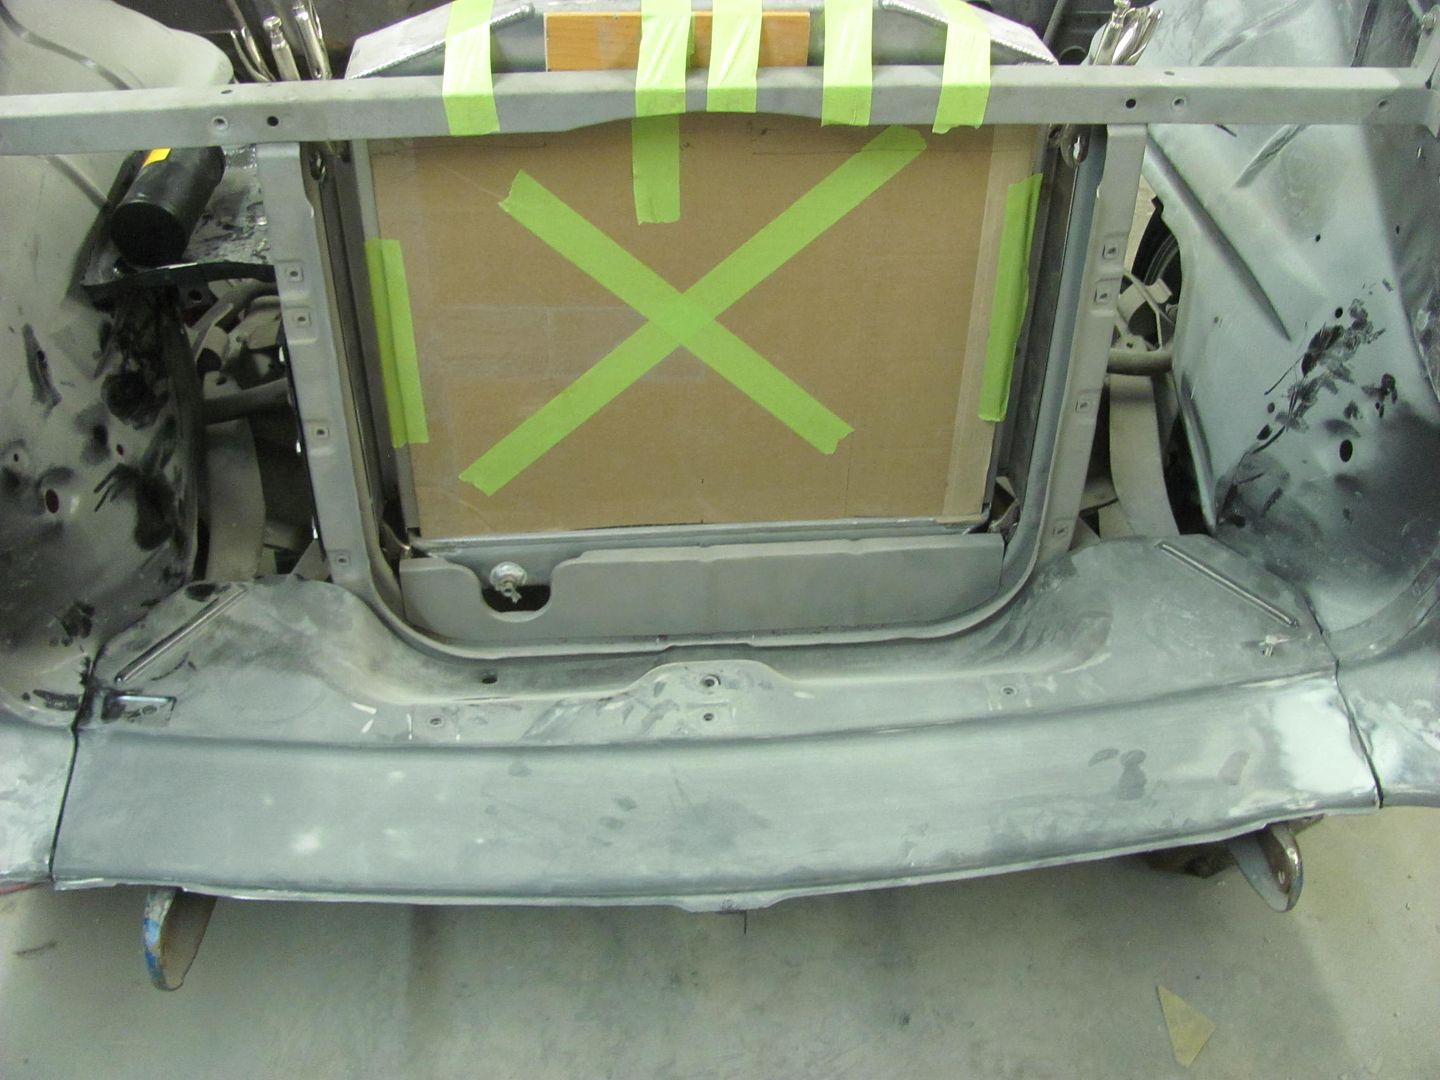 Kyle had learned some Tig welding this past weekend at GatorMeet, from Gator's boy Dakota. Dakota is quite accomplished for his youth, having won the state competition for welding. Here Kyle runs a couple of practice samples to get the machine dialed in... Seems he forgot his long sleeve welding shirt this evening.  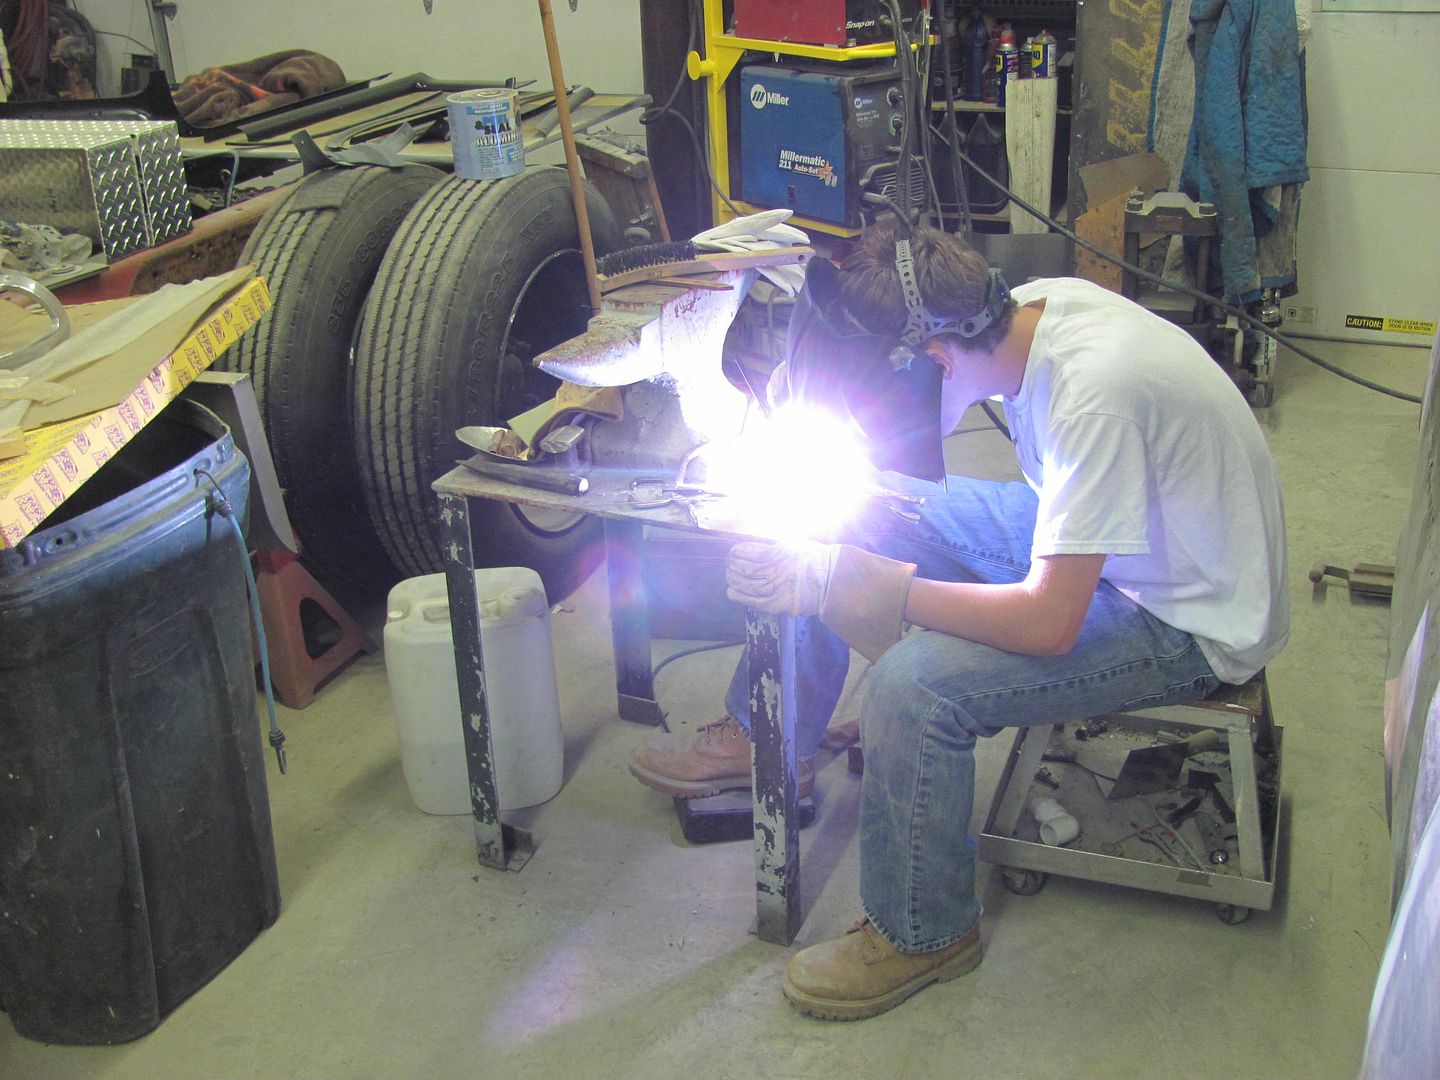 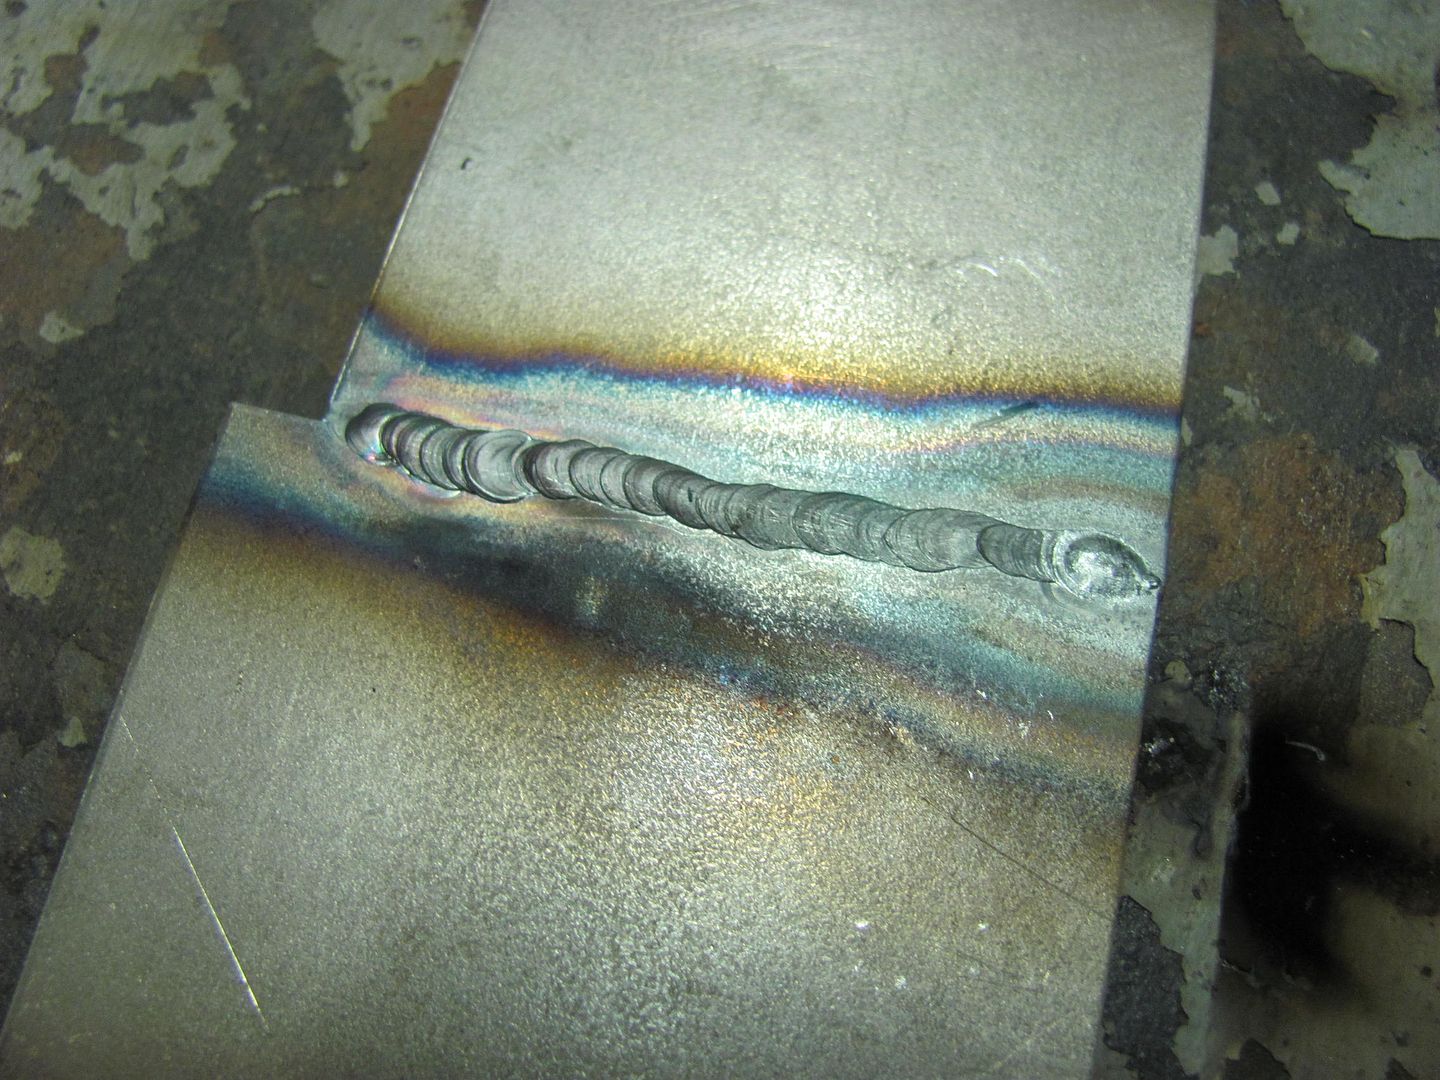  I had shown him how to tack without using filler, and gave him more aspiration by showing him a no-filler fusion weld. All in due time.. Practice aside, here is the hole filling effort in the baffle panels...  While Kyle worked on filling the holes, I had directed attention to the condenser and the holes we would need to add to the passenger side baffle prior to powder coat... just as shown in the book..  ....only Murphy had other plans, it appears our condenser was intended for a cross flow radiator...  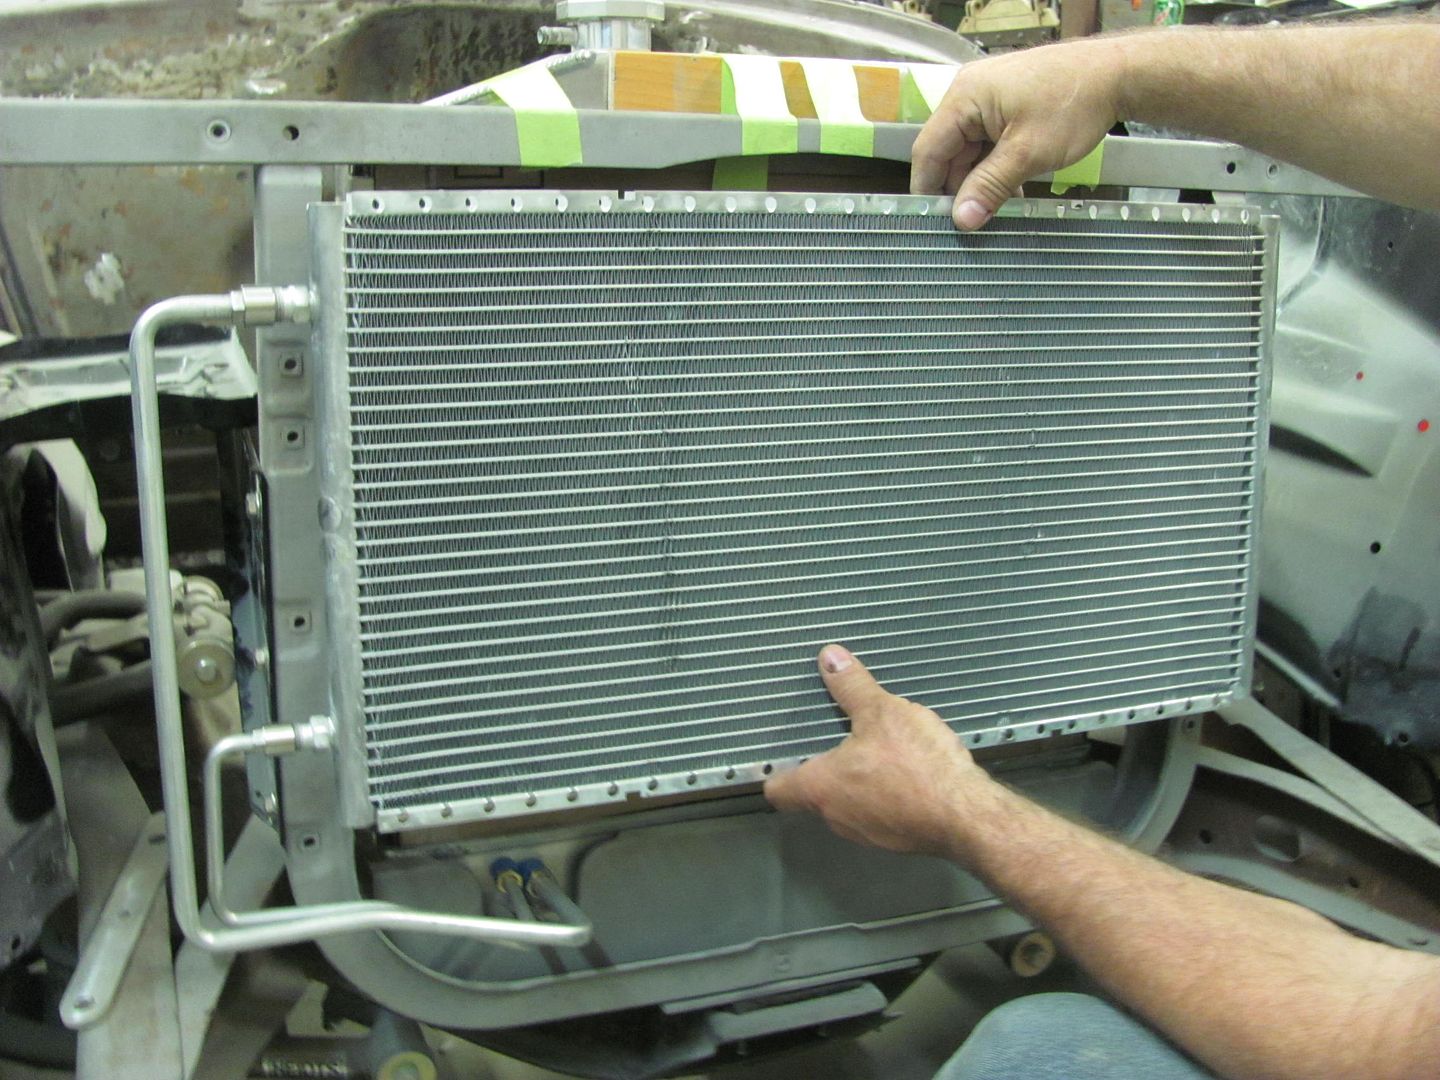 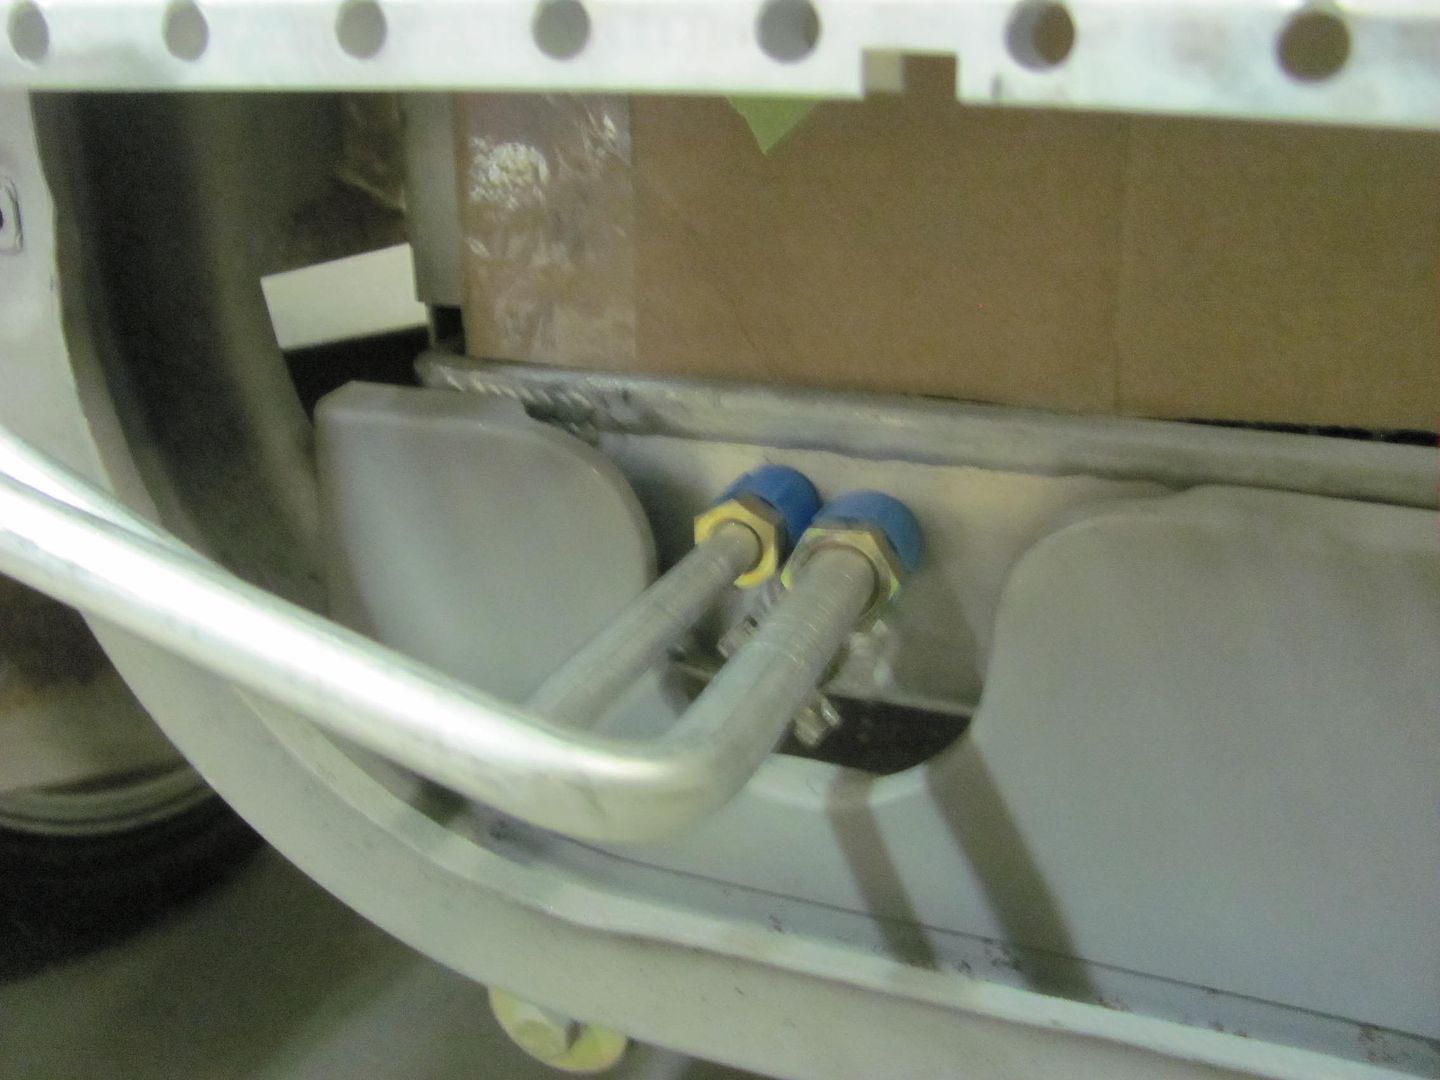 Hmm..... don't think this is going to work. So to back up and punt, the plan is to make a mounting bracket that will hold this universal condenser to a top flow radiator all while hiding those ugly holes that scream "I'm a universal fit". Then we'll have to get some new hard lines made up that fit correctly. 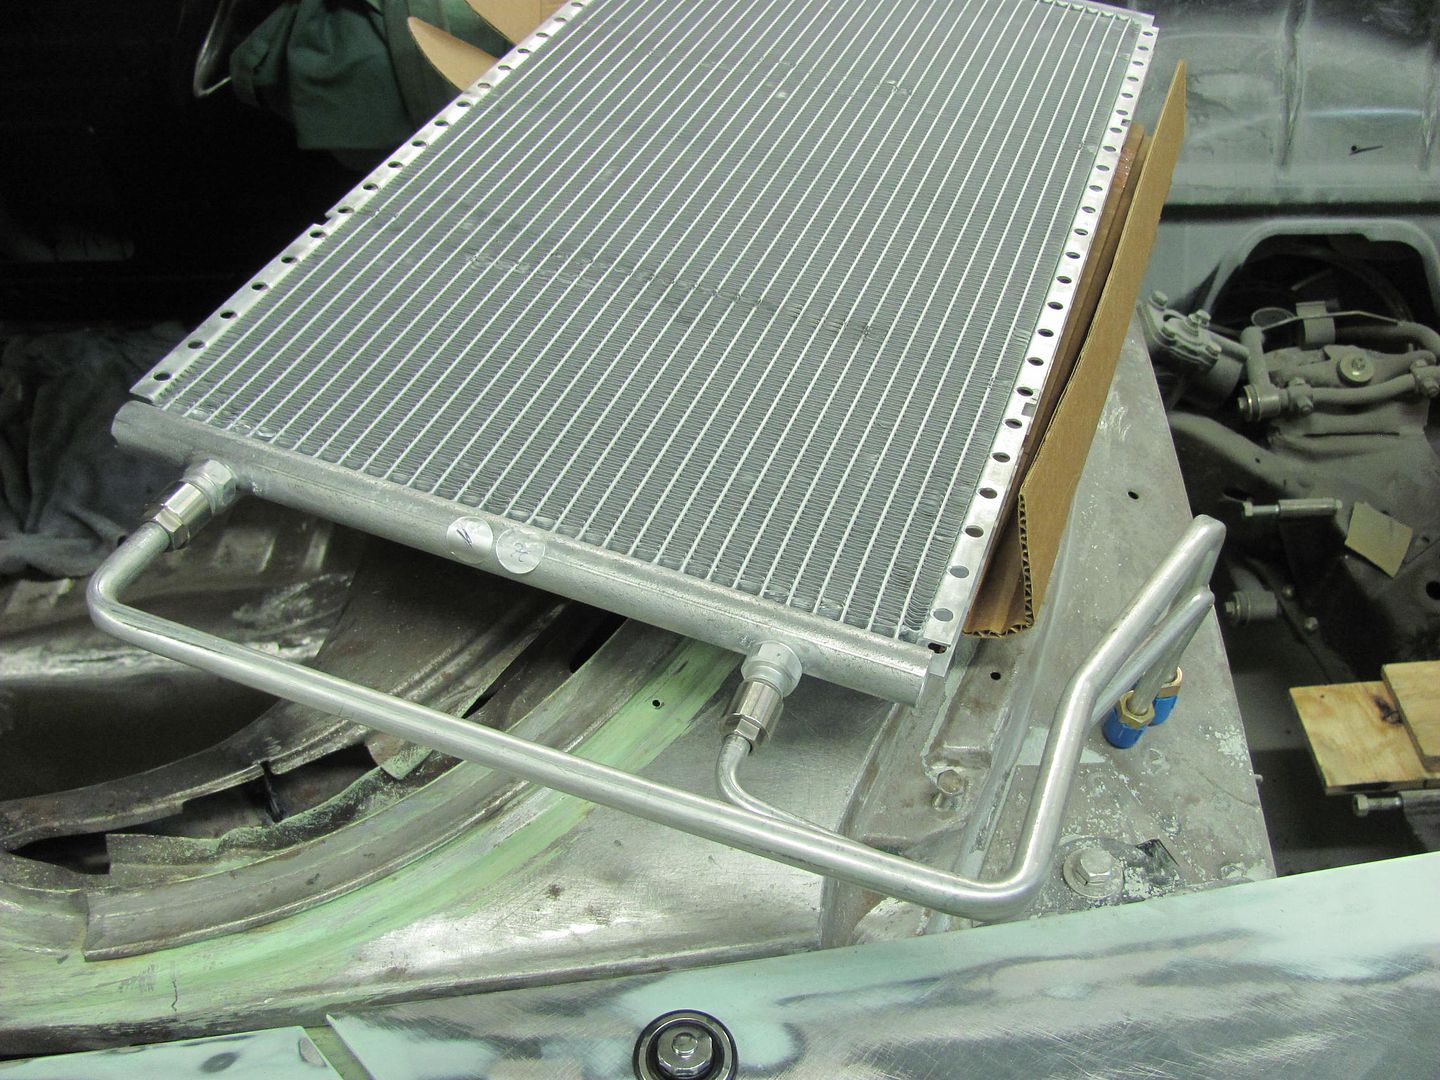 Layout of the mounting bracket... 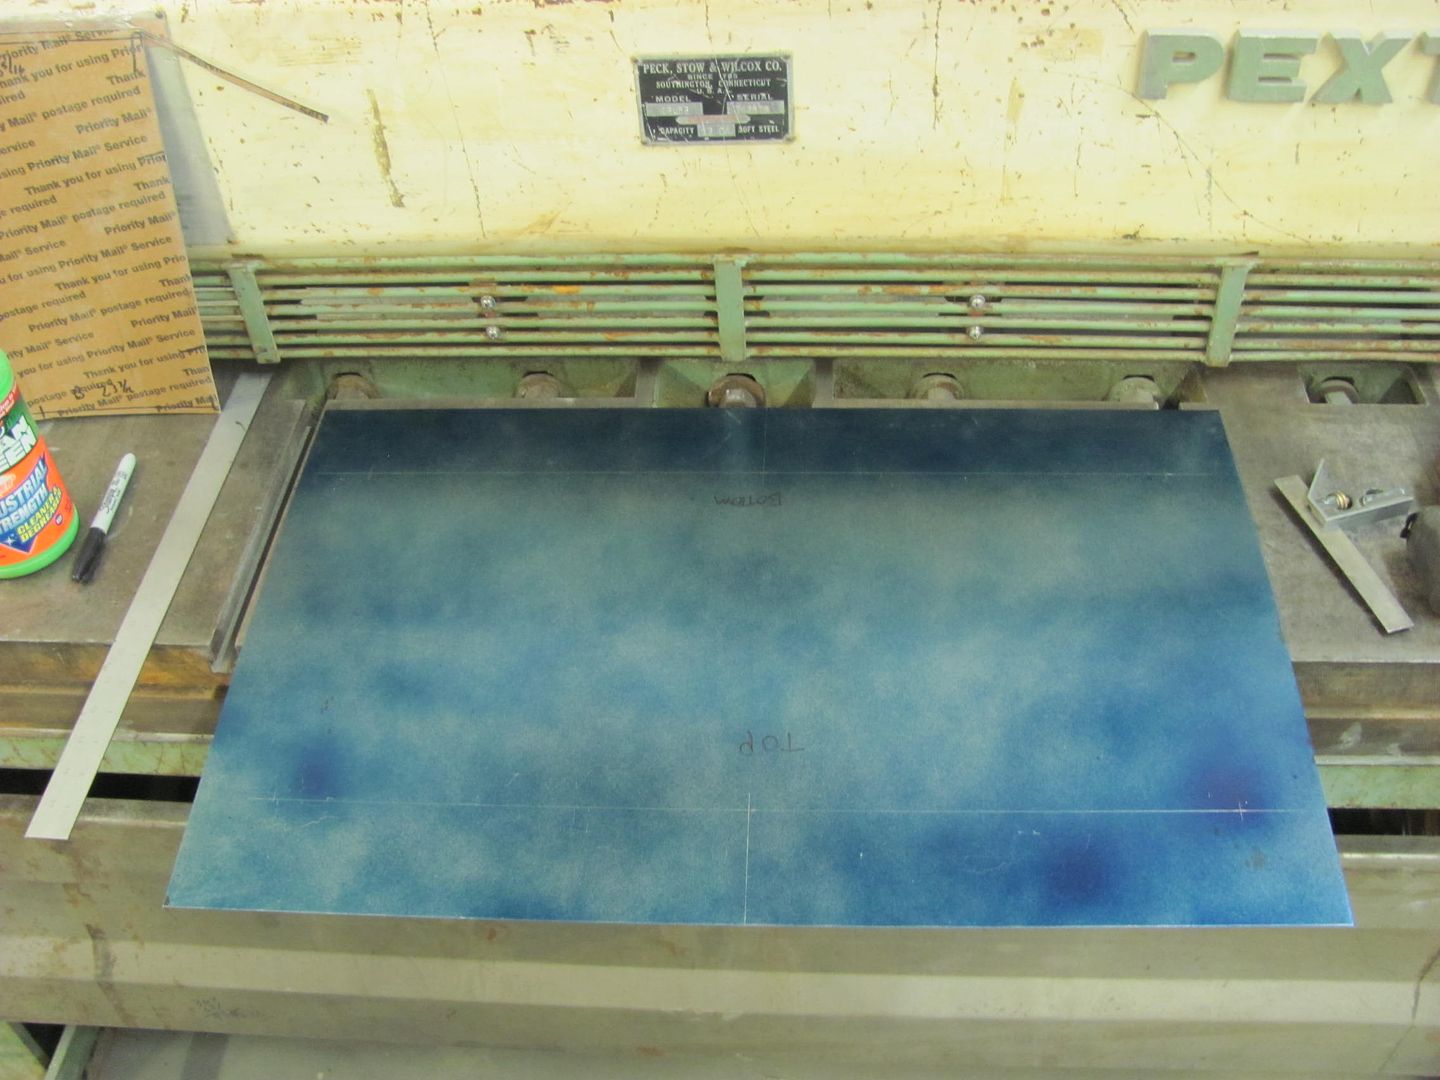 Don't try this at home, it was done on a closed test track... 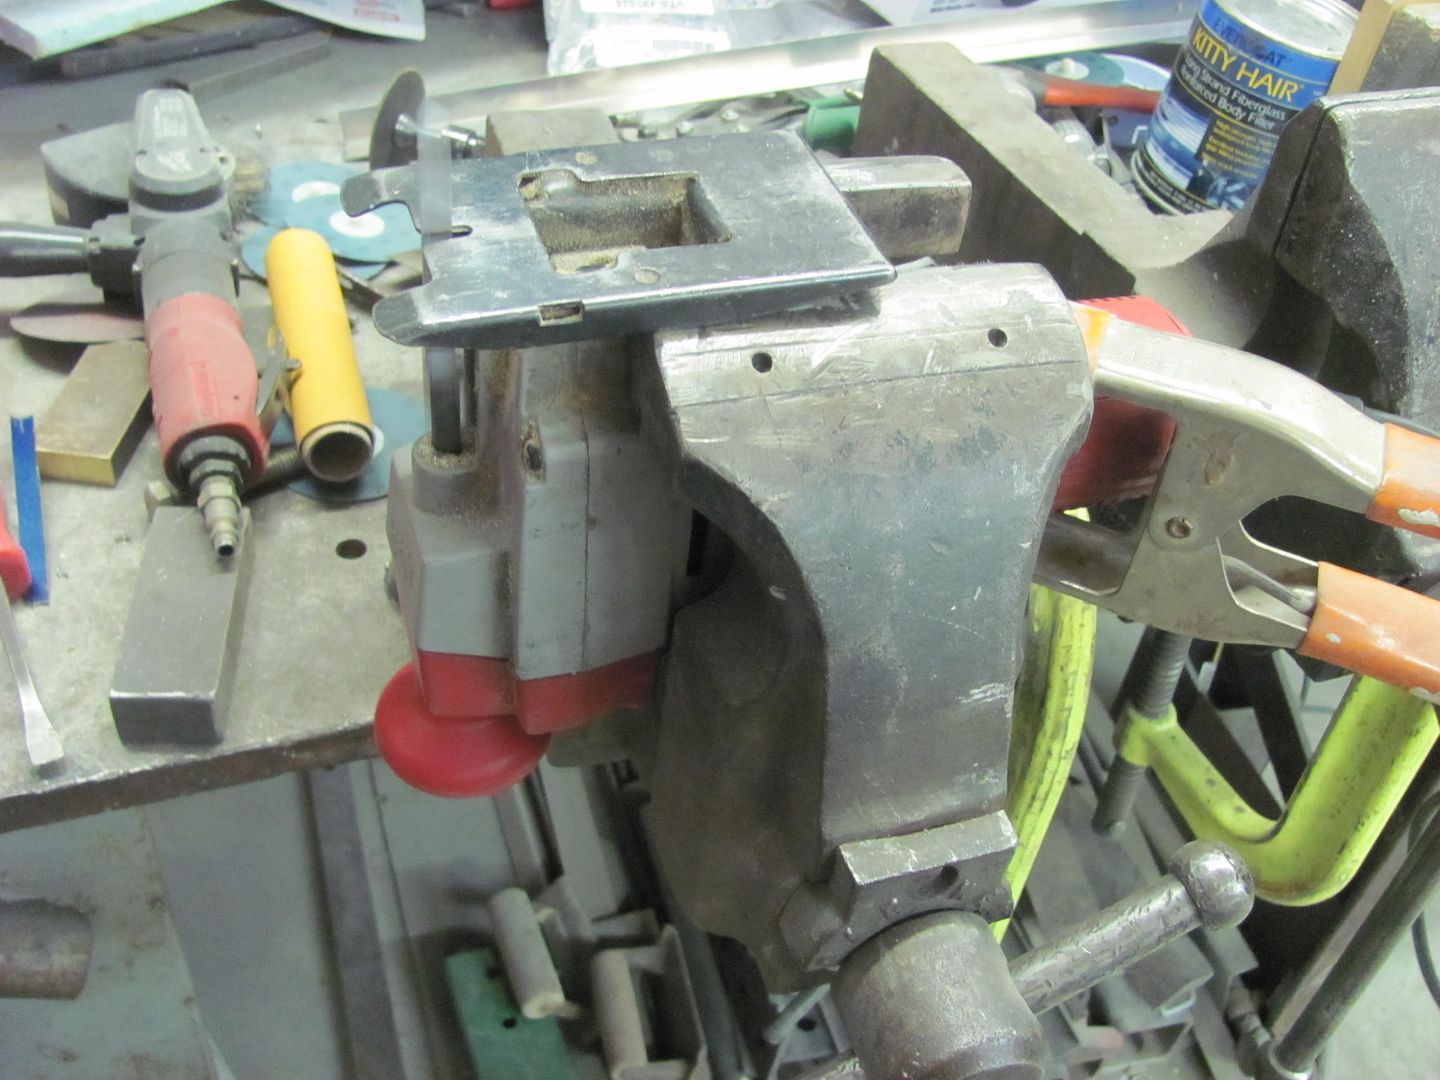 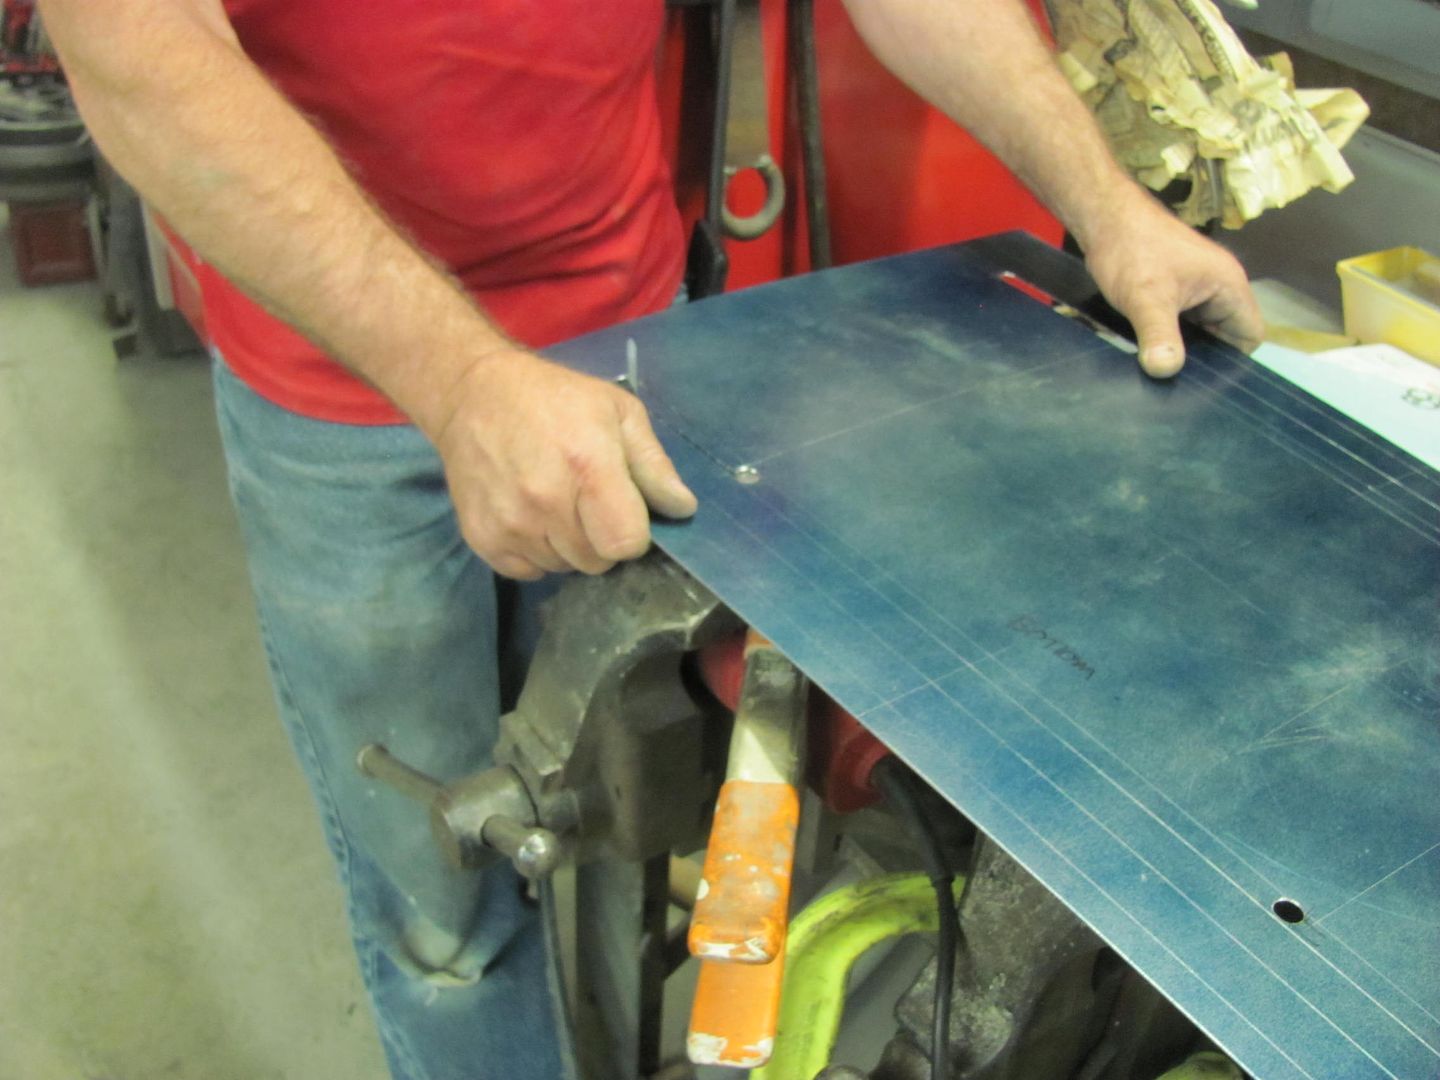 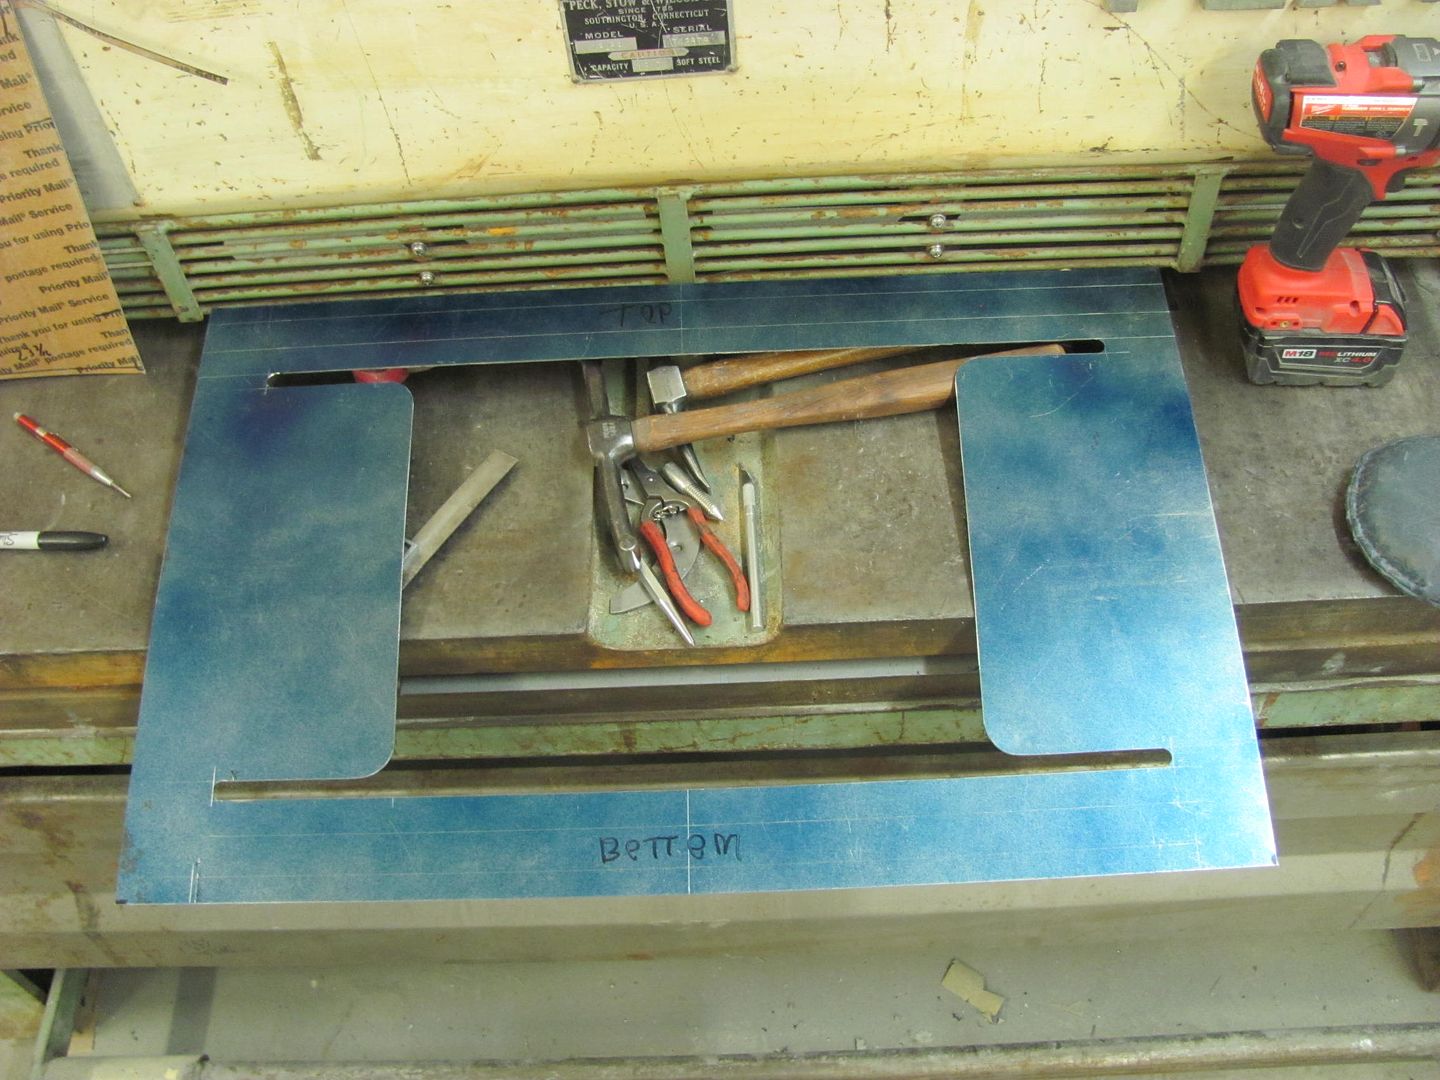 The ears inside will be folded inward to use the same bolts on the side of the radiator.. Here we are making the top and bottom folds in the magnetic brake, this design will help to hide all those holes..  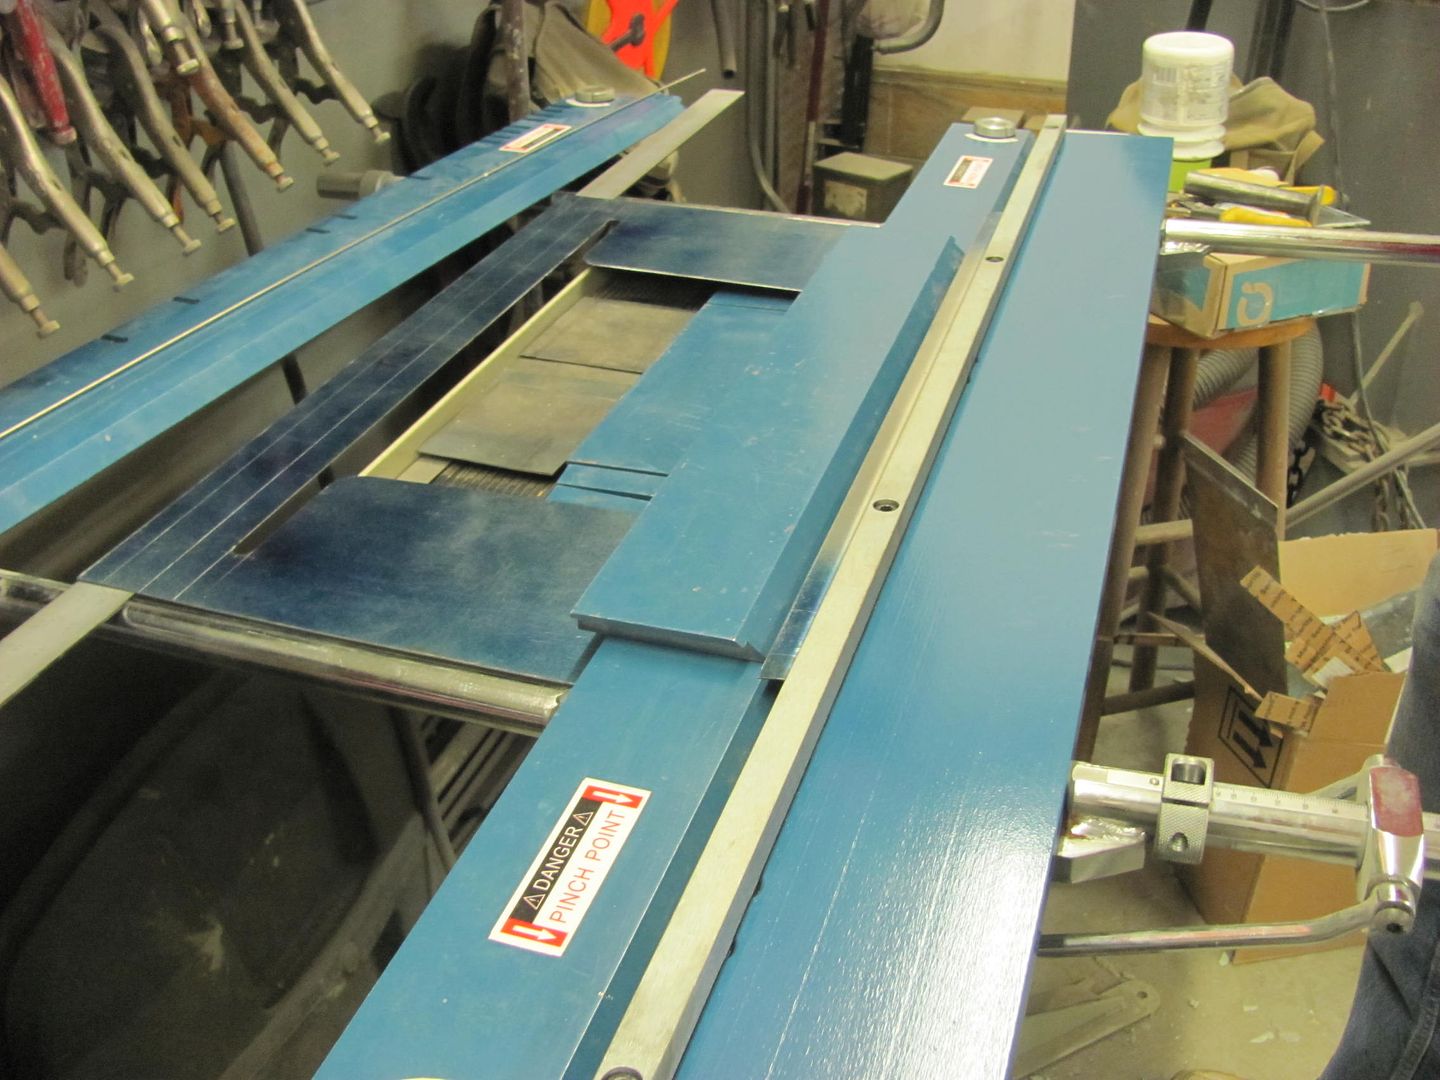 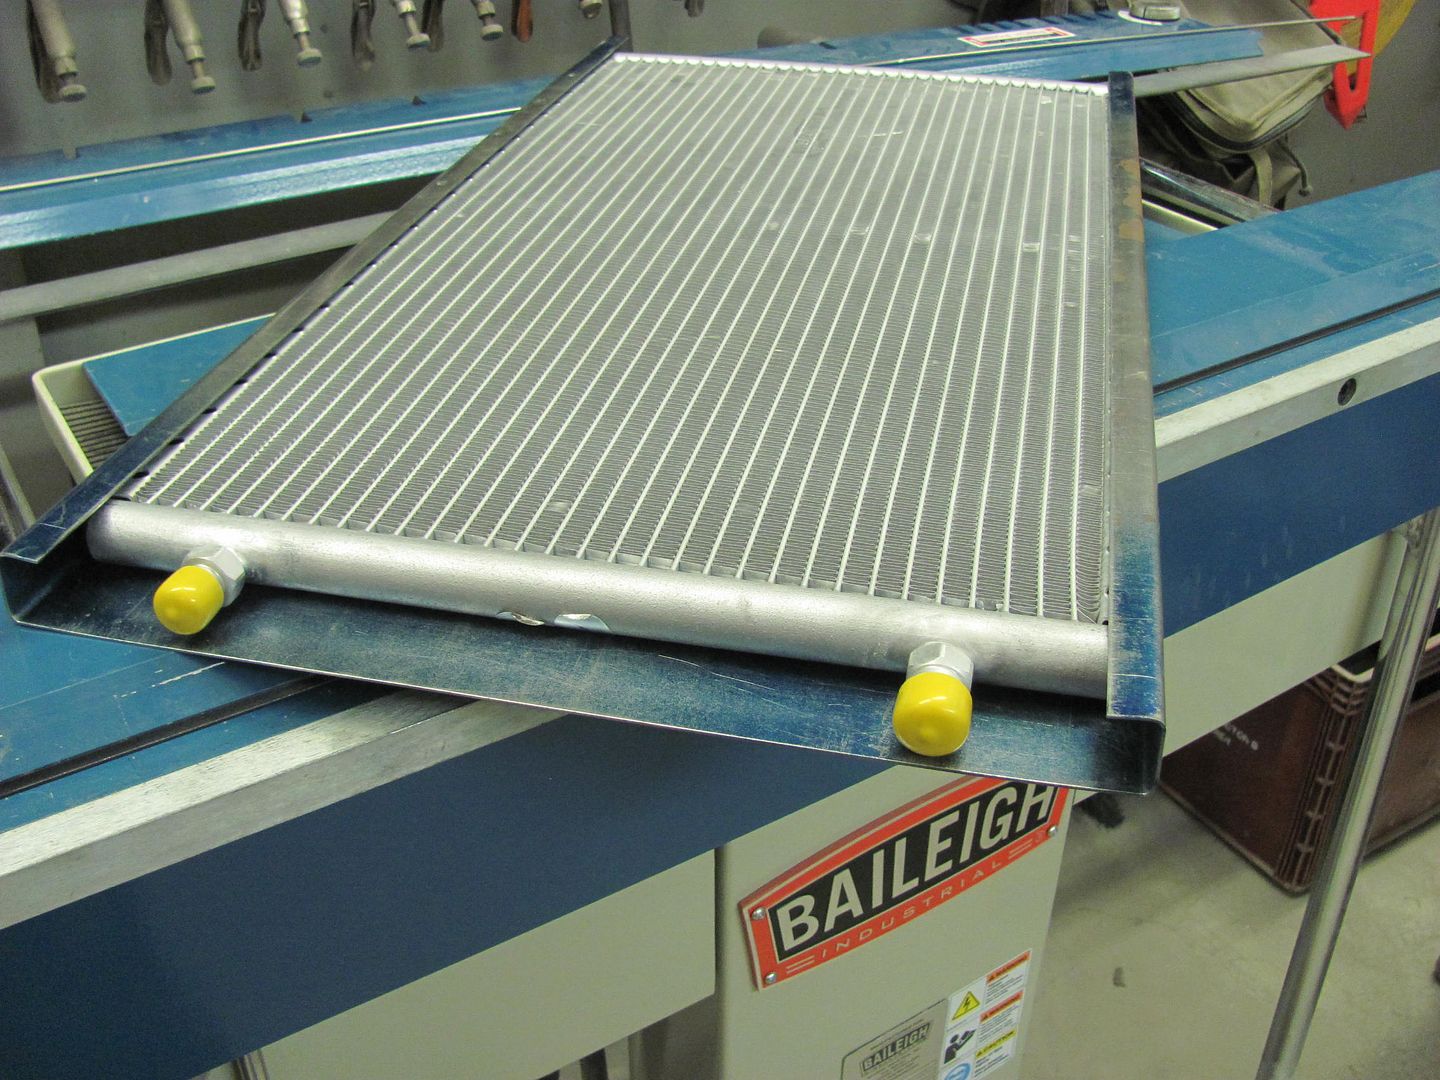 ....and we'll finish the mounting flanges next time..
__________________
Robert |
|
|
|
|
05-08-2015, 09:18 AM
|
#446 |
|
Registered User
Join Date: Nov 2011
Location: West Plains Missouri
Posts: 2,088
|
Re: 55 Wagon Progress
Looking really good Robert..
as the story goes with Hot Rodding Nothing goes as planned  On the power ant. maybe french it? (don't know if that will blend with the look your going for, but just a thought.) Mark...
__________________
http://67-72chevytrucks.com/vboard/s...d.php?t=645774 Project Orangepeel 52 A.D. http://67-72chevytrucks.com/vboard/s...d.php?t=653337 John's LS 49 dodge http://67-72chevytrucks.com/vboard/s...d.php?t=655780 Blake's 67 GMC LS stepside http://67-72chevytrucks.com/vboard/s...d.php?t=690527 Reed 78 FJ40 Rebuild http://67-72chevytrucks.com/vboard/s...d.php?t=733259 Barger's 78 FJ40 |
|
|
|
|
05-08-2015, 09:38 AM
|
#447 |
|
Senior Member
Join Date: Jul 2012
Location: Oblong, Illinois
Posts: 7,017
|
Re: 55 Wagon Progress
Murphy fights me about every day in the shop....my end result isn't nearly as good as yours though I keep trying!
Nice work guys! |
|
|
|
|
05-08-2015, 10:20 AM
|
#448 |
|
Registered User
Join Date: Jan 2012
Location: Eastern Ontario, Canada
Posts: 1,041
|
Re: 55 Wagon Progress
Too funny! Awesome Baileigh equipment and your band saw consists of a jig saw clamped in a vise. Nice work!
__________________
1952 Canadian Chevy 1300 C4 IFS & D44 IRS 5.3 HO L33 My Build: http://67-72chevytrucks.com/vboard/s...d.php?t=632938 
|
|
|
|
|
05-08-2015, 11:53 AM
|
#449 |
|
Registered User
Join Date: Jan 2013
Location: Leonardtown, MD
Posts: 1,636
|
Re: 55 Wagon Progress
We've got a Lockformer bandsaw with a 24" throat, but no blade welder to be able to cut out the middle of a panel.

__________________
Robert |
|
|
|
|
05-08-2015, 03:38 PM
|
#450 |
|
6>8 Plugless........
 Join Date: Sep 2007
Location: Prairie City, Ia
Posts: 17,141
|
Re: 55 Wagon Progress
Great work as usual! Thanks for the countersinking trick! I've got the same flairing tool and I can use that trick later on!
__________________
Ryan 1972 Chevy Longhorn K30 Cheyenne Super, 359 Inline 6 cylinder, Auto Trans, Tilt, Diesel Tach/Vach, Buckets, Rare Rear 4-link and air ride option Build Thread 1972 GMC Sierra Grande Longhorn 4x4 1972 Chevy Cheyenne Super K20 Long Step side tilt, tach, tow hooks, AC, 350 4 speed 1972 C10 Suburban Custom Deluxe 1969 Chevy milk truck 1971 Camaro RS 5.3 BTR STG3 Cam Super T10 1940 Ford 354 Hemi 46RH Ford 9" on air ride huge project Tired of spark plugs? Check this out. |
|
|
|
 |
| Bookmarks |
|
|


 Linear Mode

