
 |
|
|
|
|
#1 |
|
Registered User
Join Date: Jan 2017
Location: Virginia Beach, VA
Posts: 1
|
Re: 57 Panel "FAKMLC" build
Awesome!
|
|
|

|
|
|
#2 |
|
Registered User
Join Date: Sep 2016
Location: Redington Beach
Posts: 1,312
|
Re: 57 Panel "FAKMLC" build
So - if you decide to not wear safety glasses whilst grinding/cutting metal. This is what you can look for
 https://www.youtube.com/watch?v=1PiAPWIF7yk |
|
|

|
|
|
#3 |
|
Registered User
Join Date: Sep 2016
Location: Redington Beach
Posts: 1,312
|
Re: 57 Panel "FAKMLC" build
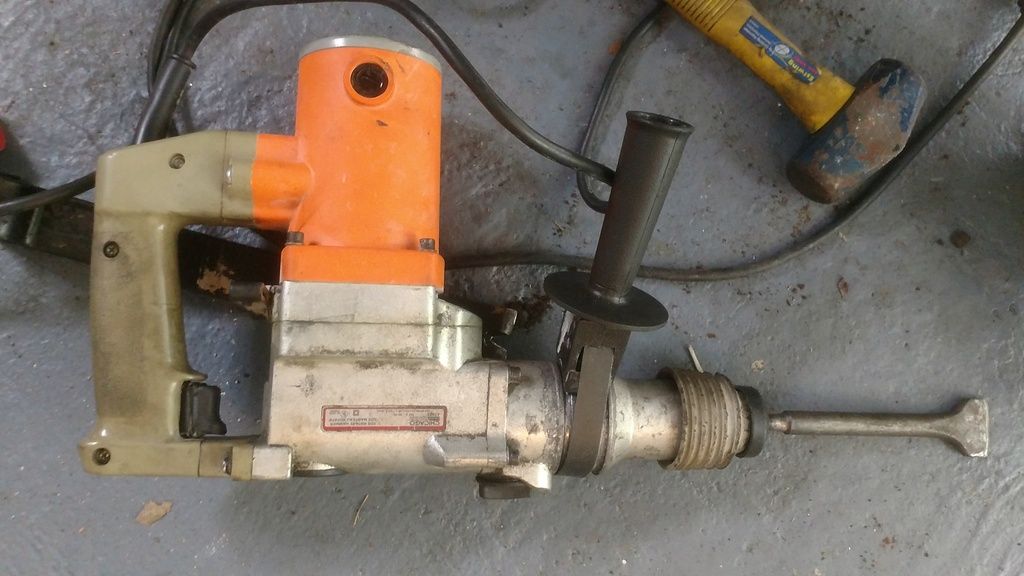
On better news - teardown on the main crossmember begins. Turns out that the drilling method sucks. Best was basically scoring across the head 2-3 times and then shearing off with a good rotary hammer I borrowed from neighbour ...
 Once that was done .... I put in the front brace/spreader from IC kit. Turns out they welded the mating flange a few degerees out meaning the botls wouldnt align ..... a good C CLAMP helped realign here. 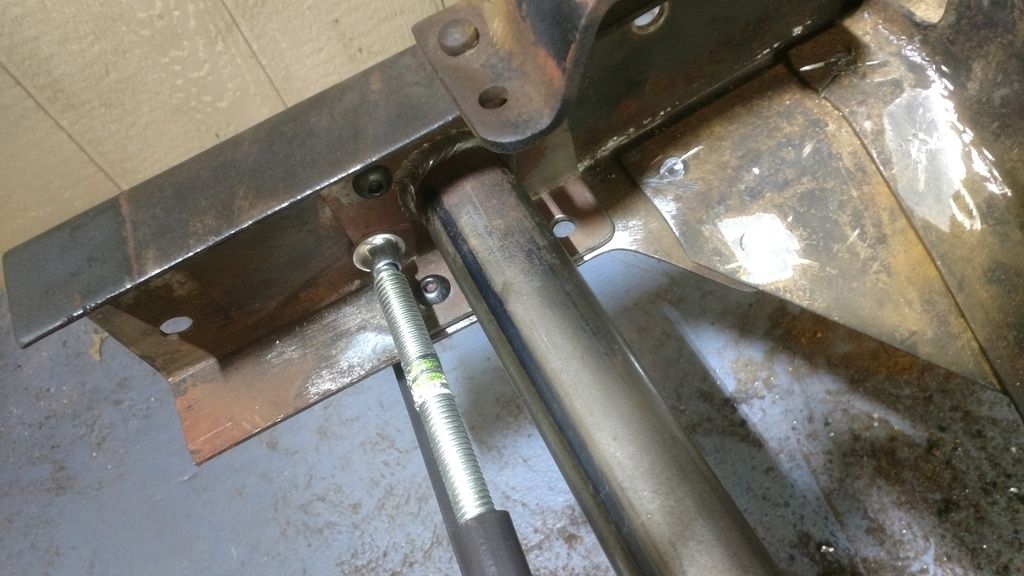
|
|
|

|
|
|
#4 |
|
Registered User
Join Date: Sep 2016
Location: Redington Beach
Posts: 1,312
|
Re: 57 Panel "FAKMLC" build
After all rivets were cut/sheared off I sawzalled down the sides and the middle of the crossmember.
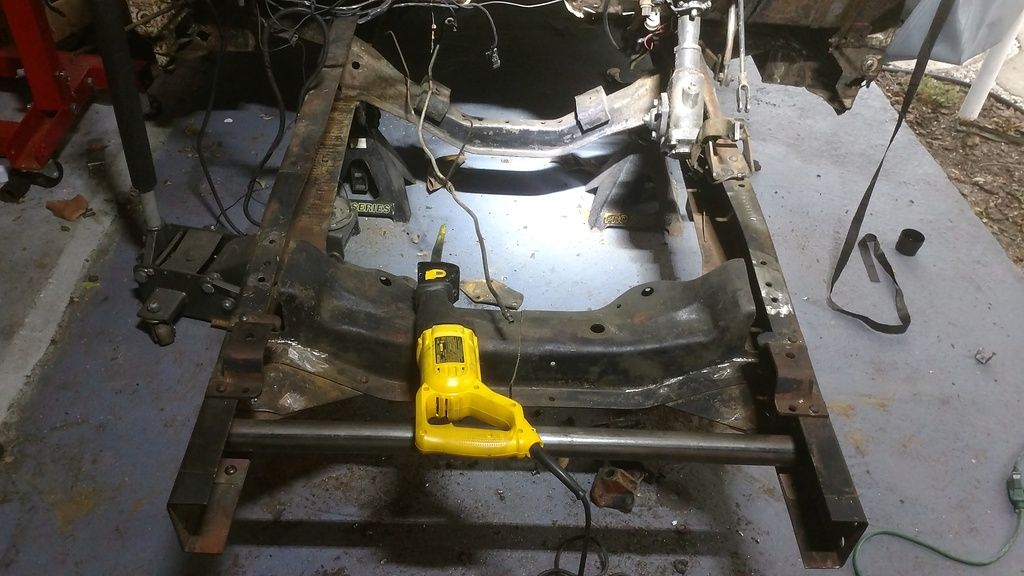 However event with all rivets on both sides cut and off ....... couldnt get it apart. Punch didnt do much at all ........ so basically ended up using pickle fork and various claw hammers around it to eventually pry it off. Not an easy task at all - in fact the rivets heads really werent that bad with right tool - but getting it off was a bear. 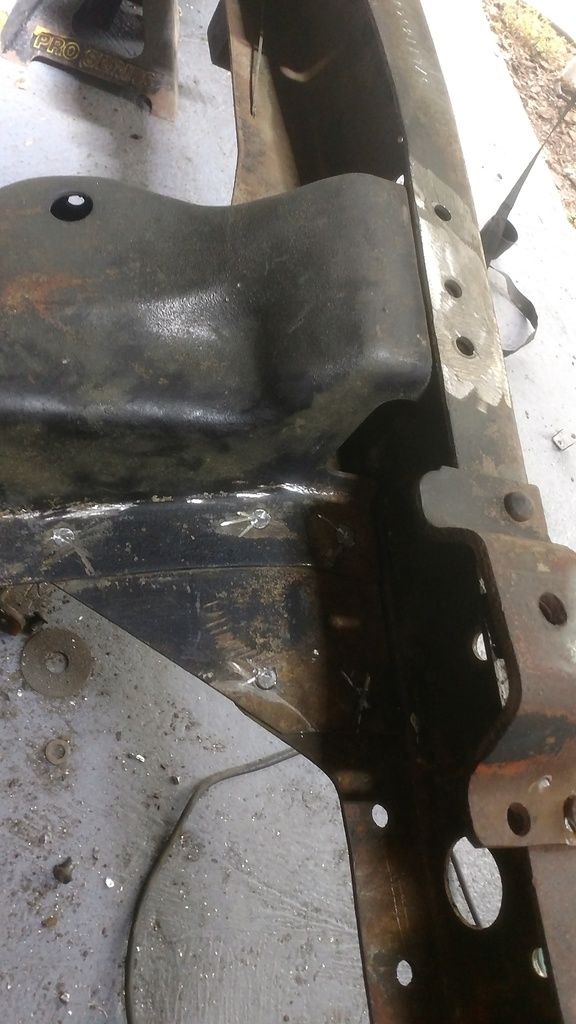 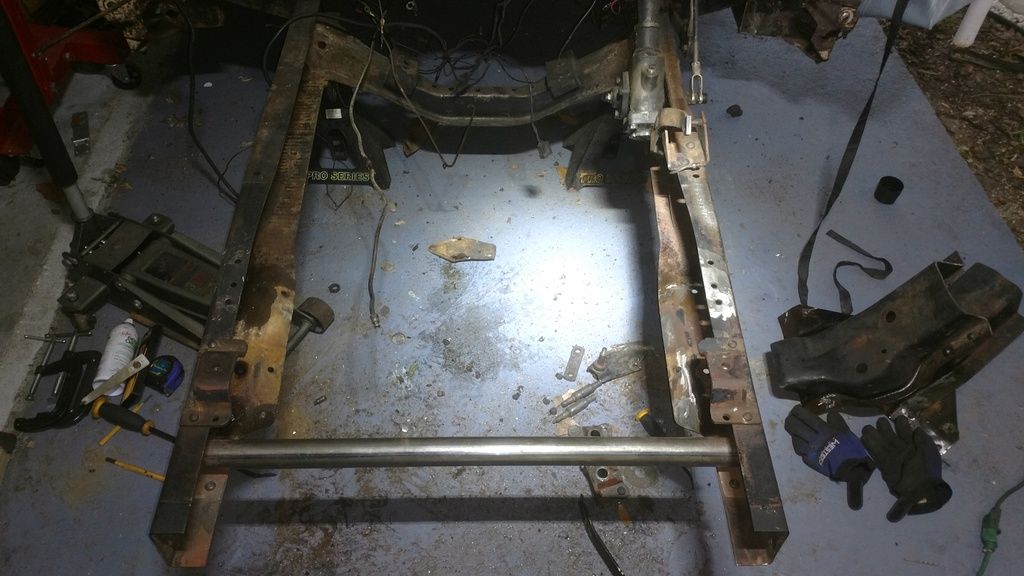
|
|
|

|
|
|
#5 |
|
Registered User
Join Date: Sep 2016
Location: Redington Beach
Posts: 1,312
|
Re: 57 Panel "FAKMLC" build
Will start putting in the Industrial Chassis IFS supports and crossmmeber tomorrow. Will tack weld them in place when IM happy and have a pro come and mobile them together.
|
|
|

|
|
|
#6 |
|
Senior Member
 Join Date: Jul 2012
Location: Oblong, Illinois
Posts: 7,017
|
Re: 57 Panel "FAKMLC" build
Some great, hard fought progress!
|
|
|

|
|
|
#7 |
|
Registered User
Join Date: Sep 2016
Location: Redington Beach
Posts: 1,312
|
Re: 57 Panel "FAKMLC" build
|
|
|

|
|
|
#8 |
|
A320 Pilot/USAF Retired
Join Date: Mar 2009
Location: Charleston, SC
Posts: 2,622
|
Re: 57 Panel "FAKMLC" build
Looks good!

__________________
JJ My 1957 build: http://67-72chevytrucks.com/vboard/s...d.php?t=334552 http://www.trifive.com/forums/showthread.php?t=22037 Instagram - Chuckdriver57 |
|
|

|
|
|
#9 |
|
Registered User
Join Date: Jul 2014
Location: Clear and Still Idaho
Posts: 509
|
Re: 57 Panel "FAKMLC" build
"F"
I'm always in favor of Overkill it's always over rated!!!! ie. Rotohammer Build is fun Keep on keepin on NC
__________________
Been there, wrecked that 
|
|
|

|
|
|
#10 |
|
Registered User
Join Date: Jul 2014
Location: Clear and Still Idaho
Posts: 509
|
Re: 57 Panel "FAKMLC" build
Under
__________________
Been there, wrecked that 
|
|
|

|
|
|
#11 |
|
Registered User
Join Date: Sep 2016
Location: Redington Beach
Posts: 1,312
|
Re: 57 Panel "FAKMLC" build
Thanks.
Well I did a bit more cleanup including cutting off the steering box. Did a mock fitup and there is clearance issues due to the lower frame. So that has to be cutout (instructions do say so). Basically all this metal on the outside of the boxing plates needs to be cutout with a sawzall. 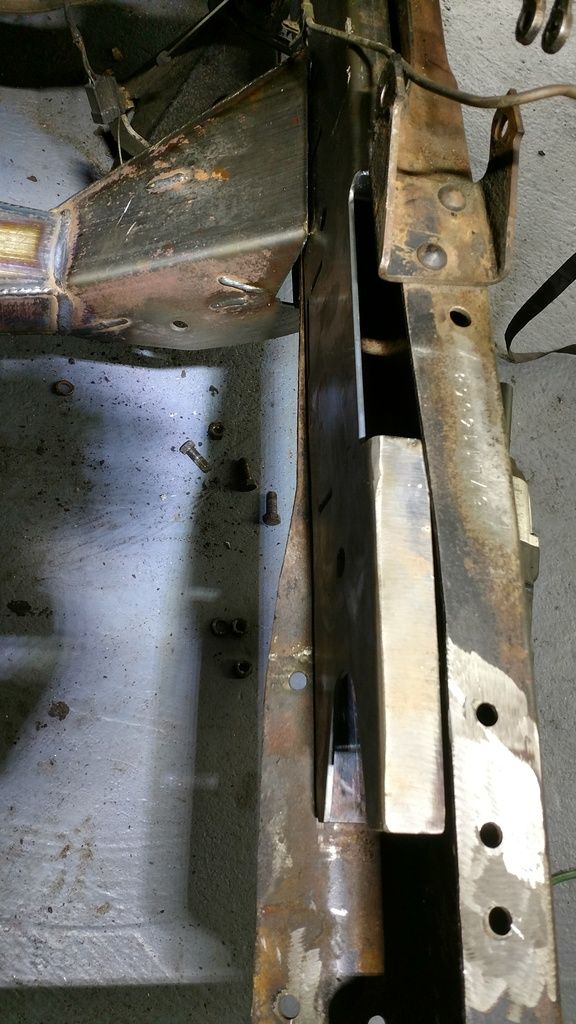 So then I after I put it back together - but IM still about 1/16th inch too short frame to frame meaning I cant get the cross member in place. Pretty sure Im either going to have to spread the frame that distance of grind back on the crossmember. But I stopped here due to wanting to check with Steve at IC that thats normal. Here you see the chevron back spacers that go plush against the inside of the frame to space out the boxing plates and add strength. 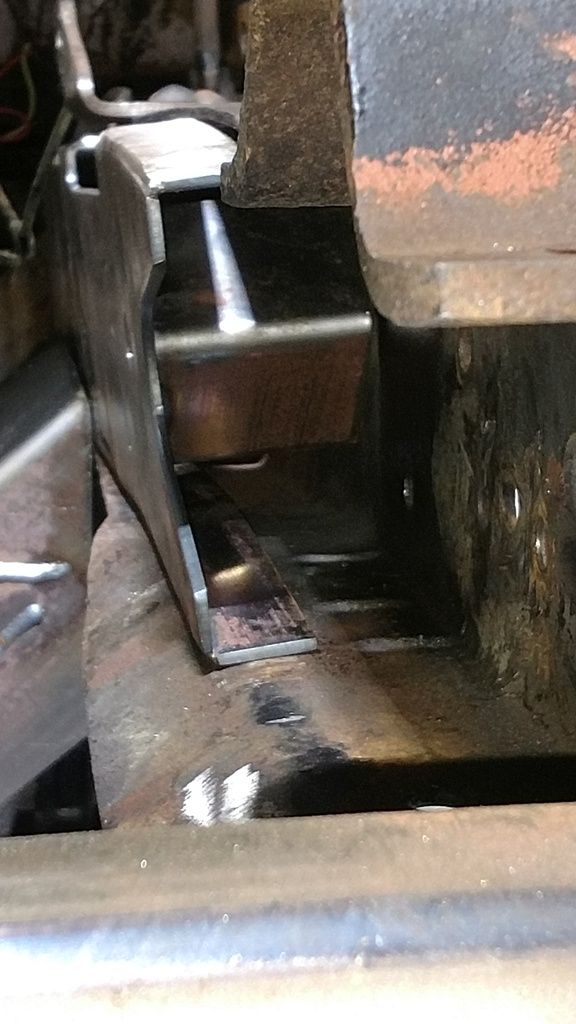
|
|
|

|
|
|
#12 |
|
Registered User
Join Date: Jul 2014
Location: Clear and Still Idaho
Posts: 509
|
Re: 57 Panel "FAKMLC" build
"F"
Trim the lower part of the C channel frame to match the upper, then measure and measure again to get it straight, plumb and level before you begin to install the cross member. Looking great so far. Keep on keepin on NC
__________________
Been there, wrecked that 
|
|
|

|
|
|
#13 |
|
Registered User
Join Date: Sep 2016
Location: Redington Beach
Posts: 1,312
|
Re: 57 Panel "FAKMLC" build
Thanks. Lower frame (c channel) has been cut and is not providing a clearance issue. The lip of the cross member catches the edge of the boxing plate. Obviously those can't really move much with the Chevron spacers. Probably 1/8th inch overall.
So think I'll have to spread it slightly then reposition and tighten up. |
|
|

|
|
|
#14 |
|
Registered User
Join Date: Sep 2016
Location: Redington Beach
Posts: 1,312
|
Re: 57 Panel "FAKMLC" build
|
|
|

|
|
|
#15 |
|
Registered User
Join Date: Aug 2007
Location: Corona, California
Posts: 7,998
|
Re: 57 Panel "FAKMLC" build
Looks like fun.
Kim |
|
|

|
|
|
#16 |
|
Registered User
Join Date: Sep 2011
Location: Nevada City, CA
Posts: 908
|
Re: 57 Panel "FAKMLC" build
before spreading the frame, I would want to be sure it has / hasn't moved. It should be pretty much dead nuts at 34" top and bottom. I know there is a brace in there but even so, I'd measure it. If it's true to width at 34" top and bottom, well, see what the guys at IC say but I'd start grinding the cross member.
__________________
"Over my head" 1957 Chevy 3200, big rear window & 6 lug. Front disc, power steering, Vortec 4.8 / 4L60E swap, hydro boost brakes & patina. |
|
|

|
|
|
#17 | |
|
Registered User
Join Date: Sep 2016
Location: Redington Beach
Posts: 1,312
|
Re: 57 Panel "FAKMLC" build
Quote:
Looking to do a welding workshop here in next couple weeks also. Not sure how much Ill learn - in terms of 3 3 hour classes ........ but hey. IC said to spread it. |
|
|
|

|
|
|
#18 | |
|
Registered User
Join Date: Sep 2016
Location: Redington Beach
Posts: 1,312
|
Re: 57 Panel "FAKMLC" build
Quote:
|
|
|
|

|
|
|
#19 |
|
Registered User
Join Date: Jan 2014
Location: Grants New Mexico
Posts: 613
|
Re: 57 Panel "FAKMLC" build
Fakky;
I just come across a 55-58 panel. It is in rough shape, the dr side is rusted out bad, plus someone hooked up to the floor hold to pull the body of a trailer. You can ck out the pic on my post (New project 57chevy panel)under my blog name (T-P Auto) Will keep a look at your postings; Thank you; T-P Auto  Tim |
|
|

|
|
|
#20 |
|
Registered User
Join Date: Sep 2016
Location: Redington Beach
Posts: 1,312
|
Re: 57 Panel "FAKMLC" build
Nice ^^^
Haven't disappeared...... Bought a decent welder and been practicing. How do you guys determine your welds are good enough ? Cross member. 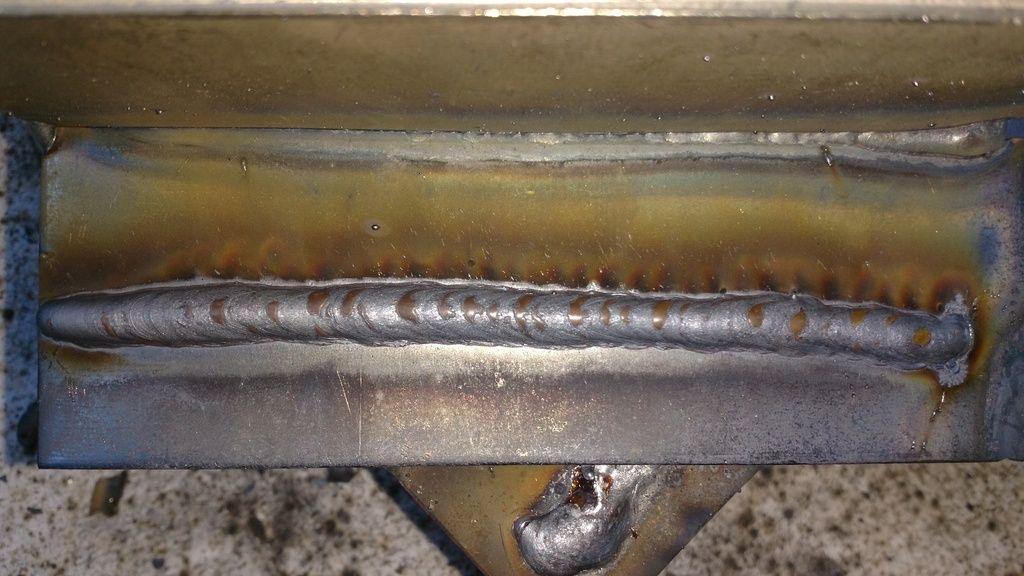 Gas 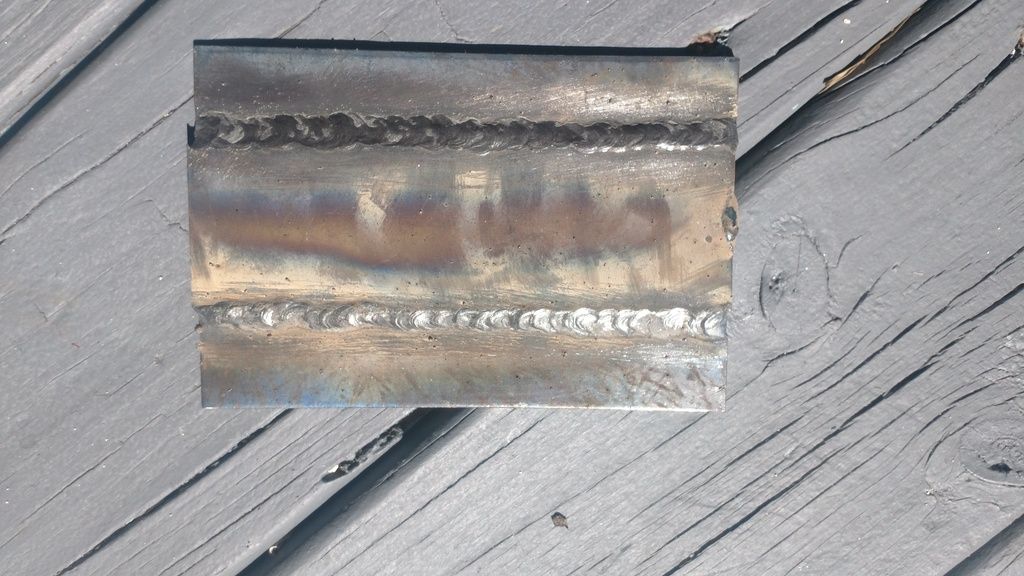 FCAW 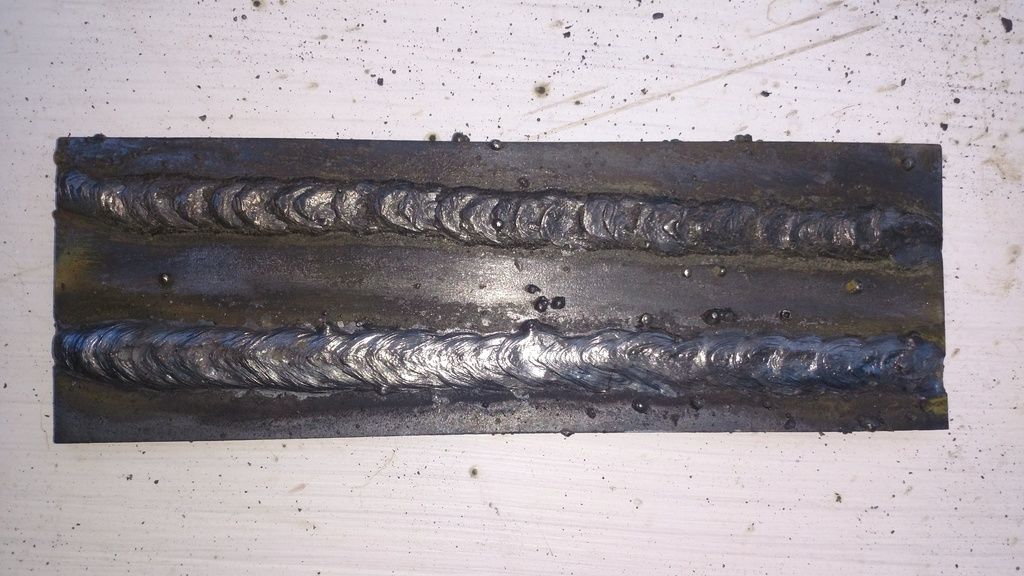 6011 rod on top (hard to weld for me) 6013 on bottom Need to try some 7014. Trying to decide if I can get good enough to weld in this crossmember. Bought a 211i tweco/esab .... Last edited by FAKKY; 02-26-2017 at 07:32 PM. |
|
|

|
|
|
#21 |
|
Registered User
Join Date: Sep 2016
Location: Redington Beach
Posts: 1,312
|
Re: 57 Panel "FAKMLC" build
|
|
|

|
|
|
#22 |
|
Registered User
Join Date: Sep 2016
Location: Redington Beach
Posts: 1,312
|
Re: 57 Panel "FAKMLC" build
Here are two bearings I bought to see about reusing the stock shaft.
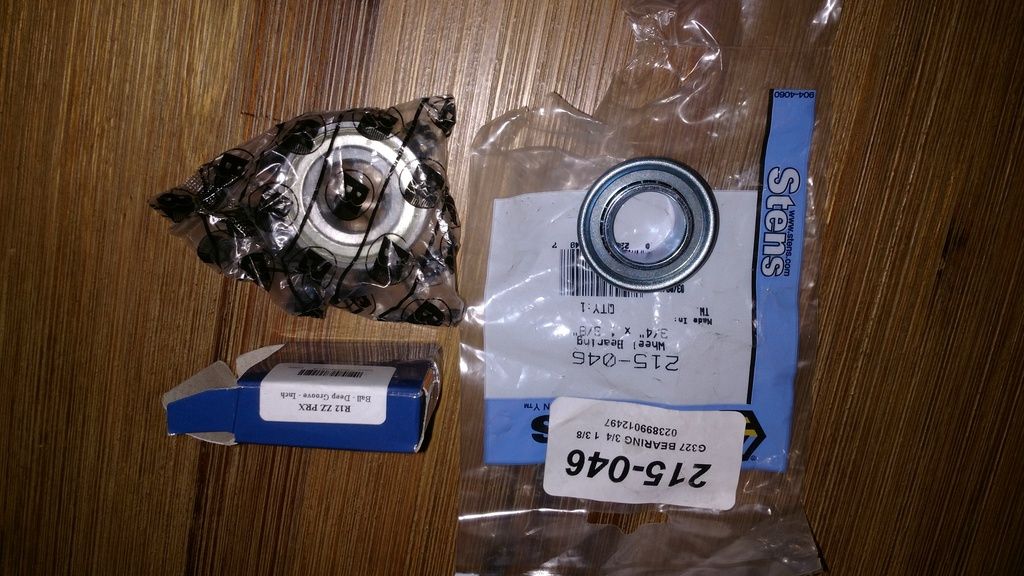 I think either would work depending on how much further back I took the outer column .... but the smaller one will almost fit as it is here (cutoff right at box) 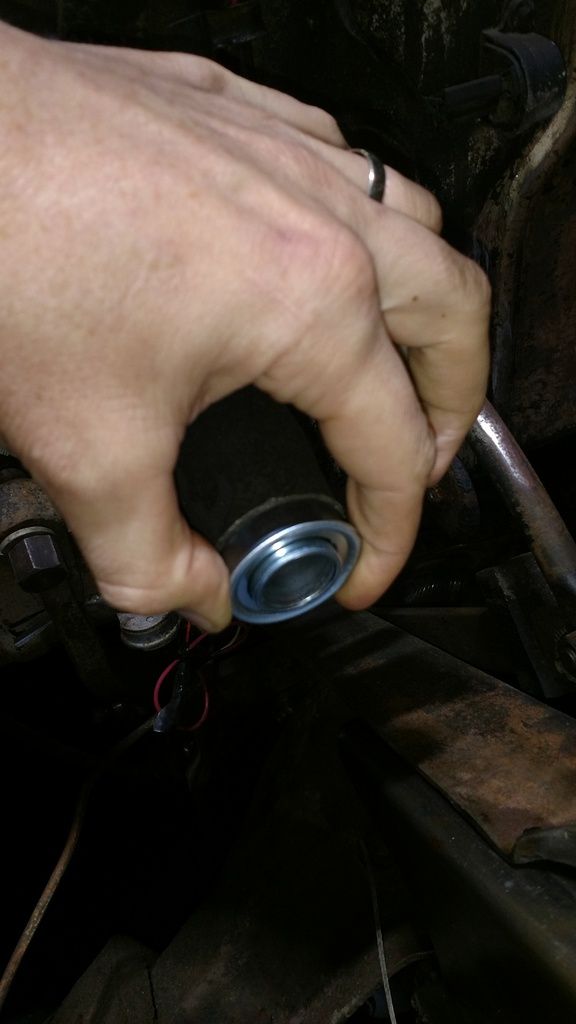 The other larger bearing seems better quality and sealed better however - but Im sure Ill have to spread the column somehow. Still really undecided and confused on column. I know some guys have used the later vans but Im not sure I quite like the look. I think some of the late 60's columns work I think ...... but not really buying that much over stock column I dont think instead of not having to deal with bearing. Also the CPP column saver kit for $80. Kind of makes me think I'll end up with ididit column and just be done ..... but $800 versus $5 for a bearing ....... ouch |
|
|

|
|
|
#23 |
|
Registered User
Join Date: Sep 2011
Location: Nevada City, CA
Posts: 908
|
Re: 57 Panel "FAKMLC" build
I'm far from expert but Youtube will be your friend here.
I am for welds going into the metal instead of onto. If you can't feel a ton of weld above the surface of the work material, it's penetrated well.
__________________
"Over my head" 1957 Chevy 3200, big rear window & 6 lug. Front disc, power steering, Vortec 4.8 / 4L60E swap, hydro boost brakes & patina. |
|
|

|
|
|
#24 |
|
Registered User
Join Date: Sep 2016
Location: Redington Beach
Posts: 1,312
|
Re: 57 Panel "FAKMLC" build
Was getting messy as doubled posts from some earlier stuff
So did a separate thread so other people could find if doing same thing. FINISHING OFF THE IFS http://67-72chevytrucks.com/vboard/s...89#post7954389 Last edited by FAKKY; 05-29-2017 at 10:33 AM. |
|
|

|
|
|
#25 |
|
Registered User
Join Date: Sep 2016
Location: Redington Beach
Posts: 1,312
|
Re: 57 Panel "FAKMLC" build
So after this I bought a 8.8 rear of a 2000 Explorer (31 spline) V8. $150 shipped to my door from local full service yard. Good condition.
Basically pulled the rear axle and gave it away. Put the new one on furniture dolleys and put into position. The leaf spring perches wont work as too wide (2.5 or 3") versus the 2" OEM ones and not right width (which I already knew). So cut them off. Sawzall and then grinder. 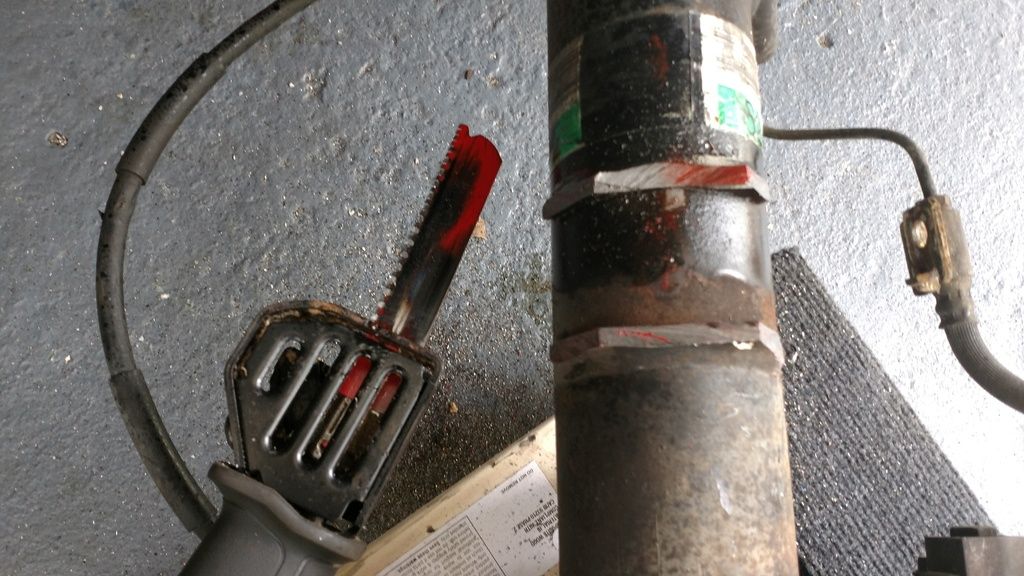 Then positoned under truck. 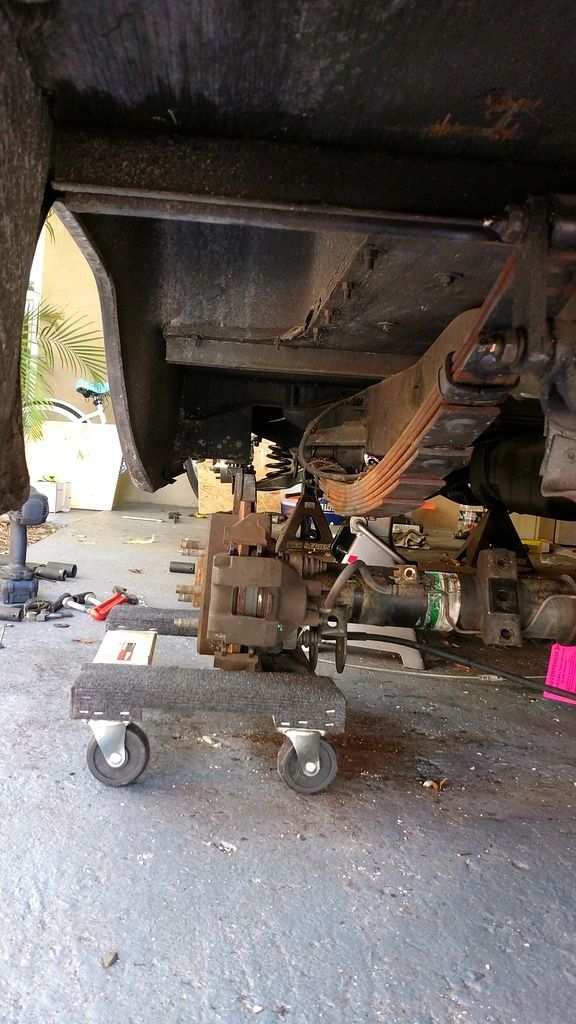 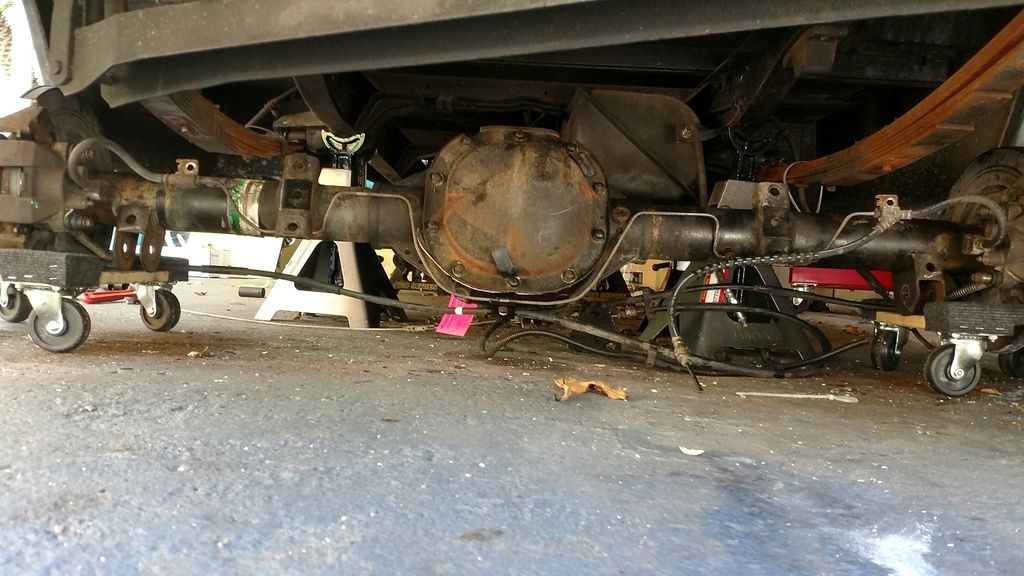 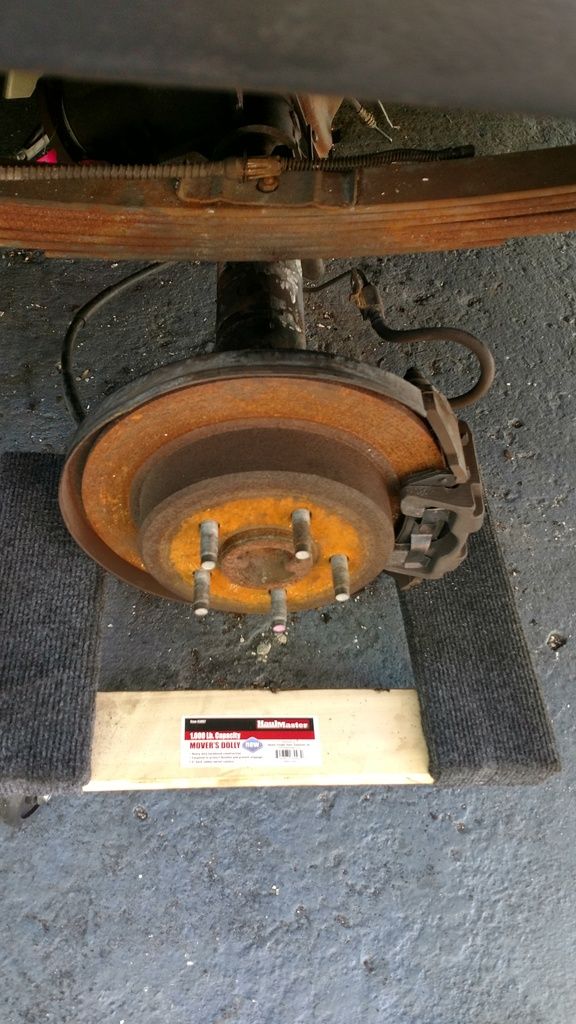 Think IM going to buy these ..... http://www.ebay.com/itm/350527219174...%3AMEBIDX%3AIT Then reem out the 3" to 3.25" to fit the axle. Then hook the axle up ...... but dont weld anythign in place until end. Now here are my measurements. ************* OLD OEM AXLE. ************* 41.5" center of leaf to center of leaf 56" backing plate to backing plate 3" width each drum from backin plate to WMS 62" TOTAL There was about a 6" gap from fender to base of WMS (base of studs on rotor). ************* NEW 8.8 AXLE ************* 39" leaf center to leaf center 54 3/4" backing plate to backing plate 2 1/3" from backing plate to base WMS 59 1/2" TOTAL (this was nice as it is VERY closet to Dakota Front End Measurement) So ....... really want to get some wheels so I can wheen the truck out in order to get the engine in in future ..... as well as for cleaning down (sanding front ready for rattle cans etc). The panel trucks have a little more a lip over the wheel well so makes needing a tight/accurate offset/wheel thickness fit. Whats the best way to work this out ? Which wheels will fit well that I can get in and out ok. ? |
|
|

|
 |
| Bookmarks |
|
|