
|
Register or Log In To remove these advertisements. |
|
|
|
|||||||
| View Poll Results: Engine color question, stock colors or?? | |||
| Stock Orange |
|
3 | 42.86% |
| Satin Black to match inner fenders |
|
1 | 14.29% |
| Body color with maybe matching finned valve covers |
|
3 | 42.86% |
| Don't give a damn, do what you want |
|
0 | 0% |
| Paint the aluminum intake to match? |
|
1 | 14.29% |
| Multiple Choice Poll. Voters: 7. You may not vote on this poll | |||
 |
|
|
Thread Tools | Display Modes |
|
|
 08-24-2015, 05:29 PM
|
#1 |
|
Wide n'Low
 Join Date: Jan 2007
Location: La Center, WA
Posts: 1,511
|
Re: 68 Burb - Project - GoldMember
Ok,
these might be a bit premature and out of sequence on the build, but while at lunch today I decided not to go for a bike ride and instead take a few pics UN-boxing the Fitech system. First impression: Really quality looking parts and packaged well. After putting an Fast EZ-EFI on my sons Blazer, this one look even "easier".. Enjoy. 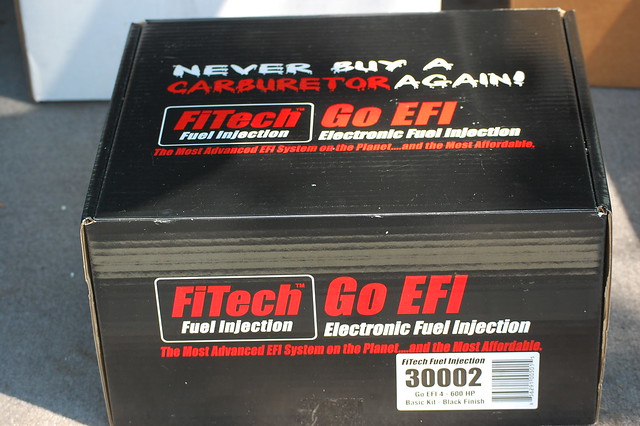  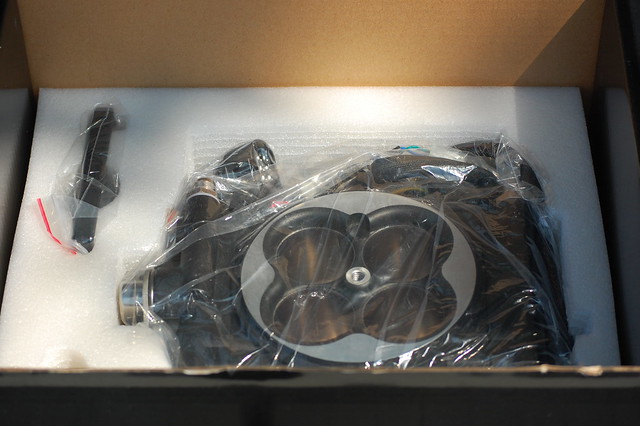 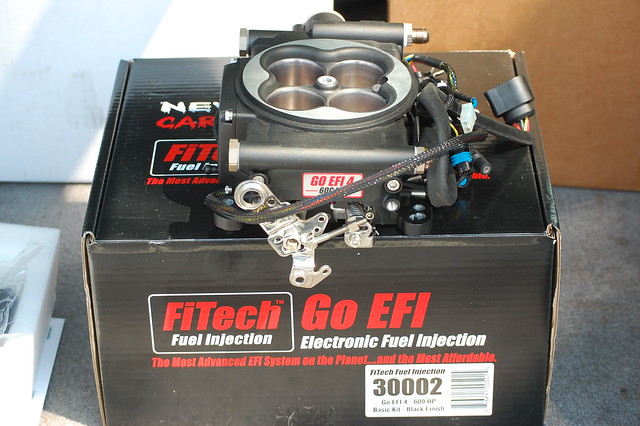 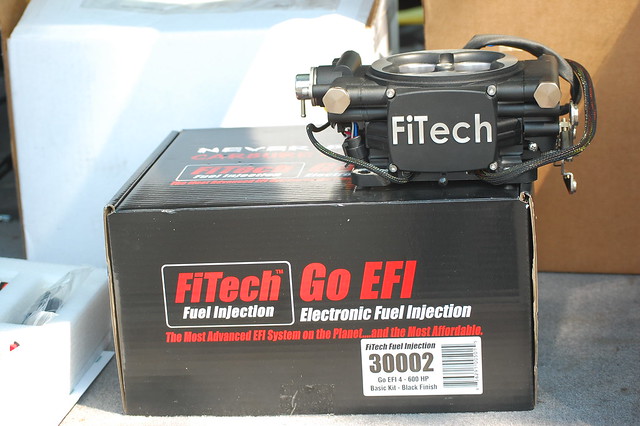 I also opted for the Command Center on this go round.. I can see multiple uses for something like this..  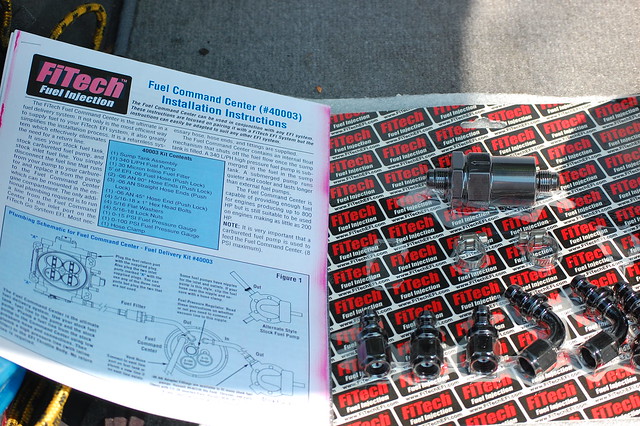 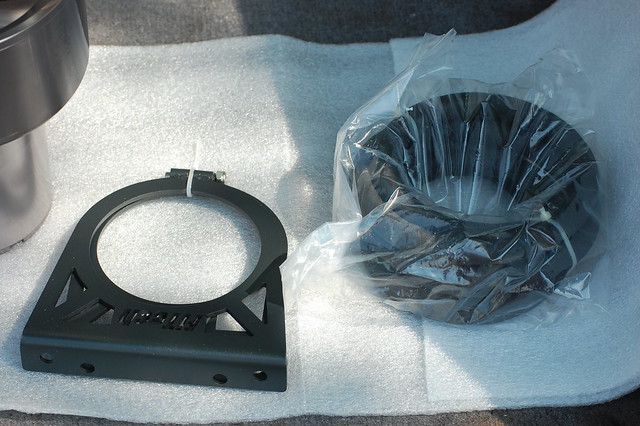
__________________
Trippin Hazard.. 67 swb, Gold Member.. 68 Suburban Air Force Retired |

|

|
|
08-24-2015, 09:31 PM
|
#2 |
|
Senior Member
Join Date: Jul 2012
Location: Oblong, Illinois
Posts: 7,017
|
Re: 68 Burb - Project - GoldMember
Thanks for sharing the parts. I agree about the command center usefullness too. Likely handy for LS swaps.
Will be interested on your take of Fitech vs FAST. The front end looks really good too! |
|
|
|
|
08-24-2015, 11:16 PM
|
#3 |
|
Senior Member
Join Date: Oct 2013
Location: Marietta, GA
Posts: 1,642
|
Re: 68 Burb - Project - GoldMember
Parts look killer! Definitely interested to hear your feedback as you work toward installing it all.
__________________
- Robbie UNITED BY TRUCKS - classic truck video content YouTube: www.youtube.com/c/unitedbytrucks Instagram: @united_by_trucks Paw Paw '68 508 Dark Blue Custom C10 Teddy '68 GMC SWB 503 Light Green LS Build Mississippi Mud '75 Skyline Blue Patina SBC Build |
|
|
|
|
08-25-2015, 11:15 AM
|
#4 | ||
|
Wide n'Low
Join Date: Jan 2007
Location: La Center, WA
Posts: 1,511
|
Re: 68 Burb - Project - GoldMember
Quote:
I am excited to say the least.. I was thinking last night, I could easily enough setup the engine and the system on a break in stand and pre-run everything. I think with this setup, it would actually be easy enough to create the final install hose lengths, and wiring layout on a temp stand to break in a cam and validate no leaks etc... then transfer it to its final location without to much fuss. May have to try that out Almost have the front complete, a couple cotter pins and the sway bar. Quote:
plan is to setup the Go Pro and shoot some of the install.. We'll see how that turns out 
__________________
Trippin Hazard.. 67 swb, Gold Member.. 68 Suburban Air Force Retired |
||
|
|
|
|
08-30-2015, 04:38 PM
|
#5 |
|
Registered User
Join Date: Jun 2010
Location: aurora colo
Posts: 210
|
Re: 68 Burb - Project - GoldMember
What interior are you going with? Use this. lol
__________________
70 c10 2wd crashed Suburban 67 c10 2wd sb truck 67 c10 4wd lb truck |
|
|
|
|
08-31-2015, 01:42 AM
|
#6 | |
|
Wide n'Low
Join Date: Jan 2007
Location: La Center, WA
Posts: 1,511
|
Re: 68 Burb - Project - GoldMember
Quote:
 I am going with buckets and console, I'll post a pic of the houndstooth material I have, I just need to decide on the seat color. I removed the third seat to make room for hauling my road bicycle, so I'll have the buckets and second row seat upholstered to match. I have plenty of the houndstooth material so I can do some sort of accent on the door panels and or the rear side panels I have yet to make..
__________________
Trippin Hazard.. 67 swb, Gold Member.. 68 Suburban Air Force Retired Last edited by Twisted78SS; 08-31-2015 at 02:14 AM. Reason: Added some text |
|
|
|
|
|
08-31-2015, 02:10 AM
|
#7 |
|
Wide n'Low
Join Date: Jan 2007
Location: La Center, WA
Posts: 1,511
|
Re: 68 Burb - Project - GoldMember
Well,
Been trying to get my photos to upload tonight, but that didn't go so well, so I'll just describe my progress tonight and get the few pics up in the morning. I finished the c-notch install, which might sound like no biggie, but after doing these in the past with the body off, I can say it goes a bit slower hanging out under the Burb.. After that was done, I pulled the fuel tank to drain it and get a look inside to see what sort of shape its in. Since this sat for about 22yrs, I was afraid it was going to be a mess, but to my surprise it has very little scale on the inside. I got some fuel tank cleaner and will run that through tomorrow after work. Man were the hoses brittle! I pulled out the bags for the rear and looked over my assortment of fittings, seems my bags have a 1/2 port, and my fittings with 1/2 inch threads are rather tall.. Might have to do something about that.. I'll also work on those tomorrow. Then I took a break from the dusty dirty underside and started to map out where the Accuair components are going to live. I decided that they will go in the back left corner inside and behind what will be the side panel. The lines and harness wiring will exit via a hole in the fuel filler housing cover. I also have a pair of 3 gallon tanks I'm going to run to give me a little extra air so if needed I can fill some bike tires while out on the road. That means I need to decide where to plumb a port for that.. I think the tanks and compressor will have plenty of room aft of the gas tank on either side, which should work out nice.. Well, not as much as I had hoped to do, but the notches took more time than I anticipated, and I spent all of today running around town with the wife and son. Pics coming in the morning (I hope) I almost forgot, finished sanding the the heater motor mounting area after the last round of filler. Drew
__________________
Trippin Hazard.. 67 swb, Gold Member.. 68 Suburban Air Force Retired |
|
|
|
|
08-31-2015, 02:11 AM
|
#8 | |
|
Registered User
Join Date: Mar 2015
Location: San Jose, CA
Posts: 130
|
Quote:
I've got dropped spindles along with the disc brake kit for my 68 but I've haven't decided if I want to go with air ride or just go for more of a stock lowered stance. How do you like the ride of air suspension vs stock? Nice seats BTW Golden! Posted via Mobile Device |
|
|
|
|
|
08-31-2015, 02:16 AM
|
#9 | |
|
Registered User
Join Date: Mar 2015
Location: San Jose, CA
Posts: 130
|
Quote:
Posted via Mobile Device |
|
|
|
|
|
08-31-2015, 11:52 AM
|
#10 | ||
|
Wide n'Low
Join Date: Jan 2007
Location: La Center, WA
Posts: 1,511
|
Re: 68 Burb - Project - GoldMember
Quote:
I really like they way these trucks ride on air, can't wait to get this one out on her maiden voyage! Here is the Houndstooth material I will be using for the seats. Thanks to 70shortfleet, he was able to find what is was originally used in. Looks like it came in a 1972 AMC Hornet or Matador..  Quote:
Surgery is right, Since I won't be towing with this anytime soon, I'm OK with the notch, but if I change my mind down the road, I will re-think on what to do.. Looks like operator error was in play on the camera, however I did manage to save a couple shots. Here is the completed Notches, just have to tidy up the rest of the frame rails and paint it all. (the bolt sticking down with the nut on it is where the bag cup will attach) 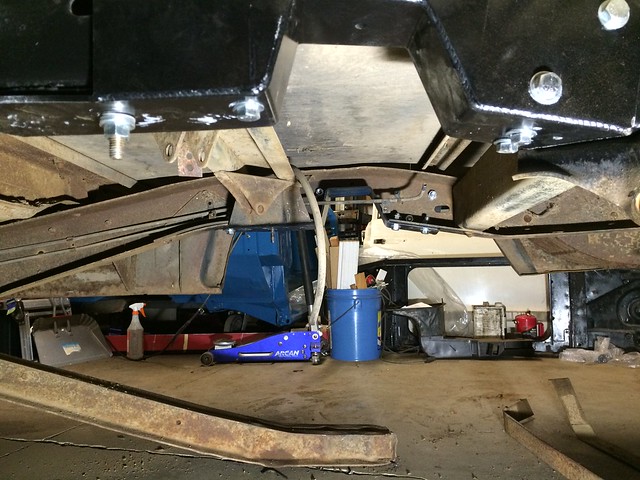 I went ahead and removed the tank, and here is how things look underneath  The tank is in surprisingly good condition as well. 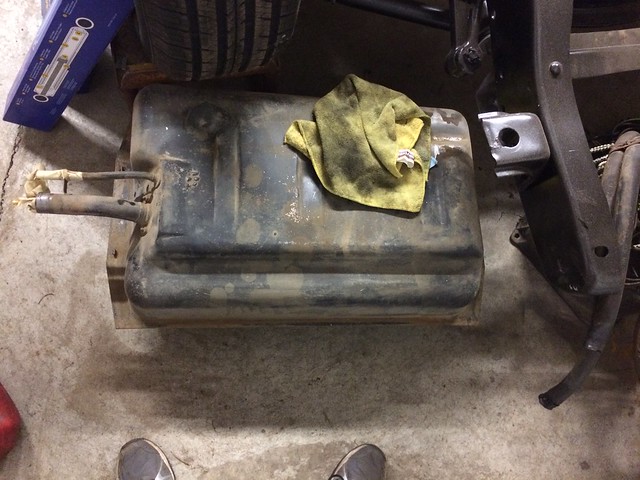 More fun to follow..
__________________
Trippin Hazard.. 67 swb, Gold Member.. 68 Suburban Air Force Retired |
||
|
|
|
|
09-03-2015, 02:18 PM
|
#11 |
|
*************
Join Date: Apr 2005
Location: Pensacola, FL
Posts: 17,835
|
Re: 68 Burb - Project - GoldMember
Looks good!
__________________
Rob - https://www.instagram.com/hart_rod_c10 As Iron Sharpens Iron, So One Man Sharpens Another. Proverbs 27:17 FOR SALE: DBW pedal bracket - http://67-72chevytrucks.com/vboard/s...d.php?t=651123 FOR SALE: Hood Brackets http://67-72chevytrucks.com/vboard/s...d.php?t=679945 1987 Silverado SWB - 34.5K original miles http://67-72chevytrucks.com/vboard/s...d.php?t=801834 1969 SuperBurb - http://67-72chevytrucks.com/vboard/s...d.php?t=200387 1968 Farm truck - http://67-72chevytrucks.com/vboard/s...d.php?t=358692 1968 SWB - http://67-72chevytrucks.com/vboard/s...d.php?t=551258 1948 Chevy - http://67-72chevytrucks.com/vboard/s...=122164&page=3 |
|
|
|
|
09-03-2015, 02:34 PM
|
#12 |
|
Strongman Garage
Join Date: Apr 2000
Location: Salinas, CA
Posts: 10,241
|
Re: 68 Burb - Project - GoldMember
That houndstooth is going to look awesome
__________________
Kalle 68 GMC Suburban 1500 4x4 SOLD 69 Pontiac Lemans 99 Silverado 4.8 5 speed ECSB [ Facebook Instagram Subscribe on YOUTUBE |
|
|
|
|
09-03-2015, 10:44 PM
|
#13 | ||
|
Wide n'Low
Join Date: Jan 2007
Location: La Center, WA
Posts: 1,511
|
Re: 68 Burb - Project - GoldMember
Quote:
Quote:
Been toying with the idea of going with some shade of white vinyl, originally I thought about a brown shade, but think the white would look killer. I also think I might change the interior from the factory argent silver to the saddle to offset the seats and eventual door and side panels. I'll try a sample area to see how it looks, and post it here for some feedback. I have high hopes for the weekend, lots to do for sure..
__________________
Trippin Hazard.. 67 swb, Gold Member.. 68 Suburban Air Force Retired |
||
|
|
|
|
09-07-2015, 01:26 AM
|
#14 | |
|
Strongman Garage
Join Date: Apr 2000
Location: Salinas, CA
Posts: 10,241
|
Re: 68 Burb - Project - GoldMember
Quote:
__________________
Kalle 68 GMC Suburban 1500 4x4 SOLD 69 Pontiac Lemans 99 Silverado 4.8 5 speed ECSB [ Facebook Instagram Subscribe on YOUTUBE |
|
|
|
|
|
09-04-2015, 11:19 AM
|
#15 |
|
Registered User
Join Date: Mar 2015
Location: San Jose, CA
Posts: 130
|
Re: 68 Burb - Project - GoldMember
Looking good Drew!
So I'm curious; where do you plan to install the tanks? Under-cab? From everything ive been reading about the AccuAir system, it looks really good and I'm starting to lean in that direction. Where did you buy yours? Thanks, David
__________________
56 Chevy step-side 68 Chevy Suburban 69 Corvette Stingray 00 BMW 325 (Daily driver) 09 BMW M3 18 GMC Acadia (Wife's daily driver) |
|
|
|
|
09-07-2015, 12:23 AM
|
#16 | |
|
Wide n'Low
Join Date: Jan 2007
Location: La Center, WA
Posts: 1,511
|
Re: 68 Burb - Project - GoldMember
Quote:
I am putting the air tanks under the Burb in front of the rear bumper and behind the gas tank. My sone who is home for a few days made a removable mounting bracket that bolts to each fram rail and has cross braces that the tanks bolt to. I will take some pics as we install in tomorrow. Nothing super complicated, but it will keep that tanks tucked up high nearly touching the floor and hide them from view.
__________________
Trippin Hazard.. 67 swb, Gold Member.. 68 Suburban Air Force Retired |
|
|
|
|
|
09-07-2015, 03:20 PM
|
#17 |
|
Registered User
Join Date: Mar 2015
Location: San Jose, CA
Posts: 130
|
Re: 68 Burb - Project - GoldMember
Thanks Drew. Sounds like a great plan. Can't wait to see the pics.
__________________
56 Chevy step-side 68 Chevy Suburban 69 Corvette Stingray 00 BMW 325 (Daily driver) 09 BMW M3 18 GMC Acadia (Wife's daily driver) |
|
|
|
|
09-07-2015, 11:46 PM
|
#18 | ||
|
Wide n'Low
Join Date: Jan 2007
Location: La Center, WA
Posts: 1,511
|
Re: 68 Burb - Project - GoldMember
Quote:
Quote:
Rather than cut more rivets, I decided to modify them in place. All was progressing fine until I ended up with some fine metal shavings making there way around my safety glasses and into my right eye. It didn't seem to bad at first, but over then next few hours I knew I had not flushed it all out.. That pretty much ended the weekend fun. I thought I would be ok today, and it is much better, but I didn't get out to the shop at all to finish up. I did manage to get a coat of paint on before I quit yesterday, more or less looking out of one eye, but I didn't hang the air tanks, nor did I finish the gas tank. My son got it all sanded down, we used the fuel tank cleaner on it to flush out everything, and I did give it a couple coats of tank tone, but it still needs to go back in.. Overall we got a lot done, but sucks to get sidelined so easily.. I also realized we didn't shoot any pictures, so I will for sure take some tomorrow when I get home..
__________________
Trippin Hazard.. 67 swb, Gold Member.. 68 Suburban Air Force Retired |
||
|
|
|
|
09-08-2015, 12:56 AM
|
#19 |
|
I've got grease on my mind.
Join Date: Sep 2007
Location: Oly, Wa
Posts: 481
|
Re: 68 Burb - Project - GoldMember
Man. Hope you're OK. I seem to have the same safety glasses, they funnel things into my eyes. Not good.
|
|
|
|
|
09-08-2015, 09:23 AM
|
#20 |
|
The Older Generation
  Join Date: Aug 2006
Location: Montezuma, Iowa
Posts: 25,337
|
Re: 68 Burb - Project - GoldMember
-
I've had that happen too, especially if you are laying on your side. Don't take any chances with it, if it isn't feeling better soon go see the Dr. LockDoc
__________________
Leon Locksmith, Specializing In Antique Trucks, Automobiles, & Motorcycles (My Dually Pickup Project Thread) http://67-72chevytrucks.com/vboard/s...d.php?t=829820 - |
|
|
|
|
09-08-2015, 11:40 AM
|
#21 | ||
|
Wide n'Low
Join Date: Jan 2007
Location: La Center, WA
Posts: 1,511
|
Re: 68 Burb - Project - GoldMember
Quote:
You would think after all these years I would be more careful.. Things happen.. sometimes unavoidable. Quote:
Doing well now, no apparent residual effects. I do plan on going to have it looked at just to be sure.. At my age I need all all the help I can get.. Being a one eyed willie would not suit me well at all. I had planned on taking today off to extend the weekend, but my office recently moved and things are still up in the air, so I decided to take care of business first and will pick things up tonight. Pics to follow
__________________
Trippin Hazard.. 67 swb, Gold Member.. 68 Suburban Air Force Retired |
||
|
|
|
|
09-08-2015, 03:36 PM
|
#22 |
|
Registered User
Join Date: Mar 2015
Location: San Jose, CA
Posts: 130
|
Re: 68 Burb - Project - GoldMember
That sucks!
I've had that happen to me a couple times too. I'm going to second what the good doc said. Be sure you got it all out. unlike a splinter that will fester and work its way to the surface, the eye will actually heal over a foreign object. I found out about a small metal fragment which had to be removed from my eye just prior to getting an MRI (which I understand could have otherwise ended badly for me) (apparently the eyes don't like magnets installed)
__________________
56 Chevy step-side 68 Chevy Suburban 69 Corvette Stingray 00 BMW 325 (Daily driver) 09 BMW M3 18 GMC Acadia (Wife's daily driver) |
|
|
|
|
09-09-2015, 10:23 PM
|
#23 |
|
Wide n'Low
Join Date: Jan 2007
Location: La Center, WA
Posts: 1,511
|
Re: 68 Burb - Project - GoldMember
Finally got myself sorted out, pretty much back to normal.
also got around to shooting a couple pics of the tank mount.. Sorry, the lighting sucked! 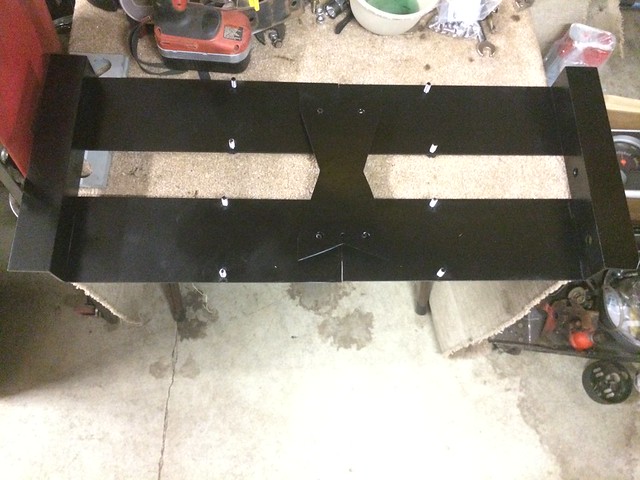 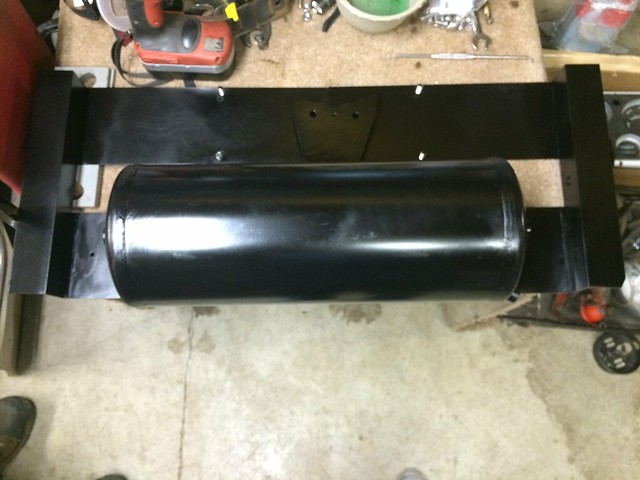 As you can probably tell, this is a 3 piece unit. Since I wanted the tanks tucked up as high as possible, my son made this about as tall as he could, but we could not get it into place as one large piece (The angle iron sits on top of the frame rails) So, he cut it in half (more or less) and made a connecting plate to tie them together. Since it will be up next to the floor, I told him to weld studs in place so when we mount the tanks we won't have to worry about how to tighten the hardware. Of course you are seeing it upside down in these pics.. Nothing fancy, but is sturdy enough not to flex, especially once the tanks are bolted on.. I know I know.. he didn't drill the angle iron mounting holes yet, that's because I hadn't drilled the frame before I got crap in my eye Should get some shop time tonight to finish this part up and do a final test fit.. My water traps have not arrived yet, so no final mounting till then
__________________
Trippin Hazard.. 67 swb, Gold Member.. 68 Suburban Air Force Retired |
|
|
|
|
09-10-2015, 09:02 AM
|
#24 |
|
Senior Member
Join Date: Jul 2012
Location: Oblong, Illinois
Posts: 7,017
|
Re: 68 Burb - Project - GoldMember
Wow, glad your eye is ok! We can get hurt pretty quickly with this hobby of ours even with proper safety gear.
The tank mount assembly is a good idea and well put together. Looks like there is room on there for the pump too? |
|
|
|
|
09-10-2015, 02:17 PM
|
#25 | |
|
Wide n'Low
Join Date: Jan 2007
Location: La Center, WA
Posts: 1,511
|
Re: 68 Burb - Project - GoldMember
Quote:
I did another round of flushing the eye when I got to work, and by lunchtime is was almost like it never happened.. So we tinkered a bit in the shop last night doing a couple trial fits on the tanks and bracket, I think it's going to work out great. The pics do show where I left off on the cleaning/painting, so just ignore that for now Although it make look like there is extra room, once I put the water traps in place I will have to mount the compressors on the outside of the frame. No big deal as there is a huge cavity on the rear driver side. 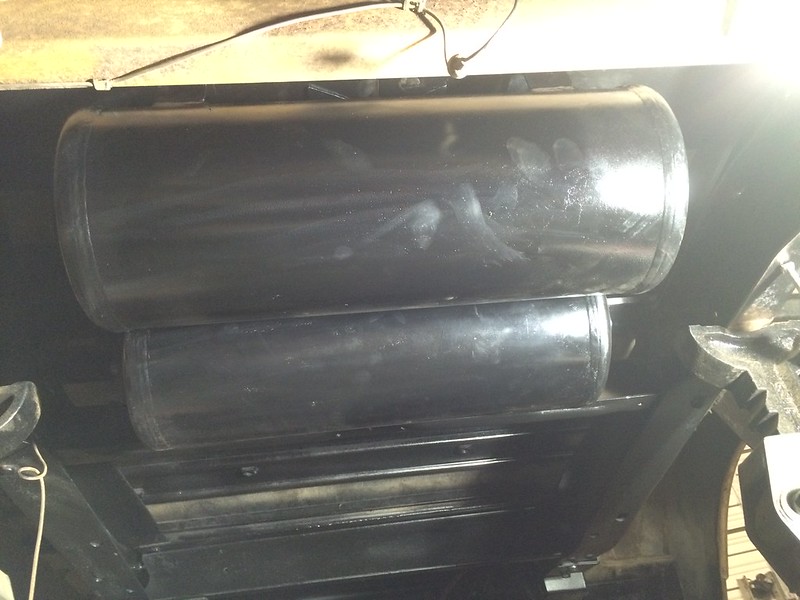 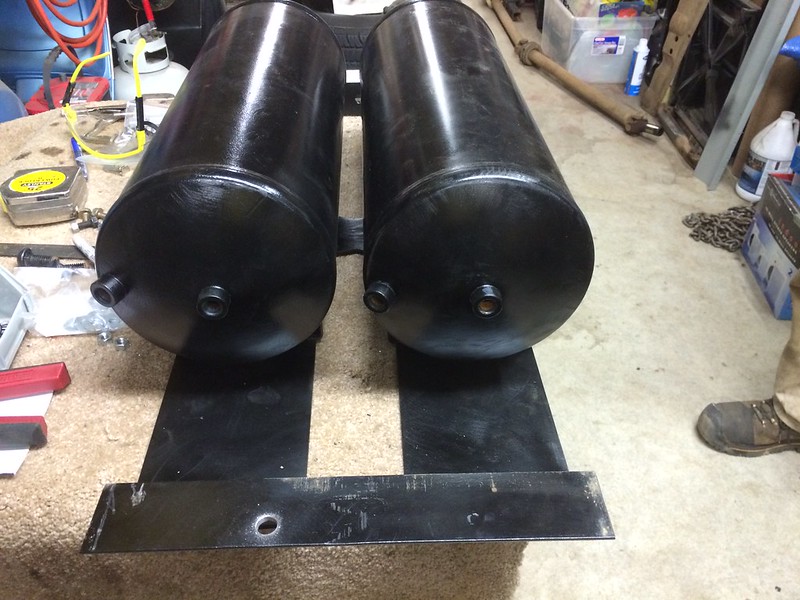 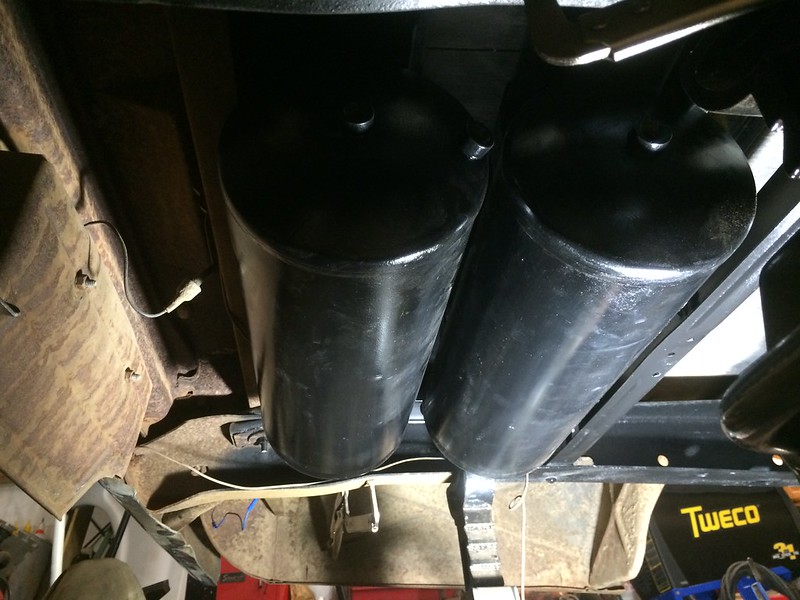 What you cannot tell real easy in these pics, is that once mounted they will sit about even to the bottom of the frame rail and thus way out of harms way.. I hope! I also finished mapping out my line routing and wiring, so tonight I plan to run my air lines and level sensor wiring along with whatever else I can get done. Finished off the night by separating the inner fender wells so they can get stripped painted this week, and making another template for mounting the VU4 and other pieces inside. More to follow..
__________________
Trippin Hazard.. 67 swb, Gold Member.. 68 Suburban Air Force Retired |
|
|
|
|
|
| Bookmarks |
|
|


 Hybrid Mode
