
|
Register or Log In To remove these advertisements. |
|
|
|
|||||||
 |
|
|
Thread Tools | Display Modes |
|
|
 03-08-2012, 11:08 AM
|
#1 | |
|
Registered User
 Join Date: Feb 2012
Location: Orange, CA
Posts: 300
|
Re: 1969 Blazer...To be my daily driver
Quote:
|
|

|

|
|
03-08-2012, 12:18 PM
|
#2 |
|
Registered User
Join Date: Feb 2012
Location: Orange, CA
Posts: 300
|
Re: 1969 Blazer...To be my daily driver
Yesterday I got the original clutch hole in the fire wall filled and a few hole PO's made. Engine compartment gets attacked today and tomorrow. The way the wires are run is really bothering me, but that will have to be taken care of on a weekend once she is up and running... priorities. Started prep for the Al's liner as well. The crate motor gets delivered tomorrow... hopefully I will have it in this weekend.
 Some friends helping me out... 
Last edited by DustinU; 03-08-2012 at 12:19 PM. Reason: grammer |
|
|
|
|
03-08-2012, 11:16 PM
|
#3 |
|
Registered User
Join Date: Feb 2012
Location: Orange, CA
Posts: 300
|
Re: 1969 Blazer...To be my daily driver
Thanks I had to break my silver or graphite rut I had been stuck in for the last three trucks I have owned.
Yes if has the factory sag in the rear, I am not sure if I like it or not yet... if I end up wanting it level I too will go with 2" front springs. As I mentioned in an earlier post, the rear are a little more "broke in" than the front. |
|
|
|
|
03-09-2012, 01:28 AM
|
#4 |
|
Registered User
Join Date: Apr 2006
Location: Cookeville, TN
Posts: 274
|
Re: 1969 Blazer...To be my daily driver
I was thinking I read that here, but couldn't remember. It's untelling how long mine have been installed. Couple years I'd say, but the u bolts still look almost new. That's the only good thing about my truck being stripped - the back was so light that I don't think the springs have sagged at all. The PO must have put them on and then lost interest for some reason. I suspect it has to do with the truck's inability to turn the steering wheel to the right past center.
Not sure what color I'll paint mine. Or what interior to go with. I think I'll just Krylon it for my road trip. That way I won't cry if I get some trail rash.
__________________
1954 Ford F-100 1956 Chevy big window 1970 4x4 Blazer CST 1987 Land Cruiser 1990 Chevy K3500 454 |
|
|
|
|
03-19-2012, 08:08 AM
|
#5 |
|
Senior Member
Join Date: Oct 2006
Location: Wichita, Kansas
Posts: 1,050
|
Re: 1969 Blazer...To be my daily driver
Update on front drivers seat bracket. Some before, during and after pics. Don't pay any attention to the FWD marking on the rear part of the new bracket...obviously I didn't!
 It was symmetric before I added the cutout to clear the floor hump and was installed under the seat when I marked it for the floor so I couldn't see the markings I had made. It was symmetric before I added the cutout to clear the floor hump and was installed under the seat when I marked it for the floor so I couldn't see the markings I had made.
Last edited by 29od1; 03-19-2012 at 09:34 AM. |
|
|
|
|
03-19-2012, 10:55 AM
|
#6 |
|
Registered User
Join Date: Feb 2012
Location: Orange, CA
Posts: 300
|
Re: 1969 Blazer...To be my daily driver
Looks GREAT 29od1, Thank you! I can't wait to see them in the Blazer. 29od1 had fabbed the 2008 2nd row captain seat brackets previously, he was kind enough to help me out and let me hire him to fab mine.
I pulled my old motor last week and put the crate engine in but couldn't get it to fire, bought a new dizzy yesterday... the fix she needed! Cam is broken in and running great. I did a very quick once over on the engine compartment before, rerouted some wires, taped them up, new hoses and grommets, etc. I used some cleaner/degreaser and several cans of the low gloss black (satin) dupli-color engine paint. Looks good, not a show truck, but a good looking driver/off-roader. I am sanding the bed/cab then I am spraying Al's liner today/tomorrow... My Brother pulled the seat out of his Jimmy so I can finish the break in and take it to get the cage built. Couple of friends helping me with the pull:    I will take some after pics of the engine today and post them tonight. Last edited by DustinU; 03-19-2012 at 10:58 PM. |
|
|
|
|
03-19-2012, 11:18 PM
|
#7 |
|
Registered User
Join Date: Feb 2012
Location: Orange, CA
Posts: 300
|
Re: 1969 Blazer...To be my daily driver
So down the line I may want to dress it up a bit with so chrome etc, but for the time being... (I didn't finish until after dark, I will take better pics tomorrow)
|
|
|
|
|
03-20-2012, 08:25 AM
|
#8 |
|
GEARHEAD
Join Date: Aug 2003
Location: MN
Posts: 6,114
|
Re: 1969 Blazer...To be my daily driver
Looks like a good install. The main thing is that it runs. Are you going to spray a coat of primer on the bed before the liner or spray it as is?
__________________
If no one knows what you're doing, they can't tell you you're doing it wrong HG's Dream Car Build - Shelby Cobra Kit Build your own adjustable track bar 71  Long Fleet C/10 Long Fleet C/10 72  Jimmy 4x4 (Junkyard Jimmy) Jimmy 4x4 (Junkyard Jimmy)HG's Plow Truck '78  K35 Dually K35 DuallyBigass Farm Truck HG's thread of miscellaneous stuff |
|
|
|
|
03-20-2012, 10:05 AM
|
#9 |
|
Registered User
Join Date: Feb 2012
Location: Orange, CA
Posts: 300
|
Re: 1969 Blazer...To be my daily driver
I agree, it runs, that . I made a bracket that I don't like for the fuel line (modified old spark plug wire holder) it will eventually wear into the fuel line.
I will prime the floor pan before spraying, bought the kit which includes primer. I also bought the additional flattener for a well, flatter finish (flat/satin vs semi gloss). |
|
|
|
|
03-20-2012, 10:18 AM
|
#10 |
|
GEARHEAD
Join Date: Aug 2003
Location: MN
Posts: 6,114
|
Re: 1969 Blazer...To be my daily driver
I'll be doing ls Liner very soon also. Started prepping the bed saturday. One tip I got from another board member is that it will spray smoother if you open the trigger further and have more texture with less trigger pull. I got the rubber additive for mine but not the flattener, and I bought some tint to match my paint. What color are you doing?
__________________
If no one knows what you're doing, they can't tell you you're doing it wrong HG's Dream Car Build - Shelby Cobra Kit Build your own adjustable track bar 71 Long Fleet C/10 72 Jimmy 4x4 (Junkyard Jimmy)HG's Plow Truck '78 K35 DuallyBigass Farm Truck HG's thread of miscellaneous stuff |
|
|
|
|
03-20-2012, 10:24 PM
|
#11 | |
|
Registered User
Join Date: Feb 2012
Location: Orange, CA
Posts: 300
|
Re: 1969 Blazer...To be my daily driver
Quote:
I am going with black. Thanks for the tip, I will be searching out different techniques for different textures. I am pretty much just doing this as a heat and noise (I know they make HNR specific) or if I want to pull the carpet out in the future. It will be nice to know that if i get hit with rain or soak the carpet there is some protection for the floor. I just finished grinding off the old liner of some sort (It was a pain to get off) and going to lacquer thinner tonight. Should hopefully spray tomorrow or Thursday. |
|
|
|
|
|
03-24-2012, 08:36 AM
|
#12 |
|
Senior Member
Join Date: Oct 2006
Location: Wichita, Kansas
Posts: 1,050
|
Re: 1969 Blazer...To be my daily driver
It looks like you have a good start on your engine and liner!
I finished the brackets and just need to blast them today and they'll be on their way to sunny California on Monday morning. |
|
|
|
|
03-24-2012, 11:12 AM
|
#13 | |
|
Registered User
Join Date: Feb 2012
Location: Orange, CA
Posts: 300
|
Re: 1969 Blazer...To be my daily driver
Quote:
(much needed). I need the new seats in before the cage fabrication for clearances and the 3 point seat belt anchor locations. Thank you again! |
|
|
|
|
|
03-25-2012, 01:10 PM
|
#14 |
|
Registered User
Join Date: Jan 2007
Location: Central Coast California
Posts: 1,026
|
Re: 1969 Blazer...To be my daily driver
When I used Al's Liner on the entire inner cab/bed of the K5 it took about 1 & 1/2 kits. I sprayed it on thick...should have sprayed it on thin. Thick caused lots of bare spots that took more of the Liner to cover. Also, I probably should have primed it since the original ochre floor color showed through the bare spots....well, actually, maybe that was a good thing to let me know where I missed.
I guess what I'm saying is that you may need more than one kit...
__________________
1972 K20 Suburban 5.7/700r4/NP205 Dana 44/H052 Sold  1972 C10 5.3L/4L60E 12bolt 5Lug - Sold 1971 K5 Blazer 6.0L LQ9 4L60E NP205 Dana 44/H052!!!  1970 K3500 1ton CrewCab 8.1L/Allison1000/NP205 Dana 60/14B!!!! - Sold 1984 K10 SWB 7.4L/4L80e/NP208 Corp 10/12 bolt Sold 1988 V30 CCLB 7.4L/TH400/NP205/Dana 60/Dana 70/3.73!!! (Sold) 2003 K2500HD 8.1/Allison1000/NP263
|
|
|
|
|
03-25-2012, 05:18 PM
|
#15 | |
|
Registered User
Join Date: Feb 2012
Location: Orange, CA
Posts: 300
|
Re: 1969 Blazer...To be my daily driver
Quote:
Thanks OldCreek, I actually started with 2 gallons of Al's Liner and it wasn't enough. I put it on fairly thick, but my plan of attack wasn't well thought out. For anyone doing this in the future... Mix maybe half a gallon first, get in and get the corners and hard spots (nooks and crannies) from the center of the bed, then under the rail with whats left of that half gallon (do this last or you may spill it, ask me how I know  . Then mix the next full gallon and go after it, leaving the last half a gallon for thin parts and touch up places you may have missed. That is what I would do if I had another shot at it anyway. . Then mix the next full gallon and go after it, leaving the last half a gallon for thin parts and touch up places you may have missed. That is what I would do if I had another shot at it anyway.My third gallon is on the way for touch ups etc. I ended up using the medium tip on the $20 harbor freight gun, adjusted the trigger pull as hgs_notes suggested and only used half the flattener per gallon, I like it. It is raining so I will take pics tomorrow. I only used the etching primer on the bare metal areas, otherwise I just scuffed the paint and cleaned it very well with lacquer thinner per the instructions. It was very easy to do and would recommend it so far. Last edited by DustinU; 03-25-2012 at 05:24 PM. |
|
|
|
|
|
04-23-2012, 03:05 PM
|
#16 |
|
VA72C10
 Join Date: Mar 2008
Location: Midlothian, VA
Posts: 25,269
|
Re: 1969 Blazer...To be my daily driver
Seats and cage look great.
__________________
Looking for a 67-72 swb or blazer project in or around VA. 
|
|
|
|
|
04-23-2012, 05:02 PM
|
#17 |
|
Senior Member
Join Date: Oct 2006
Location: Wichita, Kansas
Posts: 1,050
|
Re: 1969 Blazer...To be my daily driver
Dustin it's looking good man!
For these Blazers, the doors work as a structural part of the tub and provide some additional bending capability when the top is off. So if the previous owner had the top off and was wheeling it and got it into a bind, it may have cracked the door at the hinge mount. Although the pickups crack out there too from the hinges not being oiled and the door getting hard to open and forcing them. Anyway, that cage will definitely stiffen up the tub in the door opening area and help out a lot when you off road it. Glad to see your making good progress and getting to enjoy it. Nothing better than cruizing around with the top off! |
|
|
|
|
04-23-2012, 05:12 PM
|
#18 | |
|
Registered User
Join Date: Feb 2012
Location: Orange, CA
Posts: 300
|
Re: 1969 Blazer...To be my daily driver
Quote:
And thank you both for the compliments. Last edited by DustinU; 04-23-2012 at 08:32 PM. |
|
|
|
|
|
04-24-2012, 07:47 AM
|
#19 |
|
Senior Member
Join Date: Oct 2006
Location: Wichita, Kansas
Posts: 1,050
|
Re: 1969 Blazer...To be my daily driver
That cage looks like a really good solid design. That's a nice feature that he put in floor mounts so you can unbolt it and remove it if you want. How much do you think it weighs and what kind of tubing did he use?
|
|
|
|
|
04-24-2012, 10:36 AM
|
#20 | |
|
Registered User
Join Date: Feb 2012
Location: Orange, CA
Posts: 300
|
Re: 1969 Blazer...To be my daily driver
Quote:
I like the "sporty" rake on the back vs squared off. I cant wait to get it in and get some pics that aren't on my driveway, lol. My guess on weight, honestly don't know maybe 200-250 lbs. My Brother and I can move it pretty easy... into the truck a third person will make things smoother. If it is not lighter than the hard top, I would be surprised. |
|
|
|
|
|
04-25-2012, 10:29 AM
|
#21 |
|
Registered User
Join Date: Feb 2012
Location: Orange, CA
Posts: 300
|
Re: 1969 Blazer...To be my daily driver
Made some progress yesterday, Fatmat, Jute, carpet, seat belts and cage installed. It was late so no pics of carpet and cage yet.
 I used strips of jute to help level out the floor in front of rear seat and cargo area.  I used the scrap jute under the rear seat...recycling 
|
|
|
|
|
04-25-2012, 01:10 PM
|
#22 | |
|
Registered User
Join Date: Apr 2008
Location: Md
Posts: 2,452
|
Re: 1969 Blazer...To be my daily driver
Quote:
|
|
|
|
|
|
04-25-2012, 01:42 PM
|
#23 | |
|
Registered User
Join Date: Feb 2012
Location: Orange, CA
Posts: 300
|
Re: 1969 Blazer...To be my daily driver
Quote:
|
|
|
|
|
|
04-26-2012, 04:20 PM
|
#24 | |
|
Registered User
Join Date: Apr 2008
Location: Md
Posts: 2,452
|
Re: 1969 Blazer...To be my daily driver
Quote:
|
|
|
|
|
|
05-14-2012, 11:48 AM
|
#25 |
|
Registered User
Join Date: Feb 2012
Location: Orange, CA
Posts: 300
|
Re: 1969 Blazer...To be my daily driver
I haven't updated this in a while so here is where I am at now...
I have installed the carpet, the sound deadener, jute combo worked out great and even with the top off it is quite! I am very happy with the out come. I re-hung the doors temporarily and bought a nice set of Southern California rust free truck doors to convert in the coming months. I swapped out the ignition, heater control and cig lighter (need to charge the phone), mirror and door panel/handles.   I also cut the free double wall top up and took the front for the roll bar bimini top (so no drilling the windshield). The top is actually being made today so I will post some pics of that soon.  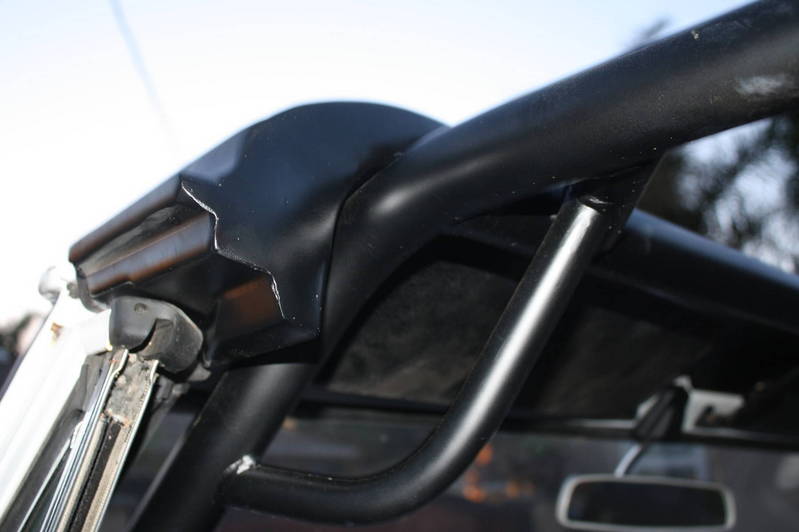 I used window/door foam inside and bondo to fill (fiberglass would have been better but time and experience with it prevented it). Next up, I need to swap out the hood hinges, install rear side panels and the ORD zero rate leafs to correct this: 
|
|
|
|
|
| Bookmarks |
|
|


 Hybrid Mode
